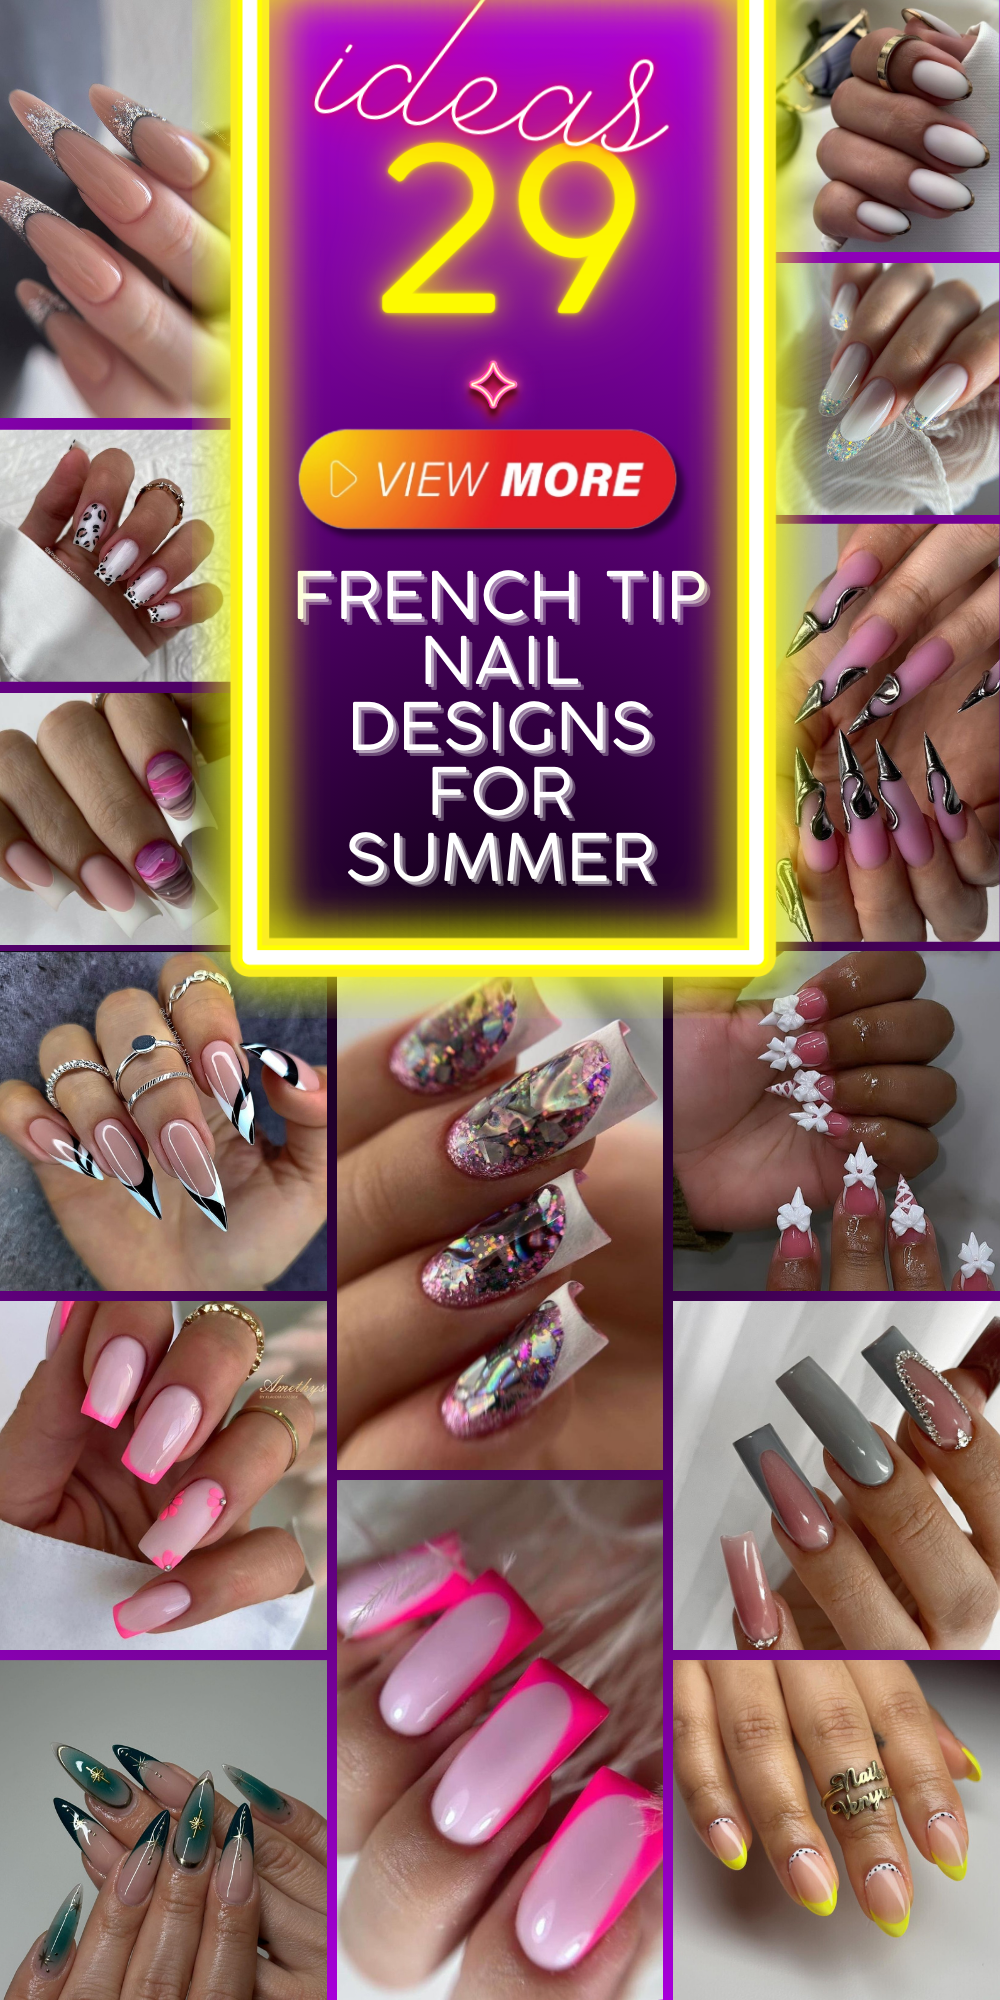
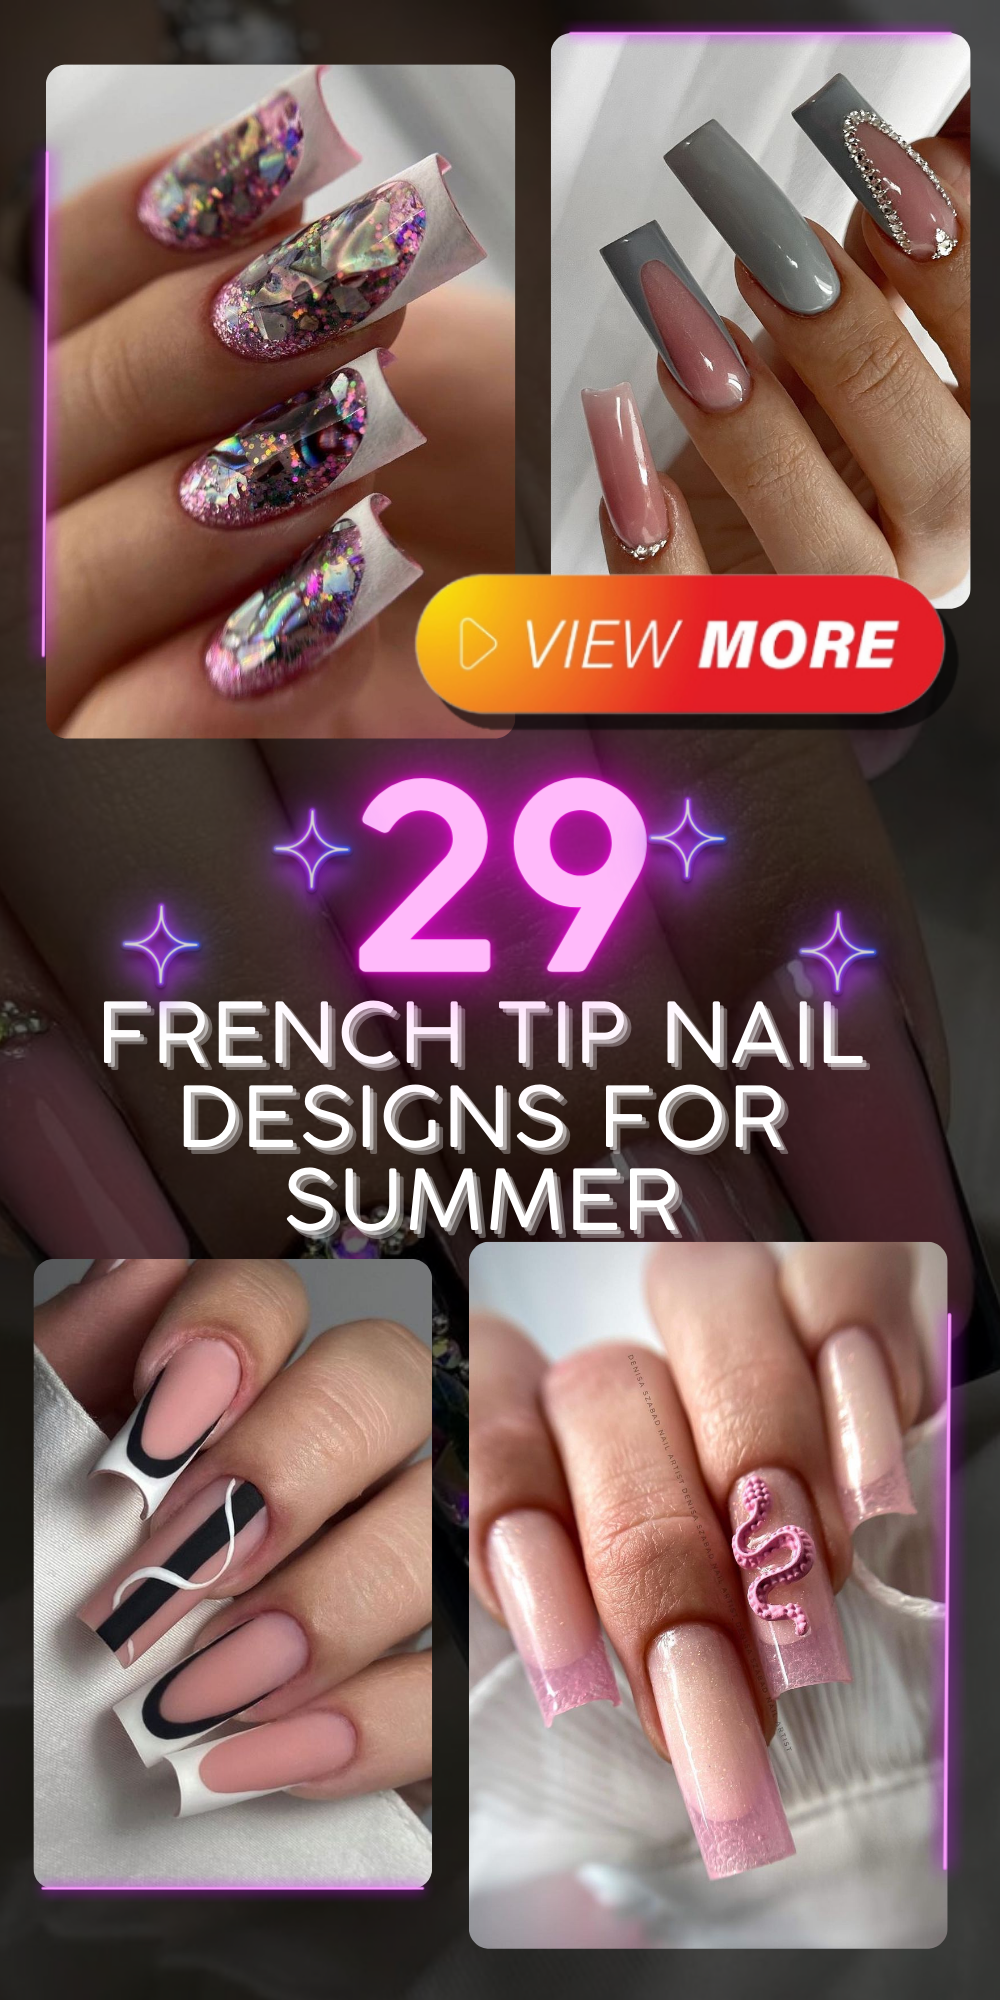
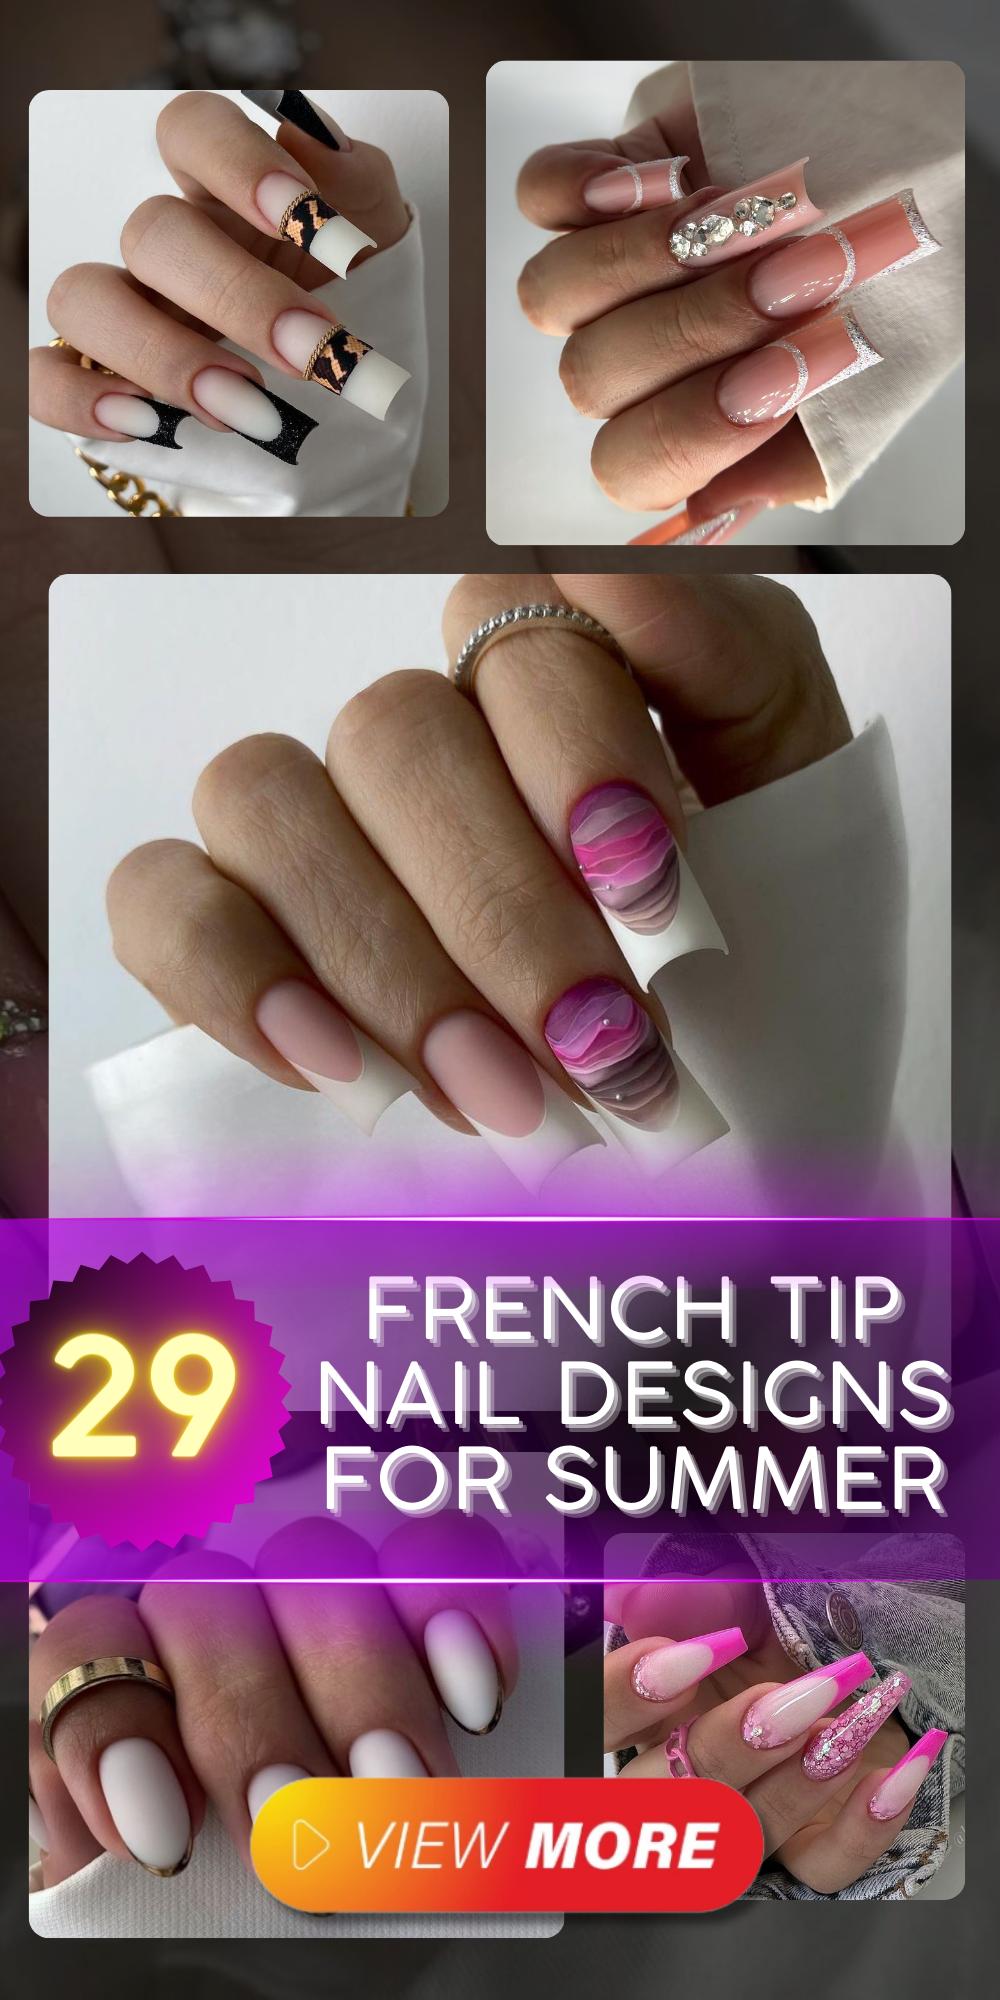
29 French Tip Nail Designs for Summer: Elevate Your Manicure with Classic Elegance
The temperature rises as the days get longer, and my sense of style needs a new lease of life from top to bottom. What does the future hold for nail fashion this summer? The elegance of French tip nails is timeless while keeping up on the latest trends. But what really makes a unique, trendy or even classical French tip? We will soon find out.
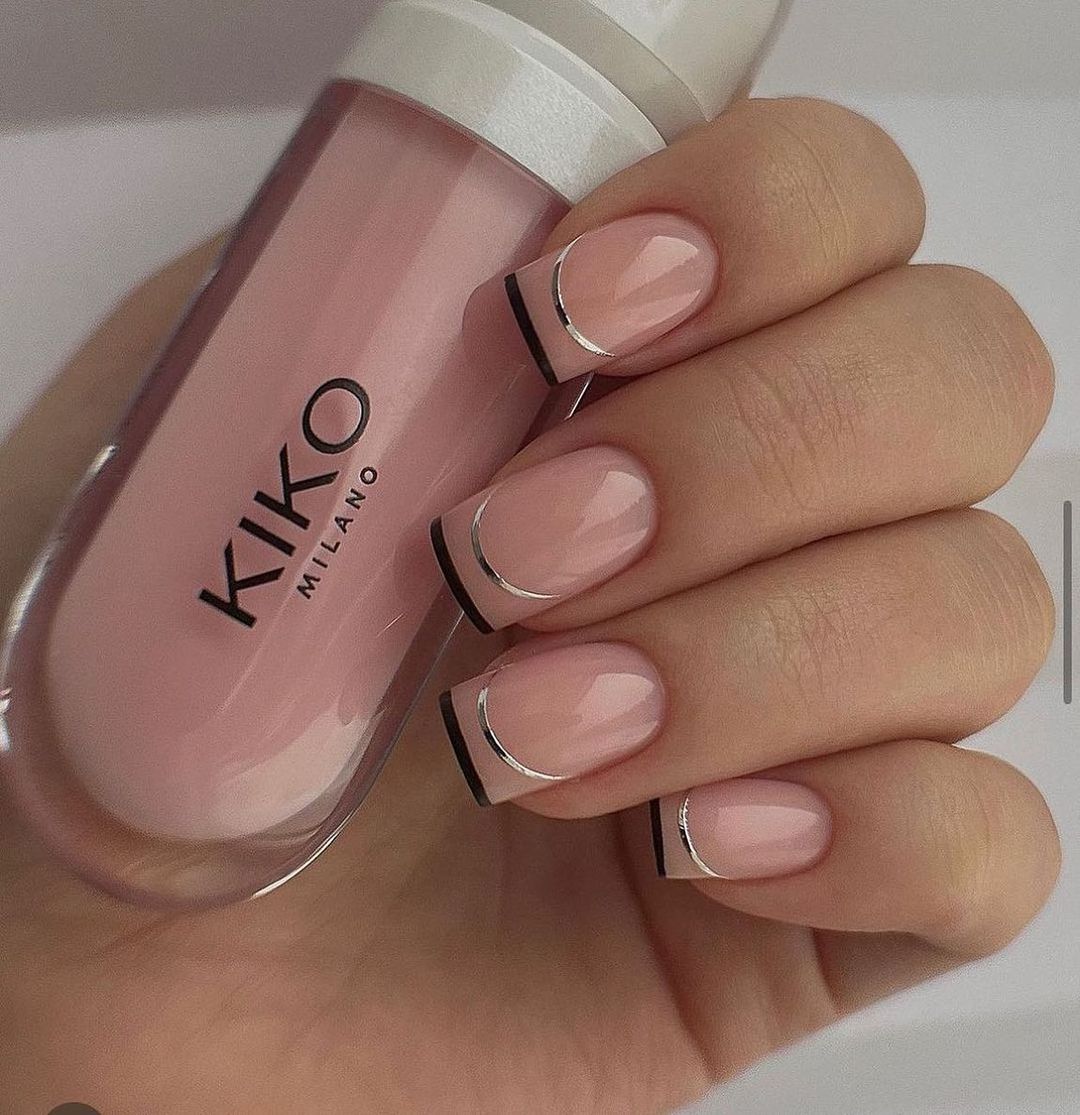
Cute and Contemporary: Square Tips with a Twist
Delicate though they may be, the classic French manicure gains a novel twist on these square tips. The clean white lines of polish dance gracefully across the edge of the nail, while a playful embellishment adds that cute factor which is just right for summer. It’s the mix of new and old that makes this design one for mani mavens.
- OPI Natural Nail Base Coat (or any other base coat)
- Essie Blanc (or any other white nail polish)
- Seche Vite Dry Fast Top Coat (or any other top coat)
- Nail art stickers/decals for an unusual accent
Start with a clean and shaped nail. Apply your choice of base coat for protection. After it dries out, paint your nails tips with white nail enamel using either a steady hand or tip guide. Allow it to set then apply top coat to give it shine and last longer. For more style, softly press on some dry polished art stickers.
Elegance in Simplicity: Short Acrylic with a Pop of Pink
There is something very attractive about having short acrylic nails that are adorned with a touch of bright pink color. In this design, plain acrylic tips meet a vibrant summer shade, making it nearly impossible for anyone to look away. They are classy, easy to maintain and will be perfect for some beach-to-boardroom stuff.
- Acrylic nail kit (e.g., Mia Secret Acrylic Nail Kit)
- Hot pink polish (e.g., CND Vinylux in Hot Pop Pink)
- Nail primer and dehydrator for acrylic application
Apply the dehydrator and the primer on your nails. Apply the mixture carefully so as not to achieve a long length that was desired. The first layer should be allowed to dry before applying the second one up until you have enough layers. A glossy or matte top coat would then be applied depending on one’s preference.
Green Hibiscus Dreams: Floral Tips for Fun Summer Days
A design that has a green hibiscus flower at each tip brings summer spirit. It is like being transported to an exotic getaway location every time you look at the flower art. Those who want the vibrancy of summer at their fingertips will love these bright colors.
- Sally Hansen Xtreme Wear in Green with Envy or any other green nail polish
- Hibiscus nail stickers or hand-painted with a brush
- Detailing tools
Put your hibiscus stickers carefully on your base coat or use a thin brush to paint the flowers. Dotting tools are used to outline and accentuate smaller features. Apply a top coat to make sure your green hibiscus blossoms last as long as they should during summer.
Glittery Elegance: The Classic French with a Sparkling Twist
This design takes the ever-loved French tip to new sparkling heights. A sprinkling of glittery decorations and a nude base are combined with bold gold chrome accents to create an understated elegance. It’s not too much for those who want simplicity with a touch of glam, sophistication whispering.
- Nude gel polish (e.g., Gellen Gel Nail Polish in Elegant Nude)
- Gold chrome powder (e.g., Born Pretty Gold Chrome Powder)
- No-wipe gel top coat
- Fine-tip brush for glitter application
Cure your nude gel polish and then apply a no-wipe gel top coat. While it’s still curing, use a fine brush to gently pat gold chrome powder on the tips making them look gradient. Cure it again, then sweep off excess powder for an awesome looking glittery tip.
Save Pin
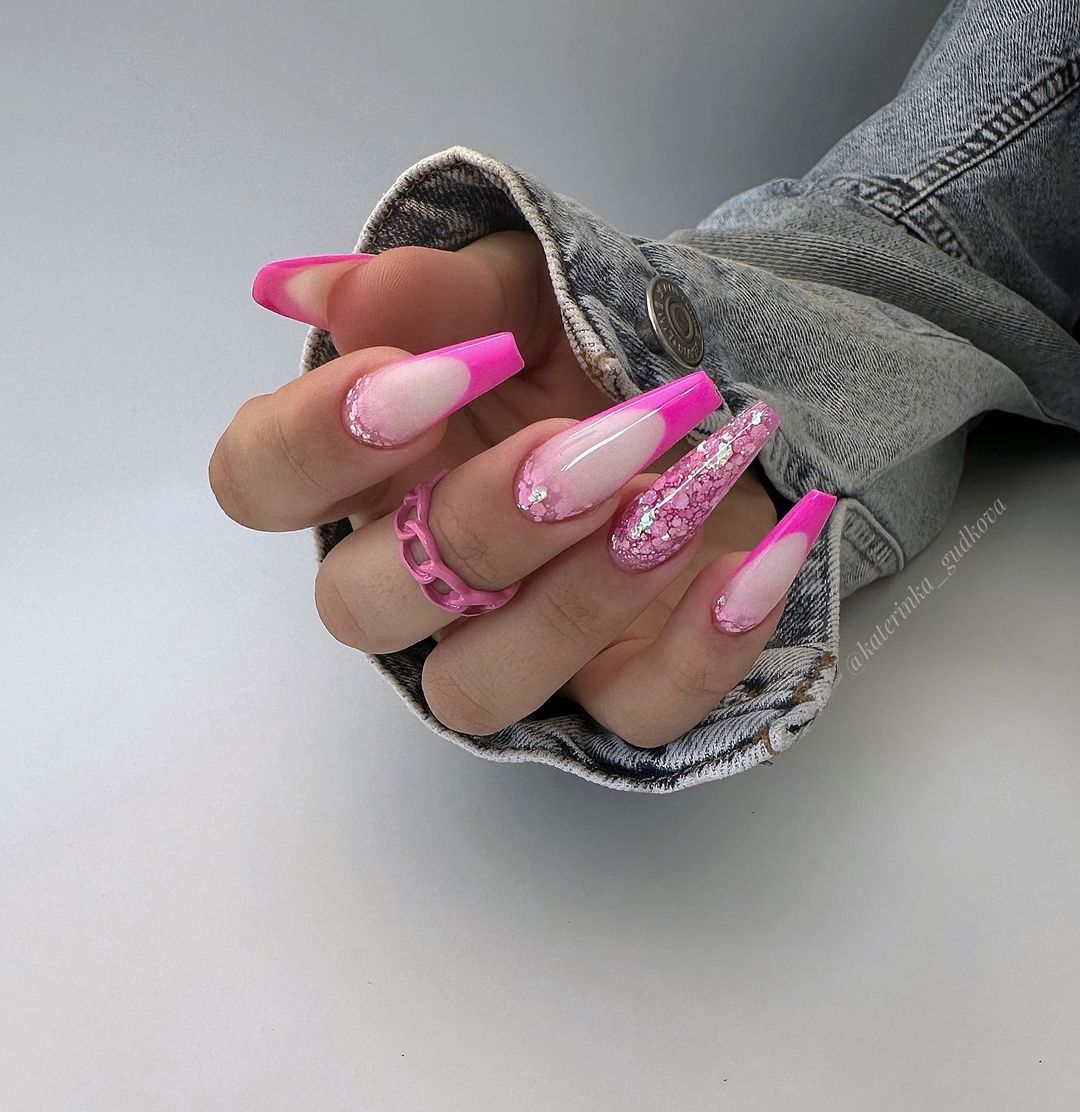
Vibrant and Bold: Pink French with Textured Accents
It’s the hot pink tips that bring the vibrancy out, making this design a must-have for summer. The addition of a glittery pink overlay on some of the nails adds to the overall appeal of the look in terms of fun and glamor.
- Gelish in Make You Blink Pink – bright pink gel polish
- Magpie Glitter in Fuchsia Pink – pink glitter
- Gel top coat
- Adhesive for gems
Apply your pink gel polish to the tips and cure for two minutes. Mix furniture with a gel top coat until it is thick enough then put it on accent nails. Put some adhesive on them where you want. Finally, cure and seal with a top coat to give it a sparkling texture.
Playful Petals: Short Almond Pink French with Floral Details
This pink French design is softly drawn on soft, short almond nails. Simple, concise tips sport a hot pink shade while cute petal details give it a nice touch that makes it suitable for summer days and nights whether casual or formal.
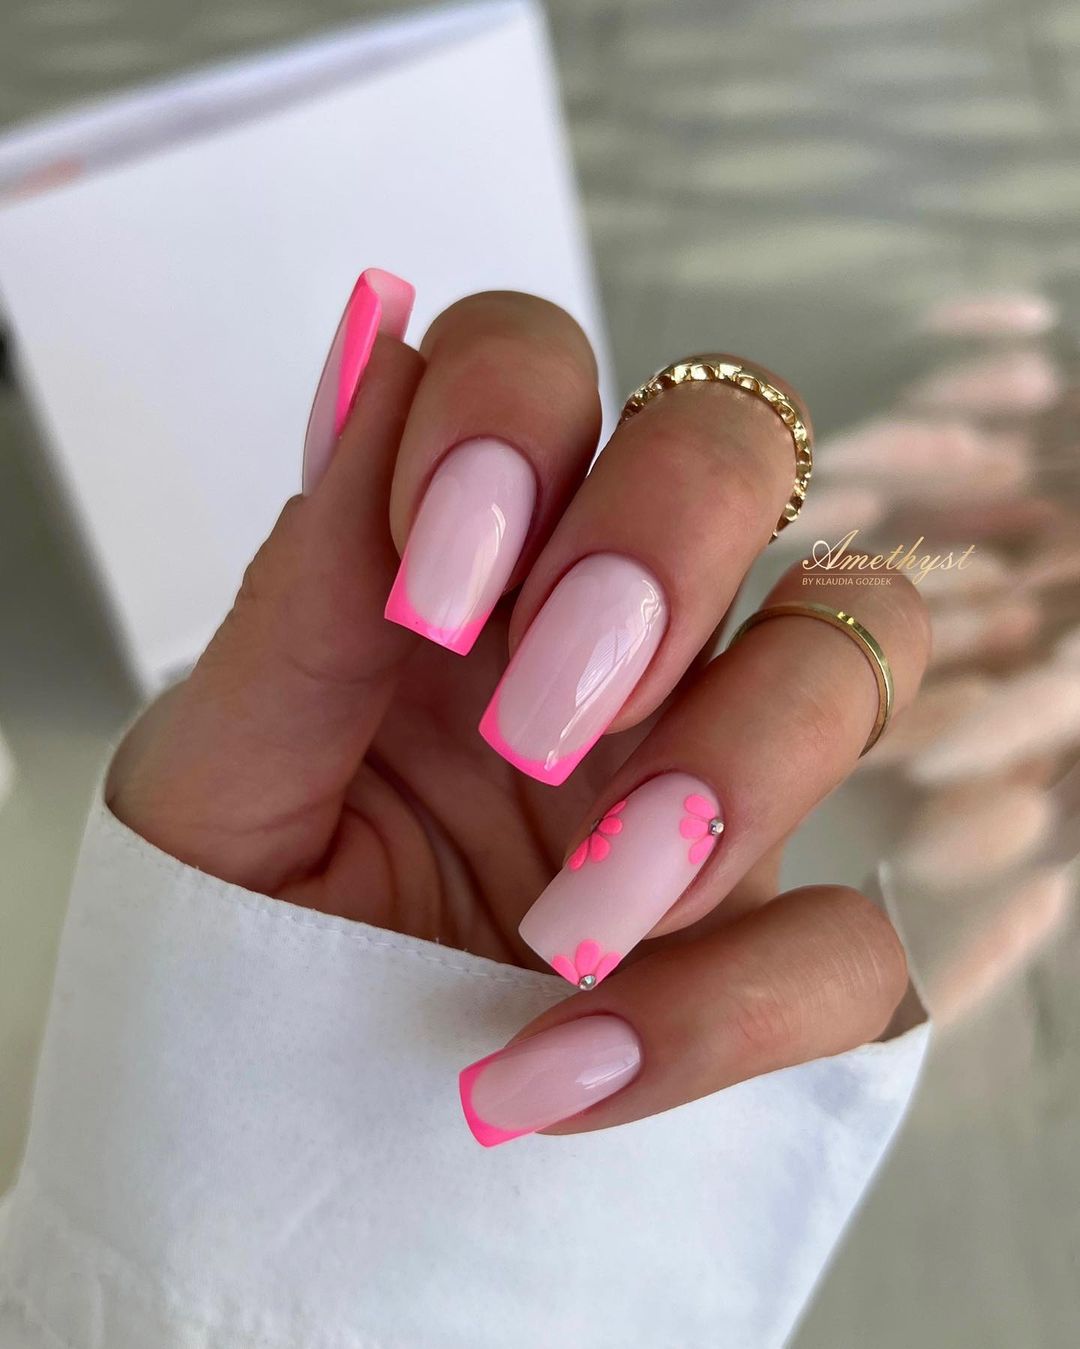
- Pale pink gel polish (e.g., DND Gel Polish in Ballerina Pink)
- Hot pink polish for the tip edge and detailing (e.g., Vetro in Neon Pink)
- Rhinestones
- Fine-point nail art brush
Put on base coat of light pink gel and cure. Apply hot pink as tips and make petal details using fine brush. Put small rhinestone at the middle of each petal. Seal with top coat to set design and shine.
Garden Party Chic: White Tips with Delicate Floral Art
Like a summer garden party at your fingertips are these nails. The white tips make a classic foundation for the dainty floral art, giving it a playful sophistication. So simple, so fresh, and absolutely adorable; perfect for the lively atmosphere of summer.
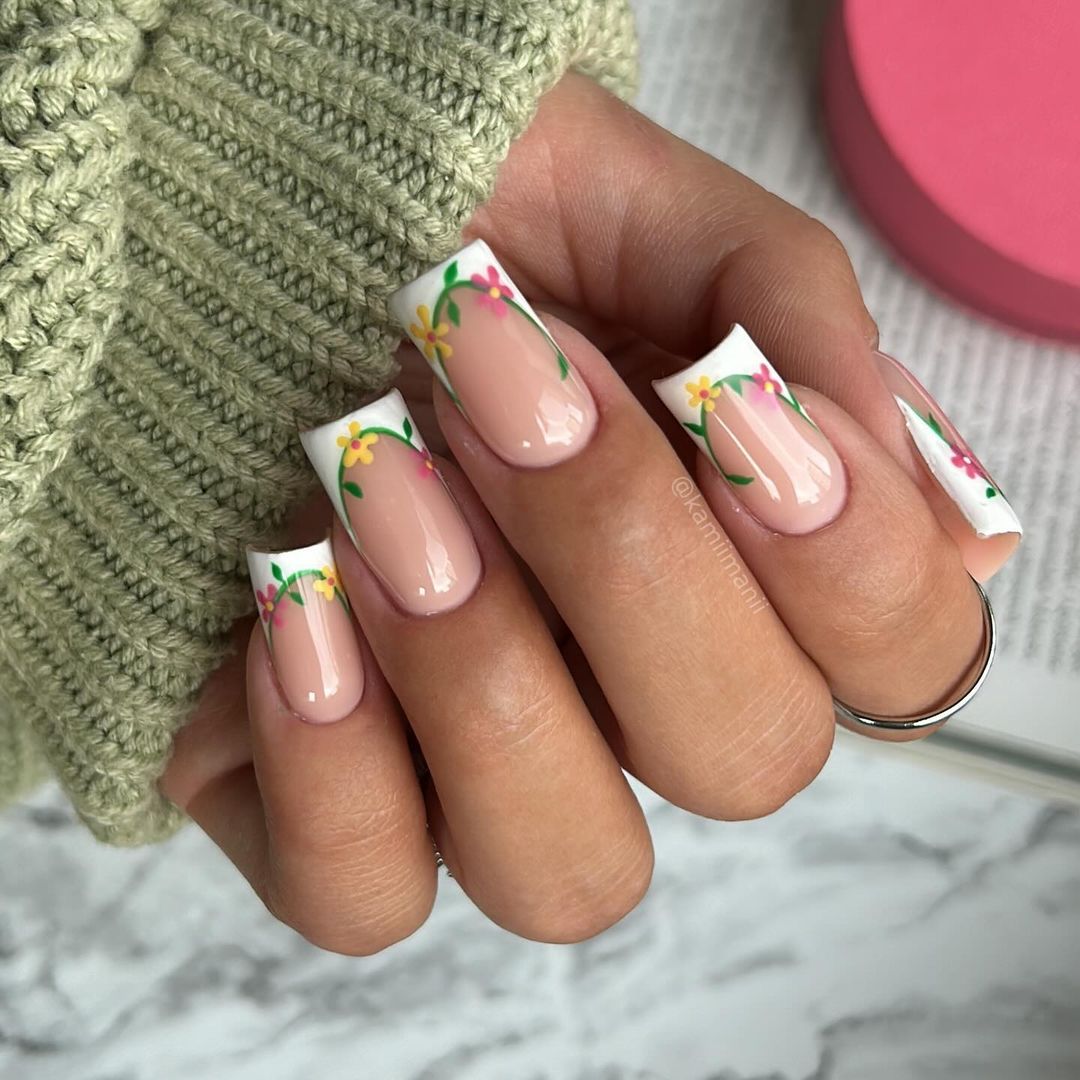
- Sheer pink polish (such as Essie Gel Couture in Fairy Tailor)
- White nail polish for tips (like China Glaze White on White)
- Nail art pens in different shades
- Fine tip brush for intricate details
Apply sheer pink and add a clean white tip. Next, take nail art pens and paint small flowers along the white edge. Add leaves and dots using a fine-tip brush to create more realism. Finish your garden-inspired design with some glossy top coat.
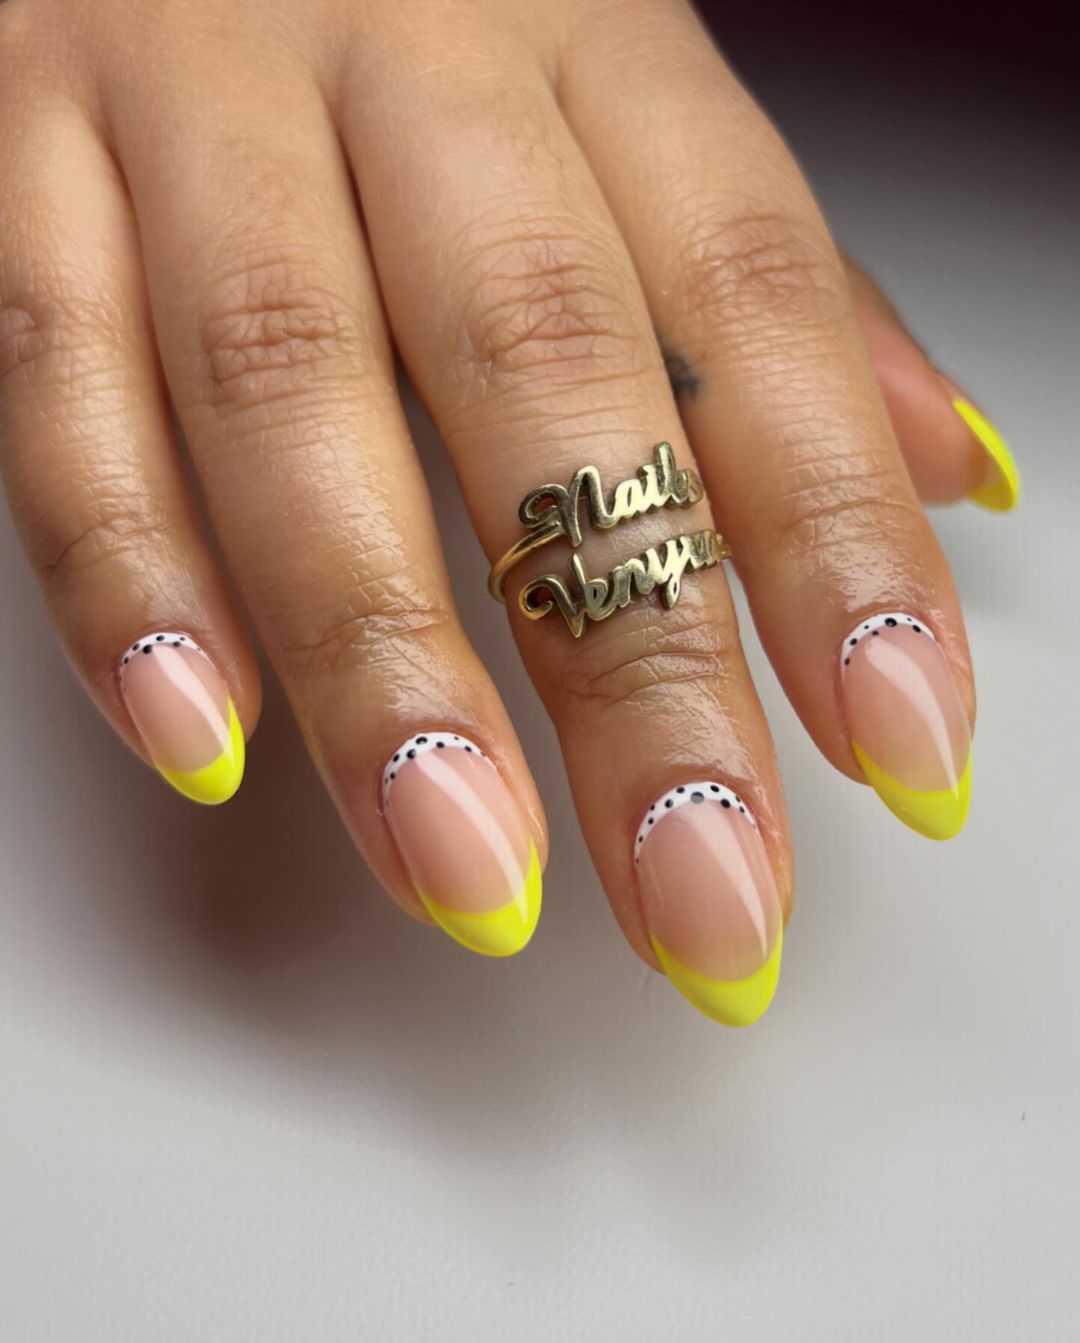
Bold and Bright: Neon Pink Tips for a Luminous Look
The core of summer fun is neon, and these neon pink nails are no different. These nails are visible because they have a glowing quality that is luminous and daring. They make a soft transition into lighter pink which is not only adorable but also serves as one of today’s modern gradient effect trends.
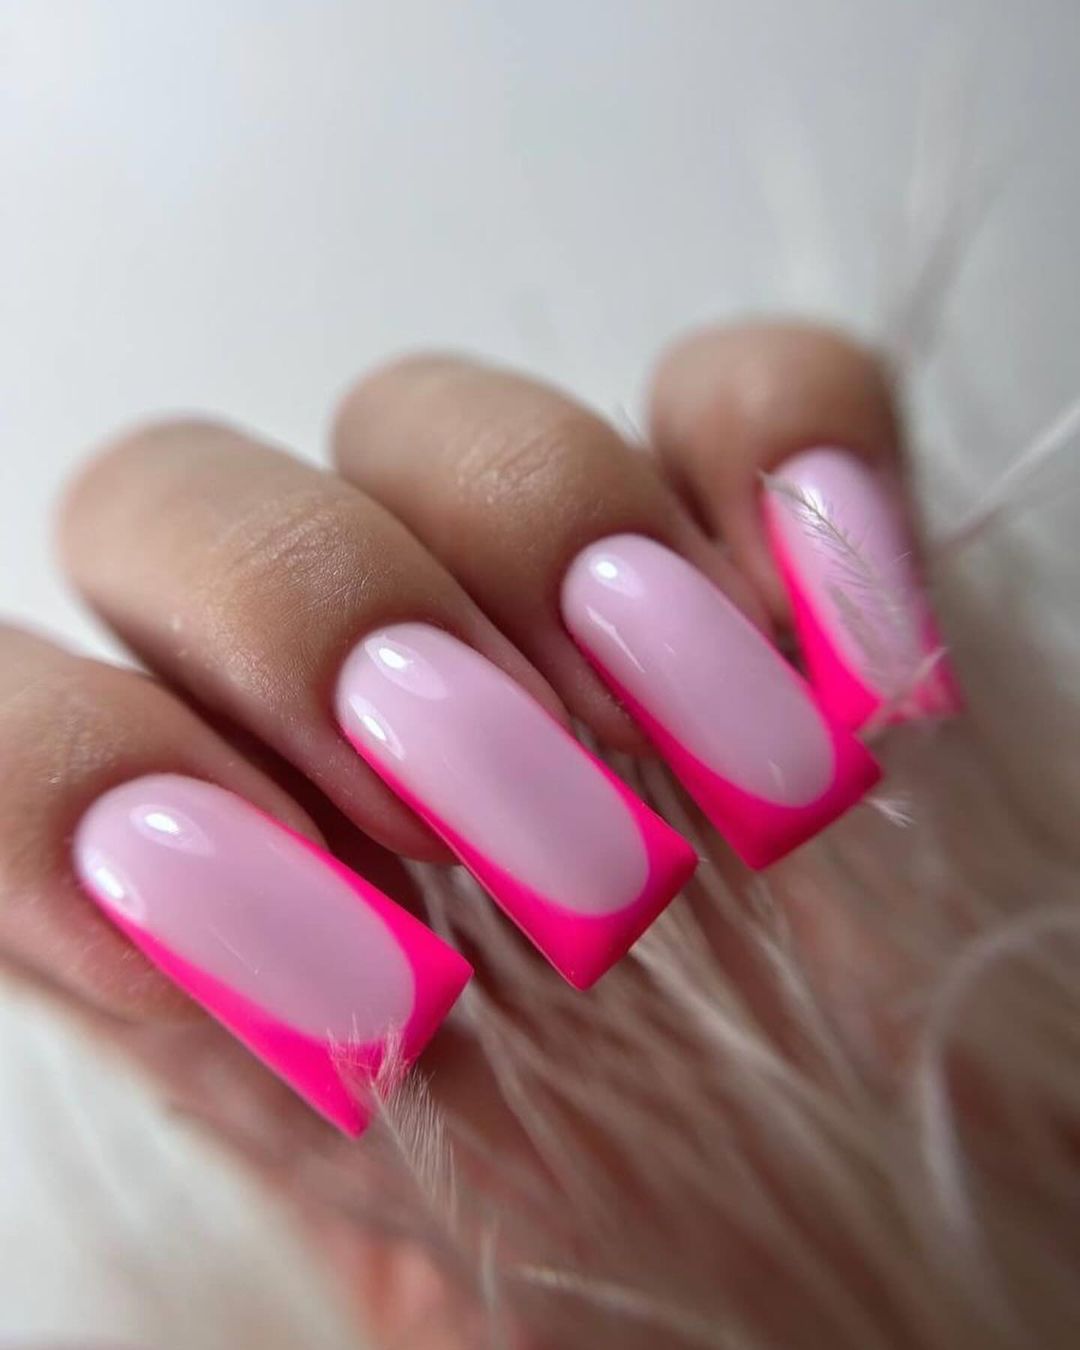
- 1 bottle of OPI gel color in Put it in Neutral
- 1 bottle of ORLY Neon Heat nail polish (Neon Pink)
- sponge for grading effect
- good glossy top coat to give a shiny finish
After applying pale pink base, use sponge to apply neon pink on the tips to get a smooth graded look. You can repeat this for intensity and then put on the top coat for that shine and durability.
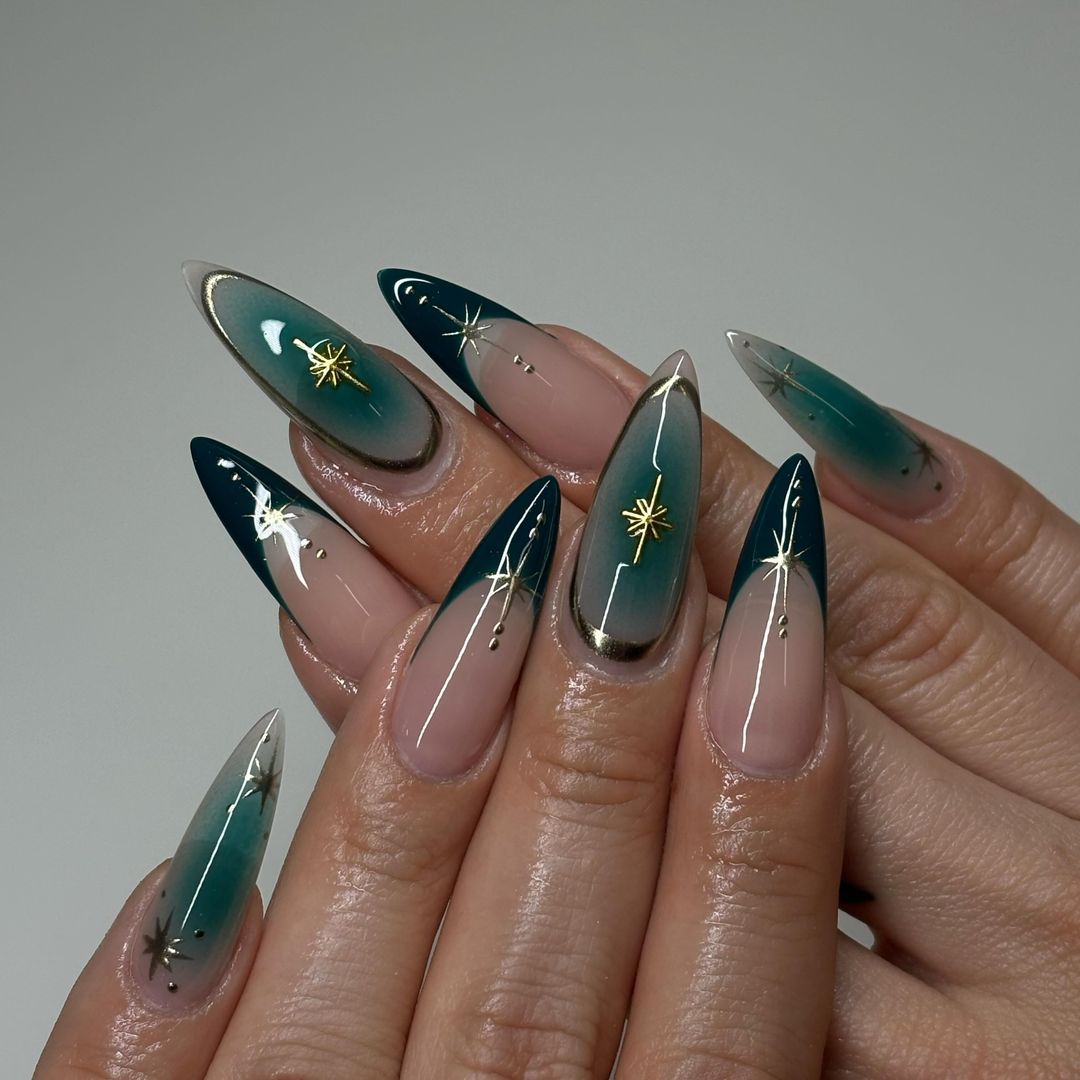
Aquatic Elegance: Seafoam French Tips with Crystal Embellishments
These seafoam green-colored fingernails are a peaceful allusion to the oceanic shades of summer. With this, they become an unorthodox declaration that can be worn with any summer outfit because of the addition of transparent jewel ornamentations.
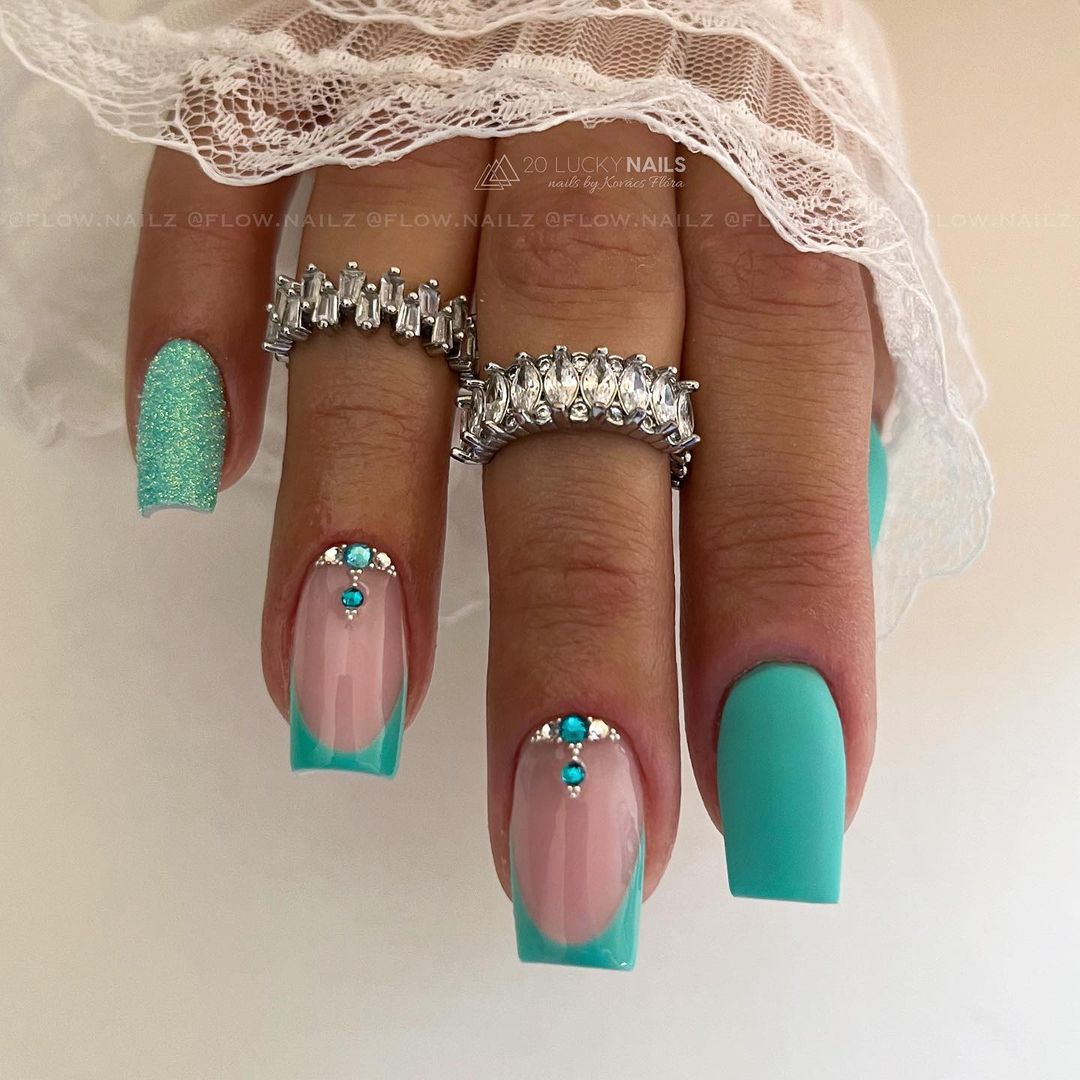
- ILNP’s Music Box (sea foam green polish)
- Nail embellishments made of crystal
- Gel top coat
- Nail glue for holding crystals tight.
Lamp cure your tips with the seafoam green paint if you’re using gel and also apply nail glue on them if needed. Then, mounting crystals at selected spots meant applying glue behind them. Next seal in the stones with a gel top coat that also acts as a protective glossy covering.
Save Pin
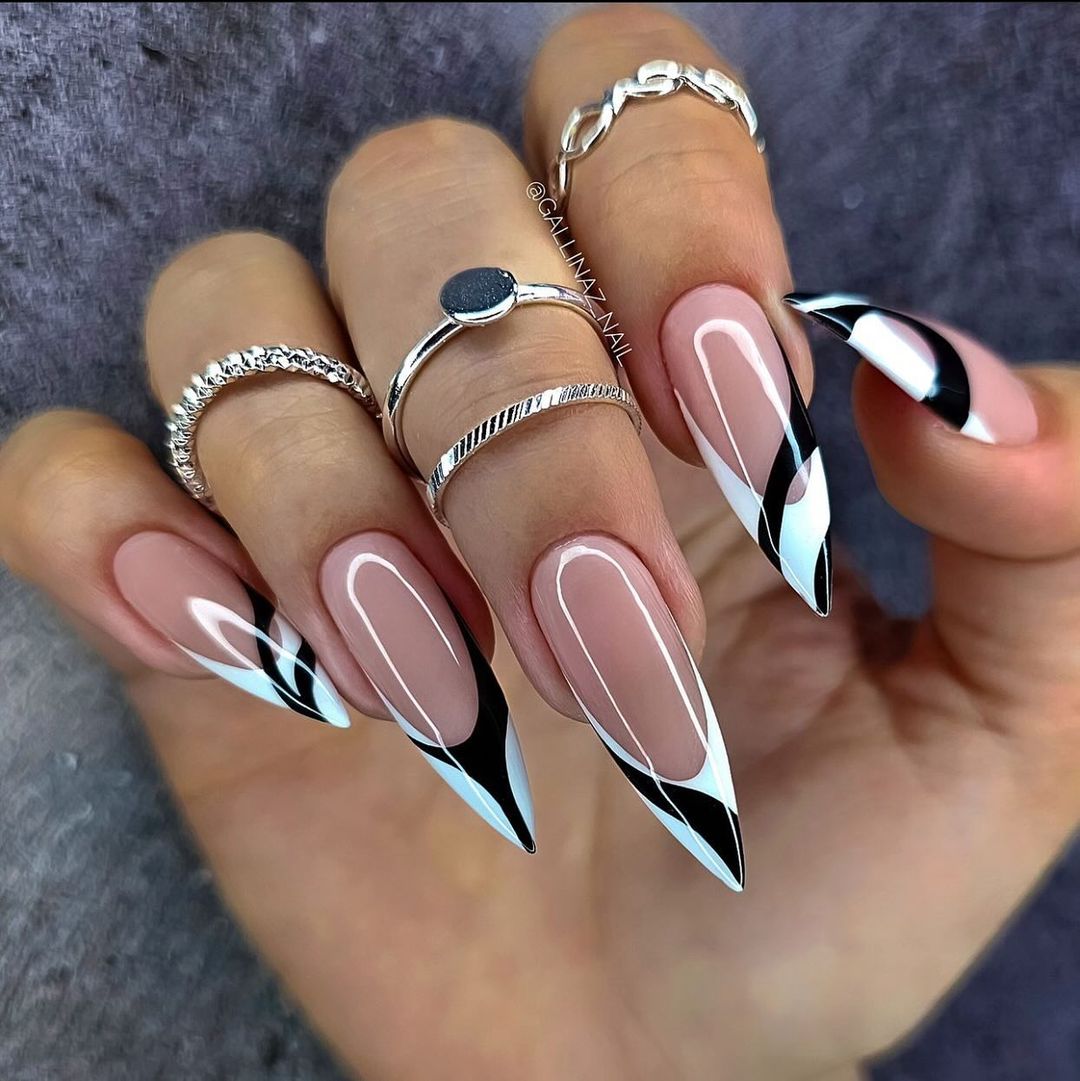
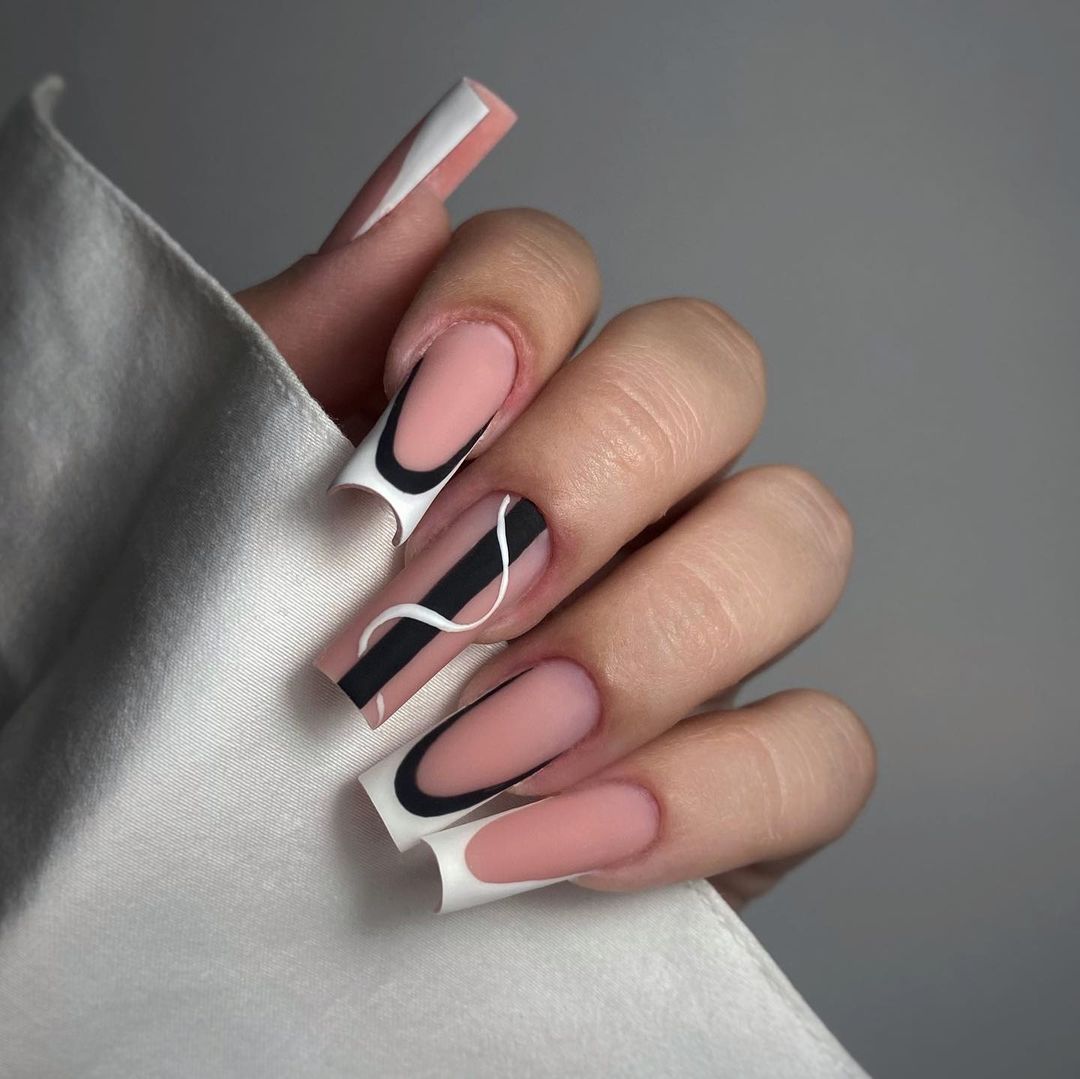
Sleek and Dramatic: Black and White Stiletto French
The classic French tip is taken to another level in this nail design by being sharpened into stilettos with black swirls over a white background. It’s an artistic and unique selection that blends sophistication and an edge, making it perfect for bold fashion statements during the summer.
- Transparent light coloured nail polish (e.g. Bubble Bath by OPI)
- Nail polish in white base for tips e.g. White Pick it by Sally Hansen Insta-Dri
- Nail art polish in black color for designs e.g Black from Nail Art Express
- Stiletto false nails (if required)
- A glossy top coat to finish
First, apply a sheer nude polish on your nails. If you are using false nails, insert the stiletto tips onto them. Afterward, paint these tips white and allow them to dry out fully. Create different patterns or just black colored spirals on every tip using thin brush or nail art pen. Finally, secure the design with a glossy top coat and add shine.
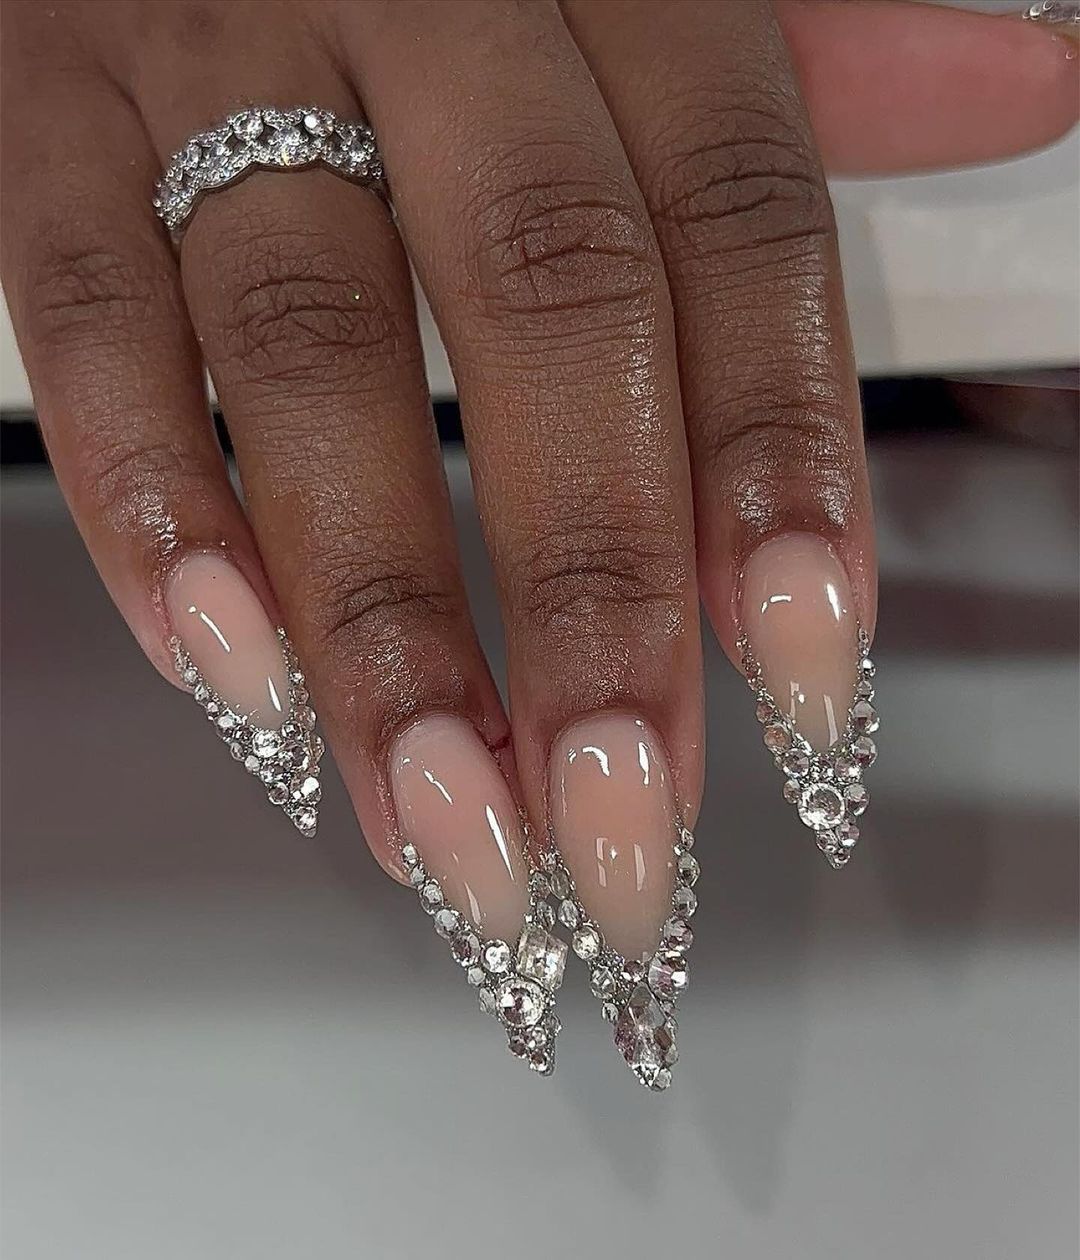
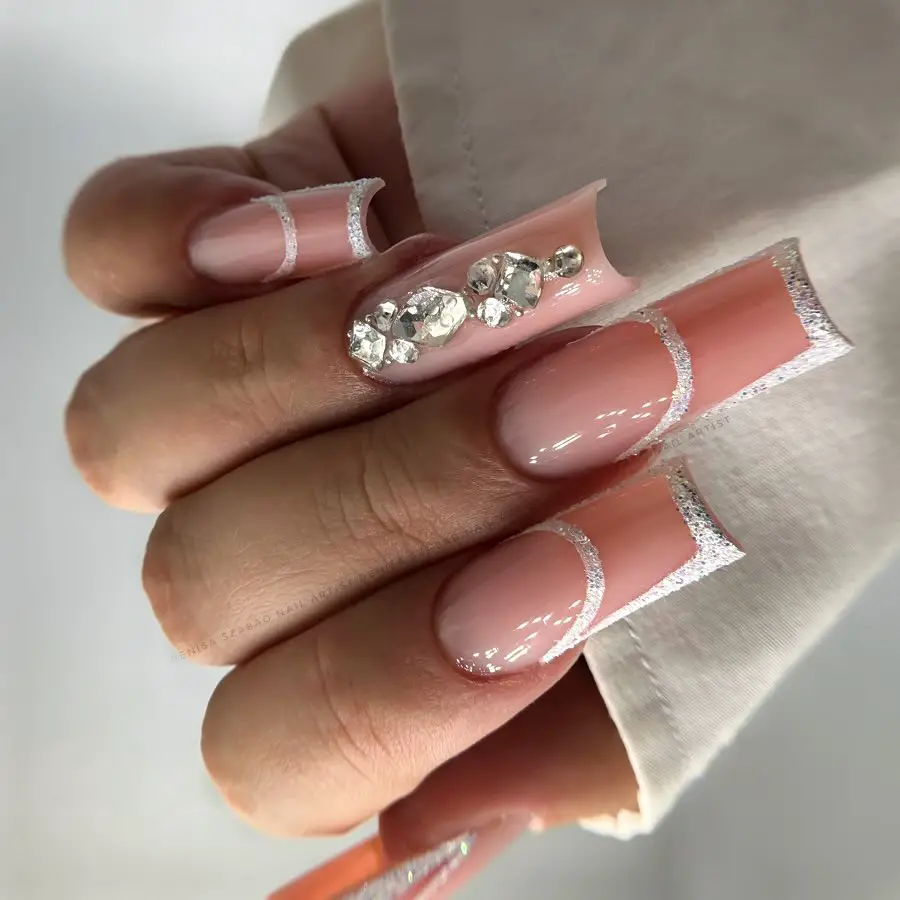
Crystal Elegance: Classic French with Luxurious Gem Accents
To give the nails a luxurious touch, they are adorned with French tips and extravagant crystals. The design will definitely appeal to people who enjoy a tinge of opulence in their style. Every gemstone brings some summer festivity sparkle.
- Nude nail polish (e.g., Deborah Lippmann Nail Color in Fashion)
- White tip polish (e.g., Zoya Nail Polish in Snow White)
- Different types of crystal nail gems and rhinestones
- Nail adhesive for securing adornments
- A glossy topcoat for shine
Apply nude lacquer as a base before creating your French tips using white polish. After drying, arrange your nail crystals as desired. Attach each crytal by means of nail glue. Finally, apply another layer of gloss on top for added shiny effect and protection purposes.
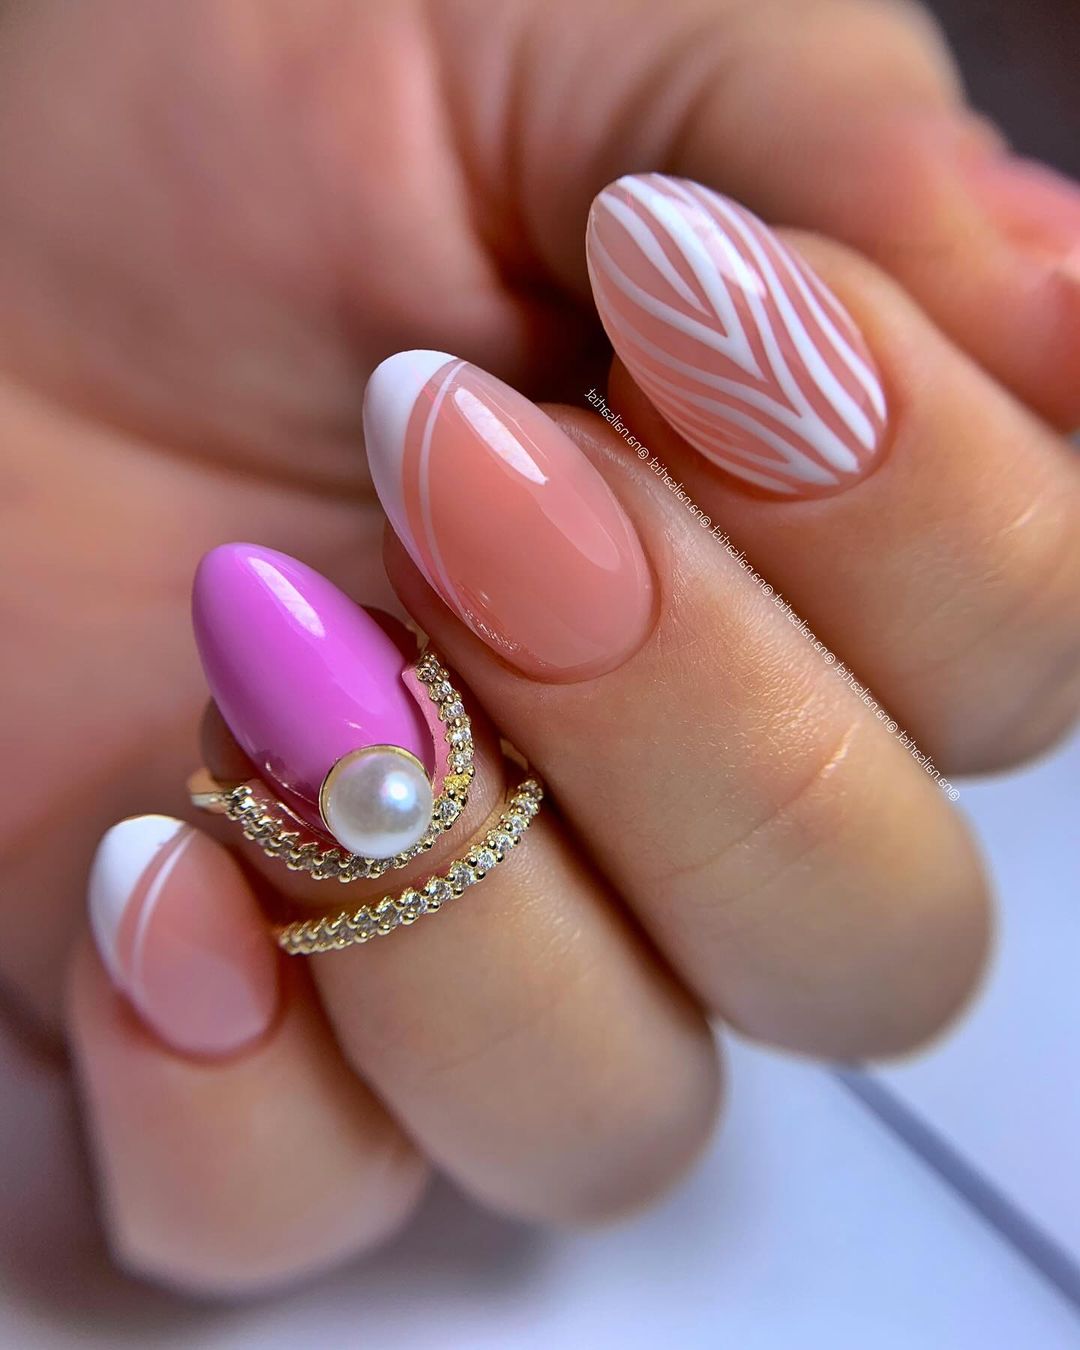
Playful Pink Geometry: Mixed Design for a Fresh Summer Look
This set of nails is indeed a summer sound, mixing faint pink colors with geometrical patterns as well as art. It’s a playful selection that can be enjoyed by people with varied preferences and tastes thereby making it suitable for any summer event, from casual trips to red carpet events.
- LeChat Perfect Match in Pink Lace (a light pink gel polish)
- ORLY Beach Cruiser (hot pink polish for accents)
- Stripe Rite in White (white nail art polish for geometric designs)
- Embellishments including pearls or studs
- Matte and glossy top coats to create different finishes
Use the light pink gel polish as your base and cure. On some nails, add vibrant touches using hot pink polish. On other nails, you could draw geometrical lines or stripes using white nail art polish. Enhance dimension on nails by adding pearls or studs. Create a variation of matte and shiny coats of top coat hence bringing out an interesting contrast.
Soft Waves and Pearls: A Tranquil Summer Seascape
These nails have been designed to imitate the calmness of the ocean using soft light blue waves that go over clear and plain pale pink. The addition of delicate pearls adds a touch of elegance associated with deep blue treasures, making it a perfect design for a tranquil summer look.

- Sheer pink polish (e.g., OPI Gel Color in Bubble Bath)
- Light blue gel polish (e.g., Gelish in Arctic Freeze)
- Tiny beads and flicks
- Pearl glue
- Top coat, glossy
To achieve this look, apply sheer pink base color and then paint on soft light blue waves at the tips using a thin brush. When dry, attach tiny pearls along the line of the waves using nail glue to create a 3-D effect. Finish up with a top coat to seal your work.
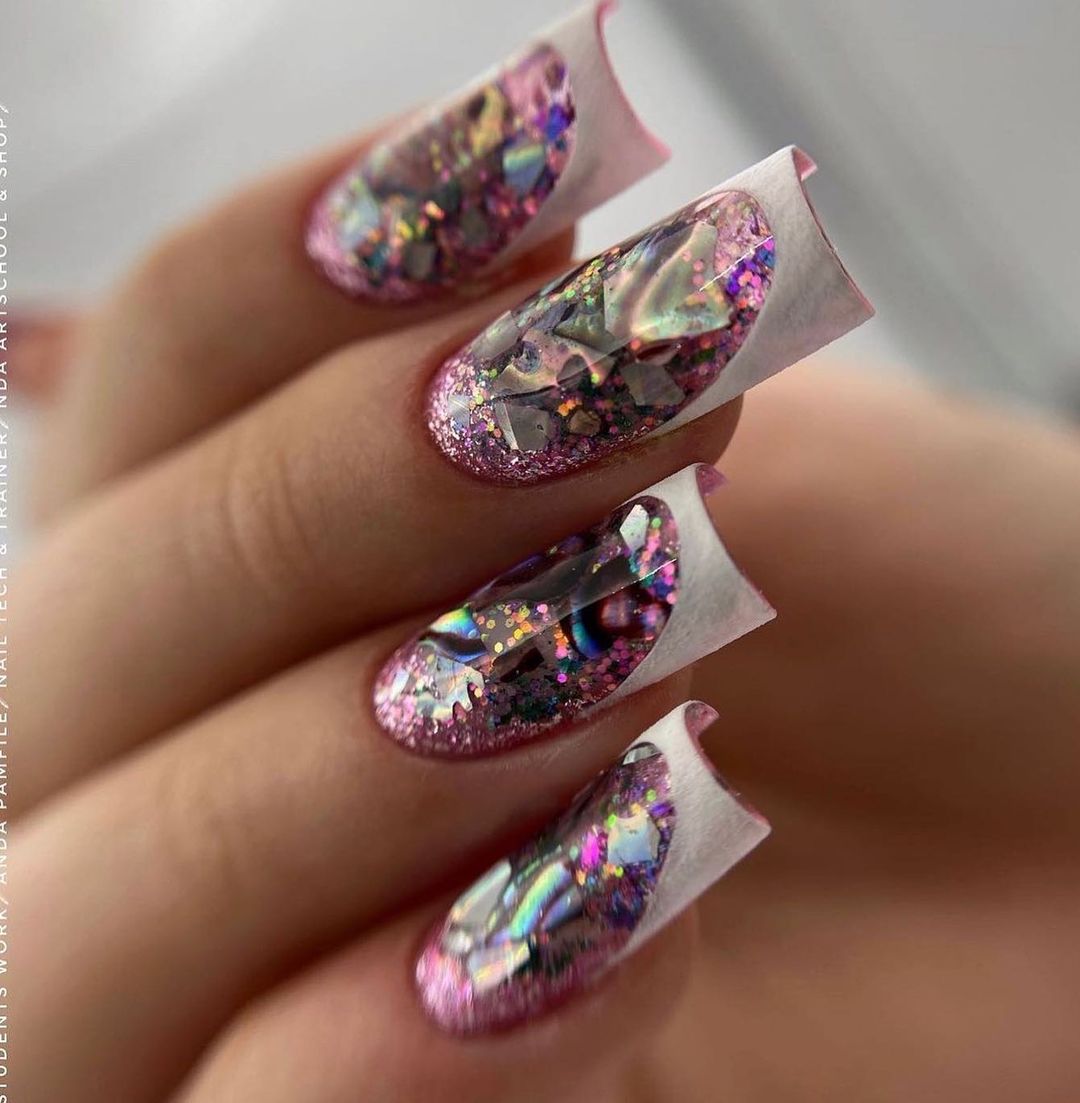
Chromatic Splendor: Holographic Glitter with French Precision
The design is a summer spectacle with its chrome and holographic glitter effects for those who love to shine. Every nail becomes a canvas for iridescent play of light and color as the precision of the French tips is enriched with contemporary twists—a rare choice for sparkling summer nights.
- French tip guides or striping tape
- Silver holographic glitter polish (e.g., Color Club Harp On It)
- Chrome pigment (e.g., Daily Charme Mirror Chrome Powder)
- Sponge applicator for chrome pigment
- No-wipe top coat
Use prepped nails on which you have already put tip guides so that you can be accurate. Put holographic glitter polish on tips but do not forget to remove the guides before it dries out. Pour chrome pigment over cured gel polish adhesive layer at the bottom part of the nails and blend up towards the glitters using sponge. Finish with a no-wipe top coat to seal your chromatic creation.
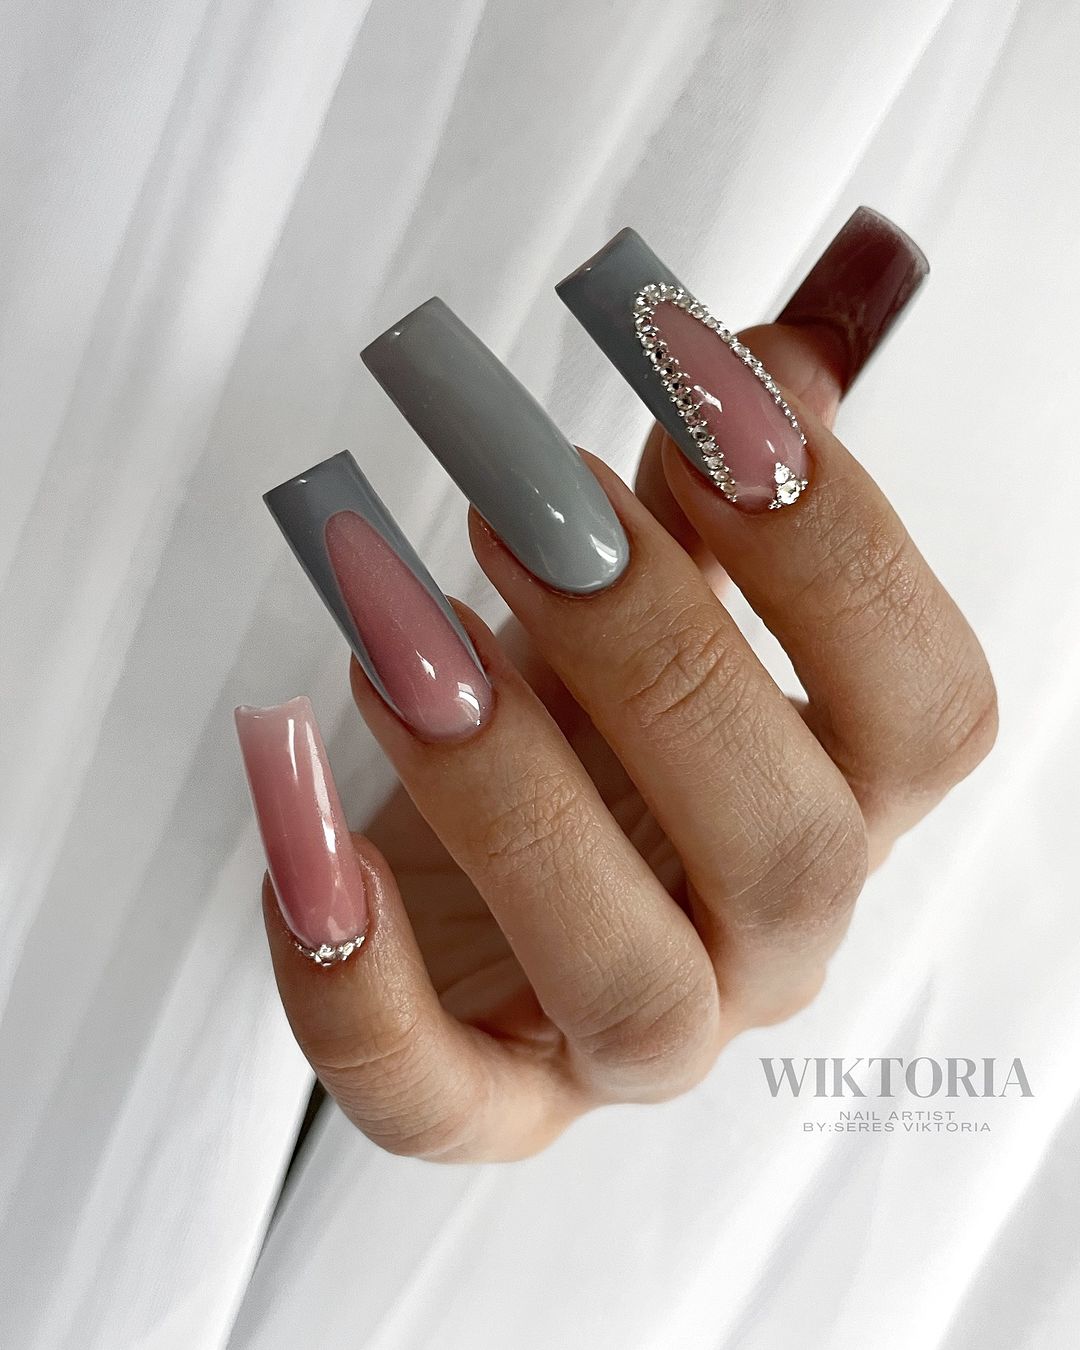
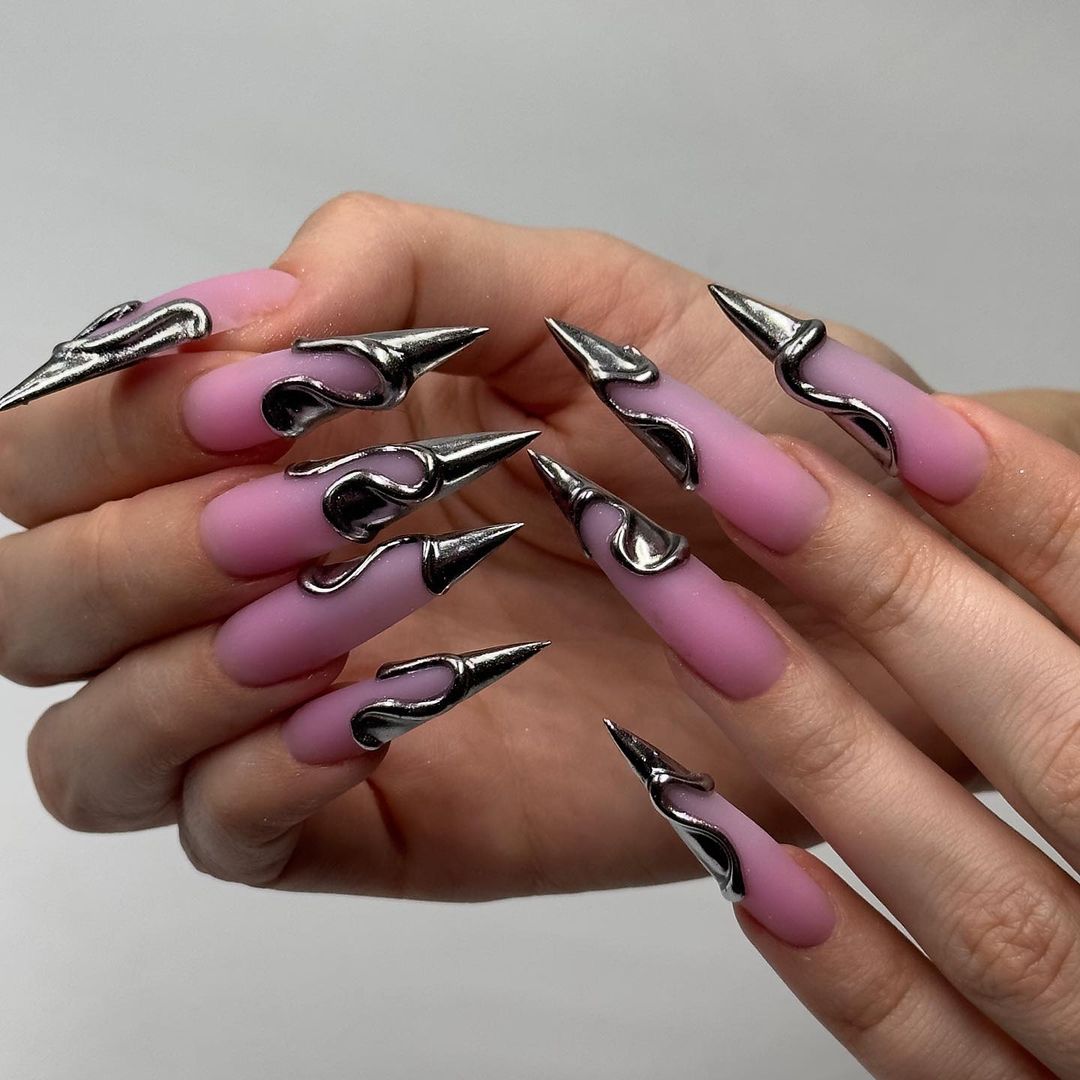
Edgy Metallic: Bold Silver Accents on Soft Pink
Combining hard and solid matte pink with shiny silvery metal, this design is about contrasts. However, the silver accents make the nails look a little bit more edgy thus standing out as a statement piece. It’s an interesting mix of cool and sophisticated that suits people who want to be different.
- Essie Matte About You polish (matte pink)
- Silver metallic striping tape
- Sally Hansen Salon Chrome in Peacock (silver chrome powder)
- Matte top coat
Paint your nails with matte pink polish and let it dry. Apply angularly patterned strips of silver metallic tape on each nail.
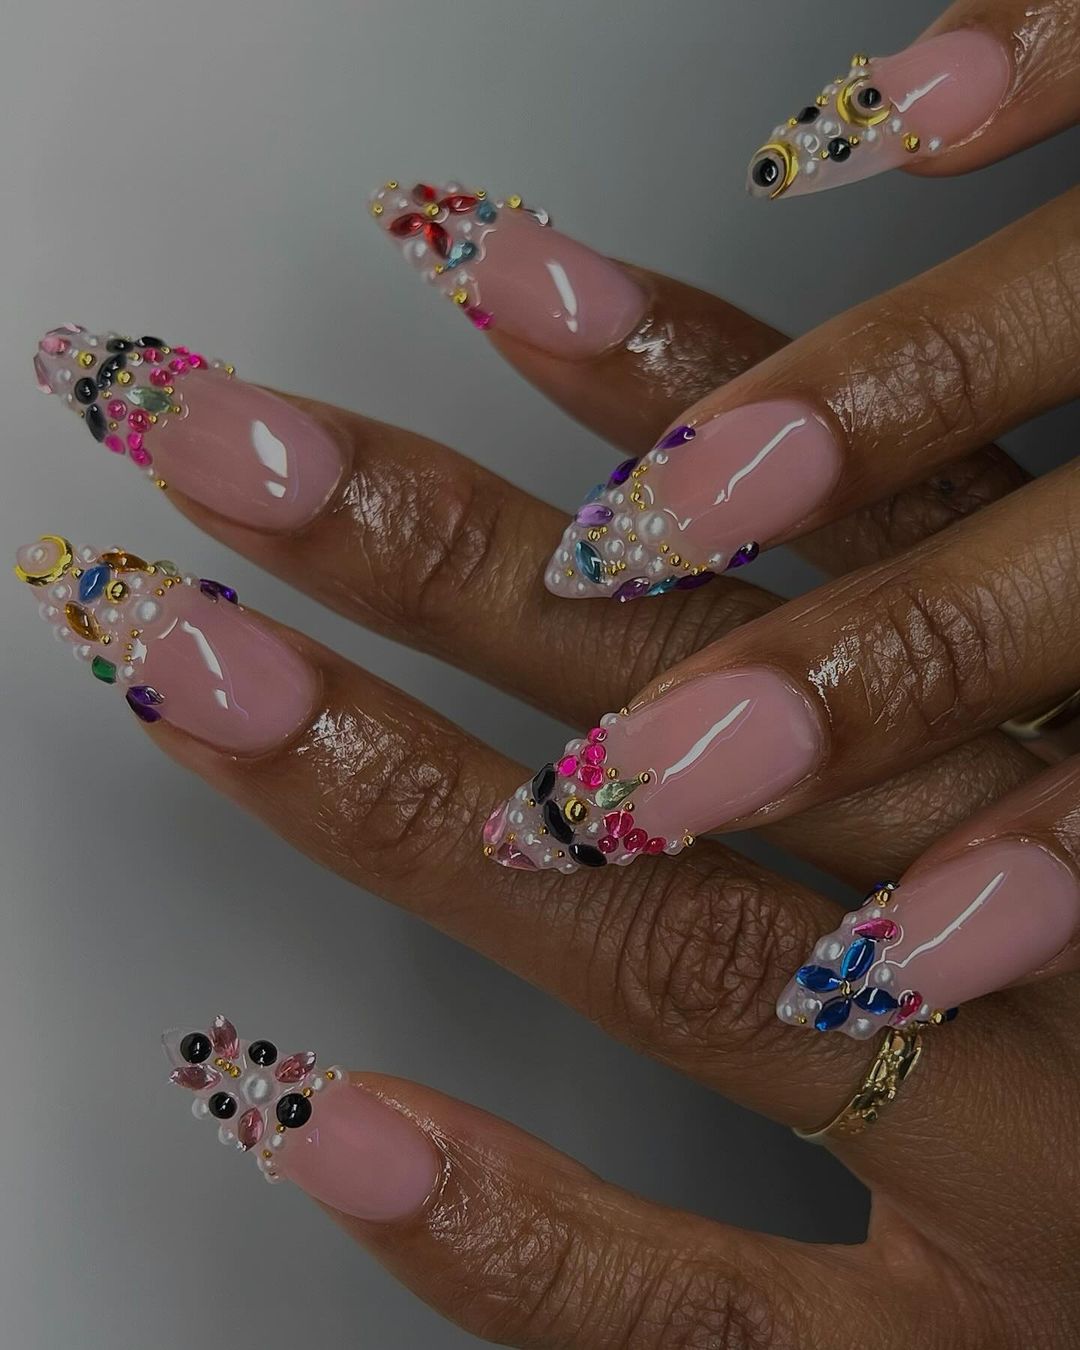
Beaded Elegance: Jewel-Toned Embellishments for a Luxurious Finish
These nails are the language of opulence itself with their myriad of gem colored beads and crystals. They provide a tangible experience that is as captivating to feel as it is to look upon. It’s an art piece created by every bead and stone placement, which suits perfectly those who wants to show their true character on their finger tips.
- Transparent pink basis lacquer (e.g., DND Daisy Gel in Pink Tutu)
- Various colors of beads and crystals
- Nail adhesive for keeping them steady
- Glossy top coating for smooth finish
Use sheer pink polish as a base first. After it has dried up well, arrange your beads and crystals on the nail according to how you want them placed. Ensure each piece remains so by using nail glue. Give it some shine by adding a glossy top coat that will hold the design in place.
Glimmering Serenity: Gentle Pink with a Subtle Sparkle
The simple, slightly glowing baby pink polish is combined with the subtle twinkle of glitter, creating a calm and lively atmosphere of summer. The nails are made in such a way that tiny shiny lines are visible at the fingertips and this makes them so charming.
- Baby pink polish (e.g., ORLY Breathable in Kiss Me, I’m Kind)
- Pink glitter polish (e.g., ILNP in Juliette)
- Tape for clean glitter lines
- Glossy top coat
Paint your nails with the baby pink nail polish and wait until it dries out. Put strips on the tips then apply the pink glitter to those parts. Take off the stripes to reveal neat sparkling tips. Finally put on a layer of glossy top coat which will make it last longer.
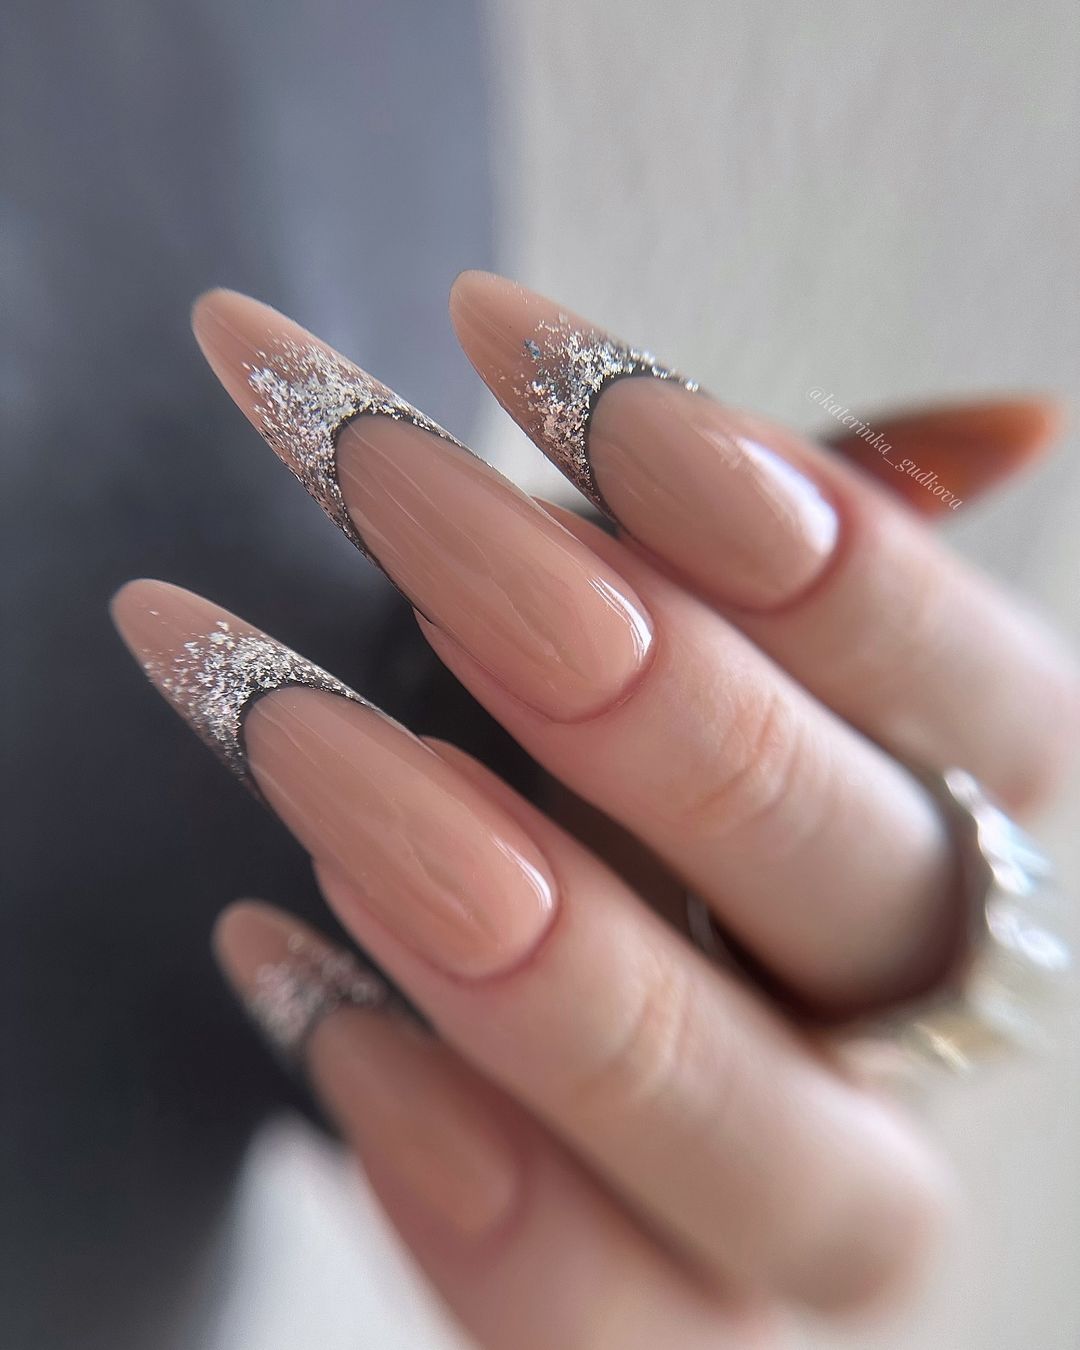
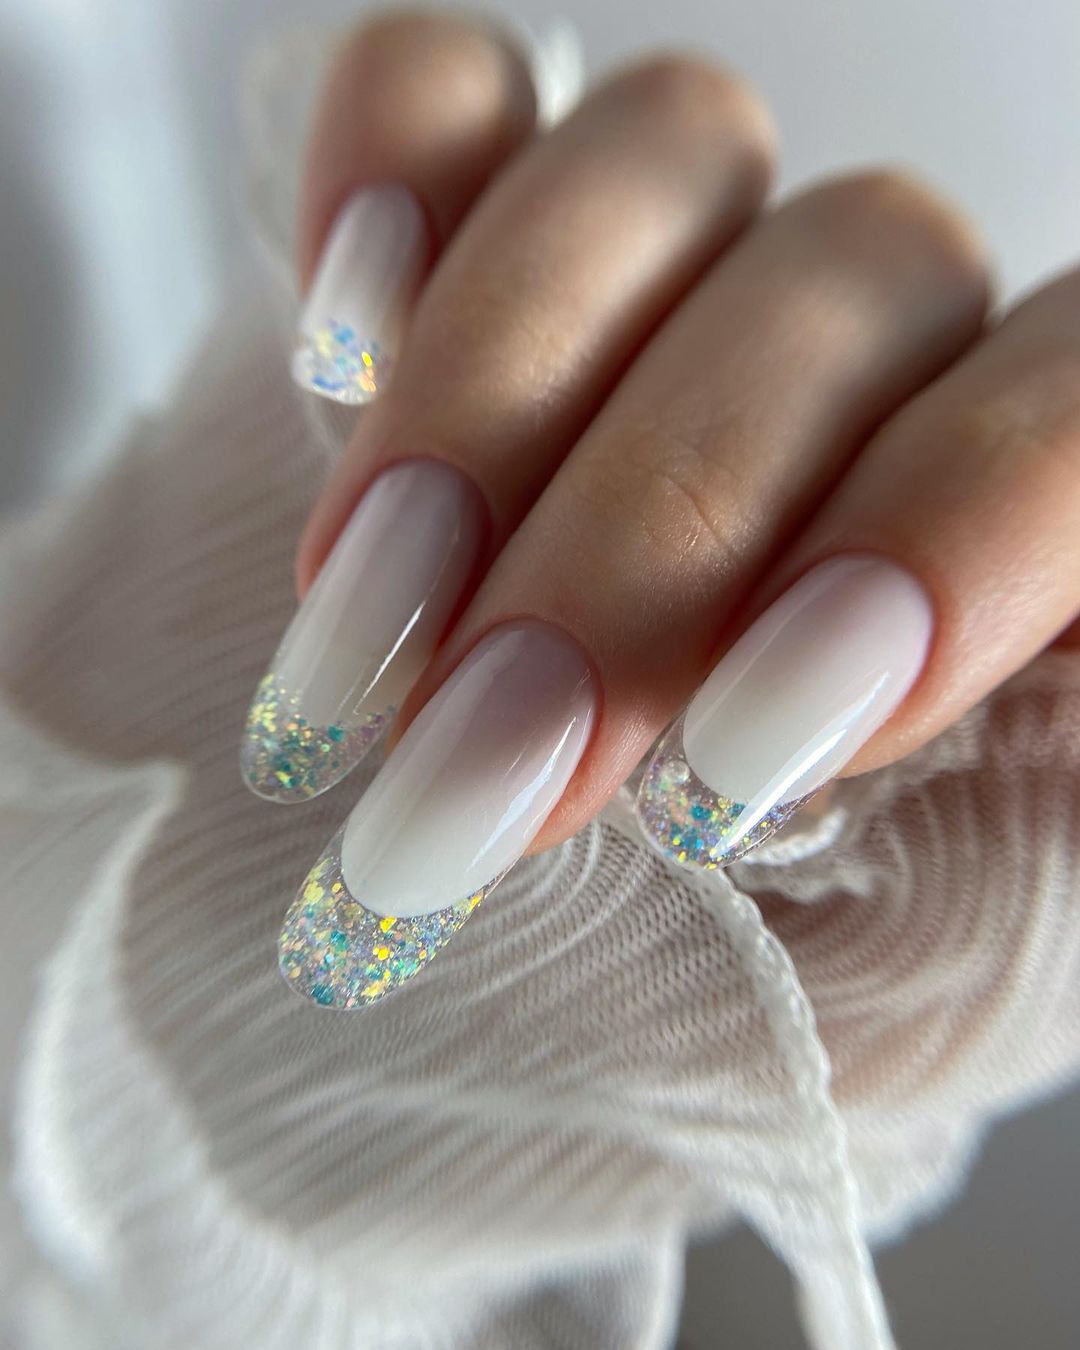
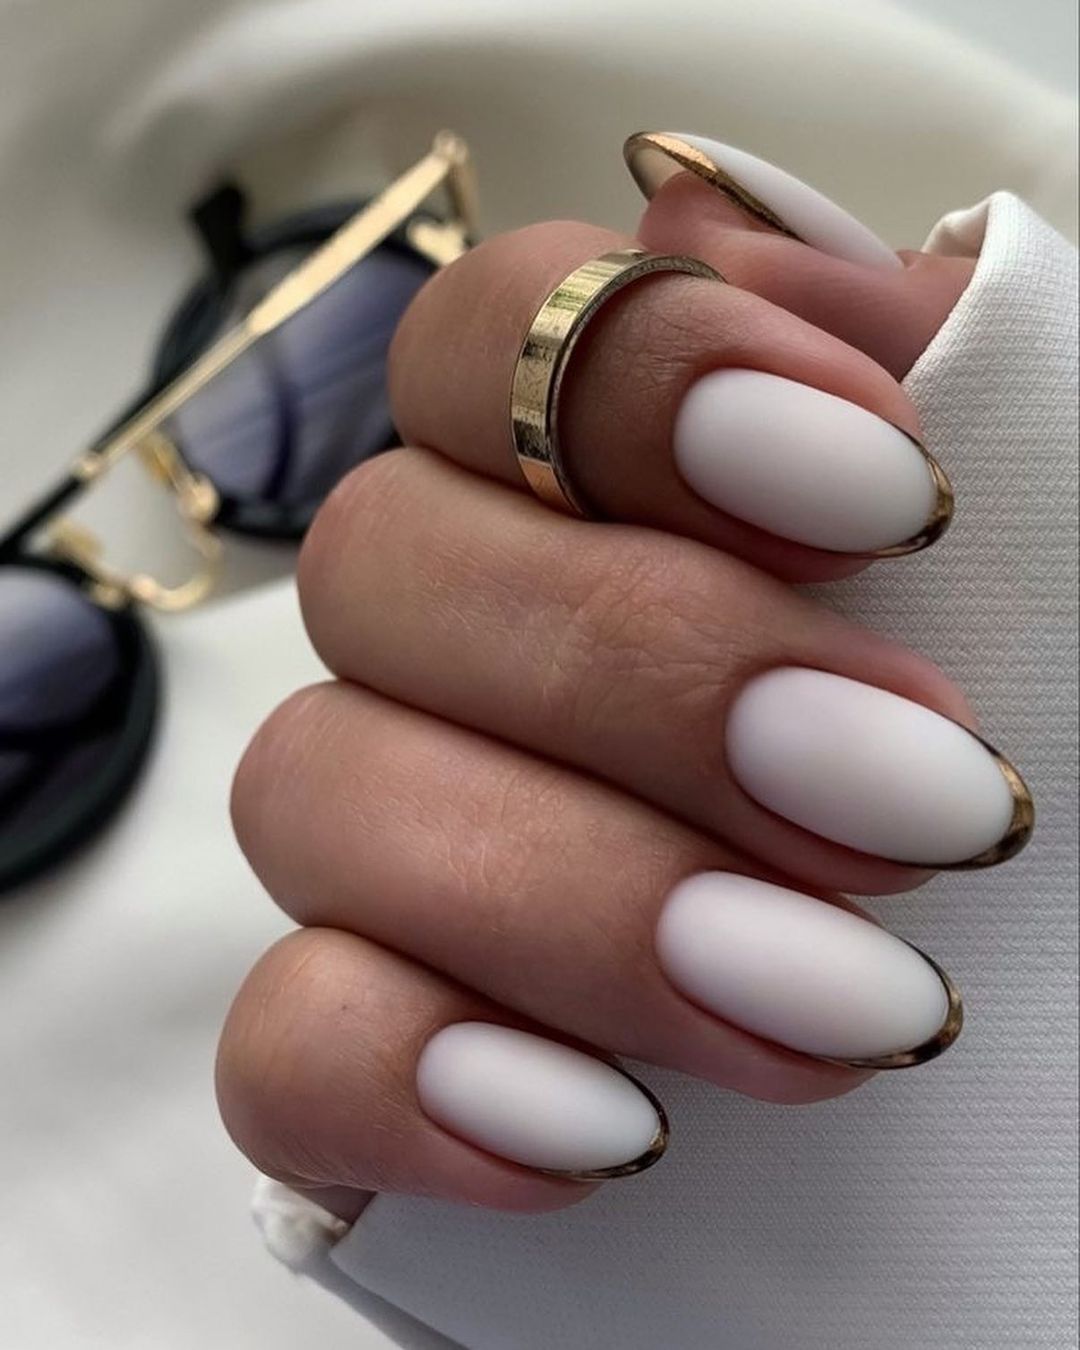
Classic Chic: Timeless French Tips with a Glittering Edge
Timeless classic with a difference, these French tips are sophisticates with a touch of glittery grace. A gentle sparkle along the edges adds subtle shimmer that is perfect for an easy yet trendy summer outfit, which can be worn from morning to evening without problems.
- Nude polish (ex. Zoya Nail Polish in Avery)
- White polish for the tips (e.g., ORLY French Tip)
- Silver glitter stripe (such as Stripe Rite in Silver Glitter)
- Glossy top coat for shine
Begin by applying nude polish on nails. Paint the ends white and run silver glitter down the edge of the white tip. End up with glossy top coat to enhance glimmer and protect it.
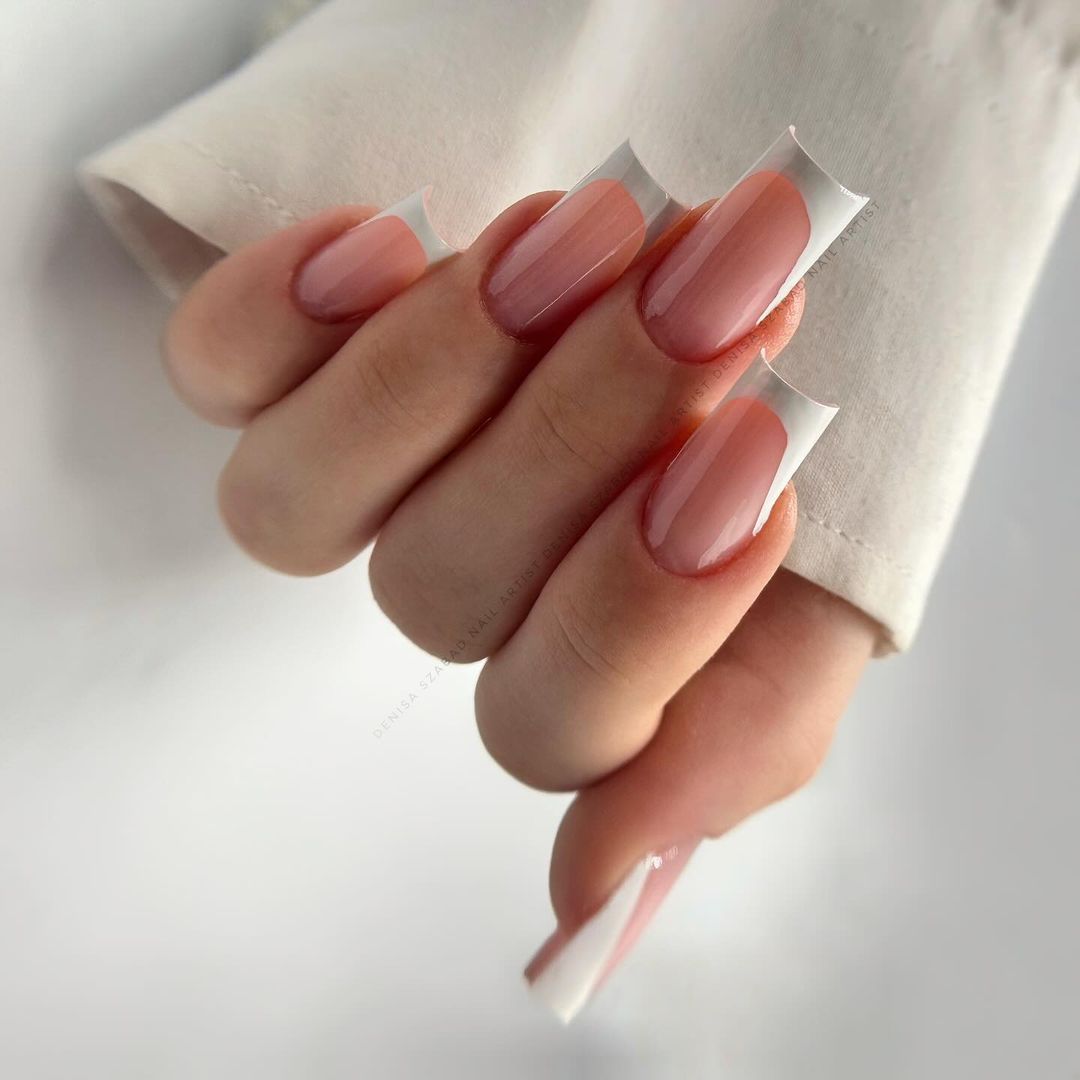
Translucent Tips: A Modern Take on the Classic French
This is how to get modern art on your fingertips, starting with the classical French-tip design. The appearance of glass is brought by translucent extension that contrasts beautifully with the natural pink of the nail bed. It is a simple but elegant embodiment of simplicity making it suitable for those that like traditional styles with a contemporary spin.
- Gel polish (for example, Blush by Bio Seaweed Gel in Unity All-In-One)
- Clear nail tips or sculpting gel
- A glossy top coat for a glassy finish
Apply sheer pink gel over your natural nails and cure under lamp. Alternatively, attach clear nail tips using glue or sculpt the extensions from clear gel. Cure once more then apply glossy top coat to further enhance transparency effect.
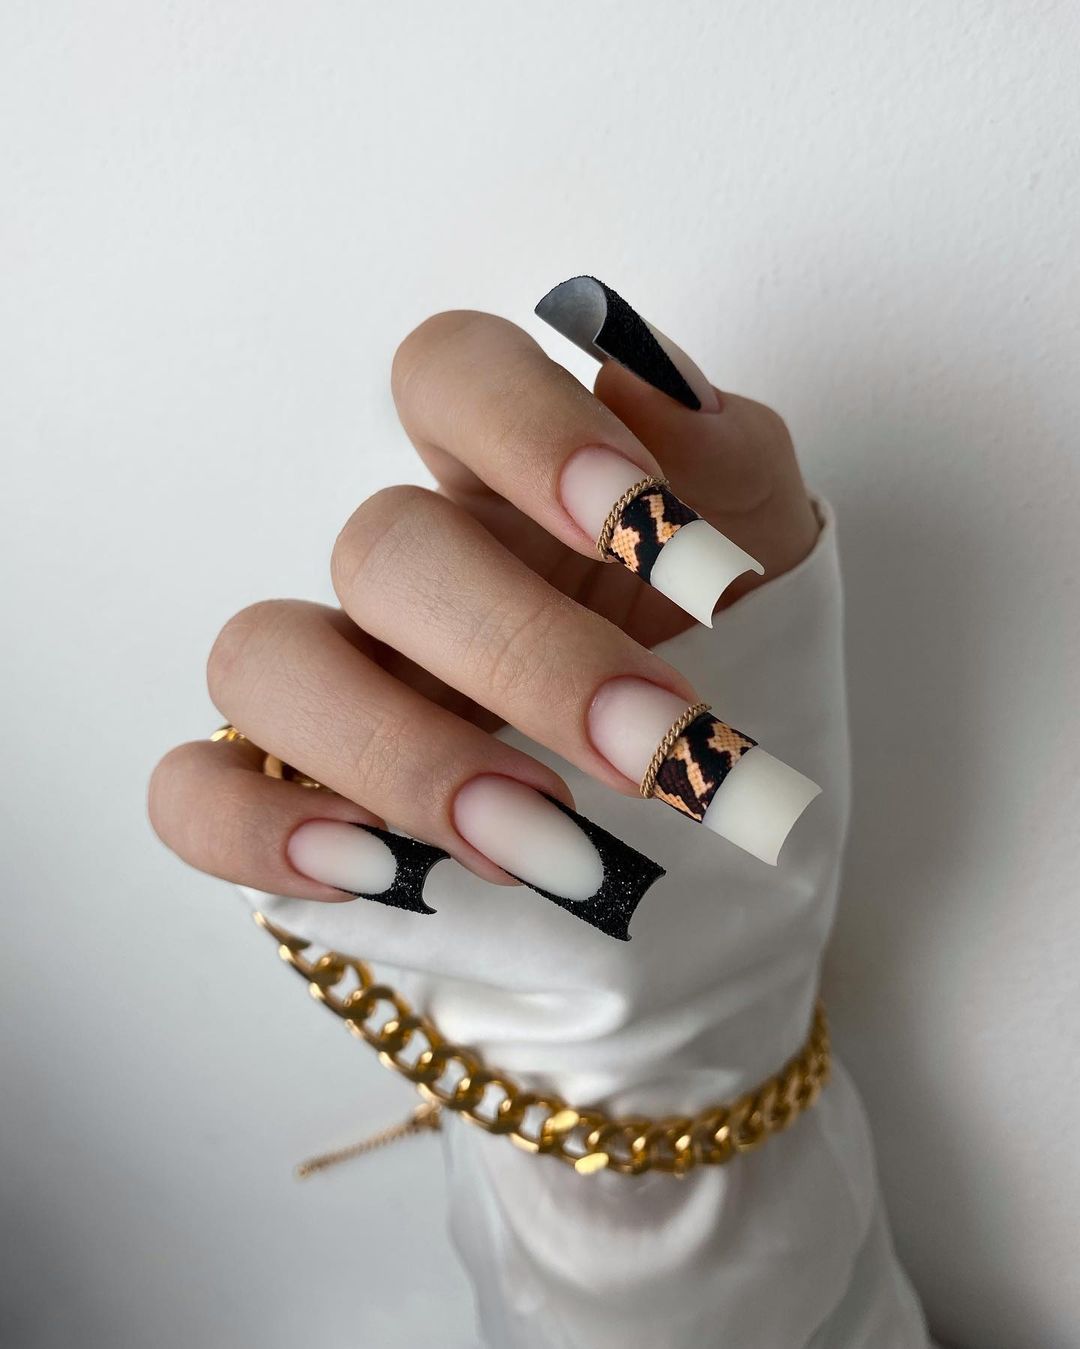
Bold Contrasts: White Tips with Fashion-Forward Textures
Full of attitude and fashion forward, these nails have white tips that are dramatically different from the black textured patterns on them giving an edgy but sophisticated look. The neutral animal print is accentuated with animal motifs to add some touch of wildness making them look perfect for a fashionista who wants to make a statement.
- Nude gel polish (e.g., CND Shellac in Satin Pajamas)
- White gel polish for tips (e.g., Gelish in Arctic Freeze)
- Black textured polish (e.g., OPI Leather Effect in Black Onyx)
- Animal print decals or stencils
Apply nude gel polish as base and cure it. Next, paint the tips white, cure again, then apply black textured polish you prefer or use stencils for accuracy. For a matte finish top coat over the black areas, cure for the last time.
Fluid Pink Marbling: Swirling Elegance on French Tips
The nails have a marbled effect like moving pink shades on the standard French tip. These swirls make it look both whimsical and elegant, which is great for romantic summer days full of excitement and exploration.

- Base polish – pale pink (e.g. Mademoiselle by Essie)
- Pink polishes in varying shades for the marbling process- (e.g. Muchi, Muchi and Fiji by Essie)
- Water bowl
- Toothpick/dotting tool
- Glossy top coat (for a smooth finish)
Begin with applying light pink polish as the base. Add some drops of different kinds of pink nail paint into water and mix them around with toothpick to create marble design. Dip each finger separately in water so that the polish sticks on just the tips; clean up messes afterwards, wait for it to dry, then seal it with a glossy top coat.
Starry Eyed: Glitter Tips with a Celestial Touch
These nails are based on the inspiration from the sky at night, a clear base coat is used with glittery tips. This gives off an impression similar to that of a starry night, suitable for warm evenings during summer when one can enjoy the open sky. And, it’s shimmering, stylish, and absolutely captivating.
- Pale pink polish (like Essie Gel Couture in Sheer Fantasy)
- Holographical Glitter (for instance: Daily Charme Holographic Silver Glitter)
- A glossy topcoat for seamless finish
Put on the sheer pink polish as your base. While still sticky sprinkle holographic glitters over tips and gently pat down. Finally sweep away any excesses and seal this celestial design with a shiny top coat.
Minimalist Chic: Clean Lines and Sheer Sophistication
This nail design is an epitome of simplicity and minimalism, with the base coat being barely visible and bold, sharp lines at the edges. The design is simple and gives a new look which can be used for different occasions showing off subtle elegance.
- Sheer nude polish (e.g., OPI Nail Lacquer in Bubble Bath)
- Black striping tape or black nail polish for precision lines
- Glossy top coat for a sleek finish
First, apply a sheer nude polish as the foundation. After that, after drying, use black striping tape to have loud lines on the ends or utilize a fine brush. Lastly, select glossy top coat to bring out some shine and define them.
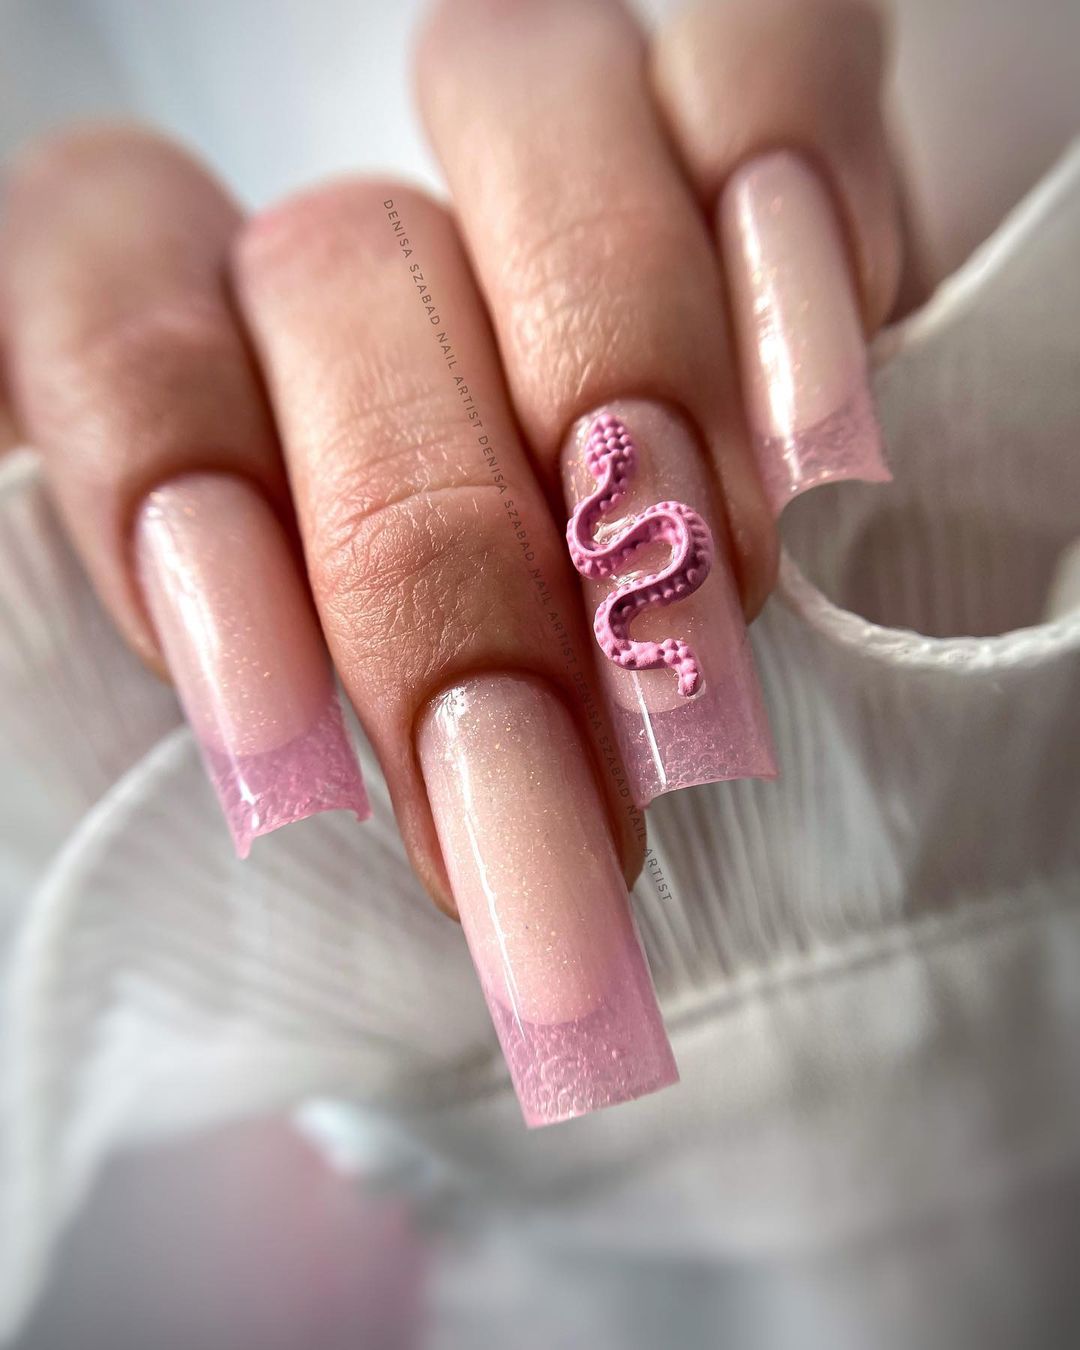
Floral Fantasy: 3D Flowers for a Bold Summer Statement
Be brave with 3D flowers that unveil a touch of imaginative reverie at the tips of your fingers. Each bloom adds some theatrical and tactile sensation, making your nails a masterpiece. If you are daring enough with their summer nail fashion, it is a playful but elegant pick.
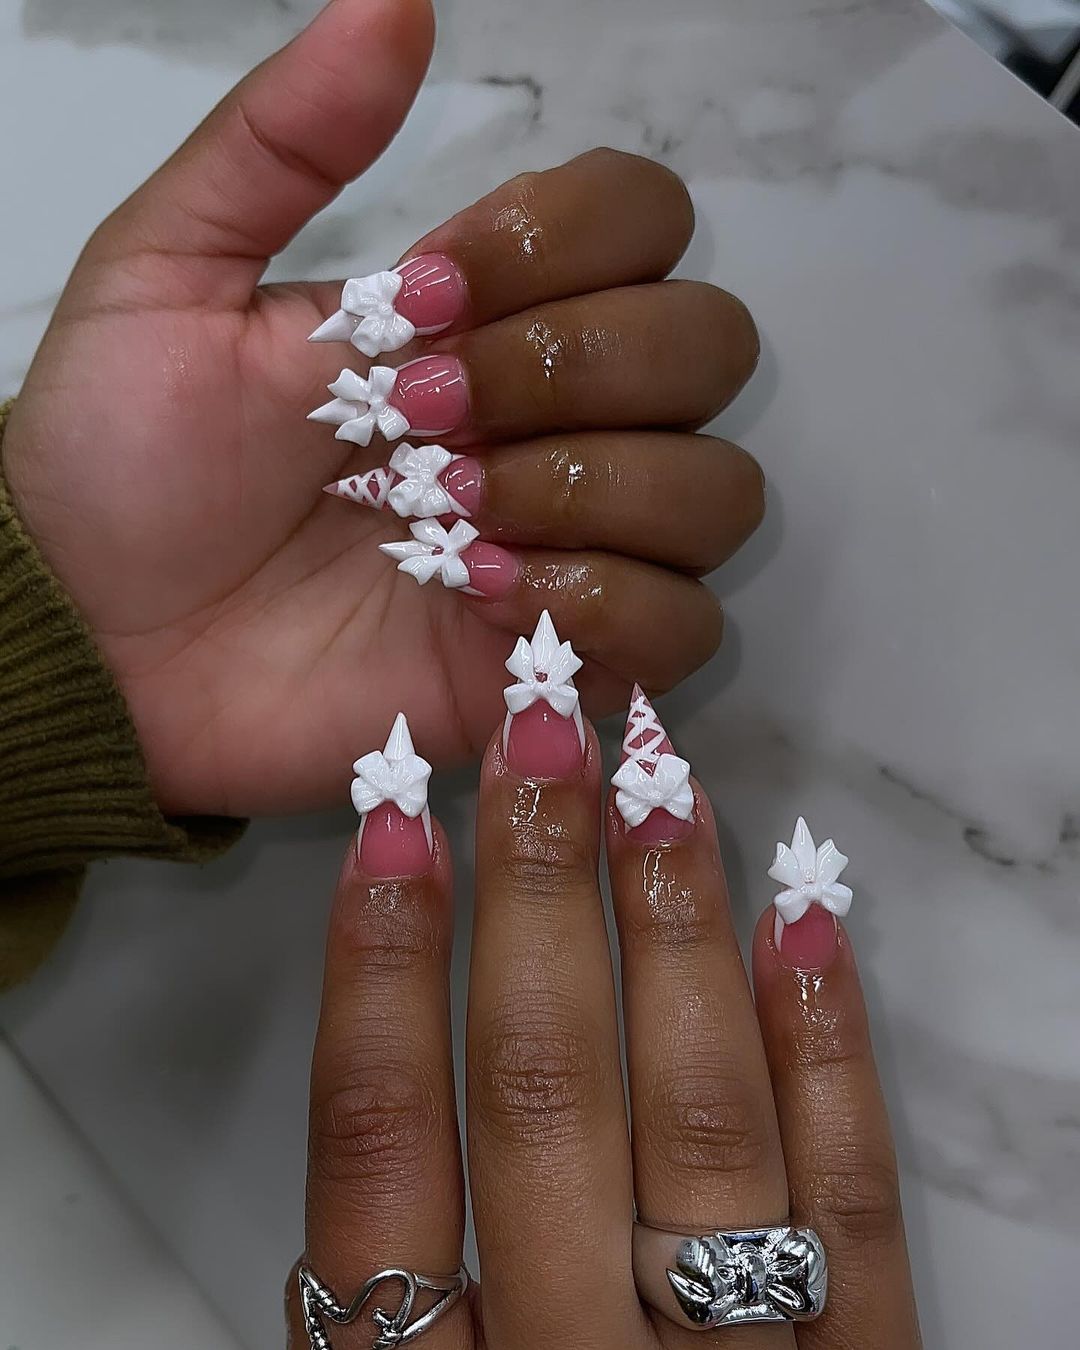
- Sheer pink base polish (for example Essie’s ballet slippers)
- Acrylic powder and monomer for 3D flowers
- Various nail art brushes for sculpting
- Rhinestones or gems for the flower centers
- Glossy top coat to enhance and protect
Once your base polish is done, create 3D flowers on the nails using acrylic powder mixed with monomer. Place rhinestone or gem in the center of each flower while the acrylic is still soft. Once dried apply glossy top coat to get vibrant finish.
Modern Geometry: Soft Pink Meets Sharp Black Lines
These nails provide an art lover with a canvas, which mixes soft pink and sharp black geometrical lines. It is a modernized variation of the traditional French tip that gives out sleek yet simple designs with bold statements; it is ideal for those who want to mix delicate romanticism and harsh contemporaneity in their summer wardrobe style.
- Zoya Bela nail polish – soft pink
- Sally Hansen Nail Art Pen in Black (black nail art polish)
- Glossy top coat for protection and shine
Apply the soft pink polish on the nails. Then, dry them and use the black nail art pen to draw neat geometric shapes at their tips. Finally, apply a coat of glossy transparent lacquer to prevent fade out of contrast between white tips and main color scheme as well as preserve the artwork from damages.
Frosted Elegance: White Glitter Tips for a Wintry Summer Vibe
Unlike the typical summer trends, these nails add a touch of winter’s chill with white glitter tips that give off an icy coolness to hot summer days. The effect of the glitter is gentle yet distinct, giving an impression of melted snowflakes glistening under sunlight—a classy and quirky touch.
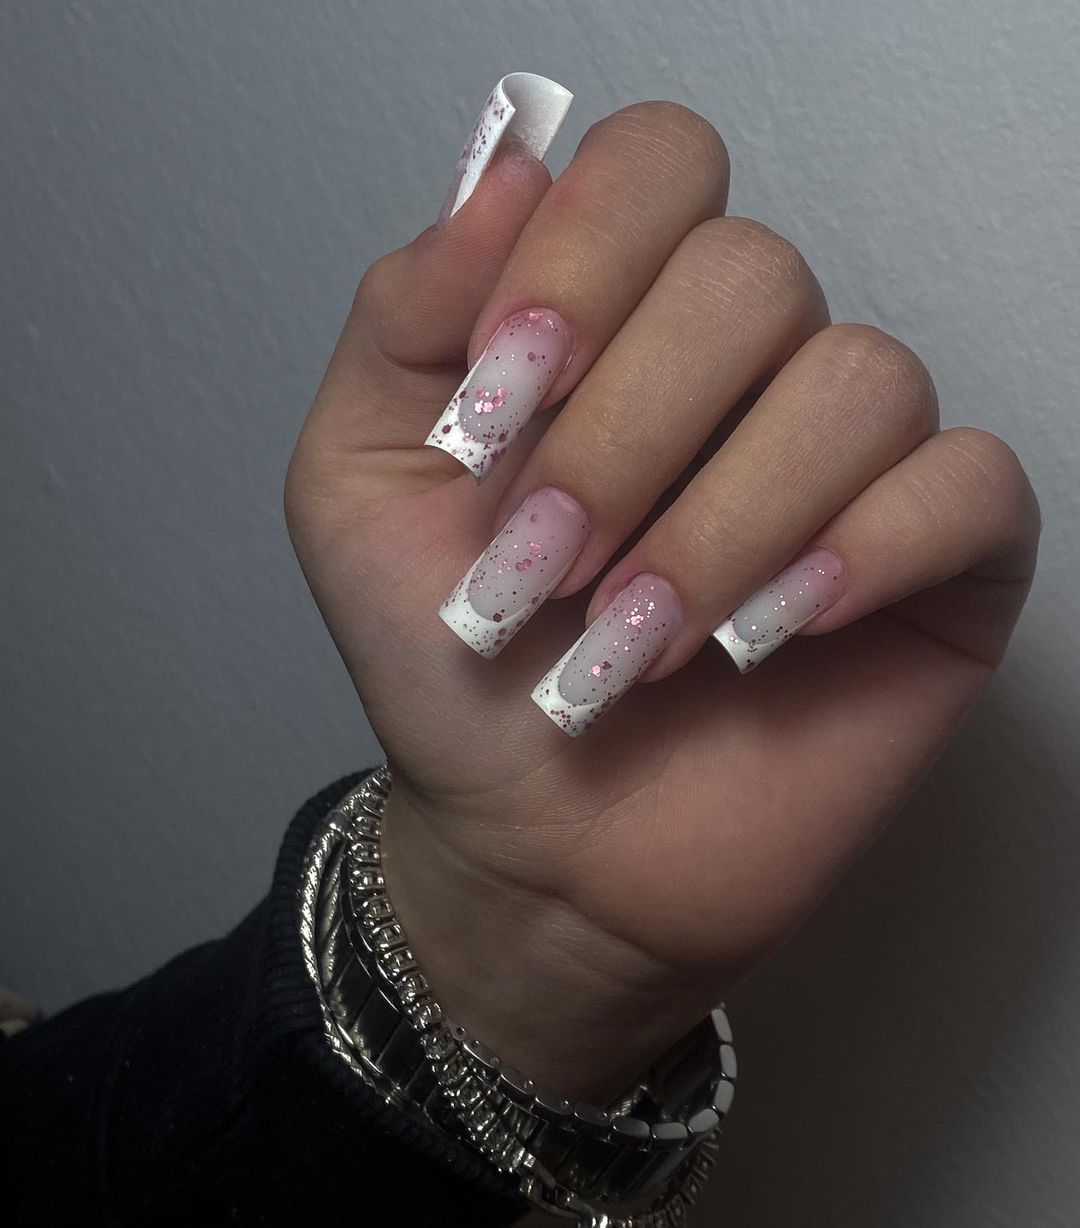
- Transparent nude varnish (e.g. Essie Gel Couture in Pre-Show Jitters)
- White sparkle nail polish (e.g. OPI in Kyoto Pearl)
- Sponge for more compact gleaming application
- Lustrous top coat for smooth icy finish
Start by applying a base coat of sheer nude polish. Apply white glitter polish on a sponge and dab it at the tips gradually increasing opacity for frosted appearance. The last step should be putting glossy top coat as if you were trying to imitate glittering snow.
Bold Edges: Matte White with Metallic Accents
Their matte white finish, against the gold tips that are metallic and striking, make these nails stand out. It is a combination of simplicity and opulence, making it perfect for those who want to feel like they have added a little luxury to their summer nail wardrobe.
- Matte nail polish (such as OPI Matte Nail Envy)
- Gold metallic polish (for example Essie in Good As Gold)
- Tape or stencils for sharp lines
- Matt top coat for an even velvety finish
Paint your base with the matt white polish then use tape to outline where the metallic nails would be applied. Paint your golden metallic on the pattern you have designed, remove the tape and let it dry. Apply a matt top coat across the entire nail to seal and enhance its matte effect.
White Leopard Print: Wild Patterns on a Frosty Base
So that your summer style has an edge, try leopard print done with this amazing frosty white background. It’s a fun and chic look as the animal print is subtle so you can be playful.
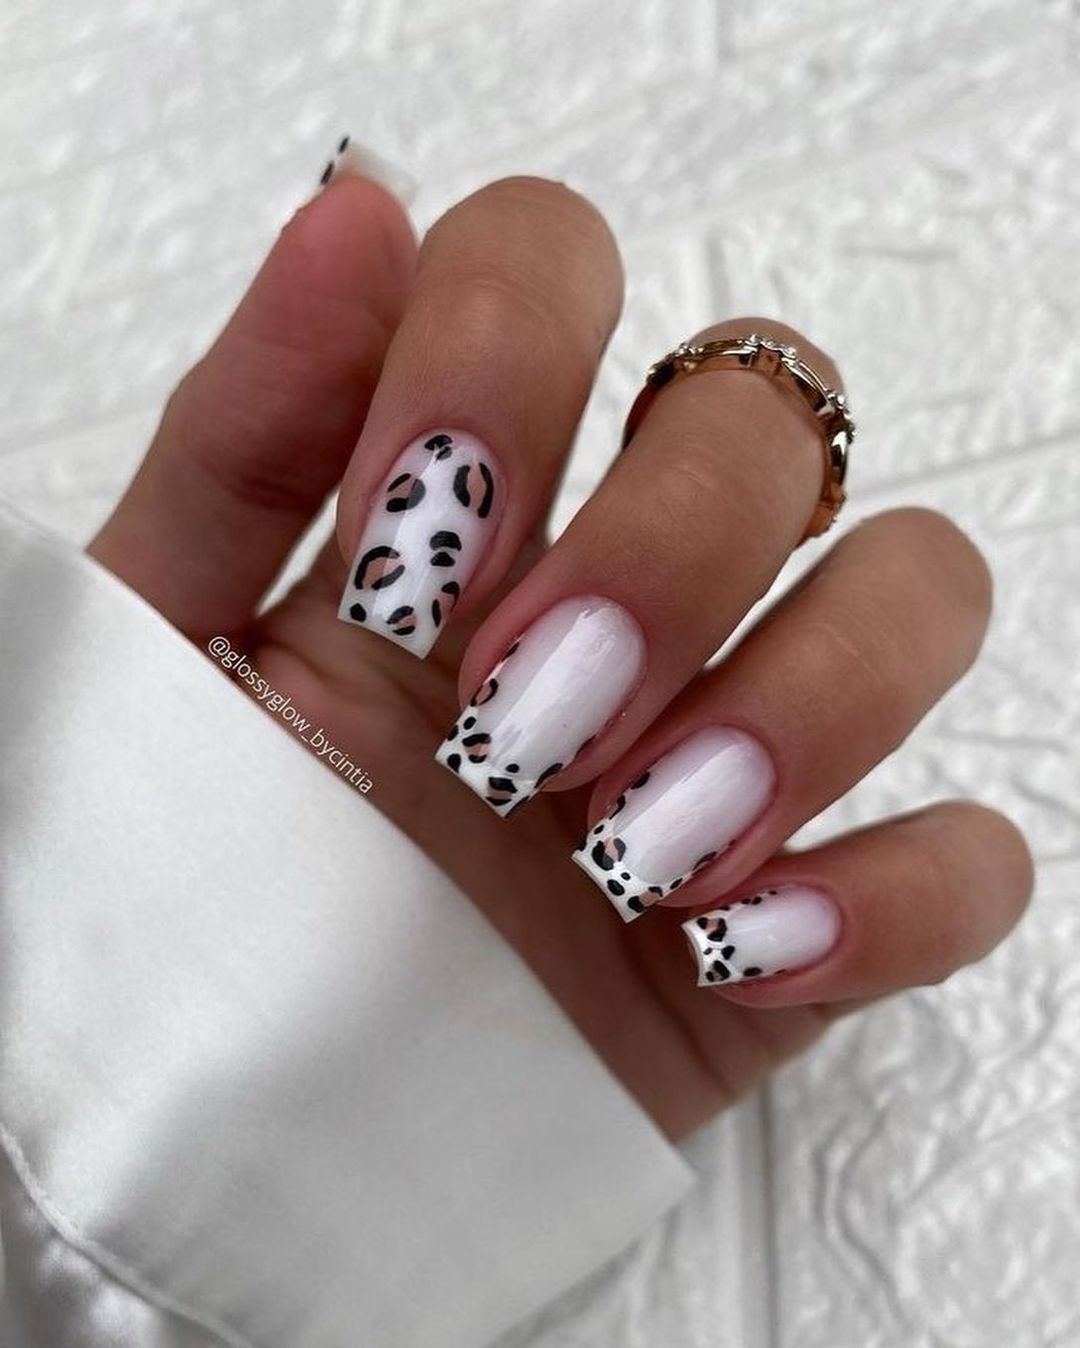
- White matte nail polish (i.e. Dandy Lyin’ Around by China Glaze)
- Grey, black nail polish for the spots of a leopard, like Black Onyx and Suzi Takes The Wheel from OPI
- Dotting tool or detailing brush to help spot precision
- Glossy top coat for shine
Start with the white matte nail polish underneath. Once it dries use a dotting tool or detailing brush to hand paint gray and black leopard spots on top. Apply a glossy top coat so that the design looks smooth and shiny while protecting the spots.
French Glamour: Classic Pink with Black and Crystal Embellishments
The dark black ends and rich crystal highlights bring a fashionable twist to the conventional French manicure in this nail art. This is graceful, cultured, and suitable for a glamorous summer evening.
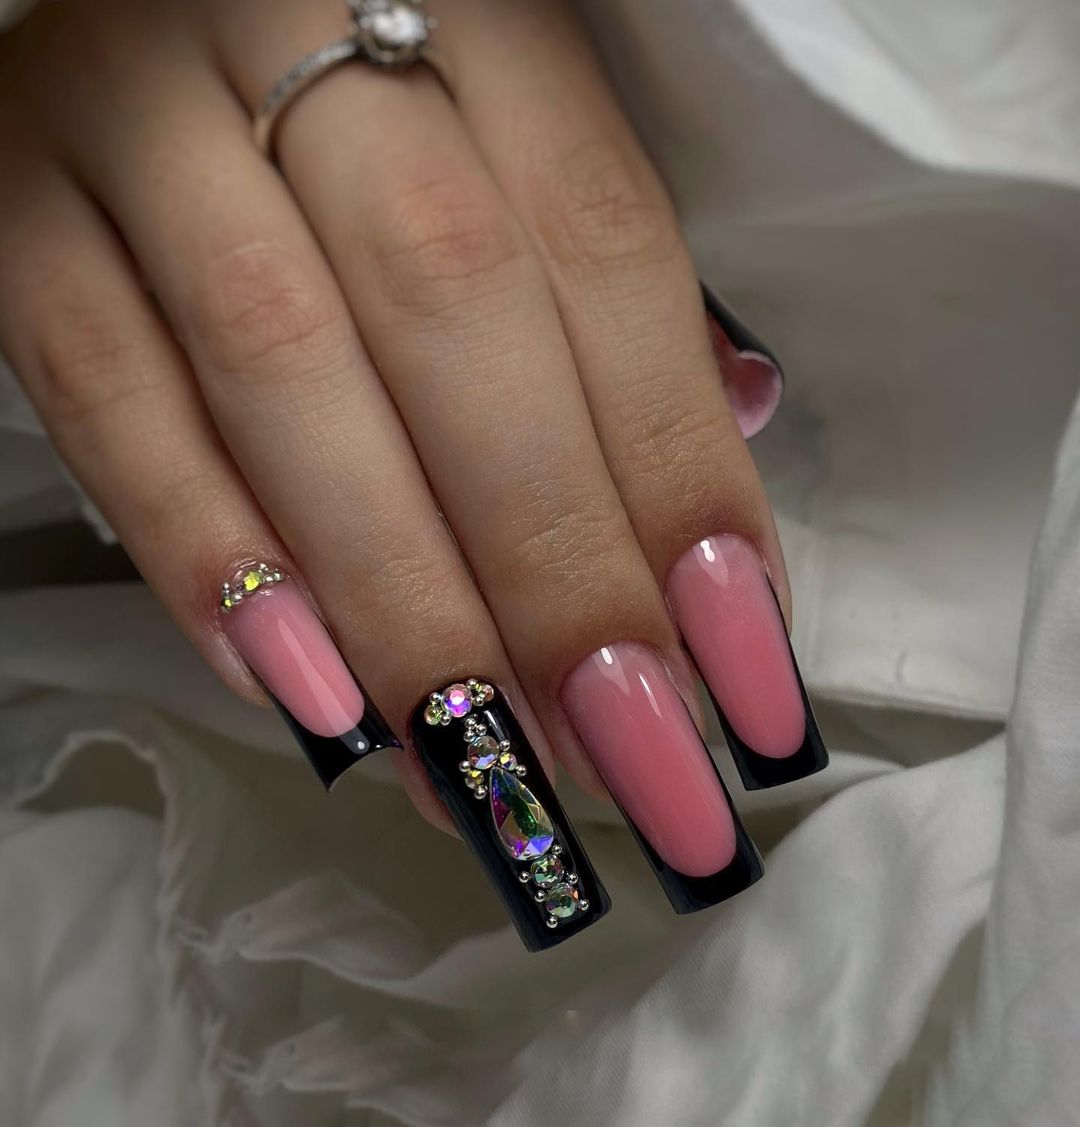
- Rose (ILNP) or pink
- Black Shadow (Gelish) polish is used for tips
- Different type of precious stones and nails jewerly
- Adhesive for sticking decorations on nails
- Shiner coat to have shiny results after we are done.
Put some Pink polish all over your nail. Then apply some Black gel on the tip and put assorted crystals for decoration using Fingernail adhesive glue. Eventually top it up with glossy topcoat to give an extra shine that will make sure your design lasts longer.
FAQ
A: I mean, can ordinary people do these nail designs at home?
Q: Typically how long do these nail designs last?
A: The duration of your nail art is based on what kind of polish you use and your daily activities. On the whole, gel polish could last for a longer period, which is usually up to two weeks while normal polish would require reapplication within seven days.
Q: Is there any specific brand that you suggest to get the best results?
A: Such high-quality brands as OPI, Essie, Gelish, and ILNP are renowned for their durability and bright hues. Therefore the best way is selecting a single brand that really serves your nails well in order to have consistent results.
Q: These designs look like they can only be done on long nails; am I wrong?
A: Yes! Most designs may also be adapted to suit short nails. This means reducing patterns and minimizing embellishment for the smaller medium.
Q: How can stop my nail art from chipping?
A: Make sure to apply a base coat before applying the polish and a top coat subsequent to design completion for chipping prevention. It is worthwhile using gloves when undertaking housework so as not damage your nails.
Q: Do I still need UV or LED lamp while doing these designs?
A: Obviously if you are using gel polish then it must cure under an LED or UV lamp. Sometimes with normal polish no lamp is necessary but it’s important to allow sufficient time for drying in between coats.
Save Pin