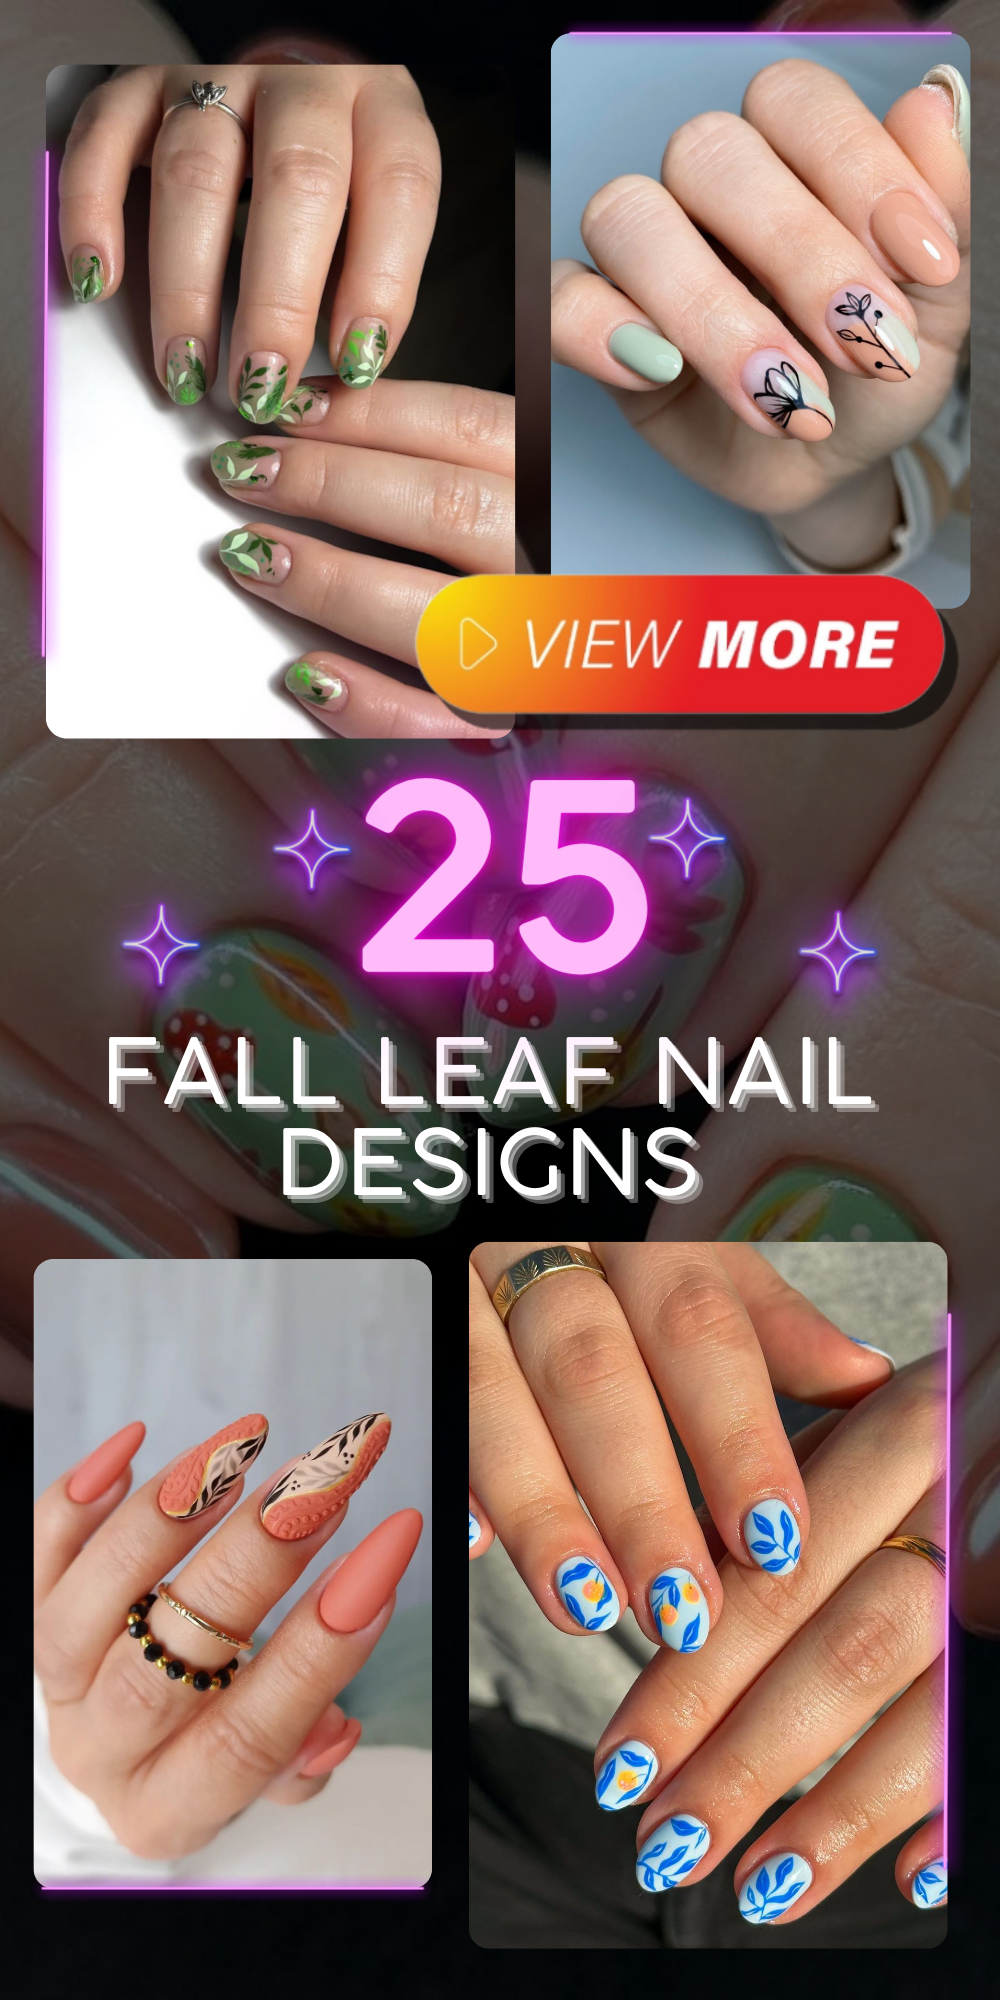
The fall season brings a beautiful array of colors, and what better way to celebrate it than by adorning your nails with fall leaf designs? In this article, we will explore a variety of fall leaf nail designs, each captured in stunning photos. Whether you prefer simple or intricate designs, short or long nails, we’ve got you covered. Let’s dive into these enchanting autumn nail ideas.
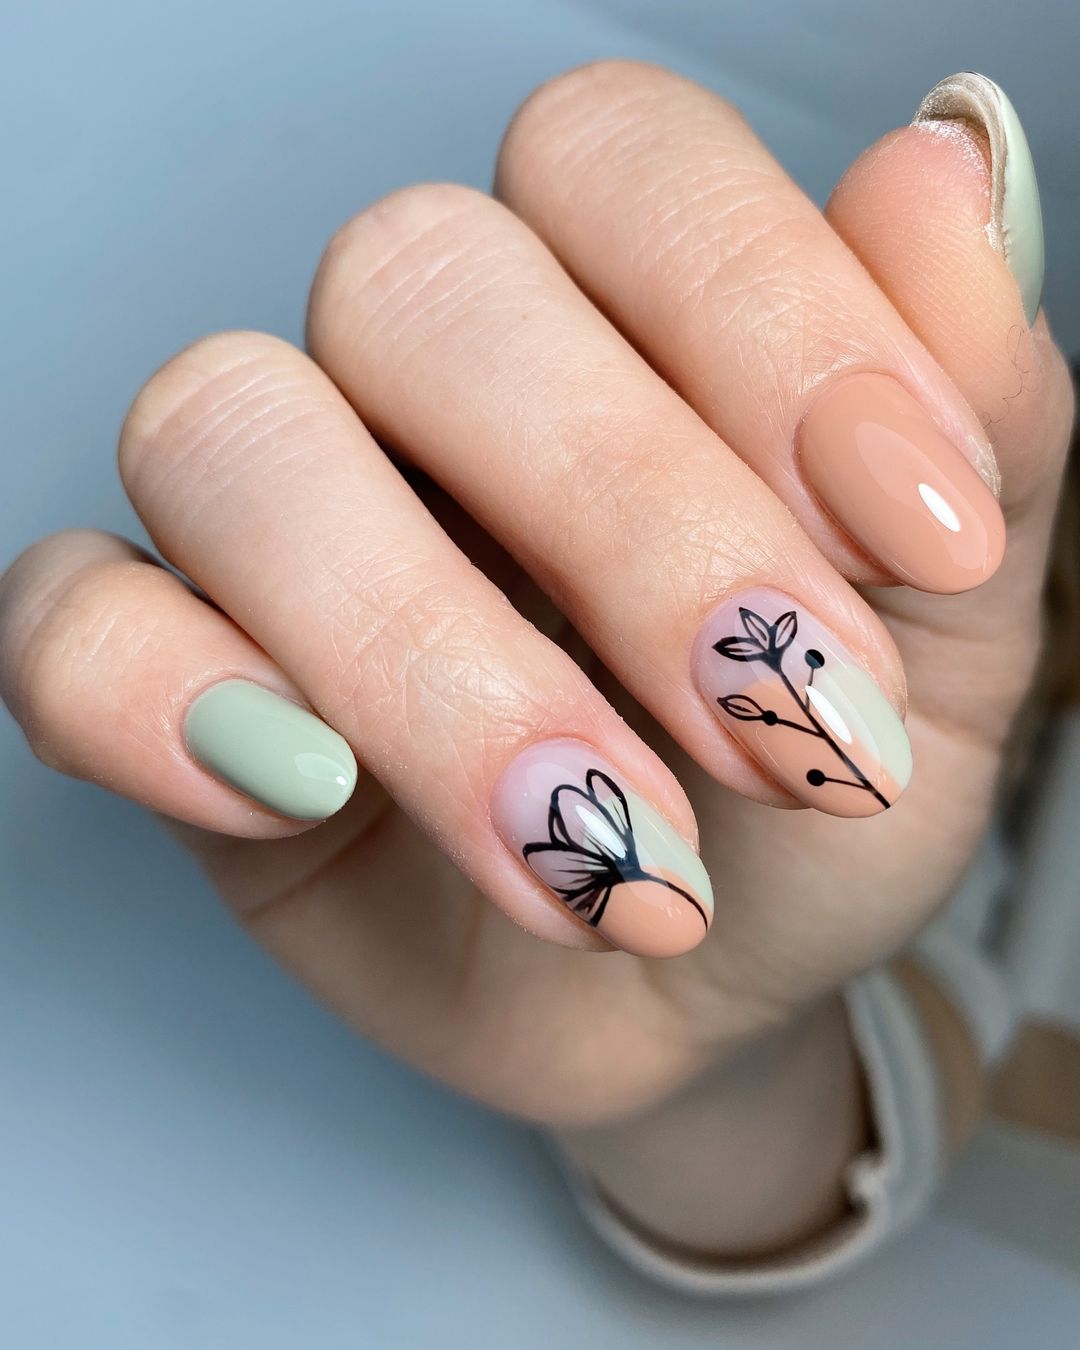
Leafy Pastels
Fall nail designs don’t always have to be dark and moody. This set combines soft pastel hues with delicate leaf art, offering a refreshing take on autumn nails. The subtle peach and mint colors are perfect for those who love a gentle, sophisticated look. The black outlines of the leaves add a modern touch, making the design both timeless and trendy.
- Pastel peach nail polish (OPI – “Samoan Sand”)
- Pastel mint nail polish (Essie – “Mint Candy Apple”)
- Black nail art pen (Sally Hansen Nail Art Pen)
- Top coat (Seche Vite Dry Fast Top Coat)
DIY Instructions:
- Prep Your Nails: Start by cleaning and shaping your nails into an almond or round shape.
- Base Coat: Apply a clear base coat to protect your nails.
- Pastel Colors: Paint alternating nails with peach and mint colors. Apply two coats for full coverage.
- Leaf Art: Once dry, use the black nail art pen to draw delicate leaves on two accent nails.
- Top Coat: Seal your design with a glossy top coat for a long-lasting finish.
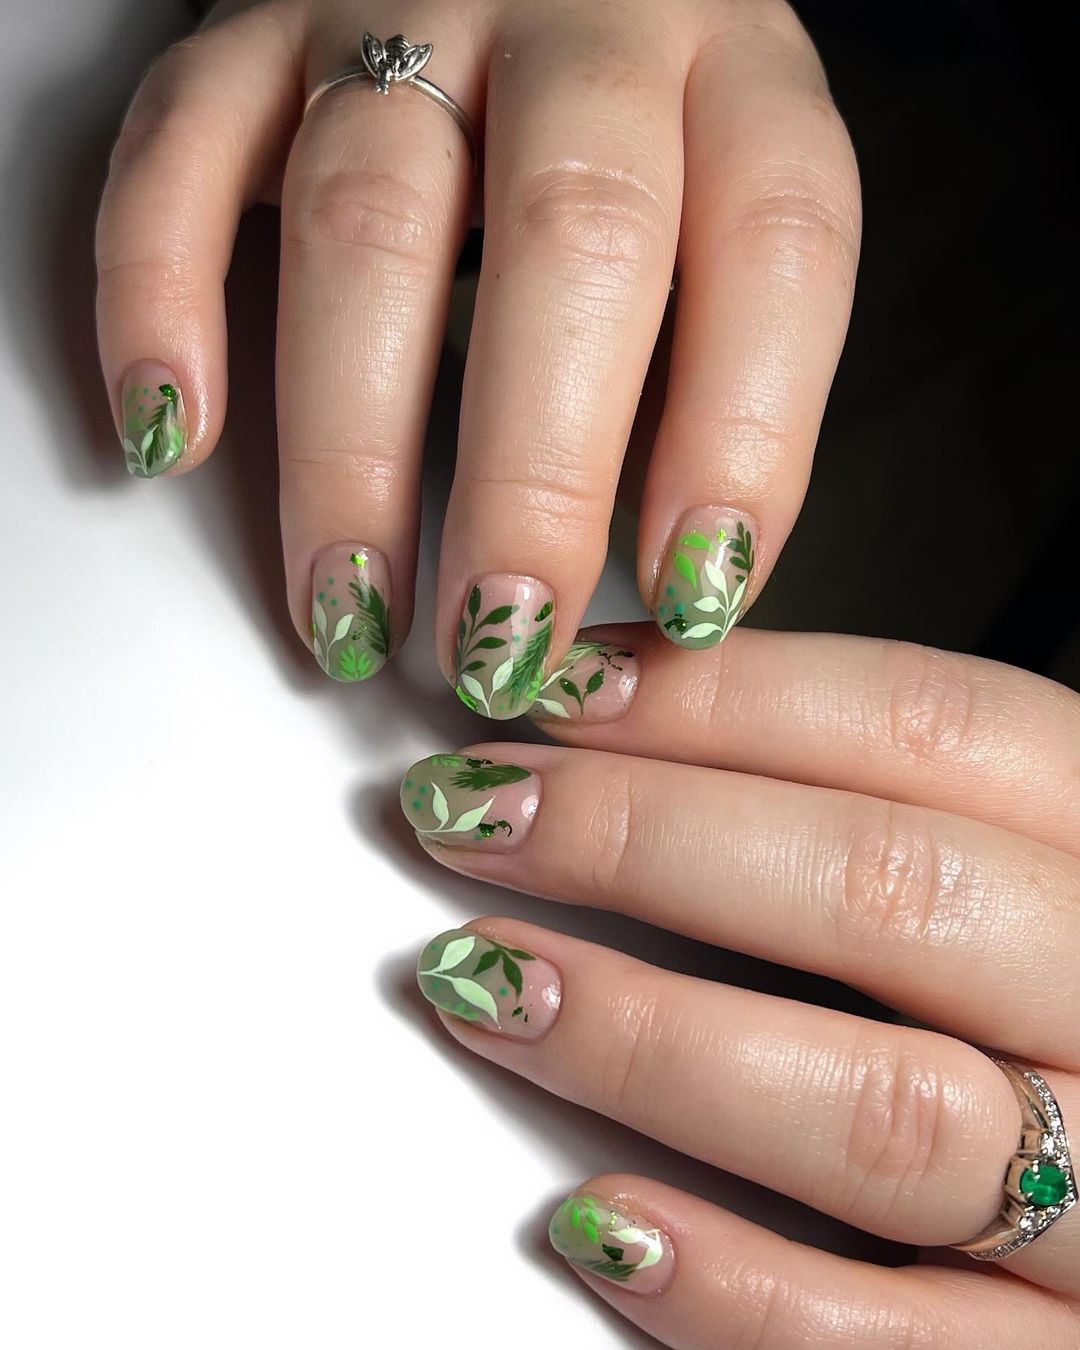
Vibrant Green Foliage
This design is a celebration of green hues, perfect for showcasing the vibrant colors of fall foliage. The intricate leaf patterns in different shades of green bring a sense of depth and complexity to the nails. Ideal for short to medium-length nails, this design is both eye-catching and elegant.
- Light green nail polish (Zoya – “Tiana”)
- Dark green nail polish (Essie – “Going Incognito”)
- Leaf stencil stickers (What’s Up Nails Leaf Stencils)
- Top coat (Essie Gel Couture Top Coat)
DIY Instructions:
- Nail Prep: File and buff your nails to your desired shape.
- Base Layer: Apply a base coat, followed by two coats of light green polish.
- Leaf Stencils: Place the leaf stencils on your nails and paint over them with the dark green polish.
- Remove Stencils: Carefully remove the stencils while the polish is still wet.
- Top Coat: Finish with a top coat to ensure the design lasts longer.
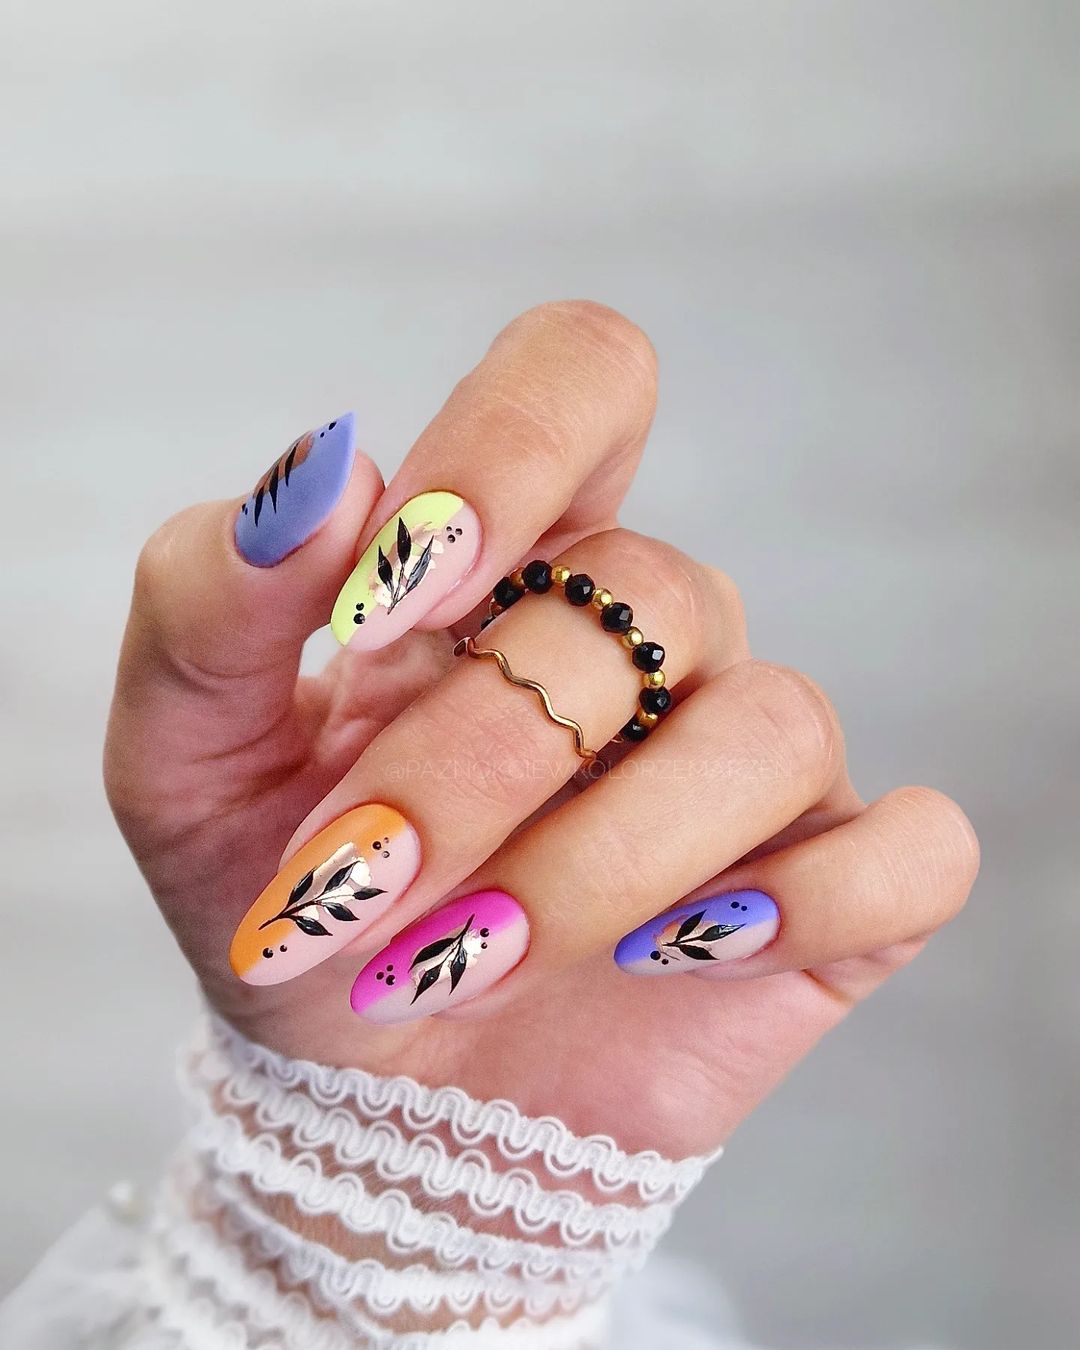
Rainbow Leaf Ombre
For those who love a burst of color, this rainbow leaf ombre design is a must-try. Featuring a gradient of colors from purple to orange, each nail is a canvas of autumnal brilliance. The black leaf accents provide a striking contrast, making the colors pop even more.
- Gradient nail polish set (ILNP – “Color Kissed Ultra Holos”)
- Black nail art brush (Mia Secret Professional Nail Art Brush Set)
- Sponge for ombre effect (Beauty Blender Mini Sponges)
- Top coat (OPI Matte Top Coat)
DIY Instructions:
- Prepare Your Nails: Clean, shape, and buff your nails into a medium-length stiletto shape.
- Base Coat: Apply a clear base coat.
- Create the Gradient: Using a sponge, apply the gradient polish starting with purple at the cuticle and blending into orange towards the tip. Repeat for each nail.
- Leaf Accents: Once the gradient is dry, use the black nail art brush to draw leaf designs on each nail.
- Top Coat: Apply a matte top coat for a smooth, velvety finish.
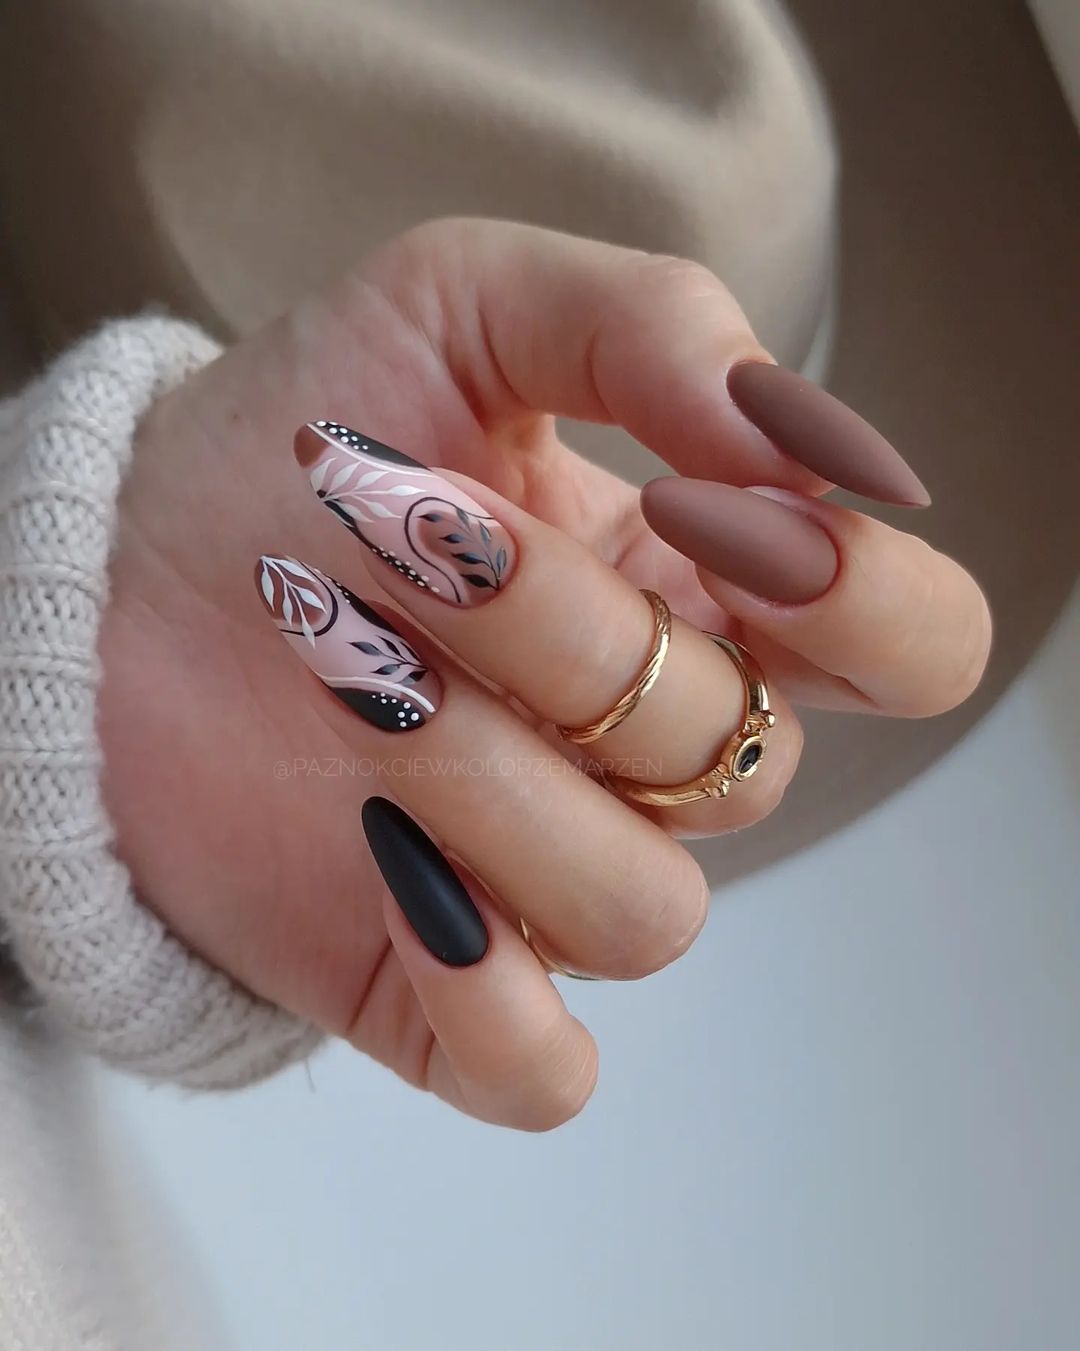
Chic Matte and Glossy Contrast
This nail design perfectly combines matte and glossy finishes, creating a striking look ideal for autumn. The nails feature a mix of matte brown and black, interspersed with intricate leaf patterns in glossy finishes. The almond shape of the nails adds to the elegance and sophistication of the design, making it suitable for any occasion.
- Matte brown nail polish (OPI – “Espresso Your Inner Self”)
- Matte black nail polish (Essie – “Licorice”)
- Glossy top coat (Seche Vite Dry Fast Top Coat)
- Black and white nail art pens (Sally Hansen Nail Art Pens)
- Nude base color (OPI – “Bubble Bath”)
DIY Instructions:
- Nail Preparation: Begin by shaping your nails into a stiletto or almond shape.
- Base Layer: Apply a nude base color on all nails to create a smooth foundation.
- Matte Coating: Paint alternating nails with matte brown and matte black polishes. Apply two coats for full opacity.
- Leaf Art: Use black and white nail art pens to draw intricate leaf patterns on the nude base nails.
- Glossy Highlights: Add glossy top coat accents on specific parts of the leaf designs to create a contrast with the matte finish.
Save Pin
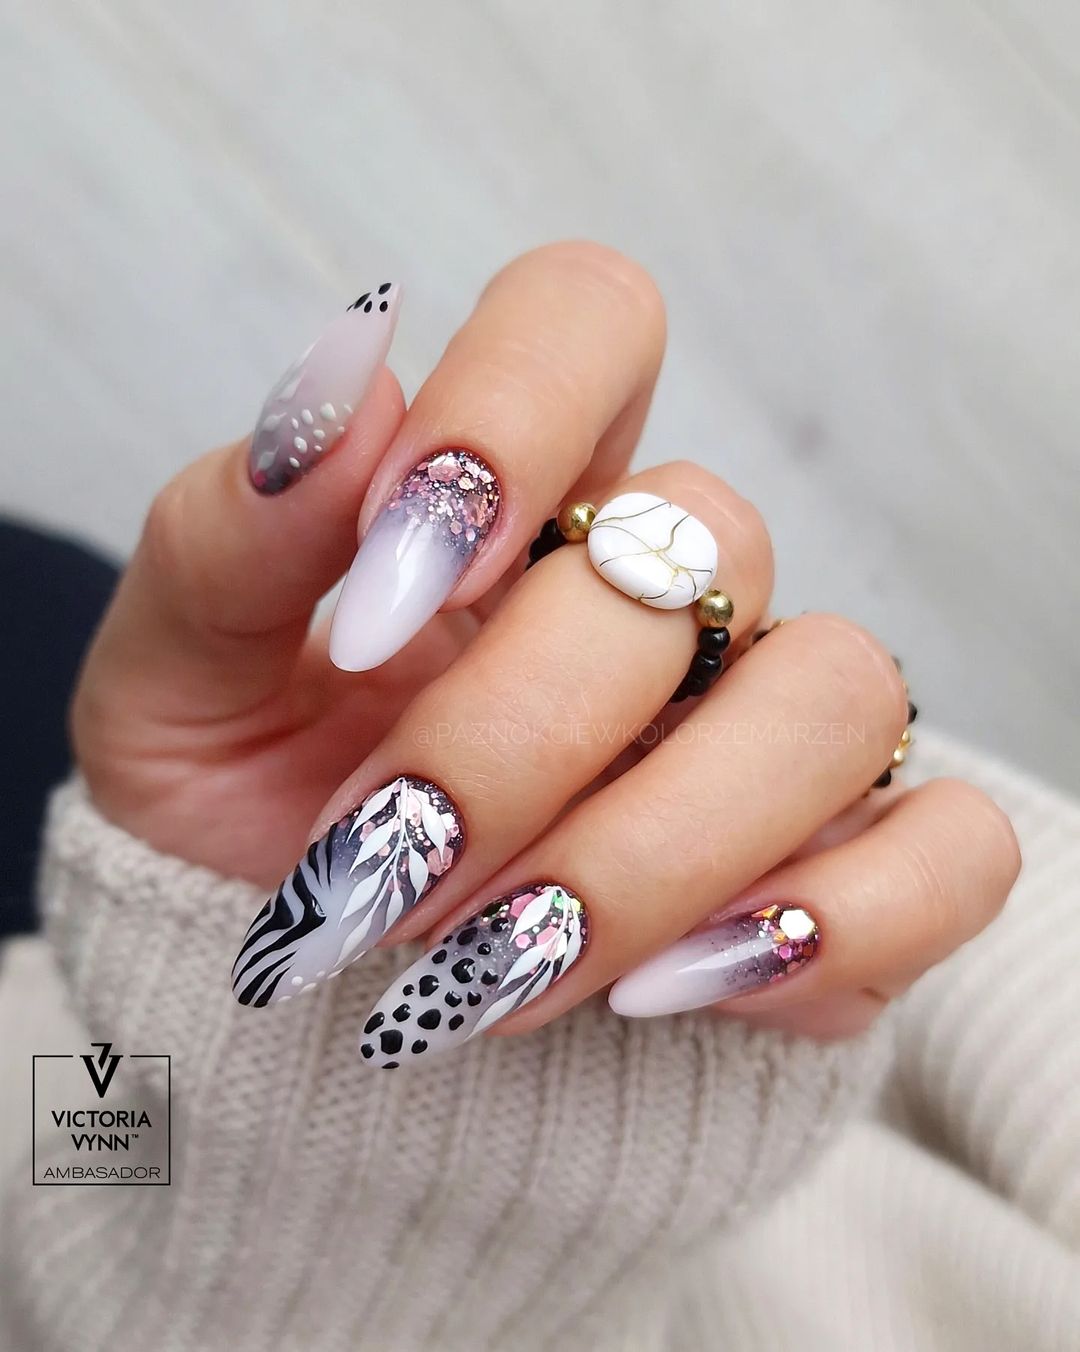
Glittery Forest
This design is a beautiful blend of nature-inspired elements and glitter, perfect for those who love a bit of sparkle. The nails feature a combination of leaf patterns, zebra stripes, and glitter gradients. The mix of black and white with glitter creates a dynamic and festive look, making it perfect for fall celebrations.
- White nail polish (Essie – “Blanc”)
- Black nail polish (OPI – “Black Onyx”)
- Silver glitter polish (China Glaze – “Fairy Dust”)
- Nail art brush set (Mia Secret Professional Nail Art Brush Set)
- Leaf stencil stickers (What’s Up Nails Leaf Stencils)
- Top coat (Sally Hansen Miracle Gel Top Coat)
DIY Instructions:
- Nail Preparation: Clean and shape your nails into a long almond or stiletto style.
- Base Layer: Apply two coats of white nail polish as the base.
- Leaf and Zebra Art: Use the black nail polish and nail art brushes to create leaf patterns and zebra stripes on alternating nails.
- Glitter Gradient: Apply silver glitter polish to the tips of some nails and blend it downwards for a gradient effect.
- Top Coat: Finish with a top coat to protect the designs and add shine.
Autumn Harvest
Embrace the warm tones of autumn with this nail design featuring shades of orange and green, complemented by intricate leaf and pumpkin patterns. The combination of glossy and matte finishes adds depth and variety to the look, making it a standout design for the fall season.

- Orange nail polish (OPI – “Crawfishin’ for a Compliment”)
- Green nail polish (Essie – “Mojito Madness”)
- White nail polish (China Glaze – “White on White”)
- Black nail art pen (Kiss Nail Art Pen)
- Pumpkin decals (Born Pretty Store Nail Stickers)
- Top coat (Essie Gel Couture Top Coat)
DIY Instructions:
- Nail Preparation: Shape your nails into a medium or long almond shape.
- Base Layer: Apply orange polish to some nails and green polish to others, alternating the colors.
- Leaf and Pumpkin Art: Use the black nail art pen to draw leaf and pumpkin designs on the white base nails.
- Apply Decals: Add pumpkin decals to enhance the autumn theme.
- Top Coat: Seal the design with a top coat to ensure longevity and shine.
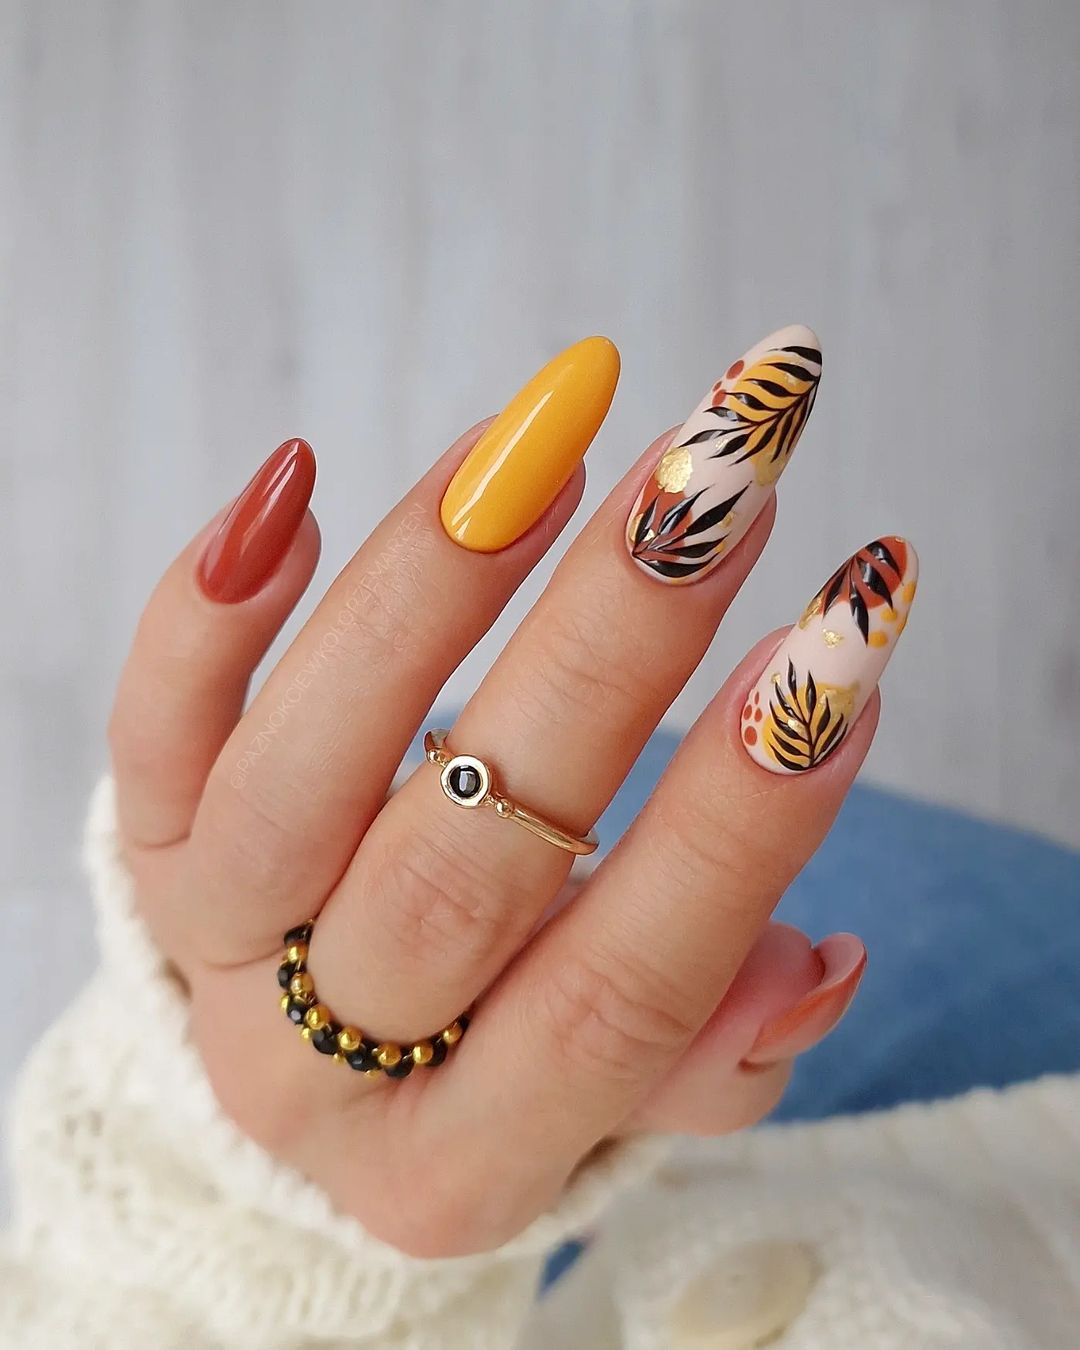
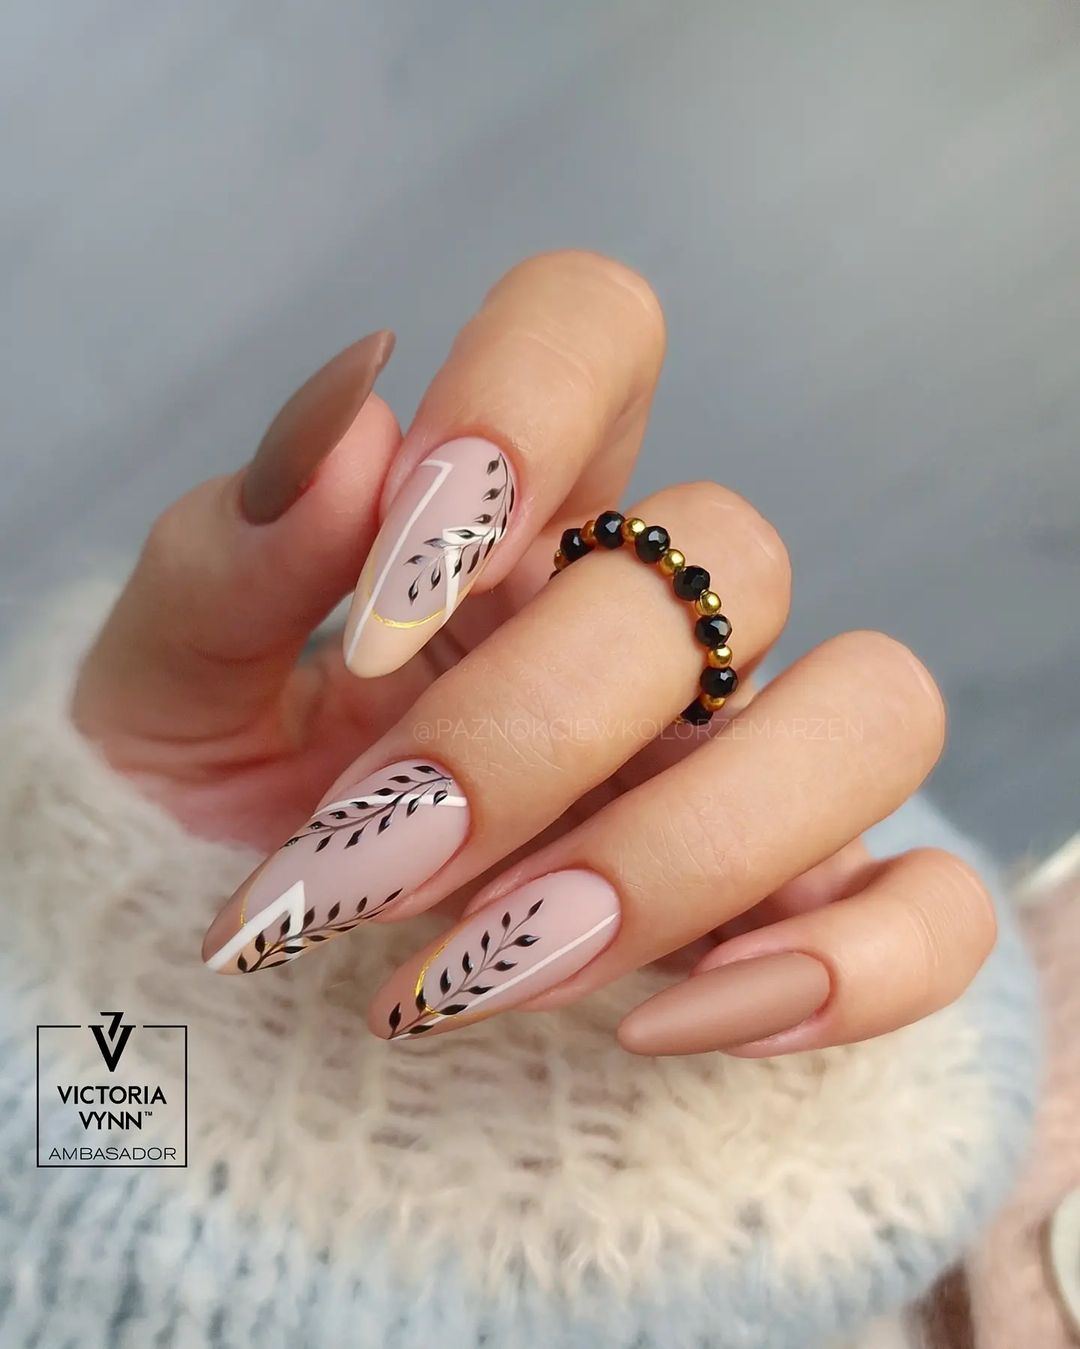
Autumn Gold Elegance
This nail design exudes the essence of fall with its rich blend of gold, mustard yellow, and earthy brown tones. The intricate leaf patterns on the accent nails are highlighted with subtle touches of gold foil, adding a touch of elegance and sophistication. The almond shape enhances the overall aesthetic, making it a perfect choice for those looking to embrace the autumn season in style.
- Mustard yellow nail polish (OPI – “Never a Dulles Moment”)
- Rich brown nail polish (Essie – “Playing Koi”)
- Nude base color (Zoya – “Laurie”)
- Gold foil flakes (Born Pretty Gold Foil)
- Black and brown nail art pens (Sally Hansen Nail Art Pens)
- Top coat (Seche Vite Dry Fast Top Coat)
DIY Instructions:
- Prepare Your Nails: Shape your nails into an almond style and buff them.
- Base Layer: Apply the nude base color on the accent nails and the mustard yellow and rich brown on the remaining nails.
- Leaf Art: Use black and brown nail art pens to draw leaf patterns on the nude nails. Add touches of gold foil flakes for extra sparkle.
- Top Coat: Seal the design with a top coat to ensure durability and shine.
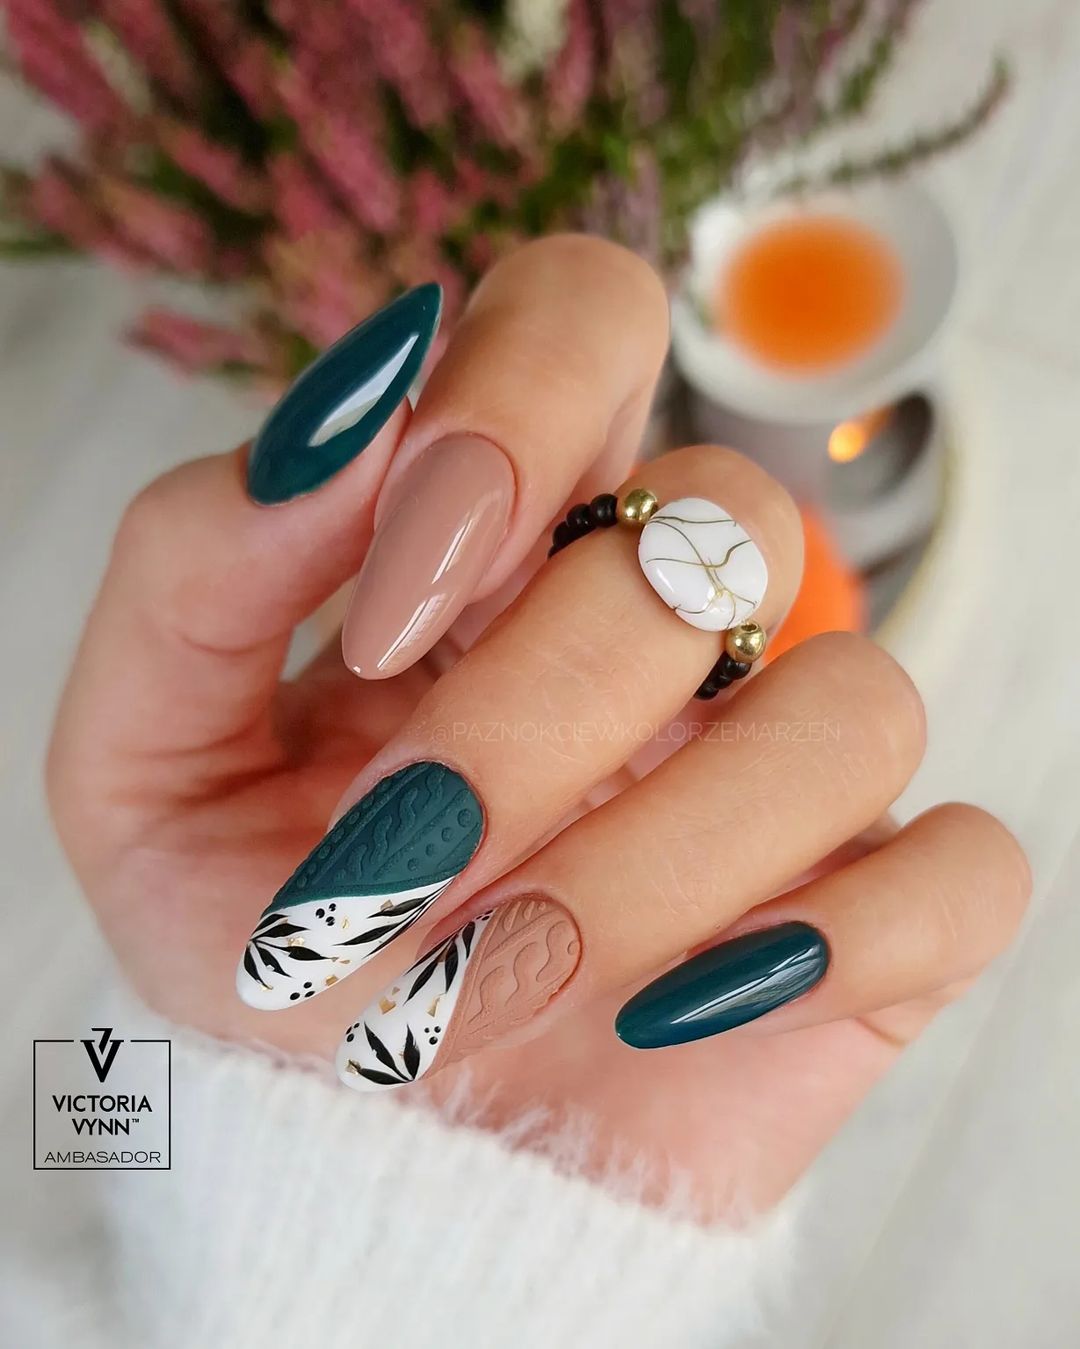
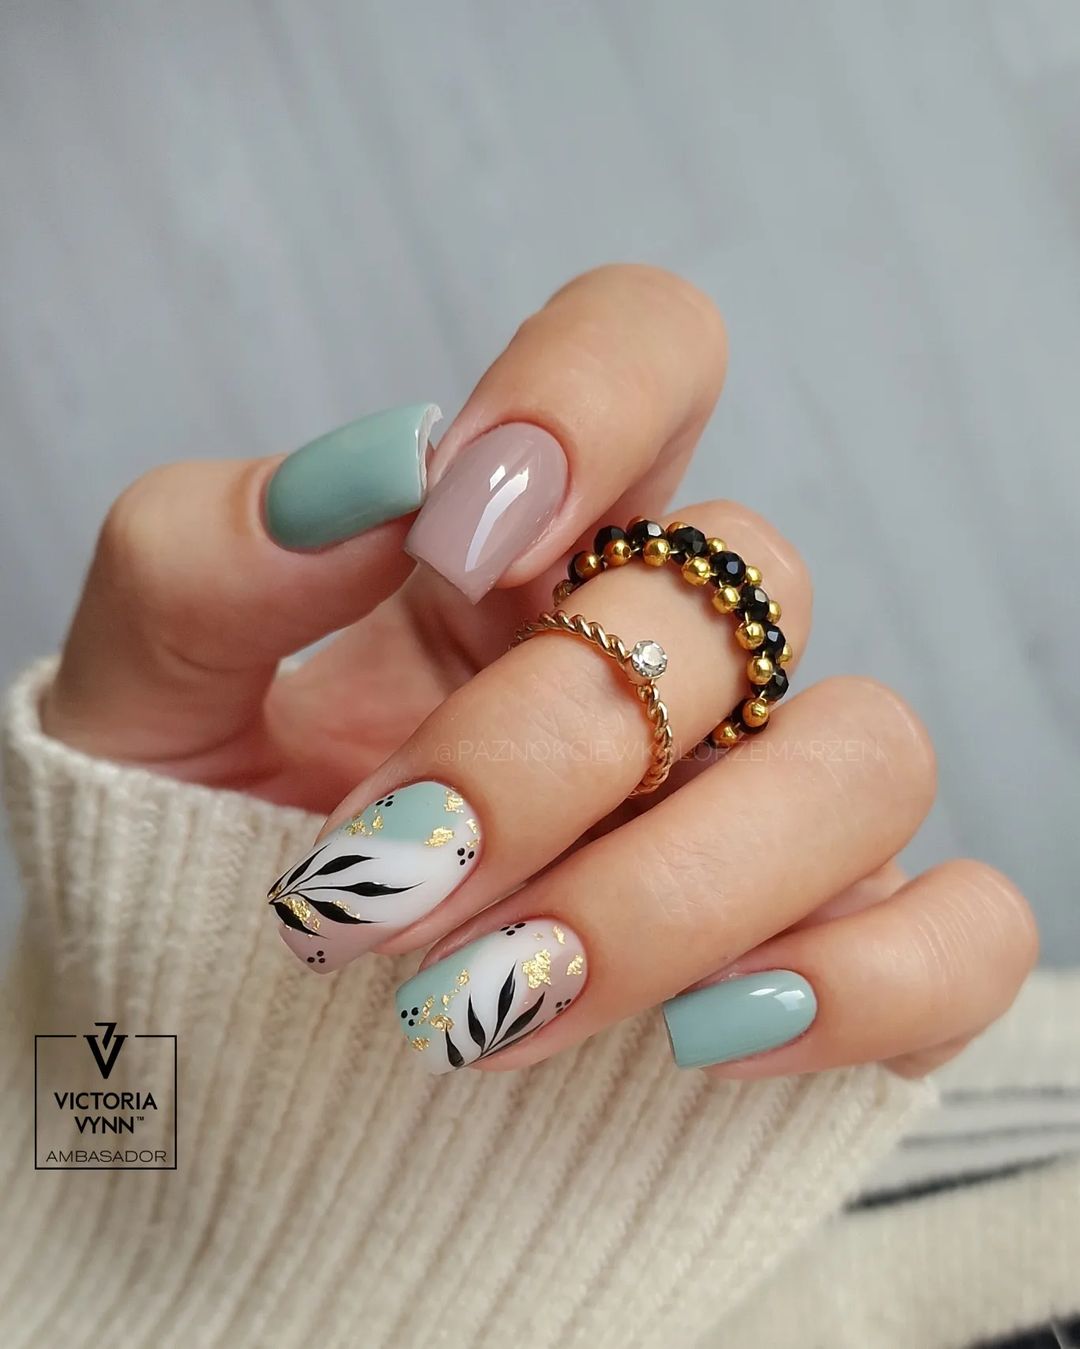
Elegant Teal and Nude
This nail design combines the elegance of teal with the subtlety of nude, accented with intricate white and black leaf patterns. The combination of glossy and matte finishes, along with the detailed leaf designs, creates a sophisticated look perfect for any autumn occasion.
- Teal nail polish (Essie – “Off Tropic”)
- Nude nail polish (OPI – “Dulce de Leche”)
- White and black nail art pens (Kiss Nail Art Pens)
- Matte top coat (OPI Matte Top Coat)
- Textured nail polish (CND Vinylux – “Hand Fired”)
DIY Instructions:
- Prepare Your Nails: Shape your nails into a long almond or stiletto style.
- Base Layer: Apply the nude polish on some nails and the teal on others.
- Leaf Art: Use white and black nail art pens to draw intricate leaf patterns on the accent nails.
- Matte Finish: Apply a matte top coat on the teal nails for a smooth, sophisticated look.
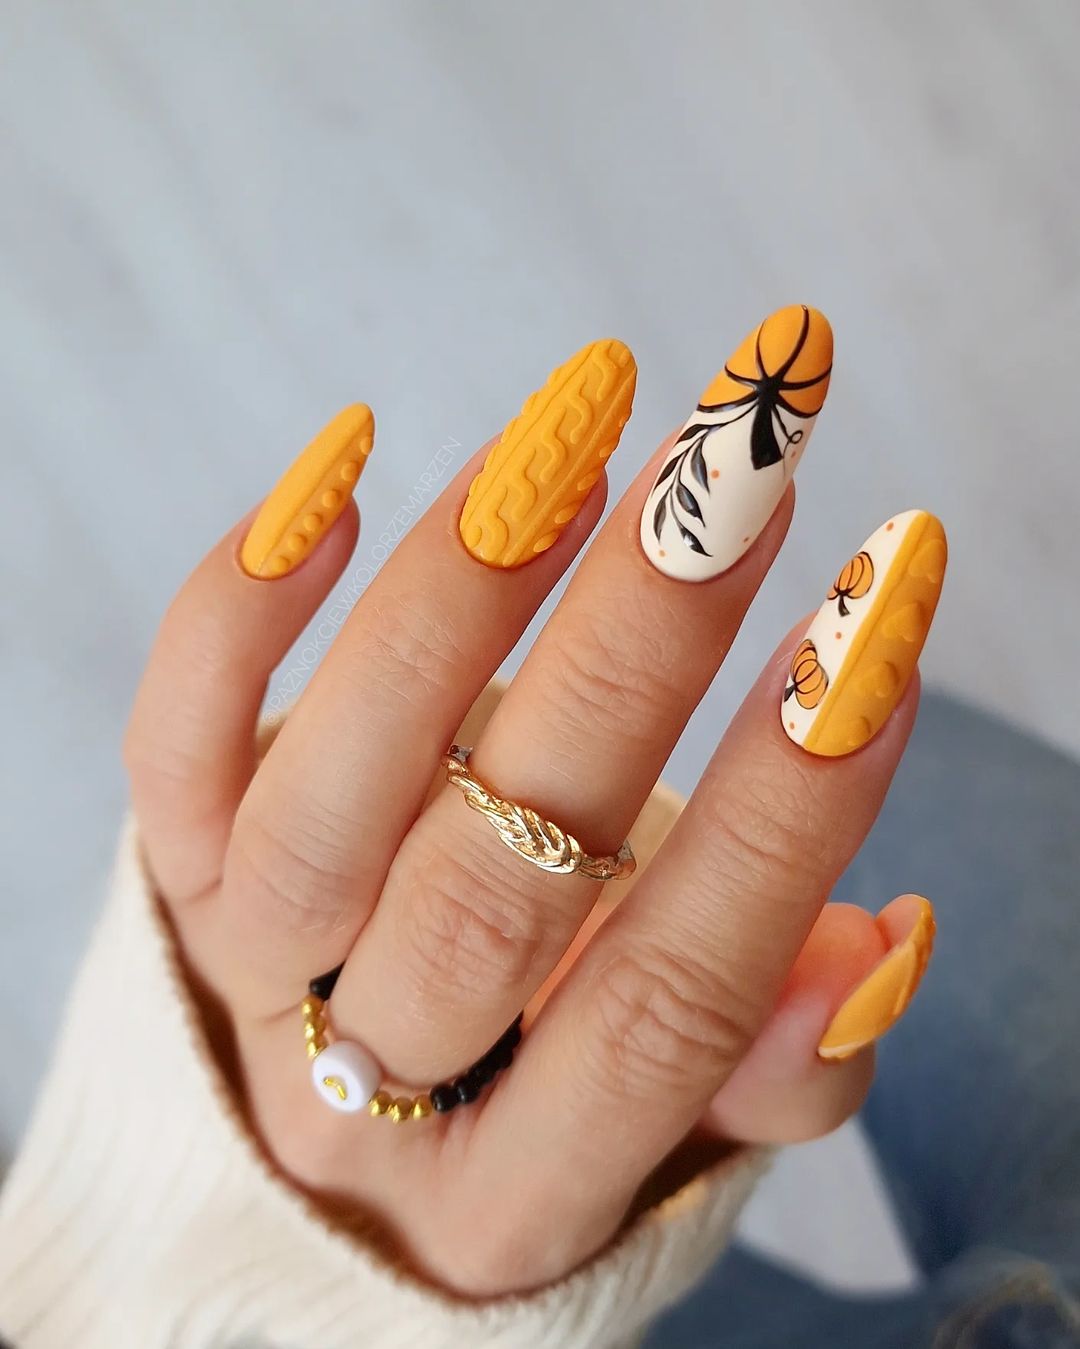
Cozy Knitted Look
This unique nail design features a cozy knitted pattern perfect for the fall season. The vibrant orange tones combined with intricate leaf and pumpkin designs create a playful and festive look. The matte finish adds a cozy, sweater-like texture to the nails, making them ideal for chilly autumn days.
- Bright orange nail polish (OPI – “A Good Man-darin is Hard to Find”)
- White nail polish (Essie – “Blanc”)
- Black nail art pen (Sally Hansen Nail Art Pen)
- Matte top coat (Essie Matte About You)
- Textured nail polish (CND Vinylux – “Marble Mist”)
DIY Instructions:
- Prepare Your Nails: Shape your nails into an almond or stiletto style and buff them.
- Base Layer: Apply the orange polish on all nails, with the white polish on the accent nails.
- Knitted Pattern: Use the textured nail polish to create a knitted pattern on some nails.
- Leaf and Pumpkin Art: Draw leaf and pumpkin designs using the black nail art pen on the accent nails.
- Matte Finish: Apply a matte top coat to complete the cozy, sweater-like look.
Save Pin

Pastel Leaf Dream
This nail design is a dreamy combination of pastel blue and nude, accented with delicate black and gold leaf patterns. The soft colors and intricate designs create a serene and elegant look, perfect for those who prefer a more subdued yet stylish autumn manicure.
- Pastel blue nail polish (Essie – “Mint Candy Apple”)
- Nude nail polish (OPI – “Samoan Sand”)
- Black and gold nail art pens (Kiss Nail Art Pens)
- Gold foil flakes (Born Pretty Gold Foil)
- Top coat (Sally Hansen Miracle Gel Top Coat)
DIY Instructions:
- Prepare Your Nails: Shape your nails into a medium square or almond style and buff them.
- Base Layer: Apply the nude polish on some nails and the pastel blue on others.
- Leaf Art: Use black and gold nail art pens to draw delicate leaf patterns on the accent nails. Add touches of gold foil flakes for extra sparkle.
- Top Coat: Seal the design with a top coat to ensure durability and shine.
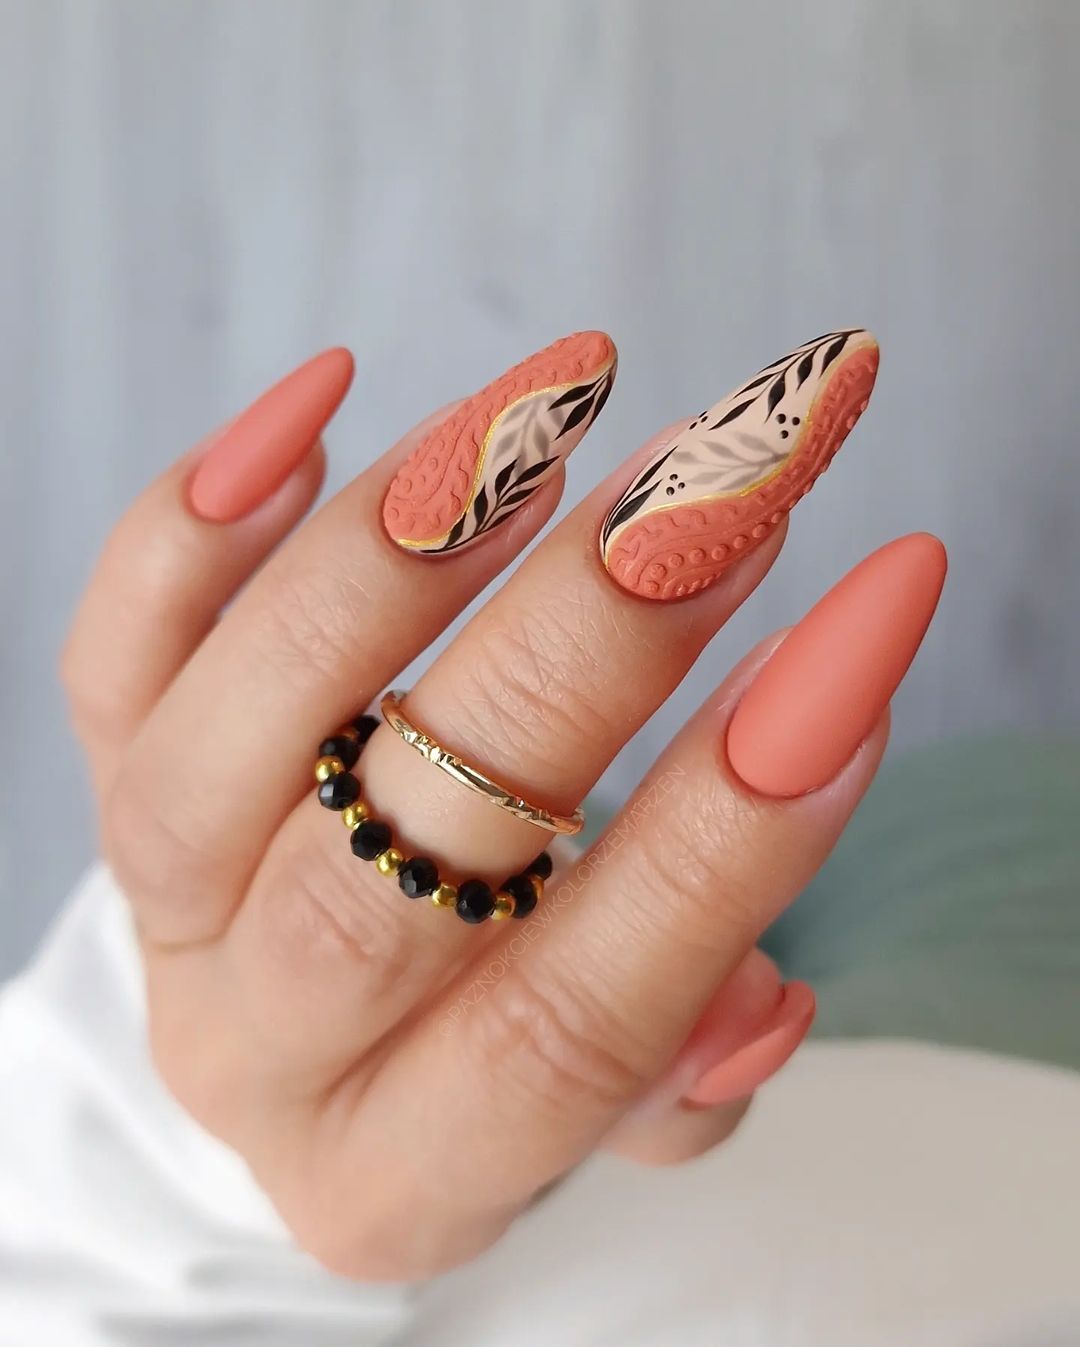
Terracotta Elegance
This nail design features warm terracotta tones combined with intricate gold and black leaf patterns. The matte finish and textured accents create a sophisticated and elegant look, perfect for the autumn season. The almond shape adds to the overall aesthetic, making it suitable for both casual and formal occasions.
- Terracotta nail polish (OPI – “It’s a Piazza Cake”)
- Black nail art pen (Sally Hansen Nail Art Pen)
- Gold foil flakes (Born Pretty Gold Foil)
- Matte top coat (OPI Matte Top Coat)
- Textured nail polish (CND Vinylux – “Hand Fired”)
DIY Instructions:
- Prepare Your Nails: Shape your nails into a long almond or stiletto style and buff them.
- Base Layer: Apply the terracotta polish on all nails.
- Leaf Art: Use the black nail art pen to draw intricate leaf patterns on some nails. Add touches of gold foil flakes for extra sparkle.
- Matte Finish: Apply a matte top coat to complete the sophisticated look.
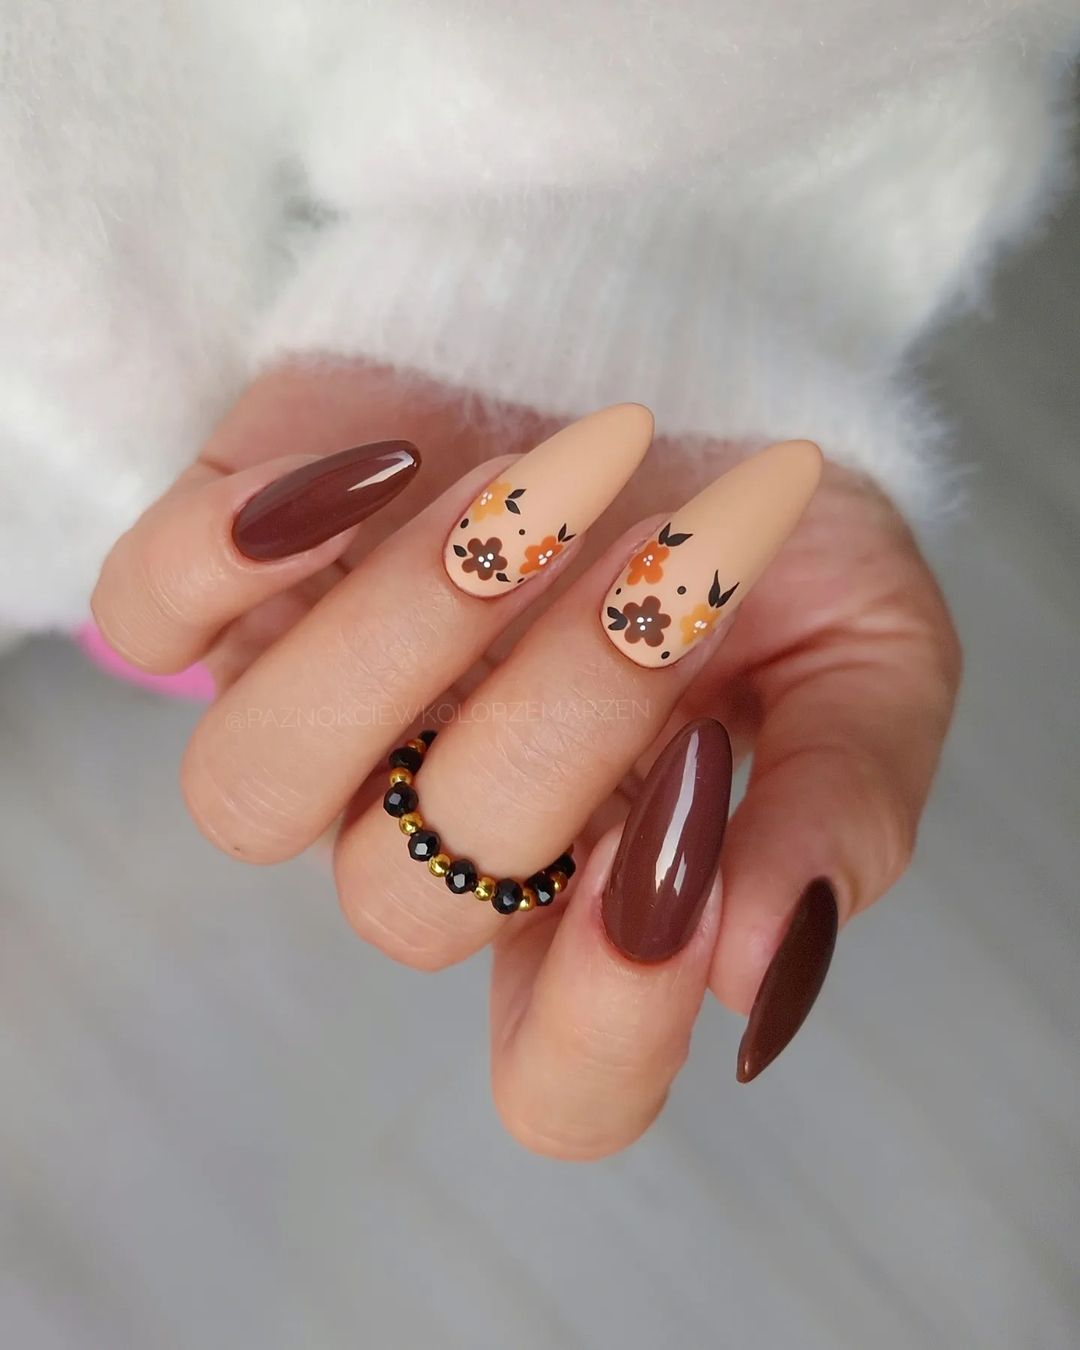
Floral Fall Fantasy
This nail design combines warm brown tones with delicate floral patterns, perfect for the autumn season. The flowers in shades of orange and brown, against a matte nude base, create a beautiful and serene look. The glossy finish on the solid brown nails adds a nice contrast, making the design both elegant and versatile.
- Warm brown nail polish (Essie – “Wicked”)
- Nude nail polish (OPI – “Bubble Bath”)
- Black and orange nail art pens (Kiss Nail Art Pens)
- Matte top coat (Essie Matte About You)
- Top coat (Seche Vite Dry Fast Top Coat)
DIY Instructions:
- Prepare Your Nails: Shape your nails into an almond style and buff them.
- Base Layer: Apply the nude polish on the accent nails and the warm brown on the remaining nails.
- Floral Art: Use the black and orange nail art pens to draw delicate floral patterns on the nude nails.
- Top Coat: Apply a matte top coat on the floral nails and a glossy top coat on the solid brown nails to ensure durability and shine.
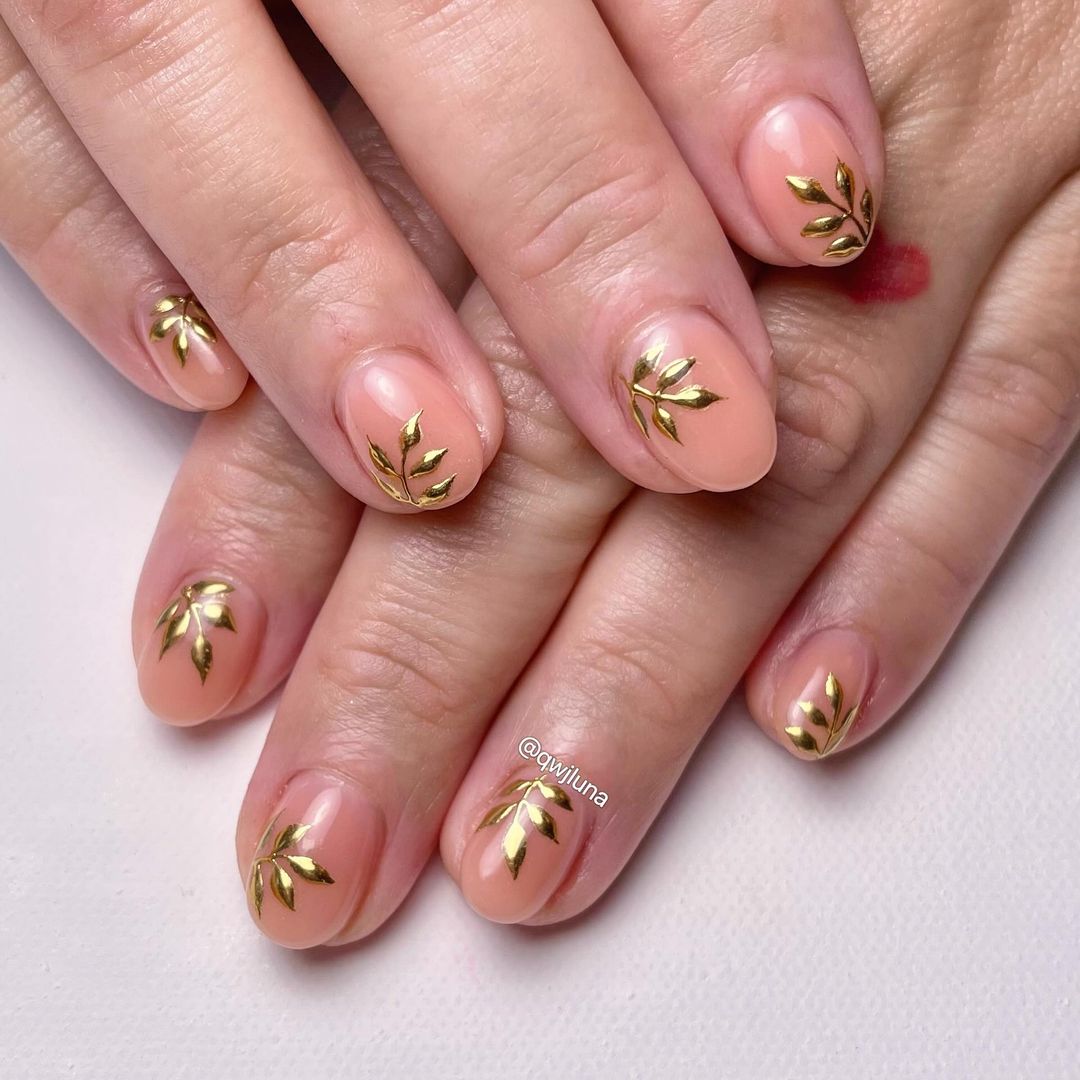
Nude Elegance with Leaf Accents
This design combines the elegance of nude tones with intricate black and gold leaf accents. The almond shape and the minimalistic lines make it a sophisticated choice for fall. The subtle gold details add a touch of luxury without overwhelming the simplicity of the design.
- Nude nail polish (Essie – “Topless & Barefoot”)
- Black nail art pen (Sally Hansen Nail Art Pen)
- Gold nail art tape (Born Pretty Store Gold Striping Tape)
- Top coat (Seche Vite Dry Fast Top Coat)
DIY Instructions:
- Prepare Your Nails: Shape your nails into an almond style and buff them.
- Base Layer: Apply the nude polish on all nails.
- Leaf Art: Use the black nail art pen to draw delicate leaf patterns on the accent nails.
- Gold Accents: Apply the gold striping tape to add fine lines and details.
- Top Coat: Seal the design with a top coat to ensure durability and shine.
Bold Autumn Mix
This bold design features a striking mix of deep reds, mint green, and intricate leaf patterns. The combination of colors and detailed art creates a vibrant look perfect for autumn. The glossy finish on all nails enhances the colors and makes the design pop.
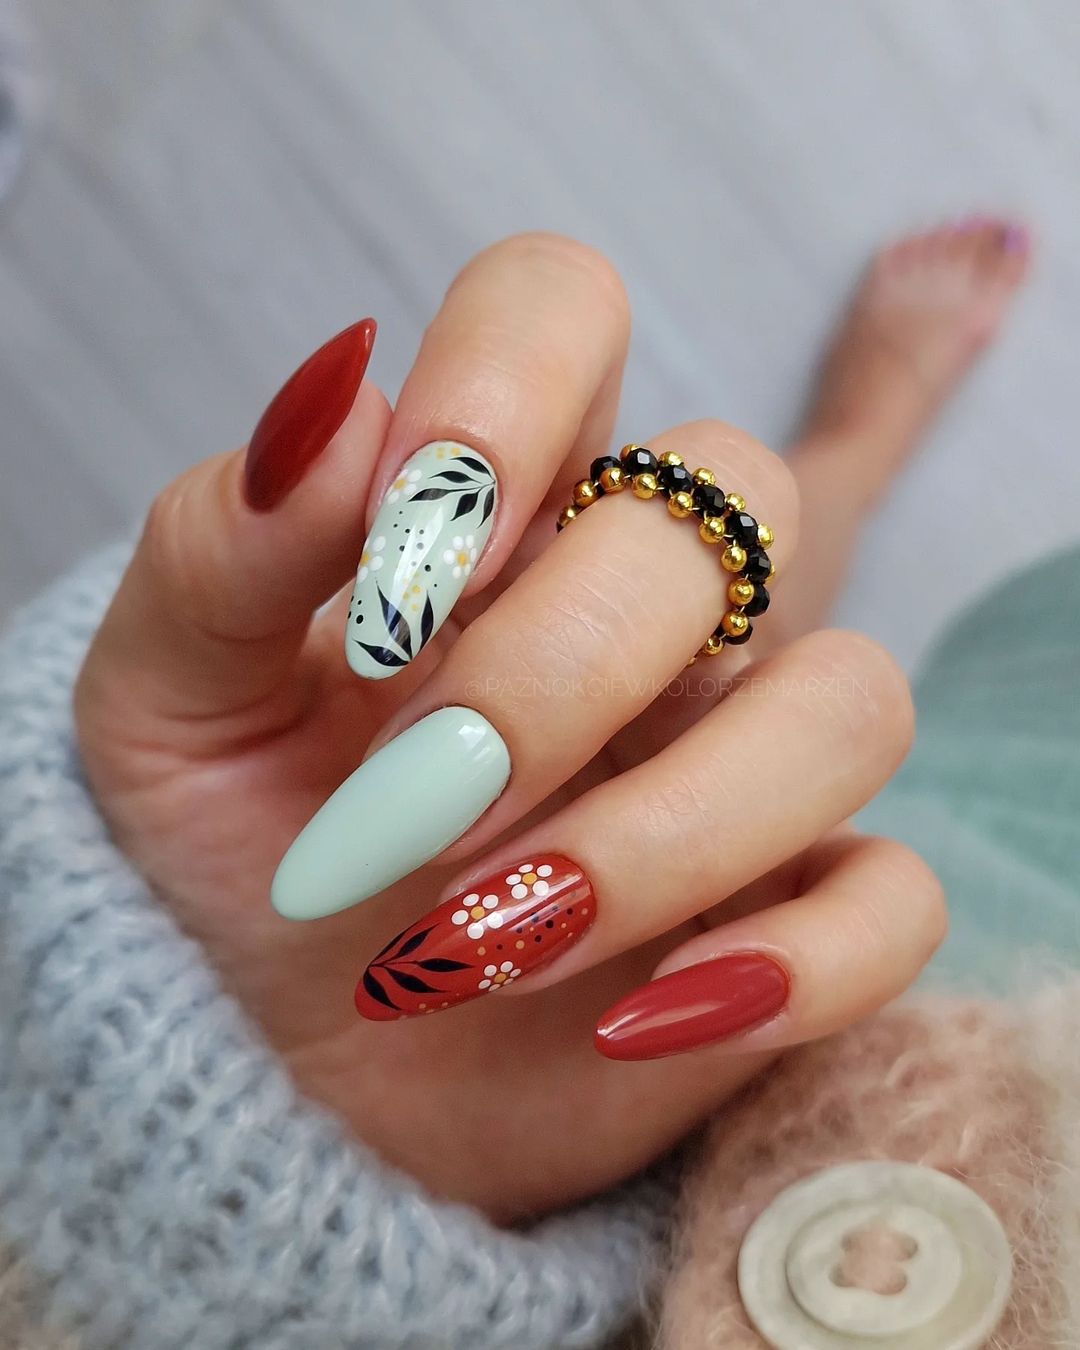
- Deep red nail polish (OPI – “Big Apple Red”)
- Mint green nail polish (Essie – “Mint Candy Apple”)
- Black nail art pen (Sally Hansen Nail Art Pen)
- White nail art pen (Kiss Nail Art Pen)
- Top coat (Seche Vite Dry Fast Top Coat)
DIY Instructions:
- Prepare Your Nails: Shape your nails into an almond style and buff them.
- Base Layer: Apply the deep red polish on some nails and mint green on others.
- Leaf Art: Use black and white nail art pens to draw detailed leaf patterns and dots.
- Top Coat: Apply a top coat to protect the design and add shine.
Starry Glitter Tips
This playful design features glittery green tips with star accents, perfect for adding a touch of fun to your fall nails. The simple yet eye-catching design is great for short to medium-length nails, providing a festive look with minimal effort.

- Clear base coat (Essie – “All In One Base”)
- Green glitter nail polish (China Glaze – “Fairy Dust”)
- Star nail decals (Born Pretty Store Star Decals)
- Top coat (Sally Hansen Miracle Gel Top Coat)
DIY Instructions:
- Prepare Your Nails: Shape your nails into a short almond or round style and buff them.
- Base Layer: Apply a clear base coat to all nails.
- Glitter Tips: Apply green glitter polish to the tips of the nails, creating a French tip effect.
- Star Decals: Place star decals on each nail for a whimsical touch.
- Top Coat: Seal the design with a top coat to ensure durability and shine.
Blue and Orange Floral Delight
This design features vibrant blue and orange floral patterns on a white base, creating a fresh and lively look for fall. The combination of colors and detailed floral art brings a cheerful and playful vibe to your nails, perfect for any autumn outing.
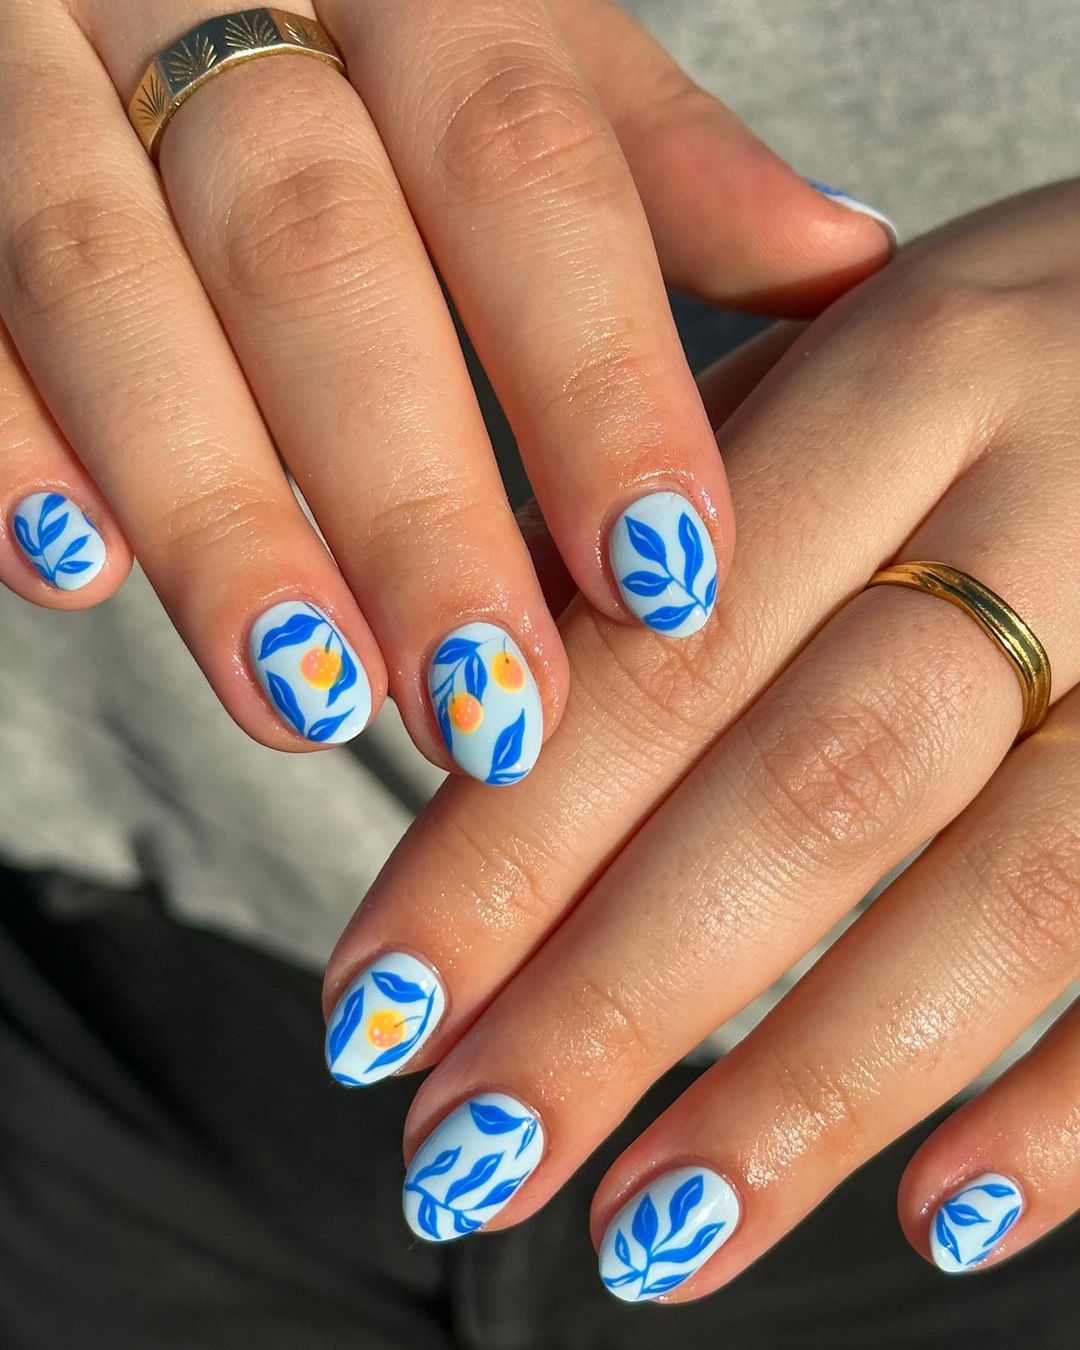
- White nail polish (Essie – “Blanc”)
- Blue nail art pen (Kiss Nail Art Pen)
- Orange nail art pen (Sally Hansen Nail Art Pen)
- Top coat (Seche Vite Dry Fast Top Coat)
DIY Instructions:
- Prepare Your Nails: Shape your nails into a short round style and buff them.
- Base Layer: Apply the white polish on all nails.
- Floral Art: Use blue and orange nail art pens to draw intricate floral patterns on each nail.
- Top Coat: Apply a top coat to protect the design and add shine.
Floral French Tips
This stunning design features clear acrylic nails with colorful floral tips and a classic French manicure twist. The vibrant flowers encased in clear acrylic make for a unique and eye-catching design, perfect for making a statement this fall.
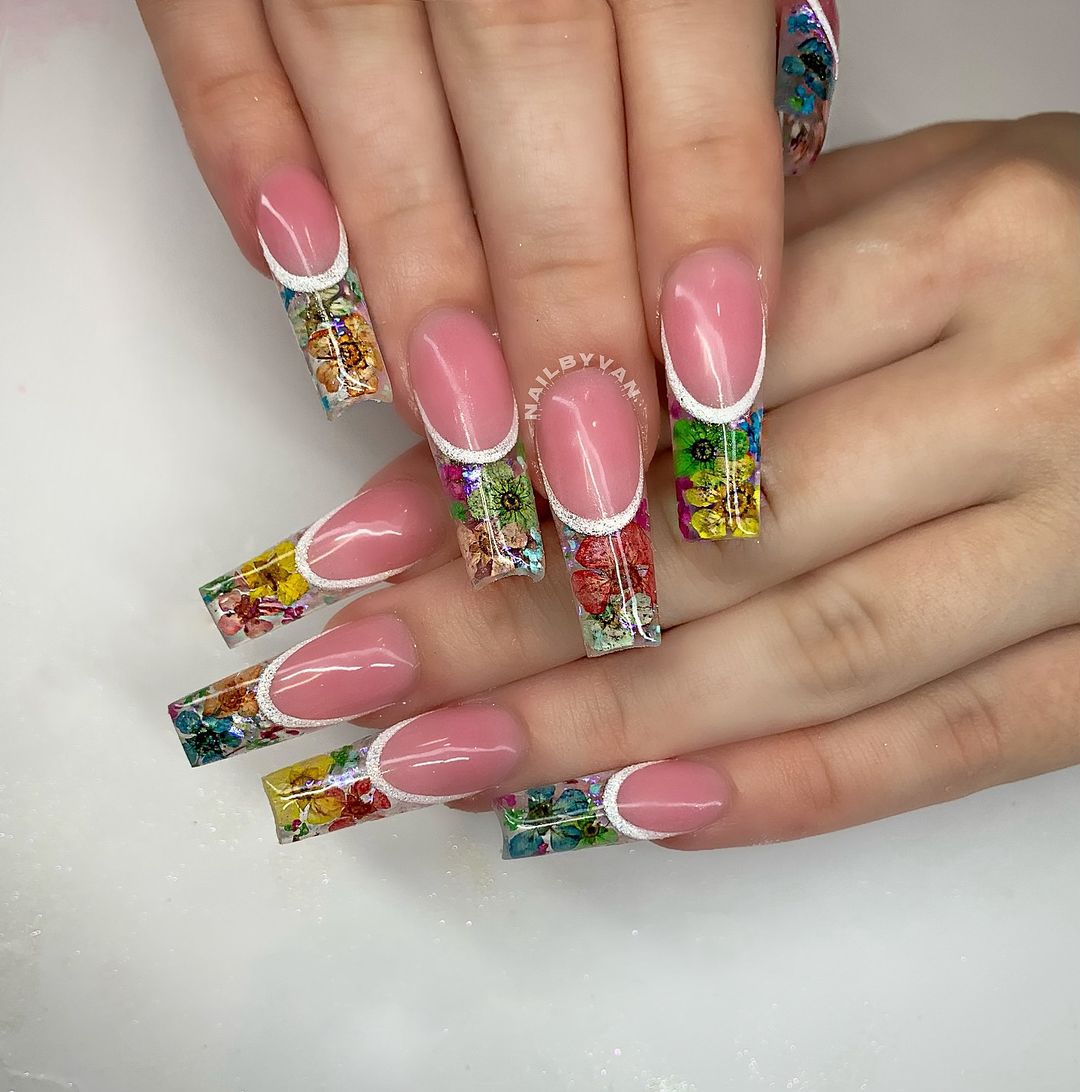
- Clear acrylic nails (Kiss Acrylic Nail Kit)
- White nail polish (OPI – “Alpine Snow”)
- Dried flower decals (Born Pretty Store Dried Flower Decals)
- Top coat (Seche Vite Dry Fast Top Coat)
DIY Instructions:
- Prepare Your Nails: Shape your nails into a long coffin style and buff them.
- Acrylic Application: Apply clear acrylic nails according to the kit instructions.
- French Tips: Paint a classic French tip with white polish on each nail.
- Floral Accents: Place dried flower decals on the tips, encasing them in the clear acrylic.
- Top Coat: Seal the design with a top coat to ensure durability and shine.
Whimsical Fall Art
This playful design features intricate fall-themed art, including pumpkins and leaves, on a clear acrylic base. The vibrant colors and detailed artwork make this design a fun and festive choice for the fall season.
- Clear acrylic nails (Kiss Acrylic Nail Kit)
- Orange nail polish (OPI – “A Good Man-darin is Hard to Find”)
- Green nail polish (Essie – “Mojito Madness”)
- Black nail art pen (Sally Hansen Nail Art Pen)
- Top coat (Seche Vite Dry Fast Top Coat)
DIY Instructions:
- Prepare Your Nails: Shape your nails into a long coffin style and buff them.
- Acrylic Application: Apply clear acrylic nails according to the kit instructions.
- Fall Art: Use orange and green polishes along with the black nail art pen to create detailed fall-themed designs, such as pumpkins and leaves, on each nail.
- Top Coat: Seal the design with a top coat to ensure durability and shine.
Whimsical Autumn with Pooh and Friends
This playful design features beloved characters from Winnie the Pooh along with autumn-themed accents. The rich browns and vibrant yellows capture the essence of fall, while the detailed character art adds a fun and nostalgic touch.
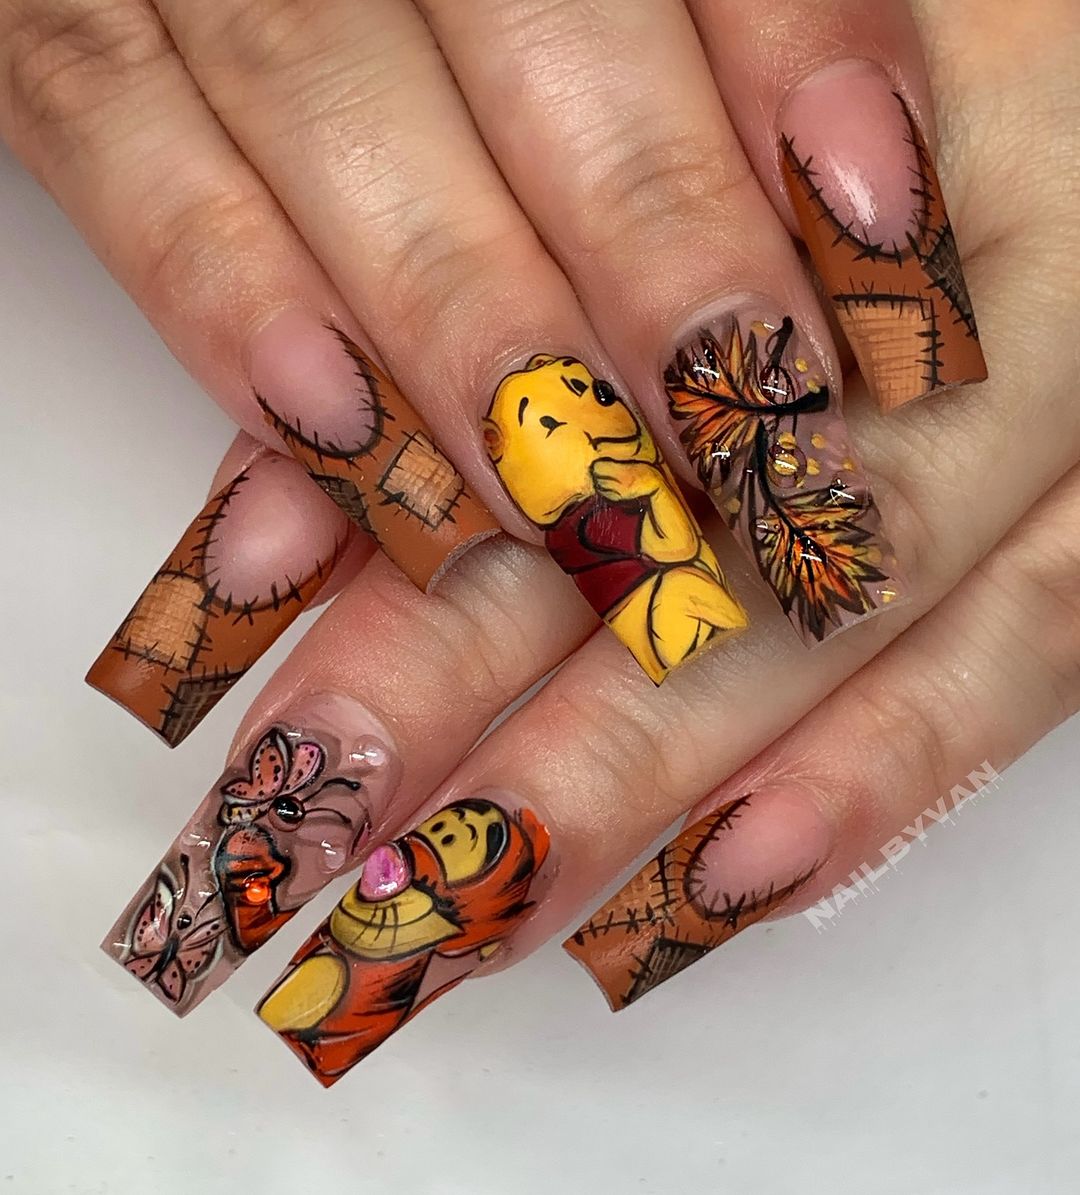
- Brown nail polish (Essie – “Playing Koi”)
- Yellow nail polish (OPI – “Sun, Sea, and Sand in My Pants”)
- Black nail art pen (Sally Hansen Nail Art Pen)
- Clear rhinestones (Born Pretty Store Clear Rhinestones)
- Top coat (Seche Vite Dry Fast Top Coat)
DIY Instructions:
- Prepare Your Nails: Shape your nails into a long coffin style and buff them.
- Base Layer: Apply the brown polish on all nails except for the accent nails where you will paint the characters.
- Character Art: Use the black nail art pen to draw outlines of the characters, then fill in with the appropriate colors.
- Autumn Accents: Add details like leaves and pumpkins using the nail art pens.
- Top Coat: Seal the design with a top coat to ensure durability and shine.
Woodland Magic
This charming design features a woodland theme with adorable mushrooms and leaves on a sage green base. The cute and whimsical artwork is perfect for those who love nature-inspired nails and want to bring a bit of forest magic to their fingertips.
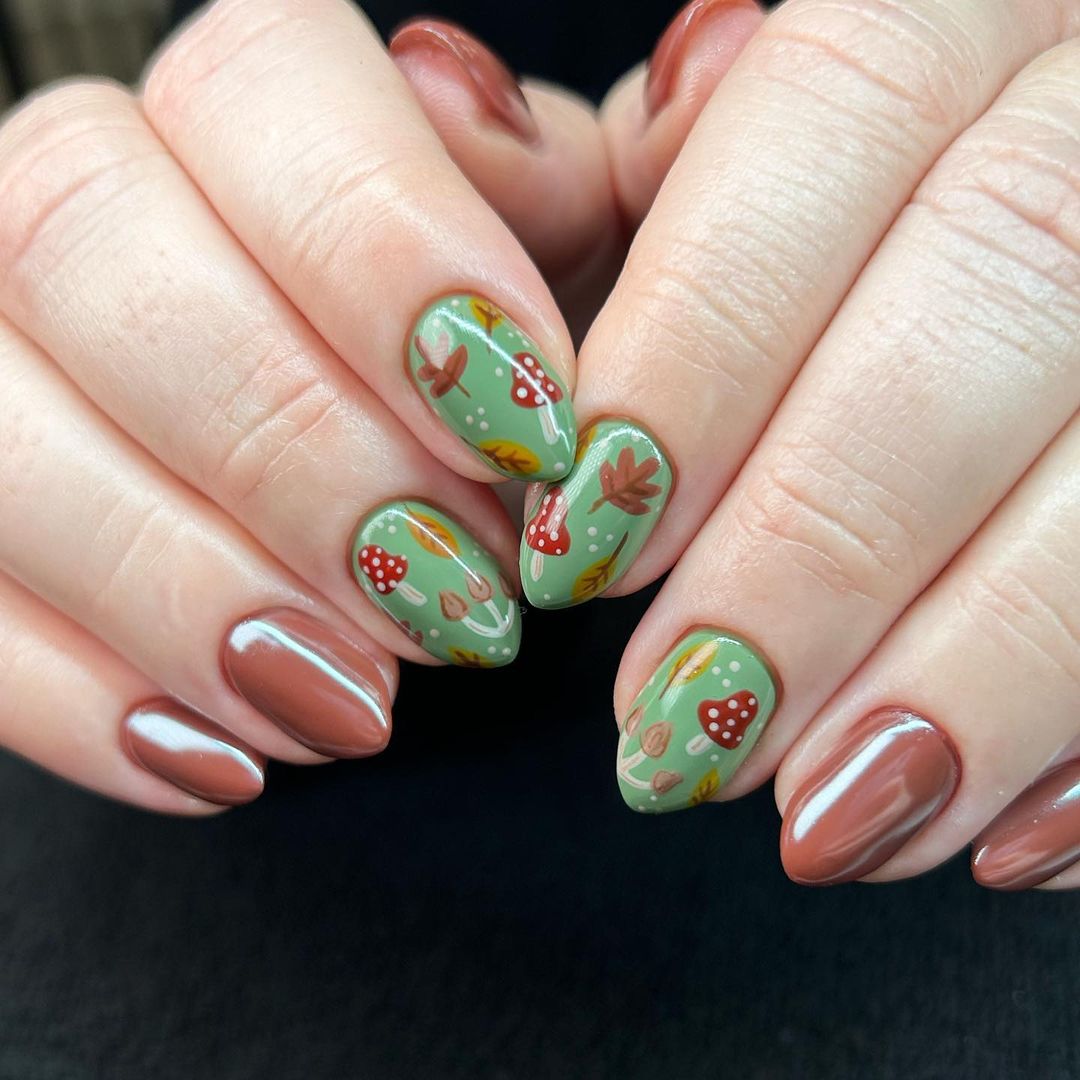
- Sage green nail polish (Essie – “Sage You Love Me”)
- Brown nail polish (OPI – “Chocolate Moose”)
- Red and white nail art pens (Kiss Nail Art Pens)
- Top coat (Sally Hansen Miracle Gel Top Coat)
DIY Instructions:
- Prepare Your Nails: Shape your nails into an almond style and buff them.
- Base Layer: Apply the sage green polish on all nails.
- Woodland Art: Use the red and white nail art pens to draw mushrooms, and add leaves with the brown polish.
- Top Coat: Apply a top coat to protect the design and add shine.
Earthy Elegance
This elegant design combines earthy tones with delicate leaf patterns. The mix of brown, nude, and coral shades creates a sophisticated look that’s perfect for the fall season. The glossy finish adds a touch of elegance to the natural palette.
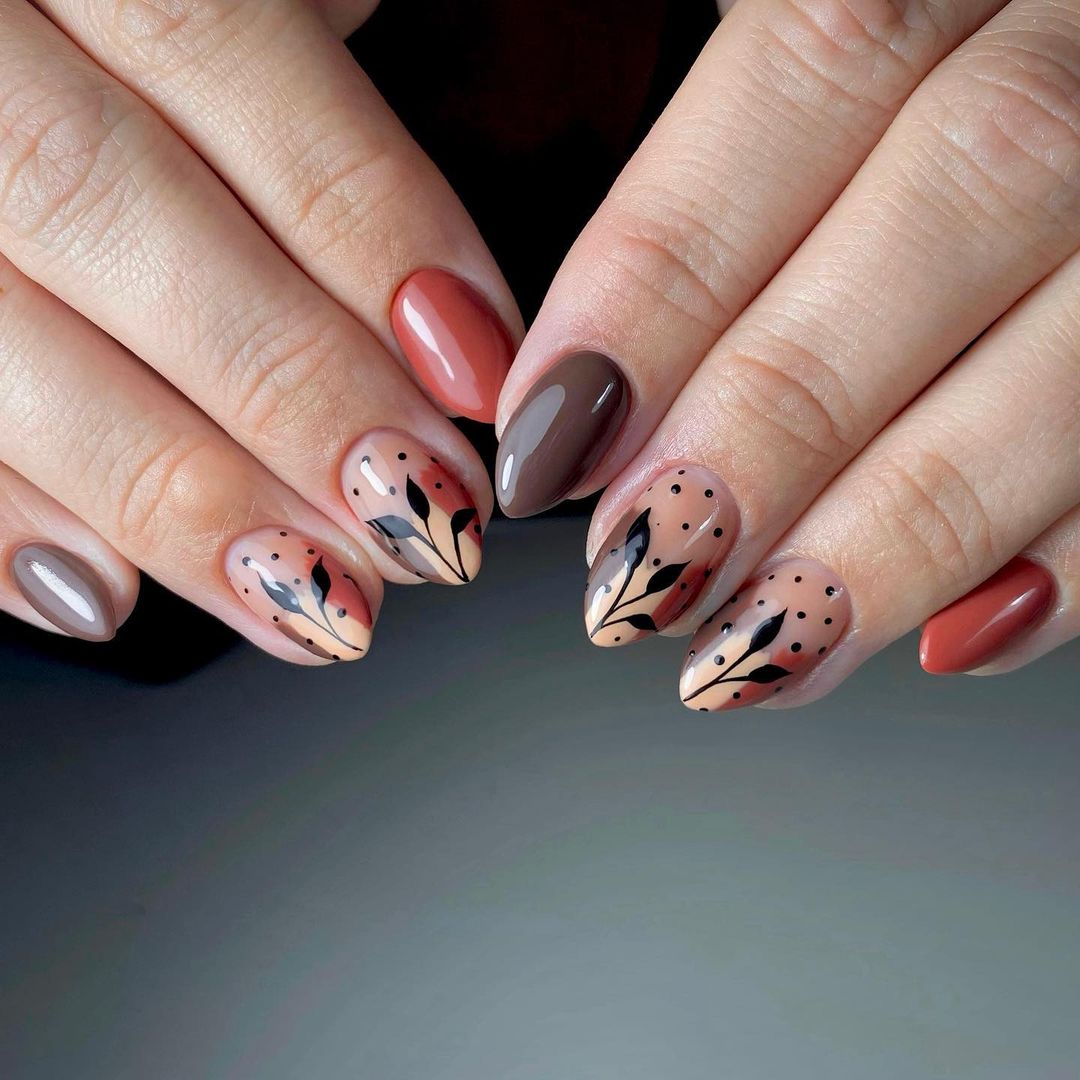
- Nude nail polish (OPI – “Be There in a Prosecco”)
- Brown nail polish (Essie – “Mink Muffs”)
- Coral nail polish (OPI – “A Good Man-darin is Hard to Find”)
- Black nail art pen (Sally Hansen Nail Art Pen)
- Top coat (Seche Vite Dry Fast Top Coat)
DIY Instructions:
- Prepare Your Nails: Shape your nails into an almond style and buff them.
- Base Layer: Apply the nude polish on all nails.
- Leaf Art: Use the black nail art pen to draw delicate leaf patterns on the accent nails.
- Color Accents: Apply the brown and coral polishes on alternating nails for a balanced look.
- Top Coat: Apply a top coat to protect the design and add shine.
Golden Leaves Simplicity
This minimalistic design features gold leaf accents on a nude base, creating a simple yet elegant look. The small, delicate leaves add a touch of sophistication and make the nails look effortlessly chic.
- Nude nail polish (Essie – “Ballet Slippers”)
- Gold leaf stickers (Born Pretty Store Gold Leaf Stickers)
- Top coat (Sally Hansen Miracle Gel Top Coat)
DIY Instructions:
- Prepare Your Nails: Shape your nails into a short round style and buff them.
- Base Layer: Apply the nude polish on all nails.
- Leaf Accents: Carefully place the gold leaf stickers on each nail.
- Top Coat: Apply a top coat to protect the design and add shine.
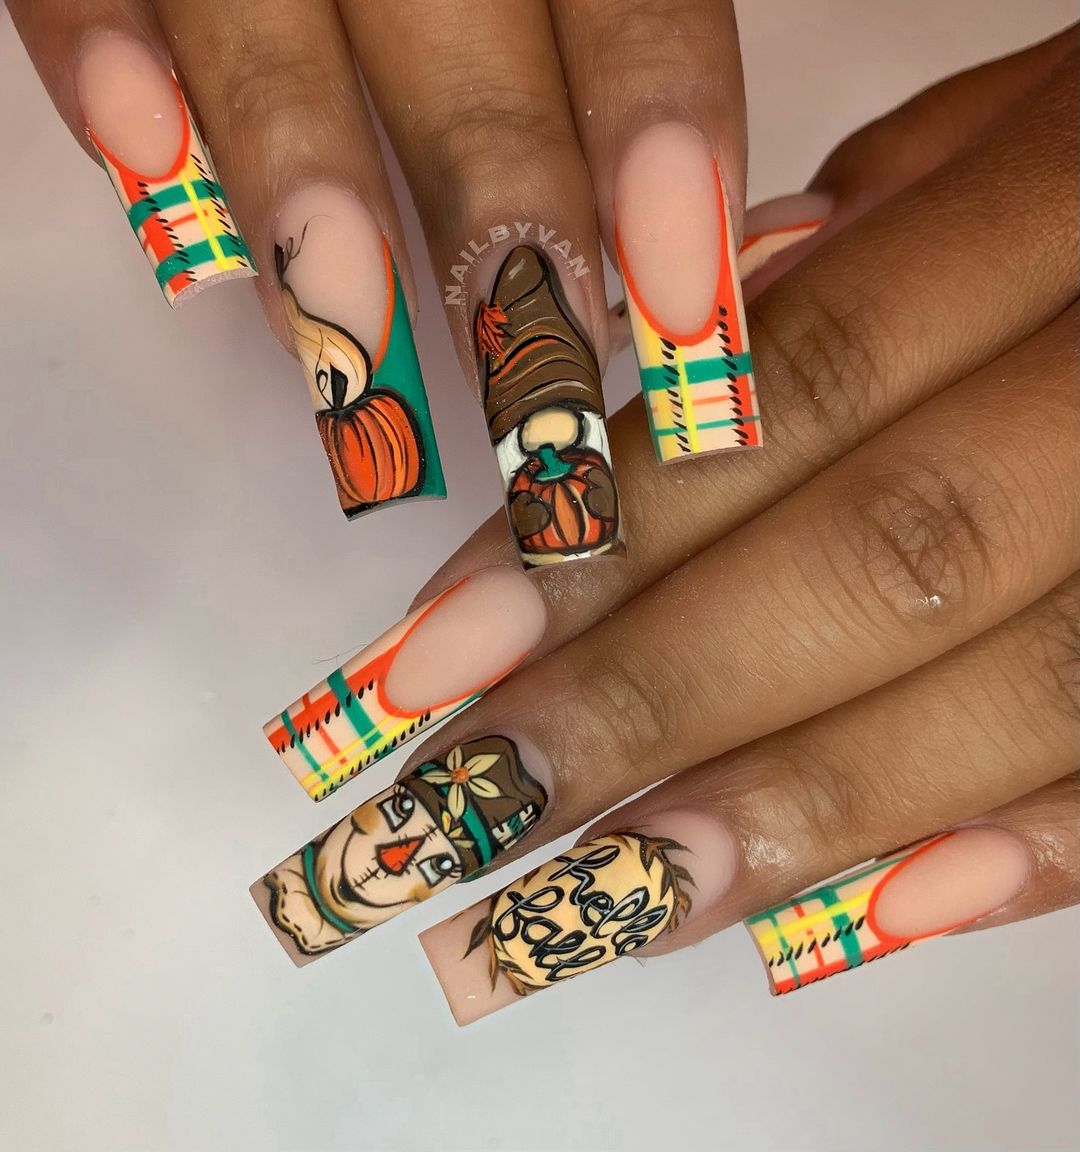
Autumn Stiletto Glam
This striking design features bold autumn colors and glitter accents on long stiletto nails. The mix of matte and glossy finishes, along with the intricate leaf and plaid patterns, creates a glamorous and festive look perfect for the fall season.
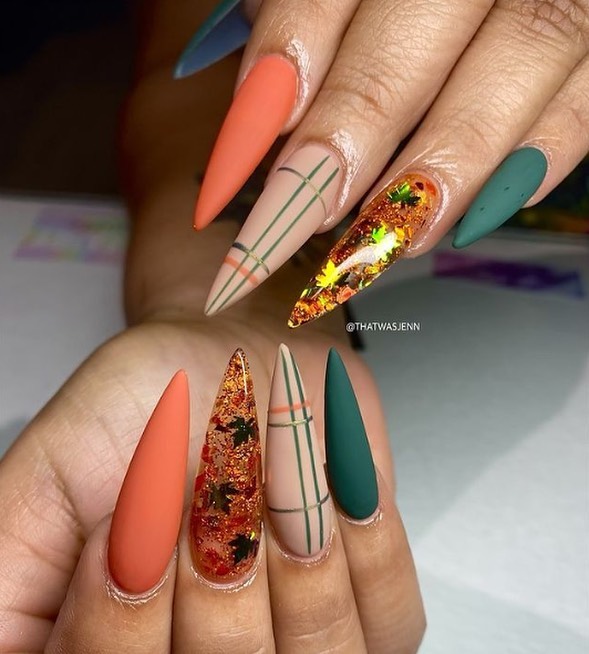
- Matte orange nail polish (OPI – “It’s a Piazza Cake”)
- Teal nail polish (Essie – “Off Tropic”)
- Nude nail polish (OPI – “Dulce de Leche”)
- Gold glitter polish (China Glaze – “Golden Enchantment”)
- Green nail art pen (Sally Hansen Nail Art Pen)
- Top coat (Seche Vite Dry Fast Top Coat)
DIY Instructions:
- Prepare Your Nails: Shape your nails into a long stiletto style and buff them.
- Base Layer: Apply the matte orange, teal, and nude polishes on alternating nails.
- Plaid and Leaf Art: Use the green nail art pen to draw plaid patterns and leaves on the accent nails.
- Glitter Accents: Apply the gold glitter polish to add sparkle.
- Top Coat: Apply a top coat to protect the design and add shine.
Fiery Fall Glam
This glamorous design features a fiery mix of marbled patterns, glitter, and gold accents on long stiletto nails. The combination of autumn colors and intricate details makes this design perfect for those who want to make a bold statement this fall.
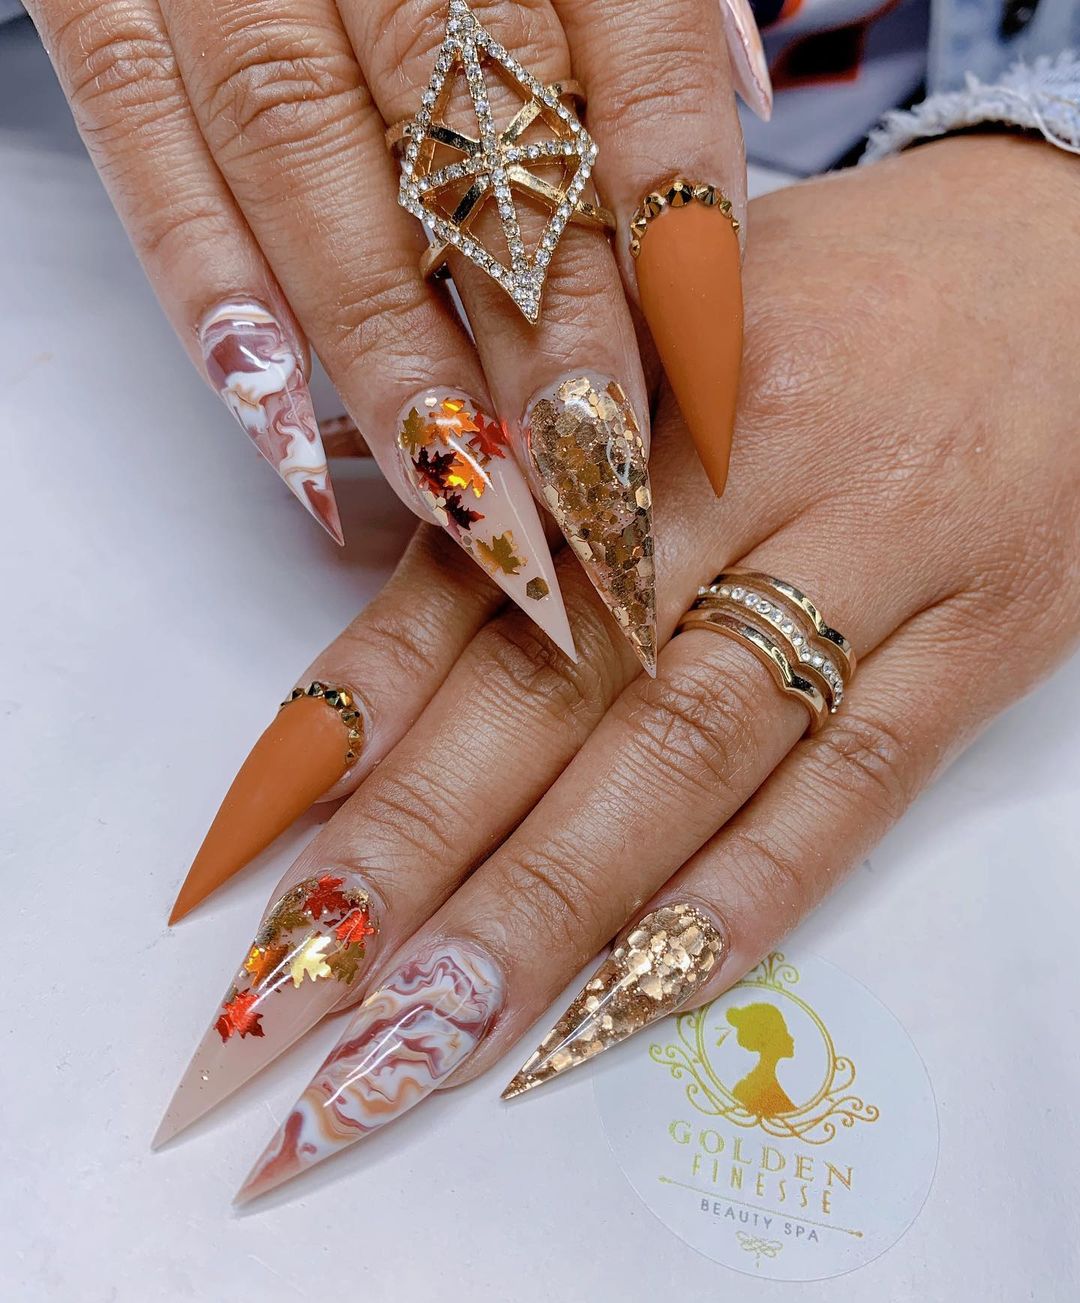
- Maroon nail polish (OPI – “Malaga Wine”)
- Gold glitter polish (Essie – “Rock at the Top”)
- Orange nail polish (OPI – “Where Did Suzi’s Man-go?”)
- Nude nail polish (Essie – “Topless & Barefoot”)
- Gold foil flakes (Born Pretty Store Gold Foil)
- Top coat (Sally Hansen Miracle Gel Top Coat)
DIY Instructions:
- Prepare Your Nails: Shape your nails into a long stiletto style and buff them.
- Base Layer: Apply the maroon, orange, and nude polishes on alternating nails.
- Marbled Art: Create marbled patterns using a combination of the maroon and nude polishes.
- Glitter and Foil Accents: Apply gold glitter polish and gold foil flakes for extra sparkle.
- Top Coat: Apply a top coat to protect the design and add shine.
Glittery Harvest
This dazzling design features black and orange glitter accents on long almond nails, perfect for a festive fall look. The combination of solid colors and glitter creates a vibrant and eye-catching design that’s perfect for any autumn celebration.
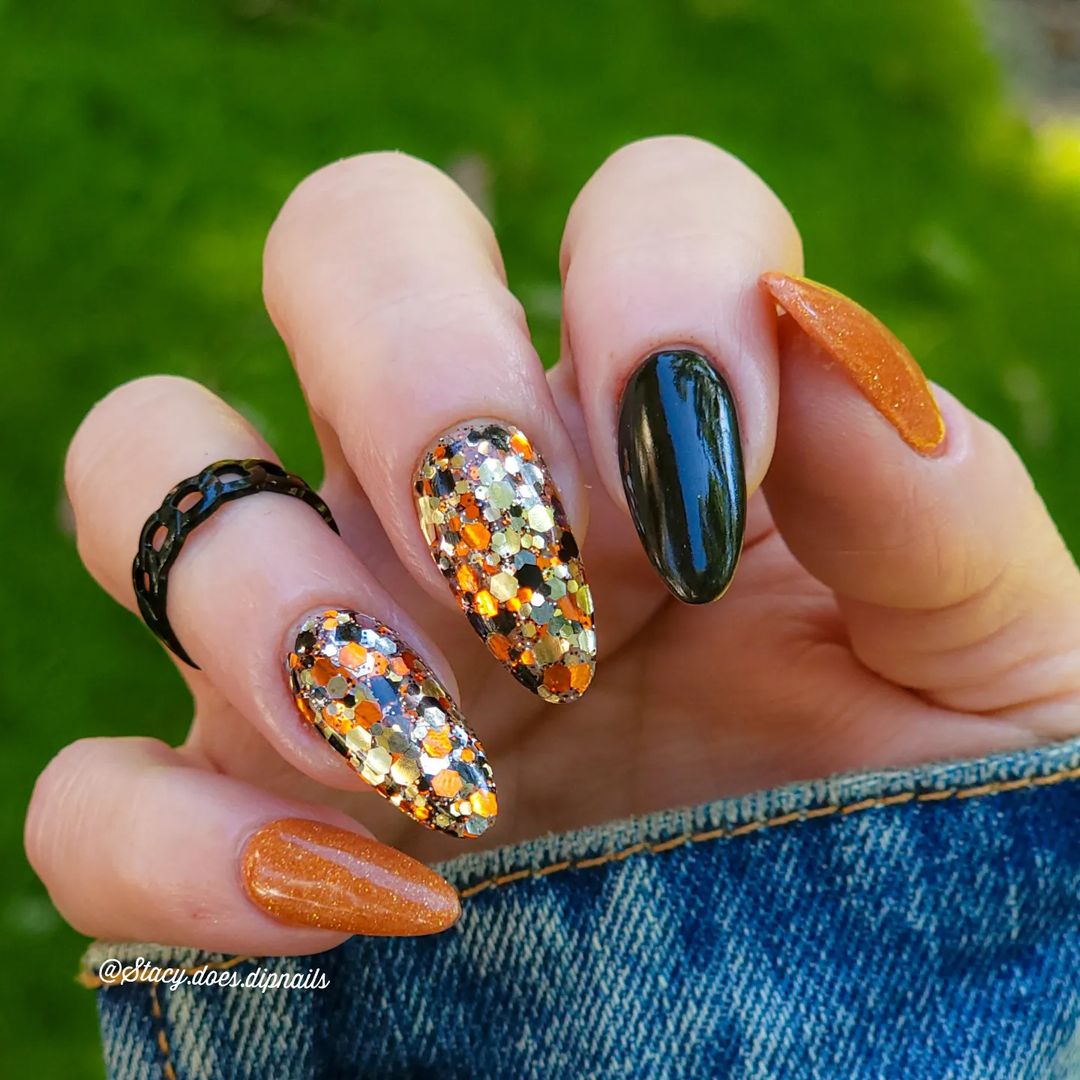
- Black nail polish (Essie – “Licorice”)
- Orange glitter polish (China Glaze – “Orange Knockout”)
- Clear top coat (Seche Vite Dry Fast Top Coat)
- Loose glitter (Born Pretty Store Loose Glitter)
DIY Instructions:
- Prepare Your Nails: Shape your nails into a long almond style and buff them.
- Base Layer: Apply the black polish on some nails and orange glitter polish on others.
- Glitter Accents: Apply loose glitter to the accent nails for extra sparkle.
- Top Coat: Apply a top coat to protect the design and add shine.
FAQ
Q: How long do these nail designs typically last? A: With proper application and a good top coat, these designs can last up to two weeks.
Q: Can I use regular nail polish for these designs, or do I need gel polish? A: Both regular and gel polishes can be used. Gel polish typically lasts longer but requires a UV lamp for curing.
Q: What is the best way to remove intricate nail art? A: Soak a cotton pad in acetone, place it on your nail, and wrap it with aluminum foil for 10-15 minutes. This helps dissolve the polish without excessive rubbing.
Q: Are these designs suitable for beginners? A: Absolutely! Each design can be adjusted in complexity. Start simple and add details as you become more comfortable.
Save Pin