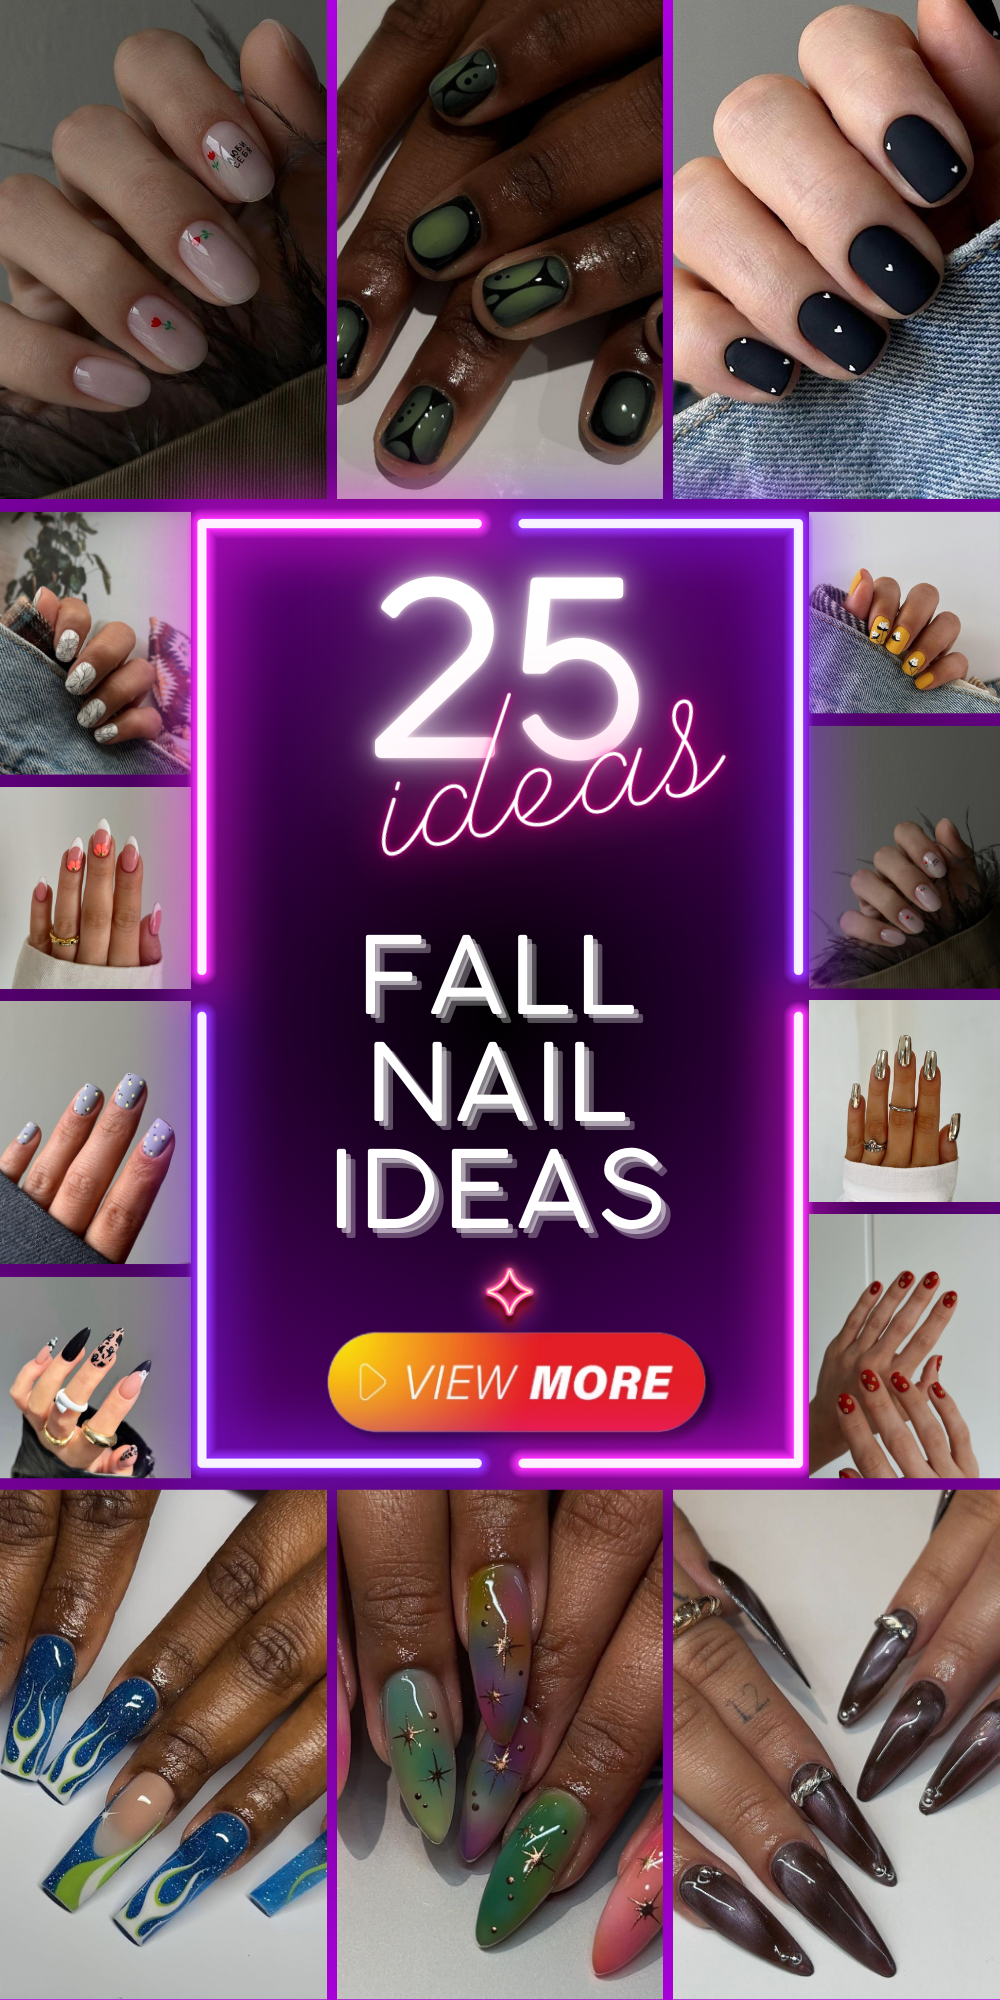
Are you looking to refresh your manicure for the upcoming season? Fall is the perfect time to experiment with new nail designs that reflect the cozy and vibrant hues of autumn. From short and simple designs to intricate acrylics, I’ve gathered some of the most captivating fall nail ideas that will leave you feeling inspired and ready to embrace the season. Let’s dive into these beautiful nail designs and explore how you can recreate them at home!
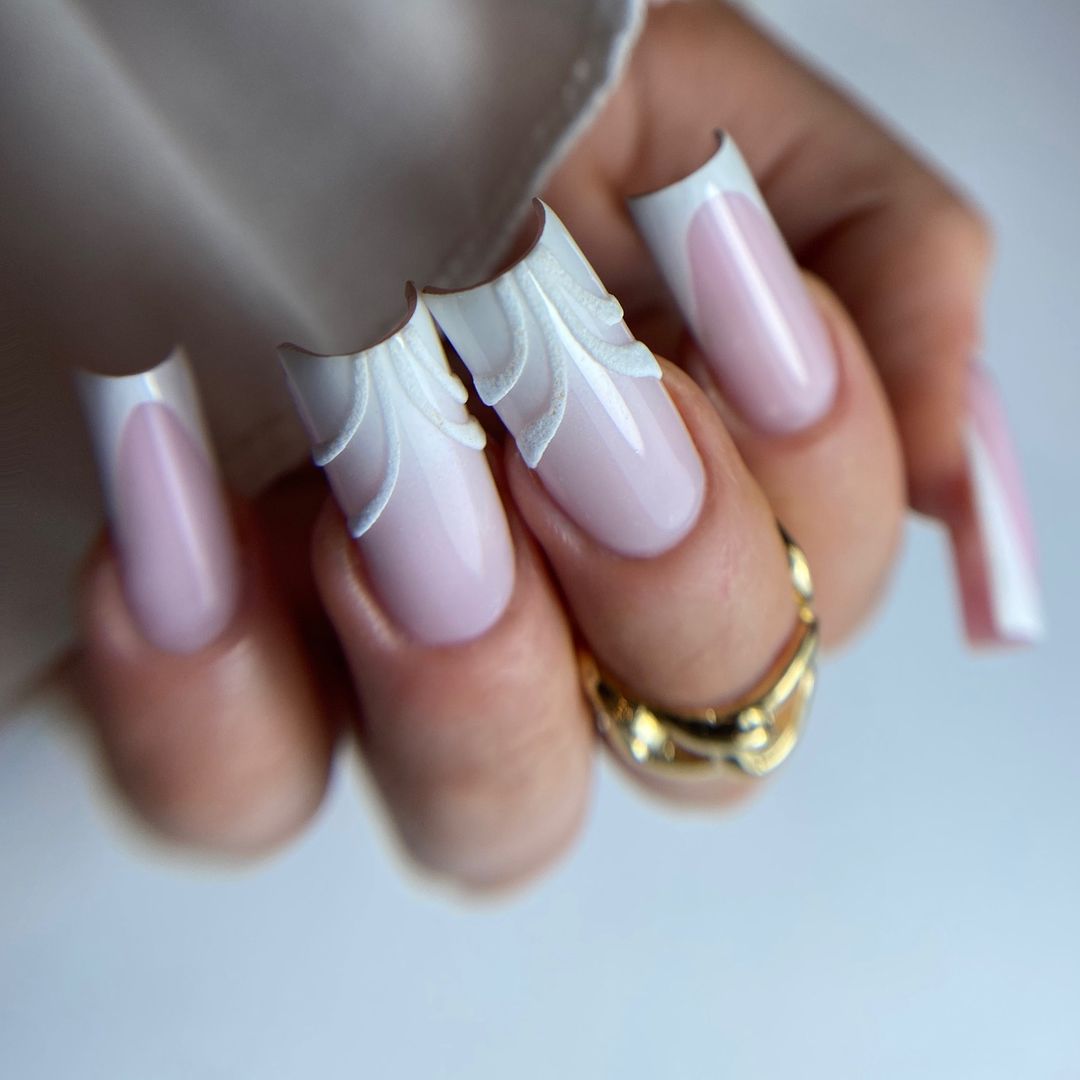
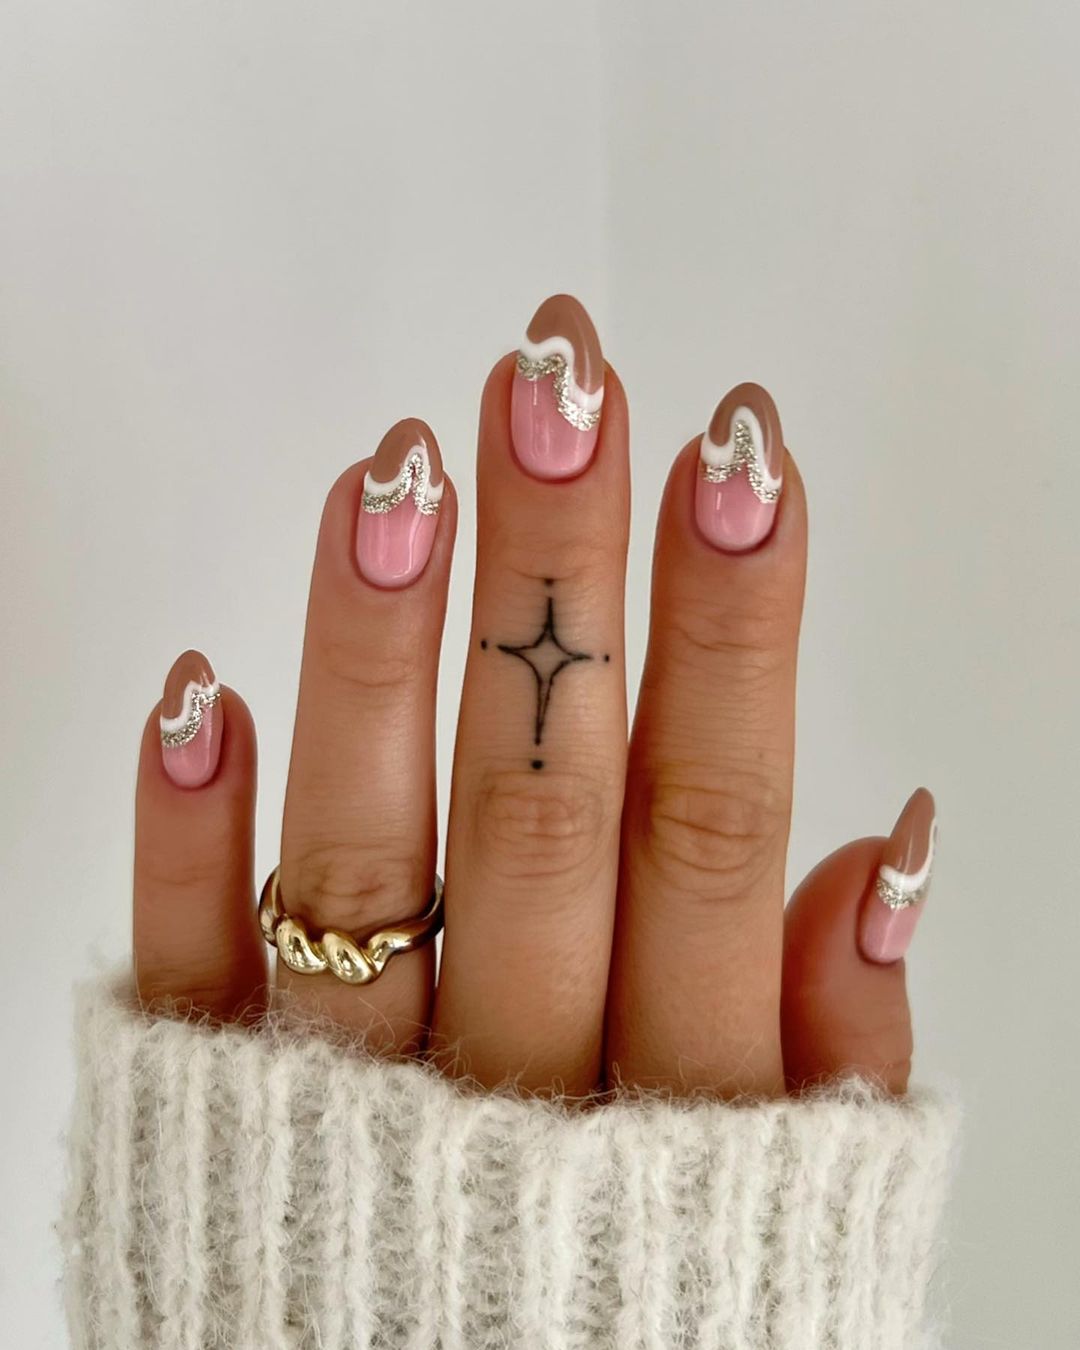
Elegant White Swirls on Pink Base
As a professional manicurist, I can tell you that this elegant design is perfect for those who love a chic and sophisticated look. The white swirls on a soft pink base create a delicate and timeless design that is ideal for any occasion. The combination of the intricate swirls with the subtle pink gives off a classy vibe that’s perfect for autumn.
Consumables:
- Soft pink nail polish (e.g., OPI Bubble Bath)
- White nail polish for swirls (e.g., Essie Blanc)
- Fine nail art brush
- Top coat (e.g., Seche Vite Dry Fast Top Coat)
To create this design at home, start by applying a base coat and then two layers of the soft pink polish. Once the pink polish is dry, use a fine nail art brush to draw the white swirls. Seal the design with a top coat for a glossy finish.
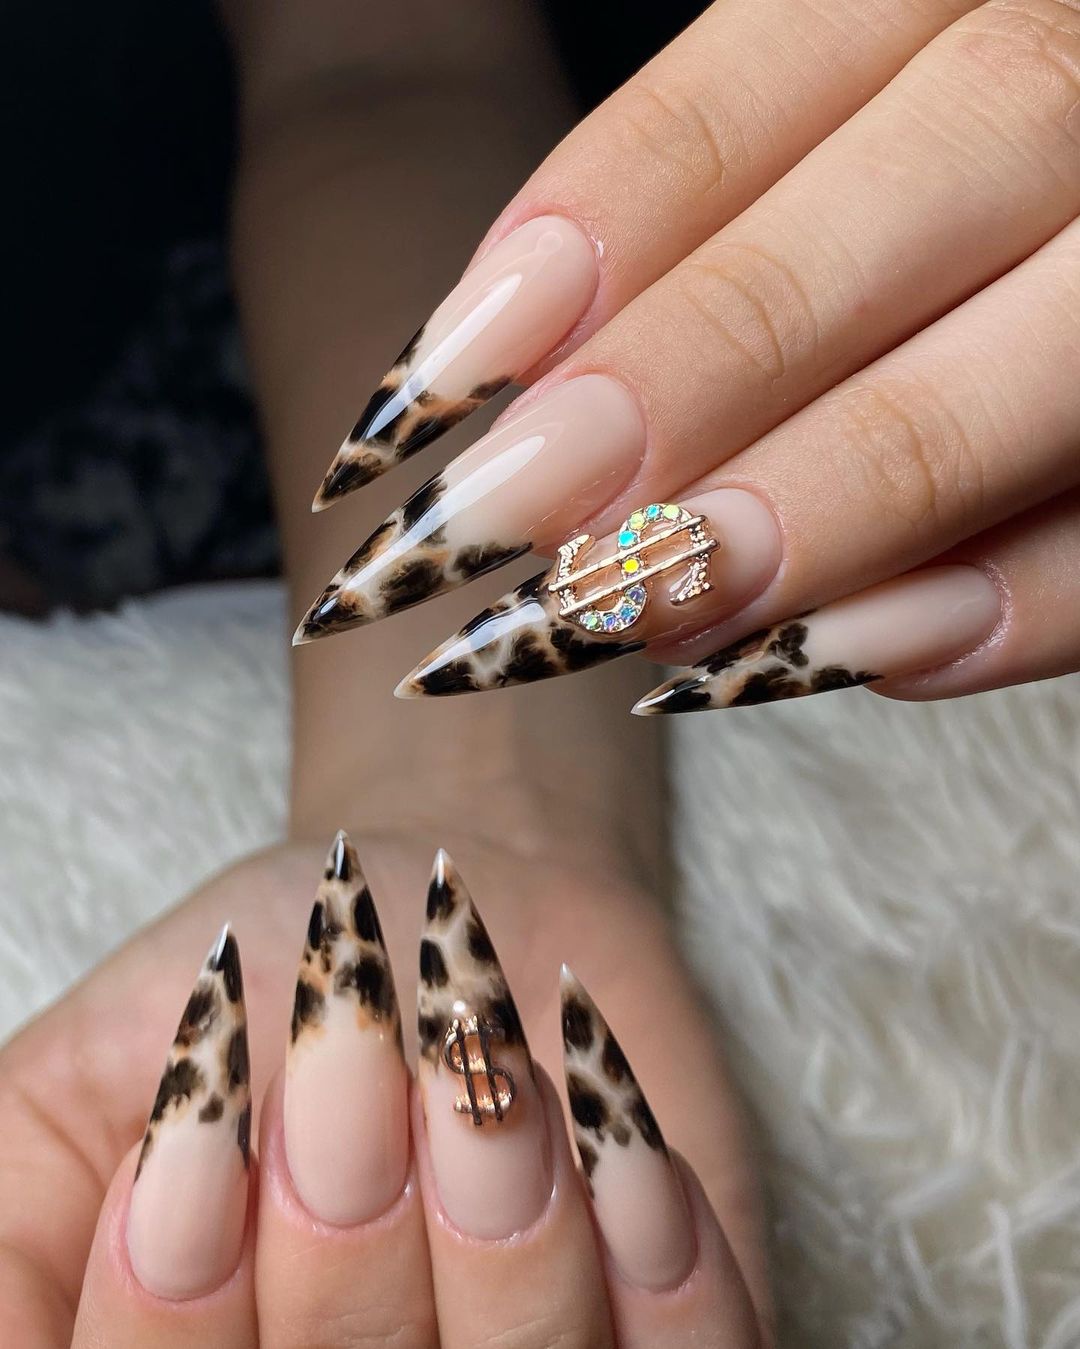
Leopard Print with Dollar Sign Accents
If you’re looking for something bold and edgy, this leopard print design with gold dollar sign accents is perfect for you. The mix of nude and leopard print is not only trendy but also versatile enough to match with any outfit. The gold accents add a touch of glamour that is simply irresistible.
Consumables:
- Nude nail polish (e.g., Zoya Avery)
- Black and brown nail polish for leopard spots (e.g., Essie Licorice and OPI Chocolate Moose)
- Gold nail stickers or nail jewels
- Top coat (e.g., Sally Hansen Miracle Gel Top Coat)
To achieve this look, apply the nude base coat and let it dry. Using a dotting tool, create irregular black and brown spots for the leopard print. Add the gold dollar sign stickers to accentuate the design. Finish with a top coat to secure the jewels and add shine.
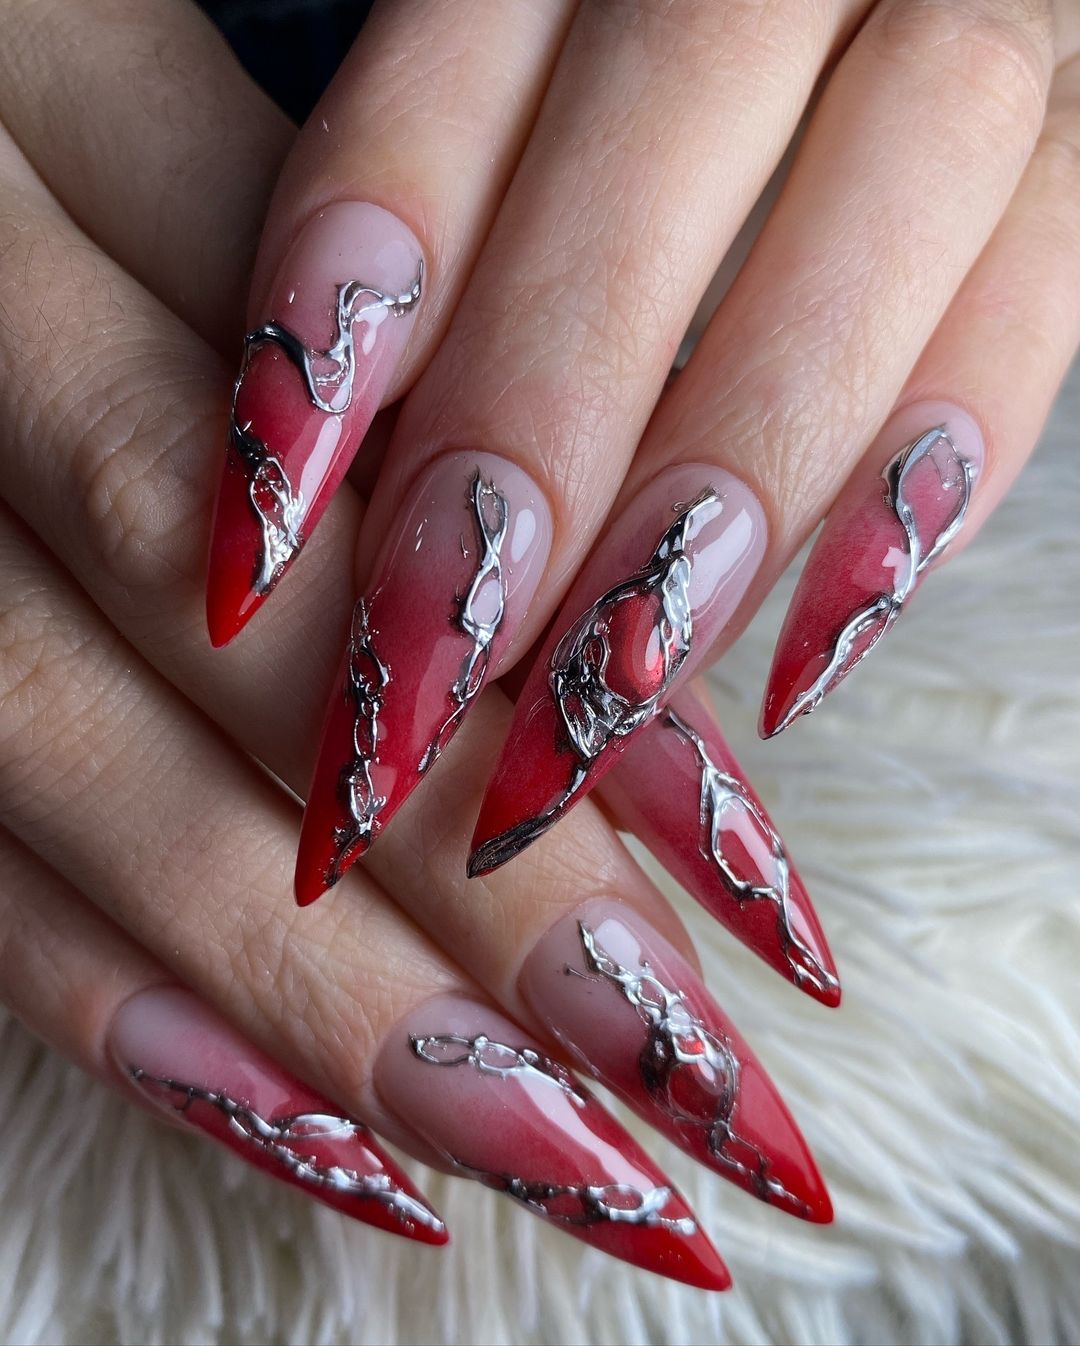
Bold Red and Silver Chains
This striking design combines bold red nails with intricate silver chain accents. The contrast between the vibrant red and the metallic silver creates a captivating look that is perfect for making a statement this fall. The chains add an edgy twist to the classic red manicure.
Consumables:
- Red nail polish (e.g., Essie Russian Roulette)
- Silver nail art chains
- Nail glue
- Top coat (e.g., OPI Top Coat)
Start by applying the red polish and let it dry completely. Carefully place the silver chains on the nails using nail glue. Ensure the chains are secure before applying the top coat to keep everything in place and add a glossy finish.
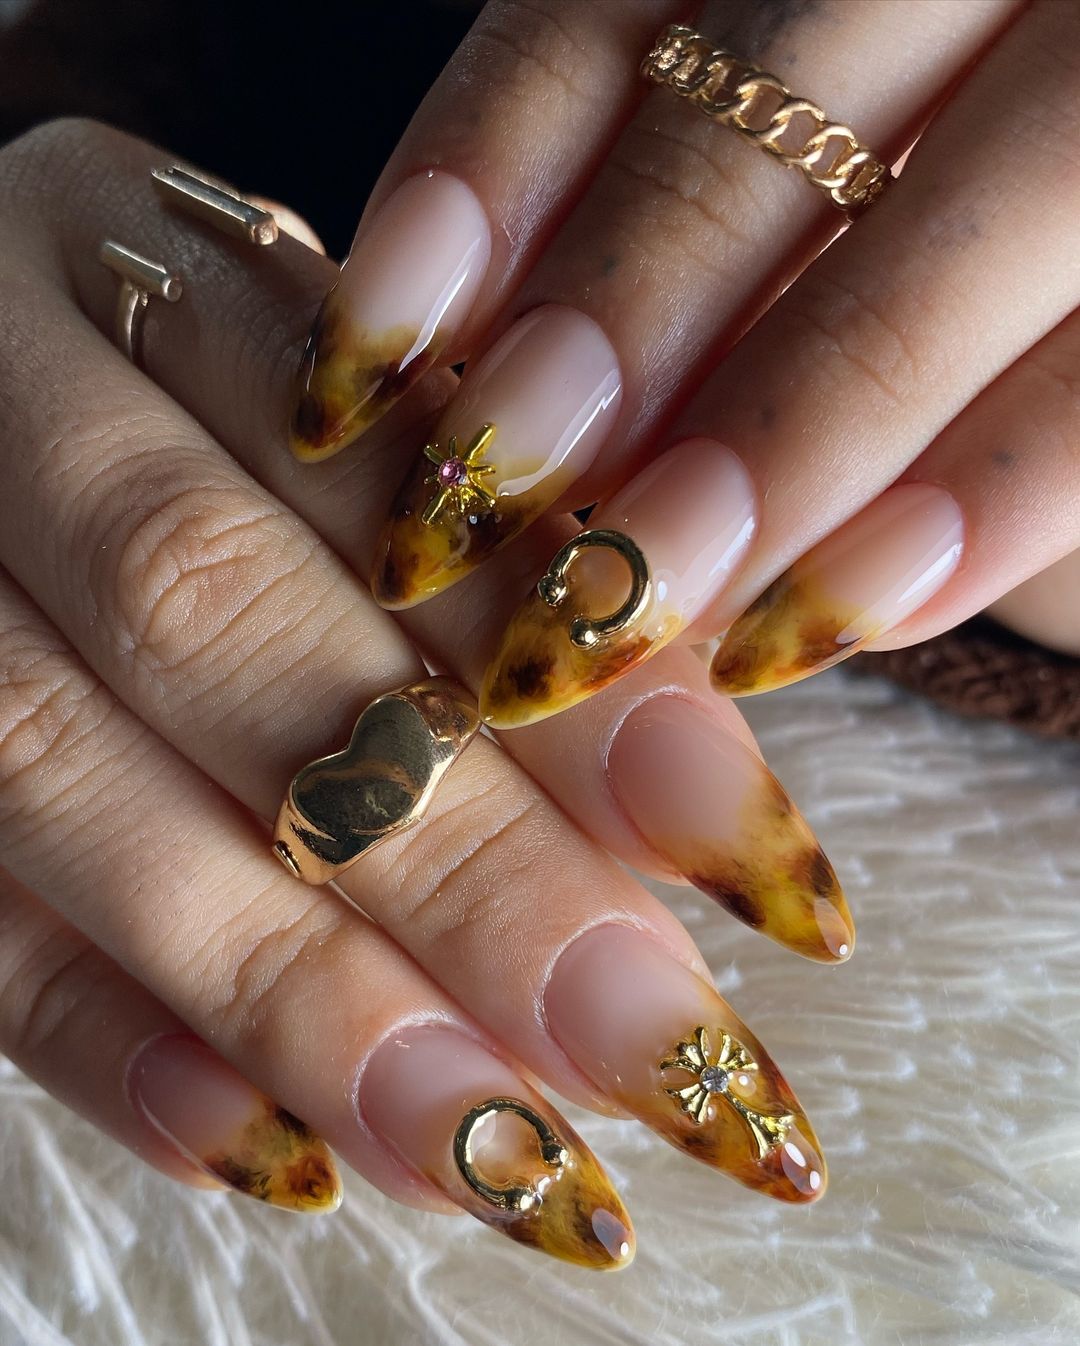
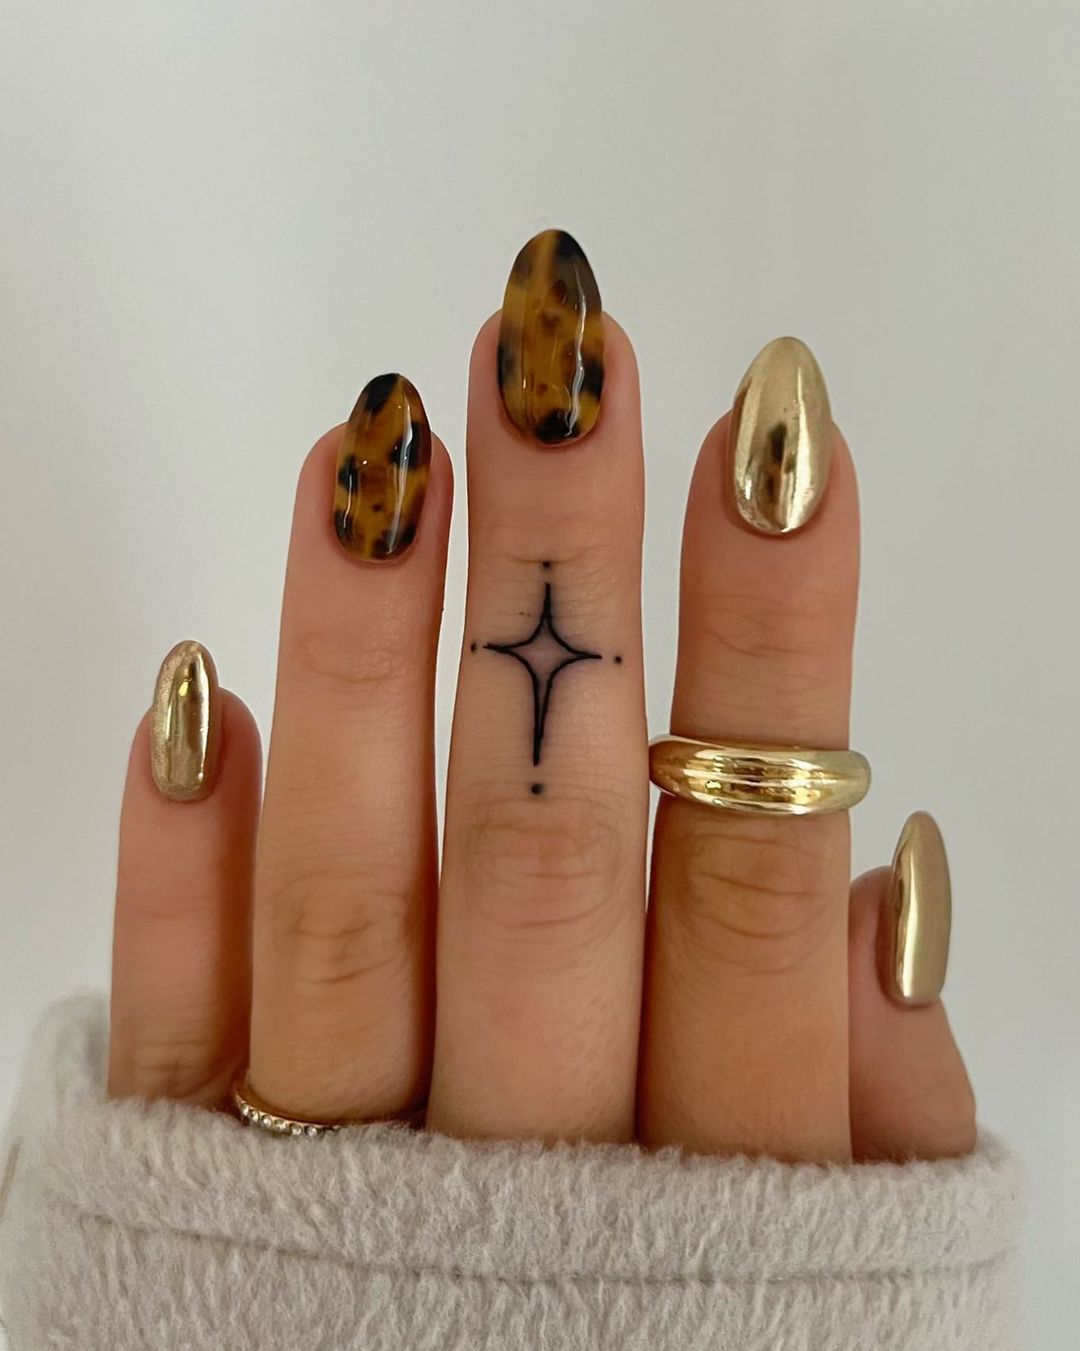
Luxurious Tortoiseshell Nails with Gold Accents
This luxurious design features a stunning tortoiseshell pattern paired with gold accents, making it a perfect choice for those who want to add a touch of elegance to their autumn manicure. The tortoiseshell effect, achieved through a mix of brown and amber hues, gives the nails a sophisticated and warm appearance, while the gold accents elevate the design with a hint of luxury.
Consumables:
- Nude base polish (e.g., OPI Put It In Neutral)
- Brown and amber polishes for tortoiseshell effect (e.g., Essie Playing Koi and Zoya Joss)
- Gold nail charms and embellishments
- Fine detail brush
- Top coat (e.g., Seche Vite Dry Fast Top Coat)
To create this design, start by applying the nude base polish and letting it dry completely. Using a fine detail brush, create irregular patches with brown and amber polishes to mimic the tortoiseshell effect. Once dry, carefully place the gold charms on your nails using nail glue. Finish with a top coat to secure the embellishments and add a glossy shine.
Save Pin
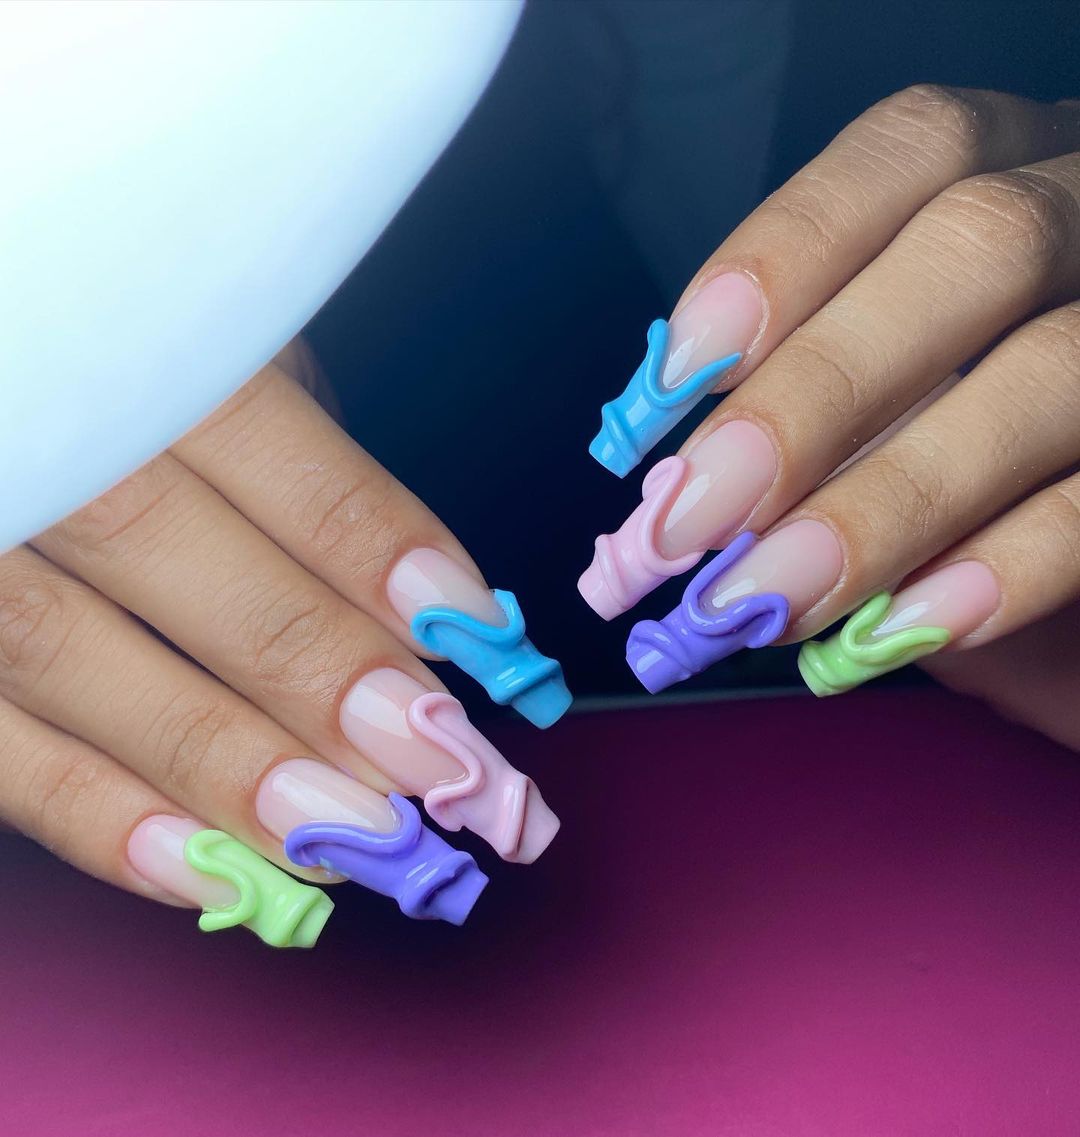
Playful Multicolored 3D Swirls
This fun and playful design features vibrant multicolored 3D swirls that make your nails stand out. The pastel colors and unique three-dimensional effect give this manicure a whimsical and artistic feel, perfect for those who love to experiment with their nail designs.
Consumables:
- Nude base polish (e.g., Essie Ballet Slippers)
- Gel polishes in various colors (e.g., blue, pink, purple, green)
- 3D nail art gel (e.g., Lovenails 3D Sculpting Gel)
- UV/LED lamp
- Nail art brush
- Top coat (e.g., OPI GelColor Top Coat)
Begin by applying the nude base polish and curing it under a UV/LED lamp. Using the 3D sculpting gel and nail art brush, create the multicolored swirls on each nail, curing each layer as you go. This ensures that the 3D effect stays intact. Finish with a gel top coat and cure it under the lamp for a durable and shiny finish.
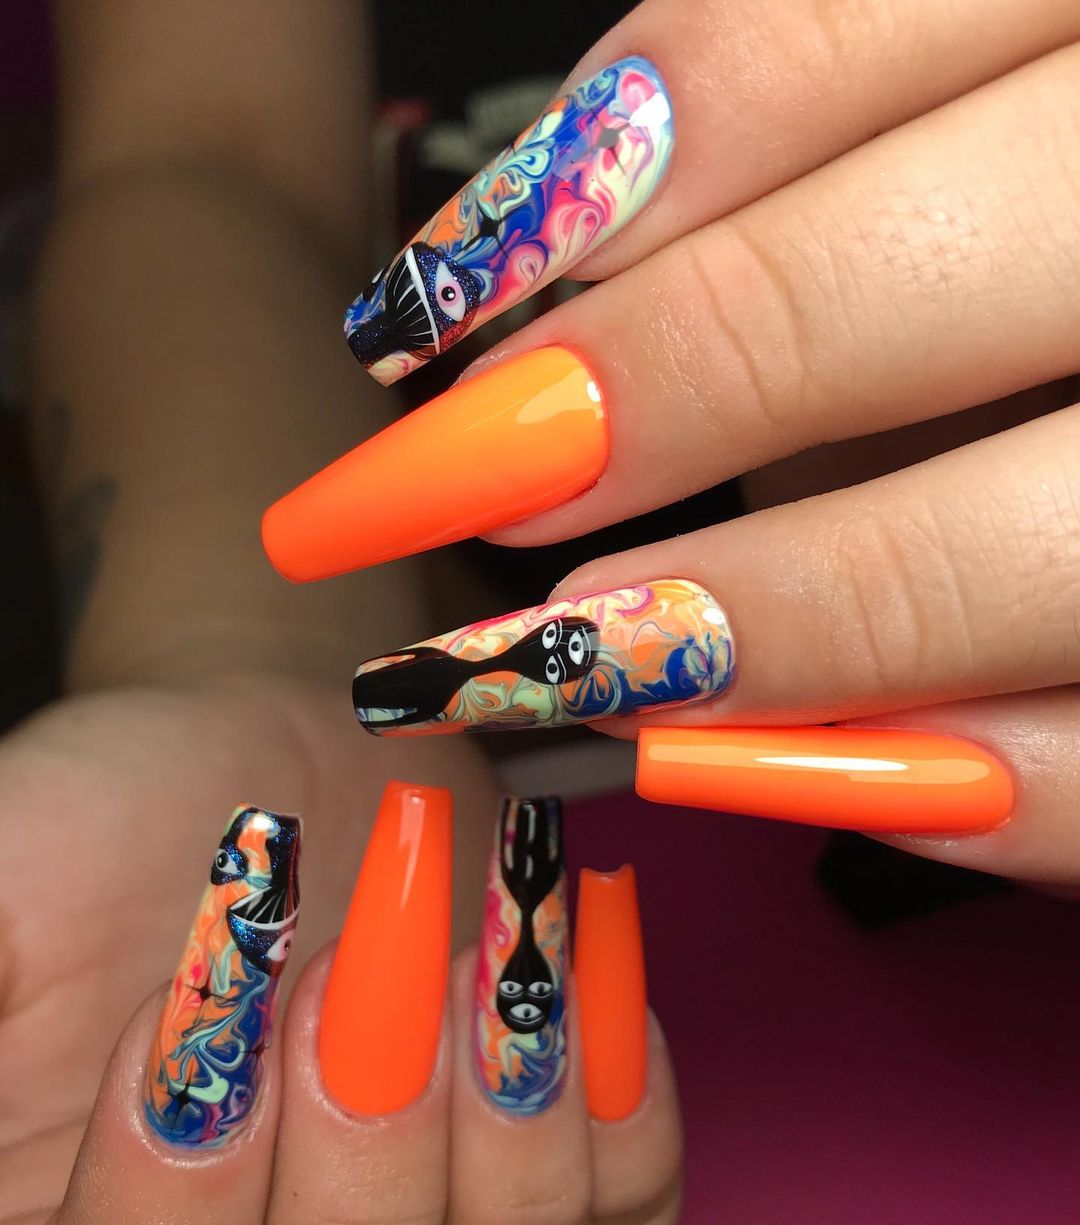
Vibrant Orange and Psychedelic Cat Designs
For a bold and eye-catching look, try this vibrant orange manicure combined with psychedelic cat designs. The bright orange base makes a statement on its own, but the addition of the intricate cat designs in swirling, colorful patterns takes this manicure to the next level of creativity.
Consumables:
- Bright orange nail polish (e.g., China Glaze Orange Knockout)
- White nail polish for base (e.g., OPI Alpine Snow)
- Assorted colorful nail art polishes (e.g., blue, pink, yellow)
- Fine detail brush
- Top coat (e.g., Sally Hansen Miracle Gel Top Coat)
Start by applying the bright orange polish to half of the nails and a white base to the rest. Once the white base is dry, use the fine detail brush and colorful polishes to create the psychedelic cat designs. Be creative with the patterns and colors to achieve a truly unique look. Seal the design with a top coat to ensure longevity and shine.
Exotic Snakeskin Nails with Gold Foil
This exotic nail design features a striking snakeskin pattern in shades of green and blue, highlighted by luxurious gold foil accents. The intricate detail and rich colors make this manicure an absolute standout, perfect for those who want to embrace the wild side of fall fashion.
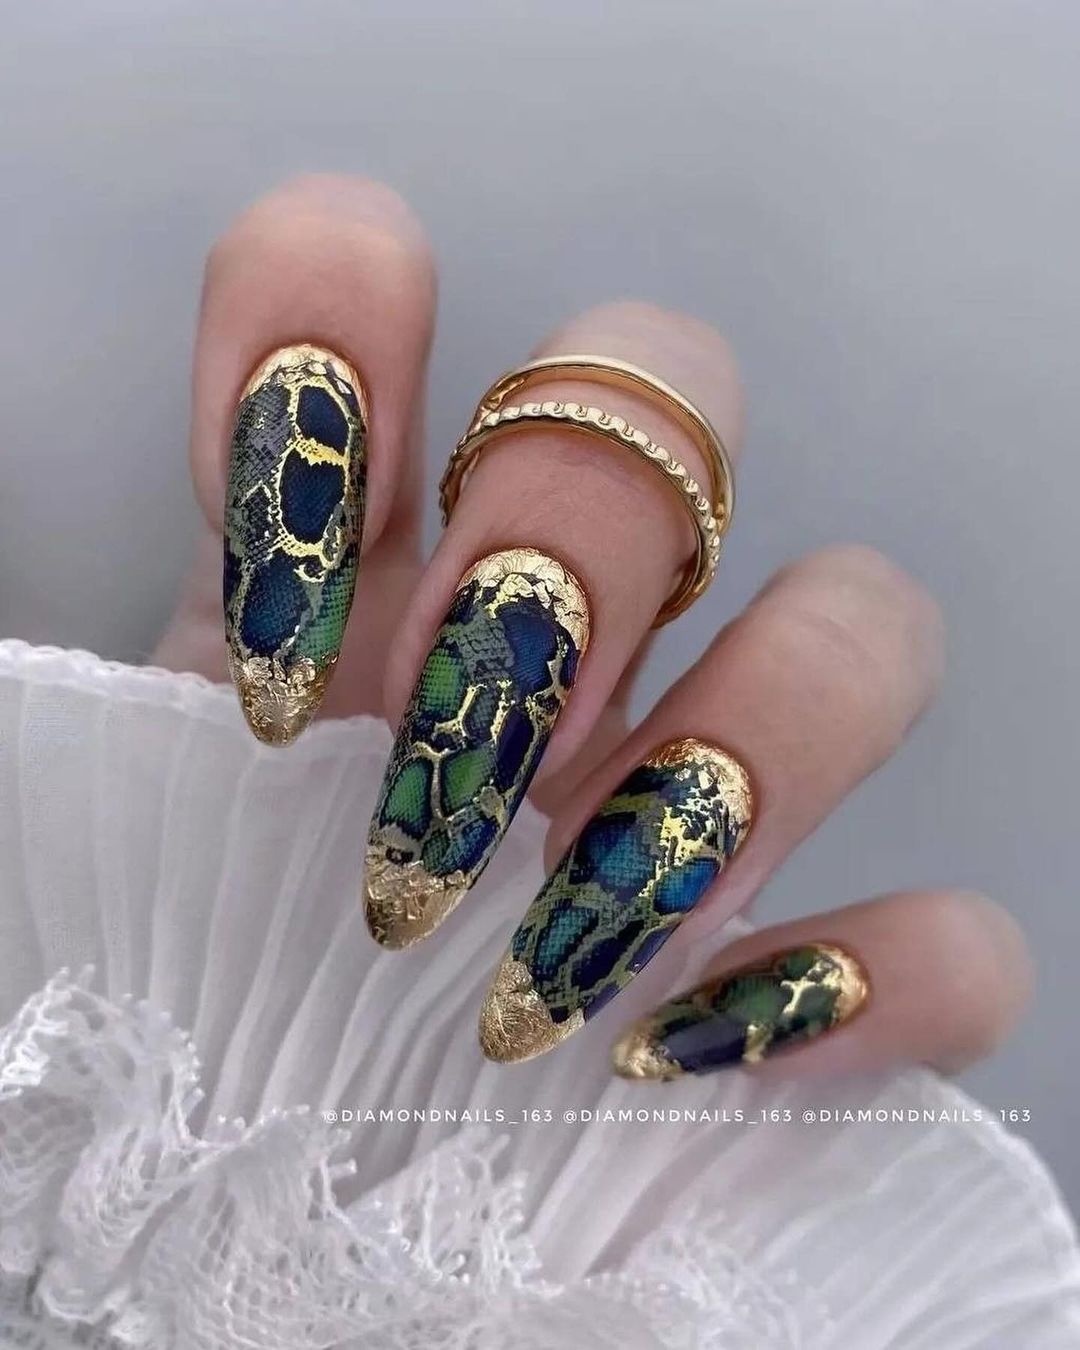
Consumables:
- Dark green and blue nail polish (e.g., OPI Stay Off the Lawn! and Essie Bell-Bottom Blues)
- Gold foil sheets
- Nail stamping plate with snakeskin pattern
- Black stamping polish
- Top coat (e.g., Seche Vite Dry Fast Top Coat)
To achieve this look, start by applying the base colors and letting them dry. Use the stamping plate and black stamping polish to create the snakeskin pattern on each nail. Apply the gold foil sheets on the edges for an opulent touch, then seal everything with a top coat to keep the design intact and shiny.
Spooky Ghosts and Black Cow Print
This fun and spooky design combines a chic black cow print with adorable ghost motifs, creating a playful yet stylish look for Halloween. The matte black and nude combination provides a perfect backdrop for the cute and spooky accents, making it an ideal choice for the autumn season.
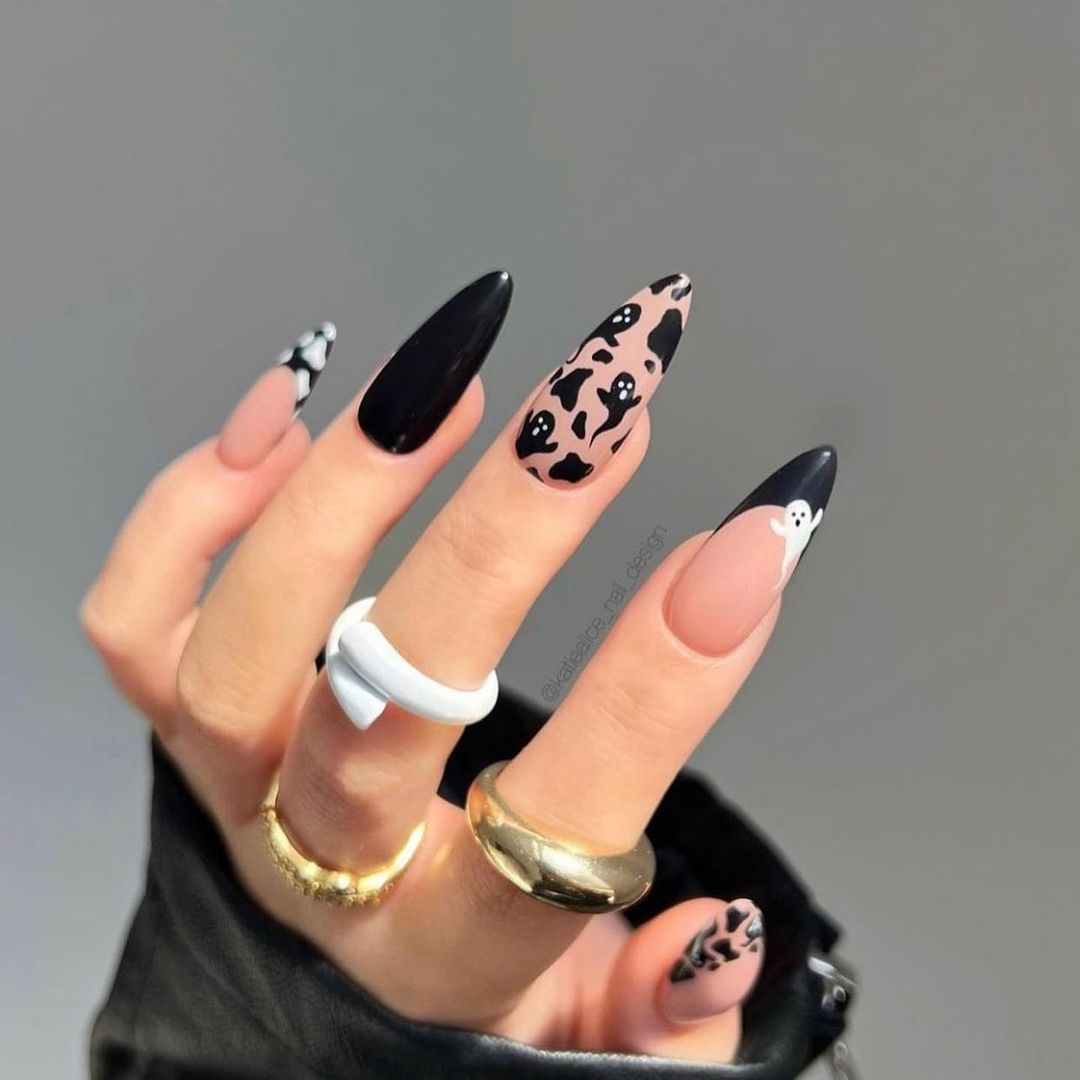
Consumables:
- Matte black nail polish (e.g., Essie Matte About You)
- Nude nail polish (e.g., OPI Bare My Soul)
- White nail polish for ghosts (e.g., Essie Blanc)
- Fine detail brush
- Top coat (e.g., Sally Hansen Miracle Gel Top Coat)
Begin by applying the nude and matte black polishes as your base. Use a fine detail brush to paint the ghost and cow print designs with the white and black polishes. Finish with a top coat to ensure the design lasts and maintains its sharp look.
Black and Nude Flame Design with Glitter
This captivating design features bold black flames over a nude base, accented with sparkling glitter. The dramatic contrast between the black flames and nude polish creates a fierce and modern look, perfect for those who want to add some edge to their autumn manicure.
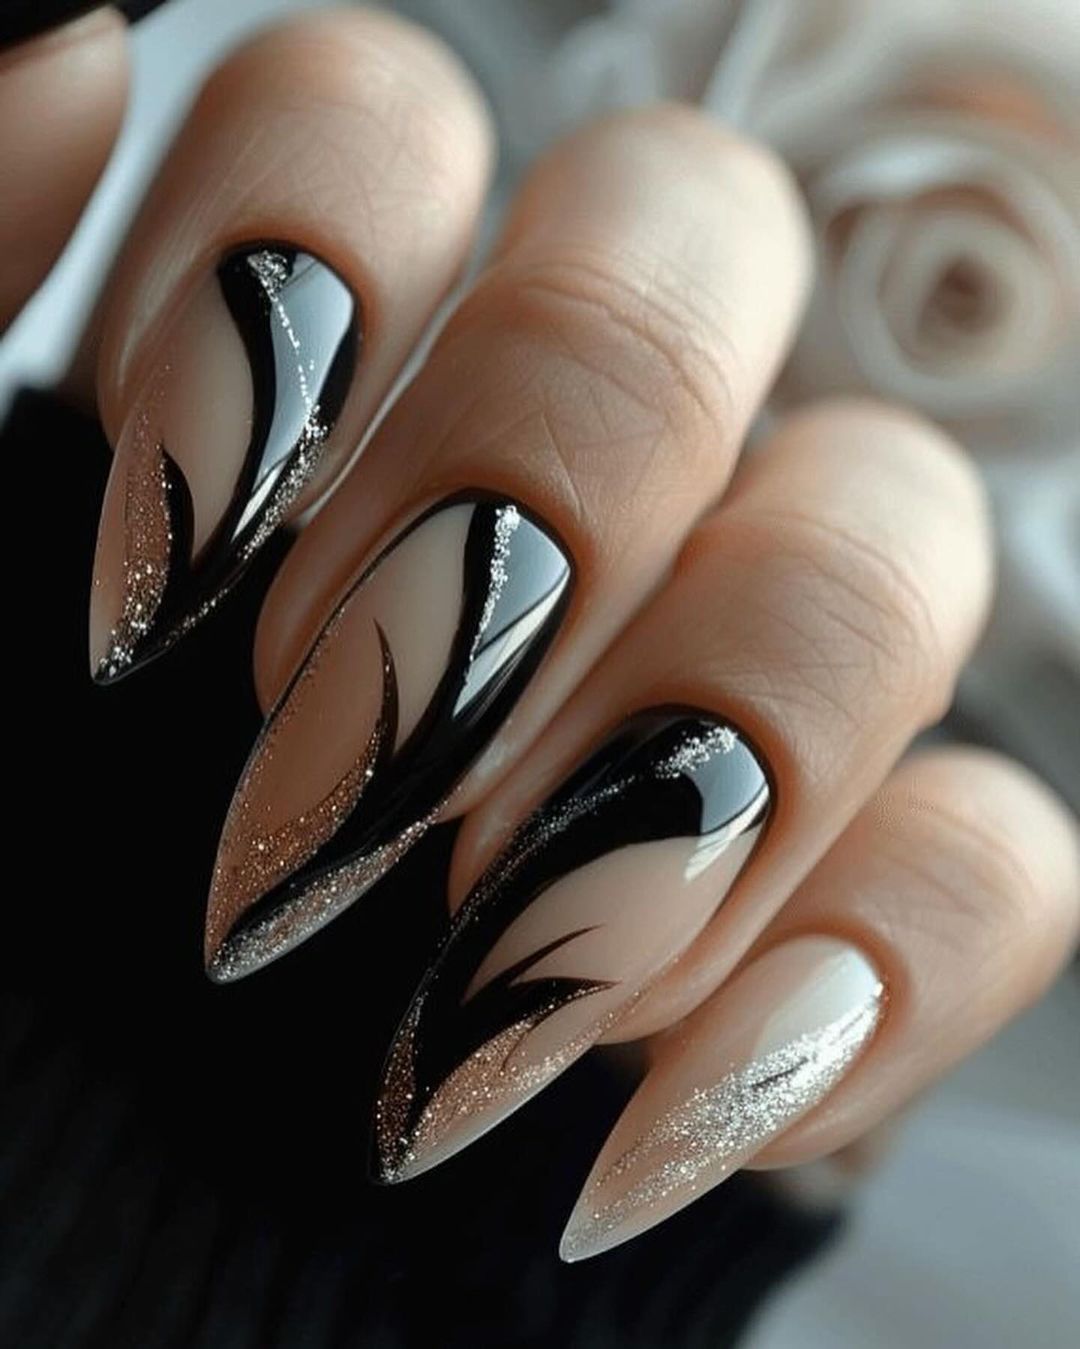
Consumables:
- Nude nail polish (e.g., OPI Samoan Sand)
- Black nail polish (e.g., Essie Licorice)
- Silver glitter polish (e.g., China Glaze Fairy Dust)
- Fine nail art brush
- Top coat (e.g., Seche Vite Dry Fast Top Coat)
Start with a nude base and let it dry. Using the fine nail art brush, paint black flames starting from the tips of your nails. Add a touch of silver glitter to the tips and flames for a sparkling effect. Seal the design with a top coat to ensure longevity and shine.
Save Pin
Chic Tortoiseshell and Gold Nails
This chic manicure combines the timeless tortoiseshell pattern with a luxurious gold polish, creating a sophisticated and elegant look. The mix of warm brown tones and shiny gold makes this design perfect for the autumn season, adding a touch of glamour to your nails.
Consumables:
- Tortoiseshell nail polish (e.g., OPI Amber Tortoise)
- Gold nail polish (e.g., Essie Good as Gold)
- Fine detail brush
- Top coat (e.g., Sally Hansen Miracle Gel Top Coat)
Apply the tortoiseshell polish as your base and let it dry completely. Use the gold polish and a fine detail brush to add accents and patterns to the nails. Finish with a top coat to keep the design intact and add a glossy finish.
Pastel Blue and Pink with Floral Accents
This delicate design features a soft pastel blue and pink base with tiny floral accents, creating a sweet and feminine look. The subtle colors and cute floral details make this manicure perfect for those who love a more understated yet charming autumn style.
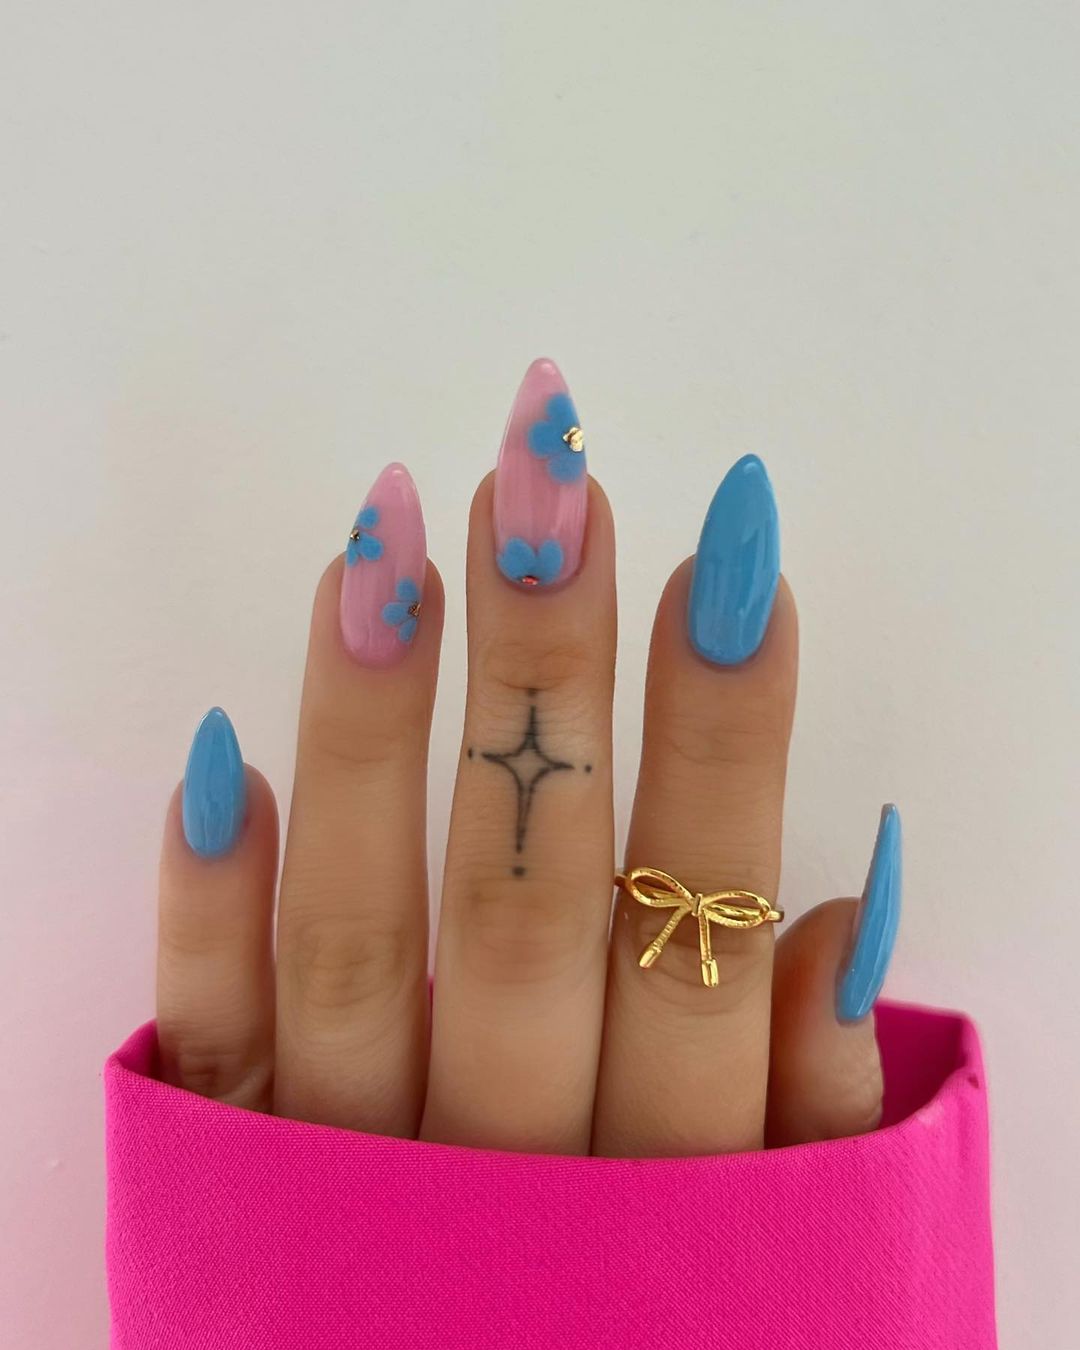
Consumables:
- Pastel blue and pink nail polish (e.g., Essie Bikini So Teeny and OPI Mod About You)
- White and yellow nail polish for flowers (e.g., Essie Blanc and OPI Need Sunglasses?)
- Fine detail brush
- Top coat (e.g., Seche Vite Dry Fast Top Coat)
Begin with alternating pastel blue and pink polishes on each nail. Once dry, use a fine detail brush to paint small flowers with white and yellow polishes. Seal the design with a top coat to ensure it lasts and shines.
Nude and Silver Waves
This elegant design features a nude base with flowing silver wave accents, creating a graceful and sophisticated look. The combination of the soft nude and shimmering silver makes this manicure ideal for any autumn occasion, adding a touch of class to your style.
Consumables:
- Nude nail polish (e.g., OPI Tiramisu for Two)
- Silver nail polish (e.g., Essie No Place Like Chrome)
- Fine detail brush
- Top coat (e.g., Sally Hansen Miracle Gel Top Coat)
Apply the nude polish as your base and allow it to dry completely. Using a fine detail brush, paint silver waves starting from the edges of your nails. Finish with a top coat to secure the design and add a beautiful shine.
Mirror Chrome Nails
This striking design features mirror chrome nails that exude a futuristic and sleek vibe. The reflective surface is eye-catching and sophisticated, making it perfect for a standout fall manicure. The silver chrome effect provides a versatile look that can match any outfit and occasion.
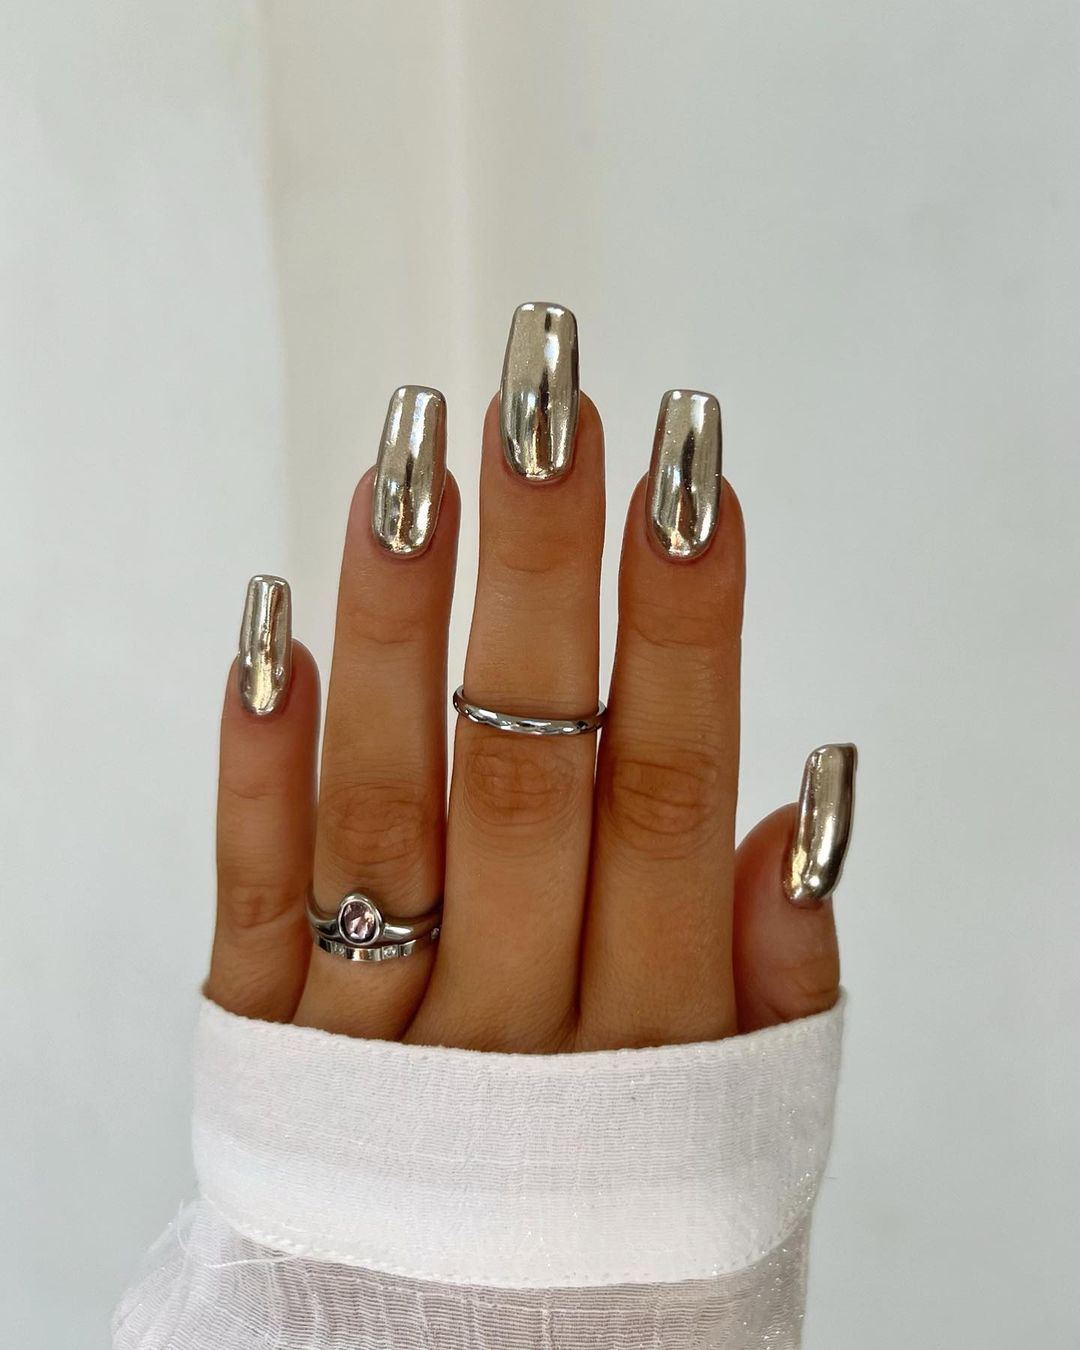
Consumables:
- Chrome nail powder (e.g., Born Pretty Chrome Powder)
- Black gel polish (e.g., Gelish Black Shadow)
- UV/LED lamp
- No-wipe top coat (e.g., Kiara Sky No Wipe Top Coat)
- Applicator sponge
Start by applying the black gel polish as a base and curing it under the UV/LED lamp. Apply the no-wipe top coat and cure it again. Using an applicator sponge, rub the chrome powder onto the nails until the desired mirror effect is achieved. Finish with another layer of no-wipe top coat and cure it to secure the design.
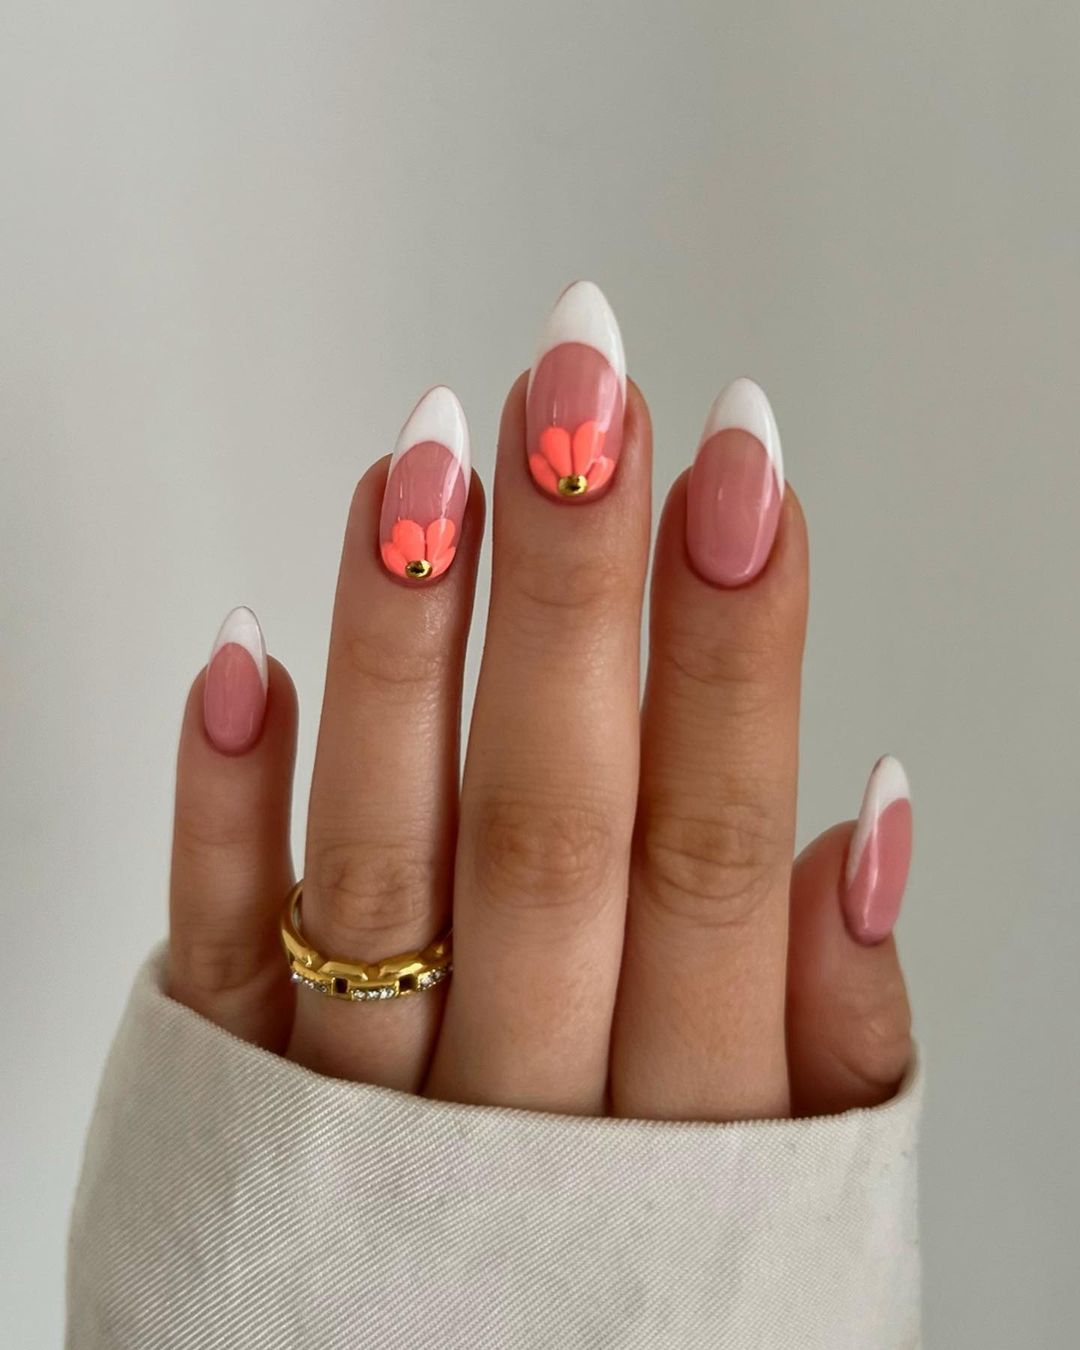
French Tips with Floral Accents
This elegant design combines classic French tips with a playful twist of floral accents. The soft pink base and white tips create a timeless look, while the addition of delicate flowers adds a touch of charm and femininity, perfect for a subtle yet beautiful autumn manicure.
Consumables:
- Soft pink nail polish (e.g., Essie Ballet Slippers)
- White nail polish for tips (e.g., OPI Alpine Snow)
- Pink and yellow polish for flowers (e.g., Essie Cute as a Button and OPI Need Sunglasses?)
- Fine detail brush
- Top coat (e.g., Sally Hansen Miracle Gel Top Coat)
Begin by applying the soft pink polish as a base and letting it dry. Use the white polish to create the French tips. Once dry, use a fine detail brush to paint the flowers with the pink and yellow polishes. Finish with a top coat to seal the design and add a glossy finish.
Abstract Color Block Nails
This vibrant design features bold color blocks in bright and contrasting hues, creating a playful and artistic look. The mix of orange, blue, green, and white with abstract patterns makes this manicure a fun choice for those who love to experiment with their nail designs.
Consumables:
- Orange, blue, green, and white nail polishes (e.g., Essie Meet Me at Sunset, China Glaze For Audrey, OPI Jade is the New Black, and Essie Blanc)
- Fine detail brush
- Top coat (e.g., Seche Vite Dry Fast Top Coat)
Apply each color in abstract blocks on the nails, allowing each layer to dry before adding the next. Use a fine detail brush to create sharp lines and patterns within the color blocks. Seal the design with a top coat for a smooth and shiny finish.
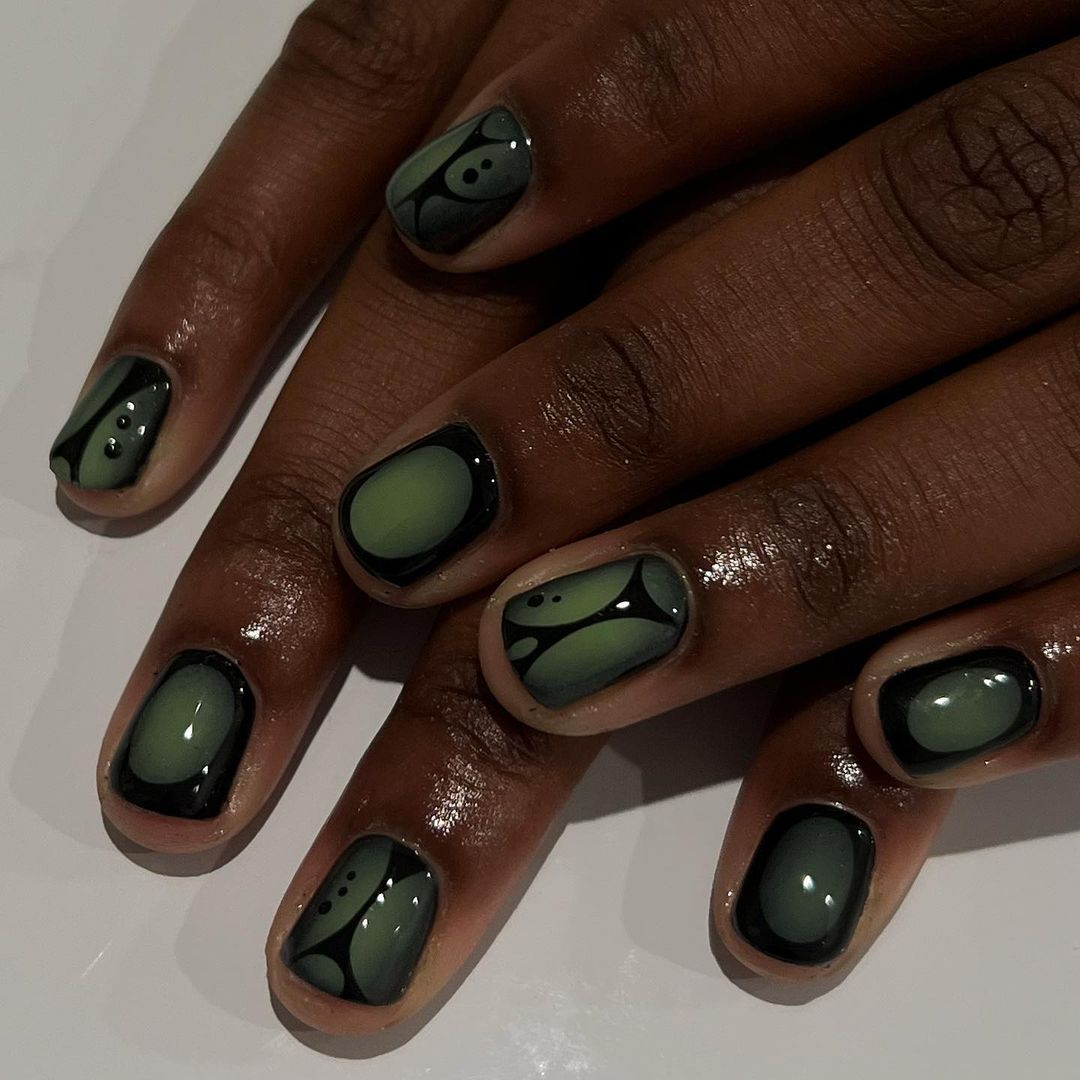
Green and Black Modern Art Nails
This sophisticated design features a mix of green and black with modern art-inspired patterns. The unique combination of shapes and colors gives this manicure an edgy and contemporary feel, perfect for making a bold statement this fall.
Consumables:
- Green and black nail polishes (e.g., Essie Off Tropic and Essie Licorice)
- Dotting tool
- Fine detail brush
- Top coat (e.g., Sally Hansen Miracle Gel Top Coat)
Start by applying the green polish as a base and let it dry. Use the black polish and a fine detail brush to create modern art-inspired shapes and patterns on each nail. Use a dotting tool to add small details. Finish with a top coat to secure the design and add a glossy finish.
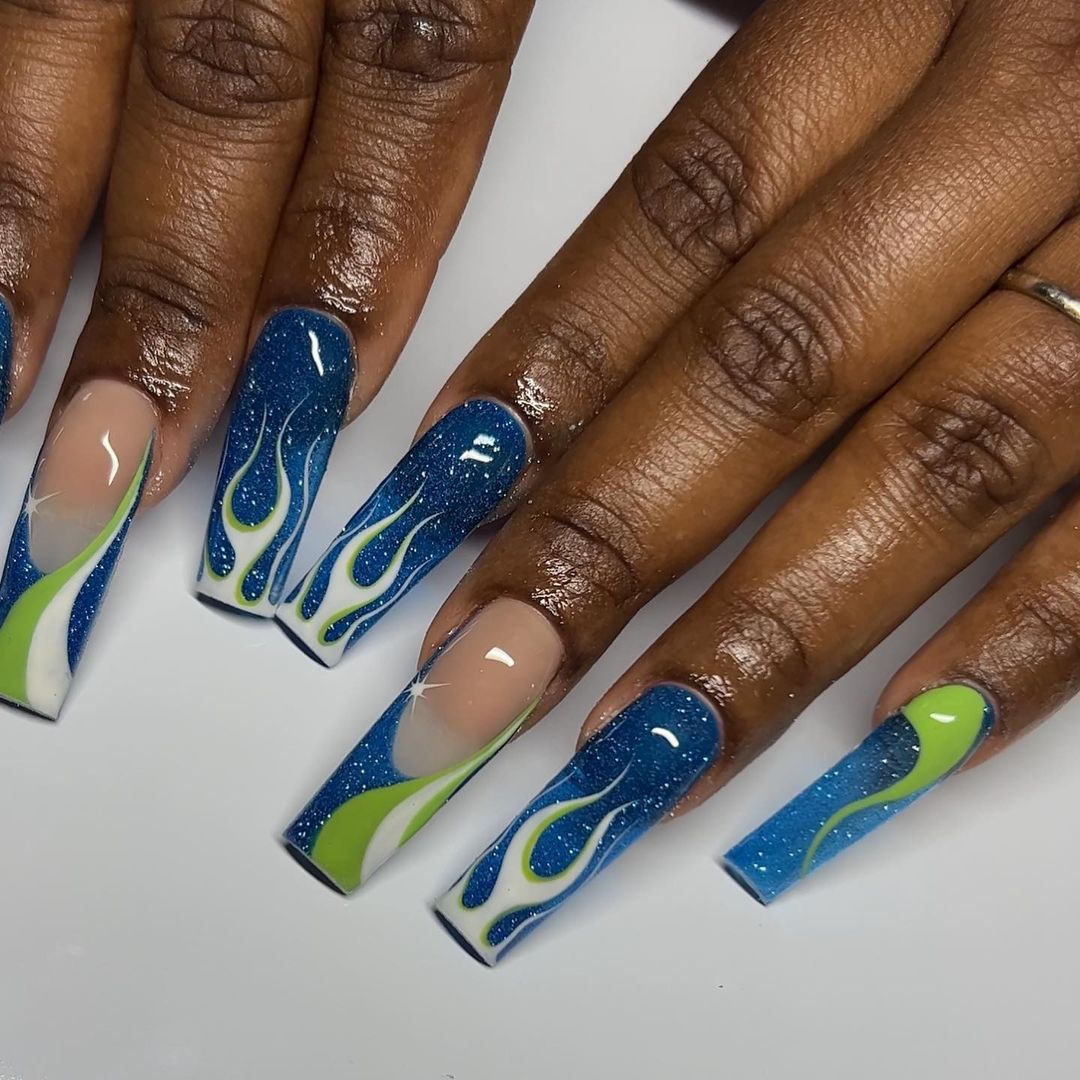
Blue and Green Flame Nails
This striking design features bold blue and green flames over a glittery blue base. The vibrant colors and dynamic flame patterns create a dramatic and eye-catching look, perfect for those who love a bold autumn manicure.
Consumables:
- Blue glitter polish (e.g., China Glaze Dorothy Who?)
- Green and white polishes for flames (e.g., OPI Need Sunglasses? and Essie Blanc)
- Fine detail brush
- Top coat (e.g., Seche Vite Dry Fast Top Coat)
Apply the blue glitter polish as a base and let it dry. Using a fine detail brush, paint the green and white flames starting from the tips of your nails. Seal the design with a top coat to ensure longevity and add a beautiful shine.
Gradient Pastel Nails with Star Accents
This dreamy design features a gradient of pastel colors with delicate star accents. The soft transitions between pink, green, and blue create a calming and ethereal look, while the star details add a touch of whimsy and magic, perfect for a cute fall manicure.
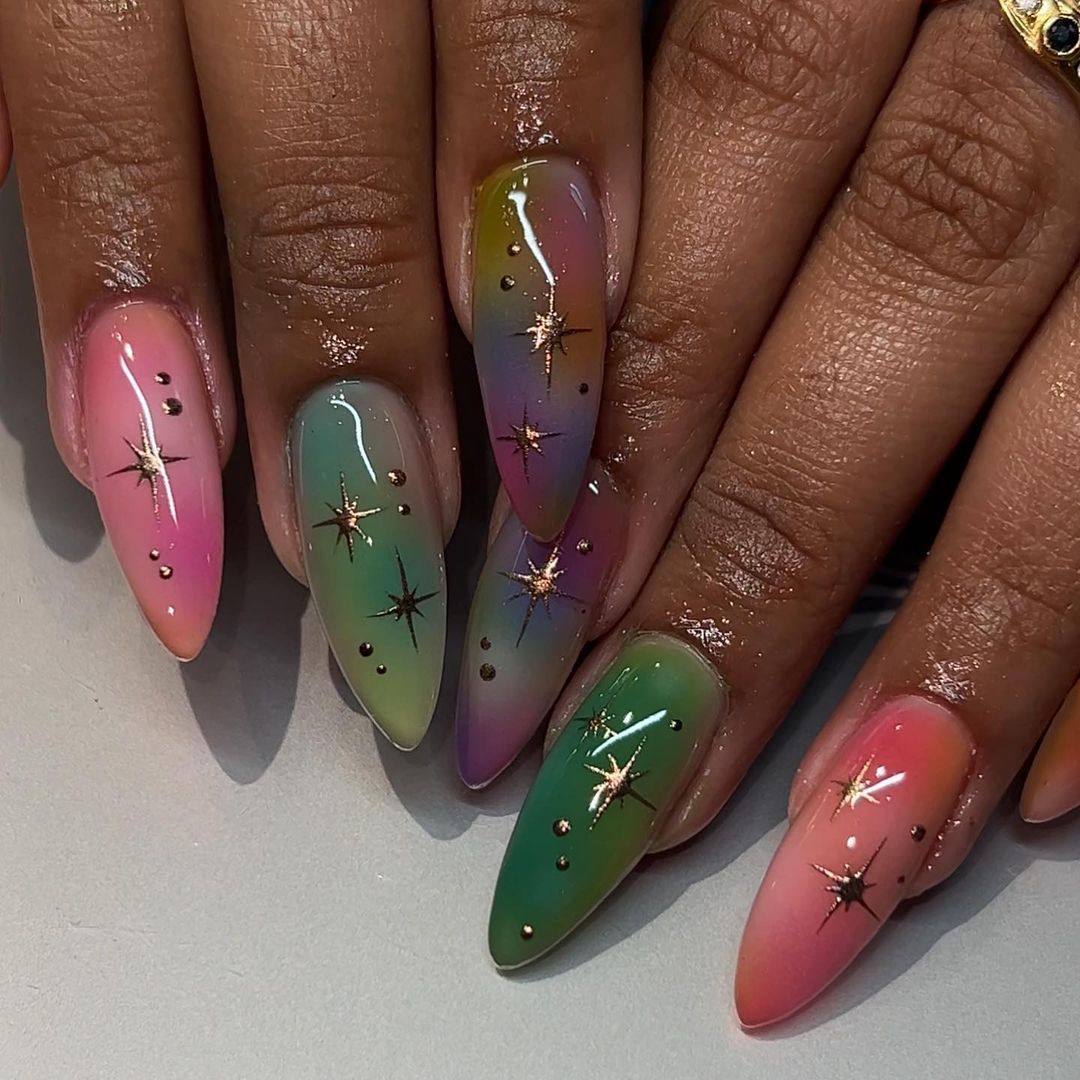
Consumables:
- Pastel pink, green, and blue polishes (e.g., Essie Fiji, Zoya Blu, and OPI That’s Hula-rious!)
- Gold star decals or stickers
- Makeup sponge for gradient
- Top coat (e.g., Sally Hansen Miracle Gel Top Coat)
Start by applying a white base coat to help the pastel colors pop. Using a makeup sponge, create the gradient effect by applying the pastel colors in layers. Once dry, add the gold star decals or stickers for a magical touch. Seal the design with a top coat to keep the decals in place and add a glossy finish.
Shimmering Brown Stiletto Nails with Silver Accents
This design features stunning stiletto nails in a rich, shimmering brown shade, complemented by subtle silver accents. The elongated shape and deep hue create a sophisticated and glamorous look, perfect for the fall season. The small silver embellishments add a touch of elegance and intrigue to the overall design.
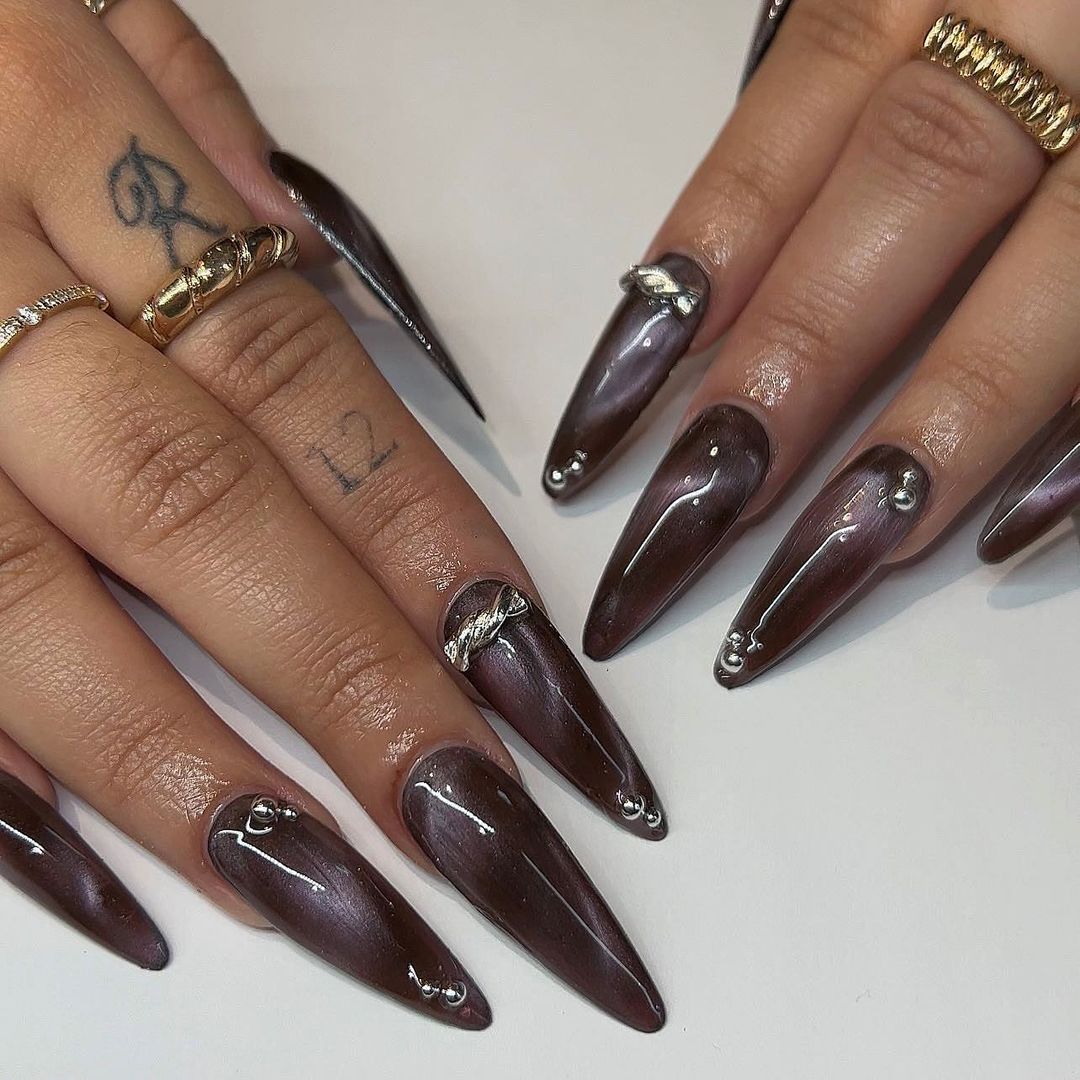
Consumables:
- Shimmering brown nail polish (e.g., OPI Chocolate Moose)
- Silver nail studs and charms
- Fine detail brush
- Top coat (e.g., Seche Vite Dry Fast Top Coat)
Apply the shimmering brown polish as your base and let it dry. Use nail glue to carefully place the silver studs and charms on each nail, arranging them in a visually appealing manner. Seal the design with a top coat to ensure durability and a glossy finish.
Matte Red Nails with Tiny Floral Details
This lovely design features a matte red base adorned with tiny floral details, creating a charming and feminine look. The rich red color is perfect for autumn, while the small flowers add a delicate touch that enhances the overall appeal.
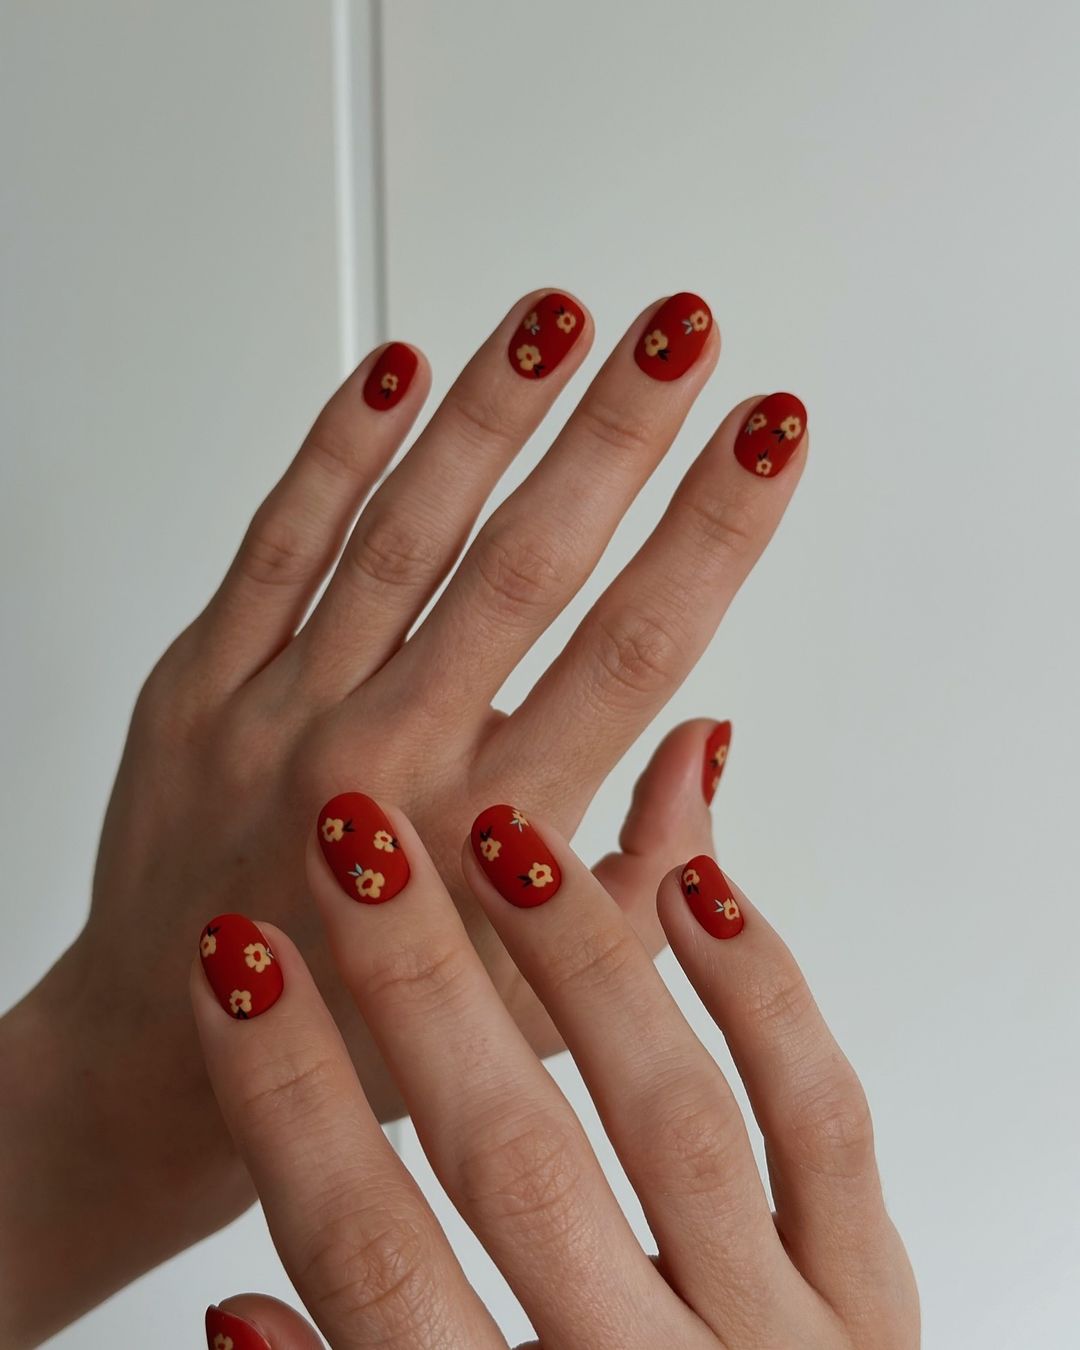
Consumables:
- Matte red nail polish (e.g., Essie Russian Roulette with matte top coat)
- Yellow and white polish for flowers (e.g., OPI Need Sunglasses? and Essie Blanc)
- Fine detail brush
- Top coat (optional for matte)
Start by applying the matte red polish and allowing it to dry. Use a fine detail brush to paint the tiny flowers with the yellow and white polishes. If you prefer a completely matte finish, skip the top coat. Otherwise, apply a matte top coat to seal the design.
Grey Nails with Tiny Yellow Hearts
This cute design features a soft grey base with tiny yellow heart accents, creating a subtle yet playful look. The muted grey provides a perfect backdrop for the cheerful yellow hearts, making this manicure ideal for adding a touch of whimsy to your fall look.
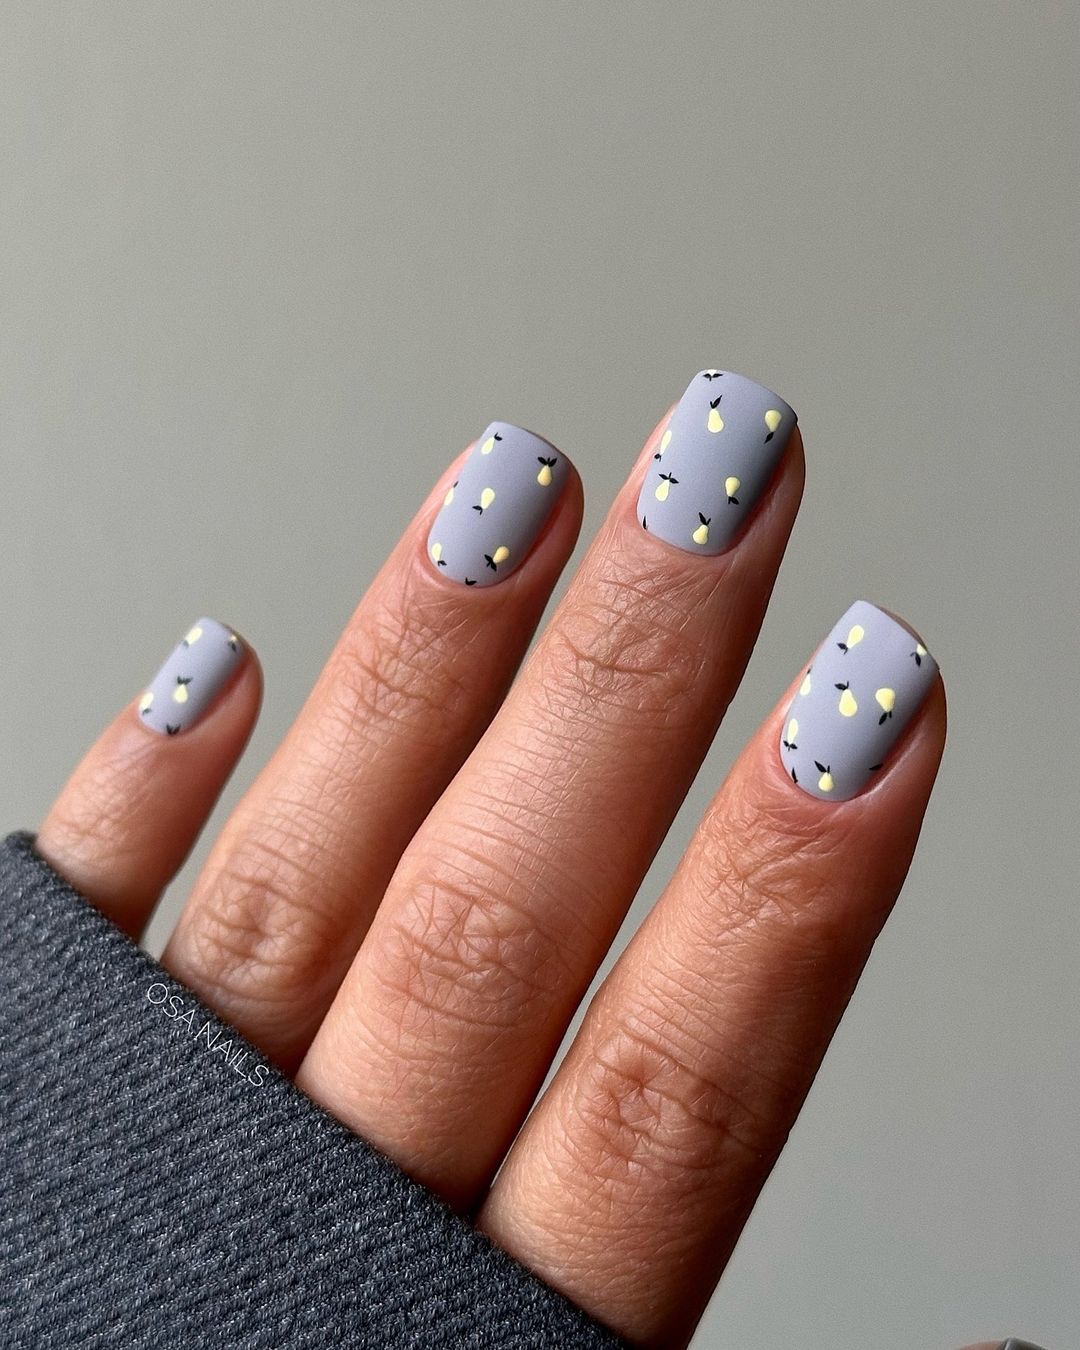
Consumables:
- Grey nail polish (e.g., Essie Chinchilly)
- Yellow polish for hearts (e.g., OPI I Just Can’t Cope-acabana)
- Fine detail brush
- Top coat (e.g., Seche Vite Dry Fast Top Coat)
Apply the grey polish as your base and let it dry completely. Use a fine detail brush to paint the tiny yellow hearts on each nail. Finish with a top coat to secure the design and add a glossy finish.
Matte Black Nails with Tiny Heart Accents
This sleek and stylish design features matte black nails with tiny heart accents, creating a modern and minimalist look. The matte finish adds a touch of sophistication, while the small hearts provide a cute and subtle detail.
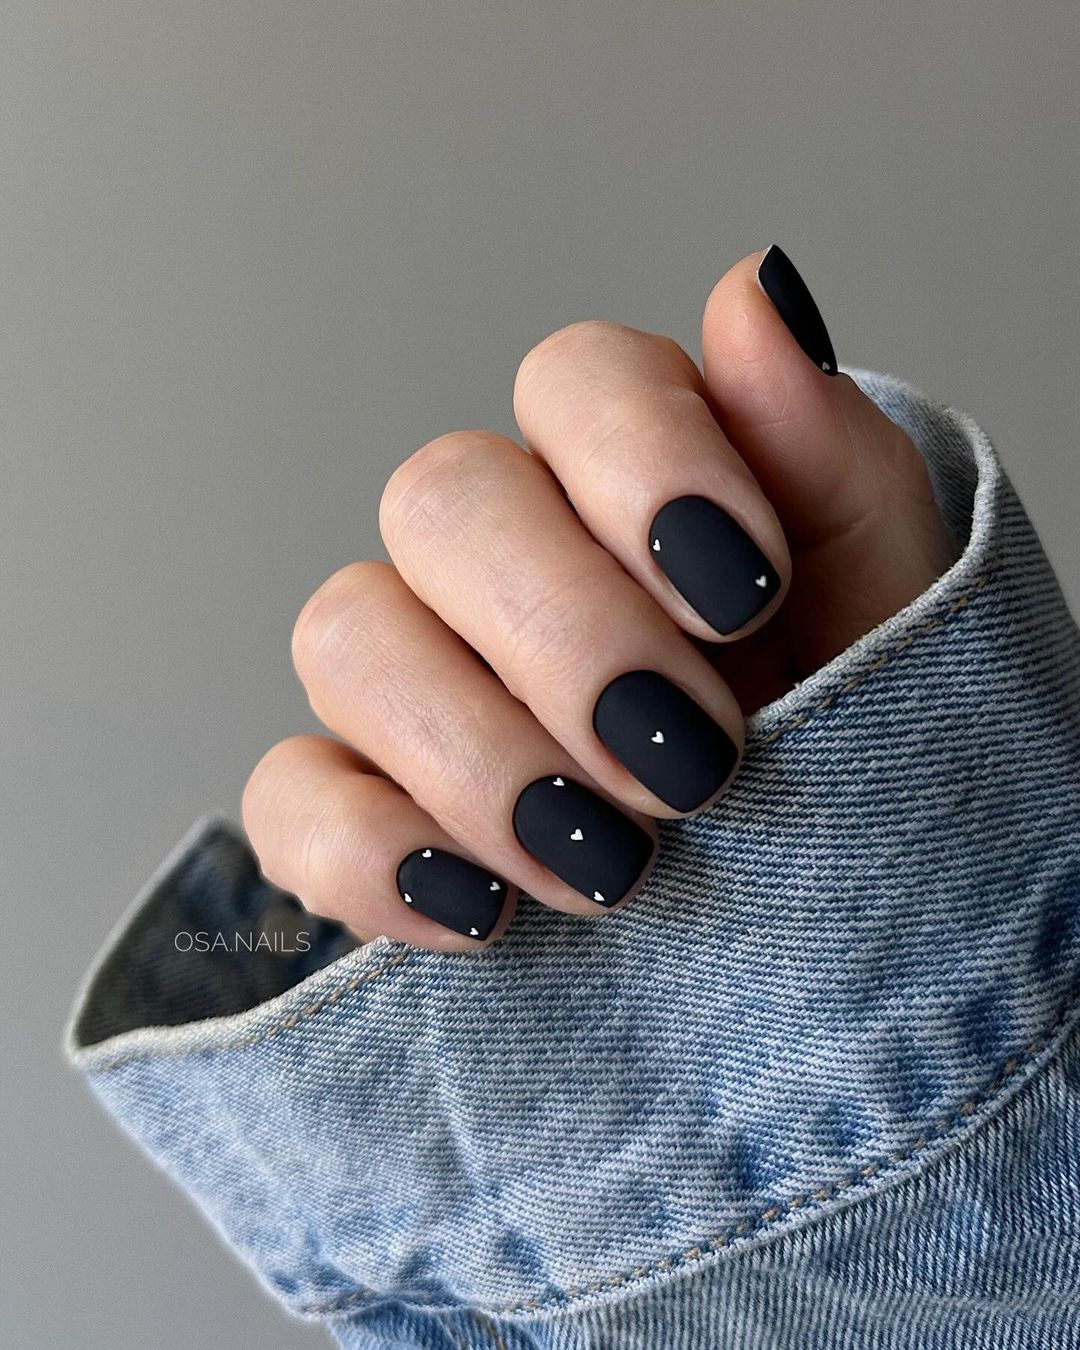
Consumables:
- Matte black nail polish (e.g., Essie Licorice with matte top coat)
- White polish for hearts (e.g., Essie Blanc)
- Fine detail brush
- Top coat (optional for matte)
Start by applying the matte black polish and letting it dry. Use a fine detail brush to paint the tiny hearts with the white polish. If you prefer a completely matte finish, skip the top coat. Otherwise, apply a matte top coat to seal the design.
Minimalist Nude Nails with Tiny Red Rose Accents
This elegant and minimalist design features nude nails adorned with tiny red rose accents, creating a subtle and sophisticated look. The nude base provides a clean and polished appearance, while the small roses add a touch of romance and charm.

Consumables:
- Nude nail polish (e.g., OPI Samoan Sand)
- Red and green polish for roses (e.g., Essie Really Red and OPI Green Come True)
- Fine detail brush
- Top coat (e.g., Seche Vite Dry Fast Top Coat)
Apply the nude polish as your base and let it dry completely. Use a fine detail brush to paint the tiny roses with the red and green polishes. Finish with a top coat to secure the design and add a glossy finish.
White Nails with Black Leaf Outlines
This sophisticated design features white nails with delicate black leaf outlines, creating a clean and stylish look. The crisp white base and intricate leaf details make this manicure perfect for a modern and elegant fall style.
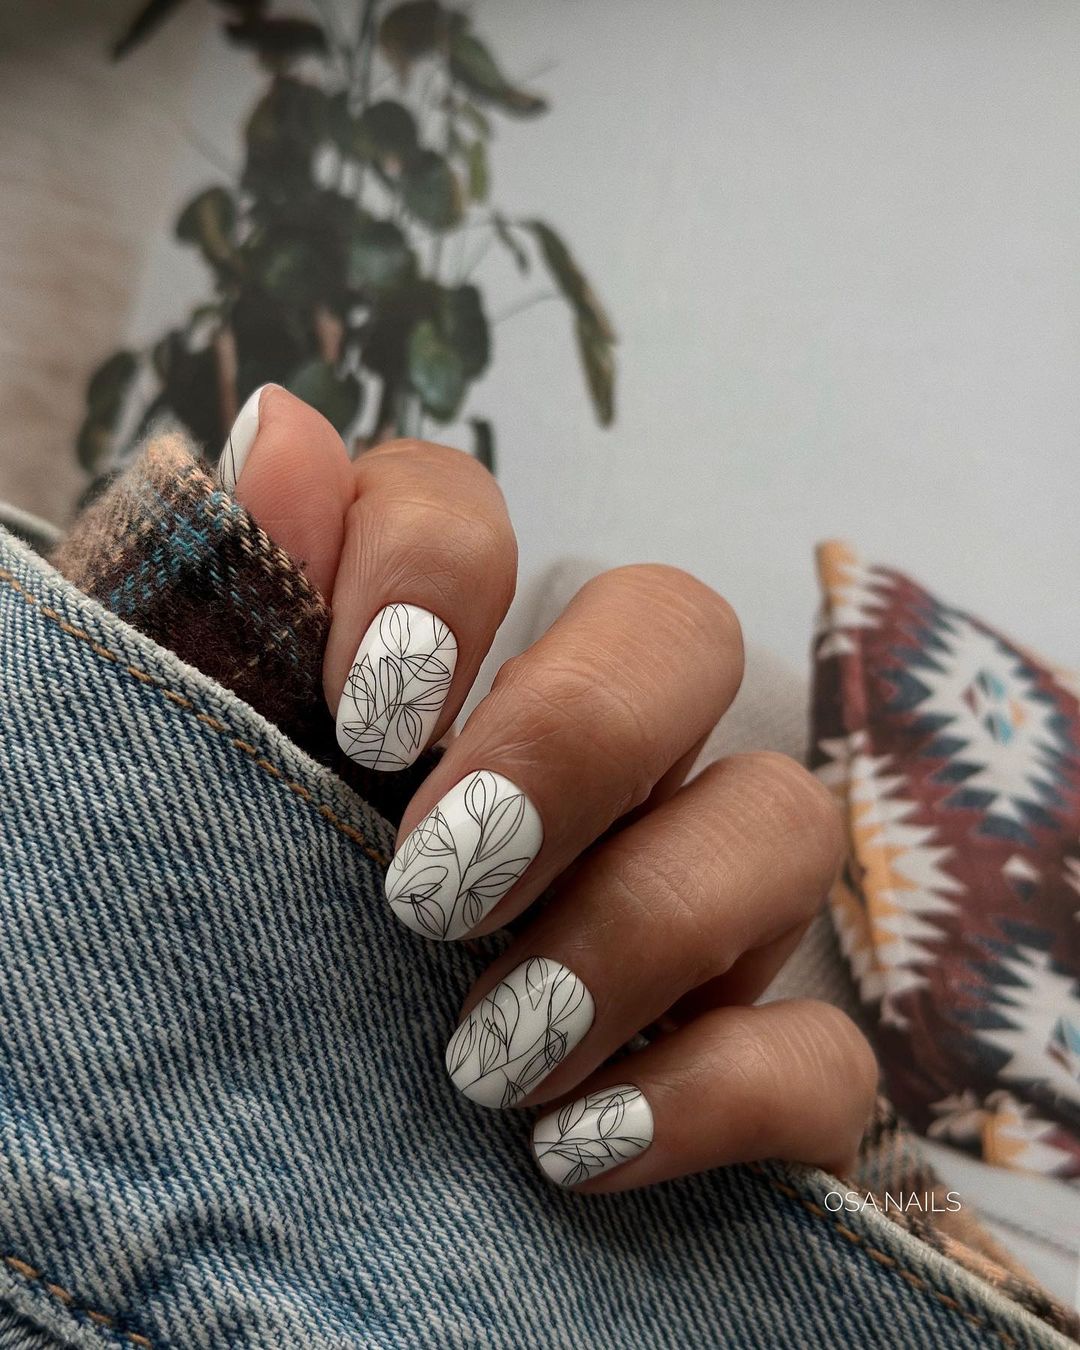
Consumables:
- White nail polish (e.g., Essie Blanc)
- Black polish for leaf outlines (e.g., OPI Black Onyx)
- Fine detail brush
- Top coat (e.g., Sally Hansen Miracle Gel Top Coat)
Start by applying the white polish and letting it dry completely. Use a fine detail brush to draw the leaf outlines with the black polish. Finish with a top coat to secure the design and add a glossy finish.
Yellow Nails with White Floral Accents
This cheerful design features bright yellow nails adorned with white floral accents, creating a sunny and playful look. The vibrant yellow color is perfect for adding a pop of brightness to your fall manicure, while the white flowers add a cute and charming touch.
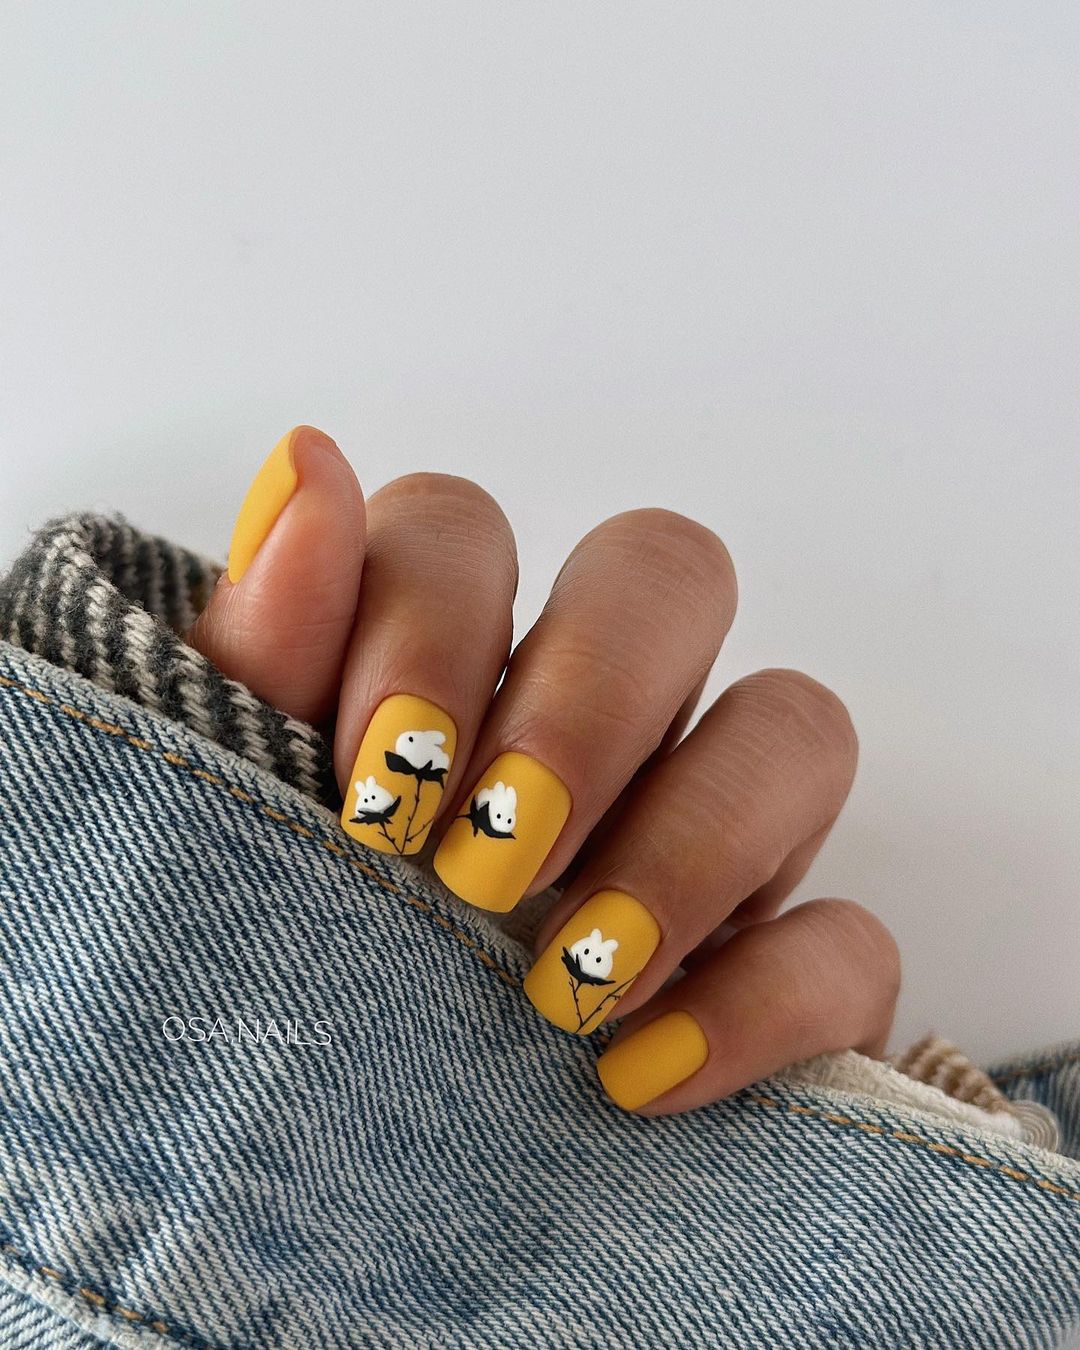
Consumables:
- Yellow nail polish (e.g., OPI I Just Can’t Cope-acabana)
- White polish for flowers (e.g., Essie Blanc)
- Fine detail brush
- Top coat (e.g., Seche Vite Dry Fast Top Coat)
Apply the yellow polish as your base and let it dry completely. Use a fine detail brush to paint the white flowers on each nail. Finish with a top coat to secure the design and add a glossy finish.
FAQ
- How do I make my fall nail designs last longer?
- Answer: To make your fall nail designs last longer, always start with a good base coat, use high-quality nail polishes, and seal your design with a durable top coat. Avoid exposing your nails to harsh chemicals and wear gloves when doing household chores.
- Can I recreate these designs on short nails?
- Answer: Absolutely! These designs can be adapted for short nails. Just make sure to adjust the size and scale of the details to fit your nail length.
- What is the best way to remove intricate nail designs?
- Answer: Use an acetone-based nail polish remover with a cotton pad. For stubborn designs, soak your nails in the remover for a few minutes before wiping off. This helps to break down the polish and makes removal easier.
Save Pin