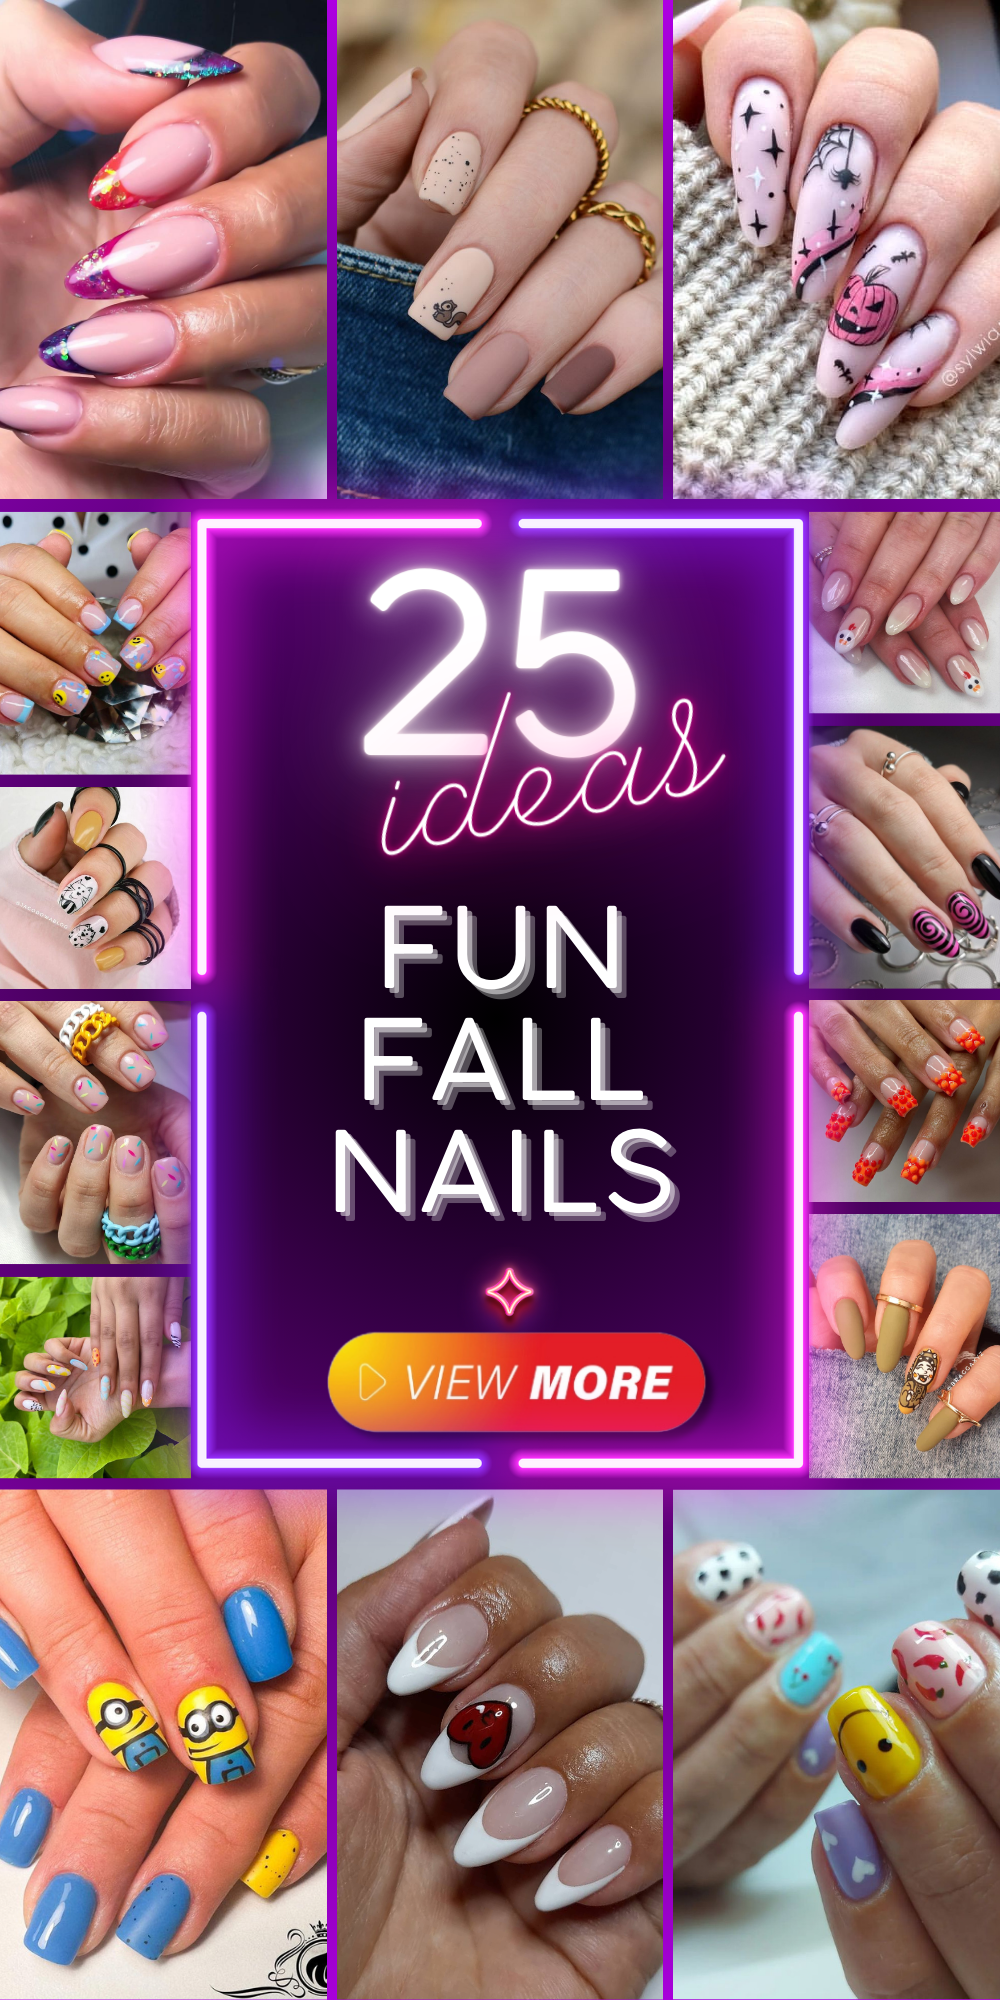
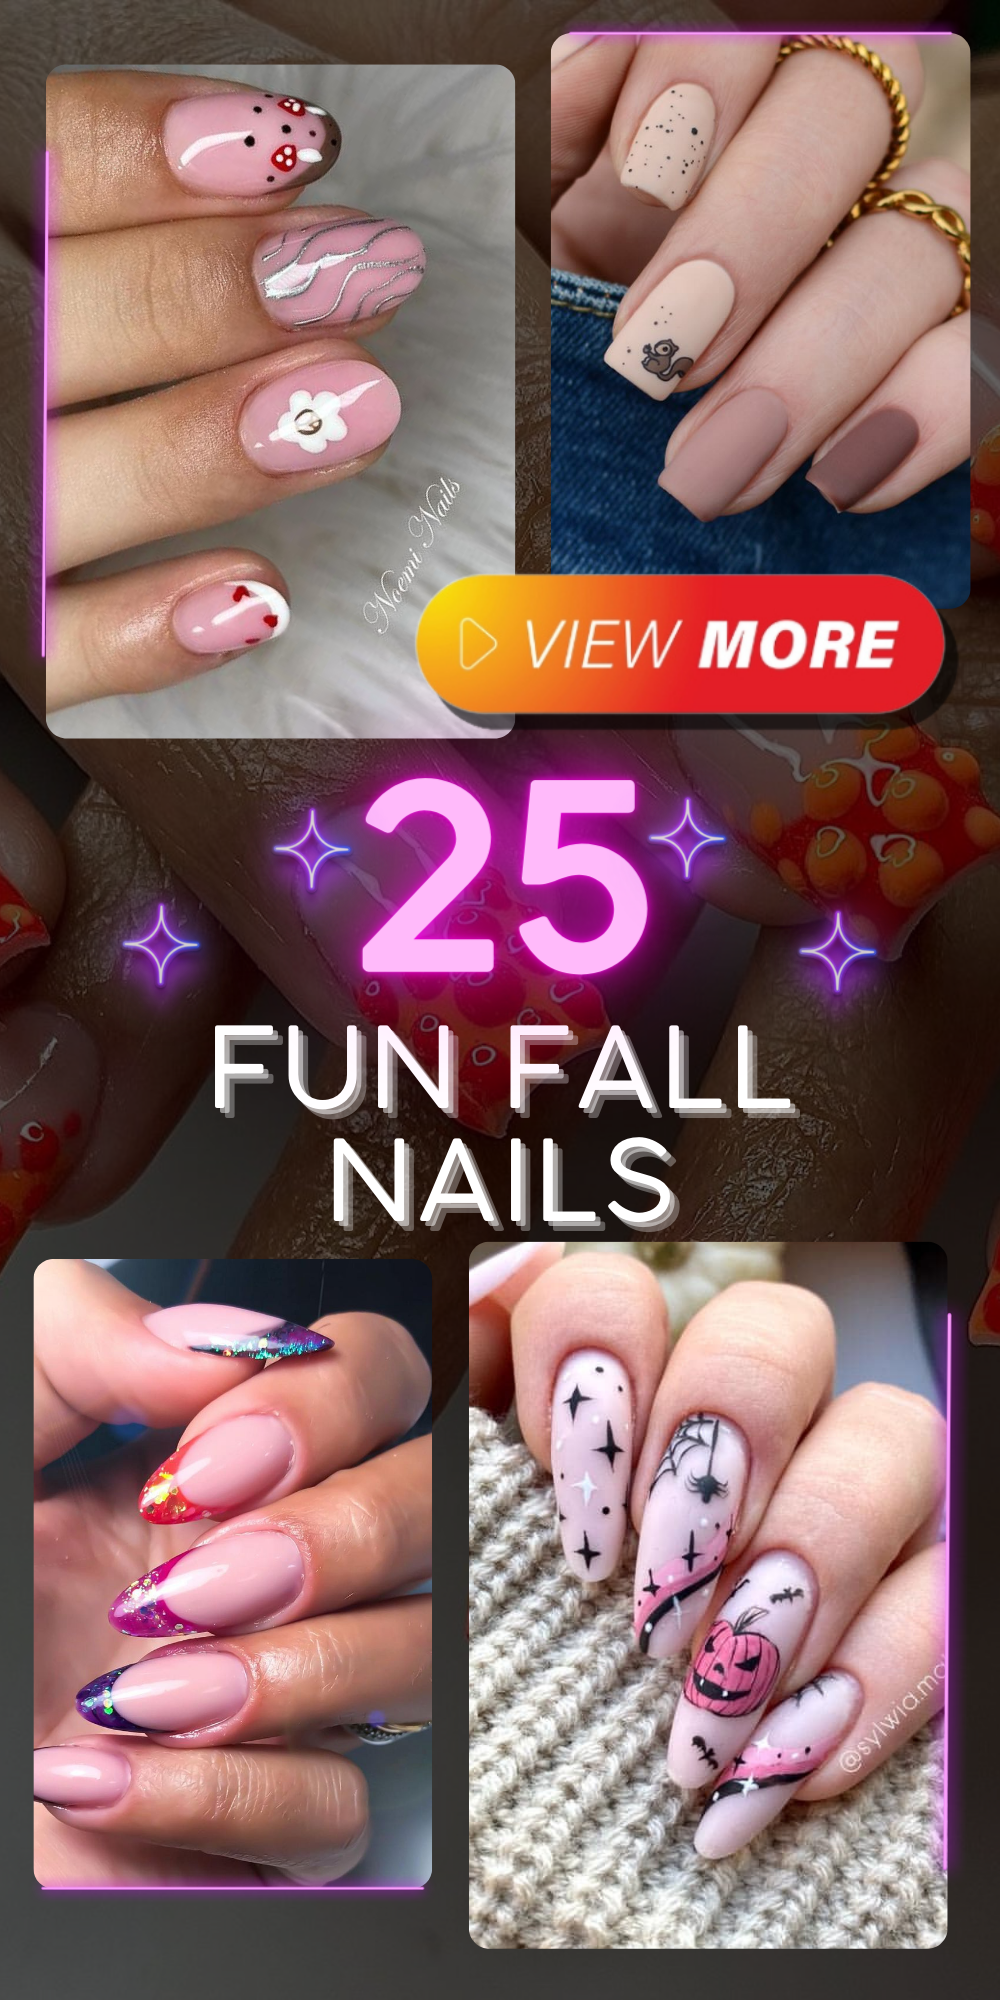
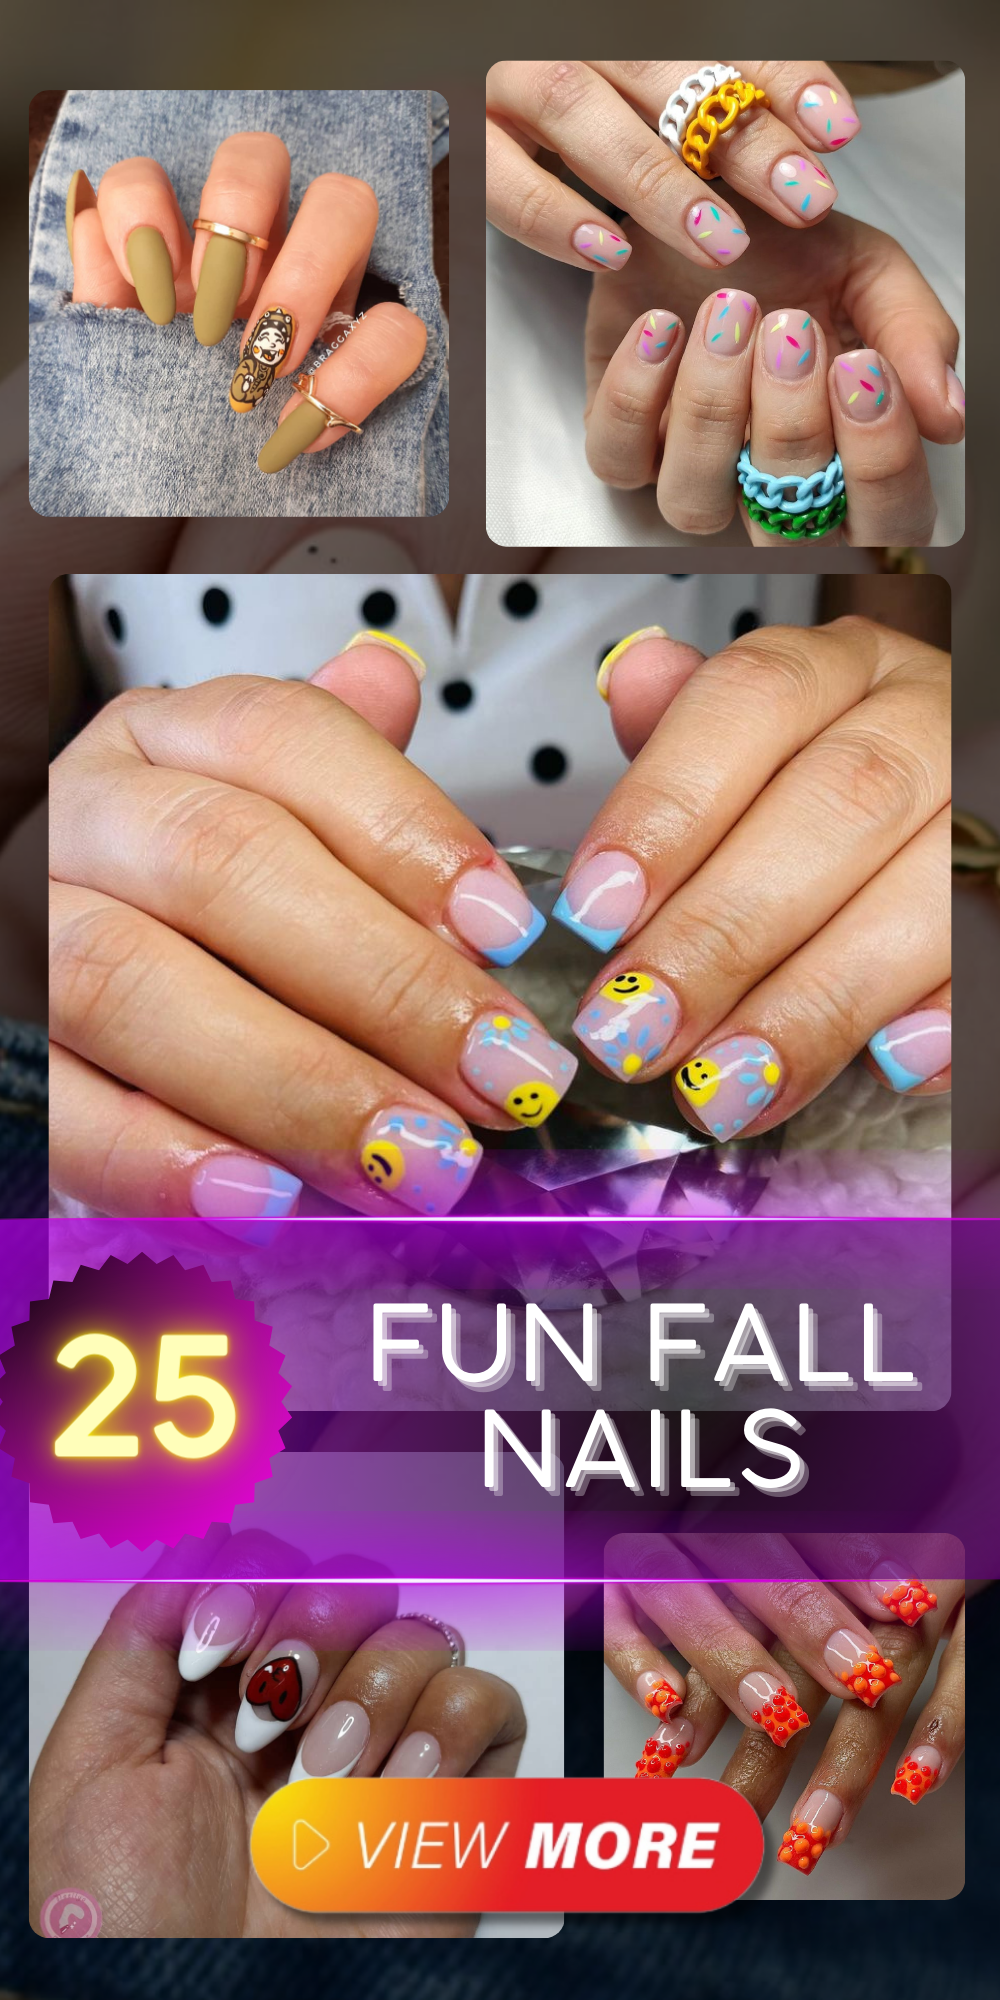
When the leaves start to turn and the air gets crisp, it’s the perfect time to update your nail game with some fresh, fun fall designs. From playful patterns to sophisticated accents, fall nail art offers endless opportunities to showcase your creativity. Whether you’re a fan of cute characters, bold colors, or elegant details, there’s a fall nail design that’s perfect for you. In this article, we’ll explore a variety of nail art ideas that are sure to inspire your next manicure. Get ready to dive into a world of autumn-inspired creativity and discover designs that will make your nails the highlight of the season
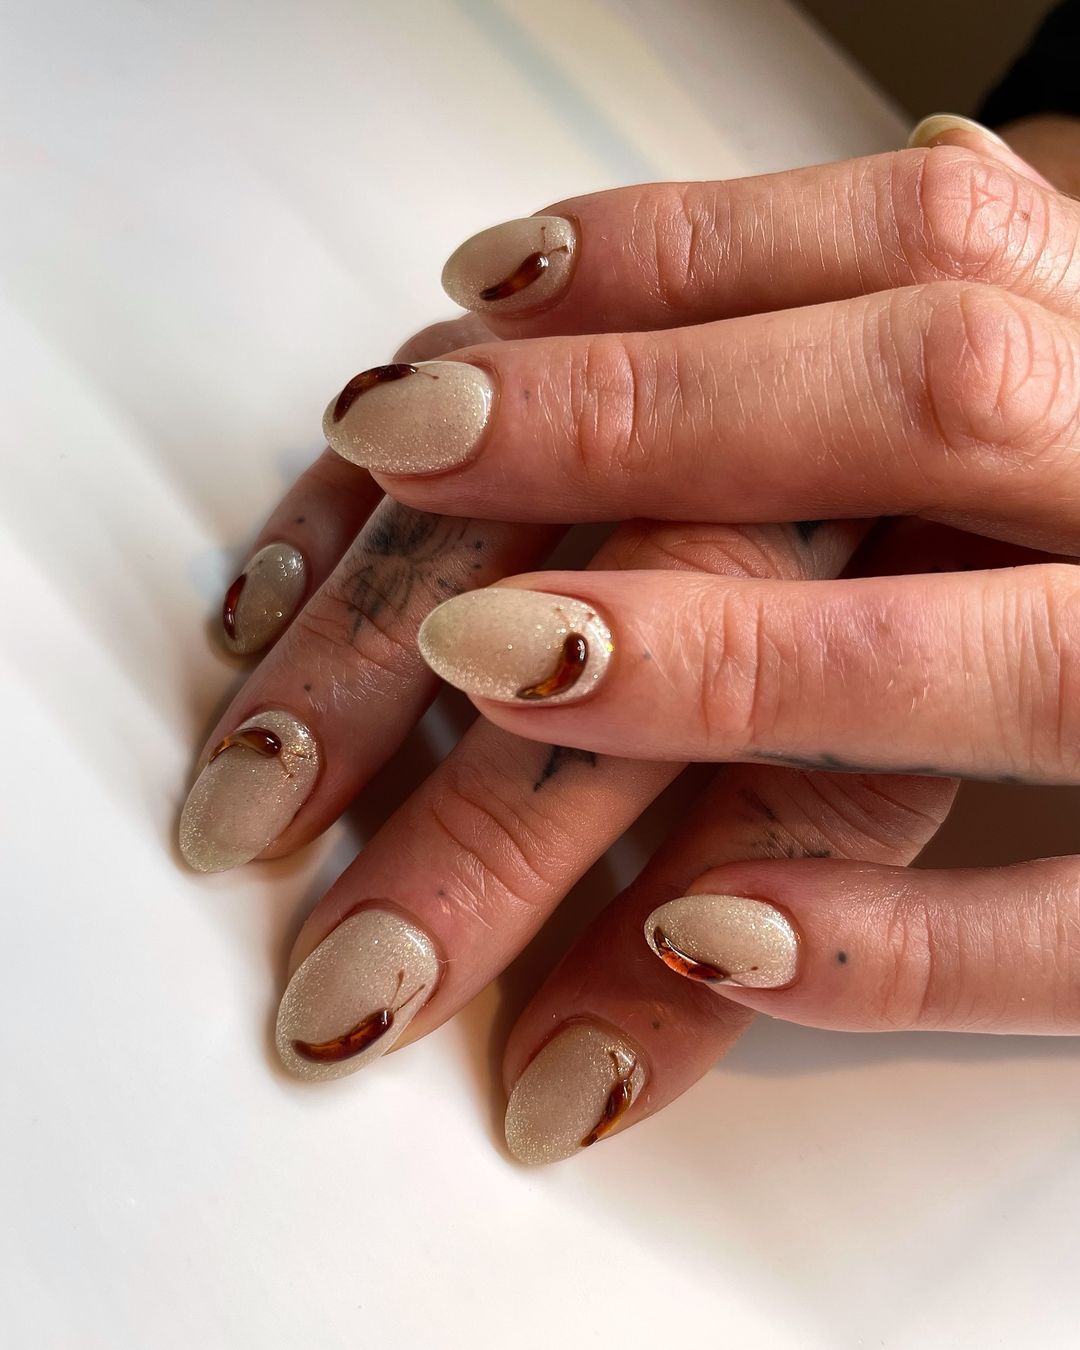
Autumn Elegance with Beige and Brown
When it comes to fun fall nails, this manicure design embodies the essence of autumn sophistication. The nails are shaped into a sleek almond form, perfect for highlighting the warm, earthy tones of the season. The base color is a subtle, shimmery beige, giving the nails a soft and elegant glow. Accenting this neutral base are delicate swirls of deep brown, creating a marbled effect that is both classy and unique. The combination of neutral and bold tones makes this design ideal for those seeking a sophisticated yet creative fall look.
-
- Shimmery beige nail polish (e.g., Essie Ballet Slippers)
- Deep brown nail polish (e.g., OPI Lincoln Park After Dark)
- Fine detailing brush
- Top coat (e.g., Seche Vite Dry Fast Top Coat)
Recommendations:
-
- Opt for high-quality polishes to ensure a smooth application and long-lasting wear.
- Use a fine detailing brush to create precise swirls and marbled effects.
- Finish with a durable top coat to maintain the glossy finish and protect the design.
DIY Instructions:
-
- Start by shaping your nails into an almond form using a nail file.
- Apply a base coat to protect your natural nails.
- Paint your nails with two coats of shimmery beige polish and let them dry completely.
- Using a fine detailing brush, create swirls with deep brown polish on each nail. Vary the swirl patterns for a more natural look.
- Seal the design with a top coat to ensure longevity and shine.
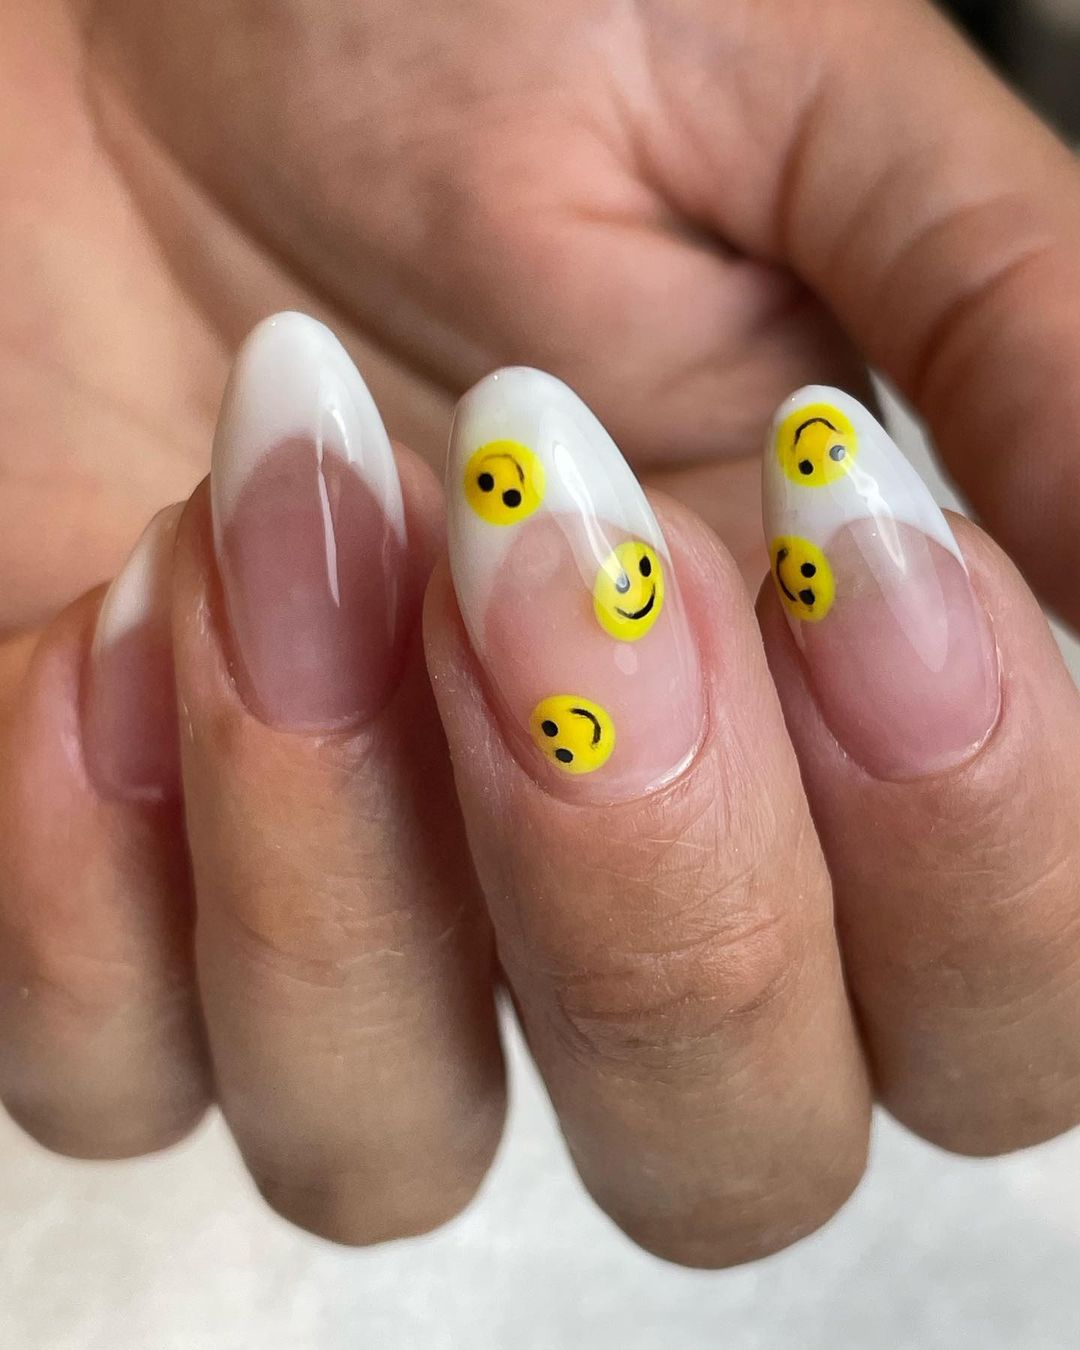
Cheerful Smiley Faces on French Tips
For a playful take on fall manicure, consider these fun fall nails featuring adorable smiley faces. The nails are styled in a short almond shape, providing a cute and practical length. The design incorporates a classic French tip with a twist: bright yellow smiley faces are dotted across the nails, adding a cheerful and creative touch. This design is perfect for those who want to embrace the joy of the season with a bit of whimsy.
-
- Clear base coat
- White nail polish for French tips (e.g., Sally Hansen White On)
- Yellow nail polish (e.g., OPI Sun, Sea, and Sand in My Pants)
- Black nail polish or nail art pen for detailing
- Dotting tool
- Top coat
Recommendations:
-
- Choose a bright yellow polish to make the smiley faces pop.
- A nail art pen can help in drawing the small details of the smiley faces with precision.
- Use a high-shine top coat to keep the design looking fresh and vibrant.
DIY Instructions:
-
- Begin with a clear base coat to protect your nails.
- Create French tips by painting the tips of your nails with white polish.
- Using a dotting tool, place yellow dots randomly on each nail.
- Once the yellow polish is dry, use a black nail art pen or a fine brush to draw smiley faces on the yellow dots.
- Seal the look with a top coat to protect the design and add a glossy finish.
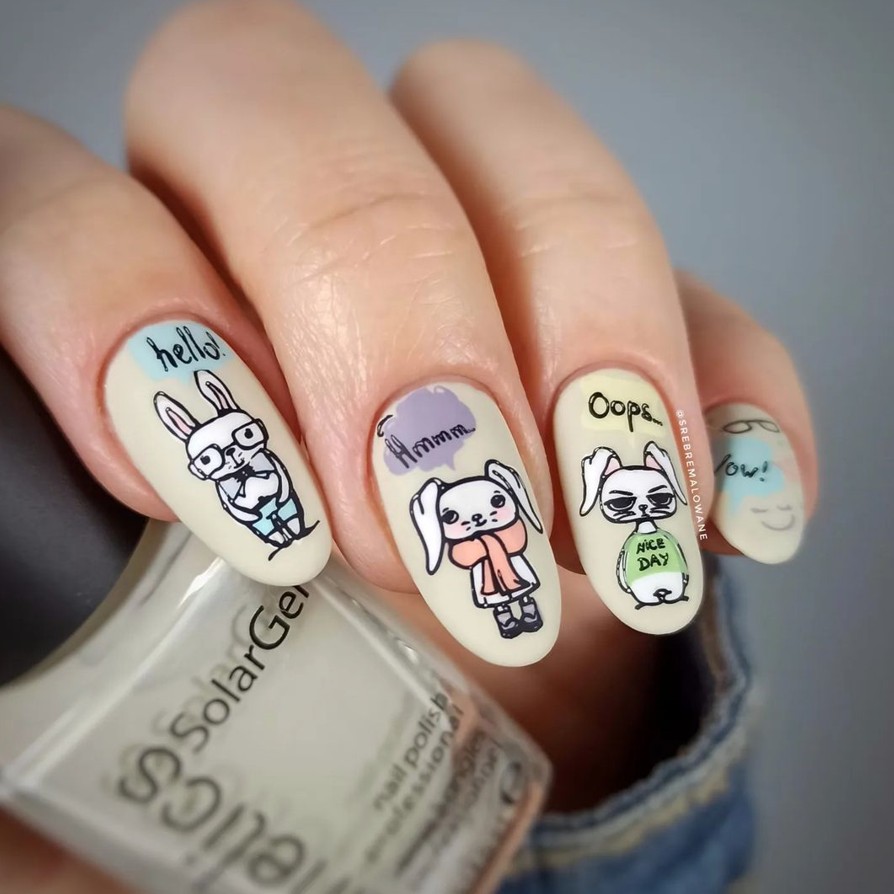
Playful Cartoon Characters for a Whimsical Look
Inject some personality into your fall nail designs with these charming cartoon-inspired nails. The nails are kept short and almond-shaped, making them easy to manage while still offering plenty of space for detailed art. Each nail features a different cartoon character or phrase, rendered in soft pastel colors that are perfect for the autumn season. This design is ideal for those looking to showcase their playful side and creative flair.
-
- Pastel-colored nail polishes (e.g., Essie’s Spring Collection)
- Black nail art pen for outlines and details
- Fine detailing brushes
- Top coat
Recommendations:
-
- Select a variety of pastel shades to create a cohesive yet varied look.
- A black nail art pen is essential for outlining and adding small details to the characters.
- Use thin brushes for more precise and intricate designs.
DIY Instructions:
-
- Apply a base coat to each nail.
- Paint each nail with a different pastel shade as the base color.
- Using fine brushes and a black nail art pen, draw different cartoon characters or phrases on each nail.
- Allow the designs to dry completely before applying a top coat to seal and protect the artwork.
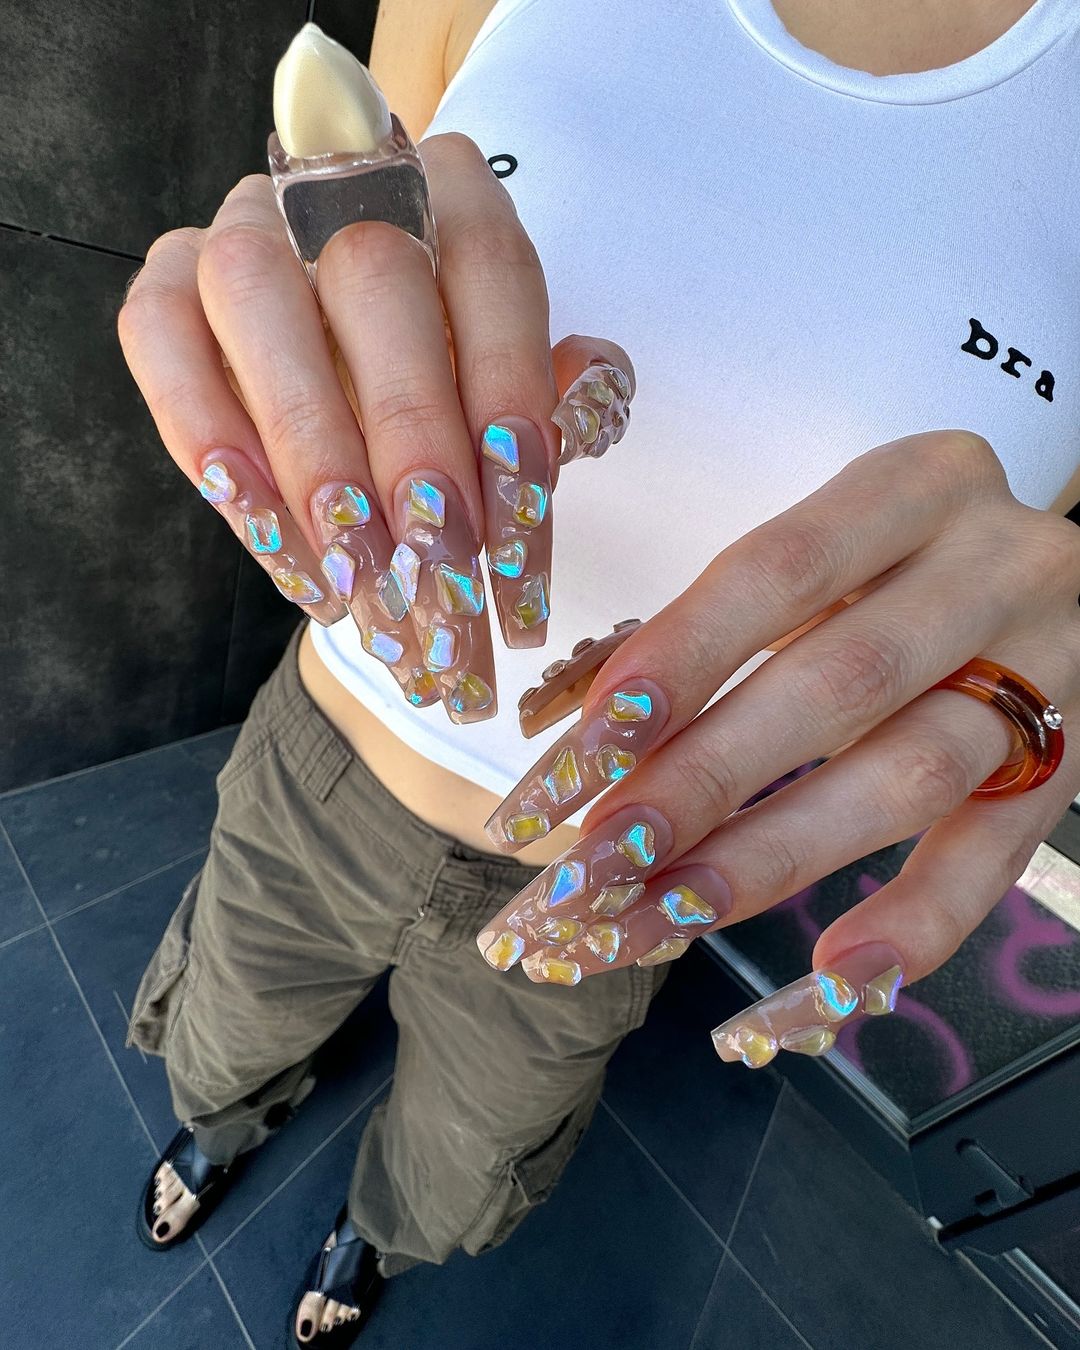
Iridescent Gemstone Fantasy
These nails are a stunning example of fun fall nails that embrace a luxurious and bold aesthetic. Each nail is adorned with large, iridescent gemstones that catch the light, creating a dazzling, multifaceted effect. The nails are shaped into long, tapered squares, offering a dramatic canvas for the intricate gemstone application. This look is perfect for those who love to make a statement with their manicure, combining glamour with the rich tones of autumn.
-
- Clear base coat
- Nude or beige base color (e.g., Essie Ballet Slippers)
- Iridescent gemstones or nail gems
- Nail glue
- Top coat (e.g., Seche Vite Dry Fast Top Coat)
Recommendations:
-
- Choose high-quality gemstones that offer a brilliant shine and durability.
- Use a strong nail glue to ensure the gems stay securely in place.
- Finish with a top coat to add extra shine and protect the design.
DIY Instructions:
-
- Start by applying a clear base coat to your nails.
- Paint your nails with a nude or beige base color, allowing it to dry completely.
- Using nail glue, carefully place iridescent gemstones on each nail, arranging them in a pattern that covers the nail surface.
- Once all gems are secured, apply a generous layer of top coat to seal the design and enhance the shine.
Save Pin
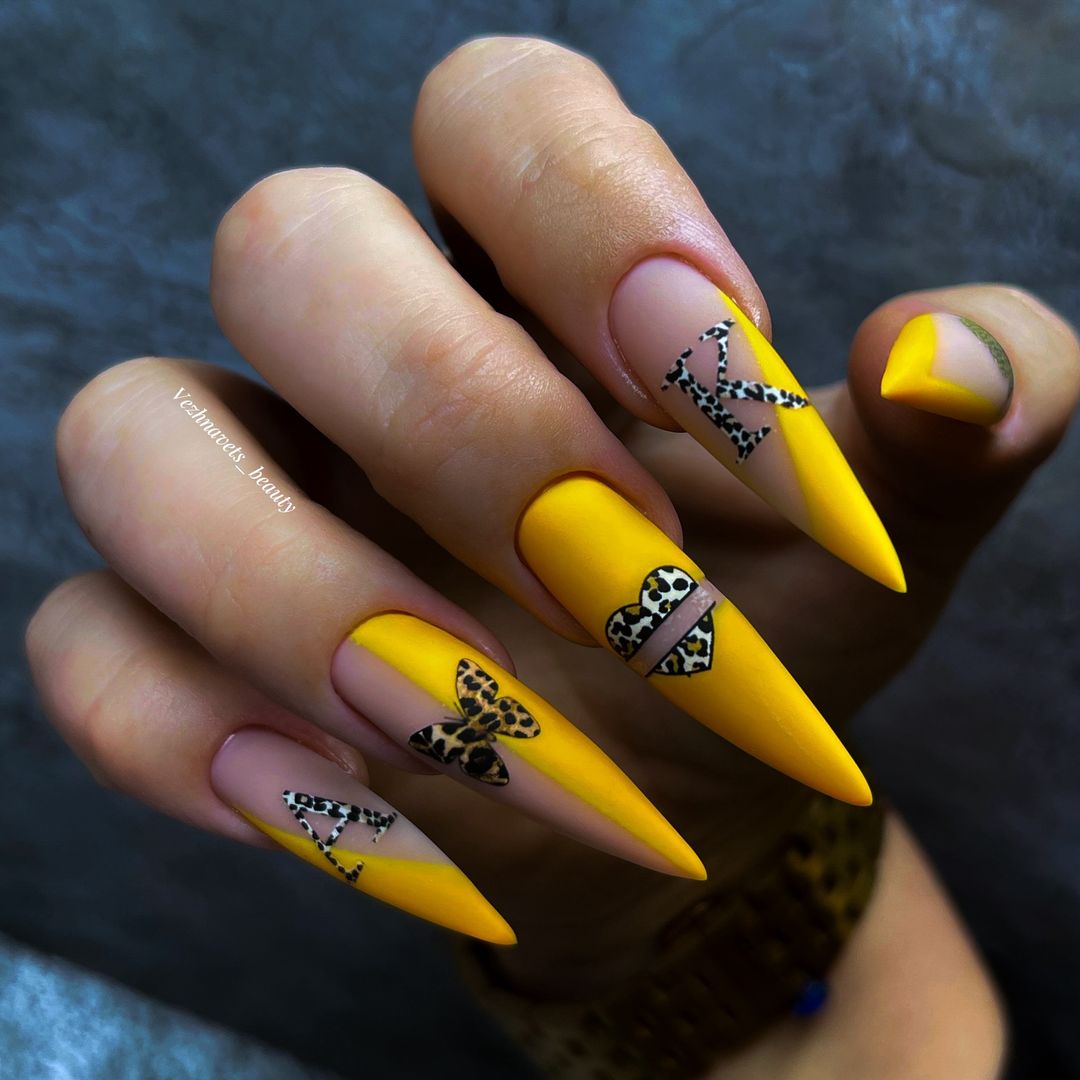
Bold Yellow with Leopard Accents
This nail design is a vibrant and eye-catching example of fun fall nails. The bright yellow base is complemented by leopard print accents on a stiletto shape, creating a bold and daring look. The use of leopard print hearts and butterflies adds a playful touch to the overall design, making it perfect for those who want to stand out with their manicure.
-
- Clear base coat
- Bright yellow nail polish (e.g., OPI Sun, Sea, and Sand in My Pants)
- Leopard print nail stickers or decals
- Black nail polish or nail art pen for detailing
- Top coat
Recommendations:
-
- Use a vibrant yellow polish to ensure the base color pops.
- Leopard print decals can save time and ensure a consistent pattern.
- A high-shine top coat will enhance the vibrancy of the colors and add durability.
DIY Instructions:
-
- Apply a clear base coat to protect your nails.
- Paint your nails with two coats of bright yellow polish and let them dry.
- Apply leopard print stickers or use a nail art pen to create leopard patterns on each nail.
- Seal the design with a top coat to protect the artwork and add shine.
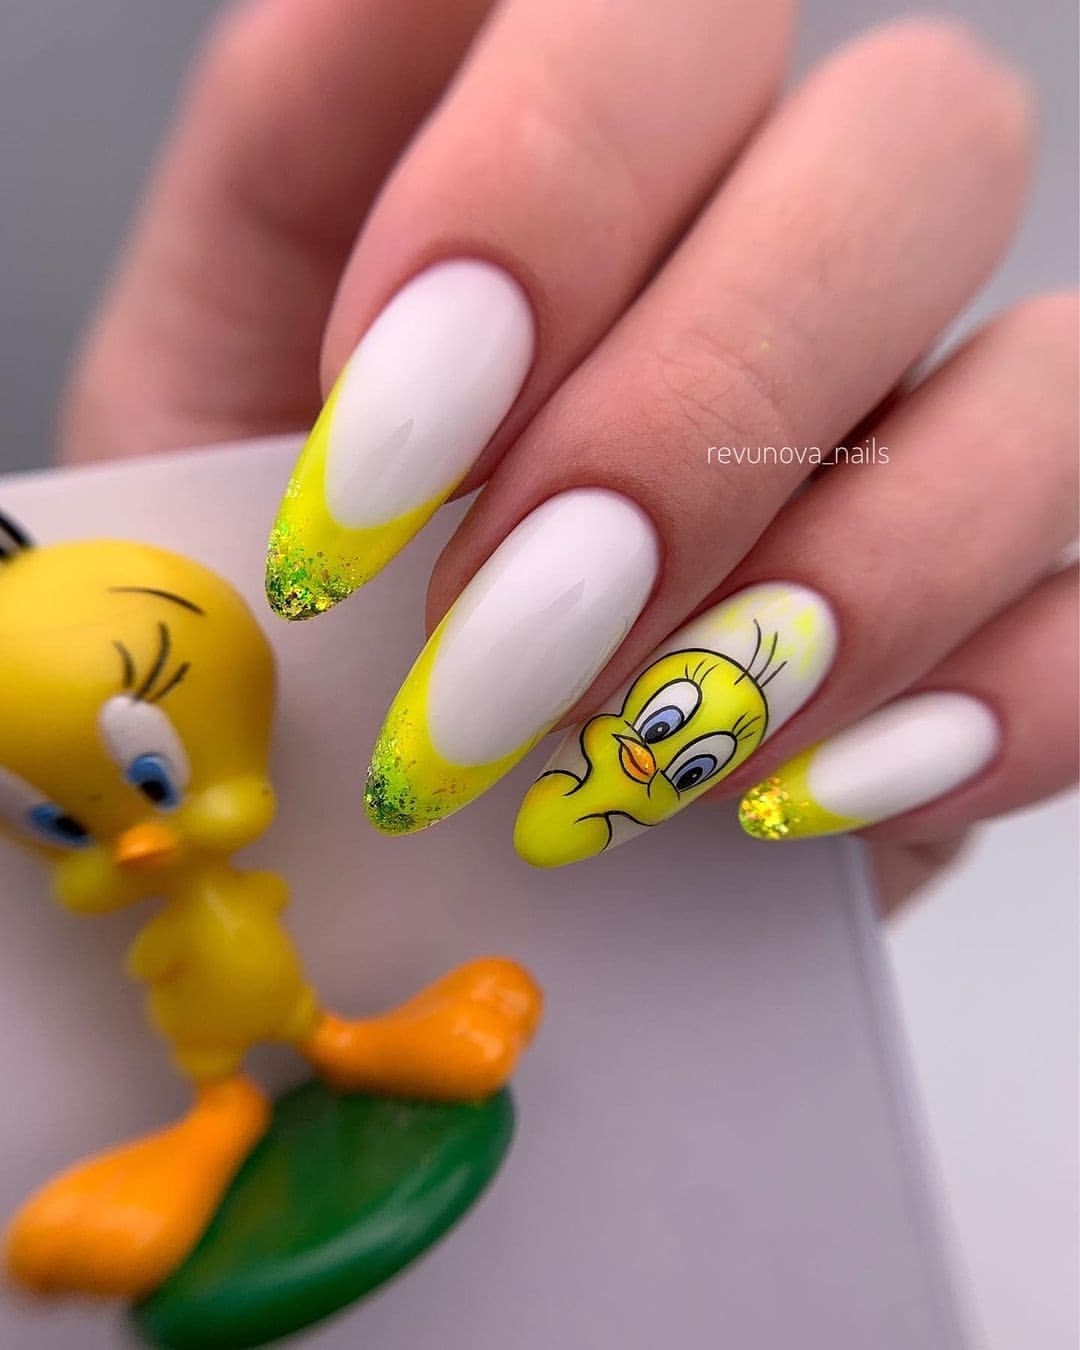
Playful Tweety Bird Design
This fun fall nails design features a playful Tweety Bird theme, perfect for adding a touch of nostalgia and whimsy to your manicure. The nails are shaped into an elegant almond form and decorated with a combination of white and yellow polish, accented by a detailed Tweety Bird illustration on one nail. This look is ideal for those who love incorporating fun and unique art into their nail designs.
-
- Clear base coat
- White nail polish (e.g., OPI Alpine Snow)
- Yellow nail polish (e.g., Essie Aim to Misbehave)
- Green glitter polish for accents
- Tweety Bird nail decal or nail art pen for drawing
- Top coat
Recommendations:
-
- Use high-quality nail polishes to achieve a smooth and even application.
- A nail art pen or decal can help in creating detailed character illustrations.
- Finish with a top coat to ensure the design lasts and maintains its shine.
DIY Instructions:
-
- Apply a clear base coat to start.
- Paint your nails with alternating white and yellow polish, letting each coat dry completely.
- Add a green glitter accent to the tips of the yellow nails.
- Apply the Tweety Bird decal or carefully draw the character using a nail art pen on one nail.
- Finish with a top coat to seal and protect the design.
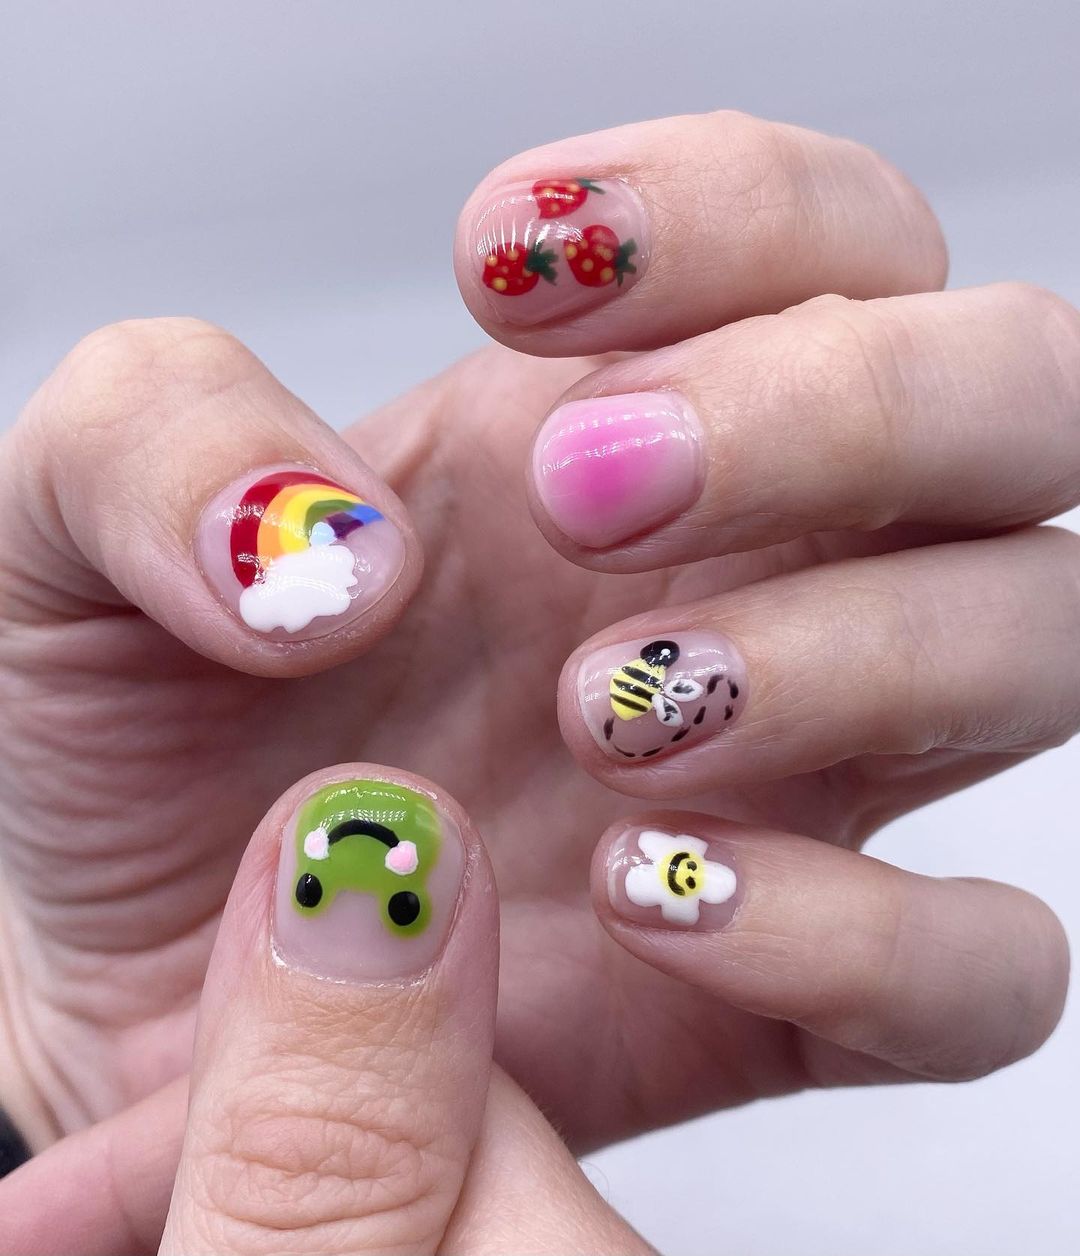
Whimsical Cartoon Mix
This fun and playful nail design is perfect for those who want to add a touch of whimsy to their fall look. Each nail features a unique cartoon-inspired motif, from rainbows and strawberries to bumblebees and frogs. The nails are kept short and natural, making this design both adorable and practical for everyday wear. The colorful and varied designs add a cheerful vibe, ideal for embracing the playful side of fall.
-
- Clear base coat
- Various colored nail polishes for the different designs (e.g., OPI Big Apple Red, Sally Hansen Mellow Yellow)
- Nail art pens or fine brushes for detailed work
- Top coat
Recommendations:
-
- Use vibrant, high-quality polishes to make the colors pop.
- A fine brush or nail art pen is essential for drawing the small details accurately.
- Finish with a top coat to protect the designs and add shine.
DIY Instructions:
-
- Apply a clear base coat to start.
- Paint each nail with a different base color, depending on the design you plan to draw.
- Use nail art pens or fine brushes to draw the different cartoon motifs on each nail.
- Once the designs are dry, apply a top coat to seal and protect the artwork.
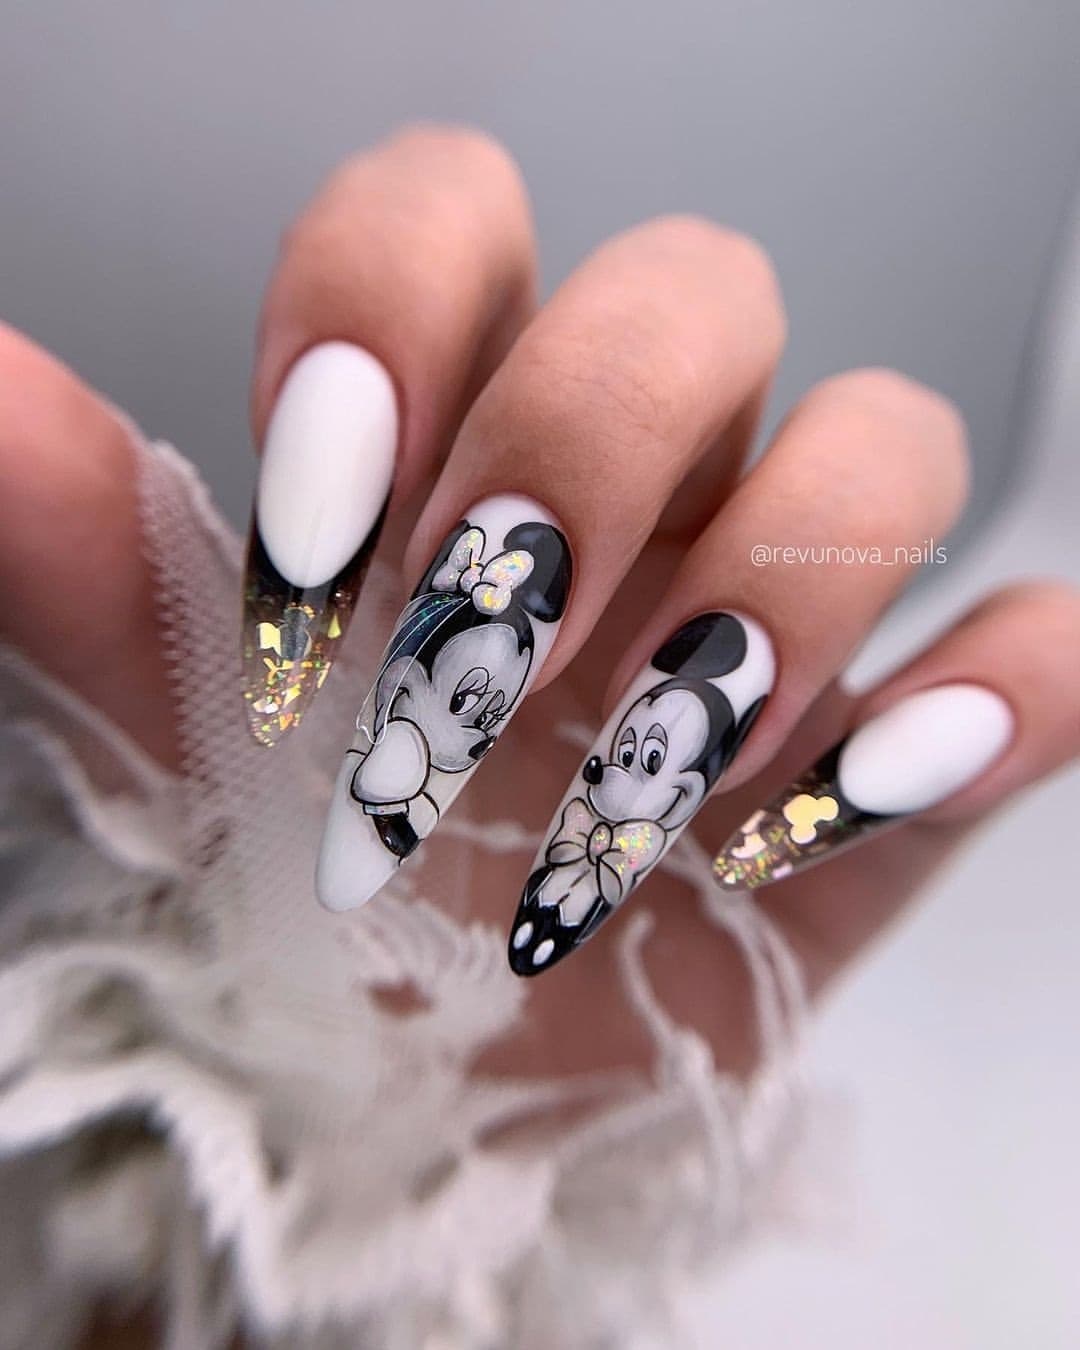
Classic Minnie and Mickey
This elegant black-and-white design features the iconic duo, Minnie and Mickey Mouse, rendered in detailed artwork on long, almond-shaped nails. The nails are predominantly white with black accents, creating a striking contrast that highlights the intricate character illustrations. This design is perfect for Disney fans looking to add a touch of nostalgia and sophistication to their fall nails.
-
- Clear base coat
- White nail polish (e.g., OPI Alpine Snow)
- Black nail polish (e.g., Essie Licorice)
- Nail art pens or decals for Minnie and Mickey designs
- Gold glitter for accents
- Top coat
Recommendations:
-
- Opt for high-quality polishes to achieve a smooth finish.
- Use nail art decals for precise character designs if freehand drawing is challenging.
- A glitter top coat can add a touch of sparkle and elegance.
DIY Instructions:
-
- Apply a clear base coat to start.
- Paint the nails with white polish and let them dry completely.
- Use a black nail polish to create accent details on each nail.
- Apply Minnie and Mickey decals or carefully draw them using a nail art pen.
- Add gold glitter accents around the characters for extra flair.
- Finish with a top coat to protect the designs and add shine.
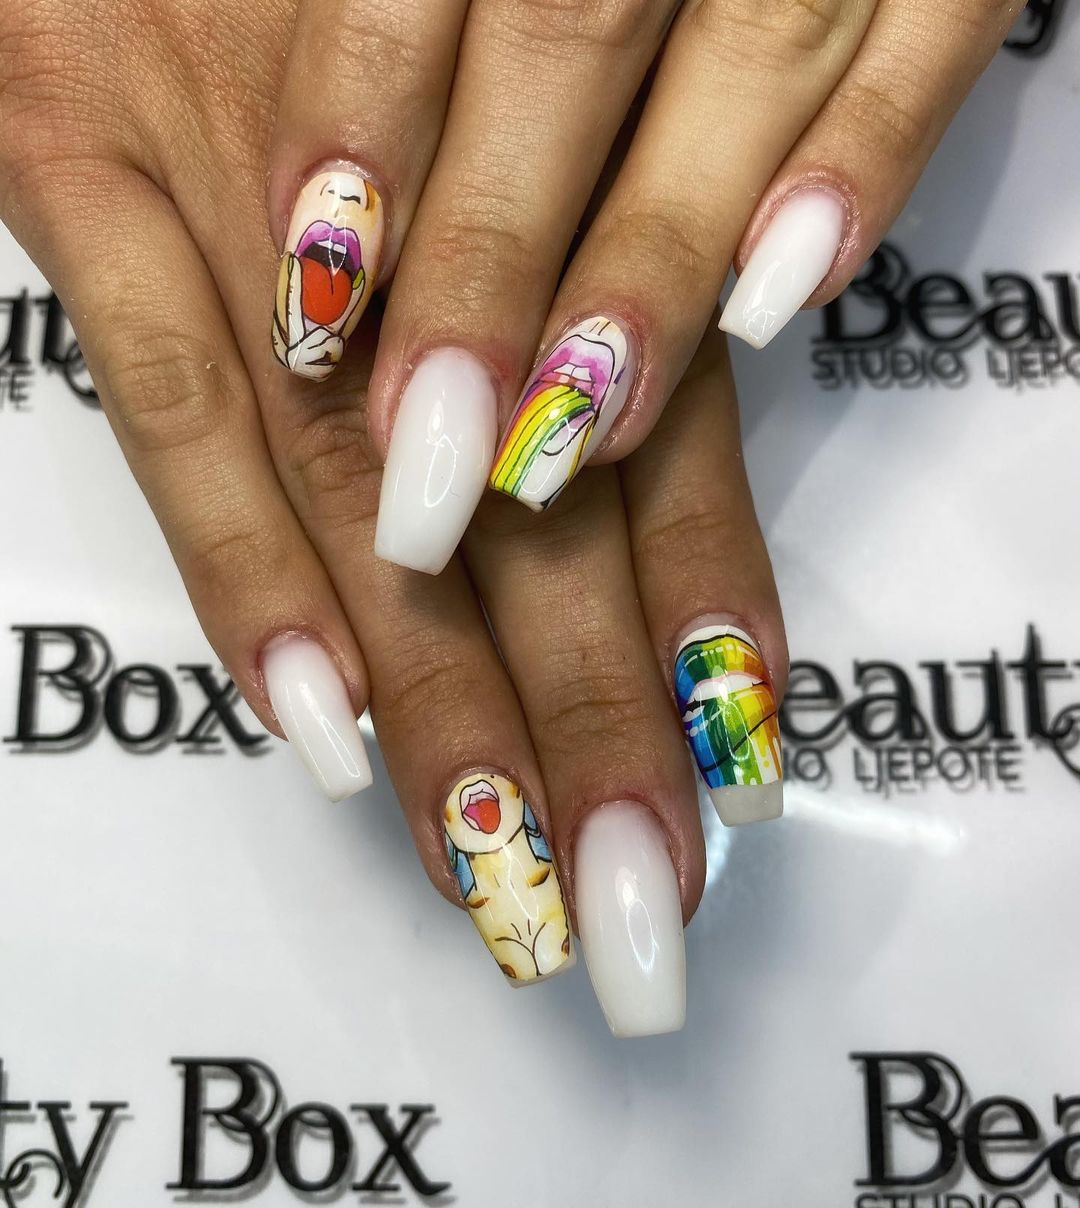
Vibrant Cartoon Characters
These nails feature a vibrant and fun design with cartoon characters and colorful rainbows. The nails are kept long and square-shaped, providing ample space for the intricate artwork. Each nail showcases a different character or element, making the design lively and engaging. This look is ideal for those who love bold, eye-catching nail art that tells a story.
-
- Clear base coat
- White nail polish (e.g., Essie Marshmallow)
- Various colored nail polishes for characters and rainbows (e.g., OPI Big Apple Red, Essie Butler Please)
- Nail art pens or fine brushes
- Top coat
Recommendations:
-
- Use bright, vibrant colors to bring the characters to life.
- Nail art pens are useful for adding detailed elements and outlines.
- Seal with a glossy top coat for a polished finish.
DIY Instructions:
-
- Apply a clear base coat to each nail.
- Paint the nails with a white base color and let them dry.
- Use nail art pens or fine brushes to draw the characters and rainbows on each nail.
- Allow the designs to dry completely before applying a top coat to seal and protect the artwork.
Save Pin
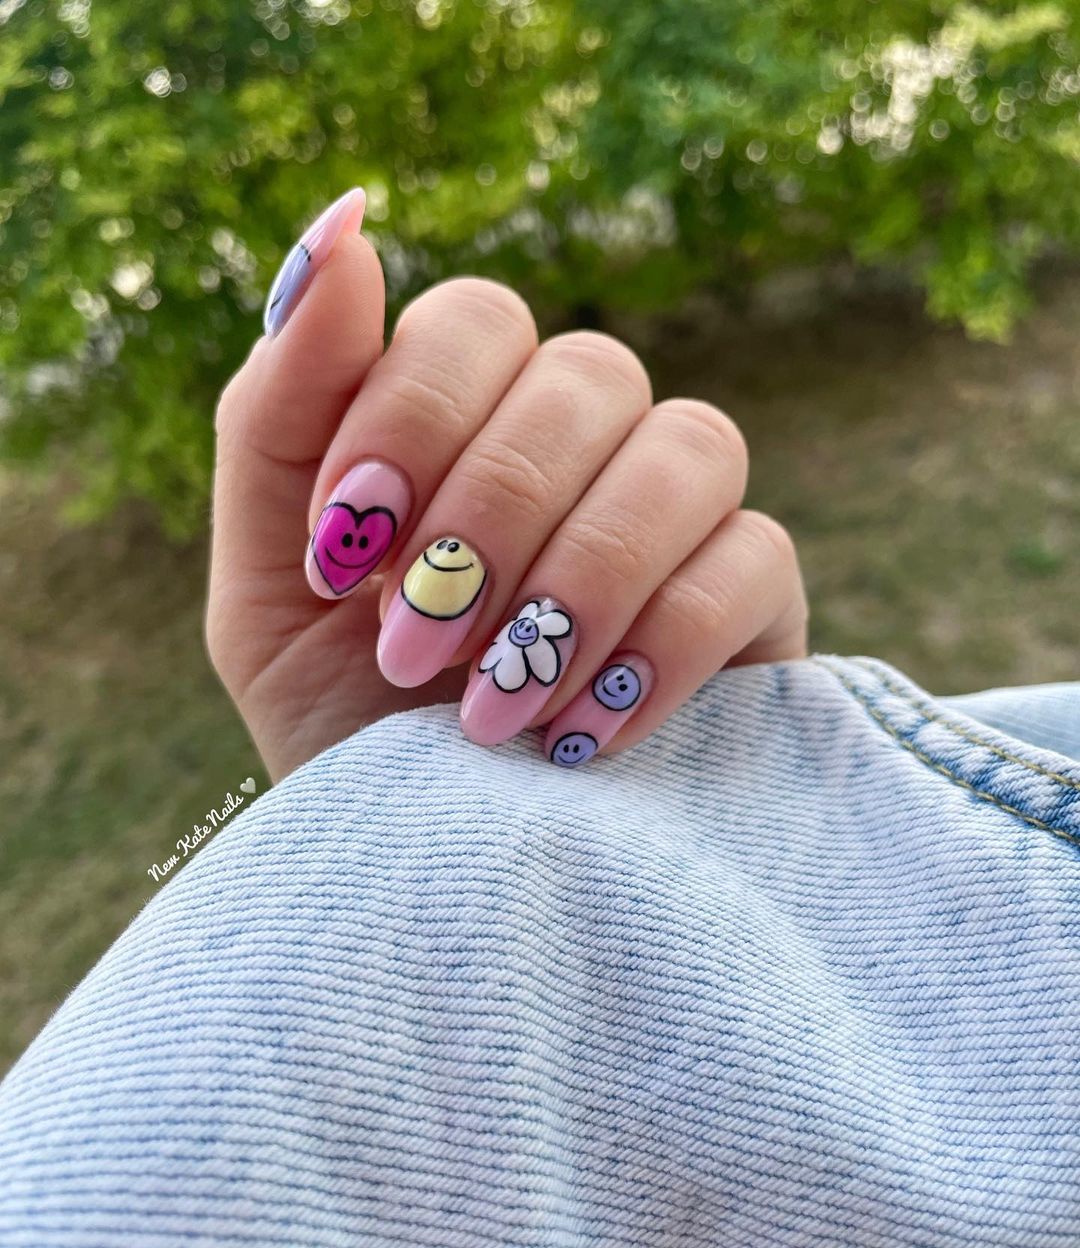
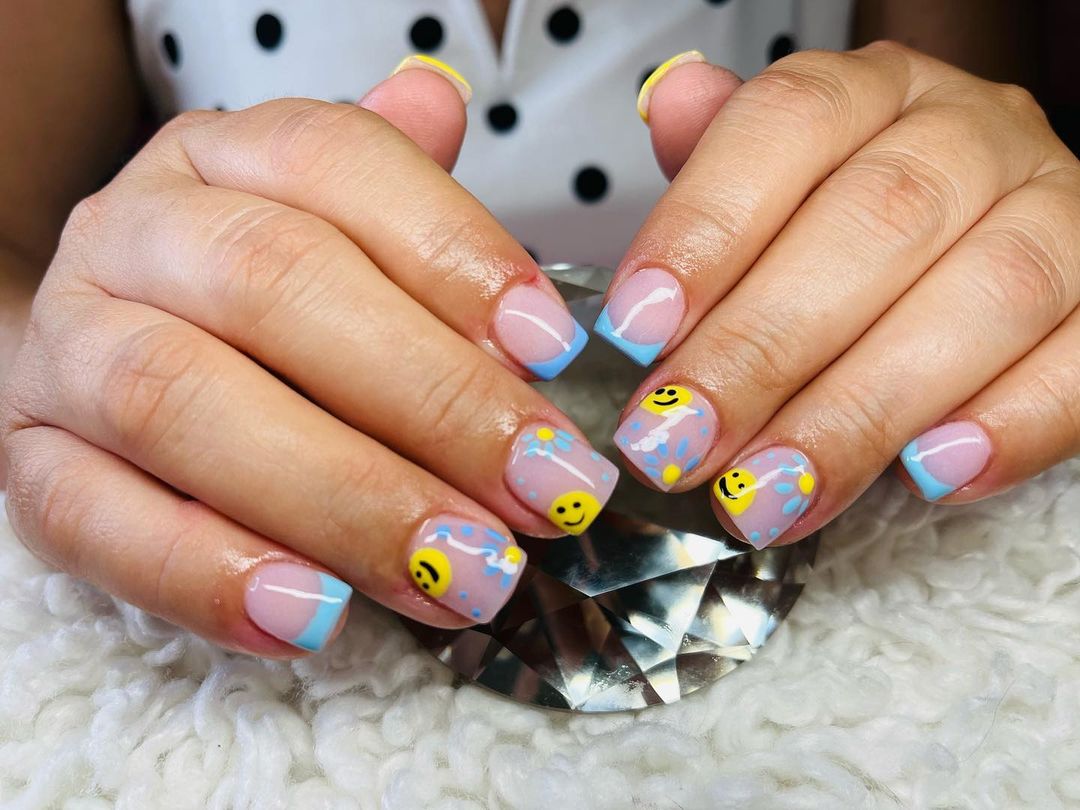
Happy Faces and Florals
This cheerful nail design features a mix of happy faces and floral motifs, perfect for adding a touch of joy to your fall manicure. The nails are shaped into a medium almond form and painted with a soft pink base. The colorful designs, including smiley faces and flowers, make this look playful and uplifting, ideal for brightening up your day.
-
- Clear base coat
- Soft pink nail polish (e.g., OPI Bubble Bath)
- Various colored polishes for the designs (e.g., OPI Sun, Sea, and Sand in My Pants for yellow)
- Nail art pens or decals for detailed work
- Top coat
Recommendations:
-
- Choose pastel shades for a soft, harmonious look.
- Use nail art pens for precise detailing of the smiley faces and flowers.
- Finish with a high-shine top coat to maintain the vibrancy of the colors.
DIY Instructions:
-
- Apply a clear base coat to protect your nails.
- Paint the nails with a soft pink base color and let them dry.
- Use nail art pens to draw smiley faces and flowers on each nail.
- Seal the design with a top coat to ensure durability and shine.
Cute Chicken Faces
This adorable nail design features cute chicken faces on a soft, nude base, perfect for those who love quirky and charming nail art. The nails are shaped into a short almond form, making them practical yet stylish. The simplicity of the design, combined with the playful chicken faces, makes this manicure a delightful choice for fall.

-
- Clear base coat
- Nude or beige nail polish (e.g., Essie Topless & Barefoot)
- White, orange, and black nail polishes for the chicken faces
- Nail art pens or fine brushes
- Top coat
Recommendations:
-
- Use a neutral base color to make the chicken faces stand out.
- Nail art pens can help achieve precise details for the faces.
- A glossy top coat will enhance the overall look and protect the design.
DIY Instructions:
-
- Start with a clear base coat on your nails.
- Apply a nude or beige polish as the base color and let it dry.
- Use nail art pens or fine brushes to draw the chicken faces on each nail.
- Once the designs are dry, apply a top coat to seal and protect the artwork.
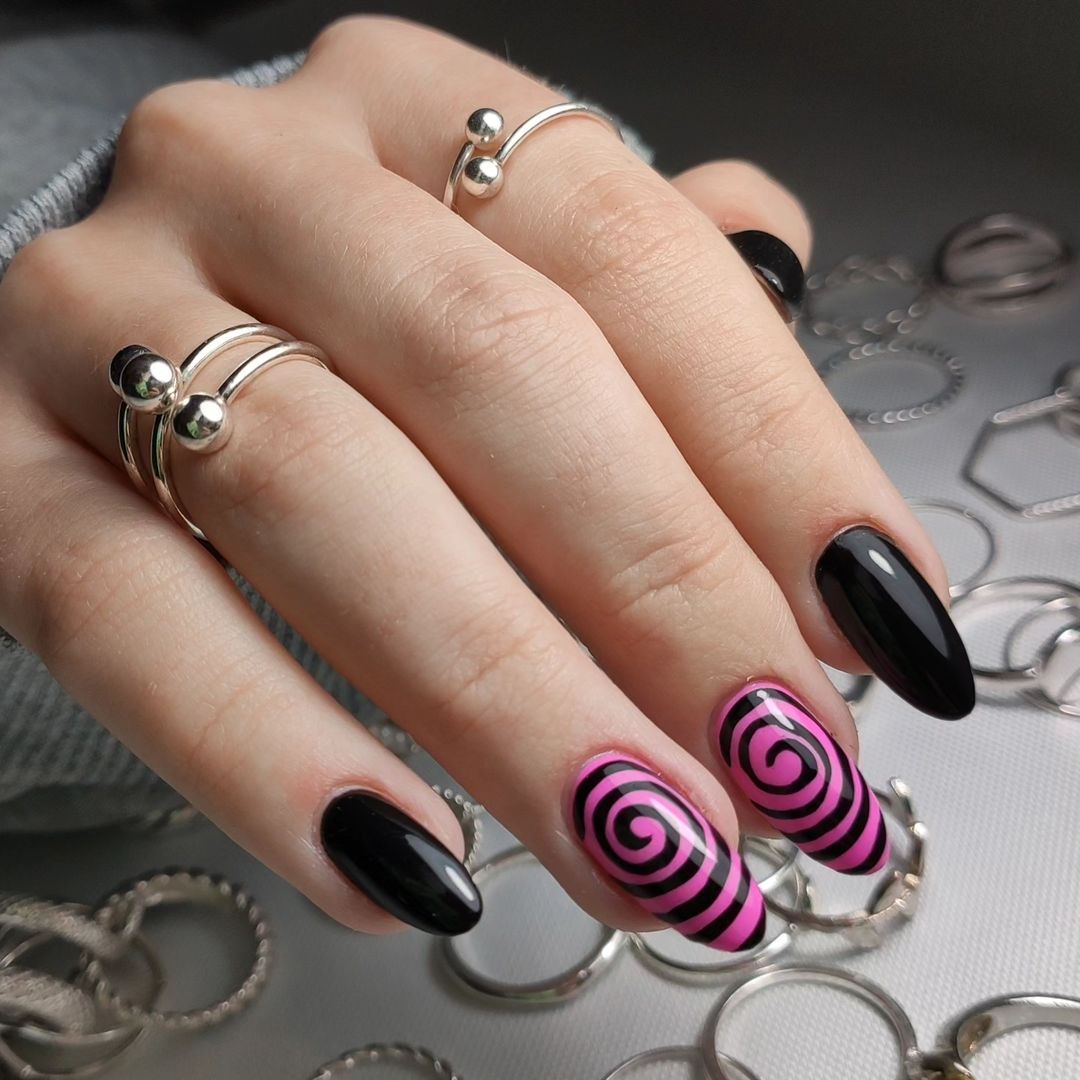
Hypnotic Black and Pink Spirals
This striking nail design features hypnotic black and pink spiral patterns, perfect for a bold fall look. The nails are shaped into a long almond form, with alternating black and pink stripes creating a mesmerizing effect. This design is ideal for those who want to make a bold statement with their manicure.
-
- Clear base coat
- Black nail polish (e.g., OPI Black Onyx)
- Bright pink nail polish (e.g., Essie Watermelon)
- Fine detailing brush for the spirals
- Top coat
Recommendations:
-
- Choose a vibrant pink polish to contrast sharply with the black.
- A fine brush is essential for creating clean, even spirals.
- Finish with a glossy top coat to add shine and protect the design.
DIY Instructions:
-
- Apply a clear base coat to each nail.
- Paint the nails with a black base color and let them dry.
- Using a fine brush, create spiral patterns with bright pink polish on each nail.
- Allow the design to dry completely before applying a top coat to seal and protect the artwork.
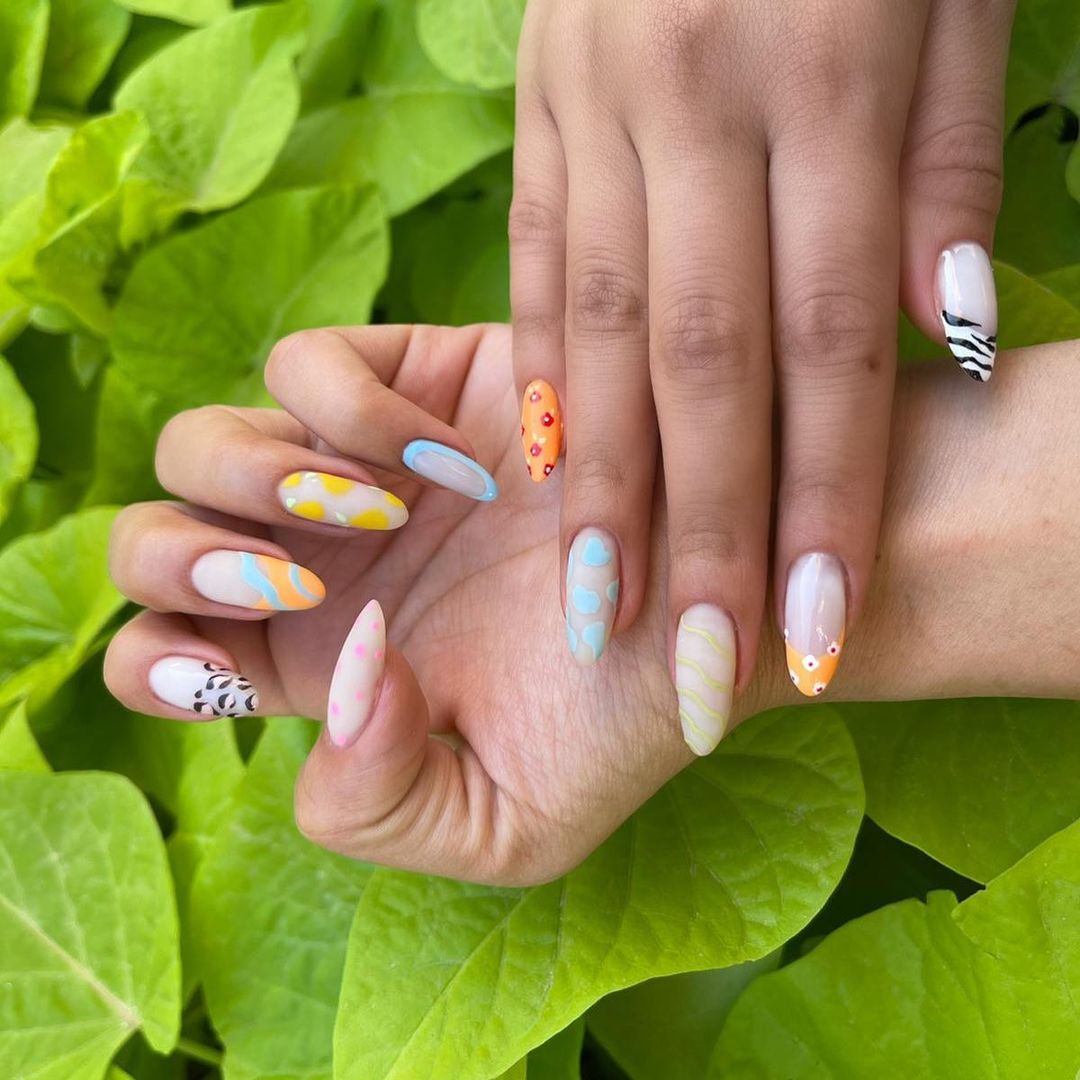
Playful Pastel Patterns
This nail design features a delightful array of pastel colors and patterns, perfect for those looking to embrace a fun and whimsical style. Each nail showcases a different design, from abstract shapes to polka dots and stripes, all in soft, pastel hues. The mix-and-match approach adds a playful and artistic touch, making these nails a standout choice for fall.
-
- Clear base coat
- Pastel nail polishes in various colors (e.g., Essie Mint Candy Apple, OPI Don’t Tell a Sol)
- Nail art pens or fine brushes for detailing
- Top coat
Recommendations:
-
- Use a range of pastel shades to create a harmonious yet varied look.
- Nail art pens are essential for adding detailed patterns.
- A high-shine top coat will enhance the colors and protect the design.
DIY Instructions:
-
- Apply a clear base coat to your nails.
- Paint each nail with a different pastel base color and let them dry completely.
- Use nail art pens or fine brushes to draw various patterns on each nail.
- Once the designs are dry, apply a top coat to seal and protect the artwork.
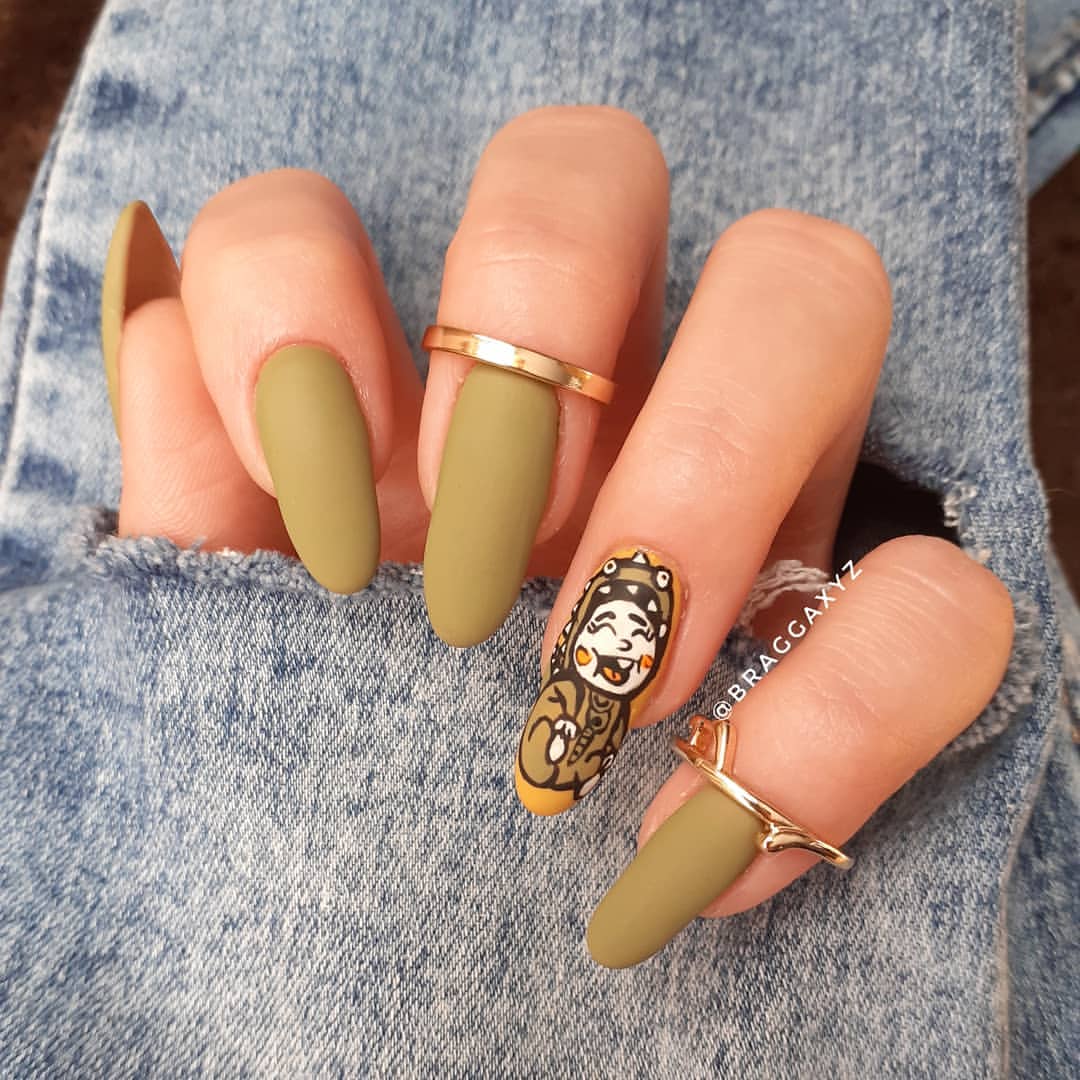
Matte Olive with Cultural Art
This sophisticated nail design features a matte olive base with an intricate cultural art accent on one nail. The nails are shaped into long, tapered squares, creating a bold and elegant look. The combination of the muted olive color and the detailed artwork makes this design perfect for those seeking a unique and stylish manicure for the fall season.
-
- Clear base coat
- Matte olive nail polish (e.g., OPI Suzi – The First Lady of Nails)
- Nail art pens or decals for the cultural design
- Matte top coat
Recommendations:
-
- Choose a high-quality matte polish to ensure a smooth, even finish.
- Use decals for the accent nail to achieve precise and intricate details.
- Finish with a matte top coat to maintain the sophisticated look.
DIY Instructions:
-
- Start with a clear base coat on your nails.
- Apply two coats of matte olive polish and let them dry completely.
- Use a nail art pen or apply a decal for the cultural art accent on one nail.
- Finish with a matte top coat to seal the design and keep the matte effect.
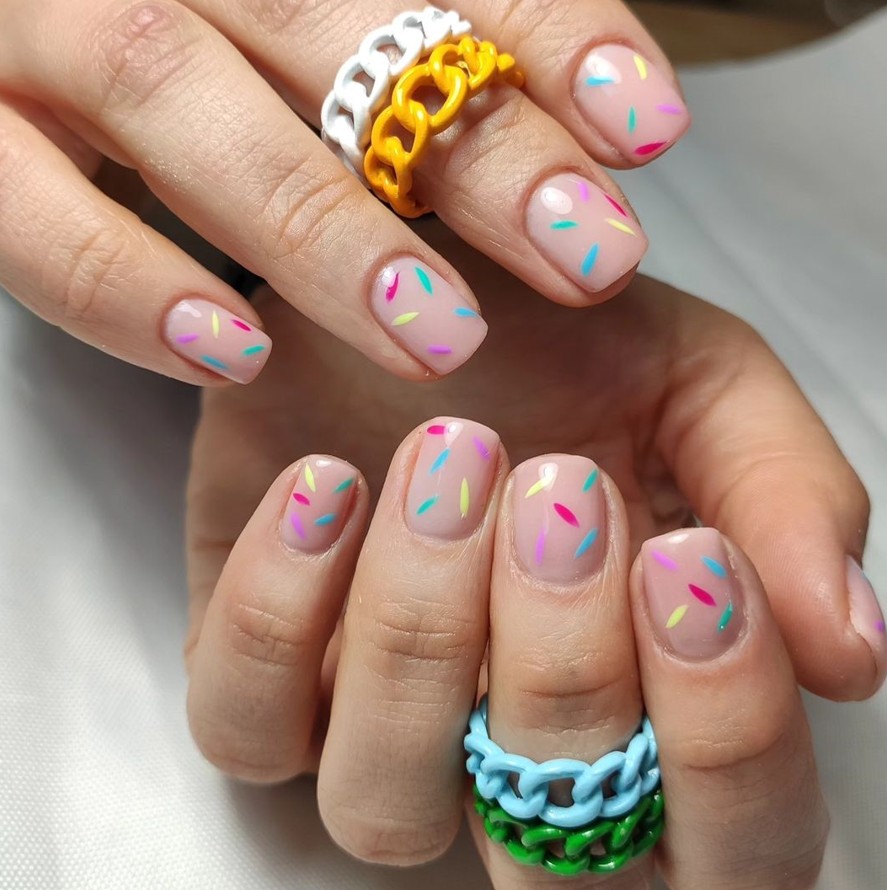
Confetti Sprinkle Nails
These nails are a burst of fun and color, featuring a confetti sprinkle design on a soft nude base. The nails are kept short and square-shaped, making them practical yet stylish. The vibrant sprinkles add a playful and festive touch, making this design perfect for adding some cheer to your fall manicure.
-
- Clear base coat
- Nude or beige nail polish (e.g., Essie Topless & Barefoot)
- Various colored nail polishes for the sprinkles (e.g., OPI Big Apple Red, Essie Butler Please)
- Fine detailing brush or dotting tool
- Top coat
Recommendations:
-
- Use a neutral base color to make the colorful sprinkles stand out.
- A fine brush or dotting tool can help achieve the small, detailed sprinkle effect.
- A glossy top coat will enhance the colors and protect the design.
DIY Instructions:
-
- Apply a clear base coat to your nails.
- Paint your nails with a nude or beige polish and let them dry.
- Use a fine brush or dotting tool to add colorful sprinkles randomly on each nail.
- Seal the design with a top coat to protect the artwork and add shine.
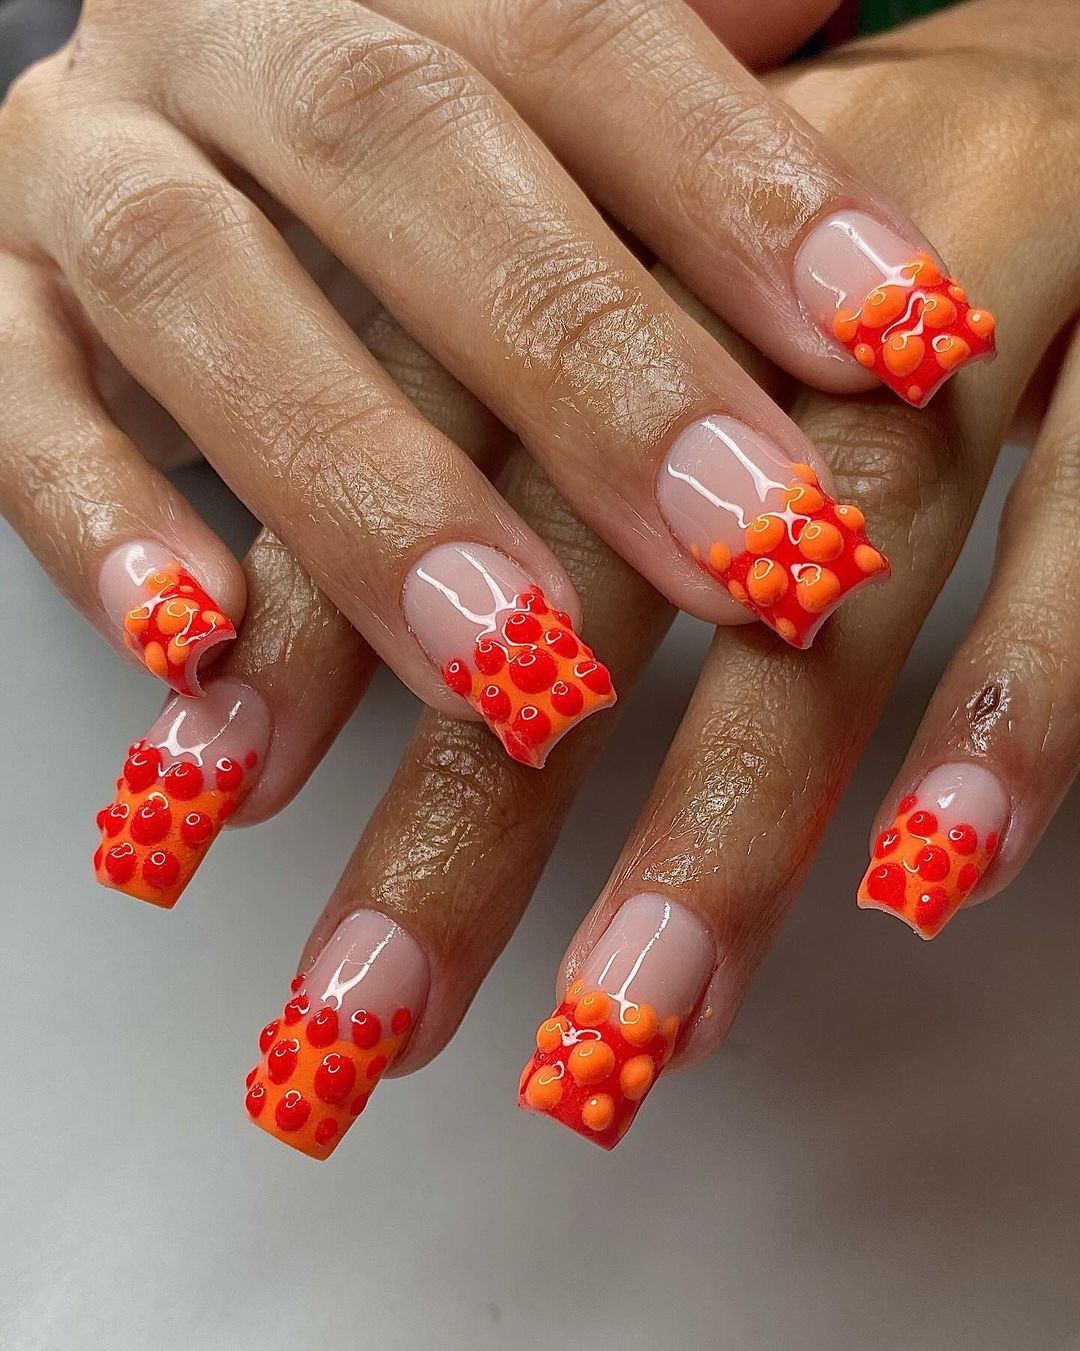
Bold Orange 3D Accents
This striking nail design features bold orange 3D accents on a nude base, creating a dramatic and eye-catching look. The nails are shaped into long squares, providing a large canvas for the intricate 3D designs. The vibrant orange color and textured accents make these nails perfect for those looking to make a bold statement with their fall manicure.
-
- Clear base coat
- Nude or beige nail polish (e.g., Essie Topless & Barefoot)
- Bright orange nail polish (e.g., OPI A Good Man-darin is Hard to Find)
- 3D nail art decorations
- Nail glue
- Top coat
Recommendations:
-
- Choose bright, high-quality polishes to make the 3D accents pop.
- Use strong nail glue to ensure the 3D decorations stay securely in place.
- Finish with a top coat to add shine and protect the design.
DIY Instructions:
-
- Apply a clear base coat to your nails.
- Paint your nails with a nude or beige polish and let them dry.
- Apply bright orange polish to the tips of your nails, creating a French tip effect.
- Use nail glue to add 3D decorations to the orange tips.
- Seal the design with a top coat to protect the artwork and add shine.
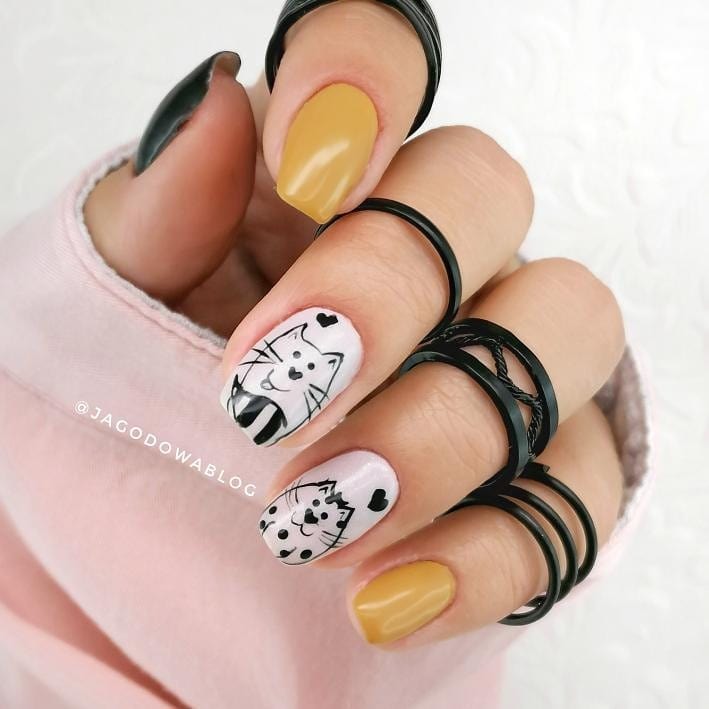
Cute Cats and Mustard Yellow
This adorable nail design features cute cat faces paired with a chic mustard yellow color. The nails are kept short and natural, making them practical for everyday wear while still being stylish. The combination of the playful cat designs and the sophisticated mustard yellow makes this manicure perfect for fall.
-
- Clear base coat
- Mustard yellow nail polish (e.g., OPI Never a Dulles Moment)
- White and black nail polishes for the cat faces
- Nail art pens for detailing
- Top coat
Recommendations:
-
- Use a mustard yellow polish for a trendy fall color.
- Nail art pens are essential for drawing the detailed cat faces.
- A glossy top coat will enhance the colors and protect the design.
DIY Instructions:
-
- Apply a clear base coat to your nails.
- Paint two nails with mustard yellow polish and the remaining nails with white polish.
- Use nail art pens to draw cat faces on the white nails.
- Seal the design with a top coat to protect the artwork and add shine.
Happy Faces and Florals
This cheerful nail design features a mix of happy faces and floral motifs, perfect for adding a touch of joy to your fall manicure. The nails are shaped into a medium almond form and painted with a soft pink base. The colorful designs, including smiley faces and flowers, make this look playful and uplifting, ideal for brightening up your day.
-
- Clear base coat
- Soft pink nail polish (e.g., OPI Bubble Bath)
- Various colored polishes for the designs (e.g., OPI Sun, Sea, and Sand in My Pants for yellow)
- Nail art pens or decals for detailed work
- Top coat
Recommendations:
-
- Choose pastel shades for a soft, harmonious look.
- Use nail art pens for precise detailing of the smiley faces and flowers.
- Finish with a high-shine top coat to maintain the vibrancy of the colors.
DIY Instructions:
-
- Apply a clear base coat to protect your nails.
- Paint the nails with a soft pink base color and let them dry.
- Use nail art pens to draw smiley faces and flowers on each nail.
- Seal the design with a top coat to ensure durability and shine.
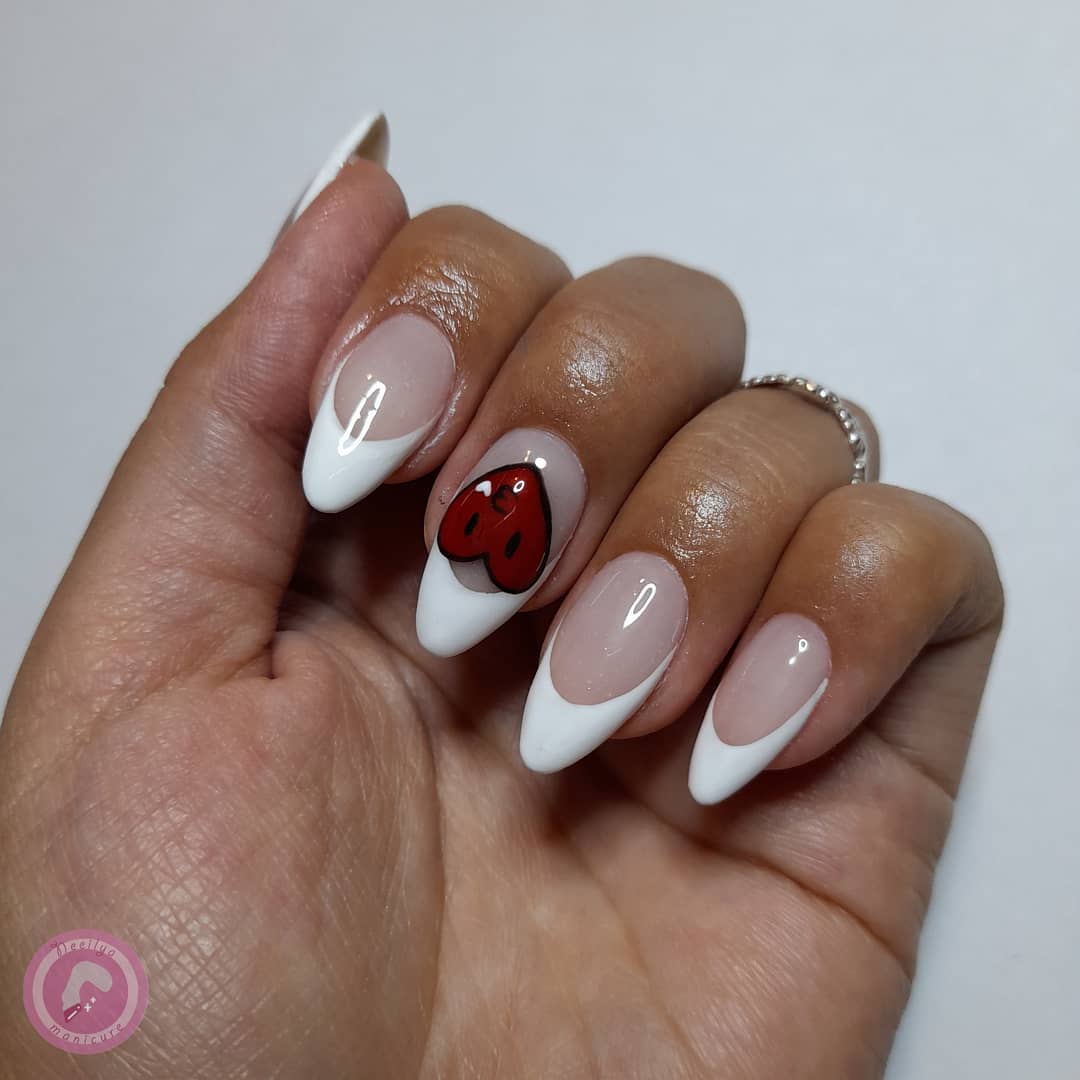
Classic French with a Twist
This elegant nail design combines the timeless French manicure with a playful twist. The nails are shaped into a sleek almond form and painted with a classic French tip, featuring crisp white tips on a nude base. The twist comes in the form of a bold, red heart accent on one nail, adding a fun and unexpected element to this sophisticated look.
-
- Clear base coat
- Nude or sheer pink nail polish (e.g., OPI Bubble Bath)
- White nail polish for tips (e.g., Essie Blanc)
- Red nail polish for the heart (e.g., OPI Big Apple Red)
- Nail art pen for detailing
- Top coat
Recommendations:
-
- Use high-quality polishes for a smooth, long-lasting finish.
- A nail art pen can help achieve precise lines and details for the heart.
- Finish with a glossy top coat to protect the design and add shine.
DIY Instructions:
-
- Apply a clear base coat to your nails.
- Paint the nails with a nude or sheer pink polish and let them dry.
- Create French tips by painting the tips of your nails with white polish.
- Use a red polish and a nail art pen to draw a heart on one nail.
- Seal the design with a top coat to ensure durability and shine.
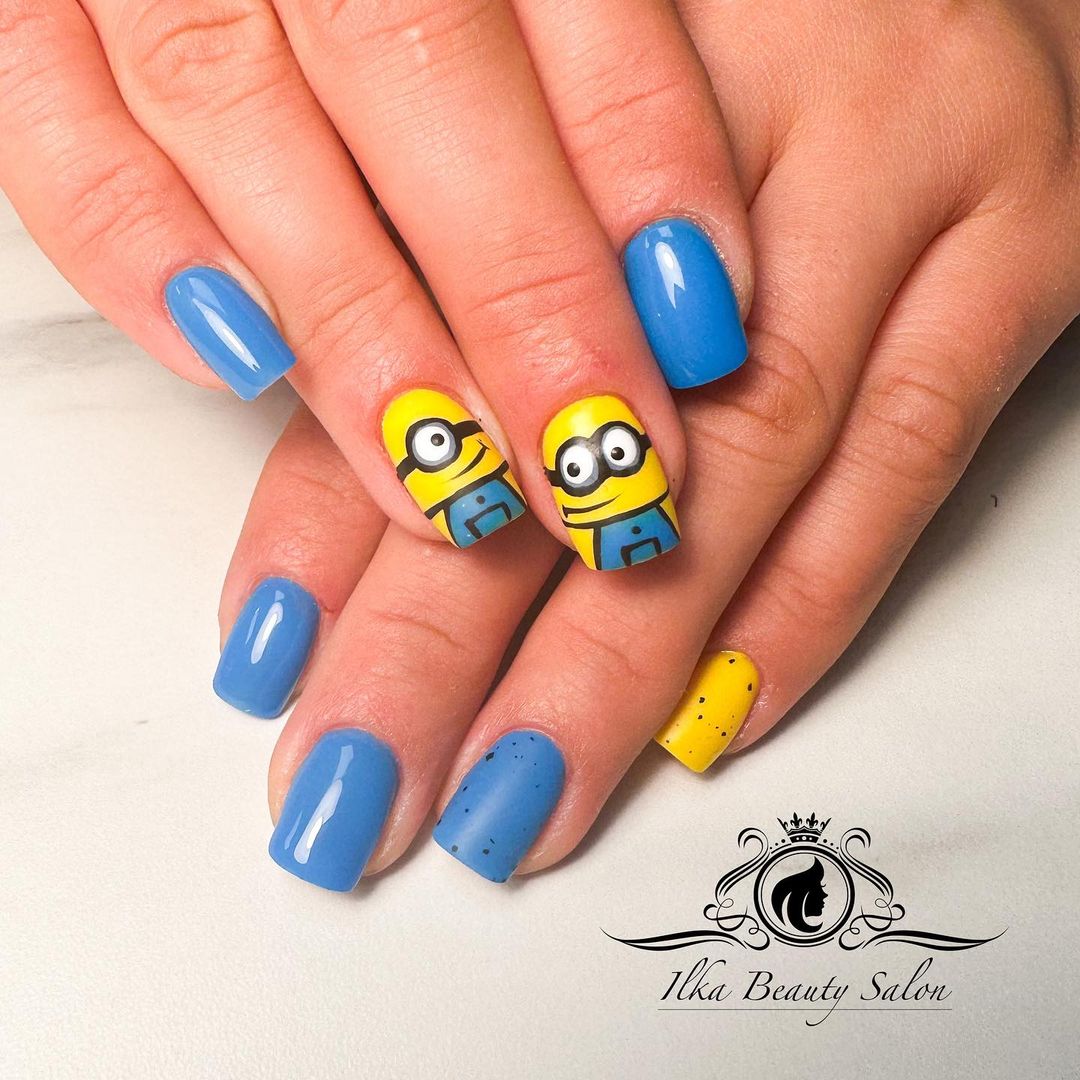
Fun Minion Nails
These nails are perfect for adding a touch of fun to your look. The design features bright blue and yellow nails with adorable Minion characters on two accent nails. The nails are kept short and square-shaped, making them practical while still being playful. This design is ideal for fans of the Despicable Me series or anyone who loves a cute and whimsical manicure.
-
- Clear base coat
- Bright blue nail polish (e.g., OPI Rich Girls & Po-Boys)
- Yellow nail polish (e.g., Essie Aim to Misbehave)
- Black and white nail polishes for details
- Nail art pens or decals for Minion designs
- Top coat
Recommendations:
-
- Use vibrant colors to make the Minions stand out.
- Nail art pens or decals can help create the detailed Minion faces.
- A high-shine top coat will enhance the colors and protect the design.
DIY Instructions:
-
- Apply a clear base coat to your nails.
- Paint some nails with bright blue polish and others with yellow polish.
- Use nail art pens or decals to create Minion faces on two accent nails.
- Finish with a top coat to seal the design and add shine.
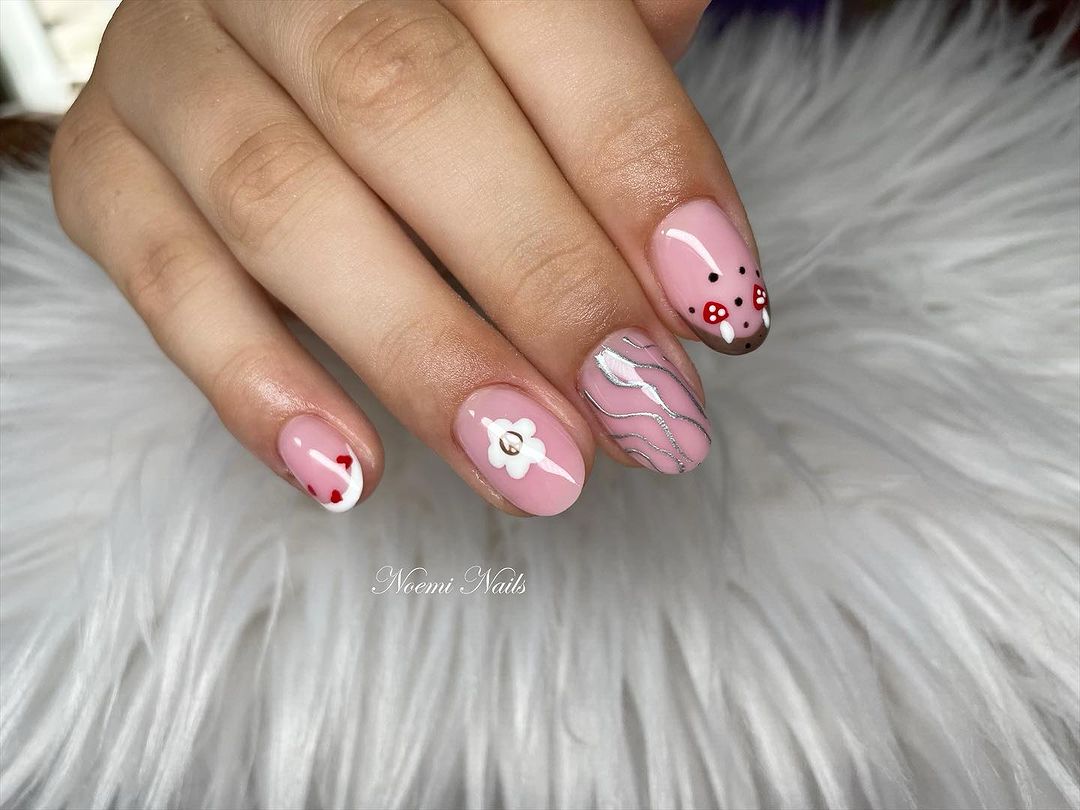
Pink and Playful Garden
This charming nail design features a mix of playful and delicate elements on a soft pink base. The nails are adorned with tiny red hearts, mushrooms, and floral accents, all brought together with a touch of silver swirls. The combination of these elements creates a whimsical garden scene, perfect for those who love intricate and detailed nail art.
-
- Clear base coat
- Soft pink nail polish (e.g., Essie Fiji)
- Red, white, and green nail polishes for details
- Silver nail art pen for swirls
- Top coat
Recommendations:
-
- Use pastel shades to create a soft, harmonious look.
- A fine brush or nail art pen can help with drawing the small details.
- Finish with a glossy top coat to protect the design and add shine.
DIY Instructions:
-
- Apply a clear base coat to your nails.
- Paint your nails with a soft pink polish and let them dry.
- Use fine brushes or nail art pens to draw hearts, mushrooms, and floral accents.
- Add silver swirls for an extra touch of elegance.
- Seal the design with a top coat to ensure durability and shine.
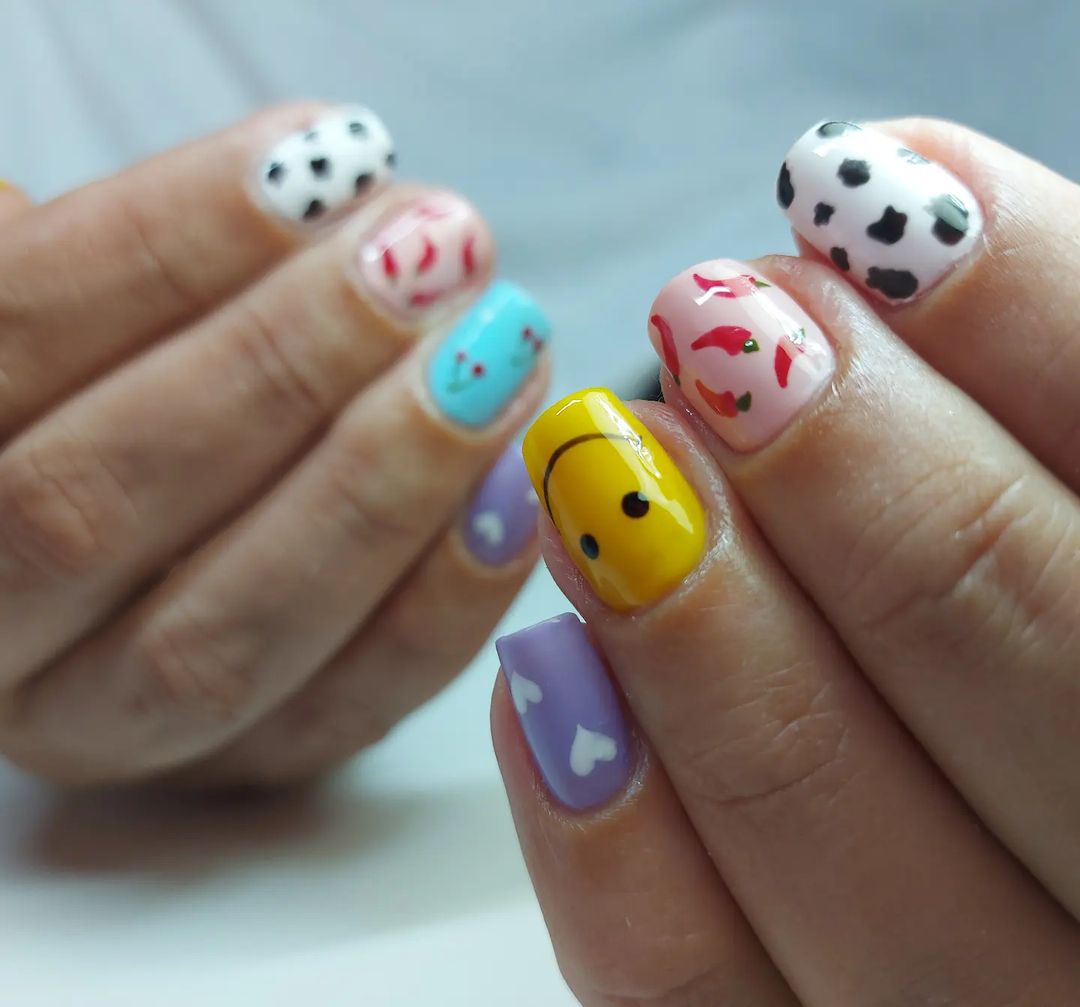
Colorful and Fun Mix
This vibrant nail design features a mix of colors and patterns on short, square-shaped nails. Each nail is painted with a different base color and adorned with various fun patterns, such as smiley faces, hearts, and abstract shapes. The playful mix of designs makes these nails perfect for those who love to experiment with bold and unique looks.
-
- Clear base coat
- Various colored nail polishes for base colors (e.g., OPI Alpine Snow, Essie Mint Candy Apple)
- Black and white nail polishes for details
- Nail art pens for precise patterns
- Top coat
Recommendations:
-
- Use bright, contrasting colors to make each design stand out.
- A nail art pen can help achieve precise patterns and details.
- A high-shine top coat will enhance the colors and protect the design.
DIY Instructions:
-
- Apply a clear base coat to your nails.
- Paint each nail with a different base color and let them dry.
- Use nail art pens to draw various fun patterns on each nail.
- Seal the design with a top coat to protect the artwork and add shine.
Matte Squirrel and Speckle
This cozy nail design features a combination of matte neutrals and a cute squirrel accent. The nails are kept short and square-shaped, with a mix of matte beige and brown shades. The squirrel and speckled accents add a touch of whimsy and are perfect for embracing the autumn season.

-
- Clear base coat
- Matte beige and brown nail polishes (e.g., OPI Taupe-less Beach)
- Black nail polish for details
- Nail art pen for the squirrel design
- Matte top coat
Recommendations:
-
- Use matte polishes for a chic, understated look.
- A nail art pen can help create the detailed squirrel design.
- A matte top coat will keep the overall look cohesive and elegant.
DIY Instructions:
-
- Apply a clear base coat to your nails.
- Paint your nails with alternating matte beige and brown polishes.
- Use a nail art pen to draw the squirrel and speckled details.
- Finish with a matte top coat to protect the design and maintain the matte effect.
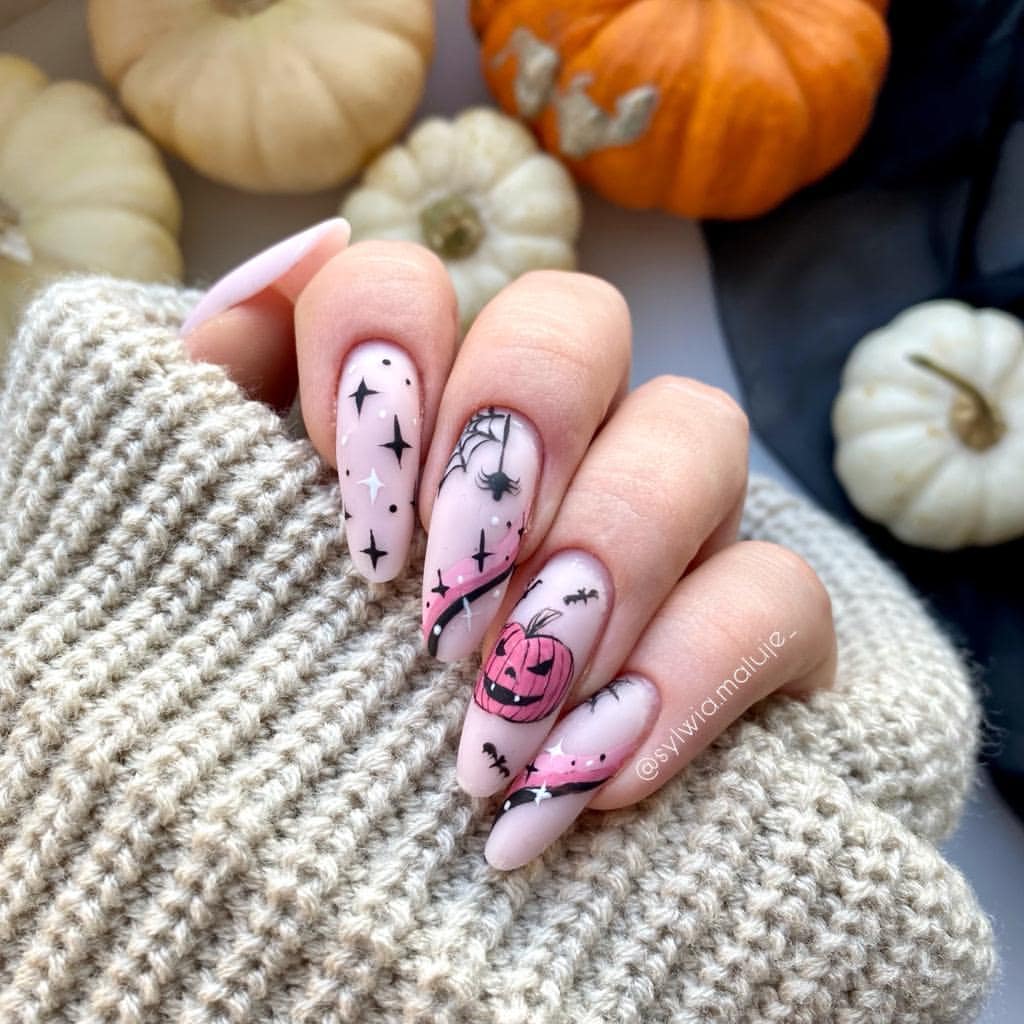
Halloween Spooky Vibes
This nail design captures the spooky essence of Halloween with intricate black and pink artwork. The nails are shaped into long, tapered almonds and feature detailed designs such as spiders, pumpkins, and stars on a soft pink base. The combination of spooky and cute elements makes these nails perfect for celebrating the Halloween season.
-
- Clear base coat
- Soft pink nail polish (e.g., OPI Mod About You)
- Black and white nail polishes for details
- Nail art pens for intricate designs
- Top coat
Recommendations:
-
- Use a soft pink base to make the black designs pop.
- Nail art pens are essential for creating detailed Halloween motifs.
- A glossy top coat will enhance the overall look and protect the design.
DIY Instructions:
-
- Apply a clear base coat to your nails.
- Paint your nails with a soft pink polish and let them dry.
- Use nail art pens to draw Halloween-themed designs such as spiders, pumpkins, and stars.
- Seal the design with a top coat to protect the artwork and add shine.
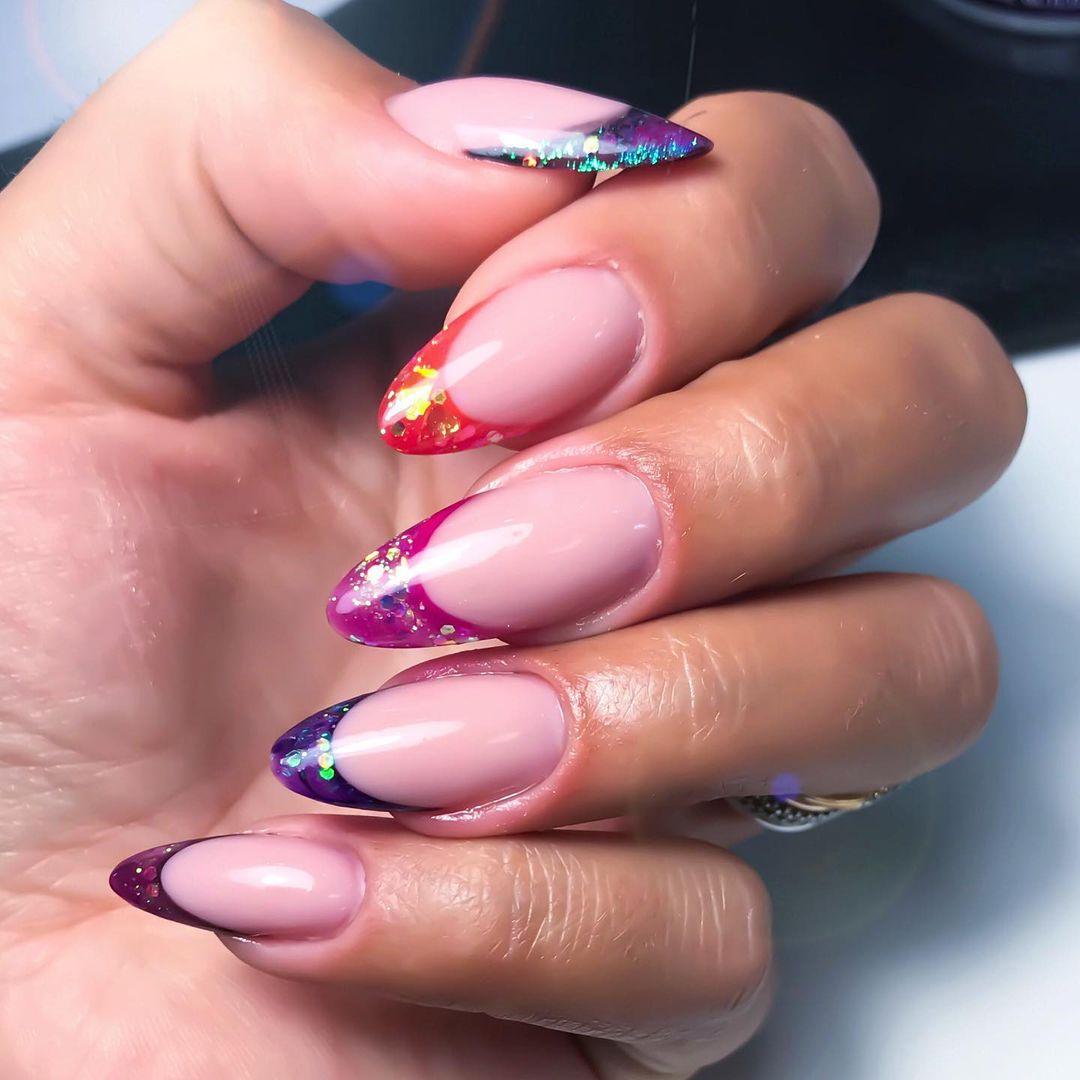
Colorful Glitter French Tips
This glamorous nail design features colorful glitter French tips on a nude base. The nails are shaped into long almonds, creating a sleek and elegant canvas for the glitter accents. Each nail tip is adorned with different colors of glitter, adding a festive and eye-catching touch to this sophisticated look.
-
- Clear base coat
- Nude or sheer pink nail polish (e.g., OPI Bubble Bath)
- Various colored glitter polishes for tips (e.g., Essie Set in Stones, OPI Show Us Your Tips)
- Top coat
Recommendations:
-
- Use high-quality glitter polishes for a dazzling effect.
- Apply the glitter tips carefully to ensure a clean, even finish.
- A glossy top coat will enhance the sparkle and protect the design.
DIY Instructions:
-
- Apply a clear base coat to your nails.
- Paint your nails with a nude or sheer pink polish and let them dry.
- Apply different colored glitter polishes to the tips of your nails.
- Seal the design with a top coat to protect the glitter and add shine.
FAQs
Q: What are some popular colors for fall nails? A: Popular colors for fall nails include deep reds, oranges, yellows, browns, and neutral shades like beige and taupe.
Q: Can I do these designs on short nails? A: Absolutely! Many fall nail designs can be adapted for short nails, offering a chic and manageable look.
Q: What type of top coat should I use to ensure longevity? A: A high-quality, fast-drying top coat like Seche Vite or Essie Gel-Setter will help protect your design and keep it looking fresh longer.
Q: Are these designs suitable for beginners? A: Yes, with a bit of practice, even beginners can achieve these fun and creative fall nail designs at home.
Q: How can I make my fall nail designs more unique? A: Experiment with different colors, textures, and patterns. Adding elements like glitter, stones, or metallic accents can also make your designs stand out.
Save Pin