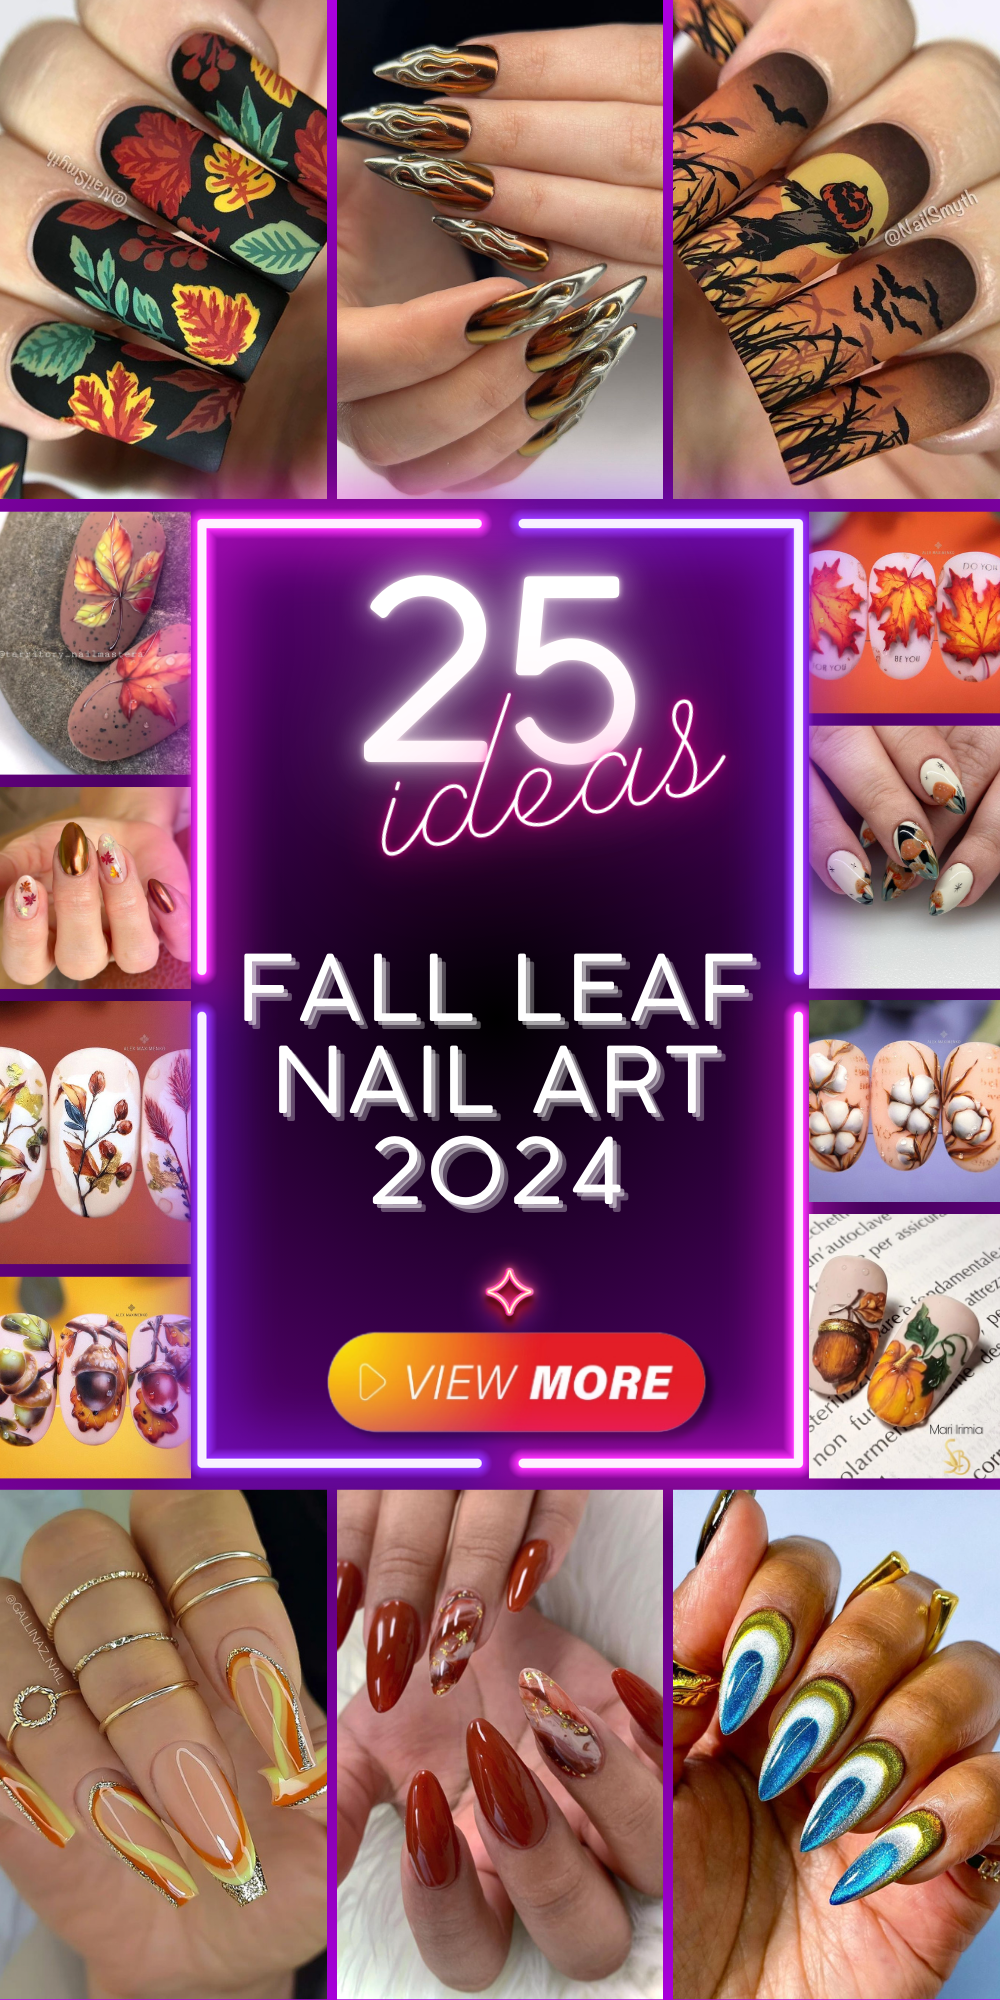
25 Ideas for Fall Leaf Nail Art 2024
Are you ready to transform your nails into mini canvases showcasing the beauty of autumn? Fall leaf nail art is the perfect way to embrace the season’s rich colors and cozy vibes. Whether you’re a fan of vibrant, bold designs or prefer subtle, elegant details, this guide has something for everyone. Get inspired by these stunning fall nail designs and learn how to recreate them at home with our step-by-step tutorials. Let’s dive into the world of autumn leaves, gold accents, and artistic elegance, and discover how you can bring the essence of fall to your fingertipsю
Metallic Maple Elegance
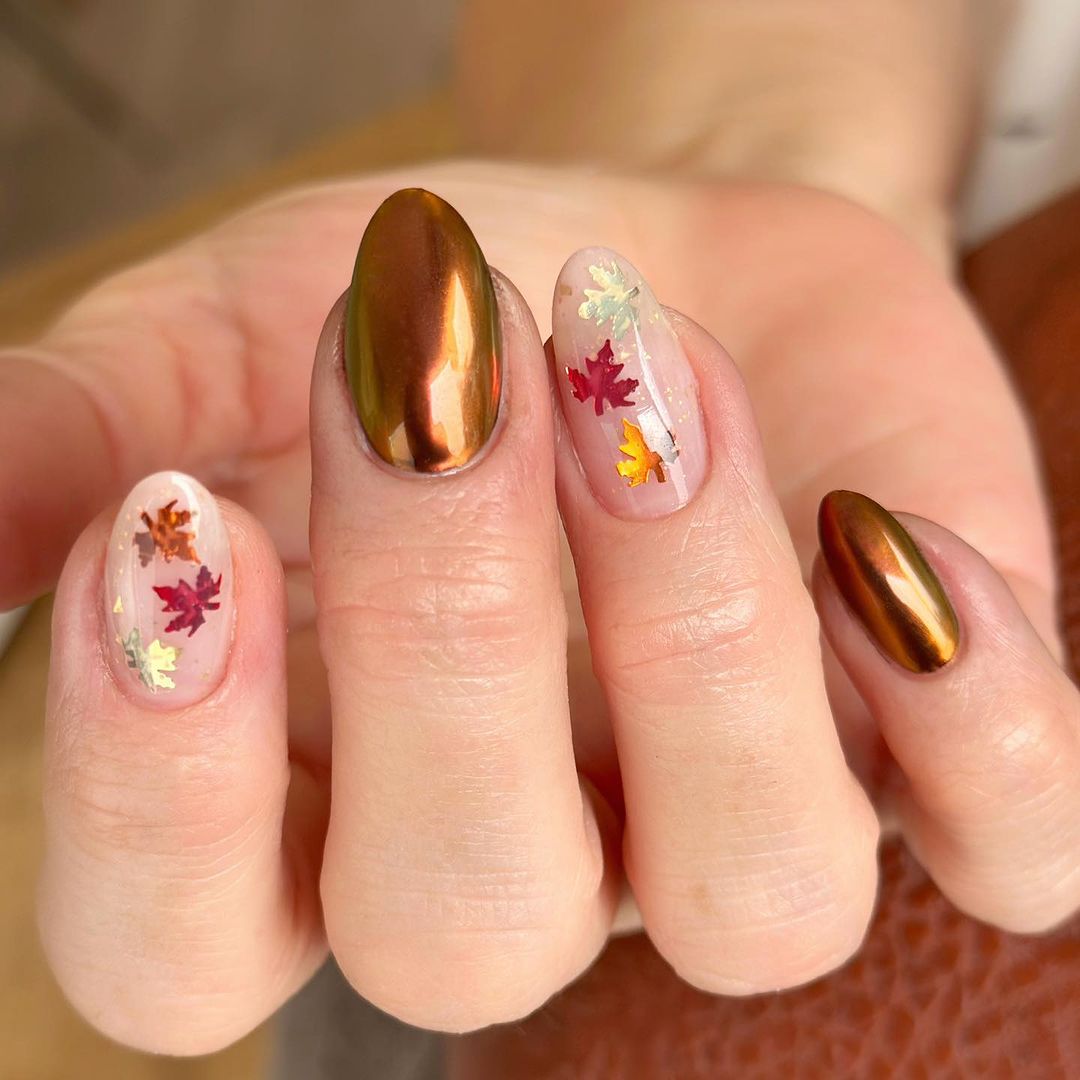
When it comes to fall leaf nail art 2024, nothing beats the charm of copper and leaf designs. The rich, metallic copper color of the nails catches the light beautifully, giving them a vibrant, glowing effect that’s perfect for autumn. The accent nails feature delicately placed autumn leaves in various colors – red, orange, yellow, and green, adding a touch of nature to your manicure. This design balances simplicity with a touch of elegance, making it suitable for both casual and formal occasions.
Consumables:
- Copper metallic gel polish (e.g., Kiara Sky Gel Polish in “Bronze Me Baby”)
- Autumn leaf nail stickers (e.g., Born Pretty Autumn Leaves Nail Stickers)
- Top coat (e.g., Seche Vite Dry Fast Top Coat)
- Base coat (e.g., OPI Natural Nail Base Coat)
- UV/LED nail lamp (e.g., SUNUV UV LED Nail Lamp)
Step-by-Step Tutorial:
- Start by applying a base coat to all your nails to protect your natural nails and ensure the polish adheres well.
- Apply two coats of copper metallic gel polish on all nails except the accent nails. Cure each coat under a UV/LED lamp.
- For the accent nails, apply a sheer nude or light beige gel polish. Cure under the lamp.
- Carefully place the autumn leaf nail stickers on the accent nails. Arrange them as you like, ensuring they are firmly pressed down.
- Apply a top coat to all nails, sealing in the stickers on the accent nails. Cure under the UV/LED lamp.
- Finish by applying cuticle oil around the nails to keep your cuticles moisturized.
Autumn Botanical Dreams
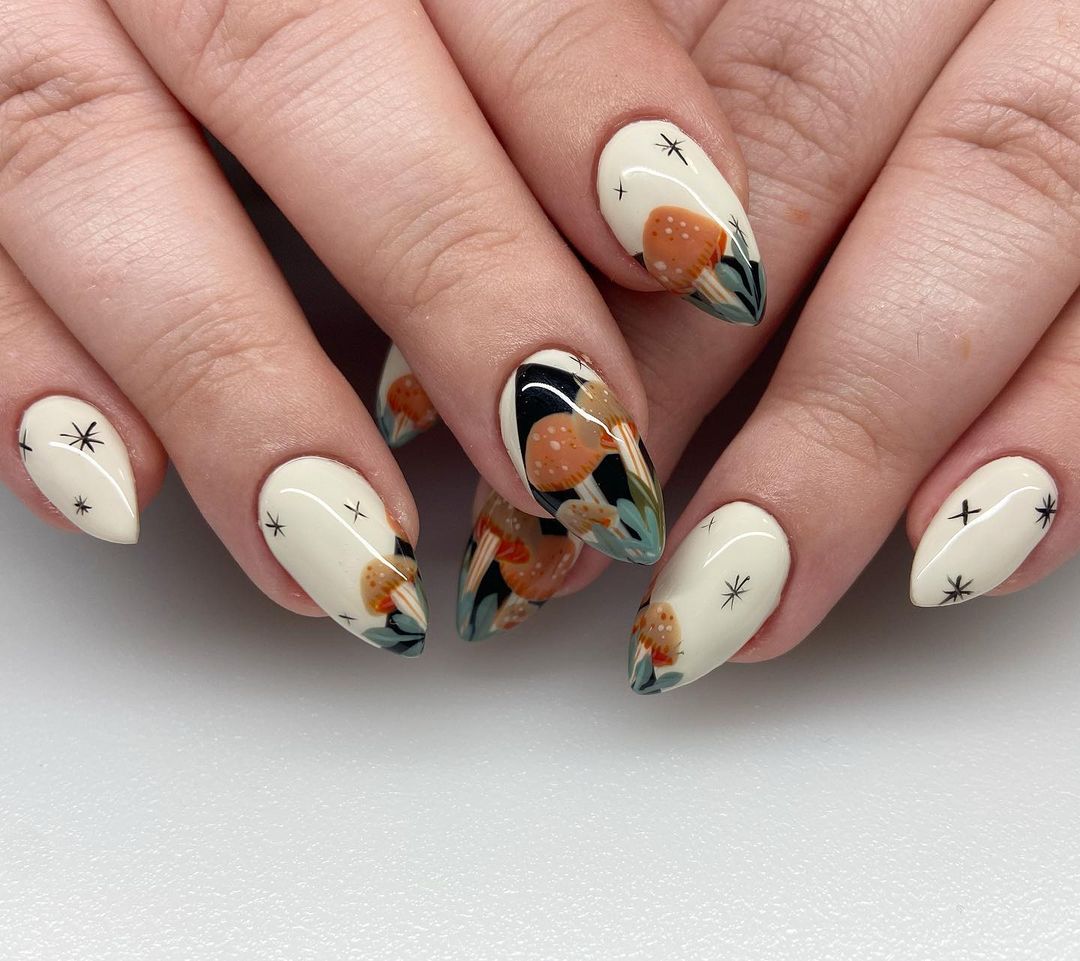
The design features a whimsical and fun take on fall leaf nail art 2024 with a creamy base color and detailed autumn leaf patterns. The black and orange elements create a striking contrast, while the little stars add a magical touch. This manicure is trendy and perfect for those who love to embrace the season with a bit of artistic flair. The almond shape of the nails adds elegance and complements the detailed designs.
Consumables:
- Creamy white gel polish (e.g., Essie Gel Couture in “Matter of Fiction”)
- Black gel polish (e.g., Gelish Gel Polish in “Black Shadow”)
- Orange gel polish (e.g., CND Shellac in “Electric Orange”)
- Nail art brushes (e.g., Beetles Nail Art Liner Brushes)
- Top coat (e.g., Sally Hansen Miracle Gel Top Coat)
- UV/LED nail lamp (e.g., Gelish 18G Professional LED Light)
Step-by-Step Tutorial:
- Apply a base coat to all nails and cure under the UV/LED lamp.
- Paint all nails with two coats of creamy white gel polish, curing each coat.
- Use a fine nail art brush to paint the black and orange autumn leaves and stars on each nail. Cure after painting each color to prevent smudging.
- Seal the design with a top coat and cure under the UV/LED lamp.
- Clean up any excess polish around the nails with a nail polish remover pen and apply cuticle oil.
Glittering Fall Foliage
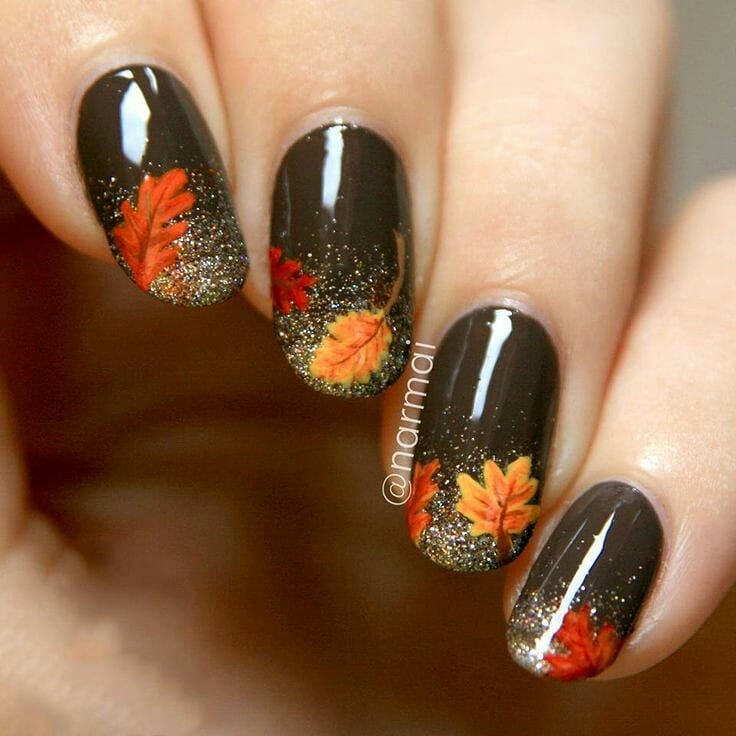
The nails exemplify a classic and sophisticated fall leaf nail art 2024 design. The deep, dark base color creates a perfect canvas for the bright, detailed autumn leaves. The glitter gradient at the tips adds a glamorous touch, making these nails perfect for evening events or a stylish day out. The short, rounded shape keeps the look neat and manageable.
Consumables:
- Dark brown gel polish (e.g., OPI GelColor in “My Italian Is a Little Rusty”)
- Gold glitter gel polish (e.g., LeChat Perfect Match in “Golden Icing”)
- Autumn leaf nail decals (e.g., Nicole Diary Autumn Leaves Nail Stickers)
- Top coat (e.g., Gelish Top It Off Gel Sealer)
- UV/LED nail lamp (e.g., SUN5 48W UV LED Lamp)
Step-by-Step Tutorial:
- Apply a base coat to all nails and cure under the UV/LED lamp.
- Paint all nails with two coats of dark brown gel polish, curing each coat.
- Apply the gold glitter gel polish at the tips of the nails, creating a gradient effect. Cure under the UV/LED lamp.
- Carefully place the autumn leaf decals on each nail, pressing them down firmly.
- Seal the design with a top coat and cure under the UV/LED lamp.
- Finish by moisturizing your cuticles with cuticle oil.
Intricate Autumn Leaves
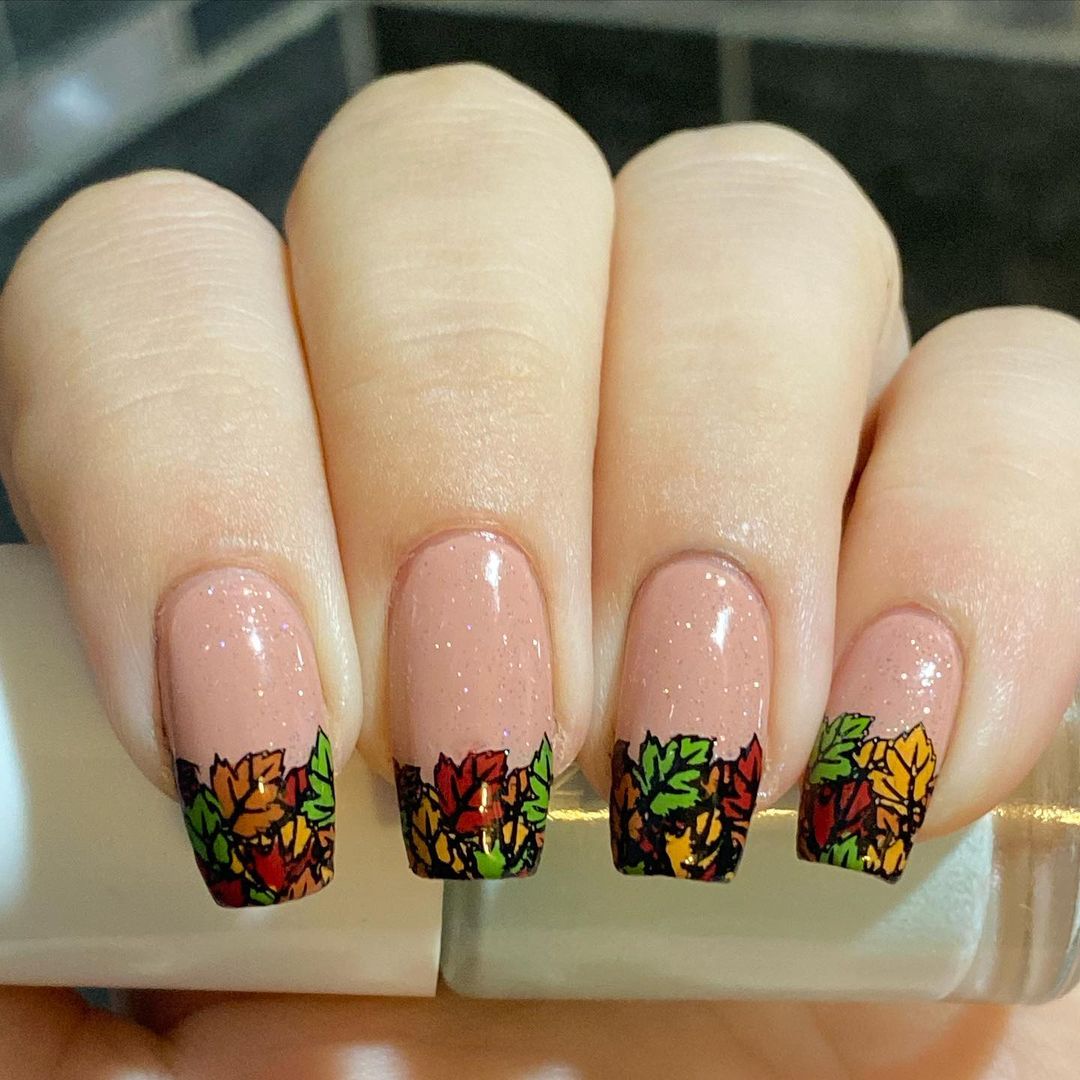
This design features a natural, nude base with a sparkling touch that provides the perfect canvas for intricate autumn leaf details at the tips. The gradient of glittery polish elevates the design, making it suitable for any festive autumn event. The vibrant hues of the leaves—red, orange, yellow, and green—stand out beautifully against the neutral background, capturing the essence of fall foliage in a sophisticated and elegant manner.
Consumables:
- Nude gel polish (e.g., Gelish “Simple Sheer”)
- Fine glitter gel polish (e.g., LeChat “Twinkle”)
- Autumn leaf nail stickers or decals (e.g., Whats Up Nails “Fall Leaves”)
- Top coat (e.g., Seche Vite Dry Fast Top Coat)
- Base coat (e.g., OPI Natural Nail Base Coat)
- UV/LED nail lamp (e.g., SUNUV UV LED Nail Lamp)
Step-by-Step Tutorial:
- Begin with a base coat to protect your nails and ensure longevity of the polish. Cure under a UV/LED lamp.
- Apply two coats of nude gel polish, curing each layer.
- Add a layer of fine glitter gel polish, focusing on the tips to create a subtle gradient effect. Cure under the lamp.
- Carefully place the autumn leaf stickers or decals on the tips, arranging them in a dense, overlapping pattern to mimic a pile of fallen leaves.
- Seal with a top coat and cure under the UV/LED lamp.
- Finish with cuticle oil to keep your nails and surrounding skin hydrated.
Save Pin
Harvest Time Elegance
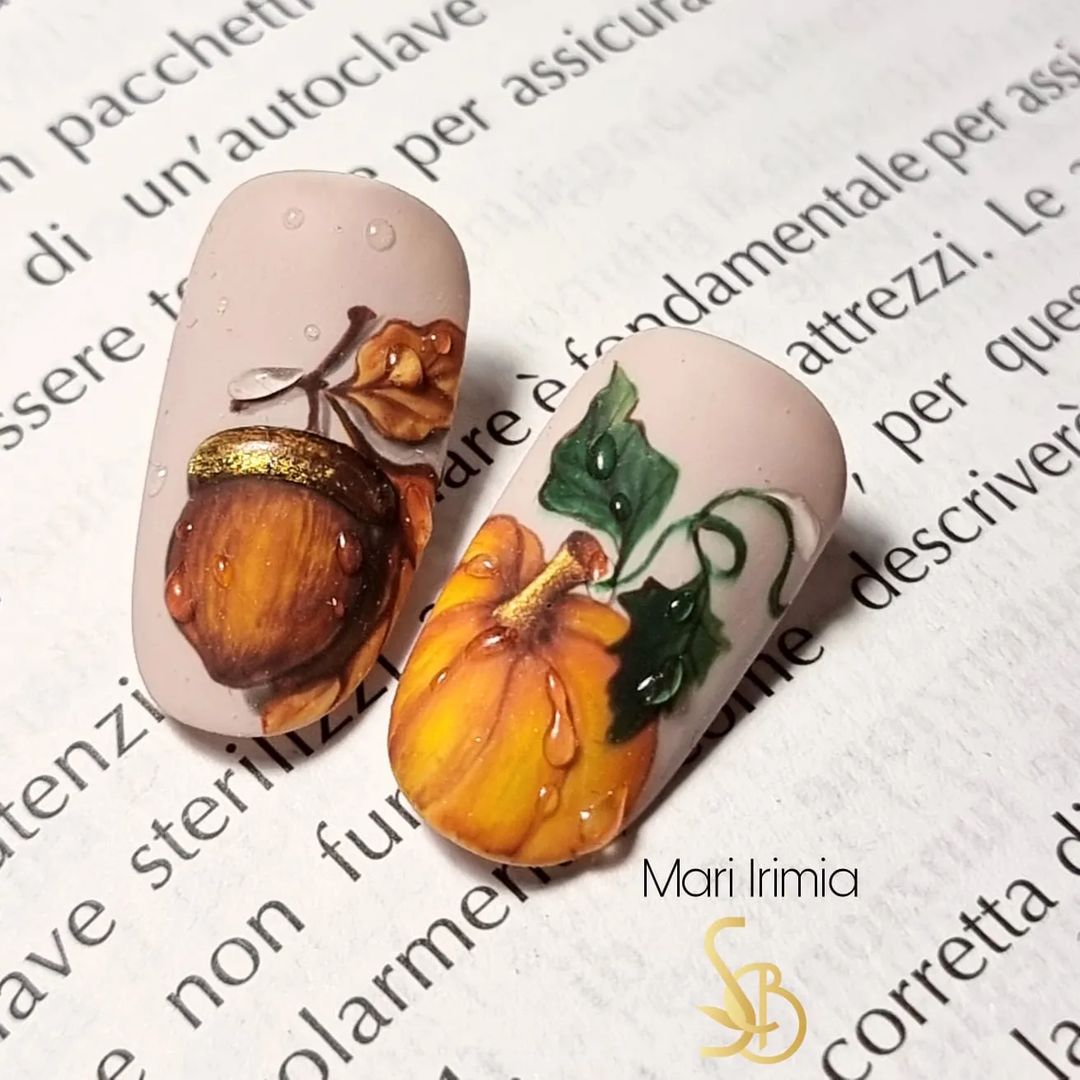
These nails embody the essence of the harvest season with detailed hand-painted designs of an acorn and a pumpkin. The matte finish adds a sophisticated touch, while the droplets of water make the designs appear fresh and lifelike. The craftsmanship in the artwork is evident, making these nails a true piece of art. This design is perfect for those who appreciate detailed, seasonal nail art that tells a story.
Consumables:
- Matte nude gel polish (e.g., Zoya “MatteVelvet”)
- Acrylic paint for nail art (e.g., Arteza Acrylic Paints)
- Nail art brushes (e.g., Beetles Gel Polish Nail Art Brushes)
- Top coat (matte) (e.g., OPI Matte Top Coat)
- Base coat (e.g., Butter London Horse Power Nail Rescue Base Coat)
- UV/LED nail lamp (e.g., MelodySusie UV LED Nail Lamp)
Step-by-Step Tutorial:
- Start with a base coat and cure it under the UV/LED lamp.
- Apply two coats of matte nude gel polish, curing each layer under the lamp.
- Using nail art brushes, paint the acorn and pumpkin designs with acrylic paints. Add fine details and water droplets for a realistic effect. Allow the paint to dry completely.
- Seal the artwork with a matte top coat and cure under the lamp.
- Gently clean around the nails with a nail polish remover pen and apply cuticle oil.
Golden Autumn Grapes
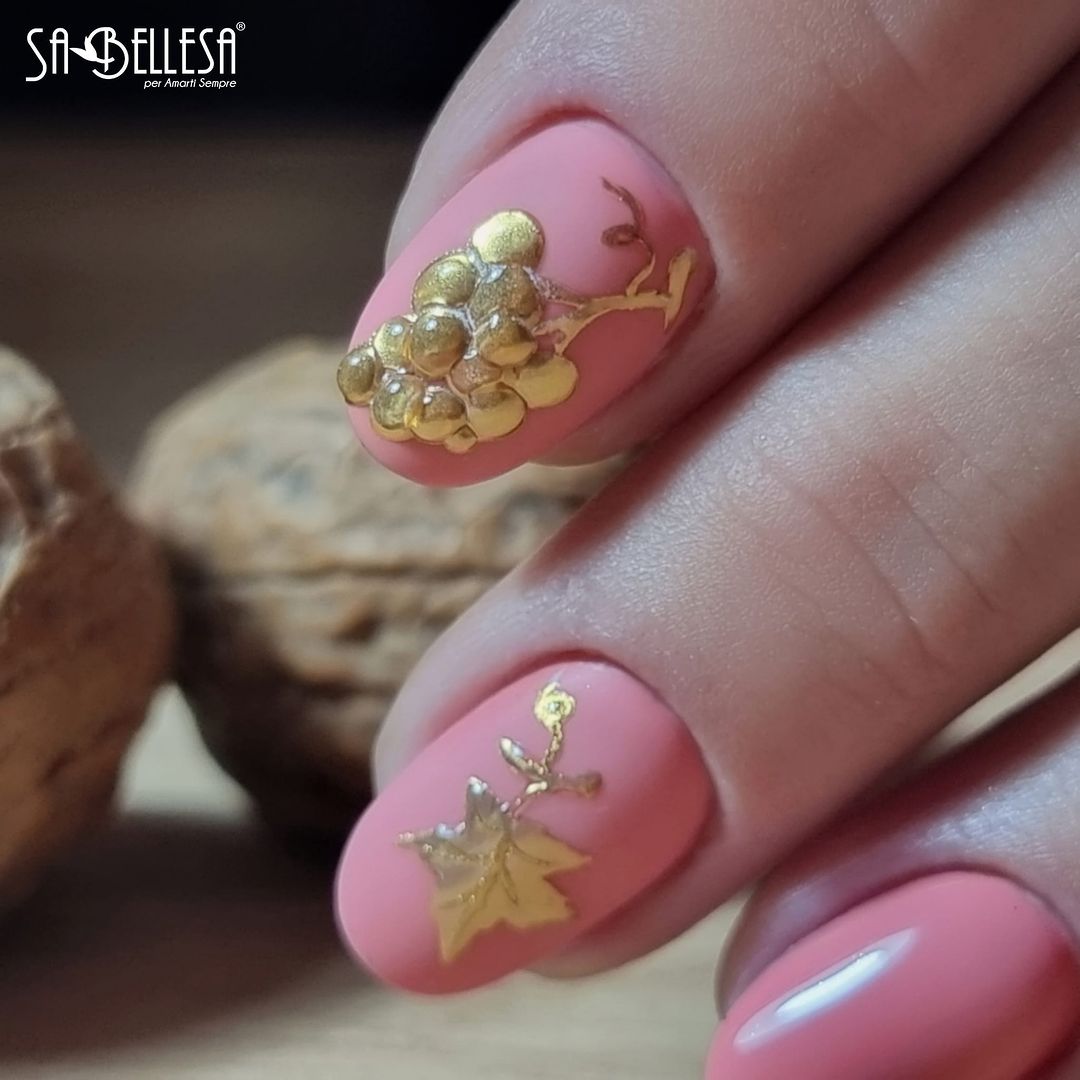
This design showcases the beauty of autumn with golden grape clusters and a delicate leaf, all set against a soft pink background. The gold accents add a touch of luxury, making this design perfect for a special occasion or a sophisticated autumn look. The short, round shape of the nails keeps the design practical while still being stylish and eye-catching.
Consumables:
- Soft pink gel polish (e.g., Essie Gel Couture “Matter of Fiction”)
- Gold leaf or foil (e.g., Gold Foil Flakes for Nails)
- Nail art brushes (e.g., Winstonia Fine Detail Nail Art Brushes)
- Top coat (e.g., Sally Hansen Miracle Gel Top Coat)
- Base coat (e.g., Deborah Lippmann All About That Base)
- UV/LED nail lamp (e.g., SUN5 48W UV LED Lamp)
Step-by-Step Tutorial:
- Apply a base coat and cure it under the UV/LED lamp.
- Paint your nails with two coats of soft pink gel polish, curing each coat under the lamp.
- Use nail art brushes to apply gold leaf or foil to create the grape clusters and the leaf. Use a small amount of nail adhesive to secure the foil in place if needed.
- Seal the design with a top coat and cure under the UV/LED lamp.
- Finish by applying cuticle oil to nourish the skin around your nails.
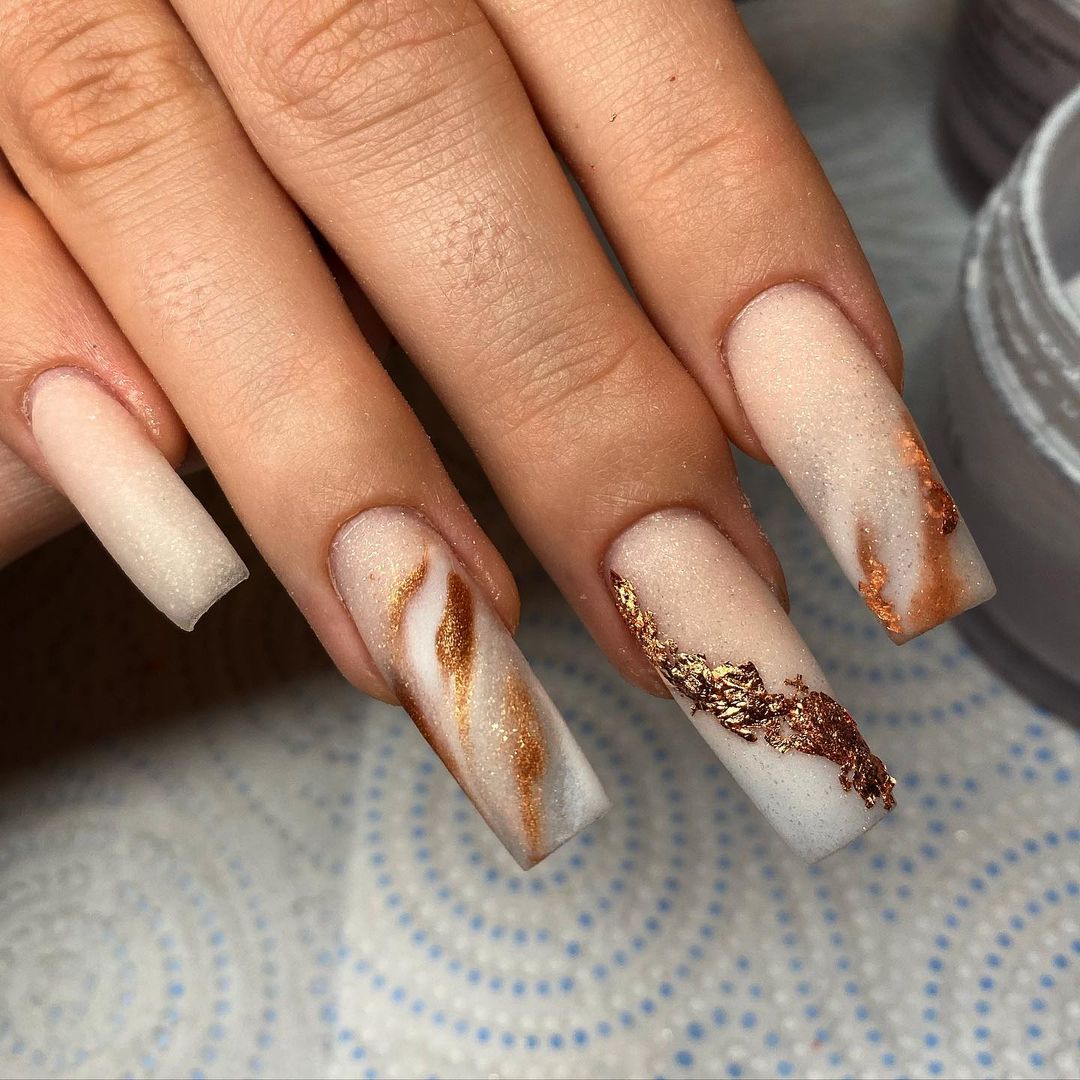
Marble Fall Elegance
This design is a luxurious take on fall nail art, featuring a marble effect with gold accents. The base is a soft, matte white, providing a perfect canvas for the marbled swirls of gold and brown. The gold flakes add a touch of opulence, making this design ideal for those who love a sophisticated and glamorous look.
Consumables:
- Matte white gel polish (e.g., Modelones Matte Top Coat)
- Gold gel polish (e.g., DND Gel Polish in “Golden Sahara”)
- Brown gel polish (e.g., OPI GelColor in “I’m Not Really a Waitress”)
- Gold foil flakes (e.g., Gold Leaf Flakes for Nails)
- Nail art brushes (e.g., PANA Nail Art Brush Set)
- Top coat (e.g., Seche Vite Dry Fast Top Coat)
- Base coat (e.g., Essie Here to Stay Base Coat)
- UV/LED nail lamp (e.g., MelodySusie LED Nail Lamp)
Step-by-Step Tutorial:
- Apply a base coat to all nails and cure under the UV/LED lamp.
- Paint all nails with two coats of matte white gel polish, curing each coat.
- Using a thin nail art brush, create marble-like swirls with gold and brown gel polish. Cure each design.
- Apply gold foil flakes to random areas to enhance the marble effect. Press down firmly.
- Seal the design with a top coat and cure under the UV/LED lamp.
- Finish with cuticle oil to nourish the skin around your nails.
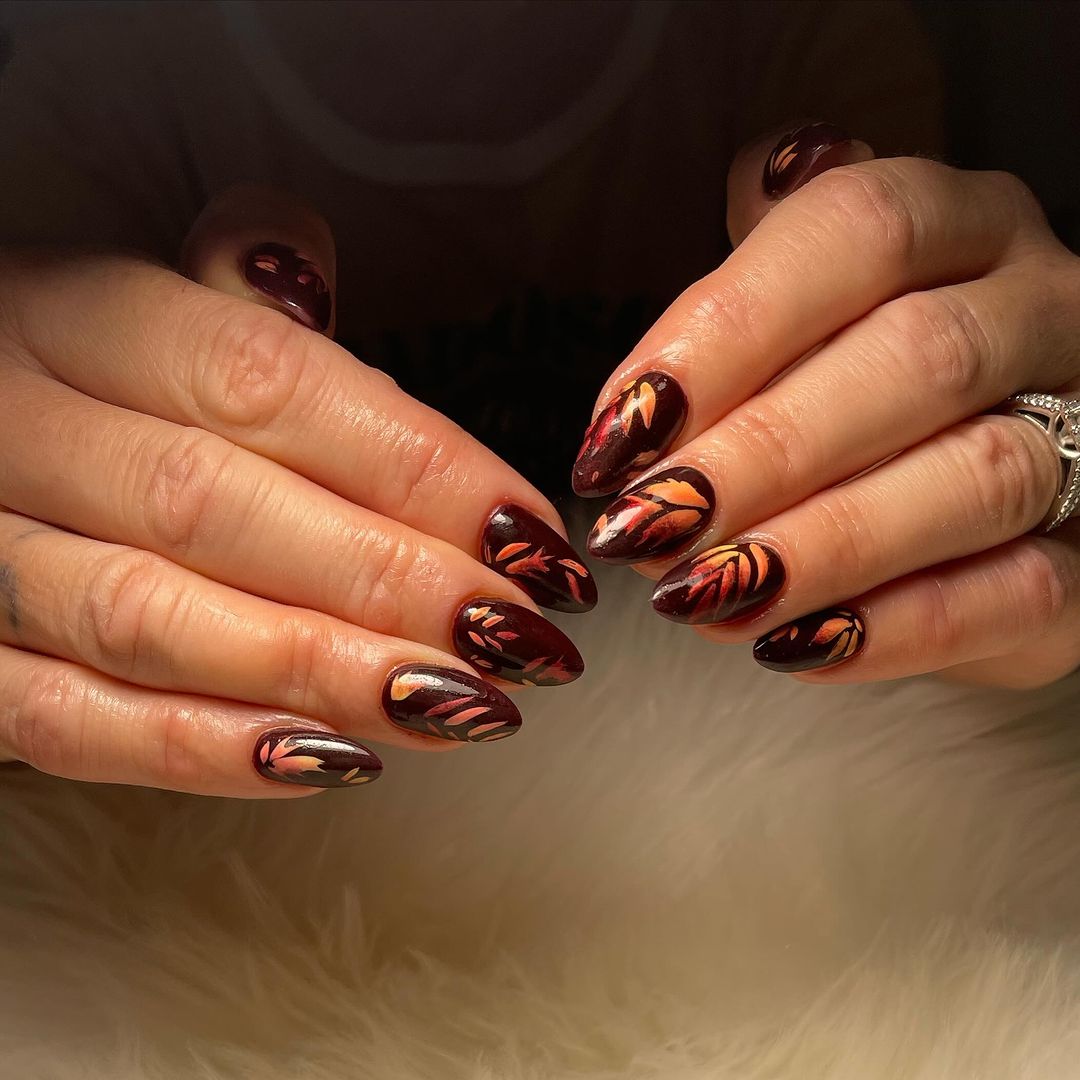
Fiery Autumn Leaves
This bold and dramatic design features deep maroon nails with fiery orange and yellow leaf accents. The almond shape of the nails adds elegance and enhances the overall impact of the vibrant fall colors. This look is perfect for those who want their nails to make a statement during the autumn season.
Consumables:
- Deep maroon gel polish (e.g., CND Shellac in “Masquerade”)
- Orange gel polish (e.g., Essie Gel Couture in “Looks to Thrill”)
- Yellow gel polish (e.g., Gelish Gel Polish in “Sunlight”)
- Nail art brushes (e.g., Winstonia Fine Detail Nail Art Brushes)
- Top coat (e.g., INM Out The Door Top Coat)
- Base coat (e.g., OPI Natural Nail Base Coat)
- UV/LED nail lamp (e.g., SUNUV 48W UV LED Nail Lamp)
Step-by-Step Tutorial:
- Apply a base coat to all nails and cure under the UV/LED lamp.
- Paint all nails with two coats of deep maroon gel polish, curing each coat.
- Using nail art brushes, paint the orange and yellow leaf accents on each nail. Cure each color separately to avoid blending.
- Seal the design with a top coat and cure under the UV/LED lamp.
- Finish with cuticle oil to keep your cuticles healthy and hydrated.
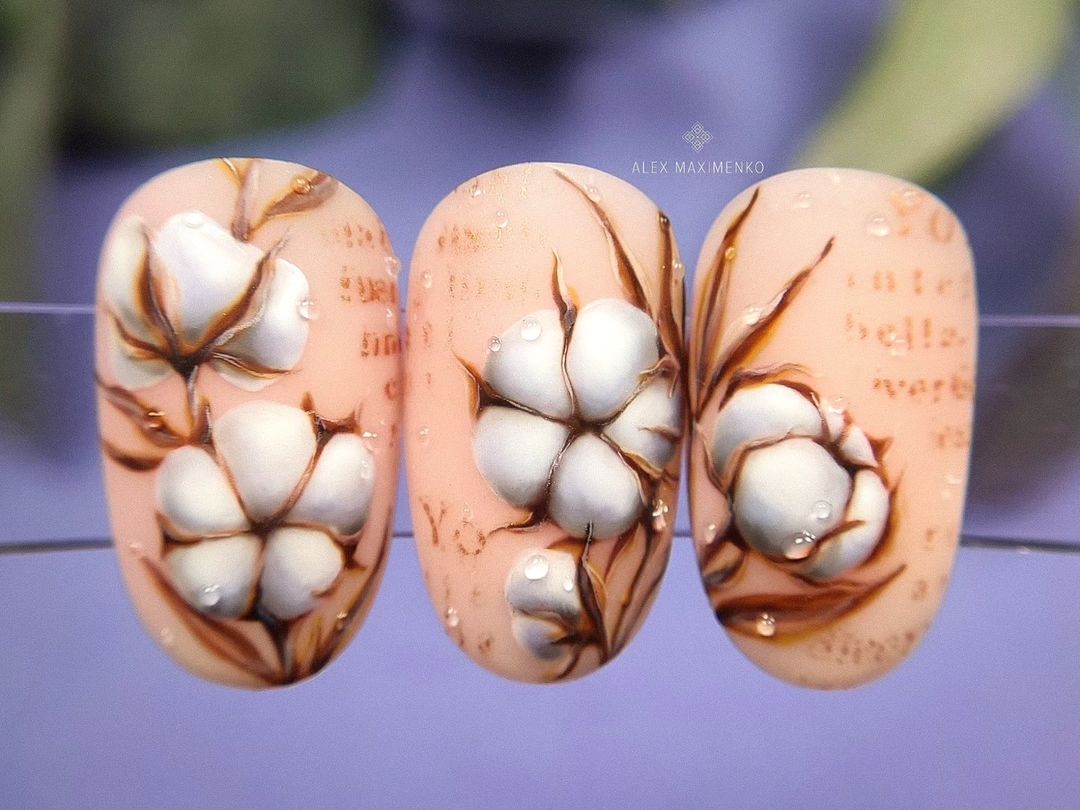
Cotton Harvest
This nail design is inspired by the natural beauty of cotton plants during the fall harvest. The delicate cotton balls are hand-painted with meticulous detail on a soft peach base, creating a serene and rustic look. The 3D effect of the cotton balls adds depth and texture to the design, making it a unique and artistic choice.
Consumables:
- Soft peach gel polish (e.g., OPI GelColor in “Bare My Soul”)
- White acrylic paint (e.g., DecoArt Americana Acrylic Paint in “Snow White”)
- Brown acrylic paint (e.g., Apple Barrel Acrylic Paint in “Burnt Umber”)
- Nail art brushes (e.g., Beetles Gel Polish Nail Art Brushes)
- Top coat (e.g., Sally Hansen Miracle Gel Top Coat)
- Base coat (e.g., Deborah Lippmann All About That Base)
- UV/LED nail lamp (e.g., SUN5 48W UV LED Lamp)
Step-by-Step Tutorial:
- Start with a base coat and cure under the UV/LED lamp.
- Apply two coats of soft peach gel polish and cure each layer.
- Use nail art brushes and acrylic paints to carefully paint the cotton balls and their stems. Allow the paint to dry completely.
- Seal the artwork with a top coat and cure under the UV/LED lamp.
- Apply cuticle oil to keep your cuticles moisturized and healthy.
Save Pin
Colorful Fall Leaves
This vibrant design captures the colorful essence of fall with a mix of bright red, orange, yellow, and green leaves. The nude base color keeps the design grounded while allowing the bold colors to stand out. This look is perfect for those who want to embrace the full spectrum of autumn colors on their nails.
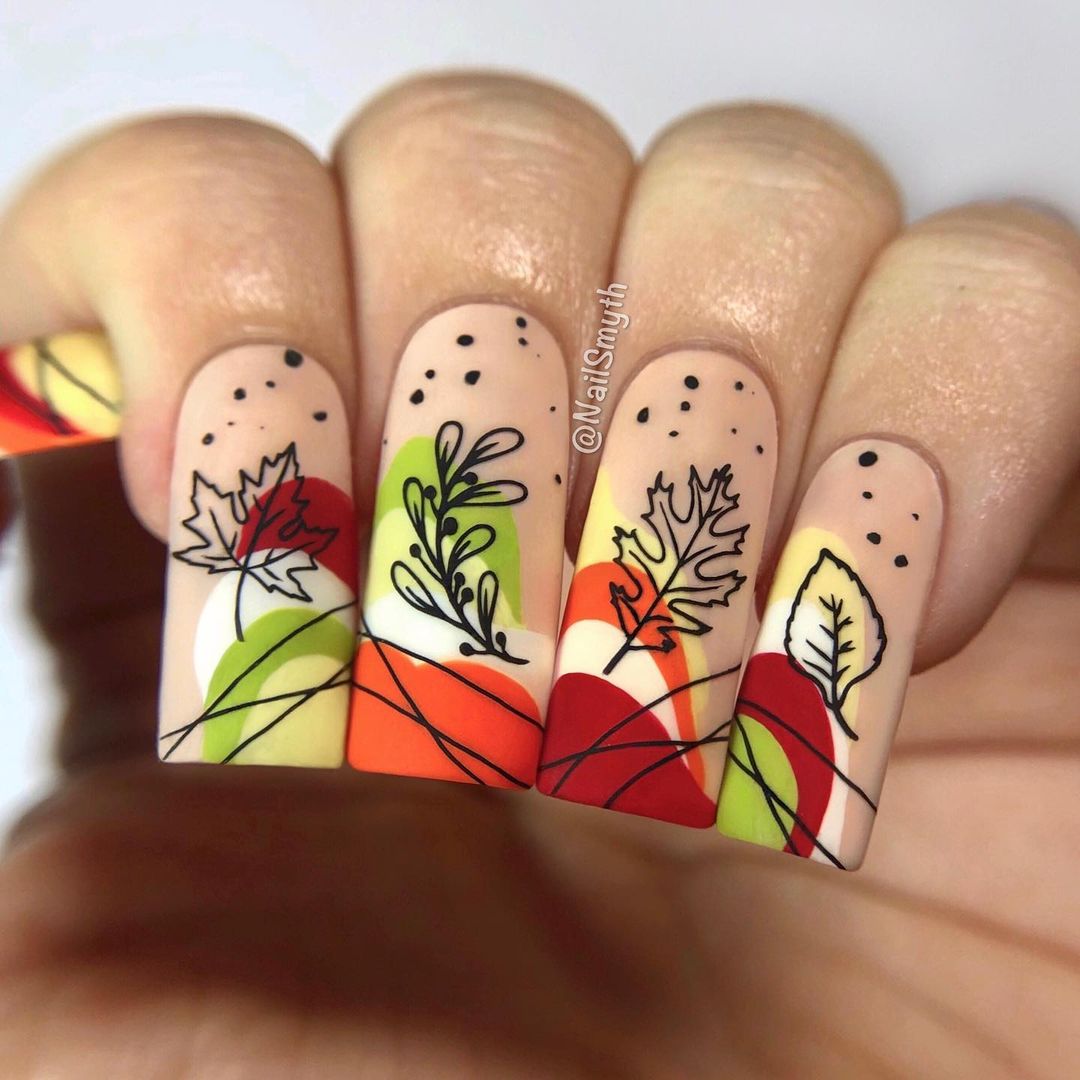
Consumables:
- Nude gel polish (e.g., Essie Gel Couture in “Fairy Tailor”)
- Red gel polish (e.g., Gelish Gel Polish in “Hot Rod Red”)
- Orange gel polish (e.g., CND Vinylux in “Gypsy”)
- Yellow gel polish (e.g., DND Gel Polish in “Sunflower”)
- Green gel polish (e.g., OPI GelColor in “Green-Wich Village”)
- Nail art brushes (e.g., Winstonia Nail Art Brush Set)
- Top coat (e.g., Seche Vite Dry Fast Top Coat)
- Base coat (e.g., OPI Natural Nail Base Coat)
- UV/LED nail lamp (e.g., MelodySusie UV LED Nail Lamp)
Step-by-Step Tutorial:
- Apply a base coat and cure under the UV/LED lamp.
- Paint all nails with two coats of nude gel polish, curing each coat.
- Using nail art brushes, paint the colorful fall leaves on each nail. Cure after each color application.
- Seal the design with a top coat and cure under the UV/LED lamp.
- Finish with cuticle oil to keep your nails and cuticles nourished.
Metallic Gradient
This design features a stunning metallic gradient from gold to blue, creating a striking and modern look. The stiletto shape of the nails enhances the dramatic effect, making this design perfect for those who want to stand out. The glossy finish adds an extra touch of glamour to this trendy fall nail art.
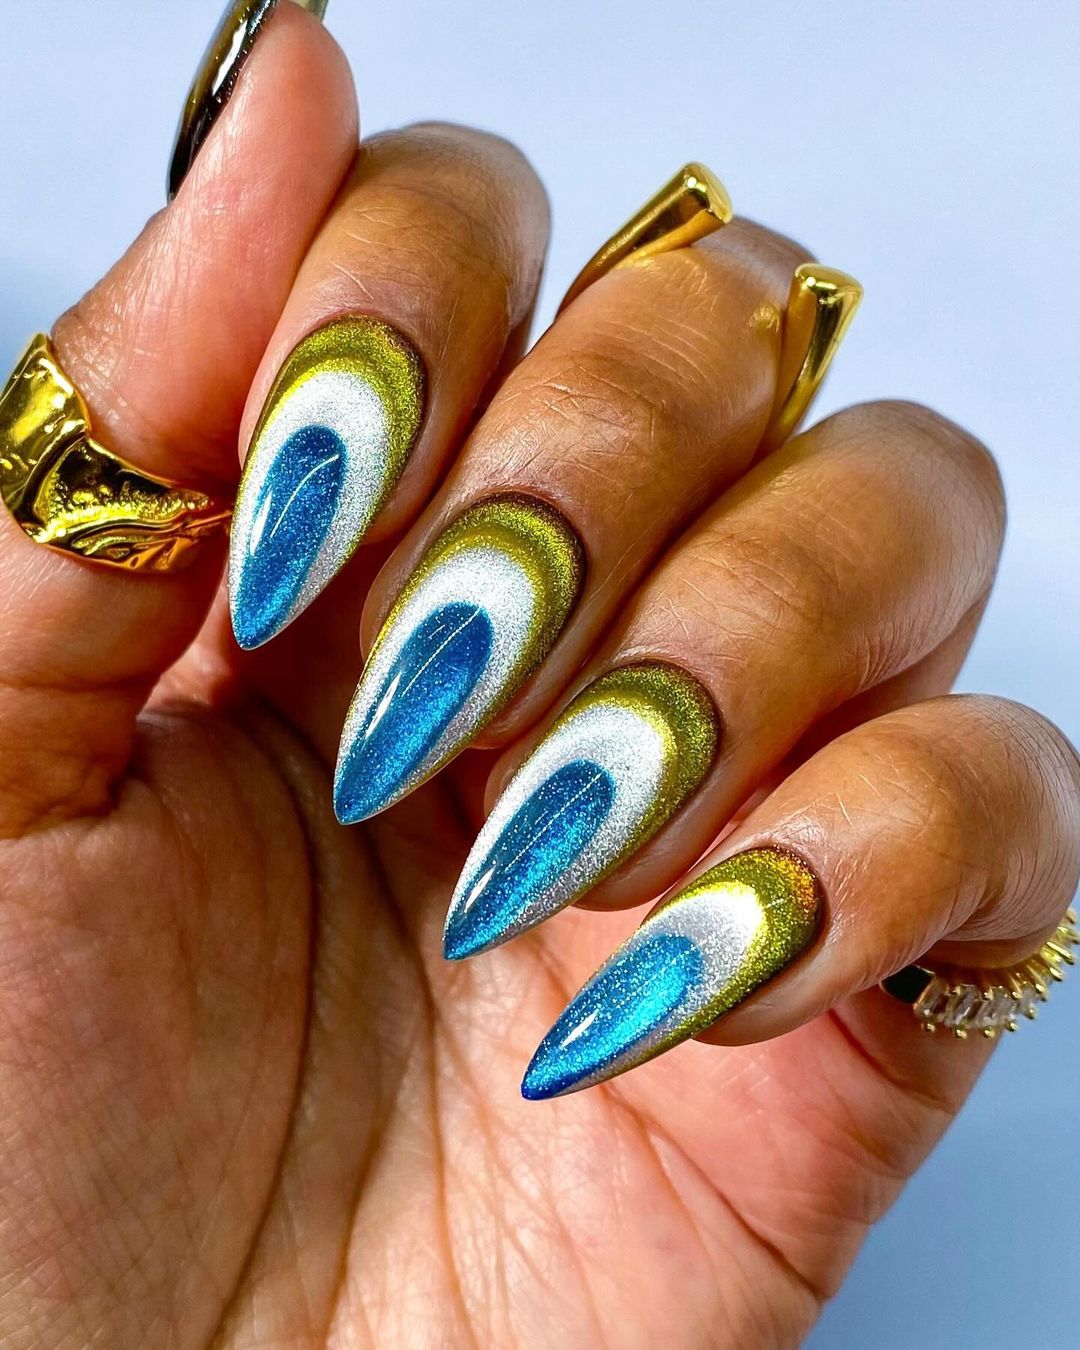
Consumables:
- Metallic gold gel polish (e.g., DND Gel Polish in “24K Gold”)
- Metallic blue gel polish (e.g., Essie Gel Couture in “Gilded Goddess”)
- Silver gel polish (e.g., Gelish Gel Polish in “Water Field”)
- Nail art sponge (e.g., Coscelia Gradient Nail Art Sponge)
- Top coat (e.g., INM Out The Door Top Coat)
- Base coat (e.g., Essie Here to Stay Base Coat)
- UV/LED nail lamp (e.g., SUNUV 48W UV LED Lamp)
Step-by-Step Tutorial:
- Apply a base coat and cure under the UV/LED lamp.
- Using the nail art sponge, apply the metallic gold gel polish to the base of the nails and blend into the silver and blue towards the tips. Cure after each color application.
- Repeat the gradient application to achieve the desired opacity and blend.
- Seal the design with a top coat and cure under the UV/LED lamp.
- Finish with cuticle oil to keep your cuticles hydrated and healthy.
Autumn Stripes
This modern and chic design features geometric stripes in warm autumn colors. The clear base with colorful stripes makes this design unique and eye-catching. The coffin shape of the nails adds elegance and sophistication, making this look perfect for those who love a contemporary take on fall nail art.
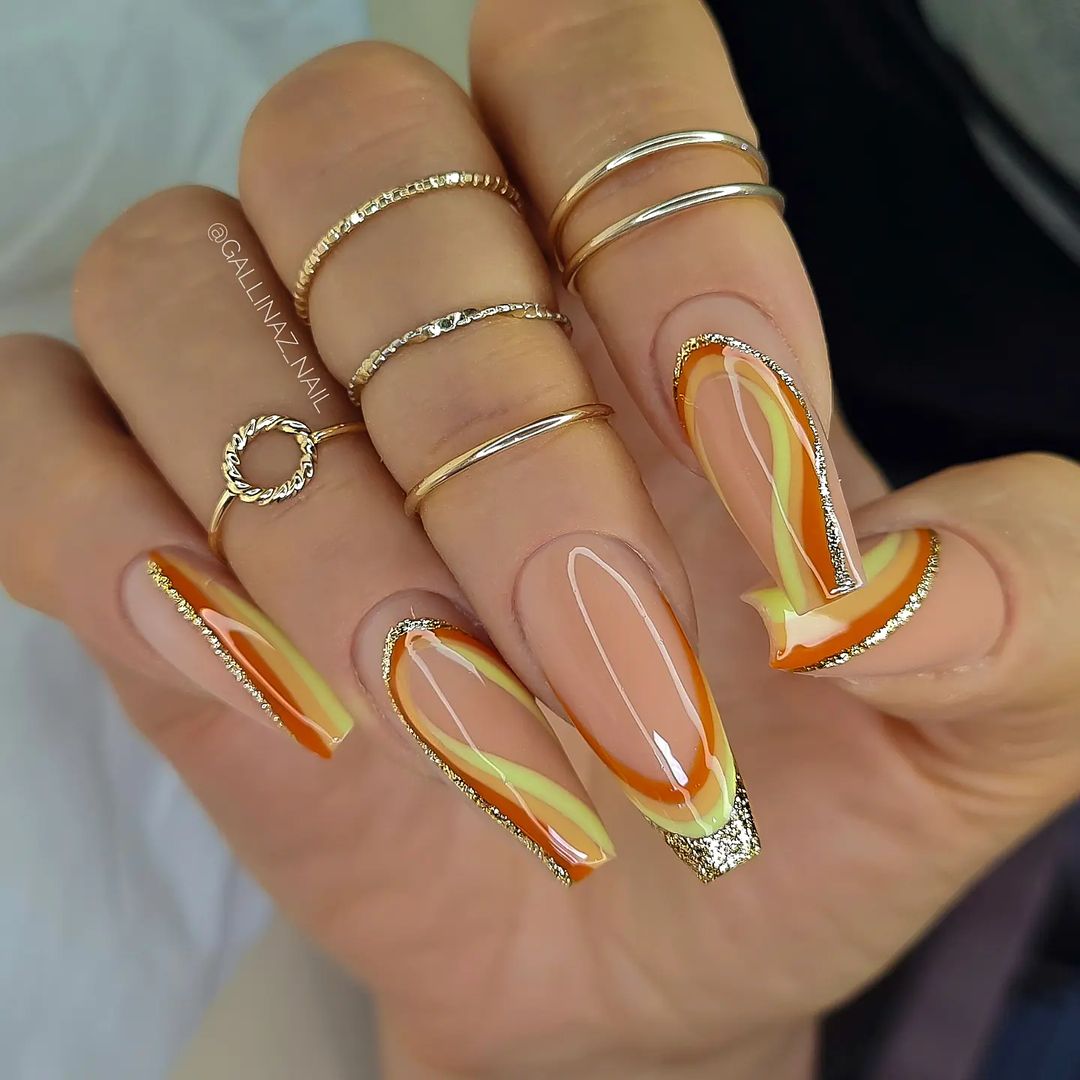
Consumables:
- Clear gel polish (e.g., Gelish Clear Gel Polish)
- Orange gel polish (e.g., Essie Gel Couture in “Looks to Thrill”)
- Yellow gel polish (e.g., DND Gel Polish in “Sunflower”)
- Gold glitter gel polish (e.g., LeChat Perfect Match in “Golden Icing”)
- Nail art brushes (e.g., PANA Nail Art Brush Set)
- Top coat (e.g., Sally Hansen Miracle Gel Top Coat)
- Base coat (e.g., Deborah Lippmann All About That Base)
- UV/LED nail lamp (e.g., MelodySusie LED Nail Lamp)
Step-by-Step Tutorial:
- Apply a base coat and cure under the UV/LED lamp.
- Paint the nails with a clear gel polish and cure under the lamp.
- Using nail art brushes, paint geometric stripes in orange, yellow, and gold glitter gel polish. Cure after each color application.
- Seal the design with a top coat and cure under the UV/LED lamp.
- Finish with cuticle oil to keep your nails and cuticles healthy and hydrated.
Terracotta Marble Magic
This nail design features a rich terracotta base with intricate marble accents. The earthy, warm tones are perfect for autumn, with a combination of deep orange and creamy white swirls that create a luxurious, sophisticated look. The addition of gold flakes adds an extra layer of elegance, making this design ideal for those who want to make a statement with their nails.
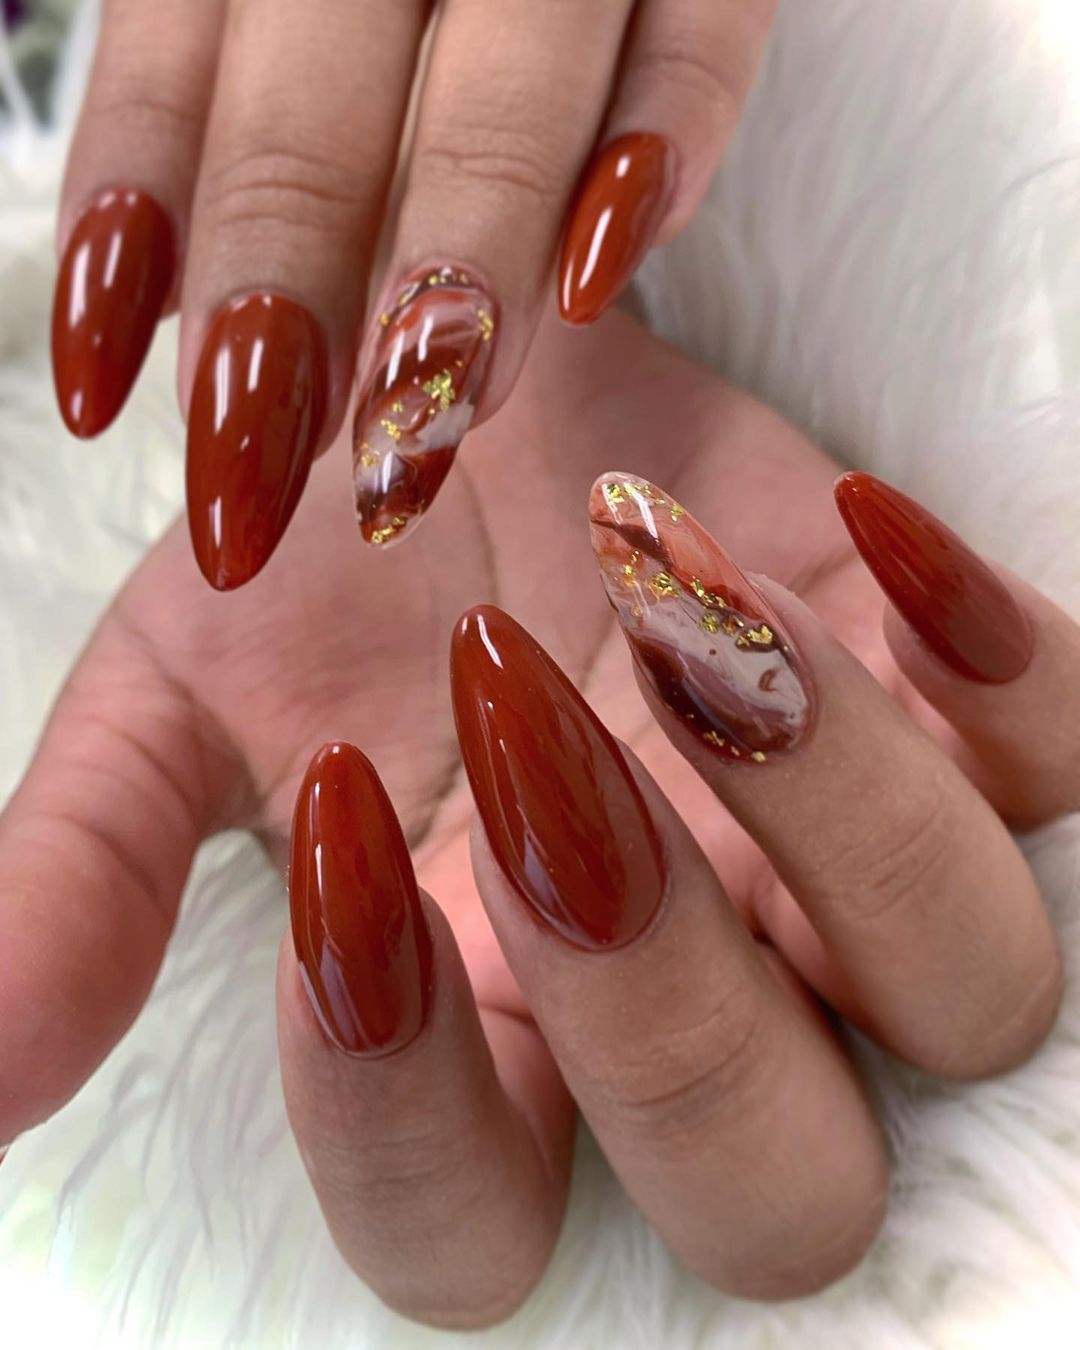
Consumables:
- Terracotta gel polish (e.g., OPI GelColor in “My Italian is a Little Rusty”)
- Creamy white gel polish (e.g., Gelish Gel Polish in “Sheer White”)
- Gold flakes (e.g., Gold Foil Flakes for Nails)
- Nail art brushes (e.g., Saviland Nail Art Brushes)
- Top coat (e.g., Seche Vite Dry Fast Top Coat)
- Base coat (e.g., Essie Here to Stay Base Coat)
- UV/LED nail lamp (e.g., MelodySusie LED Nail Lamp)
Step-by-Step Tutorial:
- Apply a base coat and cure under the UV/LED lamp.
- Paint all nails with two coats of terracotta gel polish, curing each layer.
- Use a nail art brush to create marble swirls with the creamy white gel polish. Cure after each design.
- Apply gold flakes to random areas for added texture and shine. Press down firmly.
- Seal the design with a top coat and cure under the UV/LED lamp.
- Finish with cuticle oil to keep your nails and cuticles nourished.
Autumn Acorn Art
This exquisite nail design features detailed, hand-painted acorns and autumn leaves. The soft nude background provides the perfect canvas for these intricate designs, which include realistic textures and subtle water droplets for a 3D effect. This look is perfect for those who appreciate detailed artwork and want to showcase the beauty of fall on their nails.
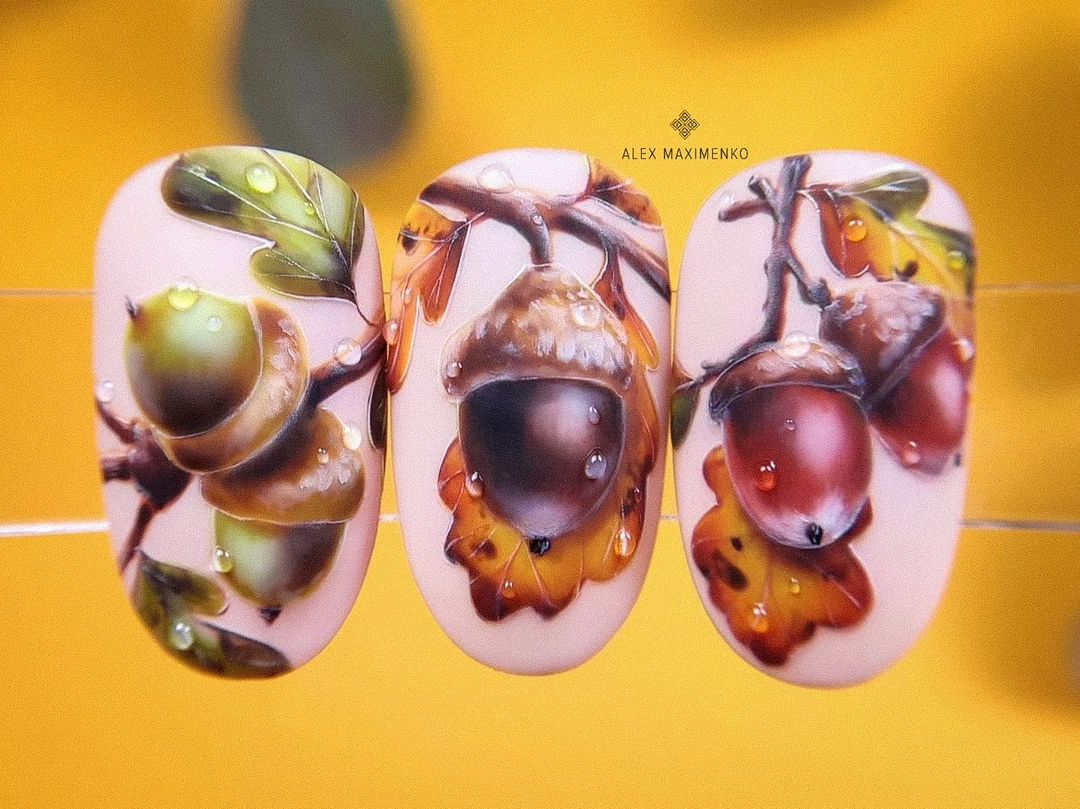
Consumables:
- Nude gel polish (e.g., OPI GelColor in “Bare My Soul”)
- Acrylic paints for nail art (e.g., Winsor & Newton Professional Acrylics)
- Nail art brushes (e.g., Winstonia Nail Art Brush Set)
- Top coat (e.g., Sally Hansen Miracle Gel Top Coat)
- Base coat (e.g., Deborah Lippmann All About That Base)
- UV/LED nail lamp (e.g., MelodySusie UV LED Nail Lamp)
Step-by-Step Tutorial:
- Apply a base coat and cure under the UV/LED lamp.
- Paint your nails with two coats of nude gel polish, curing each coat.
- Use nail art brushes and acrylic paints to carefully paint the acorns and leaves, adding fine details and water droplets for realism. Allow the paint to dry completely.
- Seal the design with a top coat and cure under the UV/LED lamp.
- Apply cuticle oil to keep your nails and cuticles hydrated.
Autumn Abstract
This nail design features a beautiful gradient of autumn colors with delicate black line art. The mix of soft peach, burnt orange, and warm brown creates a stunning fall palette, while the minimalistic black botanical lines add an artistic touch. This look is perfect for those who enjoy a subtle yet sophisticated nail design that celebrates the fall season.
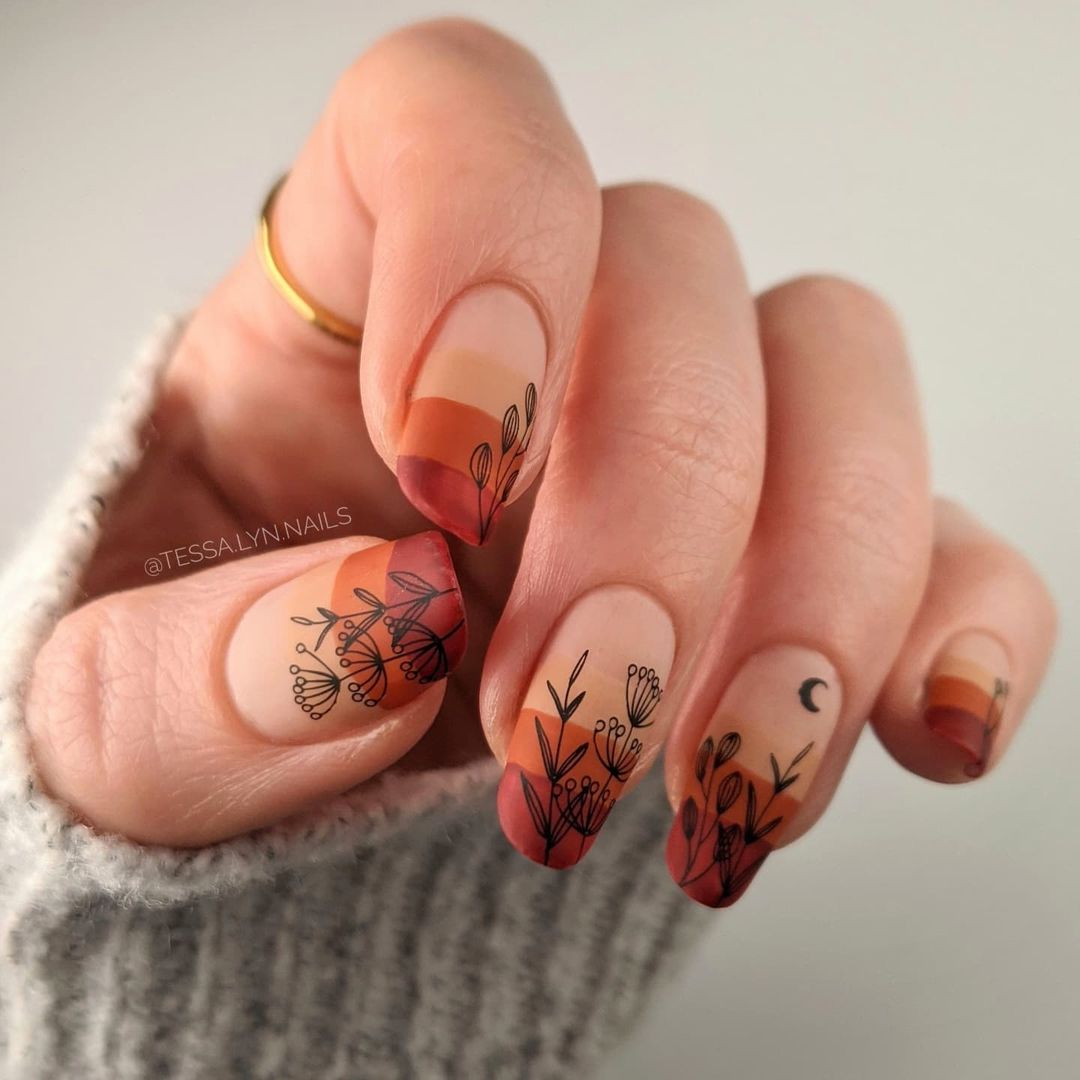
Consumables:
- Soft peach gel polish (e.g., Essie Gel Couture in “Fairy Tailor”)
- Burnt orange gel polish (e.g., Gelish Gel Polish in “Don’t Be Shallow”)
- Warm brown gel polish (e.g., CND Vinylux in “Brick Knit”)
- Black gel polish for line art (e.g., Beetles Gel Polish in “Black Out”)
- Nail art brushes (e.g., Saviland Nail Art Brushes)
- Top coat (e.g., INM Out The Door Top Coat)
- Base coat (e.g., OPI Natural Nail Base Coat)
- UV/LED nail lamp (e.g., SUNUV 48W UV LED Lamp)
Step-by-Step Tutorial:
- Apply a base coat and cure under the UV/LED lamp.
- Paint all nails with a gradient of soft peach, burnt orange, and warm brown gel polish, curing each layer.
- Use a fine nail art brush to create delicate black botanical lines. Cure under the UV/LED lamp.
- Seal the design with a top coat and cure under the UV/LED lamp.
- Finish with cuticle oil to keep your cuticles moisturized.
Earthy Swirls
This nail design features abstract earthy swirls in shades of brown, white, and terracotta. The fluid, organic shapes create a modern and chic look that is perfect for autumn. The glossy finish adds a polished touch, making this design ideal for those who want a stylish yet understated manicure.
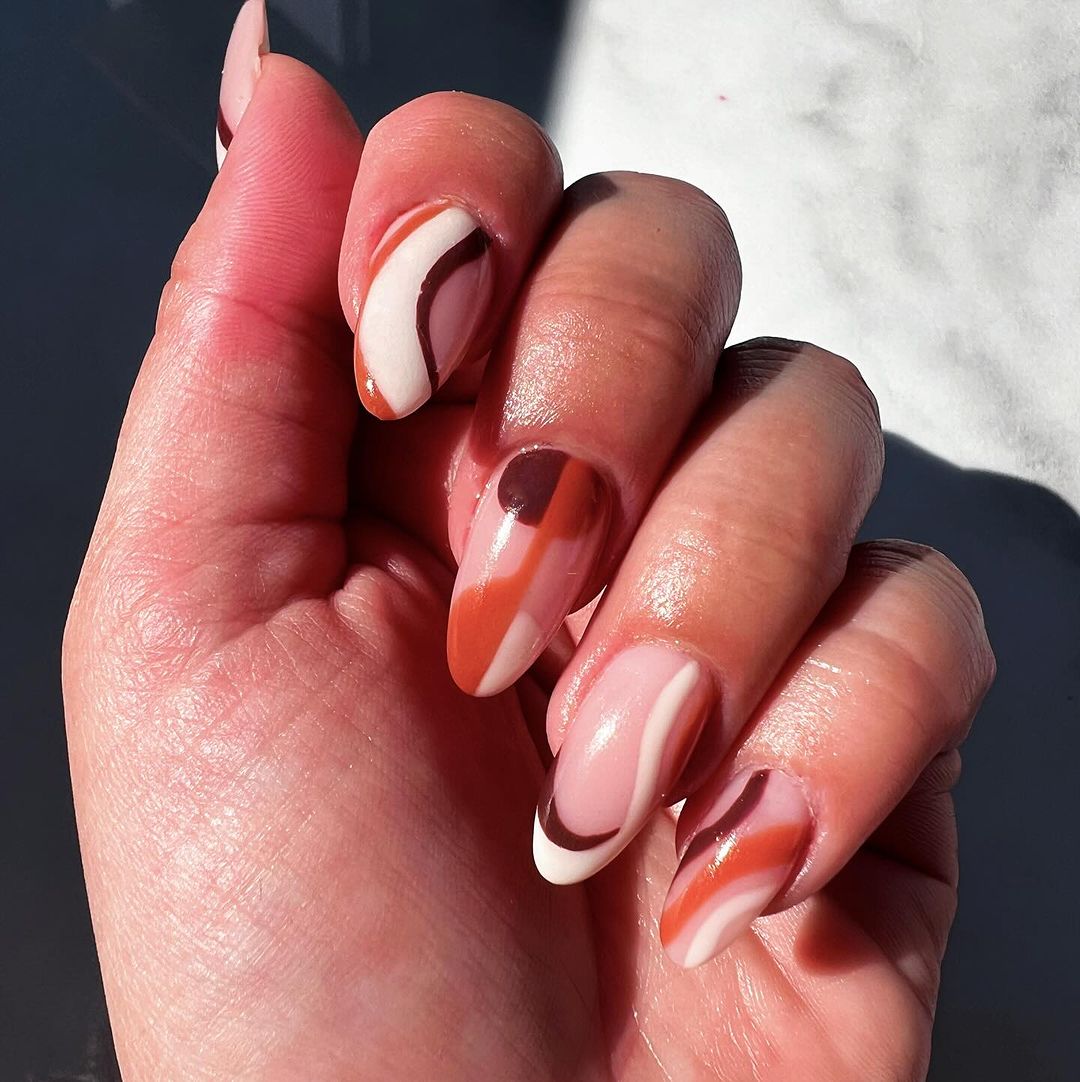
Consumables:
- Nude gel polish (e.g., Gelish Gel Polish in “Simple Sheer”)
- Brown gel polish (e.g., OPI GelColor in “That’s What Friends Are Thor”)
- White gel polish (e.g., Essie Gel Couture in “Sheer Fantasy”)
- Terracotta gel polish (e.g., DND Gel Polish in “Terracotta”)
- Nail art brushes (e.g., Winstonia Fine Detail Nail Art Brushes)
- Top coat (e.g., Seche Vite Dry Fast Top Coat)
- Base coat (e.g., Essie Here to Stay Base Coat)
- UV/LED nail lamp (e.g., MelodySusie LED Nail Lamp)
Step-by-Step Tutorial:
- Apply a base coat and cure under the UV/LED lamp.
- Paint all nails with two coats of nude gel polish, curing each layer.
- Use nail art brushes to create abstract swirls with brown, white, and terracotta gel polishes. Cure each design.
- Seal the design with a top coat and cure under the UV/LED lamp.
- Finish with cuticle oil to keep your nails and cuticles hydrated.
Tortoiseshell Chic
This nail design features a trendy tortoiseshell pattern, combining warm browns and blacks with a glossy finish. The almond shape of the nails enhances the sophisticated look, making this design perfect for fashion-forward individuals. This look is both modern and timeless, suitable for any autumn occasion.
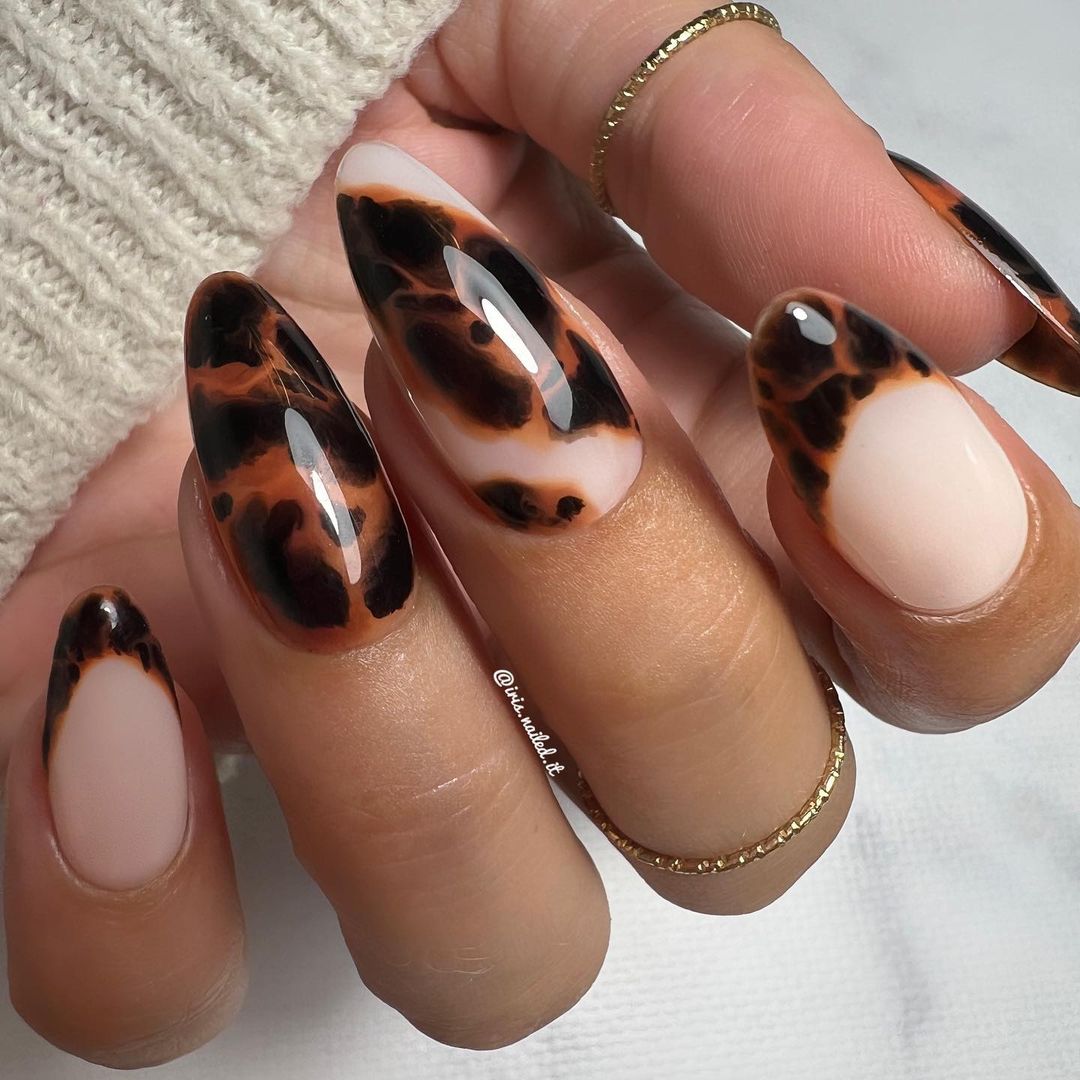
Consumables:
- Nude gel polish (e.g., OPI GelColor in “Bubble Bath”)
- Black gel polish (e.g., Beetles Gel Polish in “Black Out”)
- Brown gel polish (e.g., CND Vinylux in “Dark Lava”)
- Nail art brushes (e.g., PANA Nail Art Brush Set)
- Top coat (e.g., Sally Hansen Miracle Gel Top Coat)
- Base coat (e.g., Deborah Lippmann All About That Base)
- UV/LED nail lamp (e.g., MelodySusie UV LED Nail Lamp)
Step-by-Step Tutorial:
- Apply a base coat and cure under the UV/LED lamp.
- Paint all nails with two coats of nude gel polish, curing each layer.
- Use nail art brushes to create the tortoiseshell pattern with black and brown gel polishes. Cure each design.
- Seal the design with a top coat and cure under the UV/LED lamp.
- Finish with cuticle oil to keep your nails and cuticles hydrated.
Vibrant Fall Leaves
This nail design showcases the vibrant colors of fall leaves with a realistic and detailed hand-painted look. The warm orange, yellow, and red leaves are beautifully contrasted against a speckled brown background, creating a stunning autumn scene. This look is perfect for those who love intricate and artistic nail designs that capture the essence of the season.
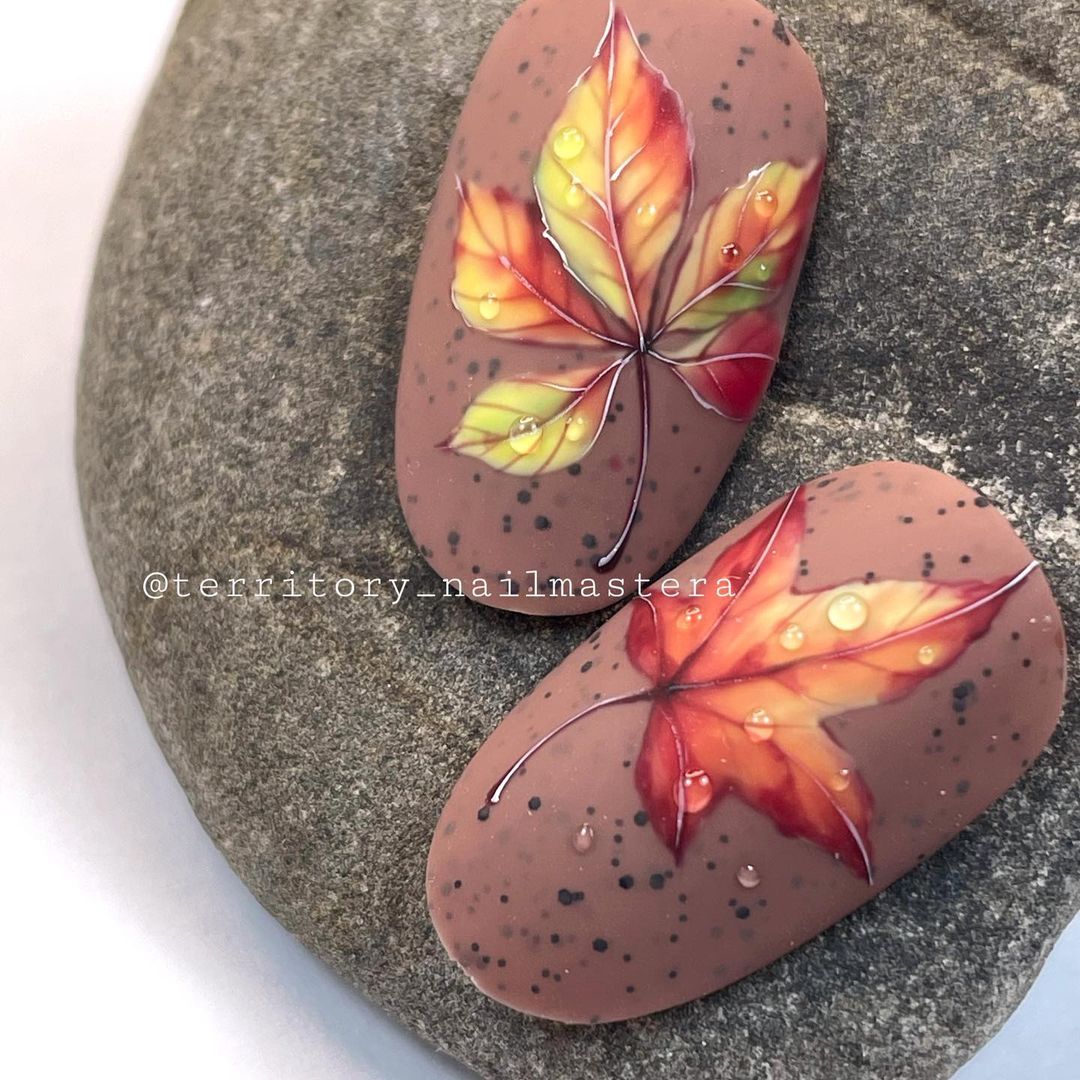
Consumables:
- Speckled brown gel polish (e.g., OPI GelColor in “You Don’t Know Jacques”)
- Orange gel polish (e.g., Gelish Gel Polish in “Mango Mint”)
- Yellow gel polish (e.g., CND Vinylux in “Jelly Bracelet”)
- Red gel polish (e.g., Essie Gel Couture in “Bubbles Only”)
- Nail art brushes (e.g., Beetles Gel Polish Nail Art Brushes)
- Top coat (e.g., Seche Vite Dry Fast Top Coat)
- Base coat (e.g., Essie Here to Stay Base Coat)
- UV/LED nail lamp (e.g., MelodySusie LED Nail Lamp)
Step-by-Step Tutorial:
- Apply a base coat and cure under the UV/LED lamp.
- Paint all nails with two coats of speckled brown gel polish, curing each layer.
- Use nail art brushes to paint the vibrant fall leaves with orange, yellow, and red gel polishes. Cure each color application.
- Seal the design with a top coat and cure under the UV/LED lamp.
- Finish with cuticle oil to keep your nails and cuticles nourished.
Autumn Maple Leaves
This nail design captures the vibrant essence of autumn with beautifully hand-painted maple leaves in striking shades of red, orange, and yellow. The realistic depiction of the leaves, complete with delicate veins and subtle water droplets, brings a touch of nature to your nails. The soft matte background enhances the colors, making them pop even more.
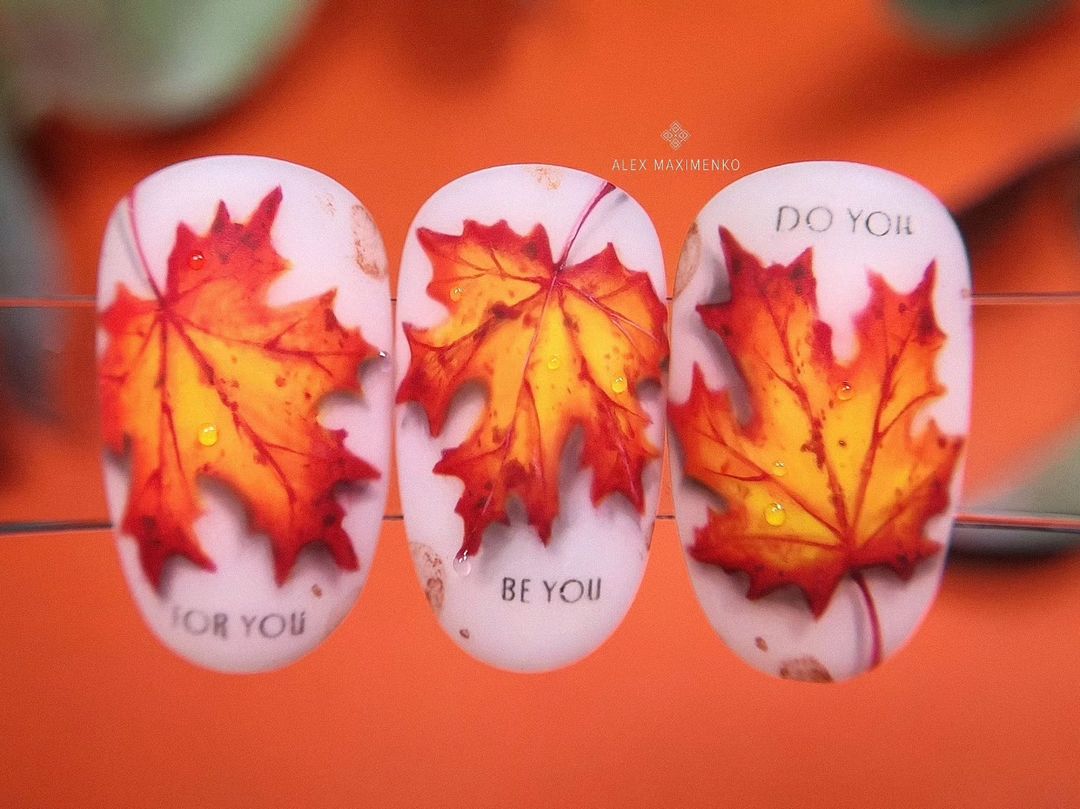
Consumables:
- Nude matte gel polish (e.g., OPI GelColor in “Bubble Bath” with a matte top coat)
- Red, orange, and yellow gel polish (e.g., Gelish Gel Polish in “Hot Rod Red”, “Mango Mint”, and “Sunlight”)
- Nail art brushes (e.g., PANA Nail Art Brush Set)
- Top coat (matte) (e.g., Essie Matte About You Top Coat)
- Base coat (e.g., OPI Natural Nail Base Coat)
- UV/LED nail lamp (e.g., SUNUV UV LED Nail Lamp)
Step-by-Step Tutorial:
- Apply a base coat and cure under the UV/LED lamp.
- Paint all nails with two coats of nude gel polish, curing each layer.
- Use nail art brushes to hand-paint the maple leaves with red, orange, and yellow gel polishes, adding fine details for realism. Cure after each color application.
- Seal the design with a matte top coat and cure under the UV/LED lamp.
- Finish with cuticle oil to keep your nails and cuticles hydrated.
Metallic Flames
This striking design features a bold combination of metallic gold and silver flames against a chrome base. The high-shine finish and sharp stiletto shape create a fierce and edgy look, perfect for those who love to stand out. The intricate flame design adds a touch of drama and intensity.
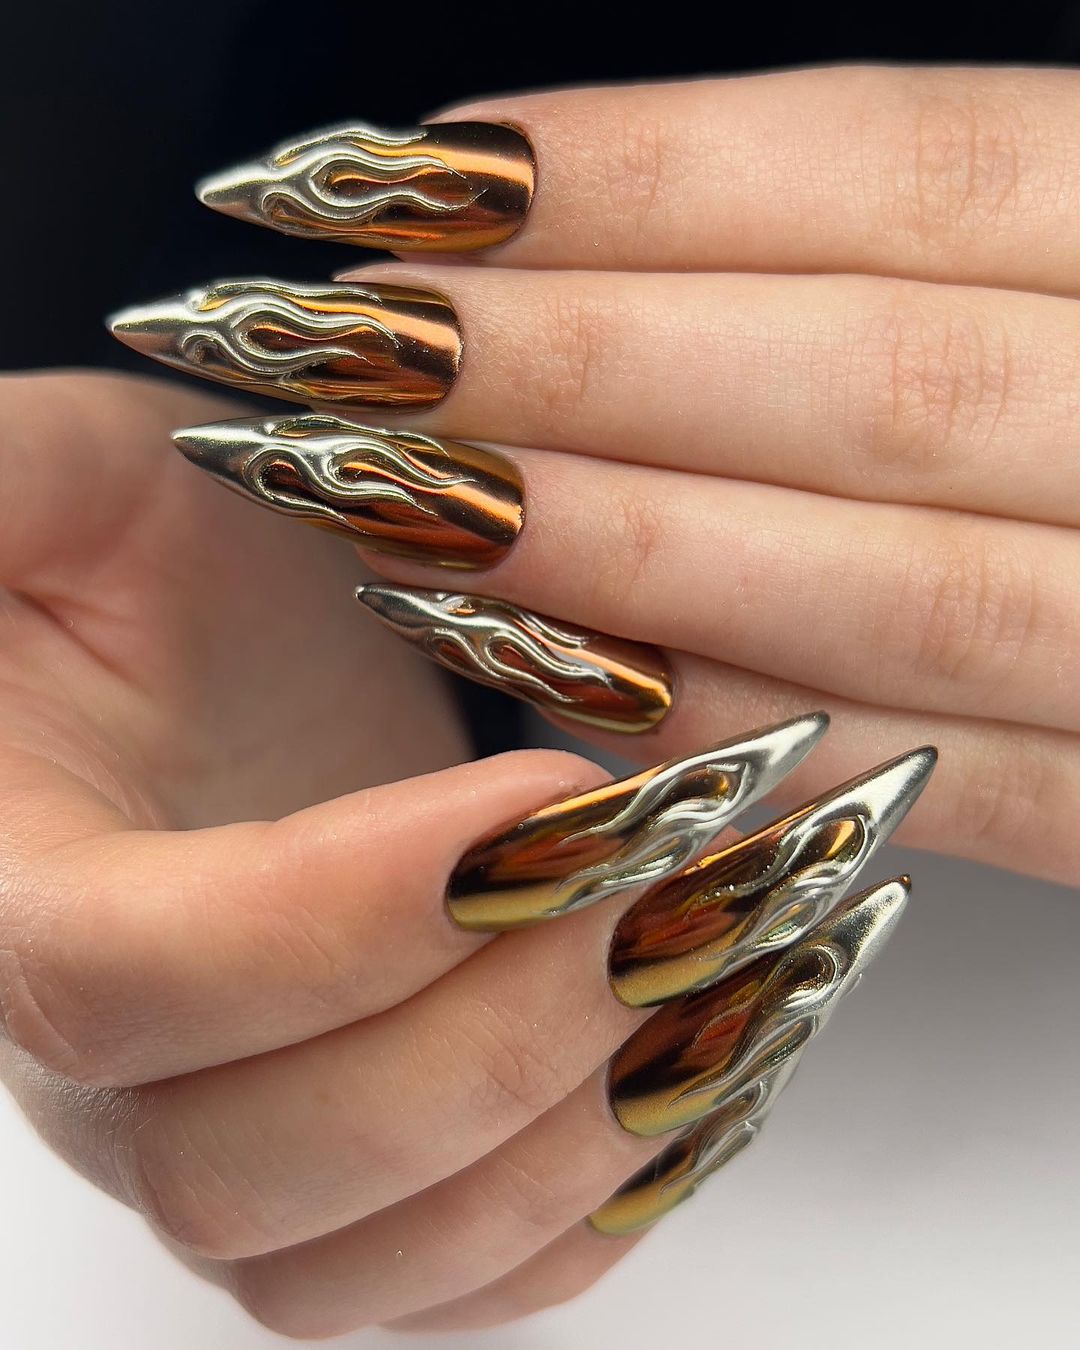
Consumables:
- Chrome gel polish (e.g., Modelones Chrome Gel Polish in “Mirror Silver”)
- Gold and silver gel polish (e.g., DND Gel Polish in “24K Gold” and “Platinum”)
- Nail art brushes (e.g., Saviland Nail Art Brushes)
- Top coat (e.g., Seche Vite Dry Fast Top Coat)
- Base coat (e.g., Essie Here to Stay Base Coat)
- UV/LED nail lamp (e.g., MelodySusie LED Nail Lamp)
Step-by-Step Tutorial:
- Apply a base coat and cure under the UV/LED lamp.
- Paint all nails with two coats of chrome gel polish, curing each layer.
- Use nail art brushes to create the gold and silver flame designs. Cure each color application.
- Seal the design with a top coat and cure under the UV/LED lamp.
- Finish with cuticle oil to keep your nails and cuticles hydrated.
Foil Leaf Overlay
This elegant design features a combination of green, gold, and copper leaf overlays on a translucent nude base. The metallic leaves create a sophisticated and intricate pattern that is perfect for autumn. This look is both modern and classic, ideal for any occasion.
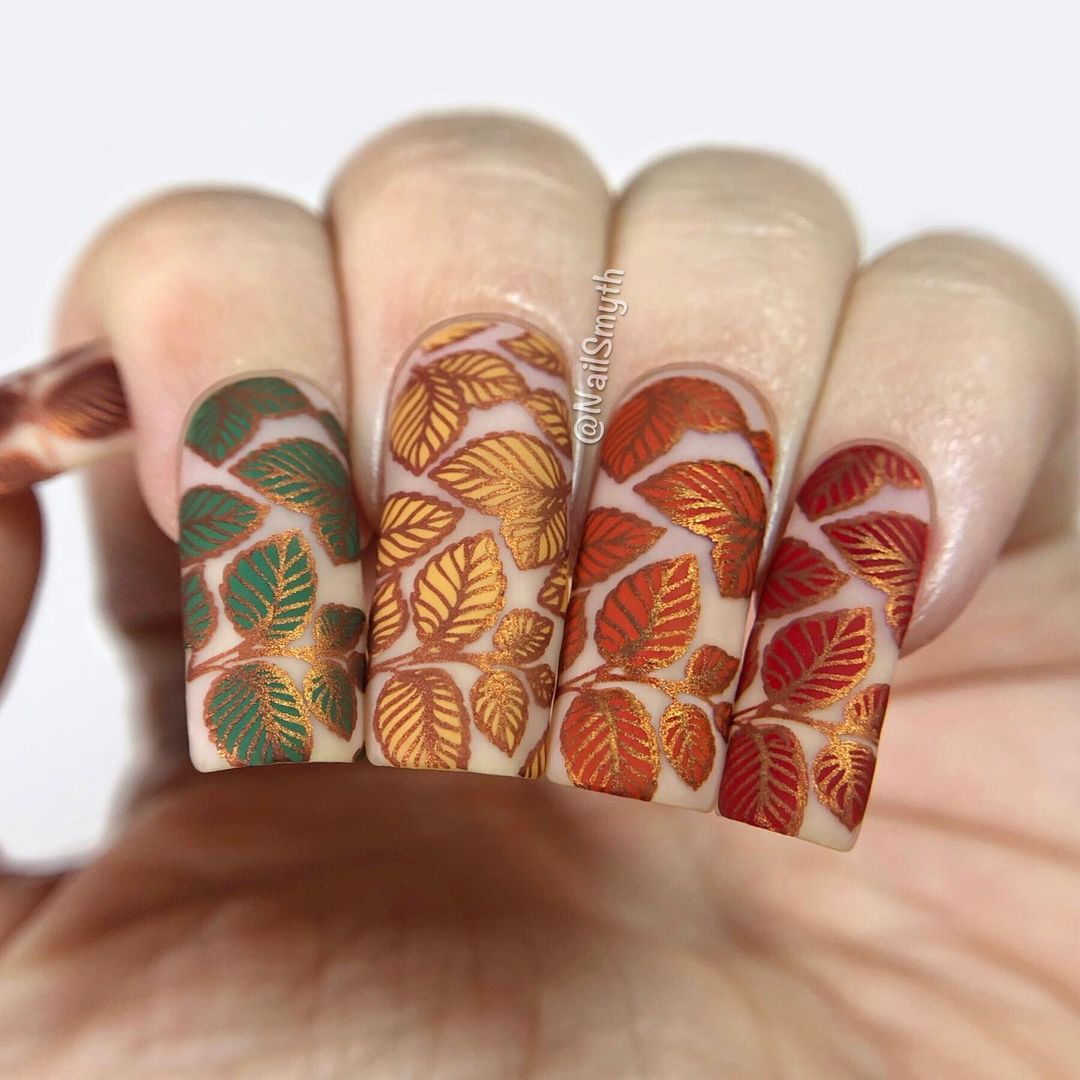
Consumables:
- Translucent nude gel polish (e.g., OPI GelColor in “Bubble Bath”)
- Green, gold, and copper gel polish (e.g., Gelish Gel Polish in “Amazon Flirt”, “Golden Icing”, and “Copper Pot”)
- Leaf nail stickers or decals (e.g., Whats Up Nails Leaf Nail Art Stickers)
- Top coat (e.g., Sally Hansen Miracle Gel Top Coat)
- Base coat (e.g., Deborah Lippmann All About That Base)
- UV/LED nail lamp (e.g., MelodySusie LED Nail Lamp)
Step-by-Step Tutorial:
- Apply a base coat and cure under the UV/LED lamp.
- Paint all nails with two coats of translucent nude gel polish, curing each layer.
- Apply the green, gold, and copper leaf stickers or decals to create a layered effect. Press down firmly.
- Seal the design with a top coat and cure under the UV/LED lamp.
- Finish with cuticle oil to keep your nails and cuticles hydrated.
Spooky Scarecrow
This Halloween-inspired design features a spooky scarecrow against a gradient background of orange and brown. The detailed scarecrow and flying bats add a fun and eerie touch to your nails, perfect for celebrating the spooky season. The matte finish enhances the overall effect, making the design pop.
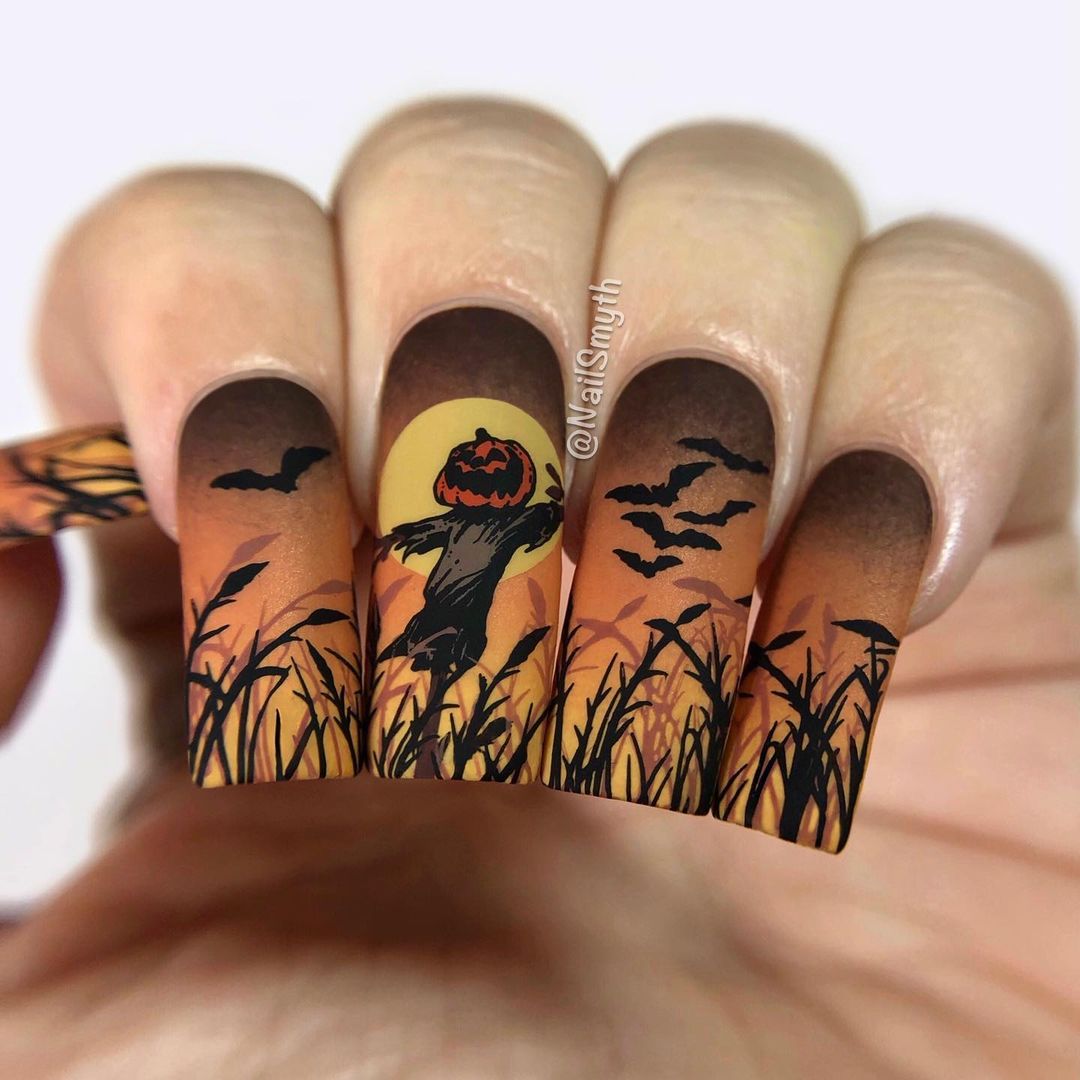
Consumables:
- Gradient gel polish (orange to brown) (e.g., Gelish Gel Polish in “Tiger Blossom” and “Black Shadow”)
- Black gel polish for details (e.g., Beetles Gel Polish in “Black Out”)
- Nail art brushes (e.g., Winstonia Nail Art Brush Set)
- Top coat (matte) (e.g., Essie Matte About You Top Coat)
- Base coat (e.g., OPI Natural Nail Base Coat)
- UV/LED nail lamp (e.g., SUNUV UV LED Nail Lamp)
Step-by-Step Tutorial:
- Apply a base coat and cure under the UV/LED lamp.
- Create a gradient effect using orange and brown gel polish, curing each layer.
- Use nail art brushes to paint the scarecrow, bats, and other details with black gel polish. Cure each application.
- Seal the design with a matte top coat and cure under the UV/LED lamp.
- Finish with cuticle oil to keep your nails and cuticles hydrated.
Vibrant Autumn Leaves on Black
This design features vibrant autumn leaves painted on a matte black base, creating a stunning contrast. The detailed leaves in red, yellow, green, and orange add a pop of color, making this design perfect for fall. The matte finish gives the nails a modern and chic look.
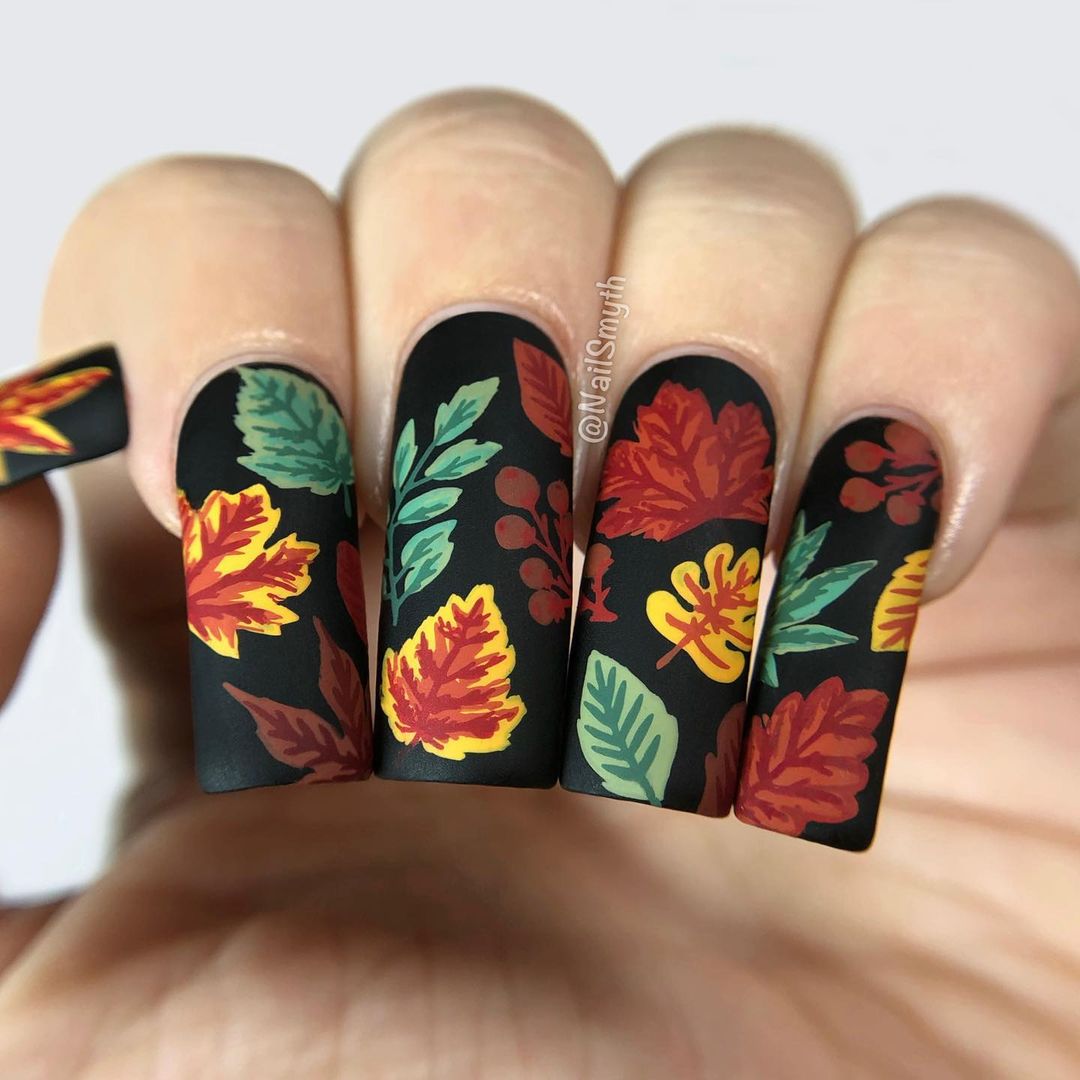
Consumables:
- Matte black gel polish (e.g., OPI GelColor in “Black Onyx” with a matte top coat)
- Red, yellow, green, and orange gel polish (e.g., Gelish Gel Polish in “Hot Rod Red”, “Sunlight”, “Amazon Flirt”, and “Mango Mint”)
- Nail art brushes (e.g., PANA Nail Art Brush Set)
- Top coat (matte) (e.g., Essie Matte About You Top Coat)
- Base coat (e.g., OPI Natural Nail Base Coat)
- UV/LED nail lamp (e.g., MelodySusie LED Nail Lamp)
Step-by-Step Tutorial:
- Apply a base coat and cure under the UV/LED lamp.
- Paint all nails with two coats of matte black gel polish, curing each layer.
- Use nail art brushes to paint the autumn leaves with red, yellow, green, and orange gel polishes, adding fine details for realism. Cure after each color application.
- Seal the design with a matte top coat and cure under the UV/LED lamp.
- Finish with cuticle oil to keep your nails and cuticles hydrated.
Autumn Botanical
This botanical nail design features delicate hand-painted plants and leaves in warm autumn colors. The soft, creamy background highlights the intricate details of the plants, creating a serene and elegant look. This design is perfect for those who appreciate the beauty of nature and want to carry it with them on their nails.
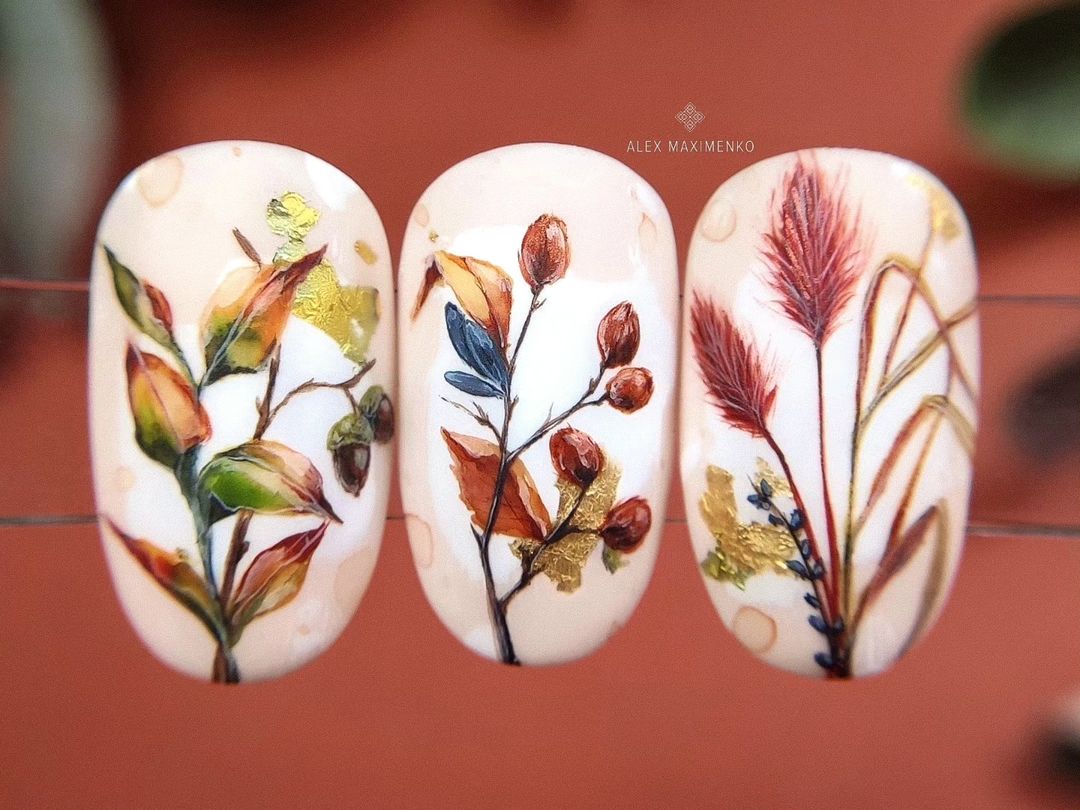
Consumables:
- Creamy nude gel polish (e.g., Essie Gel Couture in “Fairy Tailor”)
- Green, brown, orange, and gold gel polish (e.g., Gelish Gel Polish in “Amazon Flirt”, “Rodeo”, “Mango Mint”, and “Golden Icing”)
- Nail art brushes (e.g., Beetles Gel Polish Nail Art Brushes)
- Top coat (e.g., Seche Vite Dry Fast Top Coat)
- Base coat (e.g., Essie Here to Stay Base Coat)
- UV/LED nail lamp (e.g., MelodySusie LED Nail Lamp)
Step-by-Step Tutorial:
- Apply a base coat and cure under the UV/LED lamp.
- Paint all nails with two coats of creamy nude gel polish, curing each layer.
- Use nail art brushes to paint the delicate plants and leaves with green, brown, orange, and gold gel polishes, adding fine details for realism. Cure after each color application.
- Seal the design with a top coat and cure under the UV/LED lamp.
- Finish with cuticle oil to keep your nails and cuticles hydrated.
Spooky Florals
This nail design features spooky floral patterns on a vibrant orange glitter base. The black floral details, combined with tiny skulls, create a fun and eerie look perfect for Halloween. The glittery background adds a festive touch, making this design stand out during the spooky season.
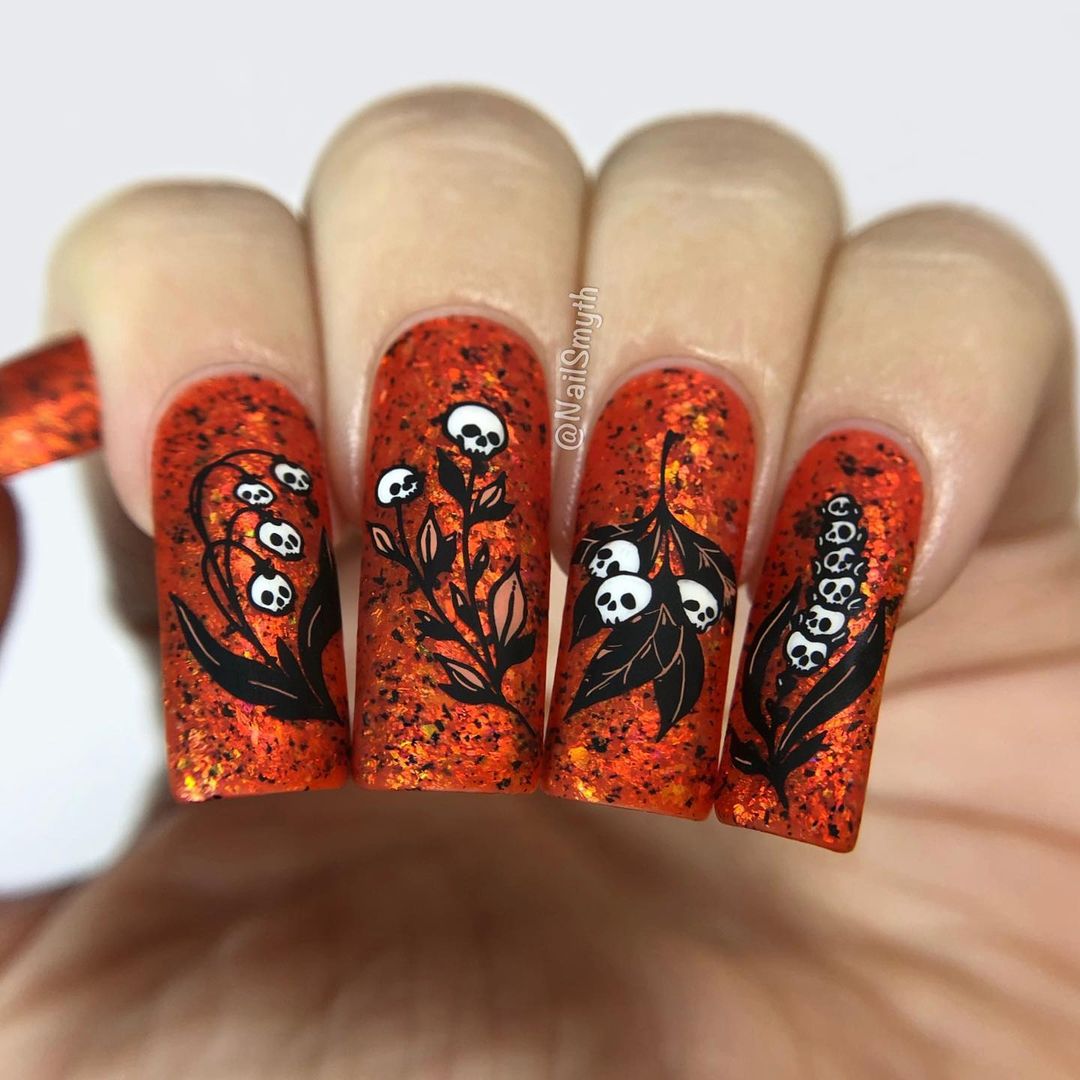
Consumables:
- Orange glitter gel polish (e.g., OPI GelColor in “Living on the Bula-vard!”)
- Black gel polish for details (e.g., Beetles Gel Polish in “Black Out”)
- Nail art brushes (e.g., Saviland Nail Art Brushes)
- Top coat (e.g., INM Out The Door Top Coat)
- Base coat (e.g., Deborah Lippmann All About That Base)
- UV/LED nail lamp (e.g., MelodySusie LED Nail Lamp)
Step-by-Step Tutorial:
- Apply a base coat and cure under the UV/LED lamp.
- Paint all nails with two coats of orange glitter gel polish, curing each layer.
- Use nail art brushes to paint the spooky florals and skulls with black gel polish. Cure each design.
- Seal the design with a top coat and cure under the UV/LED lamp.
- Finish with cuticle oil to keep your nails and cuticles hydrated.
FAQ
Q: How can I make my nail designs last longer? A: Ensure you use a high-quality base and top coat, and cure your nails properly under the UV/LED lamp. Also, avoid using your nails as tools and wear gloves when doing household chores.
Q: Can I create these designs on natural nails, or do I need extensions? A: These designs can be created on both natural nails and extensions. The key is to have a smooth and even surface to work on.
Q: What if I don’t have a UV/LED lamp? A: While a UV/LED lamp is recommended for gel polishes, you can use regular nail polishes and allow them to air dry, although the durability might not be as long-lasting.
Q: Can I use acrylic paints for nail art? A: Yes, acrylic paints are great for detailed nail art and can be used instead of nail polishes for intricate designs.
Q: How do I remove gel polish without damaging my nails? A: Soak a cotton ball in acetone, place it on your nail, and wrap it in aluminum foil. Leave it on for 10-15 minutes, then gently push off the softened gel with a cuticle pusher.
Save Pin
