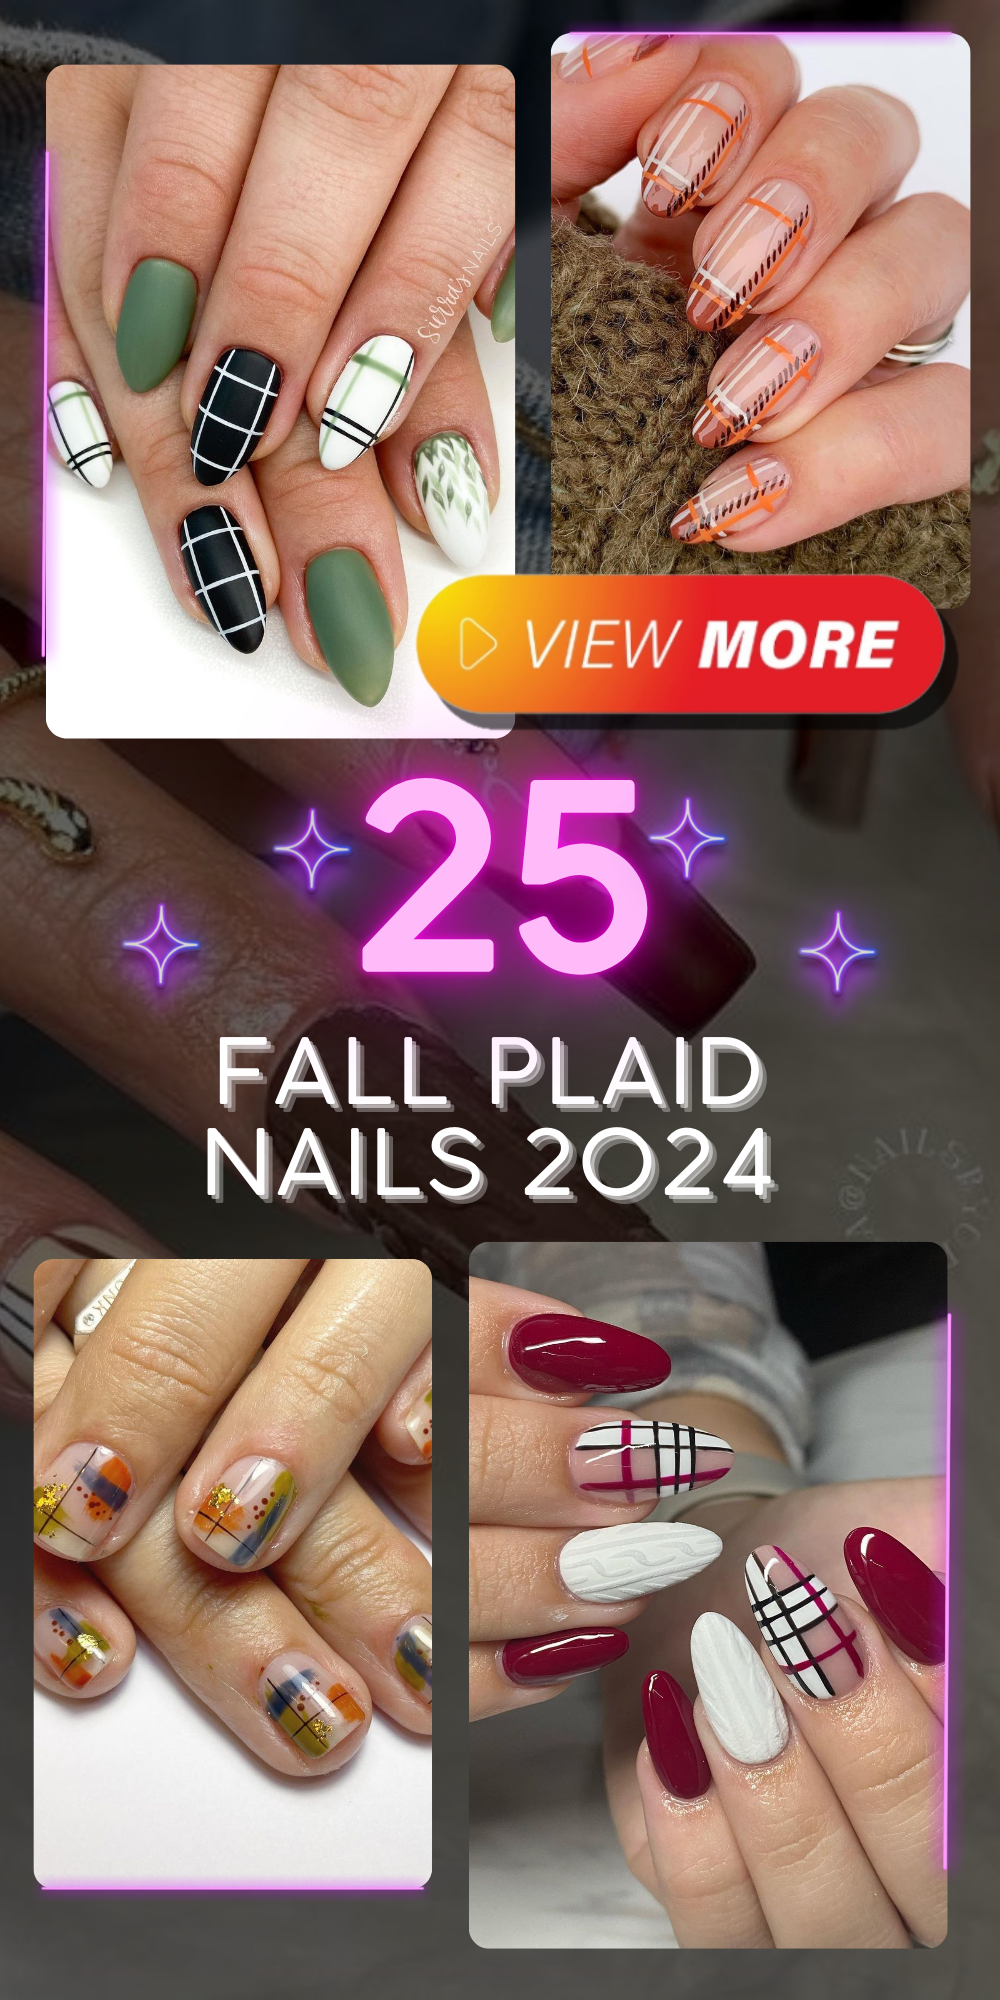
When it comes to embracing the cozy, vibrant vibes of fall, fall plaid nails 2024 are a fantastic way to incorporate seasonal trends into your manicure. From classic Burberry-inspired designs to bold buffalo plaid, there’s a plaid nail art design for everyone. Ready to dive into the world of plaid nails? Let’s explore some stunning designs that will have you booking your next nail appointment ASAP.
Bold Maroon Plaid Nails
When you think of fall, rich maroon shades often come to mind. This nail design beautifully combines a deep maroon base with white and black plaid accents, creating a striking contrast that’s both chic and seasonal. The use of maroon gives the nails a sophisticated touch, while the plaid pattern adds a playful element. The almond shape of the nails enhances the elegance of the design, making it perfect for any fall occasion.
Consumables:
- Maroon nail polish (e.g., OPI Nail Lacquer in “Got the Blues for Red”)
- White and black nail striping tapes (e.g., Born Pretty Nail Art Striping Tape)
- Top coat (e.g., Seche Vite Dry Fast Top Nail Coat)
Recommendations:
- Start with a high-quality maroon polish to ensure a rich, opaque base.
- Use thin striping tapes for precise lines.
- Finish with a glossy top coat to seal the design and add shine.
How to Create This Design at Home:
- Apply a base coat to protect your natural nails.
- Paint your nails with two coats of maroon polish.
- Once dry, use the striping tape to create a plaid pattern on each nail. Start with the horizontal lines, then add the vertical ones.
- Carefully peel off the tape after painting to reveal clean lines.
- Seal the design with a top coat.
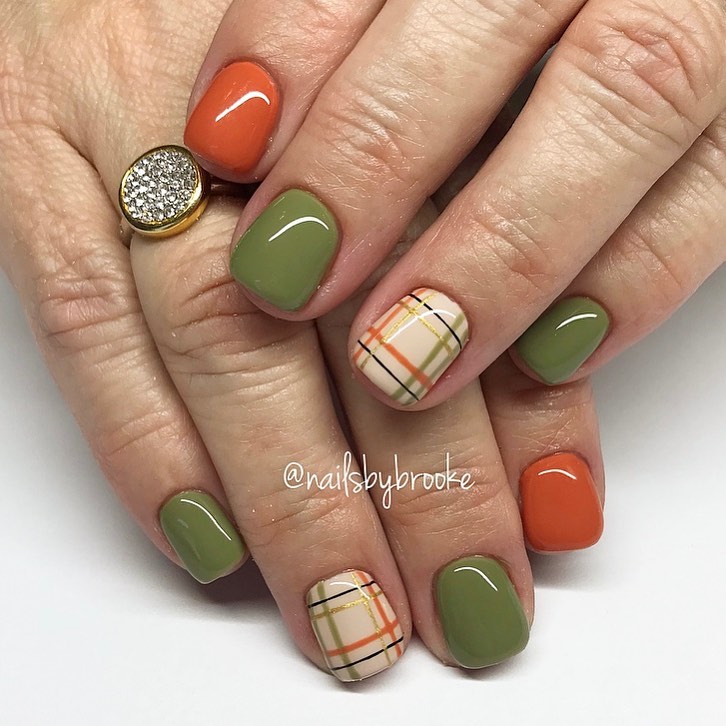
Autumn Plaid Perfection
Fall is the perfect time to play with earthy tones, and this nail design does just that. Combining warm orange, olive green, and classic plaid patterns, this manicure screams autumn. The short square shape of the nails makes this design practical and easy to maintain, while still looking incredibly stylish.
Consumables:
- Orange nail polish (e.g., Essie Nail Polish in “Playing Koi”)
- Olive green nail polish (e.g., Zoya Nail Polish in “Jace”)
- Plaid nail stickers (e.g., Whats Up Nails Plaid Nail Vinyls)
- Top coat (e.g., Sally Hansen Miracle Gel Top Coat)
Recommendations:
- Choose high-pigment polishes to avoid multiple coats.
- Opt for nail stickers if you’re not confident with freehand painting.
- Use a gel top coat for long-lasting wear.
How to Create This Design at Home:
- Apply a base coat to start.
- Paint your nails with alternating colors of orange and olive green.
- Once the base colors are dry, apply the plaid nail stickers to the desired nails.
- Smooth out any air bubbles and ensure the stickers are firmly in place.
- Finish with a gel top coat for a glossy, durable finish.
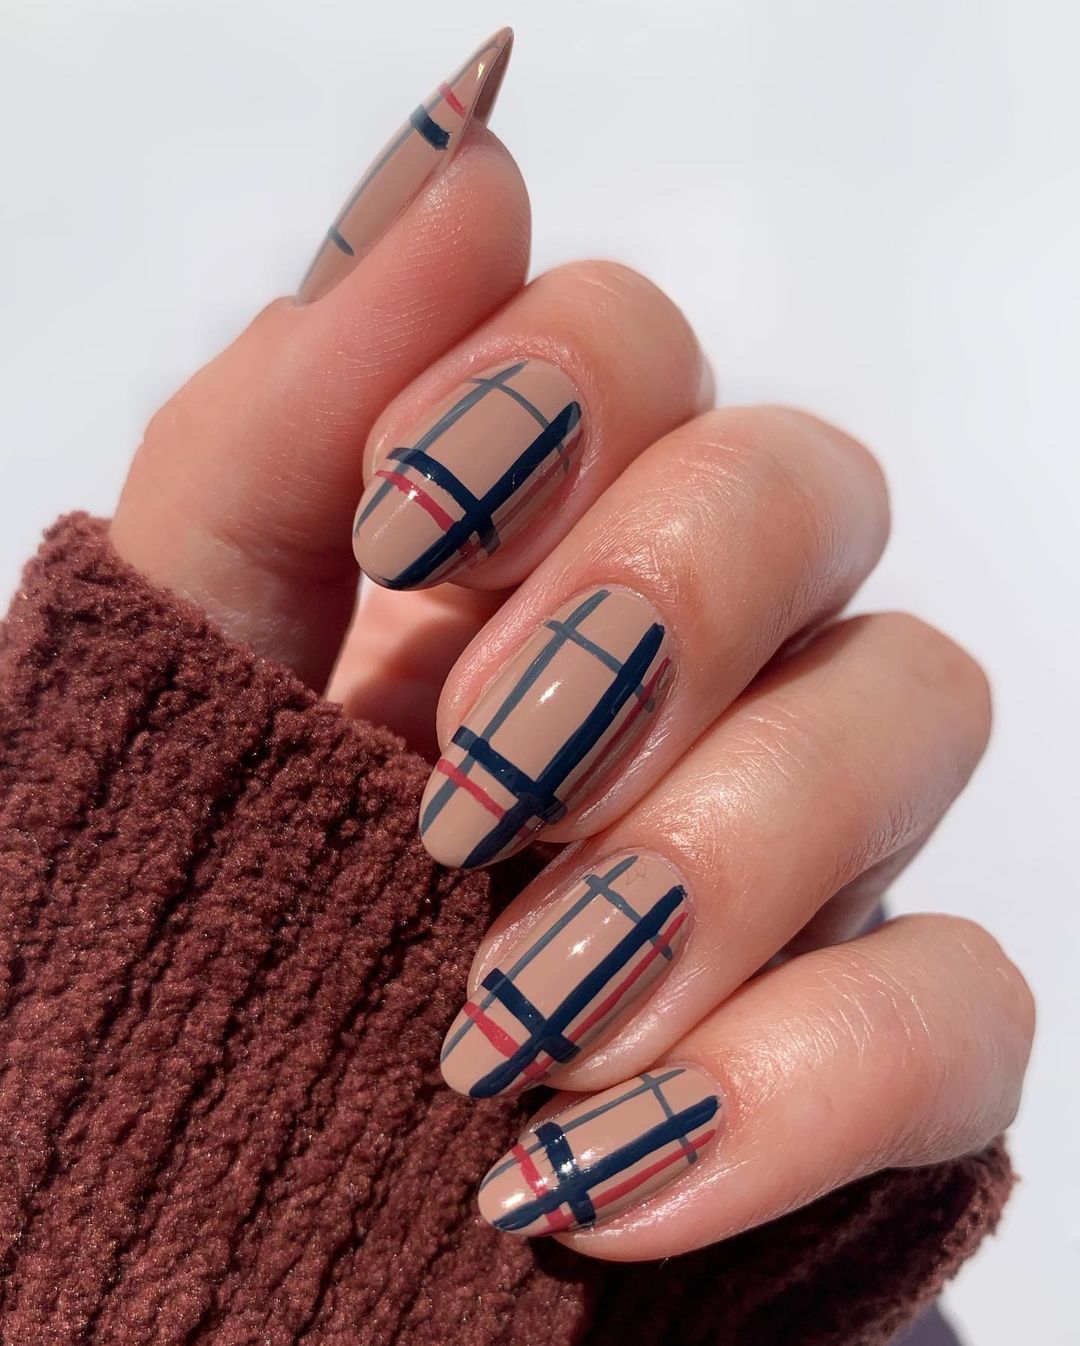
Chic Nude and Navy Plaid
For a more understated look, these nude nails with navy plaid accents are perfect. The nude base color is versatile and flattering on all skin tones, while the navy plaid design adds a touch of sophistication. This design is ideal for those who prefer a more subtle, yet stylish, manicure.
Consumables:
- Nude nail polish (e.g., Deborah Lippmann Gel Lab Pro Nail Color in “Fashion”)
- Navy nail polish (e.g., OPI Nail Lacquer in “Russian Navy”)
- Thin nail art brush (e.g., Beetles Nail Art Brushes Set)
- Top coat (e.g., Essie Gel Couture Top Coat)
Recommendations:
- Ensure your nude polish is fully opaque for a clean look.
- Use a steady hand or a nail art brush for precise lines.
- Top with a high-shine gel top coat for a professional finish.
How to Create This Design at Home:
- Apply a base coat to protect your nails.
- Paint your nails with two coats of nude polish.
- Using a thin nail art brush, create a plaid pattern with navy polish on each nail. Start with horizontal lines, then add the vertical lines.
- Allow the design to dry completely before applying a top coat.
- Finish with a gel top coat to add shine and longevity to your manicure.
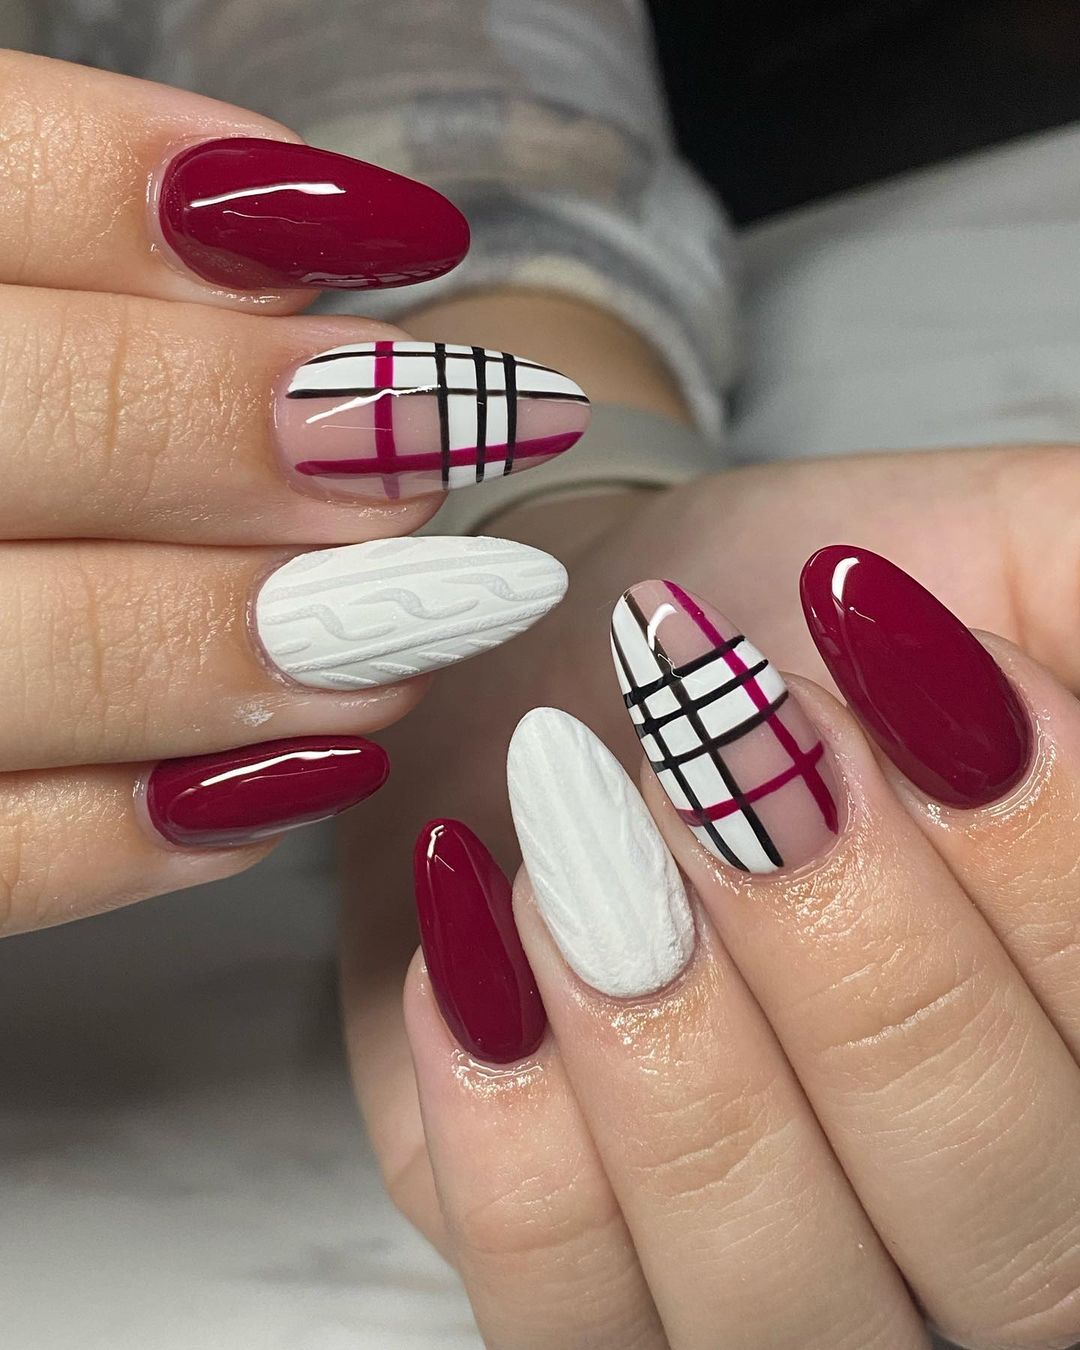
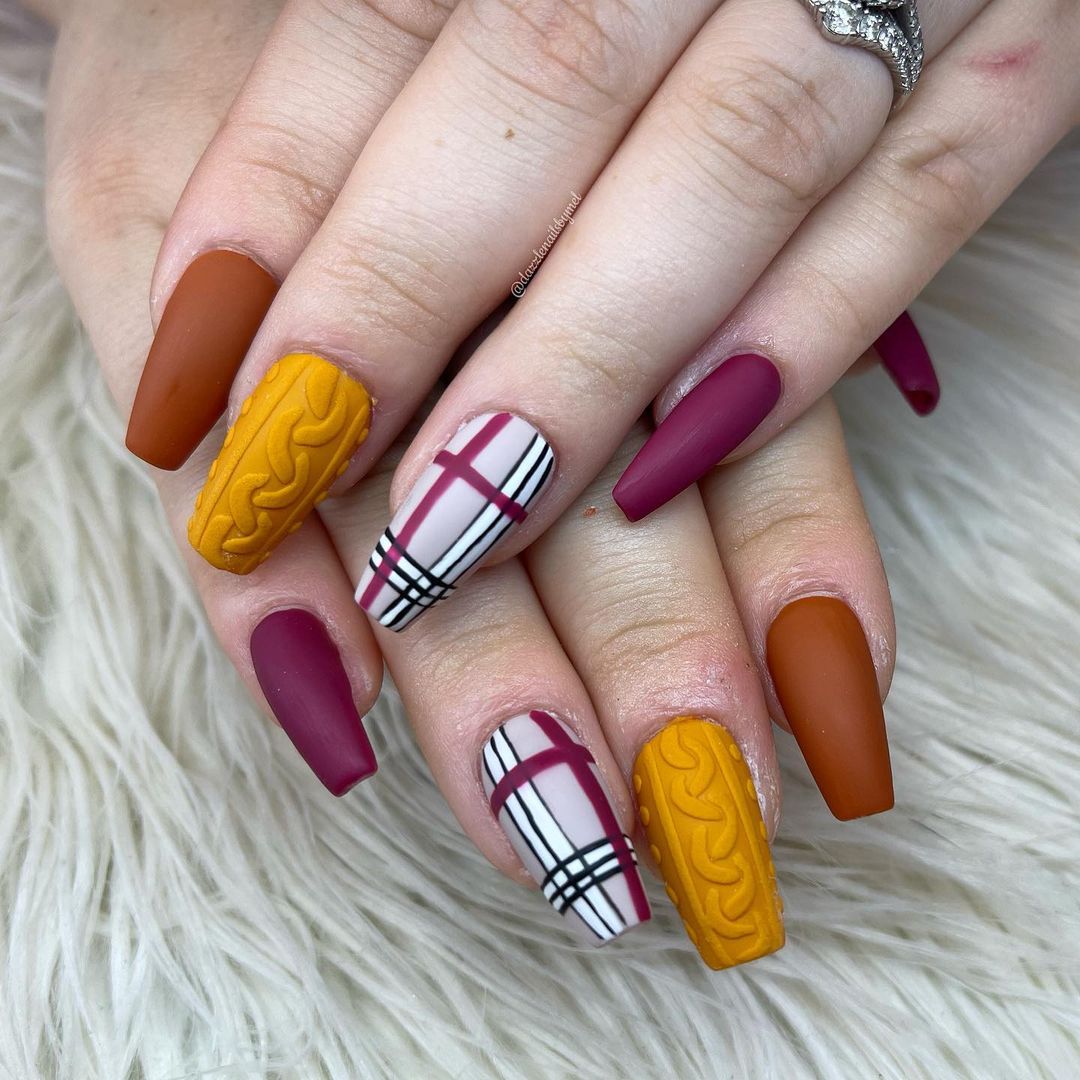
Cozy Maroon and Pink Plaid Nails
This cozy combination of maroon and pink brings a warm, inviting feel to your nails. The maroon matte nails contrast beautifully with the pink plaid and knit-patterned nails. The plaid design incorporates maroon, white, and black lines over a soft pink base, adding a touch of sophistication and fun to your look. The knit pattern on the pink nails gives a cozy, textured effect, perfect for the fall season.
Consumables:
- Maroon matte nail polish (e.g., Zoya Nail Polish in “Amara”)
- Pink nail polish (e.g., Essie Nail Polish in “Romper Room”)
- White and black striping tape (e.g., Born Pretty Nail Art Striping Tape)
- Matte top coat (e.g., OPI Matte Top Coat)
Recommendations:
- Use a high-quality matte polish to avoid any glossy patches.
- For the knit pattern, use a dotting tool to create the textured effect.
- Ensure the striping tape is firmly in place before painting to achieve clean lines.
How to Create This Design at Home:
- Apply a base coat to protect your nails.
- Paint your nails with two coats of maroon and pink polish, alternating colors.
- Use the striping tape to create a plaid pattern on the pink nails. Apply the tape in a criss-cross pattern and paint over it with maroon polish.
- For the knit pattern, use a dotting tool to create small dots and lines to mimic the texture of a knitted sweater.
- Finish with a matte top coat to seal and protect your design.
Save Pin
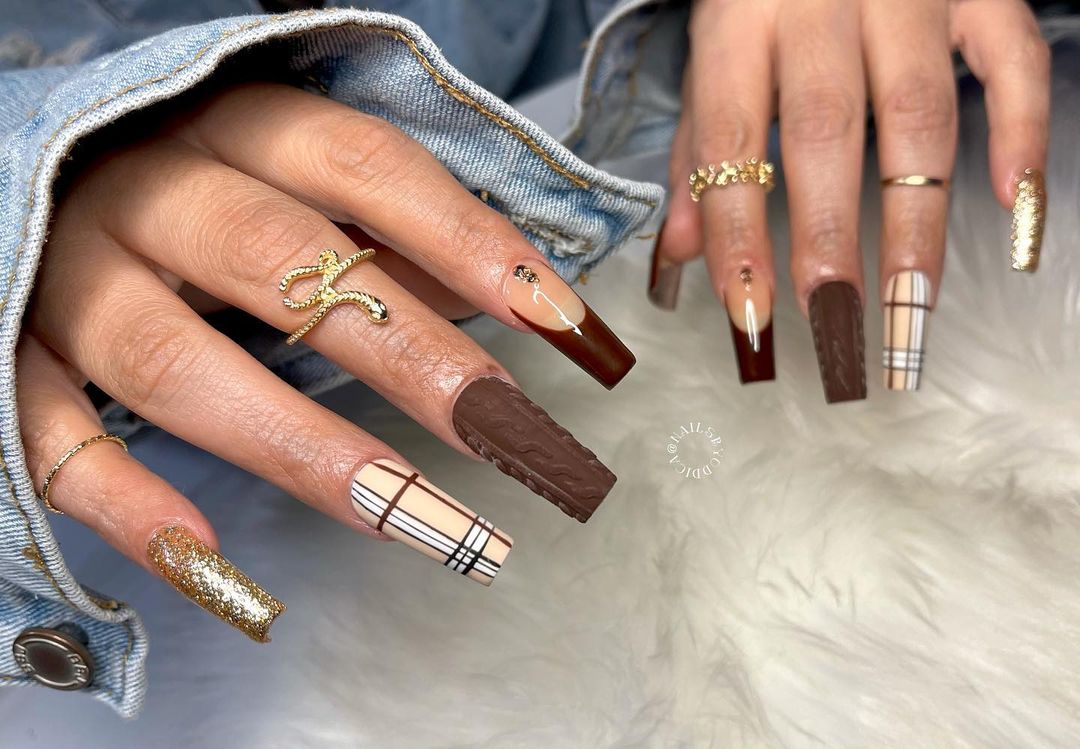
Elegant Brown and Gold Plaid Nails
This elegant design combines rich brown tones with glamorous gold accents and classic plaid patterns. The mix of glossy and matte finishes creates a sophisticated look. The plaid design on the beige nails features brown and black lines, perfectly complementing the deep brown and gold glitter nails. The gold accents add a touch of luxury, making this manicure ideal for any special occasion.
Consumables:
- Brown nail polish (e.g., OPI Nail Lacquer in “Espresso Your Inner Self”)
- Beige nail polish (e.g., Sally Hansen Miracle Gel in “Bare Dare”)
- Gold glitter nail polish (e.g., China Glaze Nail Lacquer in “Golden Enchantment”)
- Black striping tape (e.g., Whats Up Nails Striping Tape)
- Top coat (e.g., Essie Gel Couture Top Coat)
Recommendations:
- Choose a glitter polish with fine particles for a more elegant look.
- Use striping tape to achieve precise plaid lines.
- Opt for a high-shine top coat to enhance the glitter effect.
How to Create This Design at Home:
- Apply a base coat to protect your nails.
- Paint your nails with brown, beige, and gold glitter polish, alternating colors.
- Once the beige polish is dry, use the striping tape to create a plaid pattern with brown and black lines.
- Apply a second coat of glitter polish on the gold nails for extra sparkle.
- Finish with a top coat to seal the design and add shine.
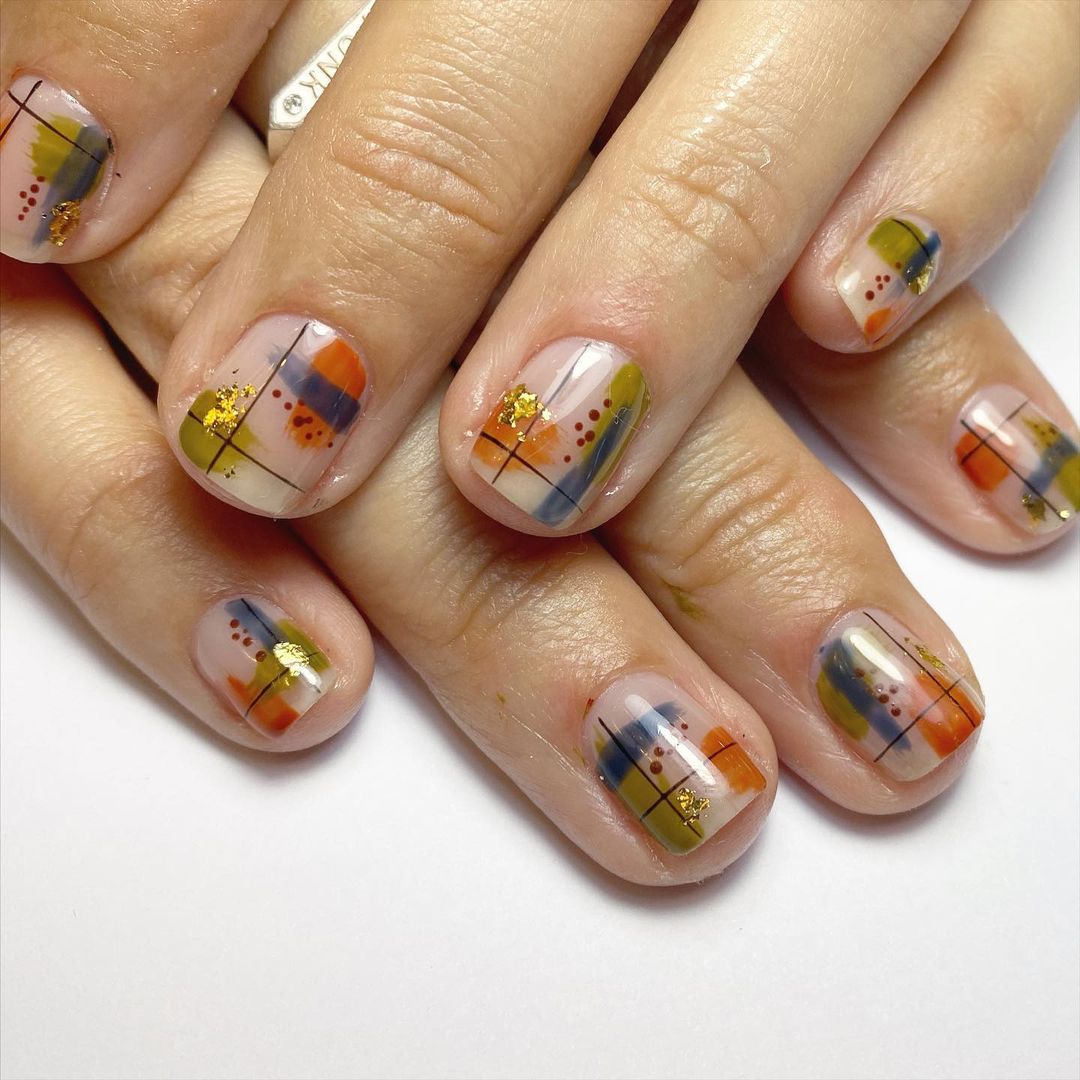
Vibrant Fall Plaid Nails
This vibrant nail design embraces the colors of fall with a playful mix of orange, green, blue, and yellow. The short nails are adorned with plaid patterns and dotted accents, creating a cheerful and festive look. The clear base allows the bold colors to stand out, making this manicure a perfect choice for those who love to experiment with colors.
Consumables:
- Orange nail polish (e.g., Essie Nail Polish in “Playing Koi”)
- Green nail polish (e.g., Zoya Nail Polish in “Jace”)
- Blue nail polish (e.g., OPI Nail Lacquer in “Rich Girls & Po-Boys”)
- Yellow nail polish (e.g., Sally Hansen Insta-Dri Nail Color in “Lightning”)
- Black striping tape (e.g., Born Pretty Nail Art Striping Tape)
- Top coat (e.g., Sally Hansen Miracle Gel Top Coat)
Recommendations:
- Use a thin nail art brush for the dotted accents.
- Apply multiple thin coats of polish for a more vibrant look.
- Choose a quick-dry top coat to speed up the drying process.
How to Create This Design at Home:
- Apply a base coat to protect your nails.
- Paint your nails with a clear or nude base coat.
- Use striping tape to create plaid patterns with orange, green, blue, and yellow polish.
- Add dotted accents using a thin nail art brush or dotting tool.
- Finish with a top coat to seal the design and add shine.
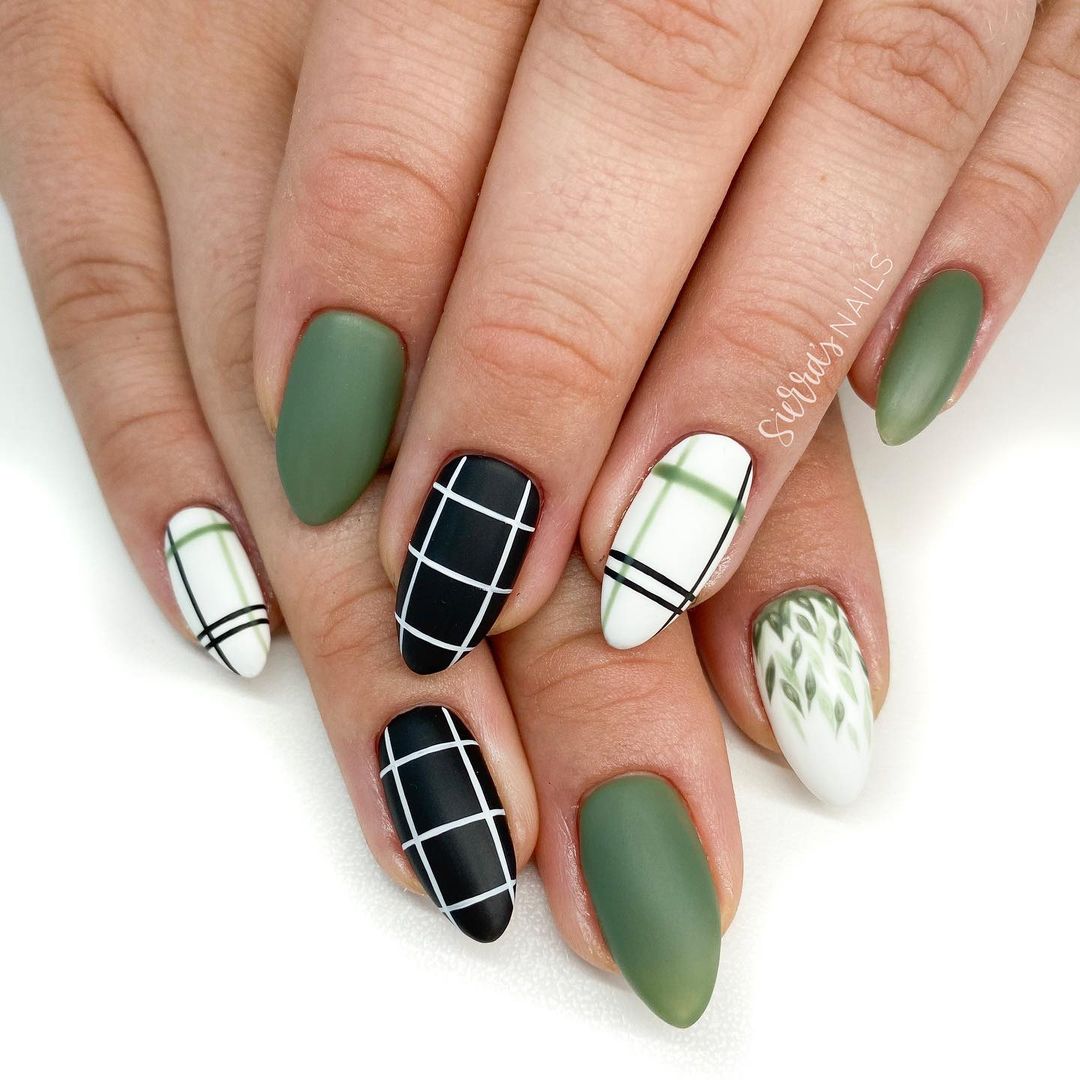
Sophisticated Green and Black Plaid Nails
This nail design beautifully combines earthy green tones with classic black and white plaid. The matte finish on the green nails adds a modern touch, while the plaid patterns bring in a timeless elegance. The addition of a leafy accent on one nail provides a unique twist, making the design both sophisticated and fresh.
Consumables:
- Green matte nail polish (e.g., Zoya Nail Polish in “Jace”)
- Black nail polish (e.g., OPI Nail Lacquer in “Black Onyx”)
- White nail polish (e.g., Essie Nail Polish in “Blanc”)
- Thin nail art brush (e.g., Beetles Nail Art Brushes Set)
- Matte top coat (e.g., Sally Hansen Big Matte Top Coat)
Recommendations:
- Use a high-quality matte polish to avoid any shiny patches.
- Apply the black and white lines carefully to achieve crisp plaid patterns.
- Finish with a matte top coat for a smooth, modern look.
How to Create This Design at Home:
- Apply a base coat to protect your nails.
- Paint your nails with two coats of green and black polish, alternating colors.
- Use a thin nail art brush to create plaid patterns with black and white polish on the green nails.
- Add a leafy accent on one nail using a thin brush and green polish.
- Finish with a matte top coat to seal the design and add a smooth finish.
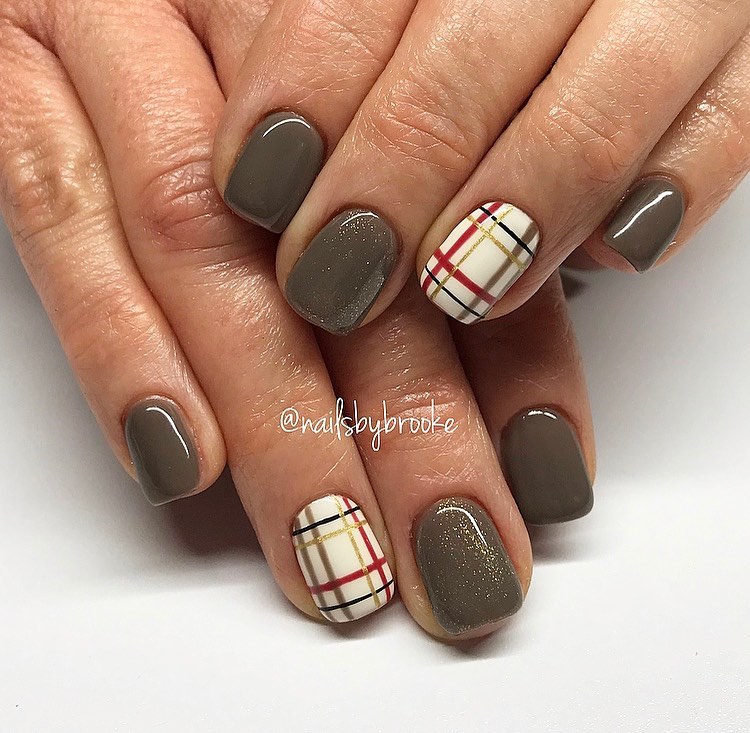
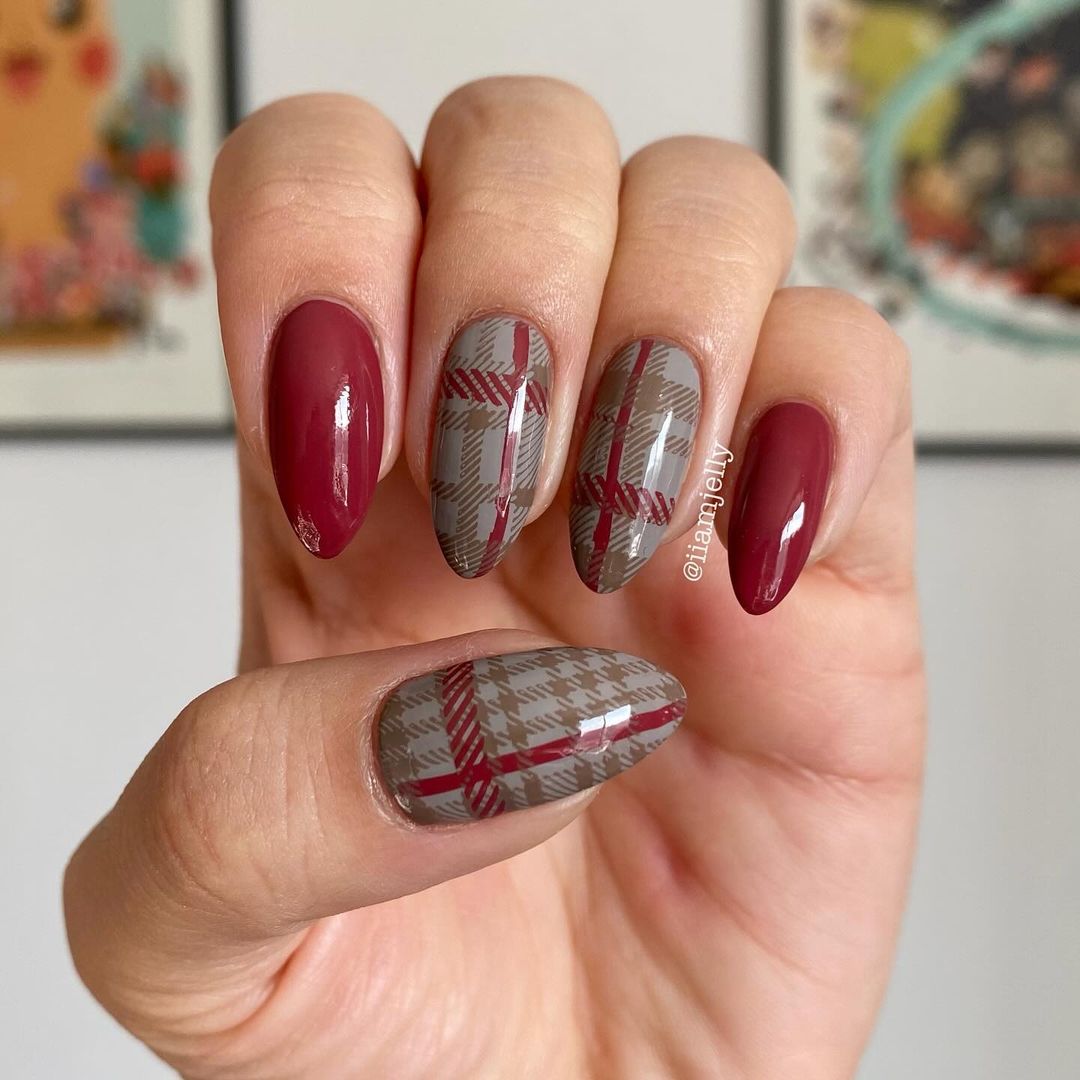
Classic Brown Plaid Nails
This design features a rich brown base with elegant plaid accents. The combination of glossy and matte finishes creates a sophisticated and versatile look. The plaid design on the accent nails incorporates brown, red, and gold lines over a white base, giving a nod to classic fall colors.
Consumables:
- Brown nail polish (e.g., OPI Nail Lacquer in “Chocolate Moose”)
- White nail polish (e.g., Essie Nail Polish in “Blanc”)
- Red nail polish (e.g., Sally Hansen Miracle Gel in “Redgy”)
- Gold striping tape (e.g., Born Pretty Nail Art Striping Tape)
- Top coat (e.g., Essie Gel Couture Top Coat)
Recommendations:
- Use high-quality polishes to achieve a rich, even finish.
- Apply the striping tape carefully to get precise plaid lines.
- Opt for a high-shine top coat to enhance the glossy finish.
How to Create This Design at Home:
- Apply a base coat to start.
- Paint your nails with two coats of brown polish.
- Once the polish is dry, use striping tape to create plaid patterns with red and gold lines on the white accent nails.
- Smooth out any air bubbles in the tape before painting over it.
- Finish with a top coat to seal the design and add shine.
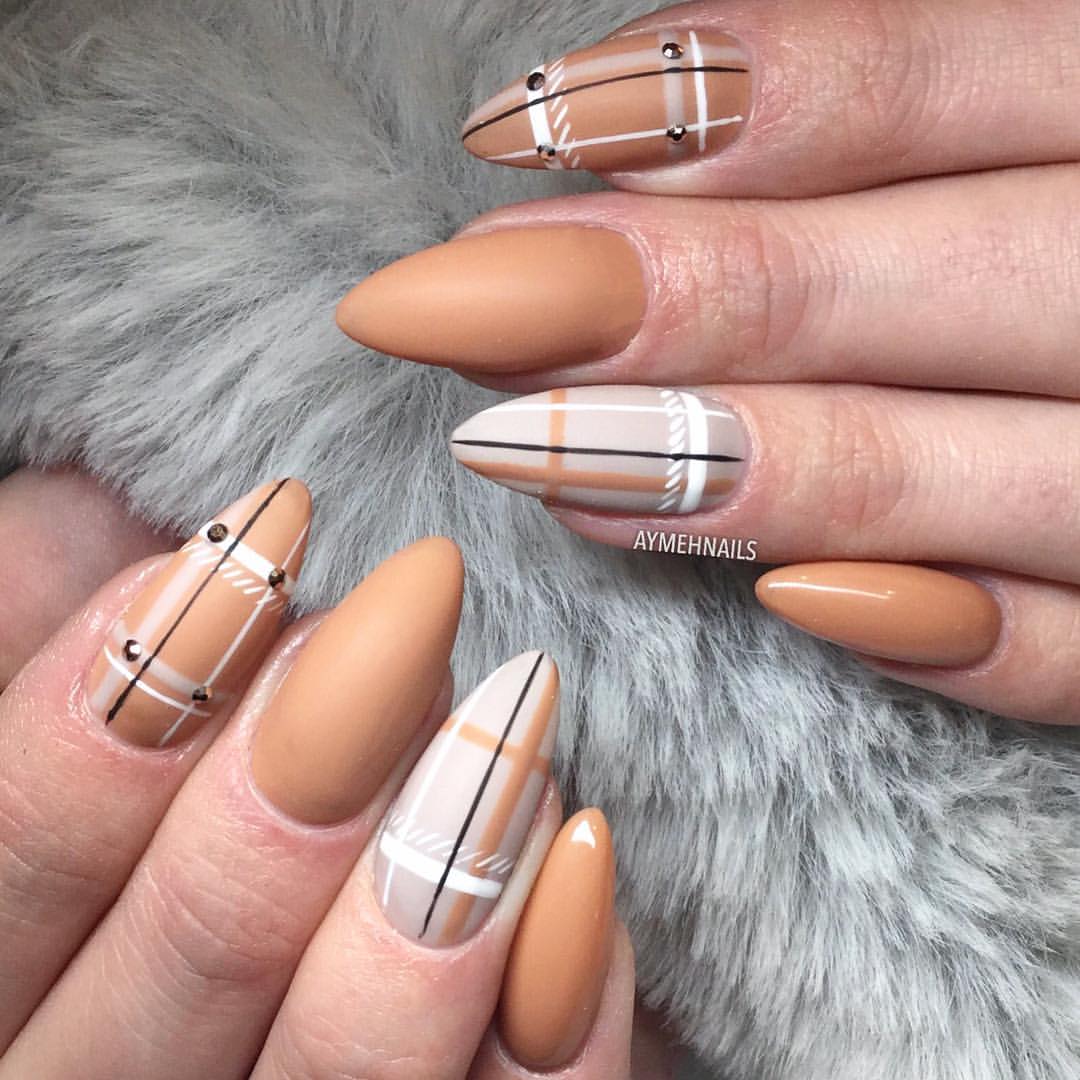
Warm Autumn Plaid Nails
This design uses a nude base with vibrant orange and brown plaid patterns, perfect for the autumn season. The almond shape of the nails adds a touch of elegance, while the plaid pattern brings in a playful element. This combination is ideal for those looking to celebrate fall with a stylish manicure.
Consumables:
- Nude nail polish (e.g., Deborah Lippmann Gel Lab Pro Nail Color in “Fashion”)
- Orange nail polish (e.g., Essie Nail Polish in “Playing Koi”)
- Brown nail polish (e.g., OPI Nail Lacquer in “Espresso Your Inner Self”)
- Thin nail art brush (e.g., Beetles Nail Art Brushes Set)
- Top coat (e.g., Sally Hansen Miracle Gel Top Coat)
Recommendations:
- Ensure the nude polish is fully opaque for a clean look.
- Use a thin brush for precise plaid lines.
- Apply a high-shine top coat for a polished finish.
How to Create This Design at Home:
- Apply a base coat to protect your nails.
- Paint your nails with two coats of nude polish.
- Use a thin nail art brush to create plaid patterns with orange and brown polish.
- Allow the design to dry completely before applying a top coat.
- Finish with a top coat to add shine and longevity to your manicure.
Save Pin

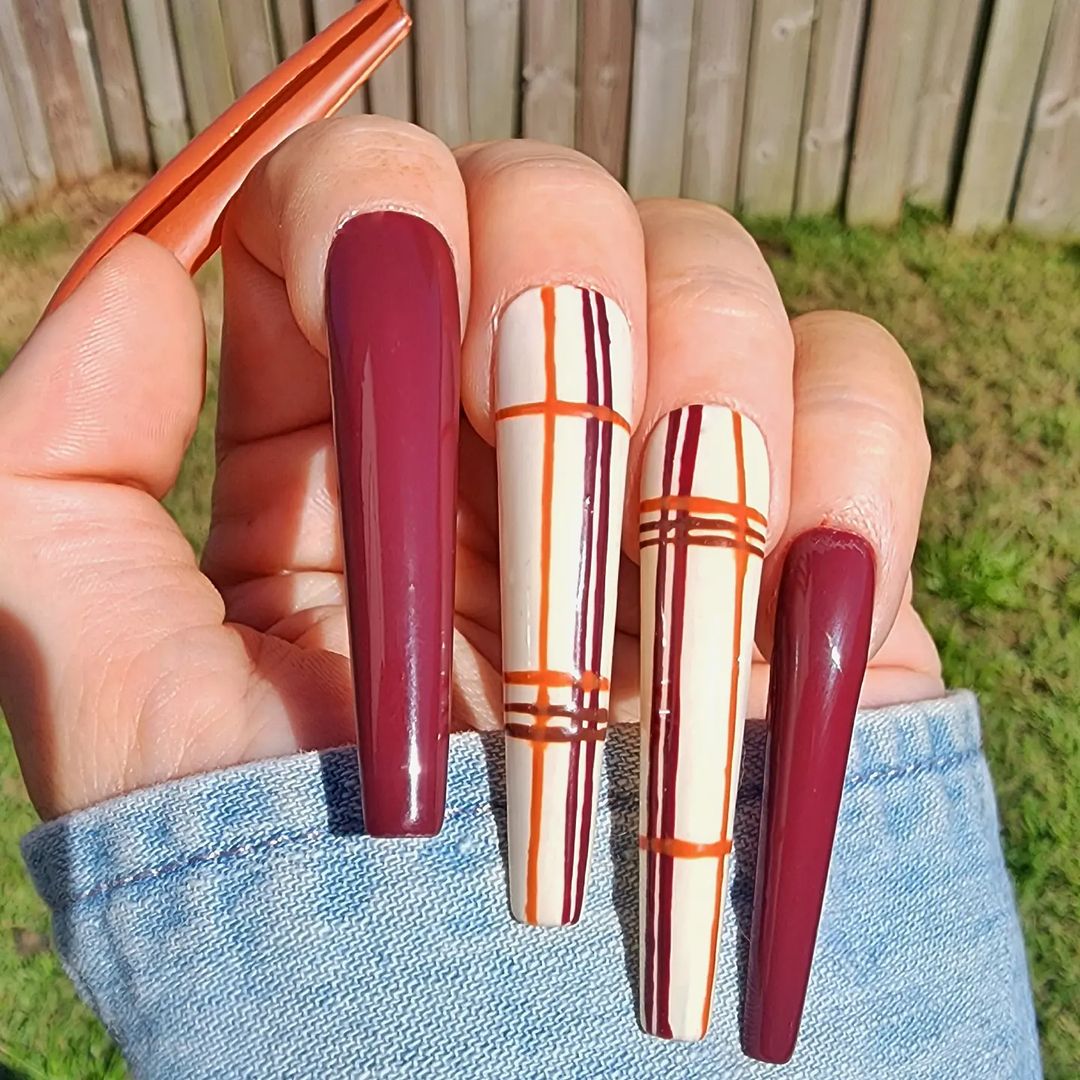
Elegant Burgundy and Orange Plaid Nails
This design features a deep burgundy base with striking orange plaid patterns. The long coffin-shaped nails provide a dramatic canvas for the intricate plaid design. The combination of burgundy and orange makes this manicure perfect for fall, blending elegance with seasonal warmth.
Consumables:
- Burgundy nail polish (e.g., Essie Nail Polish in “Bordeaux”)
- Orange nail polish (e.g., Sally Hansen Insta-Dri Nail Color in “Pumpkin Queen”)
- White nail polish (e.g., OPI Nail Lacquer in “Alpine Snow”)
- Thin nail art brush (e.g., Beetles Nail Art Brushes Set)
- Top coat (e.g., Essie Gel Couture Top Coat)
Recommendations:
- Use a high-quality burgundy polish for a deep, rich base.
- Apply the plaid lines carefully for a neat finish.
- Use a glossy top coat to enhance the shine and protect the design.
How to Create This Design at Home:
- Apply a base coat to protect your nails.
- Paint your nails with two coats of burgundy polish.
- Use a thin nail art brush to create plaid patterns with orange and white polish.
- Allow the design to dry completely before applying a top coat.
- Finish with a top coat to add shine and durability to your manicure.
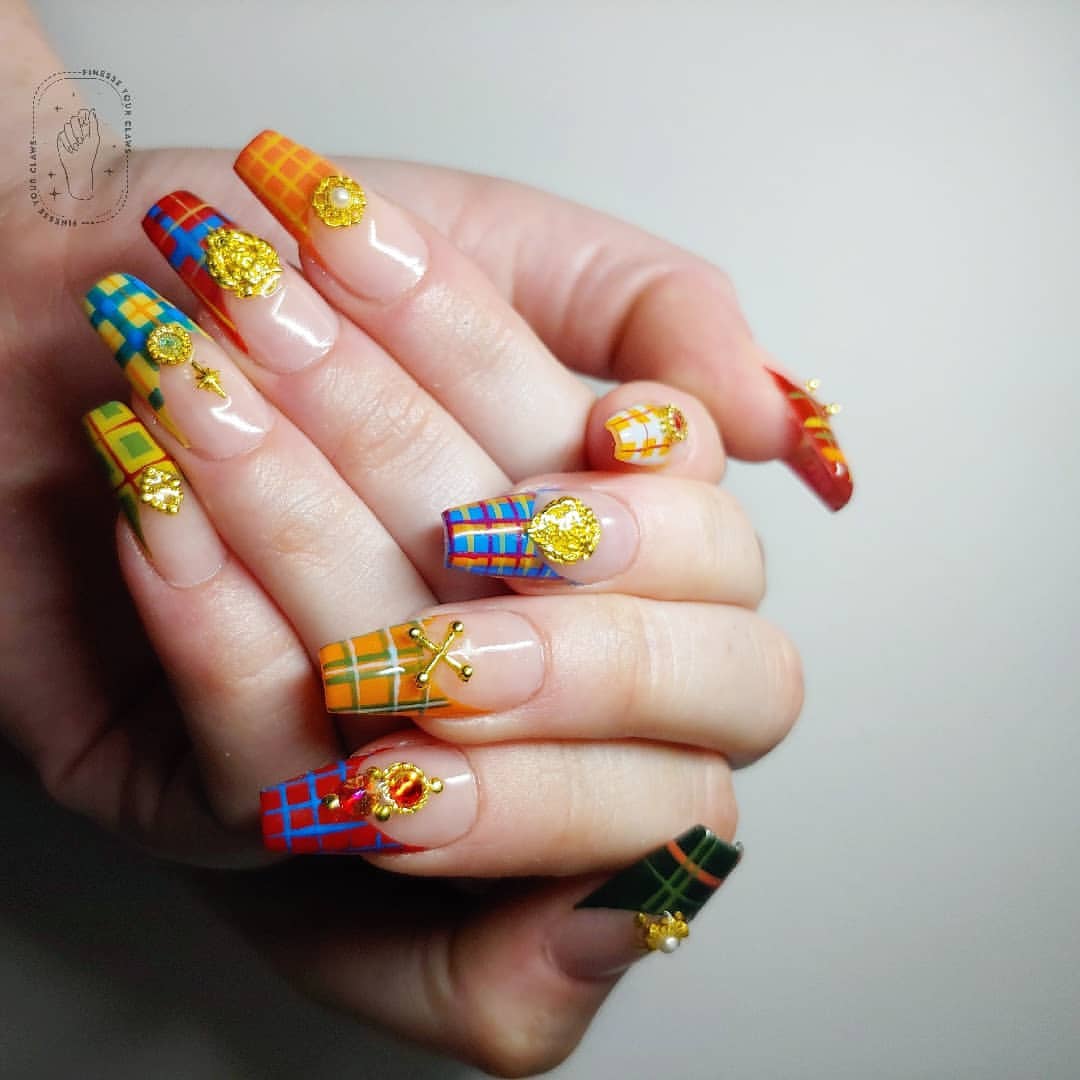
Vibrant Multicolor Plaid Nails
This design is all about vibrant colors and bold patterns. Featuring a mix of orange, blue, green, and red plaid on a clear base, this manicure is playful and eye-catching. The addition of gold embellishments adds a touch of luxury, making this design perfect for a statement look.
Consumables:
- Orange nail polish (e.g., Essie Nail Polish in “Playing Koi”)
- Blue nail polish (e.g., OPI Nail Lacquer in “Rich Girls & Po-Boys”)
- Green nail polish (e.g., Zoya Nail Polish in “Jace”)
- Red nail polish (e.g., Sally Hansen Miracle Gel in “Redgy”)
- Gold embellishments (e.g., Born Pretty Nail Art Decorations)
- Top coat (e.g., Sally Hansen Miracle Gel Top Coat)
Recommendations:
- Use bright, high-pigment polishes for a bold look.
- Apply the gold embellishments carefully to avoid smudging the design.
- Finish with a high-shine top coat to enhance the colors and protect the design.
How to Create This Design at Home:
- Apply a base coat to start.
- Paint your nails with a clear or nude base coat.
- Use a thin nail art brush to create plaid patterns with orange, blue, green, and red polish.
- Apply gold embellishments carefully using nail glue.
- Finish with a top coat to seal the design and add shine.
Subtle Brown and Orange Plaid Nails
This design uses warm brown and orange tones to create a subtle yet stylish plaid pattern. The short, square shape of the nails makes this design practical and easy to maintain. The addition of a leaf accent on one nail adds a seasonal touch, perfect for the fall.

Consumables:
- Brown nail polish (e.g., OPI Nail Lacquer in “Chocolate Moose”)
- Orange nail polish (e.g., Essie Nail Polish in “Playing Koi”)
- White nail polish (e.g., Essie Nail Polish in “Blanc”)
- Thin nail art brush (e.g., Beetles Nail Art Brushes Set)
- Top coat (e.g., Essie Gel Couture Top Coat)
Recommendations:
- Use warm, earthy tones for a cohesive fall look.
- Apply the plaid lines carefully for a neat finish.
- Use a high-shine top coat to protect the design and add gloss.
How to Create This Design at Home:
- Apply a base coat to protect your nails.
- Paint your nails with alternating colors of brown and orange polish.
- Use a thin nail art brush to create plaid patterns with white and brown polish on the orange nails.
- Add a leaf accent on one nail using a thin brush and green polish.
- Finish with a top coat to seal the design and add shine.
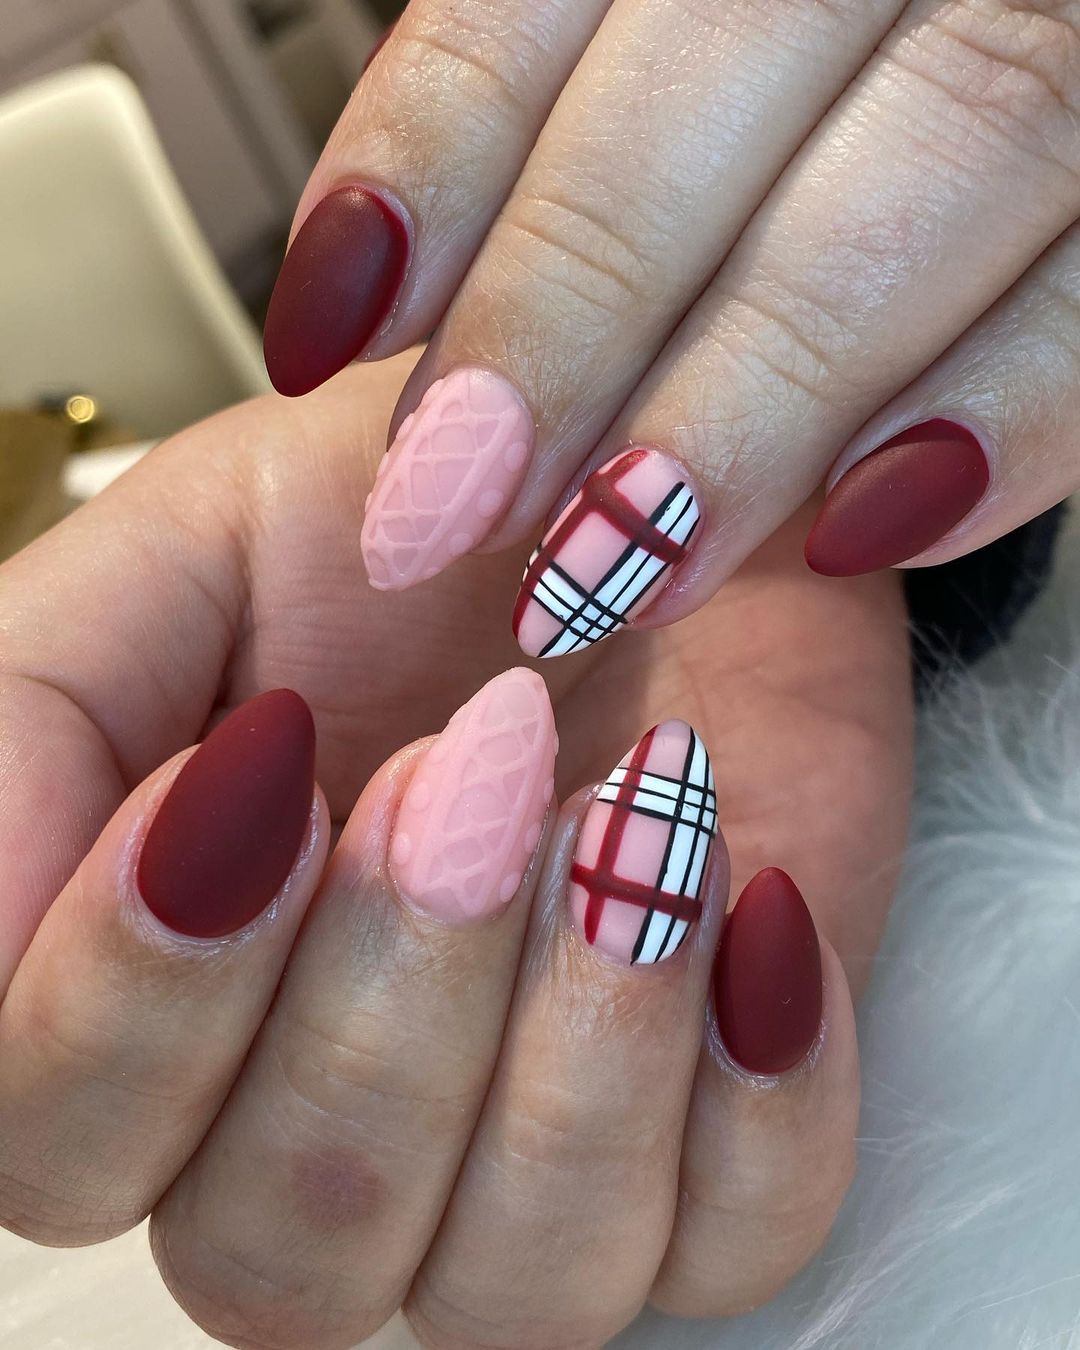
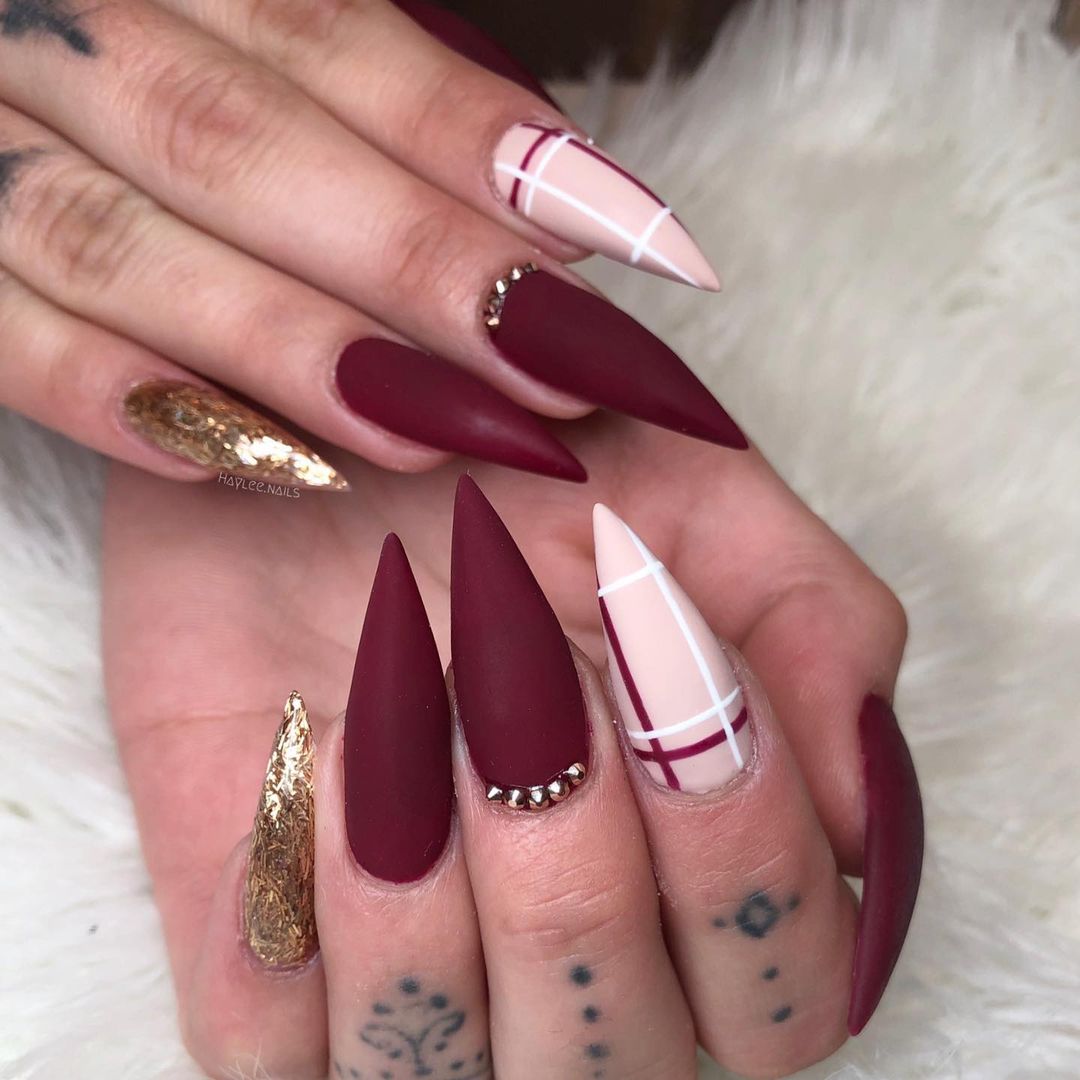
Burgundy and Gold Glam Plaid Nails
This striking design combines deep burgundy matte nails with a nude and white plaid accent. The stiletto shape adds a dramatic flair, while the gold glitter accent nail brings a touch of luxury. The addition of small gold studs at the base of one nail enhances the overall glam look, making this manicure perfect for special occasions.
Consumables:
- Burgundy matte nail polish (e.g., Zoya Nail Polish in “Amara”)
- Nude nail polish (e.g., Essie Nail Polish in “Topless & Barefoot”)
- White nail polish (e.g., Essie Nail Polish in “Blanc”)
- Gold glitter polish (e.g., China Glaze Nail Lacquer in “Golden Enchantment”)
- Gold studs (e.g., Born Pretty Nail Art Decorations)
- Matte top coat (e.g., OPI Matte Top Coat)
Recommendations:
- Ensure the burgundy polish is fully opaque for a bold look.
- Use striping tape for precise plaid lines.
- Apply the gold glitter in multiple thin layers for even coverage.
How to Create This Design at Home:
- Apply a base coat to protect your nails.
- Paint your nails with two coats of burgundy polish.
- Use striping tape to create plaid patterns on the nude accent nails with white polish.
- Apply gold glitter polish on the accent nail and place gold studs at the base of one nail.
- Finish with a matte top coat to seal the design and add a smooth finish.
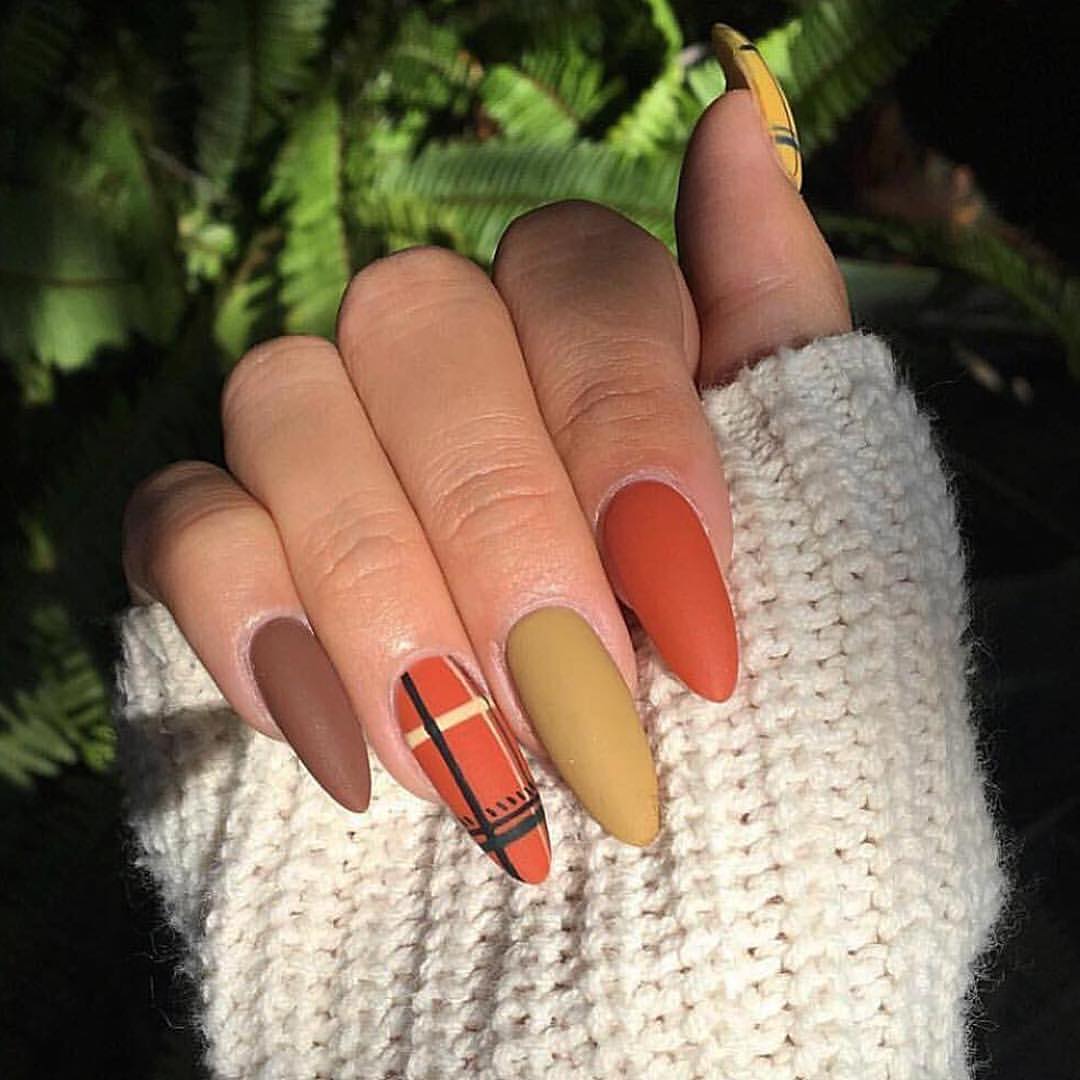
Earthy Fall Plaid Nails
This design captures the essence of autumn with earthy tones of brown, orange, and mustard yellow. The matte finish on these almond-shaped nails adds a contemporary touch, while the plaid patterns bring in a classic fall vibe. This combination of colors and patterns makes for a warm, inviting manicure perfect for the season.
Consumables:
- Brown matte nail polish (e.g., OPI Nail Lacquer in “Chocolate Moose”)
- Orange nail polish (e.g., Essie Nail Polish in “Playing Koi”)
- Mustard yellow nail polish (e.g., Sally Hansen Insta-Dri Nail Color in “Lightning”)
- Black striping tape (e.g., Born Pretty Nail Art Striping Tape)
- Matte top coat (e.g., Sally Hansen Big Matte Top Coat)
Recommendations:
- Use high-pigment polishes to avoid multiple coats.
- Apply striping tape carefully to achieve clean lines for the plaid pattern.
- Finish with a matte top coat for a modern look.
How to Create This Design at Home:
- Apply a base coat to start.
- Paint your nails with alternating colors of brown, orange, and mustard yellow polish.
- Use striping tape to create plaid patterns with black lines on the orange nails.
- Allow the design to dry completely before applying a matte top coat.
- Finish with a matte top coat to seal the design and add a smooth finish.
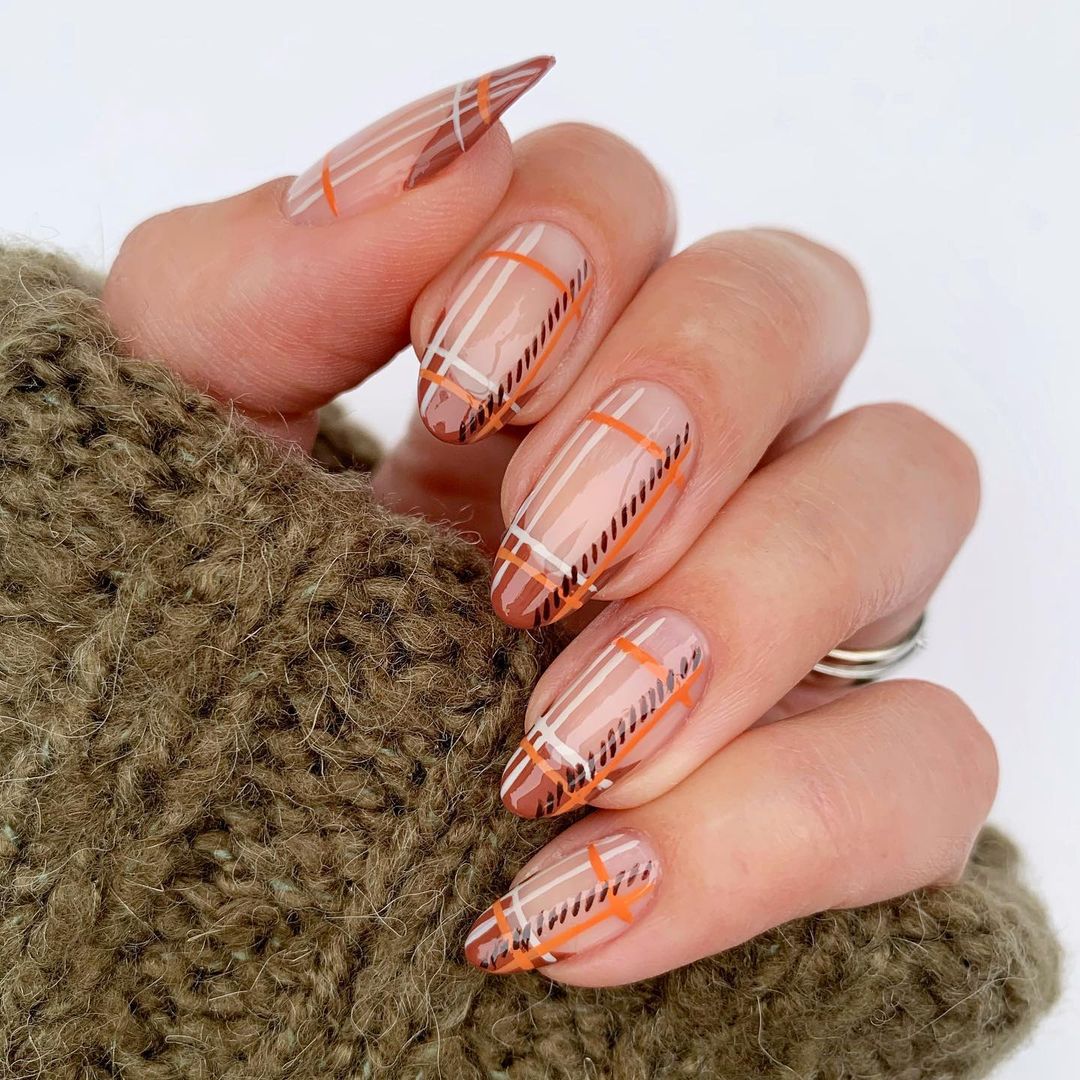
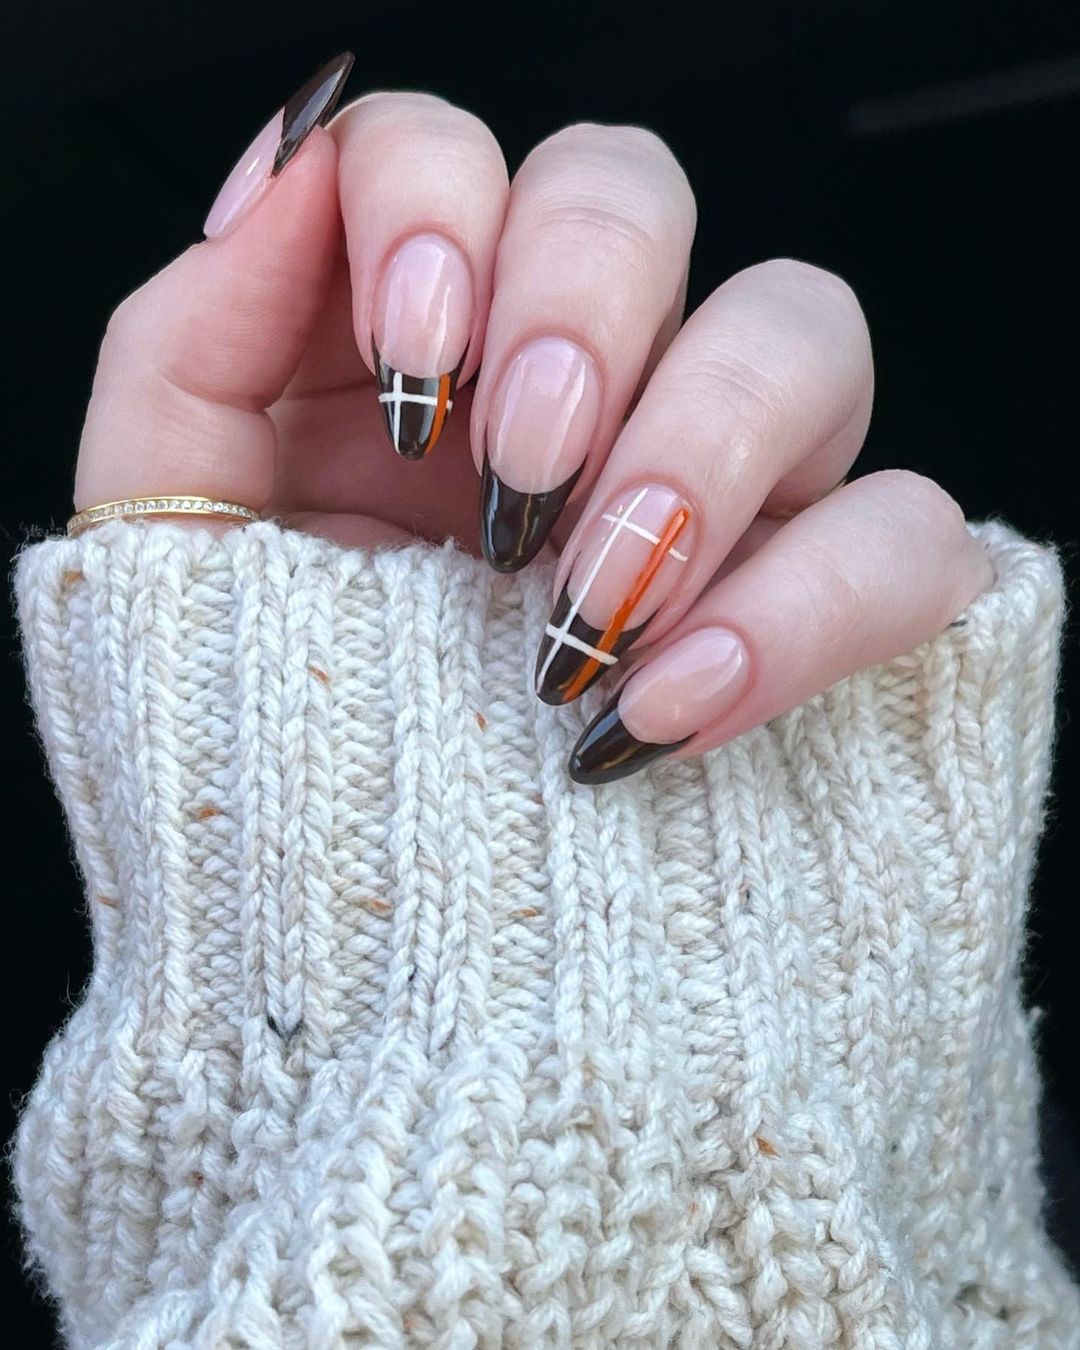
Sophisticated French Plaid Tips
This design features a modern twist on the classic French manicure with plaid tips. The nude base color keeps the look sophisticated, while the black and orange plaid tips add a playful element. This elegant design is perfect for those who want a subtle yet stylish fall manicure.
Consumables:
- Nude nail polish (e.g., Deborah Lippmann Gel Lab Pro Nail Color in “Fashion”)
- Black nail polish (e.g., OPI Nail Lacquer in “Black Onyx”)
- Orange nail polish (e.g., Essie Nail Polish in “Playing Koi”)
- White nail polish (e.g., Essie Nail Polish in “Blanc”)
- Thin nail art brush (e.g., Beetles Nail Art Brushes Set)
- Top coat (e.g., Essie Gel Couture Top Coat)
Recommendations:
- Ensure the nude polish is fully opaque for a clean look.
- Use a thin brush for precise plaid lines on the tips.
- Apply a high-shine top coat to protect the design.
How to Create This Design at Home:
- Apply a base coat to protect your nails.
- Paint your nails with two coats of nude polish.
- Use a thin nail art brush to create plaid patterns on the tips with black, orange, and white polish.
- Allow the design to dry completely before applying a top coat.
- Finish with a top coat to add shine and longevity to your manicure.
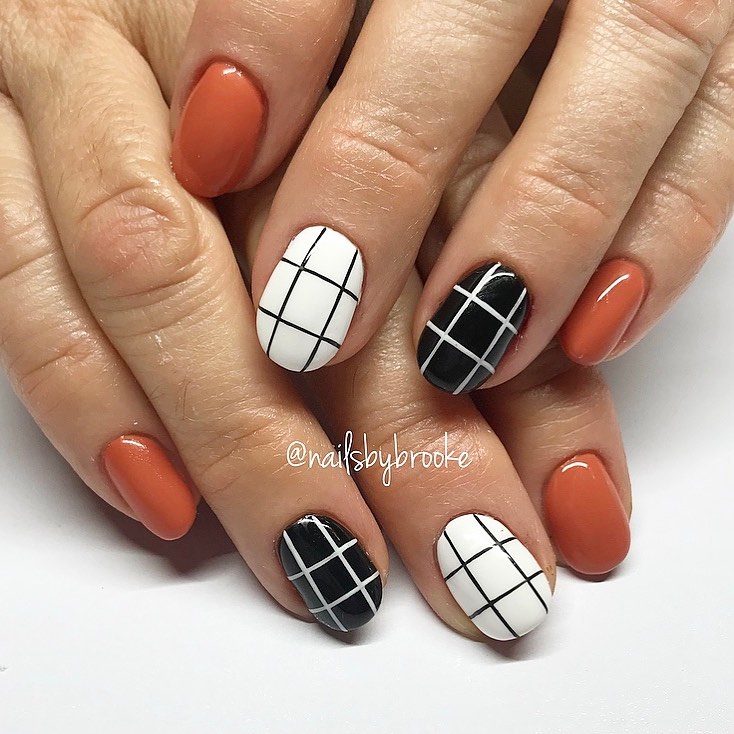
Bold Orange and Black Plaid Nails
This eye-catching design features a bold combination of orange, black, and white plaid patterns on short, rounded nails. The glossy finish enhances the vibrant colors, making this manicure perfect for those who love to make a statement. The simplicity of the design adds to its charm, making it both fun and elegant.
Consumables:
- Orange nail polish (e.g., Essie Nail Polish in “Playing Koi”)
- Black nail polish (e.g., OPI Nail Lacquer in “Black Onyx”)
- White nail polish (e.g., Essie Nail Polish in “Blanc”)
- Thin nail art brush (e.g., Beetles Nail Art Brushes Set)
- Top coat (e.g., Essie Gel Couture Top Coat)
Recommendations:
- Use bright, high-pigment polishes for a bold look.
- Apply the plaid lines carefully for a neat finish.
- Finish with a high-shine top coat to enhance the colors and protect the design.
How to Create This Design at Home:
- Apply a base coat to start.
- Paint your nails with alternating colors of orange, black, and white polish.
- Use a thin nail art brush to create plaid patterns on the black and white nails.
- Allow the design to dry completely before applying a top coat.
- Finish with a top coat to add shine and longevity to your manicure.
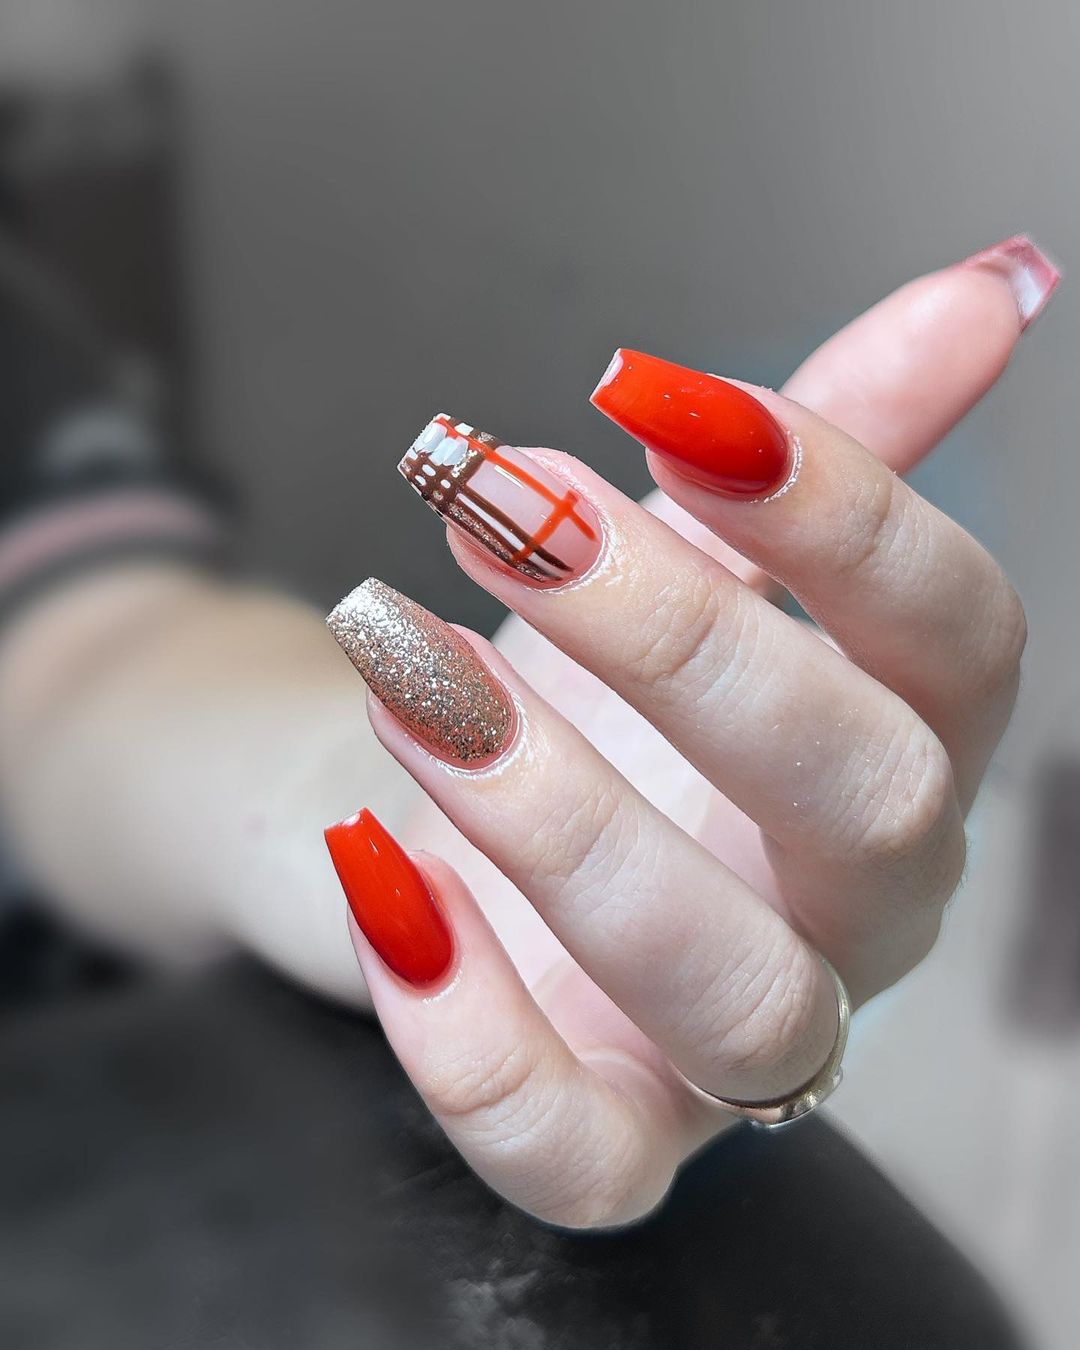
Festive Red and Gold Plaid Nails
This festive design combines bright red polish with glittering gold and plaid accents. The coffin shape of the nails provides a dramatic canvas for the intricate designs. The addition of gold glitter on one nail adds a touch of sparkle, making this manicure perfect for holiday celebrations.
Consumables:
- Red nail polish (e.g., Sally Hansen Miracle Gel in “Redgy”)
- Gold glitter nail polish (e.g., China Glaze Nail Lacquer in “Golden Enchantment”)
- Nude nail polish (e.g., Essie Nail Polish in “Topless & Barefoot”)
- Brown nail polish (e.g., OPI Nail Lacquer in “Espresso Your Inner Self”)
- White nail polish (e.g., Essie Nail Polish in “Blanc”)
- Thin nail art brush (e.g., Beetles Nail Art Brushes Set)
- Top coat (e.g., Essie Gel Couture Top Coat)
Recommendations:
- Use bright red polish for a festive look.
- Apply gold glitter polish in multiple thin layers for even coverage.
- Use a high-shine top coat to enhance the glitter and protect the design.
How to Create This Design at Home:
- Apply a base coat to protect your nails.
- Paint your nails with alternating colors of red, nude, and gold glitter polish.
- Use a thin nail art brush to create plaid patterns on the nude accent nails with brown and white polish.
- Allow the design to dry completely before applying a top coat.
- Finish with a top coat to add shine and longevity to your manicure.
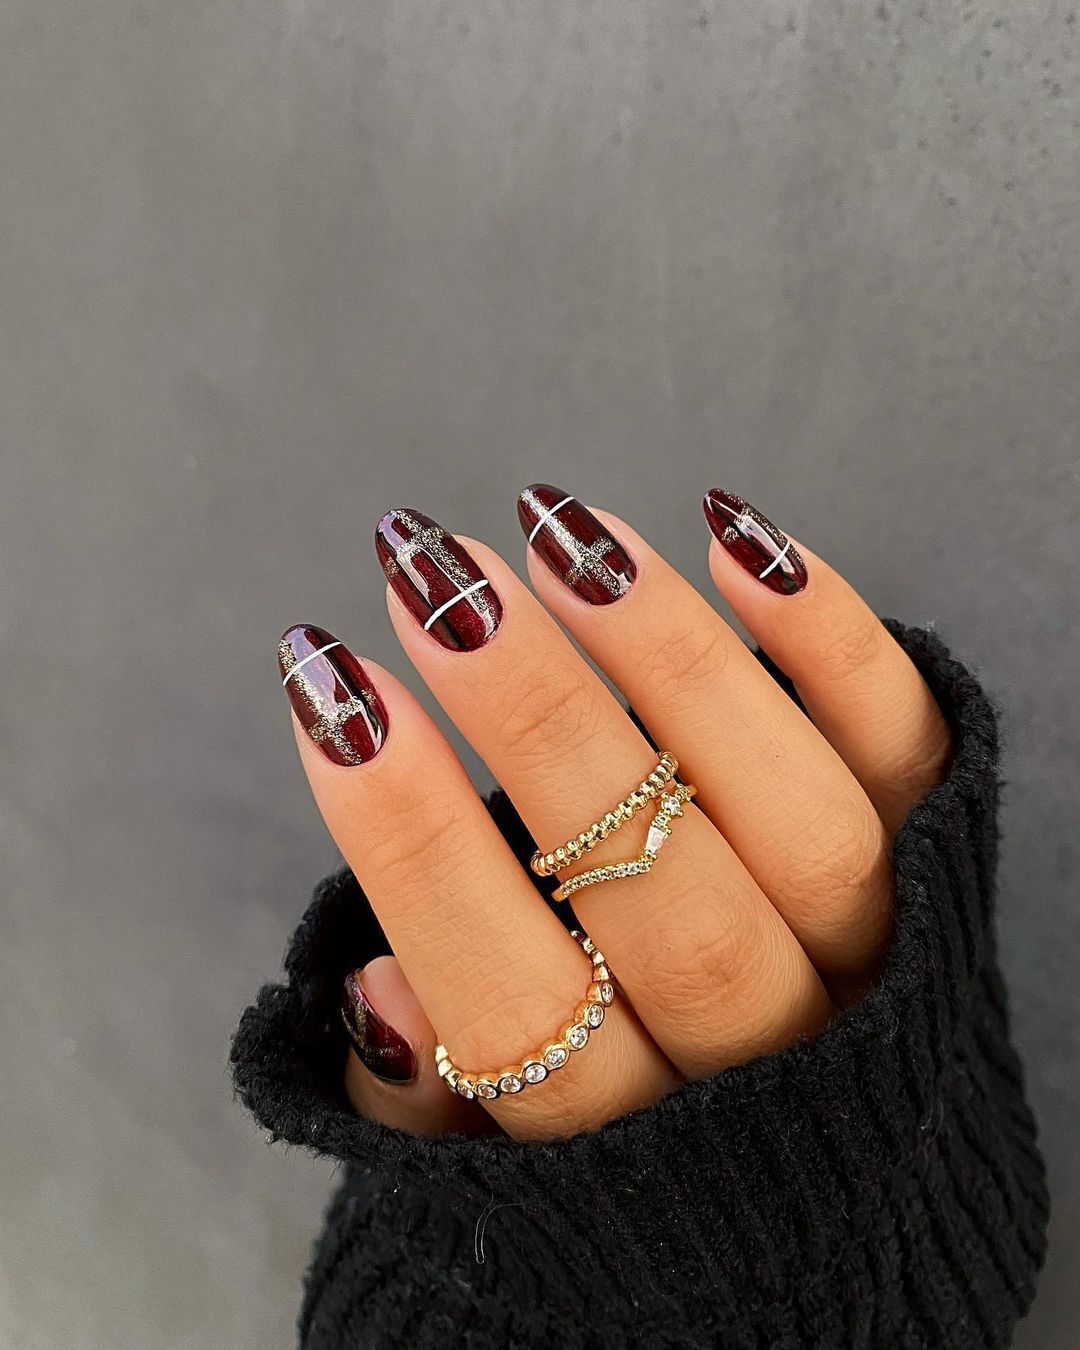
Chic Burgundy and Silver Plaid Nails
This chic design features a deep burgundy base with sophisticated silver plaid accents. The short, rounded nails provide a neat and elegant look. The combination of burgundy and silver makes this manicure versatile enough for both everyday wear and special occasions.
Consumables:
- Burgundy nail polish (e.g., Essie Nail Polish in “Bordeaux”)
- Silver nail polish (e.g., Sally Hansen Insta-Dri Nail Color in “Silver Sweep”)
- Thin nail art brush (e.g., Beetles Nail Art Brushes Set)
- Top coat (e.g., Essie Gel Couture Top Coat)
Recommendations:
- Use a high-quality burgundy polish for a deep, rich base.
- Apply the silver plaid lines carefully for a neat finish.
- Finish with a high-shine top coat to protect the design.
How to Create This Design at Home:
- Apply a base coat to protect your nails.
- Paint your nails with two coats of burgundy polish.
- Use a thin nail art brush to create plaid patterns with silver polish.
- Allow the design to dry completely before applying a top coat.
- Finish with a top coat to add shine and durability to your manicure.
Elegant Nude and Plaid Nails
This elegant design features a nude and peachy base with intricate white and black plaid accents. The almond shape adds sophistication, while the matte finish gives it a modern touch. Small metallic studs on some nails add a bit of glamour, making this manicure perfect for both casual and formal occasions.
Consumables:
- Nude nail polish (e.g., Essie Nail Polish in “Topless & Barefoot”)
- Peach nail polish (e.g., Sally Hansen Miracle Gel in “Per-Suede”)
- White nail polish (e.g., OPI Nail Lacquer in “Alpine Snow”)
- Black nail polish (e.g., OPI Nail Lacquer in “Black Onyx”)
- Thin nail art brush (e.g., Beetles Nail Art Brushes Set)
- Metallic studs (e.g., Born Pretty Nail Art Decorations)
- Matte top coat (e.g., OPI Matte Top Coat)
Recommendations:
- Use a high-quality matte top coat to avoid any shiny patches.
- Apply the plaid lines carefully using a thin brush for precision.
- Add metallic studs using nail glue to ensure they stay in place.
How to Create This Design at Home:
- Apply a base coat to protect your nails.
- Paint your nails with alternating colors of nude and peach polish.
- Use a thin nail art brush to create plaid patterns with white and black polish on the accent nails.
- Add metallic studs to some nails using nail glue.
- Finish with a matte top coat to seal the design and add a smooth finish.
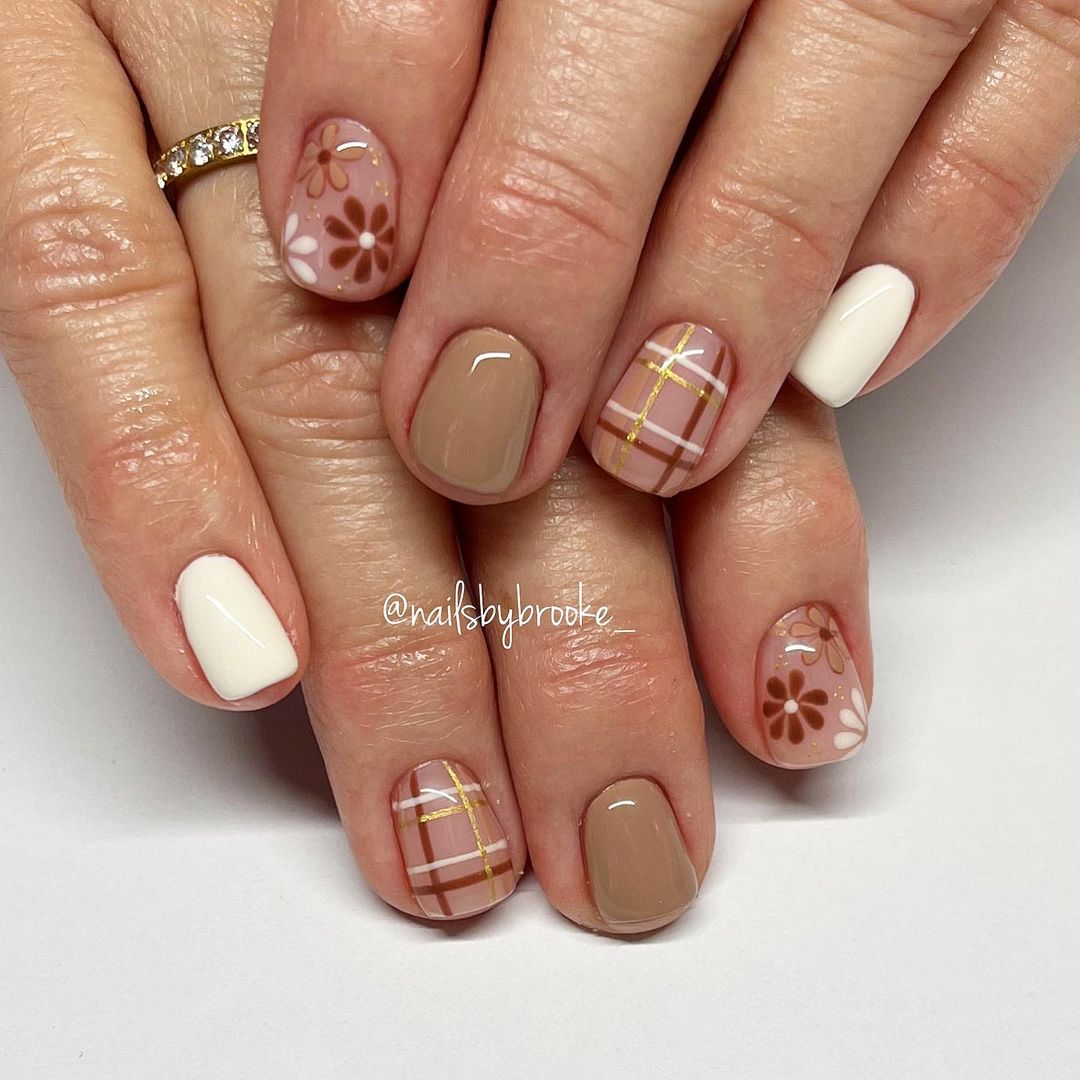
Floral and Plaid Combo Nails
This design beautifully combines floral patterns with classic plaid. The soft beige and brown tones provide a warm base, while the gold striping tape adds a touch of elegance. The floral design adds a playful element, making this manicure perfect for those who love a mix of patterns.
Consumables:
- Beige nail polish (e.g., Essie Nail Polish in “Ballet Slippers”)
- Brown nail polish (e.g., OPI Nail Lacquer in “Chocolate Moose”)
- White nail polish (e.g., Essie Nail Polish in “Blanc”)
- Gold striping tape (e.g., Born Pretty Nail Art Striping Tape)
- Thin nail art brush (e.g., Beetles Nail Art Brushes Set)
- Top coat (e.g., Sally Hansen Miracle Gel Top Coat)
Recommendations:
- Use high-pigment polishes for a clean and vibrant look.
- Apply the gold striping tape carefully to ensure straight lines.
- Finish with a high-shine top coat to enhance the colors and protect the design.
How to Create This Design at Home:
- Apply a base coat to protect your nails.
- Paint your nails with alternating colors of beige and brown polish.
- Use a thin nail art brush to create floral patterns on some nails.
- Apply gold striping tape on the plaid accent nails.
- Finish with a top coat to seal the design and add shine.
Sophisticated Red and Gray Plaid Nails
This sophisticated design features a mix of red and gray polish with intricate plaid patterns. The glossy finish adds a polished look, while the plaid design brings a touch of classic elegance. This manicure is perfect for both everyday wear and special occasions.
Consumables:
- Red nail polish (e.g., Essie Nail Polish in “Bordeaux”)
- Gray nail polish (e.g., OPI Nail Lacquer in “Suzi Takes the Wheel”)
- White nail polish (e.g., Essie Nail Polish in “Blanc”)
- Thin nail art brush (e.g., Beetles Nail Art Brushes Set)
- Top coat (e.g., Essie Gel Couture Top Coat)
Recommendations:
- Use high-quality polishes for a rich and even finish.
- Apply the plaid lines carefully for a neat and precise look.
- Finish with a high-shine top coat to enhance the design.
How to Create This Design at Home:
- Apply a base coat to protect your nails.
- Paint your nails with alternating colors of red and gray polish.
- Use a thin nail art brush to create plaid patterns with white polish on the gray nails.
- Allow the design to dry completely before applying a top coat.
- Finish with a top coat to add shine and protect the design.
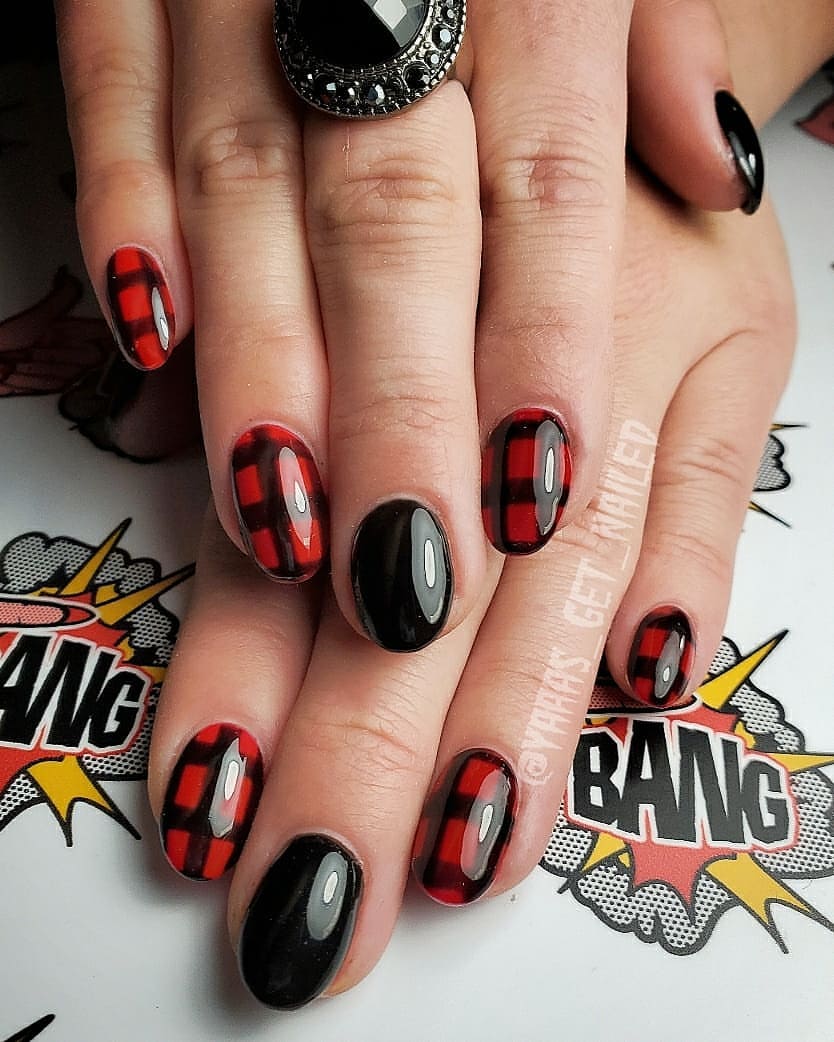
Bold Buffalo Plaid Nails
This bold design features a classic black and red buffalo plaid pattern on glossy nails. The combination of black and red creates a striking look, perfect for those who love a bold and vibrant manicure. The glossy finish adds a touch of sophistication, making this design suitable for both casual and formal settings.
Consumables:
- Black nail polish (e.g., OPI Nail Lacquer in “Black Onyx”)
- Red nail polish (e.g., Essie Nail Polish in “Really Red”)
- Thin nail art brush (e.g., Beetles Nail Art Brushes Set)
- Top coat (e.g., Sally Hansen Miracle Gel Top Coat)
Recommendations:
- Use bright, high-pigment polishes for a bold look.
- Apply the plaid lines carefully using a thin brush for precision.
- Finish with a high-shine top coat to protect the design.
How to Create This Design at Home:
- Apply a base coat to protect your nails.
- Paint your nails with alternating colors of black and red polish.
- Use a thin nail art brush to create plaid patterns on the black nails with red polish.
- Allow the design to dry completely before applying a top coat.
- Finish with a top coat to add shine and protect the design.
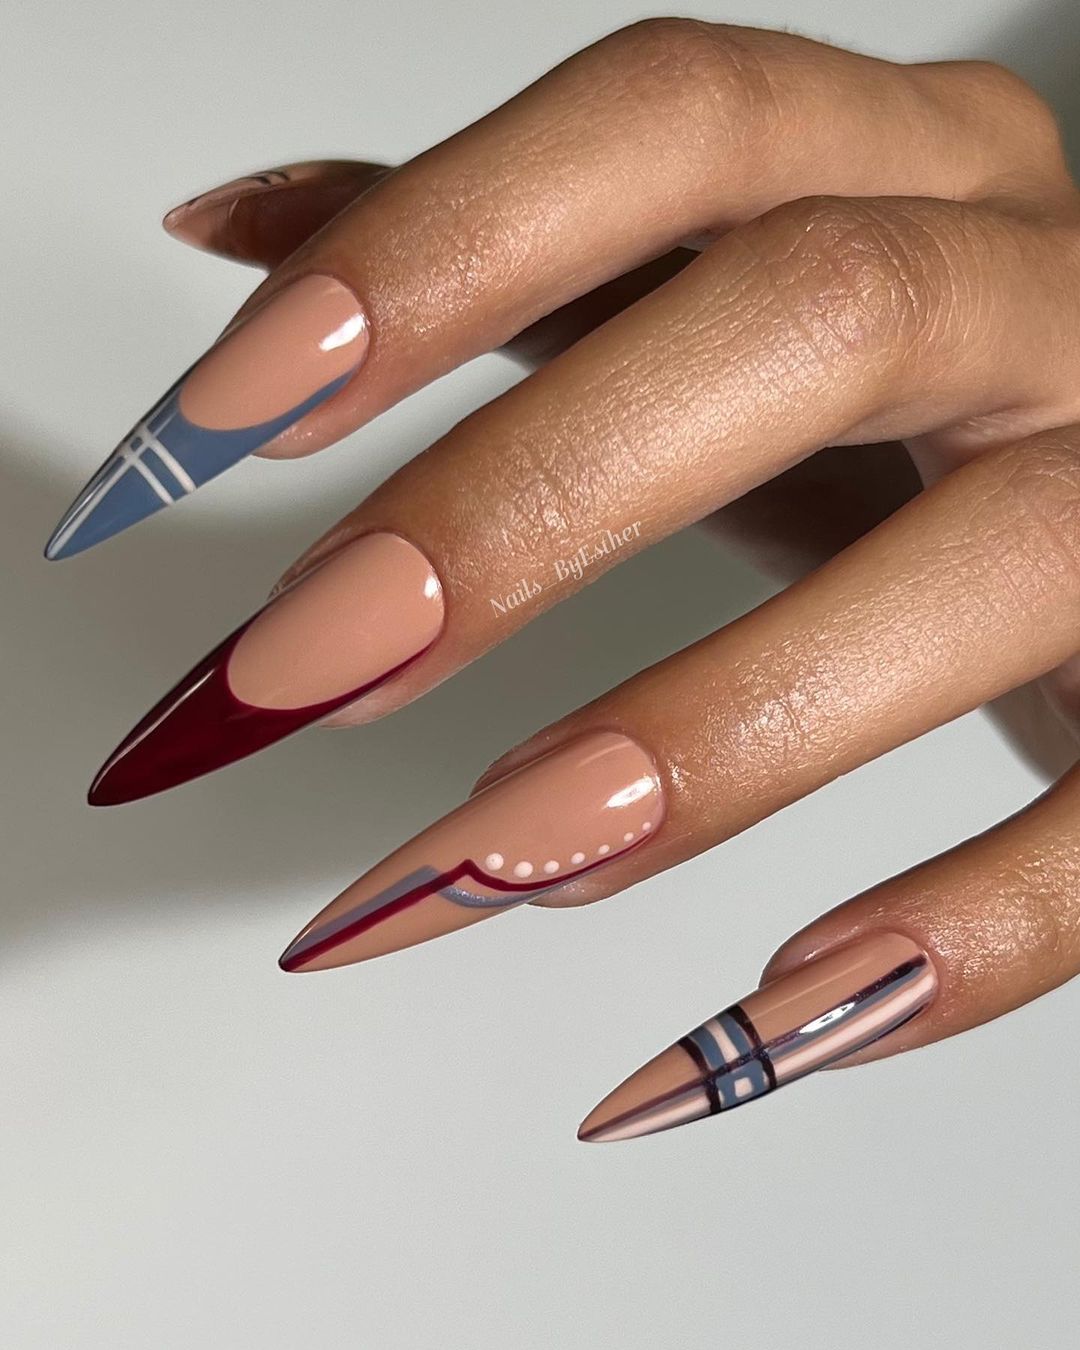
Modern Nude and Blue Plaid Nails
This modern design combines nude polish with blue plaid accents for a chic and sophisticated look. The stiletto shape adds a touch of drama, while the plaid pattern keeps the design playful. This manicure is perfect for those who want a stylish yet understated look.
Consumables:
- Nude nail polish (e.g., Deborah Lippmann Gel Lab Pro Nail Color in “Fashion”)
- Blue nail polish (e.g., OPI Nail Lacquer in “Rich Girls & Po-Boys”)
- White nail polish (e.g., Essie Nail Polish in “Blanc”)
- Thin nail art brush (e.g., Beetles Nail Art Brushes Set)
- Top coat (e.g., Essie Gel Couture Top Coat)
Recommendations:
- Use high-quality polishes for a smooth and even finish.
- Apply the plaid lines carefully for a neat and precise look.
- Finish with a high-shine top coat to enhance the design.
How to Create This Design at Home:
- Apply a base coat to protect your nails.
- Paint your nails with alternating colors of nude and blue polish.
- Use a thin nail art brush to create plaid patterns on the nude nails with blue and white polish.
- Allow the design to dry completely before applying a top coat.
- Finish with a top coat to add shine and protect the design.
Cozy Knit and Plaid Nails
This cozy design combines warm orange and mustard yellow tones with a knit texture and plaid pattern. The matte finish gives it a modern touch, while the knit pattern adds a cozy, textured effect. This manicure is perfect for embracing the fall season with style.
Consumables:
- Orange matte nail polish (e.g., Essie Nail Polish in “Playing Koi”)
- Mustard yellow nail polish (e.g., Sally Hansen Insta-Dri Nail Color in “Lightning”)
- White nail polish (e.g., OPI Nail Lacquer in “Alpine Snow”)
- Black nail polish (e.g., OPI Nail Lacquer in “Black Onyx”)
- Thin nail art brush (e.g., Beetles Nail Art Brushes Set)
- Matte top coat (e.g., OPI Matte Top Coat)
Recommendations:
- Use a high-quality matte top coat to avoid any shiny patches.
- Apply the plaid lines carefully using a thin brush for precision.
- Add a knit texture using a dotting tool to create the pattern.
How to Create This Design at Home:
- Apply a base coat to protect your nails.
- Paint your nails with alternating colors of orange and mustard yellow polish.
- Use a thin nail art brush to create plaid patterns with white and black polish on the accent nails.
- Add a knit texture on one nail using a dotting tool.
- Finish with a matte top coat to seal the design and add a smooth finish.
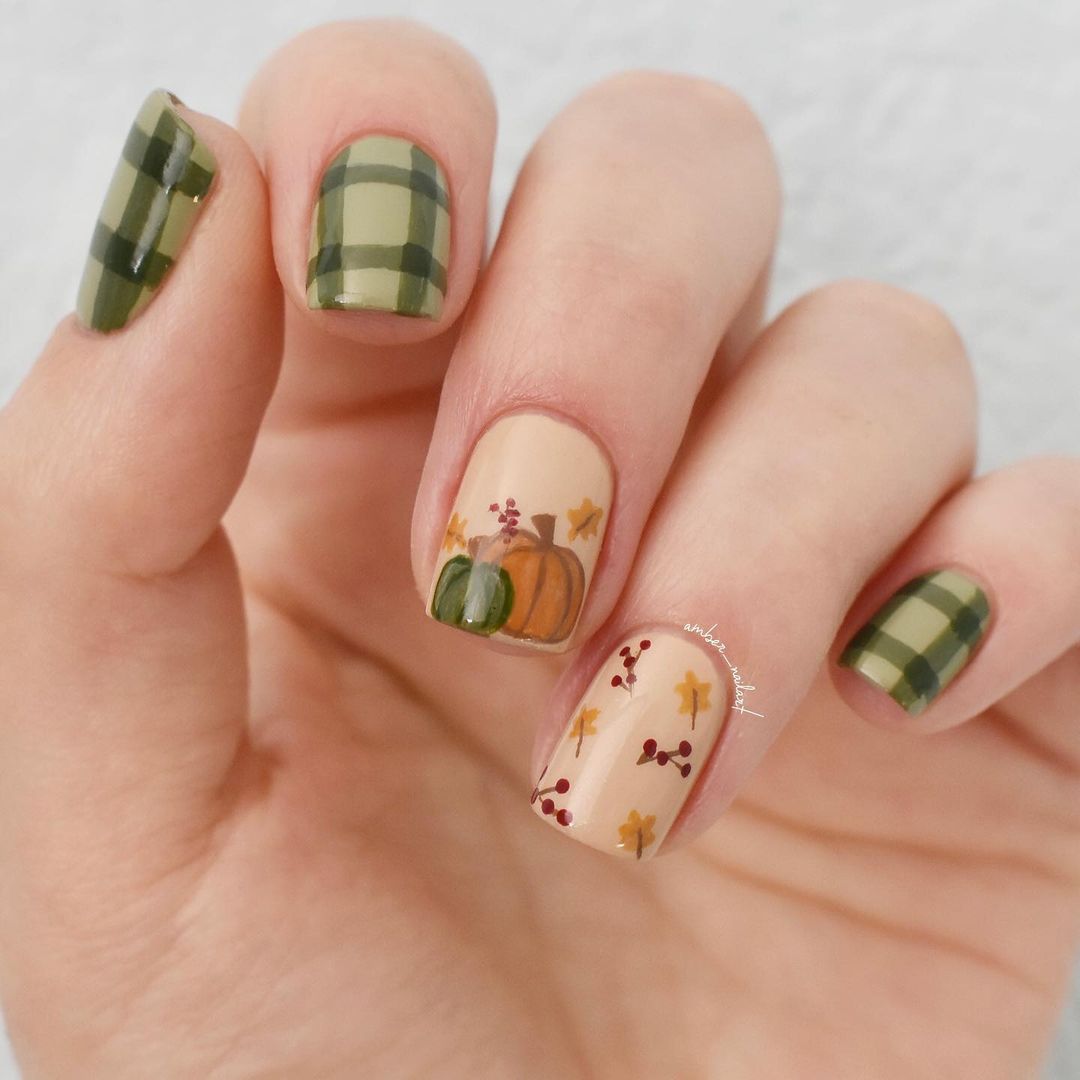
Festive Pumpkin and Plaid Nails
This festive design features a mix of green plaid and cute pumpkin accents. The short, square shape of the nails makes this design practical and easy to maintain. The combination of green and nude tones with autumnal accents makes this manicure perfect for celebrating the fall season.
Consumables:
- Green nail polish (e.g., Zoya Nail Polish in “Jace”)
- Nude nail polish (e.g., Essie Nail Polish in “Topless & Barefoot”)
- Orange nail polish (e.g., Essie Nail Polish in “Playing Koi”)
- Brown nail polish (e.g., OPI Nail Lacquer in “Chocolate Moose”)
- Thin nail art brush (e.g., Beetles Nail Art Brushes Set)
- Top coat (e.g., Sally Hansen Miracle Gel Top Coat)
Recommendations:
- Use high-pigment polishes for vibrant colors.
- Apply the plaid lines carefully for a neat finish.
- Add pumpkin and leaf accents using a thin brush for precision.
How to Create This Design at Home:
- Apply a base coat to protect your nails.
- Paint your nails with alternating colors of green and nude polish.
- Use a thin nail art brush to create plaid patterns on the green nails.
- Add pumpkin and leaf accents on the nude nails using a thin brush.
- Finish with a top coat to seal the design and add shine.
FAQ
Q: How do I make my plaid nail designs last longer? A: To extend the life of your plaid nail designs, always start with a base coat and finish with a high-quality top coat. Avoid exposing your nails to harsh chemicals and wear gloves when doing household chores.
Q: Can I achieve plaid nail designs with gel polish? A: Yes, you can use gel polish for plaid designs. Gel polish offers a longer-lasting finish and is perfect for intricate designs. Just make sure to cure each layer under a UV/LED lamp.
Q: What are some tips for creating straight lines in plaid designs? A: Use striping tape or a thin nail art brush for straight lines. Patience and practice are key. Make sure the base color is completely dry before applying tape or painting lines.
With these stunning fall plaid nails 2024 ideas, you’re sure to find a design that suits your style and skill level. Whether you prefer bold colors or subtle patterns, plaid nails are a perfect way to celebrate the autumn season. So grab your nail polish and get creative!
Save Pin