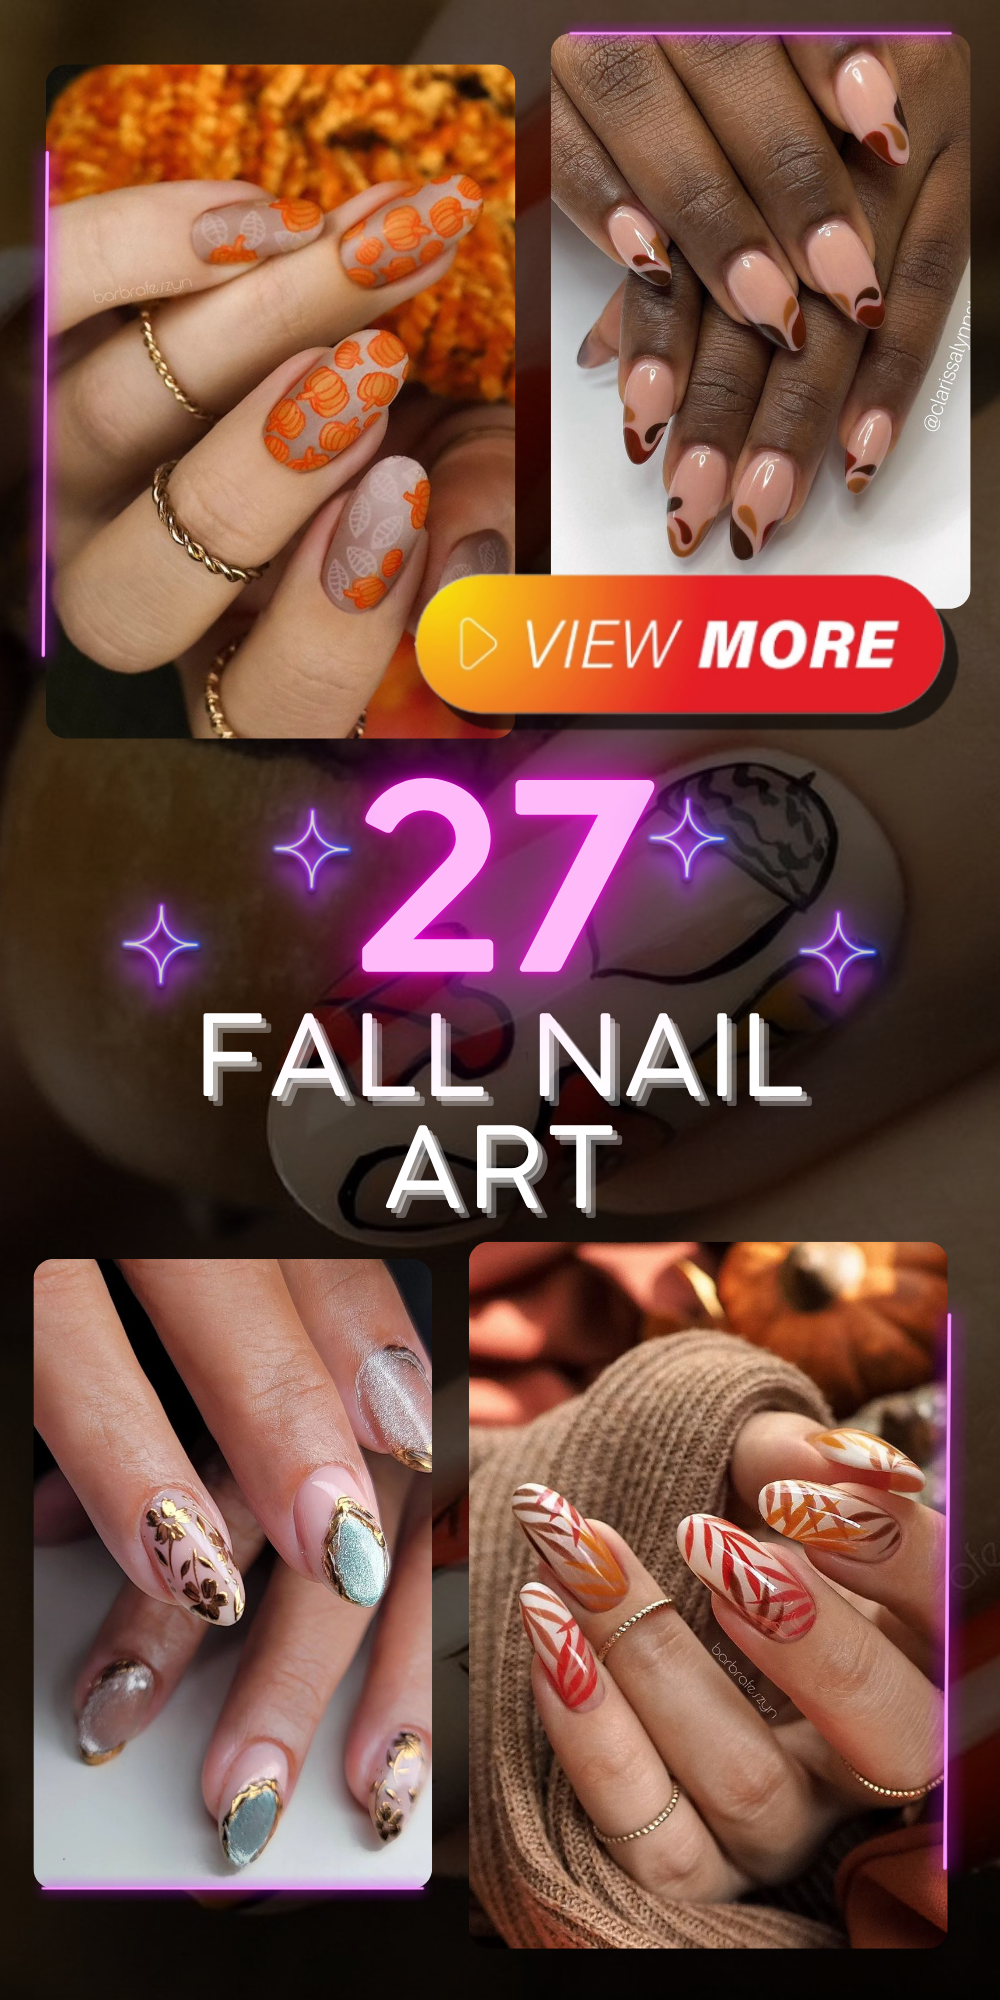
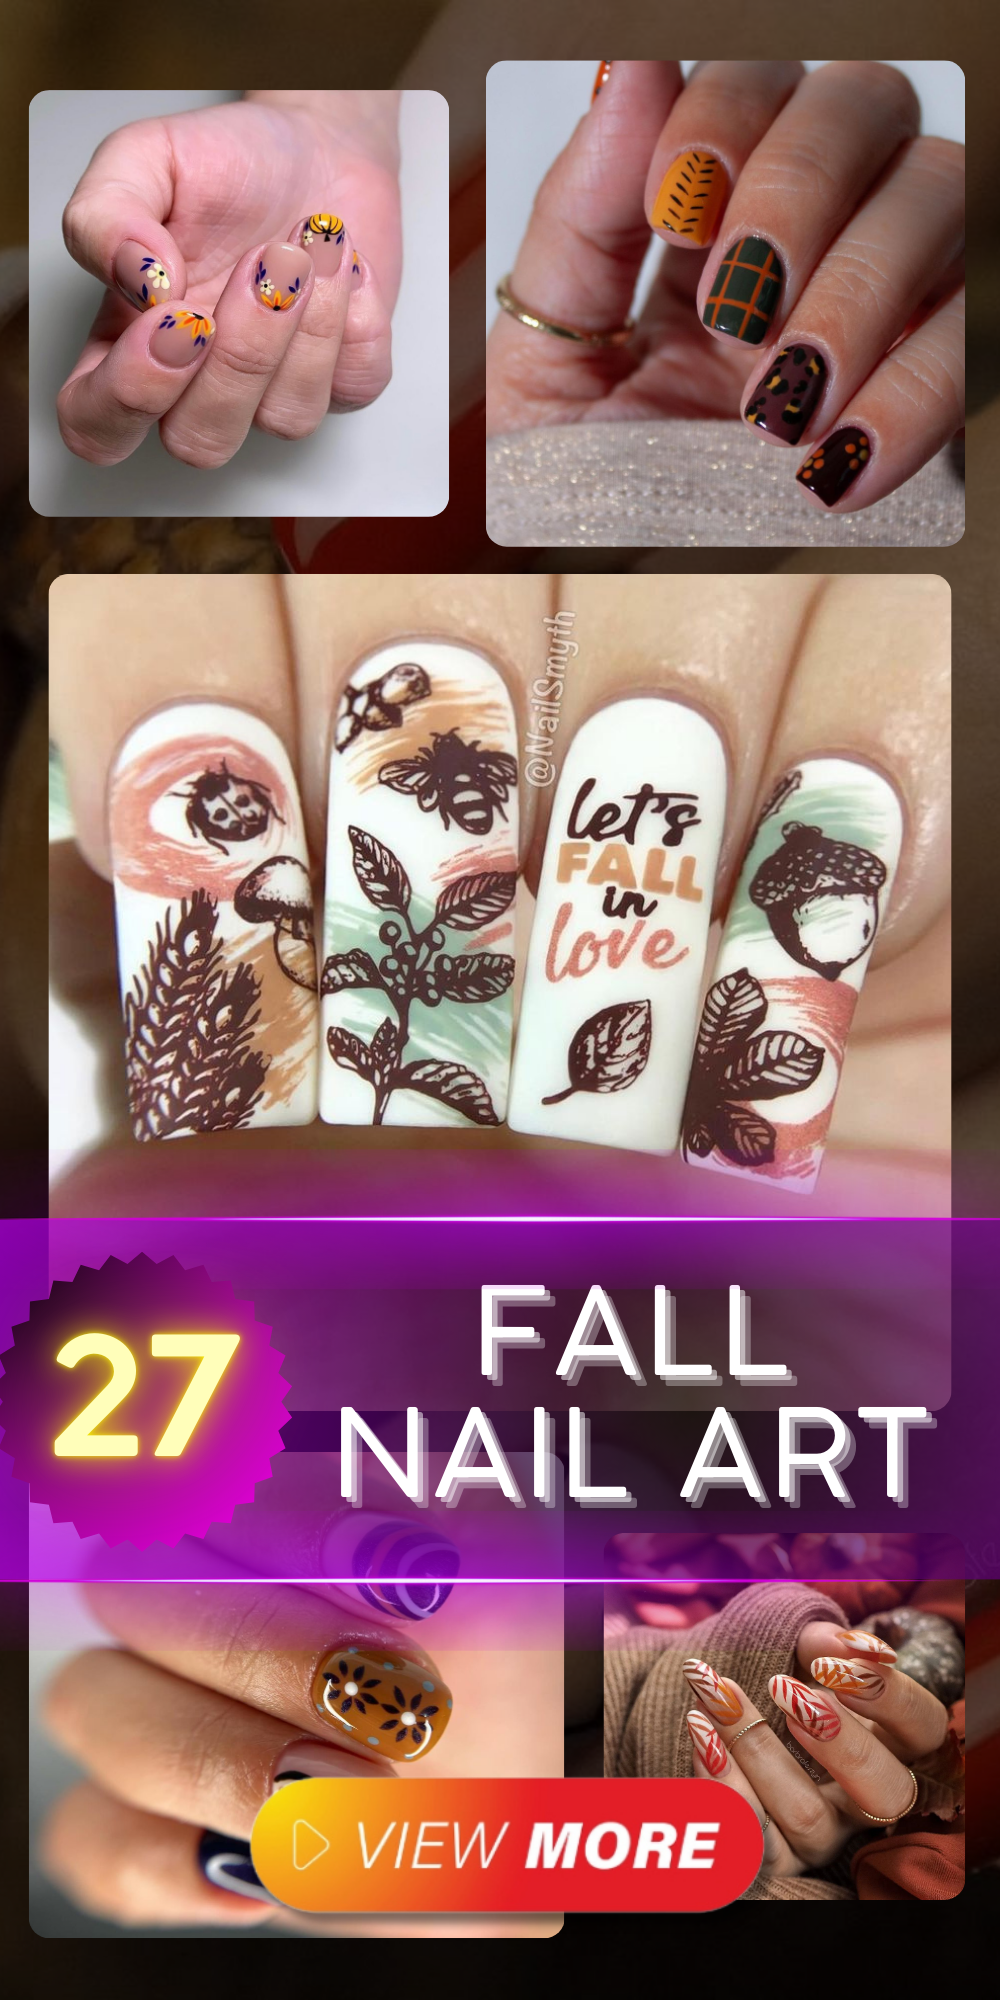
Nail art lovers, are you ready to embrace the fall nail art trends this season? Autumn is the perfect time to experiment with rich hues, cozy patterns, and intricate designs that capture the essence of the season. In this article, we’ll dive into a variety of fall nail art ideas that are sure to inspire your next manicure. From minimalist styles to bold statement pieces, there’s something for everyone. Let’s explore these designs and find the perfect autumn look for you!
Mushroom Magic: A Whimsical Fall Nail Art Design
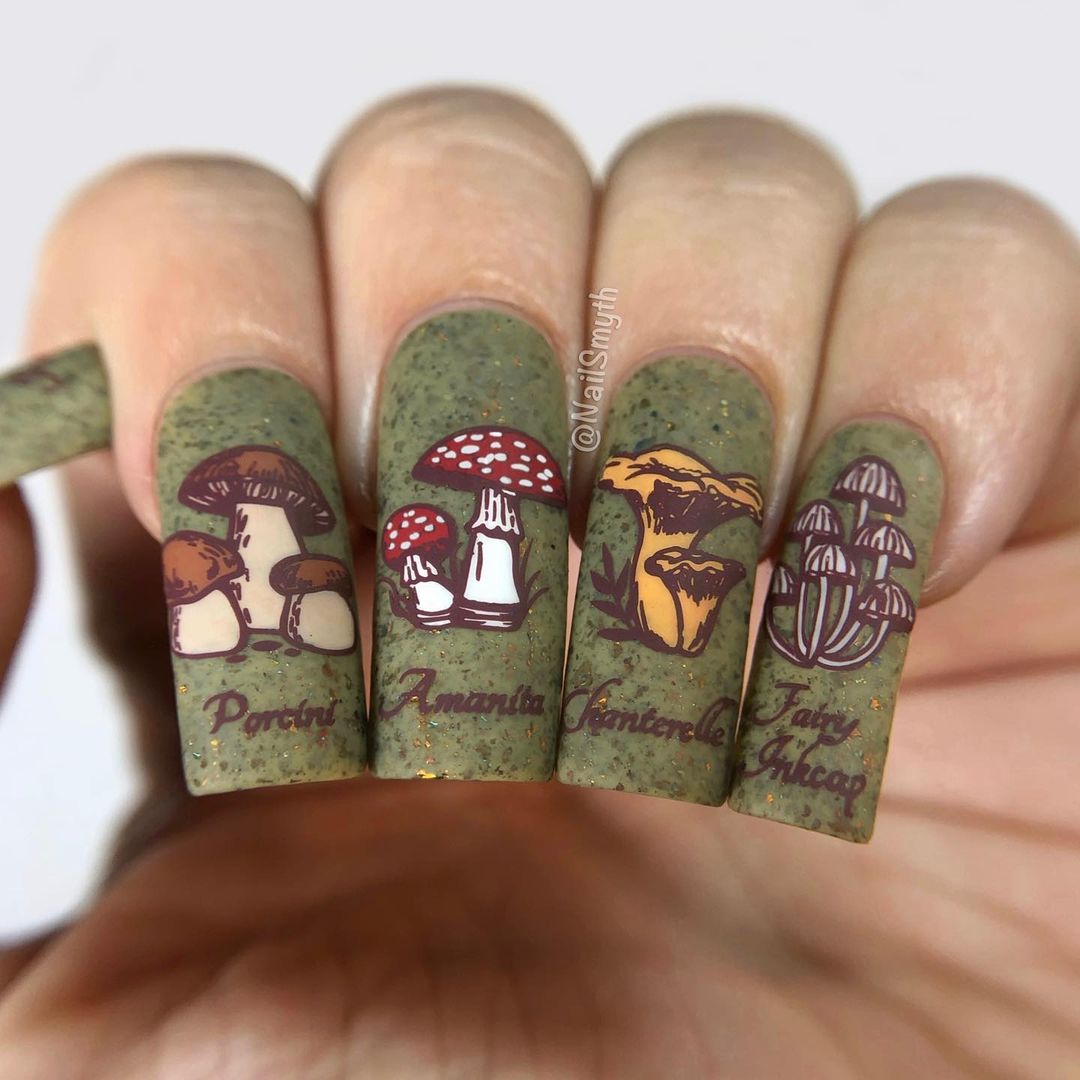
As a professional manicurist, I can’t help but adore the enchanting mushroom-themed nails. This design captures the whimsical charm of a forest in autumn. The earthy green base provides a perfect backdrop for the intricate mushroom illustrations. Each nail features a different type of mushroom, from the iconic red-capped Amanita to the delicate Fairy Cap. The detailing is exquisite, making this design both playful and sophisticated.
-
- Green nail polish (e.g., OPI “Suzi – The First Lady of Nails”)
- White nail polish (e.g., Essie “Blanc”)
- Red nail polish (e.g., Sally Hansen “Red My Lips”)
- Fine detail brush
- Top coat (e.g., Seche Vite Dry Fast Top Coat)
Tutorial:
-
- Apply a base coat to protect your nails.
- Paint all nails with a green base color.
- Using the fine detail brush, draw mushroom shapes on each nail with white polish.
- Add red accents to the Amanita mushrooms and brown detailing to others.
- Seal your design with a top coat to ensure durability.
Forest Sunset: A Serene Autumn Nail Design
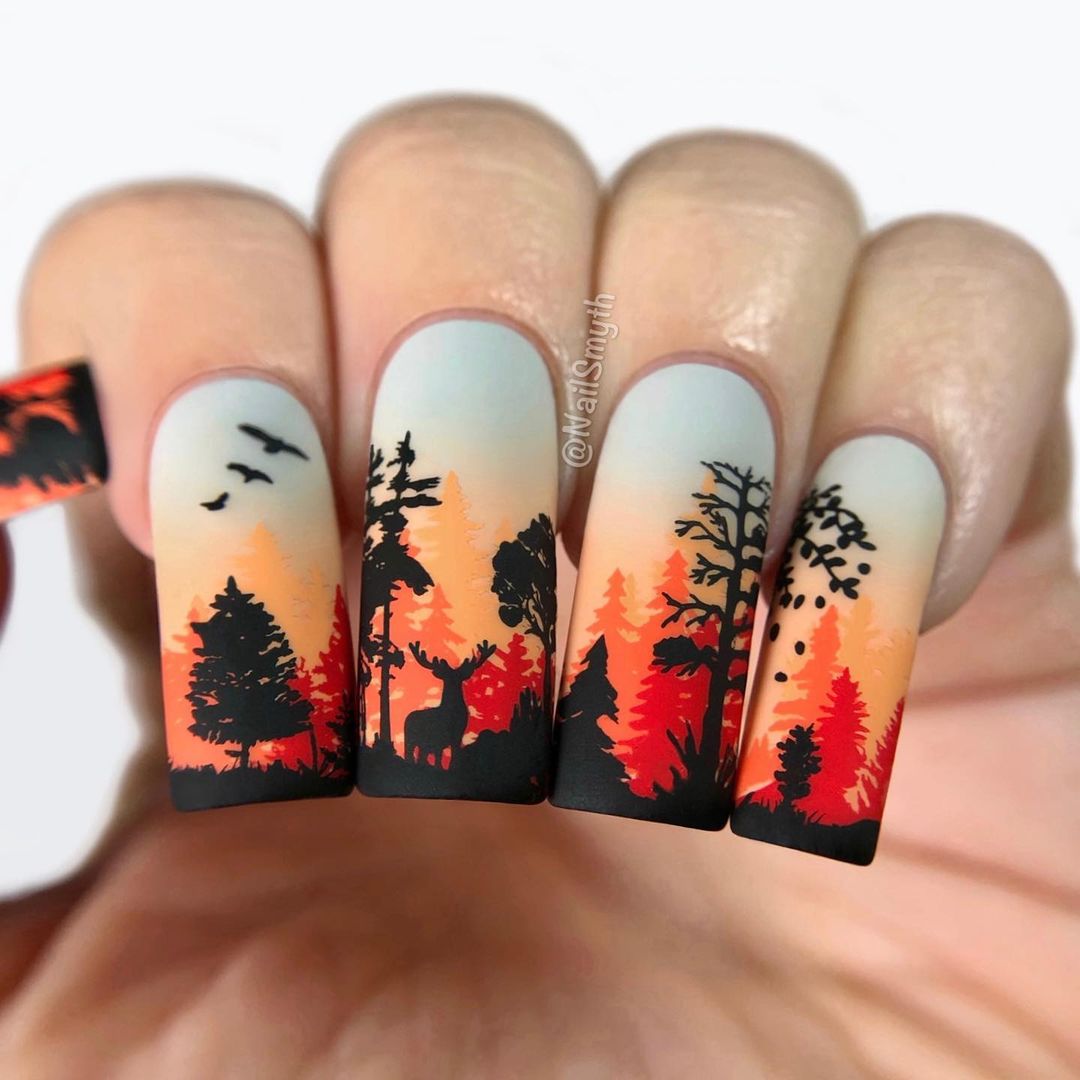
This forest sunset design is a breathtaking representation of a serene autumn evening. The gradient background, transitioning from soft blue to warm orange, sets the stage for the silhouette of trees and a majestic deer. It’s a perfect blend of abstract art and natural beauty, making it a standout choice for any fall occasion.
-
- Gradient sponge
- Blue nail polish (e.g., Zoya “Blu”)
- Orange nail polish (e.g., China Glaze “Orange Knockout”)
- Black nail polish (e.g., Essie “Licorice”)
- Top coat
Tutorial:
-
- Apply a base coat.
- Use the gradient sponge to apply the blue and orange polishes, creating a sunset effect.
- Once dry, paint tree and deer silhouettes using a fine detail brush and black polish.
- Finish with a top coat to protect the design.
Spooky Season: Halloween-Inspired Nail Art
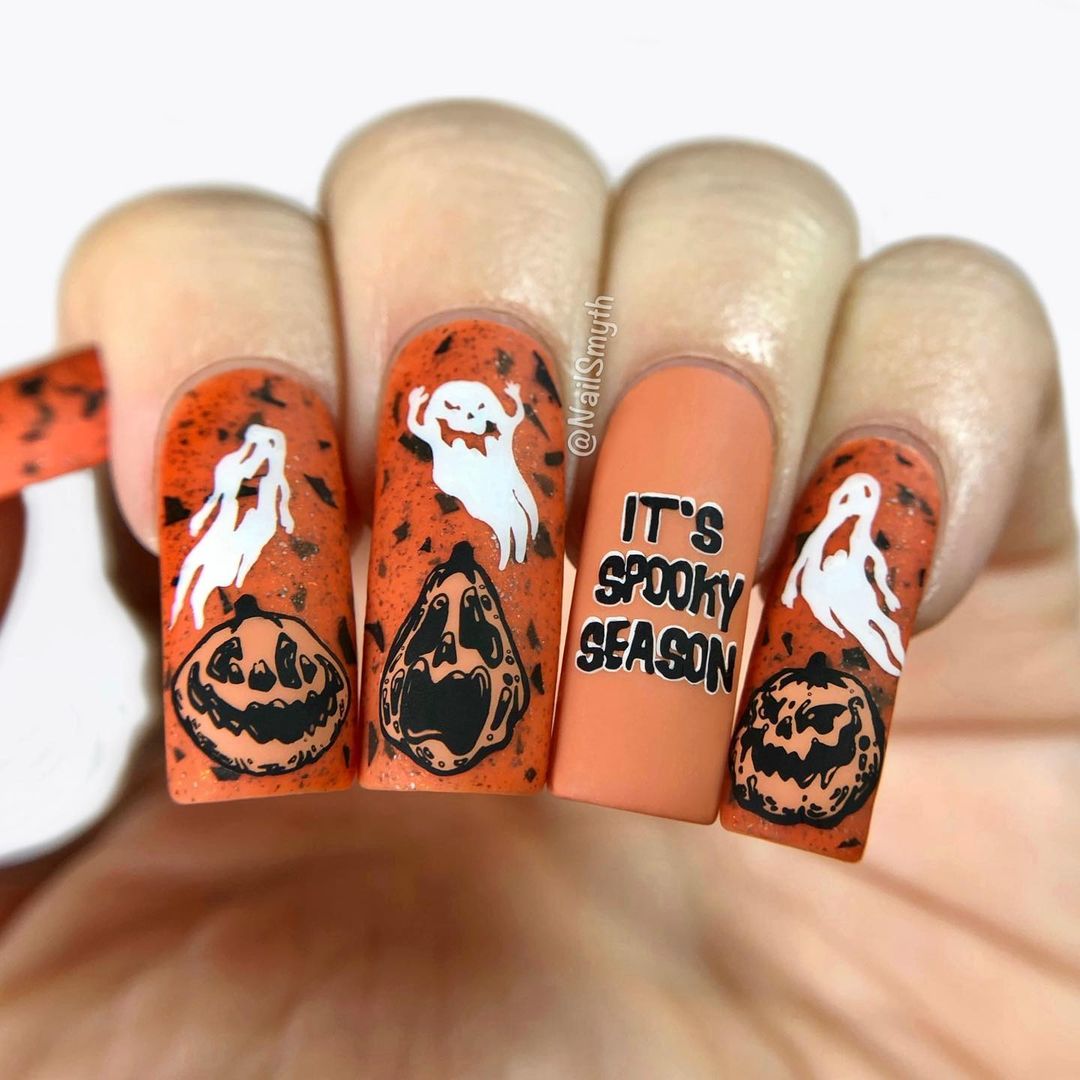
Embrace the spooky spirit of Halloween with this vibrant and fun nail design. The orange base is speckled with black, giving a textured look. Ghosts, pumpkins, and playful text add a festive touch, making it a perfect fall nail art choice for October.
-
- Orange nail polish (e.g., OPI “It’s a Piazza Cake”)
- Black speckle polish (e.g., Sally Hansen “Black Out”)
- White nail polish
- Nail art stickers or decals for ghosts and pumpkins
- Top coat
Tutorial:
-
- Apply a base coat.
- Paint nails with the orange base polish.
- Add black speckle polish for texture.
- Apply ghost and pumpkin stickers or use a detail brush to paint them.
- Seal with a top coat.
Too Cute to Spook: Adorable Halloween Nail Art
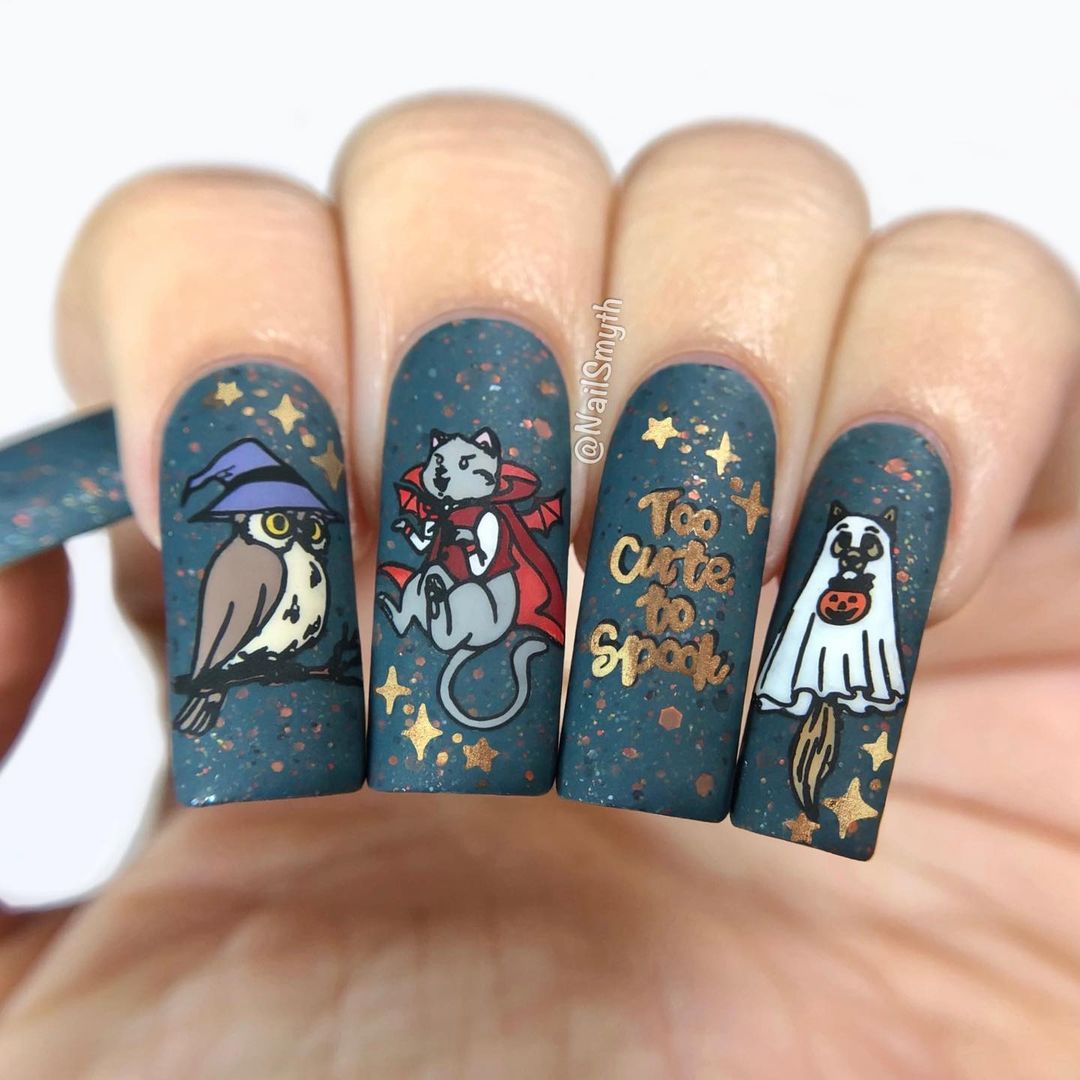
This fall nail art design captures the playful spirit of Halloween with a dash of cuteness. The dark, speckled base sets a mysterious tone, while the adorable illustrations of a witchy owl, a vampire cat, and a ghostly dog add a whimsical touch. The “Too Cute to Spook” text perfectly encapsulates the fun and light-hearted mood of the design, making it a great choice for anyone looking to celebrate Halloween in a cute, not creepy, way.
-
- Dark blue speckled nail polish (e.g., China Glaze “Combat Blue-ts”)
- White nail polish for the illustrations (e.g., Essie “Blanc”)
- Red, brown, and black polishes for details
- Fine detail brushes for precision
- Top coat to seal the design
Tutorial:
-
- Apply a base coat to your nails.
- Paint all nails with the dark blue speckled polish.
- Using fine detail brushes, draw the witchy owl, vampire cat, and ghostly dog on different nails with white polish.
- Add red, brown, and black details to the illustrations to bring them to life.
- Carefully write “Too Cute to Spook” on one nail using a fine brush.
- Finish with a top coat to protect your artwork.
Save Pin
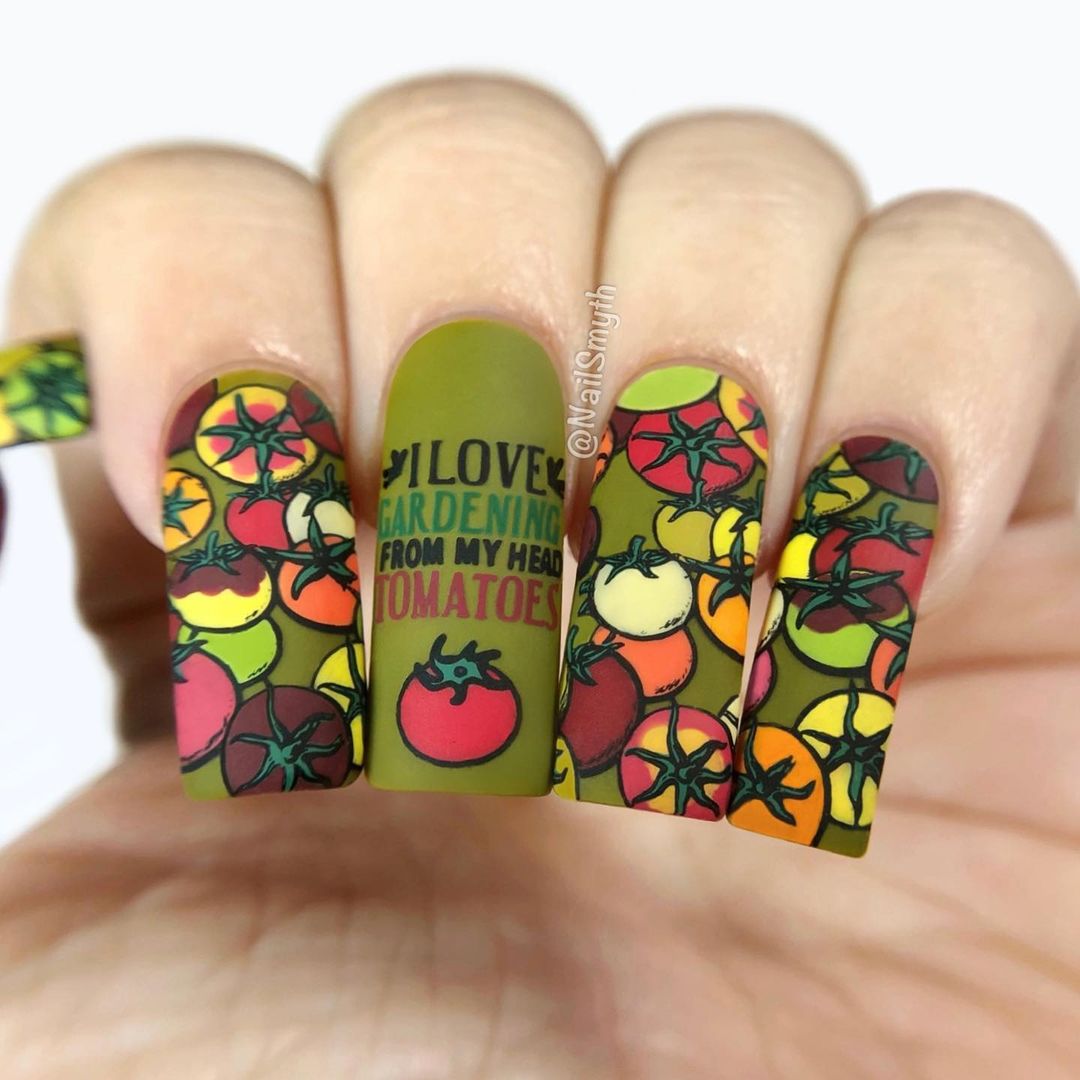
Tomato Garden: A Burst of Colorful Fun
Celebrate the harvest season with this vibrant and playful tomato-themed nail art. The green base highlights the rich colors of the tomatoes, ranging from deep reds to sunny yellows. This design is a fun and unique way to show your love for gardening and the fall harvest. The phrase “I love gardening from my head tomatoes” adds a humorous touch that ties the whole look together.
-
- Green nail polish (e.g., OPI “Suzi – The First Lady of Nails”)
- Red, yellow, and orange nail polishes for the tomatoes (e.g., Essie “Geranium”, “Yellow Sub-Title”, and “Tangerine Tease”)
- Black nail polish for outlines (e.g., Essie “Licorice”)
- Fine detail brushes for the illustrations
- Top coat
Tutorial:
-
- Apply a base coat to your nails.
- Paint all nails with the green base polish.
- Using fine detail brushes, draw various sizes and colors of tomatoes on each nail.
- Outline the tomatoes with black polish to add definition.
- Carefully write the phrase “I love gardening from my head tomatoes” on one nail.
- Seal your design with a top coat to ensure longevity.
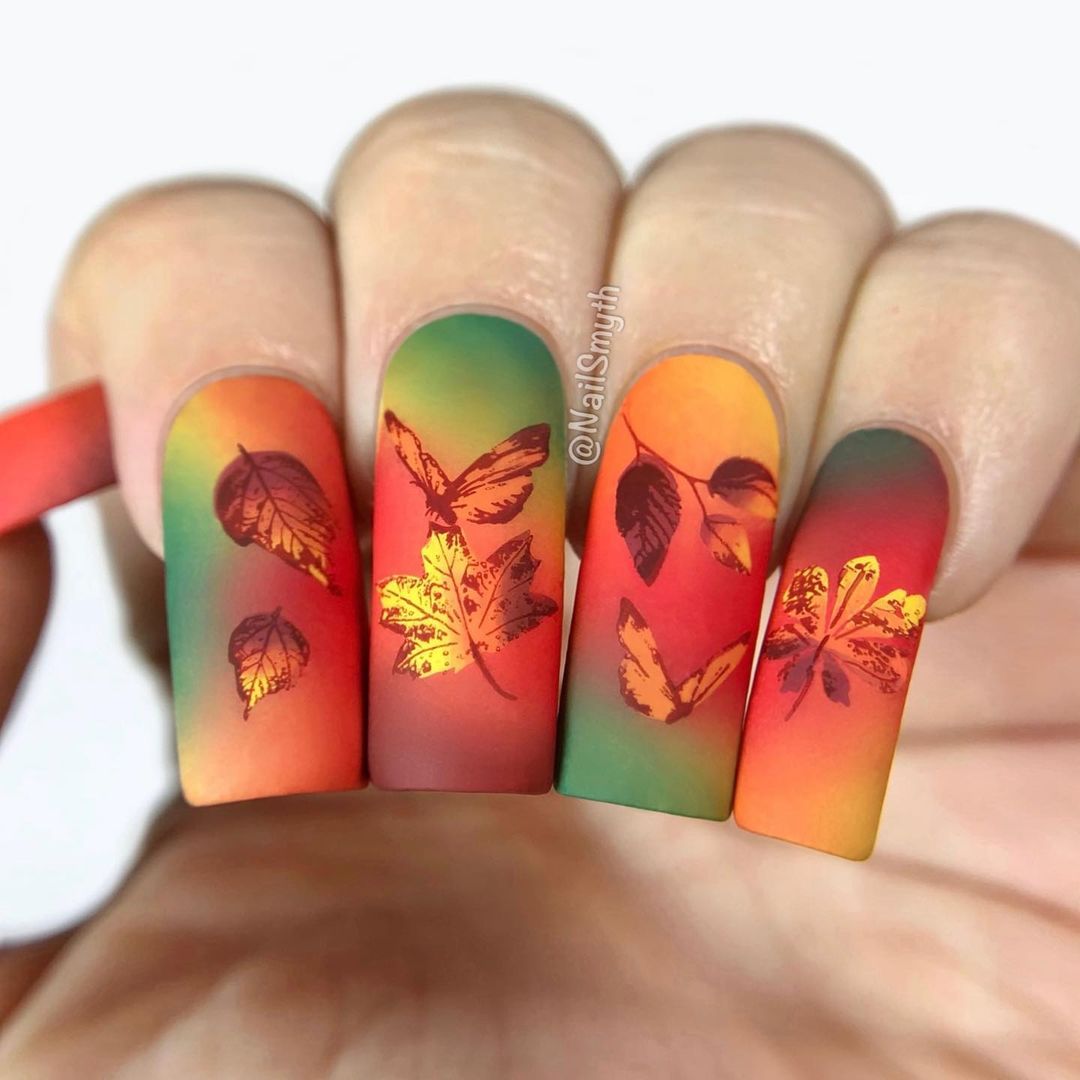
Autumn Leaves: A Classic Fall Nail Design
Embrace the beauty of fall with this stunning gradient nail design featuring delicate autumn leaves. The gradient base transitions smoothly from green to orange to red, mimicking the changing colors of the leaves. The detailed leaf illustrations on top add an elegant and seasonal touch, making this design perfect for any fall occasion.
-
- Gradient sponge
- Green, orange, and red nail polishes (e.g., Zoya “Hunter”, China Glaze “Orange Knockout”, and OPI “Big Apple Red”)
- Black or dark brown nail polish for the leaf outlines
- Fine detail brushes
- Top coat
Tutorial:
-
- Apply a base coat to your nails.
- Use the gradient sponge to apply the green, orange, and red polishes, creating a smooth transition on each nail.
- Once the gradient base is dry, use fine detail brushes to draw leaf outlines with black or dark brown polish.
- Add smaller details to the leaves for a more realistic look.
- Finish with a top coat to protect and enhance the design.
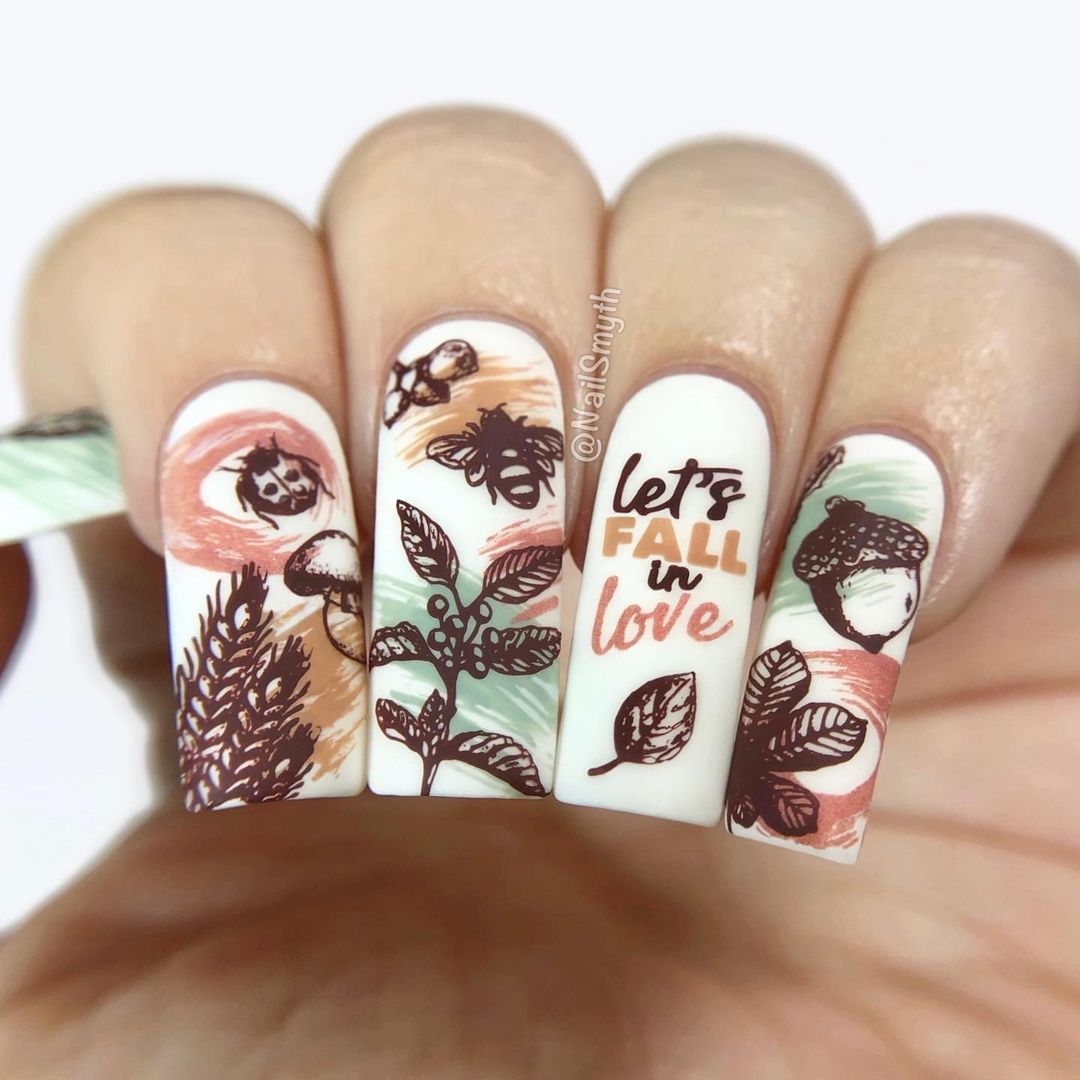
Let’s Fall in Love: Autumn Inspired Nail Art
This design is a perfect celebration of the autumn season, capturing various fall elements with a touch of elegance. The white base provides a clean canvas for the intricate illustrations of leaves, acorns, bees, and pumpkins, along with the heartwarming phrase “Let’s Fall in Love”. The soft pastel strokes in the background add a subtle pop of color, enhancing the overall aesthetic without overwhelming the detailed art.
-
- White nail polish (e.g., Essie “Blanc”)
- Brown nail polish for outlines (e.g., OPI “You Don’t Know Jacques!”)
- Soft pastel polishes for background strokes (e.g., Zoya “Ireland” for green, OPI “Cajun Shrimp” for orange)
- Fine detail brushes
- Top coat
Tutorial:
-
- Apply a base coat to your nails.
- Paint all nails with white polish as a base.
- Using fine detail brushes, create the fall-themed illustrations with brown polish.
- Add soft pastel strokes in the background using green and orange polishes.
- Write the phrase “Let’s Fall in Love” on one nail using a fine brush.
- Seal the design with a top coat to protect and enhance the artwork.
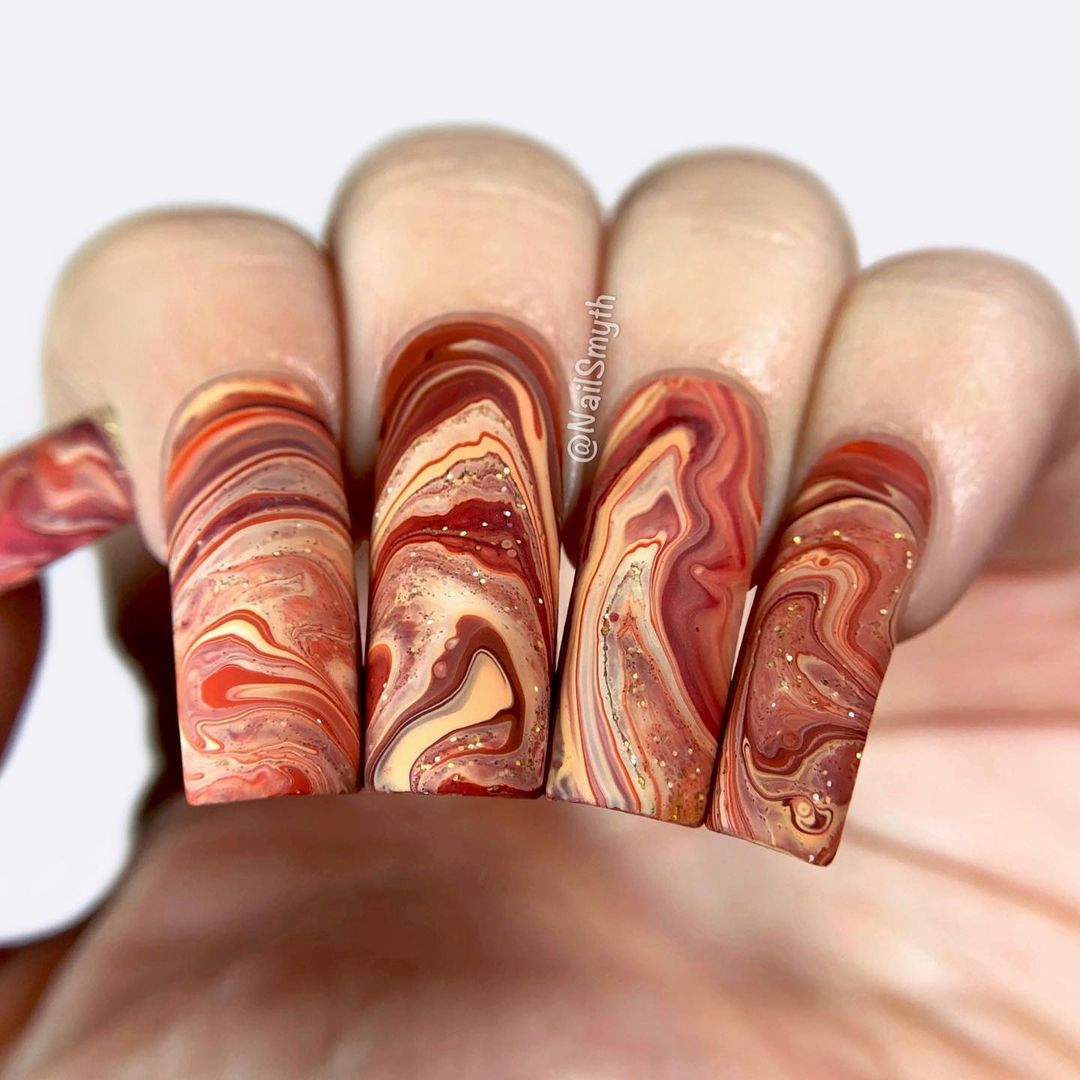
Marble Swirl: Earthy Tones Nail Art
This mesmerizing marble design brings together earthy tones in a swirl pattern, creating a sophisticated and dynamic look. The combination of deep reds, burnt oranges, and creamy beiges gives a rich, autumnal feel, perfect for the season. Tiny specks of gold glitter add a touch of sparkle, elevating the design without overpowering it.
-
- Red, orange, and beige nail polishes (e.g., Zoya “Janel”, China Glaze “Spontaneous”, OPI “My Vampire is Buff”)
- Gold glitter polish (e.g., Essie “Rock at the Top”)
- Marbleizing tool or thin brush
- Top coat
Tutorial:
-
- Apply a base coat to your nails.
- Drop small dots of red, orange, and beige polishes randomly on the nail.
- Use the marbleizing tool to swirl the colors together, creating a marbled effect.
- Add specks of gold glitter polish to the swirled design.
- Finish with a top coat to protect and add shine to your marble art.
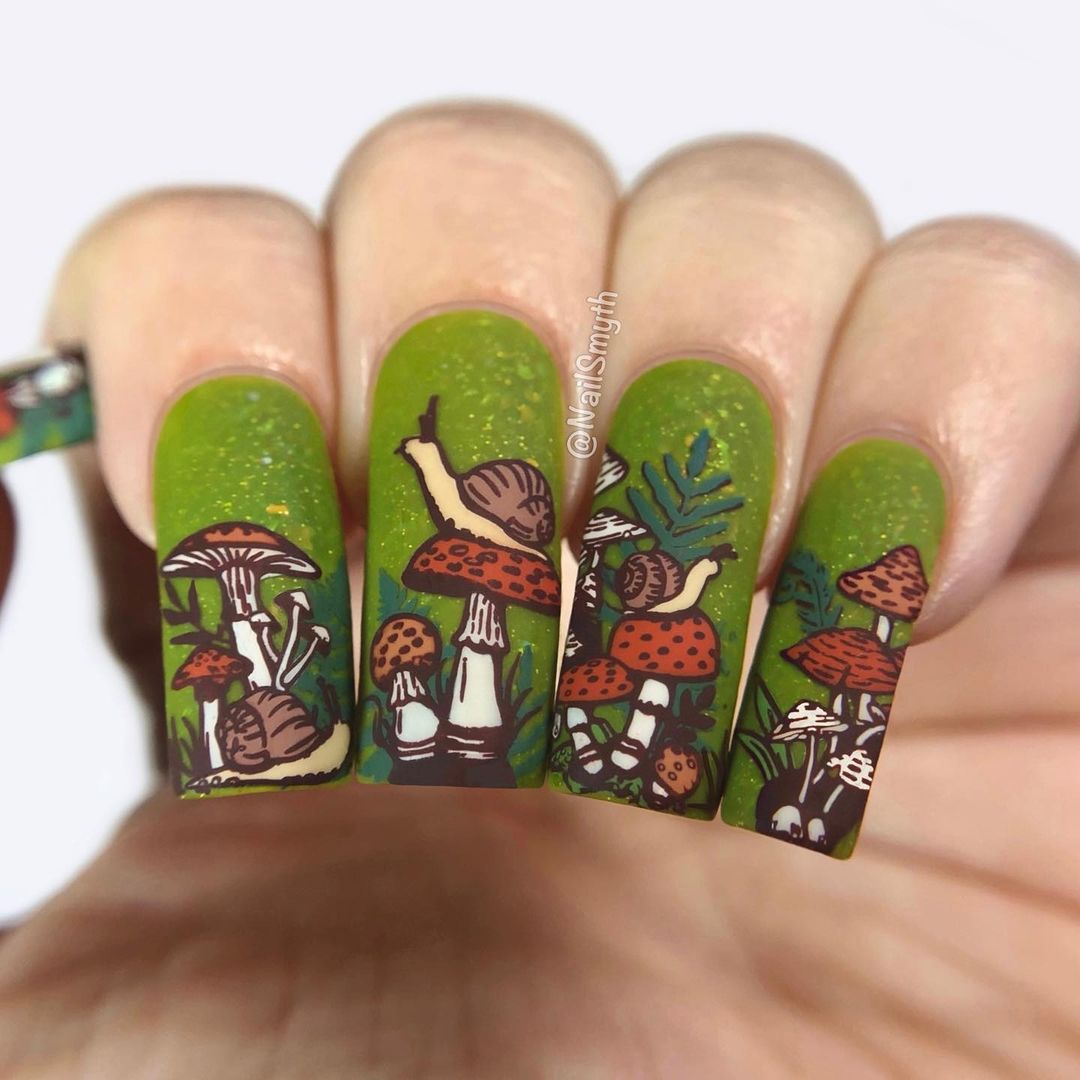
Forest Creatures: Woodland Nail Art
Immerse yourself in the enchanting world of a forest with this detailed woodland-themed nail design. The green base serves as a lush backdrop for the intricate illustrations of mushrooms, snails, and foliage. This design brings a piece of the autumn forest to your fingertips, combining the charm of nature with the beauty of nail art.
-
- Green nail polish (e.g., OPI “I’m Sooo Swamped!”)
- White, brown, and red nail polishes for the details (e.g., Essie “Blanc”, OPI “You Don’t Know Jacques!”, OPI “Big Apple Red”)
- Fine detail brushes
- Top coat
Tutorial:
-
- Apply a base coat to your nails.
- Paint all nails with green polish as a base.
- Using fine detail brushes, draw the mushrooms, snails, and foliage with white, brown, and red polishes.
- Add small details and highlights to enhance the design.
- Seal with a top coat to protect and enhance the artwork.
Save Pin
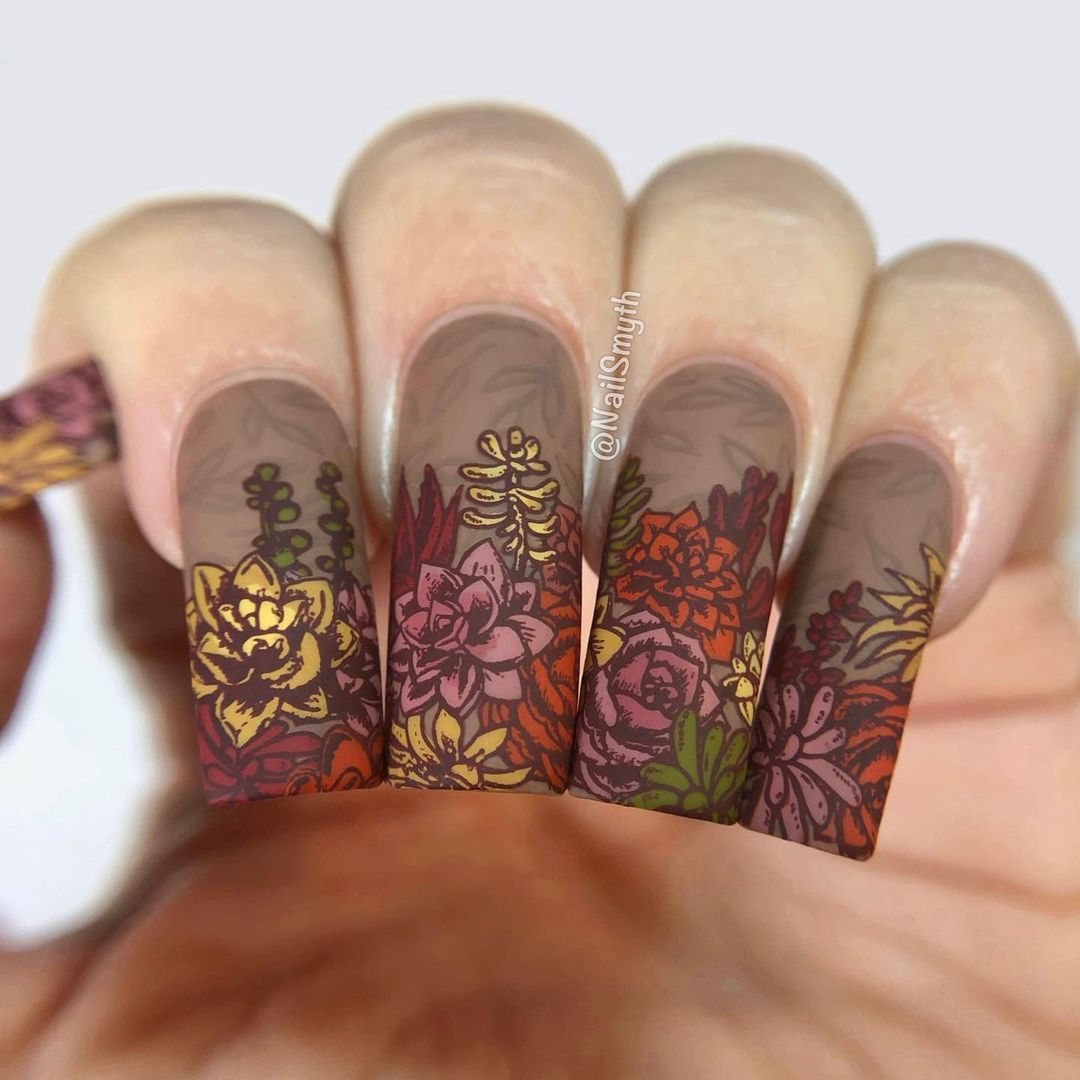
Autumn Succulents: Cozy Fall Nail Art
This beautiful design showcases a mix of autumnal succulents, blending earthy tones with vibrant colors. The brown base mimics the rich soil, while the colorful succulents add a burst of fall hues. The detailed illustrations of different succulent varieties create a stunning, cozy look that’s perfect for the season.
-
- Brown nail polish (e.g., Essie “Mink Muffs”)
- Red, yellow, and green nail polishes for the succulents (e.g., Zoya “Sooki”, OPI “Need Sunglasses?”, Essie “Mojito Madness”)
- Fine detail brushes
- Top coat
Tutorial:
-
- Apply a base coat to your nails.
- Paint all nails with brown polish as a base.
- Using fine detail brushes, draw various succulent designs with red, yellow, and green polishes.
- Add smaller details and shading to make the succulents look realistic.
- Finish with a top coat to protect your design.
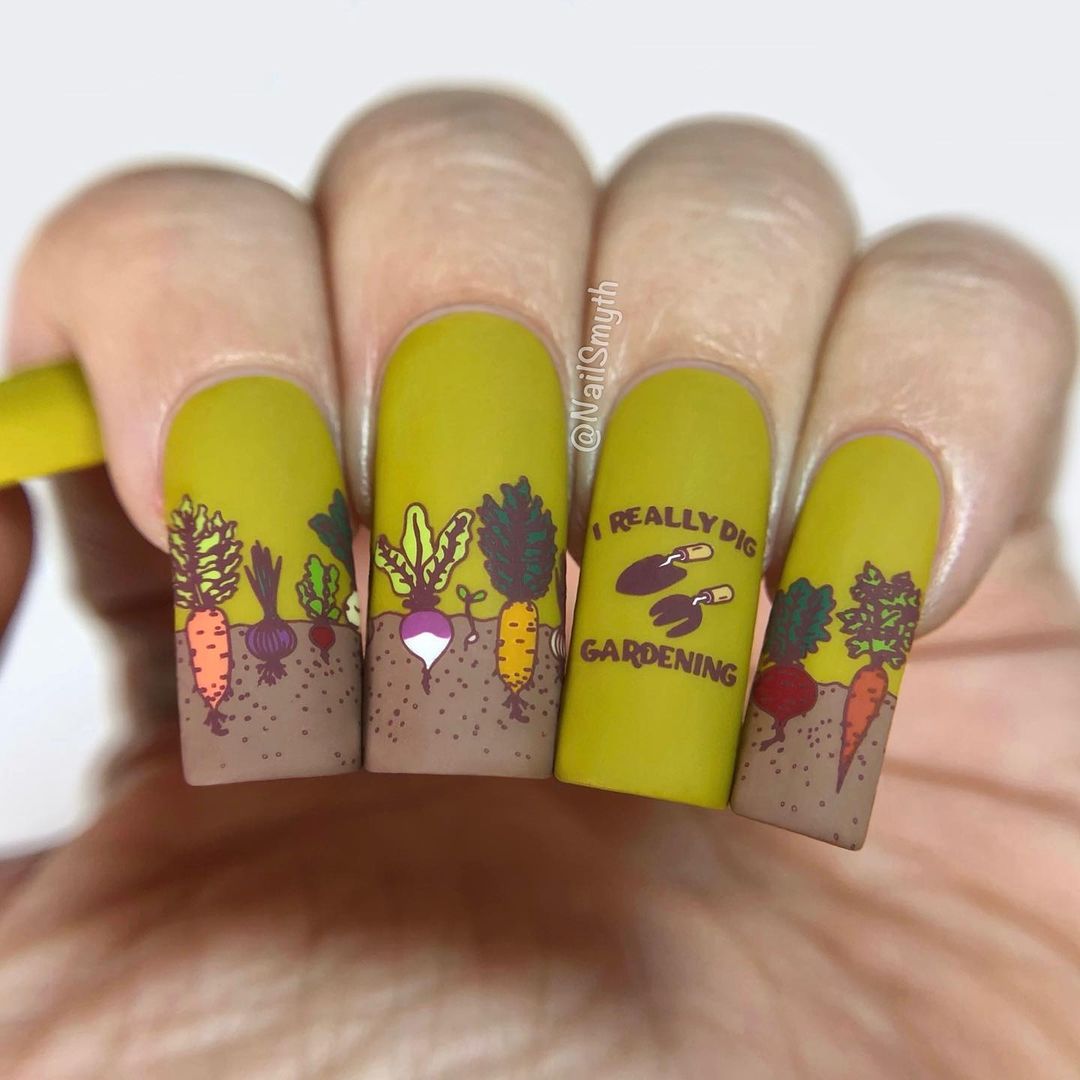
Garden Harvest: Fresh and Fun Nail Art
Celebrate the harvest season with this fun and fresh garden-themed nail design. The green and brown base colors represent the soil and plants, while the colorful vegetables bring the garden to life. The playful phrase “I really dig gardening” adds a humorous touch, making this design both delightful and seasonally appropriate.
-
- Green and brown nail polishes (e.g., OPI “I’m Sooo Swamped!” and Essie “Mink Muffs”)
- Red, orange, yellow, and white nail polishes for the vegetables (e.g., Essie “Geranium”, OPI “It’s a Piazza Cake”, Zoya “Pippa”, Essie “Blanc”)
- Fine detail brushes
- Top coat
Tutorial:
-
- Apply a base coat to your nails.
- Paint the lower half of the nails with brown polish and the upper half with green polish.
- Using fine detail brushes, draw various vegetables such as carrots, beets, and radishes with red, orange, yellow, and white polishes.
- Write the phrase “I really dig gardening” on one nail using a fine brush.
- Seal with a top coat to protect your design.
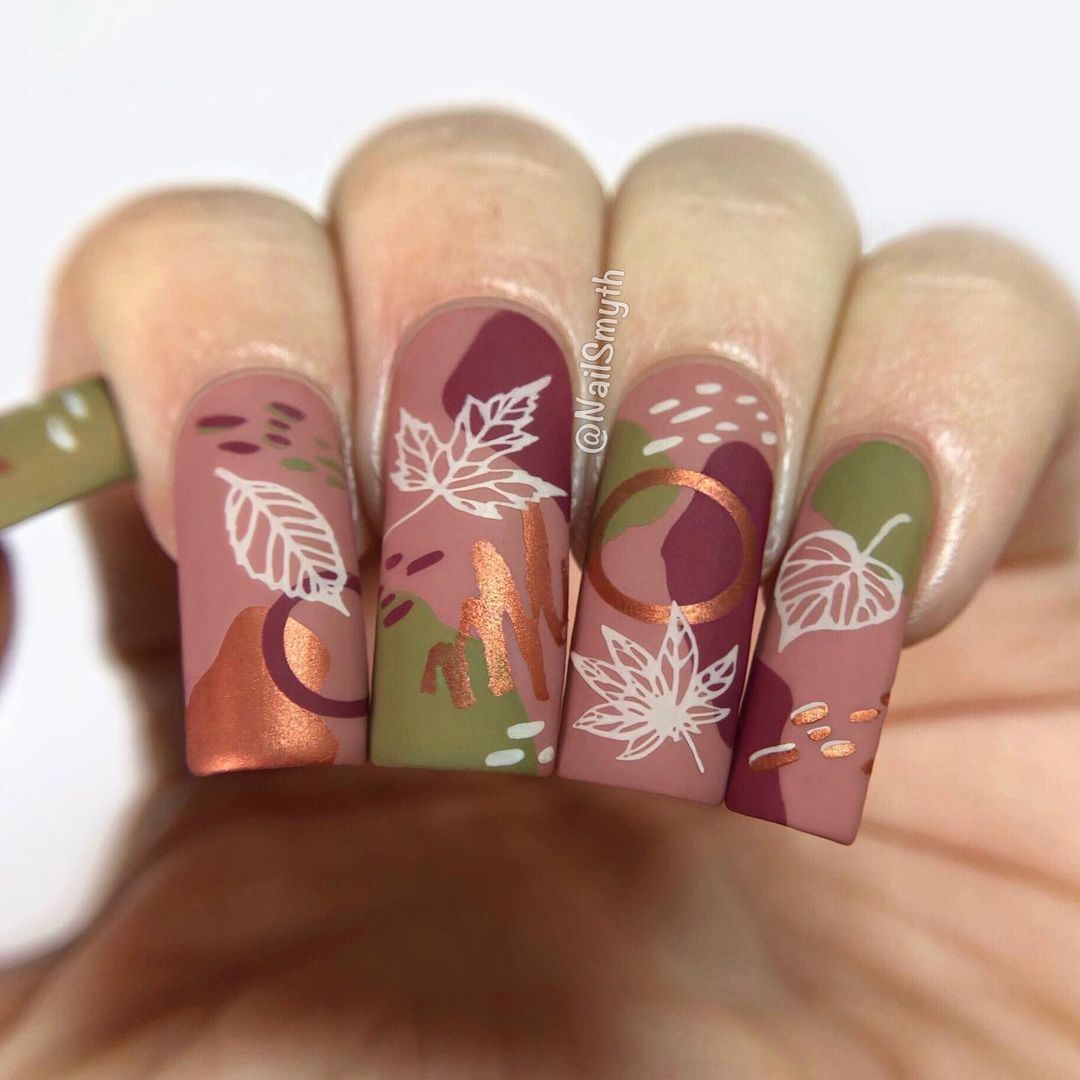
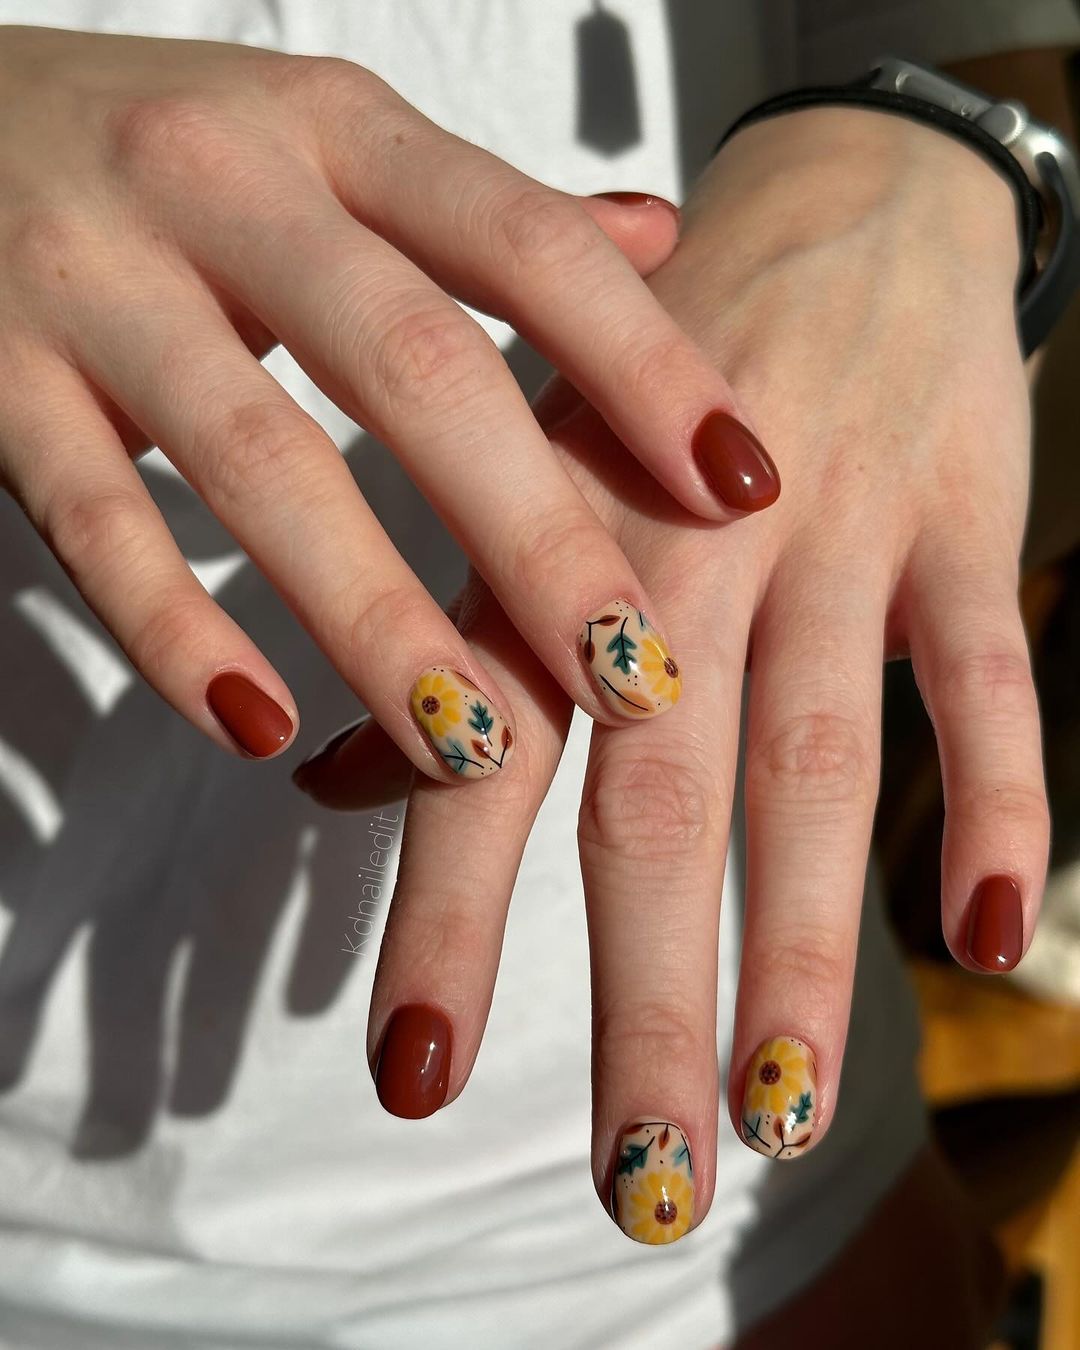
Autumn Leaves: Elegant and Subtle Nail Art
This design elegantly captures the essence of fall with its subtle color palette and delicate leaf illustrations. The combination of soft pink, green, and copper hues creates a harmonious blend of autumn colors. The intricate leaf designs add a touch of sophistication, making this a perfect choice for those who prefer a more understated yet beautiful look.
-
- Pink, green, and copper nail polishes (e.g., Essie “Ballet Slippers”, Zoya “Ireland”, OPI “Worth a Pretty Penne”)
- White nail polish for the leaf designs (e.g., Essie “Blanc”)
- Fine detail brushes
- Top coat
Tutorial:
-
- Apply a base coat to your nails.
- Paint all nails with a mix of pink, green, and copper polishes, creating a camouflaged effect.
- Using fine detail brushes, draw the leaf designs with white polish.
- Add small details and highlights to enhance the design.
- Seal with a top coat to protect your artwork.
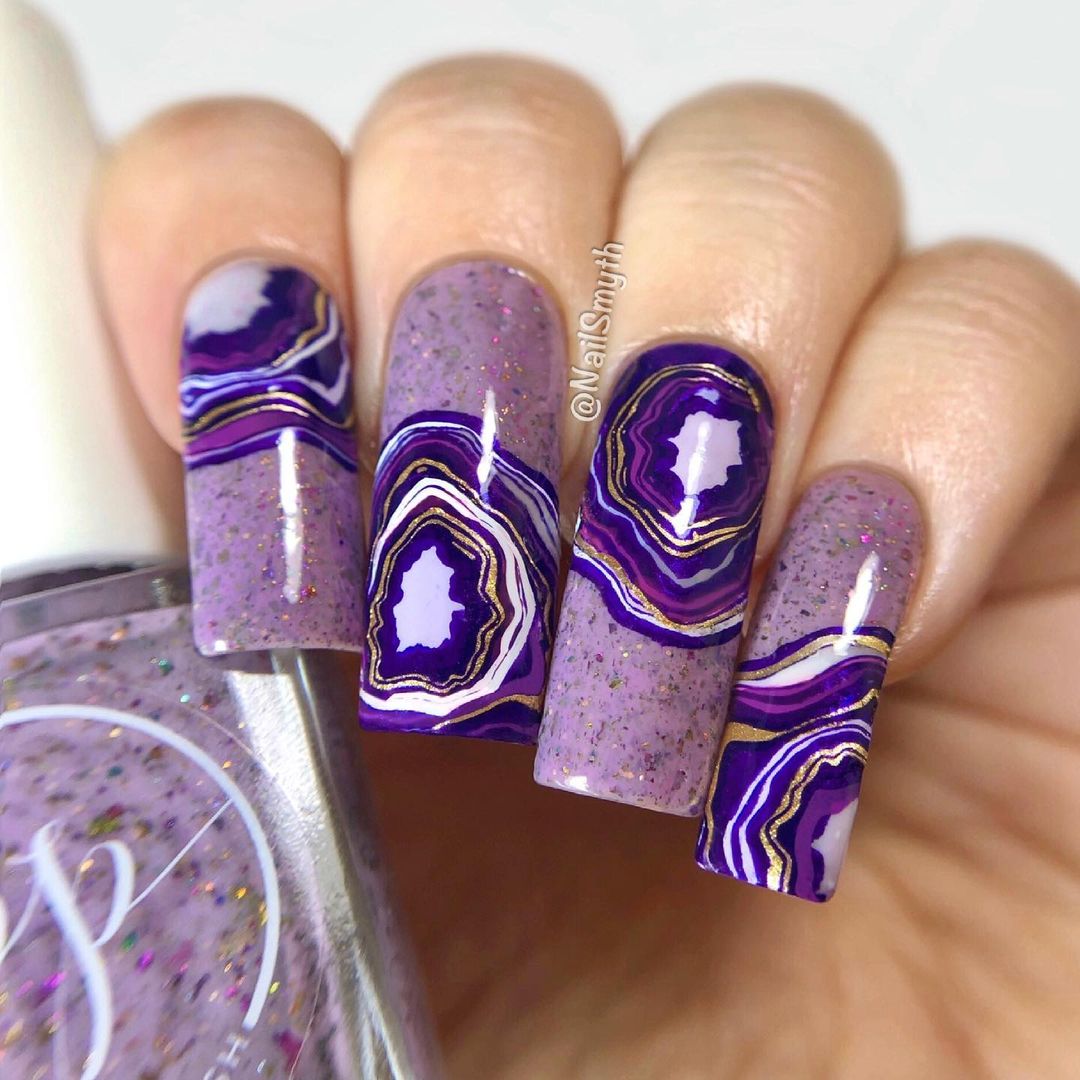
Geode Glam: Purple Agate Nail Art
This stunning geode-inspired nail art features a vibrant purple palette that beautifully mimics the intricate layers of agate stones. The blend of deep purples and lilacs, highlighted with gold accents, creates a luxurious and eye-catching design. The sparkly base adds depth, making this look perfect for anyone who wants to combine elegance with a bit of sparkle.
-
- Purple and lilac nail polishes (e.g., OPI “Do You Lilac It?”, Essie “Play Date”)
- White and gold nail polishes for detailing (e.g., Essie “Blanc”, OPI “Gold Digger”)
- Fine detail brushes
- Top coat with glitter (e.g., China Glaze “Fairy Dust”)
Tutorial:
-
- Apply a base coat to your nails.
- Paint all nails with a sparkly base coat.
- Using fine detail brushes, create the geode layers with purple, lilac, and white polishes.
- Highlight the edges of the geode layers with gold polish for a striking contrast.
- Seal the design with a top coat to add shine and protect your artwork.
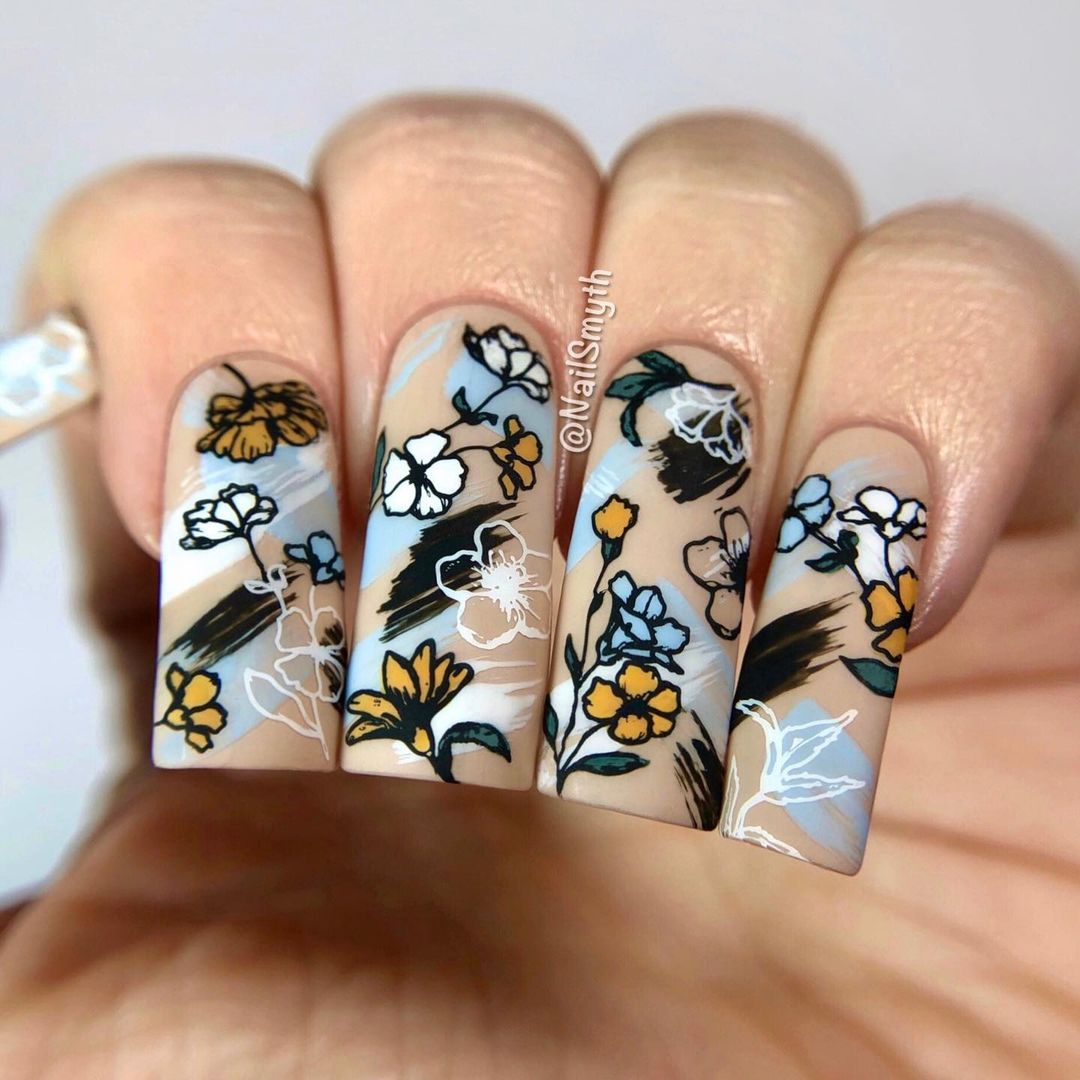
Floral Fantasy: Delicate Flower Nail Art
This delicate floral nail art captures the beauty of a blooming garden. The neutral nude base is adorned with intricate flowers in white, blue, and yellow, creating a sophisticated and feminine look. The detailed floral illustrations add a touch of elegance, making this design perfect for any occasion.
-
- Nude nail polish (e.g., OPI “Samoan Sand”)
- White, blue, and yellow nail polishes for the flowers (e.g., Essie “Blanc”, Zoya “Blu”, OPI “Need Sunglasses?”)
- Fine detail brushes
- Top coat
Tutorial:
-
- Apply a base coat to your nails.
- Paint all nails with nude polish.
- Using fine detail brushes, draw various flowers in white, blue, and yellow polishes.
- Add small details and highlights to enhance the floral designs.
- Finish with a top coat to protect your nail art.
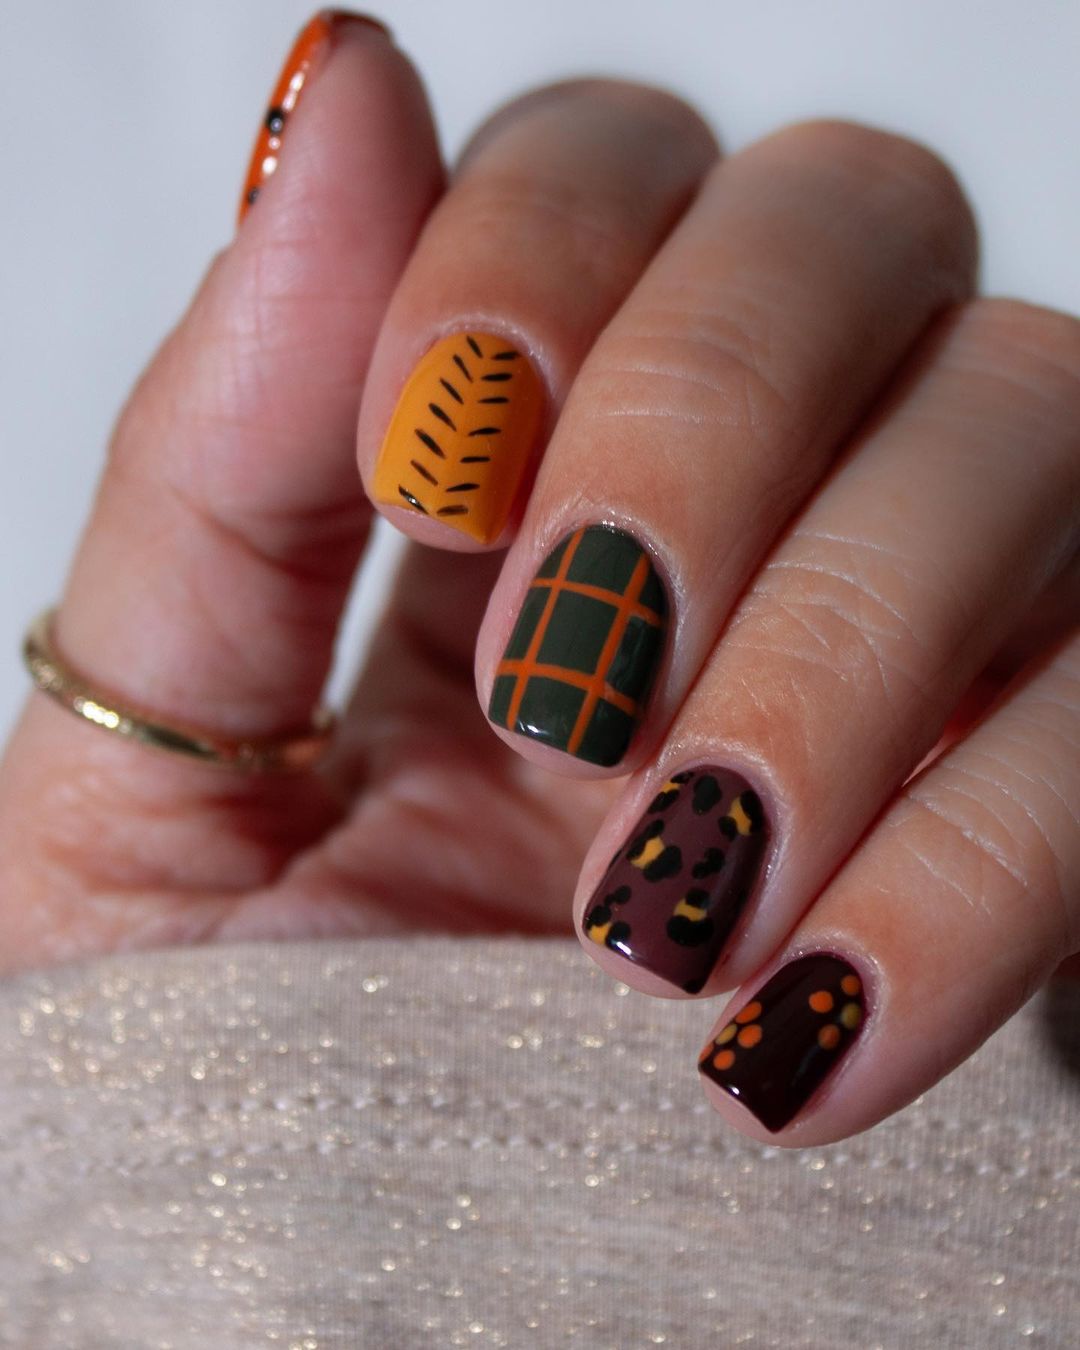
Autumn Plaid and Patterns: Cozy Nail Art
Embrace the cozy vibes of autumn with this chic plaid and pattern nail design. The combination of mustard yellow, forest green, and burgundy creates a warm and inviting look. The mix of plaid, leaf, and leopard patterns adds a trendy twist, making this design perfect for any fall occasion.
-
- Mustard yellow, forest green, and burgundy nail polishes (e.g., Zoya “Cecilia”, OPI “Good Girls Gone Plaid”, Essie “Fall For NYC”)
- Black nail polish for detailing (e.g., Essie “Licorice”)
- Fine detail brushes
- Top coat
Tutorial:
-
- Apply a base coat to your nails.
- Paint each nail with a different base color (mustard yellow, forest green, or burgundy).
- Using fine detail brushes, create plaid, leaf, and leopard patterns with black polish.
- Add small details and highlights to enhance the designs.
- Seal with a top coat to protect your artwork.
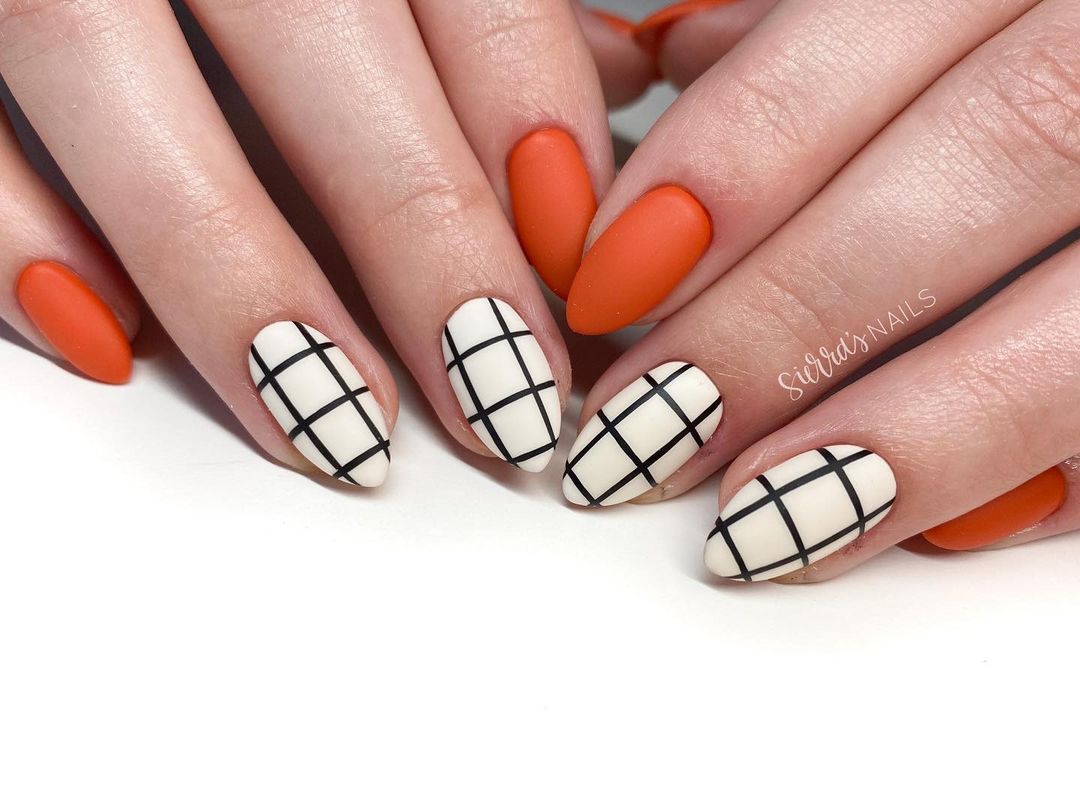
Bold and Modern: Orange and Black Plaid Nail Art
This bold and modern nail design combines the vibrant hues of orange with the classic black and white plaid. The matte finish on some nails adds a contemporary touch, while the plaid pattern brings a timeless elegance. This look is perfect for anyone wanting to make a statement this fall.
-
- Orange nail polish (e.g., OPI “A Good Man-darin is Hard to Find”)
- Black and white nail polishes for the plaid (e.g., Essie “Licorice”, Essie “Blanc”)
- Matte top coat (e.g., OPI “Matte Top Coat”)
- Fine detail brushes
- Top coat
Tutorial:
-
- Apply a base coat to your nails.
- Paint some nails with orange polish and others with white polish.
- Using fine detail brushes, create the plaid pattern with black polish on the white nails.
- Apply a matte top coat to the orange nails for a modern finish.
- Seal the plaid design with a regular top coat to protect the artwork.
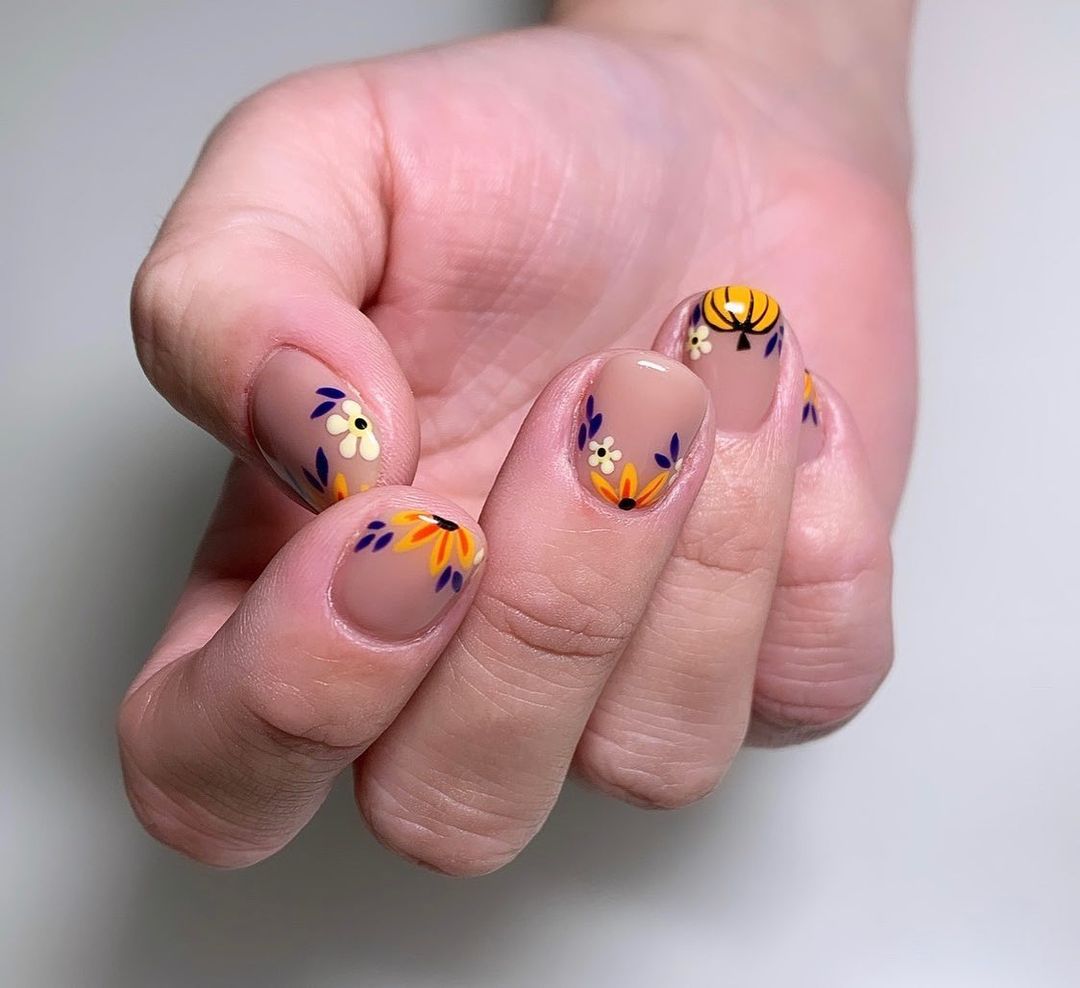
Minimalist Florals: Subtle and Chic Nail Art
This minimalist floral nail art is perfect for those who prefer a subtle yet chic look. The nude base is adorned with small, delicate flowers in yellow and blue, creating a fresh and simple design. This look is ideal for everyday wear, adding a touch of elegance to any outfit.
-
- Nude nail polish (e.g., OPI “Bubble Bath”)
- Yellow and blue nail polishes for the flowers (e.g., Essie “Sunshine State of Mind”, Zoya “Blu”)
- Fine detail brushes
- Top coat
Tutorial:
-
- Apply a base coat to your nails.
- Paint all nails with nude polish.
- Using fine detail brushes, draw small flowers in yellow and blue polishes.
- Add small details and highlights to enhance the floral designs.
- Finish with a top coat to protect your nail art.
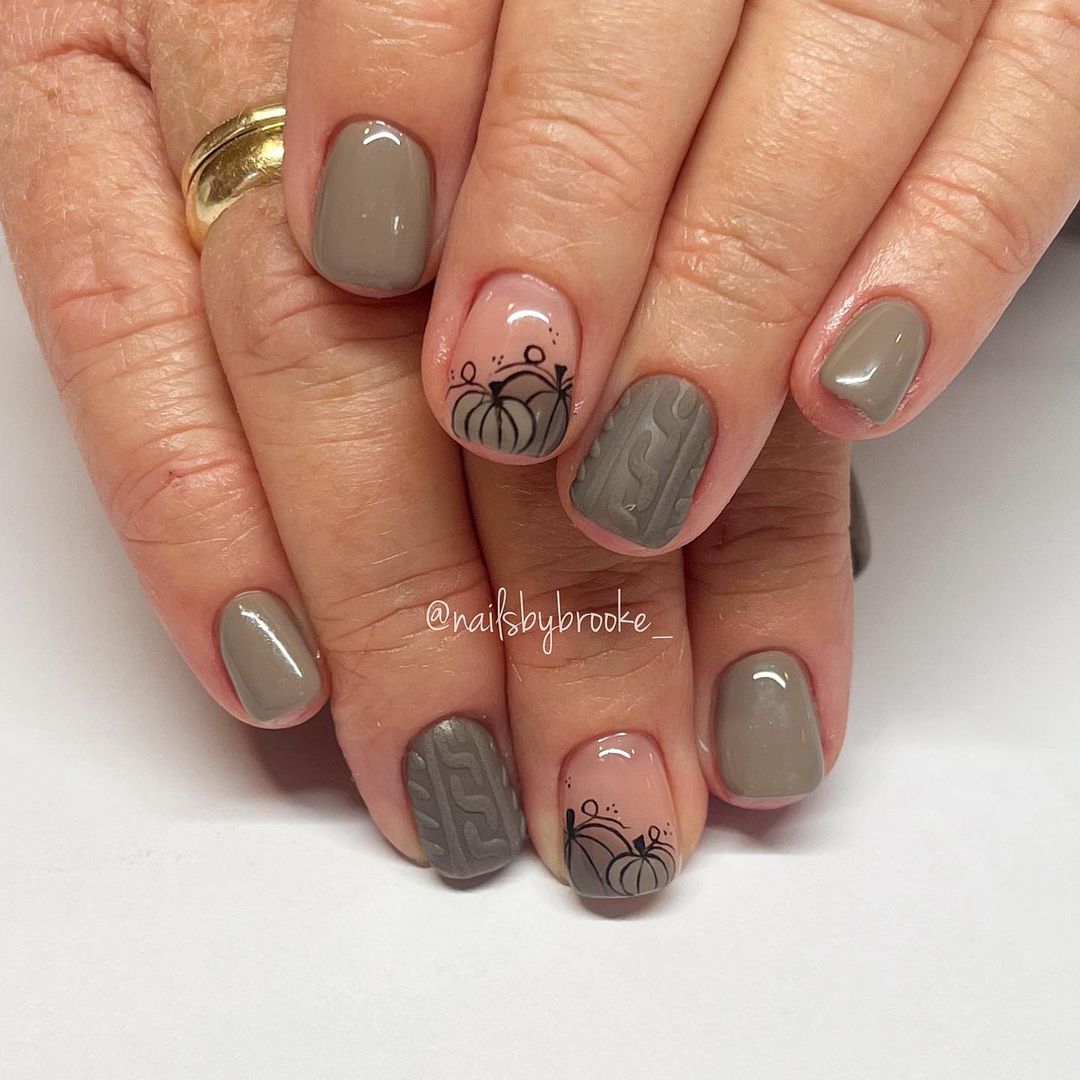
Cozy Pumpkins: Festive Fall Nail Art
Get into the festive spirit of fall with this adorable pumpkin nail art. The neutral grey base provides a soft backdrop for the cute pumpkin illustrations and cozy knit patterns. This design is perfect for celebrating the season in a stylish and playful way.
-
- Grey nail polish (e.g., OPI “I Can Never Hut Up”)
- Black nail polish for the pumpkins and knit patterns (e.g., Essie “Licorice”)
- Fine detail brushes
- Top coat
Tutorial:
-
- Apply a base coat to your nails.
- Paint all nails with grey polish.
- Using fine detail brushes, draw pumpkins and knit patterns with black polish.
- Add small details and highlights to enhance the designs.
- Seal with a top coat to protect your artwork.
Autumn Abstract: Elegant Swirl Nail Art
This elegant swirl nail art combines autumn hues with a minimalist design. The soft nude base is accentuated with delicate swirls in shades of brown, caramel, and chocolate, creating a sophisticated and seasonal look. The abstract design on the tips adds a touch of modern elegance, making it perfect for any fall occasion.

-
- Nude nail polish (e.g., OPI “Samoan Sand”)
- Brown, caramel, and chocolate nail polishes (e.g., Essie “Wicked”, Zoya “Autumn”, OPI “Suzi Loves Cowboys”)
- Fine detail brushes
- Top coat
Tutorial:
-
- Apply a base coat to your nails.
- Paint all nails with nude polish.
- Using fine detail brushes, draw swirls in brown, caramel, and chocolate polishes on the tips of your nails.
- Add small details and highlights to enhance the design.
- Finish with a top coat to protect your nail art.
Retro Chic: Bold and Playful Nail Art
This retro chic nail art design combines bold colors and playful patterns. The mix of navy, mustard, and white creates a vibrant and stylish look, while the floral and abstract patterns add a fun and whimsical touch. This design is perfect for those who love a mix of classic and contemporary styles.

-
- Navy, mustard, and white nail polishes (e.g., OPI “Russian Navy”, Essie “Fall For NYC”, OPI “Alpine Snow”)
- Fine detail brushes
- Dotting tool
- Top coat
Tutorial:
-
- Apply a base coat to your nails.
- Paint each nail with a different base color (navy, mustard, or white).
- Using fine detail brushes, create floral and abstract patterns with contrasting colors.
- Add small details and highlights to enhance the design.
- Seal with a top coat to protect your artwork.
Autumn Blossoms: Elegant Floral Nail Art
This elegant floral nail art captures the beauty of autumn blossoms. The deep burgundy base is paired with intricate floral designs in mustard and green, creating a sophisticated and seasonal look. The detailed flowers add a touch of nature’s charm, making this design perfect for any fall event.
-
- Burgundy, mustard, and green nail polishes (e.g., OPI “Malaga Wine”, Zoya “Pippa”, Essie “Mojito Madness”)
- Fine detail brushes
- Top coat
Tutorial:
-
- Apply a base coat to your nails.
- Paint all nails with burgundy polish.
- Using fine detail brushes, draw various flowers in mustard and green polishes.
- Add small details and highlights to enhance the floral designs.
- Finish with a top coat to protect your nail art.
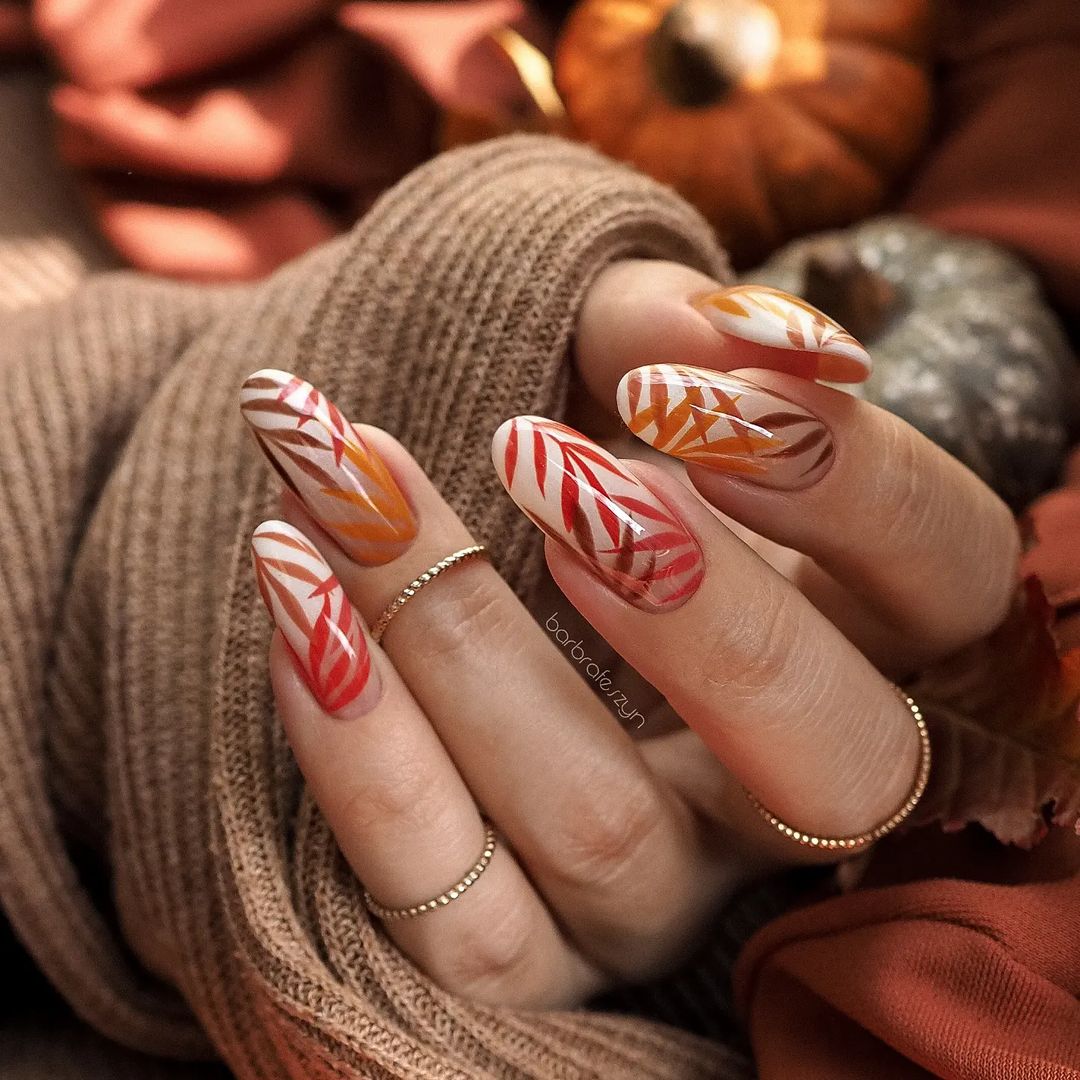
Falling Leaves: Seasonal Leaf Nail Art
This nail art design features the warm colors of fall leaves. The neutral base is adorned with delicate leaf patterns in shades of orange, red, and brown, capturing the essence of autumn. The thin lines and intricate details make this design both elegant and festive, perfect for the season.
-
- Neutral nail polish (e.g., OPI “Icelanded a Bottle of OPI”)
- Orange, red, and brown nail polishes (e.g., Essie “Playing Koi”, OPI “Big Apple Red”, Zoya “Dea”)
- Fine detail brushes
- Top coat
Tutorial:
-
- Apply a base coat to your nails.
- Paint all nails with neutral polish.
- Using fine detail brushes, draw leaf patterns in orange, red, and brown polishes.
- Add small details and highlights to enhance the design.
- Finish with a top coat to protect your nail art.
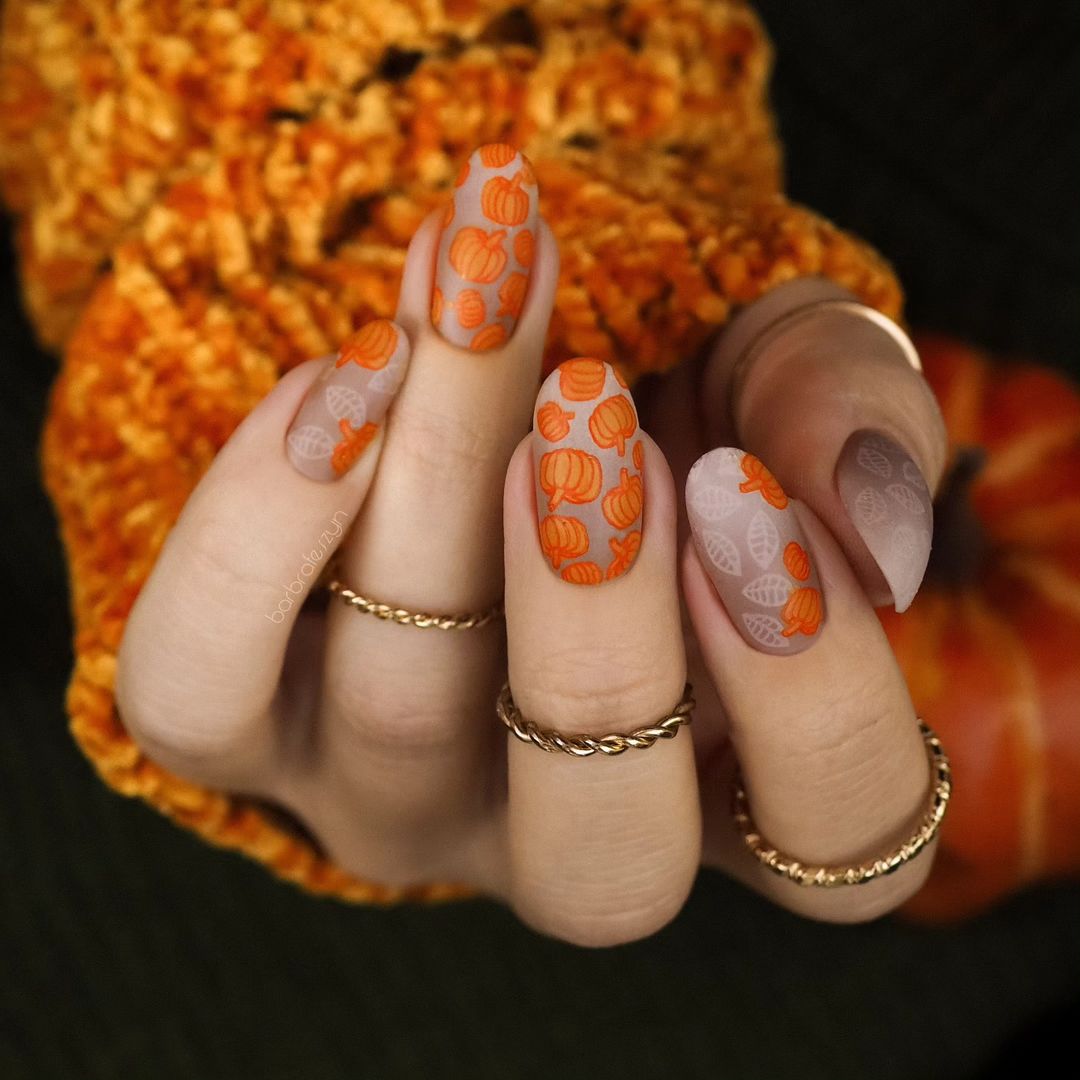
Pumpkin Patch: Festive Fall Nail Art
This festive nail art design brings the pumpkin patch to your fingertips. The soft matte base is decorated with playful pumpkins and leaves, creating a cozy and seasonal look. The vibrant orange and subtle grey colors capture the spirit of autumn, making this design perfect for fall celebrations.
-
- Matte grey and orange nail polishes (e.g., Essie “Chinchilly”, OPI “It’s a Piazza Cake”)
- Fine detail brushes
- Top coat
Tutorial:
-
- Apply a base coat to your nails.
- Paint all nails with matte grey polish.
- Using fine detail brushes, draw pumpkins and leaves in orange polish.
- Add small details and highlights to enhance the designs.
- Seal with a matte top coat to protect your artwork.
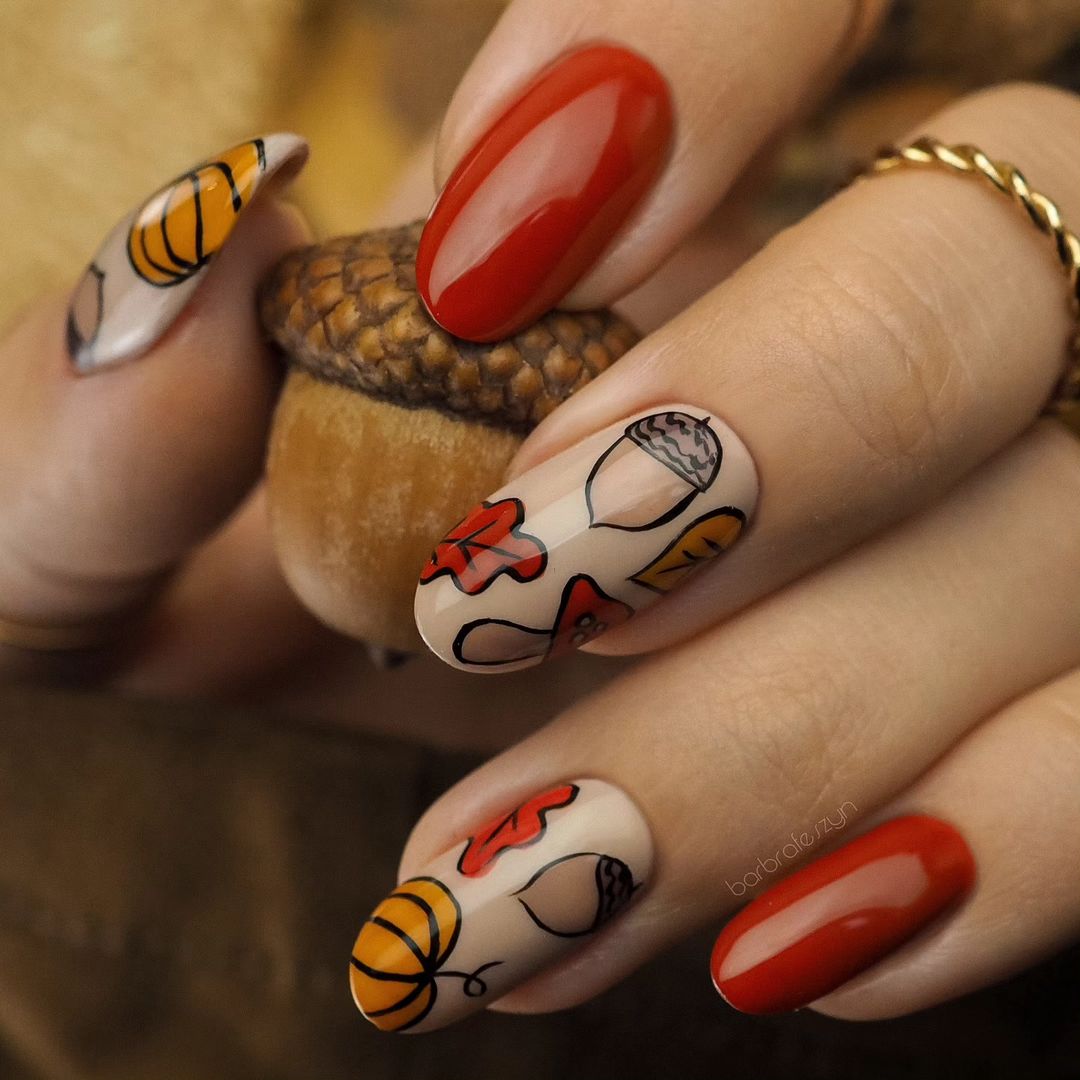
Harvest Festival: Playful Autumn Nail Art
Celebrate the harvest season with this playful and colorful nail art design. The neutral base is brought to life with whimsical illustrations of pumpkins, acorns, and leaves in bright orange and red. This design is perfect for adding a touch of festive fun to your autumn look.
-
- Neutral nail polish (e.g., OPI “Bubble Bath”)
- Orange and red nail polishes for the designs (e.g., Essie “Playing Koi”, OPI “Big Apple Red”)
- Fine detail brushes
- Top coat
Tutorial:
-
- Apply a base coat to your nails.
- Paint all nails with neutral polish.
- Using fine detail brushes, draw pumpkins, acorns, and leaves in orange and red polishes.
- Add small details and highlights to enhance the design.
- Finish with a top coat to protect your nail art.
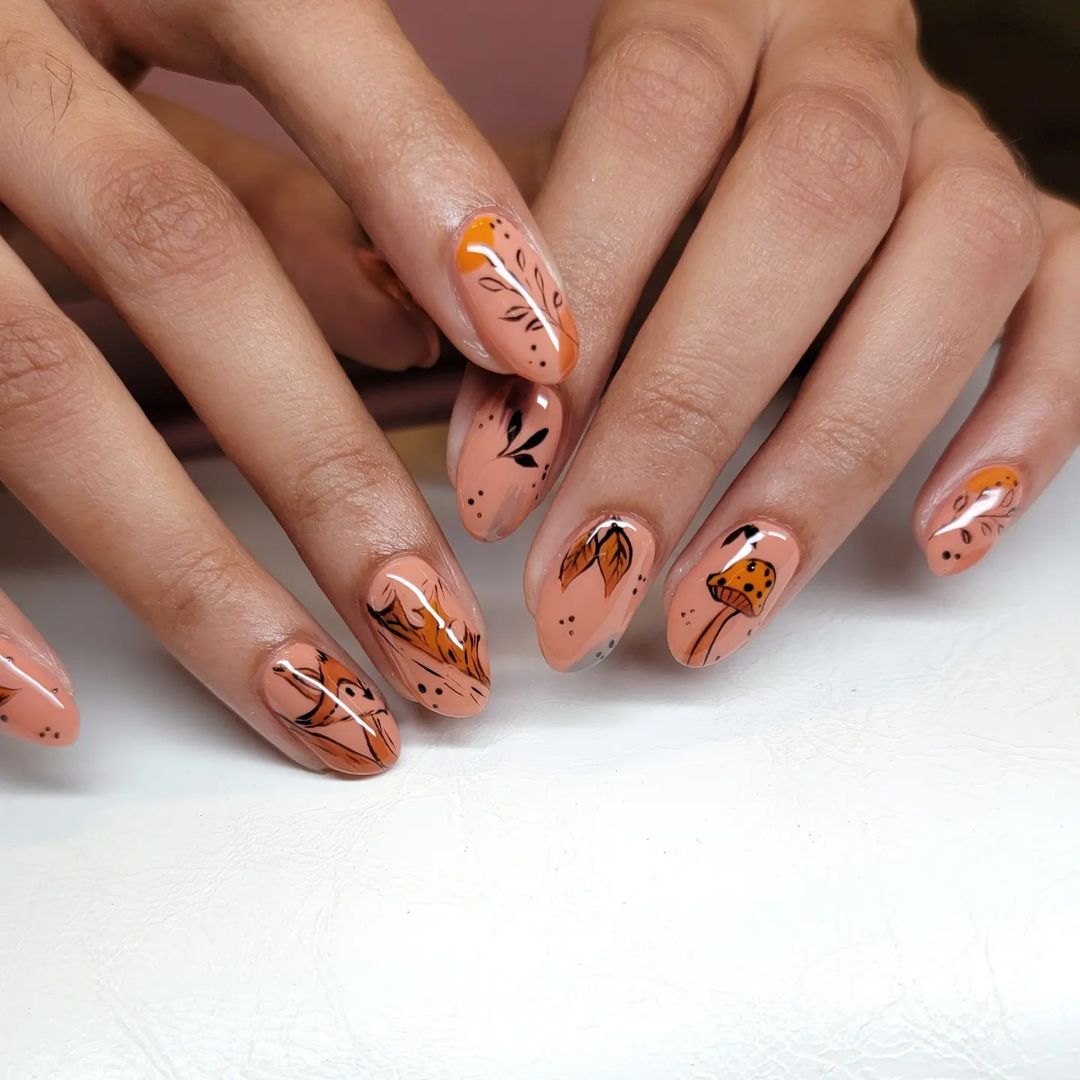
Fall Foliage: Nature-Inspired Nail Art
This nature-inspired nail art showcases the beauty of fall foliage with its warm hues and intricate designs. The soft nude base is adorned with detailed leaves and mushrooms in shades of orange and brown, capturing the essence of autumn. The fine black accents add depth and definition, making each nail a tiny canvas of fall beauty.
-
- Nude nail polish (e.g., OPI “Be There in a Prosecco”)
- Orange, brown, and black nail polishes for detailing (e.g., Essie “Playing Koi”, OPI “You Don’t Know Jacques!”, Essie “Licorice”)
- Fine detail brushes
- Top coat
Tutorial:
-
- Apply a base coat to your nails.
- Paint all nails with nude polish.
- Using fine detail brushes, draw leaves and mushrooms in orange and brown polishes.
- Add black accents to enhance the design.
- Finish with a top coat to protect your nail art.
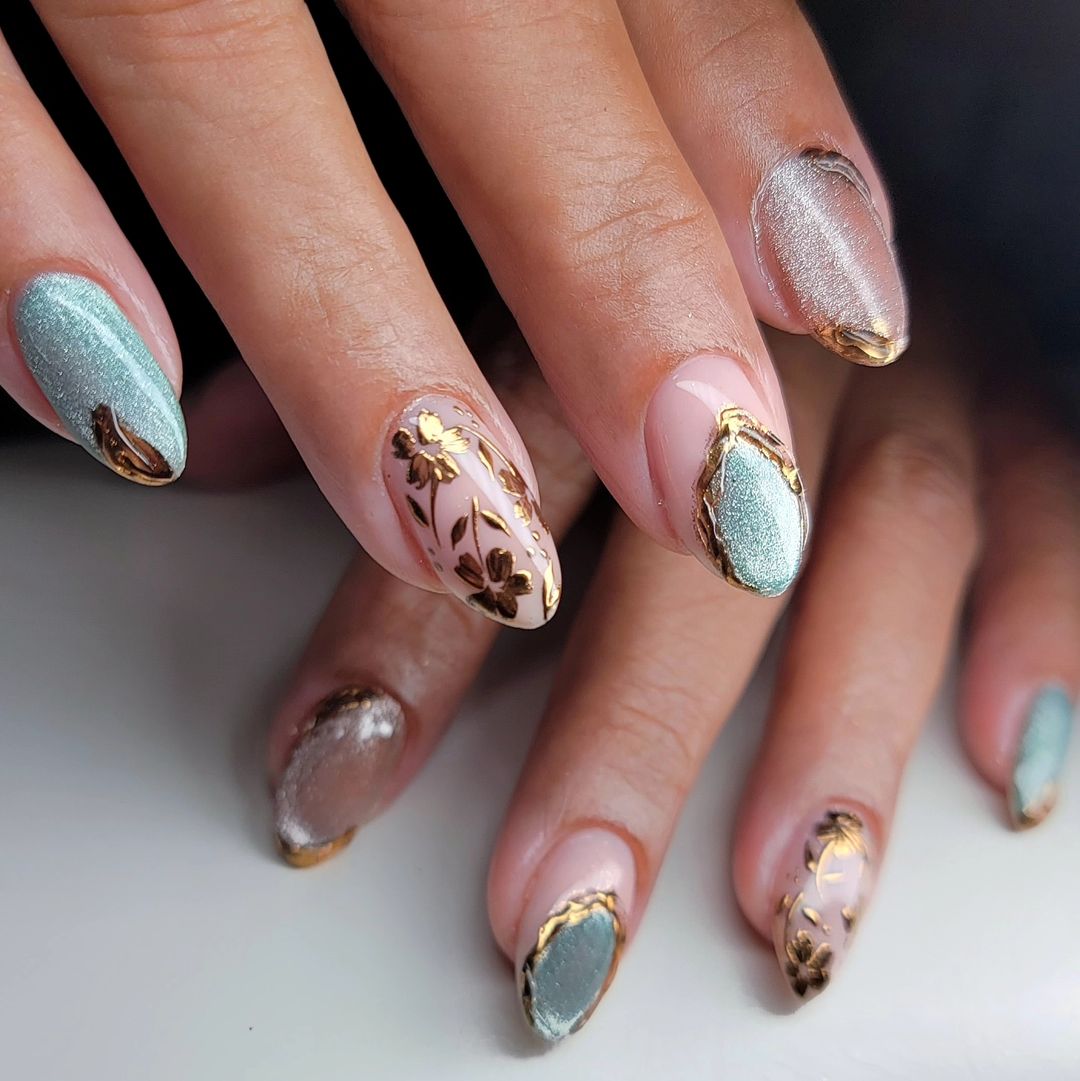
Gilded Elegance: Gold Leaf and Floral Nail Art
This luxurious nail art design combines the elegance of gold leaf with delicate floral patterns. The mix of soft pink and shimmering metallic shades creates a sophisticated and opulent look. The gold accents highlight the intricate details, making this design perfect for special occasions and adding a touch of glamour to your fall style.
-
- Pink and metallic nail polishes (e.g., Essie “Ballet Slippers”, Zoya “Trixie”)
- Gold nail polish for detailing (e.g., OPI “Gold Digger”)
- Fine detail brushes
- Top coat
Tutorial:
-
- Apply a base coat to your nails.
- Paint some nails with pink polish and others with metallic polish.
- Using fine detail brushes, draw floral patterns and add gold leaf accents.
- Add small details and highlights to enhance the design.
- Seal with a top coat to protect your nail art.
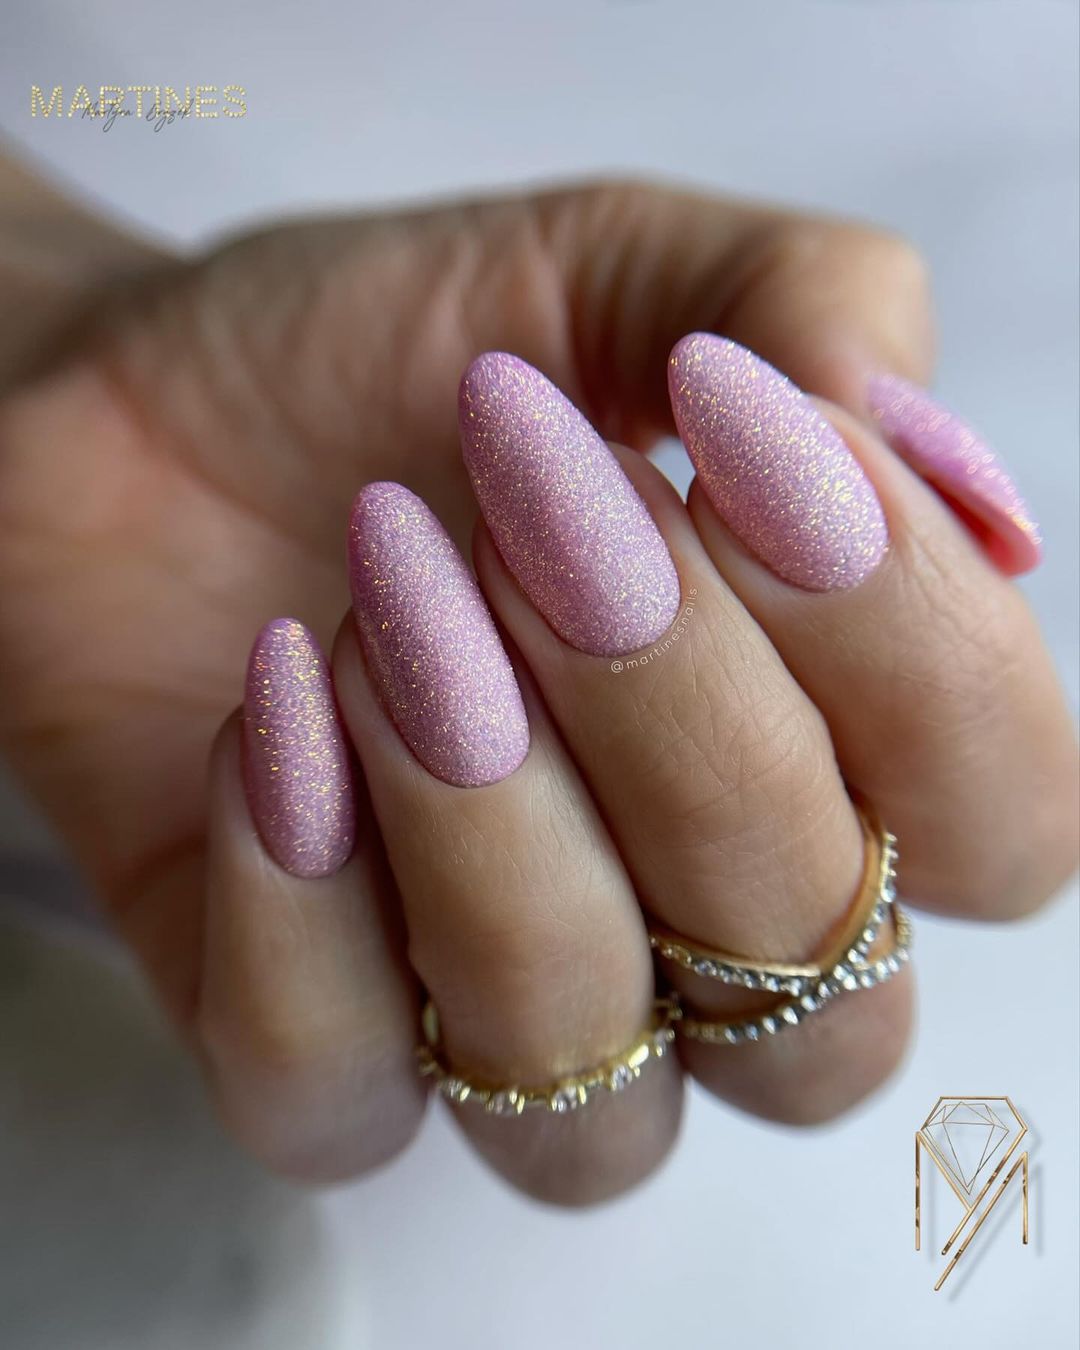
Pink Glitter Dream: Sparkling Nail Art
This sparkling nail art design is a dream for those who love glitter and glam. The soft pink base is covered with fine, shimmering glitter, creating a dazzling and eye-catching look. This design is perfect for adding a touch of sparkle to any fall outfit and is sure to make your nails the center of attention.
-
- Pink nail polish (e.g., OPI “Mod About You”)
- Fine pink glitter polish (e.g., China Glaze “Fairy Dust”)
- Top coat
Tutorial:
-
- Apply a base coat to your nails.
- Paint all nails with pink polish.
- Apply fine pink glitter polish over the pink base.
- Apply multiple layers of top coat to seal the glitter and enhance the shine.
FAQ
Q: How can I make my fall nail art last longer?
A: Always start with a base coat and finish with a top coat. Avoid using your nails as tools and wear gloves when doing chores.
Q: What are some popular fall nail colors?
A: Popular colors include deep reds, burnt oranges, forest greens, and muted neutrals. These colors capture the essence of autumn and complement any fall outfit.
Q: Can I achieve these designs on short nails?
A: Absolutely! Many of these designs can be adapted for short nails. Opt for smaller patterns and simpler designs to suit shorter lengths.
With these fall nail art ideas, you’re all set to showcase the beauty of autumn on your fingertips. Whether you prefer a minimalist look or a detailed design, there’s a perfect fall manicure waiting for you. Happy painting!
Save Pin