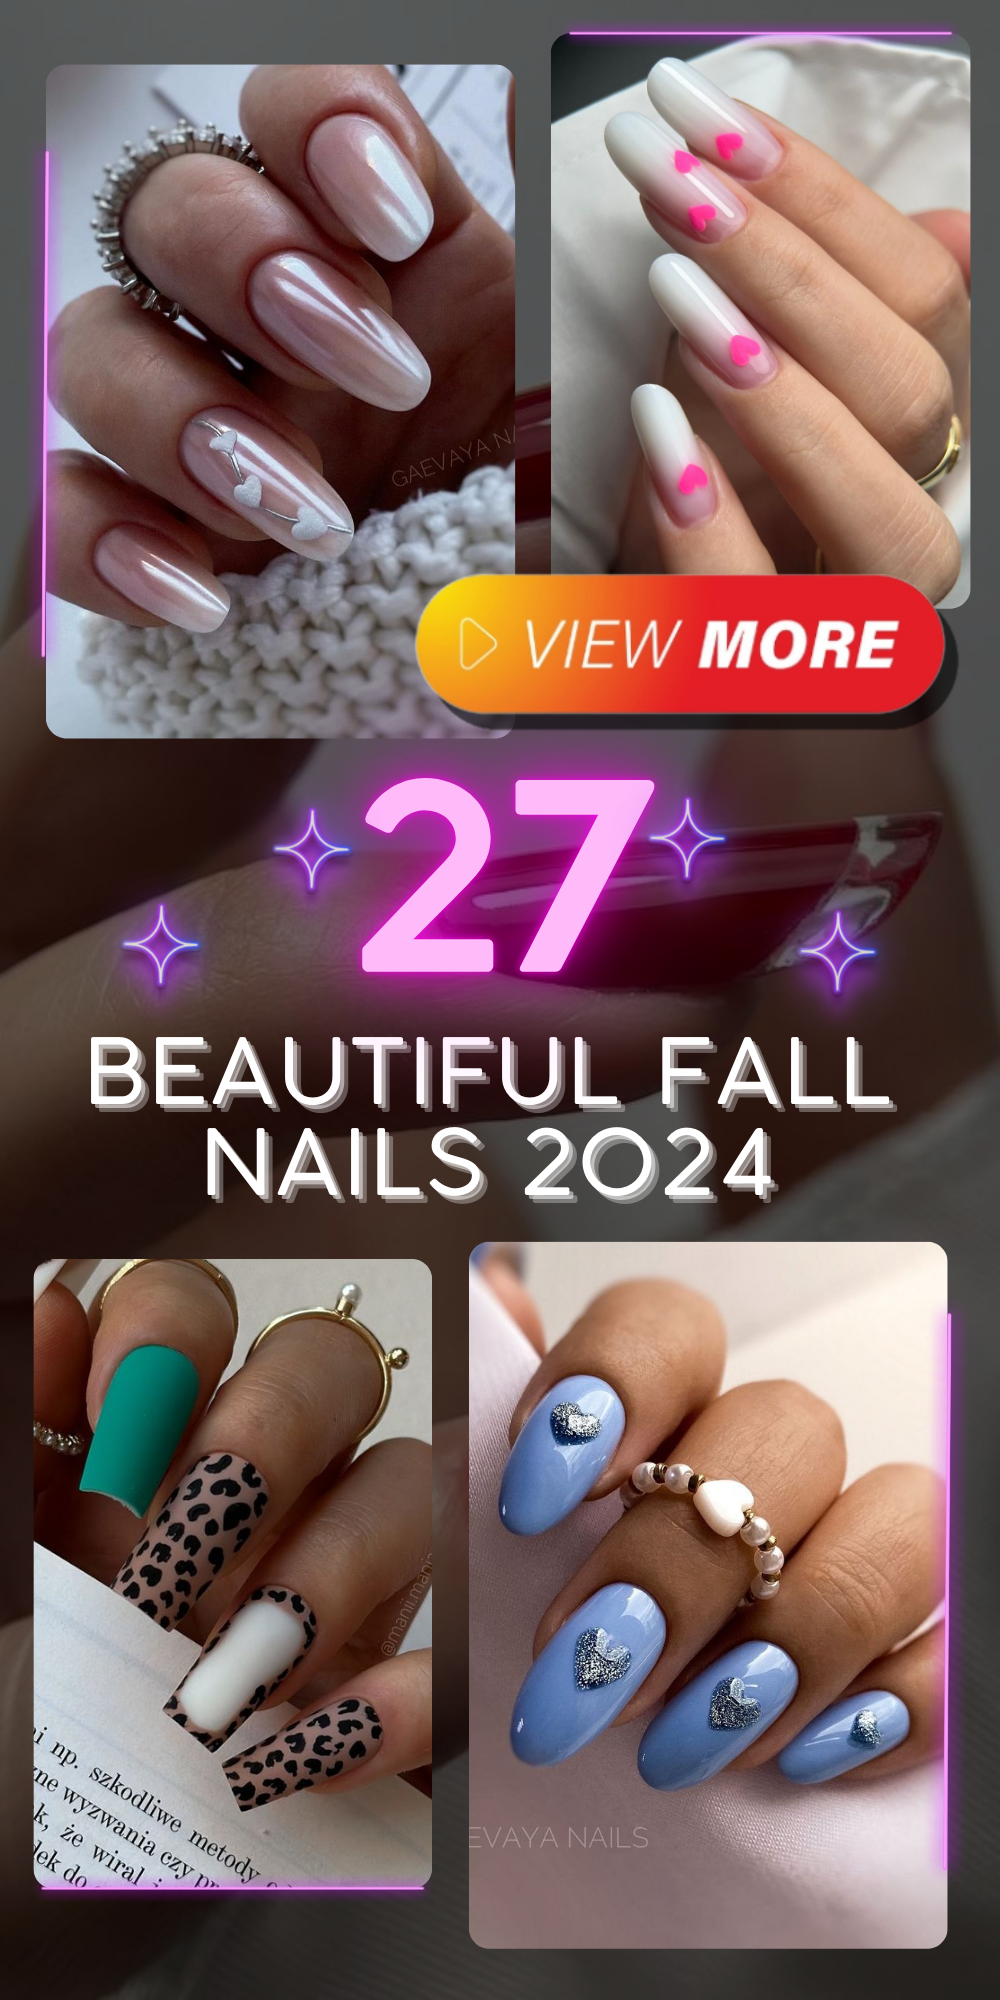
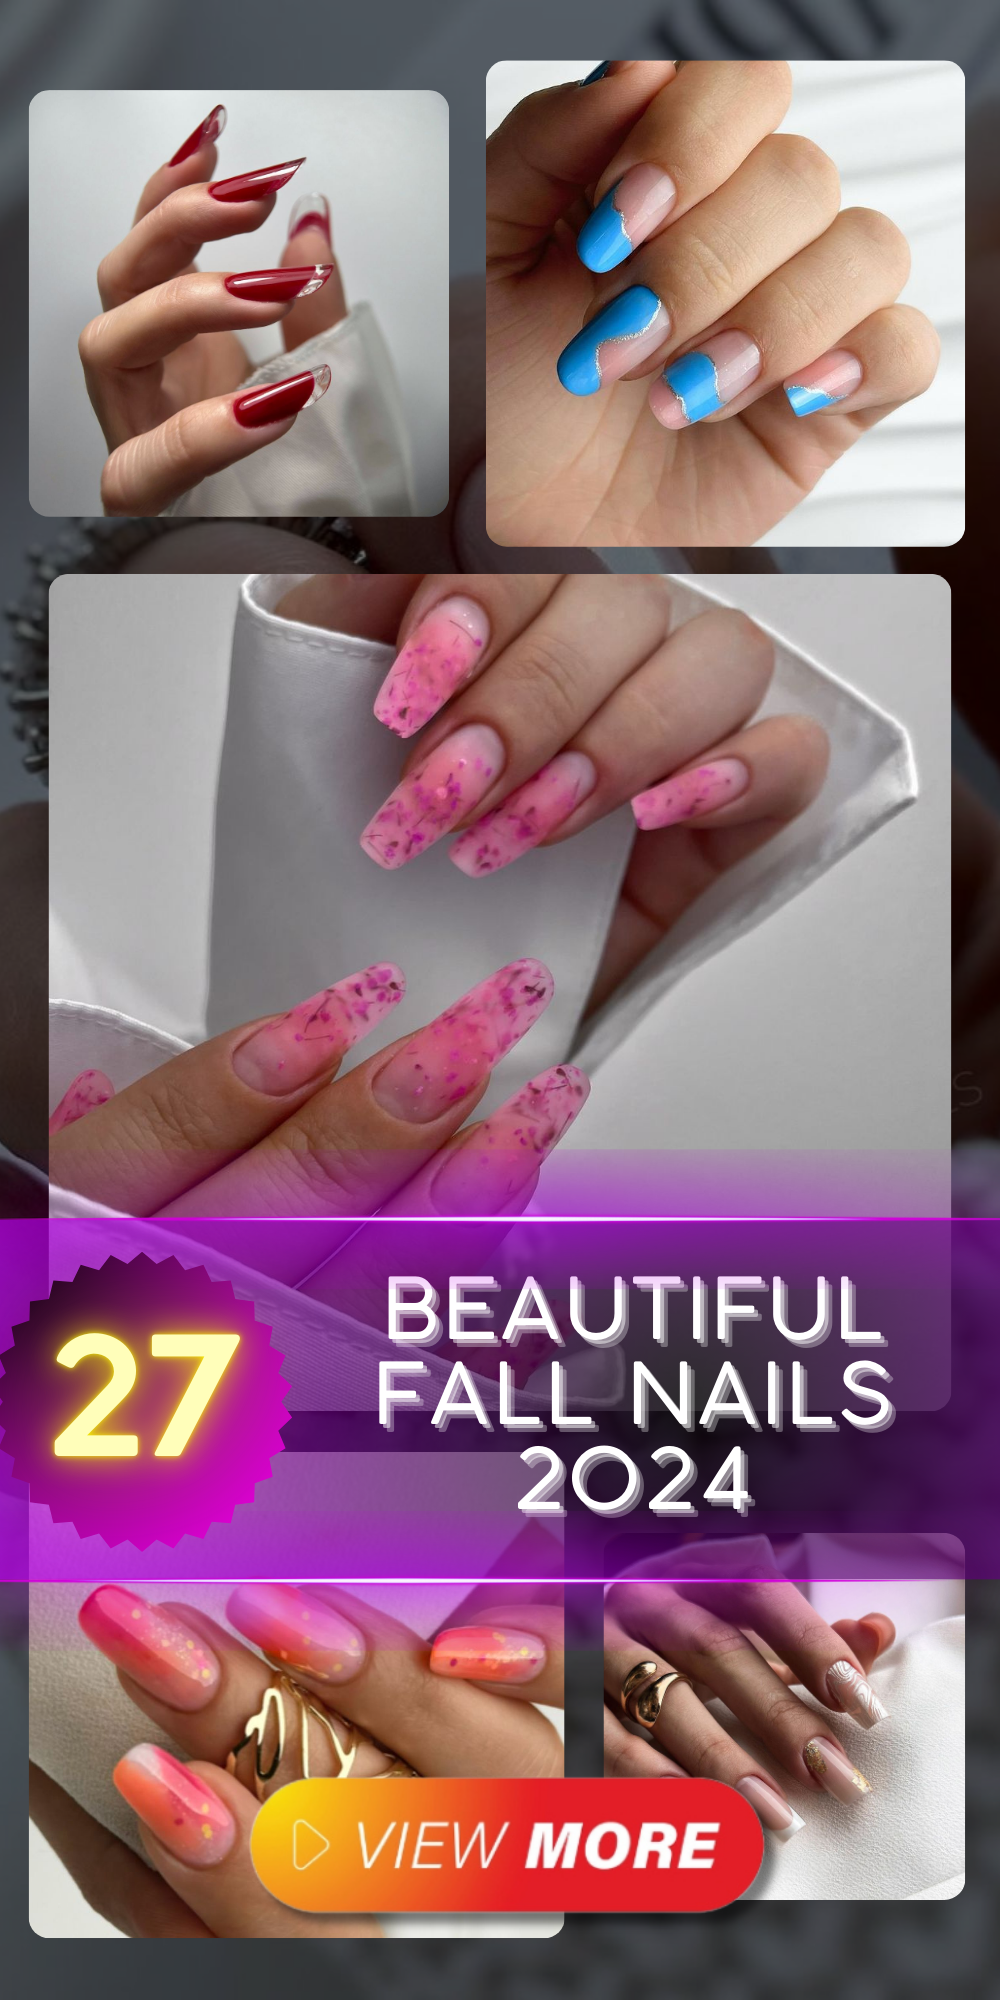
As the leaves turn and the air cools, fall becomes the perfect season to refresh your nail game with beautiful and trendy designs. This year, beautiful fall nails 2024 are all about bold colors, intricate patterns, and a touch of elegance. From stunning ombre effects to luxurious marble accents, there’s a nail design for every style and occasion. Dive into the world of fall nail art with these inspiring ideas that will keep your manicure looking chic and stylish all season long. Whether you prefer simple and subtle or bold and glamorous, these designs will help you embrace the spirit of autumn in the most fashionable way.
Green and Gold Glamour
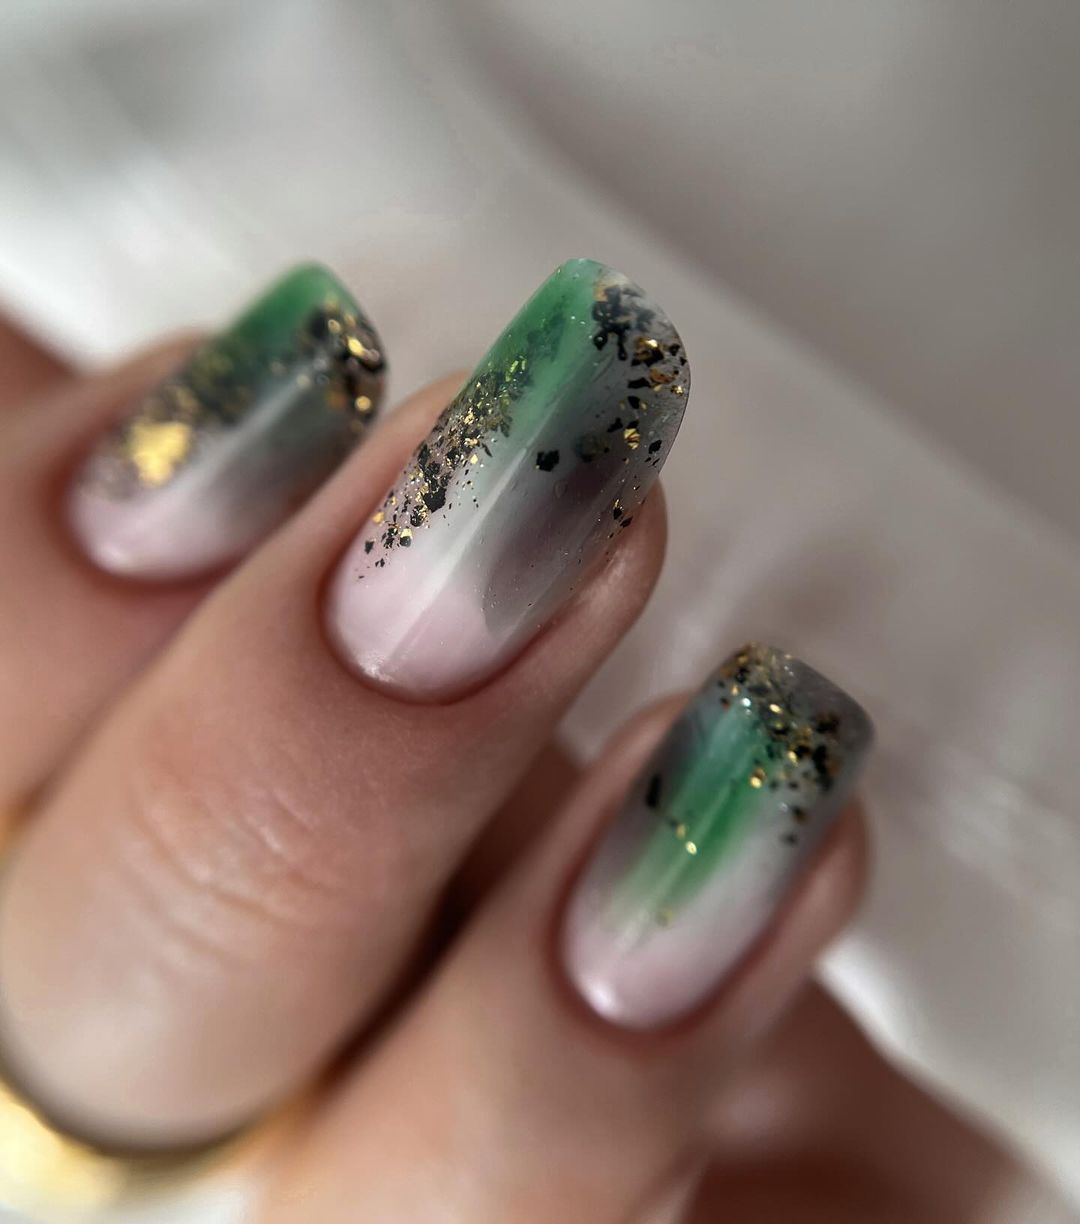
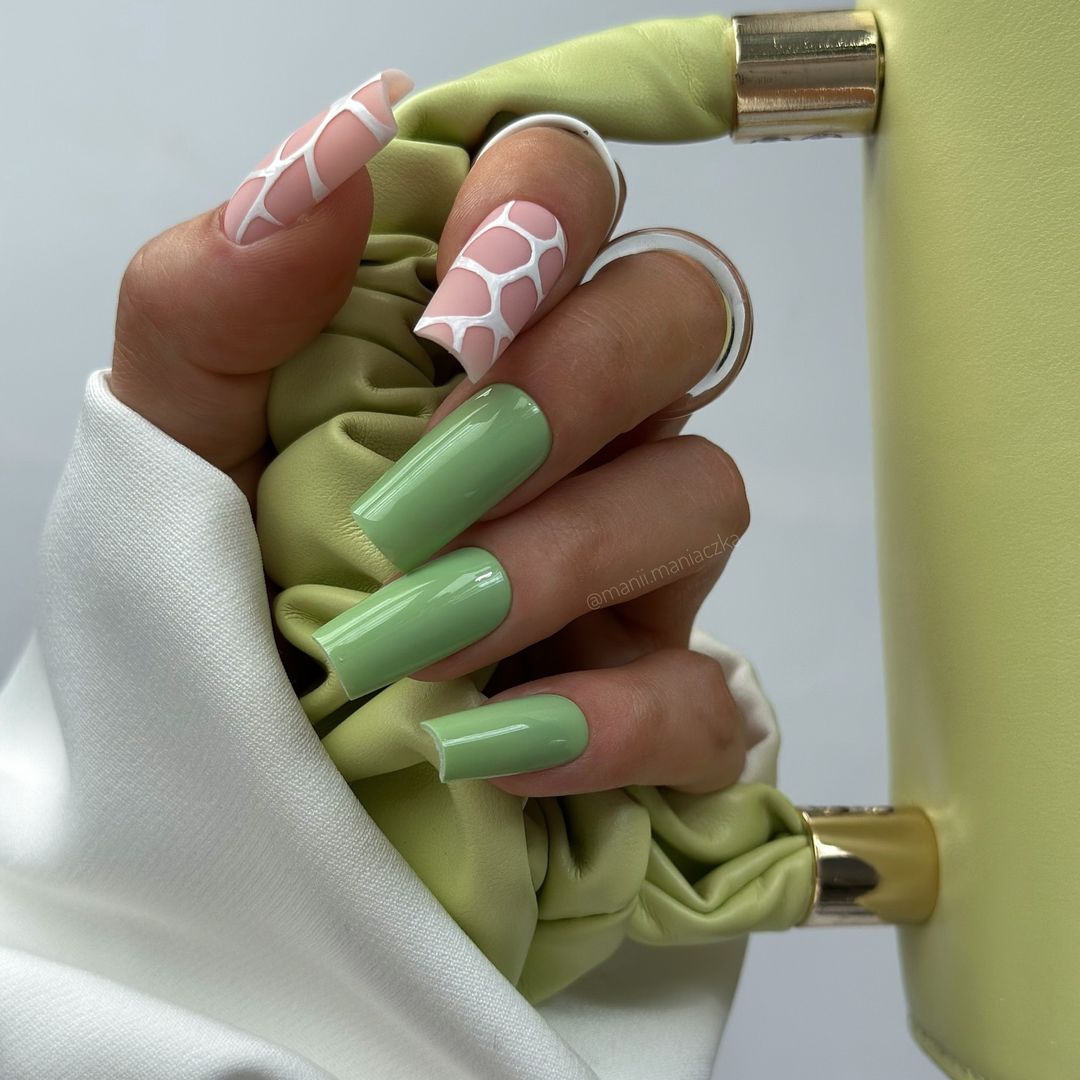
For those looking to add a touch of glamour to their fall nail game, this design is an absolute showstopper. The seamless blend of green and pink hues creates a mesmerizing ombre effect, perfectly complemented by flecks of gold foil that add a luxurious touch. This nail art strikes a balance between subtlety and opulence, making it ideal for both everyday wear and special occasions.
Consumables:
- Green nail polish (OPI “Stay Off the Lawn”)
- Pink nail polish (Essie “Ballet Slippers”)
- Gold foil flakes (Born Pretty Gold Foil)
- Top coat (Seche Vite Dry Fast Top Coat)
At-Home Instructions:
- Start with a base coat to protect your nails.
- Apply the pink polish to the entire nail and let it dry.
- Use a sponge to dab the green polish on the tips, creating a gradient effect.
- While the polish is still tacky, carefully place the gold foil flakes on the nails.
- Seal the design with a glossy top coat for a long-lasting finish.
Lavender Dreams
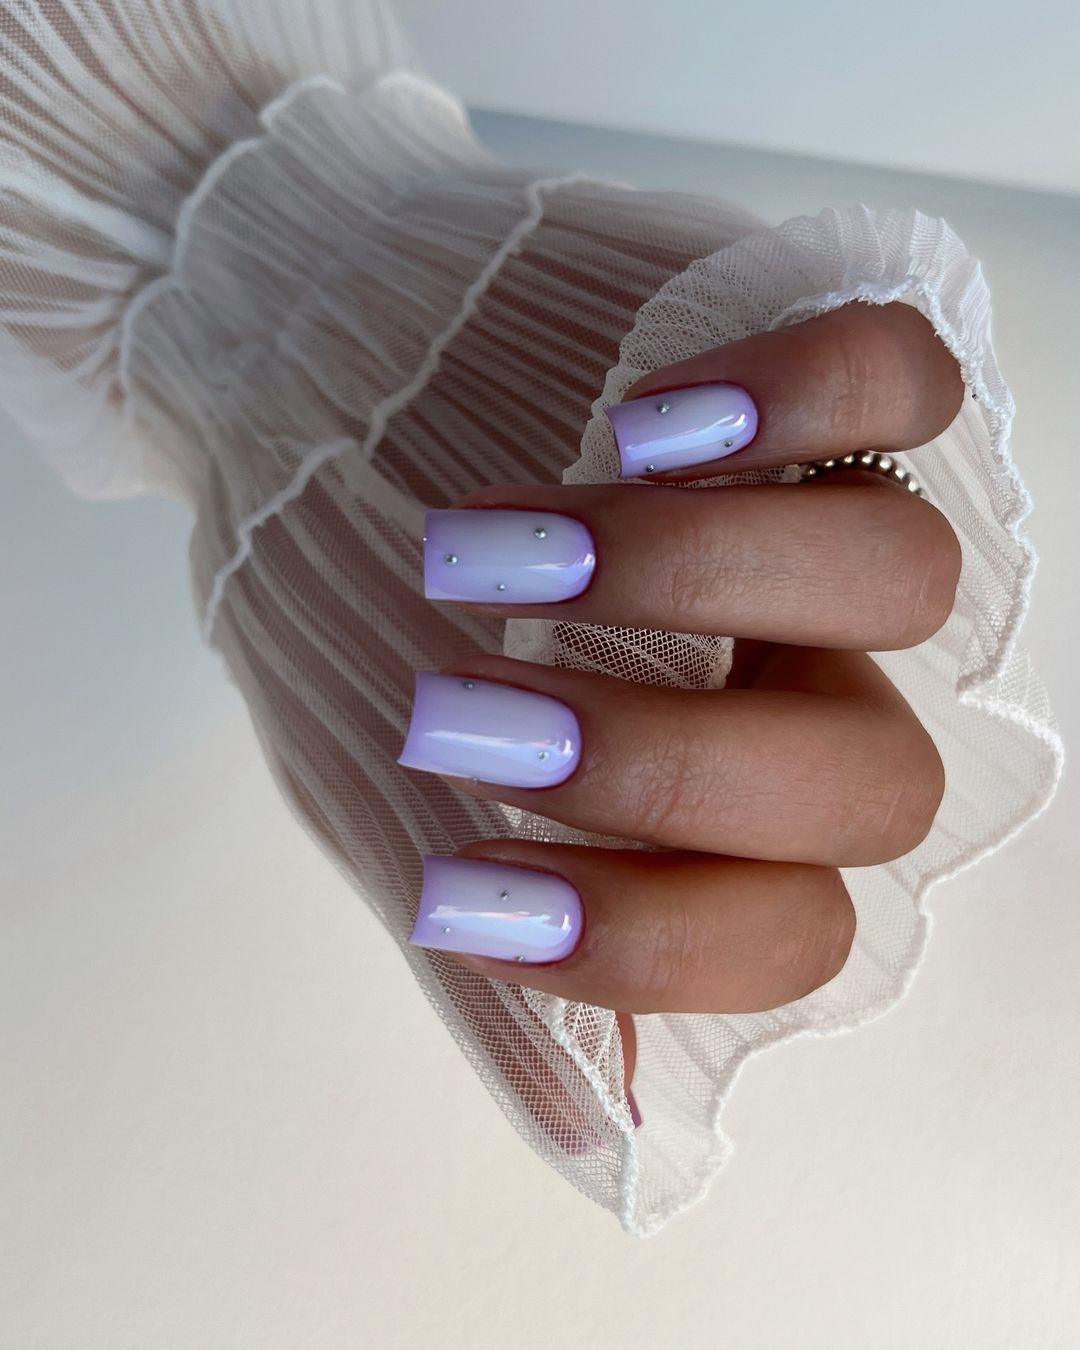
Lavender nails are a dreamy choice for fall, offering a soft yet striking look. This design features a smooth transition from a deeper lavender shade to a lighter hue, embellished with tiny silver studs that add a hint of sparkle. It’s a perfect blend of elegance and modernity, suitable for both casual and formal settings.
Consumables:
- Dark lavender nail polish (Sally Hansen “Good. Kind. Pure.”)
- Light lavender nail polish (Zoya “Malia”)
- Silver studs (KADS Nail Art Rhinestones)
- Top coat (Essie Gel Couture Top Coat)
At-Home Instructions:
- Apply the darker lavender polish as the base color.
- Use a makeup sponge to blend the lighter lavender from the middle to the tips.
- Place the silver studs strategically while the polish is still wet.
- Finish with a gel top coat to secure the studs and add shine.
Aquatic Elegance
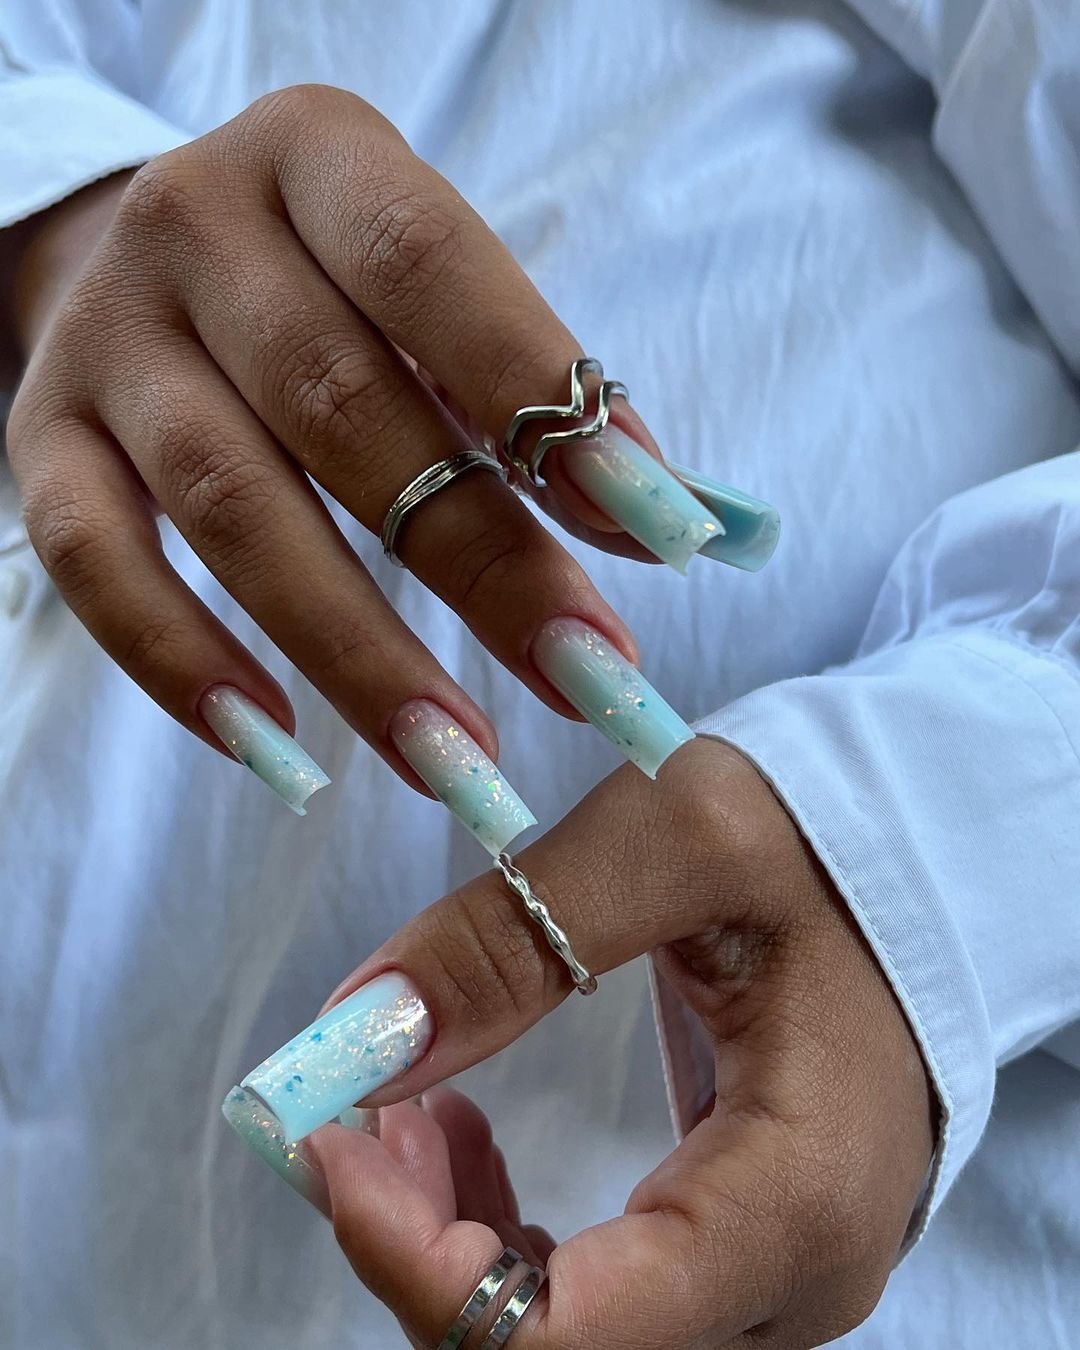
This stunning nail art features an icy blue gradient that evokes the serene beauty of the ocean. Tiny flecks of glitter mimic the sparkle of sunlight on water, creating a captivating look that’s perfect for fall. This design is both refreshing and elegant, making it a versatile choice for any occasion.
Consumables:
- Light blue nail polish (China Glaze “At Vase Value”)
- White nail polish (OPI “Alpine Snow”)
- Blue glitter (NYK1 Blue Glitter)
- Top coat (Glisten & Glow Top Coat)
At-Home Instructions:
- Begin with a white base to make the blue pop.
- Use a sponge to blend the light blue polish from the base towards the tips.
- Add a layer of blue glitter for extra sparkle.
- Apply a top coat to seal the design and ensure durability.
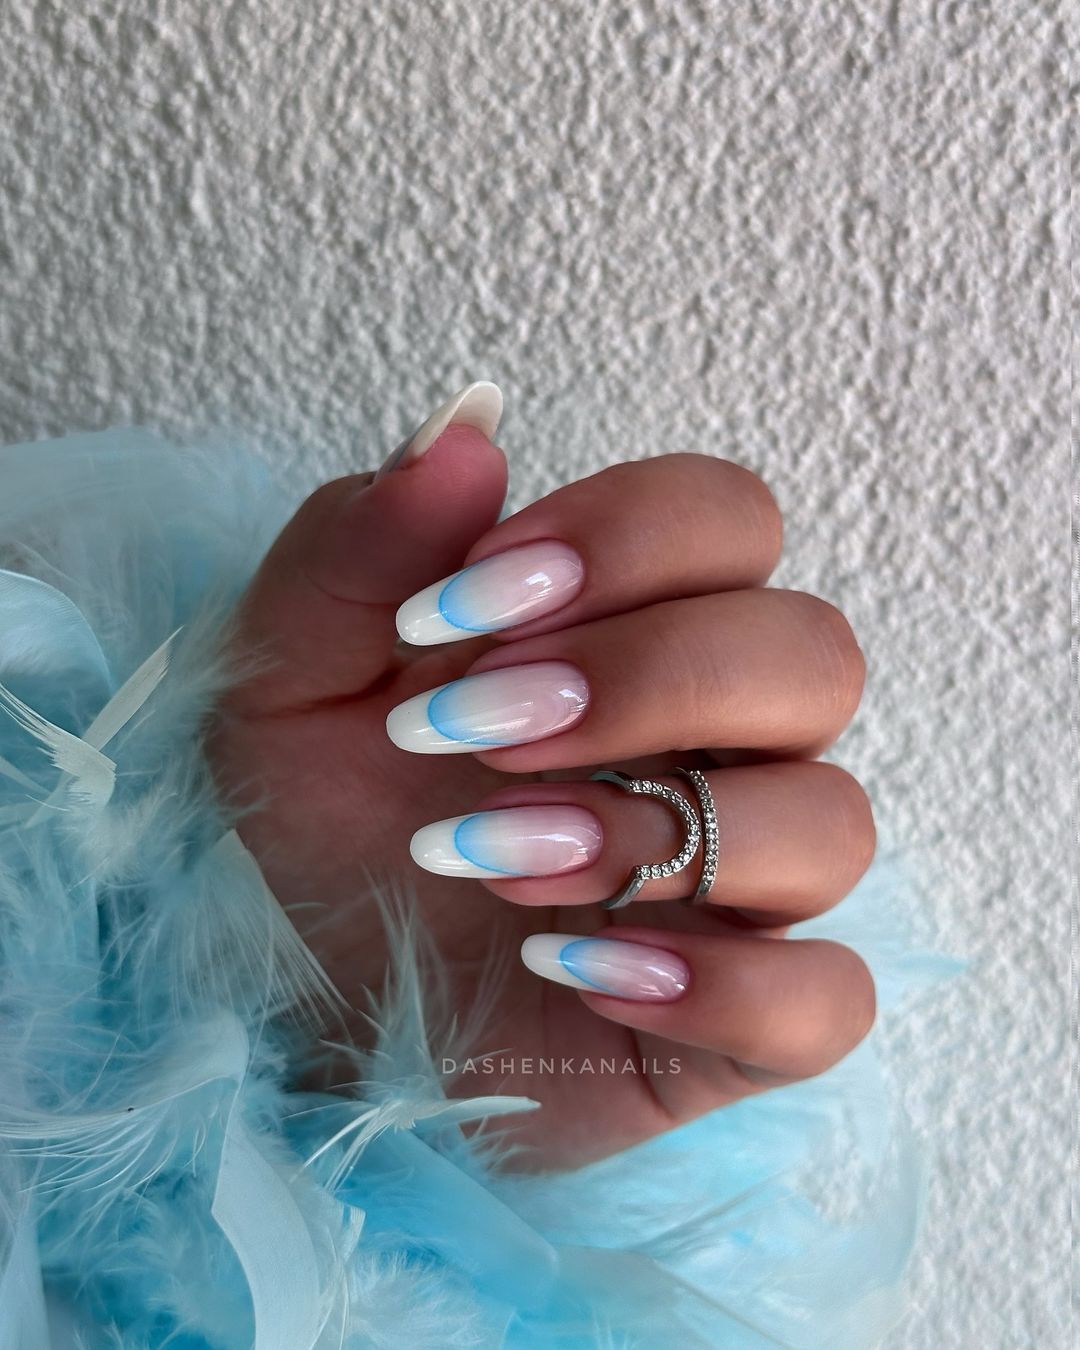
Sophisticated French Tips
Sophisticated French tips are a timeless choice, but this design adds a modern twist with a soft blue gradient. The subtle transition from nude to light blue creates an ethereal look that’s both elegant and trendy. This design is perfect for those who want to keep their nails classy yet contemporary.

Consumables:
- Nude nail polish (OPI “Samoan Sand”)
- Light blue nail polish (Essie “Bikini So Teeny”)
- Top coat (Sally Hansen “Insta-Dri”)
At-Home Instructions:
- Apply a base coat to protect your nails.
- Paint your nails with the nude polish and let them dry completely.
- Use a makeup sponge to create a gradient effect by dabbing the light blue polish from the tips towards the center.
- Finish with a top coat to smooth out the gradient and add shine.
Save Pin
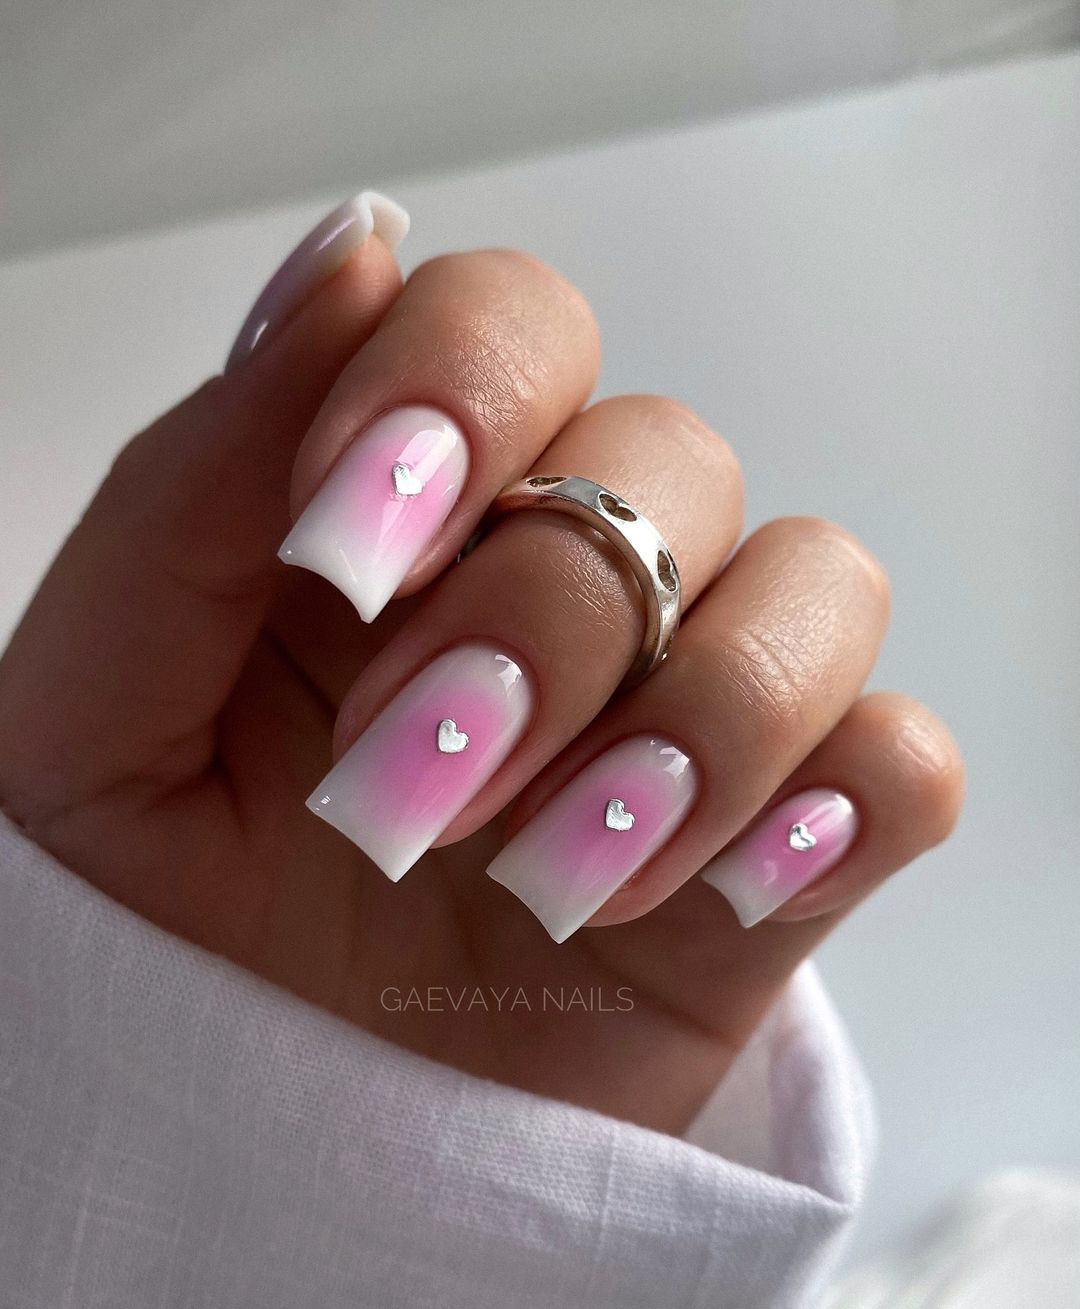
Heartfelt Pink Ombre
This pink ombre design with tiny heart accents exudes romance and playfulness. The smooth gradient from a soft pink to white serves as the perfect backdrop for the delicate heart-shaped embellishments, making this look both cute and charming. It’s ideal for anyone wanting to add a touch of sweetness to their fall nails.
Consumables:
- Soft pink nail polish (Zoya “Dot”)
- White nail polish (OPI “Alpine Snow”)
- Heart-shaped nail art studs (KADS Nail Art Rhinestones)
- Top coat (Essie Gel Couture Top Coat)
At-Home Instructions:
- Start with a base coat to ensure your nails are protected.
- Apply the soft pink polish and allow it to dry.
- Create the ombre effect by sponging the white polish from the tips to the middle of the nails.
- Place the heart-shaped studs while the polish is still tacky.
- Seal the design with a gel top coat for durability and shine.
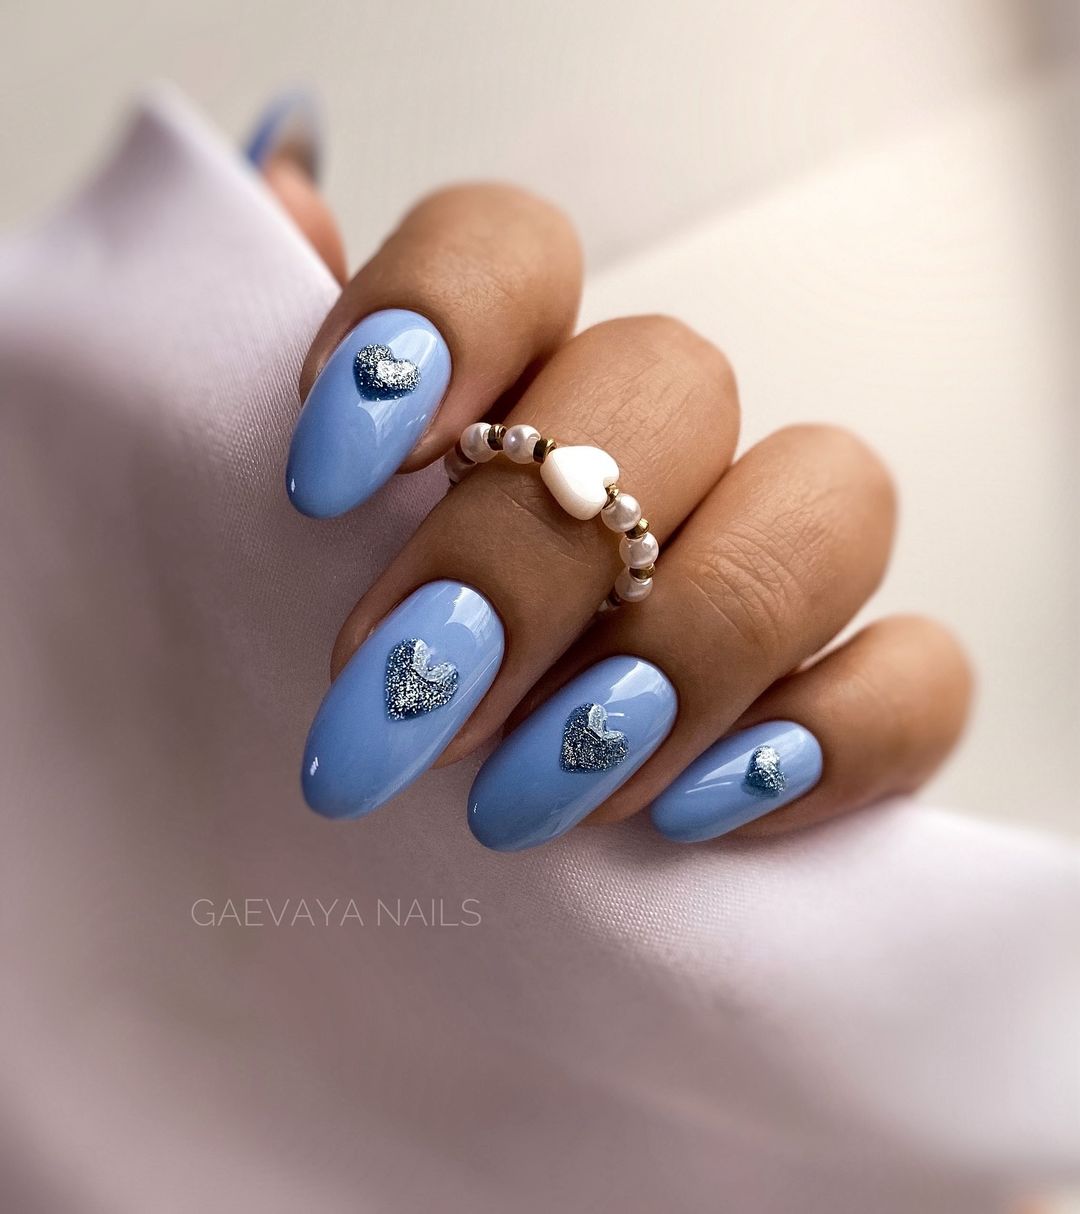
Blue Hearts Delight
This delightful blue design is both fun and elegant, featuring a solid blue base adorned with glittery heart accents. The vivid blue color is eye-catching and perfect for fall, while the hearts add a whimsical touch that makes the design stand out. This look is great for those who want to make a bold yet playful statement.
Consumables:
- Bright blue nail polish (China Glaze “Bahamian Escape”)
- Silver glitter polish (Sally Hansen “Strobe Light”)
- Heart-shaped glitter (Born Pretty Glitter Hearts)
- Top coat (Glisten & Glow Top Coat)
At-Home Instructions:
- Apply a base coat to prepare your nails.
- Paint your nails with the bright blue polish and let it dry thoroughly.
- Add the heart-shaped glitter using a small brush or dotting tool while the polish is still slightly wet.
- Apply the silver glitter polish around the hearts for extra sparkle.
- Finish with a top coat to secure the design and add a glossy finish.
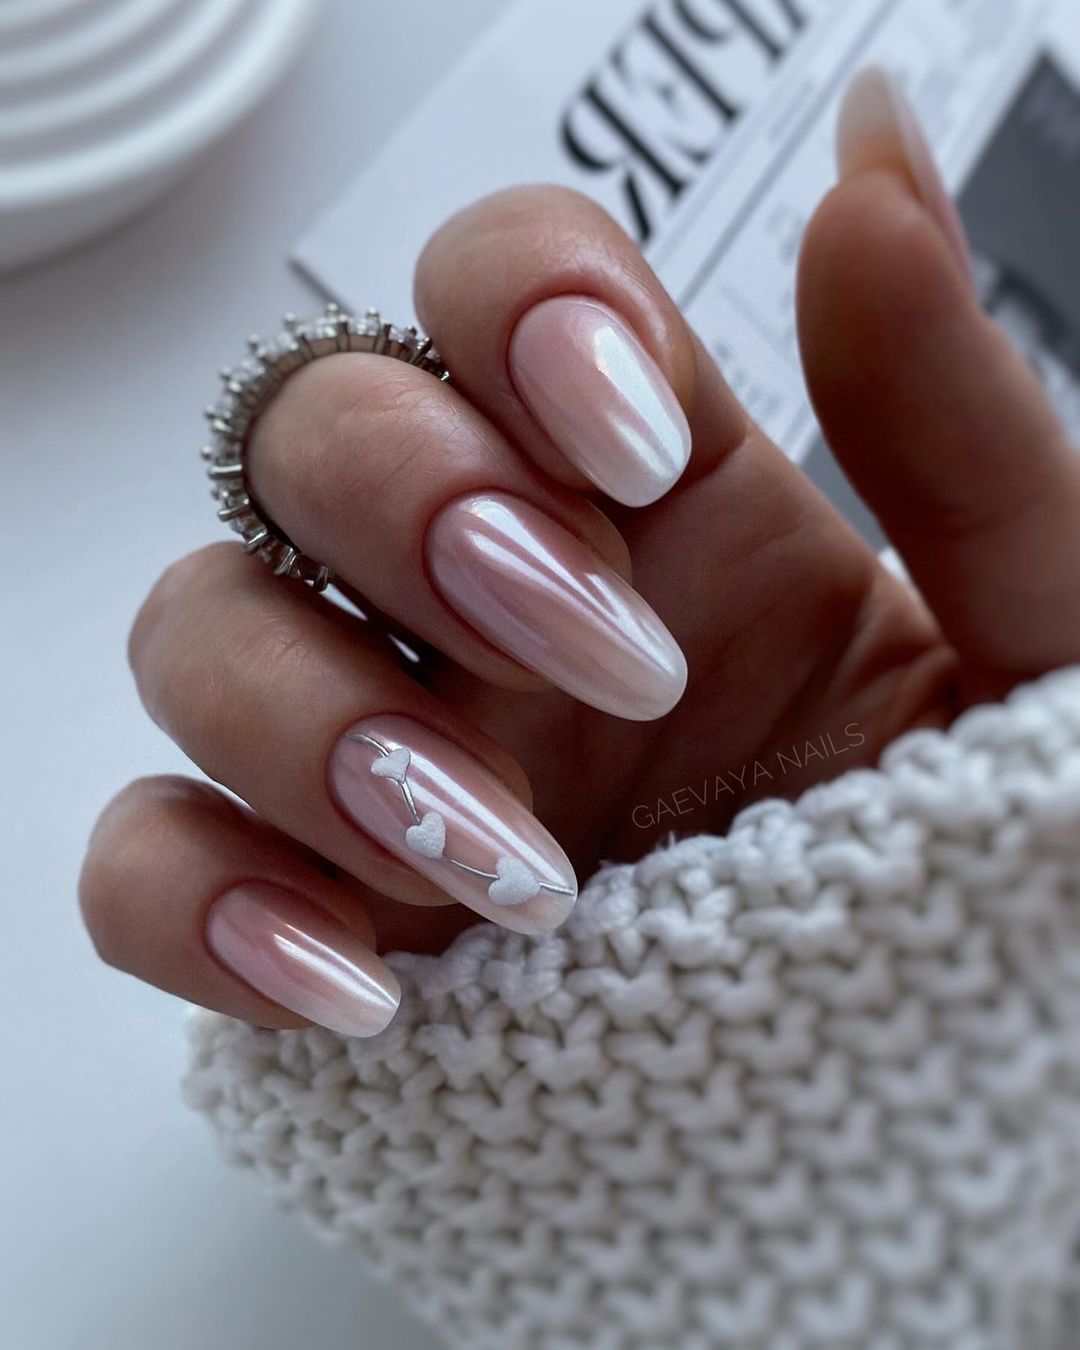
Pearl Hearts Elegance
This elegant design showcases a soft, pearlescent base adorned with delicate white hearts. The iridescent shimmer adds a touch of sophistication, while the hearts provide a whimsical flair. This look is perfect for those who appreciate a subtle yet charming manicure.
Consumables:
- Pearlescent nail polish (Essie “Pearlfection”)
- White heart-shaped stickers (KADS Nail Art Stickers)
- Top coat (Seche Vite Dry Fast Top Coat)
At-Home Instructions:
- Apply a base coat to protect your nails.
- Paint your nails with the pearlescent polish and let it dry.
- Carefully place the heart-shaped stickers on the accent nail.
- Seal the design with a top coat to ensure longevity and shine.
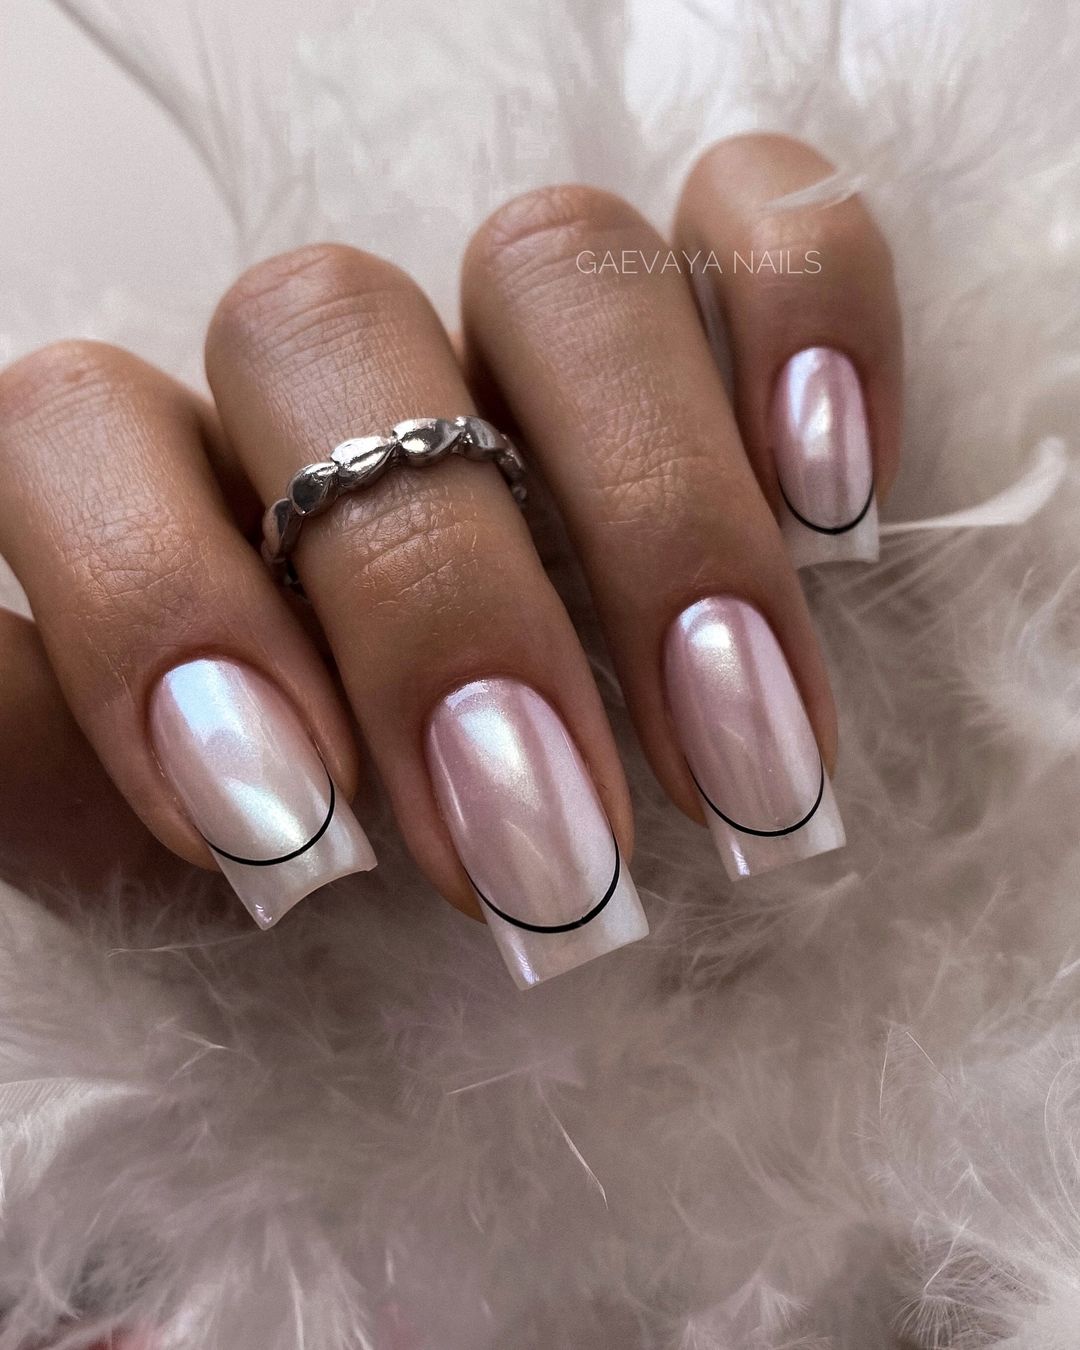
Minimalist French Twist
This design takes the classic French manicure and adds a minimalist twist with thin black lines at the tips. The combination of a pearlescent base and sleek black lines creates a chic and modern look that’s ideal for any occasion.
Consumables:
- Pearlescent nail polish (OPI “Kyoto Pearl”)
- Black nail art pen (Sally Hansen I Heart Nail Art Pen)
- Top coat (Essie Gel Couture Top Coat)
At-Home Instructions:
- Apply a base coat to prepare your nails.
- Paint your nails with the pearlescent polish and let it dry thoroughly.
- Use the black nail art pen to draw thin lines along the tips of your nails.
- Finish with a top coat to secure the design and add a glossy finish.
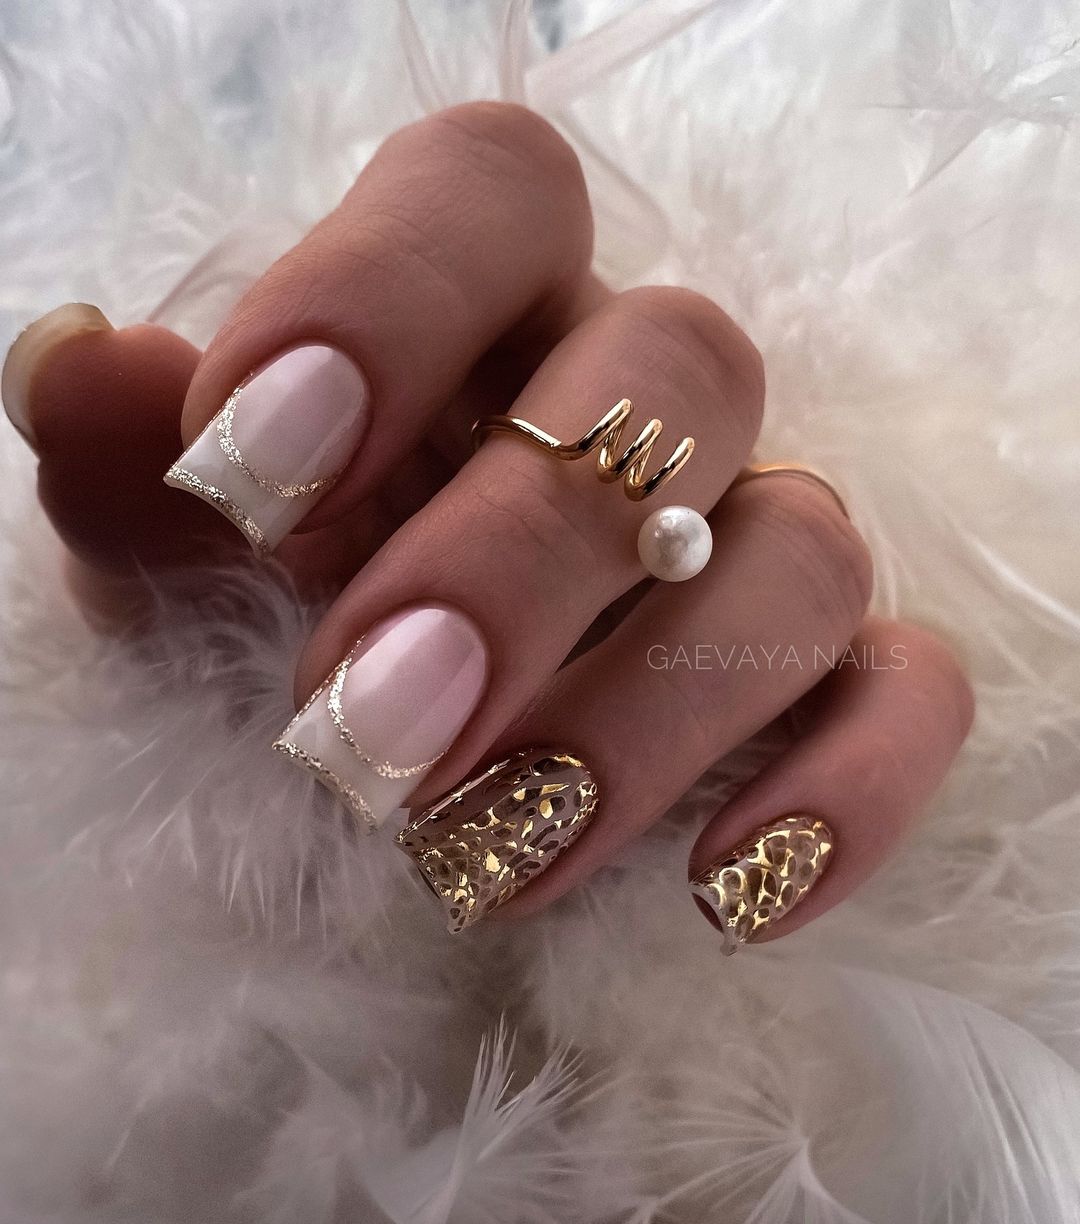
Golden Lace Luxury
This opulent design features intricate golden lace patterns on a nude base, combined with a striking gold accent nail. The delicate lace adds an air of sophistication, while the gold accent nail brings a touch of glamour. This look is perfect for special occasions or whenever you want to feel luxurious.
Consumables:
- Nude nail polish (Zoya “Chantal”)
- Gold nail polish (OPI “Glitzerland”)
- Gold lace nail stickers (Born Pretty Nail Stickers)
- Top coat (Glisten & Glow Top Coat)
At-Home Instructions:
- Start with a base coat to protect your nails.
- Apply the nude polish to all nails except the accent nail, which should be painted gold.
- Place the gold lace stickers on the nude nails once they are dry.
- Apply a top coat to seal the design and ensure a long-lasting finish.
Save Pin
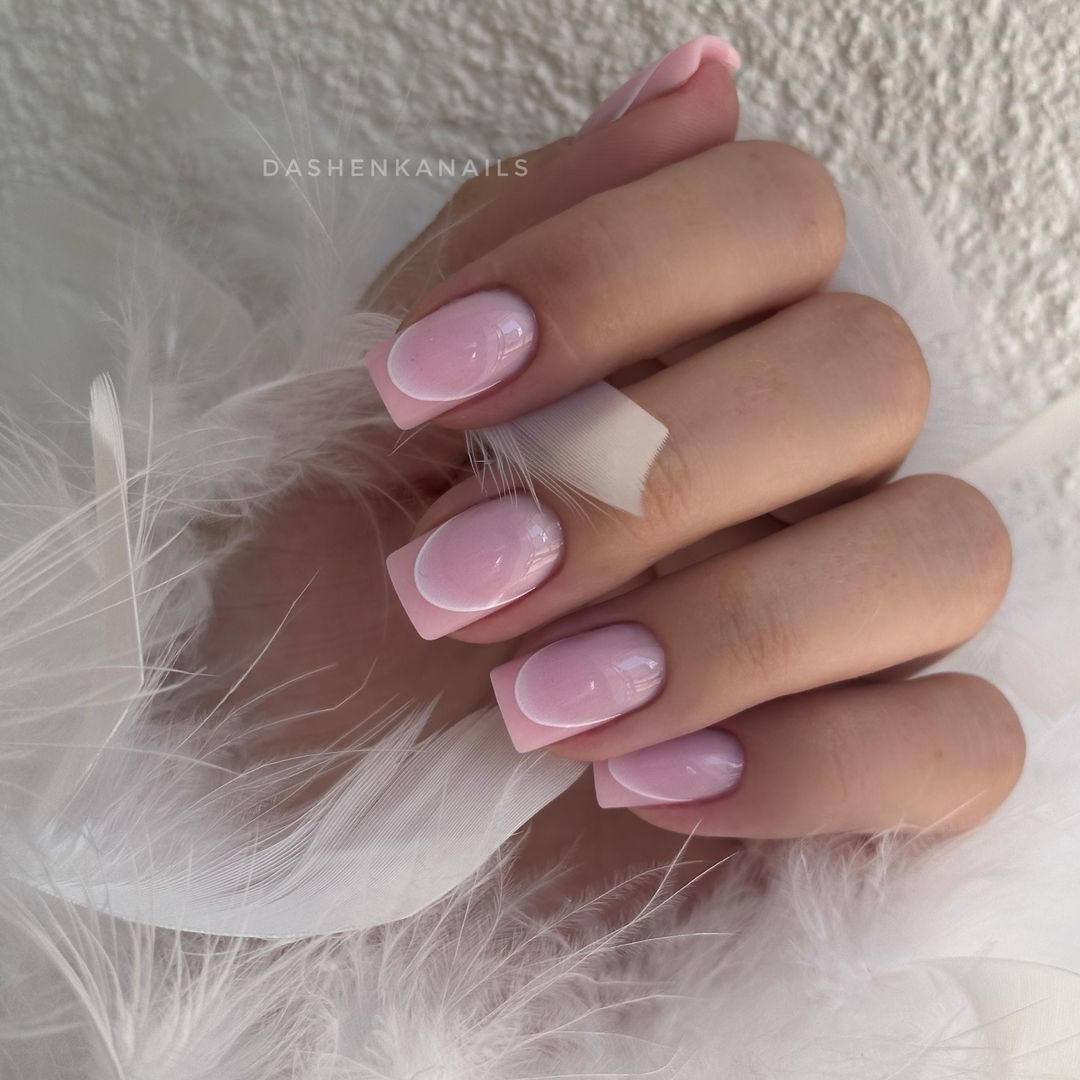
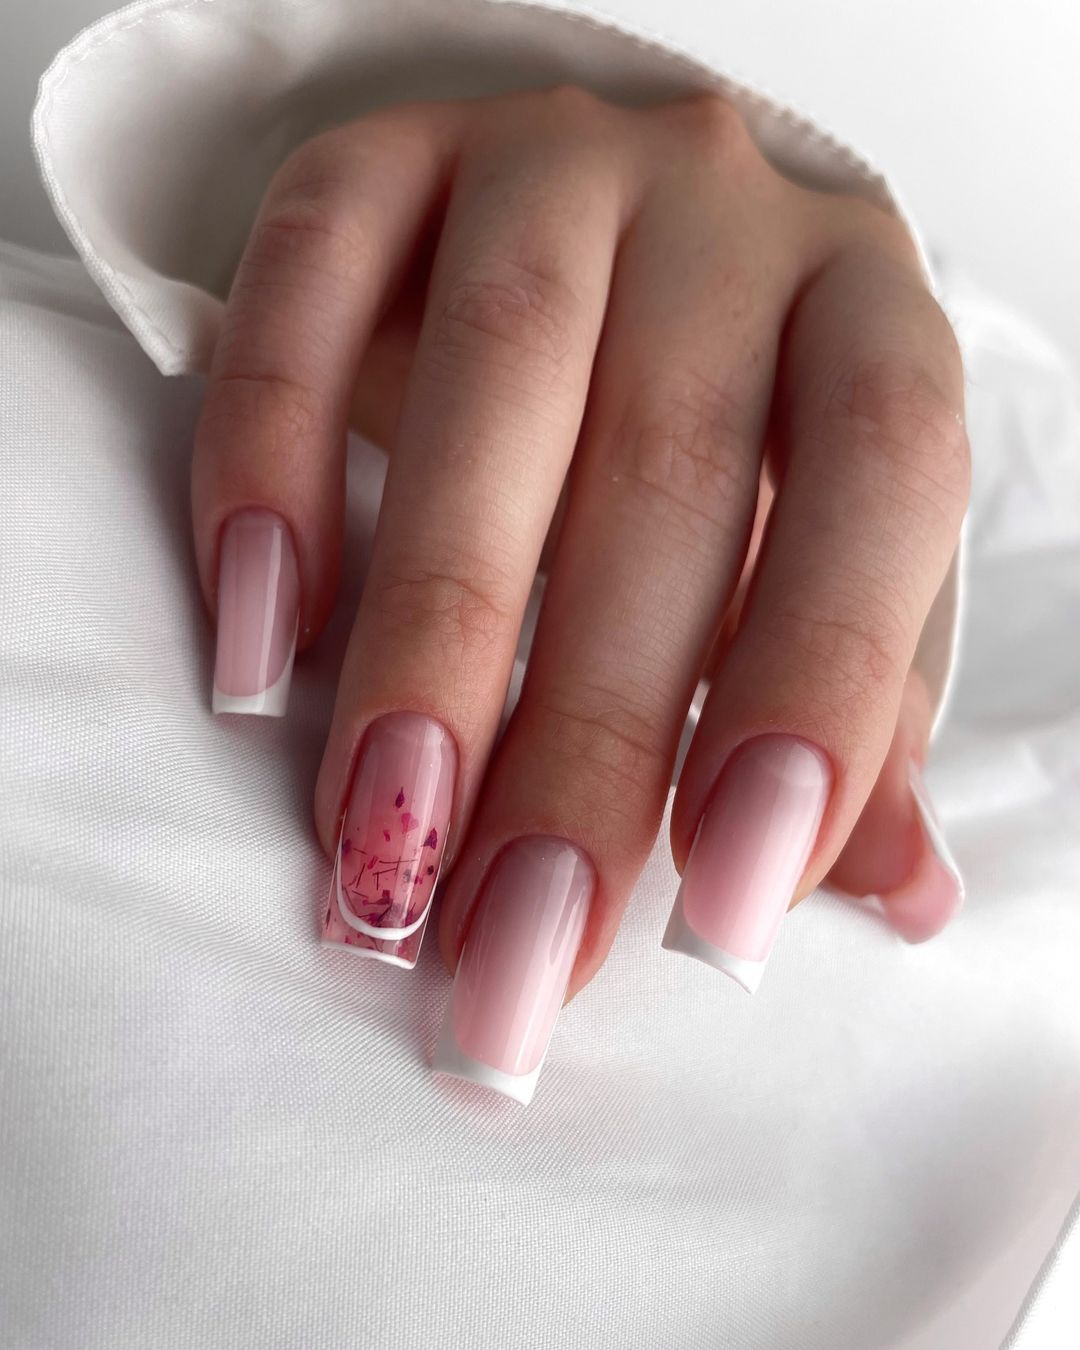
Pink Perfection
This delightful design features a soft pink base with a crisp white tip, offering a fresh take on the classic French manicure. The simplicity and elegance of this look make it perfect for everyday wear, adding a touch of class to your nails.
Consumables:
- Soft pink nail polish (Essie “Fiji”)
- White nail polish (OPI “Alpine Snow”)
- Top coat (Sally Hansen Miracle Gel Top Coat)
At-Home Instructions:
- Apply a base coat to protect your nails.
- Paint your nails with the soft pink polish and let it dry completely.
- Use the white polish to create a clean French tip.
- Finish with a top coat to add shine and extend the wear of your manicure.
Sky Blue Ombre
This mesmerizing design features a gradient from a soft pink base to a sky blue tip, creating a serene and beautiful look. The smooth transition between colors gives a dreamy effect, perfect for adding a pop of color to your fall nails.
Consumables:
- Soft pink nail polish (China Glaze “Go Go Pink”)
- Sky blue nail polish (Essie “Saltwater Happy”)
- Makeup sponge for blending
- Top coat (Glisten & Glow Top Coat)
At-Home Instructions:
- Apply a base coat to prepare your nails.
- Paint your nails with the soft pink polish and let them dry.
- Use a makeup sponge to dab the sky blue polish from the tips towards the middle, creating a gradient effect.
- Apply a top coat to smooth out the gradient and add shine.
Geometric Green
This bold design combines a solid green polish with geometric white patterns on the accent nails. The vibrant green is perfect for fall, and the geometric designs add a modern and edgy touch to the overall look.
Consumables:
- Green nail polish (OPI “I’m So Swamped!”)
- White nail polish (Sally Hansen “White On”)
- Nail art brush for geometric patterns
- Top coat (Essie Gel Couture Top Coat)
At-Home Instructions:
- Apply a base coat to protect your nails.
- Paint your nails with the green polish and let them dry.
- Use the white polish and a nail art brush to create geometric patterns on the accent nails.
- Finish with a top coat to secure the design and add a glossy finish.
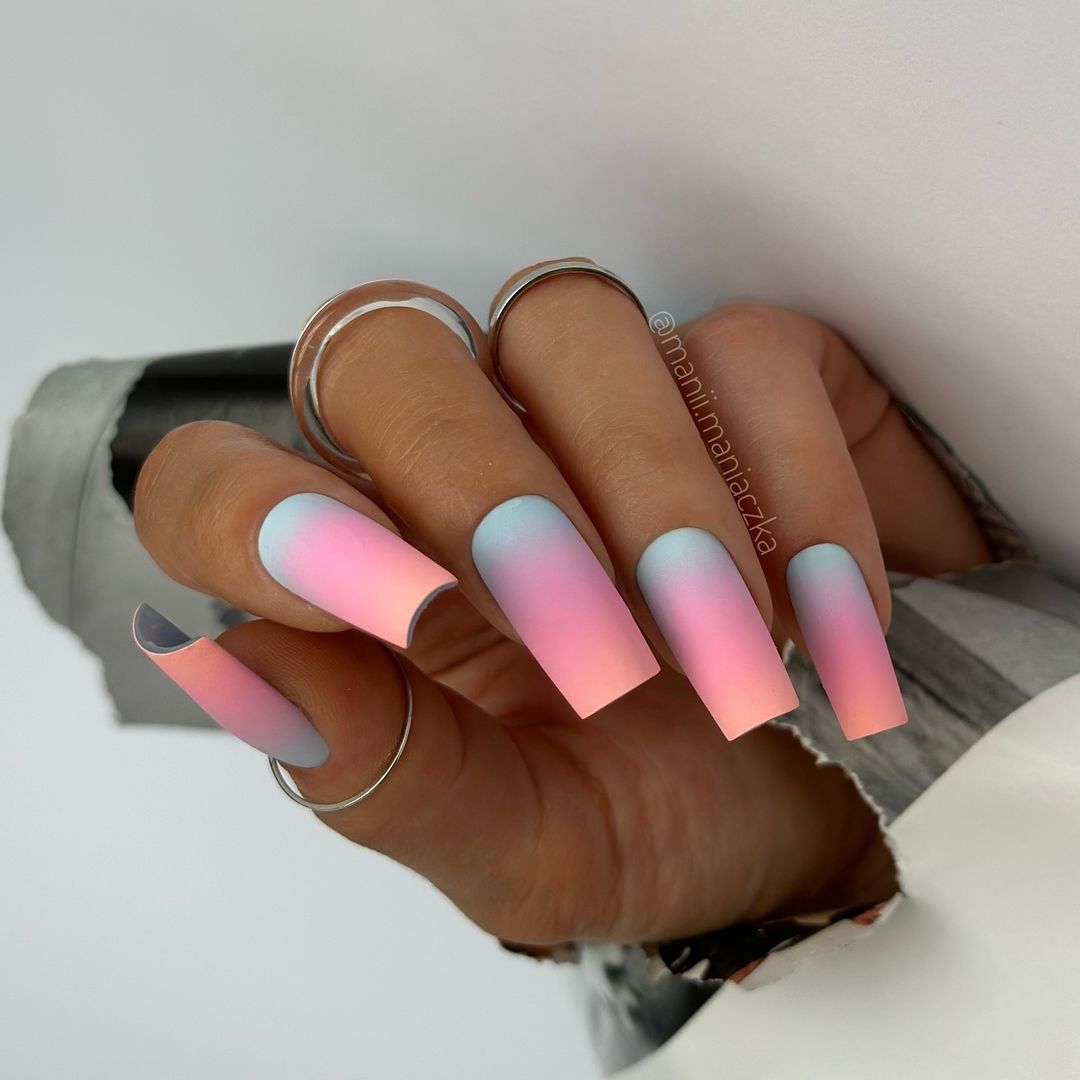
Pastel Sunset Ombre
This vibrant ombre design transitions from a soft pink to a serene blue, reminiscent of a pastel sunset. The smooth gradient creates a dreamy effect that’s perfect for adding a pop of color to your fall look. The matte finish adds a modern twist to this classic design, making it both trendy and eye-catching.
Consumables:
- Pink nail polish (China Glaze “Go Go Pink”)
- Blue nail polish (Essie “Saltwater Happy”)
- Makeup sponge for blending
- Matte top coat (OPI “Matte Top Coat”)
At-Home Instructions:
- Apply a base coat to prepare your nails.
- Paint your nails with the pink polish and let them dry.
- Use a makeup sponge to dab the blue polish from the tips towards the middle, creating a gradient effect.
- Apply a matte top coat to smooth out the gradient and add a trendy matte finish.
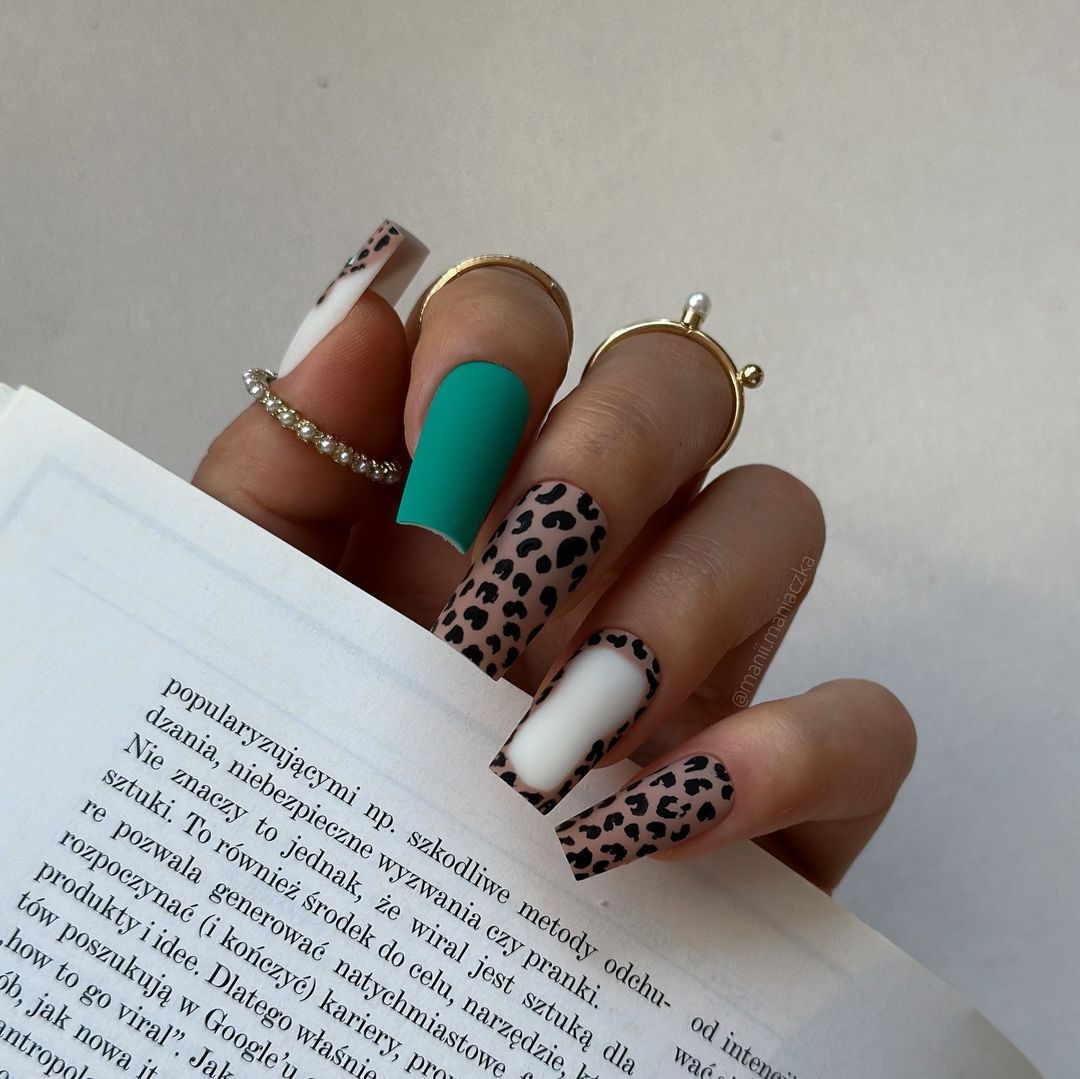
Leopard Print and Green Accent
This bold and playful design features a mix of leopard print and solid green accents. The combination of the neutral leopard print with the vibrant green creates a striking contrast that is sure to stand out. This design is perfect for those who love to experiment with patterns and colors.
Consumables:
- Nude nail polish (Zoya “Chantal”)
- Black nail polish (OPI “Black Onyx”)
- Green nail polish (OPI “I’m So Swamped!”)
- Nail art brush for leopard print
- Top coat (Seche Vite Dry Fast Top Coat)
At-Home Instructions:
- Apply a base coat to protect your nails.
- Paint two nails with the green polish and the rest with the nude polish.
- Use a nail art brush to create the leopard print with the black polish on the nude nails.
- Finish with a top coat to seal the design and add shine.
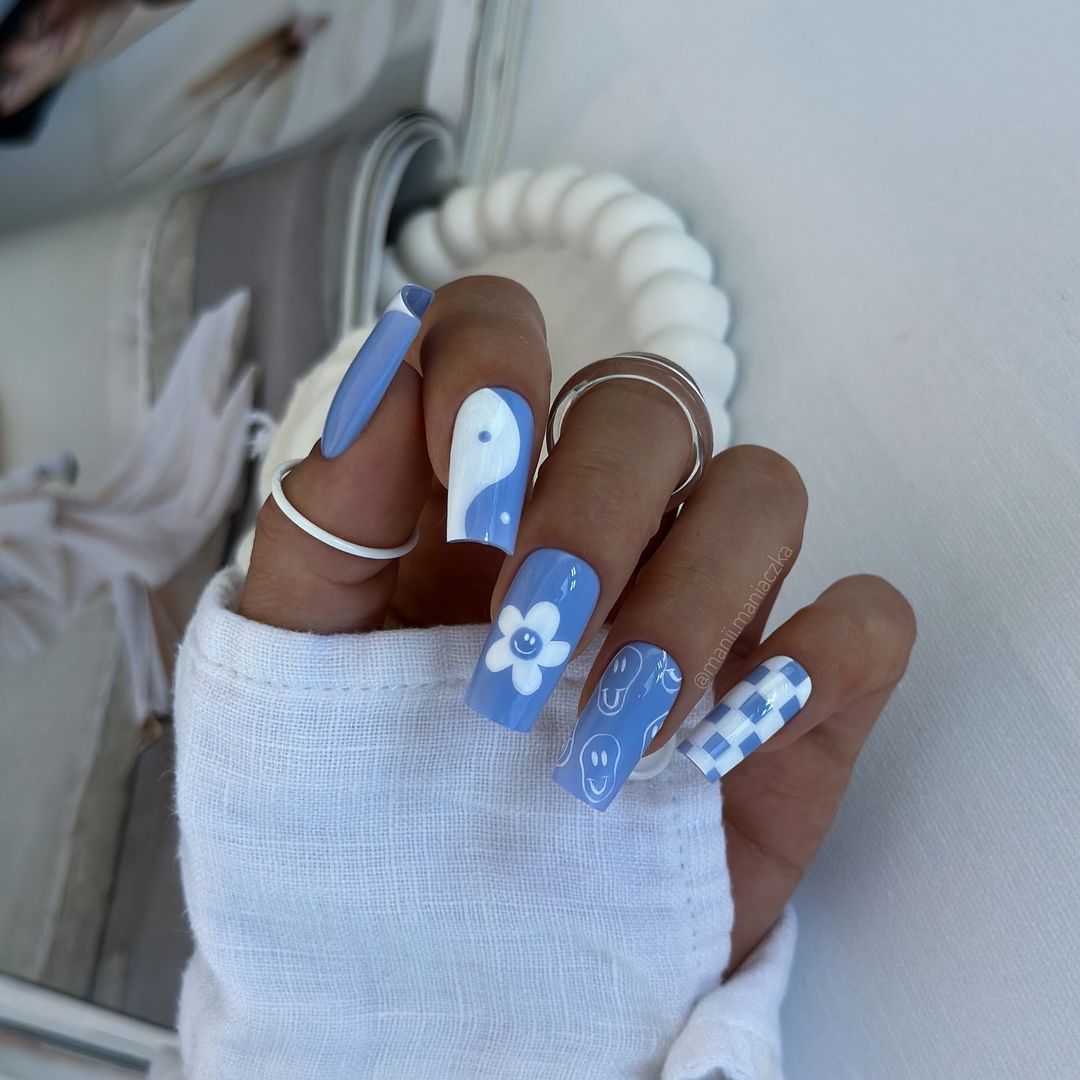
Blue and White Fun
This fun and whimsical design features a mix of blue and white elements, including smiley faces, flowers, and checkerboard patterns. The playful design is perfect for those who want to add a touch of fun to their fall nails.
Consumables:
- Blue nail polish (Essie “Bikini So Teeny”)
- White nail polish (OPI “Alpine Snow”)
- Nail art brush for patterns
- Top coat (Essie Gel Couture Top Coat)
At-Home Instructions:
- Apply a base coat to prepare your nails.
- Paint your nails with the blue polish and let them dry.
- Use the white polish and a nail art brush to create the various patterns on your nails.
- Finish with a top coat to secure the design and add a glossy finish.
Delicate Pink French
This elegant design features a soft pink base with a crisp white tip, offering a fresh take on the classic French manicure. The addition of delicate pink flower accents adds a unique and feminine touch to this timeless design.
Consumables:
- Soft pink nail polish (Essie “Fiji”)
- White nail polish (OPI “Alpine Snow”)
- Pink nail art stickers (Born Pretty Nail Stickers)
- Top coat (Sally Hansen Miracle Gel Top Coat)
At-Home Instructions:
- Apply a base coat to protect your nails.
- Paint your nails with the soft pink polish and let them dry completely.
- Use the white polish to create a clean French tip.
- Place the pink flower stickers on the accent nail.
- Finish with a top coat to add shine and extend the wear of your manicure.
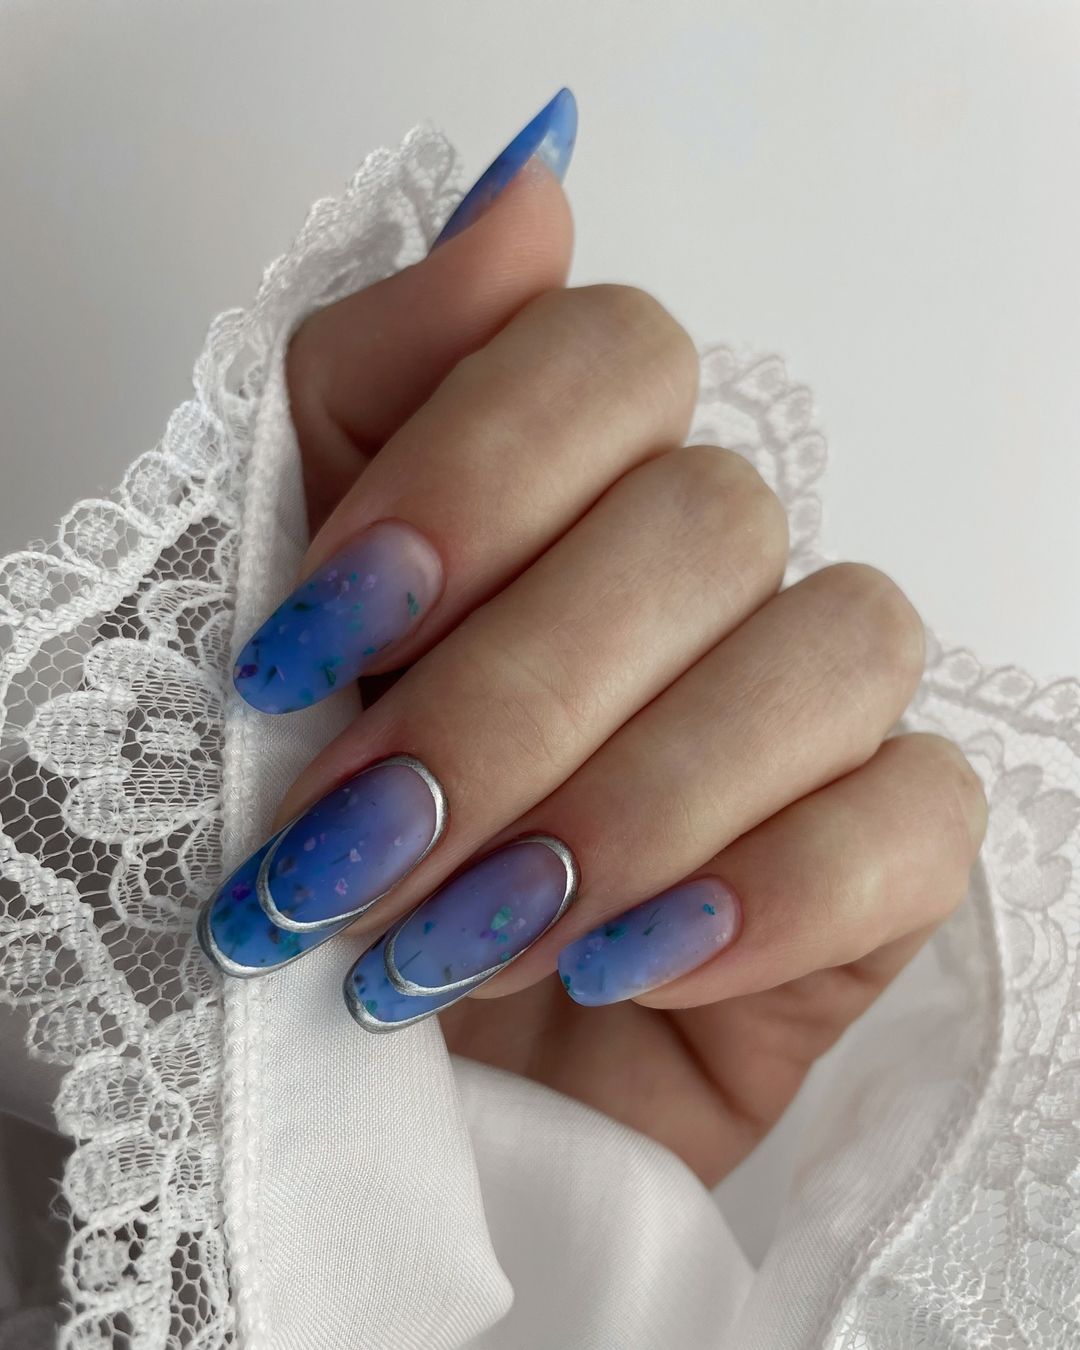
Blue Floral Magic
This enchanting design combines a soft blue base with delicate floral patterns. The gradient effect adds depth to the design, while the floral accents provide a whimsical and feminine touch. This look is perfect for those who want to embrace a romantic and dreamy aesthetic.
Consumables:
- Soft blue nail polish (China Glaze “Boho Blues”)
- White floral nail art stickers (KADS Nail Art Stickers)
- Makeup sponge for blending
- Top coat (Glisten & Glow Top Coat)
At-Home Instructions:
- Apply a base coat to prepare your nails.
- Paint your nails with the soft blue polish and let them dry.
- Use a makeup sponge to create a gradient effect with the blue polish.
- Apply the floral stickers to your nails.
- Finish with a top coat to secure the design and add a glossy finish.
Elegant White Marble
This chic design features a classic white base with subtle marble accents. The addition of delicate silver lines adds a touch of elegance and sophistication. This look is perfect for those who appreciate a minimalist yet luxurious design.
Consumables:
- White nail polish (OPI “Alpine Snow”)
- Silver nail art pen (Sally Hansen I Heart Nail Art Pen)
- Top coat (Essie Gel Couture Top Coat)
At-Home Instructions:
- Apply a base coat to protect your nails.
- Paint your nails with the white polish and let them dry thoroughly.
- Use the silver nail art pen to create marble-like lines on your nails.
- Finish with a top coat to secure the design and add a glossy finish.
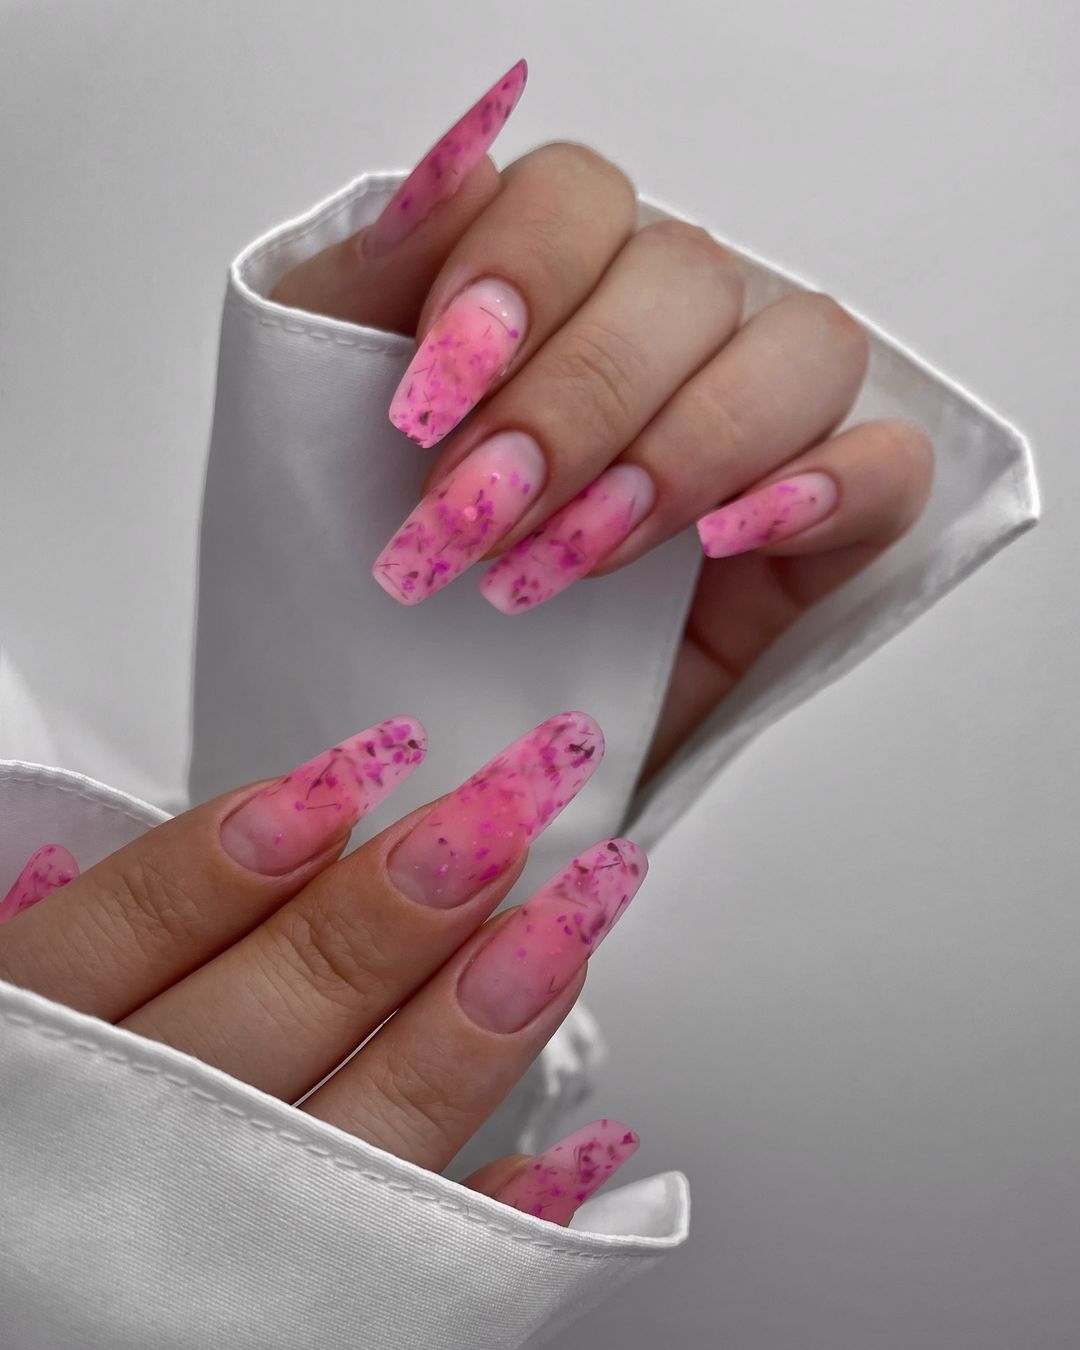
Pink Blossom
This vibrant design features a stunning blend of pink hues with delicate flower-like specks, creating a fresh and lively look. The semi-transparent base gives the design an ethereal feel, making it perfect for adding a touch of brightness to your fall ensemble.
Consumables:
- Pink nail polish (Essie “Fiji”)
- Flower nail art stickers (Born Pretty Flower Stickers)
- Top coat (OPI “Top Coat”)
At-Home Instructions:
- Apply a base coat to protect your nails.
- Paint your nails with the pink polish and let it dry completely.
- Apply the flower nail art stickers evenly across the nails.
- Seal the design with a top coat to ensure durability and shine.
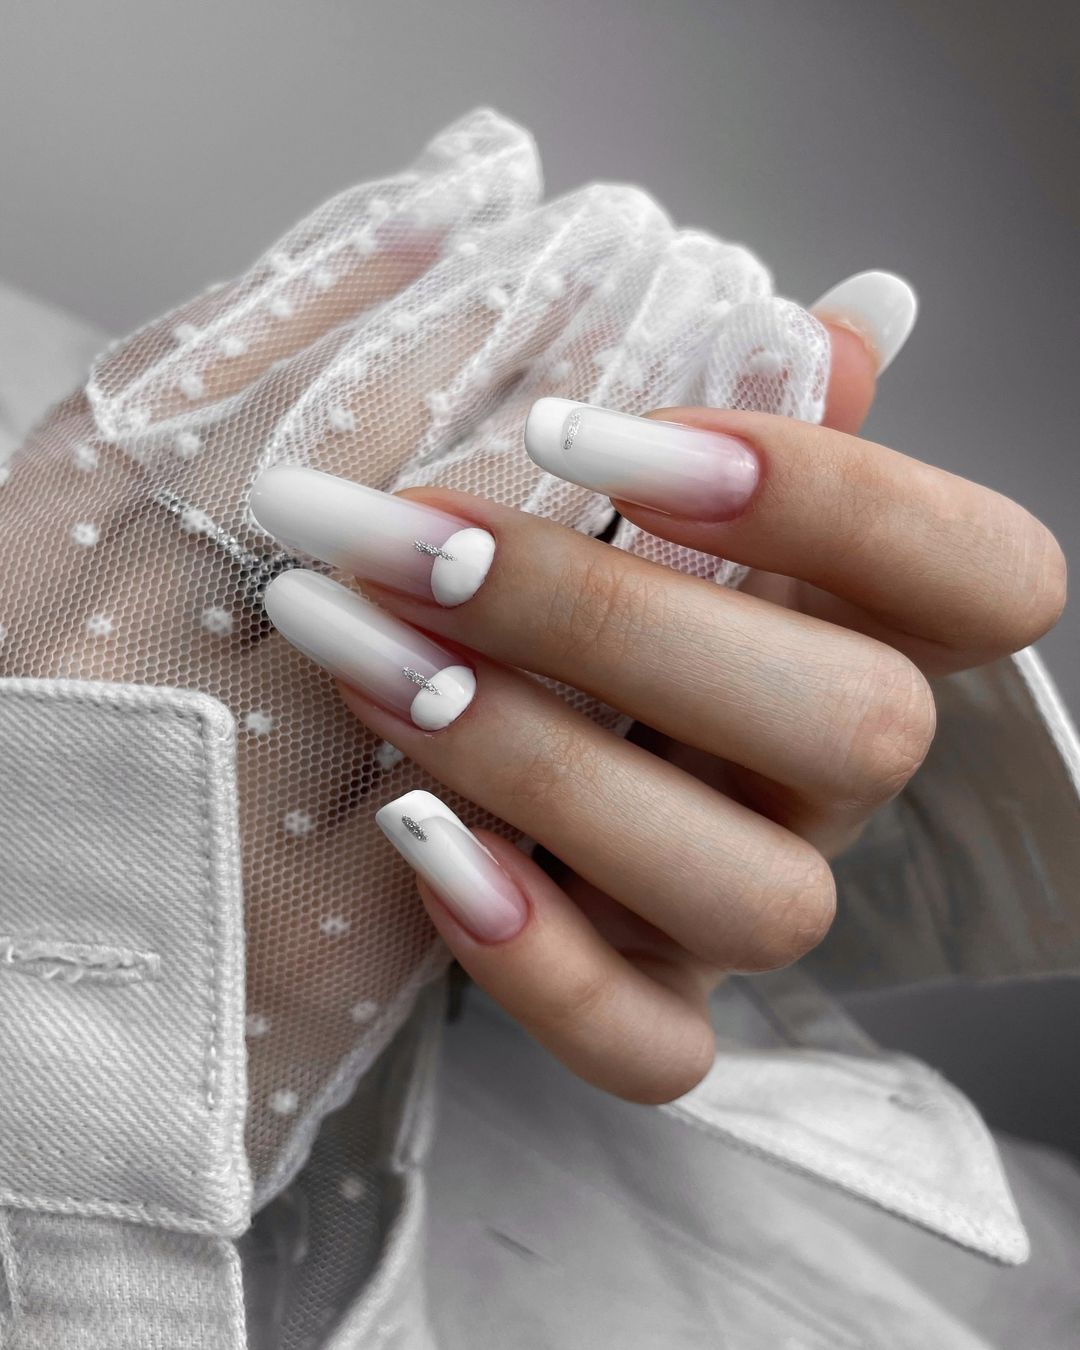
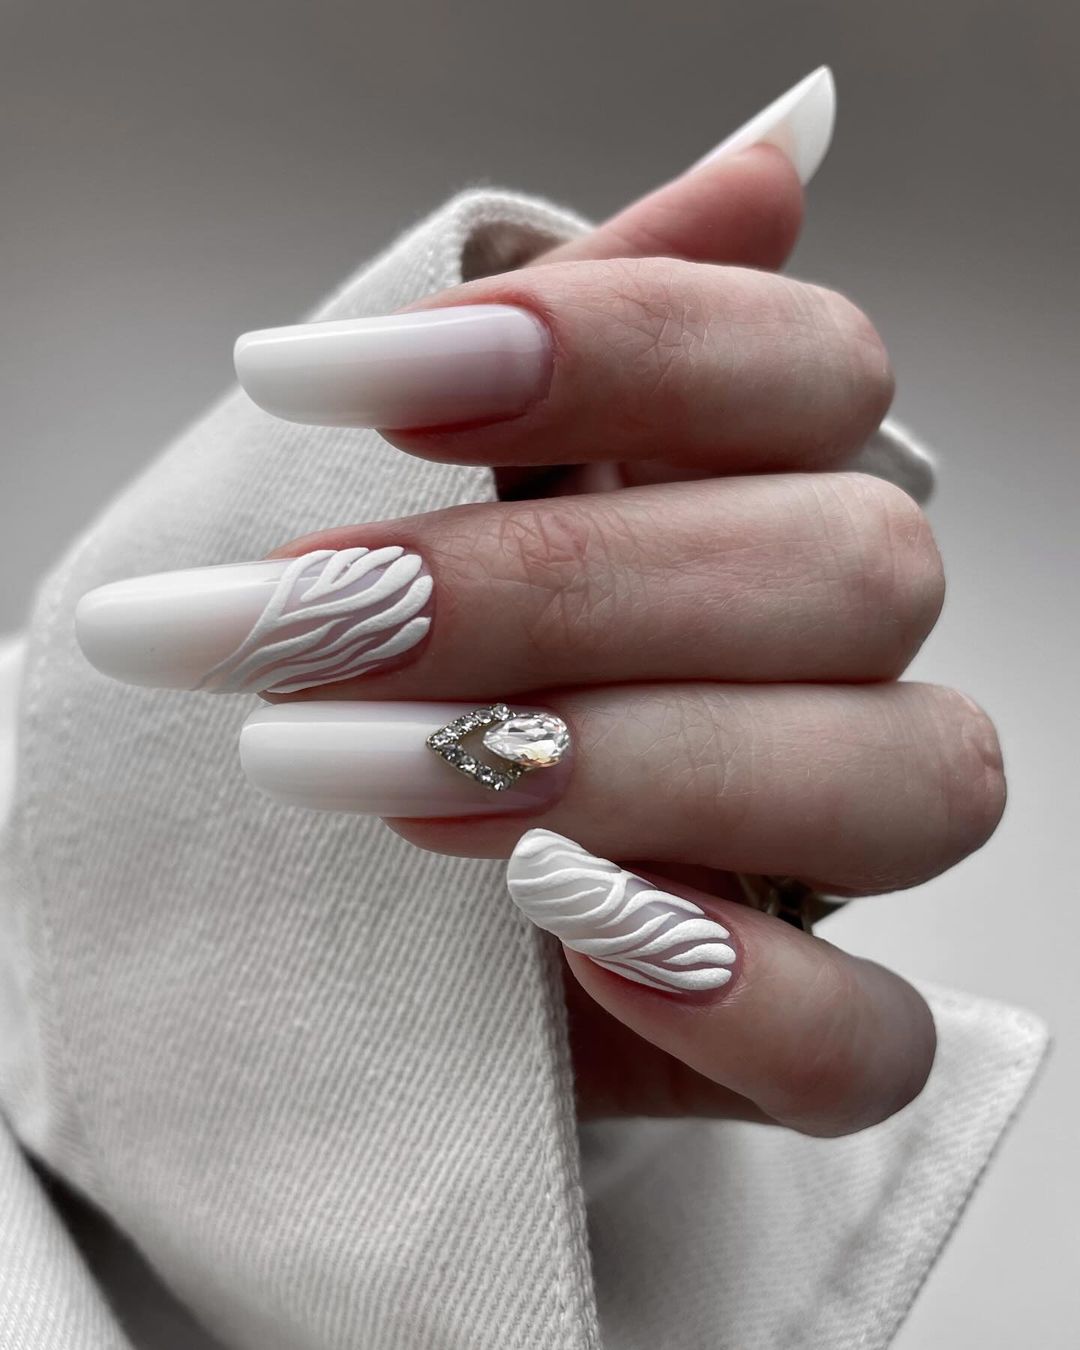
Elegant White Sculpted Design
This chic design features a pure white base with intricate sculpted patterns and a sparkling rhinestone accent. The raised patterns add a 3D effect, while the rhinestone adds a touch of glamour, making this look perfect for formal occasions or whenever you want to feel extra elegant.
Consumables:
- White nail polish (OPI “Alpine Snow”)
- White sculpting gel (Born Pretty 4D Gel)
- Rhinestones (Swarovski Flatback Crystals)
- Top coat (Seche Vite Dry Fast Top Coat)
At-Home Instructions:
- Apply a base coat to prepare your nails.
- Paint your nails with the white polish and let them dry thoroughly.
- Use the sculpting gel to create raised patterns on your nails.
- Place a rhinestone on the accent nail while the gel is still tacky.
- Finish with a top coat to secure the design and add a glossy finish.
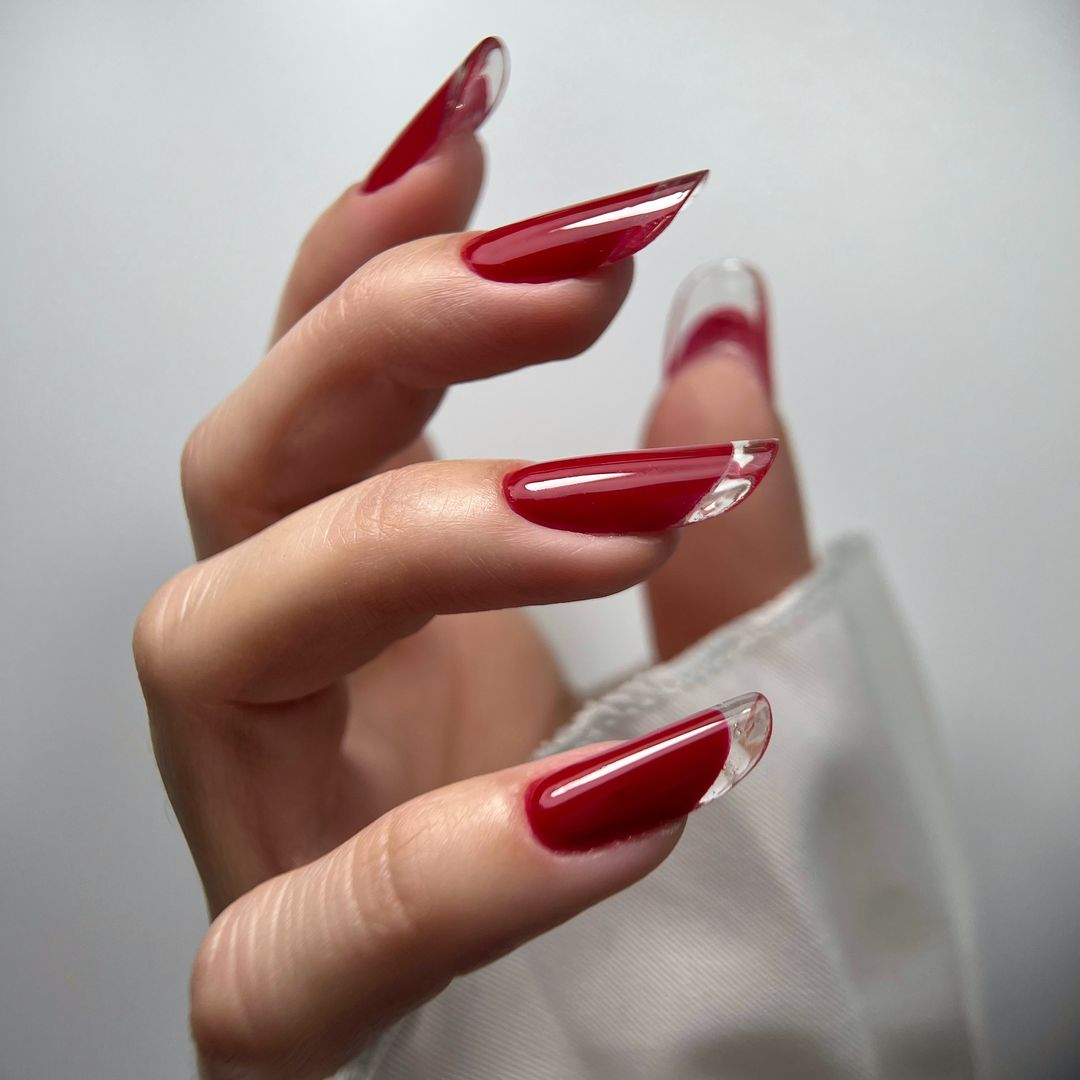
Red and Clear Stiletto
This bold and striking design features a deep red base with clear tips, creating a dramatic stiletto effect. The combination of the solid red and transparent tips gives a modern and edgy vibe, perfect for those who love to make a statement with their nails.
Consumables:
- Red nail polish (China Glaze “Seeing Red”)
- Clear nail tips (Kiss Clear Nail Tips)
- Top coat (Essie Gel Couture Top Coat)
At-Home Instructions:
- Apply a base coat to protect your nails.
- Attach the clear nail tips to your nails.
- Paint the base of your nails with the red polish, leaving the tips clear.
- Finish with a top coat to add shine and ensure the polish stays put.
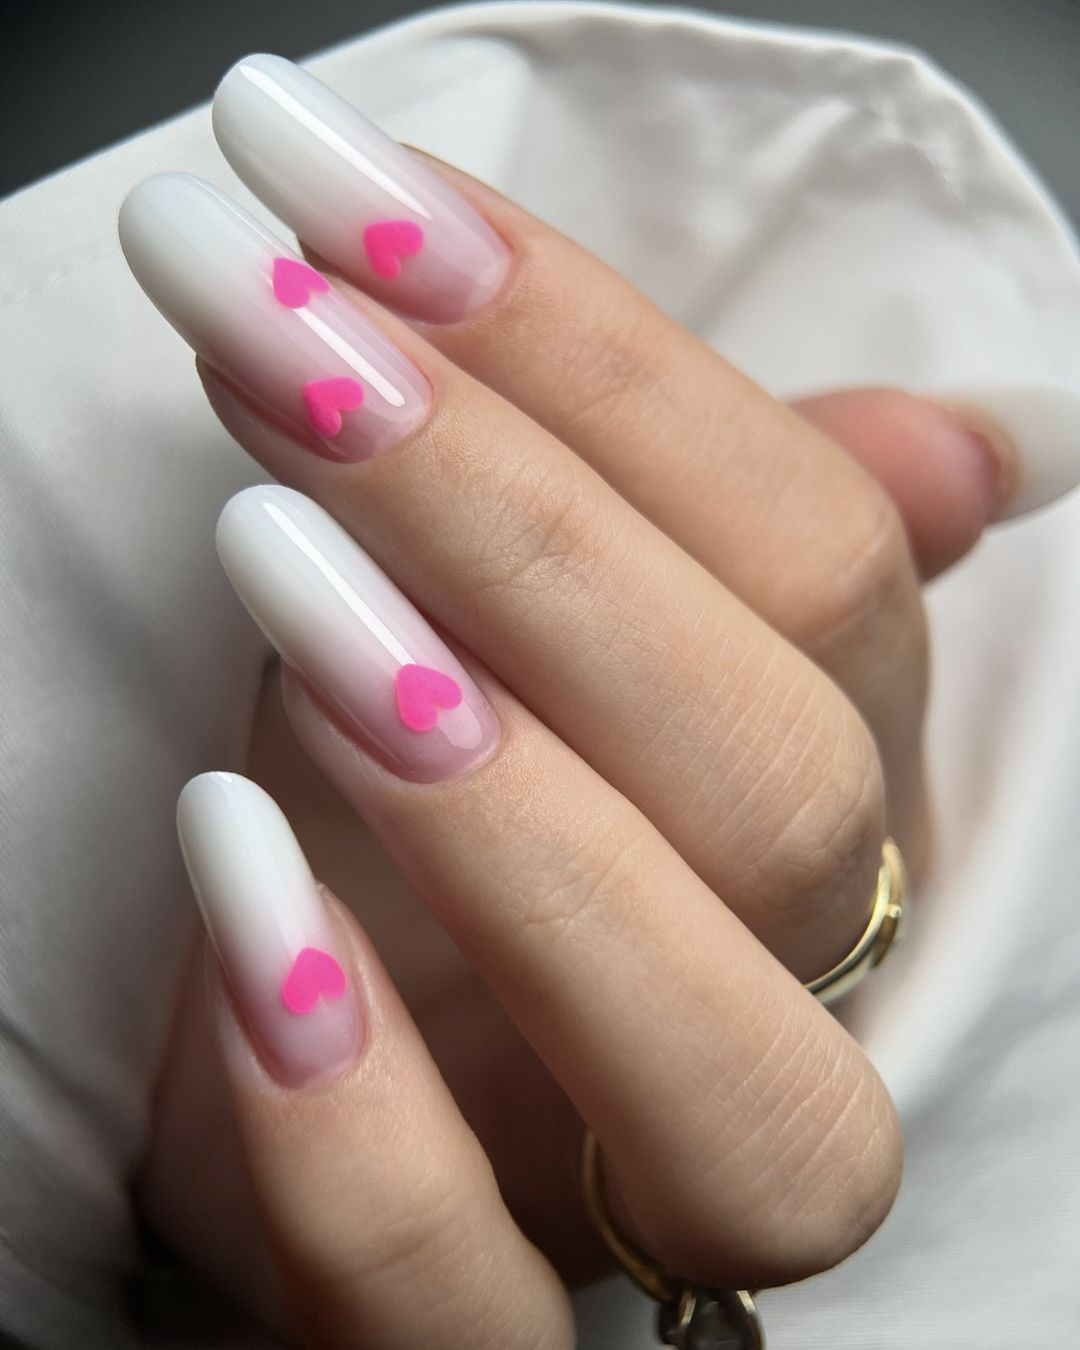
Heart Accents on White Ombre
This adorable design features a soft white ombre base with cute pink heart accents. The gradient effect gives a delicate and airy feel, while the heart accents add a playful and charming touch, perfect for a sweet and romantic look.
Consumables:
- White nail polish (OPI “Alpine Snow”)
- Pink heart nail stickers (Born Pretty Heart Stickers)
- Top coat (Sally Hansen Miracle Gel Top Coat)
At-Home Instructions:
- Apply a base coat to protect your nails.
- Create the ombre effect by blending the white polish with a makeup sponge.
- Place the pink heart stickers on your nails.
- Finish with a top coat to secure the design and add a glossy finish.
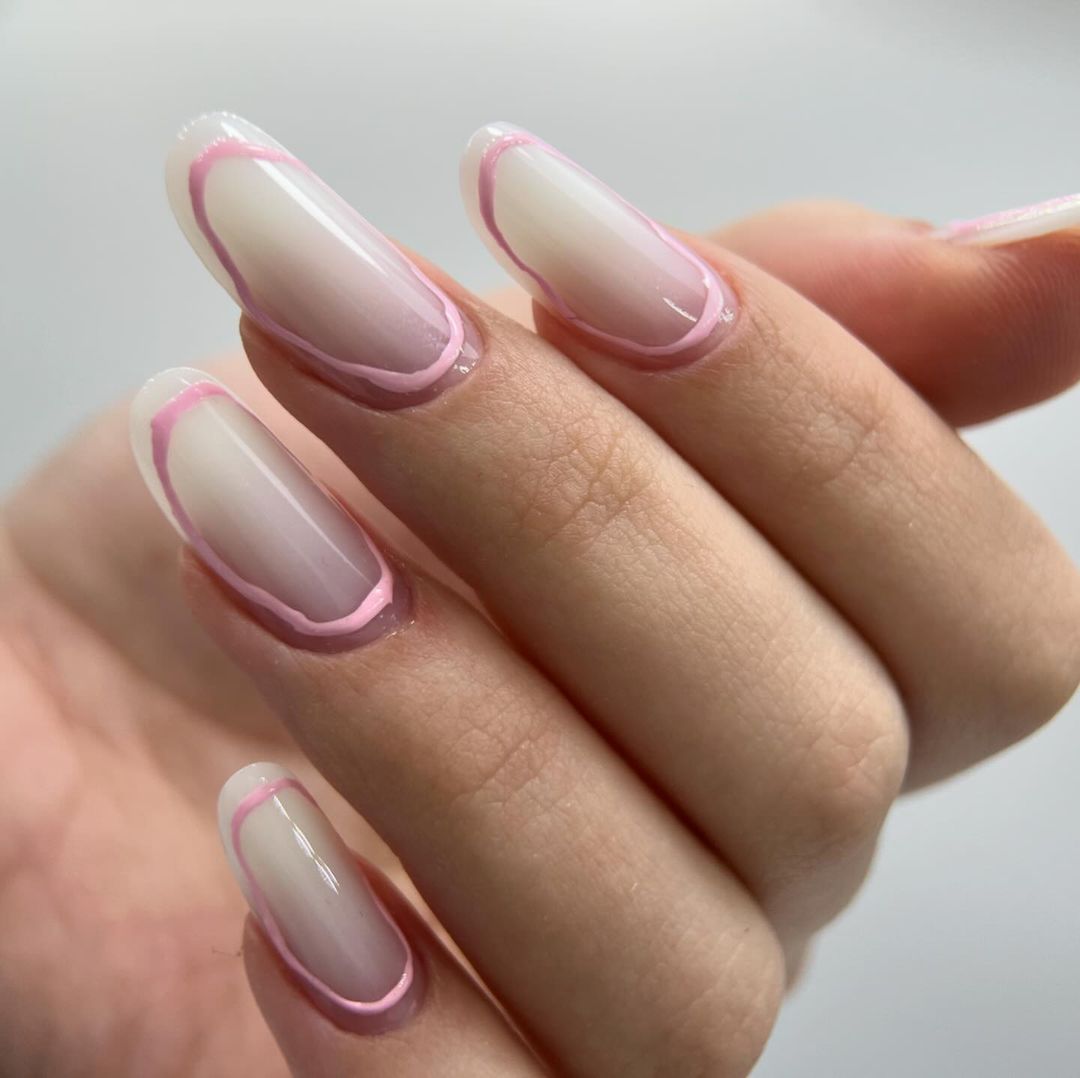
Pink Outline Elegance
This sophisticated design features a nude base with delicate pink outlines, creating a chic and minimalistic look. The clean lines and subtle color contrast make this design perfect for those who appreciate understated elegance.
Consumables:
- Nude nail polish (Zoya “Chantal”)
- Pink nail art pen (Sally Hansen I Heart Nail Art Pen)
- Top coat (Glisten & Glow Top Coat)
At-Home Instructions:
- Apply a base coat to protect your nails.
- Paint your nails with the nude polish and let them dry thoroughly.
- Use the pink nail art pen to draw thin outlines around your nails.
- Finish with a top coat to secure the design and add a glossy finish.
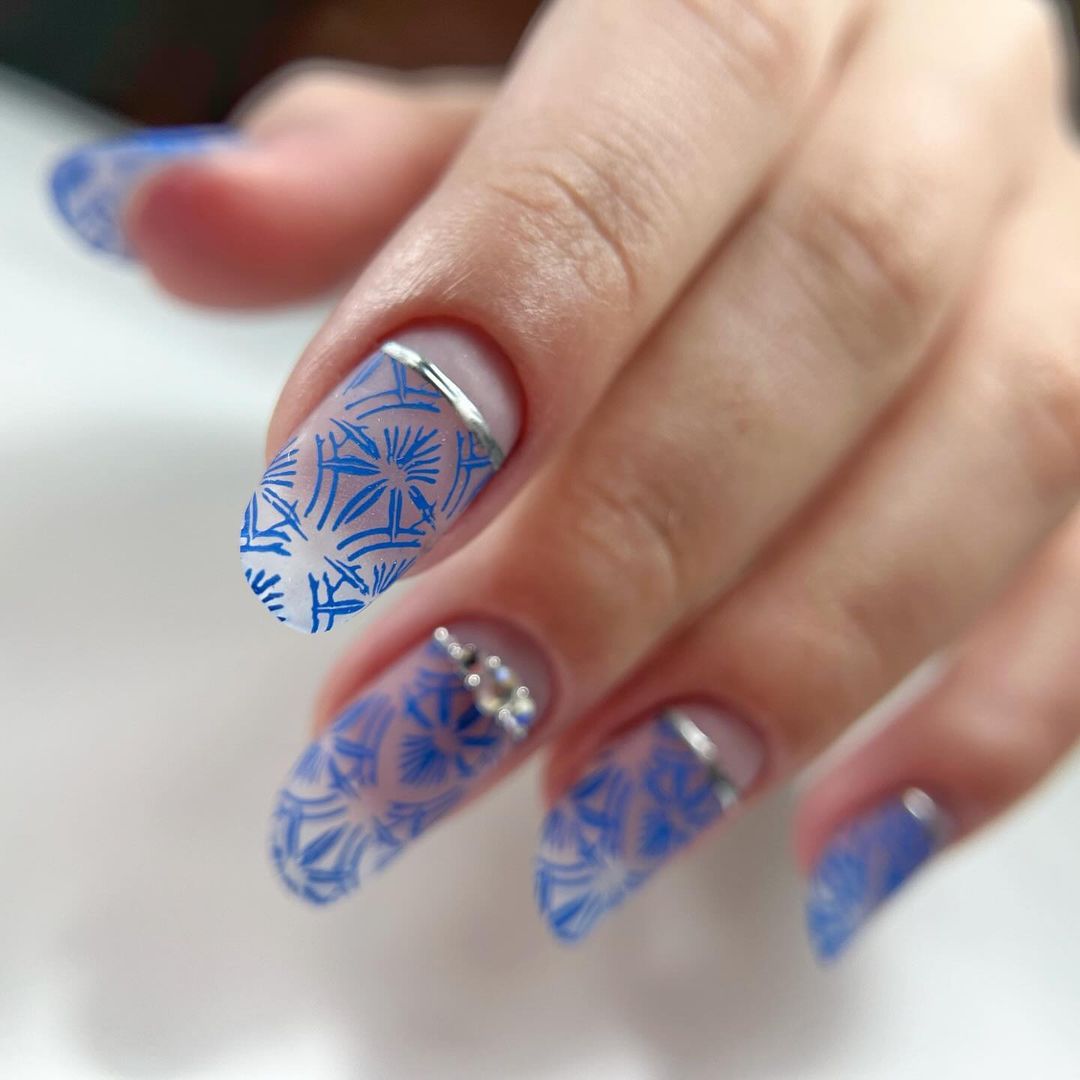
Blue Stamped Floral Design
This intricate design features a blue base with stamped floral patterns, accented with silver lines and tiny rhinestones. The detailed stamping adds a delicate and artistic touch, while the silver accents and rhinestones provide a bit of sparkle, perfect for adding a touch of elegance to your fall nails.
Consumables:
- Blue nail polish (China Glaze “Boho Blues”)
- Silver nail art pen (Sally Hansen I Heart Nail Art Pen)
- Rhinestones (KADS Nail Art Rhinestones)
- Stamping plate (Born Pretty Floral Stamping Plate)
- Top coat (Essie Gel Couture Top Coat)
At-Home Instructions:
- Apply a base coat to protect your nails.
- Paint your nails with the blue polish and let them dry thoroughly.
- Use the stamping plate and silver nail art pen to create floral patterns on your nails.
- Place the rhinestones on your nails while the polish is still tacky.
- Finish with a top coat to secure the design and add a glossy finish.
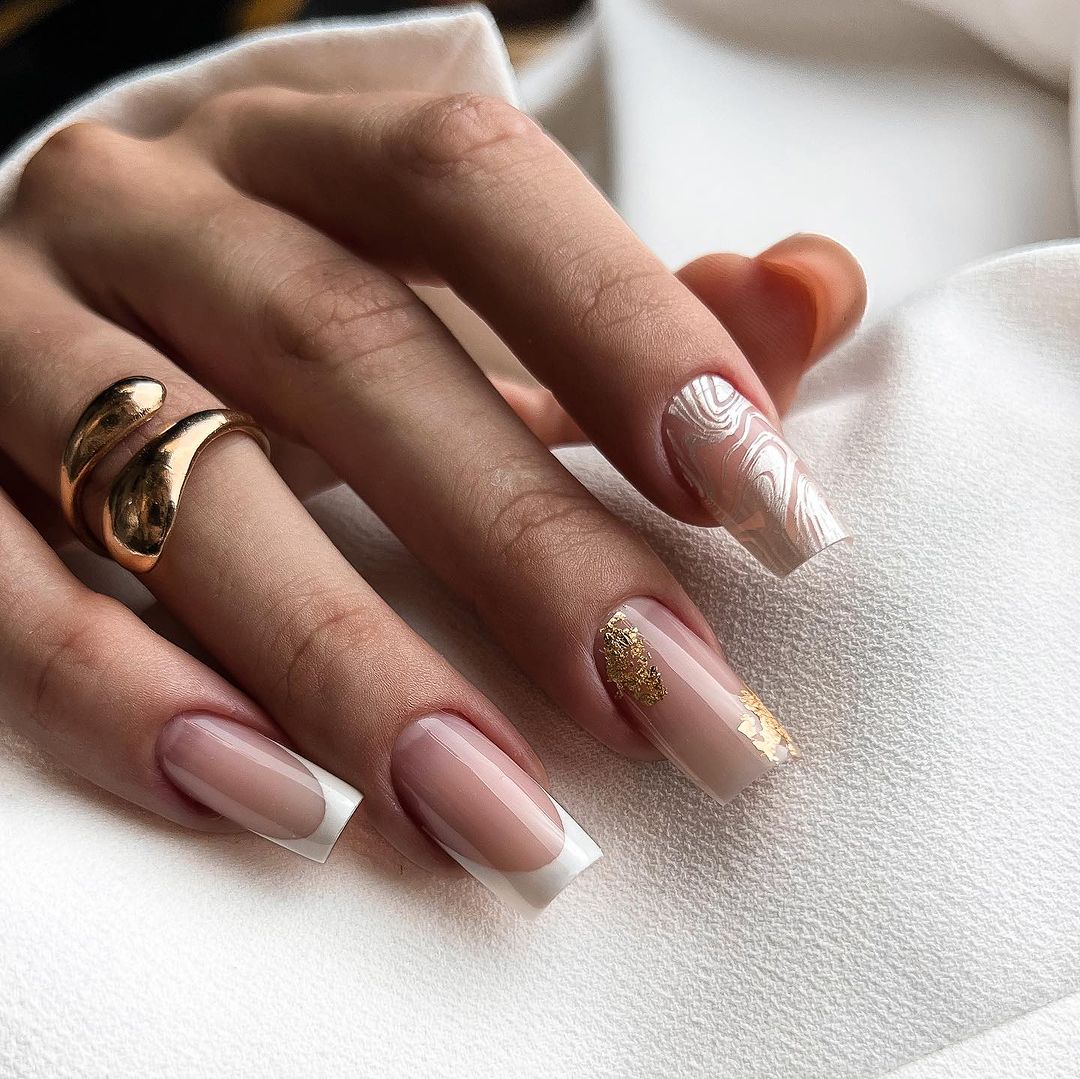
Marble and Gold Elegance
This sophisticated design combines a nude base with intricate white marble patterns and luxurious gold foil accents. The marble effect adds a touch of artistic flair, while the gold foil provides an element of opulence, creating a manicure that is both elegant and eye-catching.
Consumables:
- Nude nail polish (Zoya “Chantal”)
- White nail art pen (Sally Hansen I Heart Nail Art Pen)
- Gold foil flakes (Born Pretty Gold Foil)
- Top coat (Seche Vite Dry Fast Top Coat)
At-Home Instructions:
- Apply a base coat to protect your nails.
- Paint your nails with the nude polish and let them dry completely.
- Use the white nail art pen to create marble-like patterns on one or two accent nails.
- Apply gold foil flakes to a selected nail for a luxurious touch.
- Seal the design with a top coat to ensure durability and shine.
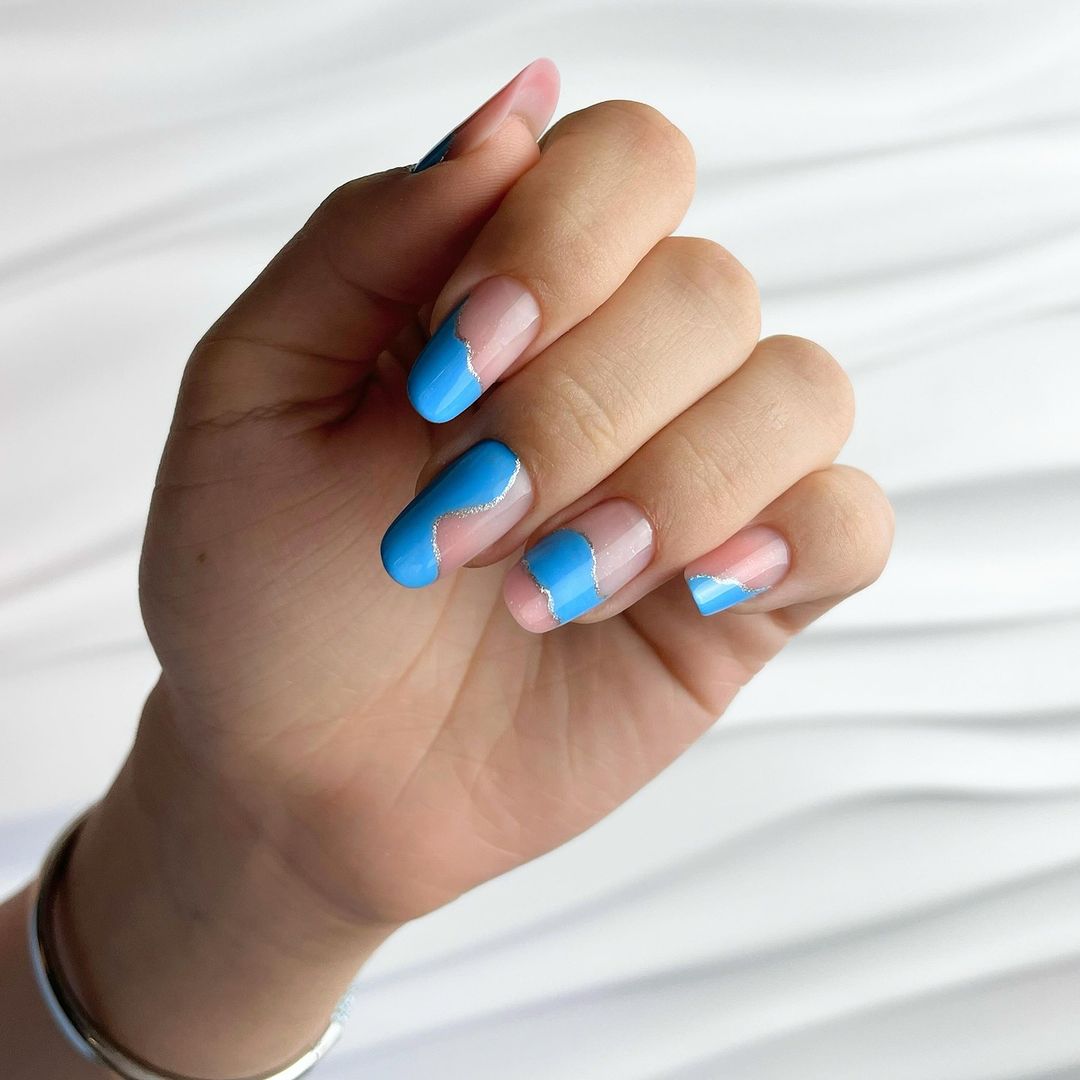
Blue Wave Delight
This playful design features a nude base with vibrant blue wave patterns, accented with a touch of silver glitter. The wavy lines add a dynamic and fun element to the manicure, making it perfect for those who love to experiment with bold colors and patterns.
Consumables:
- Nude nail polish (Essie “Spin the Bottle”)
- Blue nail polish (OPI “My Pal Joey”)
- Silver glitter nail art pen (KADS Nail Art Pen)
- Top coat (Essie Gel Couture Top Coat)
At-Home Instructions:
- Apply a base coat to protect your nails.
- Paint your nails with the nude polish and let them dry thoroughly.
- Use the blue polish to create wavy patterns on your nails.
- Add a touch of silver glitter along the edges of the waves for extra sparkle.
- Finish with a top coat to secure the design and add a glossy finish.
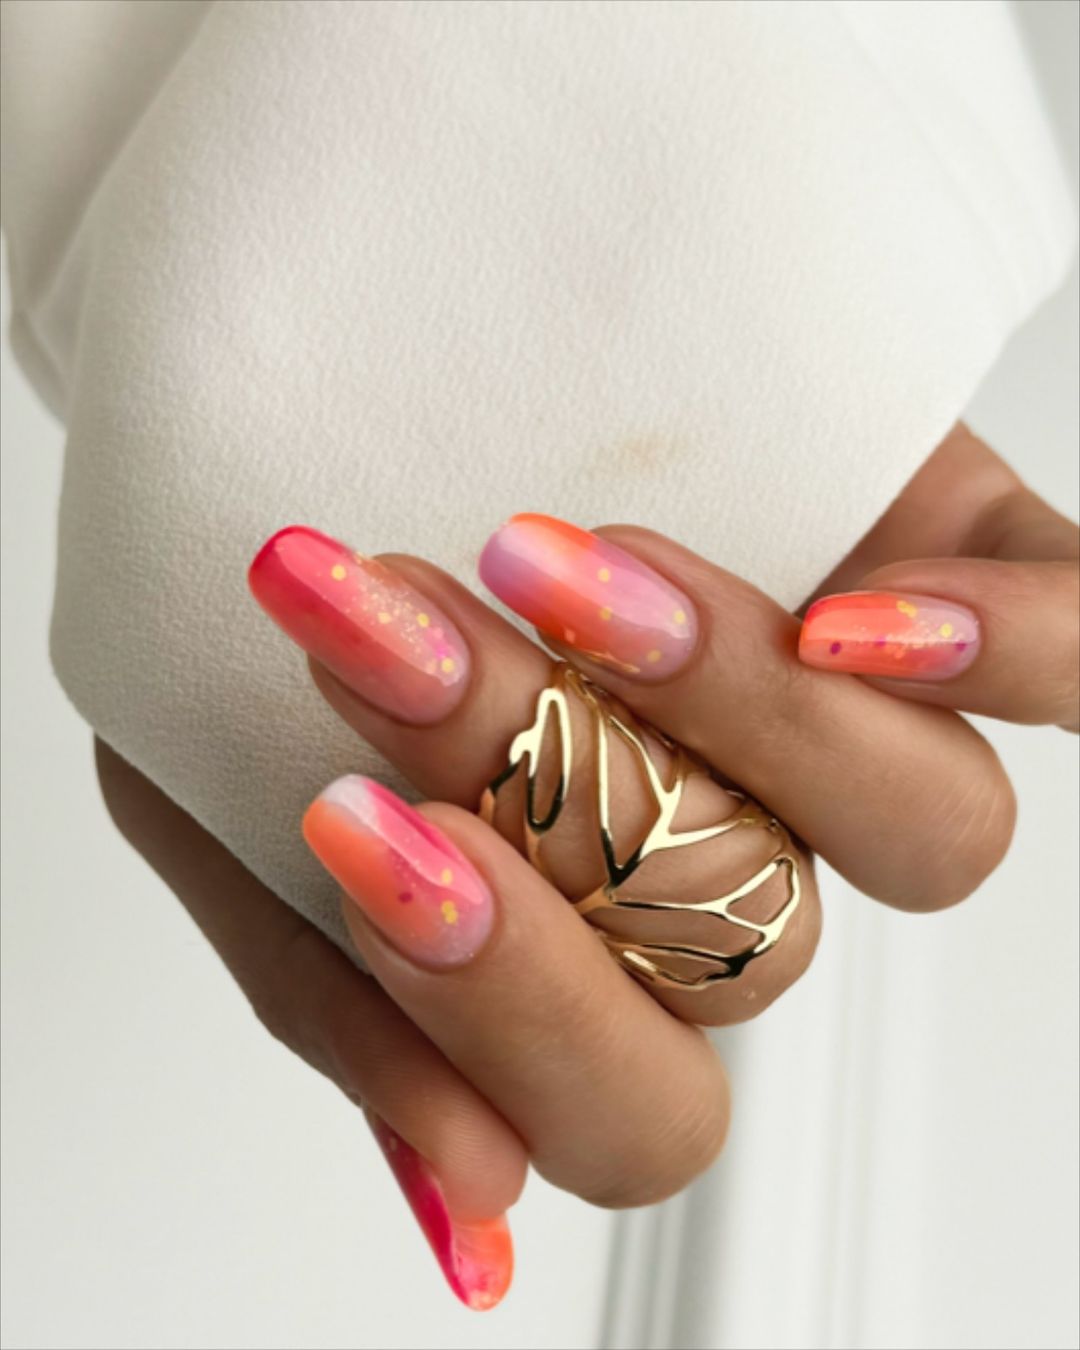
Sunset Ombre
This vibrant design transitions from a soft pink to a bright orange, reminiscent of a beautiful sunset. The smooth gradient and subtle glitter accents create a stunning and eye-catching look, perfect for adding a pop of color to your fall nails.
Consumables:
- Pink nail polish (China Glaze “Go Go Pink”)
- Orange nail polish (Essie “Tart Deco”)
- Gold glitter polish (Sally Hansen “Golden-I”)
- Makeup sponge for blending
- Top coat (Glisten & Glow Top Coat)
At-Home Instructions:
- Apply a base coat to protect your nails.
- Paint your nails with the pink polish and let them dry.
- Use a makeup sponge to blend the orange polish from the tips towards the middle, creating a gradient effect.
- Add a layer of gold glitter for extra sparkle.
- Apply a top coat to smooth out the gradient and add shine.
FAQ
Q: How can I make my nail designs last longer? A: To extend the life of your manicure, always use a high-quality base coat and top coat. Avoid exposing your nails to water and harsh chemicals, and wear gloves when doing household chores.
Q: What is the best way to remove nail designs without damaging my nails? A: Use a gentle nail polish remover and cotton pads. Soak the pads in remover, place them on your nails, and wrap each nail with aluminum foil for 10-15 minutes. This will soften the polish, making it easier to remove without scraping.
Q: Can I achieve these designs with short nails? A: Absolutely! These designs can be adapted for short nails by adjusting the gradient lengths and using smaller accents. The key is to maintain precision and use high-quality products.
Q: How do I apply nail studs and foil flakes without making a mess? A: Use a small, precise tool like a toothpick or a dotting tool to place the studs and foil flakes. Apply them while the polish is still tacky so they adhere better, and finish with a top coat to secure them in place.
Q: What are the trending nail shapes for fall 2024? A: This fall, popular nail shapes include almond, stiletto, and coffin. Each shape offers a unique look that can enhance the overall aesthetic of your nail art.
Save Pin