27 Ideas for Yellow Fall Nails 2024
Are you ready to embrace the vibrant hues of fall with a splash of yellow on your nails? From mustard to pale shades, yellow fall nails are set to be a major trend in 2024. In this article, we’ll explore various yellow fall nail designs that are perfect for the season. We’ll provide detailed descriptions, a list of necessary consumables, and practical tips for creating these stunning looks at home. Let’s dive into the world of yellow nails and discover how you can make your manicure stand out this autumn!
Subtle Yellow French Tips
Yellow French tips are a chic way to add a touch of color to your nails without going overboard. This design features a pale yellow tip on a natural or clear base, creating a soft and elegant look. The contrast between the natural nail and the yellow tip makes this design versatile and suitable for both casual and formal occasions. The yellow fall nails 2024 trend is all about subtle sophistication, and these French tips perfectly capture that essence.

- Pale yellow nail polish (e.g., OPI “Sun, Sea, and Sand in My Pants”)
- Clear base coat (e.g., Essie “All In One Base”)
- Top coat (e.g., Seche Vite “Dry Fast Top Coat”)
- Nail art brush or tape for precise tips
Practical Advice
- Start with clean, filed nails and apply a clear base coat.
- Using nail art tape or a steady hand, paint the tips of your nails with the pale yellow polish.
- Allow the tips to dry completely before applying a top coat to seal and protect the design.
- For an extra touch, you can add a thin line of gold polish below the yellow tip for added elegance.
Solid Butter Yellow Nails
Solid butter yellow nails are a bold and trendy choice for fall. This light and creamy shade of yellow is perfect for making a statement. The smooth, glossy finish of this design enhances the vibrant color, making your nails look fresh and polished. This color works well on both short and long nails, providing a cheerful and bright accent to your autumn wardrobe.

- Butter yellow nail polish (e.g., Zoya “Bee”)
- Clear base coat (e.g., Orly “Bonder Base Coat”)
- Top coat (e.g., Sally Hansen “Insta-Dri Top Coat”)
Practical Advice
- Begin with clean nails and apply a clear base coat to prevent staining and extend wear time.
- Apply two coats of butter yellow polish, allowing each coat to dry fully between applications.
- Finish with a top coat to ensure a glossy and long-lasting finish.
- To add a personal touch, consider adding small gold or black and white polka dots using a dotting tool or toothpick.
Yellow Leopard Print Nails
Leopard print nails are a trendy way to incorporate yellow into your fall nail designs. This look combines a burnt yellow base with black and white leopard spots, creating a fun and fierce manicure. The detailed art on these nails adds a playful yet sophisticated touch, making them perfect for those who love to experiment with bold patterns and colors.

- Burnt yellow nail polish (e.g., China Glaze “Mustard the Courage”)
- Black nail polish (e.g., Essie “Licorice”)
- White nail polish (e.g., OPI “Alpine Snow”)
- Thin nail art brush or dotting tool
- Clear base coat (e.g., Deborah Lippmann “Hard Rock Base and Top Coat”)
- Top coat (e.g., CND “Vinylux Weekly Top Coat”)
Practical Advice
- Prep your nails with a clear base coat and let it dry.
- Apply two coats of burnt yellow polish for a solid base color.
- Using a thin brush or dotting tool, create irregular black spots on your nails. Add smaller white spots within or around the black spots to mimic the leopard pattern.
- Seal your design with a top coat to protect your art and add shine.
- Practice the leopard spots on a piece of paper before applying them to your nails to perfect your technique.
Dazzling Yellow Starry French Tips
These yellow starry French tips are a stellar example of how to blend classic elegance with a touch of whimsy. The design features a golden yellow tip that transitions smoothly into a clear base adorned with delicate star-shaped decals. This art exudes a chic yet playful vibe, perfect for those who want their nails to reflect their sparkling personality. The transparent base allows the yellow tips to shine brightly, making the color pop even more.

- Golden yellow nail polish (e.g., Sally Hansen “Mellow Yellow”)
- Clear base coat (e.g., Essie “Clear As Day”)
- Star-shaped nail decals (e.g., Born Pretty Store Star Nail Stickers)
- Clear top coat (e.g., Seche Vite “Dry Fast Top Coat”)
Practical Advice
- Start with clean, filed nails and apply a clear base coat to protect your natural nails.
- Use a fine nail art brush or nail art tape to create the golden yellow tips. Allow them to dry completely.
- Apply the star-shaped decals on the clear base part of your nails, pressing gently to ensure they stick.
- Seal the entire design with a clear top coat to add shine and longevity to your manicure.
Save Pin

Butter Yellow Almond Nails
The butter yellow almond nails are the epitome of understated elegance. This pale yellow shade provides a soft, creamy finish that is both sophisticated and subtle. The almond shape enhances the trendy and modern feel of the manicure, making it suitable for any occasion. The smooth, glossy finish of the polish adds a touch of luxury, making these nails look effortlessly chic and refined.

- Butter yellow nail polish (e.g., Zoya “Bee”)
- Clear base coat (e.g., Orly “Bonder Base Coat”)
- Top coat (e.g., Sally Hansen “Insta-Dri Top Coat”)
Practical Advice
- Begin with clean, filed nails and apply a clear base coat to prevent staining and ensure a smooth application.
- Apply two thin coats of butter yellow polish, allowing each coat to dry completely before applying the next.
- Finish with a top coat to seal the color and add a high-gloss finish. This will also help to prolong the life of your manicure.
- For added durability, reapply the top coat every few days.
Ombre Yellow Tips
The ombre yellow tips are a stylish and modern take on the classic French manicure. This design features a gradual fade from a natural nail base to a bright yellow tip, creating a stunning gradient effect. The subtle transition of color adds depth and dimension to the nails, making them appear longer and more elegant. This look is perfect for those who want to incorporate yellow fall nails 2024 trends in a sophisticated manner.

- Yellow nail polish (e.g., China Glaze “Sun-Kissed”)
- Clear base coat (e.g., Deborah Lippmann “Hard Rock Base and Top Coat”)
- Makeup sponge for blending
- Top coat (e.g., CND “Vinylux Weekly Top Coat”)
Practical Advice
- Start with clean nails and apply a clear base coat.
- Paint a stripe of yellow polish and a stripe of clear polish onto a makeup sponge.
- Dab the sponge onto the tips of your nails, creating a gradient effect by blending the yellow into the natural nail.
- Repeat the sponging process until the desired opacity is achieved, then allow it to dry.
- Finish with a top coat to smooth out the gradient and add shine, ensuring your ombre tips stay intact.
Yellow and White Swirl Nails
Yellow and white swirl nails bring a dynamic and lively touch to any fall look. The vibrant yellow blends seamlessly with the crisp white swirls, creating a playful and eye-catching design. This manicure is ideal for those who love a bit of artistic flair on their nails. The swirls add movement and dimension, making the nails appear longer and more elegant.

- Yellow nail polish (e.g., Essie “Hay There”)
- White nail polish (e.g., OPI “Alpine Snow”)
- Clear base coat (e.g., Orly “Bonder Base Coat”)
- Thin nail art brush
- Top coat (e.g., Seche Vite “Dry Fast Top Coat”)
Practical Advice
- Start with a clear base coat on clean, filed nails.
- Apply a layer of yellow polish and let it dry.
- Using a thin nail art brush, create white swirl patterns over the yellow base.
- Allow the design to dry completely before applying a top coat to seal and protect your art.
Pastel Yellow and Pink Nails with Silver Accents
Pastel yellow and pink nails with silver accents are a subtle yet stunning choice for the fall season. The soft pastel hues blend harmoniously, while the silver accents add a touch of sparkle and sophistication. This design is perfect for those who prefer a more understated yet elegant look. The combination of colors is gentle on the eyes, making it versatile for various outfits and occasions.

- Pastel yellow nail polish (e.g., Zoya “Bee”)
- Pastel pink nail polish (e.g., Essie “Fiji”)
- Silver glitter or striping tape (e.g., Ciaté “Celestial”)
- Clear base coat (e.g., Deborah Lippmann “Hard Rock Base and Top Coat”)
- Top coat (e.g., Sally Hansen “Insta-Dri Top Coat”)
Practical Advice
- Begin with a clear base coat on your nails.
- Apply pastel yellow polish to some nails and pastel pink polish to others, allowing each coat to dry fully.
- Add silver accents using glitter polish or striping tape for a precise line.
- Seal the design with a top coat to ensure durability and shine.
Winnie the Pooh Themed Yellow Ombre Nails
Winnie the Pooh themed yellow ombre nails are a delightful and whimsical design that brings a touch of childhood nostalgia to your manicure. The ombre effect transitions from a nude base to a vibrant yellow, adorned with playful illustrations of Winnie the Pooh and honey bees. This fun and creative design is perfect for those who love to showcase their personality through their nails.

- Nude nail polish (e.g., OPI “Bubble Bath”)
- Yellow nail polish (e.g., China Glaze “Sun’s Up Top Down”)
- Clear base coat (e.g., Essie “First Base”)
- Nail art decals or stickers of Winnie the Pooh characters
- Thin nail art brush for detailed designs
- Top coat (e.g., CND “Vinylux Weekly Top Coat”)
Practical Advice
- Start with a clear base coat on clean, filed nails.
- Create an ombre effect by sponging the yellow polish onto the tips, blending it into the nude base.
- Apply nail art decals or use a thin brush to paint Winnie the Pooh and honey bee designs.
- Finish with a top coat to protect the design and add a glossy finish.
Save Pin

Solid Yellow Nails
Solid yellow nails are a bold and vibrant choice for fall. This look is all about embracing the cheerful and bright side of the season. The solid color provides a clean and polished appearance, perfect for making a statement. This shade of yellow is versatile, pairing well with both casual and formal outfits.

- Yellow nail polish (e.g., Sally Hansen “Mellow Yellow”)
- Clear base coat (e.g., OPI “Natural Nail Base Coat”)
- Top coat (e.g., Essie “Good To Go Top Coat”)
Practical Advice
- Apply a clear base coat to protect your nails and provide a smooth surface for the polish.
- Apply two to three coats of yellow polish, allowing each layer to dry completely.
- Seal with a top coat to enhance shine and extend the longevity of your manicure.
- For a smooth finish, ensure each layer is applied thinly and evenly.
Leopard Print Yellow Nails
Leopard print yellow nails are a trendy and fierce design perfect for making a bold fashion statement. The combination of yellow fall nails 2024 trends with classic leopard spots creates a striking look. This design is ideal for those who want to add a bit of wildness to their style while staying on-trend for the season.

- Yellow nail polish (e.g., China Glaze “Mustard the Courage”)
- Black nail polish (e.g., Essie “Licorice”)
- Clear base coat (e.g., Orly “Bonder Base Coat”)
- Thin nail art brush or dotting tool
- Top coat (e.g., Seche Vite “Dry Fast Top Coat”)
Practical Advice
- Start with a clear base coat on clean, filed nails.
- Apply two coats of yellow polish and let it dry completely.
- Use a thin brush or dotting tool to create black leopard spots on each nail.
- Seal with a top coat to protect the design and add shine.
- For a more textured look, try layering different shades of yellow and black.
Floral and Geometric Yellow Nails
Floral and geometric yellow nails are a beautiful fusion of natural and modern elements. The design features a mix of delicate floral patterns and bold geometric lines in soft yellow and black, set against a nude base. This combination creates a visually interesting and stylish manicure perfect for any occasion.

- Nude nail polish (e.g., OPI “Samoan Sand”)
- Yellow nail polish (e.g., Essie “Hay There”)
- Black nail polish (e.g., Zoya “Willa”)
- Clear base coat (e.g., Deborah Lippmann “Hard Rock Base and Top Coat”)
- Thin nail art brush
- Top coat (e.g., Sally Hansen “Insta-Dri Top Coat”)
Practical Advice
- Apply a clear base coat to your nails and let it dry.
- Paint some nails with yellow polish and others with a nude base.
- Using a thin brush, create floral patterns and geometric lines with black polish.
- Seal the design with a top coat to add shine and protect your art.
- For precision, practice your designs on a piece of paper before applying them to your nails.
Bright Floral Yellow Nails
Bright floral yellow nails combine the best of both worlds: vibrant colors and intricate designs. The nails feature a stunning blend of yellow, white, and pale pink, with accent nails adorned with 3D floral art and polka dots. This look is perfect for those who love to add a bit of fun and whimsy to their manicure. The flowers bring a touch of nature, making these nails stand out beautifully.

- Yellow nail polish (e.g., Essie “Hay There”)
- White nail polish (e.g., OPI “Alpine Snow”)
- Pale pink nail polish (e.g., Essie “Fiji”)
- Clear base coat (e.g., Orly “Bonder Base Coat”)
- 3D floral nail art pieces
- Dotting tool
- Top coat (e.g., Seche Vite “Dry Fast Top Coat”)
Practical Advice
- Apply a clear base coat on clean, filed nails.
- Paint some nails yellow, others white, and a few pale pink.
- Use a dotting tool to create polka dots on select nails.
- Attach 3D floral pieces using a small amount of clear polish as glue.
- Finish with a top coat to seal the design and add shine.
Neon Yellow and Nude Nails
Neon yellow and nude nails offer a bold and striking contrast that’s perfect for making a statement. The neon yellow pops vividly against the nude base, and the accent nail with delicate white line art adds an extra layer of sophistication. This design is great for those who love a bright and eye-catching manicure.
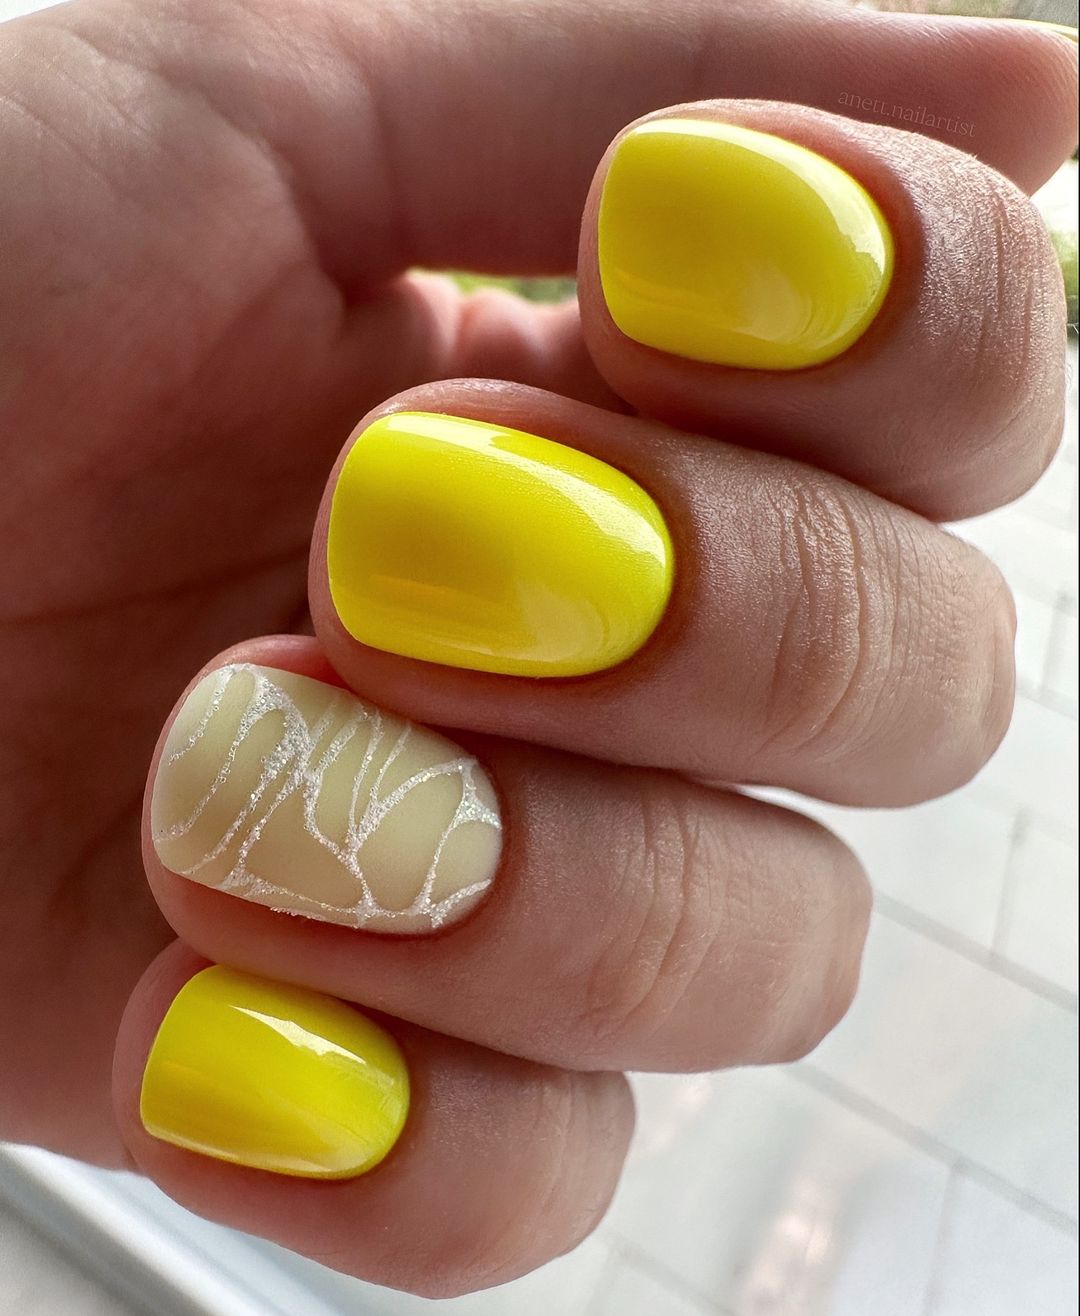
- Neon yellow nail polish (e.g., China Glaze “Sun-Kissed”)
- Nude nail polish (e.g., OPI “Samoan Sand”)
- White nail polish for line art (e.g., Essie “Blanc”)
- Clear base coat (e.g., Deborah Lippmann “Hard Rock Base and Top Coat”)
- Thin nail art brush
- Top coat (e.g., Sally Hansen “Insta-Dri Top Coat”)
Practical Advice
- Apply a clear base coat to your nails.
- Paint most nails with neon yellow polish and a couple with nude polish.
- Use a thin nail art brush to create white line art on the nude nails.
- Finish with a top coat to protect your design and add a glossy finish.
Yellow Ombré with Textured Accent Nail
Yellow ombré nails with a textured accent are a sophisticated and stylish choice for fall. The ombré effect transitions smoothly from a soft nude base to a vibrant yellow tip. The textured accent nail, adorned with glitter or caviar beads, adds depth and intrigue to the overall look. This manicure is perfect for those who want a bit of elegance with a touch of fun.
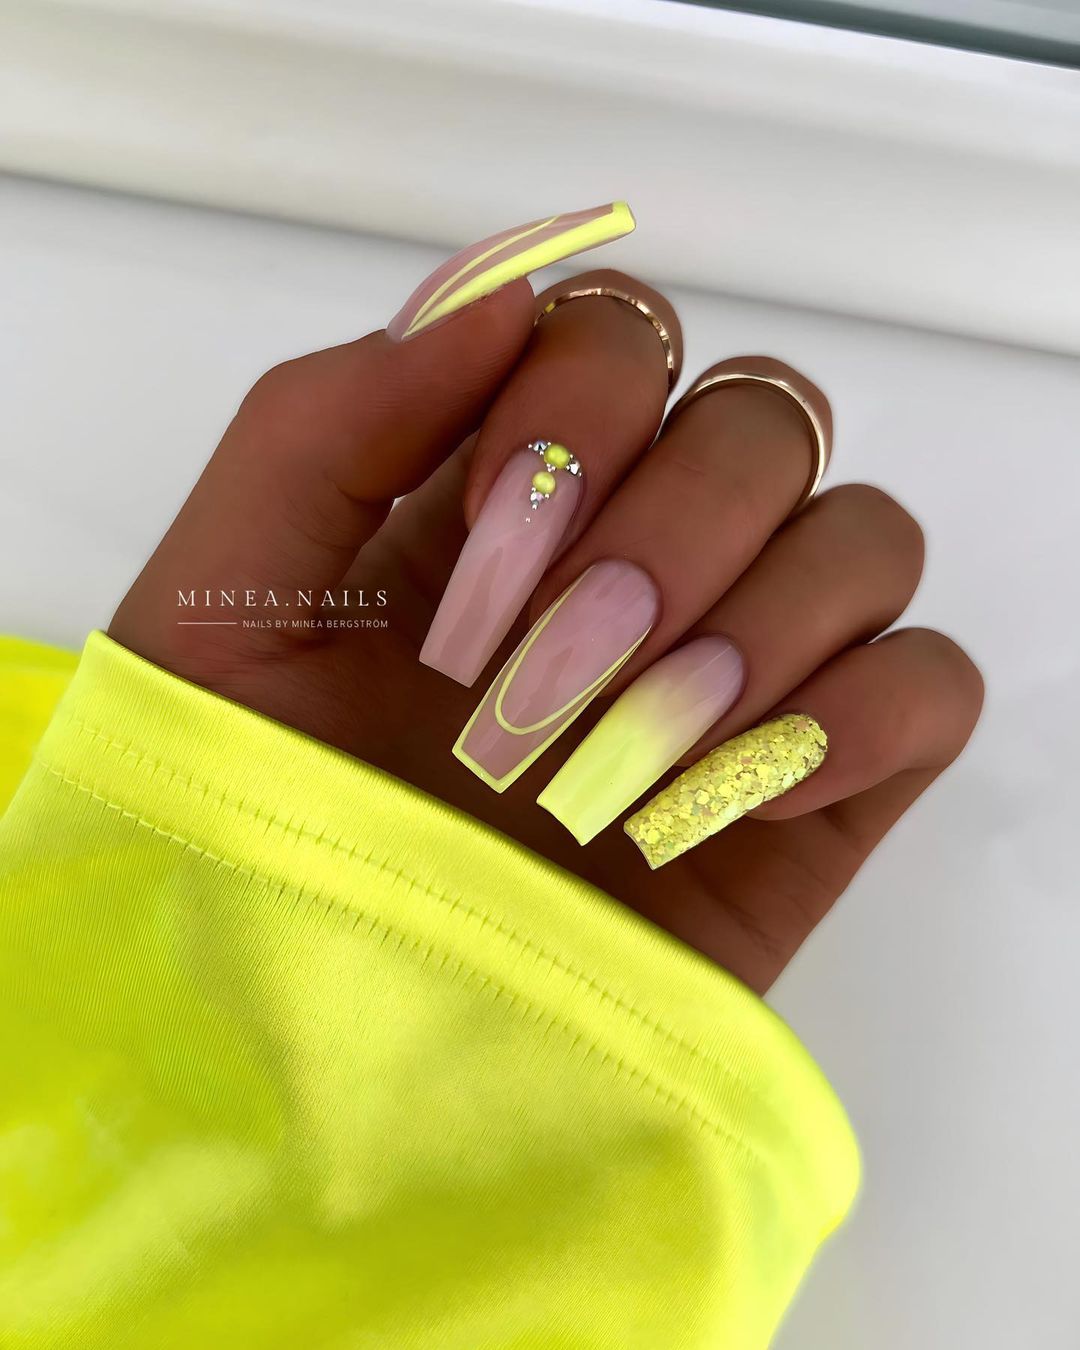
- Nude nail polish (e.g., Essie “Ballet Slippers”)
- Yellow nail polish (e.g., Zoya “Pippa”)
- Clear base coat (e.g., Orly “Bonder Base Coat”)
- Yellow glitter or caviar beads for texture
- Makeup sponge for blending
- Top coat (e.g., CND “Vinylux Weekly Top Coat”)
Practical Advice
- Apply a clear base coat on your nails.
- Create the ombré effect by sponging yellow polish onto the tips, blending into the nude base.
- Add texture to one nail with yellow glitter or caviar beads while the polish is still wet.
- Seal the design with a top coat to add shine and longevity.
Floral Yellow Nails with Rhinestone Accents
Floral yellow nails with rhinestone accents combine the elegance of flowers with the sparkle of rhinestones. The design features yellow tips fading into a clear base, with intricate floral art and strategically placed rhinestones. This look is perfect for special occasions where you want your nails to dazzle.
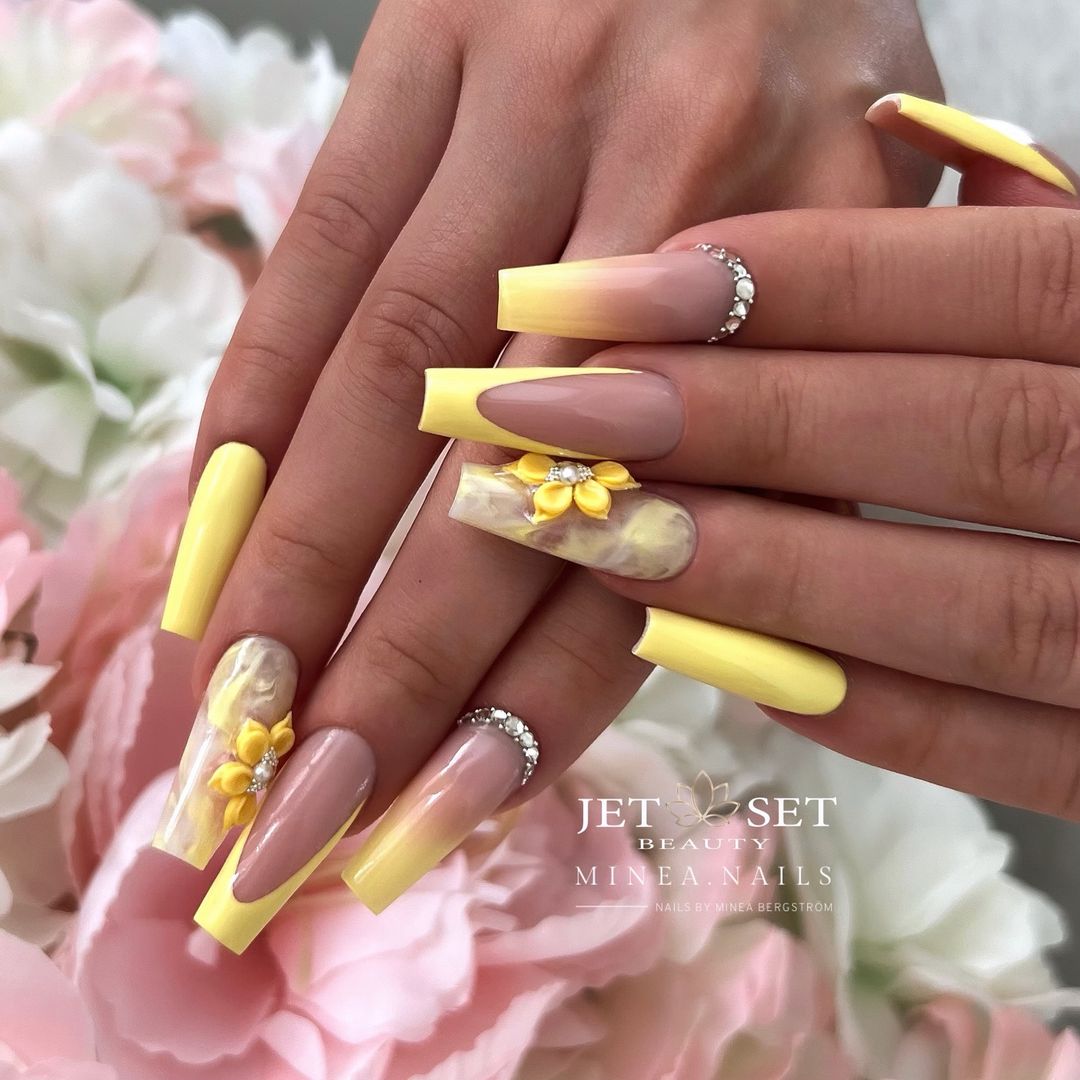
- Yellow nail polish (e.g., Sally Hansen “Mellow Yellow”)
- Clear base coat (e.g., Essie “All In One Base”)
- Floral nail decals or thin brush for painting flowers
- Rhinestones
- Top coat (e.g., Seche Vite “Dry Fast Top Coat”)
Practical Advice
- Start with a clear base coat.
- Apply yellow polish to the tips, fading into the clear base for an ombré effect.
- Use floral decals or paint flowers with a thin brush.
- Place rhinestones around the flowers or at the base of the nail using clear polish as glue.
- Seal the design with a top coat to secure the rhinestones and add shine.
Pastel Yellow and Peach Ombré Nails
Pastel yellow and peach ombré nails are a soft and romantic choice for the fall season. The gentle transition between the pastel yellow and peach hues creates a dreamy and elegant look. This design is perfect for those who prefer a more understated yet beautiful manicure.
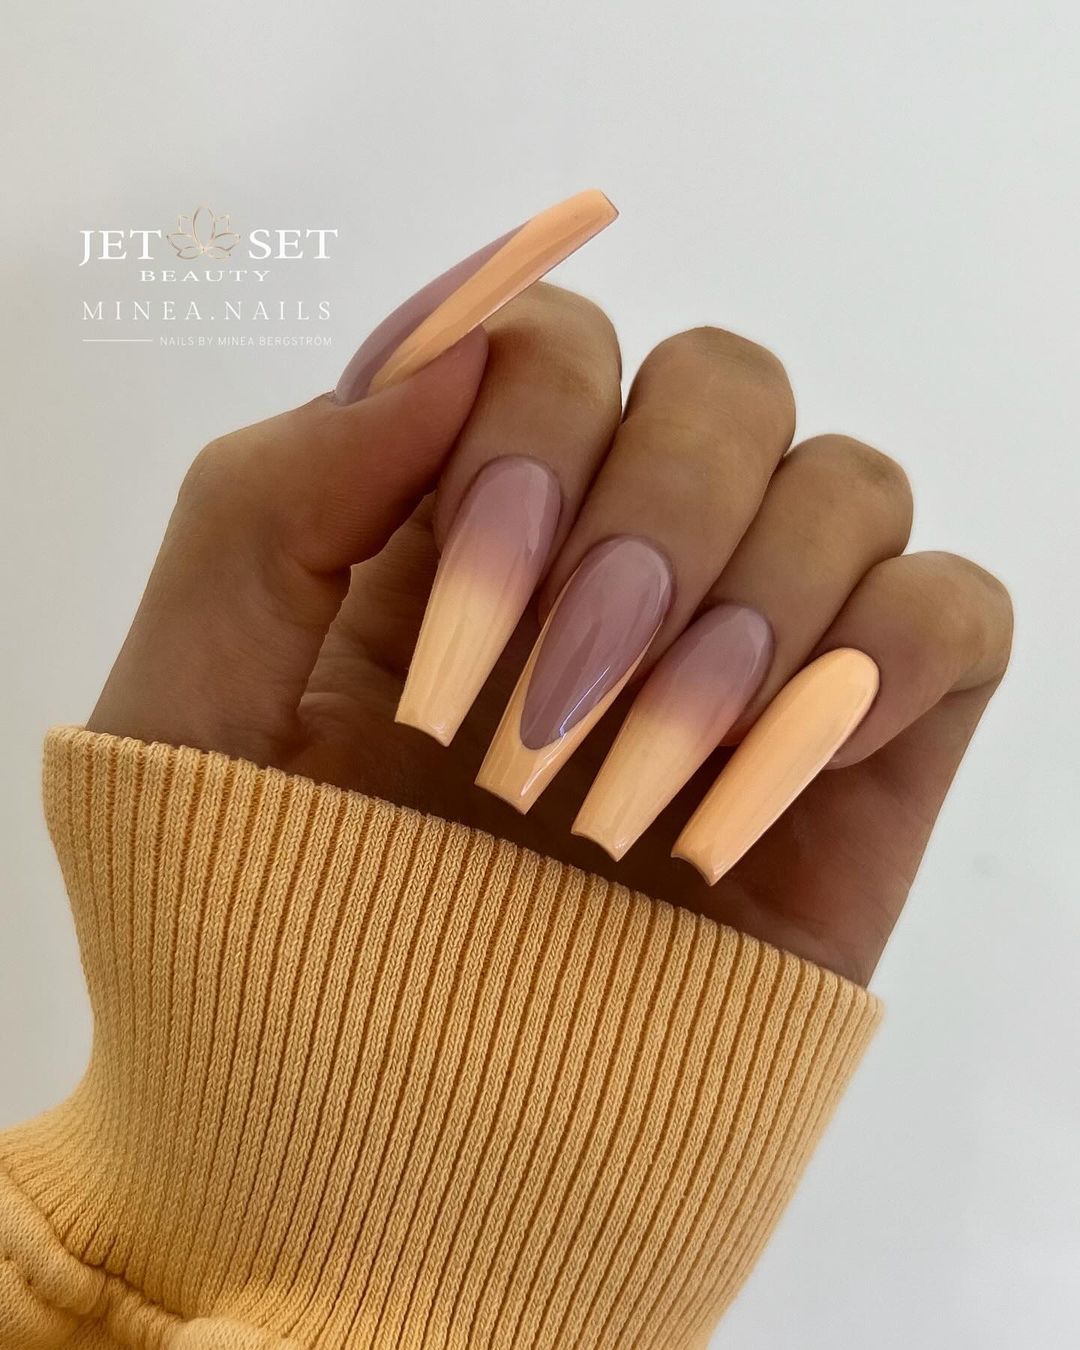
- Pastel yellow nail polish (e.g., Zoya “Bee”)
- Peach nail polish (e.g., OPI “Got Myself into a Jam-balaya”)
- Clear base coat (e.g., Orly “Bonder Base Coat”)
- Makeup sponge for blending
- Top coat (e.g., CND “Vinylux Weekly Top Coat”)
Practical Advice
- Apply a clear base coat to protect your nails.
- Create the ombré effect by sponging the peach polish onto the tips, blending into the pastel yellow base.
- Repeat the sponging process until you achieve the desired gradient.
- Finish with a top coat to smooth the gradient and add shine.
Glittery Peach and Yellow Nails
Glittery peach and yellow nails are perfect for those who love a bit of sparkle. The combination of glitter and the warm peach and yellow hues creates a festive and eye-catching design. This look is ideal for parties or any occasion where you want your nails to be the center of attention.
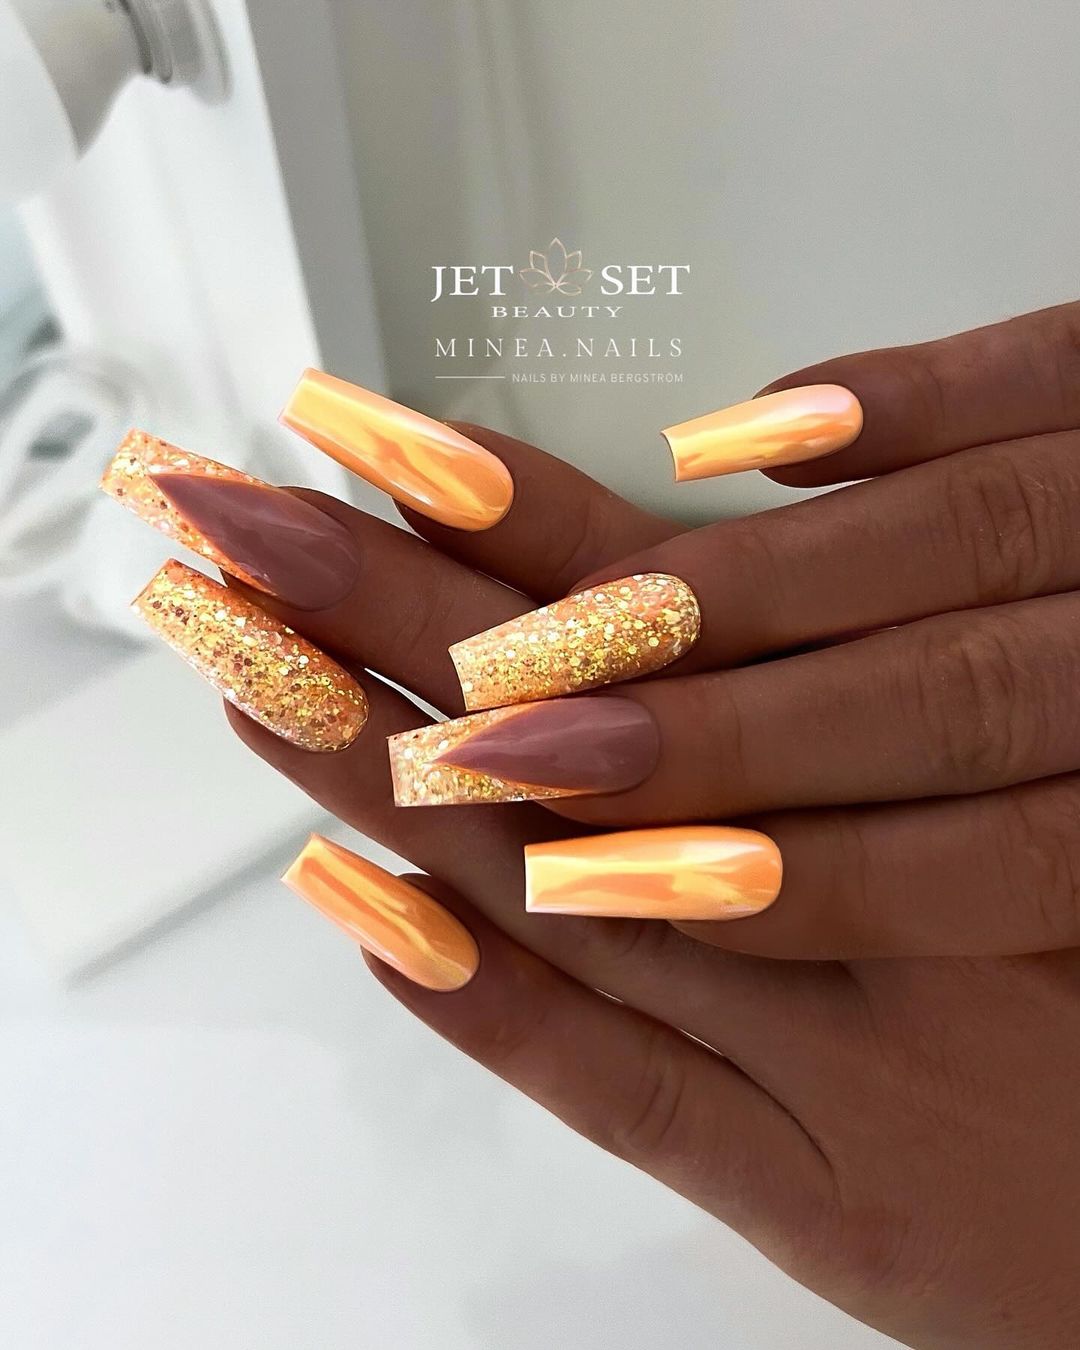
- Peach nail polish (e.g., Essie “Tart Deco”)
- Yellow nail polish (e.g., China Glaze “Lemon Fizz”)
- Clear base coat (e.g., Deborah Lippmann “Hard Rock Base and Top Coat”)
- Yellow glitter polish or loose glitter
- Top coat (e.g., Sally Hansen “Insta-Dri Top Coat”)
Practical Advice
- Start with a clear base coat on clean, filed nails.
- Apply peach polish to some nails and yellow polish to others.
- Add glitter polish or loose glitter to one or two accent nails for extra sparkle.
- Seal the design with a top coat to add shine and ensure the glitter stays in place.
Neon Yellow French Tips
Neon yellow French tips are a bold and modern twist on the classic French manicure. The bright, neon yellow tips contrast beautifully with the natural pink base, creating a vibrant and eye-catching design. This look is perfect for those who want to make a statement with their nails while keeping it chic and sophisticated.
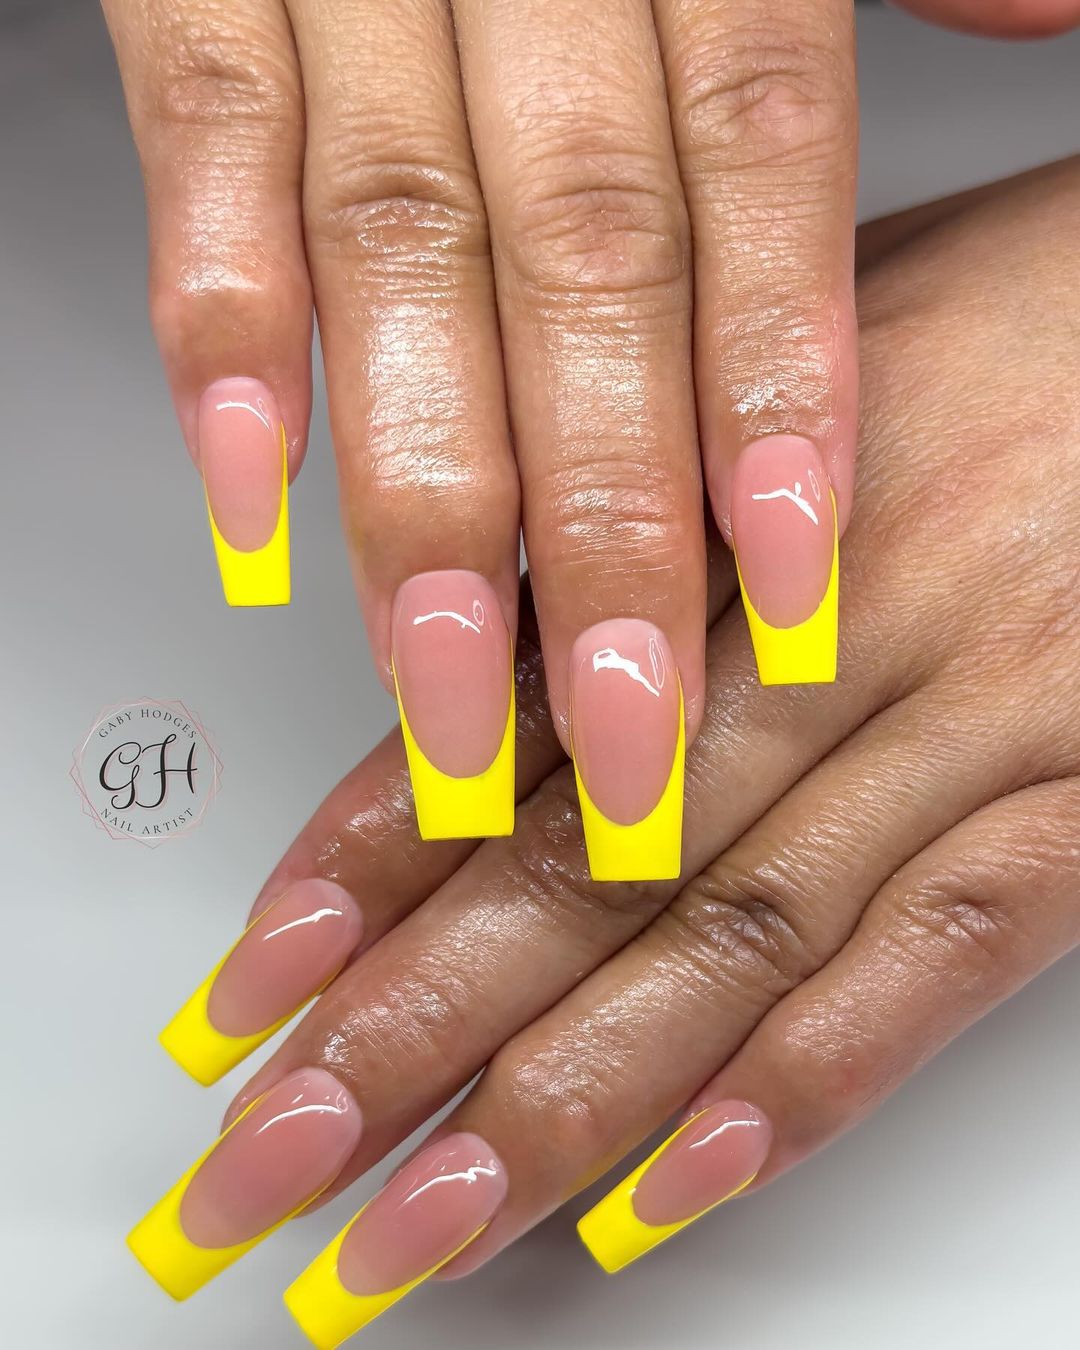
- Neon yellow nail polish (e.g., China Glaze “Celtic Sun”)
- Clear base coat (e.g., Orly “Bonder Base Coat”)
- Top coat (e.g., Seche Vite “Dry Fast Top Coat”)
- Nail art brush or tape for precise tips
Practical Advice
- Start with a clear base coat on clean, filed nails.
- Use nail art tape or a steady hand to paint the neon yellow tips.
- Allow the tips to dry completely before applying a top coat to seal and protect the design.
- For an extra touch, consider adding a thin line of silver or white polish below the yellow tip for added contrast.
Fun Giraffe and Yellow Nails
These fun giraffe and yellow nails are perfect for anyone who loves playful and creative designs. The solid yellow nails are bright and cheerful, while the giraffe print and adorable giraffe character add a whimsical touch. This design is ideal for those who enjoy unique and themed manicures.
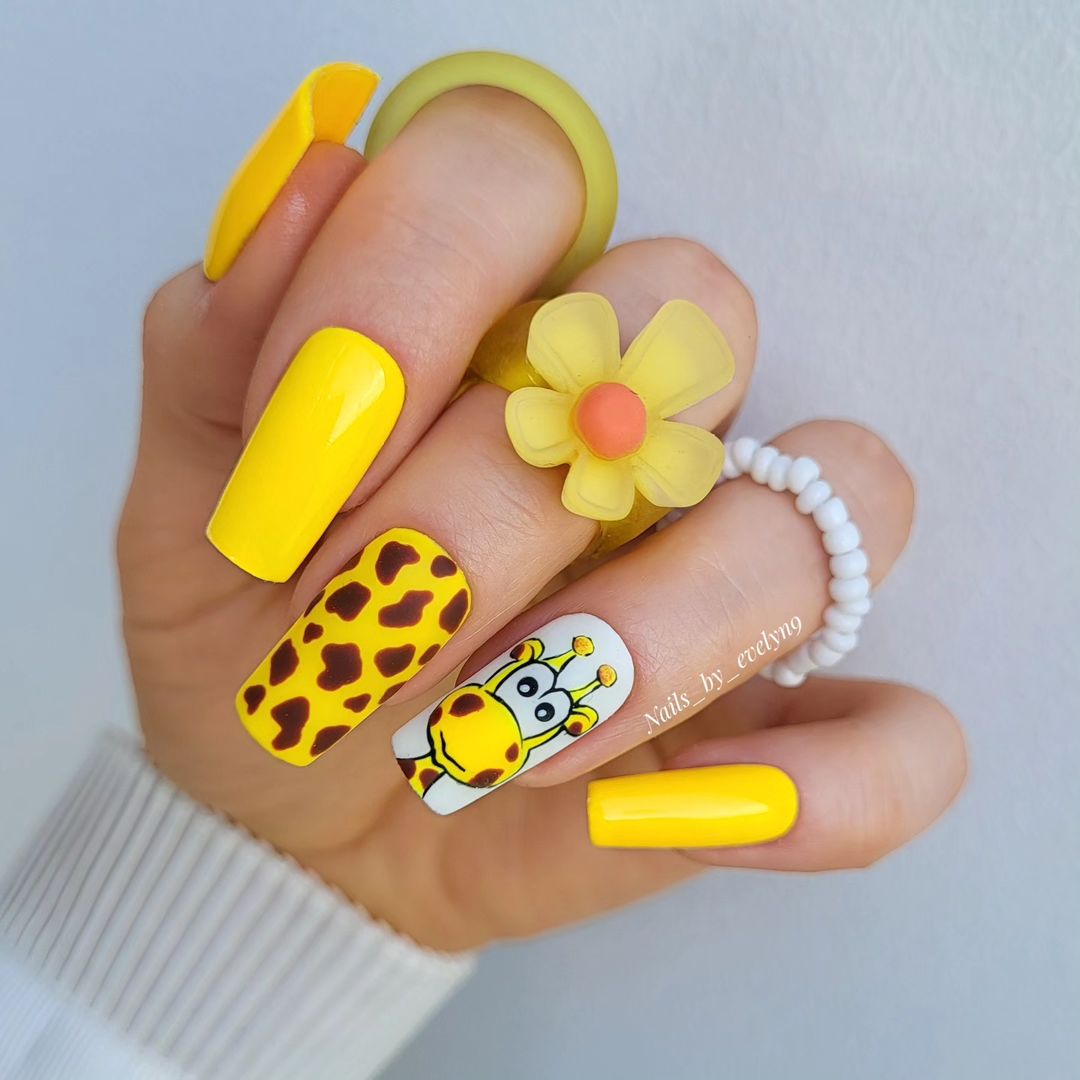
- Yellow nail polish (e.g., Essie “Hay There”)
- White nail polish (e.g., OPI “Alpine Snow”)
- Brown nail polish for giraffe spots (e.g., Essie “Wicked”)
- Clear base coat (e.g., Deborah Lippmann “Hard Rock Base and Top Coat”)
- Nail art brush for detailed painting
- Top coat (e.g., Sally Hansen “Insta-Dri Top Coat”)
Practical Advice
- Apply a clear base coat to your nails.
- Paint most nails with yellow polish, leaving one or two nails white for the giraffe design.
- Use brown polish to create giraffe spots on one nail and paint the giraffe character on another.
- Seal the design with a top coat to ensure durability and shine.
- Use a thin brush for detailed painting to achieve a clean and precise look.
Yellow Swirl Nails
Yellow swirl nails are a mesmerizing design that combines bright yellow with intricate swirls for a dynamic and lively effect. This look is perfect for those who love artistic and bold nail designs. The swirls add a sense of movement and fun, making these nails a standout choice for any occasion.
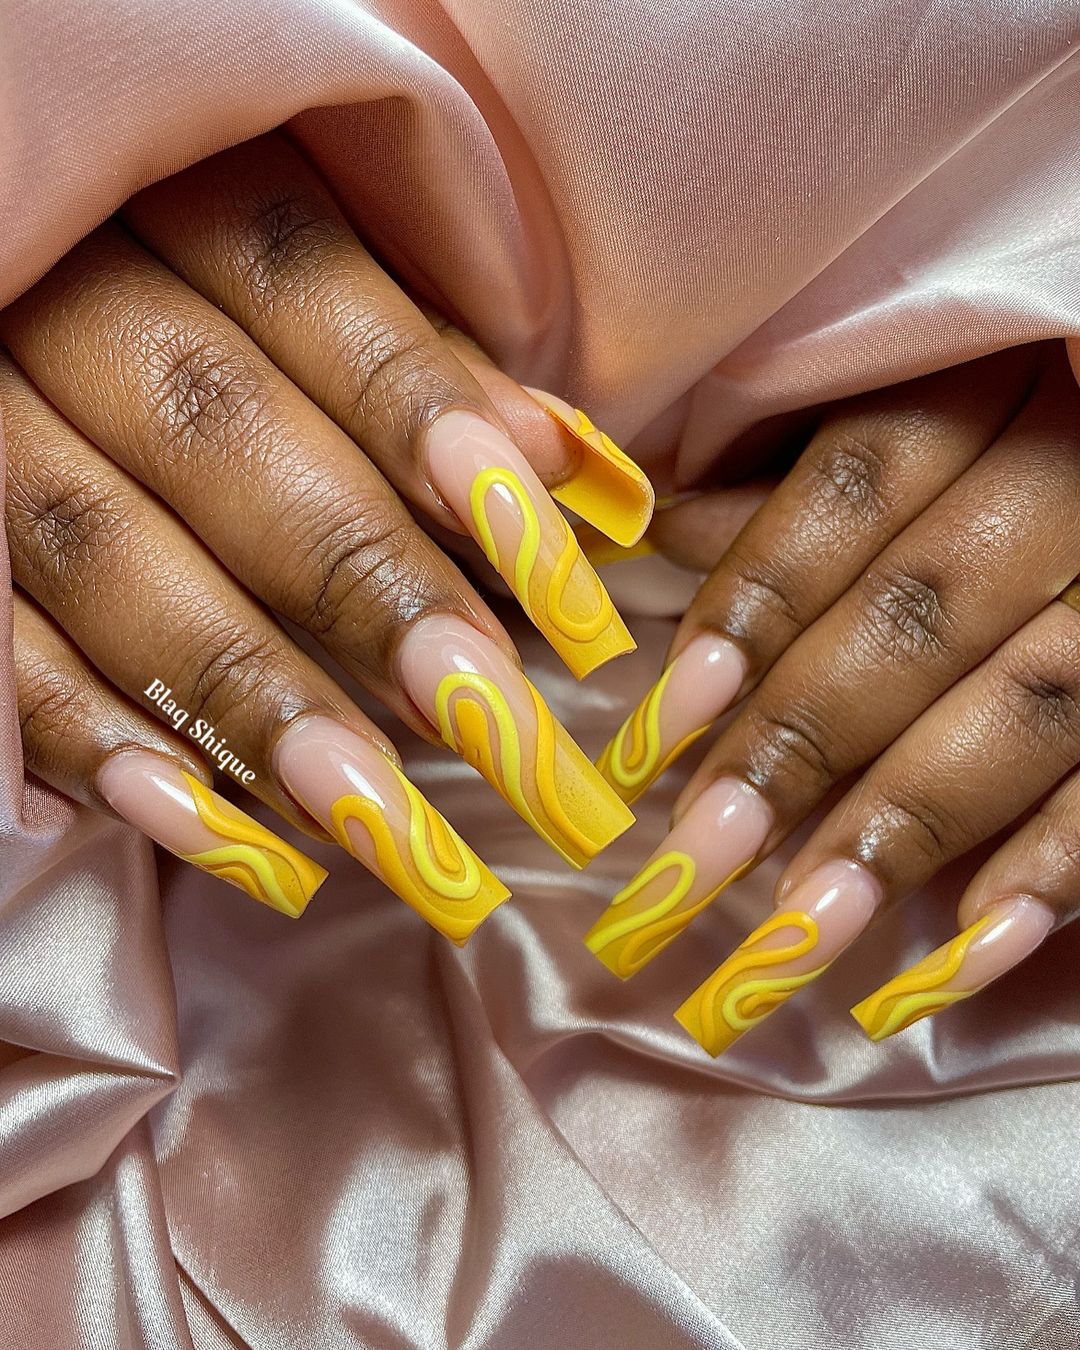
- Yellow nail polish (e.g., Zoya “Pippa”)
- Clear base coat (e.g., Essie “First Base”)
- Thin nail art brush for creating swirls
- Top coat (e.g., CND “Vinylux Weekly Top Coat”)
Practical Advice
- Apply a clear base coat to your nails.
- Paint your nails with yellow polish and let it dry.
- Use a thin brush to create swirls with a slightly darker or lighter shade of yellow for contrast.
- Seal the design with a top coat to add shine and protect the artwork.
- Practice the swirls on a piece of paper before applying them to your nails to ensure smooth and even lines.
Glittery Yellow Ombre Nails
Glittery yellow ombre nails combine the soft transition of an ombre effect with the sparkle of glitter, creating a glamorous and festive look. The yellow fades beautifully into the nude base, while the glitter adds a touch of elegance and shine. This design is perfect for special occasions or for adding a bit of sparkle to your everyday look.
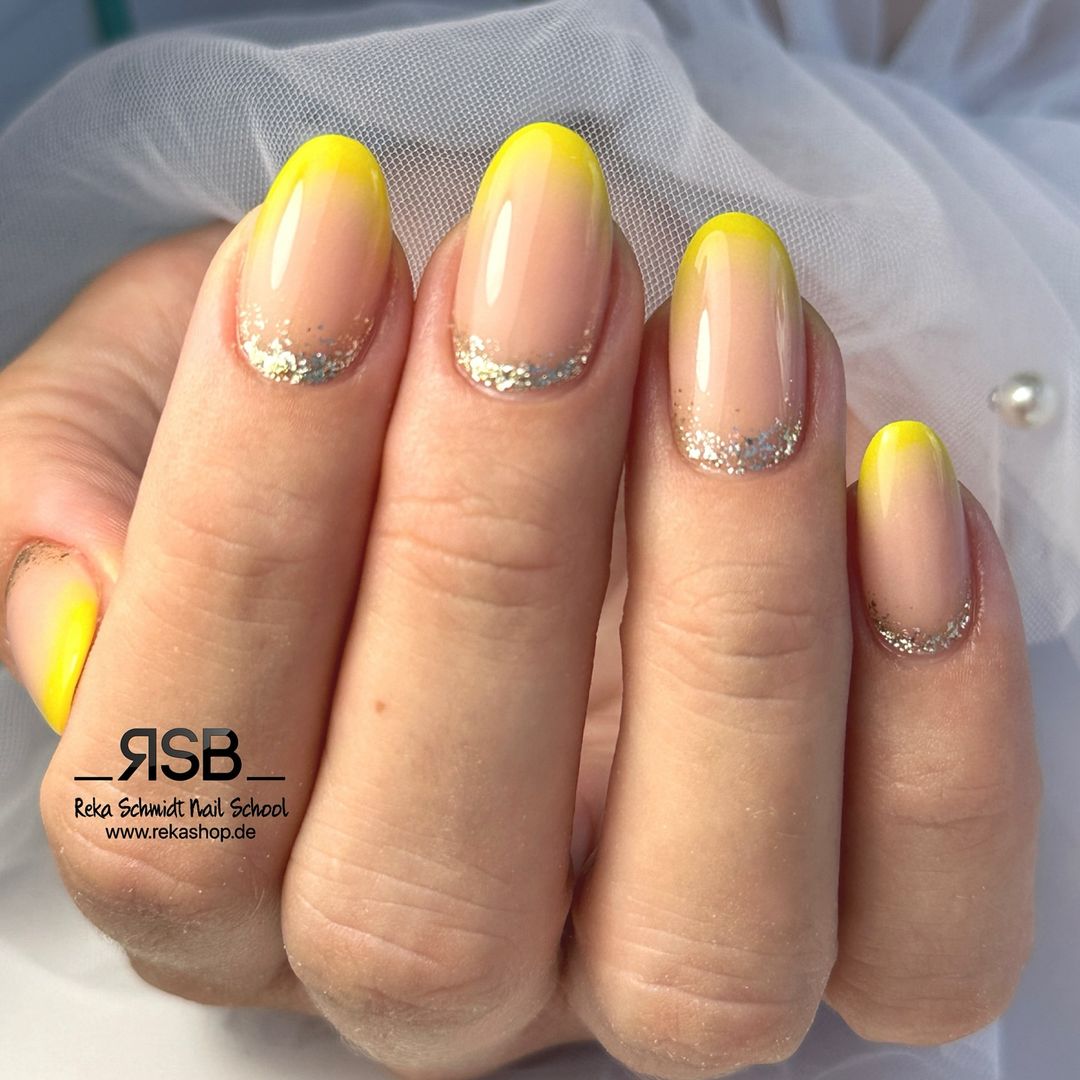
- Yellow nail polish (e.g., Sally Hansen “Mellow Yellow”)
- Nude nail polish (e.g., OPI “Bubble Bath”)
- Silver glitter polish (e.g., Ciaté “Party Shoes”)
- Clear base coat (e.g., Orly “Bonder Base Coat”)
- Makeup sponge for blending
- Top coat (e.g., Seche Vite “Dry Fast Top Coat”)
Practical Advice
- Apply a clear base coat to protect your nails.
- Use a makeup sponge to create the ombre effect by blending yellow polish into the nude base.
- Apply glitter polish near the cuticles, blending it slightly into the yellow for a seamless transition.
- Finish with a top coat to smooth the gradient and add a glossy finish.
- Ensure each layer is completely dry before applying the next to avoid smudging.
Two-Tone Yellow and Cream Nails
Two-tone yellow and cream nails offer a subtle yet stylish look that is perfect for any season. The alternating yellow and cream nails create a simple yet elegant design that is easy to achieve and versatile for various outfits. This look is great for those who prefer a more understated and classic manicure.
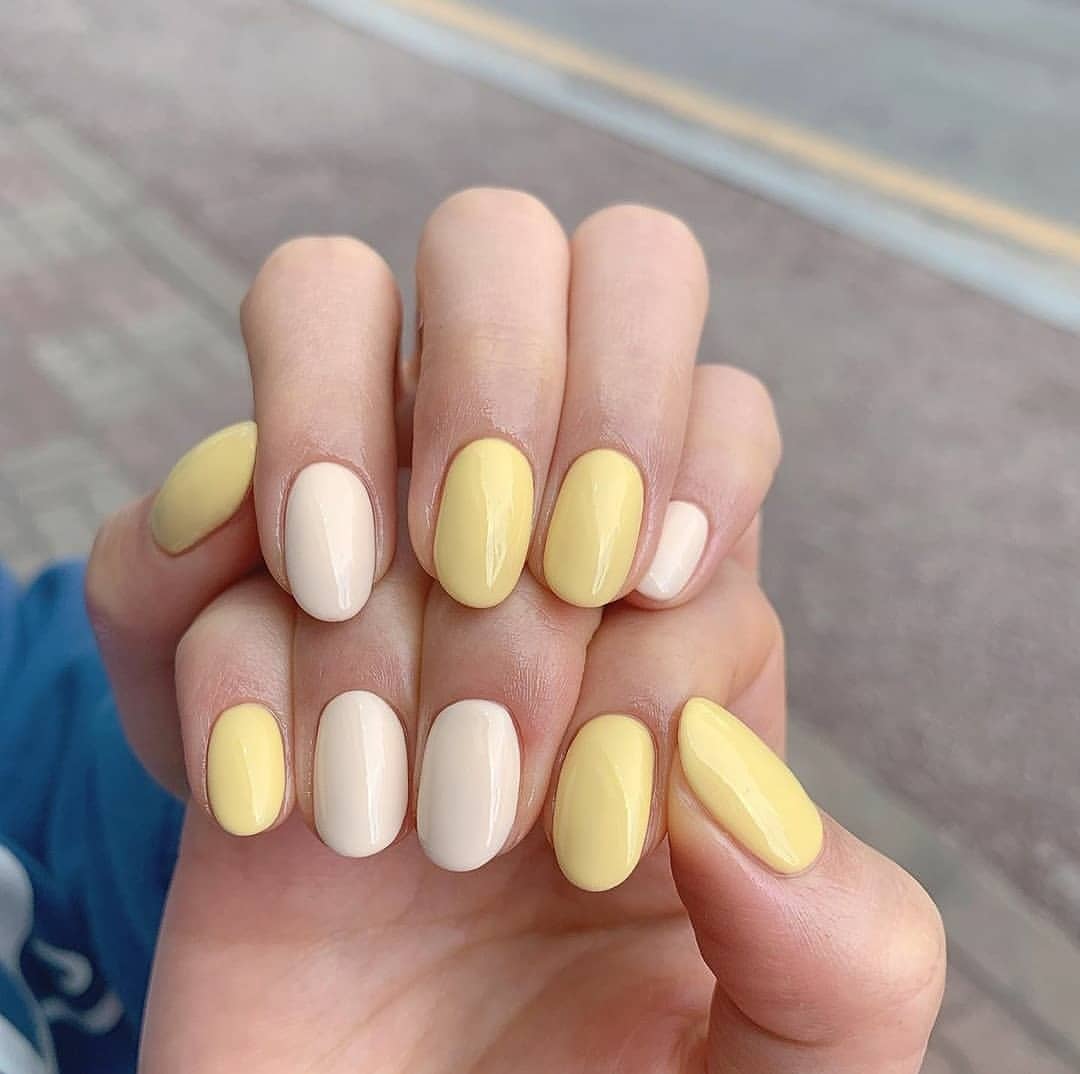
- Yellow nail polish (e.g., Essie “Hay There”)
- Cream nail polish (e.g., OPI “Be There in a Prosecco”)
- Clear base coat (e.g., Deborah Lippmann “Hard Rock Base and Top Coat”)
- Top coat (e.g., Sally Hansen “Insta-Dri Top Coat”)
Practical Advice
- Apply a clear base coat to your nails.
- Alternate between painting your nails with yellow and cream polish.
- Apply two coats of each color for full coverage, allowing each coat to dry completely.
- Finish with a top coat to add shine and protect the polish.
- For a clean look, use a small brush dipped in nail polish remover to tidy up the edges.
Tweety Bird Yellow French Tips
Tweety Bird yellow French tips are a fun and nostalgic design perfect for fans of classic cartoons. The bright yellow tips are adorned with adorable Tweety Bird faces, adding a playful and unique touch to the classic French manicure. This look is ideal for those who love to incorporate a bit of personality and whimsy into their nails.
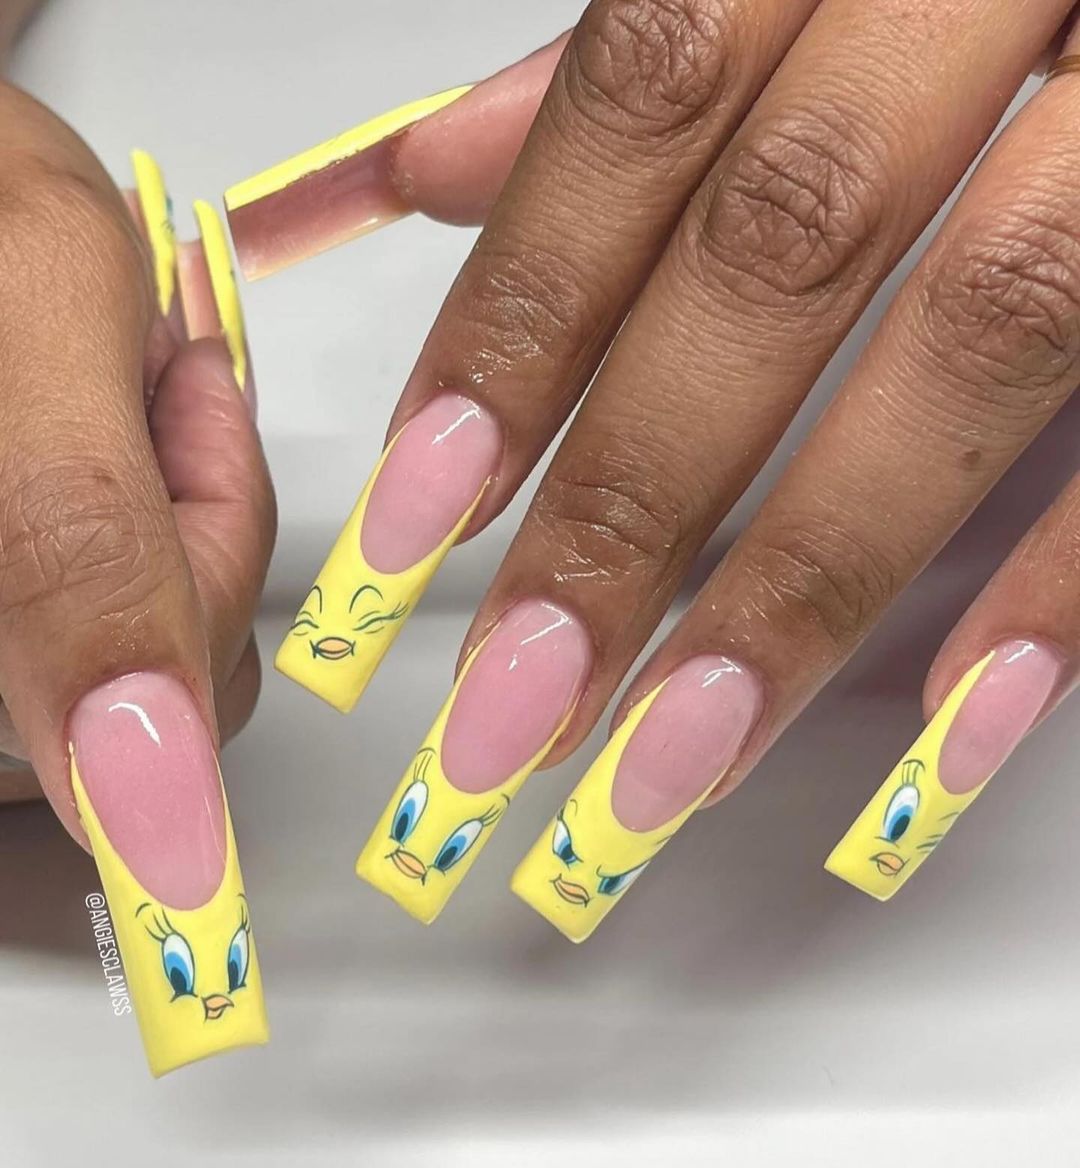
- Yellow nail polish (e.g., China Glaze “Sun’s Up Top Down”)
- Clear base coat (e.g., Essie “First Base”)
- Nail art decals or thin brush for painting Tweety Bird faces
- Top coat (e.g., CND “Vinylux Weekly Top Coat”)
Practical Advice
- Apply a clear base coat to your nails.
- Paint the tips with yellow polish, creating a French manicure look.
- Use nail art decals or a thin brush to paint Tweety Bird faces on the yellow tips.
- Finish with a top coat to seal the design and add shine.
- For detailed painting, use a fine brush and take your time to ensure clean lines and accurate depictions.
Cute Giraffe Nail Art
The cute giraffe nail art brings a playful and charming element to your manicure. The design features a solid yellow nail complemented by adorable giraffe illustrations on a nude base. The giraffes are meticulously painted, adding a touch of whimsy and fun. This manicure is perfect for those who love to express their creativity and have a fondness for cute animal designs.
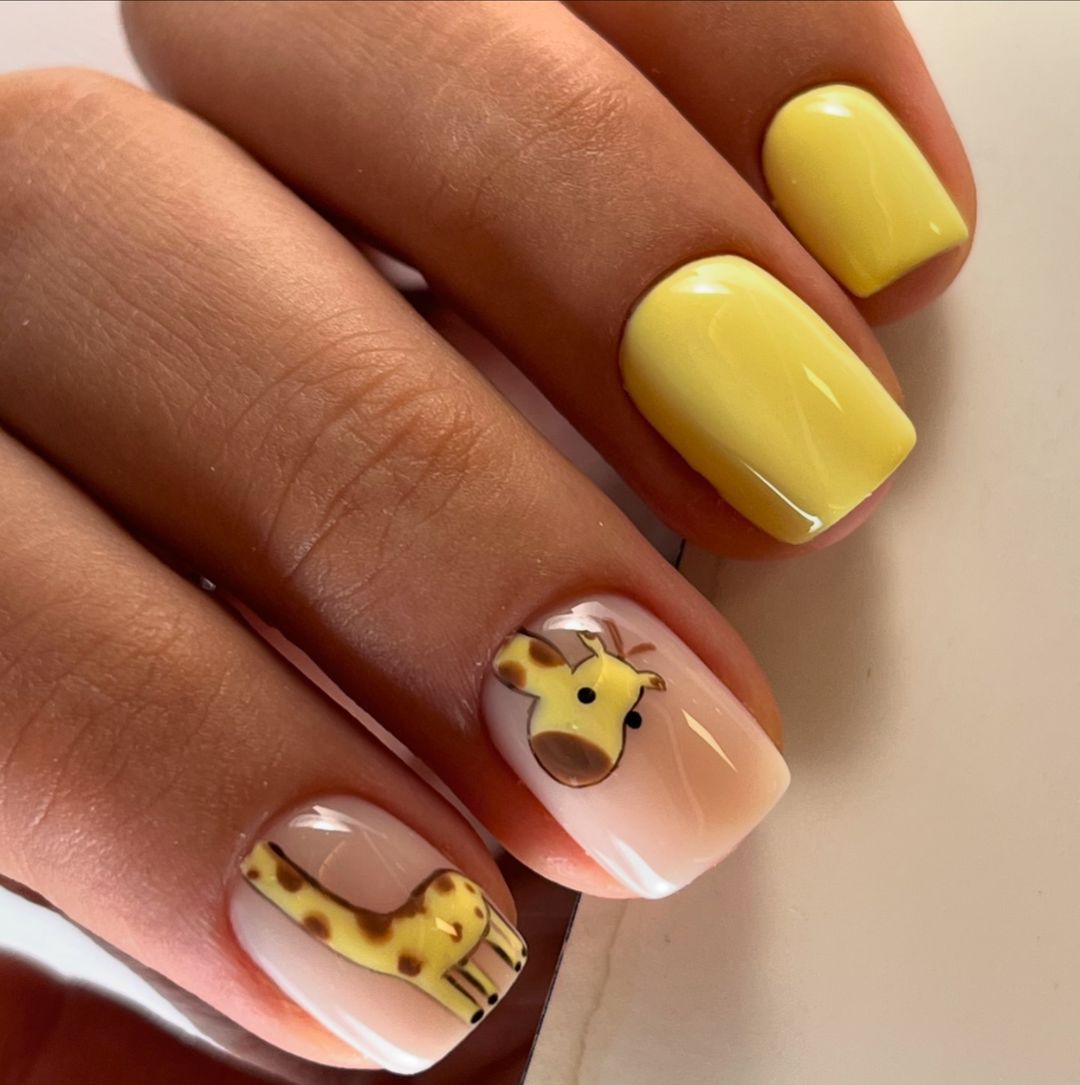
- Yellow nail polish (e.g., Essie “Hay There”)
- Nude nail polish (e.g., OPI “Bubble Bath”)
- Clear base coat (e.g., Orly “Bonder Base Coat”)
- Nail art brushes for detailed painting
- Acrylic paints or nail art pens for the giraffe illustrations
- Top coat (e.g., Seche Vite “Dry Fast Top Coat”)
Practical Advice
- Begin with a clear base coat to protect your nails.
- Apply yellow polish to some nails and nude polish to the ones intended for giraffe art.
- Use nail art brushes and acrylic paints to carefully paint the giraffe illustrations.
- Once the design is complete and dry, seal it with a top coat to add shine and protect the artwork.
- Practice the giraffe designs on paper before applying them to your nails for precision.
Sunflower Nail Design
Sunflower nails bring a bit of sunshine to your manicure. This design features bright yellow nails with detailed sunflower accents on a nude base. The sunflowers are beautifully detailed, adding a touch of nature and warmth to the overall look. This manicure is ideal for those who love floral designs and want to brighten up their nails.
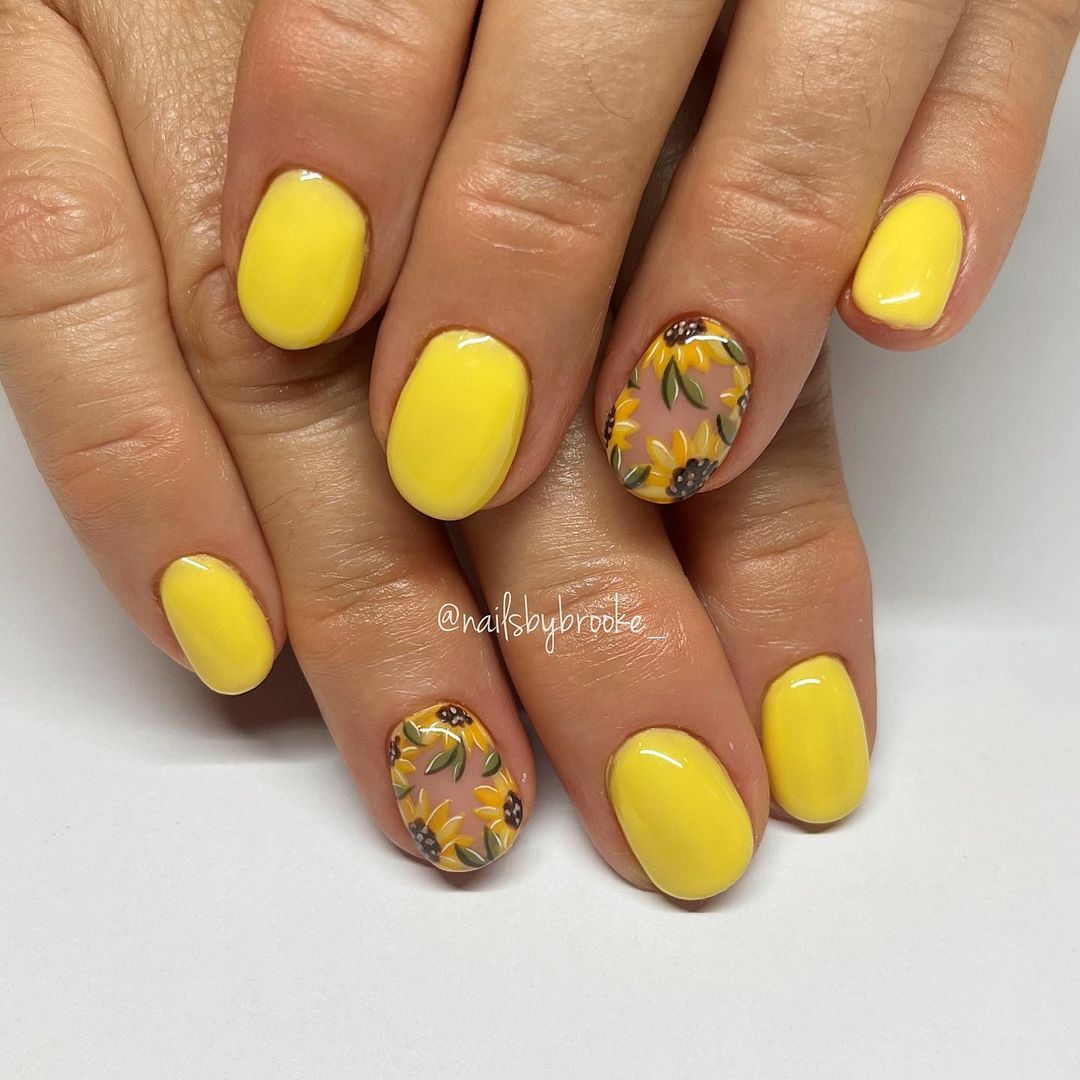
- Yellow nail polish (e.g., China Glaze “Happy Go Lucky”)
- Nude nail polish (e.g., Essie “Ballet Slippers”)
- Clear base coat (e.g., Deborah Lippmann “Hard Rock Base and Top Coat”)
- Nail art brushes for detailed painting
- Acrylic paints or nail art pens for sunflower illustrations
- Top coat (e.g., Sally Hansen “Insta-Dri Top Coat”)
Practical Advice
- Apply a clear base coat on clean, filed nails.
- Paint most nails with yellow polish and a few with nude polish for the sunflower design.
- Use nail art brushes and acrylic paints to paint sunflowers on the nude nails.
- Allow the design to dry completely before applying a top coat to seal and protect the artwork.
- For a more realistic look, use different shades of yellow and brown for the sunflowers.
Polka Dot Yellow French Tips
Polka dot yellow French tips are a fun and lively design that combines the classic French manicure with a playful twist. The bright yellow tips are adorned with colorful polka dots, adding a whimsical and cheerful element to your nails. This design is perfect for those who love to mix tradition with a bit of fun and creativity.
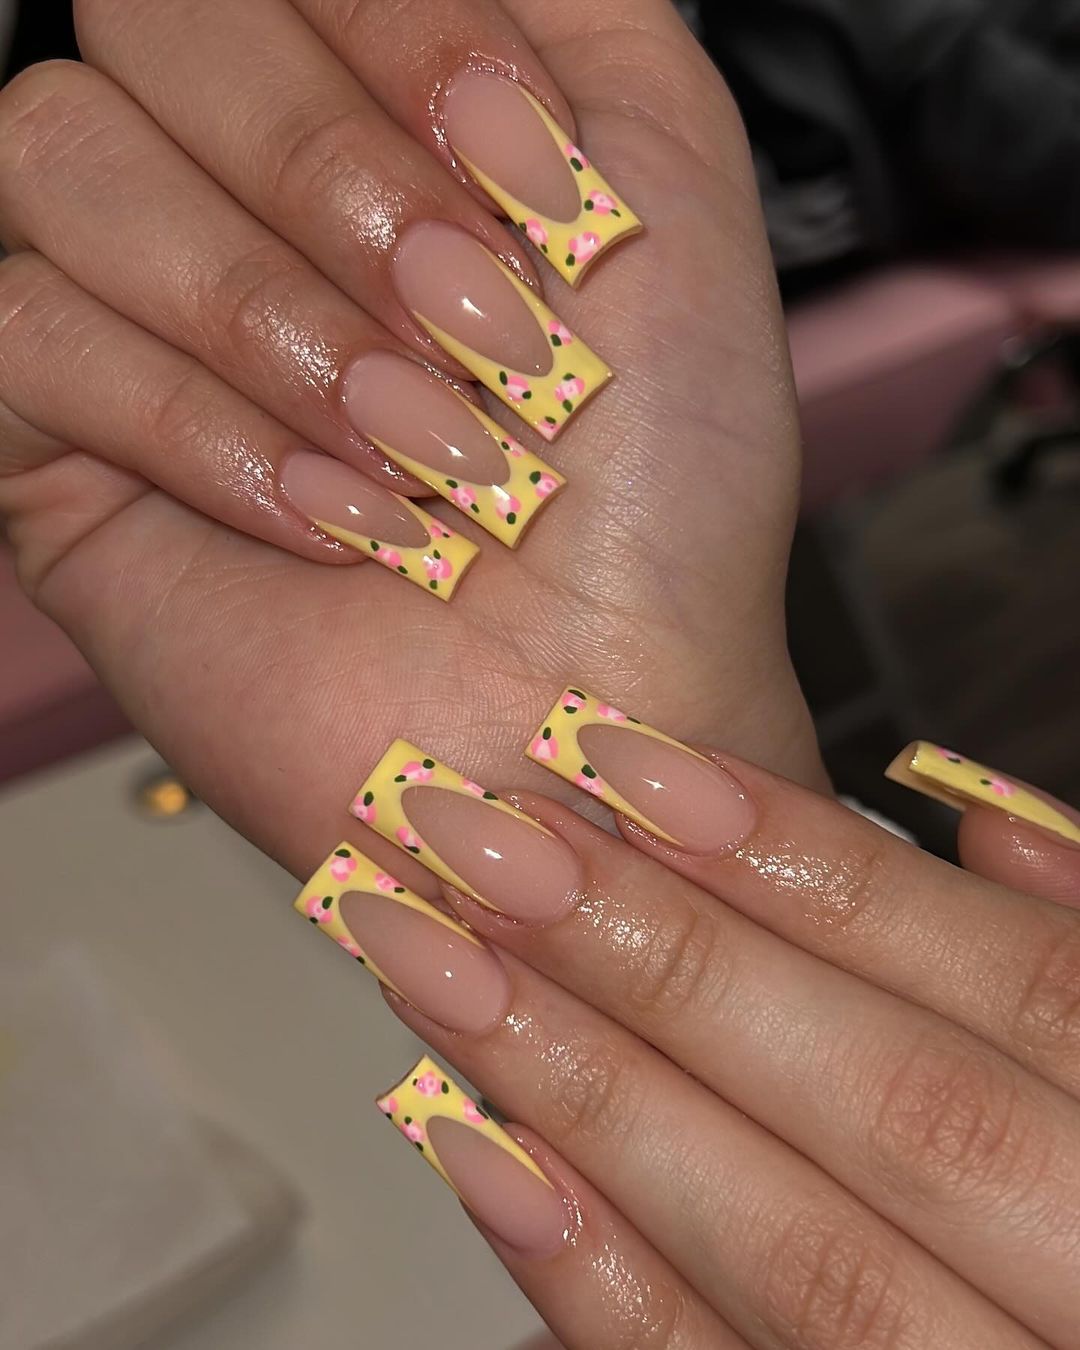
- Yellow nail polish (e.g., Zoya “Pippa”)
- Clear base coat (e.g., Essie “First Base”)
- Multiple colors of nail polish for polka dots (e.g., pink, black, white)
- Dotting tools or a thin brush for creating polka dots
- Top coat (e.g., CND “Vinylux Weekly Top Coat”)
Practical Advice
- Start with a clear base coat to protect your nails.
- Paint the tips with yellow polish to create the French manicure look.
- Use dotting tools or a thin brush to add colorful polka dots on the yellow tips.
- Seal the design with a top coat to add shine and ensure the polka dots stay intact.
- For an even application, use dotting tools of various sizes to create different sized polka dots
FAQ
Q: How do I prevent my yellow nail polish from staining my nails?
A: Always use a clear base coat before applying yellow polish. This creates a barrier between your nails and the color, preventing stains.
Q: How can I make my nail polish last longer?
A: Ensure your nails are clean and free of oils before applying polish. Use a base coat, apply thin layers of polish, and finish with a top coat. Reapply the top coat every few days to maintain the shine and extend the life of your manicure.
Q: What if I don’t have a steady hand for nail art?
A: You can use nail art tape, stickers, or stencils to create precise designs. Practice makes perfect, so don’t be afraid to experiment and improve your skills over time.
Save Pin

