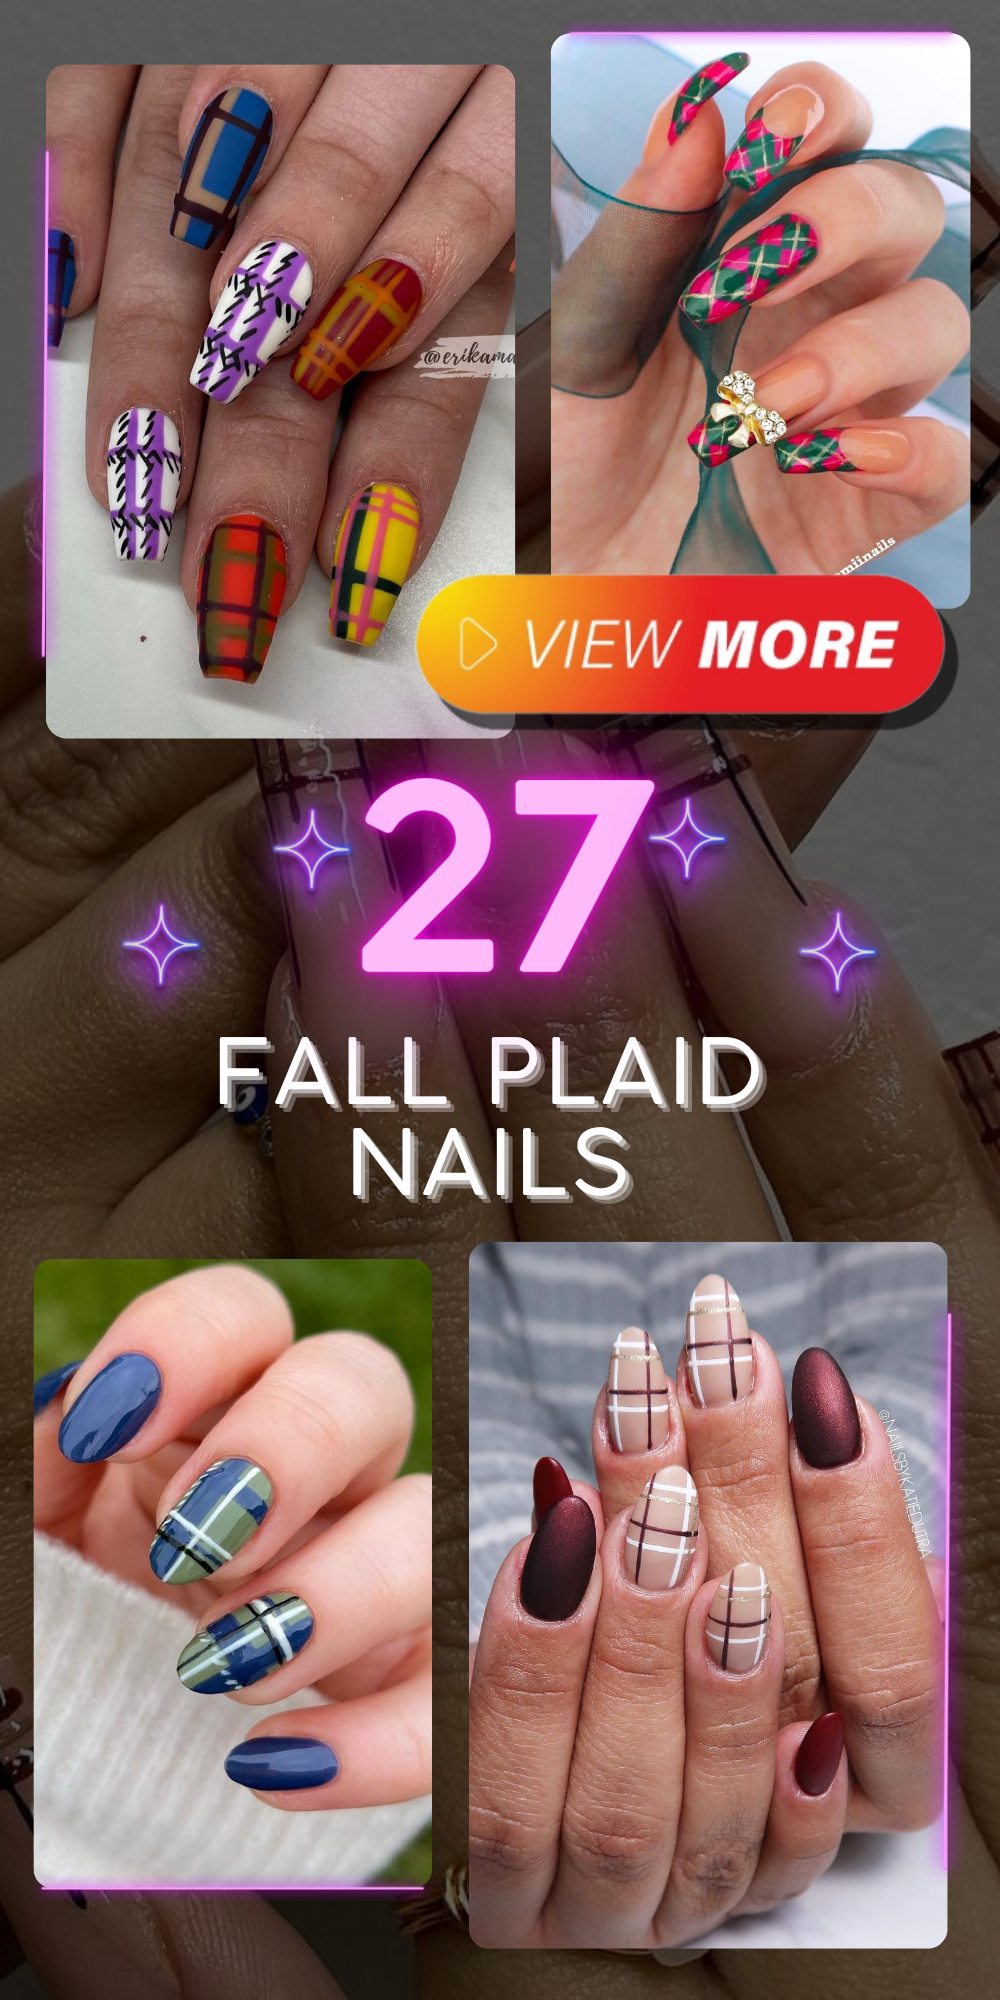
Fall is the perfect season to switch up your nail game and embrace new trends. One of the most timeless and versatile trends is fall plaid nails. From classic Burberry-inspired patterns to vibrant and colorful designs, plaid nails are a must-try for anyone looking to make a statement. In this article, I’ll walk you through some stunning fall plaid nail designs, provide detailed descriptions of each look, and share tips on how to recreate these designs at home.
Classic Elegance
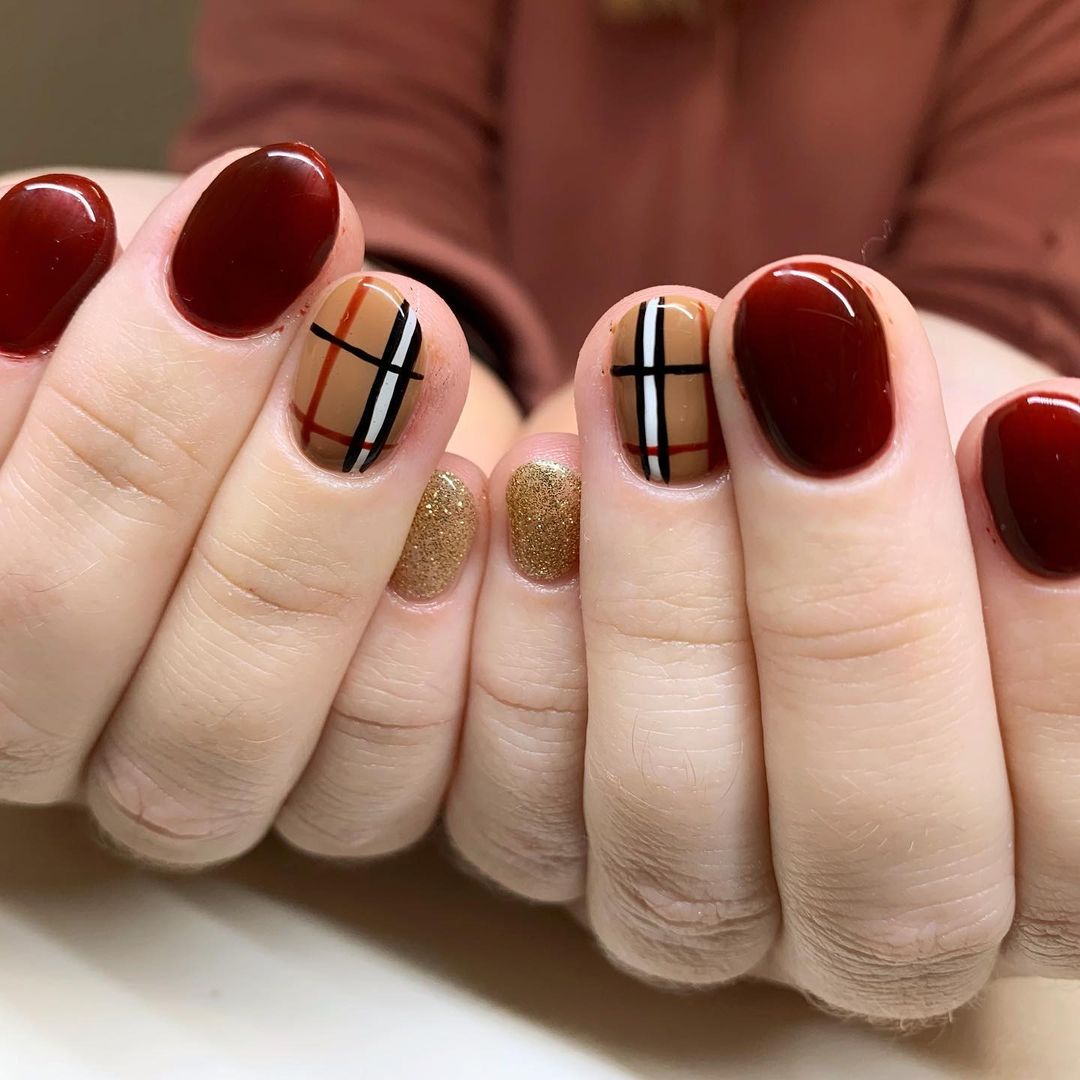
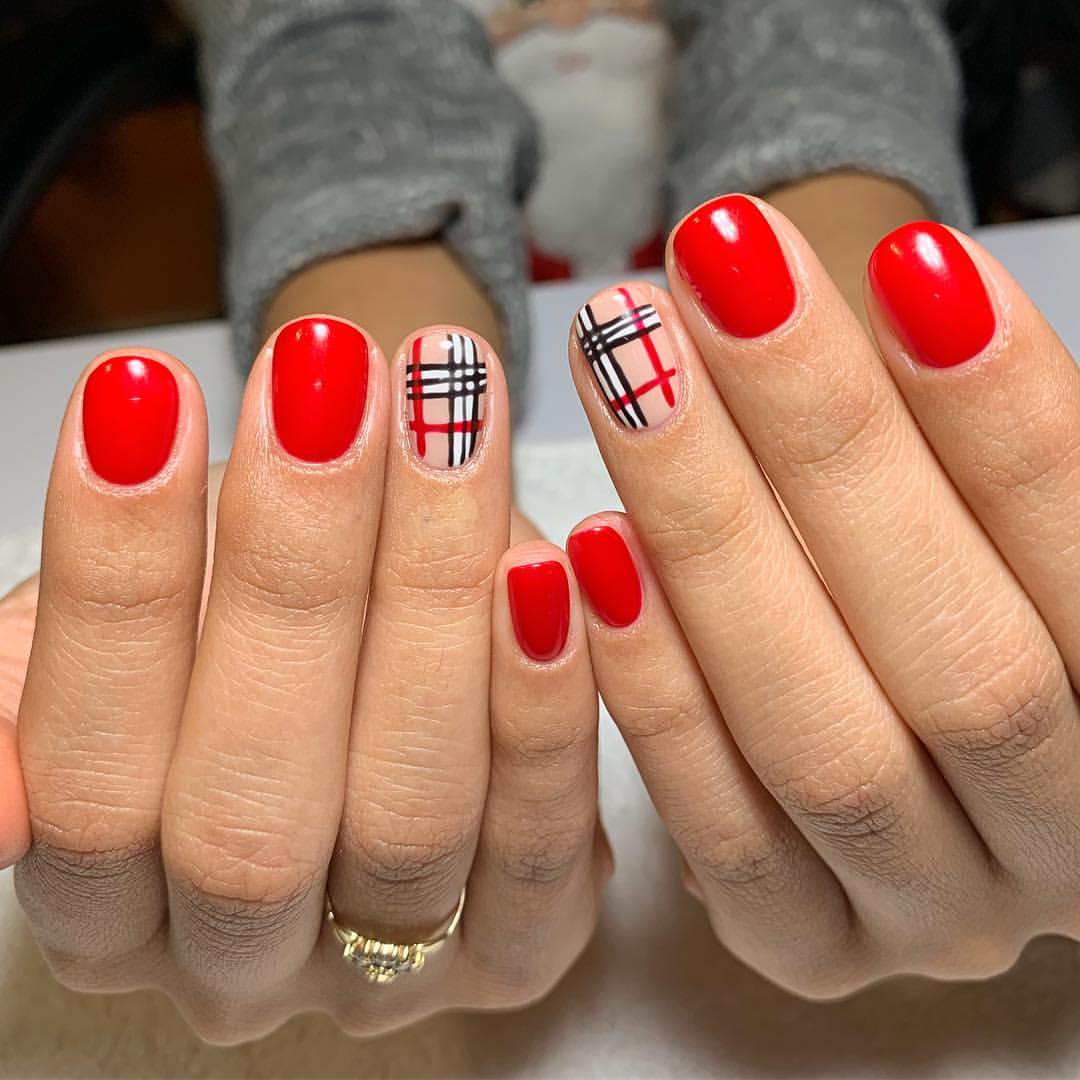
As a professional manicurist, I can confidently say that this nail design is the epitome of classic elegance. The deep red nails exude a timeless charm, while the accent nails featuring a Burberry-inspired plaid pattern add a touch of high fashion. The gold glitter nails bring just the right amount of sparkle, making this design perfect for any occasion. The combination of deep red, gold glitter, and plaid creates a sophisticated and stylish look that’s ideal for the fall season.
-
- Deep red nail polish (e.g., OPI’s “Big Apple Red”)
- Gold glitter nail polish (e.g., Essie’s “Rock at the Top”)
- Black and white striping nail art pens
- Top coat for a glossy finish (e.g., Seche Vite)
Professional Tips:
-
- Use a high-quality deep red polish for a flawless finish.
- Create the plaid pattern with a fine nail art brush and a steady hand.
- Opt for a chunky gold glitter polish to make the accent nails pop.
- Seal the design with a top coat to ensure longevity.
Creating the Look at Home:
- Start by applying a base coat to protect your nails.
- Apply two coats of deep red polish on all nails except the accent nails.
- On the accent nails, use black and white striping pens to create the plaid pattern.
- Apply gold glitter polish to the remaining nails for a touch of sparkle.
- Finish with a glossy top coat to seal the design and add shine.
Vibrant Playfulness
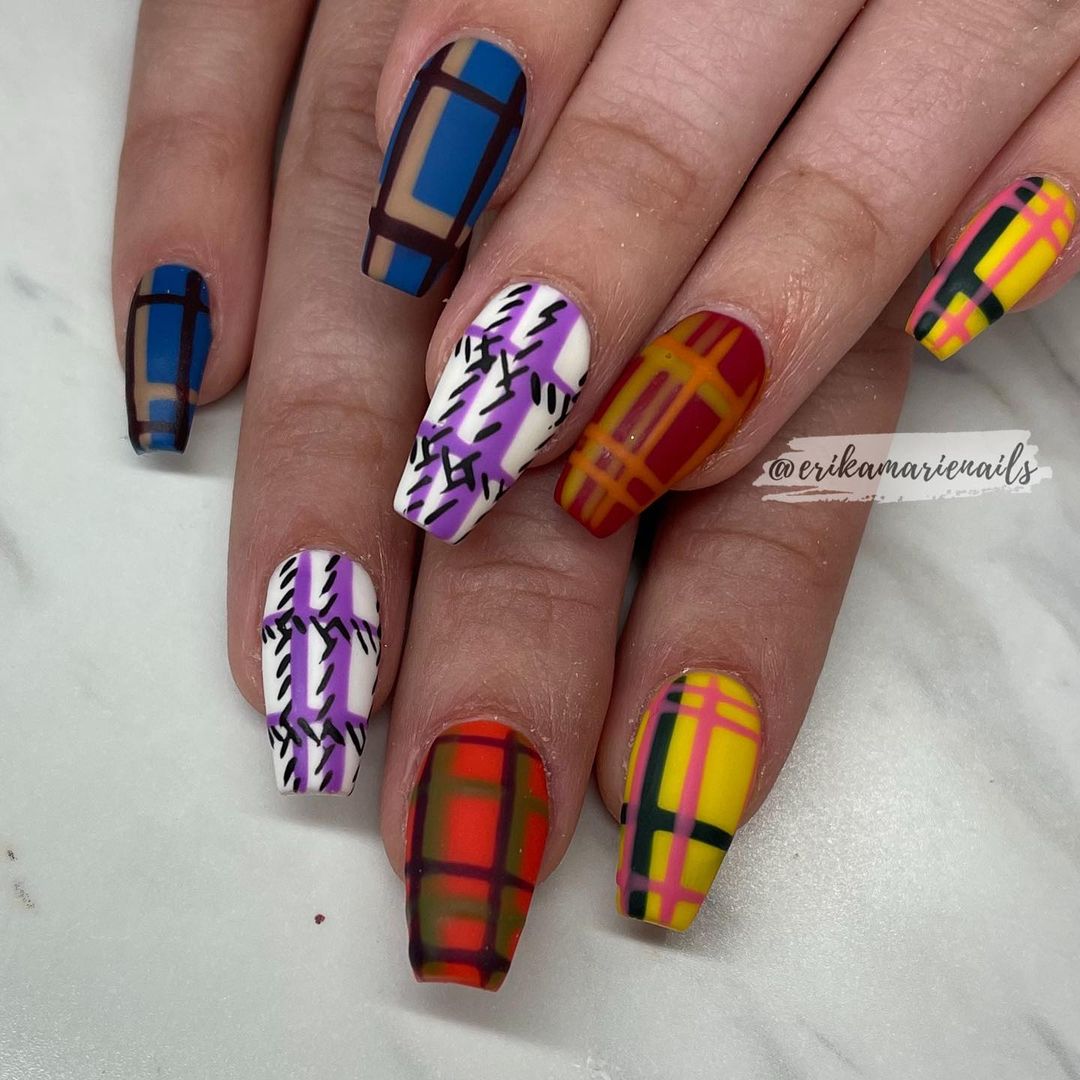
This nail design is all about vibrant colors and playful patterns. Each nail features a unique design, ranging from bold color blocks to intricate plaid patterns. The use of bright colors like blue, purple, red, and yellow makes this a fun and eye-catching design that’s perfect for those who love to experiment with their nail art.
-
- Bright nail polishes in blue, purple, red, yellow (e.g., Essie’s “Butler Please”, OPI’s “Do You Lilac It?”, Sally Hansen’s “Red My Lips”, Zoya’s “Pippa”)
- Black and white striping nail art pens
- Matte top coat (e.g., OPI Matte Top Coat)
Professional Tips:
-
- Choose a range of bright, bold colors to create the color blocks and patterns.
- Use a fine nail art brush to create the detailed plaid designs.
- Finish with a matte top coat to give the design a modern twist.
Creating the Look at Home:
- Start by applying a base coat to protect your nails.
- Apply a different bright color to each nail.
- Use striping pens to create intricate plaid patterns on some nails and bold color blocks on others.
- Finish with a matte top coat for a contemporary finish.
Subtle Sophistication
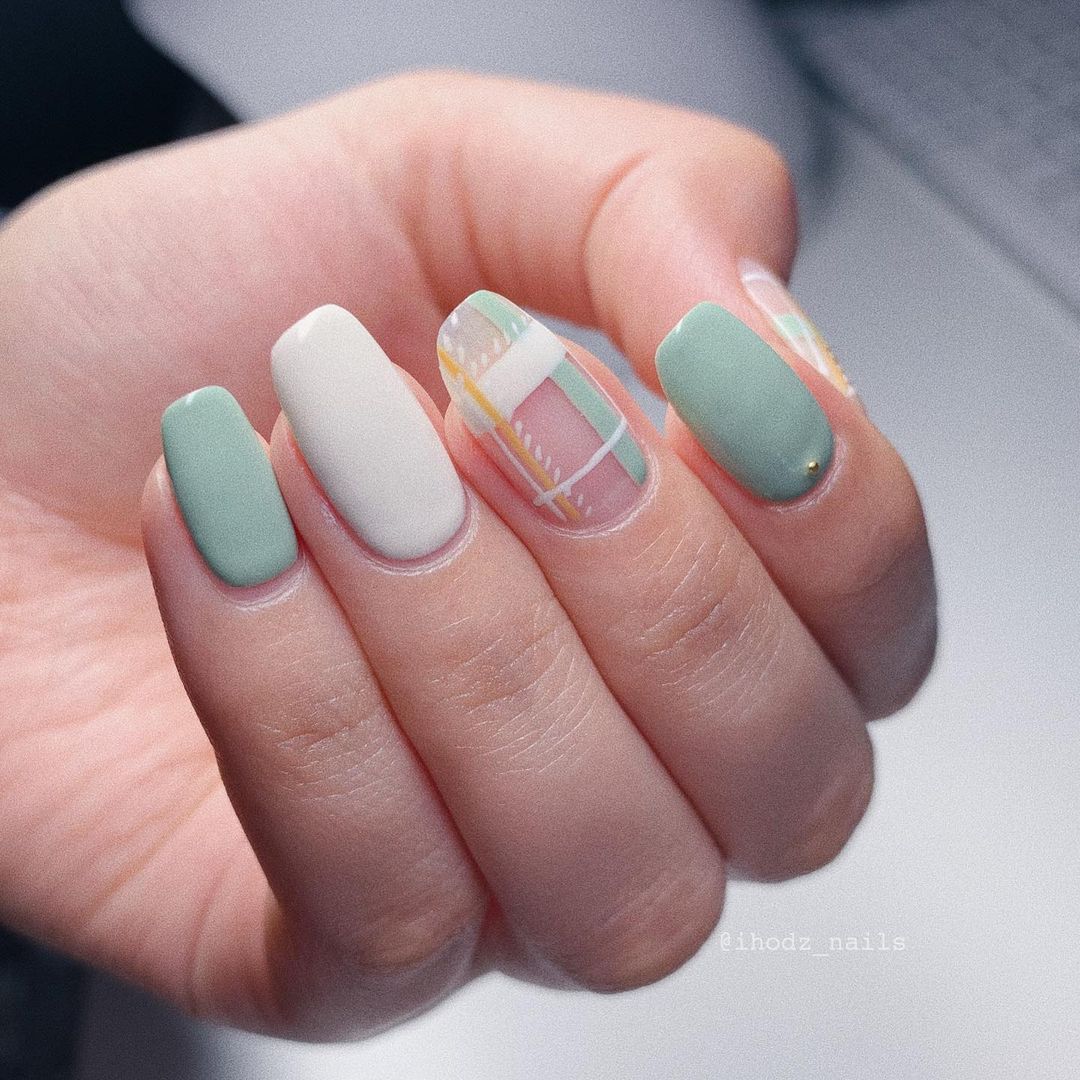
This nail design is a perfect blend of subtlety and sophistication. The soft pastel colors and delicate plaid pattern make it a great choice for those who prefer a more understated look. The combination of mint green, white, and light yellow creates a fresh and clean design that’s perfect for spring and summer.
-
- Pastel nail polishes in mint green, white, light yellow (e.g., Essie’s “Mint Candy Apple”, OPI’s “Alpine Snow”, Zoya’s “Jacqueline”)
- White striping nail art pen
- Glossy top coat (e.g., Seche Vite)
Professional Tips:
-
- Use soft pastel colors for a fresh and clean look.
- Create the plaid pattern with a fine nail art brush and soft, steady strokes.
- Finish with a glossy top coat to enhance the pastel colors.
Creating the Look at Home:
- Start by applying a base coat to protect your nails.
- Apply two coats of pastel polish on each nail.
- Use a white striping pen to create a delicate plaid pattern on accent nails.
- Finish with a glossy top coat to seal the design and add shine.
Bold Buffalo Plaid
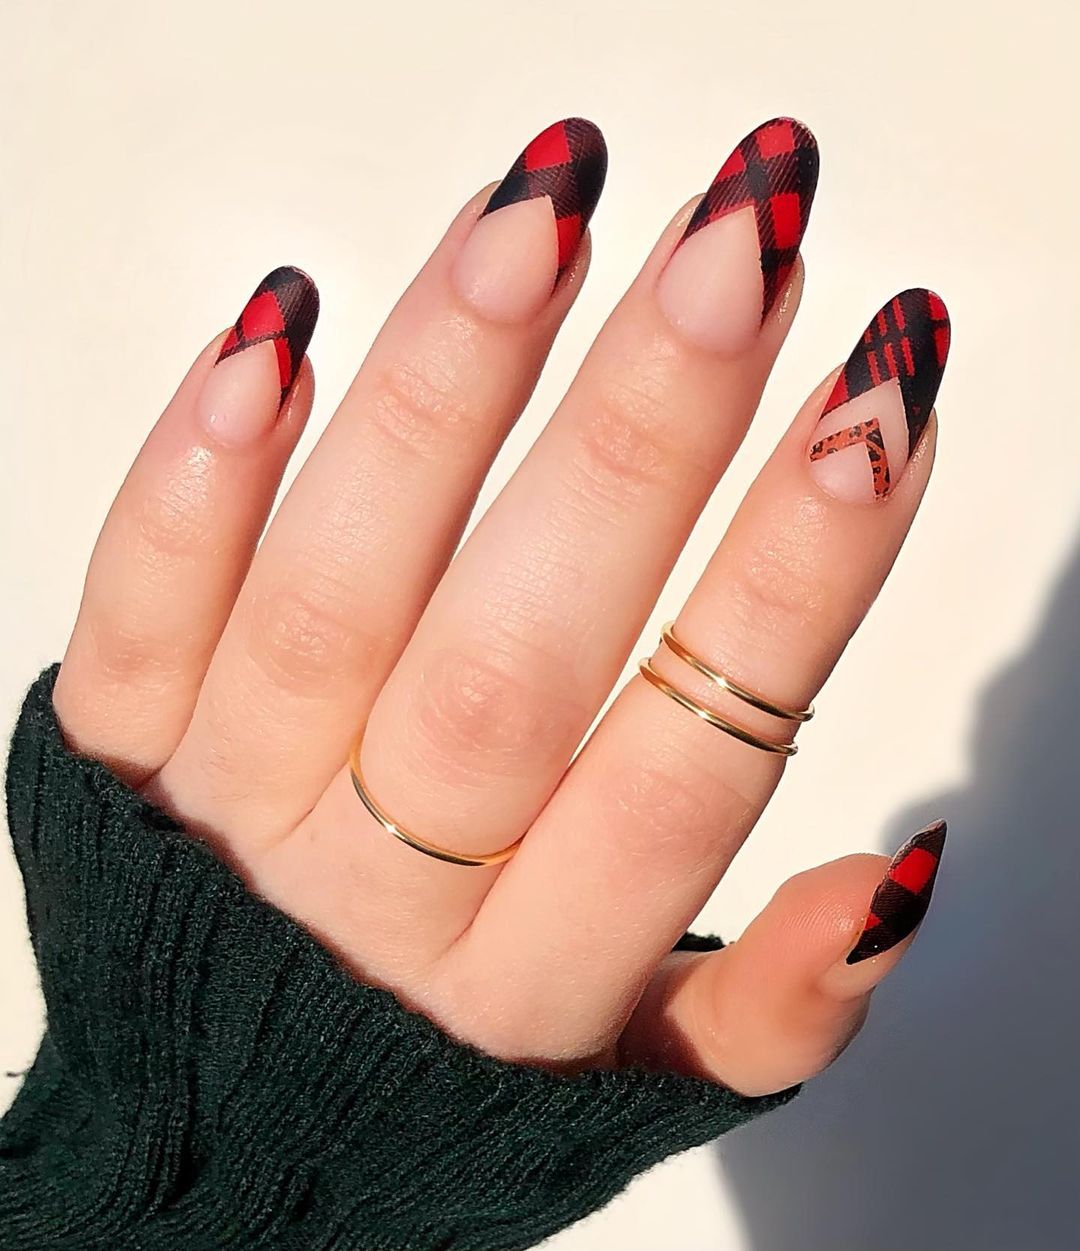
This nail design combines the boldness of red and black buffalo plaid with the elegance of a French manicure twist. The sharp, angled tips with a plaid pattern contrast beautifully with the natural nail base. The mix of solid colors and plaid patterns across the nails creates a striking and fashionable look. The plaid pattern is intricately detailed, giving the nails a textured and vibrant appearance.
-
- Red nail polish (e.g., OPI’s “Big Apple Red”)
- Black nail polish (e.g., Essie’s “Licorice”)
- Nail art brushes for detailed lines
- Matte top coat (e.g., OPI Matte Top Coat)
Professional Tips:
-
- Ensure each nail is clean and filed into an almond shape for precision.
- Use a fine brush to carefully paint the plaid pattern, allowing each layer to dry completely before adding another.
- Apply a matte top coat to seal the design and add a modern twist to the classic plaid.
Creating the Look at Home:
- Start with a base coat to protect your nails.
- Paint the tips of each nail with red polish in a V-shape.
- Use a fine nail art brush to add black lines, creating the plaid pattern on the tips.
- Once dry, apply a matte top coat to finish the look.
Save Pin
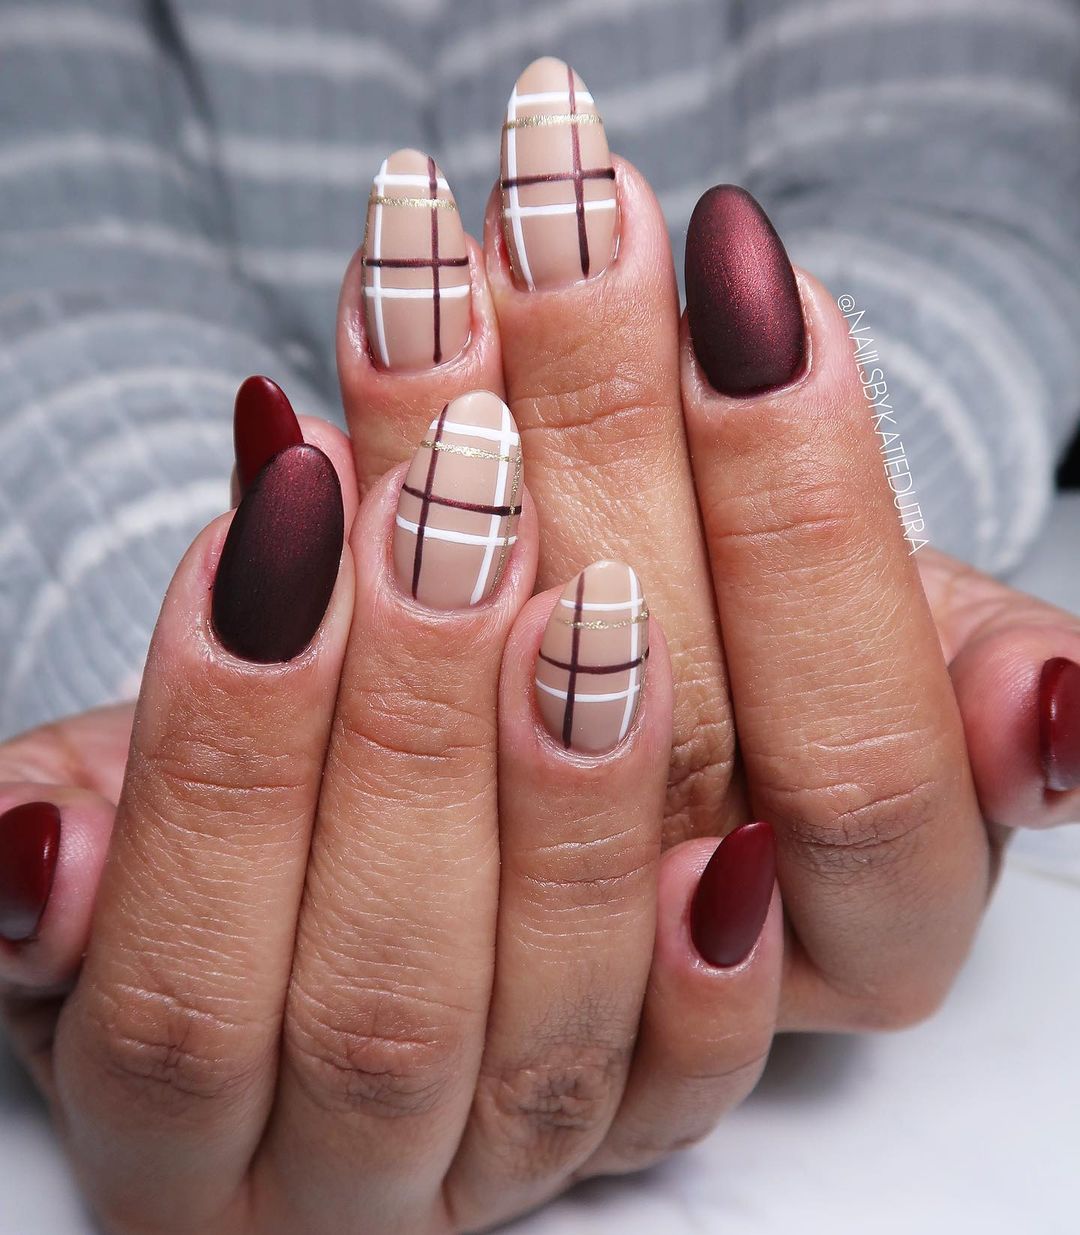
Chic Maroon Plaid
This design blends the warmth of maroon with the sophistication of nude and plaid accents. The matte maroon nails exude elegance, while the nude nails with plaid patterns add a chic twist. The gold stripe details within the plaid design bring a touch of luxury and shine to the overall look.
-
- Maroon nail polish (e.g., Essie’s “In the Lobby”)
- Nude nail polish (e.g., OPI’s “Dulce de Leche”)
- Gold striping tape or nail art pen
- White and brown striping nail art pens
- Matte top coat (e.g., OPI Matte Top Coat)
Professional Tips:
-
- File nails into an almond shape to enhance the elegance of the design.
- Use striping tape for the gold lines to ensure precision.
- Apply a matte top coat over the maroon nails to create a contrast with the glossy plaid accents.
Creating the Look at Home:
- Begin with a base coat to protect your nails.
- Apply maroon polish on half of the nails and nude polish on the other half.
- Use gold striping tape to add vertical lines on the nude nails.
- Create the plaid pattern with white and brown striping pens, adding the gold accents last.
- Finish with a matte top coat on the maroon nails and a glossy top coat on the plaid nails.
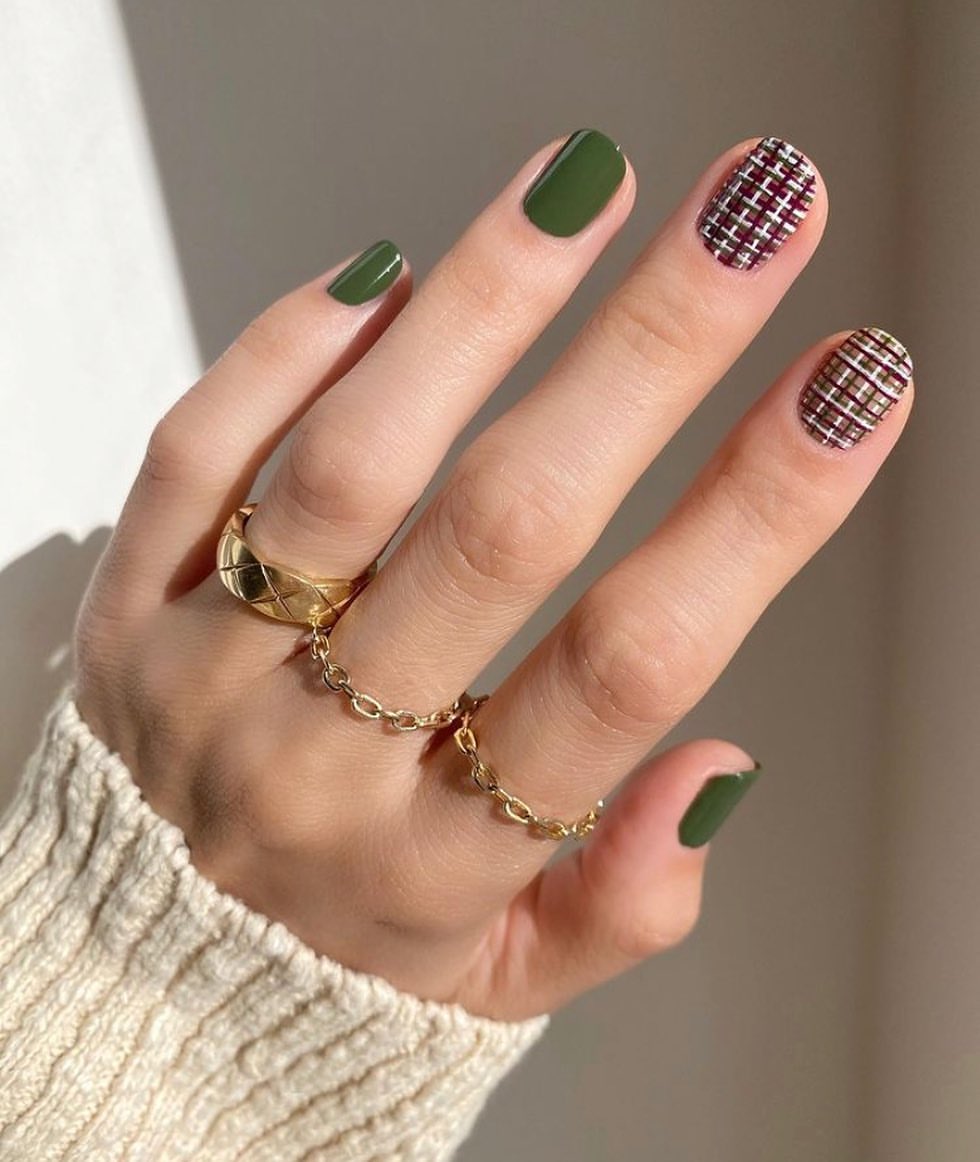
Earthy Green Plaid
This design features an earthy green base with intricate plaid accents in burgundy, white, and gold. The plaid pattern is meticulously detailed, adding a sophisticated and fashionable touch to the nails. The combination of solid green nails and plaid accent nails creates a balanced and eye-catching look.
-
- Green nail polish (e.g., OPI’s “Stay Off the Lawn”)
- Burgundy nail polish (e.g., Essie’s “Wicked”)
- White nail polish (e.g., OPI’s “Alpine Snow”)
- Gold striping tape or nail art pen
- Glossy top coat (e.g., Seche Vite)
Professional Tips:
-
- Choose a green polish with good opacity to avoid multiple coats.
- Use a fine nail art brush for the plaid details to ensure precision.
- Apply a glossy top coat to enhance the colors and protect the design.
Creating the Look at Home:
- Start with a base coat to protect your nails.
- Apply green polish to all nails.
- On the accent nails, use burgundy, white, and gold striping pens to create the plaid pattern.
- Seal the design with a glossy top coat to add shine and durability.
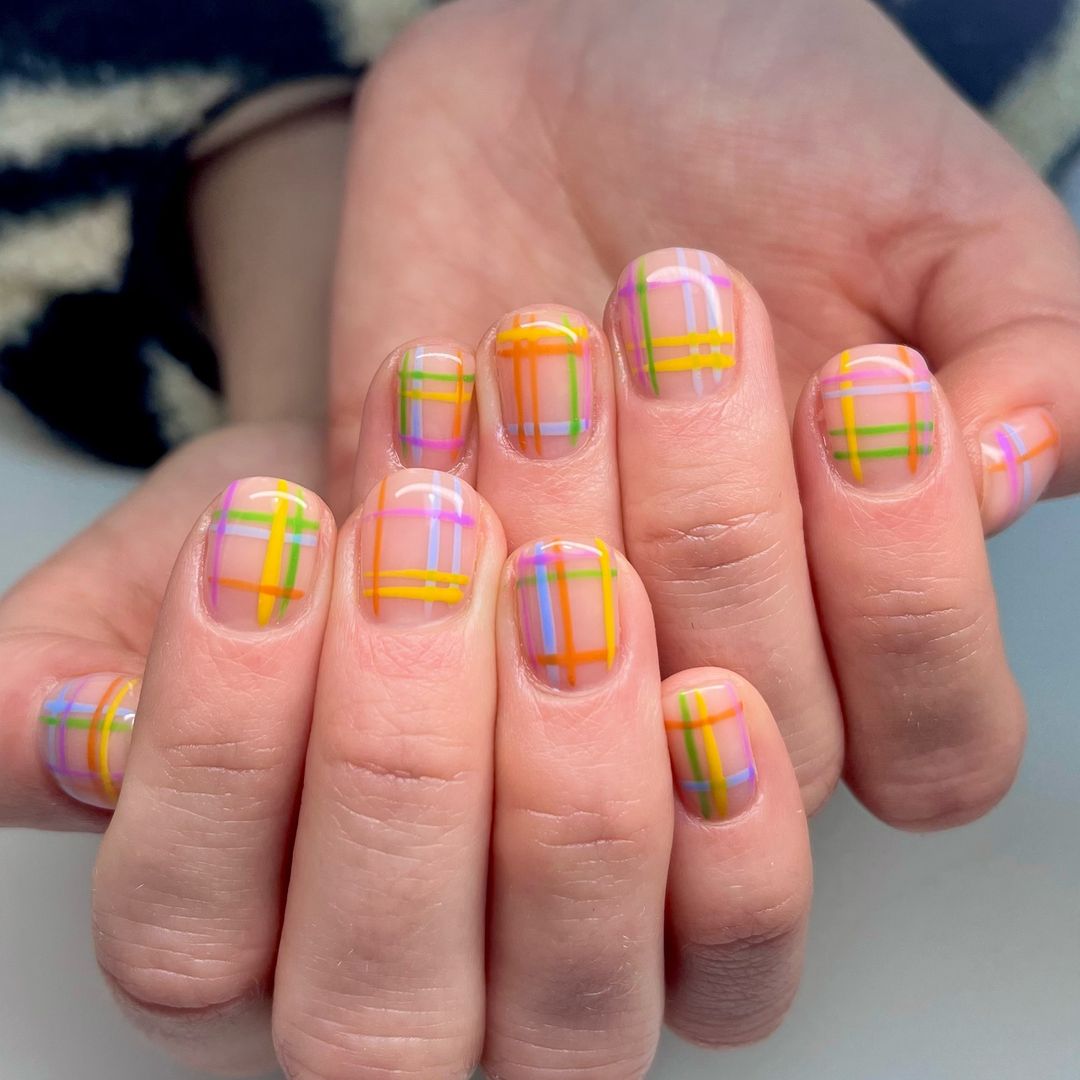
Bright Neon Plaid
This vibrant and colorful plaid design is perfect for adding a pop of color to your fall look. The use of neon orange, green, and pink lines over a clear base creates a playful and modern twist on the classic plaid pattern. The clean and precise lines give the nails a fresh and polished appearance.
-
- Neon orange nail polish (e.g., China Glaze “Orange Knockout”)
- Neon green nail polish (e.g., Orly “Glowstick”)
- Neon pink nail polish (e.g., Essie “Pinking About You”)
- Fine nail art brushes for creating lines
- Clear base coat and glossy top coat (e.g., Seche Vite)
Professional Tips:
-
- Start with a clear base coat to make the neon colors pop.
- Use a fine brush to carefully paint the plaid lines, ensuring they are evenly spaced.
- Seal with a glossy top coat to protect the design and add shine.
Creating the Look at Home:
- Apply a clear base coat to all nails.
- Use the fine nail art brushes to paint vertical and horizontal lines in neon orange, green, and pink.
- Allow each color to dry before adding the next to prevent smudging.
- Finish with a glossy top coat to seal the design and enhance the colors.
Classic Red Plaid
This classic red plaid design is both bold and stylish, making it a perfect choice for fall. The bright red nails are complemented by accent nails featuring a black, white, and red plaid pattern, creating a striking contrast that catches the eye.
-
- Bright red nail polish (e.g., OPI “Big Apple Red”)
- Black and white striping nail art pens
- Clear base coat and glossy top coat (e.g., Seche Vite)
Professional Tips:
-
- Ensure the red polish is applied smoothly and evenly for a professional look.
- Use striping pens for precise plaid lines on the accent nails.
- Apply a glossy top coat to enhance the shine and durability of the design.
Creating the Look at Home:
- Apply a clear base coat to all nails.
- Paint all nails with bright red polish, leaving a few accent nails.
- Use black and white striping pens to create the plaid pattern on the accent nails.
- Finish with a glossy top coat to protect the design and add shine.
Warm Autumn Plaid
This warm and earthy plaid design is perfect for embracing the autumn season. The mix of deep browns and reds with white plaid accents creates a cozy and inviting look. The intricate plaid pattern on the accent nails adds a touch of sophistication to the overall design.

-
- Deep brown nail polish (e.g., Essie “Partner in Crime”)
- Deep red nail polish (e.g., Essie “Maki Me Happy”)
- White striping nail art pen
- Clear base coat and glossy top coat (e.g., Seche Vite)
Professional Tips:
-
- Use deep, rich colors for a true autumn feel.
- Apply the plaid pattern with a steady hand and fine brush for precision.
- Finish with a glossy top coat to make the colors pop.
Creating the Look at Home:
- Apply a clear base coat to all nails.
- Paint the nails with deep brown and red polish, leaving some for the plaid pattern.
- Use a white striping pen to create the plaid design on the accent nails.
- Seal with a glossy top coat for added shine and protection.
Save Pin
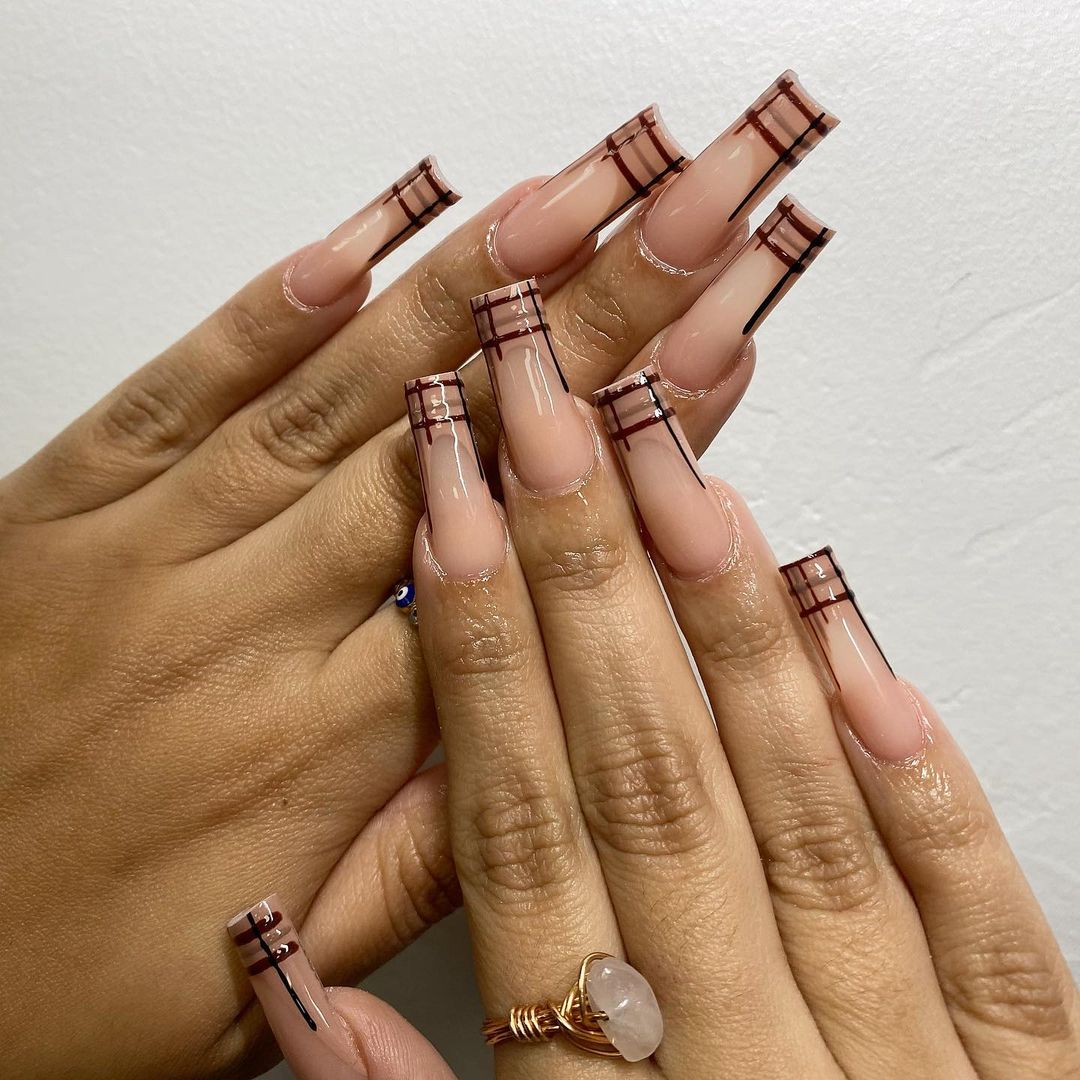
Chic Nude Plaid
This design features a nude base with chic plaid tips in shades of brown and black. The combination of a natural base with detailed plaid tips creates a sophisticated and trendy look. The long, coffin-shaped nails add to the elegance of the design.
-
- Nude nail polish (e.g., OPI “Samoan Sand”)
- Brown and black striping nail art pens
- Clear base coat and glossy top coat (e.g., Seche Vite)
Professional Tips:
-
- Keep the base coat smooth and even for a clean look.
- Use fine striping pens to create the plaid pattern on the tips.
- Apply a glossy top coat to finish the design and enhance the shine.
Creating the Look at Home:
- Apply a clear base coat to all nails.
- Paint the nails with nude polish as the base.
- Use brown and black striping pens to create the plaid pattern on the tips.
- Finish with a glossy top coat to seal the design.
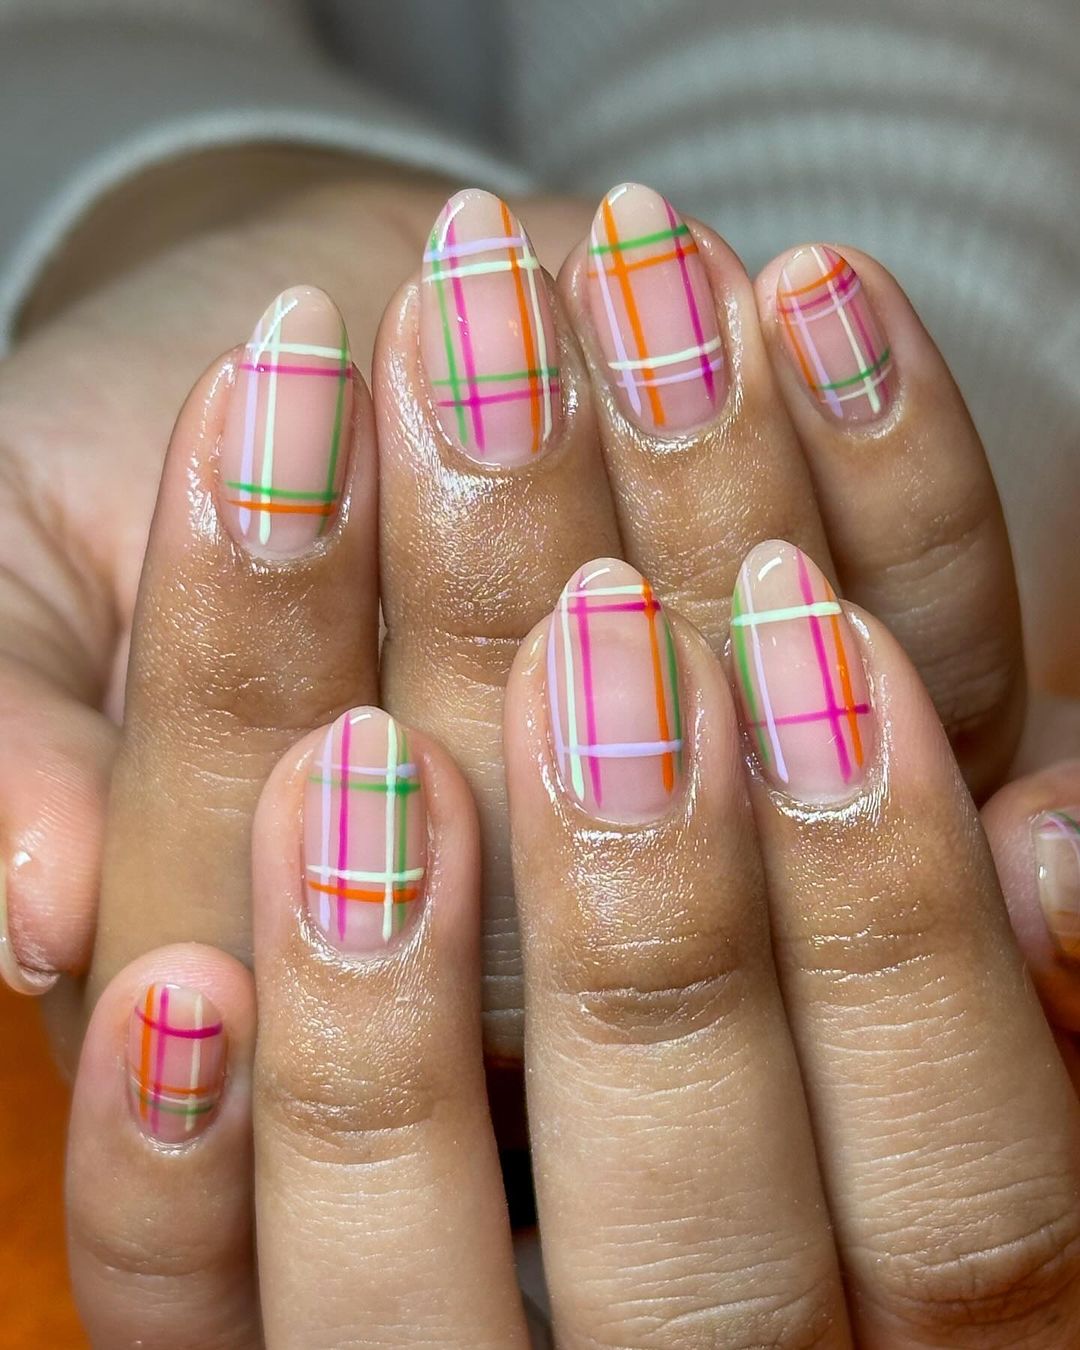
Vibrant Pastel Plaid
This playful design features a clear base with pastel plaid lines in bright orange, green, pink, and white. The use of pastel colors gives the nails a fresh and fun look, perfect for any casual outing. The plaid pattern is detailed and colorful, making it stand out beautifully.
-
- Pastel orange nail polish (e.g., OPI “Sun, Sea, and Sand in My Pants”)
- Pastel green nail polish (e.g., Essie “Mint Candy Apple”)
- Pastel pink nail polish (e.g., OPI “Pink Friday”)
- White striping nail art pen
- Clear base coat and glossy top coat (e.g., Seche Vite)
Professional Tips:
-
- Use a clear base coat to make the pastel colors pop.
- Apply the plaid lines with a fine brush for precision.
- Seal with a glossy top coat for a shiny finish.
Creating the Look at Home:
- Apply a clear base coat to all nails.
- Use fine brushes to paint plaid lines in pastel orange, green, pink, and white.
- Allow each color to dry before adding the next to avoid smudging.
- Finish with a glossy top coat to protect the design and enhance the colors.
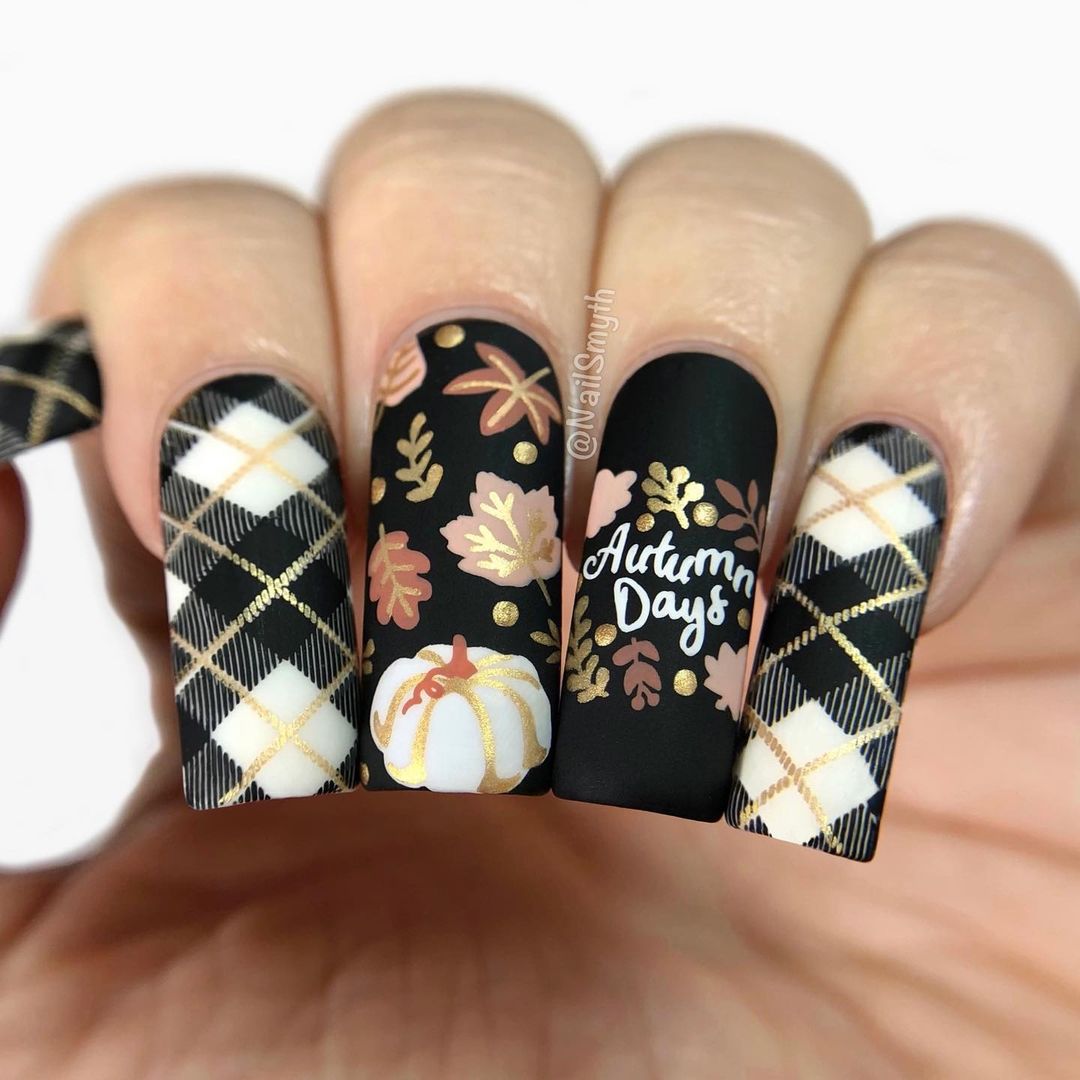
Autumn Days Plaid
This stunning design combines a matte black base with intricate autumn-themed plaid and floral accents. The gold detailing and autumn leaves add a touch of seasonal charm, making this design perfect for the fall months. The use of matte and glossy finishes adds depth and interest to the look.
-
- Matte black nail polish (e.g., OPI Matte Top Coat)
- Gold striping tape or nail art pen
- White striping nail art pen
- Autumn-themed nail stickers or decals
- Clear base coat (e.g., Seche Vite)
Professional Tips:
-
- Use a matte top coat for the black nails to add a modern twist.
- Apply gold and white details with precision for a clean look.
- Enhance the design with autumn-themed stickers or decals for added charm.
Creating the Look at Home:
- Apply a clear base coat to all nails.
- Paint the nails with matte black polish as the base.
- Use gold and white striping pens to create the plaid pattern and details.
- Apply autumn-themed stickers or decals to accent nails.
- Finish with a matte top coat on the black nails and a glossy top coat on the accents.
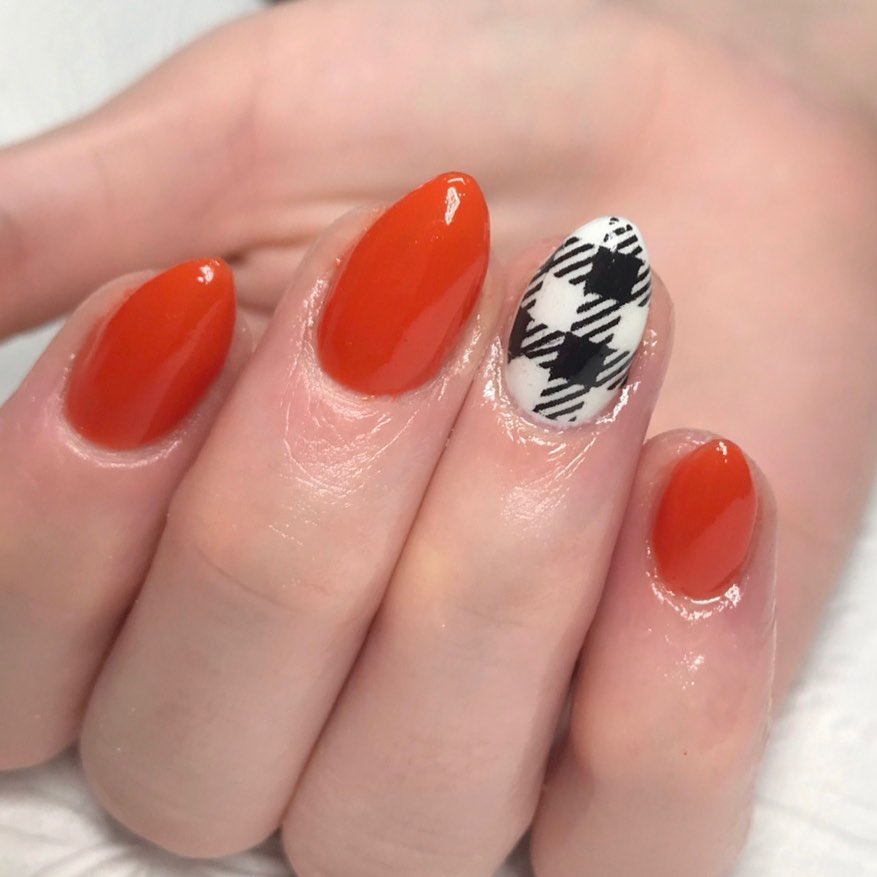
Bold Orange and Black Plaid
This vibrant design features a striking combination of bold orange nails with a black and white plaid accent nail. The bright orange color adds a pop of energy, while the plaid accent brings a classic touch, creating a perfect balance of modern and traditional elements.
-
- Orange nail polish (e.g., Essie “Tangerine”)
- Black and white striping nail art pens
- Clear base coat and glossy top coat (e.g., Seche Vite)
Professional Tips:
-
- Apply a clear base coat to prevent staining from the bright orange polish.
- Use a striping pen to create the detailed plaid pattern on the accent nail.
- Finish with a glossy top coat to enhance the shine and longevity of the design.
Creating the Look at Home:
- Apply a clear base coat to all nails.
- Paint all nails with orange polish, leaving one for the plaid design.
- Use black and white striping pens to create the plaid pattern on the accent nail.
- Seal with a glossy top coat to protect the design.
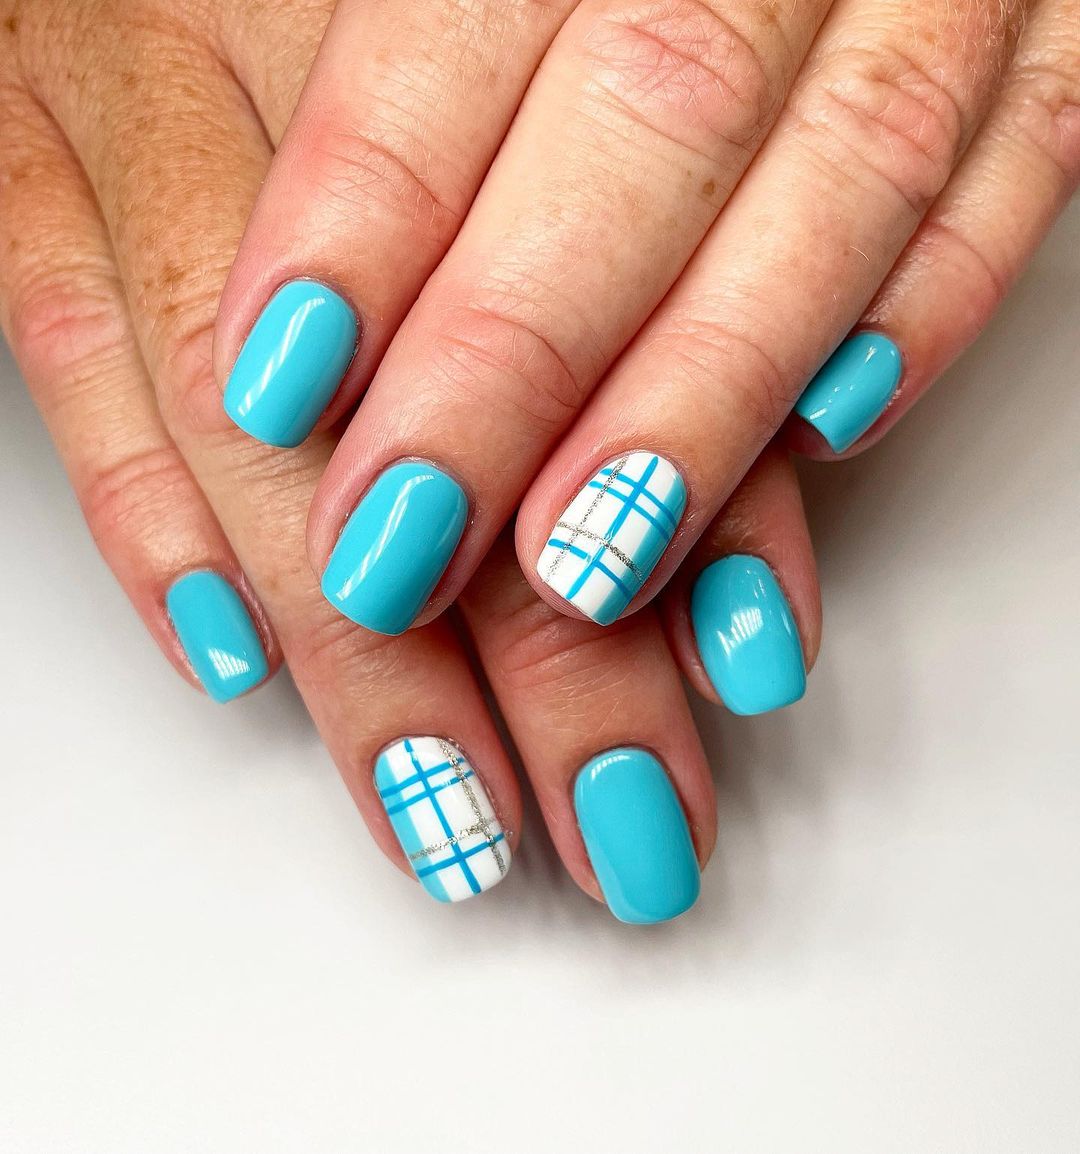
Cool Blue Plaid
This design features a refreshing blue base with plaid accents in white and silver. The combination of the bright blue and the metallic accents gives the nails a cool and modern look, perfect for any season.
-
- Bright blue nail polish (e.g., OPI “Rich Girls & Po-Boys”)
- White and silver striping nail art pens
- Clear base coat and glossy top coat (e.g., Seche Vite)
Professional Tips:
-
- Use a high-quality blue polish for an even finish.
- Apply white and silver striping pens to create the plaid pattern with precision.
- Finish with a glossy top coat to enhance the shine and durability.
Creating the Look at Home:
- Apply a clear base coat to all nails.
- Paint all nails with blue polish, leaving one or two for the plaid design.
- Use white and silver striping pens to create the plaid pattern on the accent nails.
- Seal with a glossy top coat for added shine.
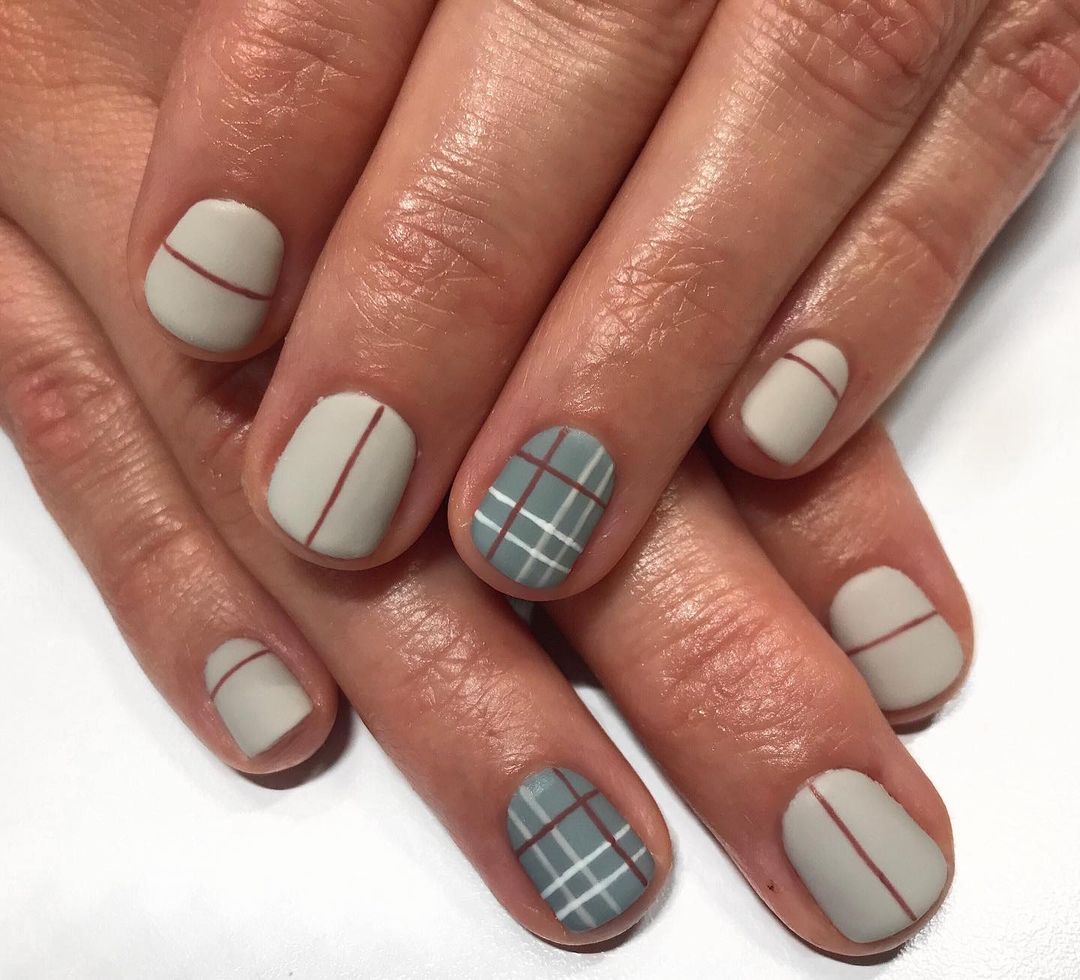
Minimalist Matte Plaid
This elegant design features a matte finish with subtle plaid accents. The combination of grey and burgundy with white lines creates a sophisticated and understated look that is perfect for any occasion.
-
- Grey matte nail polish (e.g., Essie “Chinchilly” with matte top coat)
- Burgundy and white striping nail art pens
- Clear base coat (e.g., Seche Vite)
Professional Tips:
-
- Apply a matte top coat over the grey polish for a smooth finish.
- Use striping pens to create the plaid pattern with steady, even strokes.
- Ensure the matte top coat is fully dry before adding the plaid details.
Creating the Look at Home:
- Apply a clear base coat to all nails.
- Paint all nails with grey polish and apply a matte top coat.
- Use burgundy and white striping pens to create the plaid pattern on one or two accent nails.
- Seal with a clear top coat to protect the design, ensuring it remains matte.
Navy and Green Plaid
This bold design combines navy blue and green plaid with a glossy finish. The rich colors and intricate plaid pattern create a striking look that is both stylish and sophisticated.
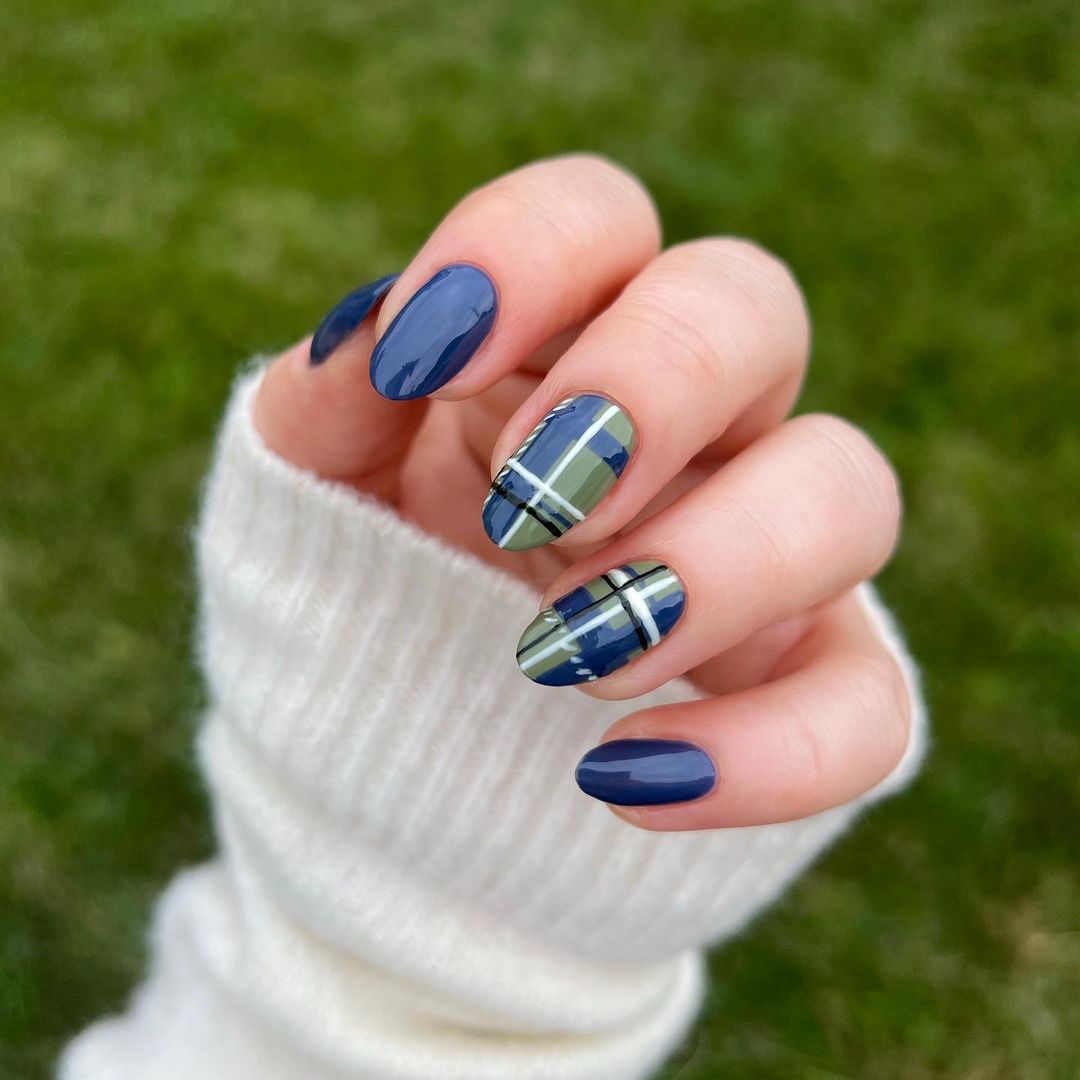
-
- Navy blue nail polish (e.g., OPI “Russian Navy”)
- Green nail polish (e.g., Essie “Stylenomics”)
- White and black striping nail art pens
- Clear base coat and glossy top coat (e.g., Seche Vite)
Professional Tips:
-
- Apply a clear base coat to enhance the longevity of the polish.
- Use a fine brush to create the plaid pattern with precise lines.
- Finish with a glossy top coat to make the colors pop and protect the design.
Creating the Look at Home:
- Apply a clear base coat to all nails.
- Paint all nails with navy blue polish, leaving some for the green plaid design.
- Use green polish and striping pens to create the plaid pattern on the accent nails.
- Seal with a glossy top coat to enhance the shine and protect the design.
Festive Pink and Green Plaid
This festive design features a vibrant pink and green plaid pattern with a touch of glam. The use of pink and green colors with gold accents creates a playful and eye-catching look that is perfect for the holiday season.
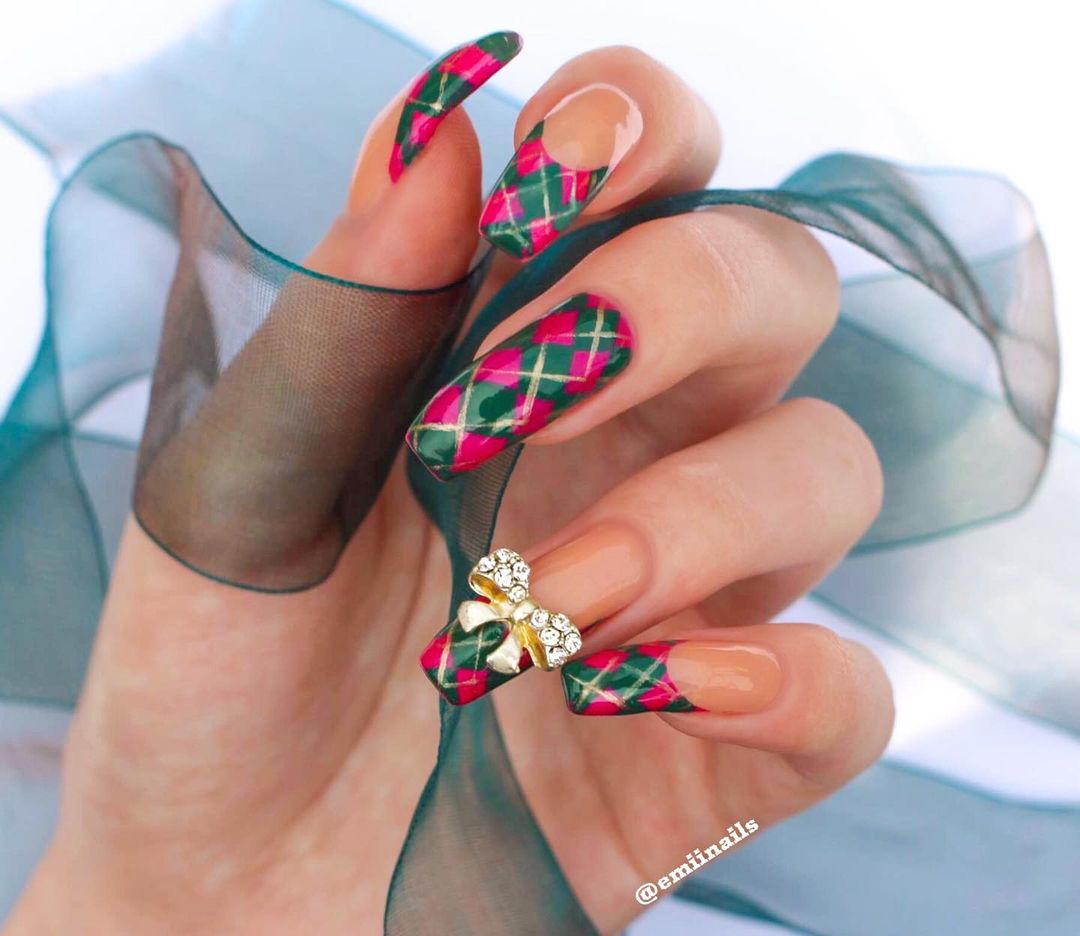
-
- Pink nail polish (e.g., OPI “Pink Flamenco”)
- Green nail polish (e.g., Essie “Mojito Madness”)
- Gold striping tape or nail art pen
- Clear base coat and glossy top coat (e.g., Seche Vite)
Professional Tips:
-
- Apply a clear base coat to protect the nails.
- Use gold striping tape to add a touch of glam to the plaid pattern.
- Finish with a glossy top coat to make the design shine.
Creating the Look at Home:
- Apply a clear base coat to all nails.
- Paint all nails with pink polish, leaving some for the green plaid design.
- Use green polish and gold striping tape to create the plaid pattern on the accent nails.
- Seal with a glossy top coat to enhance the shine and protect the design.
Autumn Plaid with Floral Accents
This design combines a classic plaid pattern with beautiful autumn-themed floral accents. The mix of navy, orange, and gold with intricate floral details creates a unique and elegant look that is perfect for the fall season.
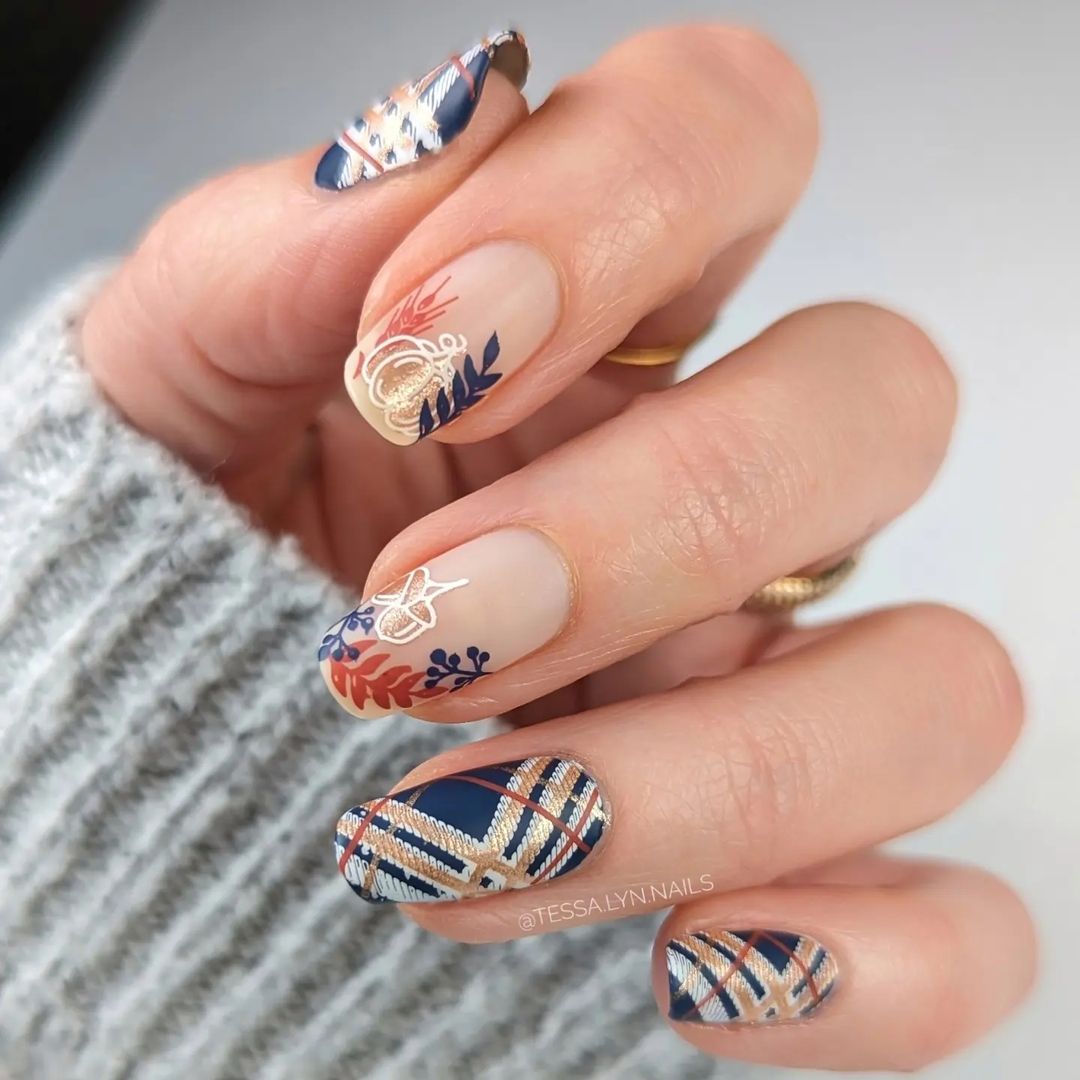
-
- Navy blue nail polish (e.g., Essie “After School Boy Blazer”)
- Orange nail polish (e.g., OPI “A Good Man-darin is Hard to Find”)
- Gold striping tape or nail art pen
- Autumn-themed nail stickers or decals
- Clear base coat and glossy top coat (e.g., Seche Vite)
Professional Tips:
-
- Use a fine brush to create the plaid pattern with precise lines.
- Apply autumn-themed floral stickers to add a seasonal touch.
- Finish with a glossy top coat to protect the design and enhance the colors.
Creating the Look at Home:
- Apply a clear base coat to all nails.
- Paint all nails with navy blue polish, leaving some for the plaid design.
- Use orange polish and gold striping tape to create the plaid pattern on the accent nails.
- Apply autumn-themed floral stickers to some nails.
- Seal with a glossy top coat to enhance the shine and protect the design.
Floral Autumn Plaid
This beautiful design combines delicate floral art with an orange plaid background. The intricate flowers add a touch of femininity and elegance to the nails, while the plaid pattern keeps it grounded in the fall season. The addition of a cute animal accent nail adds a playful element to the overall look.
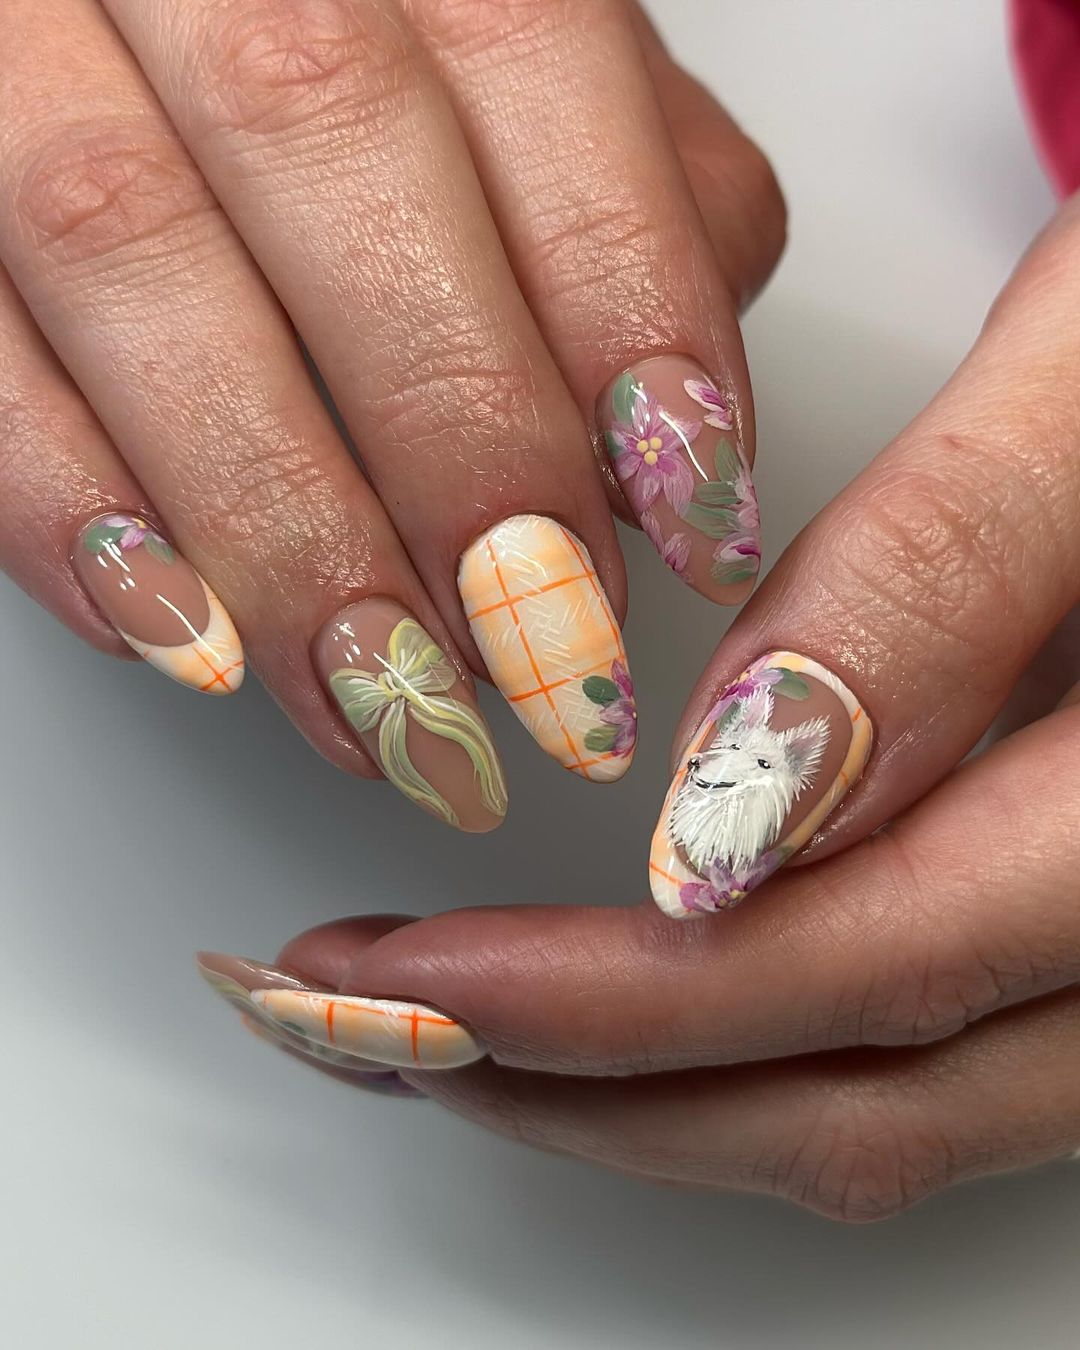
-
- Nude base polish (e.g., Essie “Ballet Slippers”)
- Orange striping nail art pen
- Floral nail stickers or decals
- Clear base coat and glossy top coat (e.g., Seche Vite)
- Fine brushes for detailed art
Professional Tips:
-
- Use a nude base to make the orange plaid pattern stand out.
- Apply floral stickers with tweezers for precise placement.
- Finish with a glossy top coat to seal and protect the intricate designs.
Creating the Look at Home:
- Apply a clear base coat to all nails.
- Paint the nails with a nude polish base.
- Use an orange striping pen to create the plaid pattern on some nails.
- Apply floral stickers and use a fine brush for additional floral details.
- Finish with a glossy top coat to seal the design.
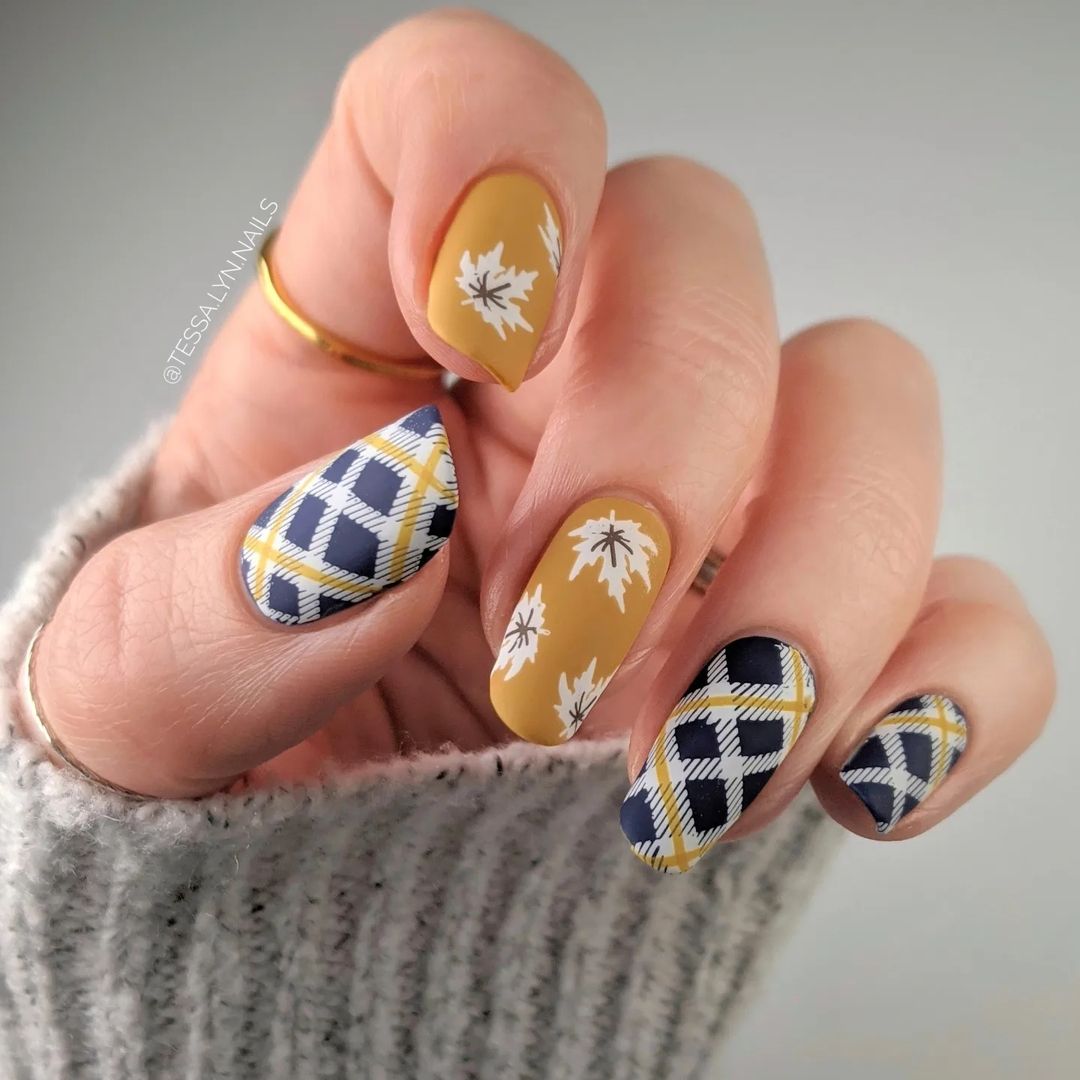
Mustard and Navy Plaid
This design features a striking combination of mustard yellow and navy blue with white plaid accents. The matte finish gives it a sophisticated edge, while the leaf designs add a seasonal touch. The mix of solid and patterned nails creates a balanced and stylish look.
-
- Mustard yellow nail polish (e.g., OPI “Never a Dulles Moment”)
- Navy blue nail polish (e.g., Essie “Midnight Cami”)
- White striping nail art pen
- Matte top coat (e.g., OPI Matte Top Coat)
- Leaf nail stickers or decals
Professional Tips:
-
- Ensure the mustard yellow polish is opaque for full coverage.
- Use a matte top coat for a sophisticated finish.
- Apply leaf stickers with precision to avoid smudging.
Creating the Look at Home:
- Apply a clear base coat to all nails.
- Paint some nails with mustard yellow and others with navy blue polish.
- Use a white striping pen to create the plaid pattern on the navy blue nails.
- Apply leaf stickers on the mustard yellow nails.
- Finish with a matte top coat for a modern look.
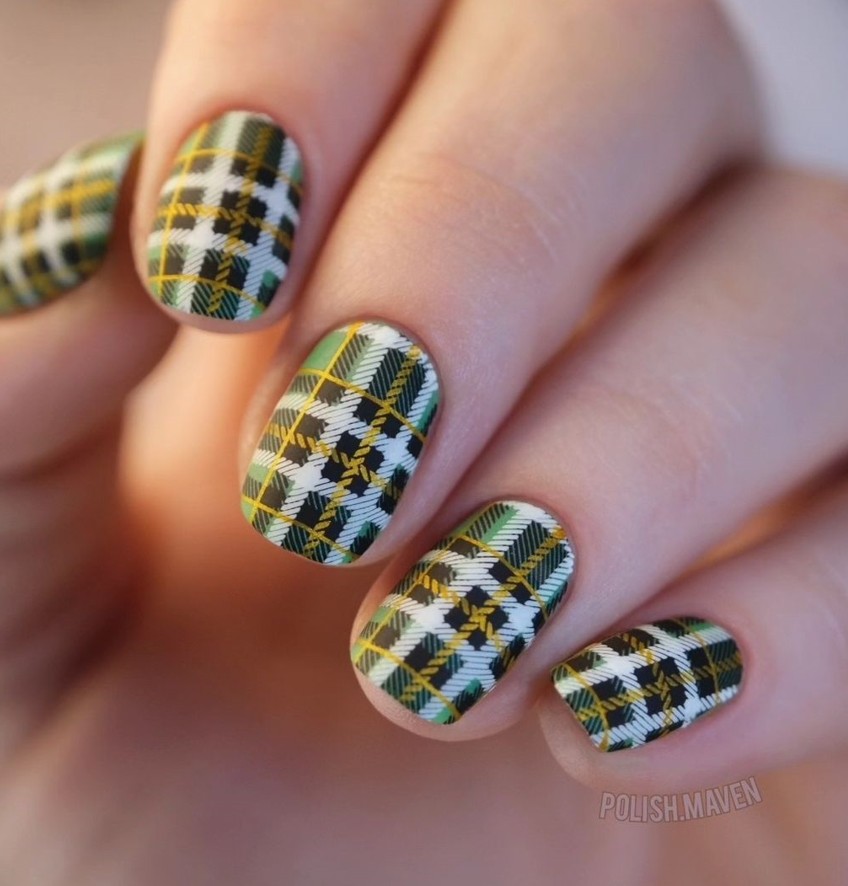
Green Tartan Plaid
This bold green tartan plaid design is perfect for those who love a bit of classic style with a twist. The detailed plaid pattern in shades of green, white, and yellow is intricate and eye-catching. The use of multiple colors adds depth and dimension to the design.
-
- Green nail polish (e.g., Essie “Going Incognito”)
- White, yellow, and black striping nail art pens
- Clear base coat and glossy top coat (e.g., Seche Vite)
Professional Tips:
-
- Use a fine brush for the detailed plaid lines.
- Allow each color to dry before applying the next to prevent smudging.
- Apply a glossy top coat to enhance the shine and protect the design.
Creating the Look at Home:
- Apply a clear base coat to all nails.
- Paint all nails with green polish.
- Use white, yellow, and black striping pens to create the plaid pattern.
- Seal with a glossy top coat to protect the design and add shine.
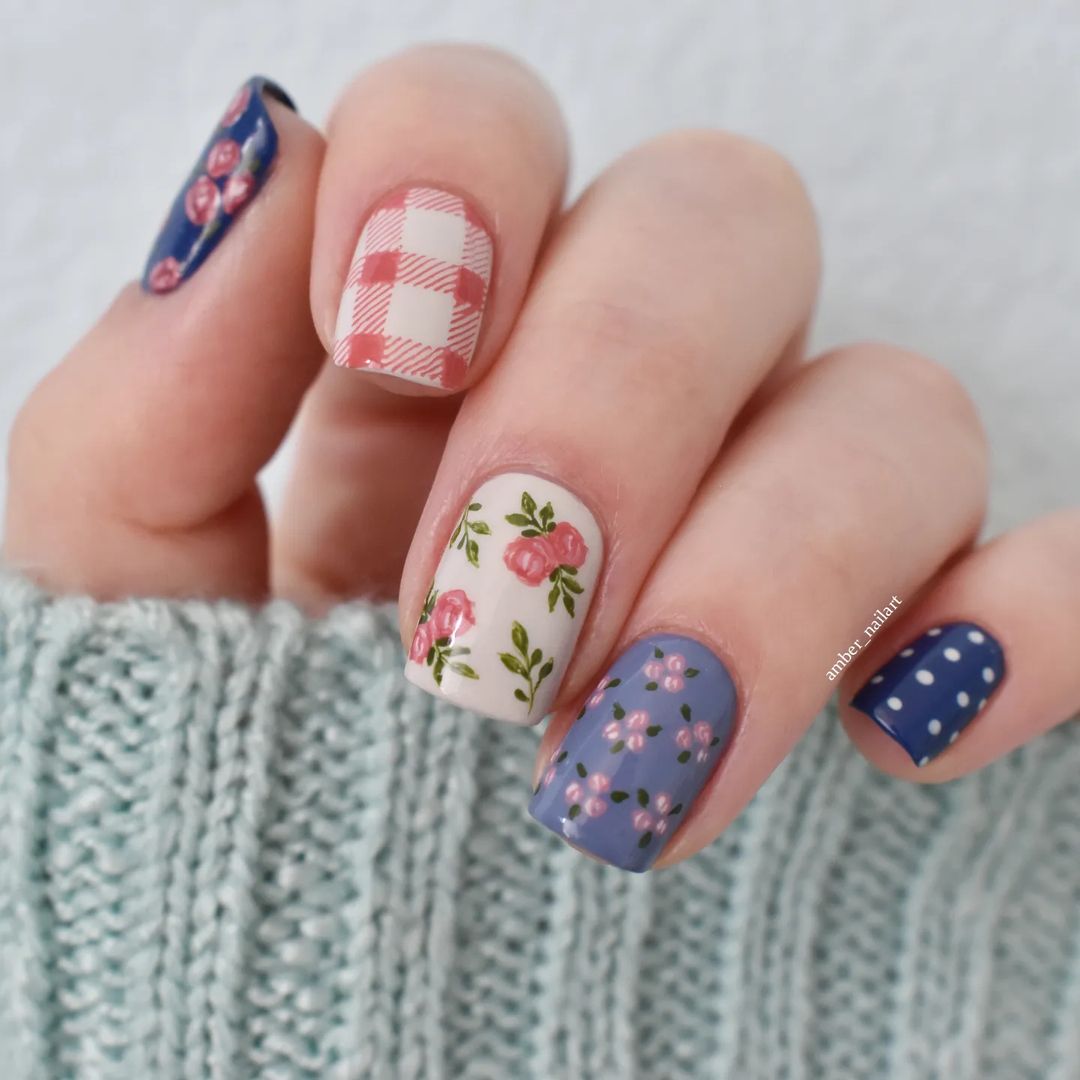
Floral and Gingham Mix
This whimsical design combines floral patterns with classic gingham and polka dots. The mix of pink, blue, and white creates a fresh and playful look that is perfect for any occasion. The variety of patterns on each nail adds a unique and fun element to the overall design.
-
- Pink nail polish (e.g., OPI “Mod About You”)
- Blue nail polish (e.g., Essie “Butler Please”)
- White striping nail art pen
- Floral nail stickers or decals
- Clear base coat and glossy top coat (e.g., Seche Vite)
Professional Tips:
-
- Use a fine brush for the gingham and polka dot patterns.
- Apply floral stickers with tweezers for precise placement.
- Finish with a glossy top coat to seal and protect the design.
Creating the Look at Home:
- Apply a clear base coat to all nails.
- Paint the nails with pink, blue, and white polish, leaving some for the gingham and polka dot patterns.
- Use white striping pens to create the gingham pattern and add polka dots on the blue nails.
- Apply floral stickers on some nails.
- Finish with a glossy top coat to enhance the shine and protect the design.
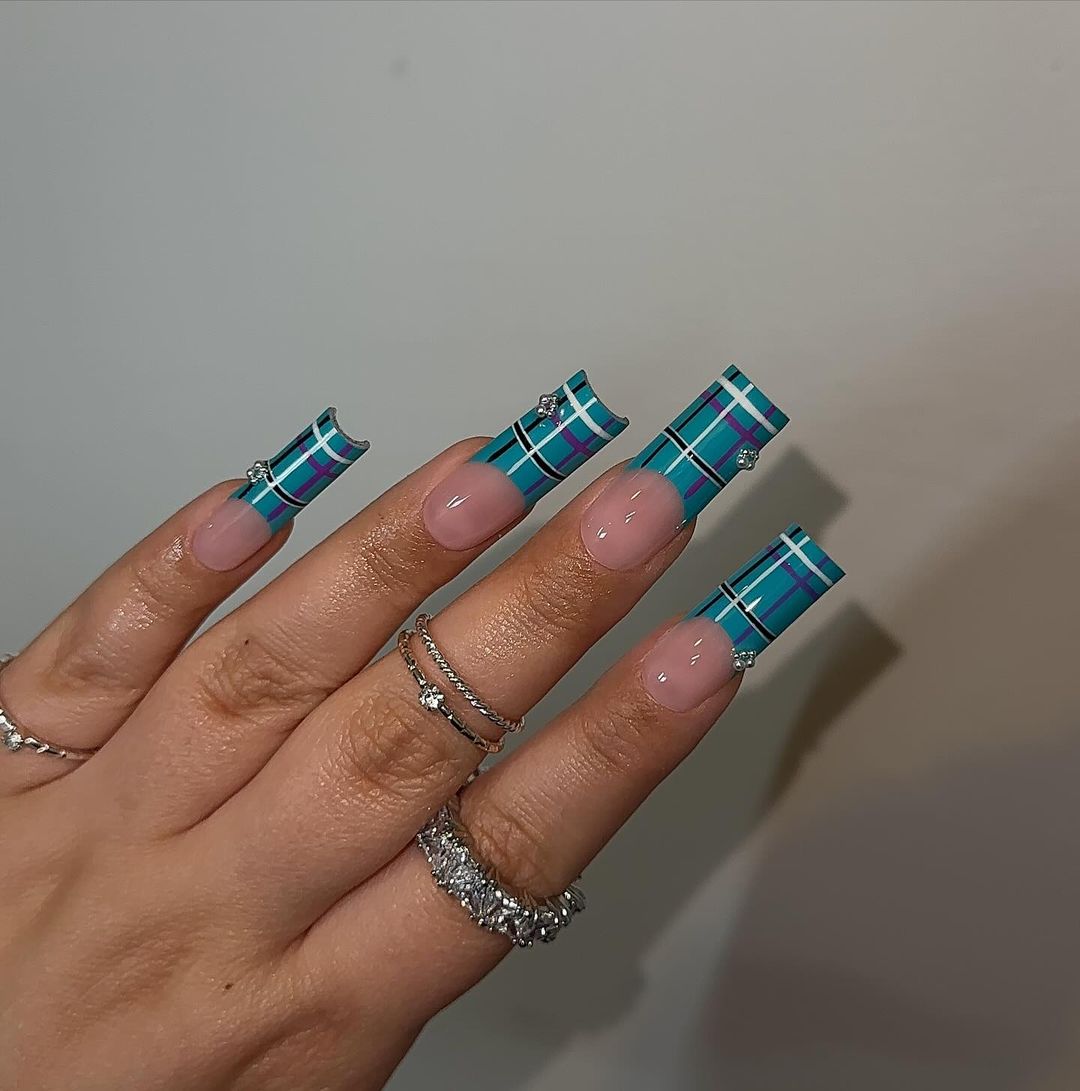
Turquoise and Purple Plaid
This modern design features a turquoise and purple plaid pattern with a glossy finish. The use of metallic accents and rhinestones adds a touch of glamour and sophistication. The long coffin-shaped nails enhance the bold and stylish look.
-
- Turquoise nail polish (e.g., Essie “In the Cab-ana”)
- Purple nail polish (e.g., OPI “Do You Lilac It?”)
- White and black striping nail art pens
- Rhinestones
- Clear base coat and glossy top coat (e.g., Seche Vite)
Professional Tips:
-
- Apply a clear base coat to enhance the longevity of the polish.
- Use striping pens to create the plaid pattern with precise lines.
- Add rhinestones for an extra touch of glamour.
Creating the Look at Home:
- Apply a clear base coat to all nails.
- Paint the nails with turquoise and purple polish, leaving some for the plaid design.
- Use white and black striping pens to create the plaid pattern on the accent nails.
- Apply rhinestones for added sparkle.
- Seal with a glossy top coat to protect the design and enhance the shine.
Green and Pink Plaid
This fresh and vibrant design features a green and pink plaid pattern with a glossy finish. The combination of green and pink creates a fun and lively look, perfect for spring and summer. The addition of a four-leaf clover accent adds a touch of luck and whimsy.
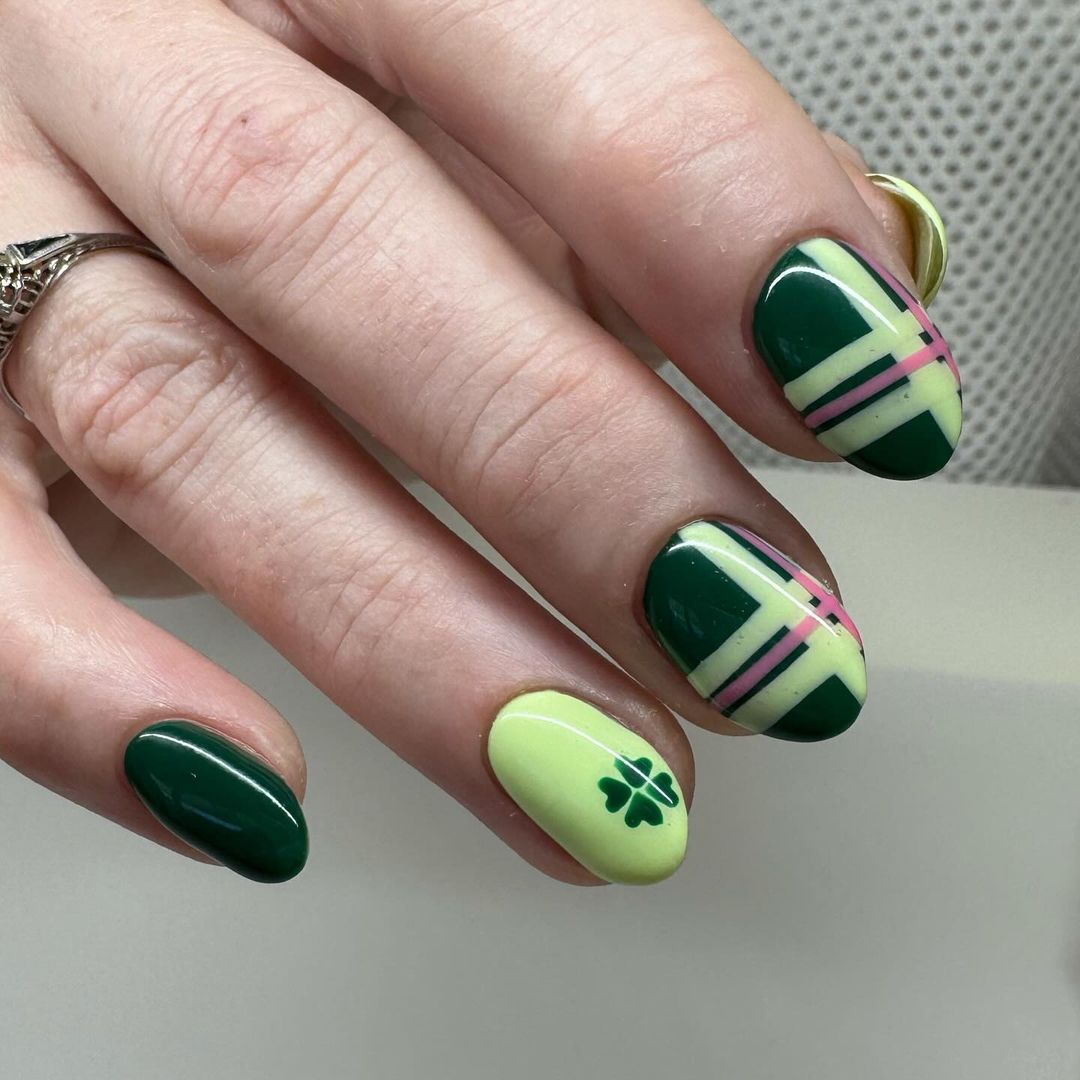
-
- Green nail polish (e.g., OPI “Jade is the New Black”)
- Pink nail polish (e.g., Essie “Cascade Cool”)
- White striping nail art pen
- Clear base coat and glossy top coat (e.g., Seche Vite)
Professional Tips:
-
- Use a high-quality green polish for an even finish.
- Apply the plaid pattern with a fine brush for precision.
- Add a four-leaf clover accent for a unique touch.
Creating the Look at Home:
- Apply a clear base coat to all nails.
- Paint the nails with green and pink polish, leaving some for the plaid design.
- Use white striping pens to create the plaid pattern on the accent nails.
- Add a four-leaf clover accent on one nail.
- Seal with a glossy top coat to protect the design and enhance the shine.
Elegant Burgundy and Gold Plaid
This stunning design features burgundy plaid tips with gold accents on a matte nude base. The elegant mix of colors and the contrast between the matte and glossy finishes create a sophisticated and chic look. The plaid pattern adds a touch of classic style while the gold lines bring a hint of luxury.

-
- Burgundy nail polish (e.g., OPI “Malaga Wine”)
- Nude matte nail polish (e.g., Essie “Matte About You” over any nude polish)
- Gold striping nail art pen
- Black striping nail art pen
- Clear base coat and glossy top coat (e.g., Seche Vite)
Professional Tips:
-
- Start with a clear base coat to protect your nails.
- Apply the nude polish and let it dry completely before applying the matte top coat.
- Use the burgundy polish to paint the tips in a plaid pattern, then add gold and black lines for detail.
- Finish with a glossy top coat on the burgundy tips to make them stand out against the matte base.
Creating the Look at Home:
- Apply a clear base coat to all nails.
- Paint the nails with nude polish and let it dry, then apply a matte top coat.
- Use a thin brush to create burgundy plaid tips, adding gold and black lines for detail.
- Finish with a glossy top coat on the tips to enhance the contrast.
Vibrant Yellow and Blue Plaid
This bold and colorful design combines yellow, blue, and plaid accents for a fun and eye-catching look. The bright colors and intricate plaid pattern create a dynamic and playful style. The mix of solid and plaid nails, along with the matte finish, adds depth and interest to the design.
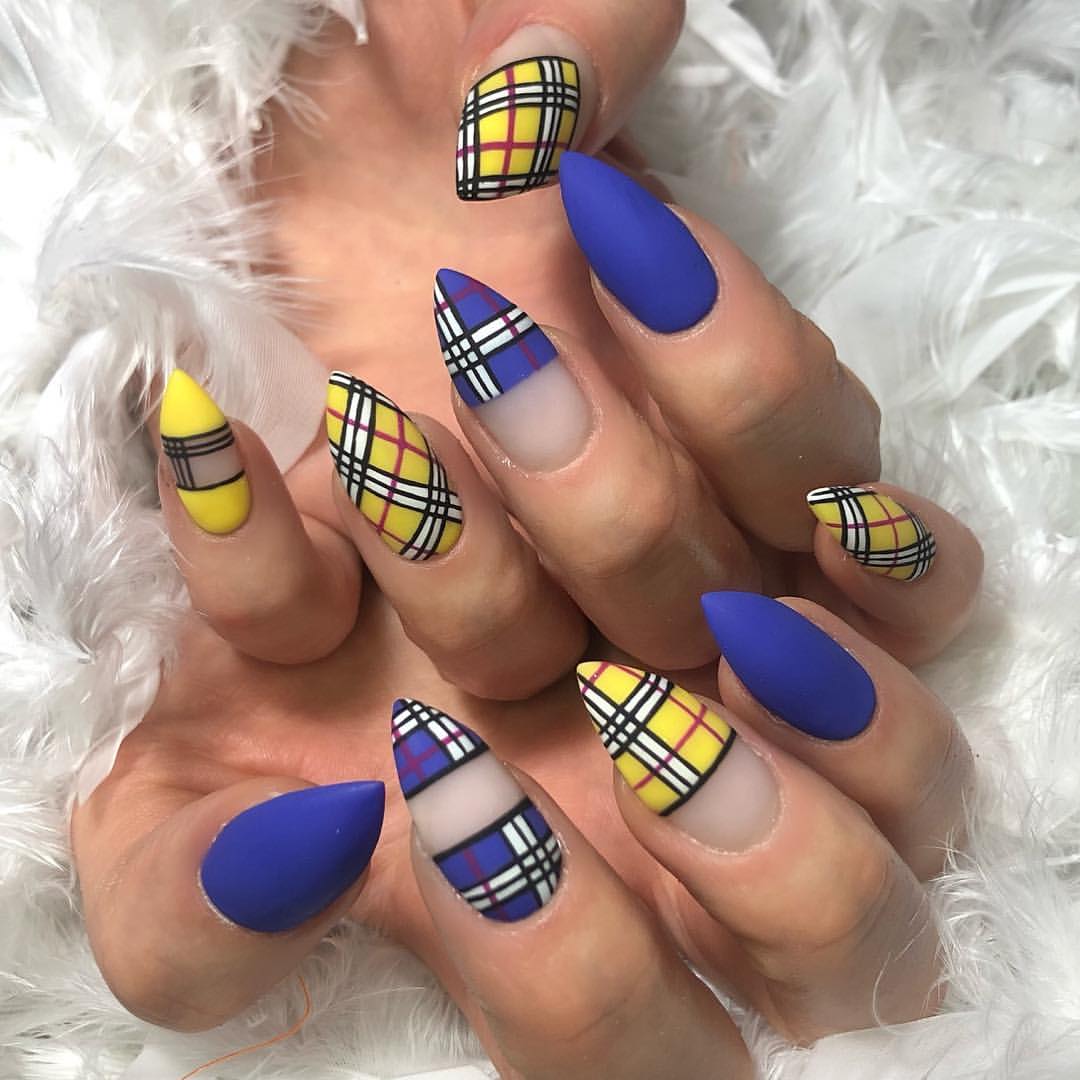
-
- Yellow nail polish (e.g., Essie “Sunny Business”)
- Blue nail polish (e.g., OPI “My Chihuahua Doesn’t Bite Anymore”)
- White, black, and red striping nail art pens
- Matte top coat (e.g., OPI Matte Top Coat)
- Clear base coat (e.g., Seche Vite)
Professional Tips:
-
- Apply a clear base coat to protect your nails.
- Use the yellow and blue polishes to paint alternating nails.
- Create the plaid pattern on the accent nails using white, black, and red striping pens.
- Finish with a matte top coat to give the design a modern, sophisticated look.
Creating the Look at Home:
- Apply a clear base coat to all nails.
- Paint alternating nails with yellow and blue polish.
- Use striping pens to create the plaid pattern on the accent nails.
- Finish with a matte top coat to seal the design.
Cute Strawberry Plaid
This adorable design features a red plaid pattern and a cute strawberry accent on a bright red base. The combination of playful patterns and the fun fruit design makes this look perfect for a cheerful, casual style. The mix of glossy and matte finishes adds texture and interest.
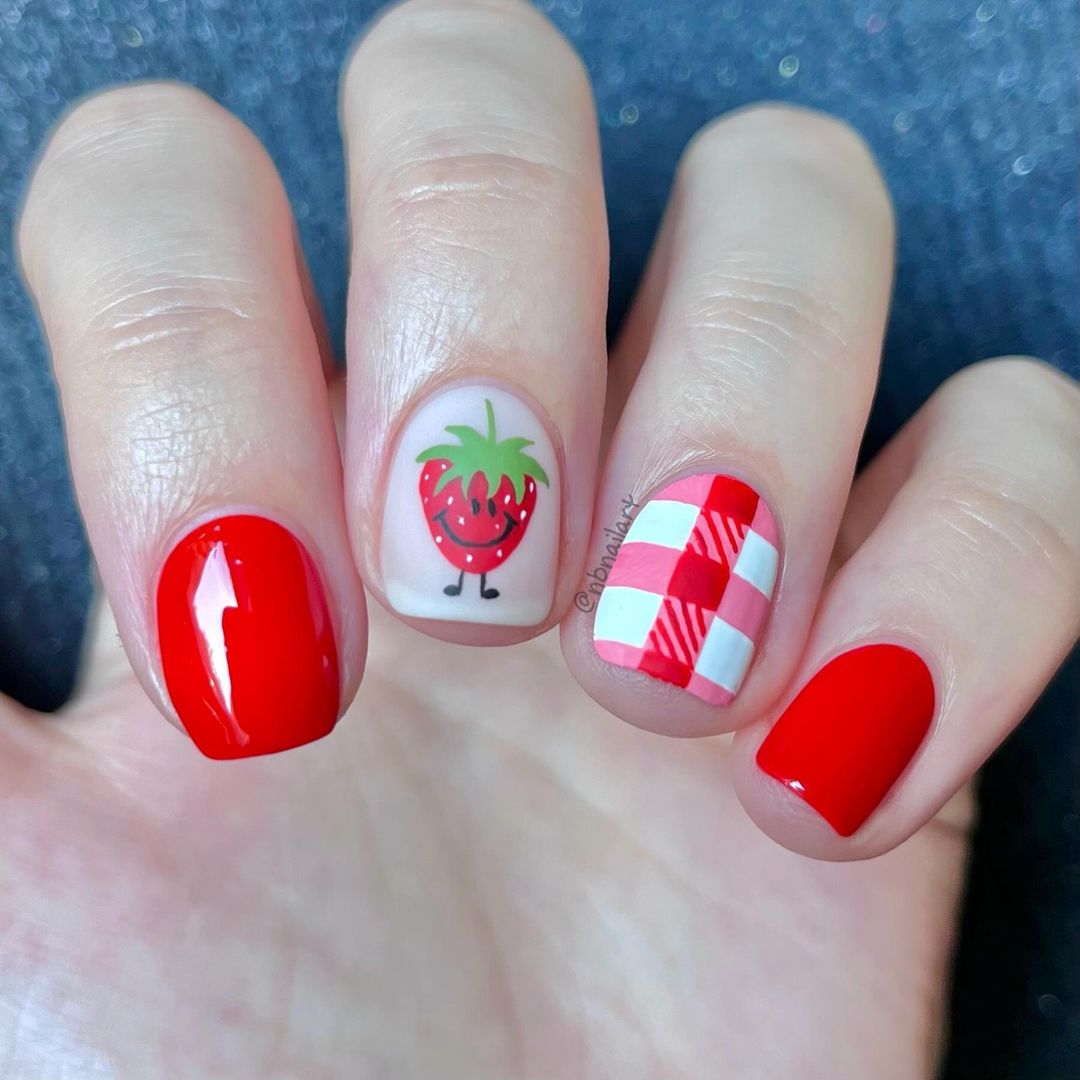
-
- Bright red nail polish (e.g., Essie “A-List”)
- White striping nail art pen
- Green and black striping nail art pens
- Strawberry nail stickers or decals
- Clear base coat and glossy top coat (e.g., Seche Vite)
Professional Tips:
-
- Use a clear base coat to protect your nails and enhance the longevity of the polish.
- Apply the red polish evenly and let it dry completely.
- Create the plaid pattern using a white striping pen, and add green and black details for the strawberry design.
- Finish with a glossy top coat to add shine and protect the design.
Creating the Look at Home:
- Apply a clear base coat to all nails.
- Paint all nails with bright red polish.
- Use a white striping pen to create the plaid pattern on one nail and apply the strawberry sticker on another.
- Add green and black details to complete the strawberry design.
- Finish with a glossy top coat to seal the design and add shine.
FAQ
Q: What are the best colors for fall plaid nails? A: For fall, rich colors like deep reds, browns, maroons, and classic plaids like black and white or Burberry-inspired patterns are ideal.
Q: Can I create these designs on short nails? A: Absolutely! Plaid designs look great on short nails, and you can use a fine nail art brush to create intricate patterns.
Q: How can I make my nail designs last longer? A: To extend the life of your nail designs, always use a good quality base coat and top coat. Avoid exposing your nails to harsh chemicals and wear gloves when doing household chores.
Q: What type of nail polish is best for creating plaid designs? A: Gel polish is great for creating long-lasting plaid designs, but regular polish works well too. Just make sure to use a good top coat to seal the design.
Fall plaid nails are a timeless and versatile trend that can be customized to fit any style. Whether you prefer classic elegance, vibrant playfulness, or subtle sophistication, there’s a plaid design for you. With the right tools and a bit of practice, you can create stunning plaid nails at home. Happy polishing!
Save Pin