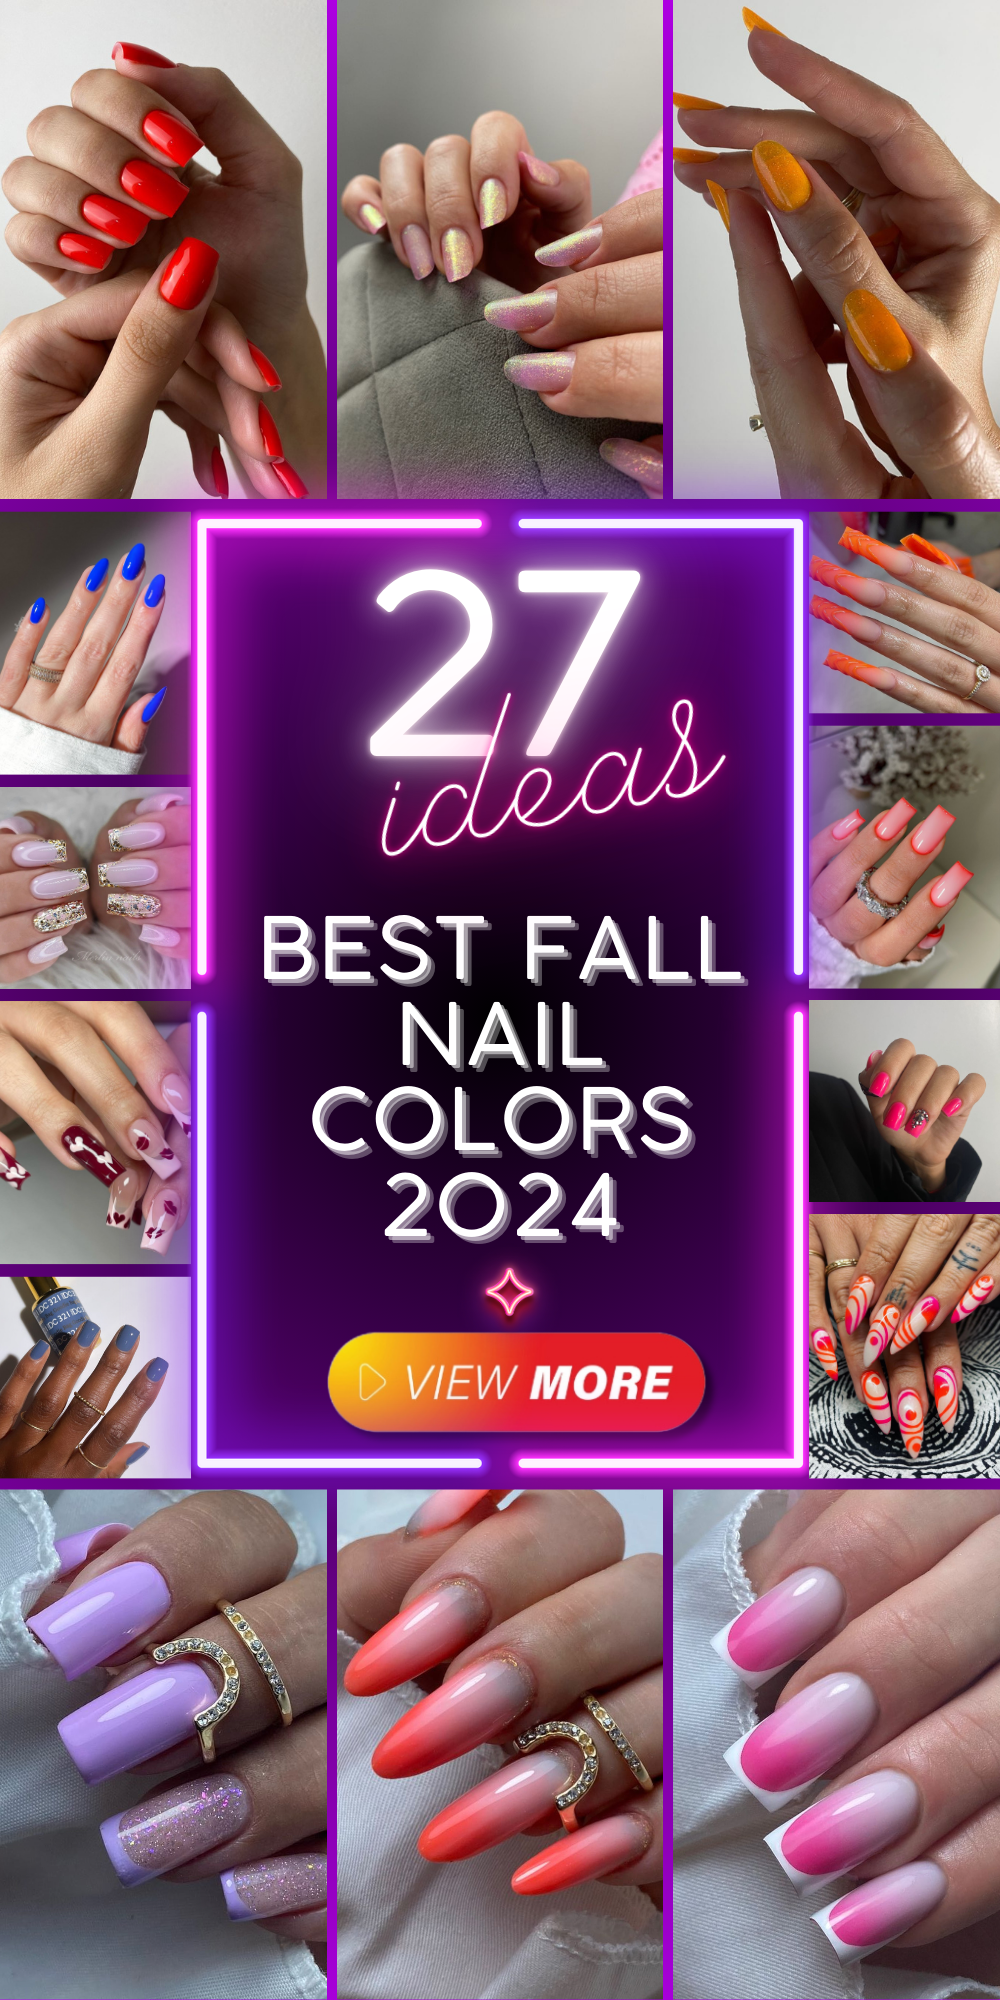
Best Fall Nail Colors 2024: 27 Ideas for Stunning Manicures
Are you ready to embrace the best fall nail colors of 2024? This year, we’re seeing a delightful mix of classic shades and trendy designs that cater to all nail types and skin tones. From deep, rich hues perfect for Halloween to soft, subtle colors that complement pale and fair skin, there’s something for everyone. Curious about the most popular choices? Keep reading to discover the best fall nail colors 2024 and how you can achieve these stunning looks at home.
Marble Blue Delight
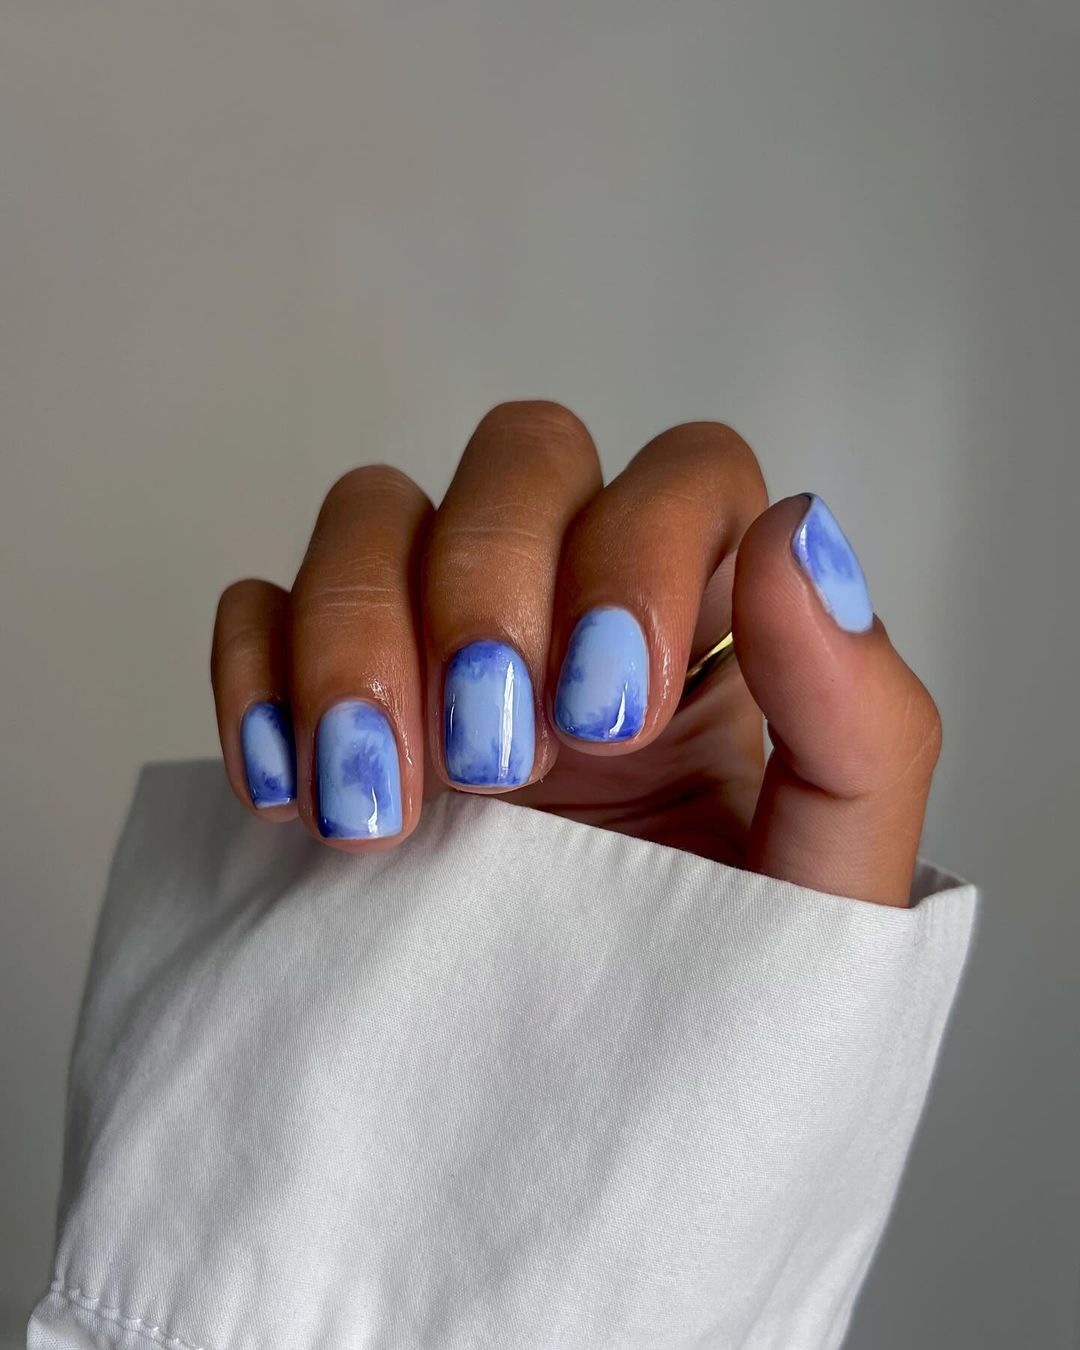
This marble blue nail design is a sophisticated and modern choice for fall. The soft blue shades blend seamlessly, creating a dreamy, cloud-like effect on the nails. The glossy finish adds a touch of elegance, making it suitable for both casual and formal occasions. It’s particularly stunning on short nails, enhancing their chic and polished look.
Consumables List
- Base Coat: OPI Natural Nail Base Coat
- Polish: OPI GelColor in “I Sea You Wear OPI”
- Top Coat: OPI Top Coat
- Tools: Thin nail art brush, makeup sponge
- Extras: UV/LED lamp for curing gel polish
DIY Instructions
- Start with a clean, dry nail and apply the base coat. Cure under the UV/LED lamp.
- Apply two coats of the blue gel polish, curing each layer.
- Use a makeup sponge to dab on lighter blue polish randomly to create the marble effect. Blend the edges with a thin nail art brush.
- Seal the design with a top coat and cure under the lamp for a glossy finish.
Pink Moon Mani
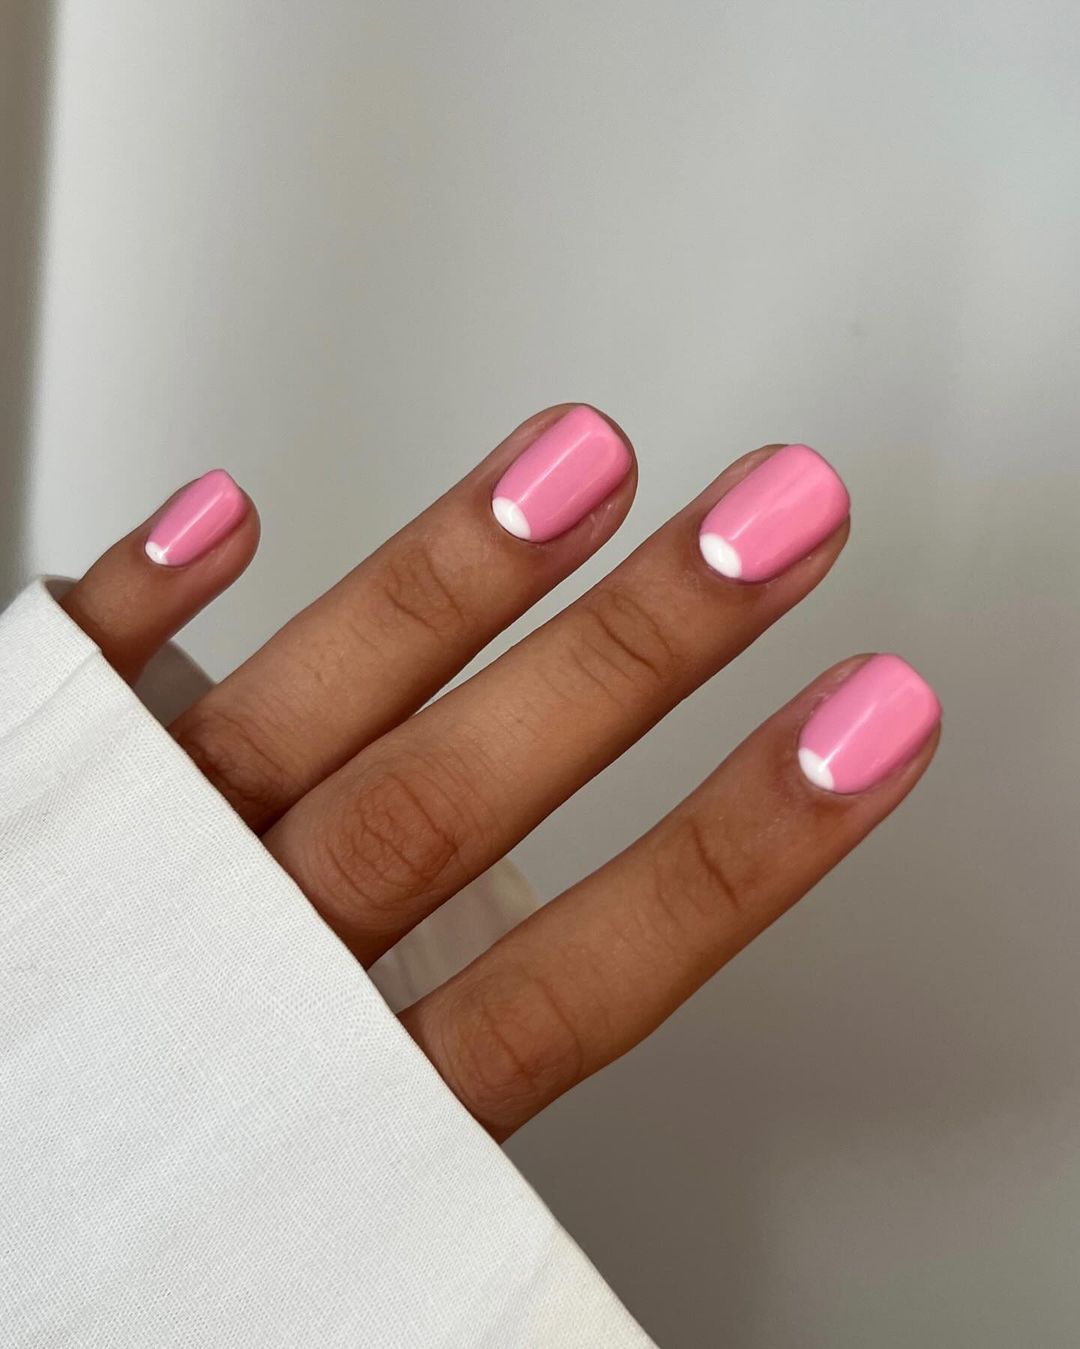
This pink moon manicure is perfect for those who love a playful yet elegant look. The vibrant pink is accentuated by a delicate half-moon design at the cuticle, giving a nod to classic nail art with a modern twist. This look is versatile and suits short to medium nail lengths, making it a trendy choice for various nail shapes.
Consumables List
- Base Coat: DND Base Gel
- Polish: DND Gel Polish in “Pink Flamingo”
- Top Coat: DND No Cleanse Top Coat
- Tools: Nail art brush, dotting tool
- Extras: UV/LED lamp for curing gel polish
DIY Instructions
- Prep your nails with a base coat and cure under the UV/LED lamp.
- Apply two coats of pink gel polish, curing each layer thoroughly.
- Use a dotting tool to create the half-moon design at the cuticle with a contrasting color. Cure.
- Finish with a top coat and cure for a durable and shiny finish.
Lilac Glitter Glam
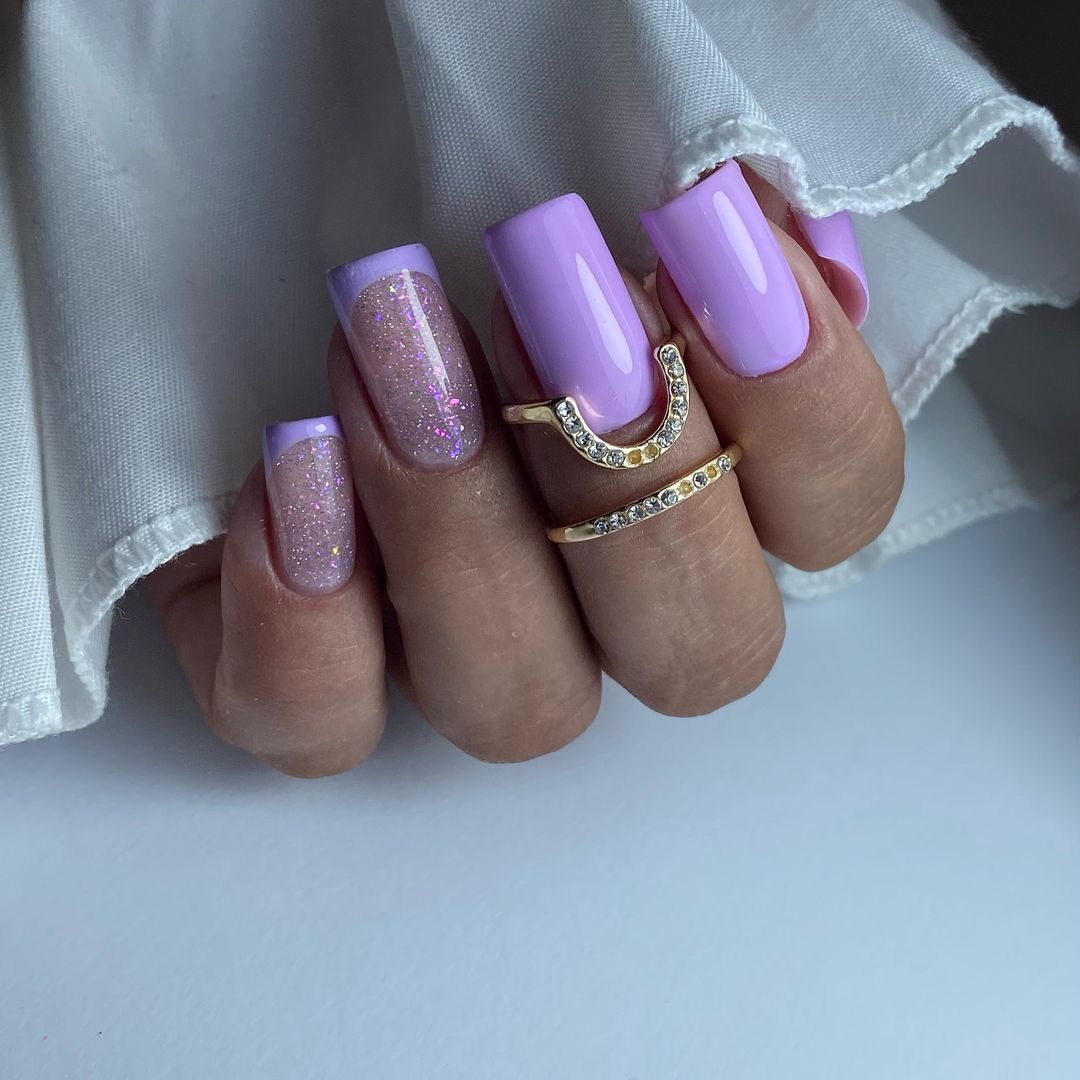
This lilac glitter glam design combines the softness of pastel lilac with the sparkle of glitter accents. The blend of solid color and glitter makes for a pretty and fun manicure, perfect for any fair skin tone. The look is elevated with the addition of bling through glitter, making it ideal for special occasions or just to add a touch of glam to your daily look.
Consumables List
- Base Coat: OPI GelColor Base Coat
- Polish: OPI GelColor in “Do You Lilac It?”
- Top Coat: OPI GelColor Top Coat
- Tools: Thin nail art brush, glitter pot
- Extras: UV/LED lamp for curing gel polish, glitter applicator
DIY Instructions
- Apply the base coat to clean nails and cure under the UV/LED lamp.
- Apply two coats of the lilac gel polish, curing each layer.
- Dab the glitter onto the desired areas of the nail using the glitter applicator. Cure to set the glitter.
- Apply the top coat to seal in the glitter and cure for a long-lasting finish.
Pink Ombre Elegance
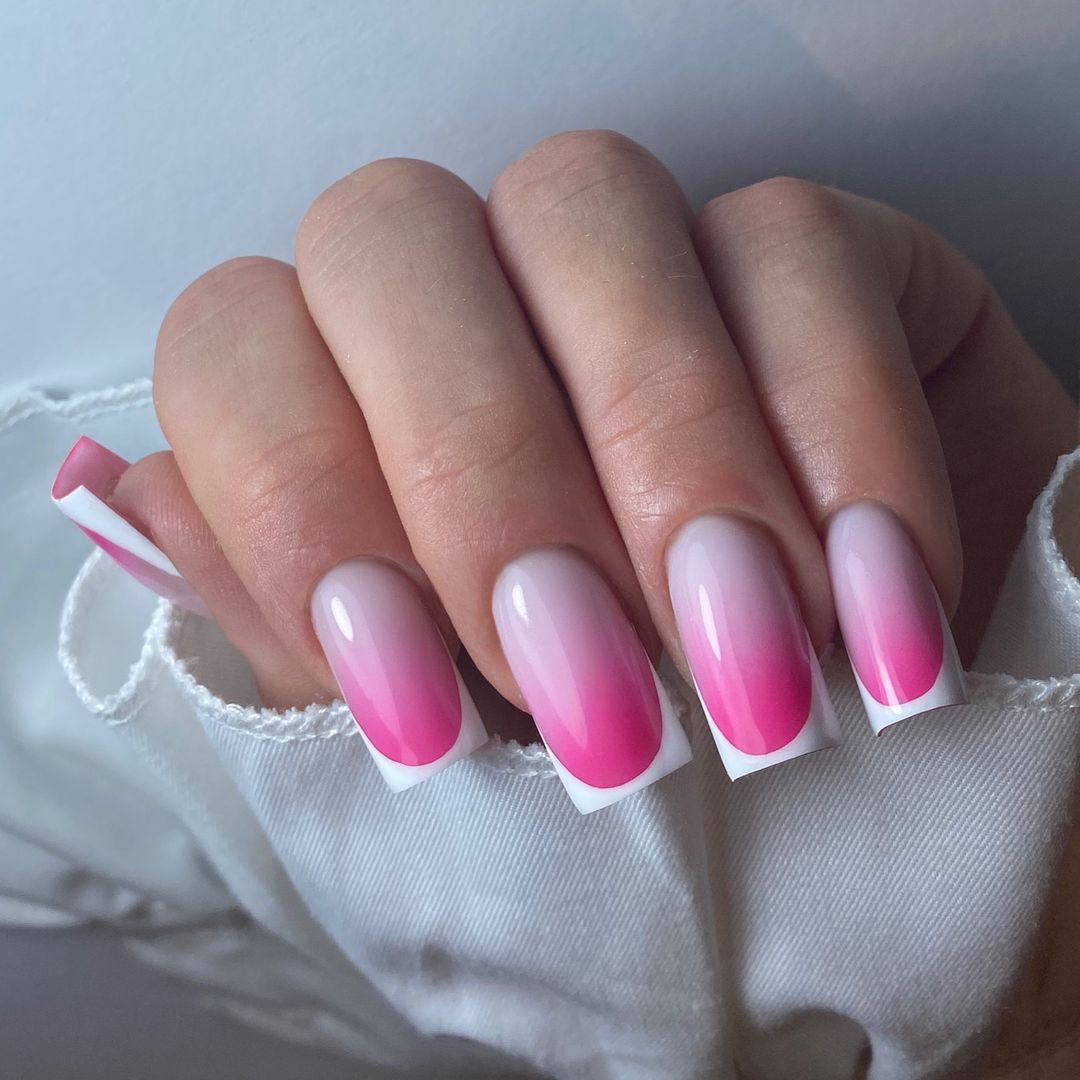
This pink ombre design is a delightful blend of soft pink transitioning to a bolder, brighter shade at the tips. The smooth gradient gives a sophisticated and feminine look that is perfect for both casual outings and formal events. This style is versatile and looks stunning on both medium and long nails, particularly in an almond or coffin shape. The glossy finish adds an extra touch of elegance, making it a go-to choice for those who love a chic and polished manicure.
Consumables List
- Base Coat: OPI GelColor Base Coat
- Polish: OPI GelColor in “Mod About You” and “Do You Think I’m Tex-y?”
- Top Coat: OPI GelColor Top Coat
- Tools: Sponge applicator, blending brush
- Extras: UV/LED lamp for curing gel polish
DIY Instructions
- Start with a clean, dry nail and apply a base coat, curing under the UV/LED lamp.
- Apply the lighter pink gel polish as the base color and cure.
- Using a sponge applicator, gently dab the darker pink polish on the tips, blending it with a brush to create a seamless ombre effect. Cure under the lamp.
- Finish with a top coat to seal the design and cure for a glossy, durable finish.
Save Pin
White Swirl French
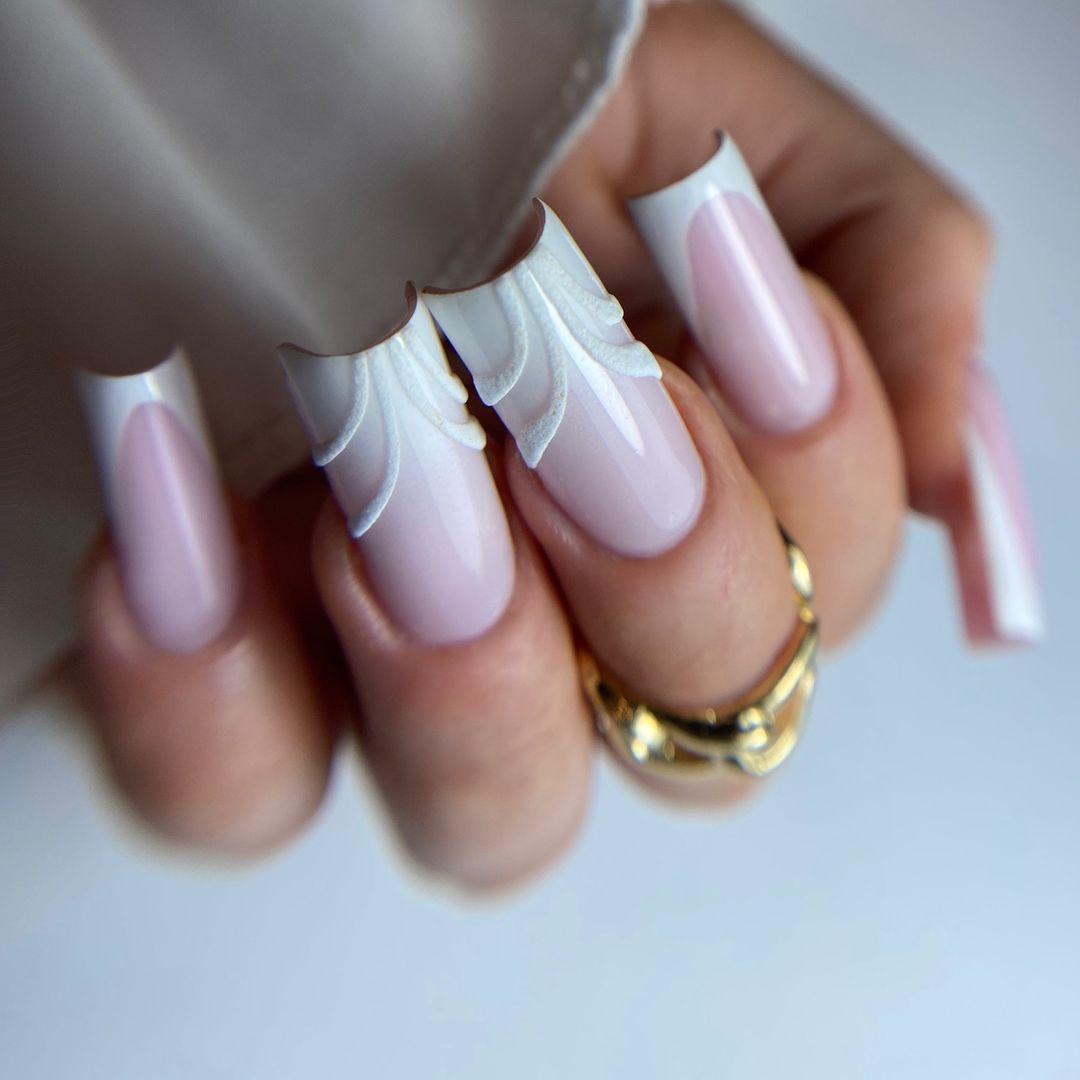
This white swirl French design takes the classic French manicure to a new level. The intricate white swirls add a unique and artistic touch, making the nails look like a work of art. This design is perfect for long nails with a coffin or stiletto shape, adding elegance and flair. The subtle pink base color enhances the overall look, making it a trendy yet timeless choice for any occasion.
Consumables List
- Base Coat: DND Base Gel
- Polish: DND Gel Polish in “White Lace” and “Ballet Pink”
- Top Coat: DND No Cleanse Top Coat
- Tools: Nail art brush, dotting tool
- Extras: UV/LED lamp for curing gel polish
DIY Instructions
- Apply the base coat to clean nails and cure under the UV/LED lamp.
- Apply two coats of the pink gel polish as the base color, curing each layer.
- Use a nail art brush to create the white swirl designs on each nail. Cure each nail after completing the swirls.
- Seal the design with a top coat and cure for a long-lasting, glossy finish.
Coral Gradient Glam
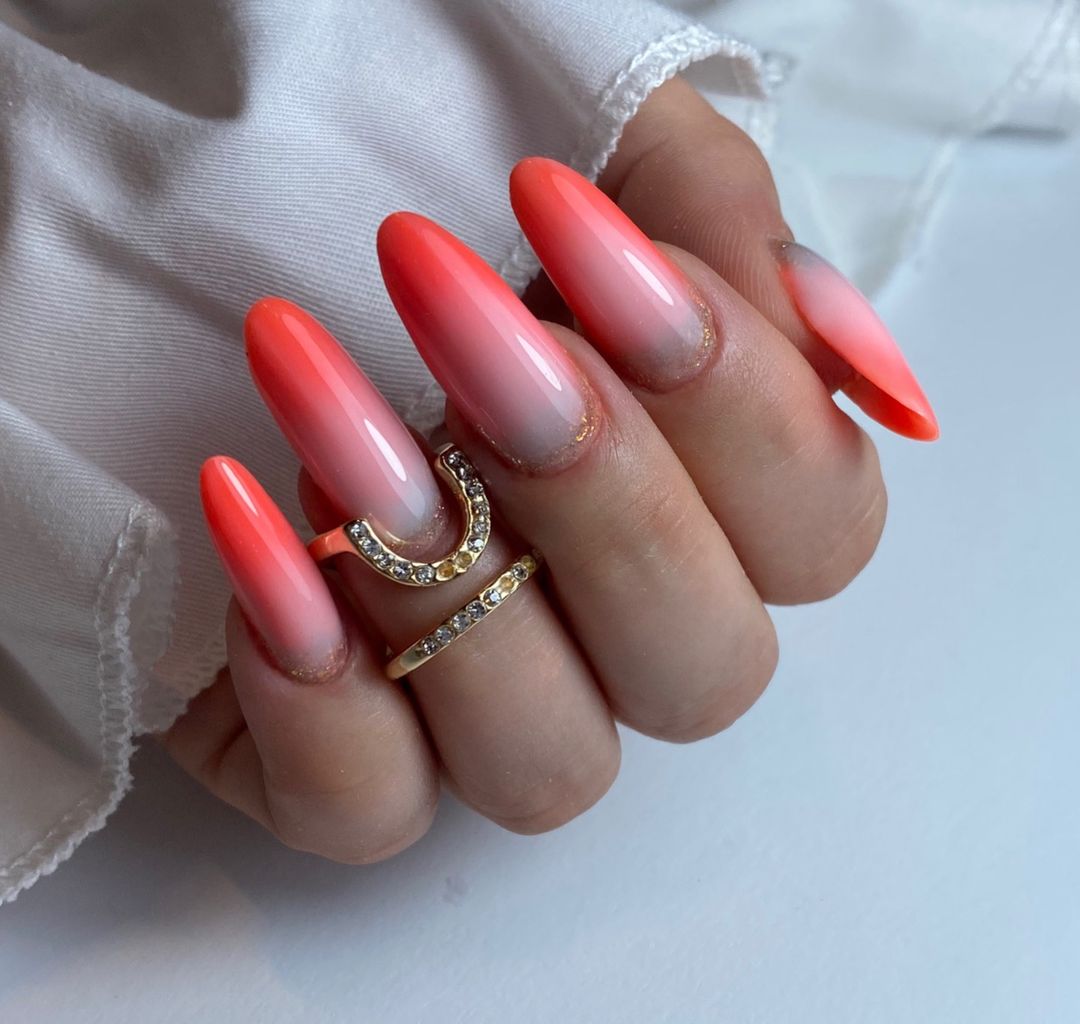
This coral gradient nail design is vibrant and eye-catching, perfect for making a bold statement. The transition from a soft nude at the base to a bright coral at the tips creates a stunning gradient effect. This look is ideal for long nails in an oval or almond shape, adding a pop of color that’s perfect for the fall season. The glossy finish enhances the vibrancy of the coral, making it a fun and trendy choice.
Consumables List
- Base Coat: OPI GelColor Base Coat
- Polish: OPI GelColor in “Bubble Bath” and “Coral-ing Your Spirit Animal”
- Top Coat: OPI GelColor Top Coat
- Tools: Sponge applicator, blending brush
- Extras: UV/LED lamp for curing gel polish
DIY Instructions
- Begin with clean, dry nails and apply the base coat, curing under the UV/LED lamp.
- Apply the nude gel polish as the base color and cure.
- Using a sponge applicator, gently dab the coral polish on the tips, blending it with a brush to create a smooth gradient. Cure under the lamp.
- Finish with a top coat to seal the design and cure for a glossy, durable finish.
Classic Blue Chic
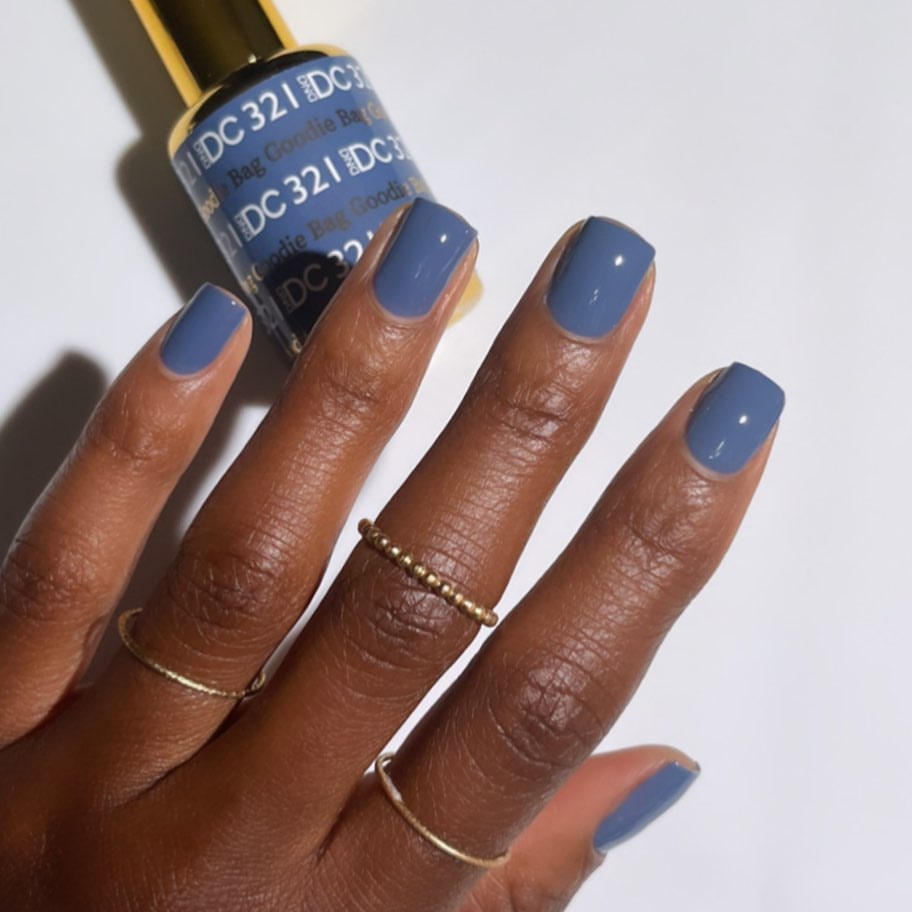
This classic blue nail design is an ideal choice for those who prefer a sophisticated yet understated look. The deep blue shade is perfect for fall and complements dark skin beautifully. This short nail design is versatile and can be worn in both casual and professional settings. The glossy finish enhances the richness of the color, making it a timeless and elegant choice for the season.
Consumables List
- Base Coat: DND DC Base Gel
- Polish: DND DC Gel Polish in “Goodie Bag”
- Top Coat: DND DC No Cleanse Top Coat
- Tools: Nail buffer, UV/LED lamp
- Extras: Cuticle oil for aftercare
DIY Instructions
- Start by prepping your nails with a base coat and curing it under the UV/LED lamp.
- Apply two coats of the blue gel polish, curing each layer thoroughly.
- Finish with a top coat and cure for a high-gloss finish.
- Apply cuticle oil to keep your nails and cuticles hydrated.
Fiery Red Vibes
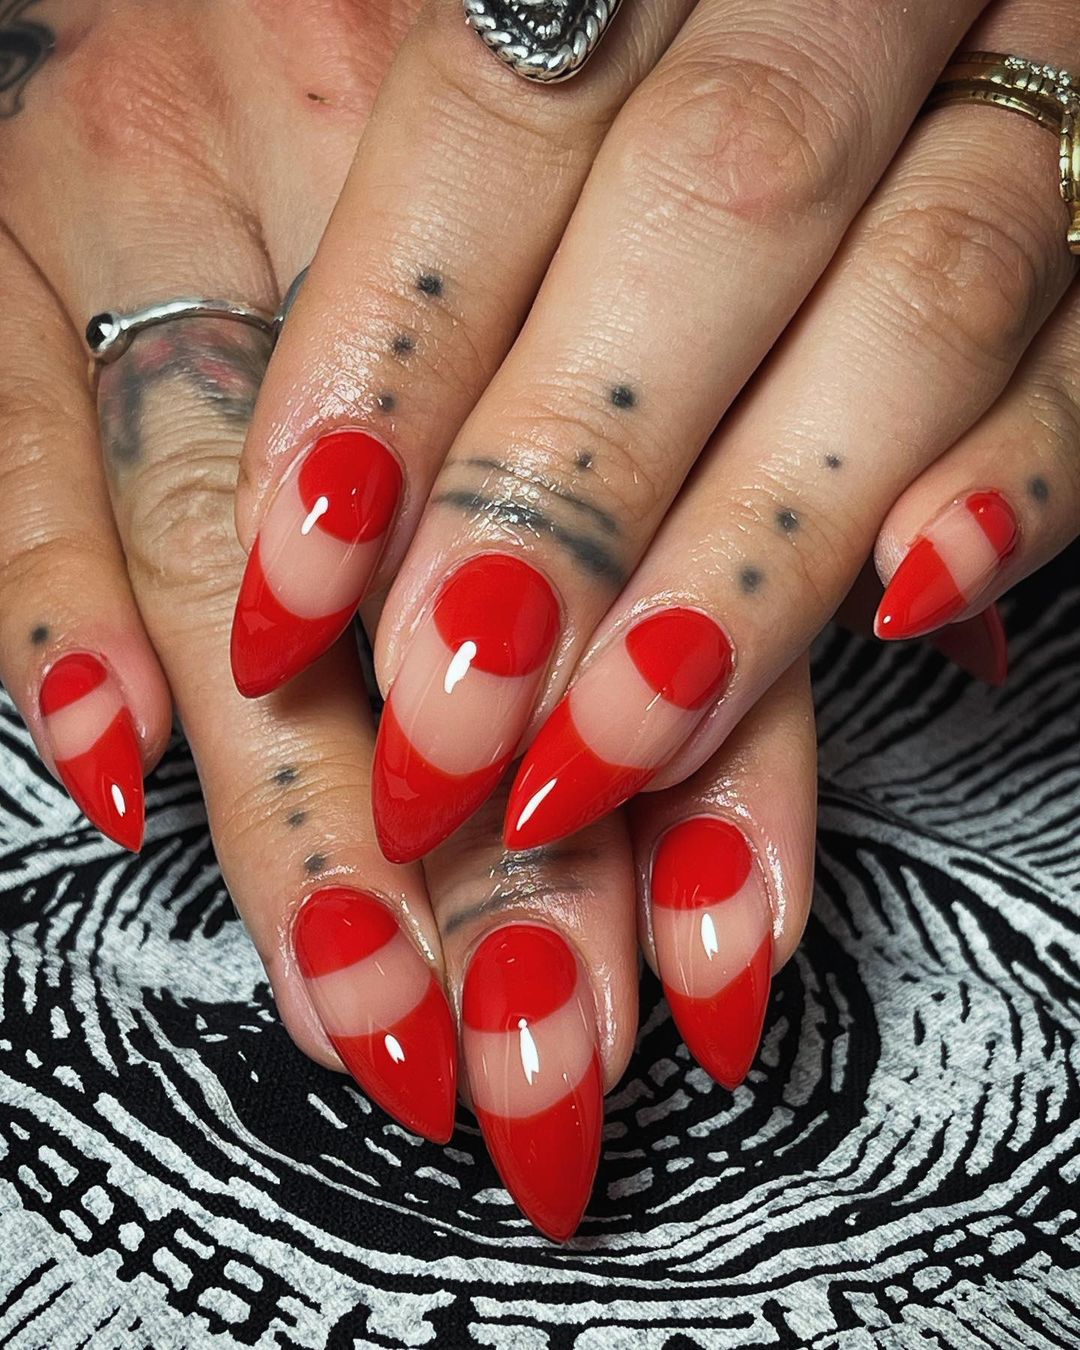
This fiery red nail design is bold and daring, perfect for those who love to make a statement. The vibrant red contrasts beautifully with the natural nail base, creating a striking look. This design is ideal for long nails in a stiletto shape, adding an edge to your overall style. The glossy finish ensures that the red pops, making it a standout choice for the season.
Consumables List
- Base Coat: OPI GelColor Base Coat
- Polish: OPI GelColor in “Big Apple Red”
- Top Coat: OPI GelColor Top Coat
- Tools: Nail art brush, UV/LED lamp
- Extras: Nail file, cuticle pusher
DIY Instructions
- Apply the base coat and cure under the UV/LED lamp.
- Apply the red gel polish in sections to create the desired design, curing each layer.
- Finish with a top coat and cure for a glossy finish.
- Use a cuticle pusher to clean up any excess polish around the edges.
Autumn Stripes
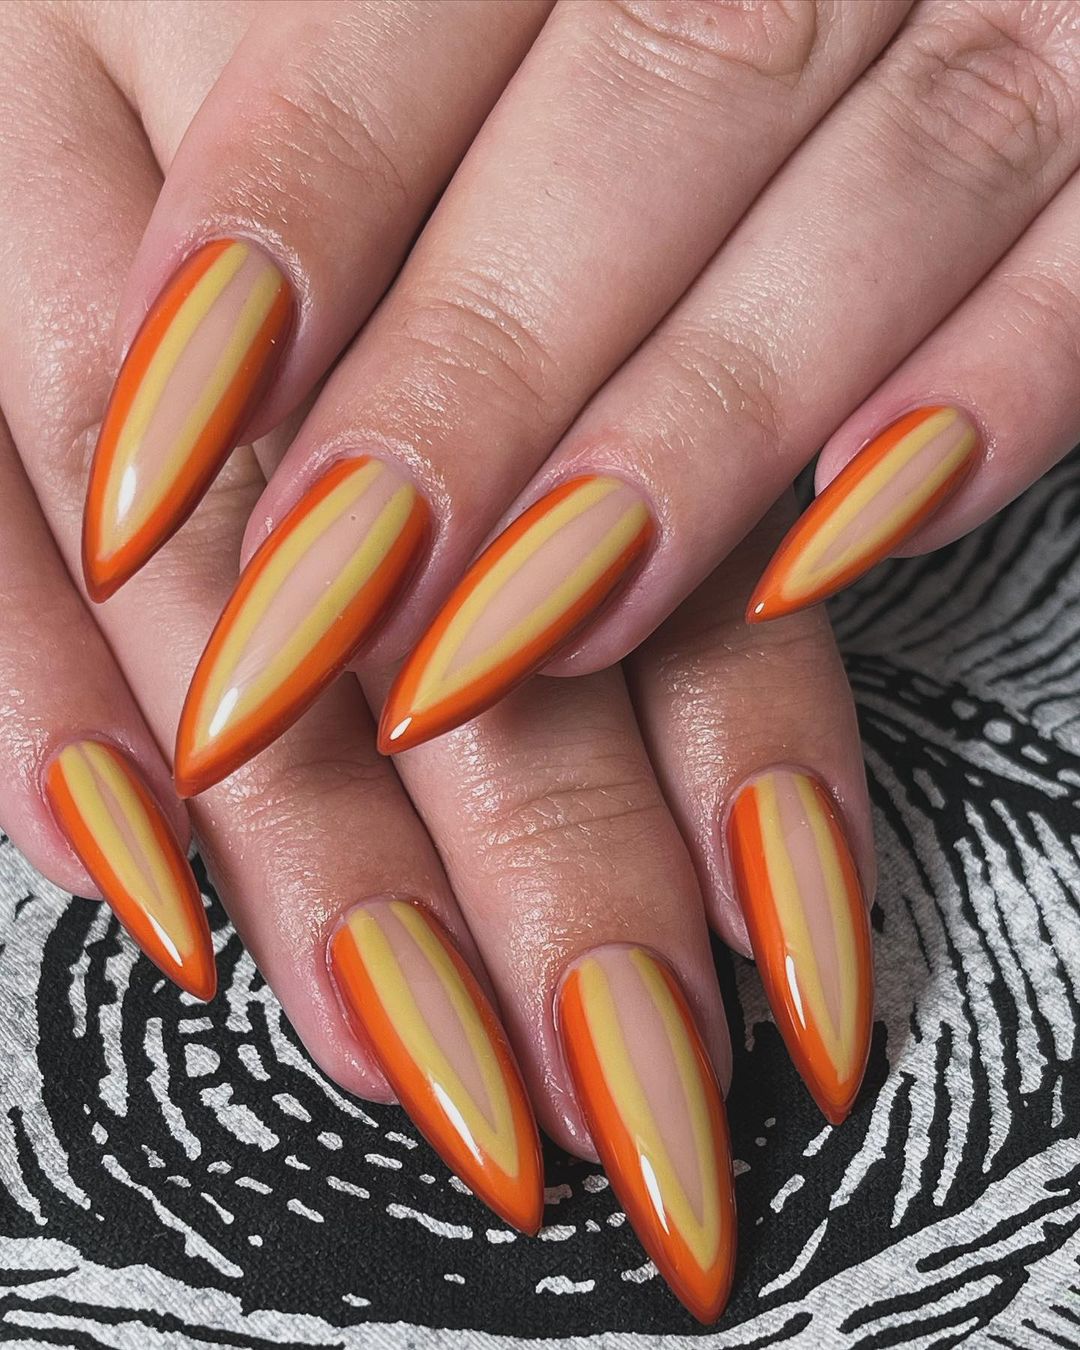
This autumn stripes design is perfect for those who love to incorporate seasonal colors into their manicure. The blend of orange and yellow stripes on a nude base creates a vibrant yet sophisticated look. This design works best on long nails in an almond shape, making it a great choice for fall festivities.
Consumables List
- Base Coat: DND Base Gel
- Polish: DND Gel Polish in “Orange Zest” and “Sunshine Yellow”
- Top Coat: DND No Cleanse Top Coat
- Tools: Striping brush, UV/LED lamp
- Extras: Nail tape for clean lines
DIY Instructions
- Apply the base coat and cure under the UV/LED lamp.
- Use the striping brush to apply the orange and yellow stripes, curing each color.
- Finish with a top coat and cure for a durable finish.
- Use nail tape to create clean, crisp lines if needed.
Save Pin
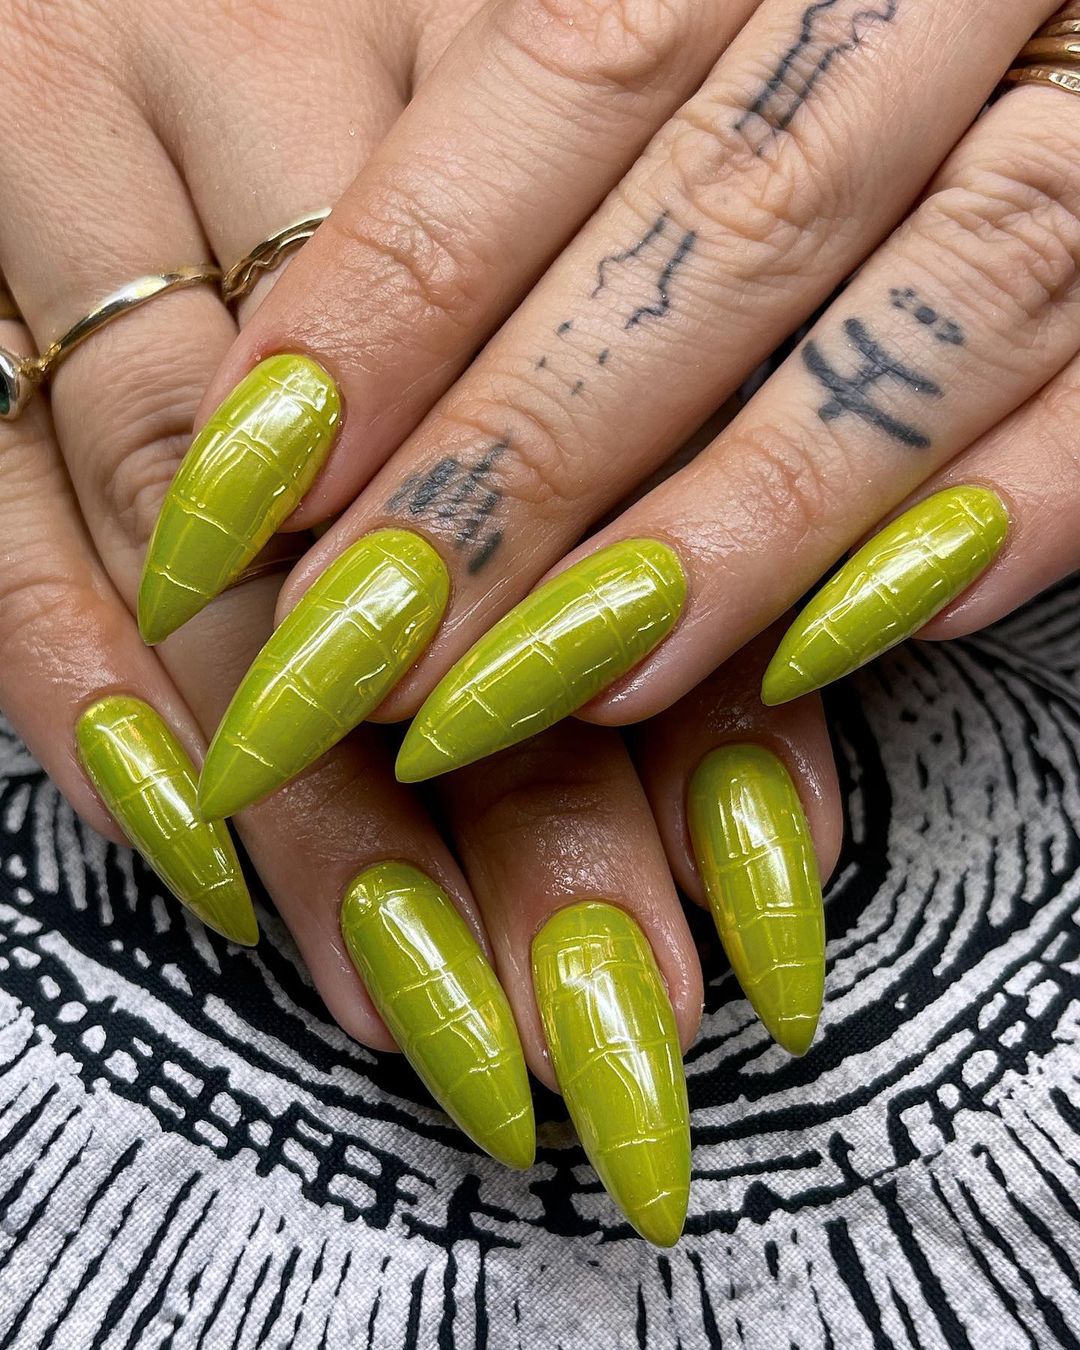
Green Croc Texture
This green croc texture design is unique and eye-catching, perfect for those who love to experiment with textures. The rich green shade combined with the textured finish gives a bold and trendy look. This design works best on long nails in a stiletto shape, making it a standout choice for the fall season.
Consumables List
- Base Coat: OPI GelColor Base Coat
- Polish: OPI GelColor in “Envy the Adventure”
- Top Coat: OPI GelColor Top Coat
- Tools: Textured nail plate, UV/LED lamp
- Extras: Nail buffer, cuticle oil
DIY Instructions
- Apply the base coat and cure under the UV/LED lamp.
- Apply the green gel polish and press the textured nail plate gently onto the wet polish. Cure.
- Finish with a top coat and cure for a glossy finish.
- Apply cuticle oil to keep your nails and cuticles hydrated.
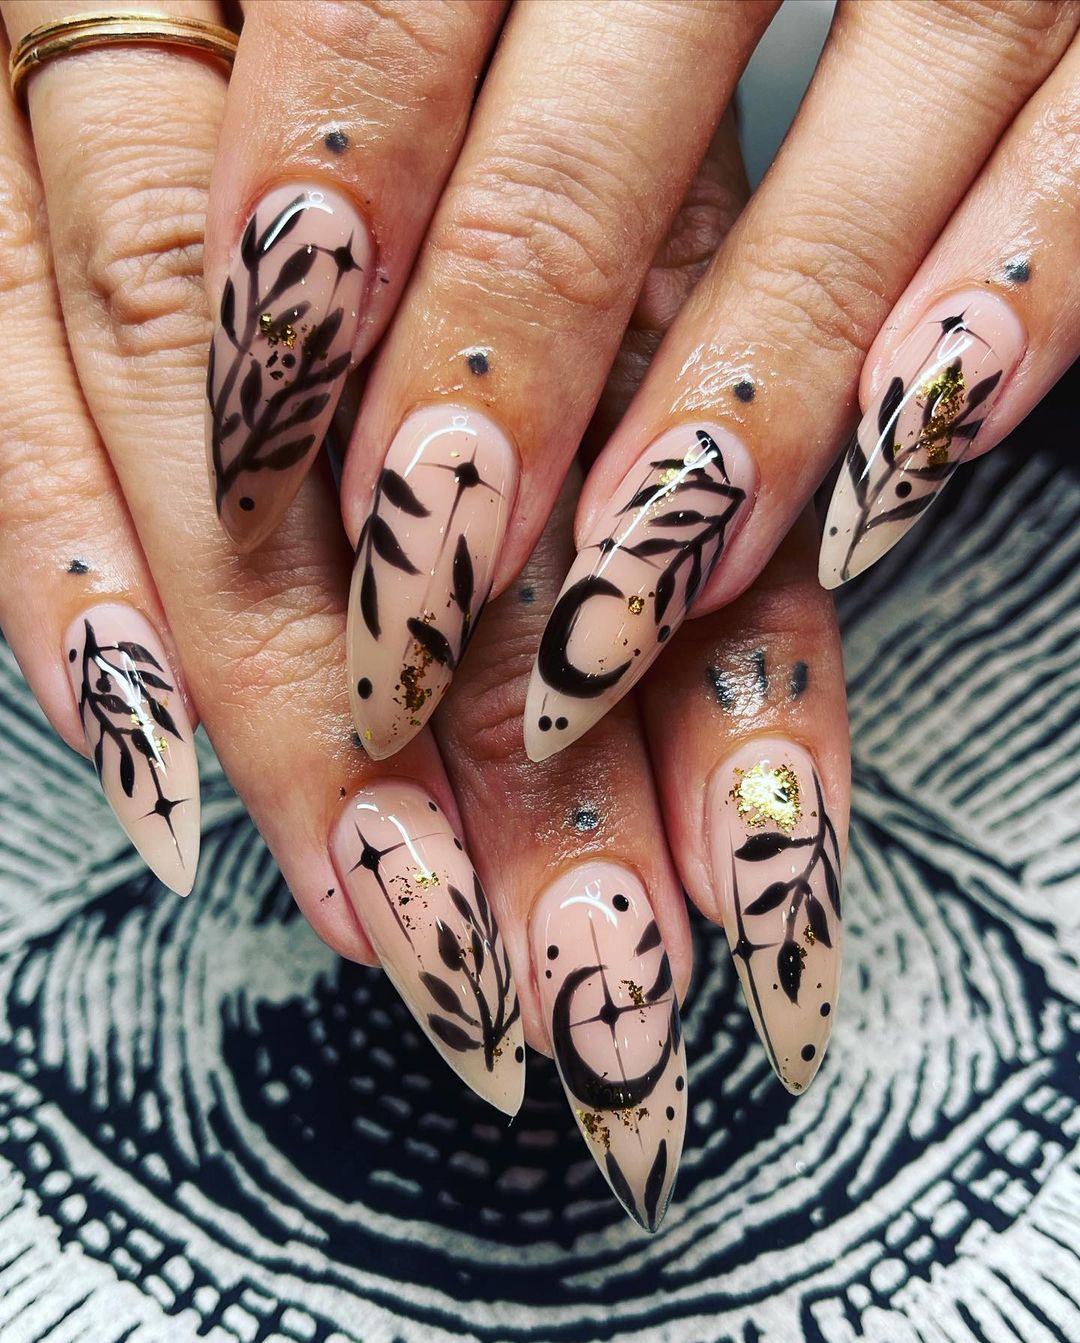
Botanical Nude Art
This botanical nude art design combines the elegance of nude polish with intricate black botanical patterns. The addition of gold foil accents adds a touch of luxury to the design. This manicure is perfect for long nails in an almond shape, providing a sophisticated and artistic look suitable for any occasion.
Consumables List
- Base Coat: DND Base Gel
- Polish: DND Gel Polish in “Nude Chic”
- Top Coat: DND No Cleanse Top Coat
- Tools: Nail art brush, gold foil, UV/LED lamp
- Extras: Nail buffer, cuticle oil
DIY Instructions
- Apply the base coat and cure under the UV/LED lamp.
- Apply two coats of the nude gel polish, curing each layer.
- Use the nail art brush to paint the black botanical patterns and apply gold foil accents. Cure.
- Finish with a top coat and cure for a long-lasting finish.
- Apply cuticle oil to keep your nails and cuticles hydrated.
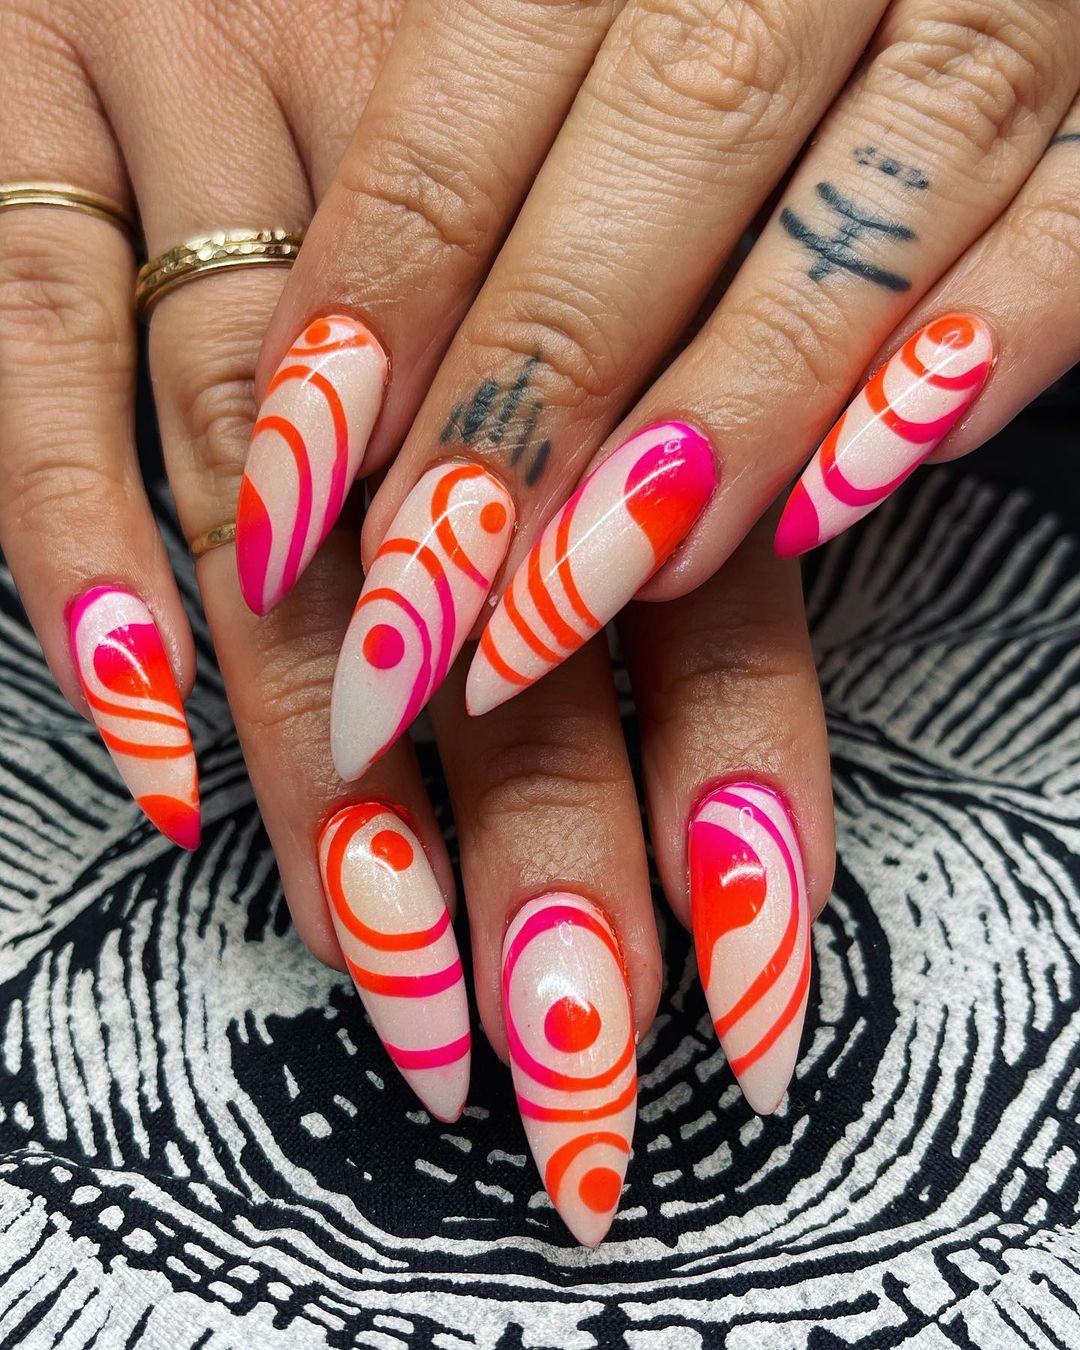
Neon Swirl Fun
This neon swirl design is playful and vibrant, perfect for those who love a pop of color. The combination of neon orange and pink swirls creates a fun and energetic look that is sure to turn heads. This design is ideal for long nails in a stiletto shape, making it a bold choice for the fall season.
Consumables List
- Base Coat: OPI GelColor Base Coat
- Polish: OPI GelColor in “Hot & Spicy” and “Pink Flamenco”
- Top Coat: OPI GelColor Top Coat
- Tools: Nail art brush, dotting tool, UV/LED lamp
- Extras: Nail buffer, cuticle oil
DIY Instructions
- Apply the base coat and cure under the UV/LED lamp.
- Apply two coats of the base color, curing each layer.
- Use the nail art brush to create the neon swirls, curing each design.
- Finish with a top coat and cure for a glossy finish.
- Apply cuticle oil to keep your nails and cuticles hydrated.
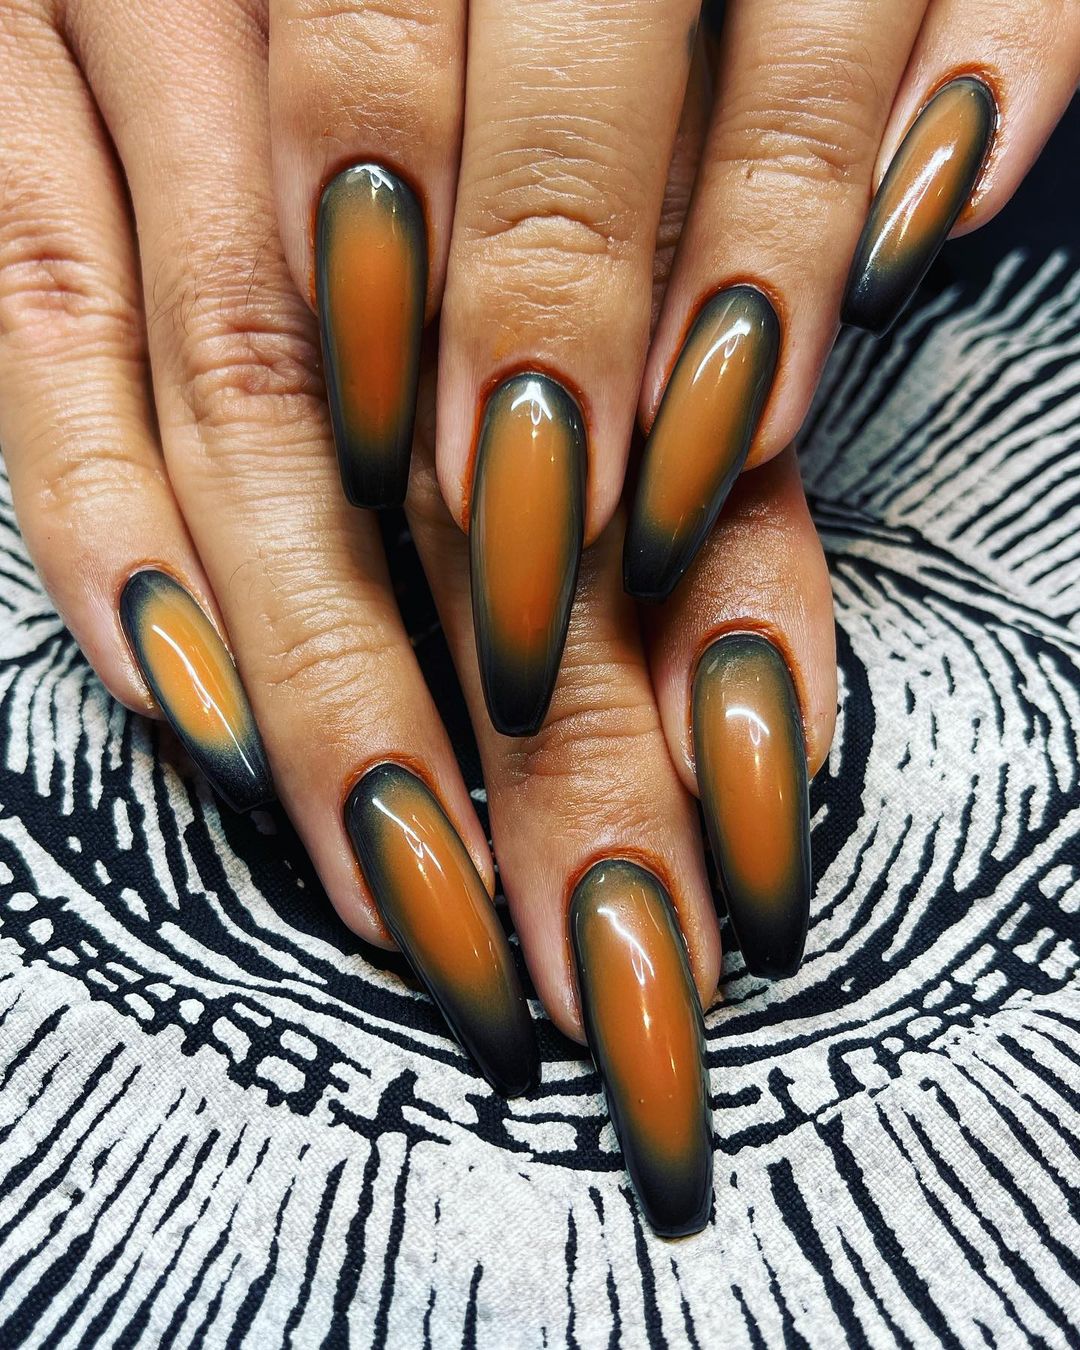
Autumn Gradient Magic
This autumn gradient design perfectly captures the essence of the fall season with its rich blend of orange and black. The smooth transition between the colors creates a captivating ombre effect that adds depth and dimension to the nails. This look is particularly striking on long nails in a coffin shape, making it a bold and trendy choice for autumn.
Consumables List
- Base Coat: OPI GelColor Base Coat
- Polish: OPI GelColor in “A Good Man-darin is Hard to Find” and “Black Onyx”
- Top Coat: OPI GelColor Top Coat
- Tools: Sponge applicator, UV/LED lamp
- Extras: Nail buffer, cuticle oil
DIY Instructions
- Apply the base coat to clean nails and cure under the UV/LED lamp.
- Apply the orange gel polish as the base color and cure.
- Using a sponge applicator, dab the black polish on the tips, blending it for a gradient effect. Cure.
- Finish with a top coat and cure for a glossy, durable finish. Apply cuticle oil to keep your nails hydrated.
Festive Red Swirl
This festive red swirl design is perfect for holiday celebrations. The vibrant red polish combined with sparkling accents and intricate swirl patterns creates a fun and festive look. This design works beautifully on long nails in a stiletto shape, making it an eye-catching choice for holiday parties and events.
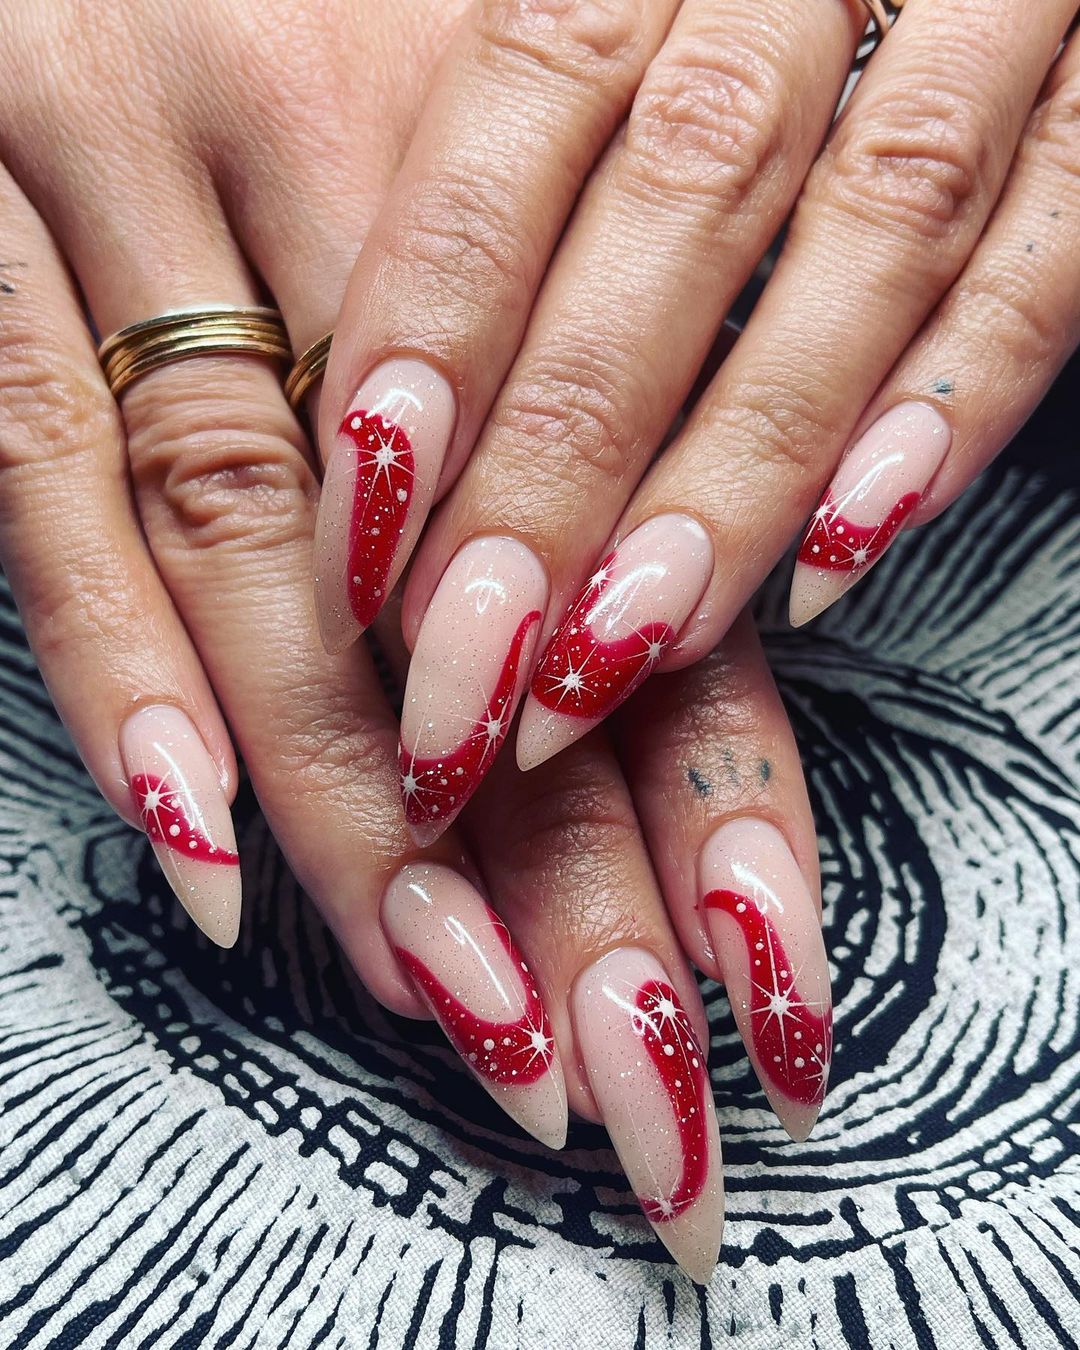
Consumables List
- Base Coat: DND Base Gel
- Polish: DND Gel Polish in “Candy Apple Red” and “Glitter Top”
- Top Coat: DND No Cleanse Top Coat
- Tools: Nail art brush, dotting tool, UV/LED lamp
- Extras: Nail buffer, cuticle oil
DIY Instructions
- Apply the base coat and cure under the UV/LED lamp.
- Apply two coats of nude gel polish as the base, curing each layer.
- Use the nail art brush to create the red swirl patterns and add glitter accents. Cure.
- Finish with a top coat and cure for a glossy, long-lasting finish. Apply cuticle oil for hydration.
Neon Wave Fun
This neon wave design is perfect for those who love a bold and playful manicure. The vibrant yellow base with green and purple wave patterns creates a striking and fun look that’s sure to stand out. This design is ideal for long nails in a stiletto shape, making it a trendy choice for those who love to make a statement.
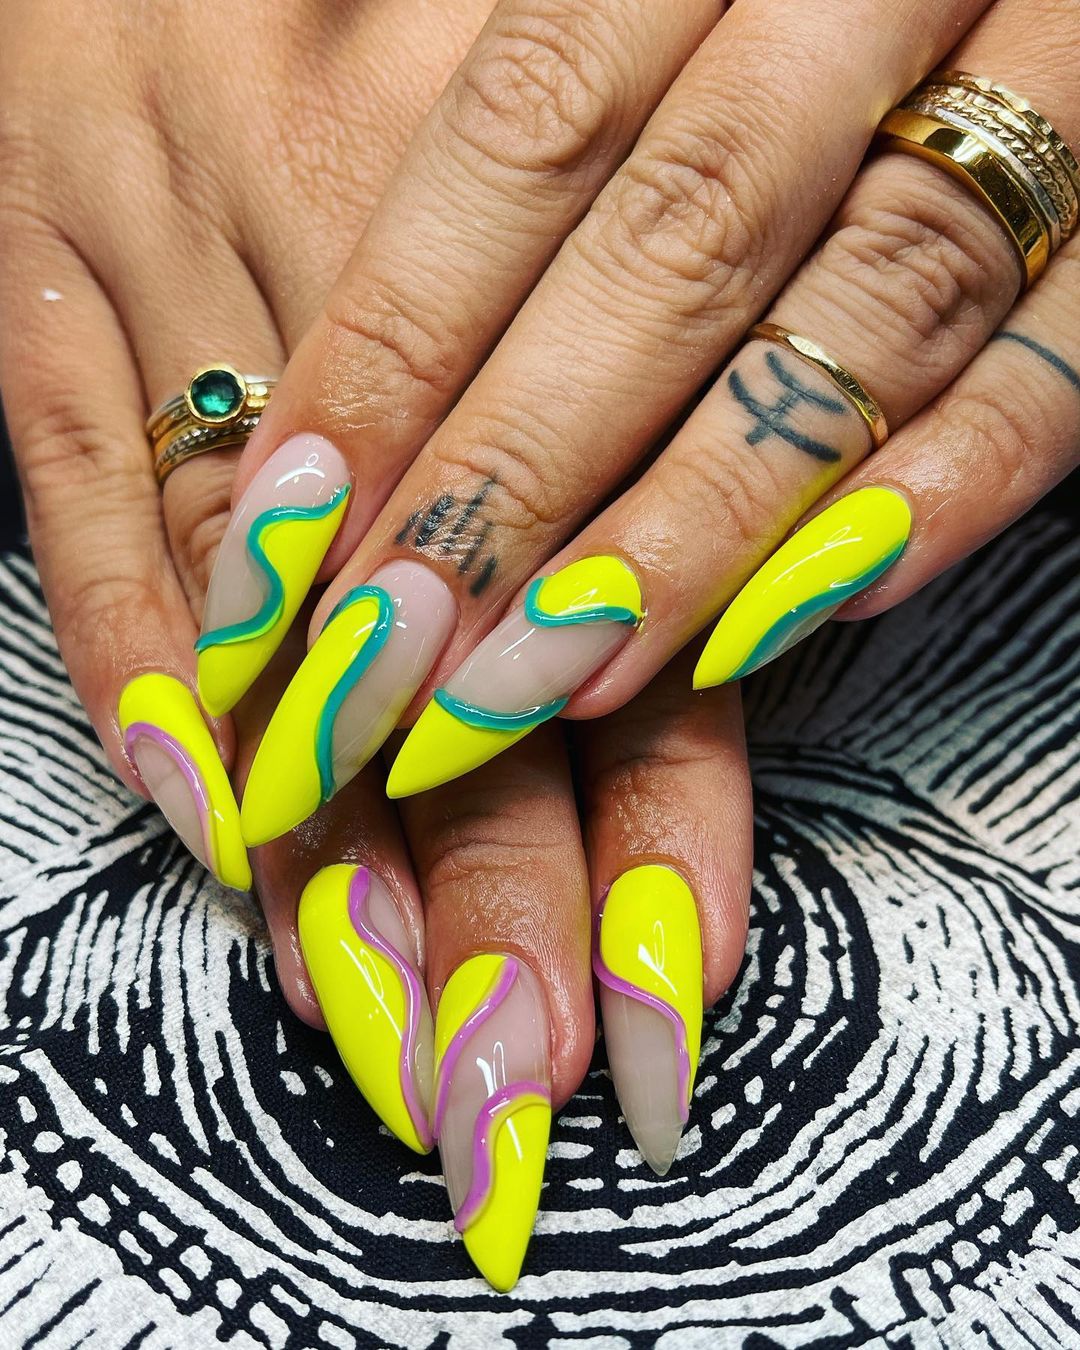
Consumables List
- Base Coat: OPI GelColor Base Coat
- Polish: OPI GelColor in “Neon Yellow” and “Green Come True”
- Top Coat: OPI GelColor Top Coat
- Tools: Nail art brush, dotting tool, UV/LED lamp
- Extras: Nail buffer, cuticle oil
DIY Instructions
- Apply the base coat and cure under the UV/LED lamp.
- Apply the yellow gel polish as the base color and cure.
- Use the nail art brush to create the green and purple wave patterns, curing each design.
- Finish with a top coat and cure for a glossy finish. Apply cuticle oil for hydration.
Pastel Pearl
This pastel pearl design is a delicate and elegant choice for any season. The soft, iridescent colors create a beautiful, subtle gradient that gives the nails a sophisticated and polished look. This design works best on medium nails in an almond shape, making it a versatile and chic option for any occasion.
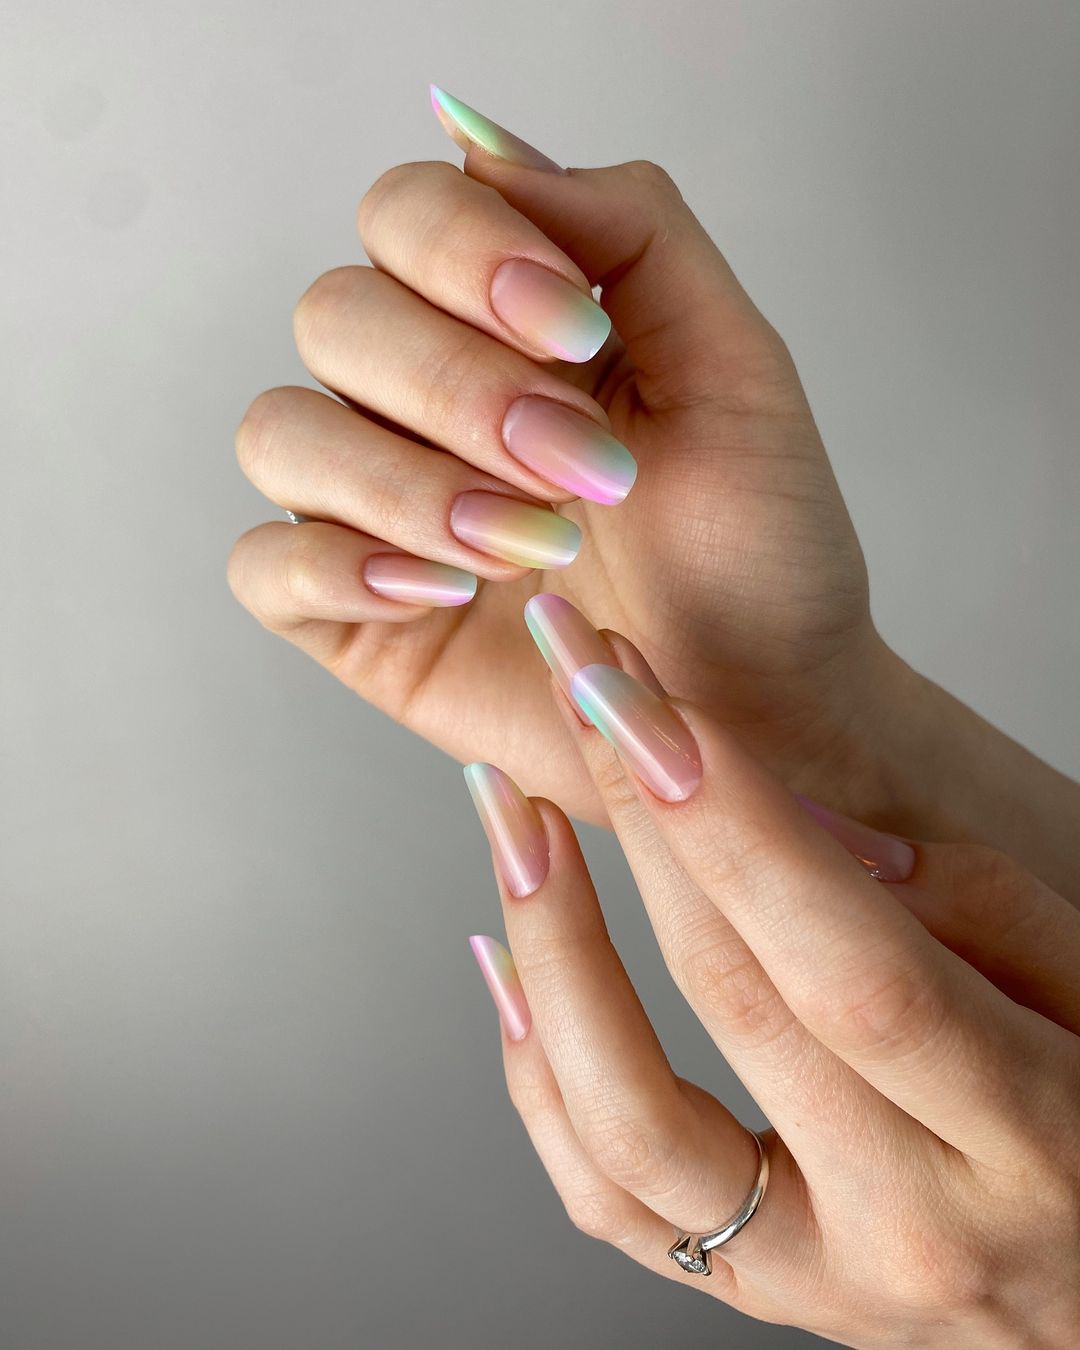
Consumables List
- Base Coat: DND Base Gel
- Polish: DND Gel Polish in “Pastel Pearl”
- Top Coat: DND No Cleanse Top Coat
- Tools: Sponge applicator, UV/LED lamp
- Extras: Nail buffer, cuticle oil
DIY Instructions
- Apply the base coat and cure under the UV/LED lamp.
- Apply the pastel gel polish in thin layers, curing each layer.
- Use a sponge applicator to blend the colors for a smooth gradient effect. Cure.
- Finish with a top coat and cure for a glossy, durable finish. Apply cuticle oil for hydration.
Bold Red Classic
This bold red classic design is a timeless choice that never goes out of style. The vibrant red polish is perfect for any occasion, adding a touch of elegance and sophistication to your look. This design is ideal for short nails in a square shape, making it a versatile and chic option for any event.
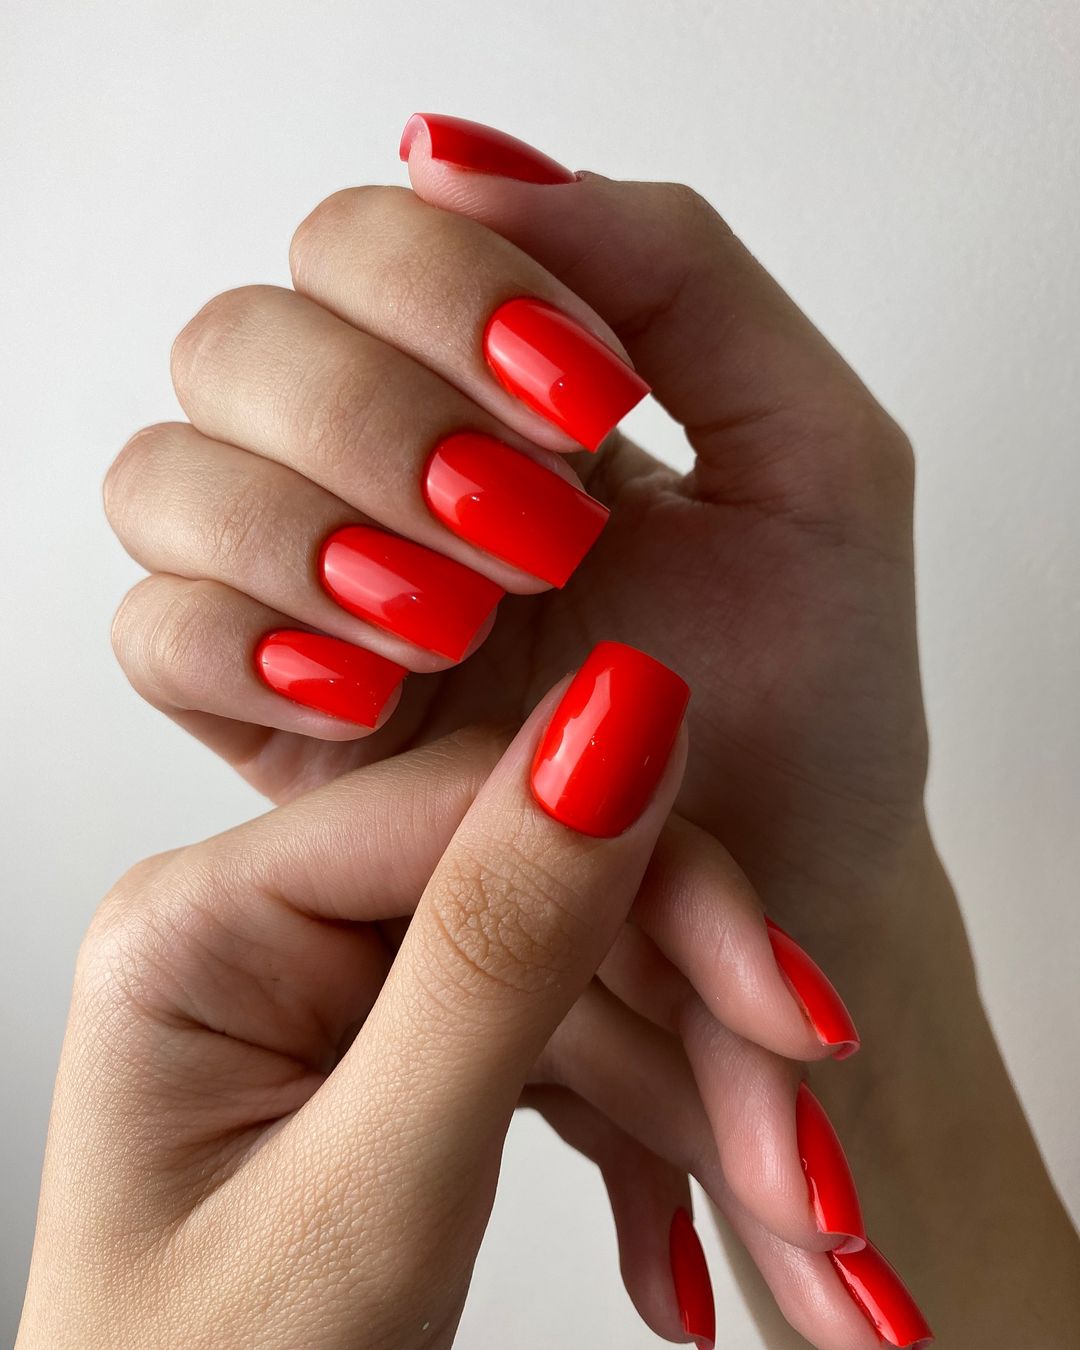
Consumables List
- Base Coat: OPI GelColor Base Coat
- Polish: OPI GelColor in “Big Apple Red”
- Top Coat: OPI GelColor Top Coat
- Tools: Nail buffer, UV/LED lamp
- Extras: Cuticle oil for aftercare
DIY Instructions
- Apply the base coat and cure under the UV/LED lamp.
- Apply two coats of the red gel polish, curing each layer thoroughly.
- Finish with a top coat and cure for a high-gloss finish. Apply cuticle oil to keep your nails hydrated.
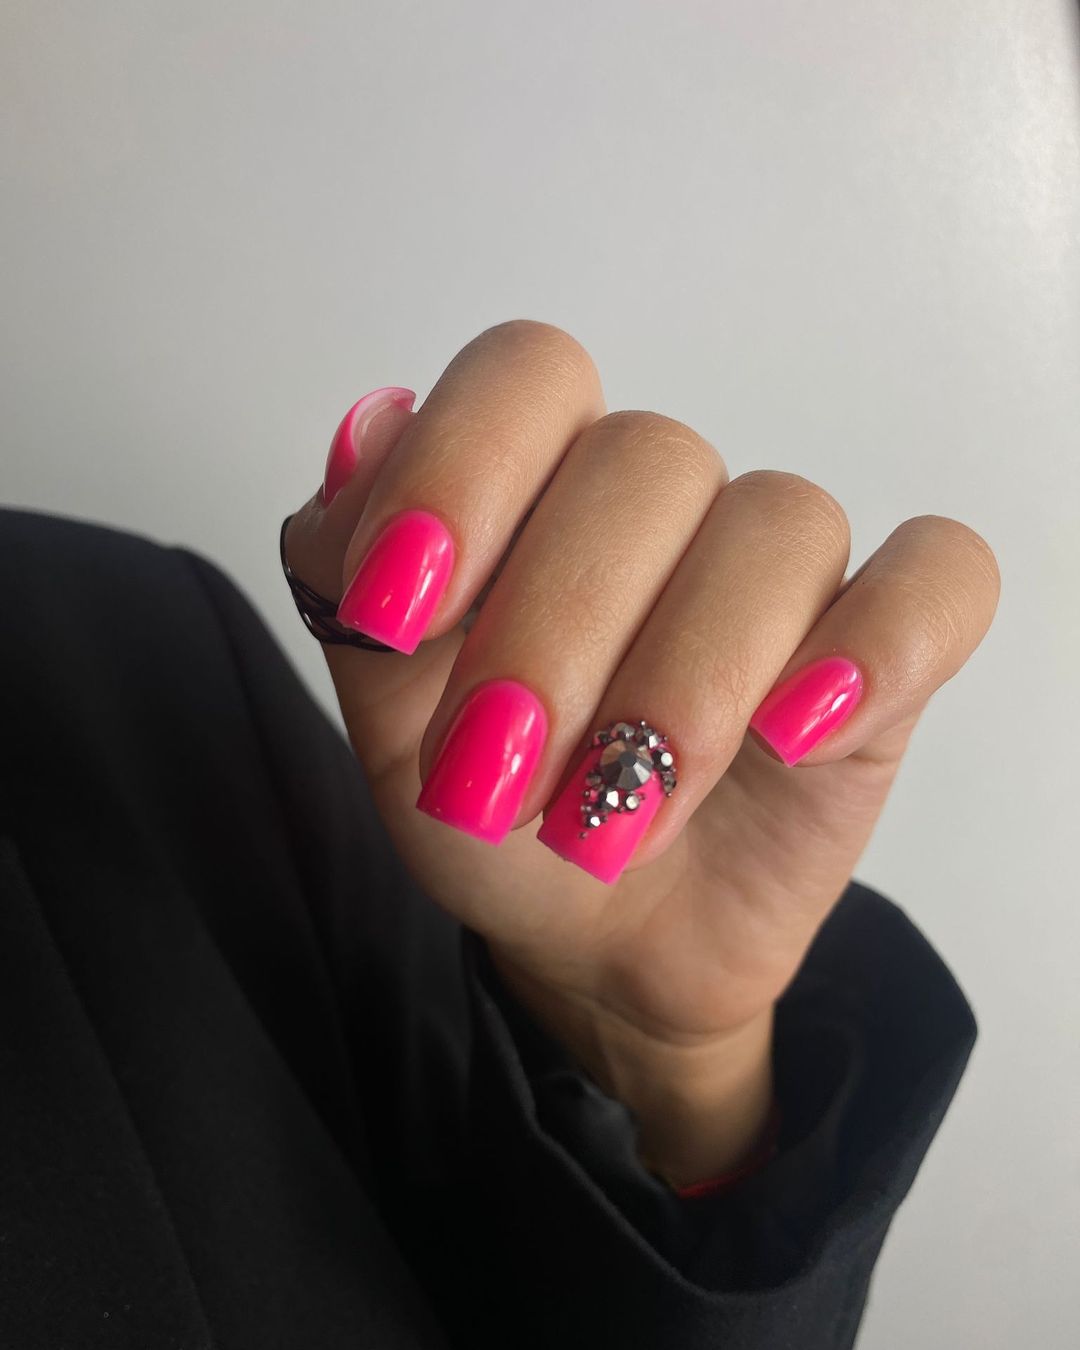
Pink Bling
This pink bling design combines the simplicity of a vibrant pink polish with the glamour of rhinestone accents. The bright pink color is eye-catching and fun, while the bling adds a touch of luxury. This design is perfect for short nails in a square shape, making it a bold and trendy choice for those who love a bit of sparkle.
Consumables List
- Base Coat: DND Base Gel
- Polish: DND Gel Polish in “Pink Flamingo”
- Top Coat: DND No Cleanse Top Coat
- Tools: Rhinestone applicator, UV/LED lamp
- Extras: Nail buffer, cuticle oil, rhinestones
DIY Instructions
- Apply the base coat and cure under the UV/LED lamp.
- Apply two coats of the pink gel polish, curing each layer.
- Use the rhinestone applicator to place the rhinestones on the desired nails, curing after placement.
- Finish with a top coat and cure for a glossy finish. Apply cuticle oil for hydration.
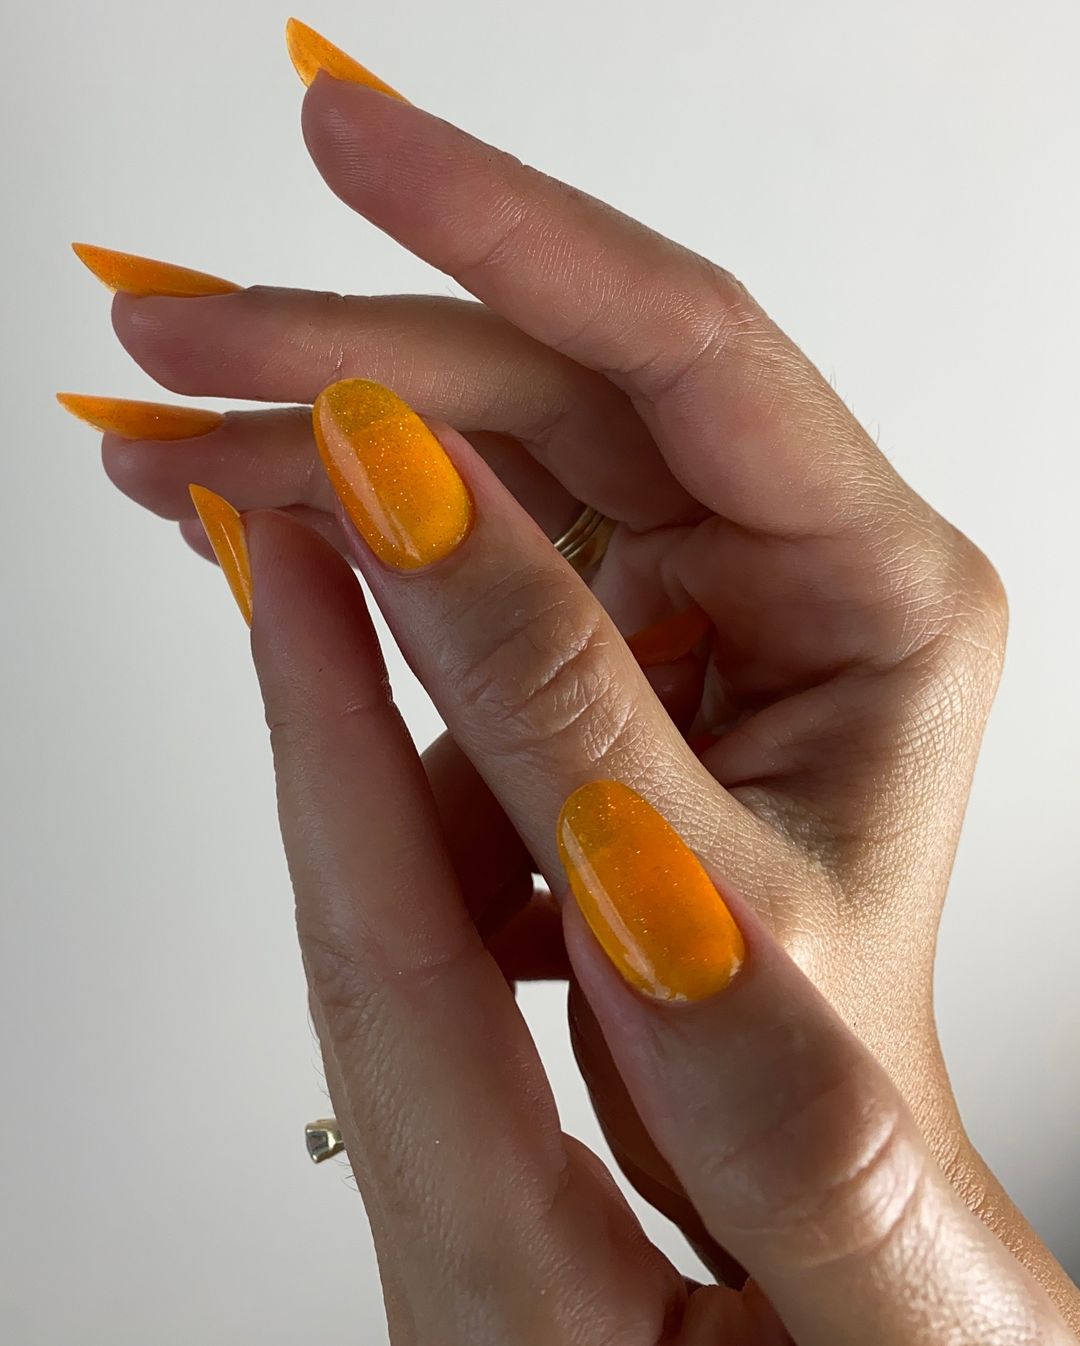
Tangerine Dream
This tangerine dream design is a vibrant and bold choice for the fall season. The rich orange color, combined with a glossy finish, creates a lively and energetic look. This design is perfect for long nails in a stiletto shape, adding a pop of color to your style.
Consumables List
- Base Coat: OPI GelColor Base Coat
- Polish: OPI GelColor in “Sun, Sea, and Sand in My Pants”
- Top Coat: OPI GelColor Top Coat
- Tools: Nail buffer, UV/LED lamp
- Extras: Cuticle oil for aftercare
DIY Instructions
- Apply the base coat and cure under the UV/LED lamp.
- Apply two coats of the orange gel polish, curing each layer thoroughly.
- Finish with a top coat and cure for a high-gloss finish.
- Apply cuticle oil to keep your nails hydrated.
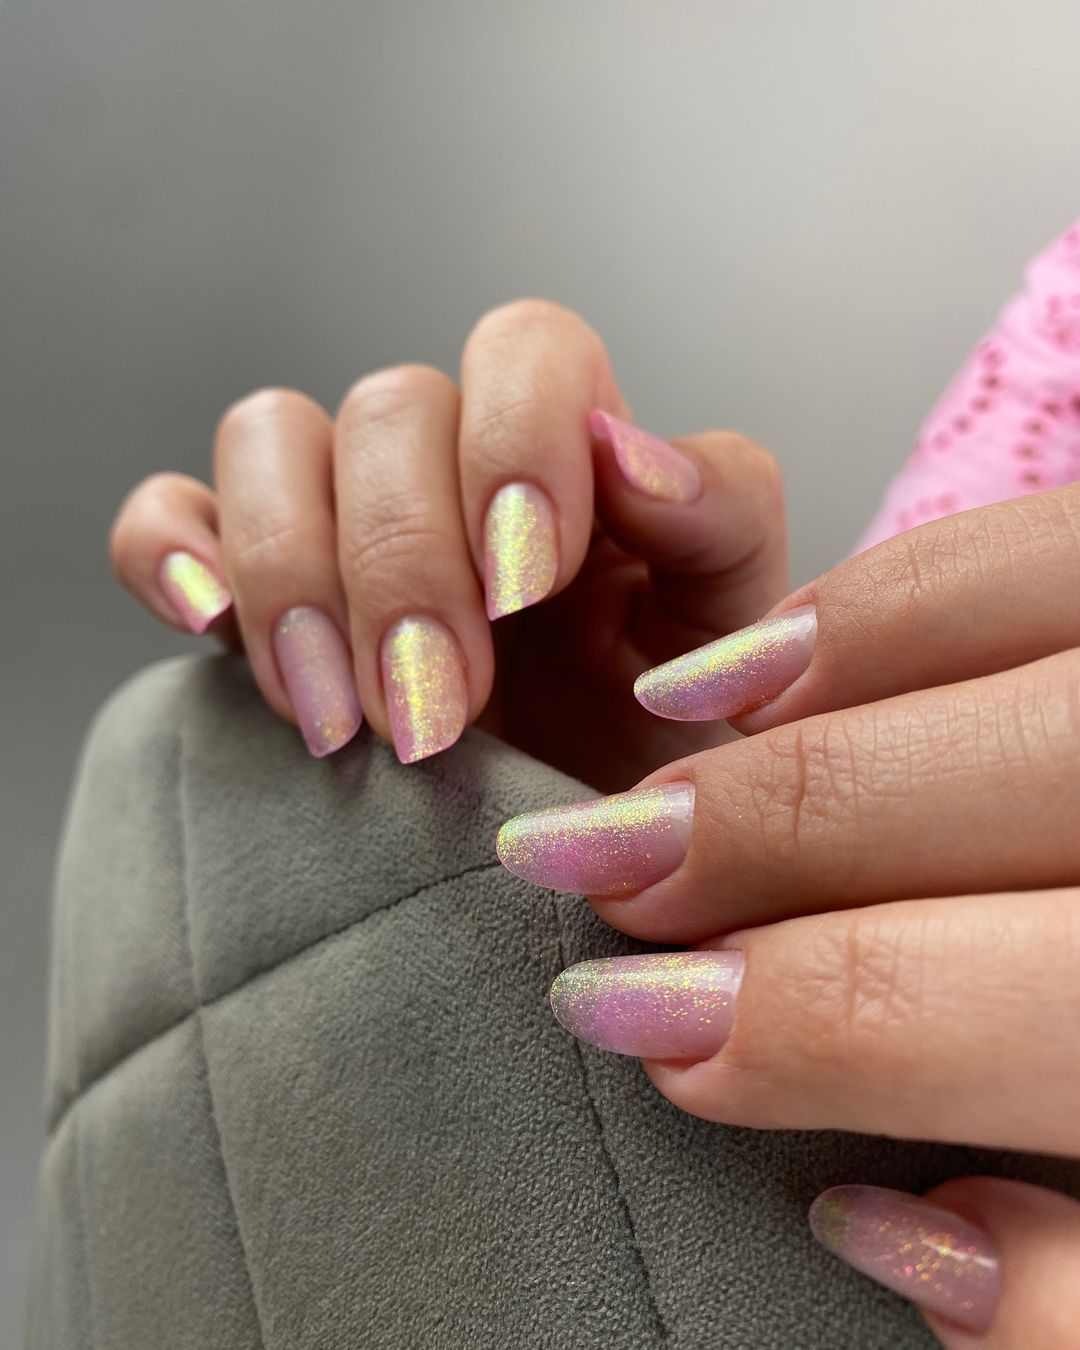
Iridescent Pink Shimmer
This iridescent pink shimmer design is delicate and enchanting. The subtle pink base with a shimmering finish creates a fairy-tale-like look that is perfect for any occasion. This design works best on medium nails in an oval shape, adding a touch of elegance and charm.
Consumables List
- Base Coat: DND Base Gel
- Polish: DND Gel Polish in “Pink Pearl”
- Top Coat: DND No Cleanse Top Coat
- Tools: Sponge applicator, UV/LED lamp
- Extras: Nail buffer, cuticle oil
DIY Instructions
- Apply the base coat and cure under the UV/LED lamp.
- Apply the pink gel polish in thin layers, curing each layer.
- Use a sponge applicator to blend the colors for a smooth gradient effect. Cure.
- Finish with a top coat and cure for a glossy, durable finish. Apply cuticle oil for hydration.
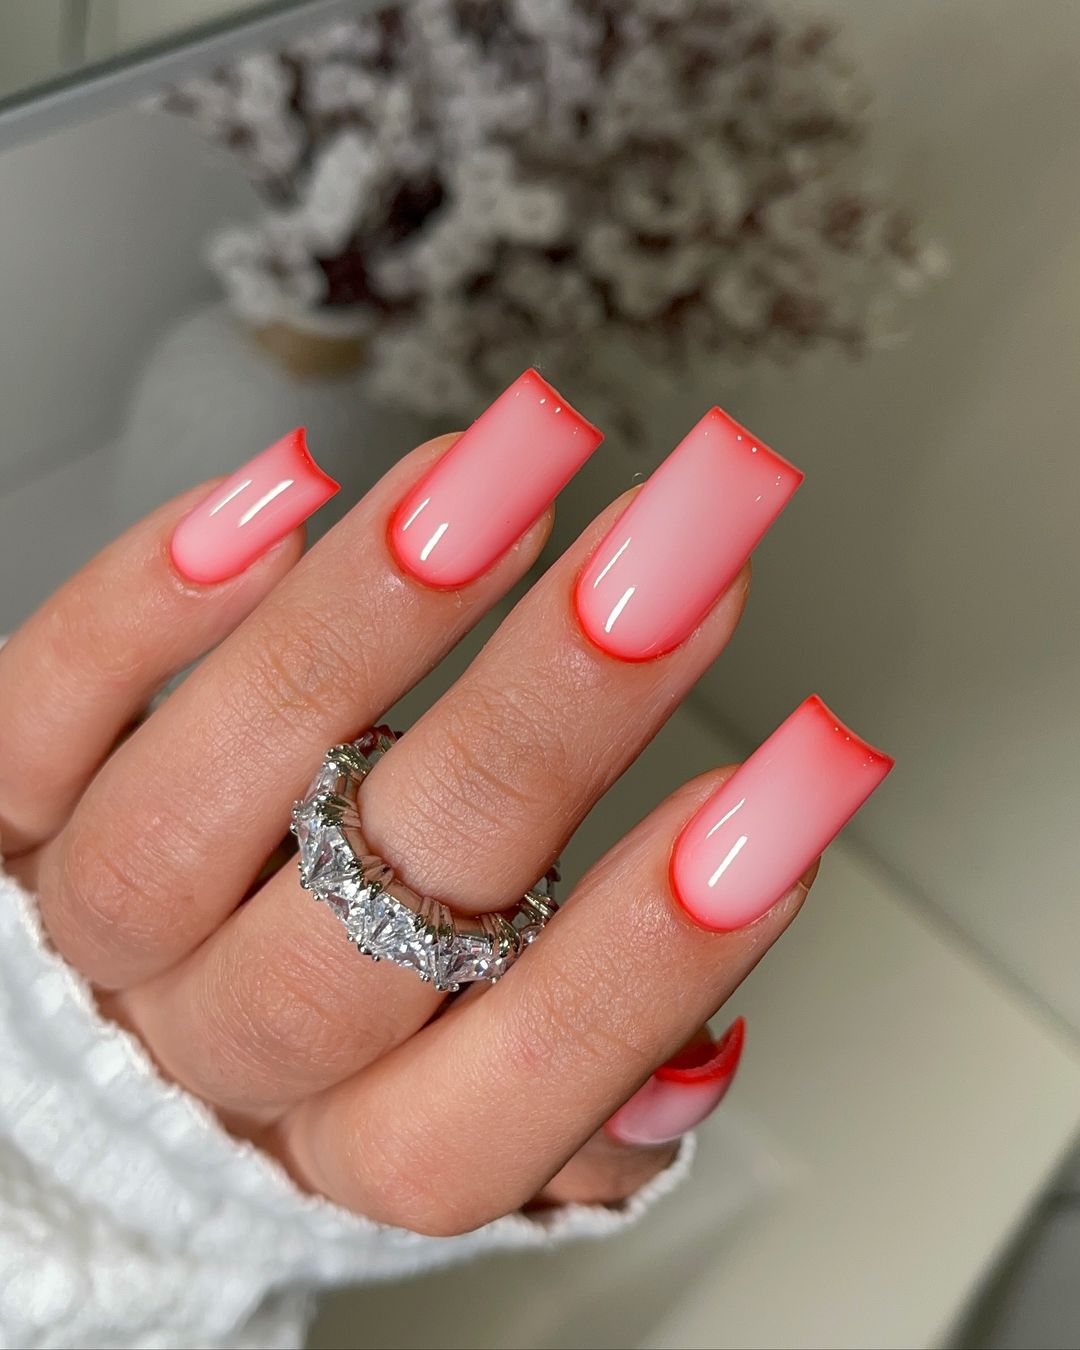
Gradient French Tip
This gradient French tip design is a modern twist on the classic French manicure. The soft gradient from nude to red at the tips creates a chic and stylish look. This design is ideal for long nails in a square shape, making it a trendy choice for any occasion.
Consumables List
- Base Coat: OPI GelColor Base Coat
- Polish: OPI GelColor in “Bare My Soul” and “Big Apple Red”
- Top Coat: OPI GelColor Top Coat
- Tools: Sponge applicator, UV/LED lamp
- Extras: Nail buffer, cuticle oil
DIY Instructions
- Apply the base coat and cure under the UV/LED lamp.
- Apply the nude gel polish as the base color and cure.
- Using a sponge applicator, gently dab the red polish on the tips, blending it for a gradient effect. Cure.
- Finish with a top coat and cure for a glossy, durable finish. Apply cuticle oil to keep your nails hydrated.
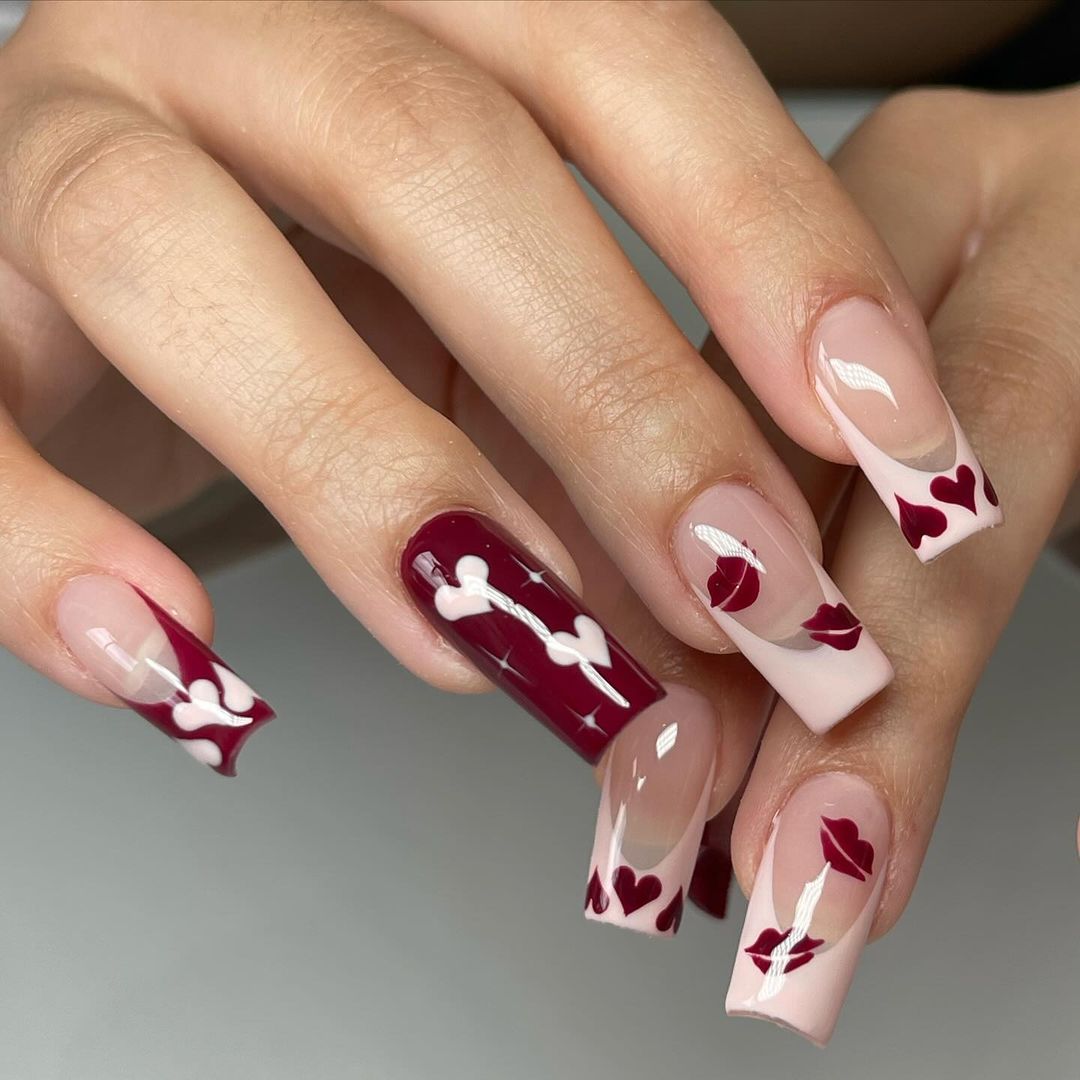
Burgundy Hearts and Kisses
This burgundy hearts and kisses design is playful and romantic. The deep burgundy color paired with heart and kiss patterns creates a fun and flirty look. This design is perfect for long nails in a coffin shape, adding a touch of whimsy to your style.
Consumables List
- Base Coat: DND Base Gel
- Polish: DND Gel Polish in “Wine Berry” and “Blush Pink”
- Top Coat: DND No Cleanse Top Coat
- Tools: Nail art brush, dotting tool, UV/LED lamp
- Extras: Nail buffer, cuticle oil
DIY Instructions
- Apply the base coat and cure under the UV/LED lamp.
- Apply the blush pink gel polish as the base color and cure.
- Use the nail art brush and dotting tool to create the hearts and kiss patterns with the burgundy polish. Cure.
- Finish with a top coat and cure for a glossy finish. Apply cuticle oil for hydration.
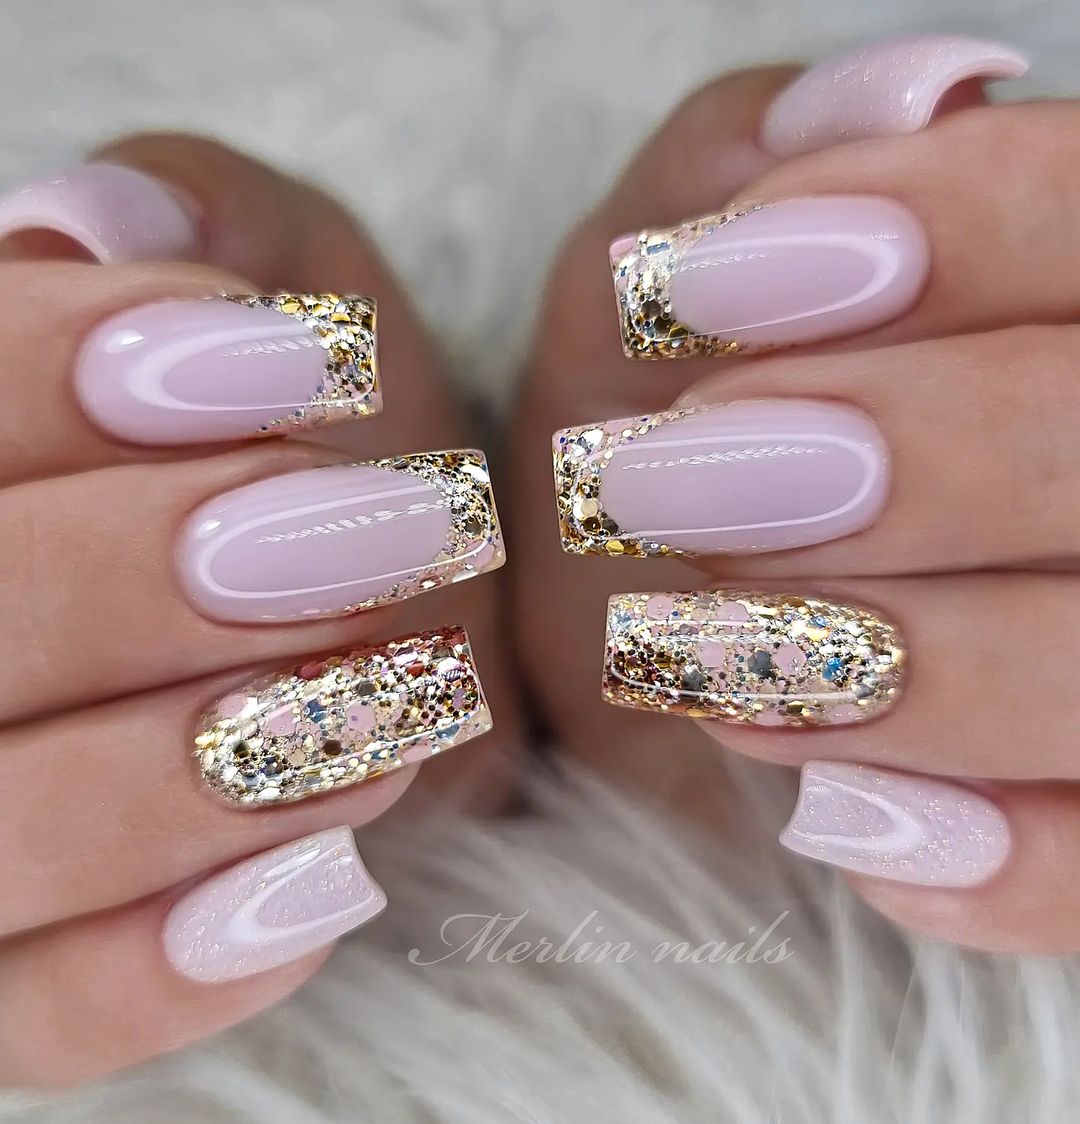
Glittering Gold Tips
This glittering gold tips design is luxurious and glamorous. The soft pink base with sparkling gold tips creates an elegant and eye-catching look. This design is ideal for medium nails in a square shape, perfect for special occasions or a touch of everyday luxury.
Consumables List
- Base Coat: OPI GelColor Base Coat
- Polish: OPI GelColor in “Bubble Bath” and “Golden Eye”
- Top Coat: OPI GelColor Top Coat
- Tools: Sponge applicator, UV/LED lamp
- Extras: Nail buffer, cuticle oil
DIY Instructions
- Apply the base coat and cure under the UV/LED lamp.
- Apply the pink gel polish as the base color and cure.
- Using a sponge applicator, dab the gold polish on the tips, blending it for a gradient effect. Cure.
- Finish with a top coat and cure for a glossy, durable finish. Apply cuticle oil to keep your nails hydrated.
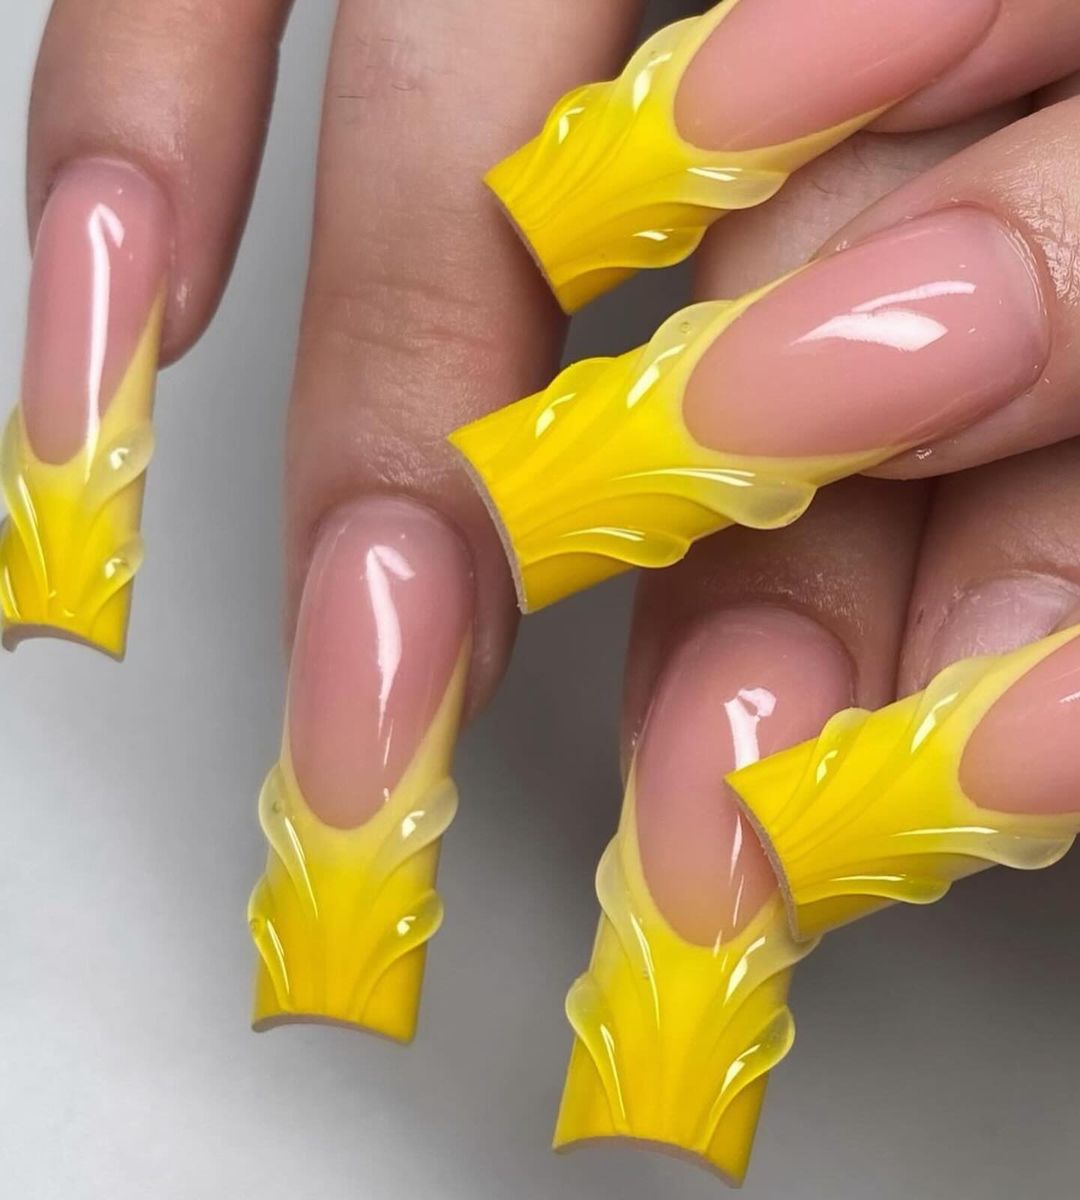
Yellow 3D Flames
This yellow 3D flames design is bold and avant-garde. The bright yellow flames add a dynamic and artistic touch to the nails, creating a unique and striking look. This design is perfect for long nails in a coffin shape, making it a statement piece for those who love to stand out.
Consumables List
- Base Coat: DND Base Gel
- Polish: DND Gel Polish in “Lemon Drop”
- Top Coat: DND No Cleanse Top Coat
- Tools: 3D nail art brush, UV/LED lamp
- Extras: Nail buffer, cuticle oil
DIY Instructions
- Apply the base coat and cure under the UV/LED lamp.
- Apply the nude gel polish as the base color and cure.
- Use the 3D nail art brush to create the yellow flames, building up the layers for a 3D effect. Cure.
- Finish with a top coat and cure for a glossy finish. Apply cuticle oil for hydration.
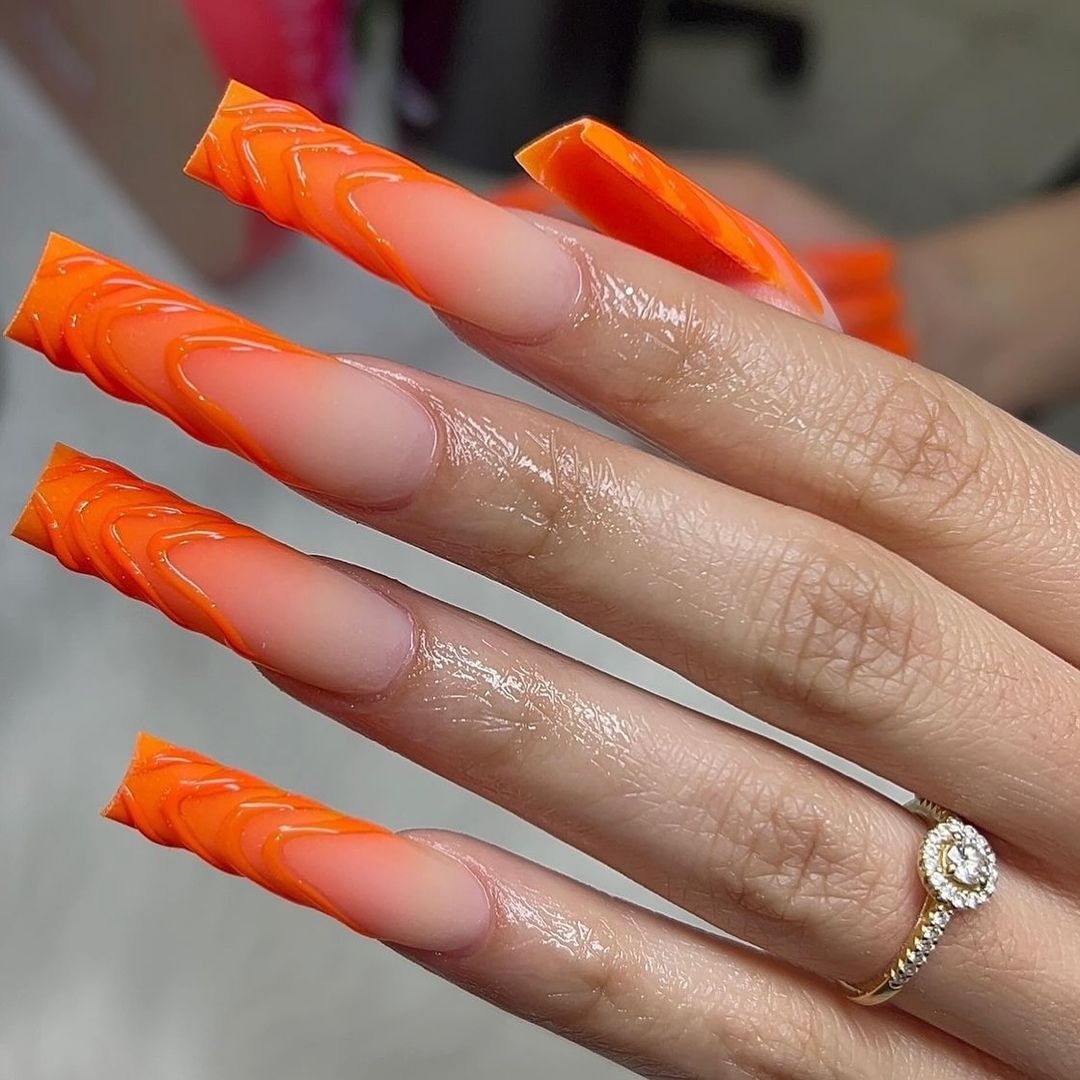
Fiery Orange Swirl
This fiery orange swirl design is a bold and dynamic choice that captures attention instantly. The vibrant orange swirls add a three-dimensional effect, creating a look that is both artistic and eye-catching. This design is perfect for long nails in a coffin shape, making a striking statement for any occasion.
Consumables List
- Base Coat: OPI GelColor Base Coat
- Polish: OPI GelColor in “A Roll in the Hague” and “Top Coat”
- Top Coat: OPI GelColor Top Coat
- Tools: 3D nail art brush, UV/LED lamp
- Extras: Nail buffer, cuticle oil
DIY Instructions
- Apply the base coat and cure under the UV/LED lamp.
- Apply the nude gel polish as the base color and cure.
- Use the 3D nail art brush to create the orange swirls, building up the layers for a 3D effect. Cure.
- Finish with a top coat and cure for a glossy finish. Apply cuticle oil for hydration.
Deep Teal Elegance
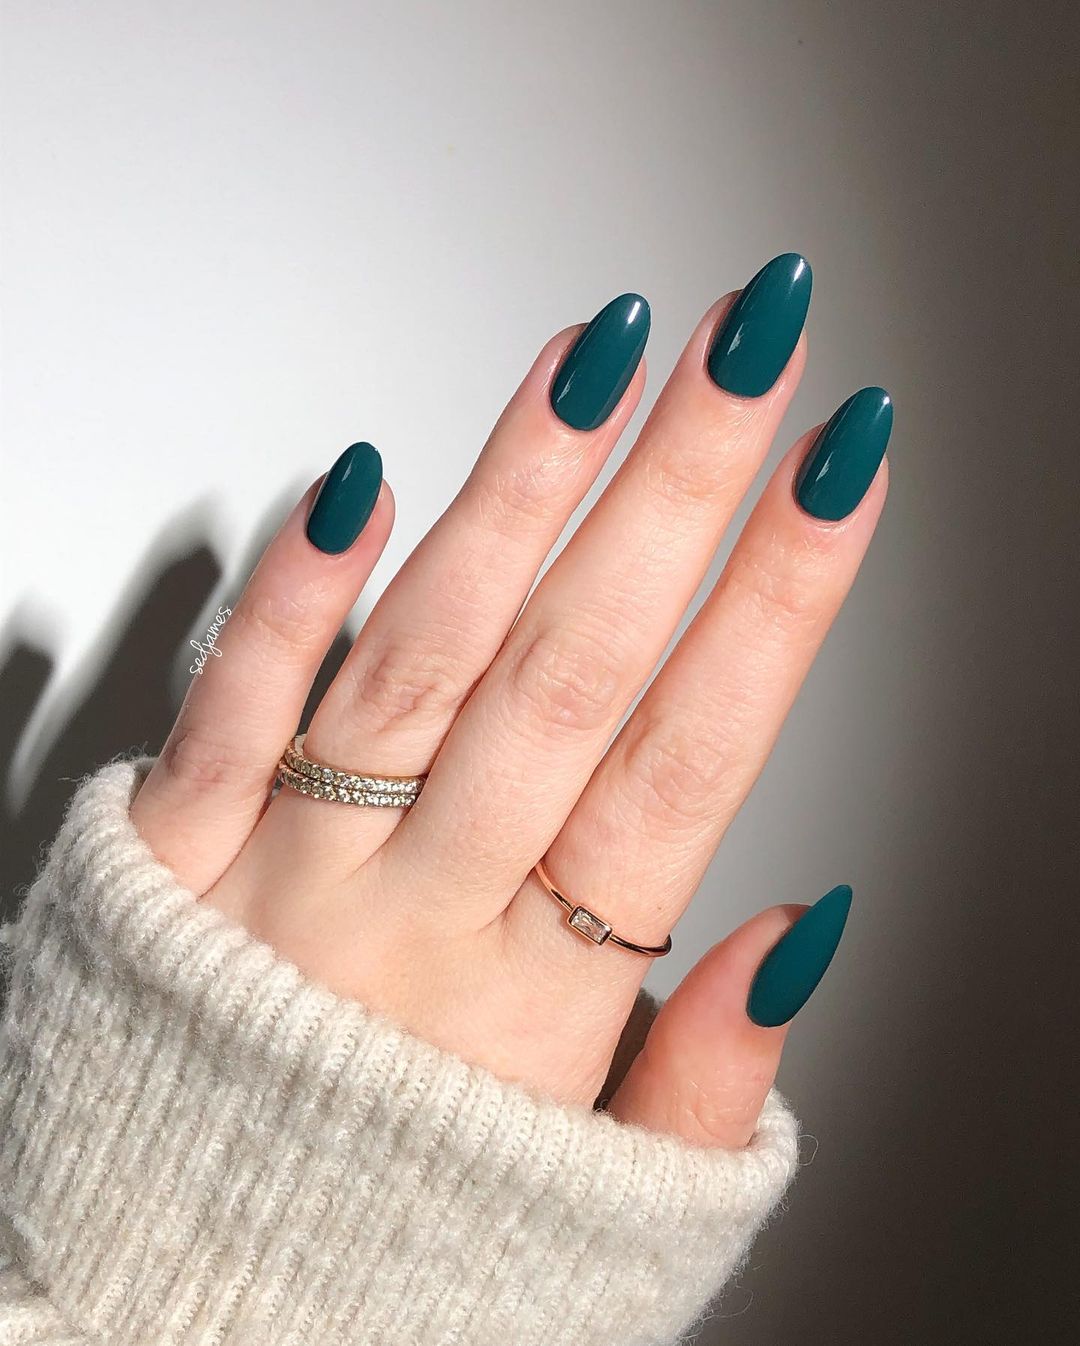
This deep teal nail design is sophisticated and chic, perfect for those who prefer a more subdued yet stylish look. The rich teal color adds depth and elegance to your nails, making it ideal for medium nails in an almond shape. This look is versatile and suitable for both casual and formal settings.
Consumables List
- Base Coat: DND Base Gel
- Polish: DND Gel Polish in “Teal The Show”
- Top Coat: DND No Cleanse Top Coat
- Tools: Nail buffer, UV/LED lamp
- Extras: Cuticle oil for aftercare
DIY Instructions
- Apply the base coat and cure under the UV/LED lamp.
- Apply two coats of the teal gel polish, curing each layer thoroughly.
- Finish with a top coat and cure for a high-gloss finish.
- Apply cuticle oil to keep your nails hydrated.
Electric Blue Allure
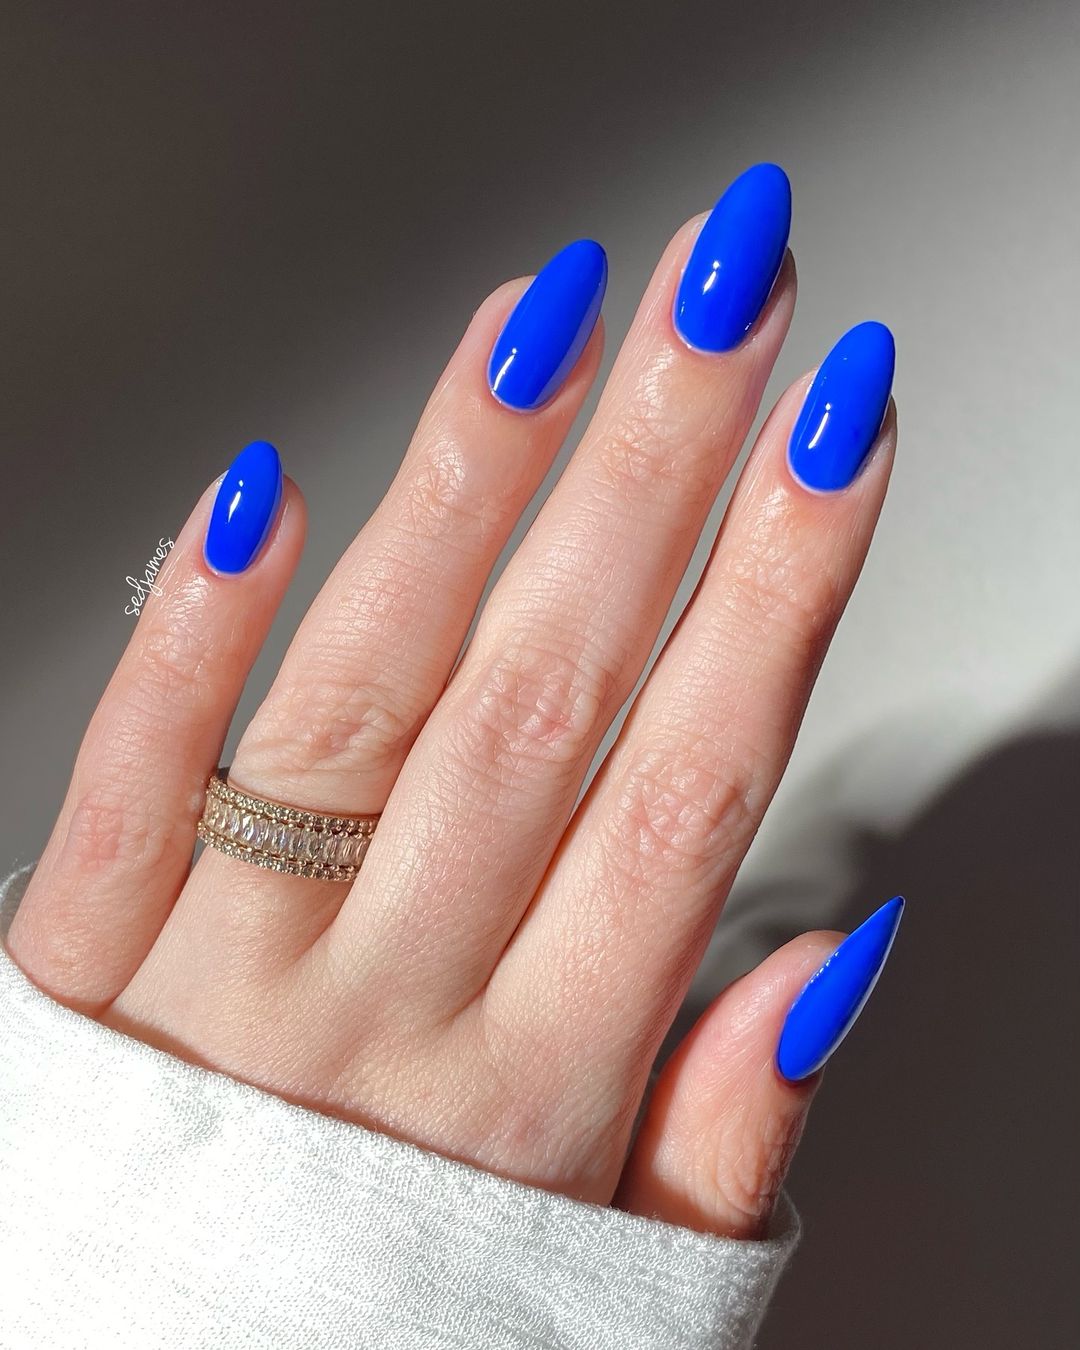
This electric blue nail design is vibrant and energetic, perfect for making a bold statement. The striking blue shade stands out beautifully, adding a pop of color to your look. This design is ideal for medium nails in an oval shape, making it a trendy and eye-catching choice.
Consumables List
- Base Coat: OPI GelColor Base Coat
- Polish: OPI GelColor in “My Car Has Navy-gation”
- Top Coat: OPI GelColor Top Coat
- Tools: Nail buffer, UV/LED lamp
- Extras: Cuticle oil for aftercare
DIY Instructions
- Apply the base coat and cure under the UV/LED lamp.
- Apply two coats of the blue gel polish, curing each layer thoroughly.
- Finish with a top coat and cure for a high-gloss finish.
- Apply cuticle oil to keep your nails hydrated.
FAQ
Q: How can I make my gel manicure last longer? A: Ensure you properly prep your nails by cleaning and buffing them before application. Use a good quality base and top coat, and always cure each layer thoroughly under a UV/LED lamp.
Q: What are the best brands for fall nail colors? A: OPI and DND are top choices for gel and traditional polishes. They offer a wide range of colors that are perfect for the fall season.
Q: Can I achieve these looks with regular nail polish? A: Yes, you can achieve similar looks with regular polish, but using gel polish will provide a longer-lasting and more durable finish.
Q: How do I remove gel polish at home? A: Soak a cotton ball in acetone, place it on your nail, and wrap it with aluminum foil. Leave it on for about 10-15 minutes, then gently scrape off the polish with a cuticle pusher.
Save Pin
