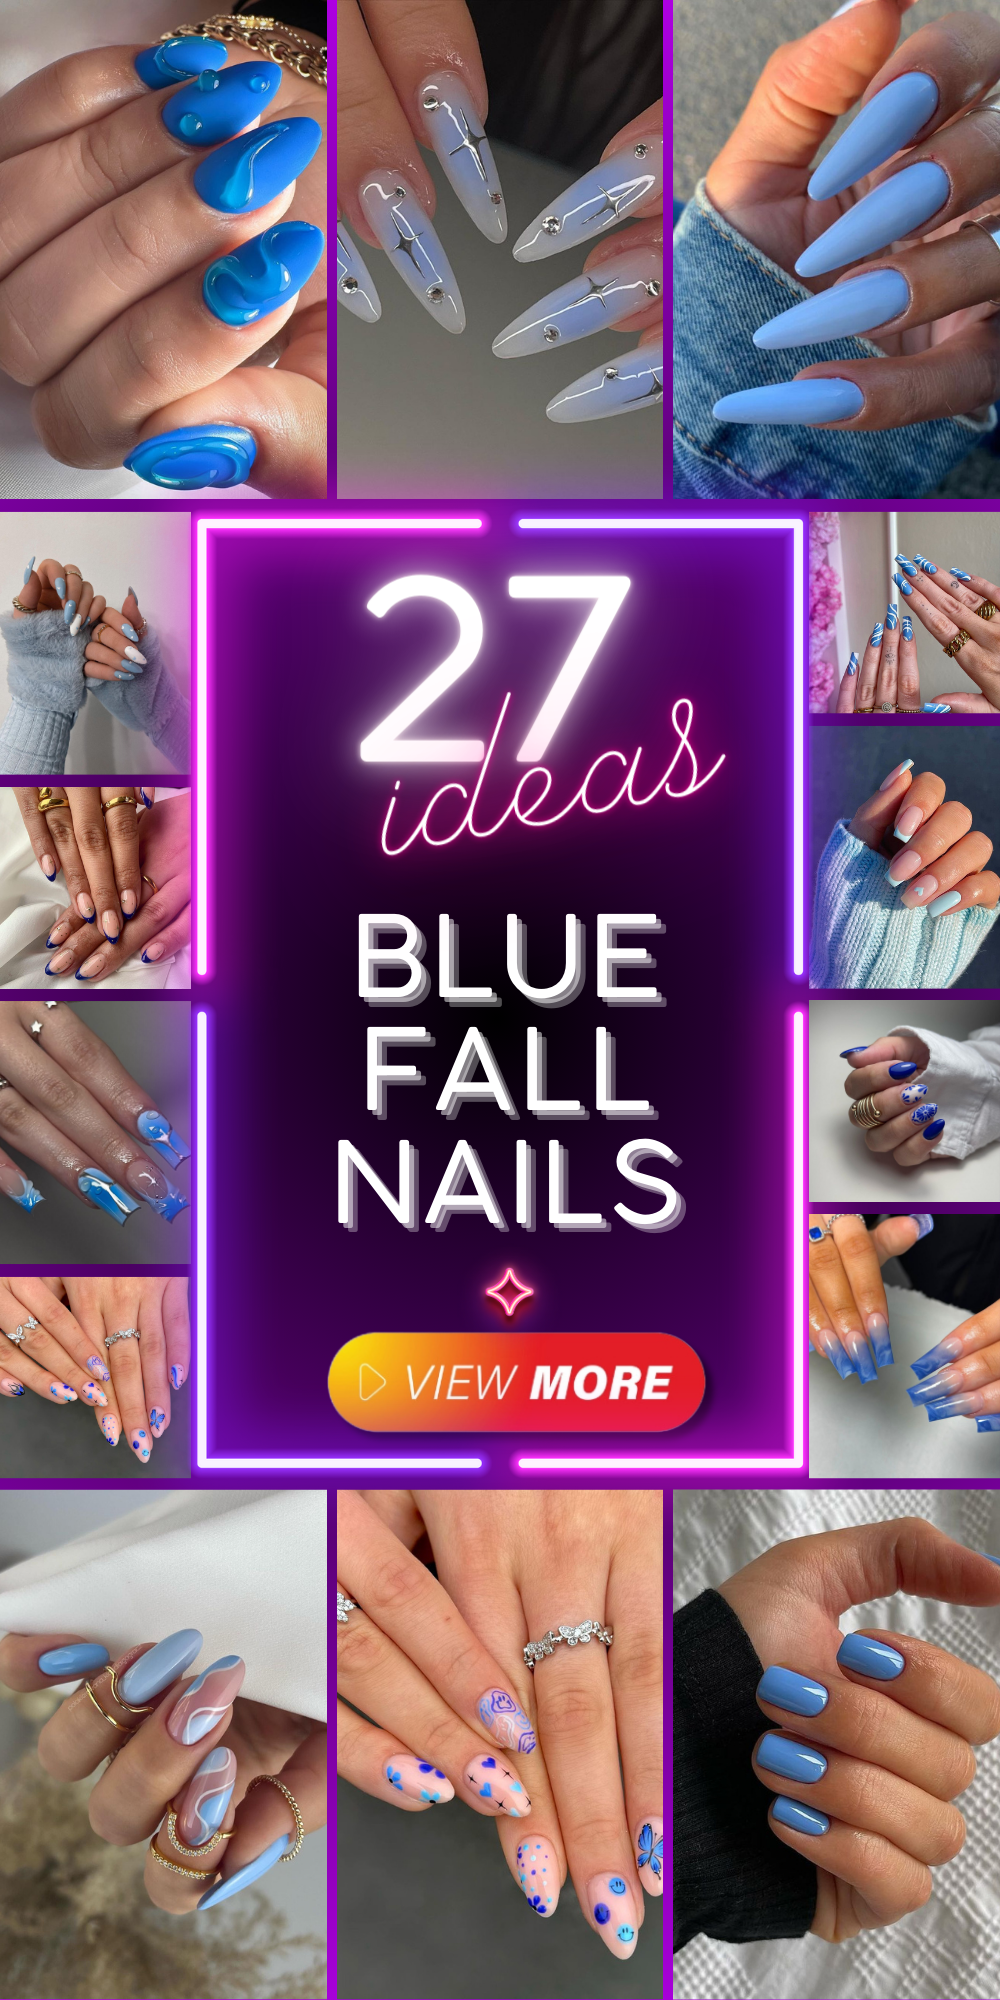
When it comes to blue fall nails, there’s an abundance of options that will leave you mesmerized. Whether you prefer dark and moody hues or light and airy tones, the versatility of blue is undeniable. From navy to royal, the color spectrum offers endless possibilities. Let’s dive into some stunning blue nail designs perfect for fall.
Elegant Blue French Tips
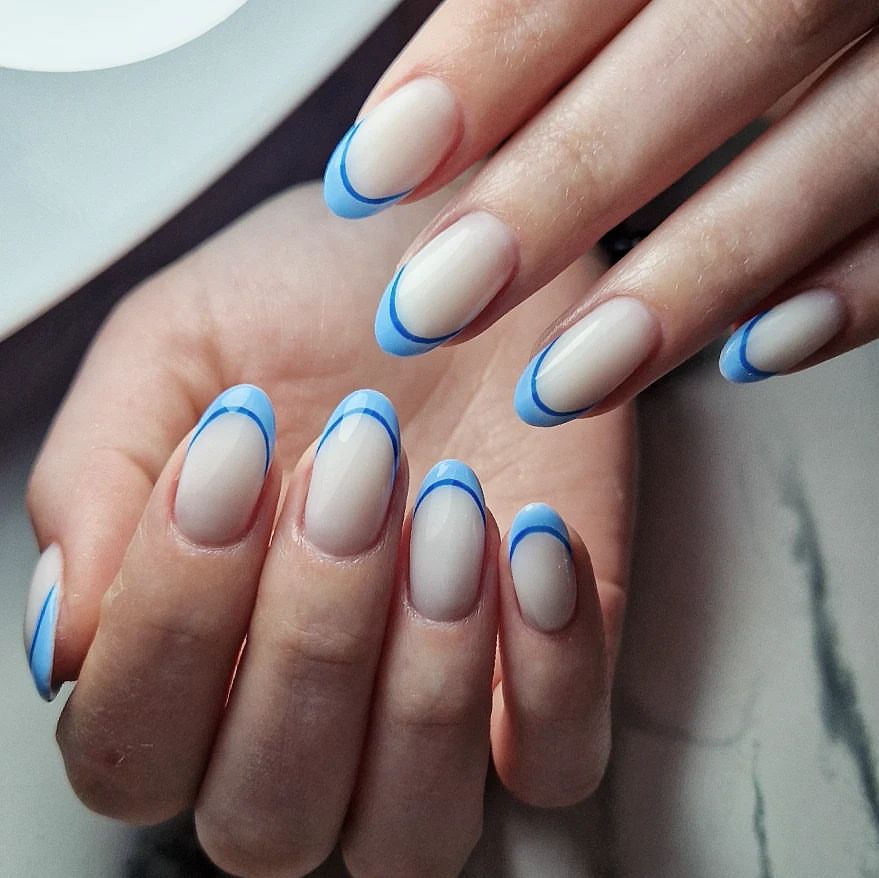
These blue fall nails showcase a modern twist on the classic French tip. The nails are almond-shaped, with a neutral base color and striking blue tips. The tips are outlined with a sleek, curved line, adding a unique and elegant touch. This design is perfect for those who love simplicity with a hint of color. The contrast between the nude and blue creates a sophisticated look suitable for any occasion.
- Base Coat: OPI Natural Nail Base Coat
- Nude Polish: Essie ‘Ballet Slippers’
- Blue Polish: Sally Hansen ‘Pacific Blue’
- Top Coat: Seche Vite Dry Fast Top Nail Coat
- Fine Liner Brush: Winstonia Fine Liner Nail Art Brush
- Cuticle Oil: CND SolarOil Nail & Cuticle Care
Instructions for Creating This Design at Home
- Apply a base coat to protect your natural nails.
- Paint your nails with a nude polish and let them dry completely.
- Using a fine liner brush, carefully paint the tips with blue polish, creating a curved French tip.
- Outline the tips with a second line of blue polish for added definition.
- Seal your design with a top coat to ensure longevity and shine.
- Finish with cuticle oil to keep your nails and surrounding skin hydrated.
Vibrant Neon Waves
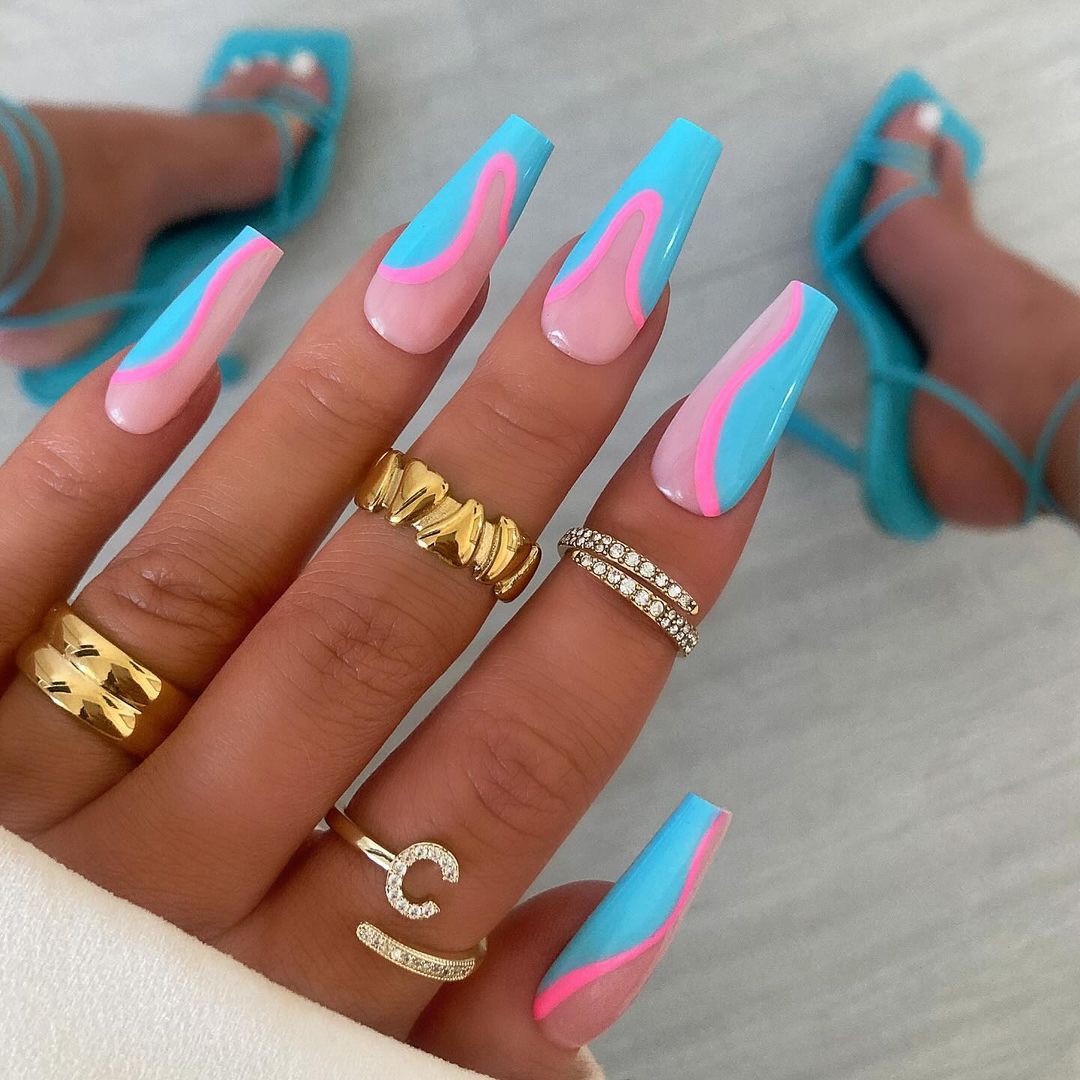
These bold and vibrant blue fall nails feature a neon wave design that screams fun and creativity. The combination of blue, pink, and orange swirls creates a striking and eye-catching look. Perfect for those who love to make a statement, this design is playful yet stylish. The coffin shape of the nails adds an extra level of drama and elegance, making this a perfect choice for trendsetters.
- Base Coat: ORLY Bonder Rubberized Basecoat
- Blue Polish: China Glaze ‘Too Yacht to Handle’
- Pink Polish: Orly ‘Hot Tropics’
- Orange Polish: OPI ‘My Chihuahua Bites’
- Top Coat: INM Out The Door Top Coat
- Striping Brush: Beetles Nail Art Liner Brushes
- Nail Art Tape: Ejiubas Nail Art Striping Tape Lines
Instructions for Creating This Design at Home
- Start with a base coat to ensure your polish adheres well.
- Apply a blue polish as your base color and let it dry.
- Using a striping brush, create wavy lines with pink and orange polish across the nails.
- Use nail art tape to help guide your lines if needed.
- Seal with a top coat to protect your design and add shine.
- Maintain with regular application of cuticle oil to keep nails healthy.
Delicate Floral Accents
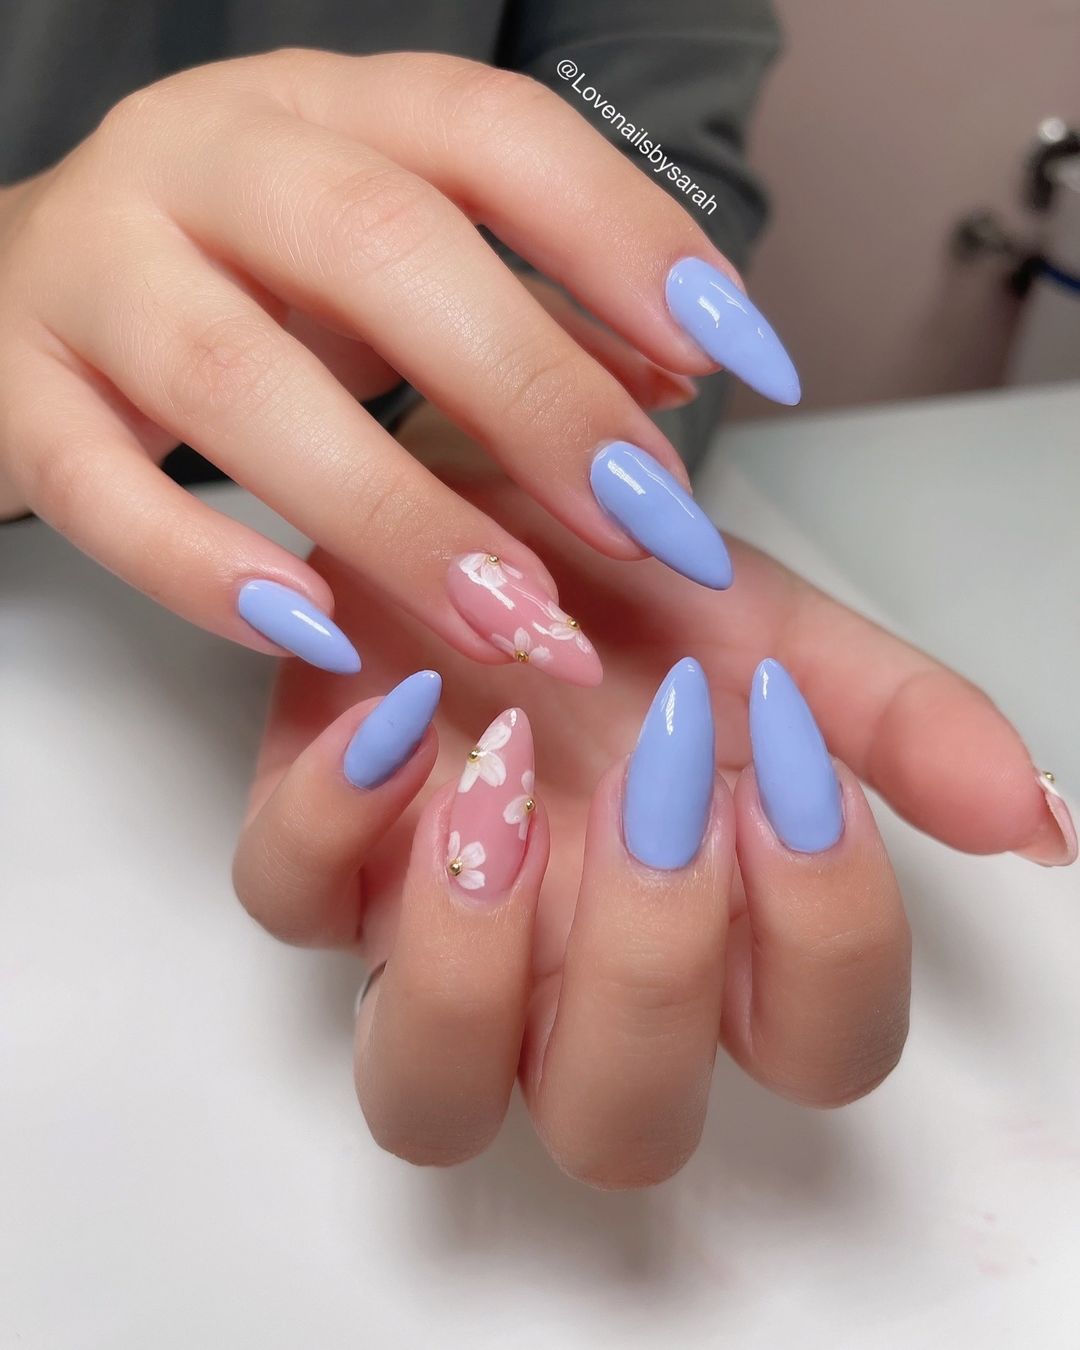
These blue fall nails feature a delicate and charming floral design. The light blue polish serves as a serene backdrop for the intricate white and yellow flowers painted on an accent nail. This design is perfect for those who appreciate subtle beauty and a touch of nature on their nails. The almond shape complements the floral design, adding to its overall elegance and femininity.
- Base Coat: Zoya Anchor Base Coat
- Light Blue Polish: Essie ‘Bikini So Teeny’
- White Polish: OPI ‘Alpine Snow’
- Yellow Polish: Sally Hansen ‘Mellow Yellow’
- Top Coat: CND Super Shiney Top Coat
- Detail Brush: PANA Nail Art Detail Brush
- Dotting Tool: KADS Nail Art Dotting Tools
Instructions for Creating This Design at Home
- Apply a base coat to start your manicure.
- Paint your nails with a light blue polish and let them dry.
- Using a detail brush, paint small white flowers on an accent nail.
- Add yellow dots in the center of each flower with a dotting tool.
- Finish with a top coat to seal your design and add a glossy finish.
- Apply cuticle oil regularly to keep your nails nourished.
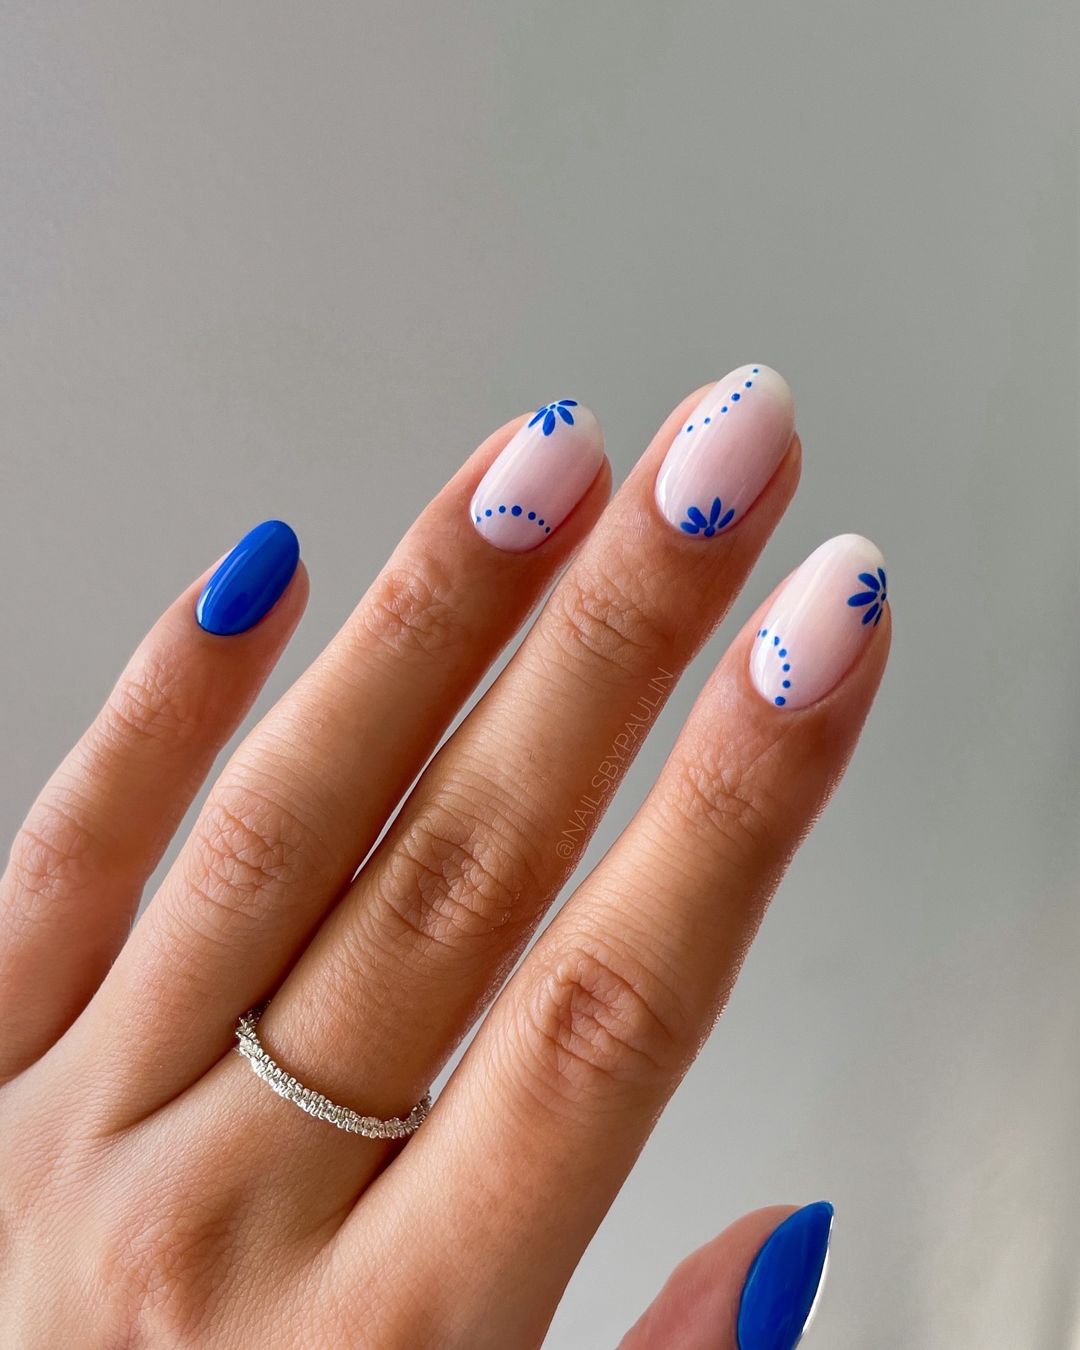
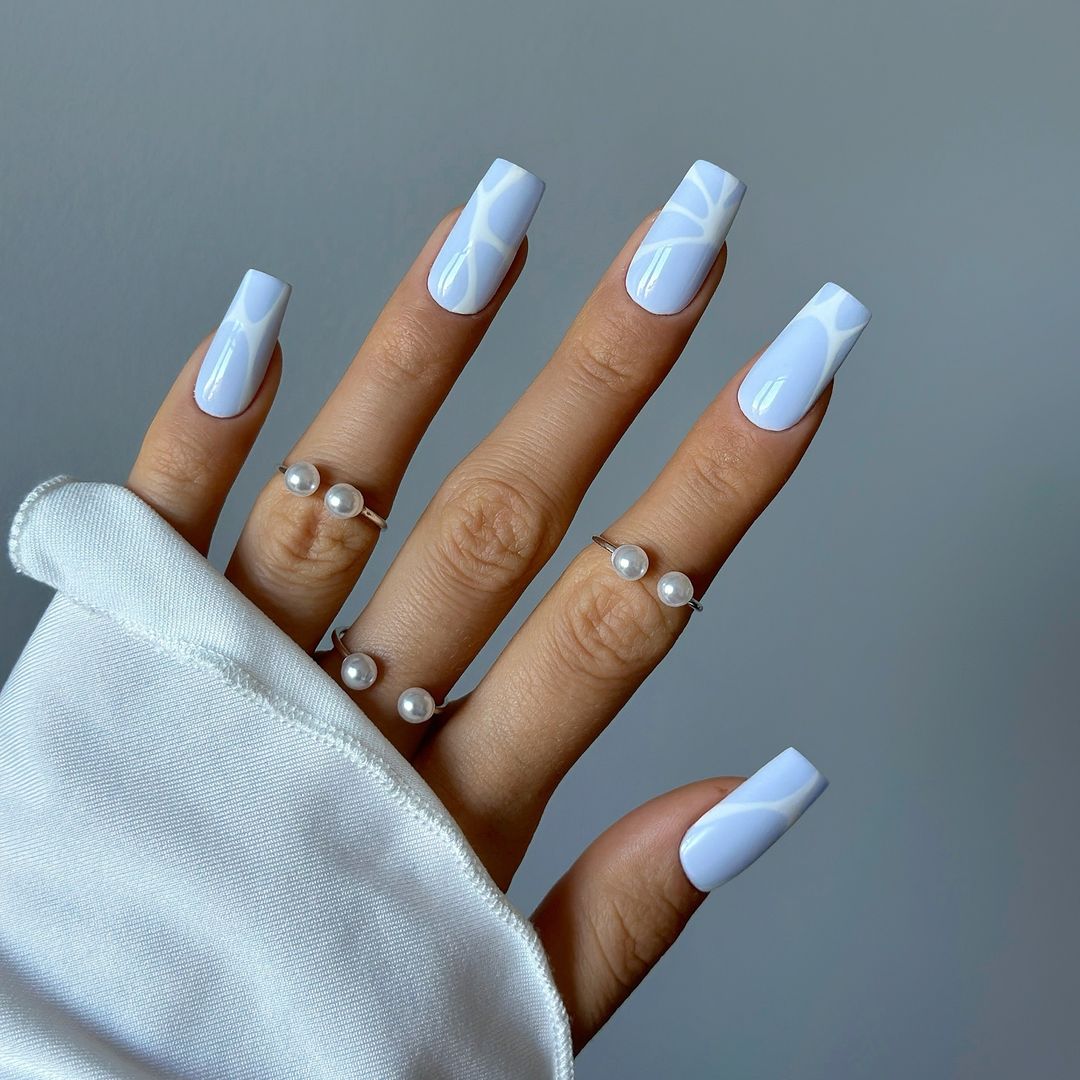
Elegant Floral Accents
These nails beautifully combine simplicity with artistic flair. The base is a soft nude, which perfectly complements the intricate blue floral designs on selected nails. The accents are minimalistic, with small blue flowers and dotted patterns adding a touch of elegance without overwhelming the design. The overall look is sophisticated and perfect for any occasion, especially in the fall.
- Base Coat: Essie ‘First Base’
- Nude Polish: OPI ‘Samoan Sand’
- Blue Polish: Sally Hansen ‘Pacific Blue’
- Top Coat: Seche Vite Dry Fast Top Nail Coat
- Detail Brush: Winstonia Fine Liner Nail Art Brush
- Dotting Tool: KADS Nail Art Dotting Tools
- Cuticle Oil: Burt’s Bees Lemon Butter Cuticle Cream
Instructions for Creating This Design at Home
- Start with a base coat to protect your nails.
- Apply a nude polish and let it dry completely.
- Using a detail brush, paint small blue flowers and dotted patterns on selected nails.
- For a precise dot, use a dotting tool dipped in blue polish.
- Seal with a top coat to ensure your design lasts longer and adds a beautiful shine.
- Finish with cuticle oil to keep your nails and cuticles healthy and hydrated.
Save Pin
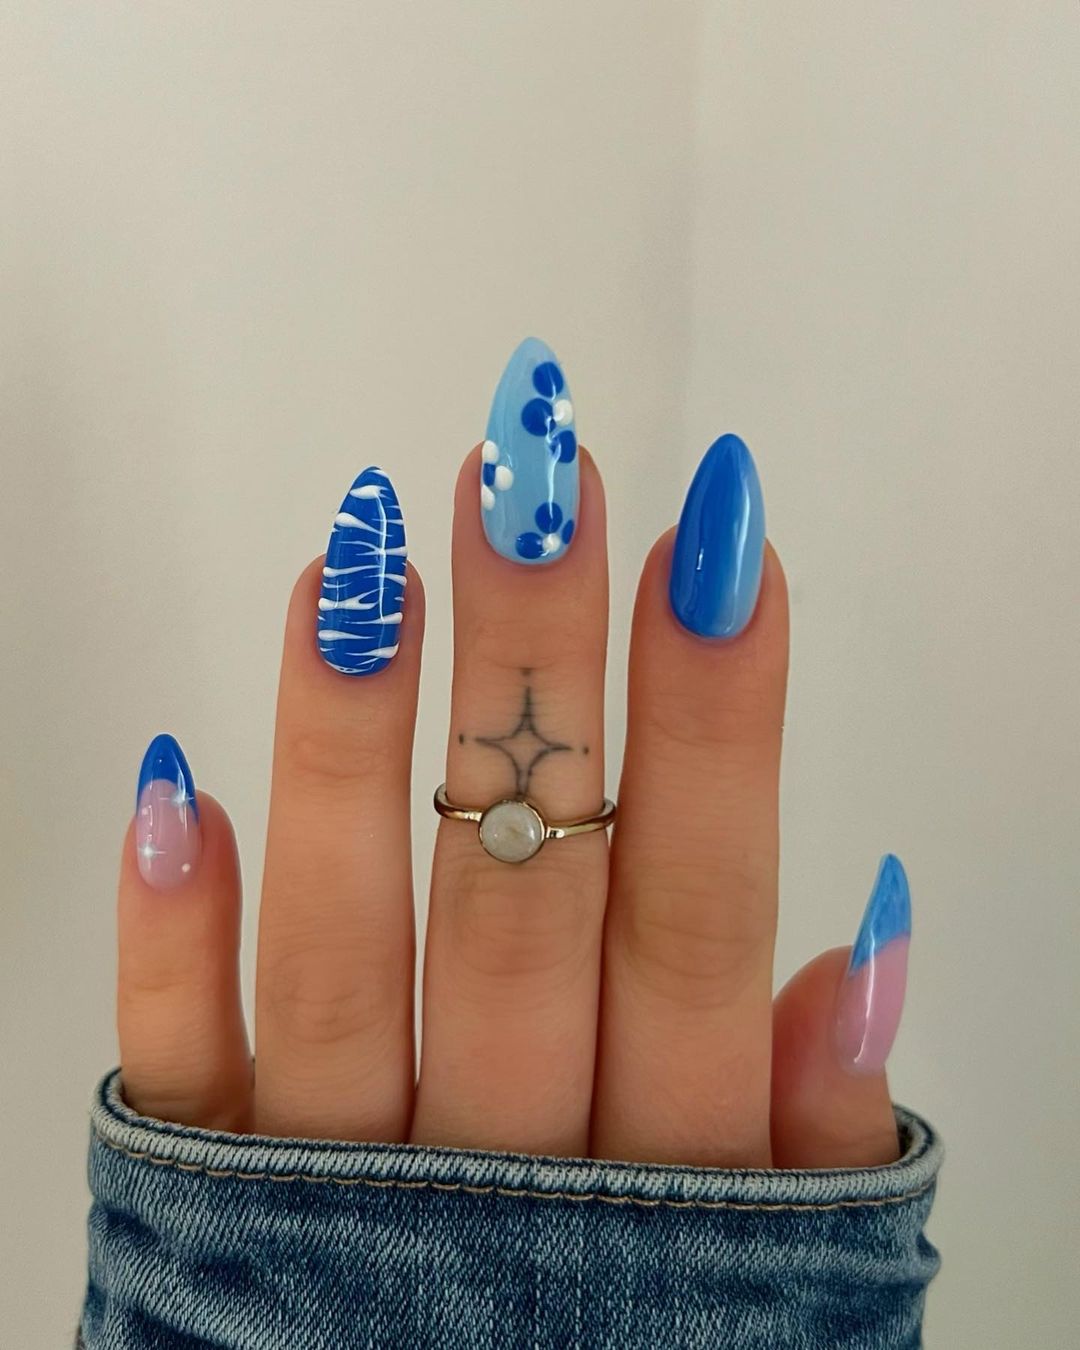
Abstract Blue Art
This design showcases a playful mix of blue shades and patterns. Each nail features a unique design, including stripes, dots, and abstract art, all in varying tones of blue. The combination of bright and muted blues creates a visually striking and artistic look. This manicure is ideal for those who love to experiment with bold and creative nail designs.
- Base Coat: ORLY Bonder Rubberized Basecoat
- Bright Blue Polish: China Glaze ‘Too Yacht to Handle’
- Light Blue Polish: Essie ‘Bikini So Teeny’
- White Polish: OPI ‘Alpine Snow’
- Top Coat: INM Out The Door Top Coat
- Striping Brush: Beetles Nail Art Liner Brushes
- Dotting Tool: PANA Nail Art Dotting Tool
- Nail Art Tape: Ejiubas Nail Art Striping Tape Lines
Instructions for Creating This Design at Home
- Apply a base coat to start your manicure.
- Paint your nails with a bright blue polish and let them dry.
- Using a striping brush and white polish, create various patterns such as stripes and abstract designs on different nails.
- Add dots using a dotting tool dipped in light blue polish for a contrasting effect.
- Use nail art tape to guide your designs if needed.
- Seal your artwork with a top coat for a glossy finish and longevity.
- Maintain with regular application of cuticle oil to keep your nails healthy.
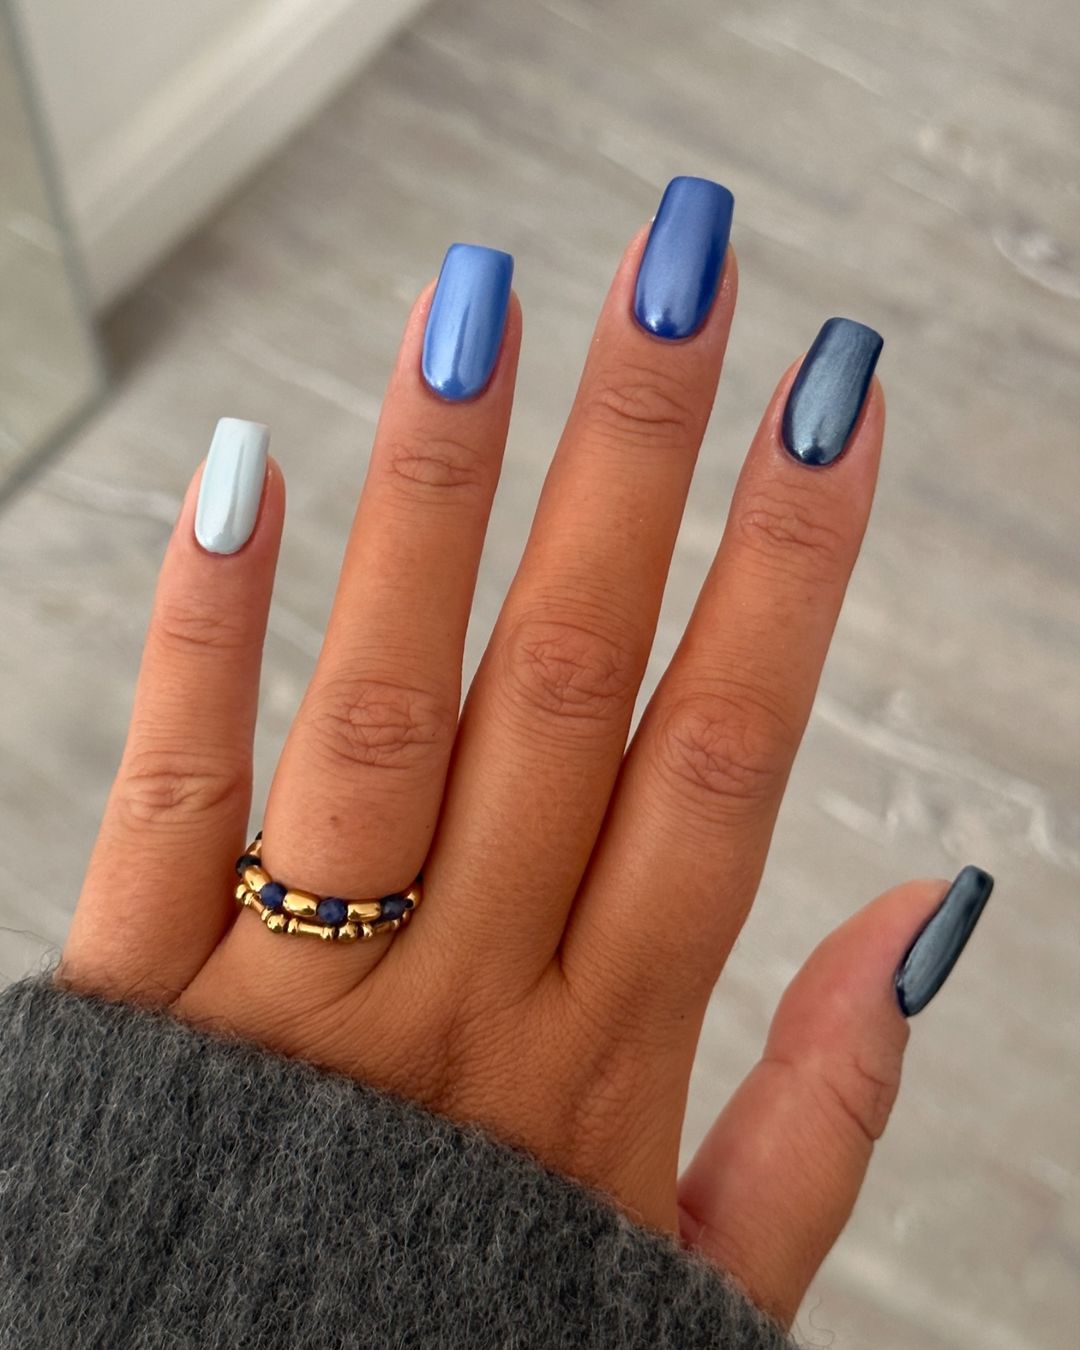
Blue Gradient Elegance
These nails feature a stunning gradient of blue shades, from light to dark. The ombre effect is beautifully smooth, creating a seamless transition between colors. This design is both elegant and versatile, suitable for any event or everyday wear. The glossy finish adds a touch of sophistication, making these nails a perfect choice for fall.
- Base Coat: Zoya Anchor Base Coat
- Light Blue Polish: Essie ‘Mint Candy Apple’
- Medium Blue Polish: OPI ‘Rich Girls & Po-Boys’
- Dark Blue Polish: Sally Hansen ‘Midnight Mod’
- Top Coat: CND Super Shiney Top Coat
- Makeup Sponge: Wedge Makeup Sponges for blending
- Clean-Up Brush: ELF Concealer Brush for precise clean-up
- Cuticle Oil: CND SolarOil Nail & Cuticle Care
Instructions for Creating This Design at Home
- Apply a base coat to protect your nails.
- Paint your nails with the lightest blue polish and let them dry.
- On a makeup sponge, apply strips of light, medium, and dark blue polishes.
- Dab the sponge onto your nails to create the gradient effect.
- Repeat until you achieve the desired opacity and blend.
- Clean up the edges with a clean-up brush dipped in nail polish remover.
- Apply a top coat to smooth the gradient and add shine.
- Finish with cuticle oil to keep your nails hydrated.
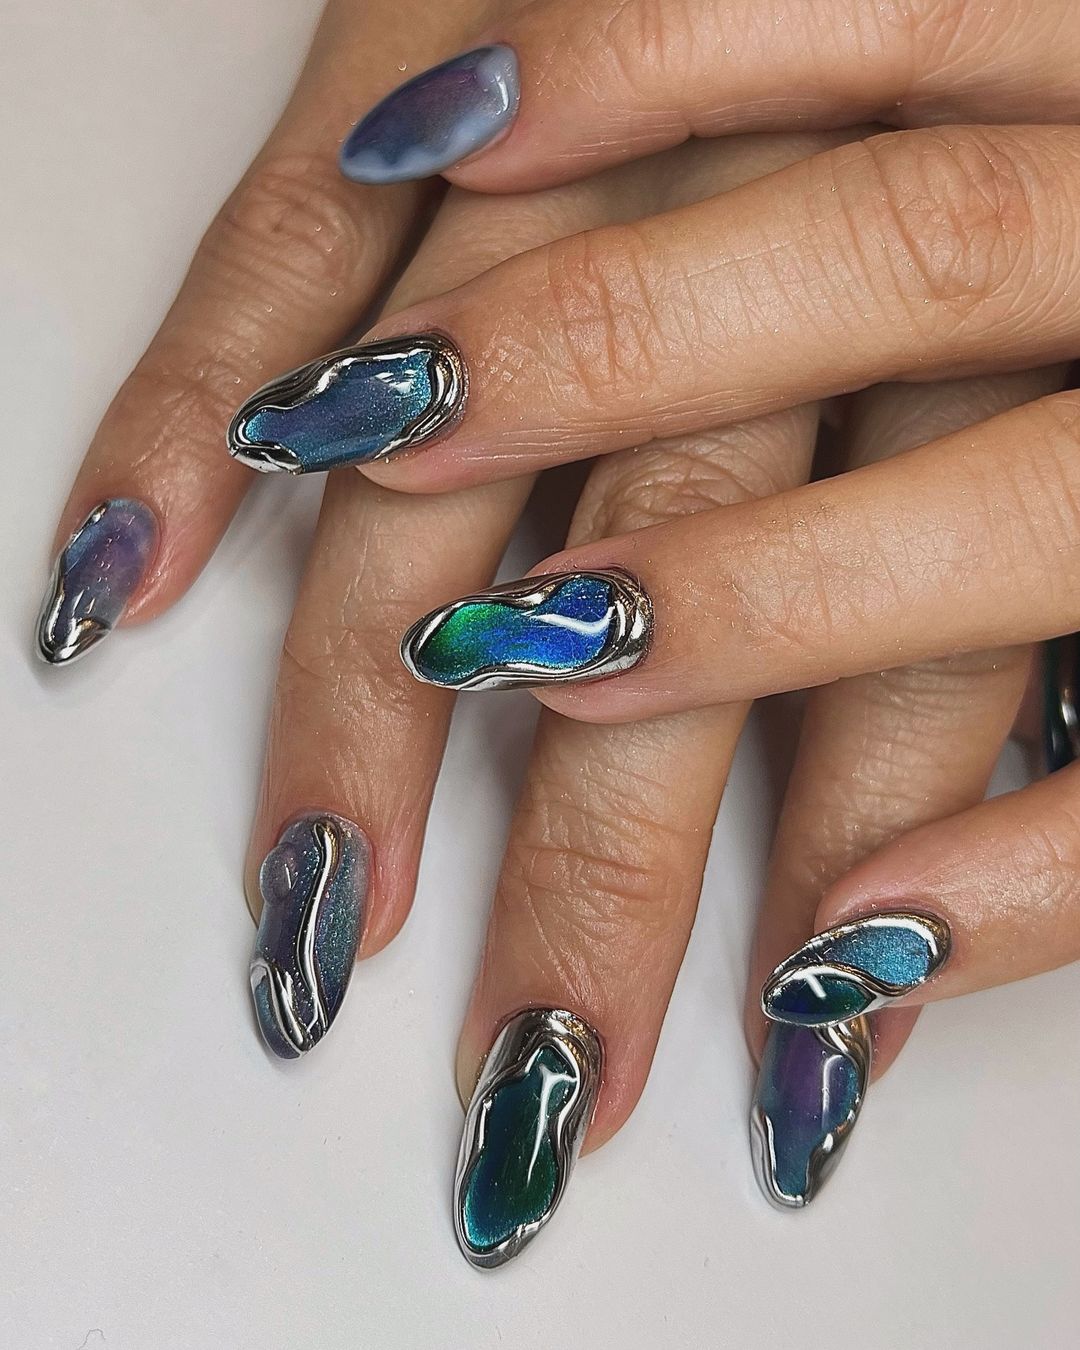
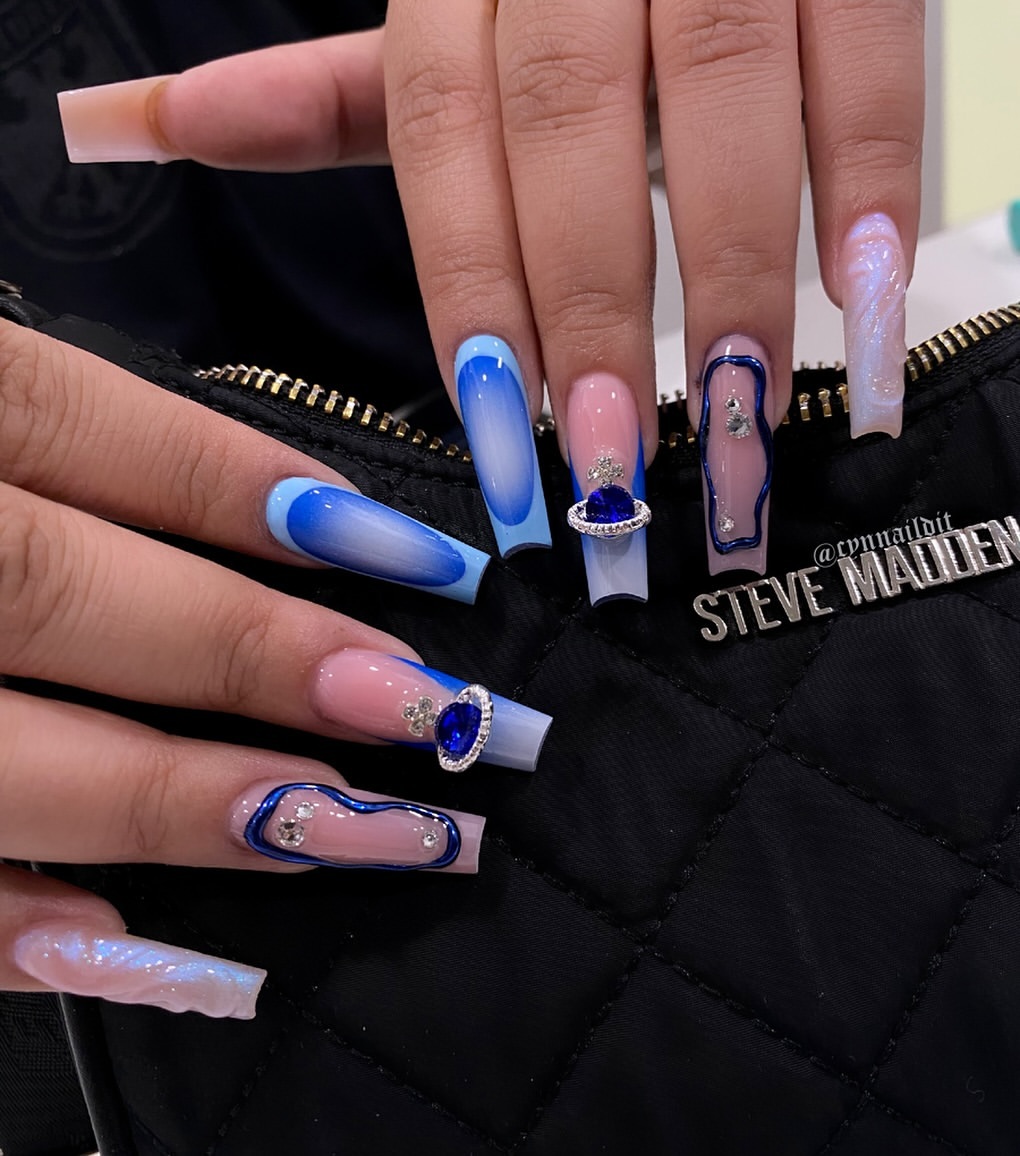
Metallic Blue Abstract
This nail design features a stunning metallic blue with an abstract, almost liquid-like effect. The shiny chrome accents give the design a futuristic feel, while the varying shades of blue create depth and interest. The irregular shapes and reflective surfaces make this manicure truly unique and perfect for making a bold statement this fall.
- Base Coat: OPI Infinite Shine Primer
- Metallic Blue Polish: Essie ‘Aruba Blue’
- Chrome Powder: Born Pretty Mirror Effect Chrome Powder
- Top Coat: Gelish Top It Off
- Detail Brush: Beetles Gel Polish Nail Art Brush
- LED Lamp: SUNUV Gel Nail Light for curing
- Cuticle Oil: Cuccio Revitalize Cuticle Oil
Instructions for Creating This Design at Home
- Apply a base coat to protect your natural nails.
- Paint your nails with a metallic blue polish and cure under an LED lamp.
- Use a detail brush to apply chrome powder in abstract shapes, curing each layer.
- Seal with a top coat and cure again.
- Apply cuticle oil to keep your nails and cuticles healthy.
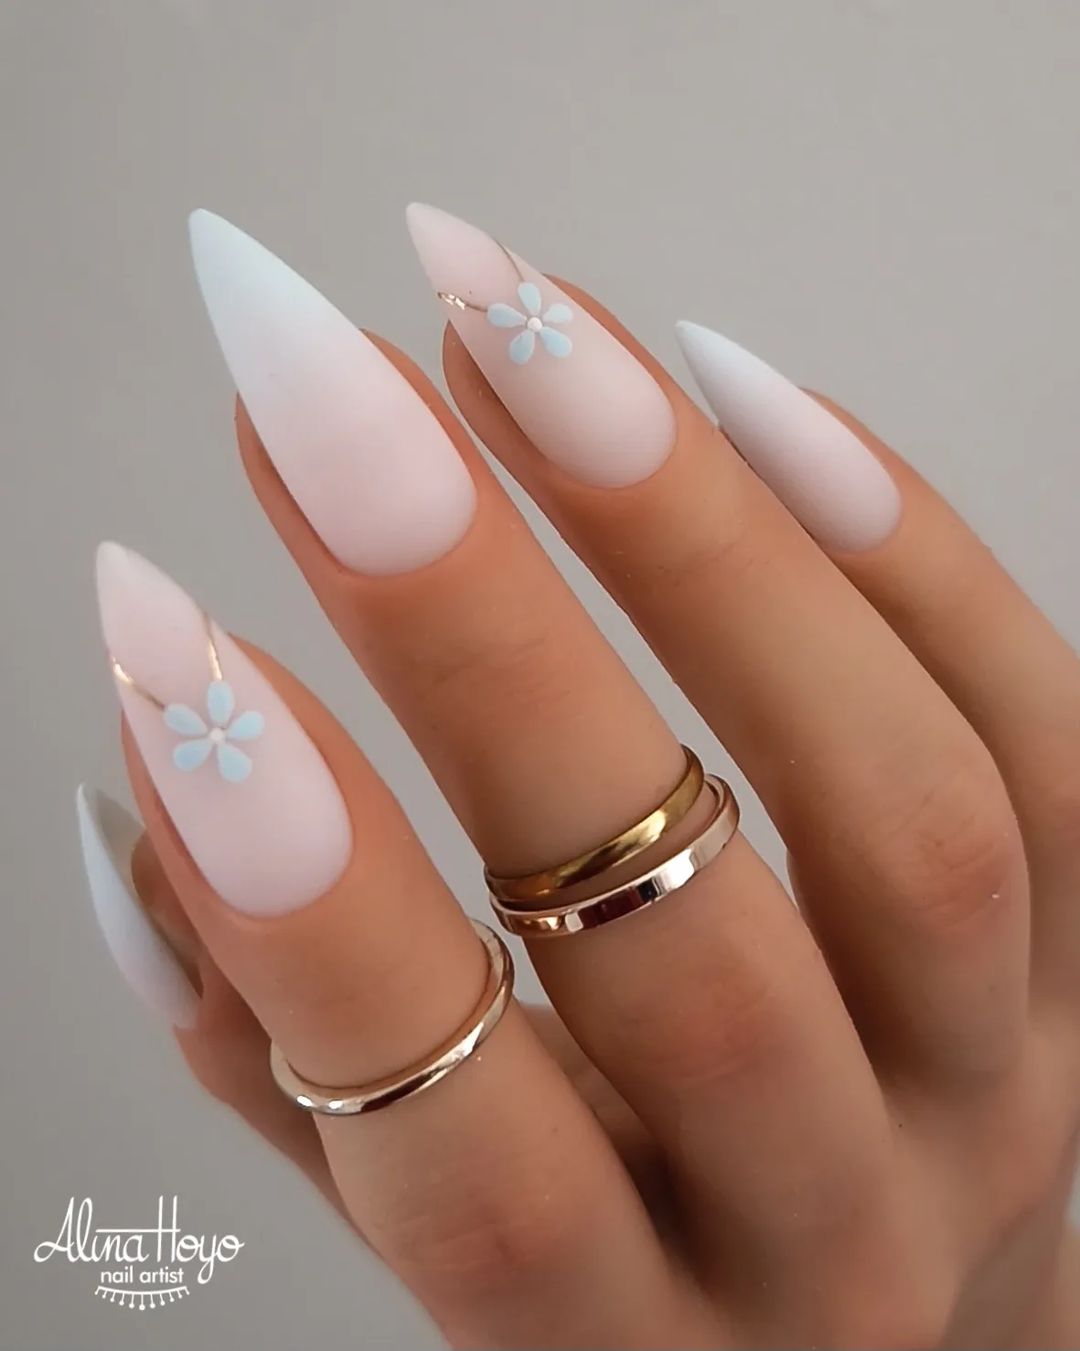
Matte Pastel Blue with Floral Accent
These nails are a perfect blend of soft pastel blue and delicate floral accents. The matte finish adds a touch of elegance, while the small, simple flowers bring a playful element to the design. This manicure is ideal for those who prefer a subtle yet stylish look.
- Base Coat: Butter London Nail Foundation Priming Basecoat
- Pastel Blue Polish: Essie ‘Blue-Tiful Horizon’
- White Polish: OPI ‘Alpine Snow’
- Matte Top Coat: Zoya Matte Velvet Top Coat
- Detail Brush: PANA Nail Art Detail Brush
- Dotting Tool: KADS Nail Art Dotting Tools
- Cuticle Oil: Sally Hansen Vitamin E Nail & Cuticle Oil
Instructions for Creating This Design at Home
- Start with a base coat to ensure your polish adheres well.
- Apply pastel blue polish to your nails and let them dry.
- Use a detail brush to paint small white flowers on selected nails.
- Apply a matte top coat to achieve the matte finish.
- Finish with cuticle oil to maintain nail health.
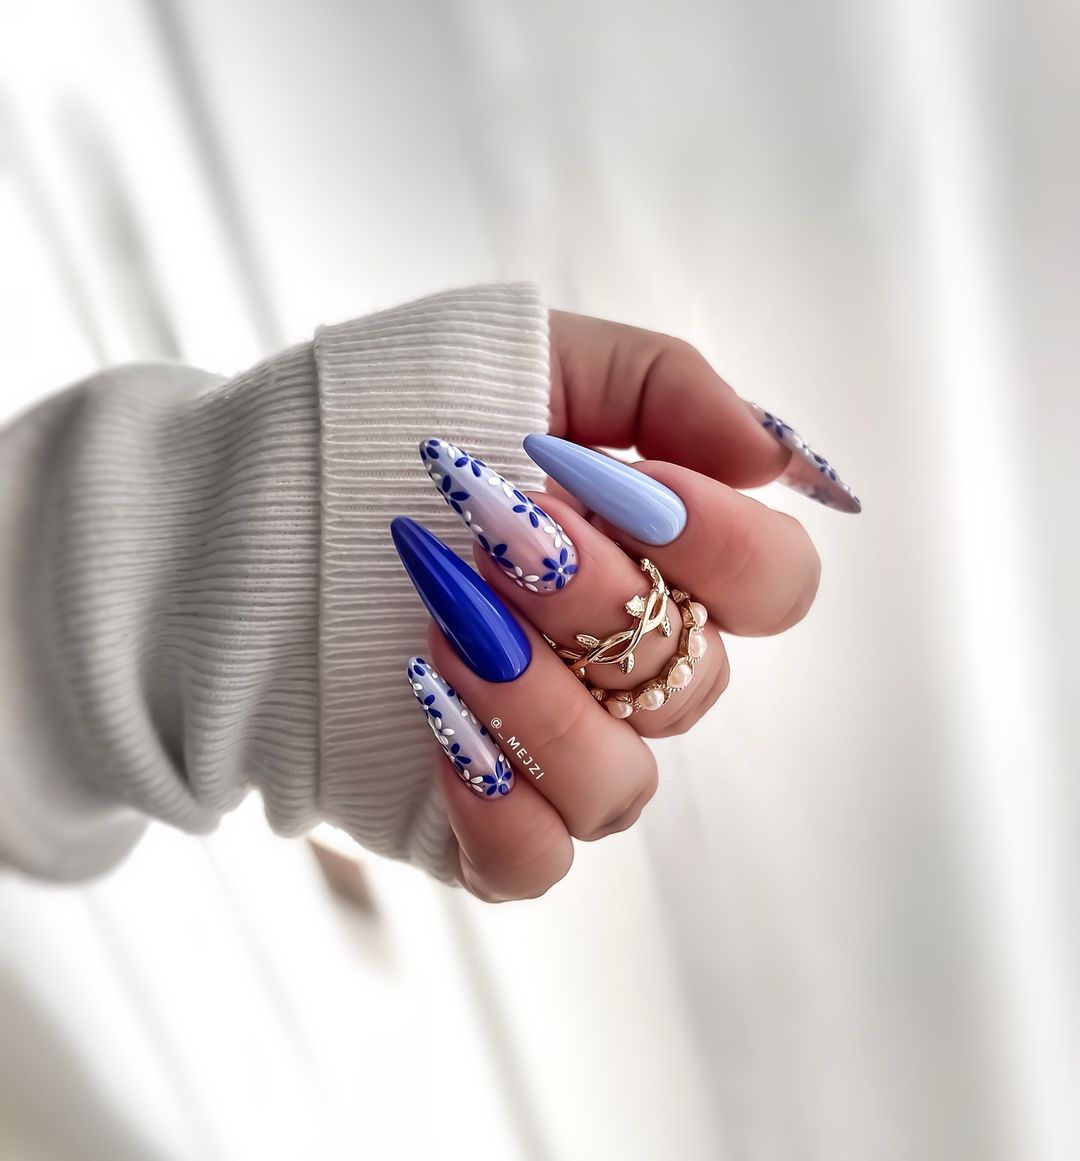
Blue Floral and Solid Combination
This design combines vibrant blue nails with delicate floral patterns. The mix of solid blue nails and intricately designed floral accents creates a visually appealing contrast. The flowers, detailed with white and blue hues, add a charming touch to the bold blue base.
- Base Coat: Essie ‘First Base’
- Vibrant Blue Polish: China Glaze ‘I Sea the Point’
- White Polish: Sally Hansen ‘White On’
- Top Coat: Seche Vite Dry Fast Top Nail Coat
- Detail Brush: Winstonia Fine Liner Nail Art Brush
- Dotting Tool: Beetles Nail Art Dotting Tools
- Cuticle Oil: Burt’s Bees Lemon Butter Cuticle Cream
Instructions for Creating This Design at Home
- Apply a base coat to start your manicure.
- Paint your nails with vibrant blue polish and let them dry.
- Use a detail brush to create floral patterns with white and blue polish on selected nails.
- Add dots using a dotting tool for extra detail.
- Seal with a top coat for a glossy finish.
- Maintain with regular application of cuticle oil.
Save Pin
Pastel Blue with Geometric Lines
These nails feature a soft pastel blue base with white geometric lines. The clean and crisp lines add a modern and stylish touch to the pastel background. This manicure is perfect for those who appreciate minimalist yet impactful designs.
- Base Coat: Zoya Anchor Base Coat
- Pastel Blue Polish: Essie ‘Mint Candy Apple’
- White Polish: OPI ‘Alpine Snow’
- Top Coat: CND Super Shiney Top Coat
- Striping Brush: Beetles Nail Art Liner Brushes
- Nail Art Tape: Ejiubas Nail Art Striping Tape Lines
- Cuticle Oil: CND SolarOil Nail & Cuticle Care
Instructions for Creating This Design at Home
- Start with a base coat to protect your nails.
- Apply pastel blue polish and let it dry completely.
- Use a striping brush to paint white geometric lines on each nail.
- Seal your design with a top coat for shine and protection.
- Finish with cuticle oil to keep your nails hydrated.
Bold Blue Ombre with Rhinestones
This nail design is a bold ombre from light blue to dark blue, adorned with sparkling rhinestones. The gradient effect is smooth and elegant, while the rhinestones add a touch of glamour and luxury. This manicure is perfect for those who love to stand out with their nail art.
- Base Coat: ORLY Bonder Rubberized Basecoat
- Light Blue Polish: Essie ‘Find Me an Oasis’
- Dark Blue Polish: OPI ‘Russian Navy’
- Top Coat: INM Out The Door Top Coat
- Makeup Sponge: Wedge Makeup Sponges for blending
- Rhinestones: Swarovski Flatback Crystals
- Nail Glue: KDS Nail Glue
- Cuticle Oil: Cuccio Revitalize Cuticle Oil
Instructions for Creating This Design at Home
- Apply a base coat to protect your nails.
- Paint your nails with light blue polish and let them dry.
- On a makeup sponge, apply strips of light and dark blue polish.
- Dab the sponge onto your nails to create the ombre effect.
- Use nail glue to apply rhinestones on selected nails.
- Seal with a top coat for shine and durability.
- Finish with cuticle oil to maintain nail health.
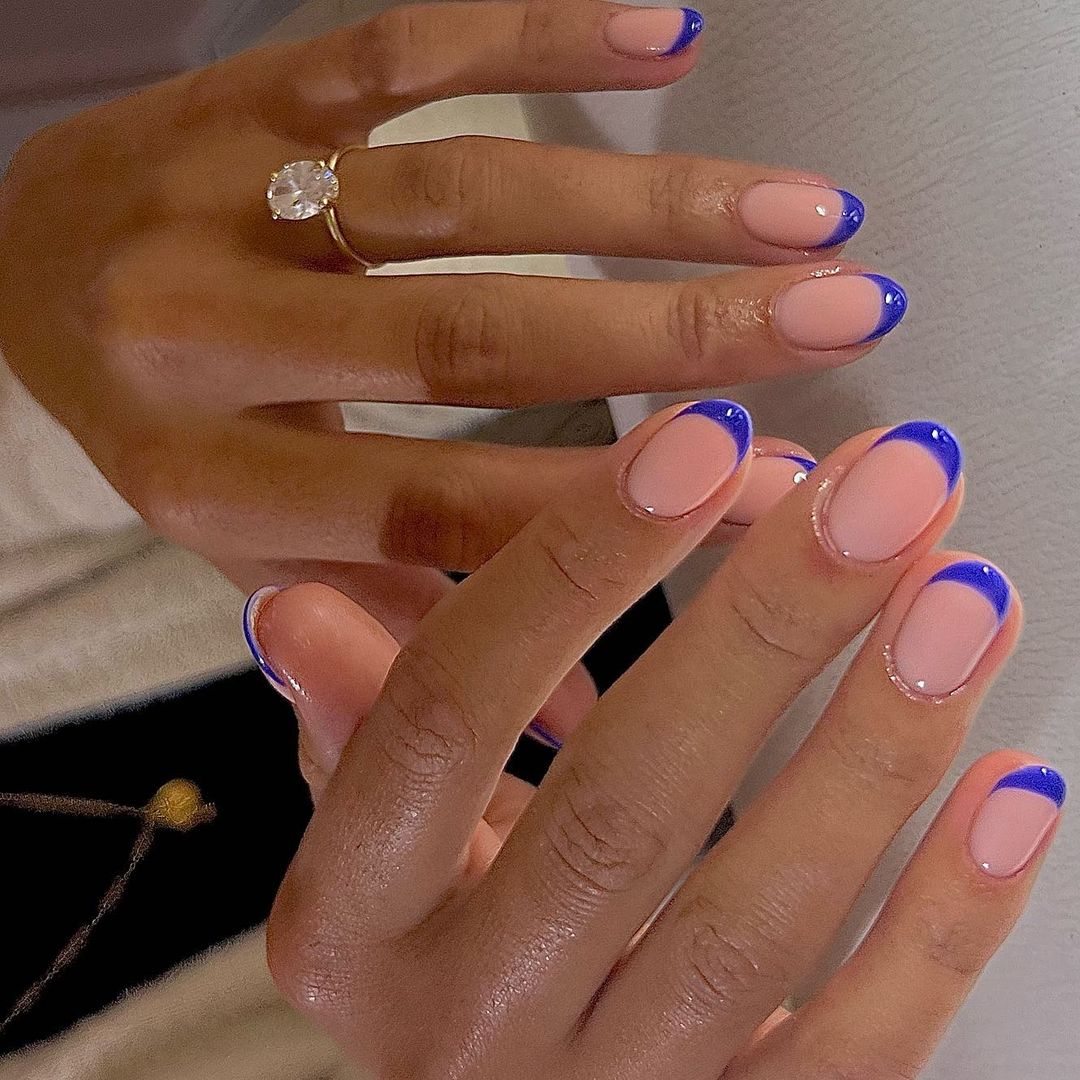
Classic Blue French Tips
This design is a modern take on the classic French manicure, featuring blue tips instead of the traditional white. The clear base highlights the bright blue tips, creating a fresh and contemporary look. This manicure is ideal for those who appreciate classic styles with a twist.
- Base Coat: Essie ‘First Base’
- Clear Polish: OPI ‘Clear Nail Lacquer’
- Blue Polish: Sally Hansen ‘Pacific Blue’
- Top Coat: Seche Vite Dry Fast Top Nail Coat
- French Tip Guides: Kiss French Tip Nail Guides
- Cuticle Oil: Burt’s Bees Lemon Butter Cuticle Cream
Instructions for Creating This Design at Home
- Start with a base coat to protect your nails.
- Apply a clear polish to your nails and let it dry.
- Use French tip guides to paint blue tips on each nail.
- Seal with a top coat to ensure the design lasts longer and adds shine.
- Finish with cuticle oil to keep your nails and cuticles healthy.
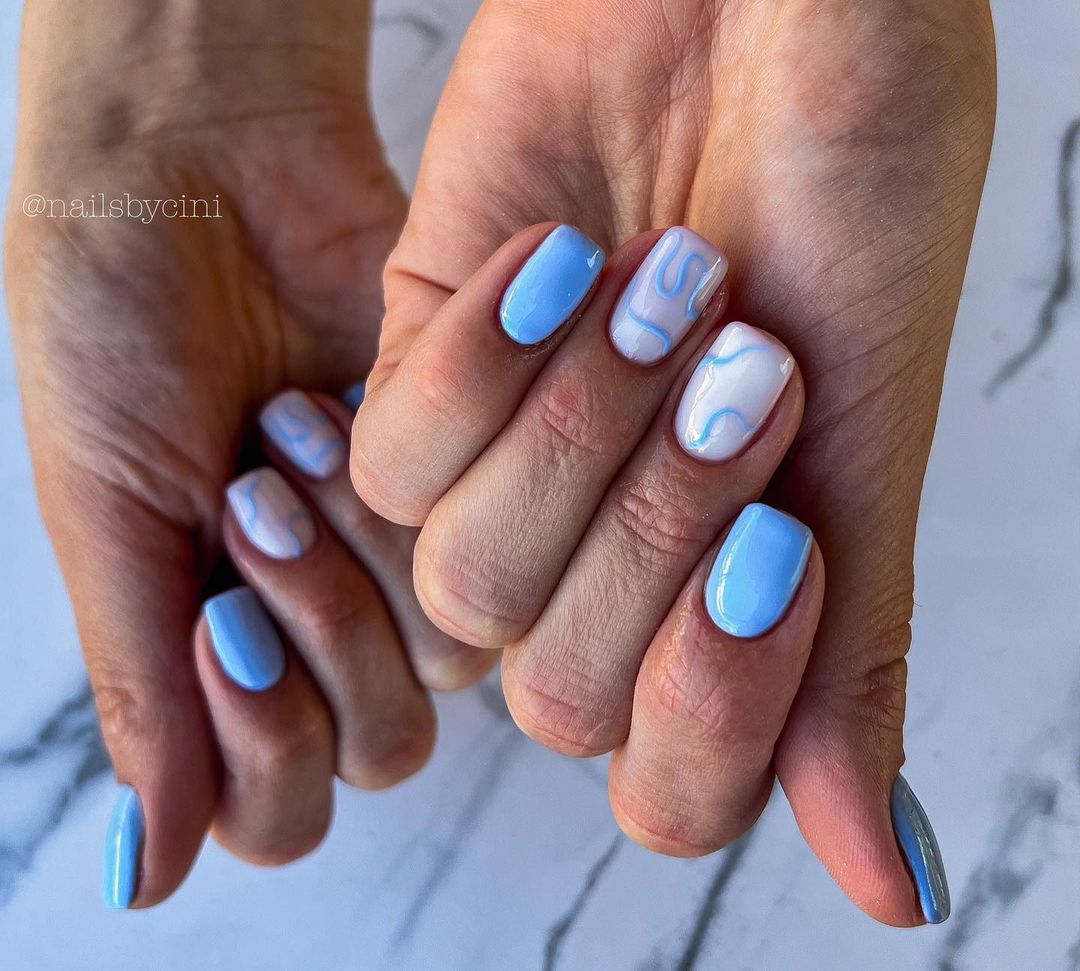
Sky Blue Waves
This nail design features a soothing combination of sky blue and white, creating a serene and calming look. The wavy patterns add a touch of fluidity and motion, making the nails appear dynamic and lively. The short, natural shape is perfect for everyday wear, while still being stylish and trendy.
- Base Coat: OPI Nail Envy Original
- Sky Blue Polish: Essie ‘Bikini So Teeny’
- White Polish: Sally Hansen ‘White On’
- Top Coat: Seche Vite Dry Fast Top Nail Coat
- Detail Brush: PANA Nail Art Detail Brush
- Cuticle Oil: Burt’s Bees Lemon Butter Cuticle Cream
Instructions for Creating This Design at Home
- Start with a base coat to protect your nails.
- Apply a sky blue polish and let it dry completely.
- Use a detail brush to create wavy patterns with white polish on selected nails.
- Seal your design with a top coat to ensure longevity and shine.
- Finish with cuticle oil to keep your nails and cuticles hydrated.
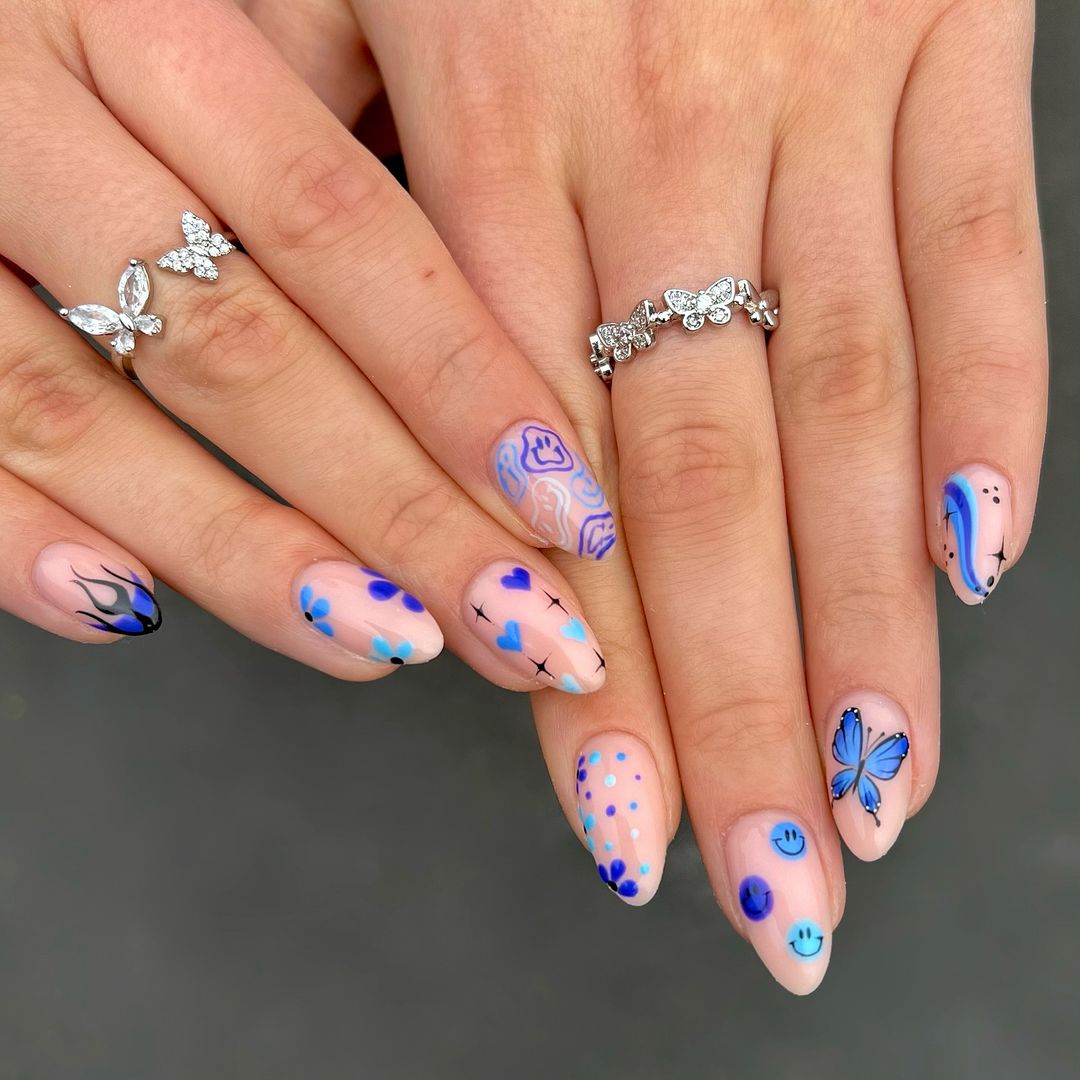
Whimsical Blue Mix
This playful design incorporates various blue elements such as hearts, butterflies, and smiley faces, creating a fun and whimsical look. The nude base allows the blue accents to stand out, making the design eye-catching and vibrant. Ideal for those who love to experiment with creative and cute nail art.
- Base Coat: Essie ‘First Base’
- Nude Polish: OPI ‘Samoan Sand’
- Blue Polish: China Glaze ‘I Sea the Point’
- Black Polish: Sally Hansen ‘Black Out’
- Top Coat: Seche Vite Dry Fast Top Nail Coat
- Detail Brush: Winstonia Fine Liner Nail Art Brush
- Dotting Tool: Beetles Nail Art Dotting Tools
- Cuticle Oil: Burt’s Bees Lemon Butter Cuticle Cream
Instructions for Creating This Design at Home
- Apply a base coat to start your manicure.
- Paint your nails with nude polish and let them dry.
- Use a detail brush to create various blue designs such as hearts, butterflies, and smiley faces.
- Add small details and dots with a dotting tool.
- Seal with a top coat for a glossy finish.
- Maintain with regular application of cuticle oil.
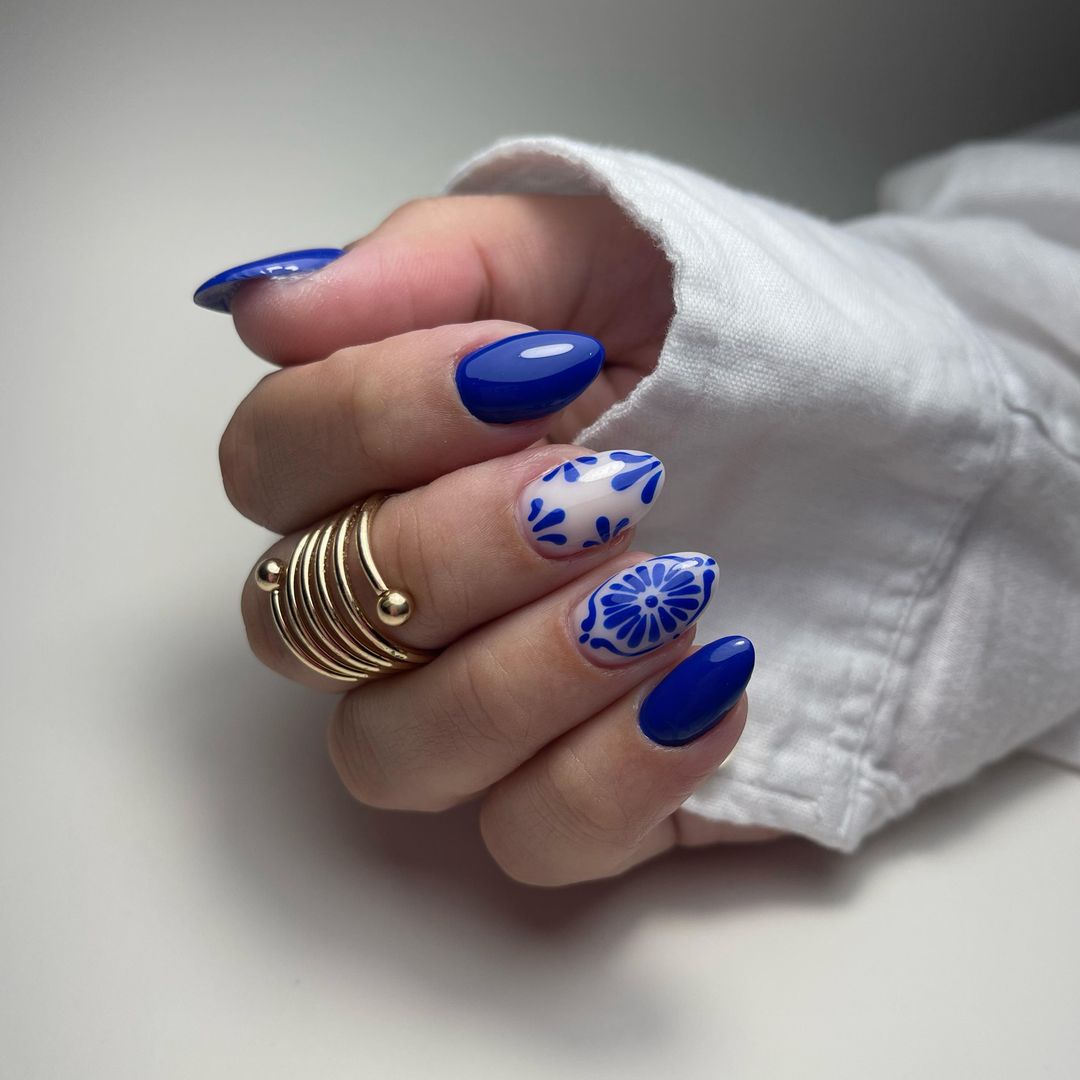
Royal Blue Florals
This elegant design features royal blue nails paired with intricate floral patterns on a white base. The contrast between the bold blue and the delicate white flowers creates a sophisticated and stylish look. Perfect for special occasions or when you want to add a touch of class to your everyday style.
- Base Coat: Butter London Nail Foundation Priming Basecoat
- Royal Blue Polish: Essie ‘Aruba Blue’
- White Polish: OPI ‘Alpine Snow’
- Top Coat: Zoya Armor Top Coat
- Detail Brush: Beetles Gel Polish Nail Art Brush
- Dotting Tool: KADS Nail Art Dotting Tools
- Cuticle Oil: Sally Hansen Vitamin E Nail & Cuticle Oil
Instructions for Creating This Design at Home
- Start with a base coat to ensure your polish adheres well.
- Apply royal blue polish to selected nails and white polish to the others.
- Use a detail brush to paint intricate floral patterns on the white nails with blue polish.
- Apply a top coat to seal and protect your design.
- Finish with cuticle oil to keep your nails and cuticles healthy.
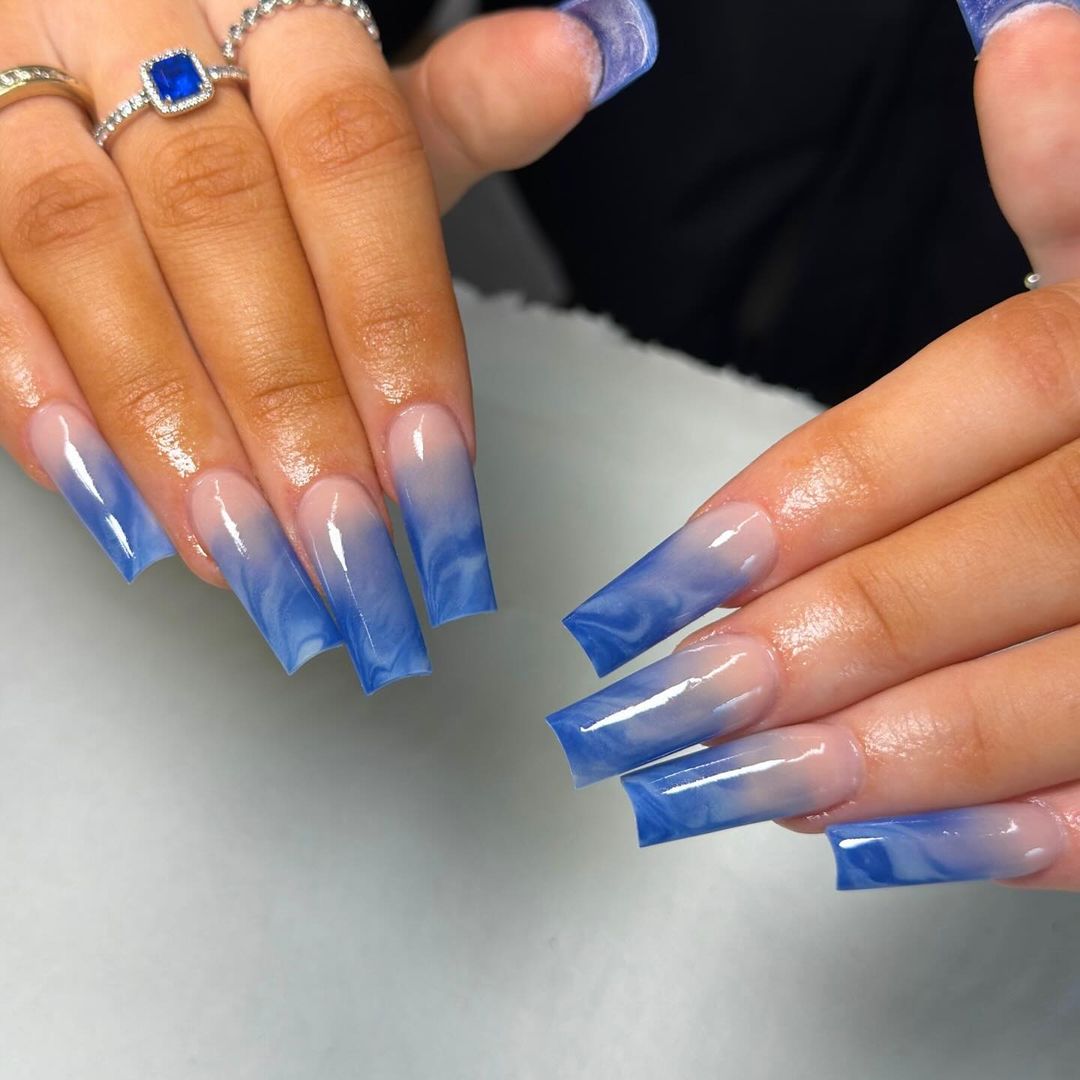
Marble Blue Ombre
This stunning design features a marble blue ombre effect that transitions from a clear base to a vibrant blue tip. The long coffin shape enhances the elegance and drama of the design, making it perfect for a night out or a special event. The glossy finish adds a luxurious touch to this chic manicure.
- Base Coat: ORLY Bonder Rubberized Basecoat
- Blue Polish: Essie ‘Butler Please’
- Top Coat: INM Out The Door Top Coat
- Makeup Sponge: Wedge Makeup Sponges for blending
- Clean-Up Brush: ELF Concealer Brush for precise clean-up
- Cuticle Oil: Cuccio Revitalize Cuticle Oil
Instructions for Creating This Design at Home
- Apply a base coat to protect your nails.
- Use a makeup sponge to create a gradient effect from clear to blue polish.
- Dab the sponge onto your nails to blend the colors seamlessly.
- Repeat until you achieve the desired opacity and blend.
- Clean up the edges with a clean-up brush dipped in nail polish remover.
- Apply a top coat to smooth the gradient and add shine.
- Finish with cuticle oil to keep your nails hydrated.
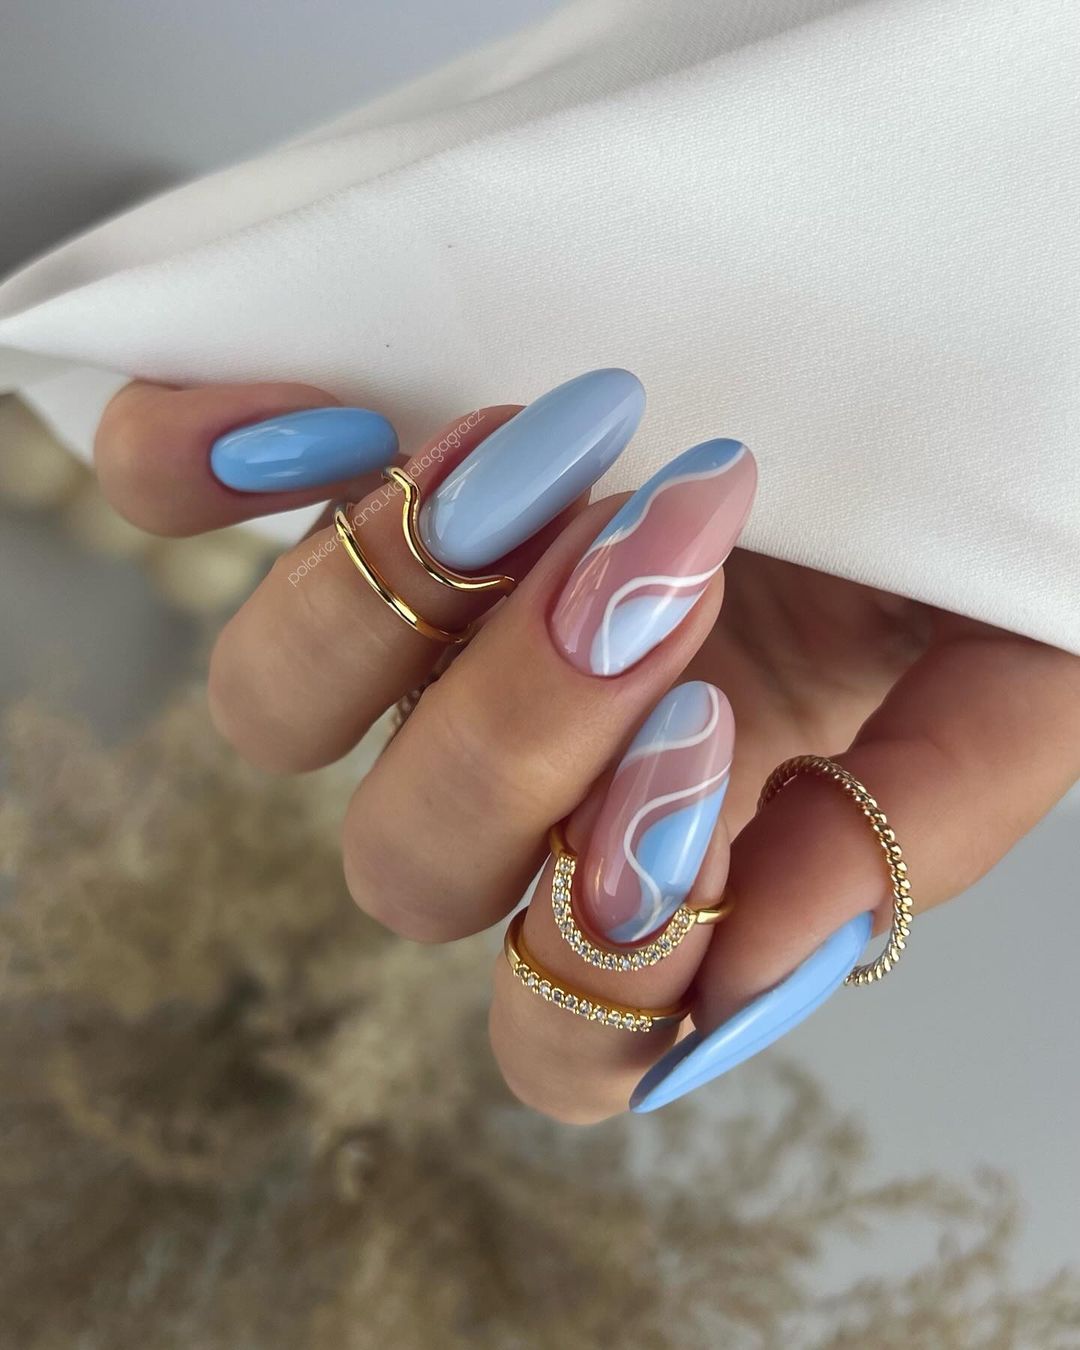
Soft Blue Abstract
This design combines soft blue and nude tones with abstract wavy patterns, creating a modern and stylish look. The almond shape enhances the elegance of the design, making it suitable for both casual and formal occasions. The glossy finish adds a touch of sophistication to this chic manicure.
- Base Coat: Essie ‘First Base’
- Light Blue Polish: OPI ‘It’s a Boy!’
- Nude Polish: Essie ‘Ballet Slippers’
- White Polish: Sally Hansen ‘White On’
- Top Coat: Seche Vite Dry Fast Top Nail Coat
- Detail Brush: Winstonia Fine Liner Nail Art Brush
- Cuticle Oil: Burt’s Bees Lemon Butter Cuticle Cream
Instructions for Creating This Design at Home
- Apply a base coat to protect your nails.
- Paint your nails with a mix of light blue and nude polish and let them dry.
- Use a detail brush to create wavy patterns with white polish on selected nails.
- Seal with a top coat to ensure longevity and shine.
- Finish with cuticle oil to keep your nails and cuticles hydrated.
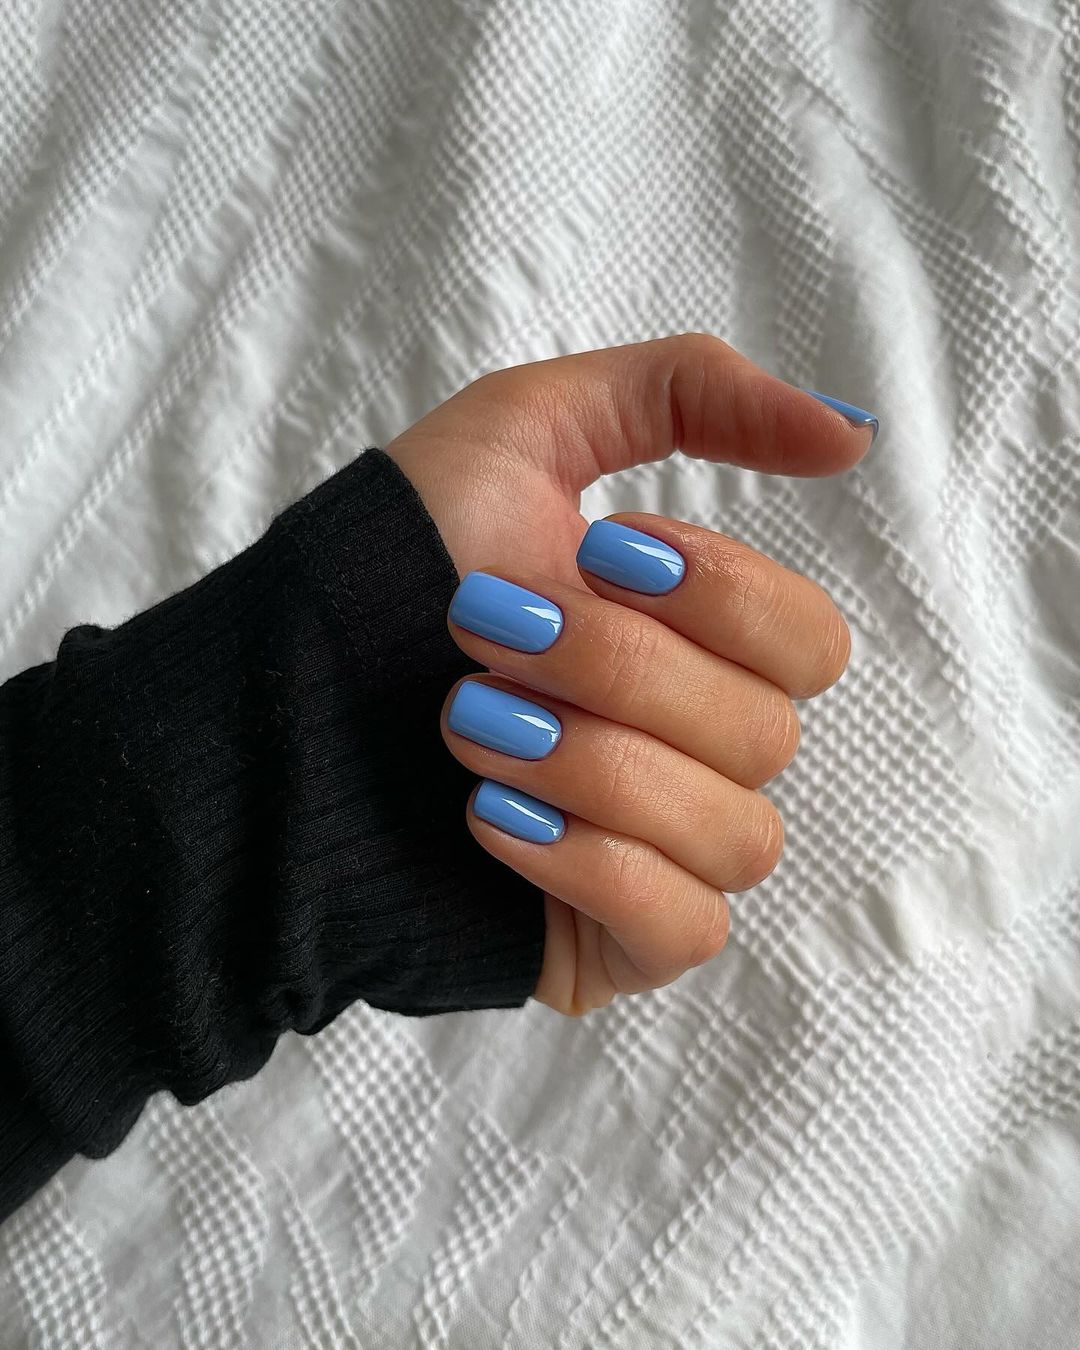
Classic Glossy Blue
This timeless design features a solid, glossy blue color that exudes simplicity and elegance. The medium length and round shape make this manicure perfect for everyday wear, while still being stylish and sophisticated. Ideal for those who prefer classic, understated nail designs.
- Base Coat: OPI Infinite Shine Primer
- Blue Polish: Essie ‘Butler Please’
- Top Coat: Gelish Top It Off
- Cuticle Oil: Cuccio Revitalize Cuticle Oil
Instructions for Creating This Design at Home
- Start with a base coat to protect your natural nails.
- Apply two coats of blue polish for an even and vibrant color.
- Seal with a top coat to ensure a glossy finish and durability.
- Finish with cuticle oil to keep your nails and cuticles healthy.
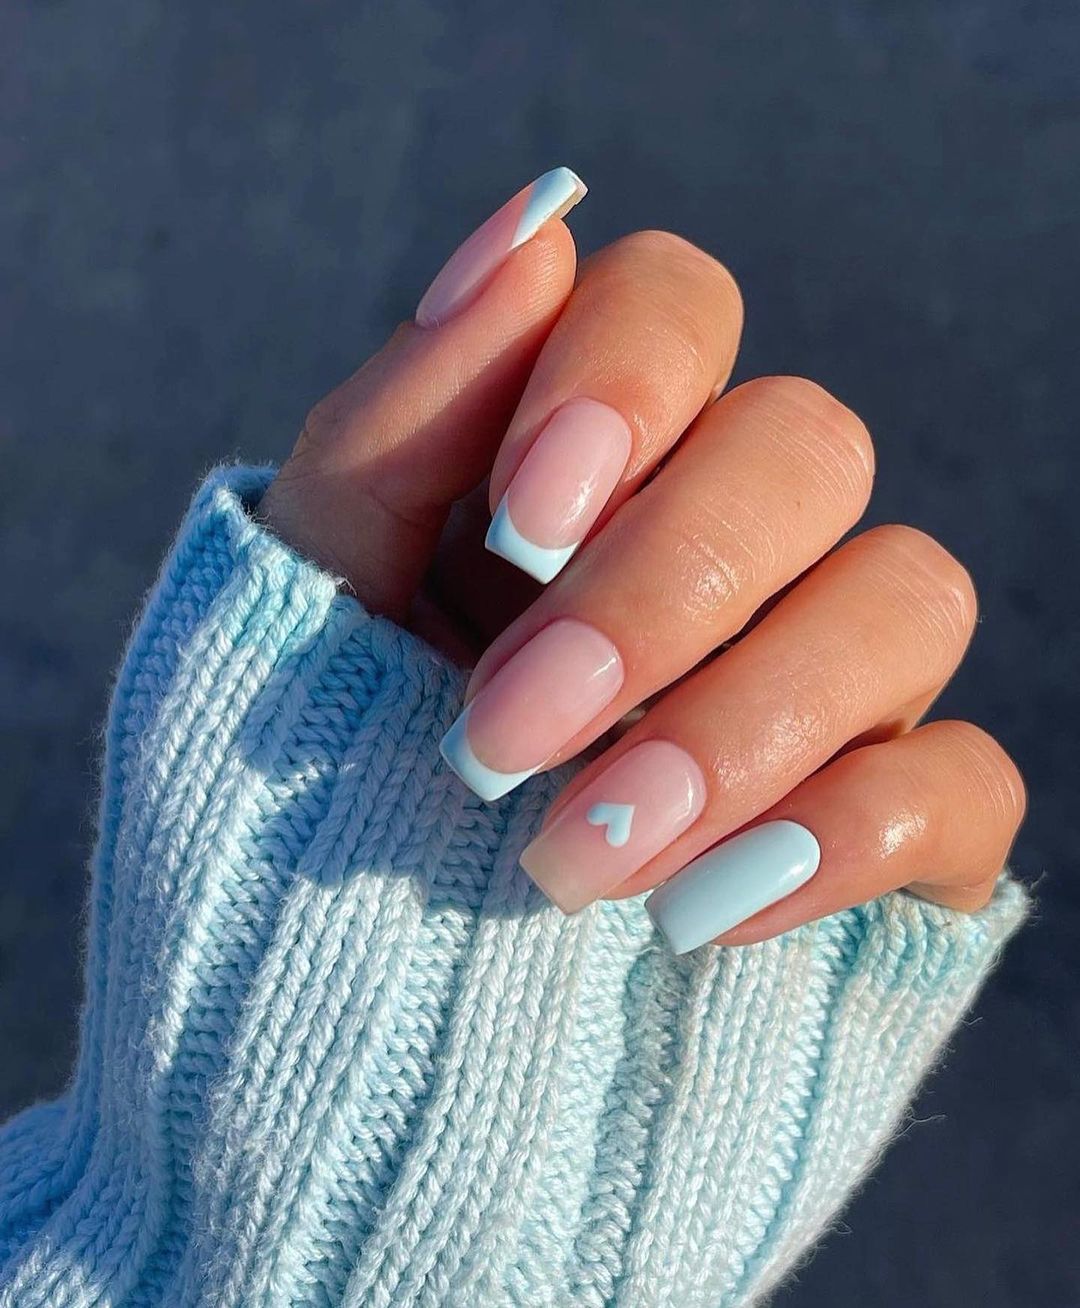
Sweet Pastel French
These nails feature a sweet and subtle twist on the classic French manicure. The tips are painted in a delicate pastel blue, perfectly complementing the soft pink base. A small white heart accent adds a cute and charming touch, making this design ideal for those who love understated elegance with a playful twist.
- Base Coat: OPI Nail Envy Original
- Pink Polish: Essie ‘Fiji’
- Pastel Blue Polish: Essie ‘Mint Candy Apple’
- White Polish: Sally Hansen ‘White On’
- Top Coat: Seche Vite Dry Fast Top Nail Coat
- French Tip Guides: Kiss French Tip Nail Guides
- Detail Brush: Beetles Gel Polish Nail Art Brush
- Cuticle Oil: Burt’s Bees Lemon Butter Cuticle Cream
Instructions for Creating This Design at Home
- Start with a base coat to protect your nails.
- Apply pink polish to all nails and let it dry completely.
- Use French tip guides to paint pastel blue tips on each nail.
- Use a detail brush to paint a small white heart on an accent nail.
- Seal with a top coat to ensure the design lasts longer and adds shine.
- Finish with cuticle oil to keep your nails and cuticles healthy.
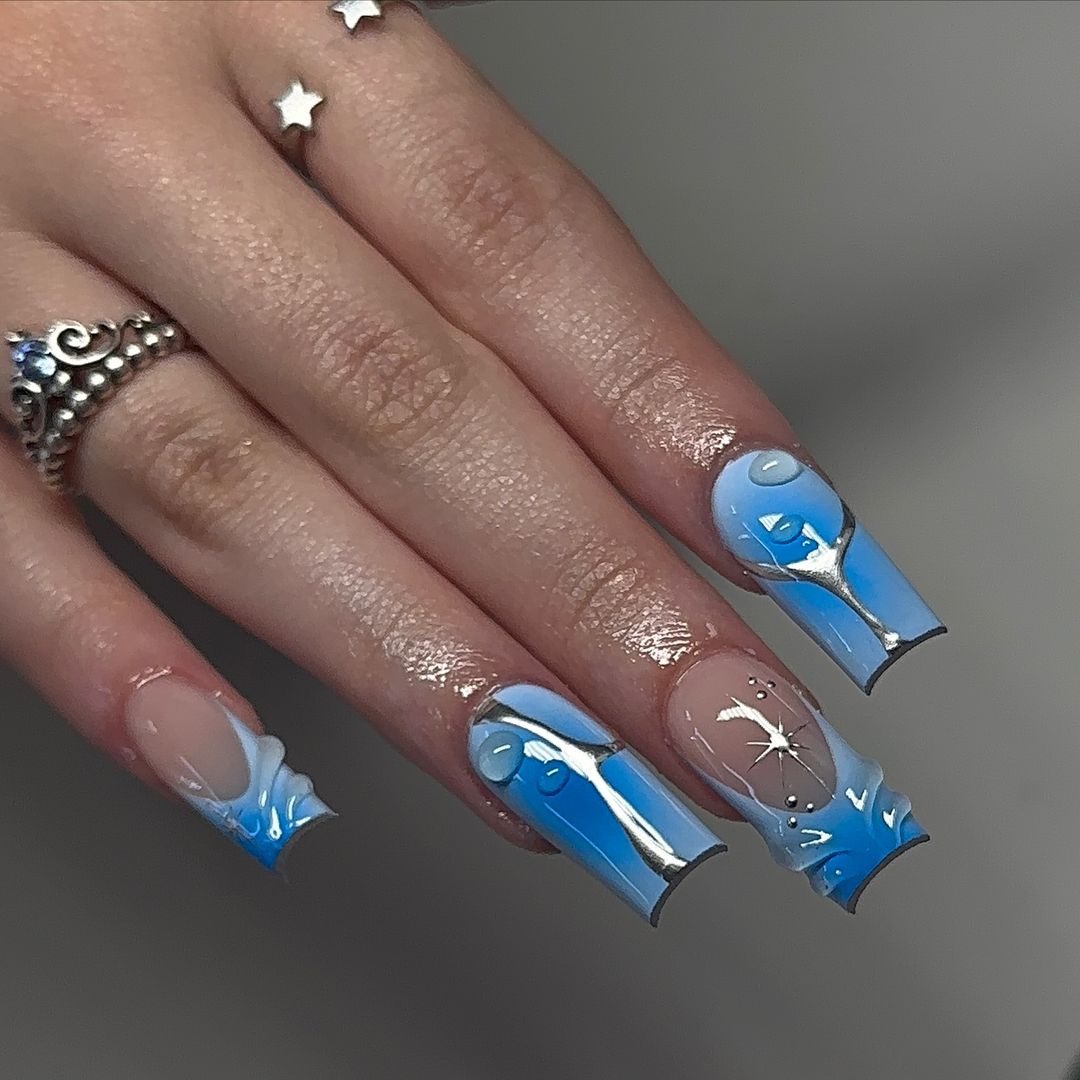
Ice Blue Sculptural Art
This dramatic design features ice blue nails with intricate sculptural accents. The mix of glossy blue polish and three-dimensional elements creates a striking and futuristic look. This design is perfect for those who love bold and avant-garde nail art.
- Base Coat: ORLY Bonder Rubberized Basecoat
- Ice Blue Polish: Essie ‘Aruba Blue’
- Top Coat: Gelish Top It Off
- 3D Nail Art Gel: Modelones Builder Nail Gel
- Nail Art Brush: PANA Nail Art Detail Brush
- LED Lamp: SUNUV Gel Nail Light for curing
- Cuticle Oil: Cuccio Revitalize Cuticle Oil
Instructions for Creating This Design at Home
- Apply a base coat to protect your nails.
- Paint your nails with ice blue polish and cure under an LED lamp.
- Use 3D nail art gel to create sculptural accents on each nail, curing each layer under the LED lamp.
- Seal with a top coat and cure again.
- Apply cuticle oil to keep your nails and cuticles hydrated.
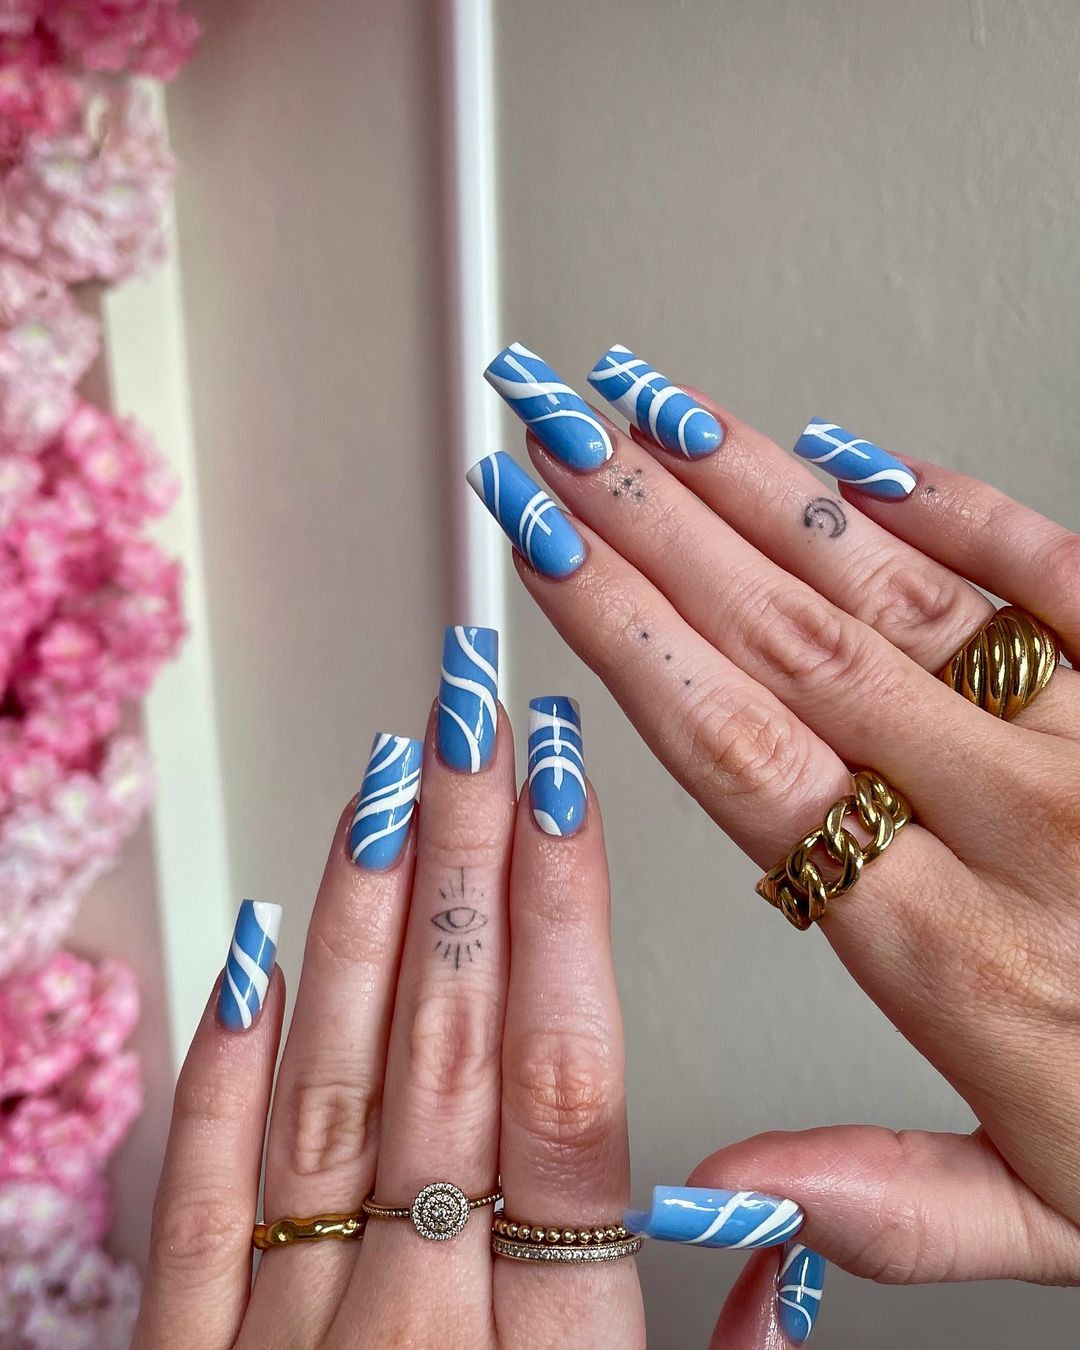
Blue and White Swirls
These nails feature a vibrant blue base with intricate white swirl patterns. The combination of the bold blue and crisp white lines creates a visually stunning effect. This design is perfect for those who want to make a statement with their nails while maintaining a touch of elegance.
- Base Coat: Butter London Nail Foundation Priming Basecoat
- Blue Polish: China Glaze ‘I Sea the Point’
- White Polish: OPI ‘Alpine Snow’
- Top Coat: Zoya Armor Top Coat
- Detail Brush: Beetles Gel Polish Nail Art Brush
- Nail Art Tape: Ejiubas Nail Art Striping Tape Lines
- Cuticle Oil: Sally Hansen Vitamin E Nail & Cuticle Oil
Instructions for Creating This Design at Home
- Apply a base coat to start your manicure.
- Paint your nails with blue polish and let them dry.
- Use nail art tape to guide your white swirl patterns on each nail.
- Paint the swirls with white polish and remove the tape carefully.
- Seal with a top coat to protect your design.
- Finish with cuticle oil to keep your nails and cuticles healthy.
Matte Blue Almonds
This simple yet elegant design features matte blue nails in a chic almond shape. The matte finish adds a touch of sophistication, making this manicure perfect for any occasion. The sleek and smooth appearance is ideal for those who appreciate understated beauty.

- Base Coat: Essie ‘First Base’
- Matte Blue Polish: Zoya ‘Dory’
- Matte Top Coat: Zoya Matte Velvet Top Coat
- Cuticle Oil: CND SolarOil Nail & Cuticle Care
Instructions for Creating This Design at Home
- Apply a base coat to protect your nails.
- Paint your nails with matte blue polish and let them dry completely.
- Apply a matte top coat to achieve the matte finish.
- Finish with cuticle oil to keep your nails and cuticles healthy.
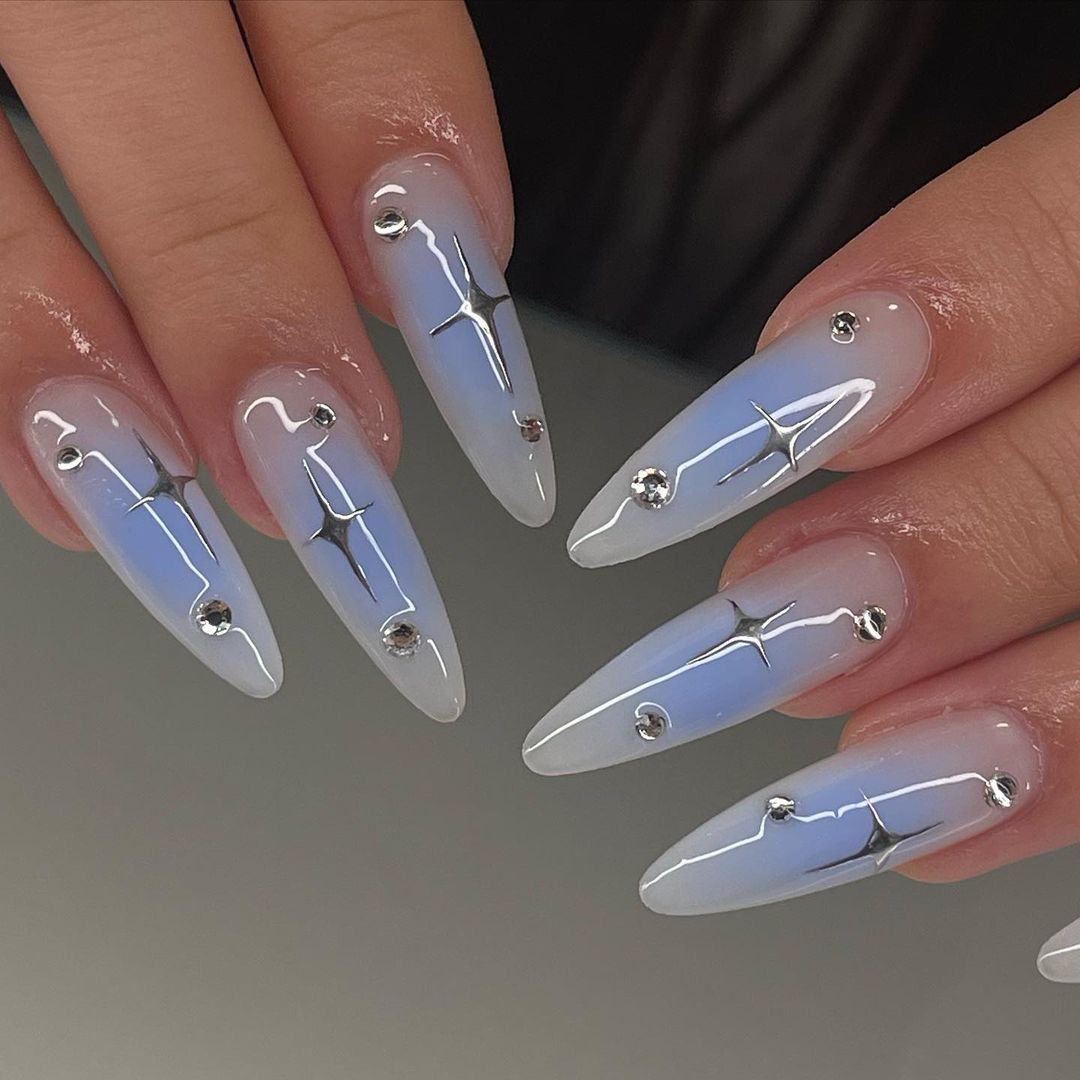
Celestial Blue Stars
These nails feature a beautiful gradient from clear to soft blue, adorned with tiny silver stars and rhinestones. The celestial theme adds a magical and whimsical touch to the design, making it perfect for those who love dreamy and ethereal nail art.
- Base Coat: OPI Infinite Shine Primer
- Blue Polish: Essie ‘Find Me an Oasis’
- Top Coat: Gelish Top It Off
- Rhinestones: Swarovski Flatback Crystals
- Nail Glue: KDS Nail Glue
- Star Stickers: Born Pretty Nail Art Stickers
- LED Lamp: SUNUV Gel Nail Light for curing
- Cuticle Oil: Cuccio Revitalize Cuticle Oil
Instructions for Creating This Design at Home
- Apply a base coat to protect your nails.
- Paint your nails with blue polish, creating a gradient effect from clear to blue.
- Cure under an LED lamp.
- Apply star stickers and rhinestones using nail glue.
- Seal with a top coat and cure again.
- Finish with cuticle oil to maintain nail health.
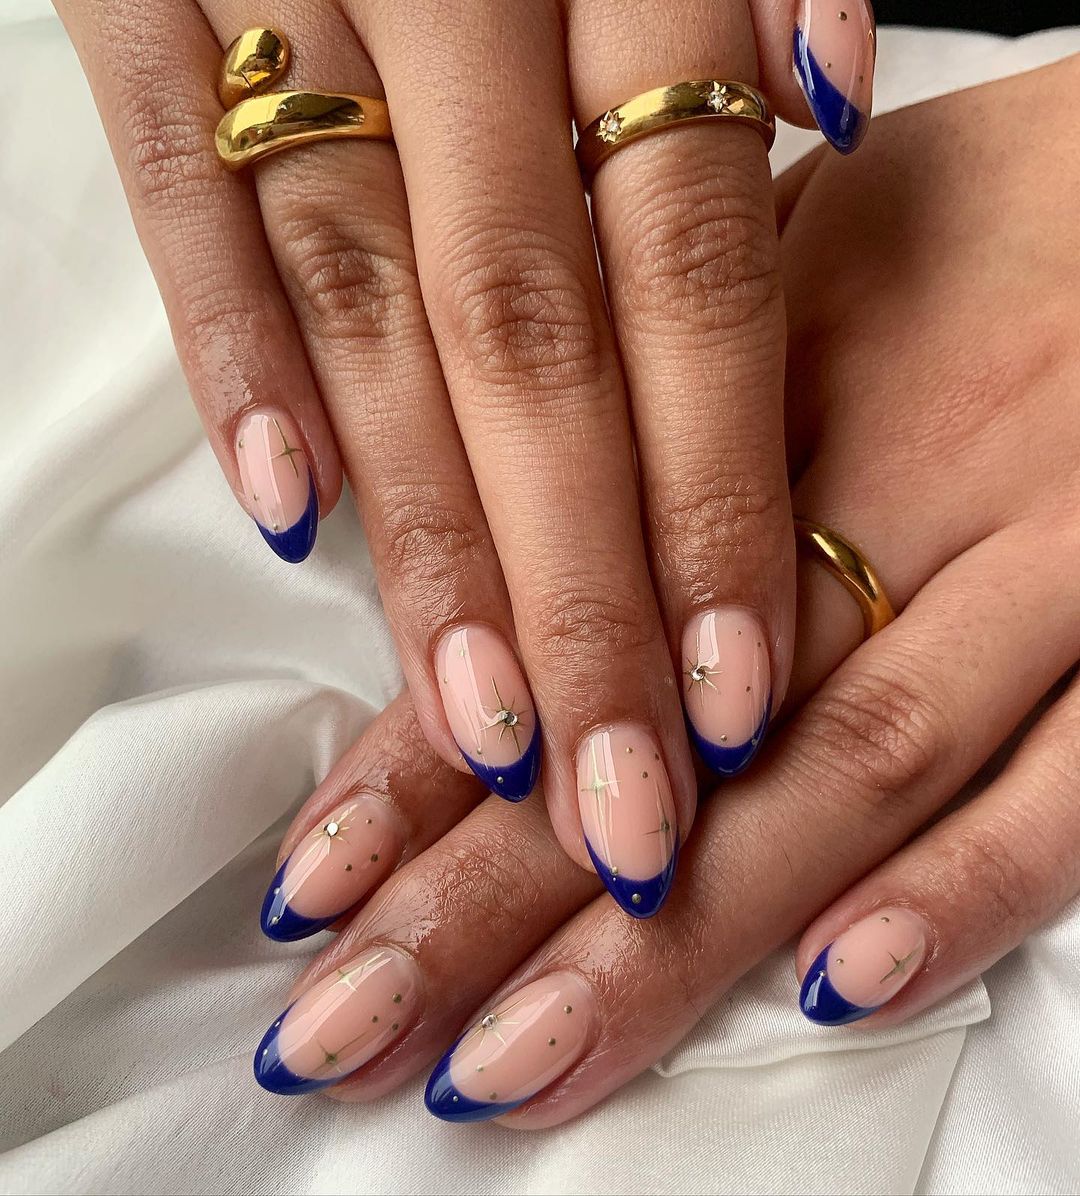
Royal Blue French Tips with Gold Accents
This elegant design combines royal blue French tips with delicate gold accents. The nude base allows the blue and gold elements to shine, creating a sophisticated and luxurious look. This manicure is perfect for special occasions or when you want to add a touch of glamour to your style.
- Base Coat: Essie ‘First Base’
- Nude Polish: OPI ‘Samoan Sand’
- Royal Blue Polish: Essie ‘Aruba Blue’
- Gold Polish: Sally Hansen ‘Golden-I’
- Top Coat: Seche Vite Dry Fast Top Nail Coat
- French Tip Guides: Kiss French Tip Nail Guides
- Detail Brush: PANA Nail Art Detail Brush
- Cuticle Oil: Burt’s Bees Lemon Butter Cuticle Cream
Instructions for Creating This Design at Home
- Apply a base coat to protect your nails.
- Paint your nails with nude polish and let them dry completely.
- Use French tip guides to paint royal blue tips on each nail.
- Use a detail brush to add small gold accents.
- Seal with a top coat to ensure the design lasts longer and adds shine.
- Finish with cuticle oil to keep your nails and cuticles healthy.
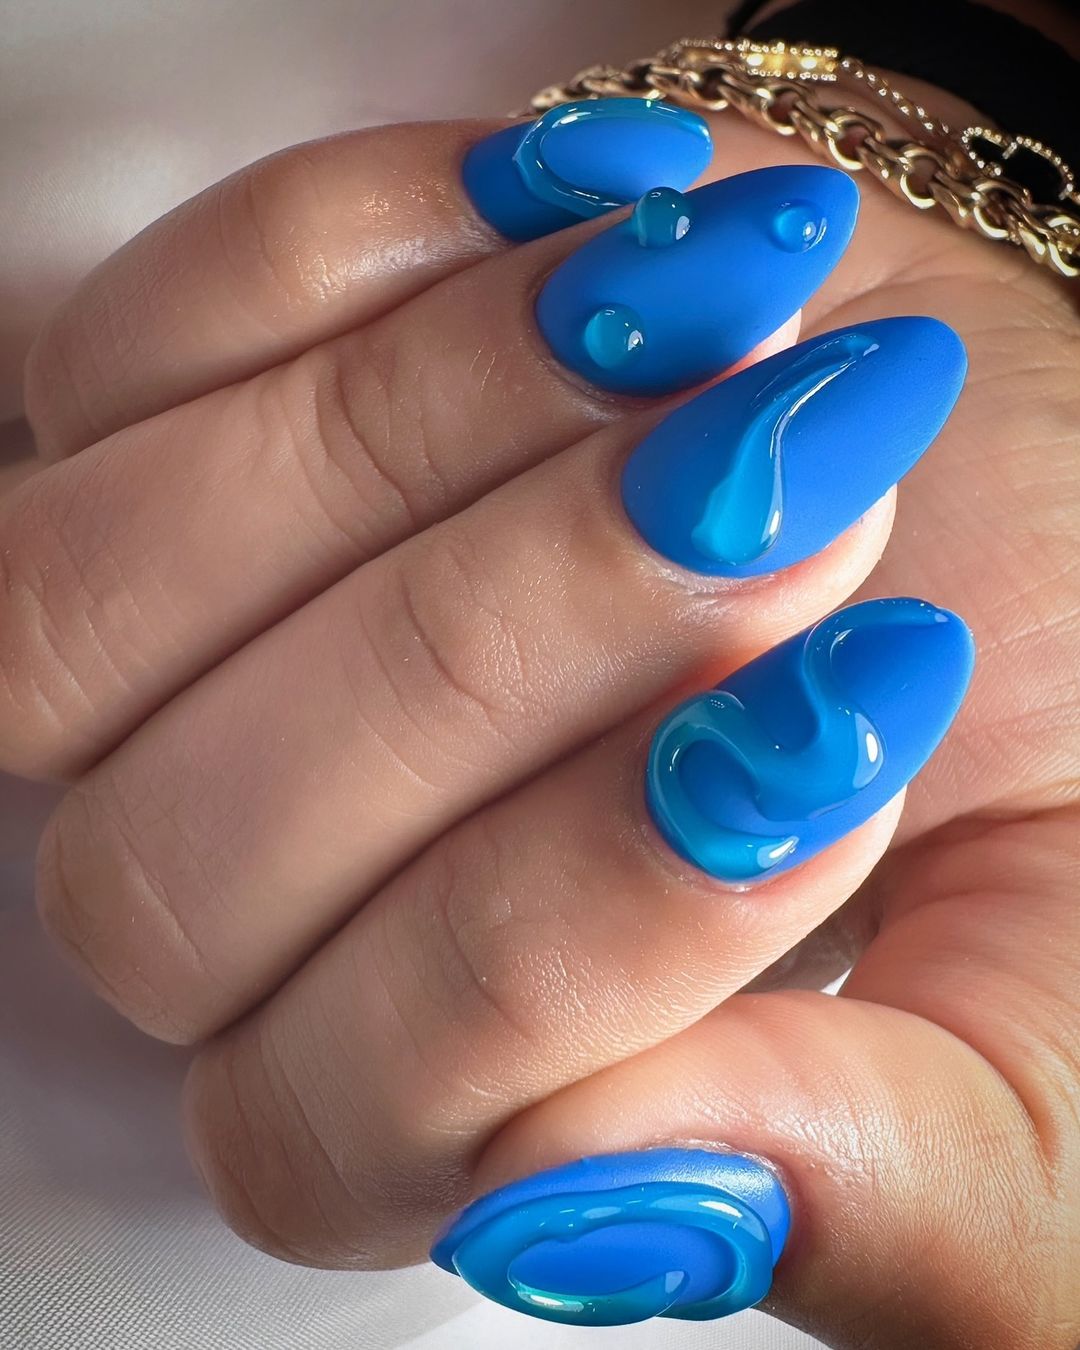
Glossy and Matte Blue Drops
This bold design showcases a mix of glossy and matte blue finishes with sculptural drop accents. The glossy drops create a three-dimensional effect against the matte blue background, giving the nails a dynamic and eye-catching look. This artistic design is perfect for those who love to experiment with textures and finishes.
- Base Coat: ORLY Bonder Rubberized Basecoat
- Matte Blue Polish: Essie ‘Butler Please’
- Glossy Blue Gel: Beetles Gel Polish in ‘Blue Lagoon’
- Top Coat: INM Out The Door Top Coat
- 3D Gel: Makartt 3D Sculpting Gel
- LED Lamp: SUNUV Gel Nail Light for curing
- Cuticle Oil: Cuccio Revitalize Cuticle Oil
Instructions for Creating This Design at Home
- Apply a base coat to protect your nails.
- Paint your nails with matte blue polish and let them dry.
- Use 3D gel to create drop accents on each nail and cure under an LED lamp.
- Apply glossy blue gel polish over the drops to create the contrasting effect and cure again.
- Seal with a top coat and cure to finish the design.
- Apply cuticle oil to keep your nails and cuticles hydrated.
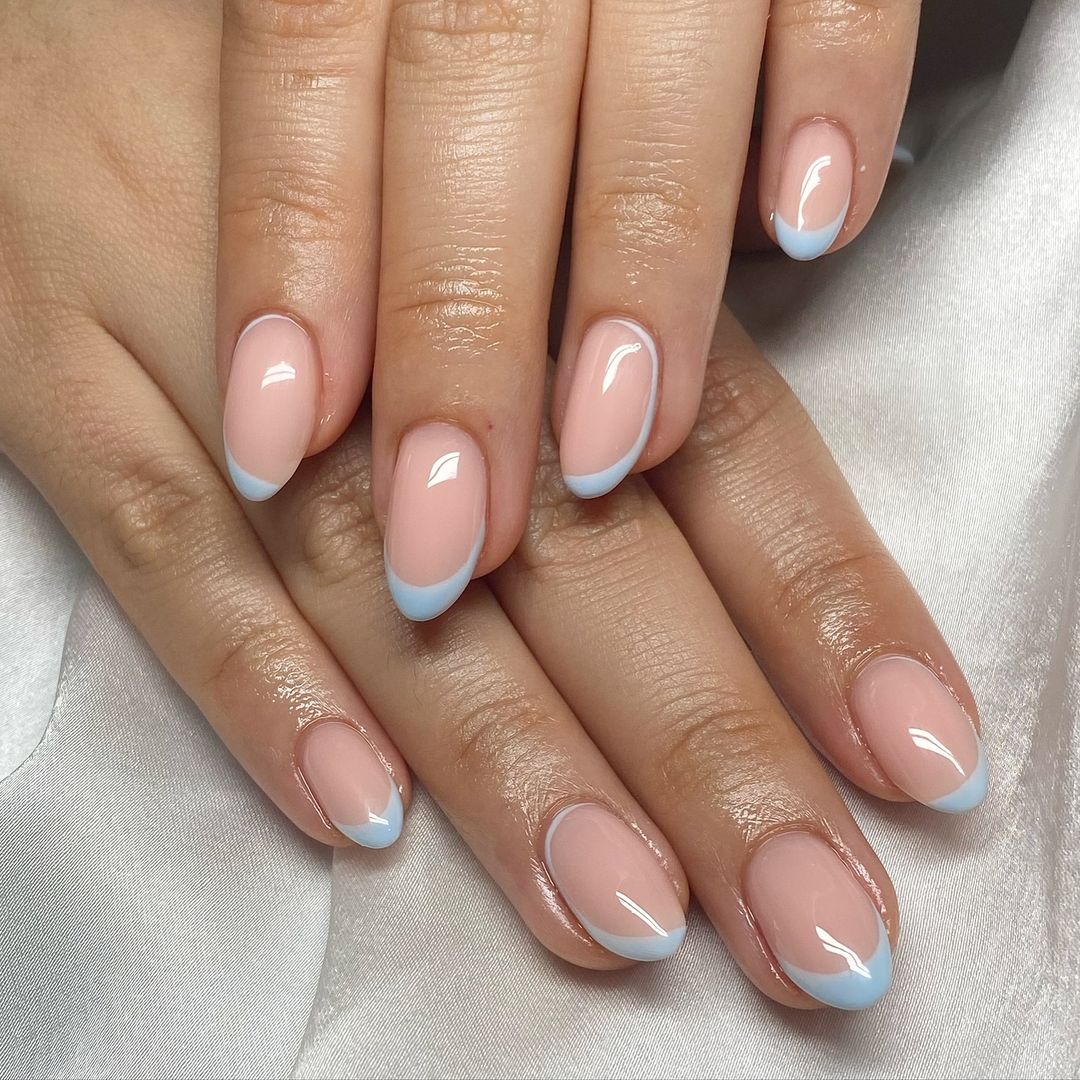
Soft Blue French Tips
This elegant design features a soft blue twist on the classic French manicure. The almond-shaped nails have a nude base with delicate pastel blue tips, creating a fresh and sophisticated look. This manicure is perfect for those who love timeless designs with a modern touch.
- Base Coat: Essie ‘First Base’
- Nude Polish: OPI ‘Bubble Bath’
- Pastel Blue Polish: Essie ‘Bikini So Teeny’
- Top Coat: Seche Vite Dry Fast Top Nail Coat
- French Tip Guides: Kiss French Tip Nail Guides
- Cuticle Oil: Burt’s Bees Lemon Butter Cuticle Cream
Instructions for Creating This Design at Home
- Apply a base coat to protect your nails.
- Paint your nails with nude polish and let them dry completely.
- Use French tip guides to paint soft blue tips on each nail.
- Seal with a top coat to ensure the design lasts longer and adds shine.
- Finish with cuticle oil to keep your nails and cuticles healthy.
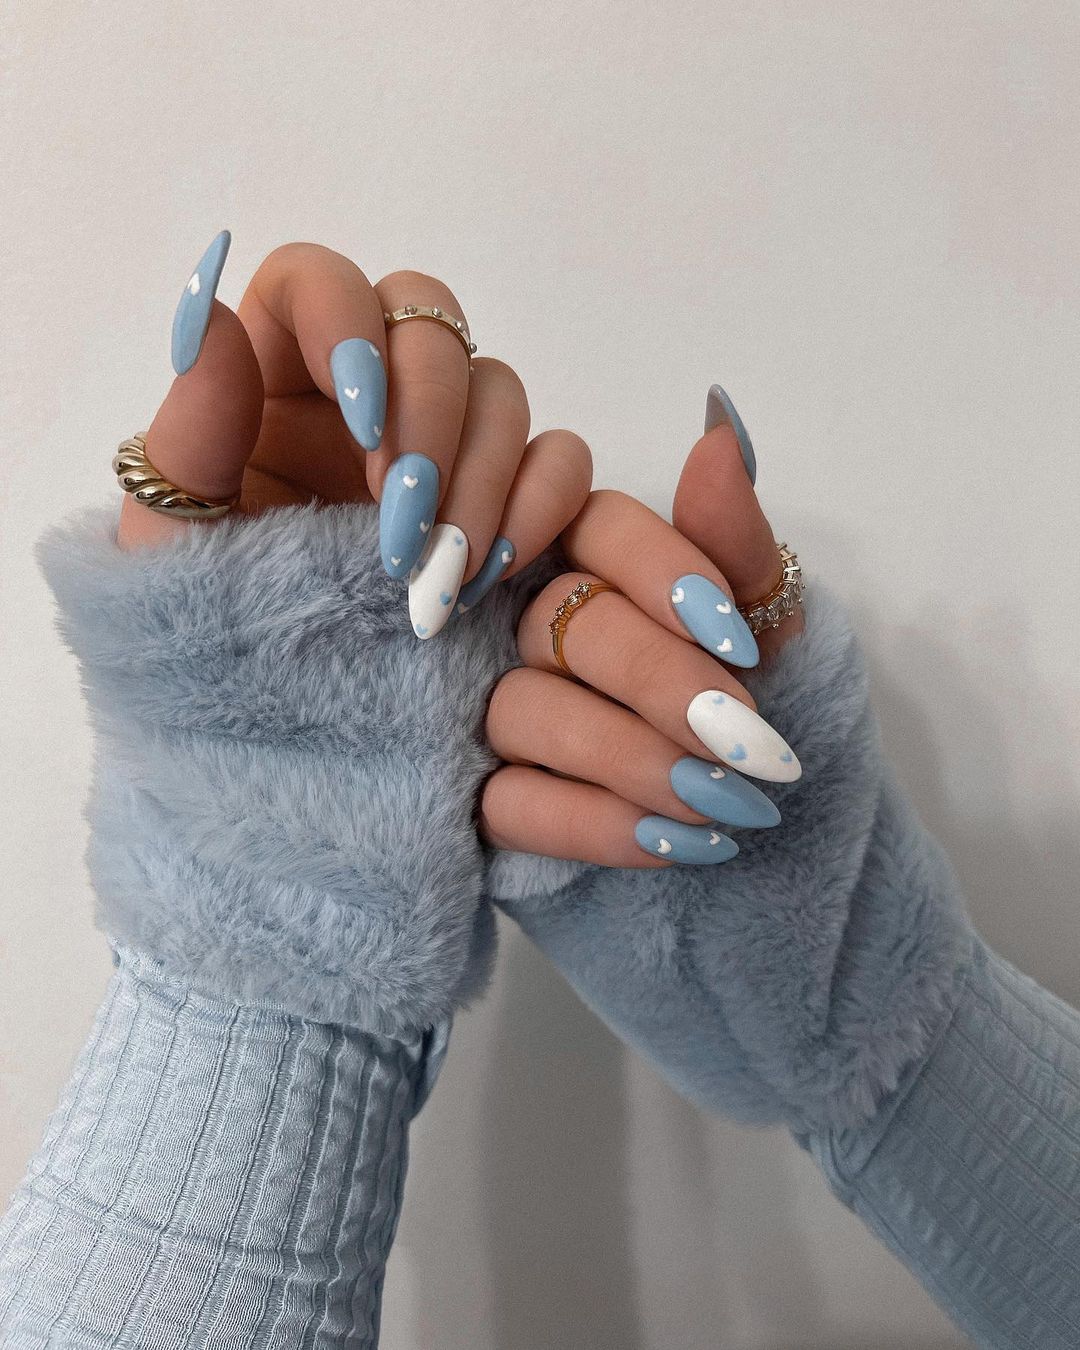
Cute Blue Hearts
These nails feature a charming design with light blue and white polishes adorned with tiny white hearts. The matte finish adds a soft and delicate touch, making this manicure perfect for those who love cute and whimsical nail art. The almond shape enhances the overall elegance of the design.
- Base Coat: Zoya Anchor Base Coat
- Light Blue Polish: Essie ‘Find Me an Oasis’
- White Polish: OPI ‘Alpine Snow’
- Matte Top Coat: Zoya Matte Velvet Top Coat
- Detail Brush: Winstonia Fine Liner Nail Art Brush
- Dotting Tool: KADS Nail Art Dotting Tools
- Cuticle Oil: CND SolarOil Nail & Cuticle Care
Instructions for Creating This Design at Home
- Apply a base coat to protect your nails.
- Paint your nails with light blue and white polish and let them dry.
- Use a detail brush to paint tiny white hearts on each nail.
- Apply a matte top coat to achieve the matte finish.
- Finish with cuticle oil to keep your nails and cuticles healthy.
FAQ
- What are the best blue fall nails designs for short nails?
Short nails can still rock bold designs! Try a simple navy blue or a matte finish for a chic look. Dusty blue and denim shades also work great on shorter lengths.
- How can I make my gel short almond nails last longer?
Ensure proper nail preparation before applying gel polish. Use a high-quality base and top coat, and avoid using your nails as tools to prevent chipping.
- What colors pair well with blue fall nails?
Blue pairs beautifully with pink and orange, brown and grey, and even red and black. Mixing these colors can create unique and stunning nail art.
- Can I achieve these designs at home?
Absolutely! With the right tools and a bit of practice, you can recreate these professional-looking designs at home. Follow the instructions provided for each look, and don’t be afraid to experiment.
Save Pin