
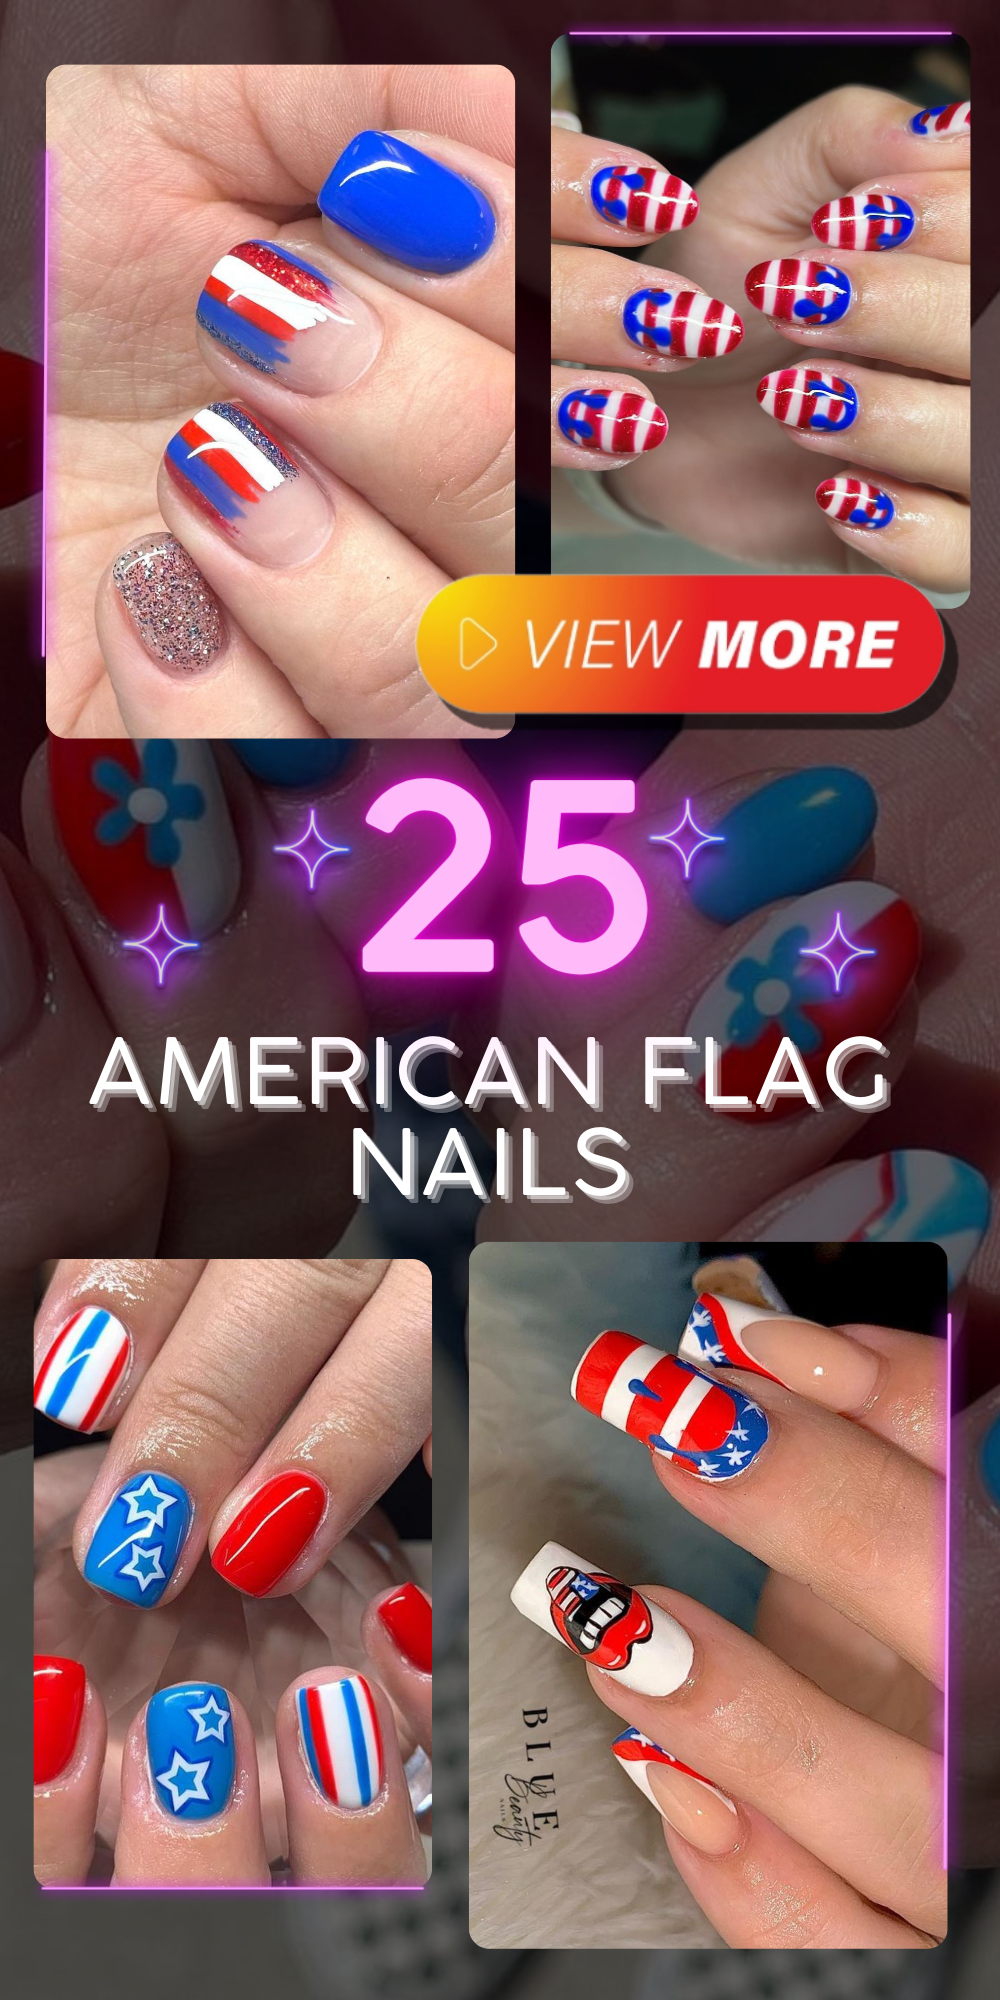
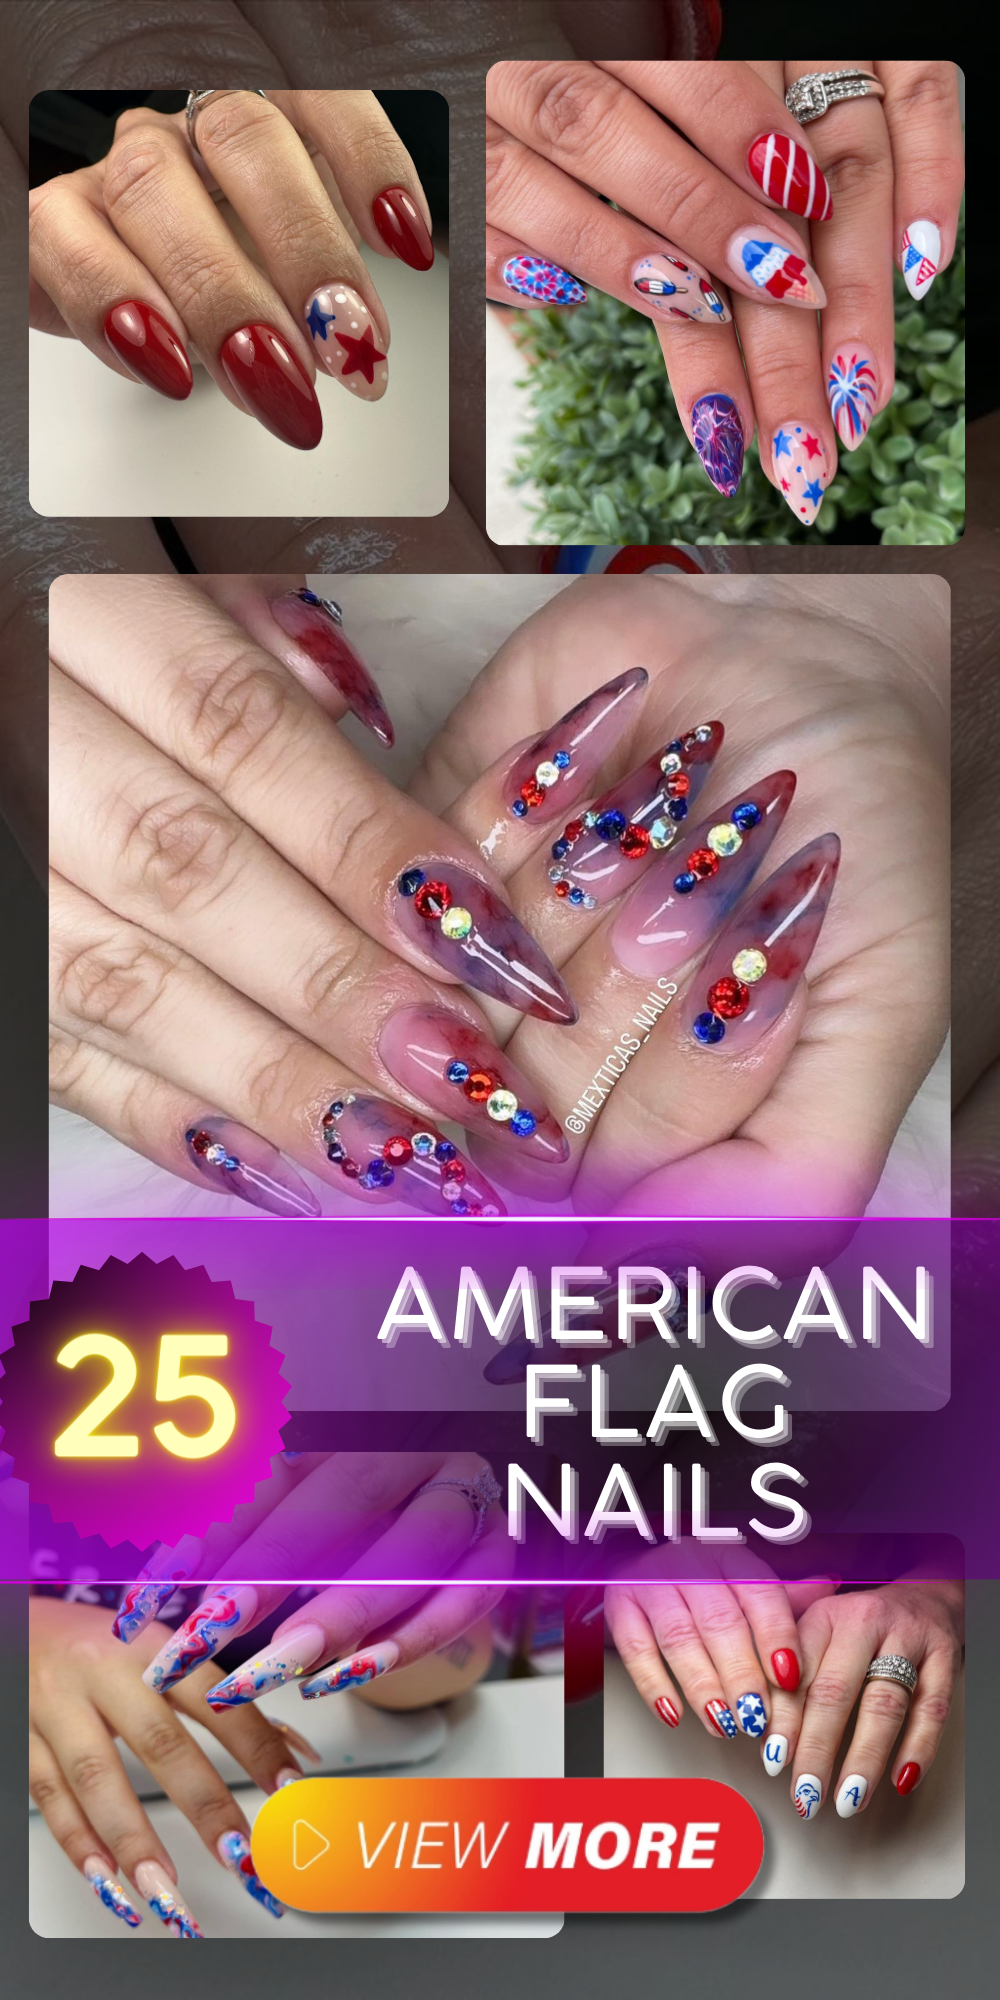
Celebrate with Style: 25 Creative American Flag Nail Designs to Show Your Patriotism
In a world where self-expression knows no bounds, one enduring symbol stands out: the American flag. From billowing proudly in the wind to adorning fashion statements, its iconic design embodies patriotism and pride. And what better canvas to showcase this symbol than on your nails? Dive into the trend of American flag nails, where beauty meets patriotism in a striking and stylish manner.
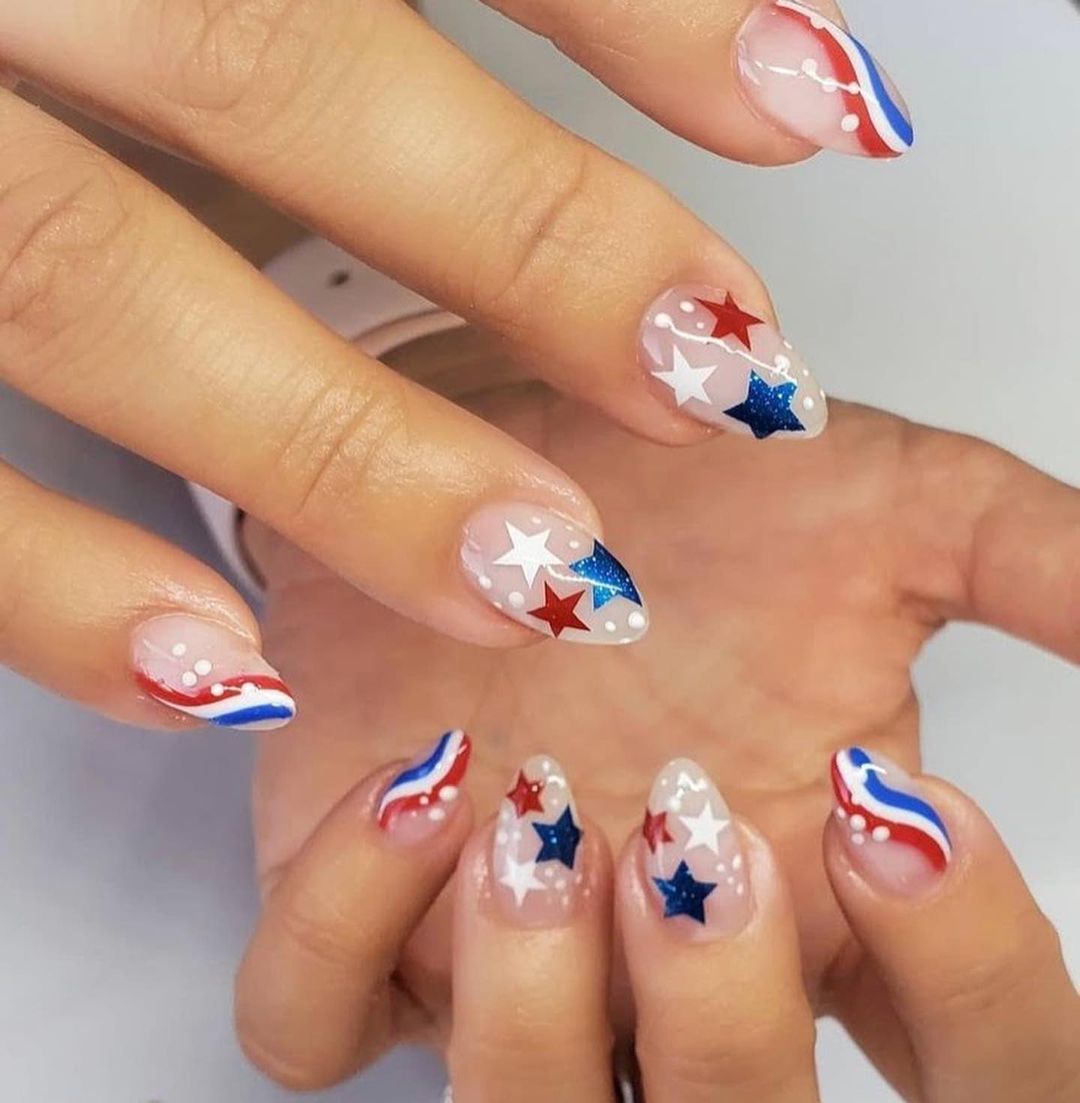
American Flag Waves
Professional Opinion and Description: The “American Flag Waves” nail design epitomizes patriotic spirit with its intricate blending of the iconic red, white, and blue. This design features a glossy finish that catches the light beautifully, enhancing the visual impact of the delicate waves and star accents. The use of a sheer white base allows the colors to pop, making this manicure perfect for 4th of July celebrations or any patriotic event.
- Base Coat: OPI Natural Nail Base Coat
- White Polish: Essie Blanc
- Red Polish: Sally Hansen Red My Lips
- Blue Polish: China Glaze Blue Ya!
- Top Coat: Seche Vite Dry Fast Top Nail Coat
- Detailing Brush: Winstonia Fine Line Nail Art Brush
DIY Instructions: Start by applying a base coat to protect your nails. Once dry, apply two coats of Essie Blanc as the base color. Using the fine line brush, paint red and blue waves alternating with each other. Add small stars with a dotting tool or the tip of your brush dipped in white polish. Finish with a glossy top coat for durability and shine.
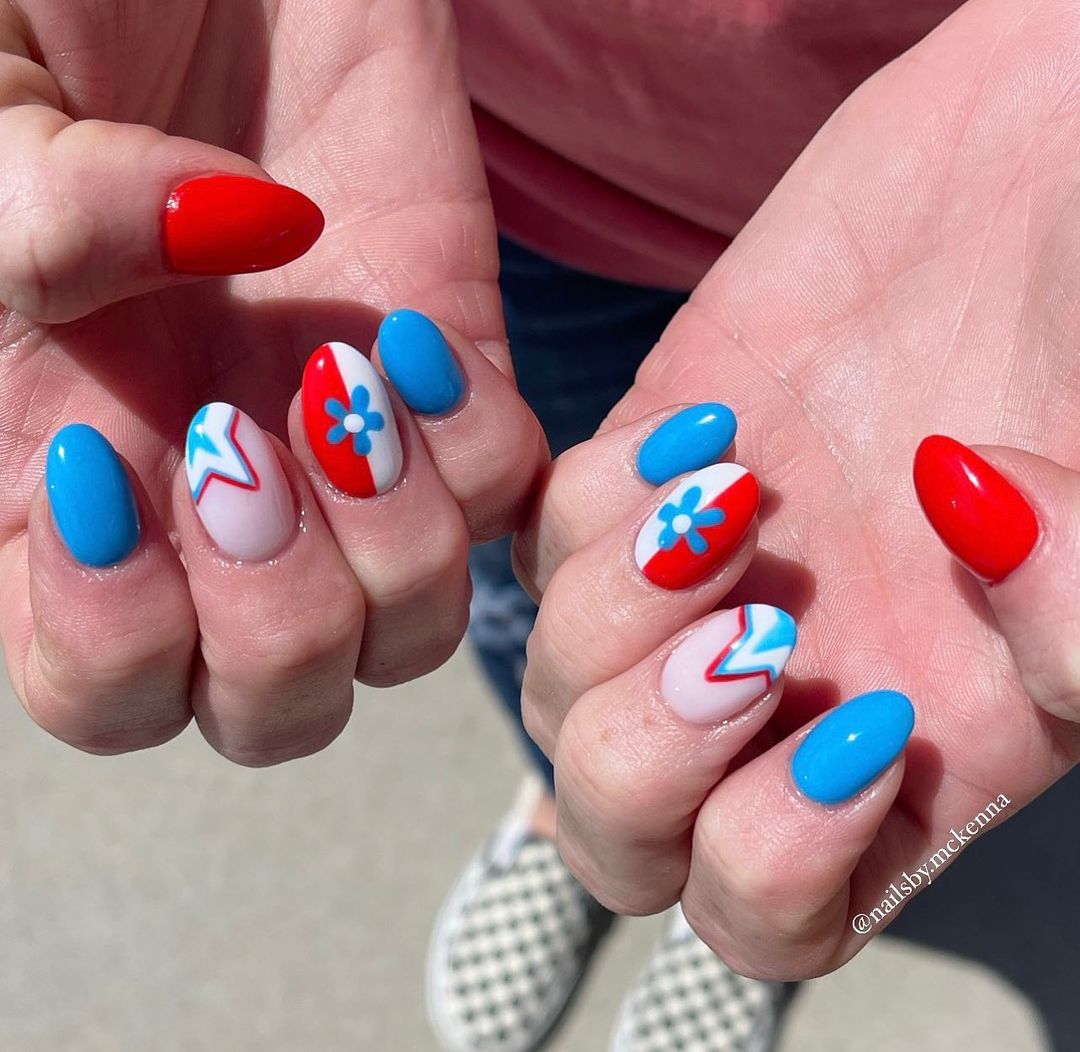
Patriotic Florals
Professional Opinion and Description: The “Patriotic Florals” design merges traditional American flag colors with playful floral motifs, creating a unique and cute look ideal for both Designs 4th of July and casual summer days. The bold reds and subtle blues are offset by the crisp white background, providing a fresh and clean aesthetic. This manicure uses a matte top coat to soften the brightness, giving it a modern twist.
- Matte Top Coat: Matte About You by Essie
- White Polish: OPI Alpine Snow
- Red Acrylic Paint: Craft Smart Red
- Blue Acrylic Paint: Craft Smart Ocean Breeze
- Detailing Brush: Winstonia Fine Line Nail Art Brush
DIY Instructions: Prepare your nails with a base coat followed by two coats of OPI Alpine Snow for a solid white canvas. Use the detailing brush to paint small red and blue flowers. To create the petals, press the brush lightly and twist slightly. Seal your design with a matte top coat for a velvety finish.
Liberty Stripes
Professional Opinion and Description: “Liberty Stripes” is a bold statement piece that brilliantly showcases the Red, White, and Blue theme in a sophisticated manner. This design features precise vertical stripes that demand a steady hand and an eye for detail, paired beautifully with a high-gloss finish that enhances the depth of the colors.
- Striping Tape: Nail Striping Tape in Silver
- Red Polish: Deborah Lippmann Lady Is A Tramp
- White Polish: Zoya Purity
- Blue Glitter Polish: KBShimmer Look on the Nightside
- Top Coat: Sally Hansen Insta-Dri Anti-Chip
DIY Instructions: After applying a base coat, use striping tape to create clean lines. Apply Zoya Purity as the base color. Carefully paint alternate stripes with Deborah Lippmann’s red and KBShimmer’s blue glitter polish. Remove the tape while the polish is still slightly wet to ensure sharp lines. Finish with a fast-drying top coat for a sleek, durable manicure.
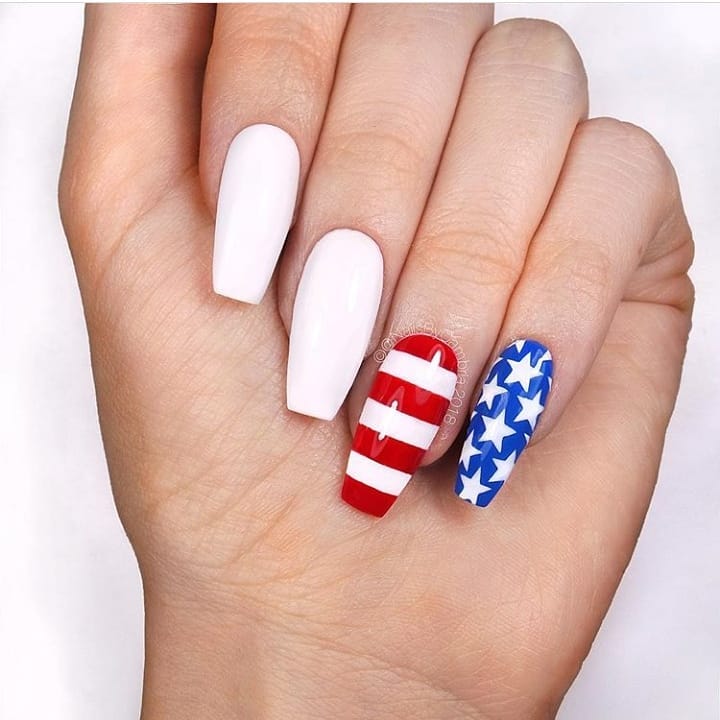
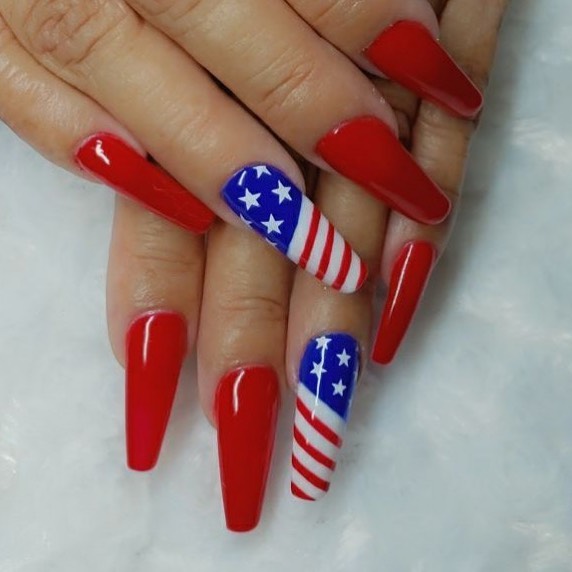
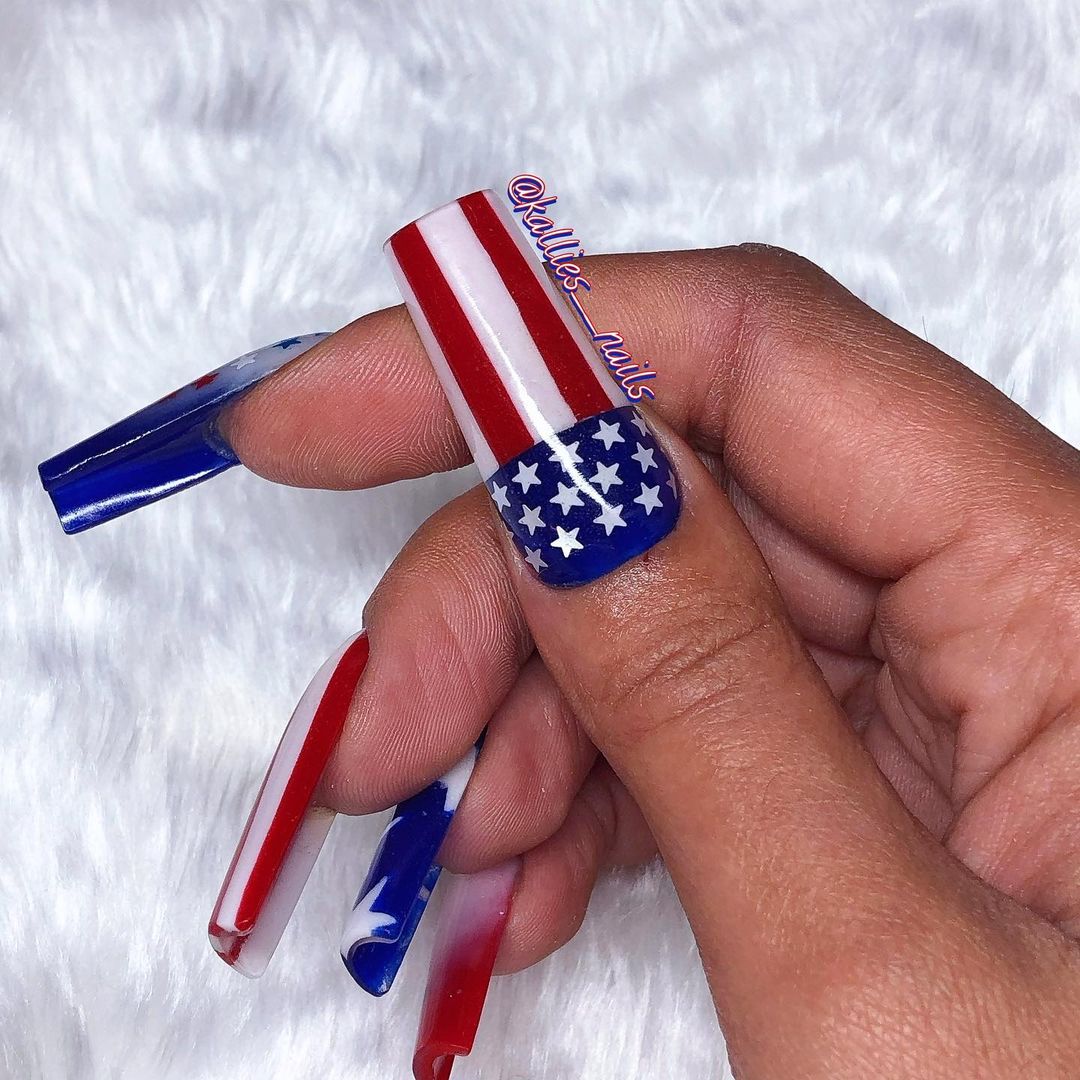
Classic American Elegance
Professional Opinion and Description: This nail design exemplifies classic elegance with a patriotic twist. The solid white nails provide a crisp, clean canvas that contrasts beautifully with the accent nails—one striped in bold red and white, and the other adorned with blue and white stars. This look not only captures the essence of American flag nails but does so with a sophistication that makes it suitable for both festive and formal occasions.
- Base Coat: CND Stickey Base Coat
- White Polish: OPI Alpine Snow
- Red Polish: Deborah Lippmann Lady Is A Tramp
- Blue Polish: China Glaze Frostbite
- Top Coat: Seche Vite Dry Fast Top Nail Coat
- Star Stickers: Pre-cut Nail Art Stickers
- Striping Tape
DIY Instructions: Begin with a base coat to protect your nails. Apply two coats of OPI Alpine Snow on all fingers except for the two accent nails. For the striped nail, apply red polish stripes using striping tape for precision. On the starry nail, place blue polish as the base and then apply white star stickers once dry. Seal all nails with a high-gloss top coat for a smooth, durable finish.
Save Pin
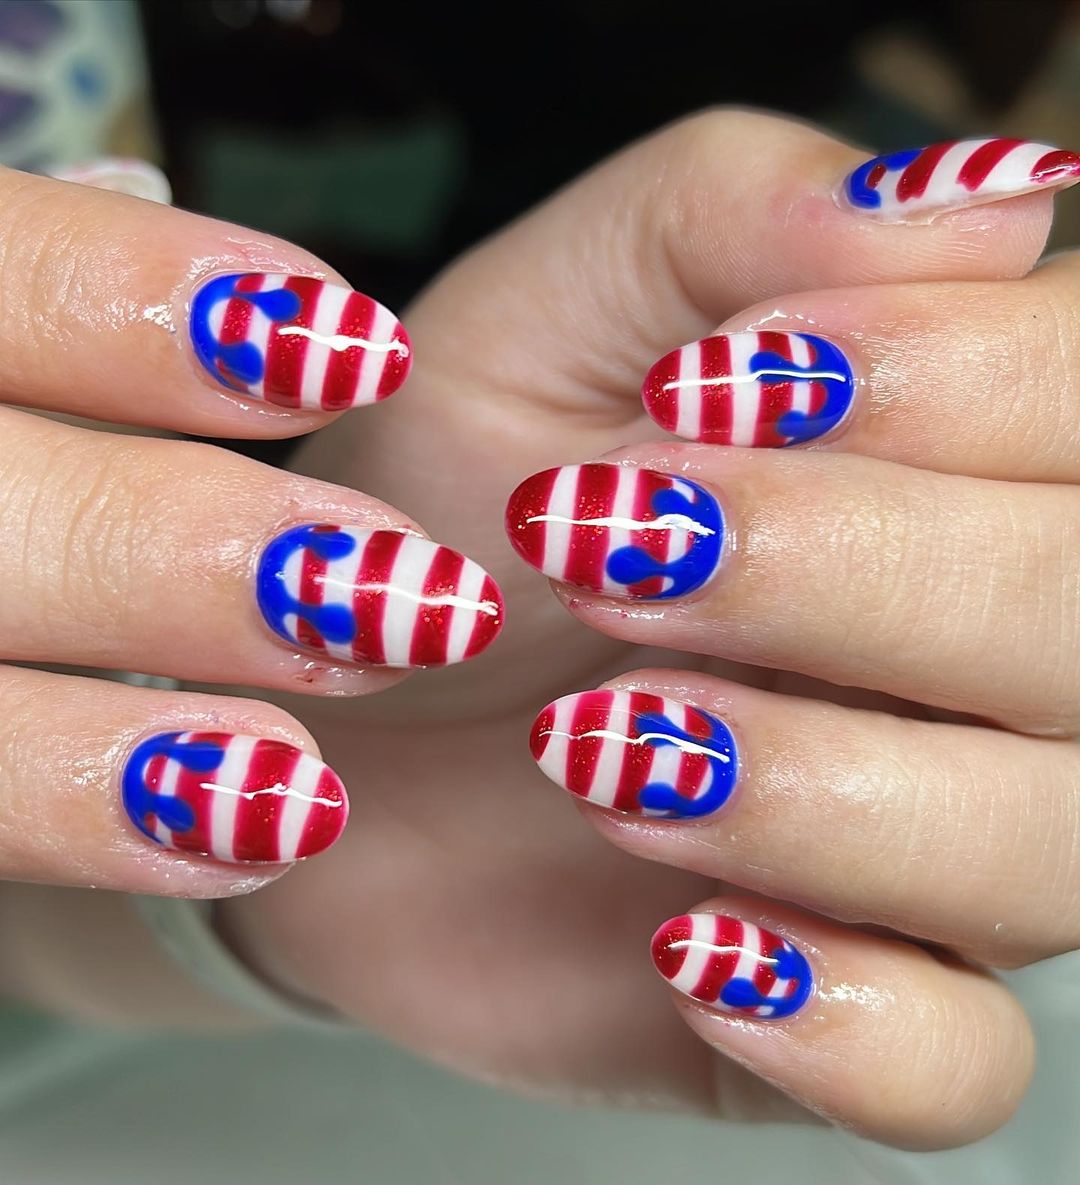
Twisted Stripes and Stars
Professional Opinion and Description: This playful design features a creative twist on traditional Designs 4th of July with intertwined red and white stripes overlaid on a blue background, creating a dynamic and vibrant look. The glossy finish enhances the depth of the colors, making this manicure a standout choice for any patriotic celebration.
- Base Coat: Essie First Base
- White Polish: Zoya Purity
- Red Polish: OPI Big Apple Red
- Blue Polish: Sally Hansen Pacific Blue
- Top Coat: OPI Top Coat
- Detailing Brush: Thin nail art brush
DIY Instructions: Start with a base coat. Paint all nails with Sally Hansen Pacific Blue. Using a thin brush, draw interlocking red and white stripes. This might require a steady hand or the use of a fine detailing brush for precision. Finish with a clear top coat to enhance the shine and protect the design.
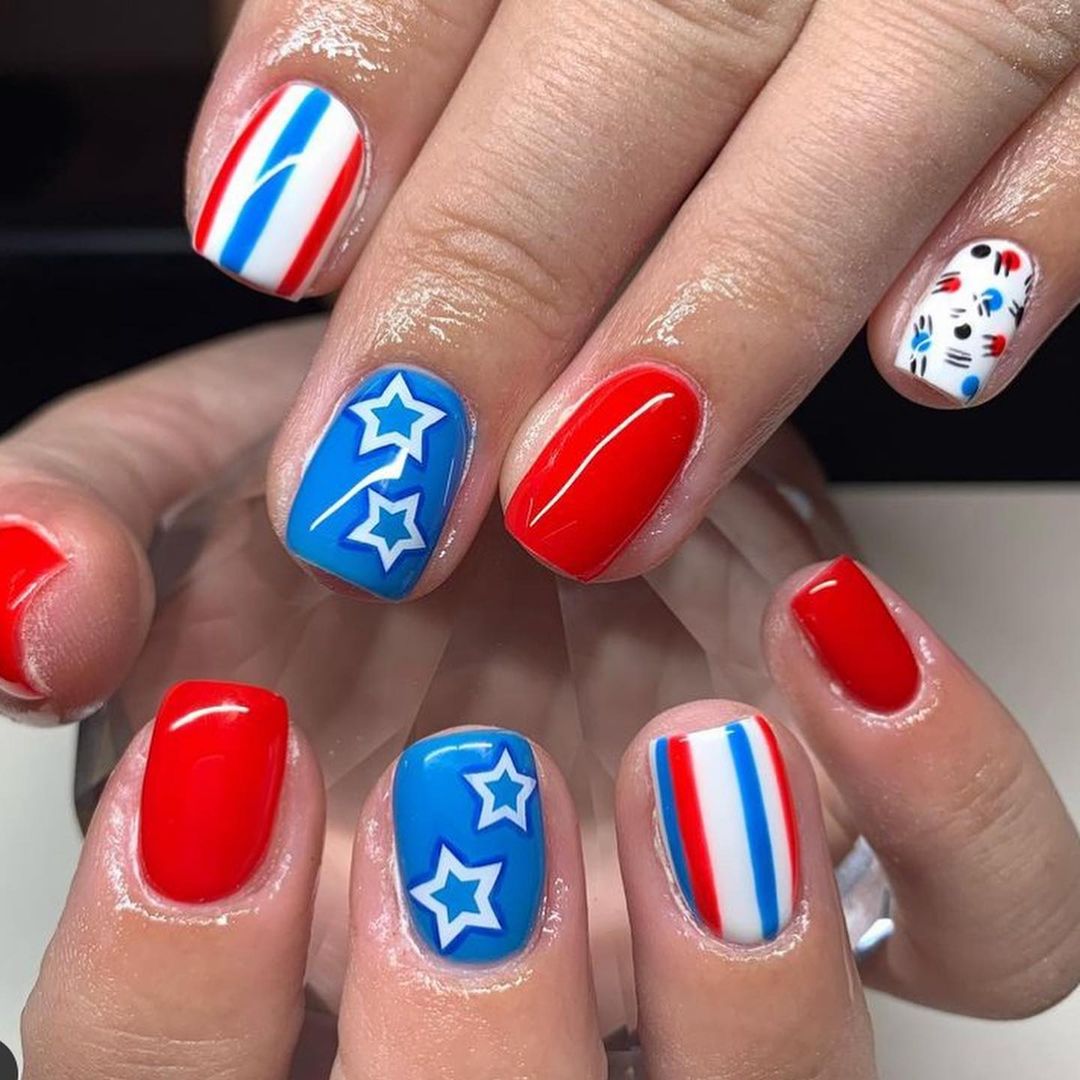
Modern Artistic Flair
Professional Opinion and Description: Modern Artistic Flair nails are a bold blend of sharp and soft design elements, featuring Red and blue color blocks accented with crisp white lines and playful star patterns. This design is perfect for those who appreciate a modern take on traditional themes, offering a fresh and stylish way to express patriotism.
- Base Coat: Butter London Nail Foundation
- White Polish: China Glaze White on White
- Red Polish: Essie Really Red
- Blue Polish: OPI Eurso Euro
- Top Coat: INM Out the Door
- Striping Tape
- Star Decals
DIY Instructions: Apply a base coat to all nails for protection. For the solid red and blue nails, apply two coats of each color respectively. For the artistic nails, use striping tape to create sharp lines after the base colors have dried. Apply star decals for an added touch of whimsy. Seal the design with a top coat to ensure longevity and a high-gloss finish.
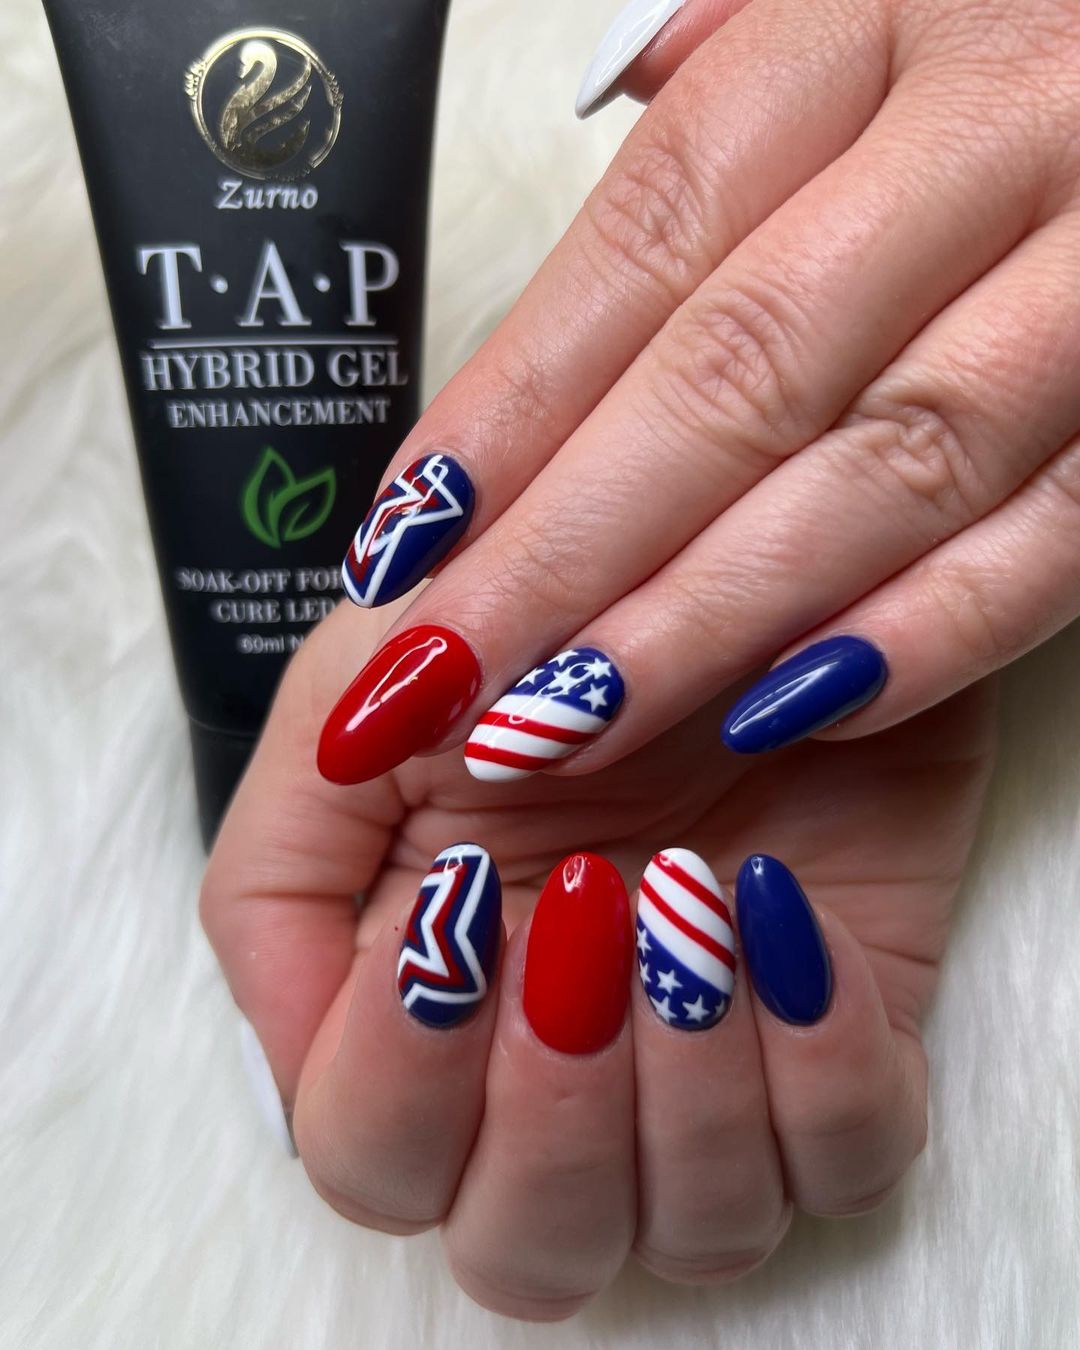
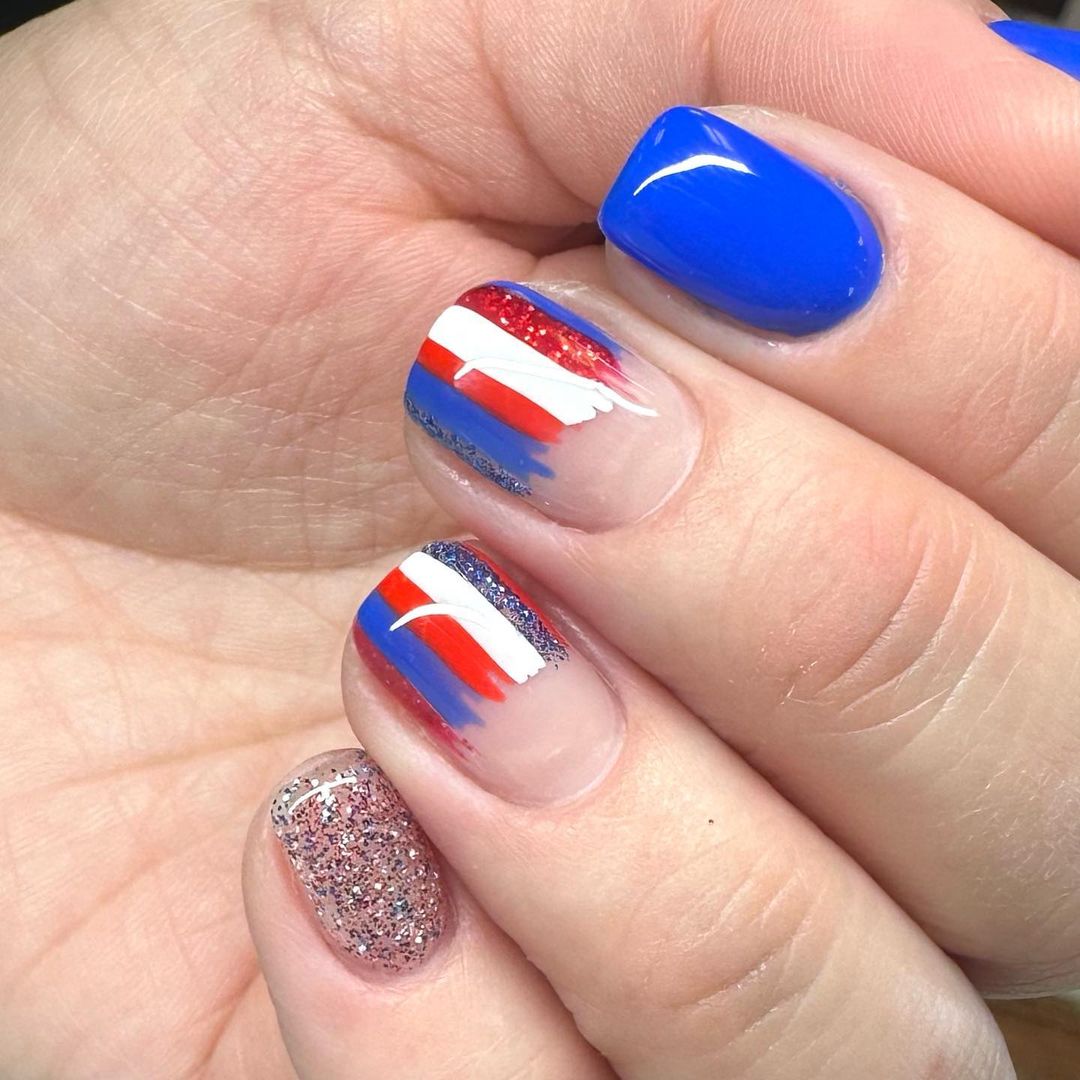
Hybrid Gel Mastery
Professional Opinion and Description: This design is a stunning showcase of precision and creativity, featuring alternating patterns of american flag nails with bold reds, deep blues, and crisp whites. The intricate lightning bolt and star patterns are meticulously crafted, demonstrating expert skill in nail art. This set is perfect for those seeking a standout manicure for any Designs 4th of july celebration.
- Base Coat: Gelish Foundation Base Gel
- White Gel Polish: Gelish Arctic Freeze
- Red Gel Polish: Gelish Red Roses
- Blue Gel Polish: Gelish Caution
- Top Coat: Gelish Top It Off Gel Sealer
- Detailing Brushes
- Striping Tape
- Star Decals
DIY Instructions: Apply a base coat to protect the nails. Use white gel polish as the base for nails with designs and cure under a UV lamp. For striped and starred designs, use striping tape and star decals to create clean and precise patterns. Apply red and blue gel polishes as needed, curing each layer. Finish with a top coat for gloss and longevity.
Soft Ombre Freedom
Professional Opinion and Description: Featuring a soft ombre effect, this nail design transitions smoothly from blue to white, adorned with subtle red stripes that add an elegant touch of patriotism. The addition of a glittery nail brings a playful vibe, making it perfect for both casual and festive occasions. This design beautifully incorporates the Ombre technique with patriotic colors, making it both trendy and thematic.
- Base Coat: OPI Natural Nail Base Coat
- White Polish: Essie Blanc
- Red Polish: OPI Big Apple Red
- Blue Polish: Sally Hansen Pacific Blue
- Glitter Polish: Essie Set in Stones
- Sponge (for ombre effect)
- Top Coat: Seche Vite Dry Fast Top Coat
DIY Instructions: Start with a base coat to protect the nails. Apply a white base and let it dry. Use a sponge to dab on blue polish from the tip, blending it towards the middle. Add thin red stripes with a detailing brush. For the glittery nail, apply a base of white polish and top with glitter polish. Seal everything with a glossy top coat.
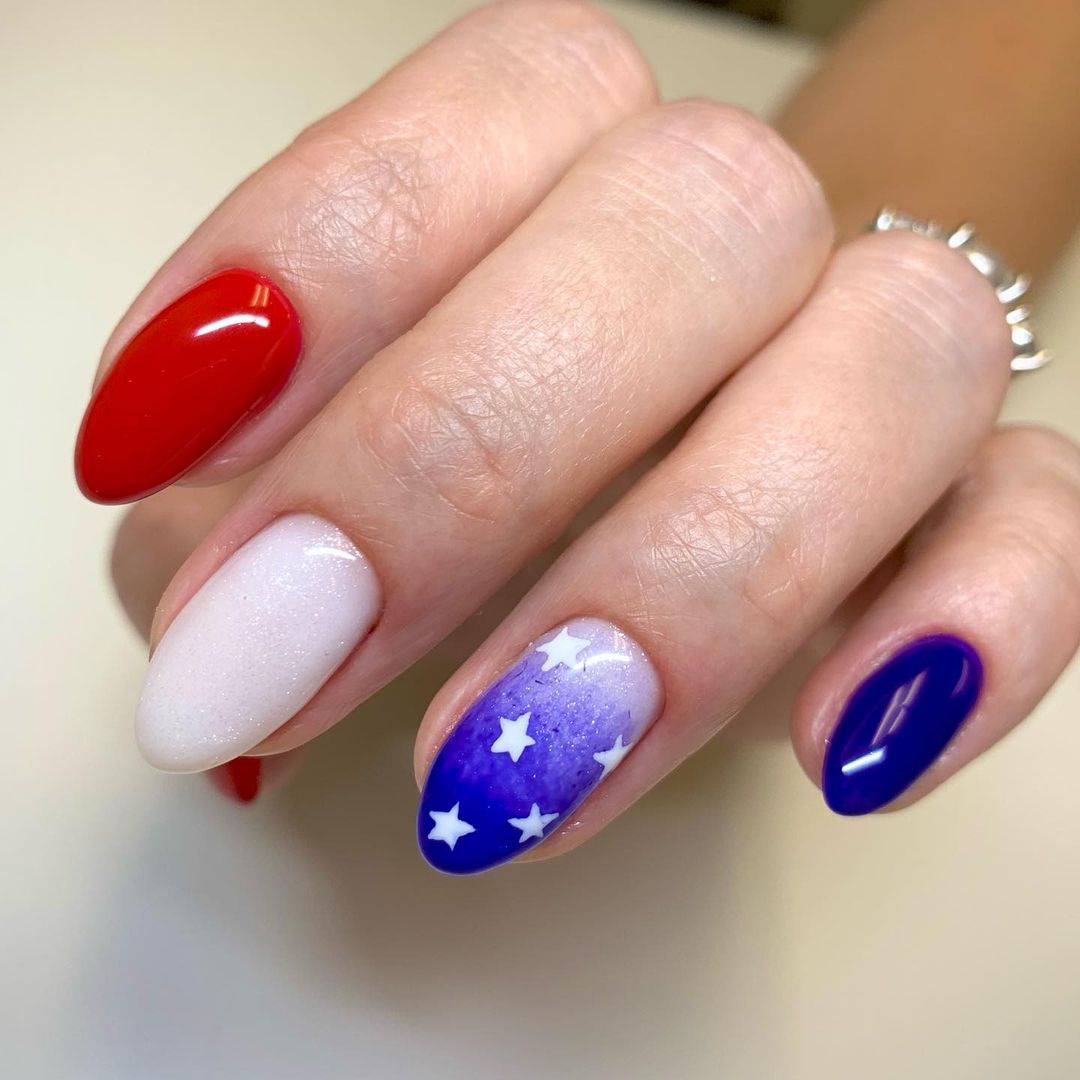
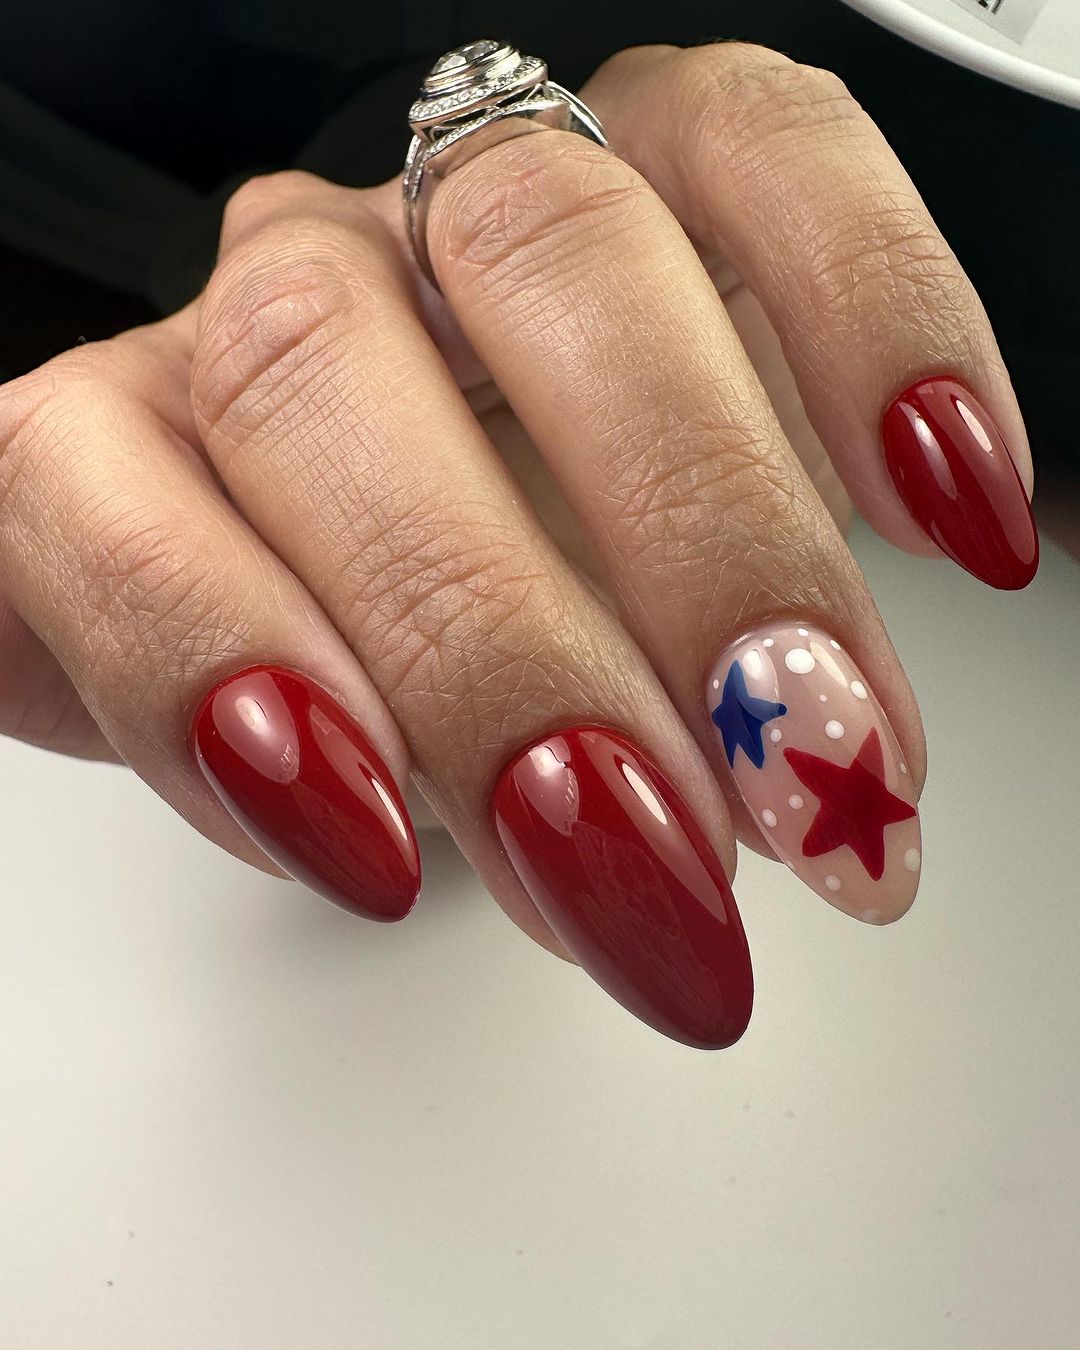
Star-Spangled Beauty
Professional Opinion and Description: This nail design is a perfect blend of bold color blocks and delicate detailing, featuring vibrant Red and blue hues paired with a white nail that boasts a purple gradient and tiny stars. It’s a fresh take on american flag nails, ideal for expressing both style and patriotism.
- Base Coat: Butter London Nail Foundation
- White Polish: China Glaze White on White
- Red Polish: Essie Really Red
- Blue Polish: OPI Eurso Euro
- Purple Glitter Polish: OPI Show Us Your Tips!
- Star Stickers
- Top Coat: INM Out the Door
DIY Instructions: Apply a base coat for nail protection. Paint the solid color nails in red and blue. For the gradient nail, apply white polish as the base, and sponge on purple glitter polish towards the tip. Add star stickers for an embellished look. Finish with a fast-drying top coat to maintain the design’s crispness and shine.
Save Pin
Striped Harmony
Professional Opinion and Description: “Striped Harmony” displays a sophisticated play of lines and colors, marrying the classic Red, White, and Blue theme in a minimalist yet striking fashion. The clear spaces between the stripes add a modern twist, making this design not only patriotic but also stylishly understated.
- Base Coat: Essie All in One Base
- White Polish: Sally Hansen White On
- Red Polish: Revlon Red
- Blue Polish: L’Oreal Paris Bleu Royal
- Top Coat: Revlon Extra Life No Chip Top Coat
- Striping Tape
DIY Instructions: Begin with a base coat to protect your nails. Apply a white polish as the base color. Once dry, use striping tape to delineate areas for red and blue stripes. Carefully apply the colored polishes and remove the tape while the polish is still wet to ensure crisp lines. Finish with a clear top coat for a glossy look.
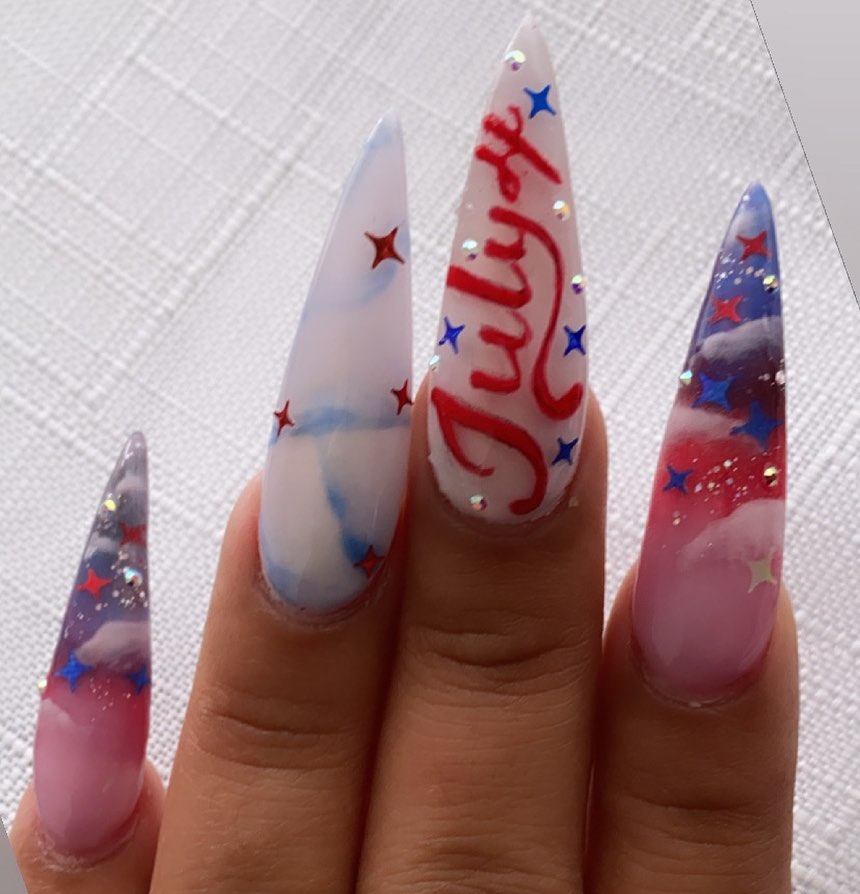
Fourth of July Festive
Professional Opinion and Description: The “Fourth of July Festive” design is a creative and enchanting display of Art 4th of july, featuring translucent nails with soft clouds, bold ‘July 4th’ script, and playful star accents. This look uses a mix of airbrush techniques and hand painting to achieve a dreamy yet vibrant celebration of Independence Day.
- Base Coat: OPI Natural Nail Base Coat
- Airbrush Kit
- Red Acrylic Paint: Golden High Flow Acrylic
- Blue Acrylic Paint: Golden High Flow Acrylic
- White Polish: Zoya Purity
- Glitter Polish: Essie Sparkle On Top
- Detailing Brushes
- Top Coat: Seche Vite Dry Fast Top Nail Coat
DIY Instructions: Start with a clear base coat. Use an airbrush to create a soft blue and red gradient background resembling the sky. Hand-paint the ‘July 4th’ script and stars using white polish and a fine detailing brush. Add accents of glitter polish for a sparkling effect. Seal with a top coat for durability and shine.
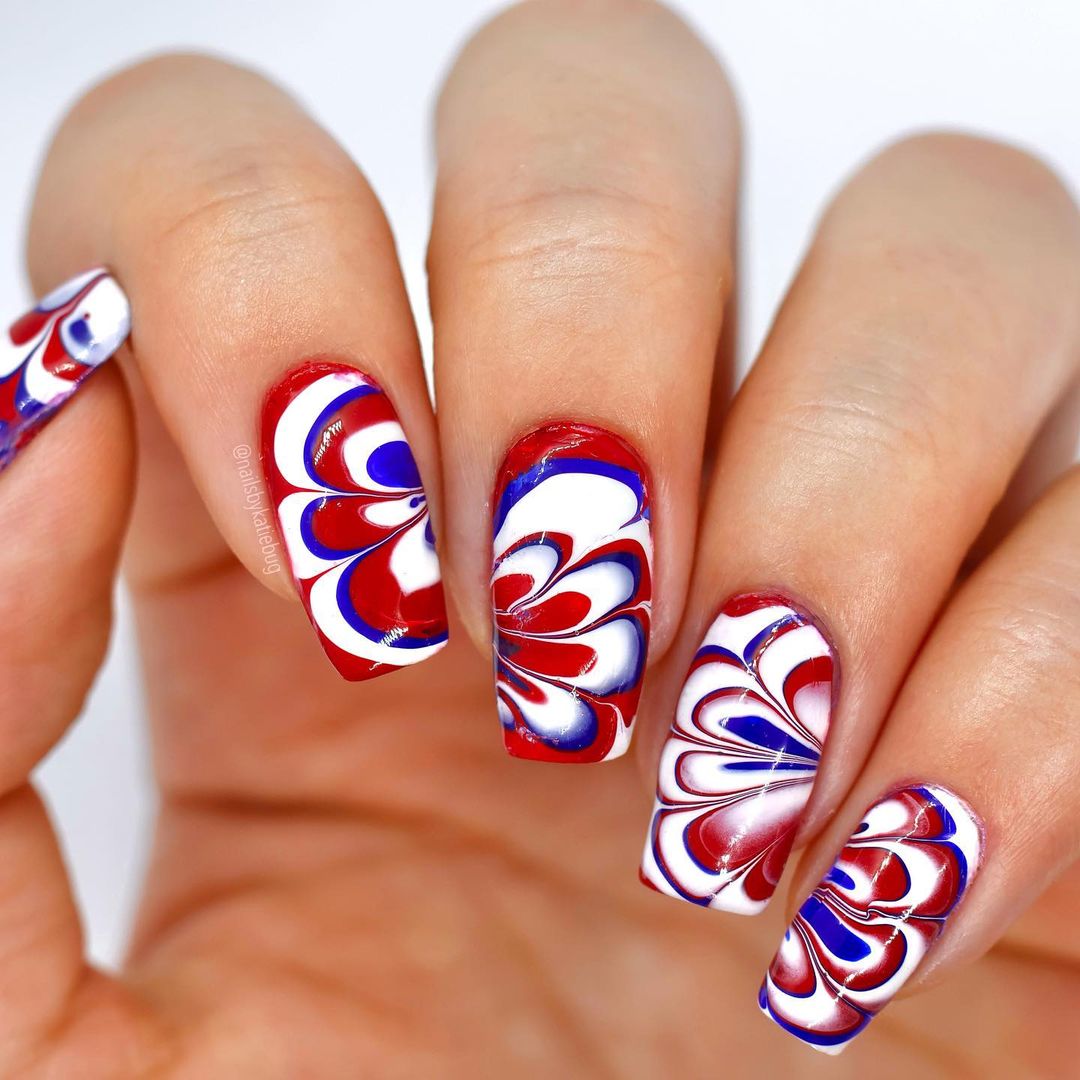
Water Marble Wonder
Professional Opinion and Description: “Water Marble Wonder” is a masterpiece of nail art, featuring a mesmerizing swirl of Red and blue that creates a dynamic and fluid pattern. This intricate design is perfect for anyone looking to make a bold statement during patriotic events or any festive occasion.
- Base Coat: Butter London Nail Foundation Priming Basecoat
- White Polish: Essie Blanc (as base color)
- Red Polish: China Glaze Red-Y To Rave
- Blue Polish: Essie Butler Please
- Water Marbling Tool
- Top Coat: CND Vinylux Weekly Top Coat
DIY Instructions: Apply a base coat followed by a white base color. Prepare a cup of water at room temperature. Drop red and blue polishes into the water and use a marbling tool to swirl the colors together. Dip your nails into the cup to transfer the design. Allow the polish to dry and apply a top coat for a smooth, glassy finish.
Pop Art Patriotism
Professional Opinion and Description: “Pop Art Patriotism” takes a bold, artistic twist on the classic American flag nails, incorporating a vivid depiction of a pop art style mouth alongside stripes and stars. This design is an eye-catching choice for those looking to express their patriotism with a unique and creative flair.

- Base Coat: ORLY Bonder Rubberized Basecoat
- White Polish: Sally Hansen White On
- Red Polish: Essie Geranium
- Blue Polish: OPI Eurso Euro
- Detailing Brushes
- Top Coat: Seche Vite Dry Fast Top Coat
DIY Instructions: Begin with a protective base coat. Apply white polish as a canvas for the detailed art. Use detailing brushes to create the pop art design, painting the lips in red and adding details with blue and white. The additional nails feature stars and stripes in red and blue. Finish with a durable top coat for a lasting glossy effect.
Classic Stripes and Stars
Professional Opinion and Description: “Classic Stripes and Stars” nails embrace a timeless look with bold red and gleaming white stripes, paired with a starry blue accent nail. This design captures the essence of Designs 4th of July with its straightforward yet striking pattern, ideal for any patriotic celebration.
- Base Coat: Essie First Base
- Red Polish: China Glaze Red-Y To Rave
- White Polish: Zoya Purity
- Blue Polish: Sally Hansen Pacific Blue
- Star Decals
- Striping Tape
- Top Coat: CND Vinylux Weekly Top Coat
DIY Instructions: Start by applying a base coat. Paint the red nails first, then use striping tape on the accent nail to create clean white stripes. Apply blue polish on another nail and add star decals once dry. Seal the design with a top coat for a polished and protective finish.
Festive Fireworks
Professional Opinion and Description: The “Festive Fireworks” design showcases a spectacular array of colors and patterns that mimic the excitement of fireworks. Featuring techniques like water marbling and freehand art, this set is a colorful celebration of Art 4th of july, complete with star accents and dynamic swirls.
- Base Coat: OPI Natural Nail Base Coat
- Red Polish: Essie Really Red
- Blue Polish: OPI Eurso Euro
- White Polish: Sally Hansen White On
- Detailing Brushes
- Water Marbling Tools
- Glitter Polish: Essie Set in Stones
- Top Coat: INM Out the Door Top Coat
DIY Instructions: Prepare your nails with a base coat. Use white polish as a base for marbling. Drop blue and red polishes into water and create a marble effect with tools. Dip your nails into the design, clean up the edges, and let dry. Use detailing brushes to add freehand stars and accents. Finish with a glitter top coat for sparkle and a final top coat for durability.
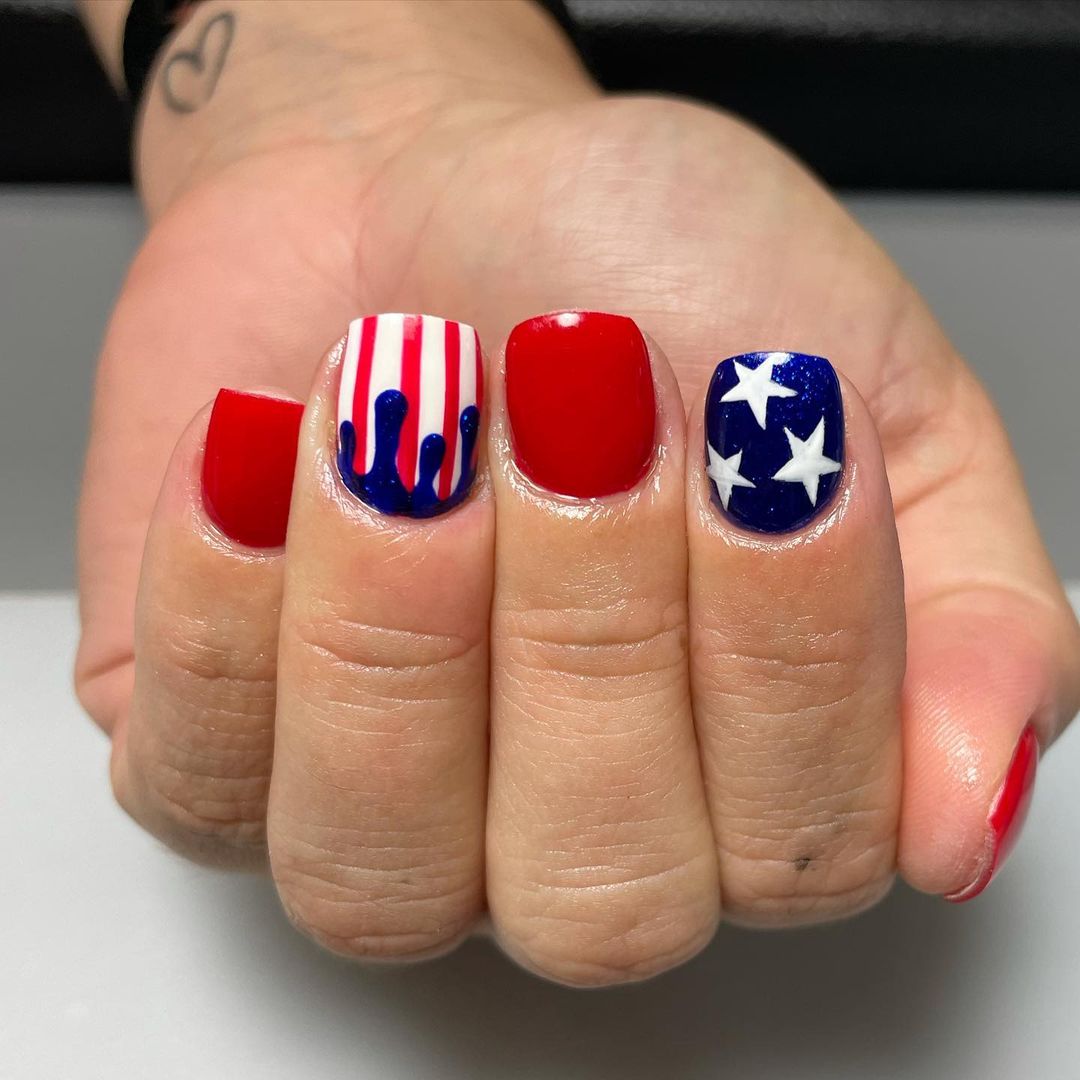
Dripping in Patriotism
Professional Opinion and Description: “Dripping in Patriotism” combines the boldness of solid red and starry blue with a unique dripping effect on a striped accent nail. This artistic take adds a dynamic and somewhat playful vibe to the traditional American flag nails theme, perfect for those looking to add a little edge to their patriotic ensemble.
- Base Coat: OPI Natural Nail Base Coat
- Red Polish: Essie Really Red
- Blue Polish: China Glaze Blue Ya!
- White Polish: Sally Hansen White On
- Detailing Brush
- Top Coat: Seche Vite Dry Fast Top Coat
DIY Instructions: Apply a base coat to protect your nails. Paint the majority of your nails in solid red. For the blue nail, apply two coats of blue polish and use a small brush to paint white stars. For the striped nail, paint a white base and once dry, add red stripes. Before the red stripes dry completely, use a clean brush to gently drag downwards to create the dripping effect. Seal all designs with a top coat for a glossy finish.
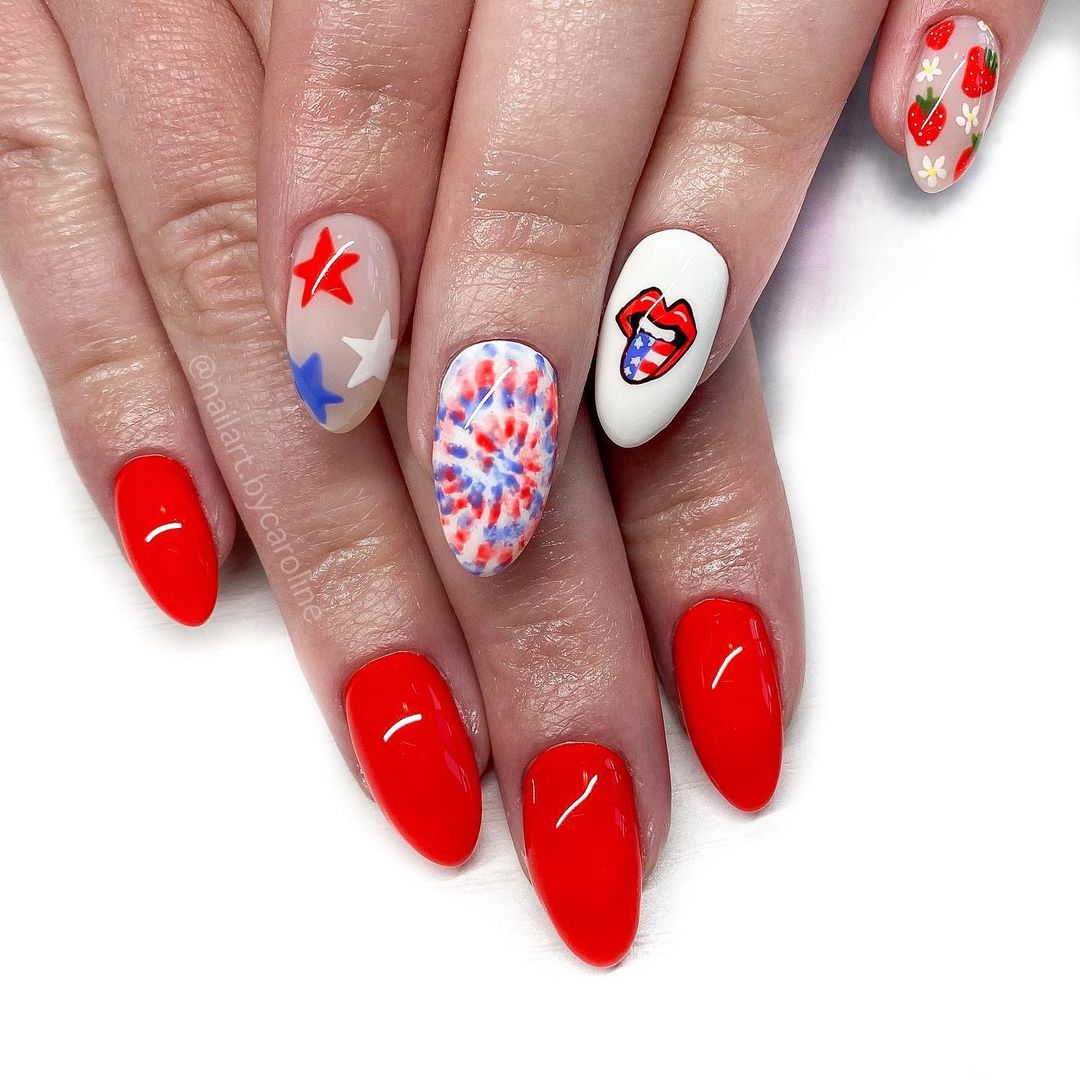
Artistic Expression
Professional Opinion and Description: “Artistic Expression” nails showcase an innovative mix of designs, including a vivid watercolor effect, a pop art-inspired lip motif, and playful florals. This set is a testament to the versatility of nail art, allowing for a personalized expression of both style and patriotism.
- Base Coat: Butter London Nail Foundation
- Red Polish: Deborah Lippmann Lady Is A Tramp
- Blue Polish: OPI Eurso Euro
- White Polish: Essie Blanc
- Detailing Brushes
- Watercolor Polish or Ink
- Top Coat: INM Out the Door
DIY Instructions: Start with a base coat to ensure nail protection. For the watercolor nail, apply a white base and dab on blue and red watercolor polish or inks, blending gently with a brush dipped in nail polish remover for a softened effect. For the pop art lip, use white as a base and carefully draw the design with red and blue. The floral nail should be done by painting red as a base and using white and blue for the flower details. Complete all nails with a high-gloss top coat for durability and shine.
Eclectic Americana
Professional Opinion and Description: “Eclectic Americana” embodies a spirited blend of classic American symbols with a playful, modern twist. Featuring a vibrant red base on several nails, the set is accented with unique designs such as stylized stars, a whimsical pop art lip, and a colorful, abstract pattern resembling a firework display. This set is perfect for showcasing a bold, festive spirit during national holidays or any patriotic celebration.
- Base Coat: Essie All in One Base
- Red Polish: OPI Big Apple Red
- Blue Polish: Essie Butler Please
- White Polish: Sally Hansen White On
- Detailing Brushes
- Top Coat: INM Out the Door
DIY Instructions: Start with a base coat to protect your nails. Apply two coats of OPI Big Apple Red on the selected nails. For the detailed nails, use white as a base and employ detailing brushes to add blue and red accents for stars and abstract patterns. On the white base nail, draw the pop art-inspired lip using red and blue. Each design element should be layered carefully to maintain clarity and vibrancy. Finish with a top coat to enhance shine and durability.
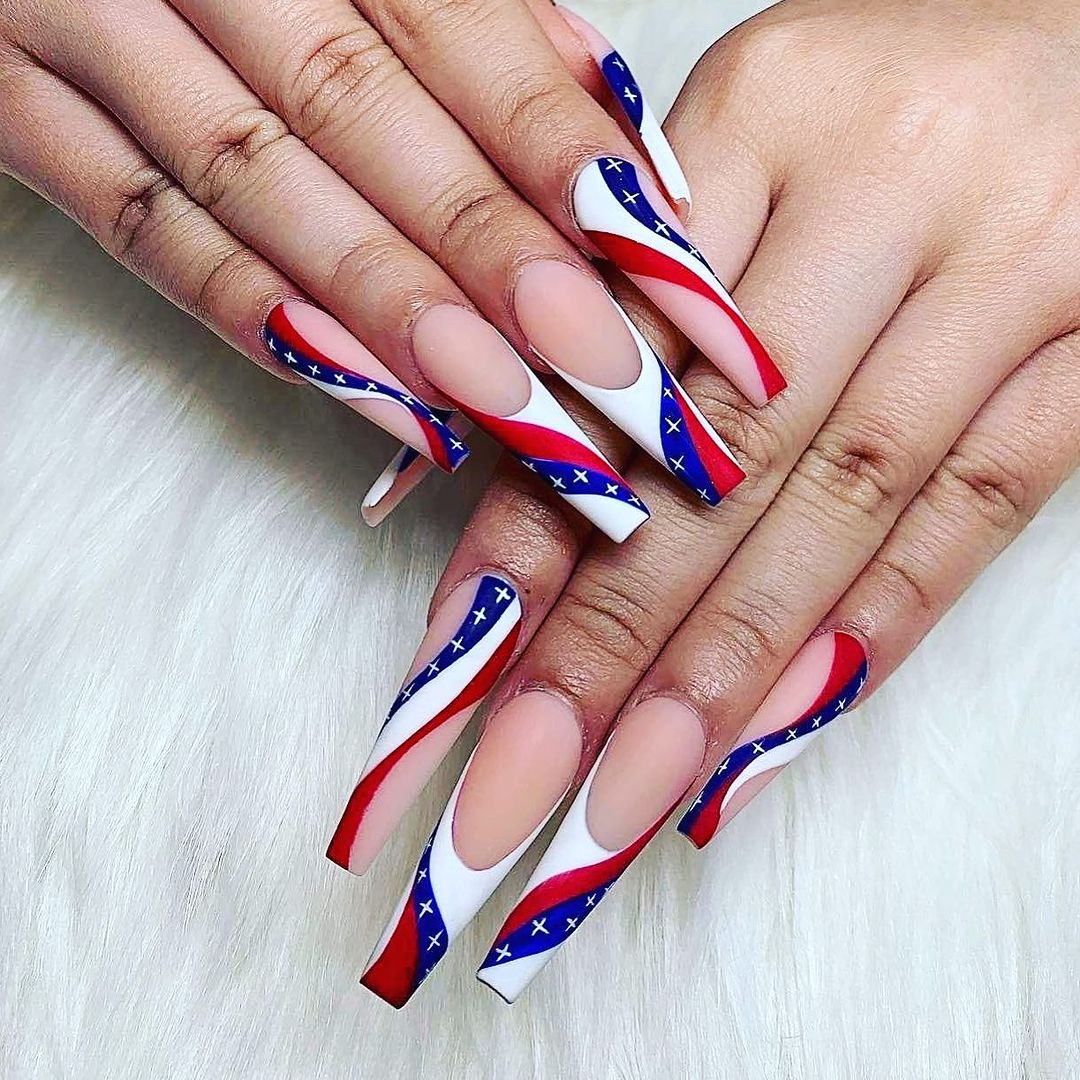
Sculptural Stripes
Professional Opinion and Description: “Sculptural Stripes” presents a dramatic and sculpted approach to Designs 4th of july, featuring bold red and blue swirls with a star-spangled pattern. The use of negative space and detailed sculpting techniques makes this design both avant-garde and patriotic.
- Base Coat: Gelish Foundation
- Red Gel Polish: Gelish Red Roses
- Blue Gel Polish: Gelish Caution
- White Gel Polish: Gelish Arctic Freeze
- Sculpting Gel
- Top Coat: Gelish Top It Off
DIY Instructions: Apply a base coat and cure under UV light. Sculpt the swirls with red and blue gel polish mixed with a clear sculpting gel for added thickness. Paint the stars on blue swirls with white gel polish. Use a fine brush for precision. Cure each layer under UV light and finish with a top coat for shine and durability.
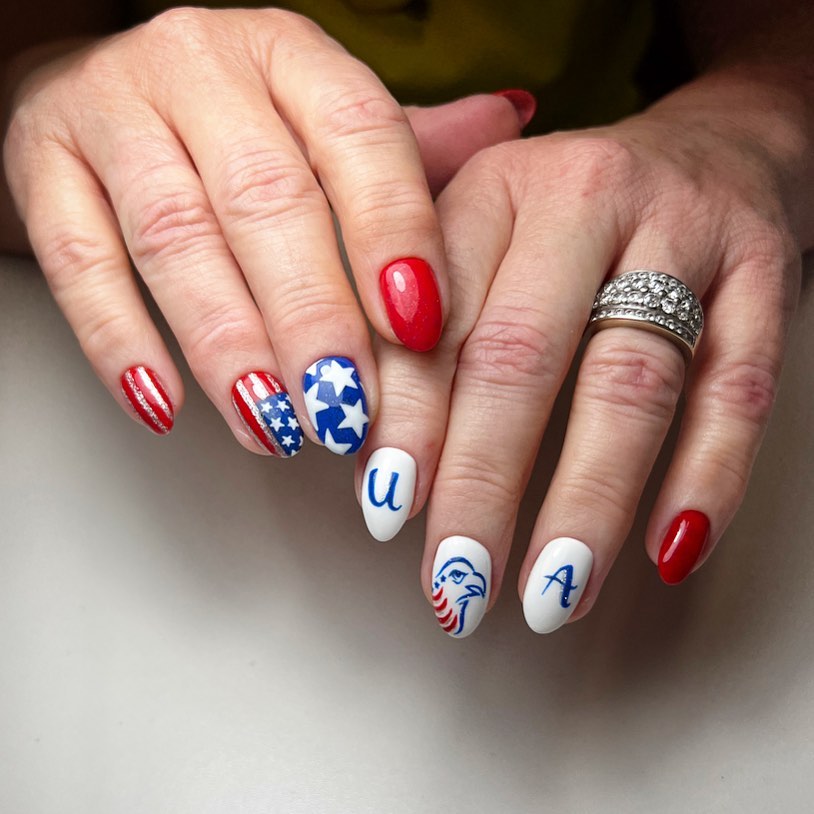
U.S.A. Pride
Professional Opinion and Description: “U.S.A. Pride” nails celebrate the American spirit with a vibrant mix of classic red, white, and blue colors, and artistic embellishments like the lettering and face of Liberty. This design is ideal for anyone looking to showcase their patriotism in a creative and personal way.
- Base Coat: OPI Natural Nail Base Coat
- Red Polish: Essie Really Red
- Blue Polish: OPI Eurso Euro
- White Polish: Sally Hansen White On
- Detailing Brushes
- Top Coat: INM Out the Door
DIY Instructions: Start with a base coat. Paint the majority of the nails in solid red. Use white polish for the base of the accent nails and then hand-paint blue stars and U.S.A. lettering. For the Liberty face, use fine detailing brushes to carefully draw the design in blue and red. Finish with a top coat for a glossy effect.
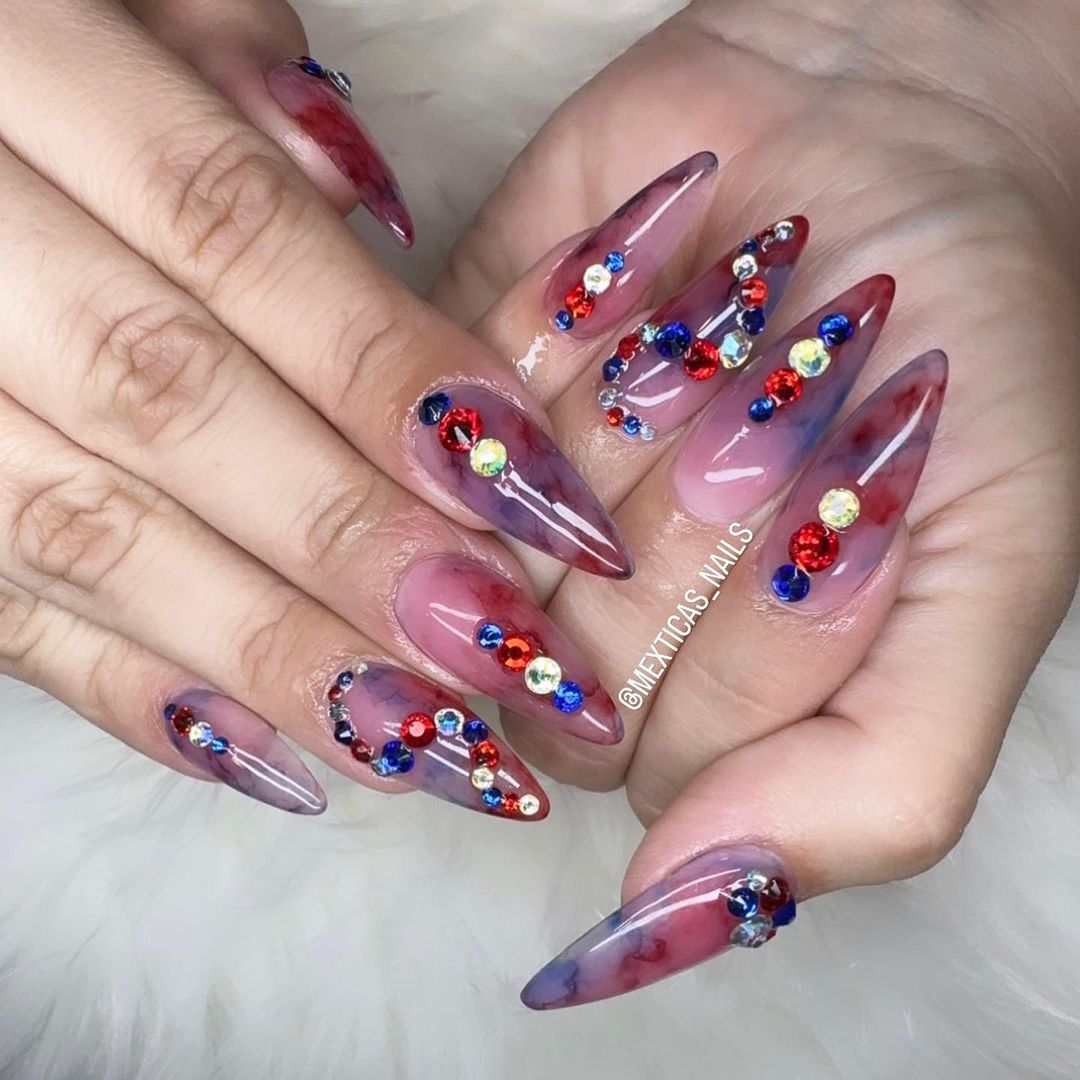
Jeweled Freedom
Professional Opinion and Description: “Jeweled Freedom” nails are a luxurious take on american flag nails with a combination of rich, translucent gels enhanced by red, blue, and clear crystals. This design is perfect for those who love a bit of glamour with their patriotism.
- Base Coat: Essie All in One Base
- Translucent Gel Polish: CND Shellac Clearly Pink
- Red Crystals
- Blue Crystals
- Clear Crystals
- Top Coat: Essie Gel Setter
DIY Instructions: Apply a base coat and a layer of translucent gel polish. Arrange red, blue, and clear crystals in a tasteful pattern while the gel is still tacky. Cure under UV light to set the design. Apply an additional gel layer to encase the crystals for a smooth finish. Seal with a top coat for extra gloss and protection.
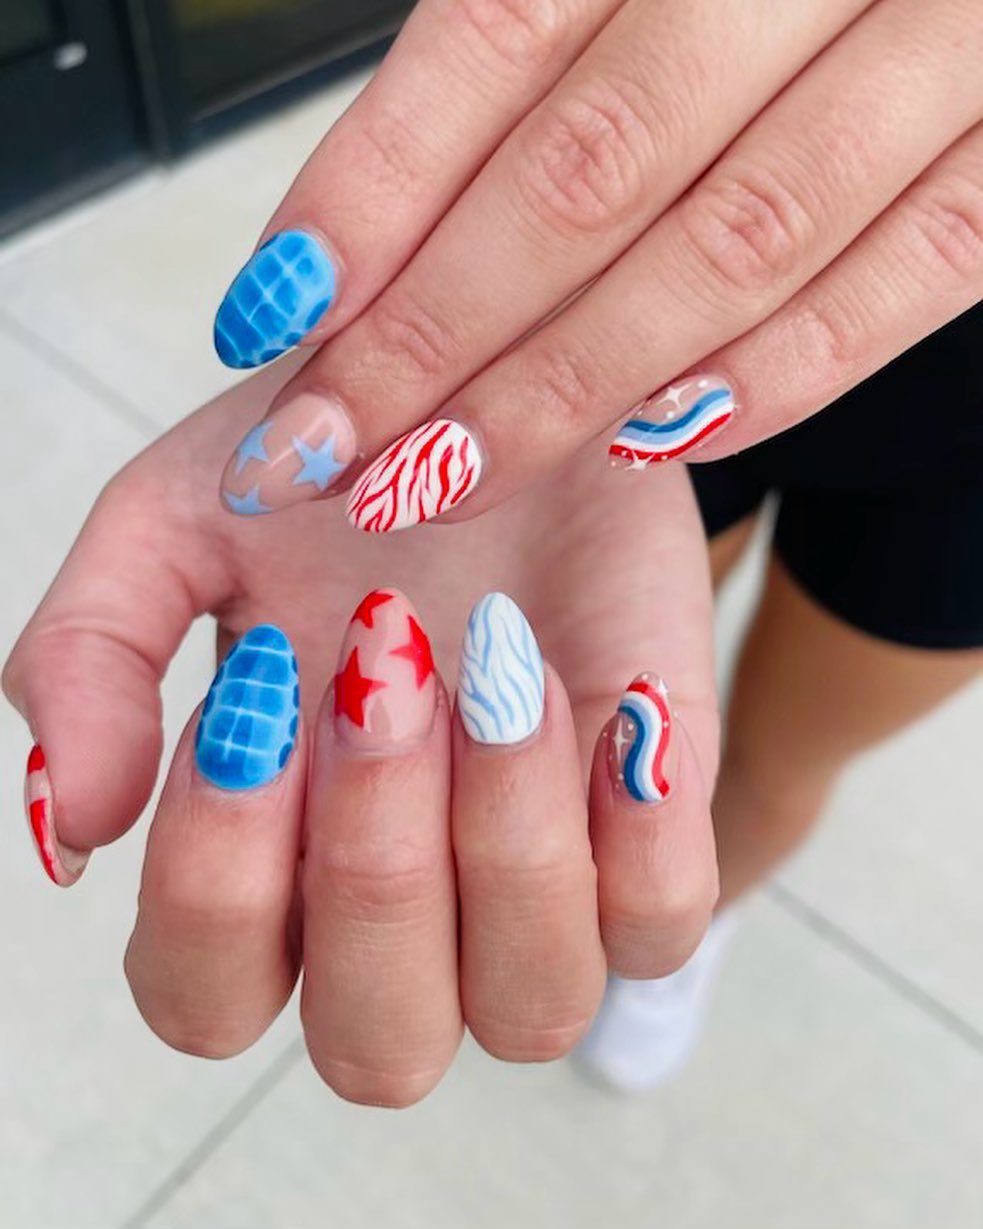
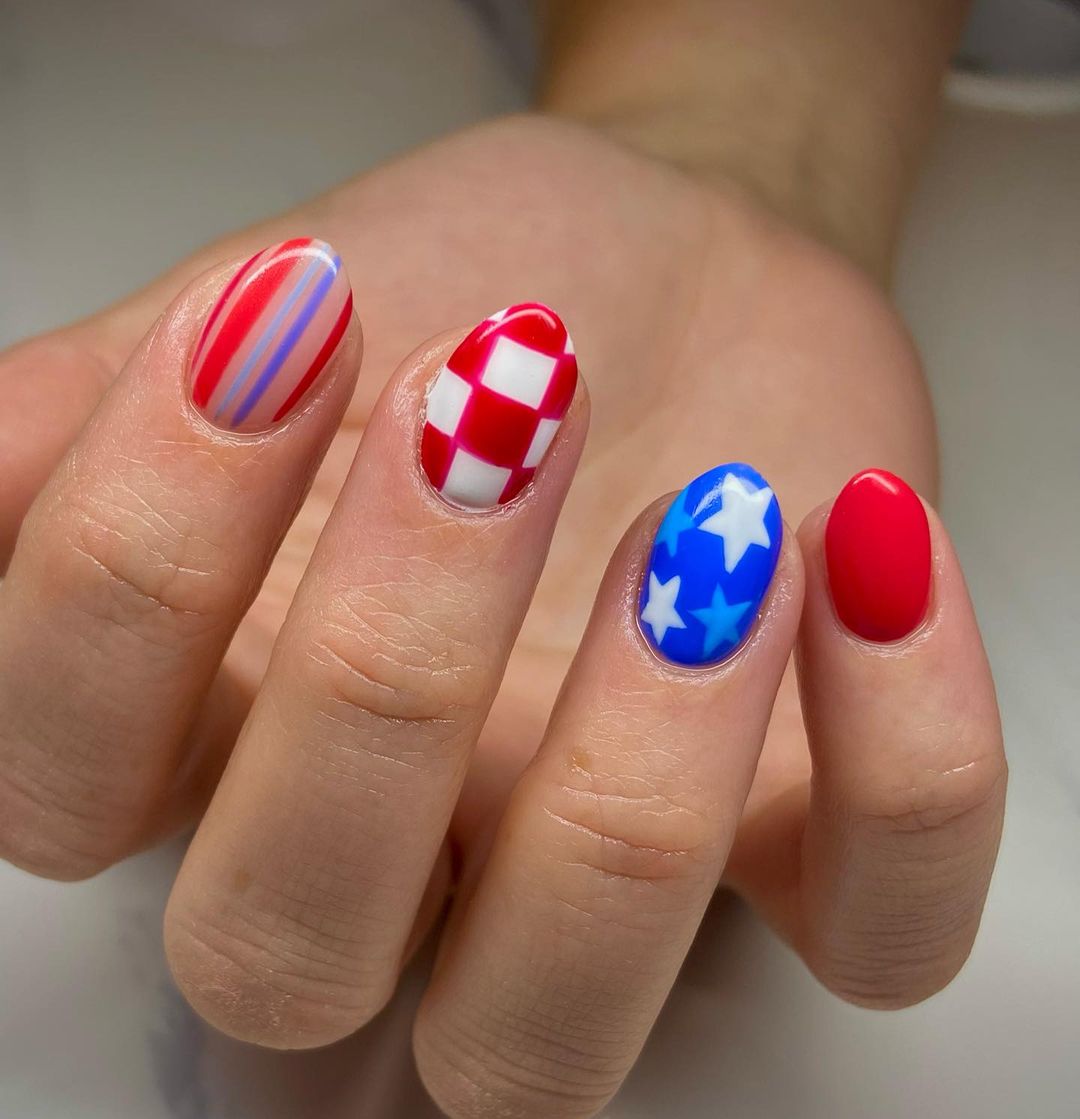
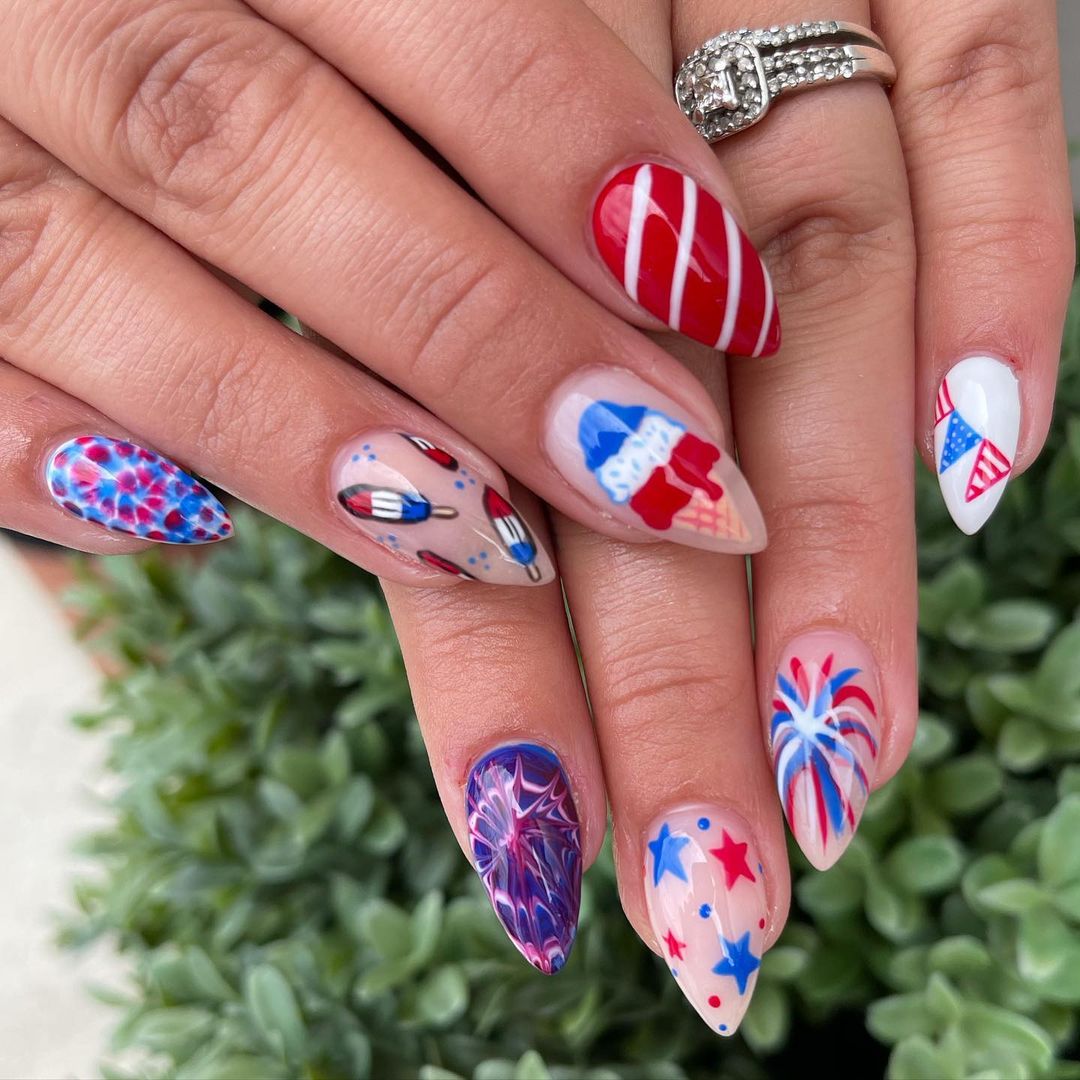
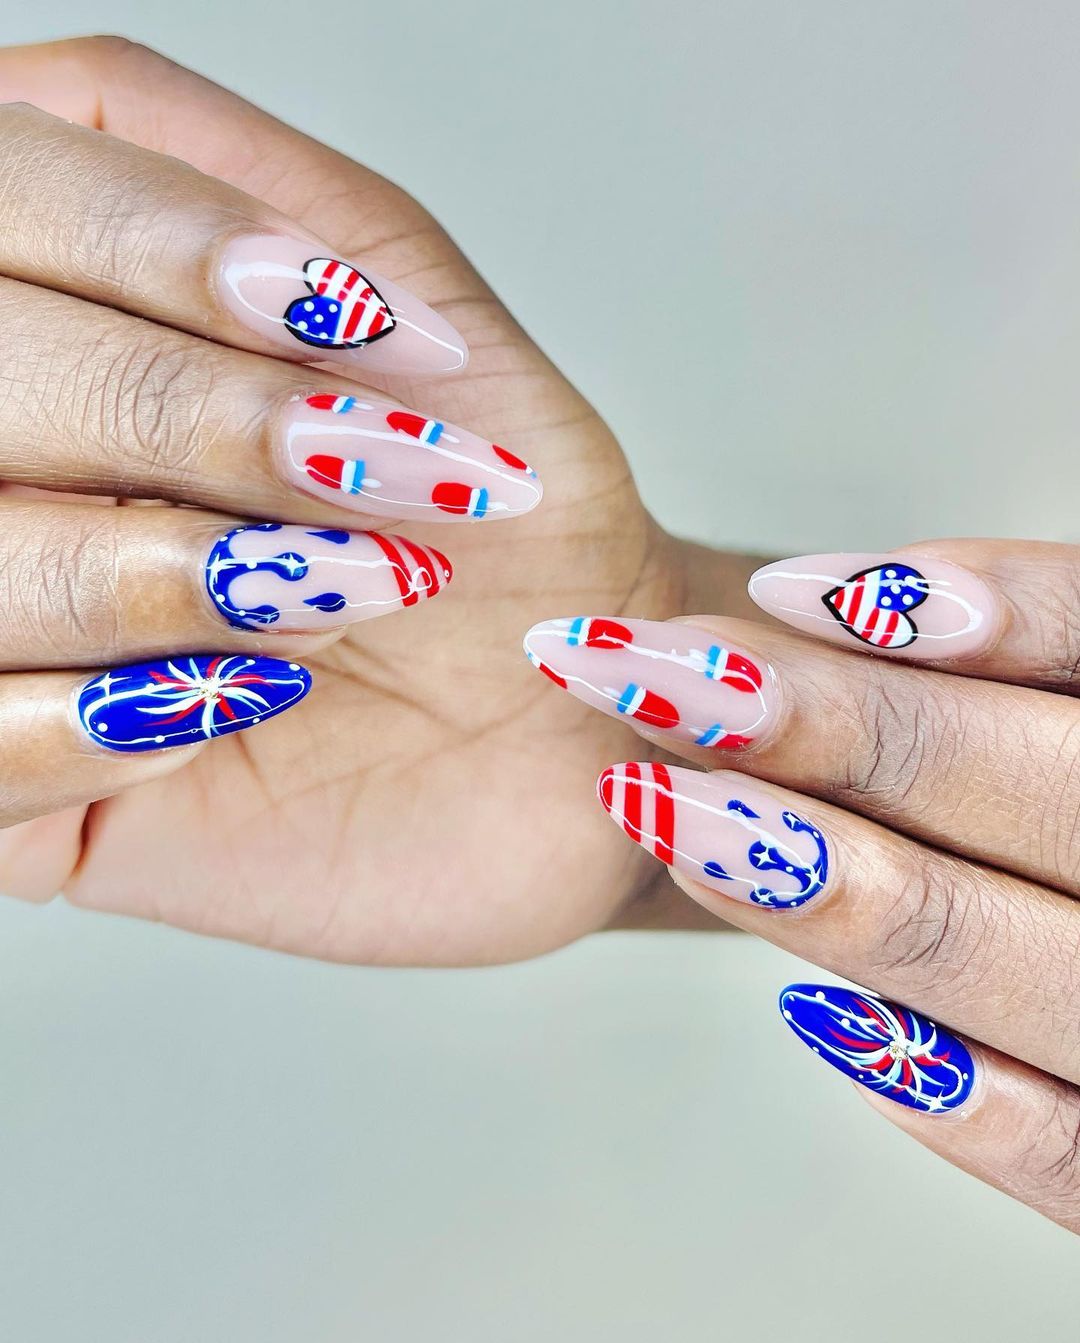
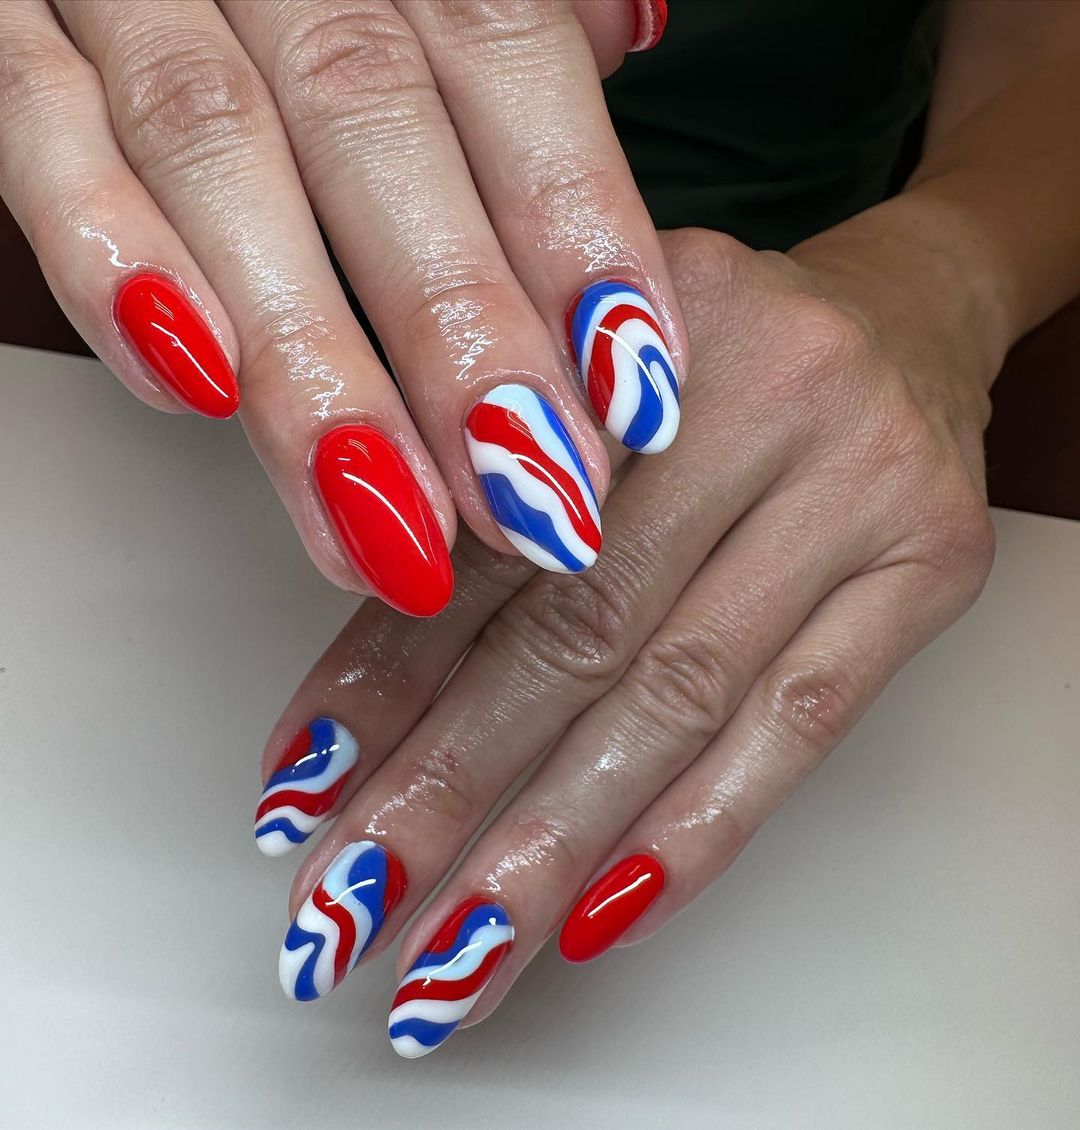
Patriotic Parade
Professional Opinion and Description: “Patriotic Parade” nails display an array of vibrant and playful designs that celebrate the american flag nails theme with a festive twist. Each nail offers a unique interpretation of the red, white, and blue motif, incorporating everything from stripes and stars to intricate swirls, making this set a perfect choice for showcasing national pride in style.
- Base Coat: ORLY Bonder Rubberized Basecoat
- Red Polish: Essie Really Red
- Blue Polish: OPI Eurso Euro
- White Polish: Sally Hansen White On
- Detailing Brushes
- Top Coat: Seche Vite Dry Fast Top Coat
DIY Instructions: Start with a base coat to protect your nails. For striped designs, use tape to create clean lines. Use detailing brushes to add stars and intricate patterns. Apply the different polishes according to the design on each nail, ensuring each layer is dry before adding the next. Finish with a top coat for a glossy and durable finish.
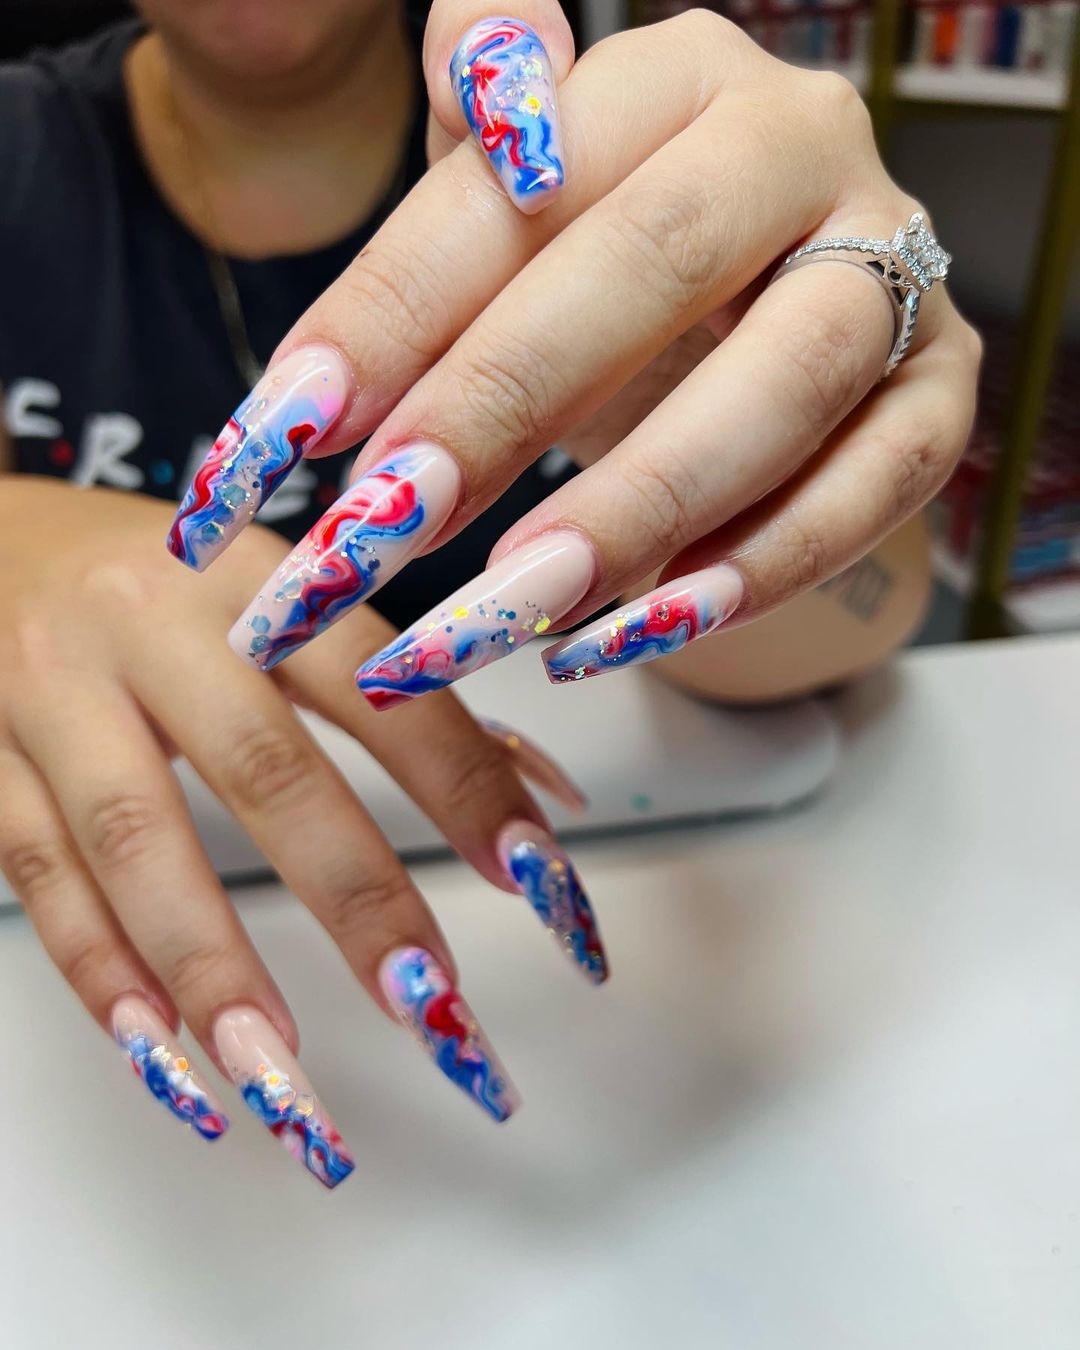
Fluid Art Magic
Professional Opinion and Description: “Fluid Art Magic” nails are a stunning showcase of fluid art techniques, blending Red, White, and Blue in a mesmerizing pattern that resembles marble or flowing water. This technique adds a modern and artistic touch to the traditional patriotic colors, ideal for those who enjoy standout nail art.
- Base Coat: Essie All in One Base
- Red Polish: China Glaze Red-Y To Rave
- Blue Polish: Essie Butler Please
- White Polish: Zoya Purity
- Detailing Brushes
- Top Coat: INM Out the Door
DIY Instructions: Apply a base coat for protection. Drip red, white, and blue polishes onto a non-absorbent surface and swirl gently with a toothpick or dotting tool. Dip your nails into the polish mixture to create the fluid art effect. Clean up the edges and apply a top coat for a smooth, glossy finish.
Star-Spangled Sculptures
Professional Opinion and Description: “Star-Spangled Sculptures” combines traditional patriotic symbols with a dramatic three-dimensional sculpting technique. The bold stripes and precise star placements create a visually stunning effect that embodies the spirit of Designs 4th of July in a bold and artistic manner.
- Base Coat: OPI Natural Nail Base Coat
- Red Acrylic Powder
- Blue Acrylic Powder
- White Acrylic Powder
- Acrylic Liquid
- Top Coat: Gelish Top It Off
DIY Instructions: Prepare the nails with a base coat. Use acrylic powders mixed with acrylic liquid to sculpt the stripes and stars directly on the nails. Carefully shape each element to achieve the desired three-dimensional effect. Cure under UV light if necessary and finish with a glossy top coat to enhance the design and ensure durability.
Wave of Freedom
Professional Opinion and Description: “Wave of Freedom” exhibits a dynamic play of colors with its fluid red and blue waves on a white background, offering a fresh twist on the traditional american flag nails. This artistic approach creates a sense of movement and freedom, ideal for celebrating patriotic holidays with style.
- Base Coat: Essie All in One Base
- Red Polish: China Glaze Red-Y To Rave
- Blue Polish: Essie Butler Please
- White Polish: OPI Alpine Snow
- Detailing Brushes
- Top Coat: INM Out the Door
DIY Instructions: Apply a base coat to protect your nails. Use white polish as the base. Once dry, take a detailing brush to create flowing red and blue waves. The key is to blend the colors slightly where they meet to enhance the wave effect. Finish with a clear top coat for lasting wear and gloss.
FAQ
Q: What is the best way to ensure my nail art lasts through the 4th of July festivities?
A: To ensure your nail art lasts, start with a good quality base coat to protect your nails and provide a good surface for the polish to adhere to. After applying your designs, finish with a high-quality top coat to seal in the art. For added durability, reapply the top coat every couple of days.
Q: Can I use regular polish for designs that suggest gel?
A: Yes, you can use regular polish for designs that suggest gel, but keep in mind that the finish and durability might differ. Gel polish tends to last longer and resist chipping better than regular polish. If you choose regular polish, ensure it’s high quality for the best results.
Q: How can I prevent my nail polish from chipping?
A: To prevent your nail polish from chipping, avoid using your nails as tools to pry things open, wear gloves while doing chores that involve water or harsh chemicals, and apply a top coat every two to three days to maintain the seal and gloss.
Q: What are some quick fixes for a nail design mistake?
A: For quick fixes to nail design mistakes, you can use a small brush dipped in nail polish remover to tidy up any errors. Alternatively, you can adjust the design to incorporate the mistake into a new pattern or cover it with a decorative element like a rhinestone or sticker.
Q: How do I remove gel nail polish at home?
A: To remove gel nail polish at home, begin by buffing the top coat to break the seal. Then soak cotton balls in acetone, place them on your nails, and wrap each fingertip with aluminum foil. Leave it on for about 15-20 minutes. The gel polish should then slide off easily. If some residue remains, gently scrape it off with a wooden stick.
Q: Are there any alternatives to using UV lamps for curing gel polish?
A: While UV or LED lamps are standard for curing gel polish, if you prefer not to use them, look for no-light gel polishes that cure without a lamp. However, these may not offer the same durability or finish as traditional gel polishes.
Save Pin
