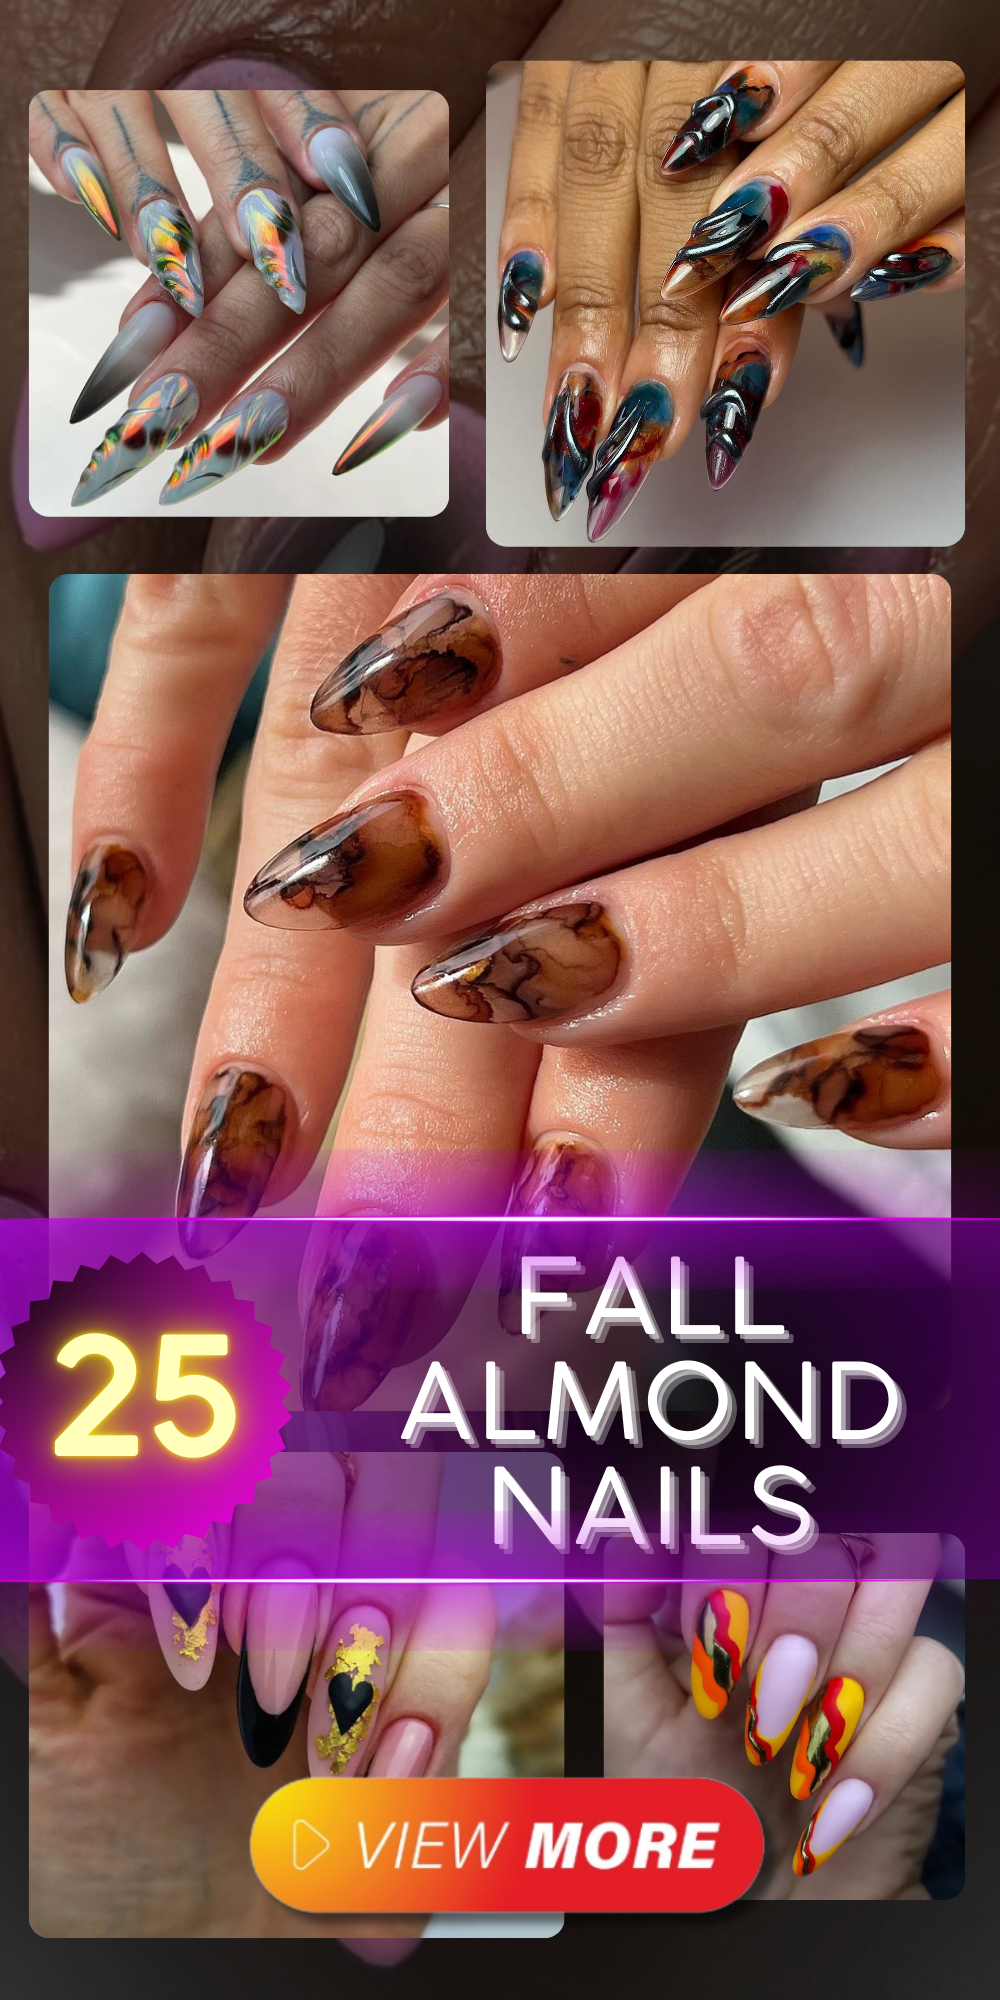
When it comes to fall almond nails, the options are as varied as the autumn leaves. Are you looking for trendy designs that bring the essence of the season to your fingertips? Whether you prefer bold colors, intricate art, or simple elegance, this guide has something for everyone. Let’s dive into some inspiring ideas and practical tips to achieve these stunning looks.
Abstract Autumn Swirl
This design is a mesmerizing mix of dark, vibrant colors swirled together, creating a rich, artistic look perfect for the fall. The fall almond nails are elongated and come to a sharp point, emphasizing the dramatic, almost gothic style. The use of deep blues, reds, and blacks intermingled with hints of orange and green creates a visual masterpiece that captures the essence of autumn. The glossy finish adds a sleek touch, making these nails not only stylish but also sophisticated.
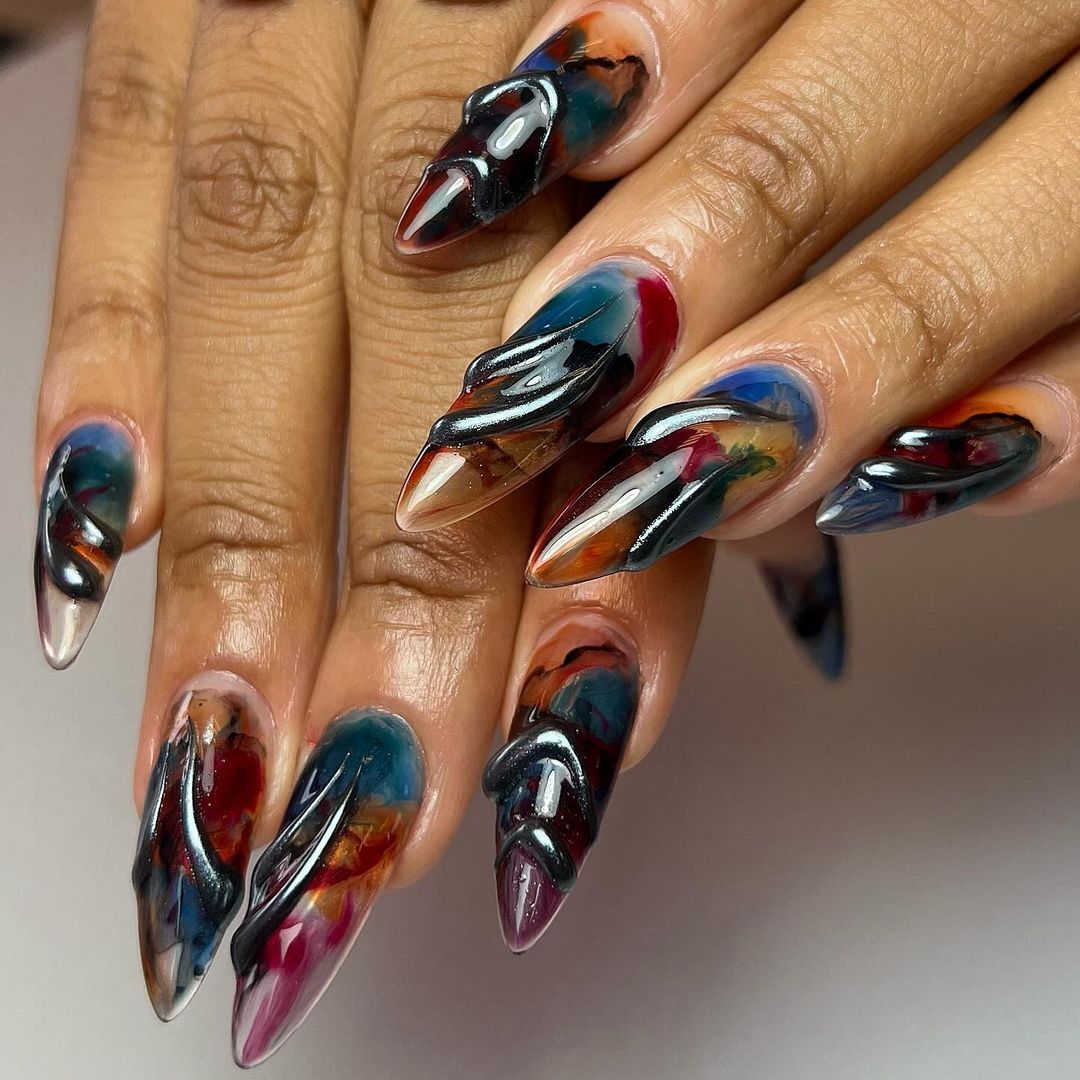
- Dark blue polish (e.g., Essie “Aruba Blue”)
- Deep red polish (e.g., OPI “Got the Blues for Red”)
- Black polish (e.g., Sally Hansen “Black Out”)
- Orange polish (e.g., Zoya “Autumn”)
- Green polish (e.g., China Glaze “Four Leaf Clover”)
- High gloss top coat (e.g., Seche Vite)
Practical Advice
- Prep your nails: Clean, trim, and file your nails into an almond shape.
- Base coat: Apply a clear base coat to protect your nails.
- Apply colors: Using a small detail brush, apply the dark blue, red, black, orange, and green polishes in a swirling pattern. Blend them together for a marbled effect.
- Top coat: Finish with a high gloss top coat to seal in the design and add shine.
Holographic Ombré Elegance
These fall almond nails feature a sleek ombré effect transitioning from a matte gray to a reflective, holographic finish. The interplay of matte and glossy textures makes this design stand out, giving it a modern yet ethereal feel. The gray base provides a neutral canvas that is elevated by the iridescent accents, making it perfect for both everyday wear and special occasions.
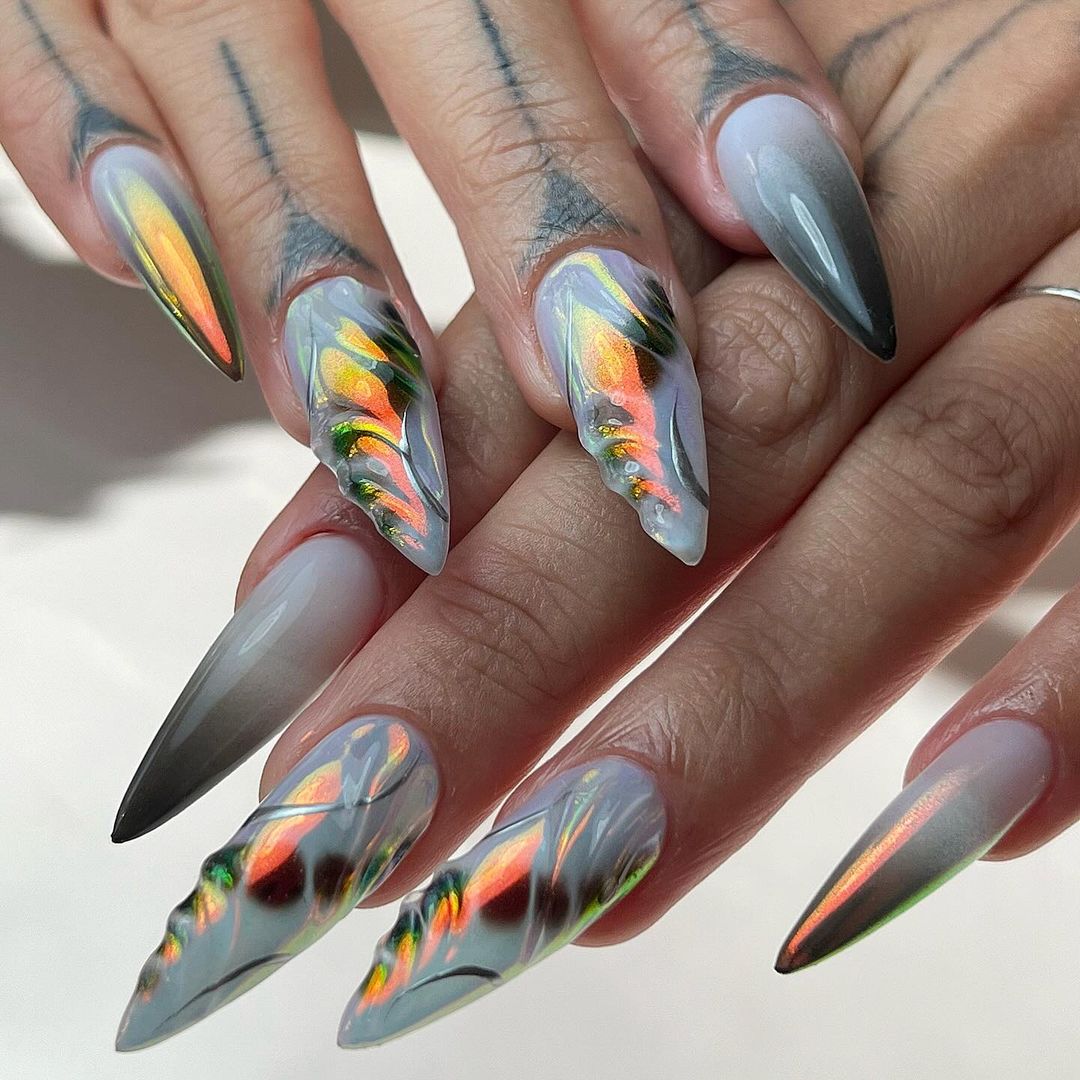
- Matte gray polish (e.g., Butter London “Shadowy Lady”)
- Holographic top coat (e.g., ILNP “Mega”)
- Fine detail brush for blending
- Nail prep kit (buffer, file, cuticle pusher)
Practical Advice
- Prep your nails: Buff, file, and shape your nails into an almond form.
- Base coat: Start with a clear base coat to ensure longevity.
- Apply matte gray: Paint your nails with the matte gray polish, allowing each layer to dry before applying the next.
- Holographic accents: Using a fine detail brush, add the holographic polish at the tips and blend it downward for an ombré effect.
- Top coat: Seal with a matte top coat to maintain the matte finish, avoiding the holographic parts.
Subtle Gradient Glamour
This nail design is all about the subtlety and elegance of milky pink blended with soft black, creating a chic, minimalist look. The fall almond nails here are a shorter length, making them practical yet stylish. The gradient from pink to black adds depth and sophistication, perfect for a classy autumn appearance. The glossy finish ensures that the nails look polished and well-maintained.
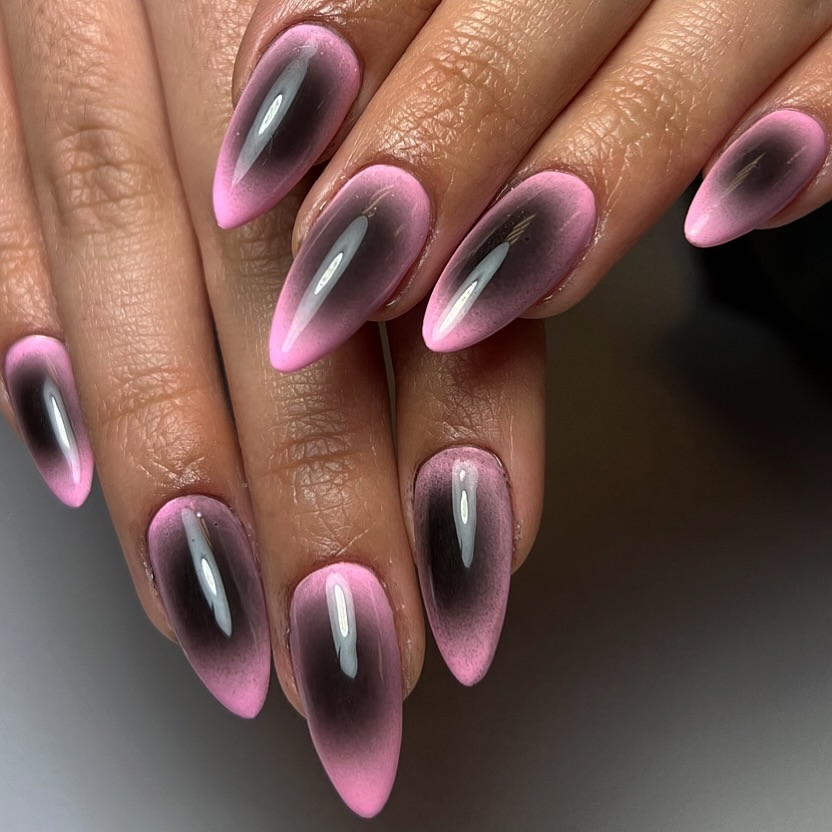
- Milky pink polish (e.g., OPI “Bubble Bath”)
- Soft black polish (e.g., Essie “Licorice”)
- Gradient sponge
- Clear glossy top coat
Practical Advice
- Prep your nails: Clean, trim, and shape your nails into an almond style.
- Base coat: Apply a clear base coat to start.
- Milky pink base: Paint your nails with the milky pink polish and let them dry completely.
- Create gradient: Using a sponge, dab the black polish at the tips and blend upwards towards the pink.
- Top coat: Apply a glossy top coat to finish off the look and protect the design.
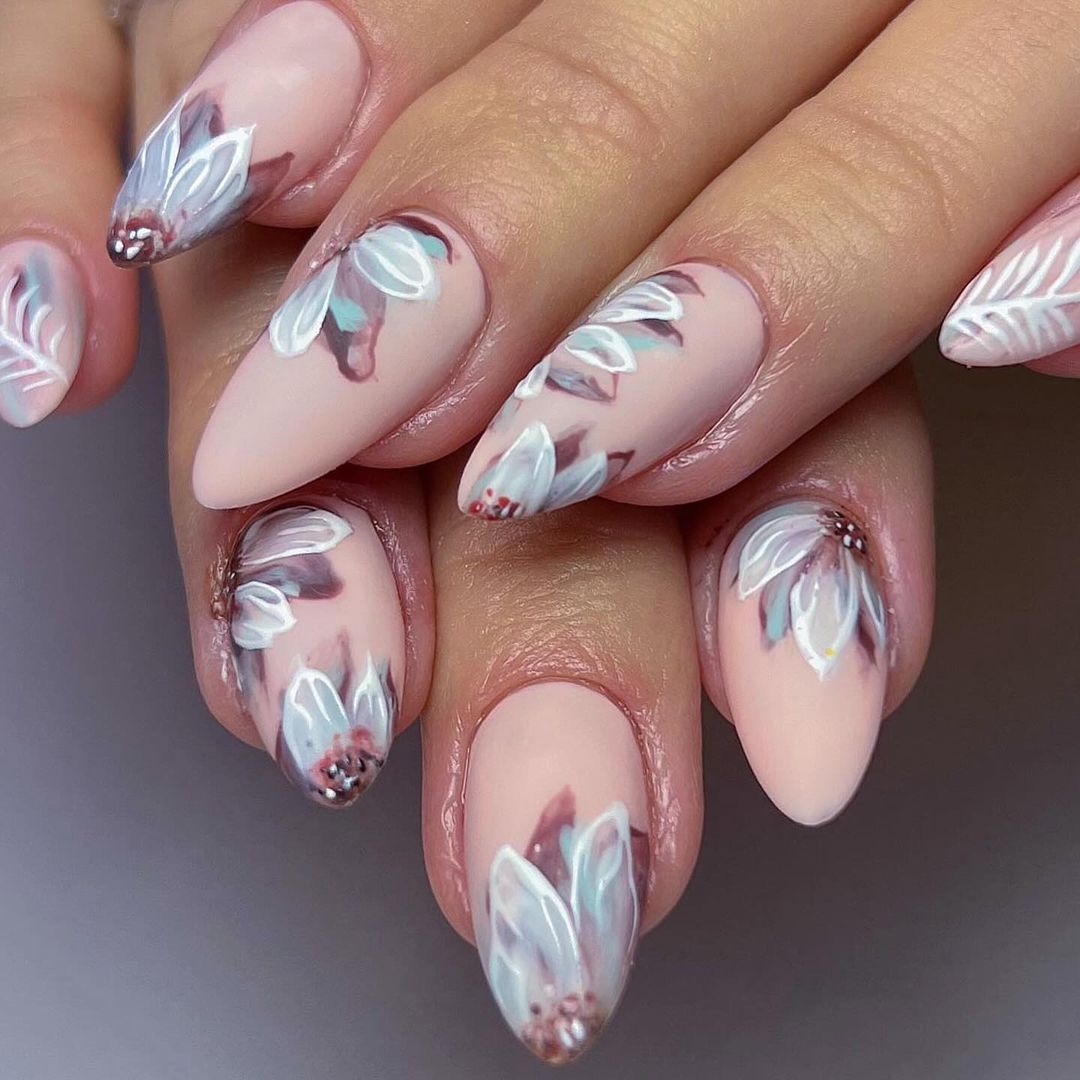
Delicate Floral Dream
These almond nails feature a soft, delicate design with a milky pink base adorned with intricate white and light brown floral accents. The floral patterns add a touch of elegance and sophistication, making this design perfect for those who prefer a more subtle yet classy look for their fall almond nails. The flowers are meticulously painted, giving a hand-painted appearance that adds to the charm of this manicure.
- Milky pink polish (e.g., OPI “Bubble Bath”)
- White nail art paint (e.g., Art Club Nail Art Lacquer)
- Light brown polish (e.g., Essie “Clothing Optional”)
- Fine detail brush for floral patterns
- Clear glossy top coat (e.g., Seche Vite)
Practical Advice
- Prep your nails: Clean, trim, and shape your nails into an almond form.
- Base coat: Apply a clear base coat to protect your nails.
- Milky pink base: Paint your nails with the milky pink polish and allow it to dry completely.
- Floral design: Using the fine detail brush, paint the floral patterns with the white and light brown polishes. Take your time to create detailed petals and leaves.
- Top coat: Apply a clear glossy top coat to seal the design and add a beautiful shine.
Save Pin
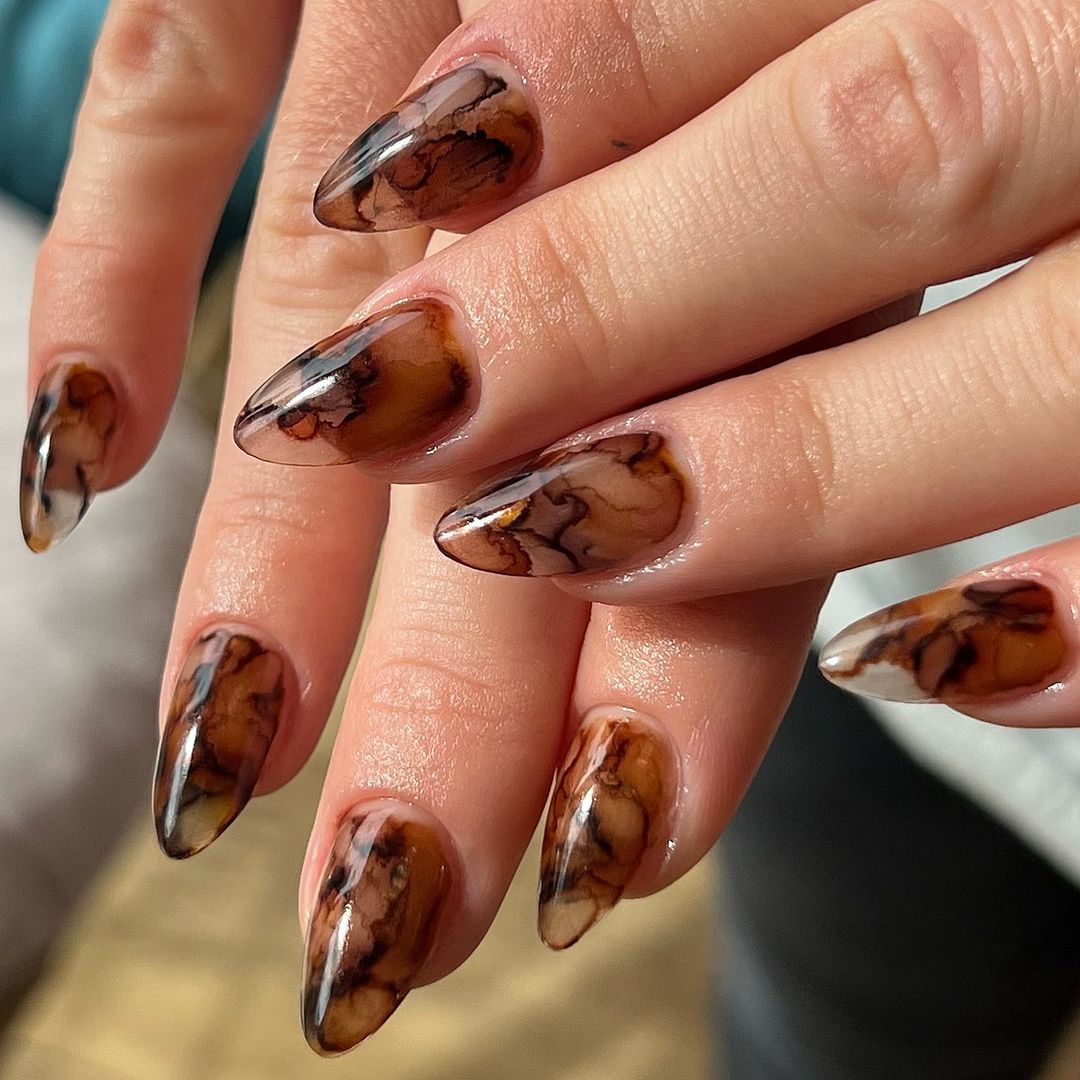
Rich Coffee Marble
This nail design showcases a rich, coffee-colored marble effect that is both luxurious and sophisticated. The deep brown and black swirls mimic the look of polished stone, creating a unique and elegant appearance for your fall almond nails. This design is perfect for those who want a classy yet trendy look that stands out.
- Deep brown polish (e.g., OPI “Espresso Your Inner Self”)
- Black polish (e.g., Essie “Licorice”)
- Clear polish for blending (e.g., Sally Hansen “Insta-Dri”)
- Nail art brush for marbling
- Clear glossy top coat
Practical Advice
- Prep your nails: Clean, trim, and shape your nails into an almond style.
- Base coat: Apply a clear base coat to protect your nails.
- Marble effect: Apply the deep brown polish as the base. While it’s still wet, add drops of black polish and use a nail art brush to create the marbled effect. Blend the colors gently to achieve the desired look.
- Top coat: Finish with a clear glossy top coat to enhance the marble effect and protect your design.
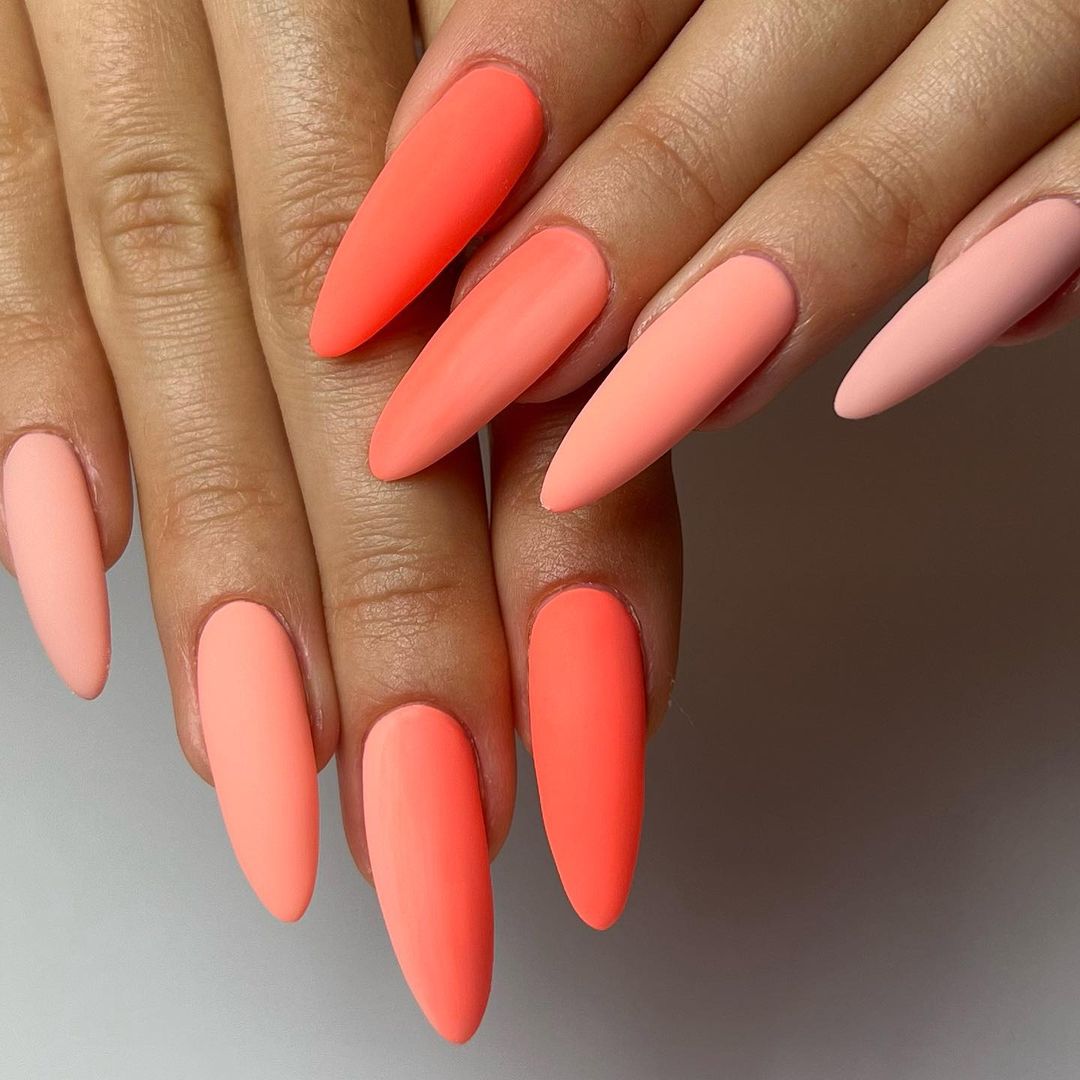
Vibrant Coral Matte
This design features vibrant coral shades in a matte finish, creating a bold and eye-catching look for your fall almond nails. The varying shades of coral add depth and interest, while the matte finish gives it a modern and trendy appearance. This design is perfect for those who want to make a statement with their manicure.
- Various shades of coral polish (e.g., OPI “Coral-ing Your Spirit Animal” and “Living on the Coral Edge”)
- Matte top coat (e.g., Essie “Matte About You”)
- Nail prep kit (buffer, file, cuticle pusher)
Practical Advice
- Prep your nails: Clean, trim, and shape your nails into an almond form.
- Base coat: Apply a clear base coat to ensure longevity.
- Coral shades: Paint your nails with the various shades of coral, alternating colors for a gradient effect.
- Matte finish: Once the polish is dry, apply a matte top coat to give the nails a trendy, non-glossy finish.
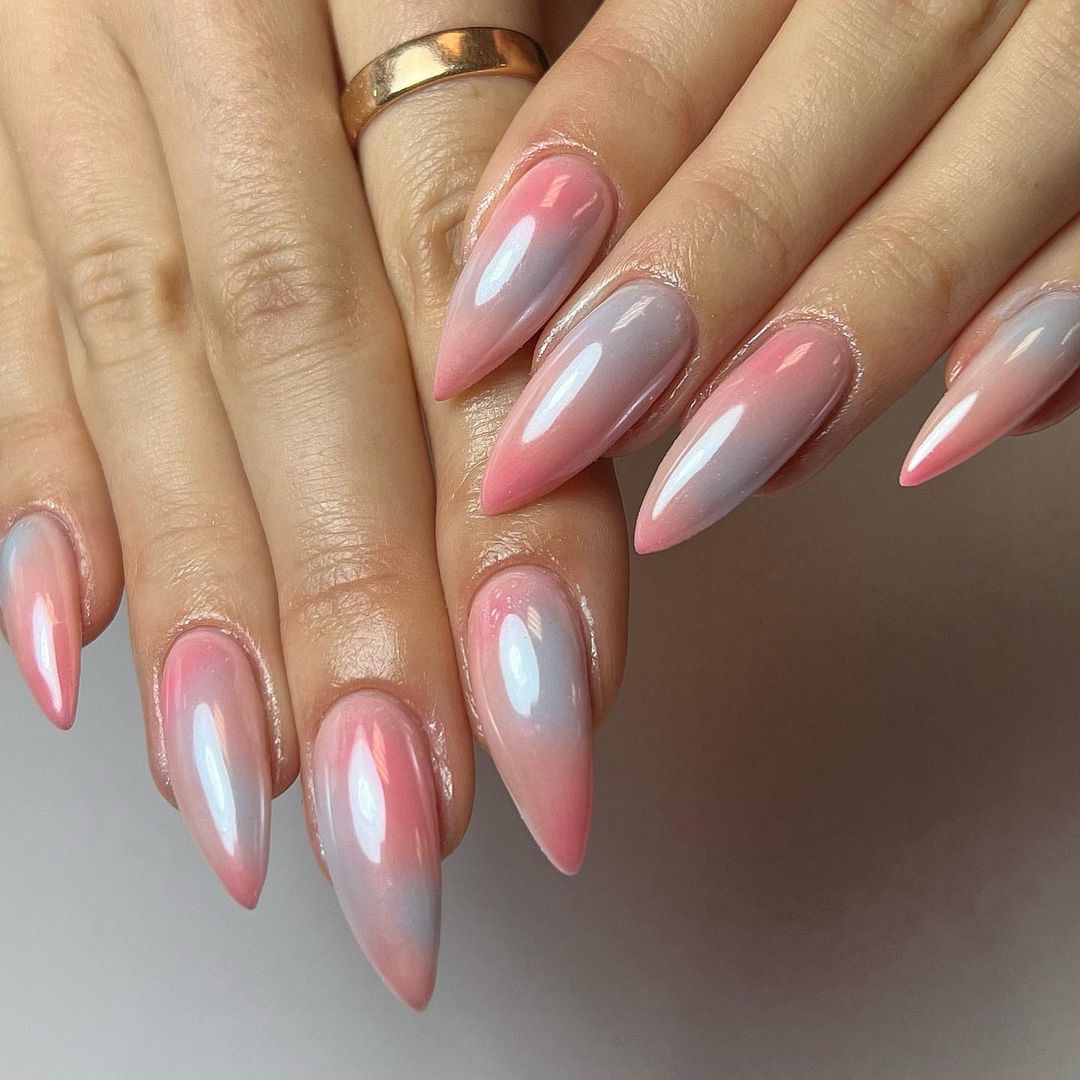
Blush Ombré Perfection
These nails feature a beautiful blend of milky pink and pearl white in an ombré effect, creating a soft and dreamy look. The glossy finish enhances the delicate gradient, making it perfect for those who want a subtle yet elegant style. The fall almond nails design here is ideal for any occasion, adding a touch of sophistication to your overall look.
- Milky pink polish (e.g., OPI “Bubble Bath”)
- Pearl white polish (e.g., Essie “Pearl Perfection”)
- Gradient sponge
- Clear glossy top coat
Practical Advice
- Prep your nails: Clean, trim, and shape your nails into an almond form.
- Base coat: Apply a clear base coat to ensure a smooth application.
- Ombré effect: Use a sponge to dab the milky pink and pearl white polishes onto your nails, blending them together to create the gradient effect.
- Top coat: Seal the design with a clear glossy top coat to enhance the shine and protect the gradient.
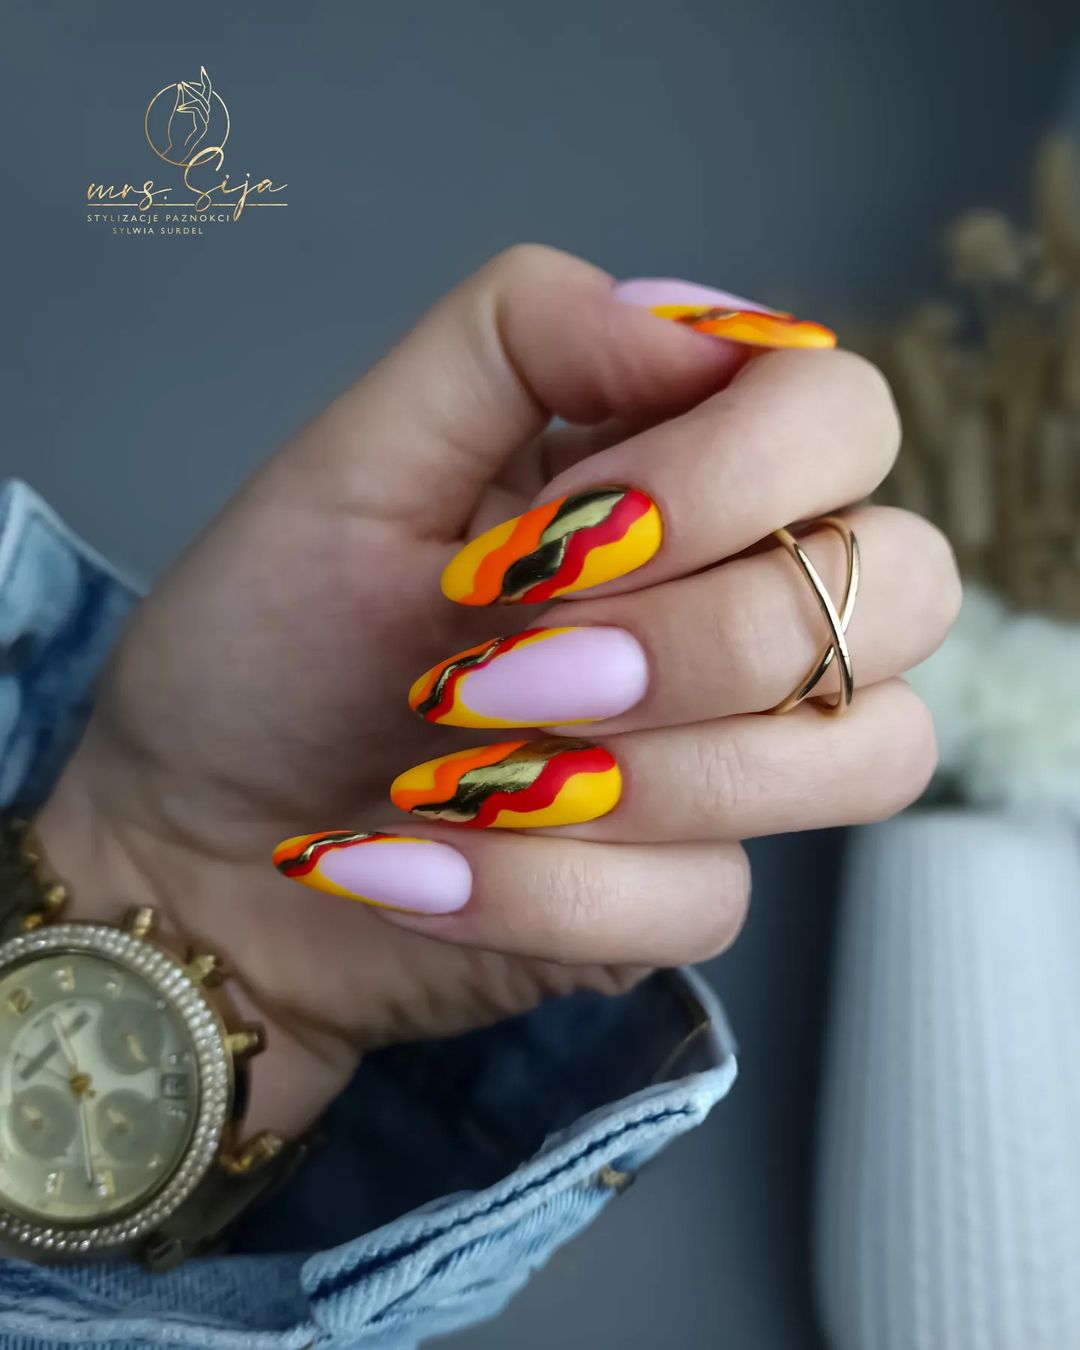
Fiery Autumn Waves
This vibrant design features bold waves of yellow, red, and orange, creating a fiery autumn-inspired look. The addition of metallic gold accents adds a touch of luxury, making these fall almond nails stand out. The combination of warm colors is perfect for capturing the essence of fall, bringing a burst of energy to your manicure.
- Yellow polish (e.g., Zoya “Bee”)
- Red polish (e.g., OPI “Big Apple Red”)
- Orange polish (e.g., Essie “Clambake”)
- Metallic gold polish (e.g., Sally Hansen “Golden-I”)
- Fine detail brush for wave patterns
- Matte top coat (optional for a different finish)
Practical Advice
- Prep your nails: Clean, trim, and shape your nails into an almond form.
- Base coat: Apply a clear base coat to protect your nails.
- Wave design: Using the fine detail brush, paint waves of yellow, red, and orange on each nail. Add metallic gold accents to enhance the design.
- Top coat: Apply a clear glossy or matte top coat to finish the look and protect your design.
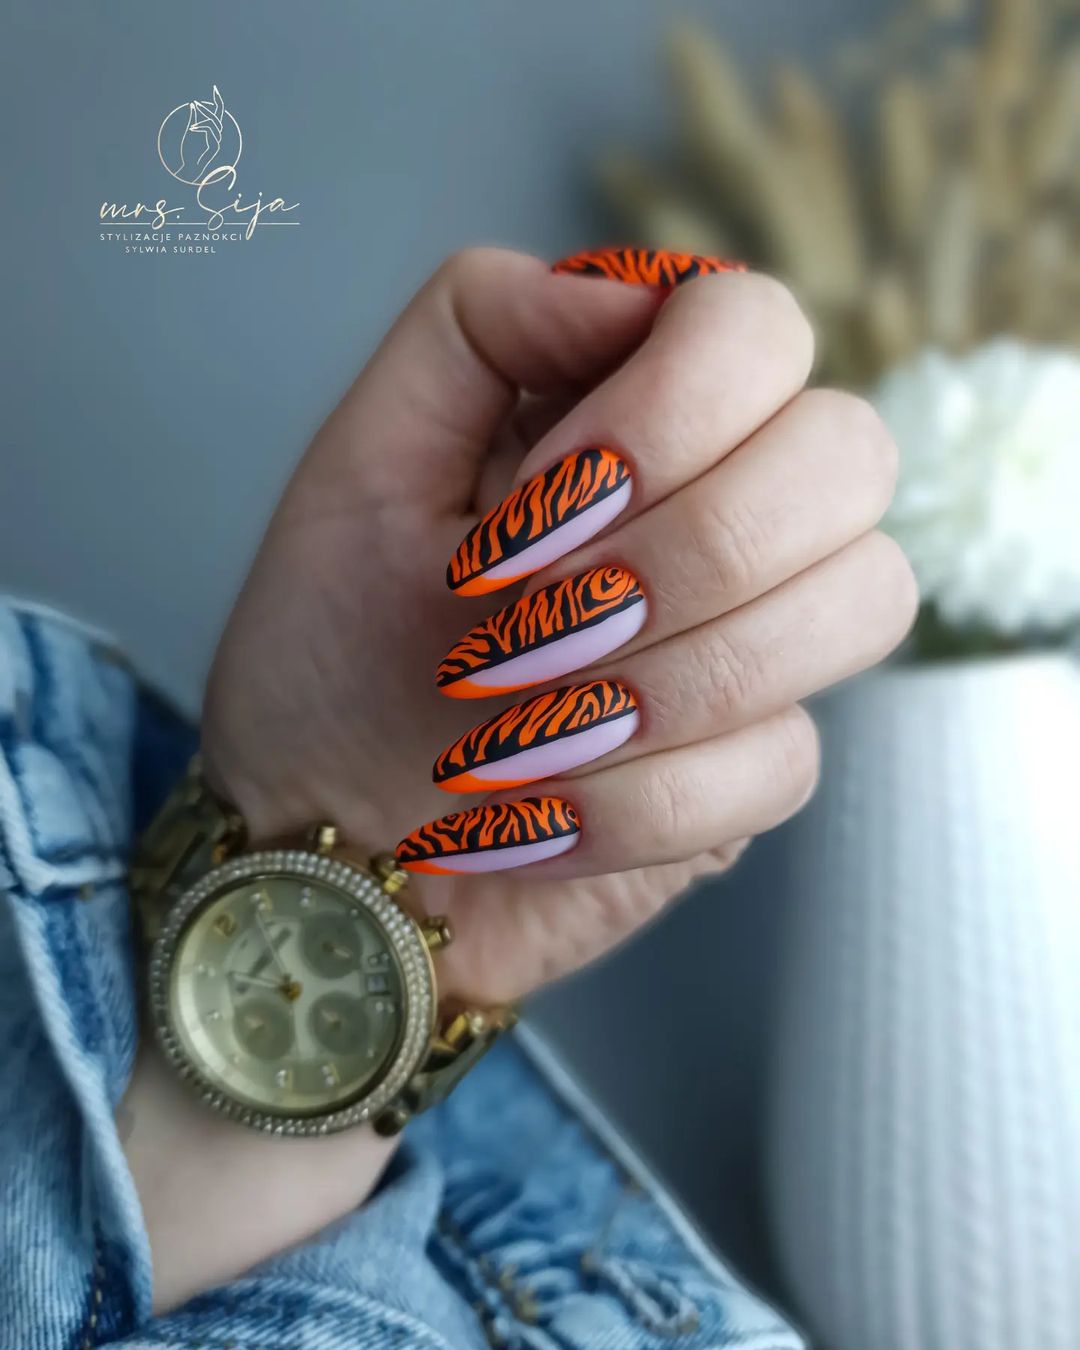
Tiger Stripes Chic
Embrace your wild side with this striking tiger stripe design. The combination of orange and black stripes over a neutral base creates a bold and fashionable look for your fall almond nails. This design is perfect for those who want to make a statement and add a touch of the exotic to their manicure.
- Neutral base polish (e.g., Essie “Topless & Barefoot”)
- Orange polish (e.g., China Glaze “Orange Knockout”)
- Black nail art paint (e.g., Art Club Nail Art Lacquer)
- Fine detail brush for stripe patterns
- Matte top coat
Practical Advice
- Prep your nails: Clean, trim, and shape your nails into an almond form.
- Base coat: Apply a clear base coat to ensure longevity.
- Stripe design: Paint your nails with the neutral base polish. Once dry, use the fine detail brush to paint orange and black tiger stripes.
- Top coat: Seal the design with a matte top coat to maintain the chic, non-glossy finish.
Save Pin
Neon Geometric Pop
This fun and playful design features neon yellow and pink with black geometric accents. The contrast of bright colors and bold patterns creates a modern and trendy look for your fall almond nails. This design is perfect for those who love to experiment with vibrant colors and unique styles.
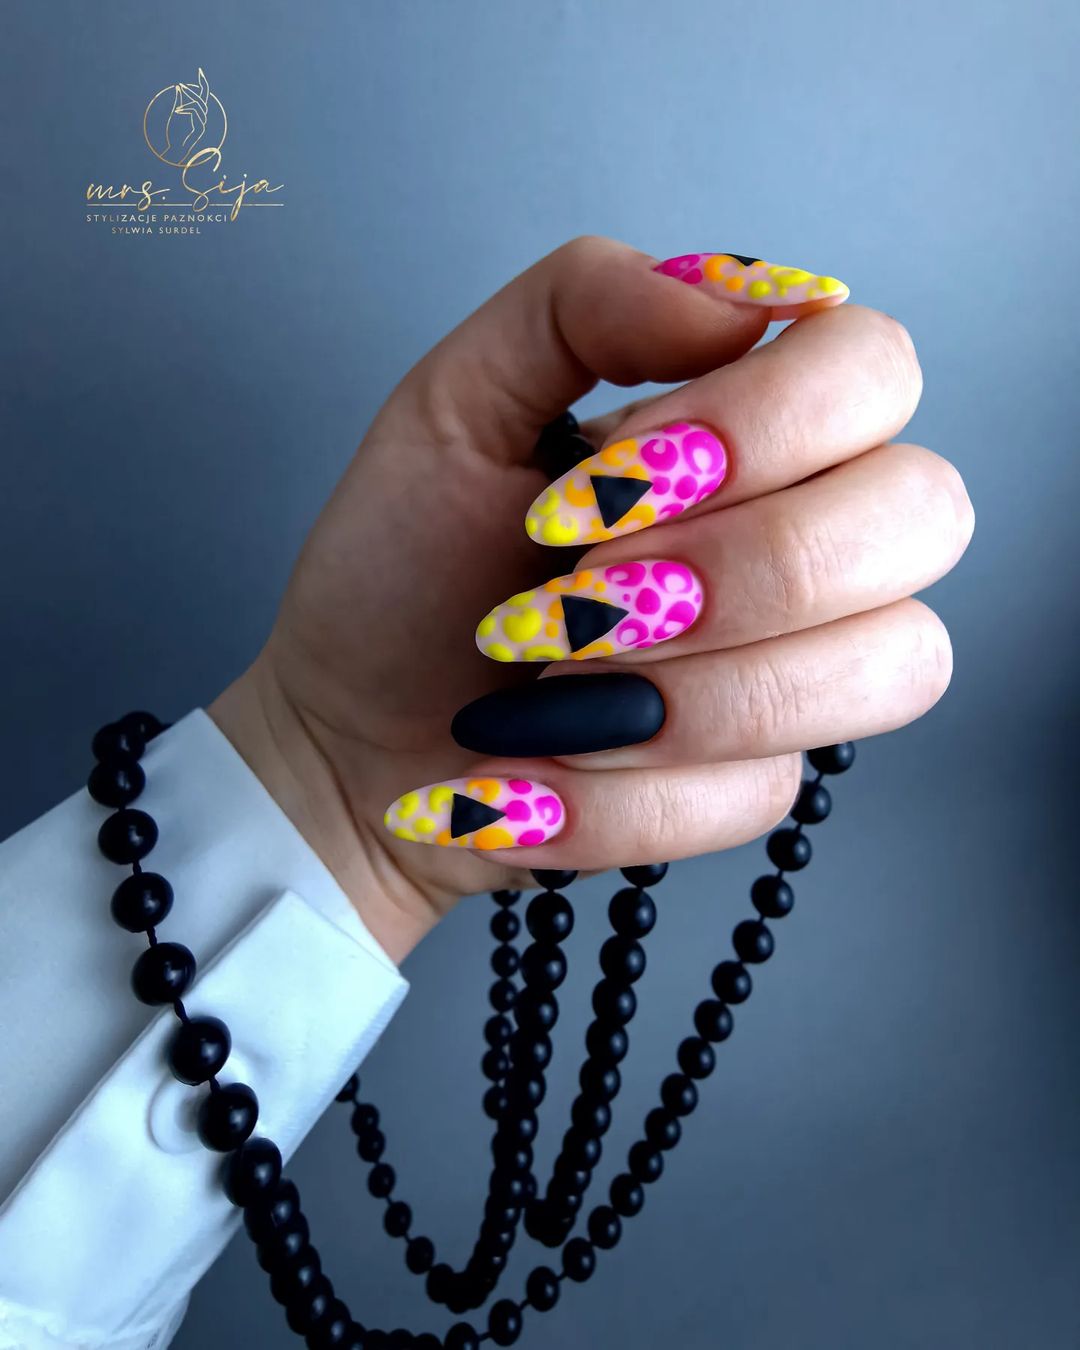
- Neon yellow polish (e.g., China Glaze “Celtic Sun”)
- Neon pink polish (e.g., Orly “Beach Cruiser”)
- Black polish (e.g., Sally Hansen “Black Out”)
- Fine detail brush for geometric patterns
- Matte top coat
Practical Advice
- Prep your nails: Clean, trim, and shape your nails into an almond form.
- Base coat: Apply a clear base coat to ensure a smooth application.
- Geometric design: Paint your nails with the neon yellow and pink polishes. Use the fine detail brush to add black geometric patterns.
- Top coat: Finish with a matte top coat to enhance the neon colors and protect the design.
Burgundy Love Script
This romantic design features deep burgundy nails with elegant white script and heart accents. The combination of rich color and delicate details makes these fall almond nails perfect for expressing love and passion. The glossy finish adds a touch of sophistication, making this design ideal for special occasions.
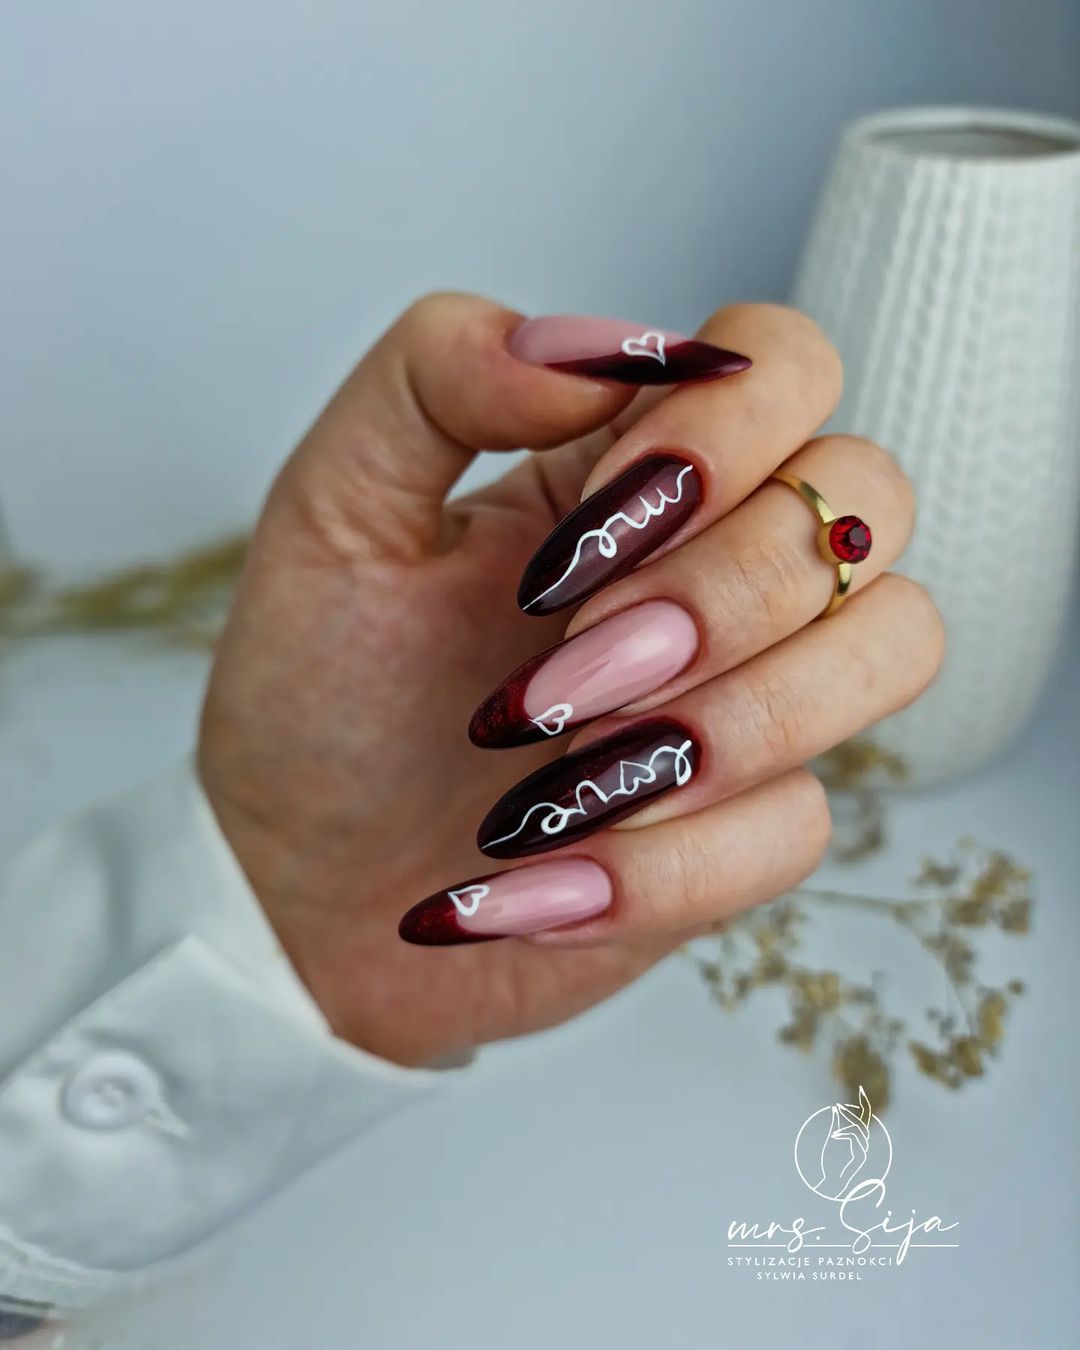
- Burgundy polish (e.g., OPI “Malaga Wine”)
- White nail art paint (e.g., Art Club Nail Art Lacquer)
- Fine detail brush for script and heart patterns
- Clear glossy top coat
Practical Advice
- Prep your nails: Clean, trim, and shape your nails into an almond form.
- Base coat: Apply a clear base coat to protect your nails.
- Script and heart design: Paint your nails with the burgundy polish. Use the fine detail brush to add white script and heart accents.
- Top coat: Seal the design with a clear glossy top coat to add shine and protect the artwork.
Gold Leaf Elegance
This luxurious design features black and nude nails adorned with gold leaf accents. The combination of soft nude, bold black, and shimmering gold creates an elegant and sophisticated look for your fall almond nails. This design is perfect for those who want a touch of glamour and opulence in their manicure.
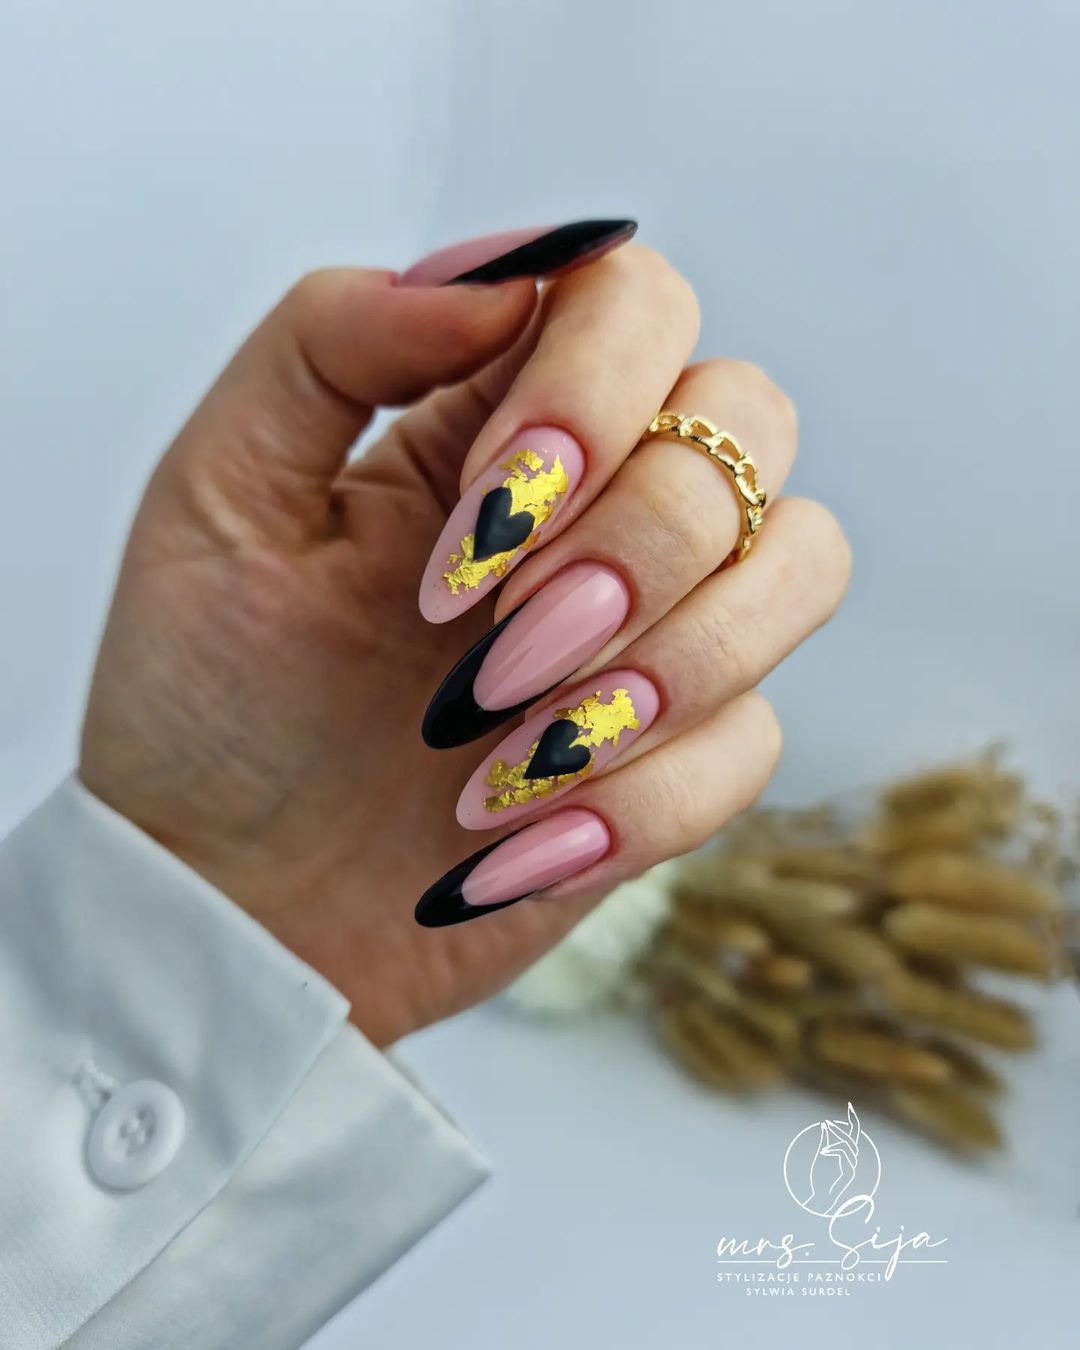
- Nude polish (e.g., Essie “Ballet Slippers”)
- Black polish (e.g., Sally Hansen “Black Out”)
- Gold leaf flakes (e.g., Born Pretty Gold Foil Flakes)
- Clear adhesive for gold leaf
- Clear glossy top coat
Practical Advice
- Prep your nails: Clean, trim, and shape your nails into an almond form.
- Base coat: Apply a clear base coat to protect your nails.
- Gold leaf design: Paint your nails with the nude and black polishes. Apply clear adhesive where you want the gold leaf, then carefully place the gold flakes.
- Top coat: Seal the design with a clear glossy top coat to secure the gold leaf and add a beautiful shine.
Glittery French Hearts
These nails feature a romantic and elegant twist on the classic French manicure with a glittery finish and delicate heart accents. The combination of milky pink and glittery white tips creates a soft and enchanting look, perfect for any romantic occasion. The tiny heart details add a charming and whimsical touch, making these fall almond nails truly special.
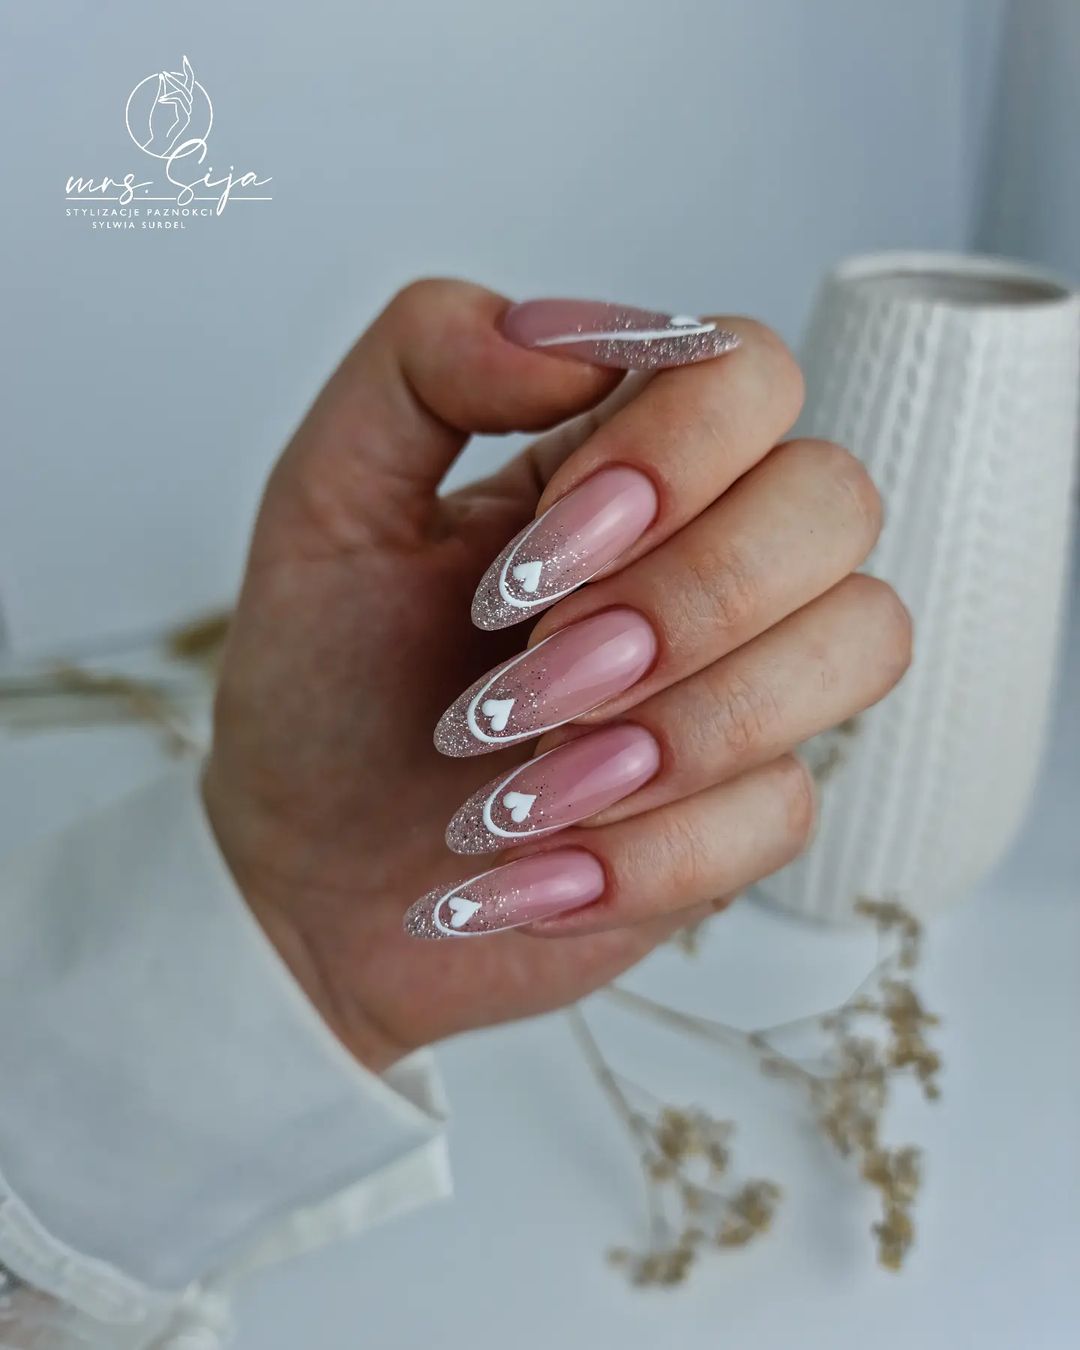
- Milky pink polish (e.g., Essie “Ballet Slippers”)
- White glitter polish (e.g., China Glaze “Fairy Dust”)
- White nail art paint for hearts (e.g., Art Club Nail Art Lacquer)
- Fine detail brush
- Clear glossy top coat
Practical Advice
- Prep your nails: Clean, trim, and shape your nails into an almond form.
- Base coat: Apply a clear base coat to protect your nails.
- French tips: Use the white glitter polish to create French tips. Once dry, add the heart accents with the fine detail brush.
- Top coat: Finish with a clear glossy top coat to seal the design and add shine.
Bold Orange Abstract
This design features bold, orange nails with striking abstract patterns in white and black. The vibrant orange base is complemented by the intricate black swirls and white accents, creating a dynamic and eye-catching look. These fall almond nails are perfect for those who love to experiment with bold colors and unique designs.

- Orange polish (e.g., OPI “A Good Man-darin is Hard to Find”)
- White nail art paint (e.g., Art Club Nail Art Lacquer)
- Black nail art paint (e.g., Art Club Nail Art Lacquer)
- Fine detail brush for patterns
- Clear glossy top coat
Practical Advice
- Prep your nails: Clean, trim, and shape your nails into an almond form.
- Base coat: Apply a clear base coat to protect your nails.
- Abstract design: Paint your nails with the orange polish. Once dry, use the fine detail brush to add black swirls and white accents.
- Top coat: Seal the design with a clear glossy top coat to protect the artwork.
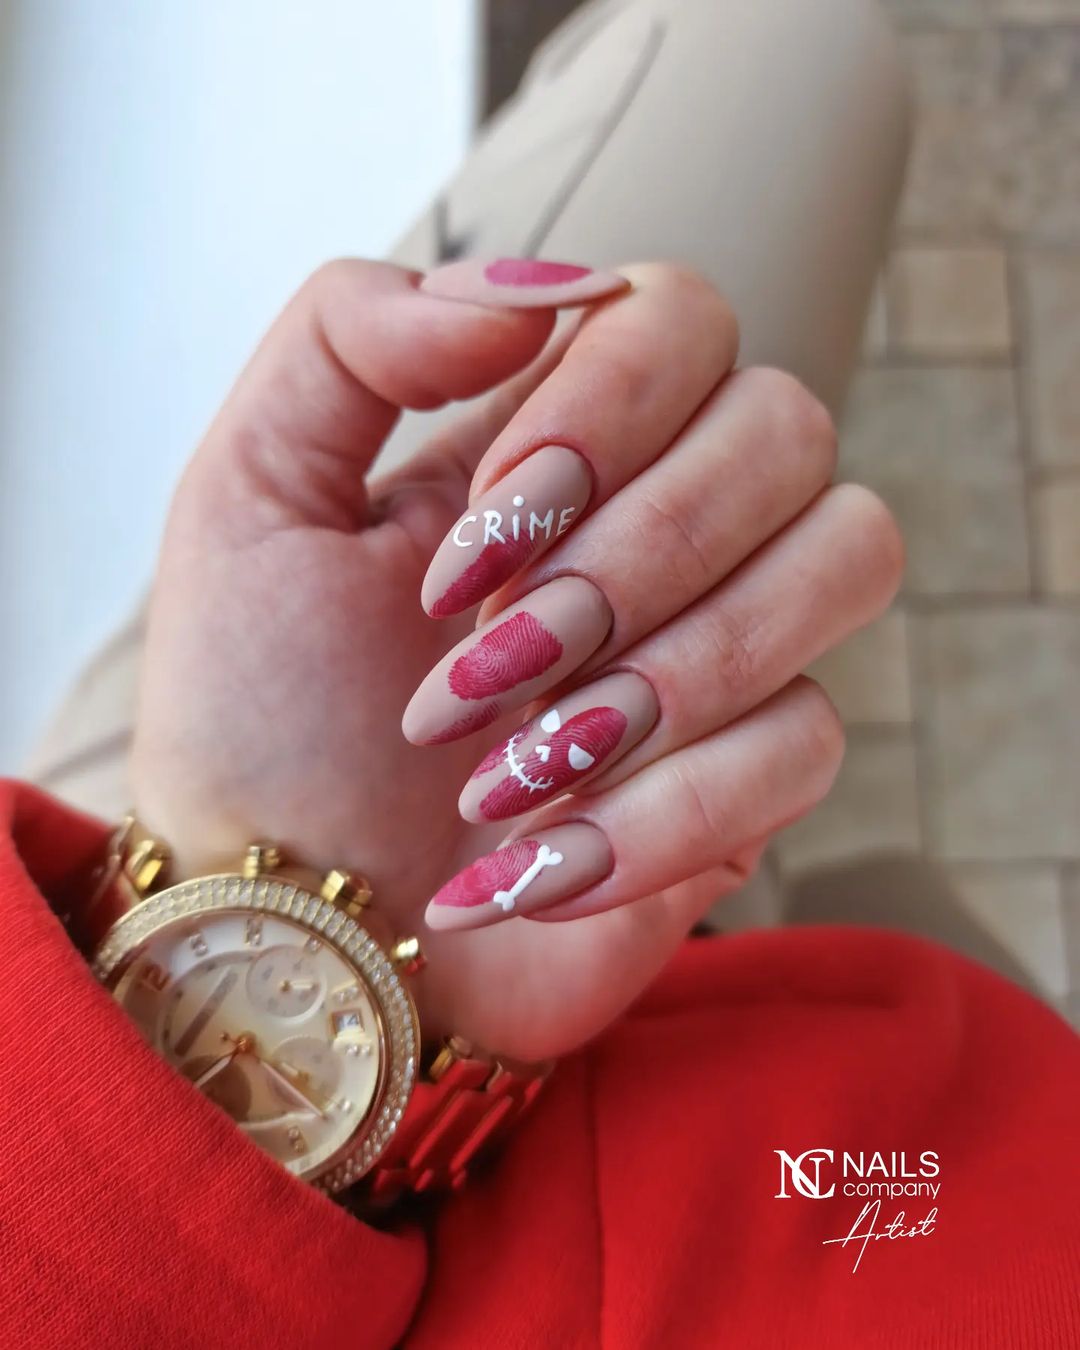
Crime Scene Chic
This unique design features a playful take on a crime scene theme with burgundy fingerprints and white crime scene tape accents on a nude base. The contrast of the deep red and the nude background creates a striking and edgy look. These fall almond nails are perfect for those who enjoy quirky and fun designs.
- Nude polish (e.g., Essie “Topless & Barefoot”)
- Burgundy polish (e.g., OPI “Malaga Wine”)
- White nail art paint (e.g., Art Club Nail Art Lacquer)
- Fine detail brush for patterns
- Clear matte top coat
Practical Advice
- Prep your nails: Clean, trim, and shape your nails into an almond form.
- Base coat: Apply a clear base coat to ensure longevity.
- Crime scene design: Paint your nails with the nude polish. Once dry, use the fine detail brush to add burgundy fingerprints and white crime scene tape accents.
- Top coat: Finish with a clear matte top coat to maintain the edgy look.
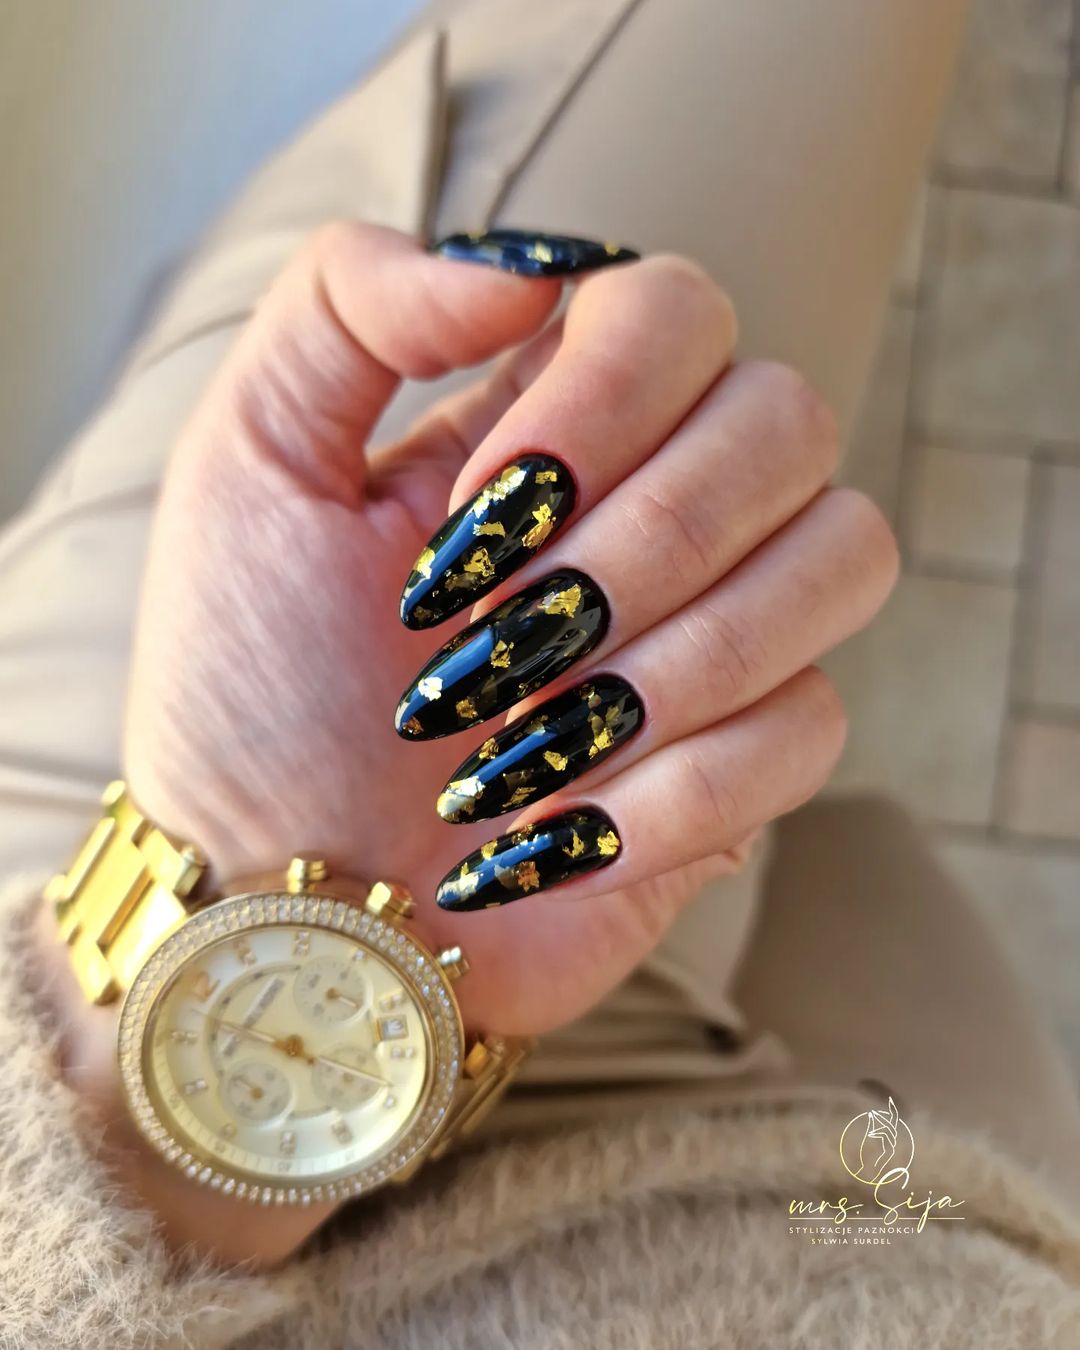
Black and Gold Luxe
This luxurious design features a sleek black base adorned with shimmering gold flakes. The combination of black and gold creates a glamorous and sophisticated look, perfect for any special occasion. These fall almond nails exude elegance and style, making them a must-try for those who love a touch of luxury.
- Black polish (e.g., Sally Hansen “Black Out”)
- Gold leaf flakes (e.g., Born Pretty Gold Foil Flakes)
- Clear adhesive for gold leaf
- Clear glossy top coat
Practical Advice
- Prep your nails: Clean, trim, and shape your nails into an almond form.
- Base coat: Apply a clear base coat to protect your nails.
- Gold leaf design: Paint your nails with the black polish. Apply clear adhesive where you want the gold leaf, then carefully place the gold flakes.
- Top coat: Seal the design with a clear glossy top coat to secure the gold leaf and add a beautiful shine.
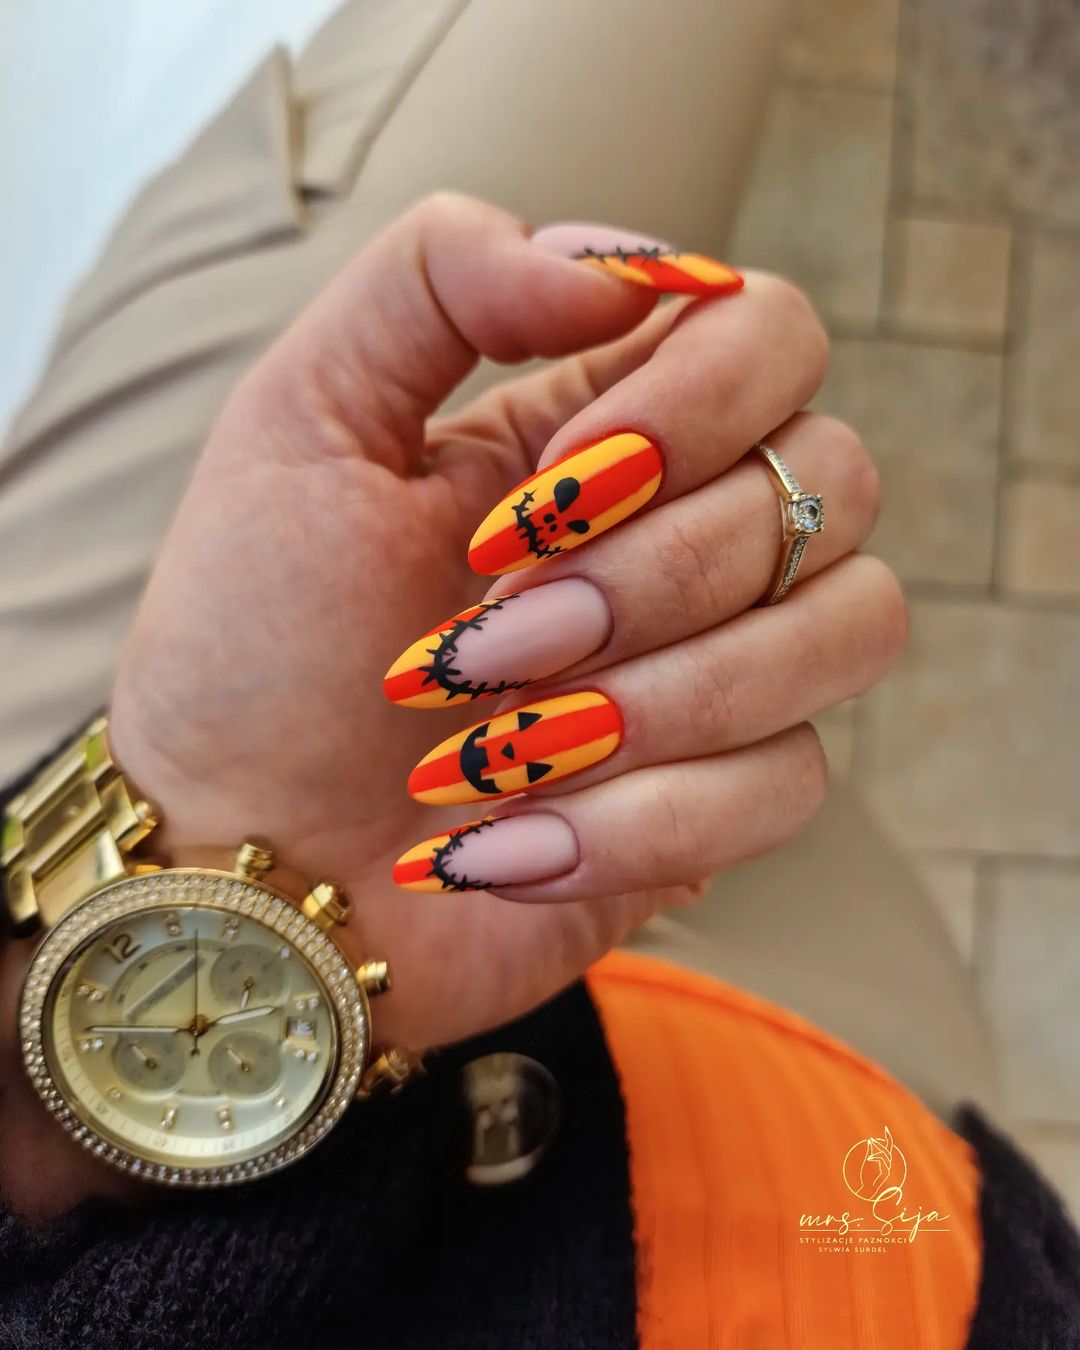
Spooky Halloween Vibes
Get into the Halloween spirit with this fun and festive design featuring bright orange and black nails with spooky pumpkin and stitch accents. The bold orange base is perfect for the season, while the black details add a spooky yet playful touch. These fall almond nails are great for celebrating Halloween in style.
- Orange polish (e.g., China Glaze “Orange Knockout”)
- Black polish (e.g., Sally Hansen “Black Out”)
- Fine detail brush for patterns
- Clear matte top coat
Practical Advice
- Prep your nails: Clean, trim, and shape your nails into an almond form.
- Base coat: Apply a clear base coat to protect your nails.
- Halloween design: Paint your nails with the orange polish. Once dry, use the fine detail brush to add black pumpkin faces and stitch accents.
- Top coat: Finish with a clear matte top coat to maintain the festive look.
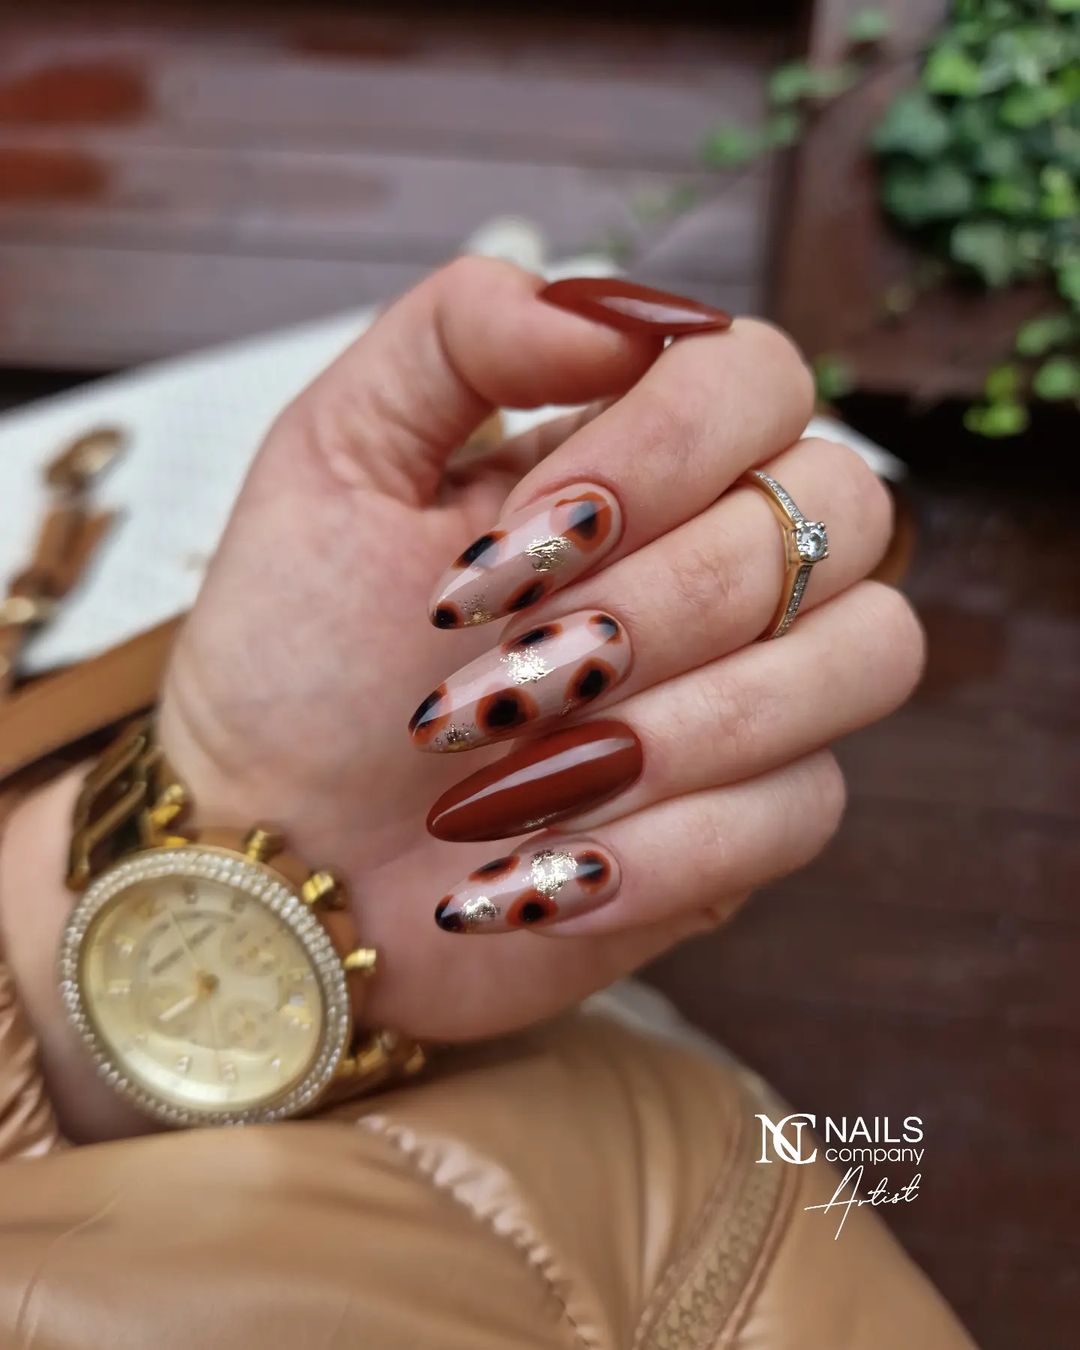
Tortoiseshell Elegance
This elegant design features a tortoiseshell pattern in warm browns and blacks with gold accents. The combination of colors and patterns creates a sophisticated and timeless look, perfect for the fall season. These fall almond nails are ideal for those who appreciate classic and chic designs.
- Brown polish (e.g., OPI “Espresso Your Inner Self”)
- Black polish (e.g., Essie “Licorice”)
- Gold polish (e.g., Sally Hansen “Golden-I”)
- Clear glossy top coat
Practical Advice
- Prep your nails: Clean, trim, and shape your nails into an almond form.
- Base coat: Apply a clear base coat to ensure longevity.
- Tortoiseshell design: Paint your nails with the brown polish. While it’s still wet, add drops of black and gold polish and use a nail art brush to blend them together, creating a tortoiseshell pattern.
- Top coat: Seal the design with a clear glossy top coat to enhance the shine and protect the pattern.
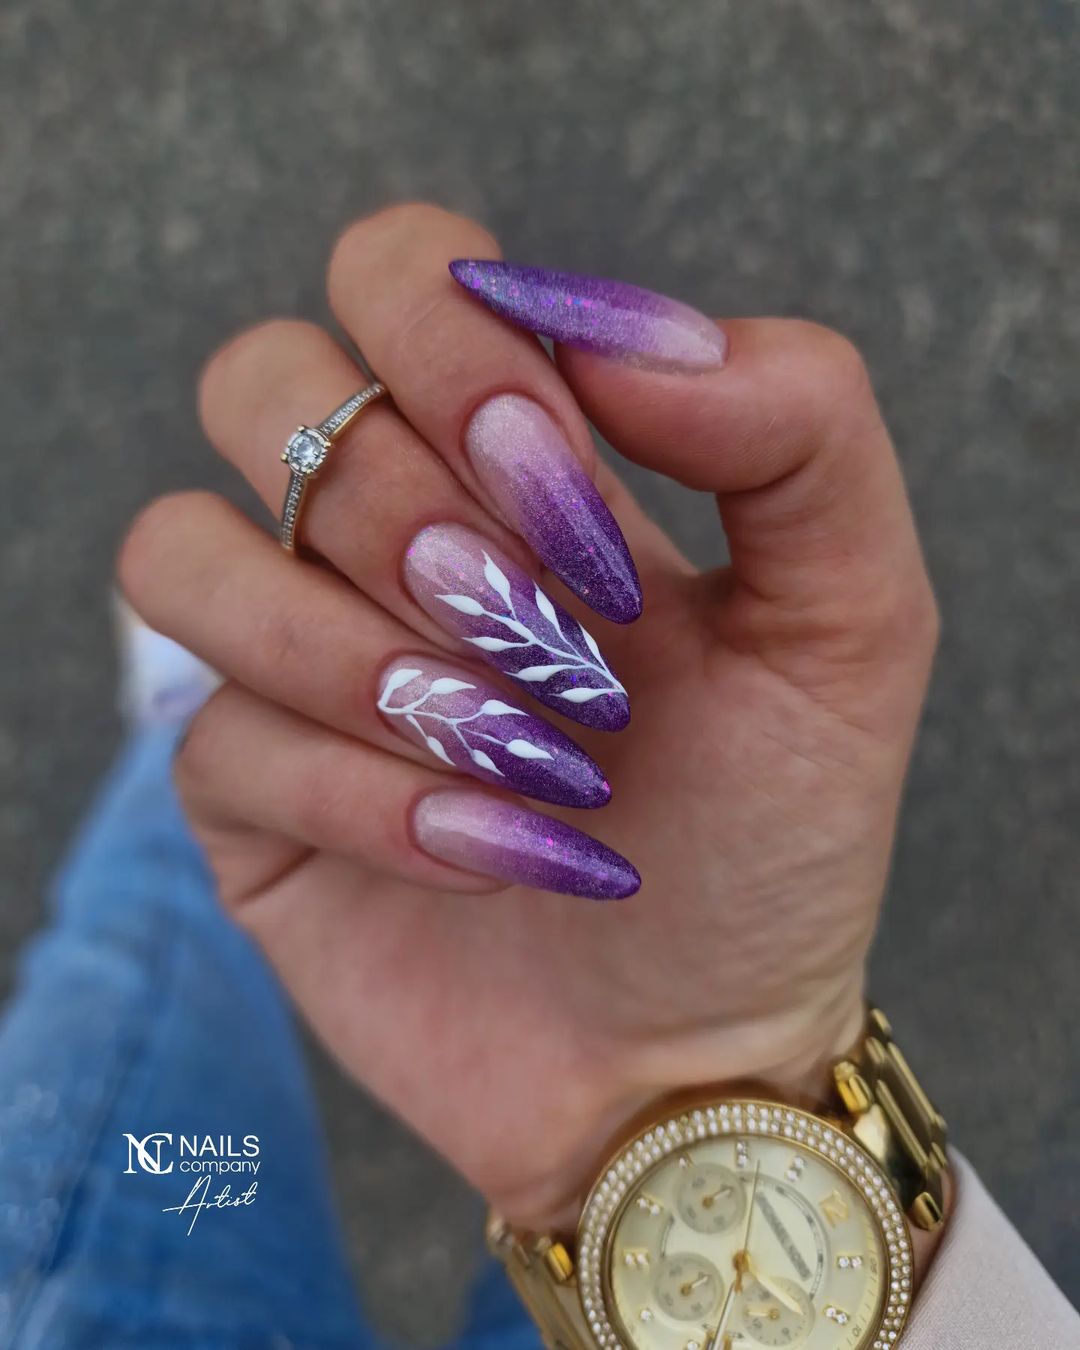
Purple Ombre with Leafy Accents
These stunning nails feature a beautiful ombre effect transitioning from a light milky pink to a rich, deep purple. The addition of delicate white leaf accents adds a touch of elegance and sophistication. The glittery finish enhances the overall look, making these fall almond nails perfect for both casual and formal occasions.
- Light pink polish (e.g., Essie “Ballet Slippers”)
- Purple glitter polish (e.g., OPI “I Carol About You”)
- White nail art paint for leaves (e.g., Art Club Nail Art Lacquer)
- Fine detail brush
- Clear glossy top coat
Practical Advice
- Prep your nails: Clean, trim, and shape your nails into an almond form.
- Base coat: Apply a clear base coat to protect your nails.
- Ombre effect: Use a sponge to dab the pink and purple polishes onto your nails, blending them together for the ombre effect. Add the white leaf accents with the fine detail brush.
- Top coat: Finish with a clear glossy top coat to seal the design and add shine.
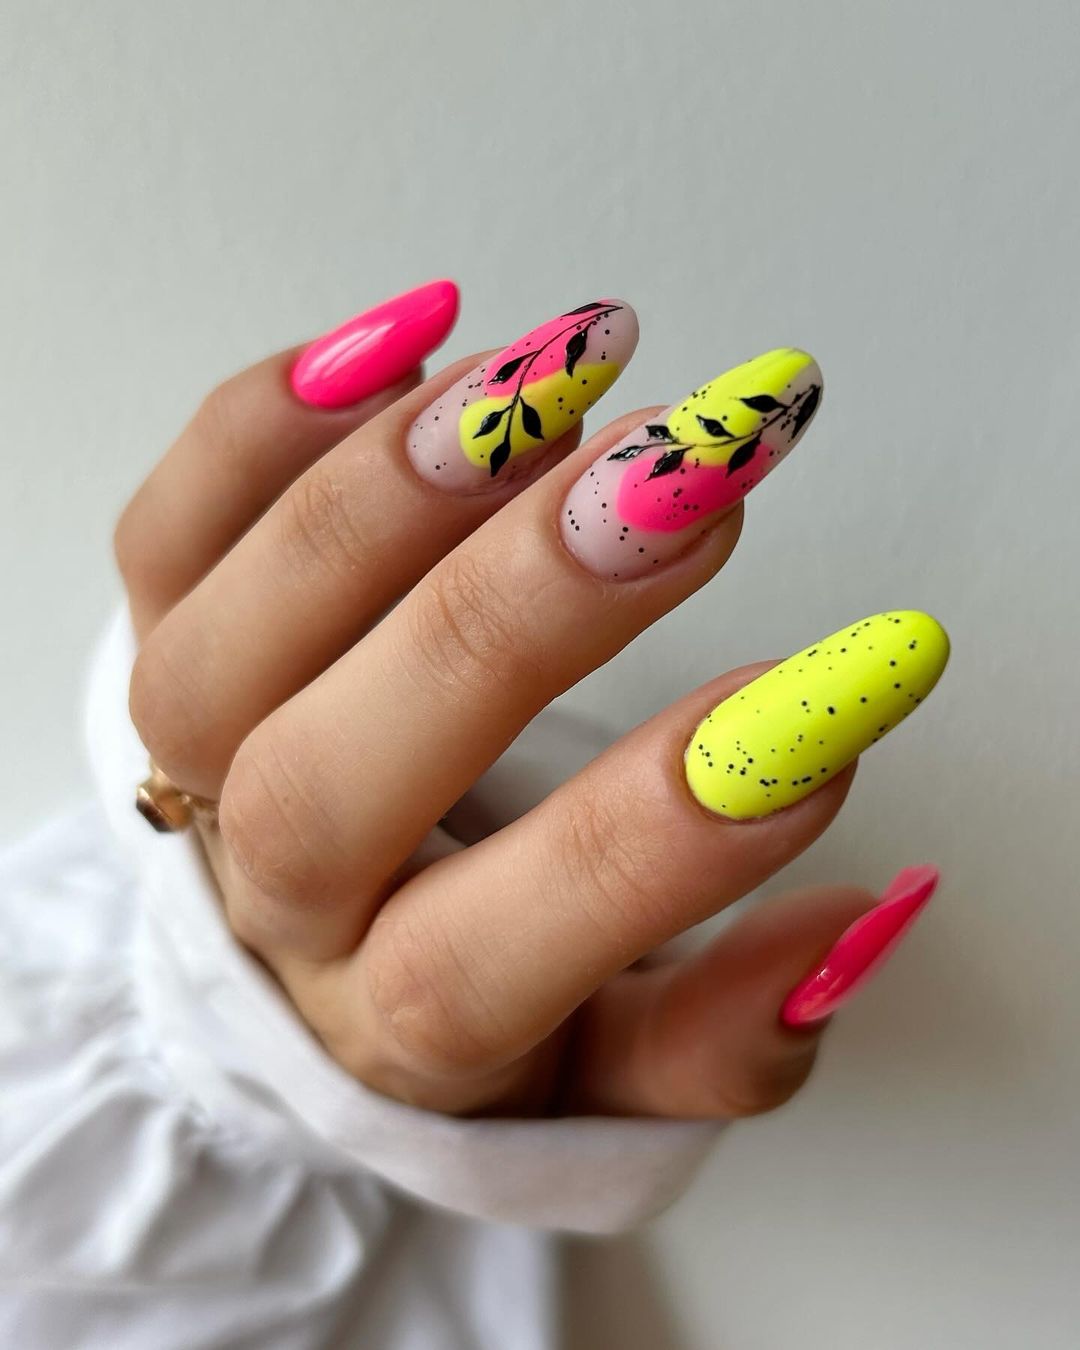
Neon Floral Fusion
This vibrant and playful design features a combination of neon pink and yellow with bold black floral accents. The contrast between the bright colors and the intricate black details creates a fun and eye-catching look. These fall almond nails are perfect for those who love to experiment with bold and unique designs.
- Neon pink polish (e.g., Orly “Beach Cruiser”)
- Neon yellow polish (e.g., China Glaze “Celtic Sun”)
- Black nail art paint for flowers (e.g., Art Club Nail Art Lacquer)
- Fine detail brush
- Clear glossy top coat
Practical Advice
- Prep your nails: Clean, trim, and shape your nails into an almond form.
- Base coat: Apply a clear base coat to protect your nails.
- Floral design: Paint your nails with the neon pink and yellow polishes. Once dry, add the black floral accents using the fine detail brush.
- Top coat: Seal the design with a clear glossy top coat to protect the artwork.
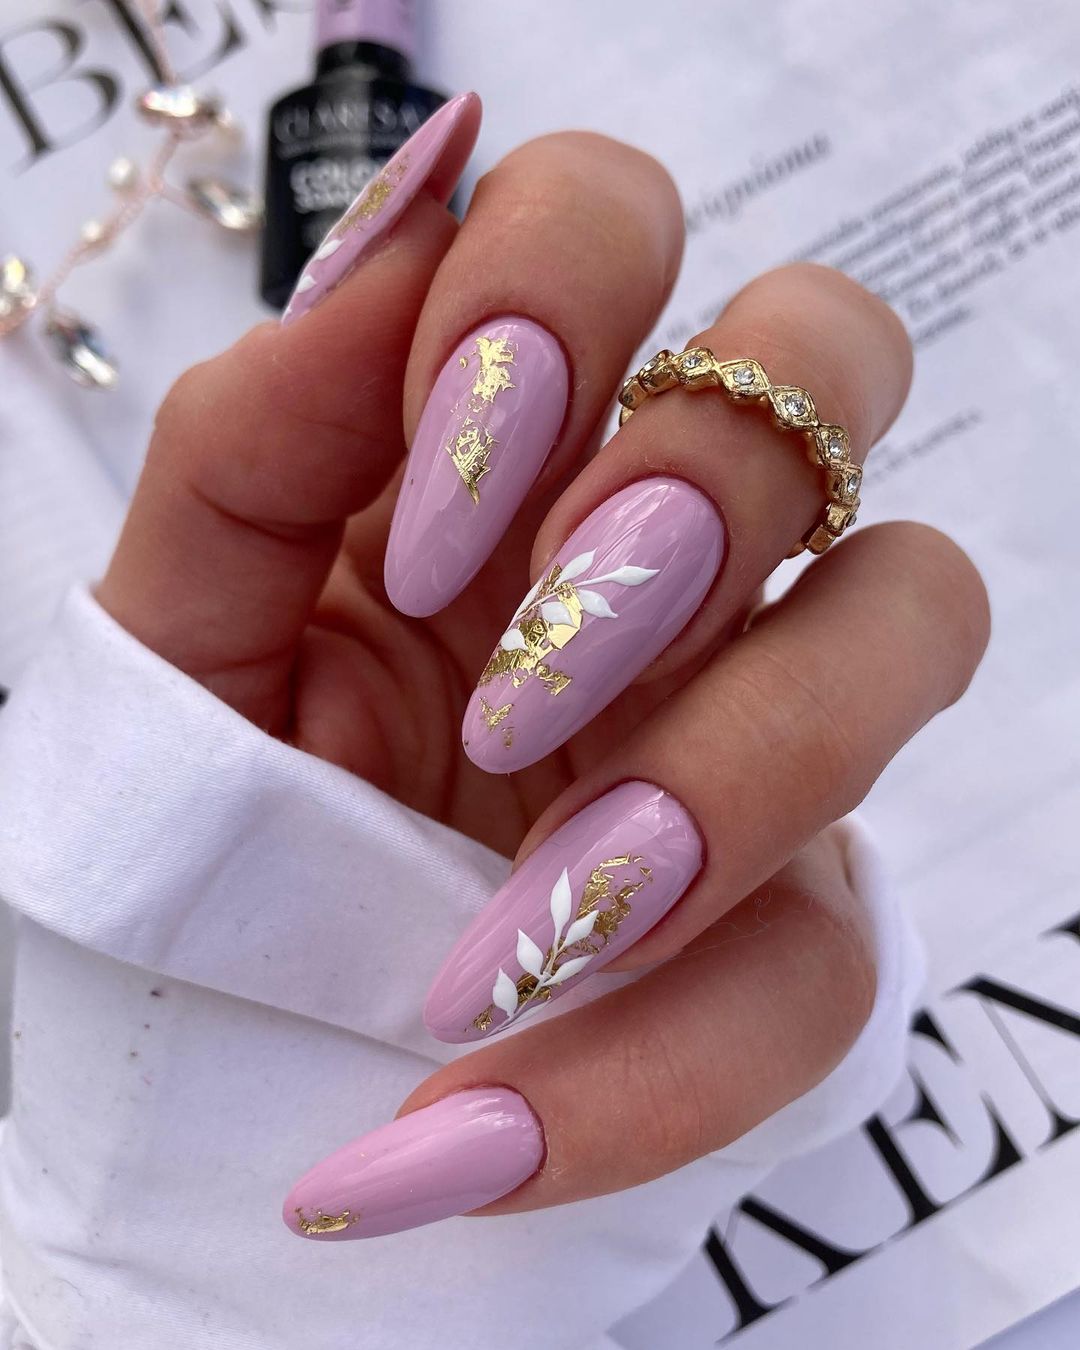
Elegant Gold Leaf Pink
These nails feature a soft, milky pink base adorned with elegant gold leaf accents and delicate white floral designs. The combination of pastel pink and shimmering gold creates a luxurious and sophisticated look, perfect for any occasion. The floral details add a touch of grace, making these fall almond nails truly exquisite.
- Milky pink polish (e.g., OPI “Bubble Bath”)
- Gold leaf flakes (e.g., Born Pretty Gold Foil Flakes)
- White nail art paint for flowers (e.g., Art Club Nail Art Lacquer)
- Fine detail brush
- Clear glossy top coat
Practical Advice
- Prep your nails: Clean, trim, and shape your nails into an almond form.
- Base coat: Apply a clear base coat to protect your nails.
- Gold leaf and floral design: Paint your nails with the milky pink polish. Apply clear adhesive where you want the gold leaf, then carefully place the gold flakes. Add white floral accents with the fine detail brush.
- Top coat: Finish with a clear glossy top coat to seal the design and add shine.
Delicate Nude Florals
This design features a chic nude base with delicate brown and white floral accents. The simplicity of the nude color combined with the intricate floral patterns creates an elegant and understated look. These fall almond nails are perfect for those who prefer a subtle yet stylish manicure.

- Nude polish (e.g., Essie “Topless & Barefoot”)
- Brown nail art paint (e.g., Art Club Nail Art Lacquer)
- White nail art paint for flowers (e.g., Art Club Nail Art Lacquer)
- Fine detail brush
- Clear glossy top coat
Practical Advice
- Prep your nails: Clean, trim, and shape your nails into an almond form.
- Base coat: Apply a clear base coat to ensure longevity.
- Floral design: Paint your nails with the nude polish. Once dry, add brown and white floral accents using the fine detail brush.
- Top coat: Seal the design with a clear glossy top coat to protect the artwork.
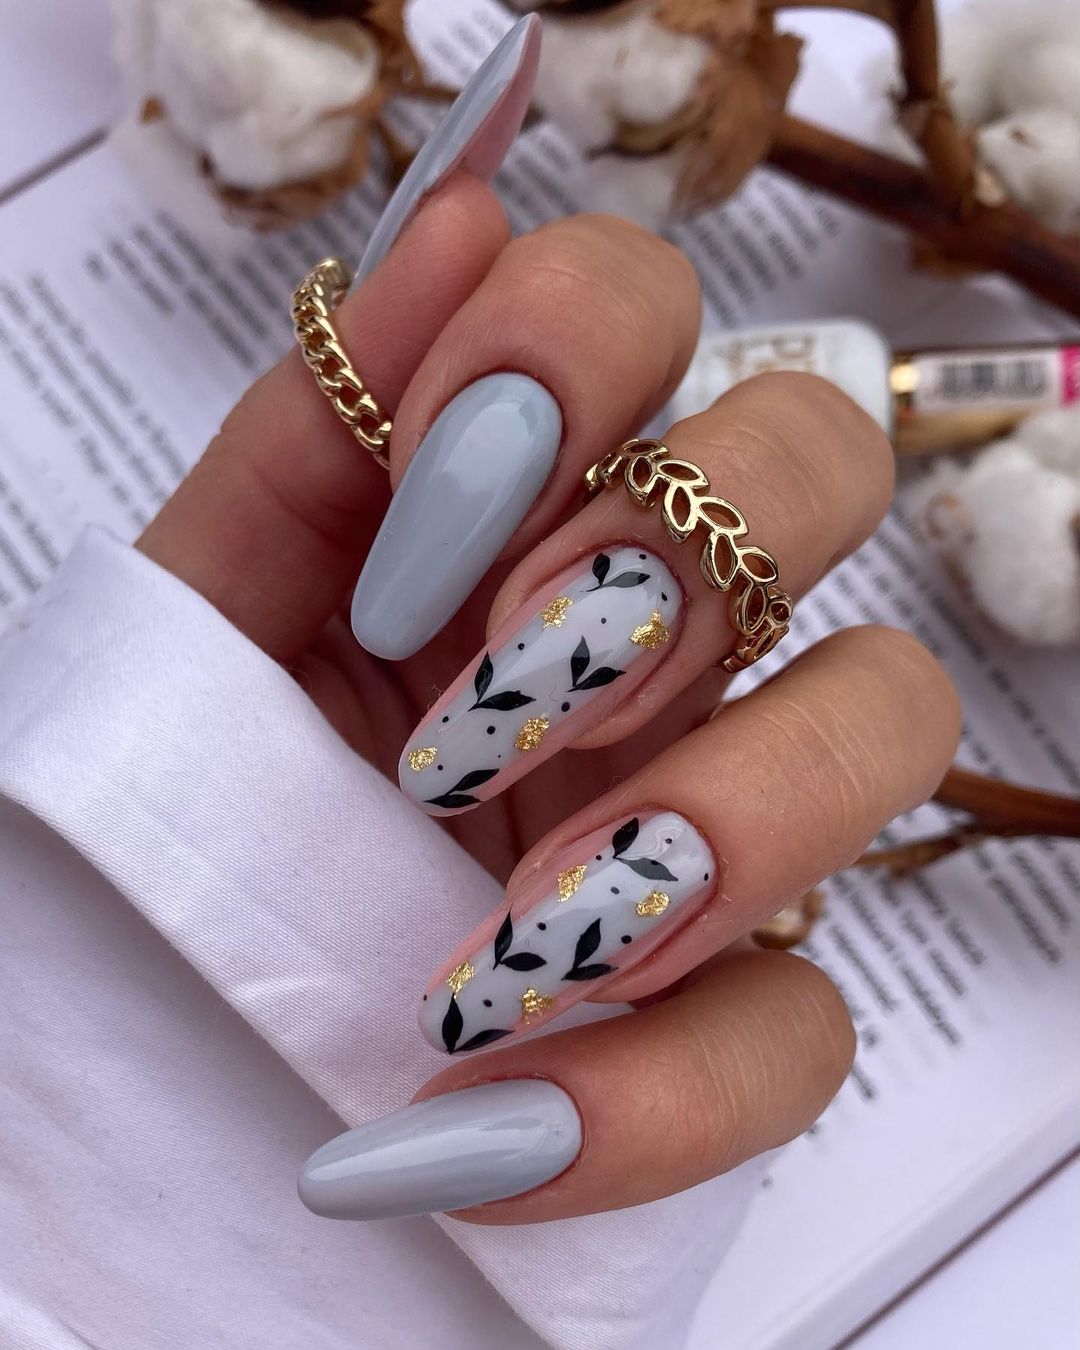
Grey and Gold Elegance
These nails feature a sophisticated grey base with delicate black leaf patterns and shimmering gold accents. The combination of grey and gold creates a modern and elegant look, perfect for the fall season. These fall almond nails are ideal for those who appreciate chic and refined designs.
- Grey polish (e.g., Sally Hansen “Concrete Jungle”)
- Black nail art paint for leaves (e.g., Art Club Nail Art Lacquer)
- Gold glitter polish (e.g., Essie “Rock at the Top”)
- Fine detail brush
- Clear glossy top coat
Practical Advice
- Prep your nails: Clean, trim, and shape your nails into an almond form.
- Base coat: Apply a clear base coat to protect your nails.
- Leaf and gold design: Paint your nails with the grey polish. Once dry, add black leaf patterns and gold accents using the fine detail brush.
- Top coat: Finish with a clear glossy top coat to seal the design and add shine.
Brown and Gold Luxe
This luxurious design features a rich brown base with shimmering gold accents. The combination of deep brown and gold creates a glamorous and sophisticated look, perfect for the fall season. These fall almond nails are ideal for those who love a touch of luxury in their manicure.
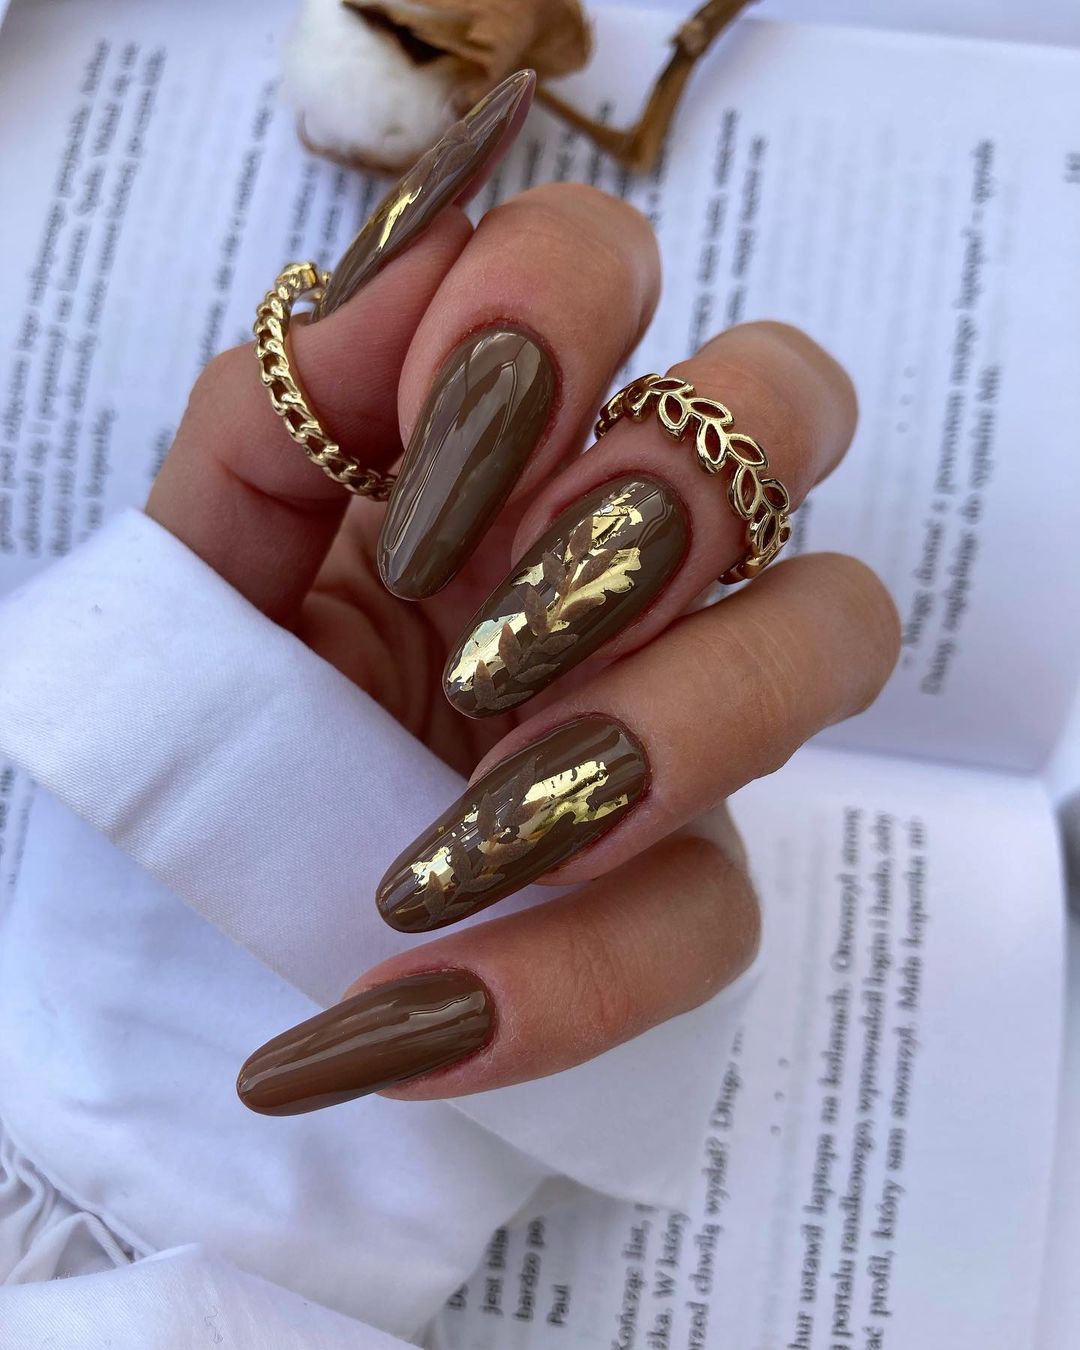
- Brown polish (e.g., OPI “Espresso Your Inner Self”)
- Gold leaf flakes (e.g., Born Pretty Gold Foil Flakes)
- Clear adhesive for gold leaf
- Clear glossy top coat
Practical Advice
- Prep your nails: Clean, trim, and shape your nails into an almond form.
- Base coat: Apply a clear base coat to protect your nails.
- Gold leaf design: Paint your nails with the brown polish. Apply clear adhesive where you want the gold leaf, then carefully place the gold flakes.
- Top coat: Seal the design with a clear glossy top coat to secure the gold leaf and add a beautiful shine.
Blush Pink Embossed Leaves
These nails feature a soft blush pink base with subtle embossed leaf patterns. The monochromatic design creates a chic and sophisticated look, perfect for any occasion. These fall almond nails are ideal for those who prefer a minimalist yet elegant style.
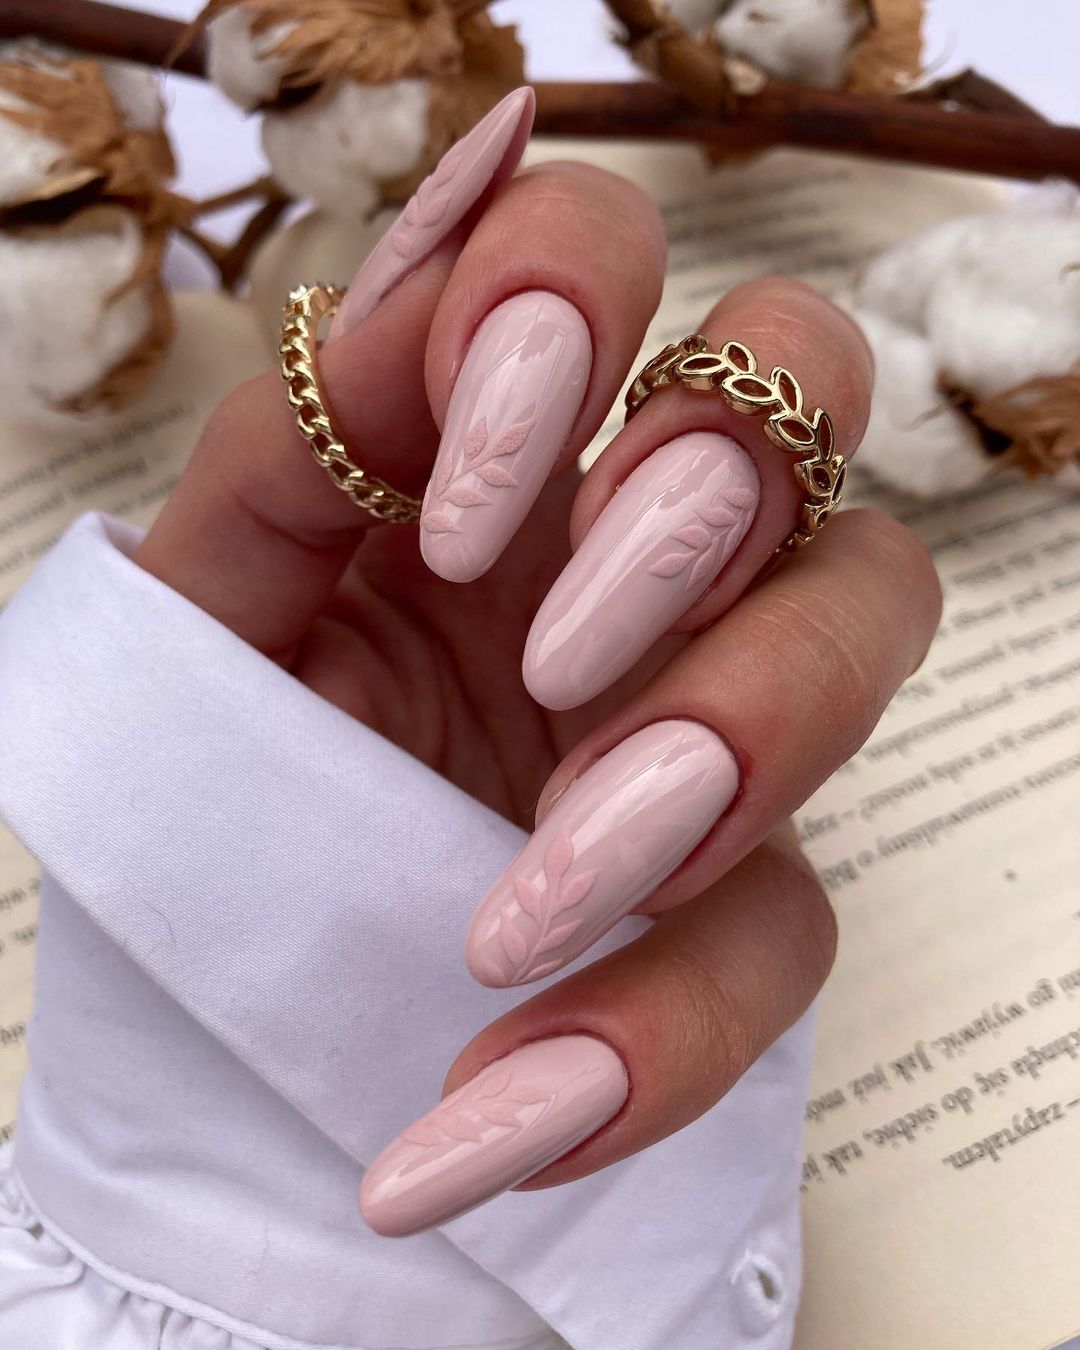
- Blush pink polish (e.g., Essie “Fiji”)
- Clear matte top coat
- Fine detail brush for embossed effect
Practical Advice
- Prep your nails: Clean, trim, and shape your nails into an almond form.
- Base coat: Apply a clear base coat to ensure longevity.
- Embossed leaf design: Paint your nails with the blush pink polish. Use the fine detail brush to create embossed leaf patterns by layering the polish.
- Top coat: Finish with a clear matte top coat to seal the design and maintain the chic look.
FAQ
Q: How can I make my fall almond nails last longer? A: Always start with a good base coat and finish with a durable top coat. Avoid using your nails as tools, and wear gloves when doing household chores.
Q: What are the best colors for fall almond nails? A: Deep reds, oranges, browns, and greens are perfect for autumn. Additionally, metallics and holographic finishes can add a festive touch.
Q: How do I maintain the almond shape? A: Regularly file your nails to keep the almond shape sharp and clean. Use a fine-grit file for the best results.
Q: Can I do these designs on short nails? A: Absolutely! While almond nails are typically longer, you can adapt these designs to shorter lengths by focusing on the tips and using smaller patterns.
Save Pin