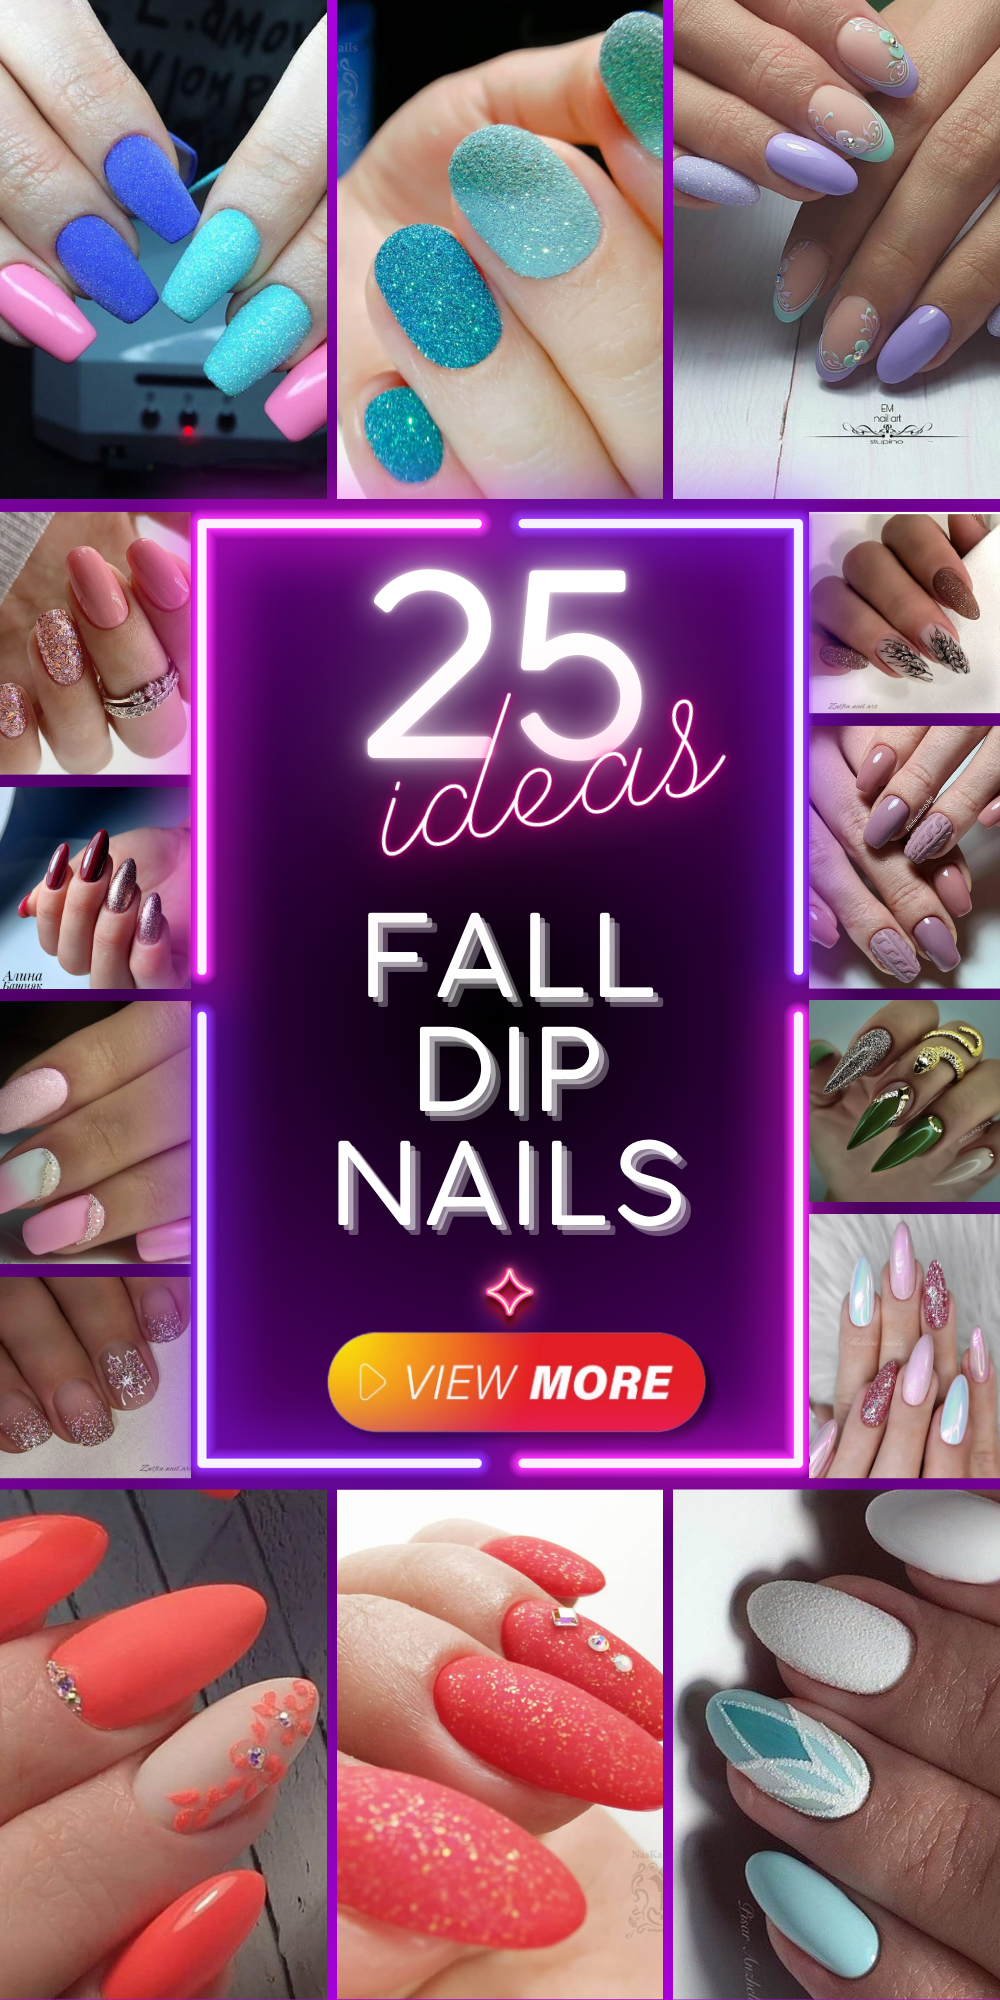
Fall is here, and with it comes a delightful array of nail trends perfect for the season. Are you ready to transform your nails with the hottest fall dip nails? From vibrant colors to stunning designs, there’s something for everyone. Let’s dive into the world of fall dip nails and explore some trendy and easy ideas that you can recreate at home. Whether you prefer short, medium, or long nails, there’s a design that will suit your style perfectly.
Elegant Sparkle and Shine
These elegant nails feature a beautiful blend of milky white and glitter accents. The glitter on the ring finger adds a touch of glamour, while the simple milky white on the other nails keeps the look sophisticated. This design is perfect for anyone looking to add a bit of sparkle to their everyday look.
-
- OPI Nail Lacquer in Alpine Snow
- OPI Glitter Top Coat in Silver
- Nail file and buffer
- Base coat and top coat
How to Create This Look:
-
- Start by filing and shaping your nails to your desired length and nail shape.
- Apply a base coat to protect your natural nails.
- Paint all nails with OPI Nail Lacquer in Alpine Snow.
- Apply the OPI Glitter Top Coat on your ring finger.
- Finish with a top coat to seal in the design and add extra shine.
Chic Ombre with a Twist
This gel almond shape design features a chic ombre effect with a hint of sparkle. The gradient from pink to white is subtle and elegant, making it perfect for any occasion. The addition of the silver stripe on the middle finger adds a modern twist to the classic ombre look.
-
- Gel polish in pink and white
- Silver striping tape
- UV/LED lamp
- Base coat and top coat
- Nail buffer and file
How to Create This Look:
-
- Prep your nails by filing and shaping them into an almond shape.
- Apply a base coat and cure under the UV/LED lamp.
- Create the ombre effect using a makeup sponge to dab the pink and white gel polish, blending them together.
- Cure under the UV/LED lamp.
- Apply the silver striping tape to the middle finger and secure it with a top coat.
- Cure one last time under the UV/LED lamp to finish.
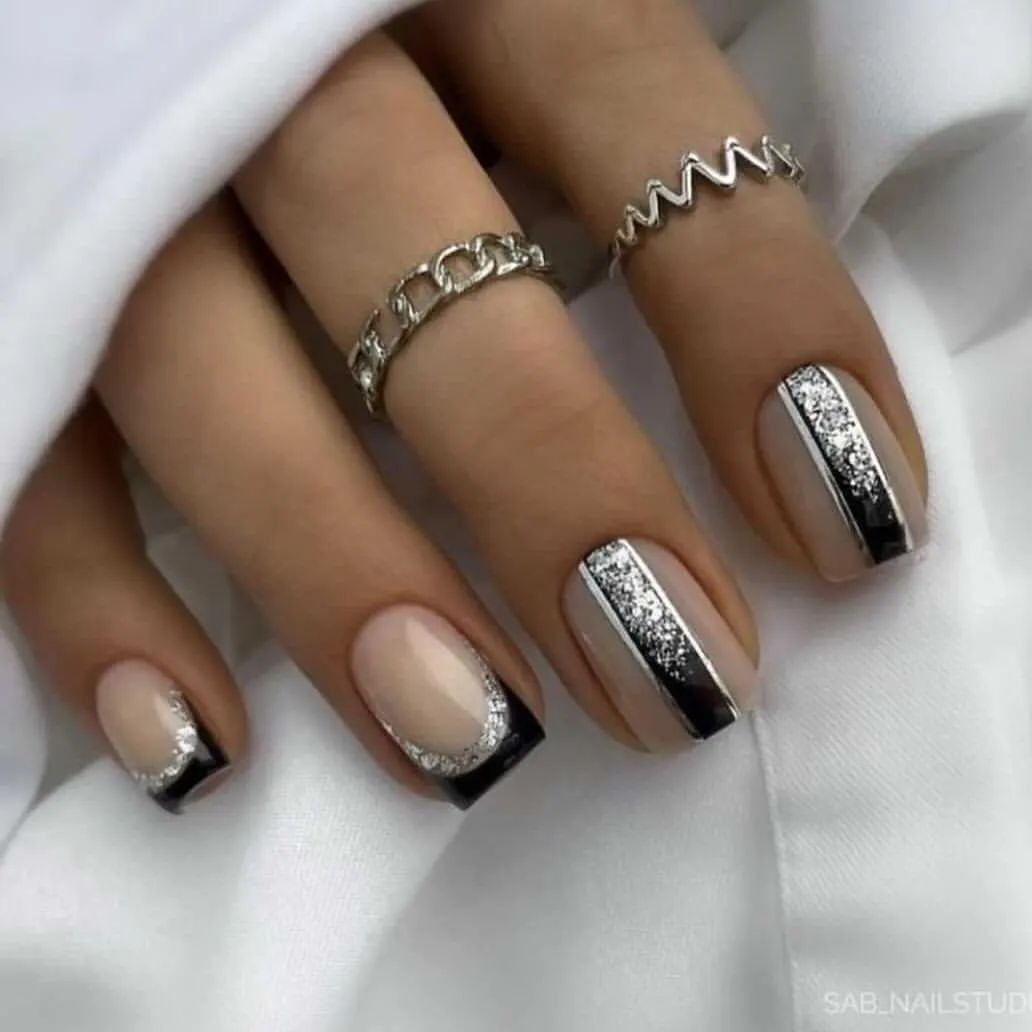
Modern Minimalist with Metallic Accents
For a sleek and modern look, this short square nail design features neutral tones with metallic accents. The clean lines and contrasting textures make this design stand out while remaining understated and chic.
-
- Neutral base color polish
- Metallic silver polish
- Striping tape
- Base coat and top coat
- Nail file and buffer
How to Create This Look:
-
- File and shape your nails into a short square shape.
- Apply a base coat to protect your nails.
- Paint your nails with the neutral base color polish.
- Use striping tape to create clean lines and apply the metallic silver polish.
- Remove the striping tape and finish with a top coat to seal in your design.
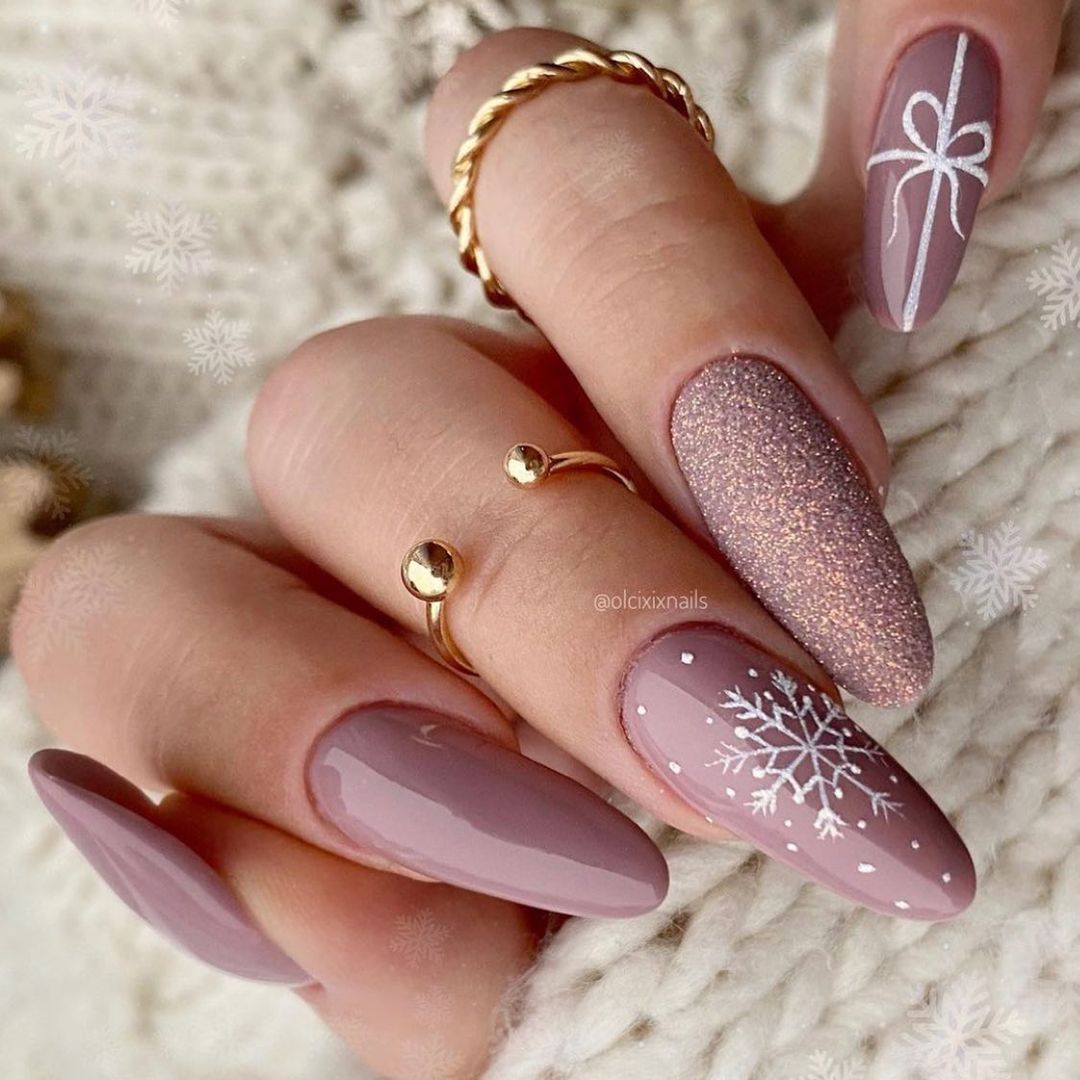
Festive Winter Wonderland
This festive manicure exudes winter charm with its mix of muted pinks and sparkling accents. The nail art features a delicate snowflake design on one nail, a glittery accent on another, and a lovely ribbon bow on the third, all on a gel almond shape. These nails are perfect for the holiday season, blending a playful theme with elegant execution.
-
- Base coat
- Muted pink gel polish
- White gel polish
- Fine glitter
- Nail art brush for the snowflake and ribbon designs
- UV/LED lamp
- Top coat
- Nail file and buffer
How to Create This Look:
-
- Start by shaping your nails into an almond shape using a nail file.
- Apply a base coat and cure under the UV/LED lamp.
- Paint all nails with the muted pink gel polish and cure.
- Using the nail art brush and white gel polish, draw the snowflake on one nail and the ribbon bow on another, then cure.
- Apply the fine glitter to the accent nail before curing.
- Seal the design with a top coat and cure again.
Save Pin
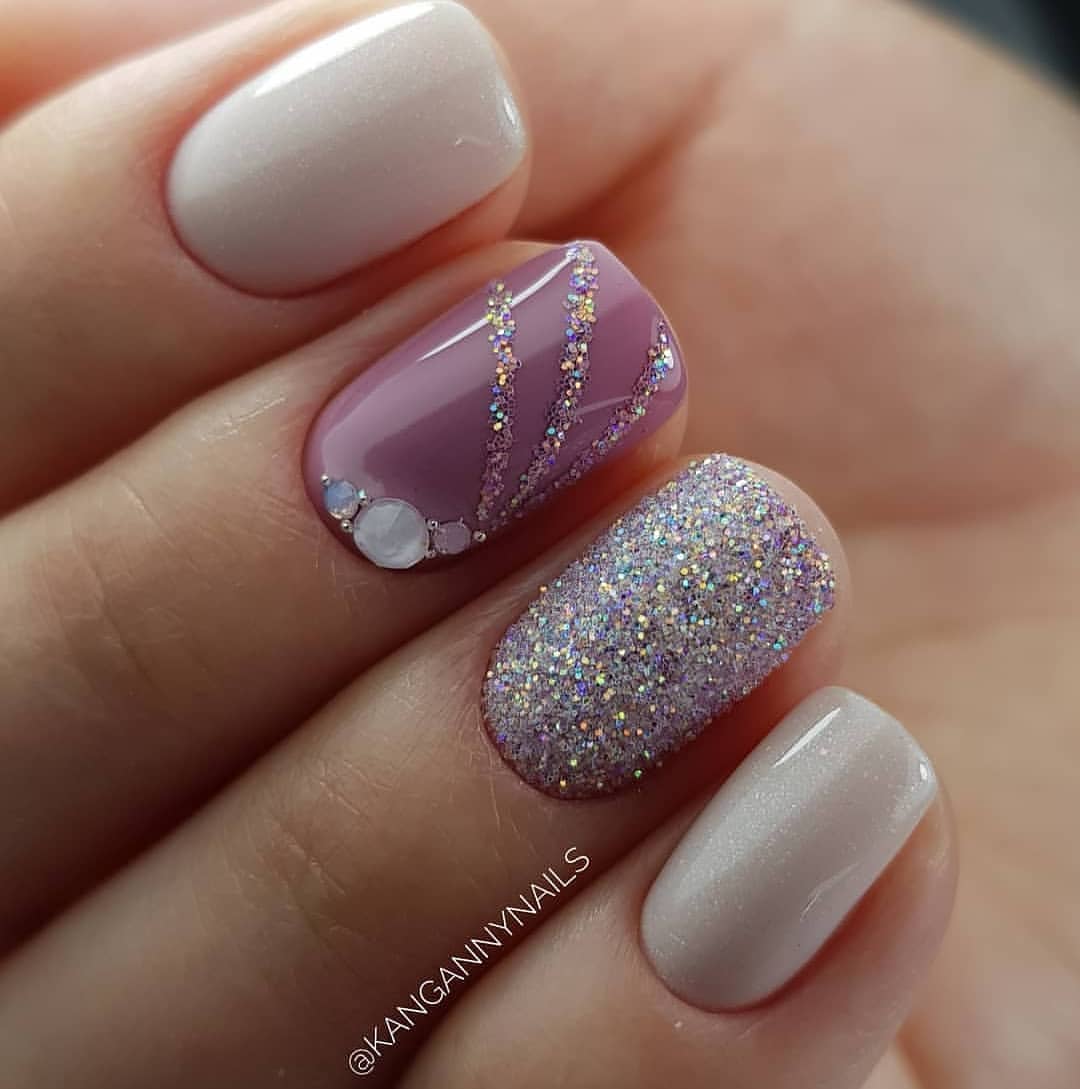
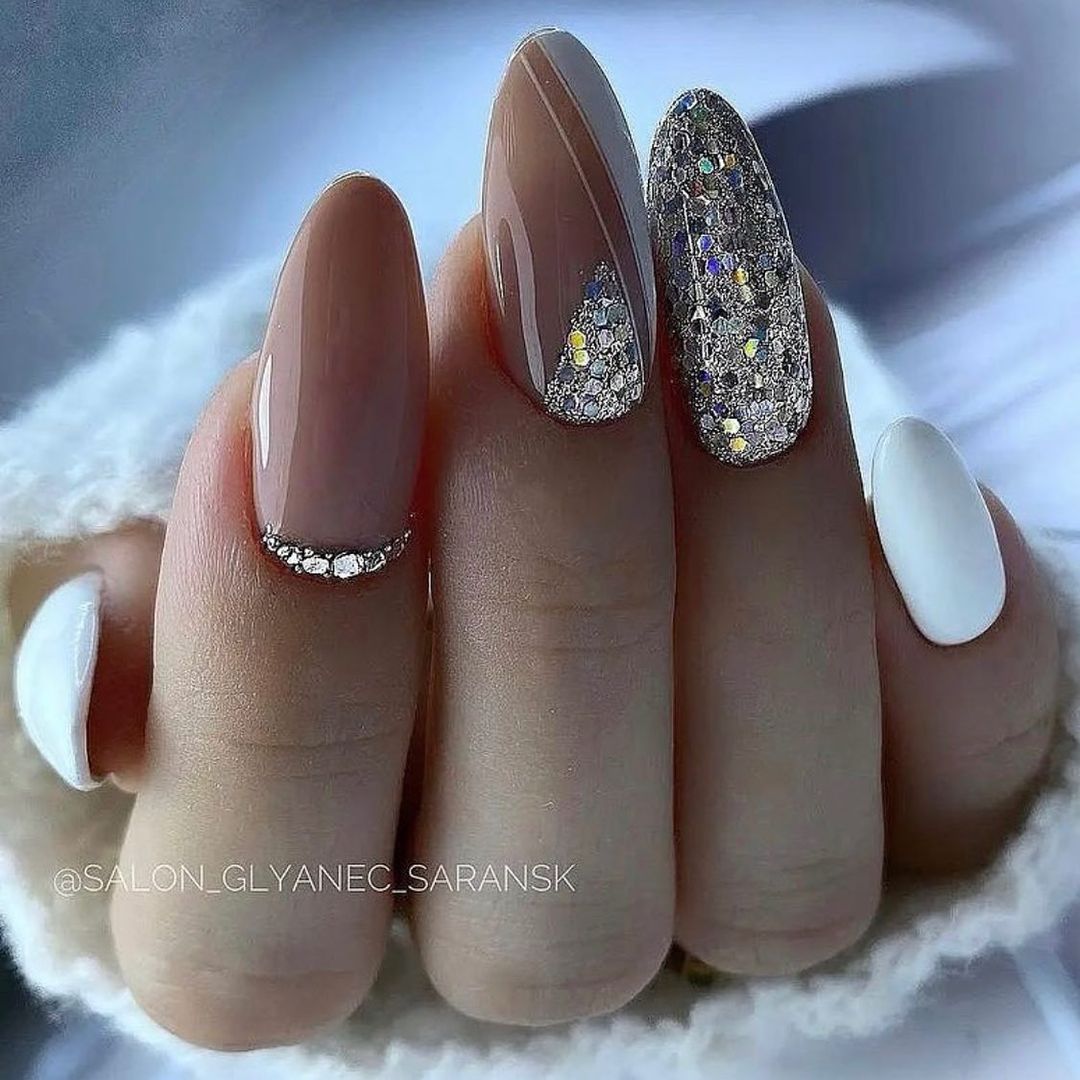
Elegant Neutral Glam
This manicure showcases a sophisticated blend of neutral tones with a touch of glitter and rhinestones. The oval shape adds to the elegance, while the different textures and finishes give it a modern twist. The combination of nude, white, and glittery nails creates a versatile look that can transition from day to night effortlessly.
-
- Base coat
- Nude gel polish
- White gel polish
- Silver glitter gel polish
- Rhinestones
- Striping tape
- UV/LED lamp
- Top coat
- Nail file and buffer
How to Create This Look:
-
- File your nails into an oval shape.
- Apply a base coat and cure under the UV/LED lamp.
- Paint your nails with the nude and white gel polishes as shown in the design, then cure.
- Apply the glitter gel polish to the accent nails and cure.
- Use the striping tape to create clean lines and add rhinestones for extra sparkle, then cure.
- Finish with a top coat to seal the design and cure one final time.
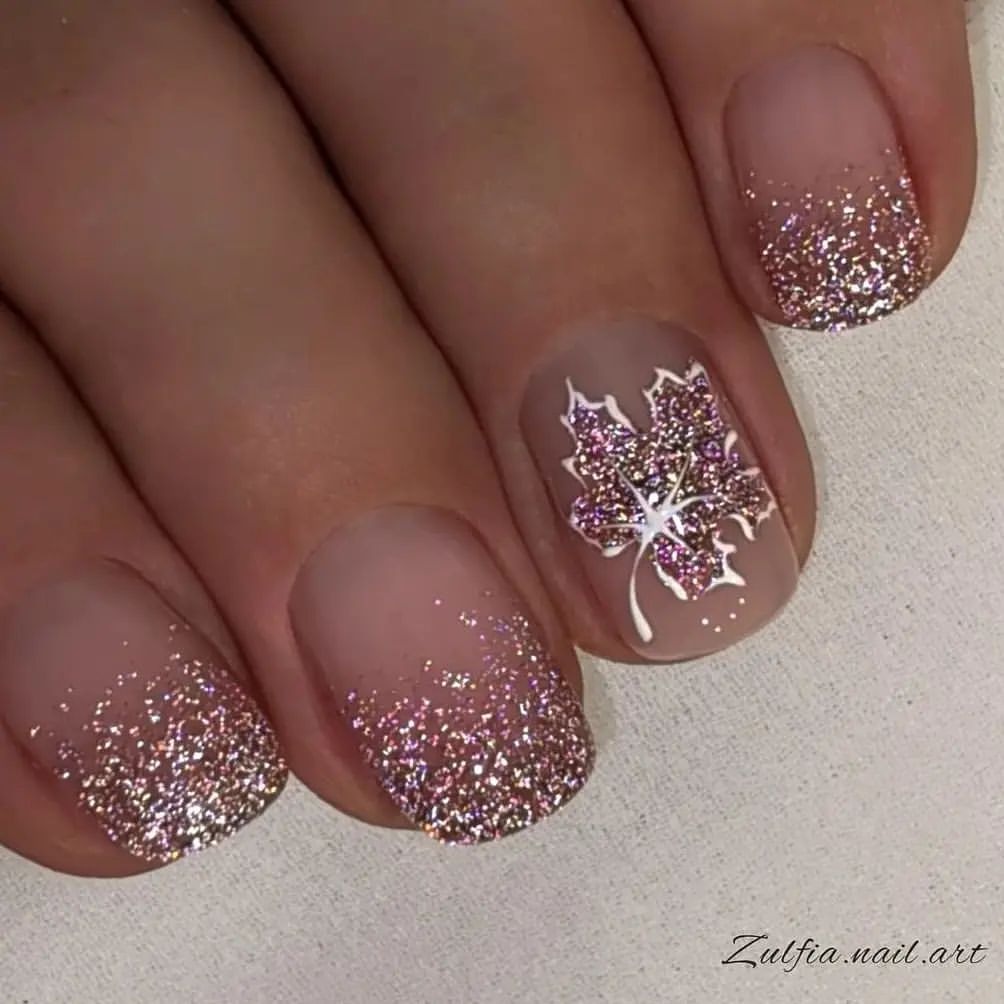
Autumn Leaves Glitter
Celebrate the beauty of fall with this stunning short nail design. The subtle gradient from a natural base to glittery tips is accented by a delicate leaf design on one nail. This manicure combines simplicity with a touch of seasonal flair, making it perfect for the autumn months.
-
- Base coat
- Natural beige gel polish
- Fine glitter in autumnal colors
- Nail art brush for the leaf design
- UV/LED lamp
- Top coat
- Nail file and buffer
How to Create This Look:
-
- Shape your nails into a short square using a nail file.
- Apply a base coat and cure under the UV/LED lamp.
- Paint your nails with the natural beige gel polish and cure.
- Use the nail art brush to create a gradient effect with the fine glitter on the tips, then cure.
- Draw the leaf design on one nail using the nail art brush and glitter, then cure.
- Seal with a top coat and cure one last time.
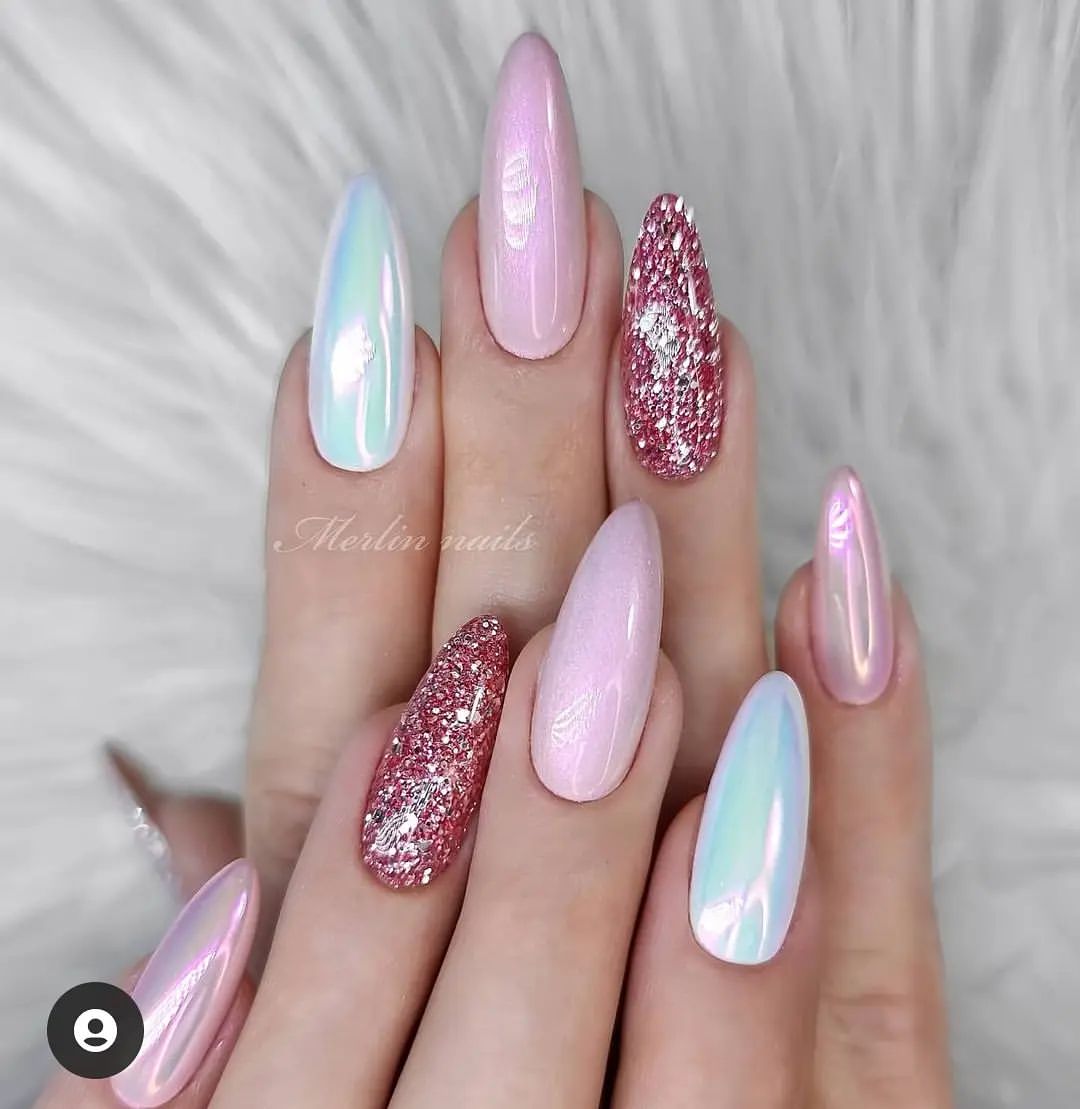
Iridescent Pink Delight
This stunning manicure showcases a captivating combination of iridescent and glitter elements on a long almond shape. The nails alternate between a shimmering pink base and a multi-dimensional glitter, creating a striking yet cohesive look that’s perfect for any occasion.
-
- Base coat
- Iridescent pink gel polish
- Multi-dimensional glitter gel polish
- UV/LED lamp
- Top coat
- Nail file and buffer
How to Create This Look:
-
- Shape your nails into a long almond shape using a nail file.
- Apply a base coat and cure under the UV/LED lamp.
- Alternate between applying the iridescent pink gel polish and the multi-dimensional glitter polish to each nail, curing after each application.
- Apply a top coat to seal in the design and cure one final time.
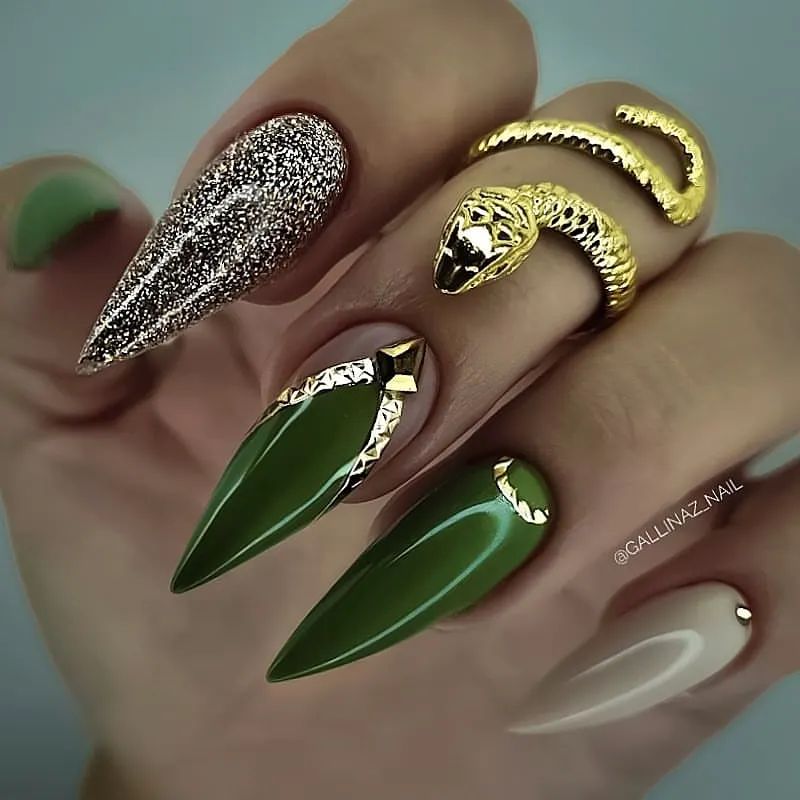
Regal Green Elegance
This manicure exudes a regal elegance with its rich green and gold accents on a stiletto shape. The design features bold green nails adorned with gold studs and glitter, giving a luxurious and opulent feel. This look is perfect for making a statement.
-
- Base coat
- Rich green gel polish
- Gold glitter gel polish
- Gold studs and embellishments
- UV/LED lamp
- Top coat
- Nail file and buffer
How to Create This Look:
-
- File your nails into a stiletto shape.
- Apply a base coat and cure under the UV/LED lamp.
- Paint your nails with the rich green gel polish and cure.
- Add the gold glitter polish to the accent nails and cure.
- Apply the gold studs and embellishments to the green nails, then seal with a top coat and cure.
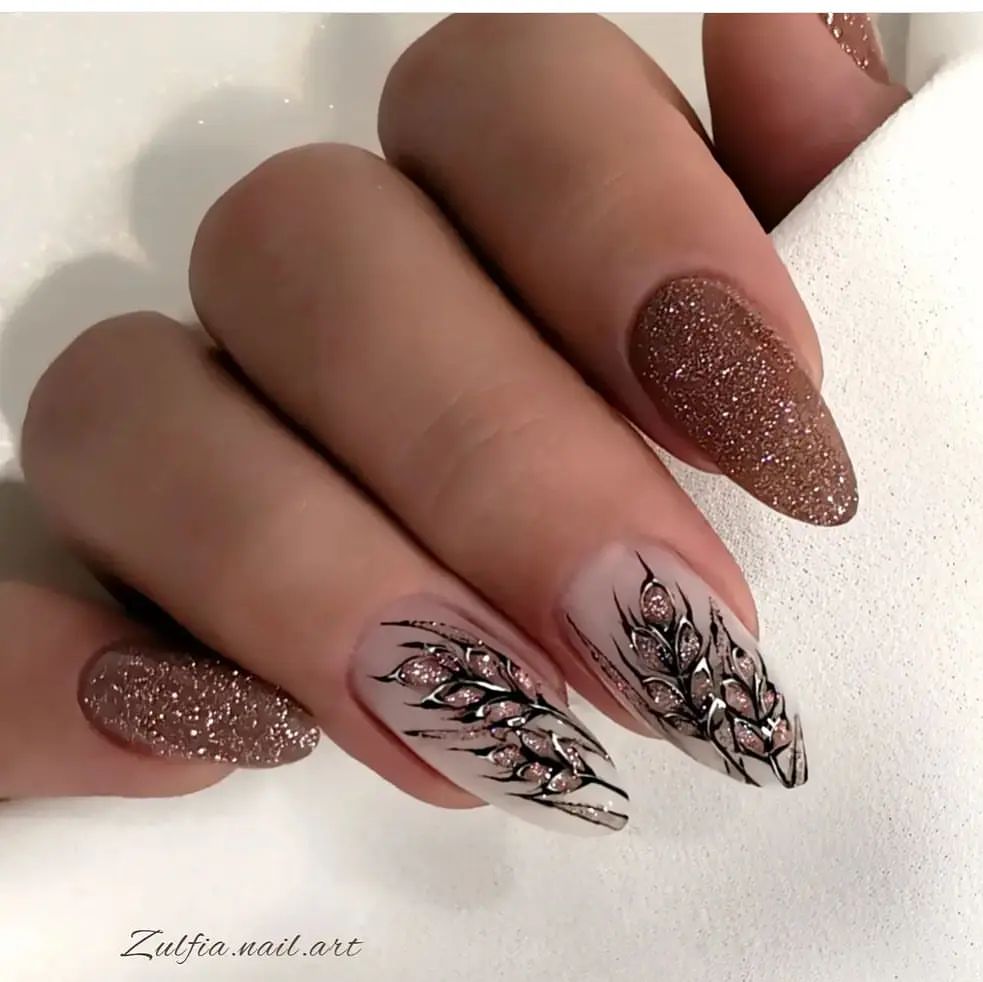
Glamorous Glitter and Leaf
This elegant manicure features a gel almond shape with a combination of glitter and intricate leaf designs. The neutral base color provides a perfect canvas for the glittery accents and detailed leaf artwork, making this a sophisticated choice for any event.
-
- Base coat
- Neutral gel polish
- Glitter gel polish
- Nail art brush for leaf designs
- UV/LED lamp
- Top coat
- Nail file and buffer
How to Create This Look:
-
- Shape your nails into a gel almond shape.
- Apply a base coat and cure under the UV/LED lamp.
- Paint your nails with the neutral gel polish and cure.
- Use the nail art brush to create intricate leaf designs with the glitter polish, then cure.
- Seal the design with a top coat and cure one last time.
Save Pin
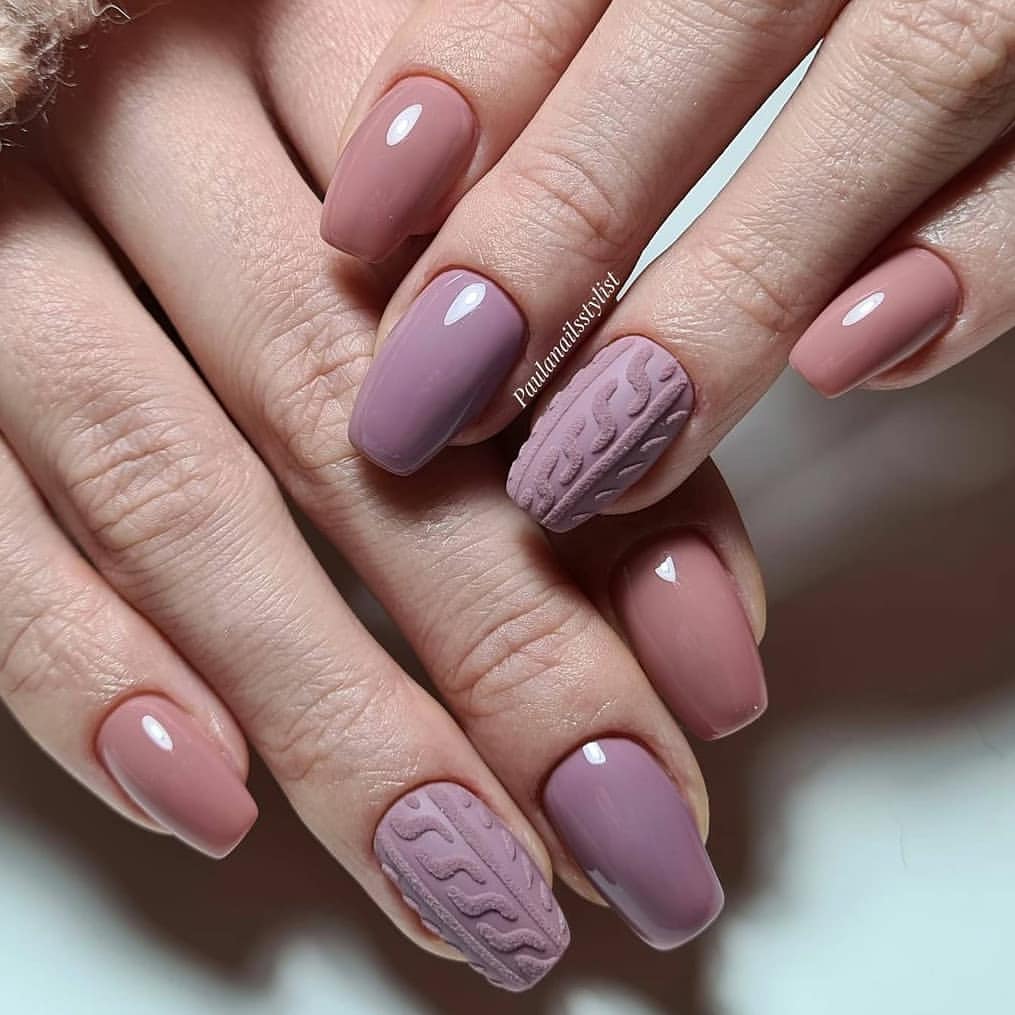
Cozy Knit Sweater Nails
This unique manicure features a cozy, knitted sweater pattern on a short square shape. The warm mauve tones add a touch of fall charm, making this design perfect for the cooler months. The textured accent nail brings a fun and tactile element to the look.
-
- Base coat
- Warm mauve gel polish
- Textured gel polish for the knitted effect
- UV/LED lamp
- Top coat
- Nail file and buffer
How to Create This Look:
-
- File your nails into a short square shape.
- Apply a base coat and cure under the UV/LED lamp.
- Paint your nails with the warm mauve gel polish and cure.
- Use the textured gel polish to create the knitted sweater pattern on the accent nail, then cure.
- Apply a top coat to seal the design and cure one final time.
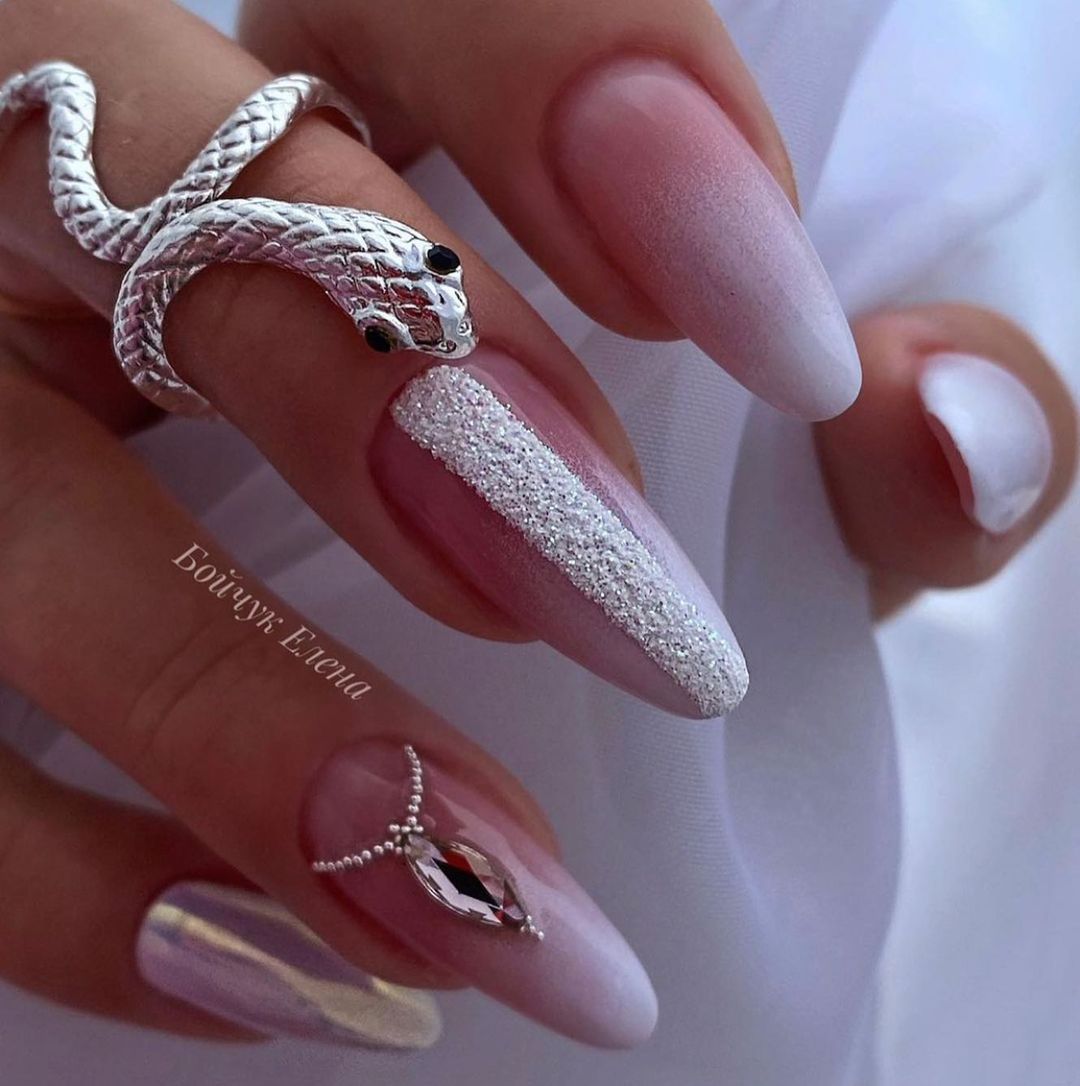
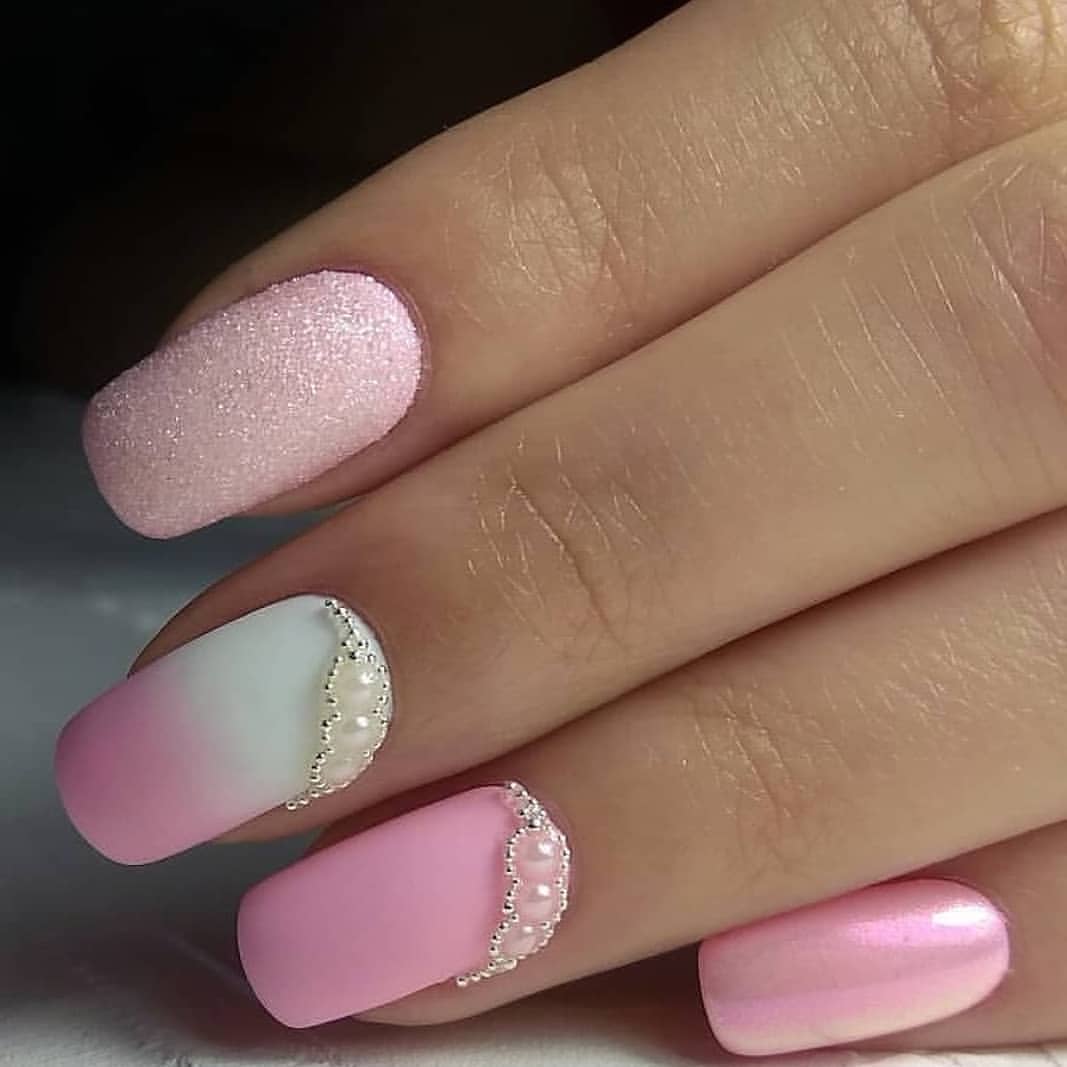
Soft Pink Ombre with Pearls
This delicate and feminine manicure features a soft pink ombre effect accented with tiny pearls on a medium square shape. The gradient from light to dark pink creates a soft and romantic look, while the pearls add an elegant touch.
-
- Base coat
- Light and dark pink gel polishes
- Tiny pearls
- UV/LED lamp
- Top coat
- Nail file and buffer
How to Create This Look:
-
- Shape your nails into a medium square shape using a nail file.
- Apply a base coat and cure under the UV/LED lamp.
- Create the ombre effect by blending the light and dark pink gel polishes with a makeup sponge, then cure.
- Apply the tiny pearls to the nails and secure with a top coat, then cure.
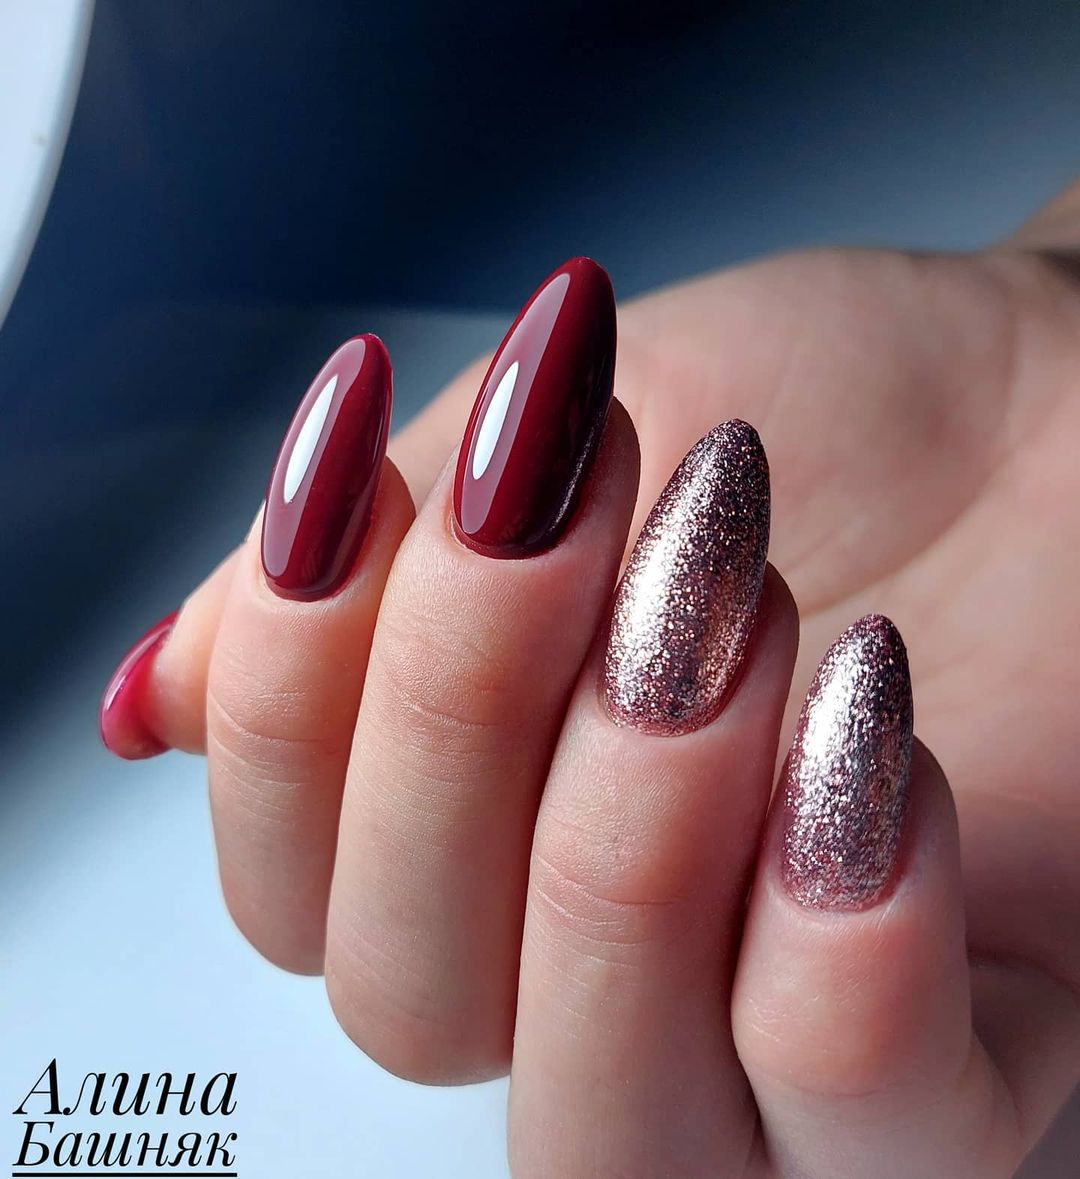
Luxurious Red and Gold Glitter
This luxurious manicure combines deep red nails with dazzling gold glitter on a round shape. The bold red color exudes confidence and sophistication, while the glitter accent nails add a festive and glamorous touch. This design is perfect for making a statement during the holiday season.
-
- Base coat
- Deep red gel polish
- Gold glitter gel polish
- UV/LED lamp
- Top coat
- Nail file and buffer
How to Create This Look:
-
- Shape your nails into a round shape using a nail file.
- Apply a base coat and cure under the UV/LED lamp.
- Paint your nails with the deep red gel polish and cure.
- Apply the gold glitter polish to the accent nails and cure.
- Seal the design with a top coat and cure one last time.
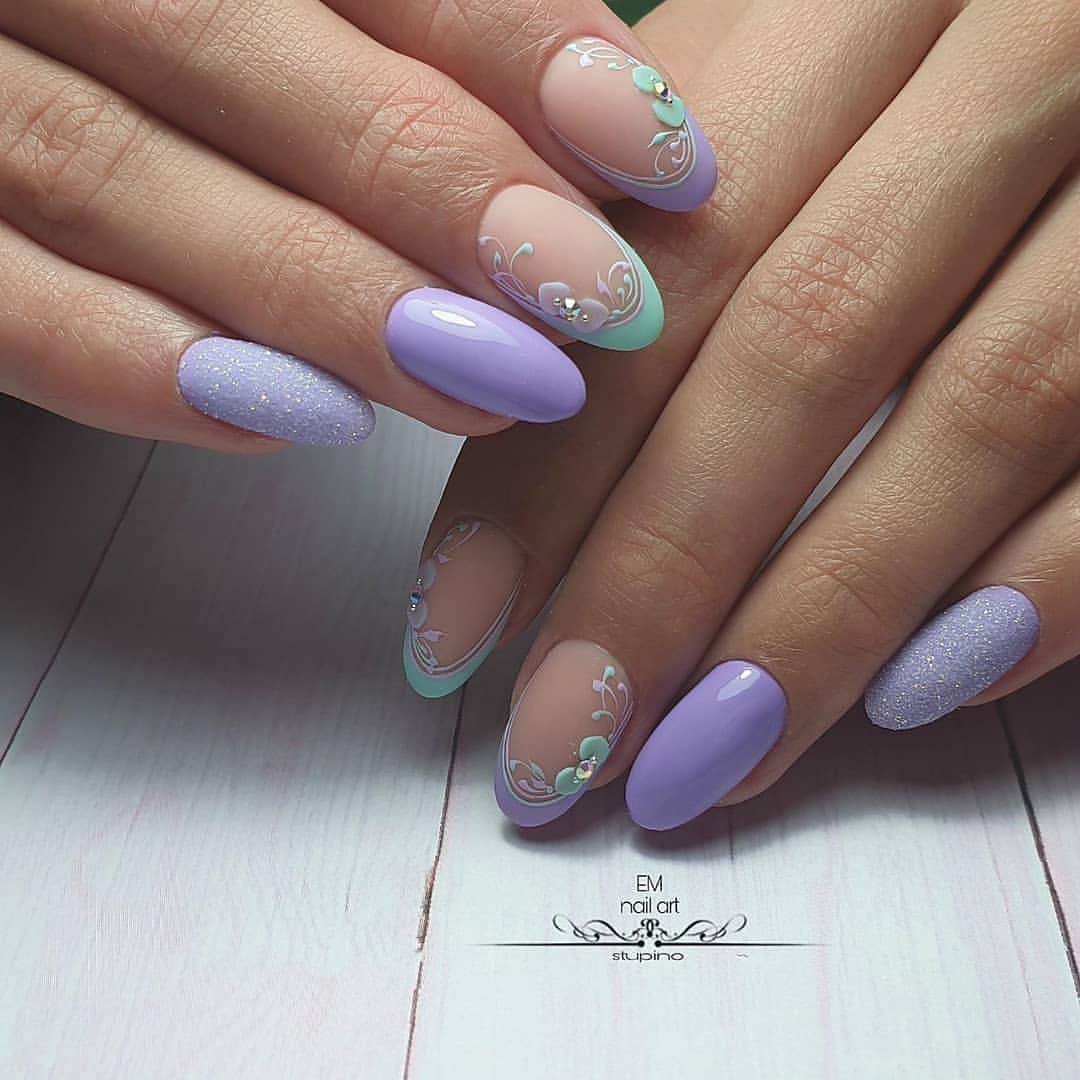
Lavender and Mint Elegance
This design combines lavender and mint green with intricate floral accents, creating a delicate and sophisticated look. The oval shape adds a touch of elegance, making this manicure perfect for those who love a soft and feminine style.
-
- Base coat
- Lavender gel polish
- Mint green gel polish
- Fine glitter
- Nail art brush for floral designs
- Rhinestones
- UV/LED lamp
- Top coat
- Nail file and buffer
How to Create This Look:
-
- Shape your nails into an oval shape using a nail file.
- Apply a base coat and cure under the UV/LED lamp.
- Paint your nails with the lavender and mint green gel polishes, curing after each application.
- Use the nail art brush to create delicate floral designs with the mint green polish, then cure.
- Apply fine glitter to the accent nail and cure.
- Add rhinestones to the floral designs, then seal with a top coat and cure.
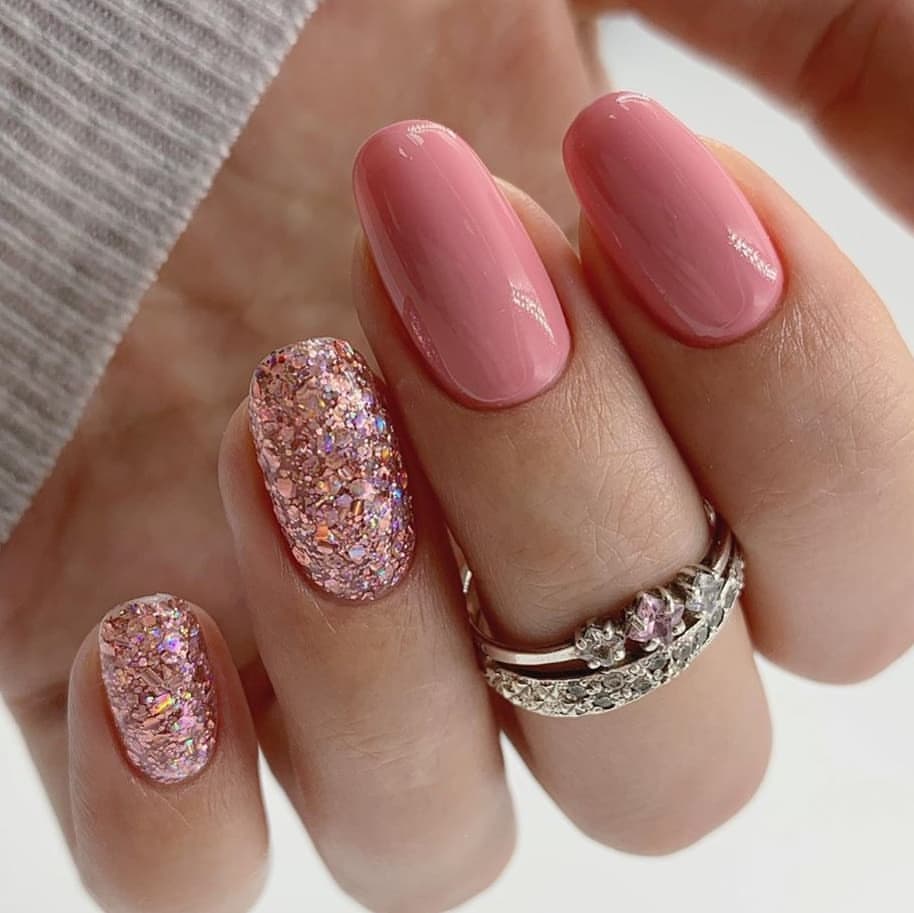
Pink Glitter Glam
This simple yet glamorous manicure features a beautiful combination of pink polish and chunky glitter. The short square shape keeps the look chic and easy to manage, perfect for everyday wear with a touch of sparkle.
-
- Base coat
- Pink gel polish
- Chunky pink glitter polish
- UV/LED lamp
- Top coat
- Nail file and buffer
How to Create This Look:
-
- File your nails into a short square shape.
- Apply a base coat and cure under the UV/LED lamp.
- Paint your nails with the pink gel polish and cure.
- Apply the chunky pink glitter polish to the accent nails and cure.
- Finish with a top coat to seal the design and cure one last time.
Winter Wonderland
This icy manicure features a blue and white color scheme with a textured accent nail. The oval shape adds a touch of elegance, while the intricate snowflake design brings a winter wonderland to your fingertips.
-
- Base coat
- White gel polish
- Blue gel polish
- Textured gel polish for the accent nail
- Nail art brush for the snowflake design
- UV/LED lamp
- Top coat
- Nail file and buffer
How to Create This Look:
-
- Shape your nails into an oval shape.
- Apply a base coat and cure under the UV/LED lamp.
- Paint your nails with the white and blue gel polishes, curing after each application.
- Apply the textured gel polish to the accent nail and cure.
- Use the nail art brush to create a snowflake design on the blue nail, then cure.
- Seal with a top coat and cure one final time.
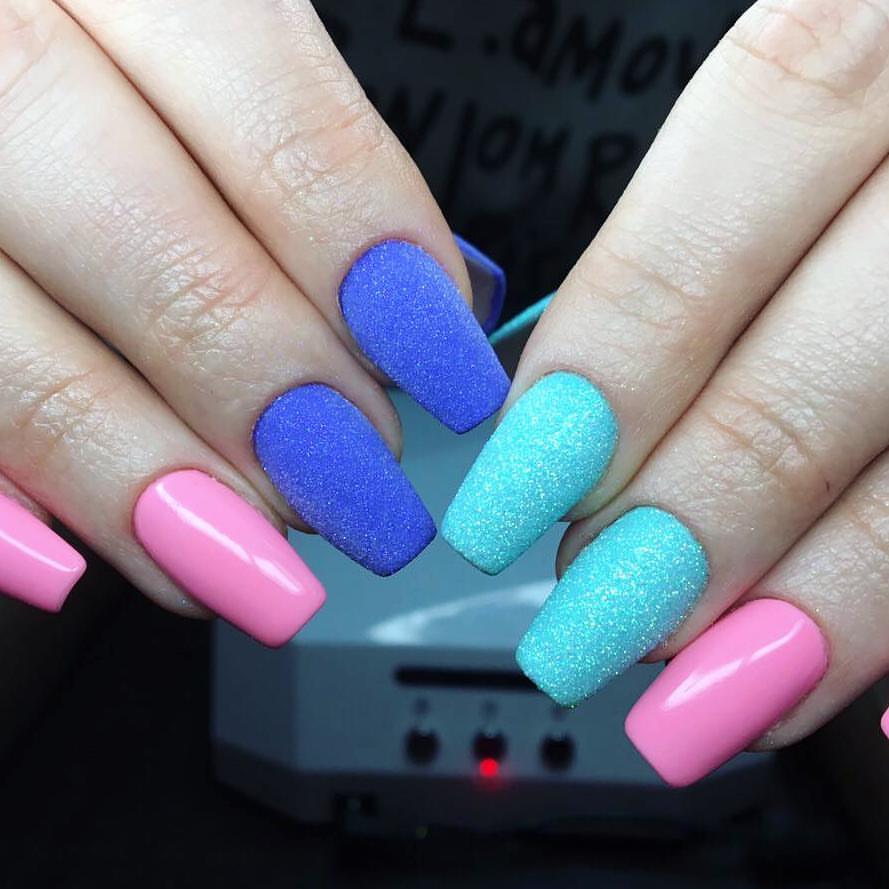
Pastel Rainbow Delight
This vibrant manicure features a coffin shape with a mix of pastel colors and a textured finish. The bold color combination and glittery texture make this design perfect for those who love a fun and playful look.
-
- Base coat
- Pink, blue, and purple gel polishes
- Textured gel polishes for the accent nails
- UV/LED lamp
- Top coat
- Nail file and buffer
How to Create This Look:
-
- File your nails into a coffin shape.
- Apply a base coat and cure under the UV/LED lamp.
- Paint your nails with the pink, blue, and purple gel polishes, curing after each application.
- Apply the textured gel polishes to the accent nails and cure.
- Finish with a top coat to seal the design and cure one last time.
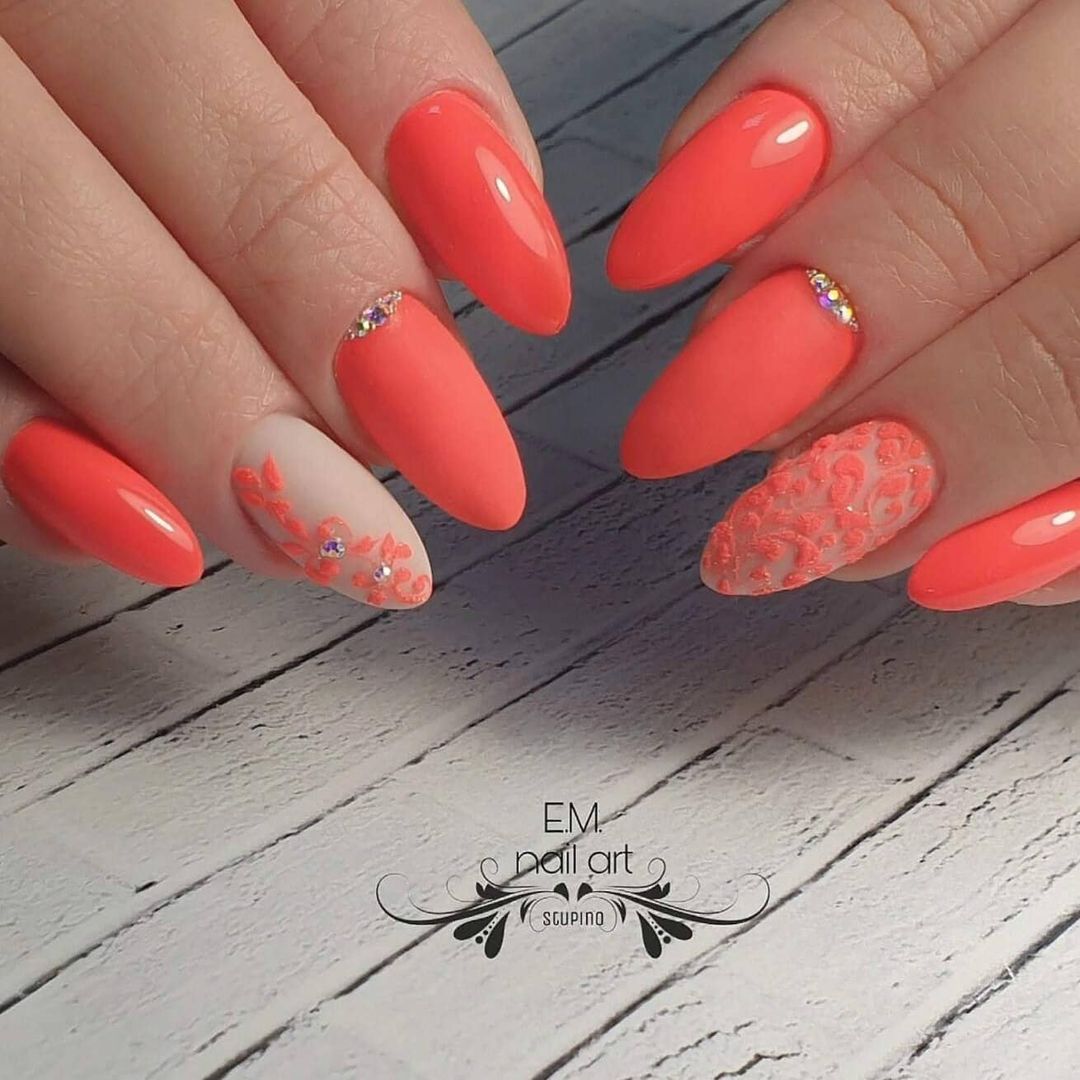
Coral Delight with Floral Accent
This vibrant coral manicure features a delicate floral accent nail, perfect for adding a touch of nature to your look. The almond shape adds a feminine touch, making this design ideal for both casual and special occasions.
-
- Base coat
- Coral gel polish
- White gel polish for the floral design
- Rhinestones
- Nail art brush
- UV/LED lamp
- Top coat
- Nail file and buffer
How to Create This Look:
-
- Shape your nails into an almond shape using a nail file.
- Apply a base coat and cure under the UV/LED lamp.
- Paint your nails with the coral gel polish and cure.
- Use the nail art brush to create the floral design with the white gel polish on the accent nail, then cure.
- Add rhinestones for extra sparkle and seal with a top coat, curing one final time.
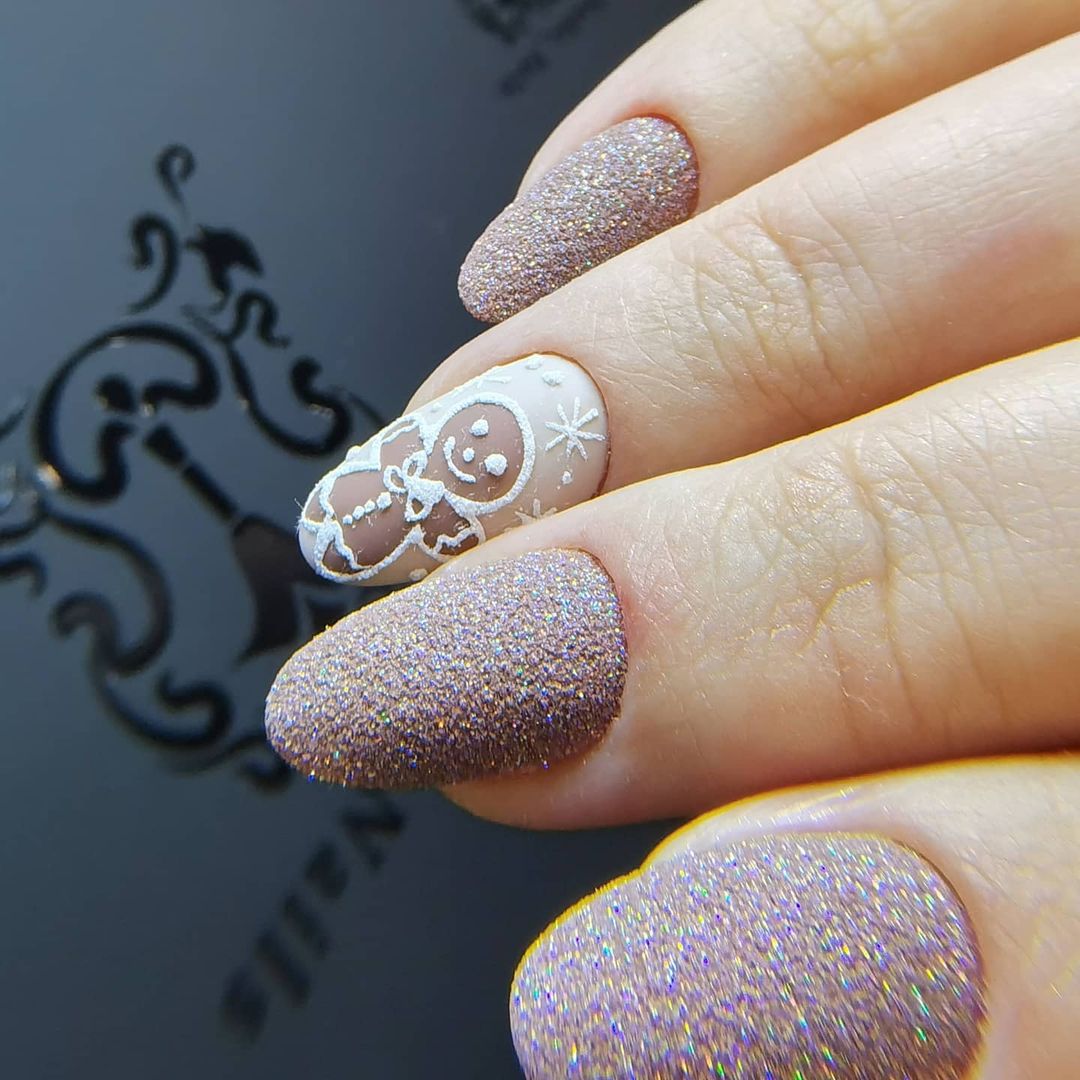
Glittery Gingerbread Delight
This festive manicure features a gingerbread man design on a medium round shape. The combination of glittery polish and detailed artwork makes this design perfect for the holiday season, bringing a touch of whimsy and joy to your nails.
-
- Base coat
- Nude gel polish
- Glitter gel polish
- White gel polish for the gingerbread design
- Nail art brush
- UV/LED lamp
- Top coat
- Nail file and buffer
How to Create This Look:
-
- Shape your nails into a medium round shape using a nail file.
- Apply a base coat and cure under the UV/LED lamp.
- Paint your nails with the nude gel polish and cure.
- Apply the glitter gel polish to the accent nails and cure.
- Use the nail art brush to create the gingerbread man design with the white gel polish, then cure.
- Seal with a top coat and cure one final time.
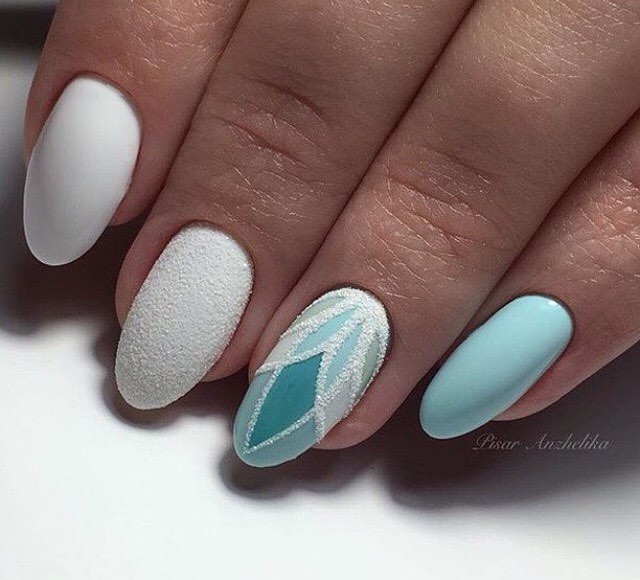
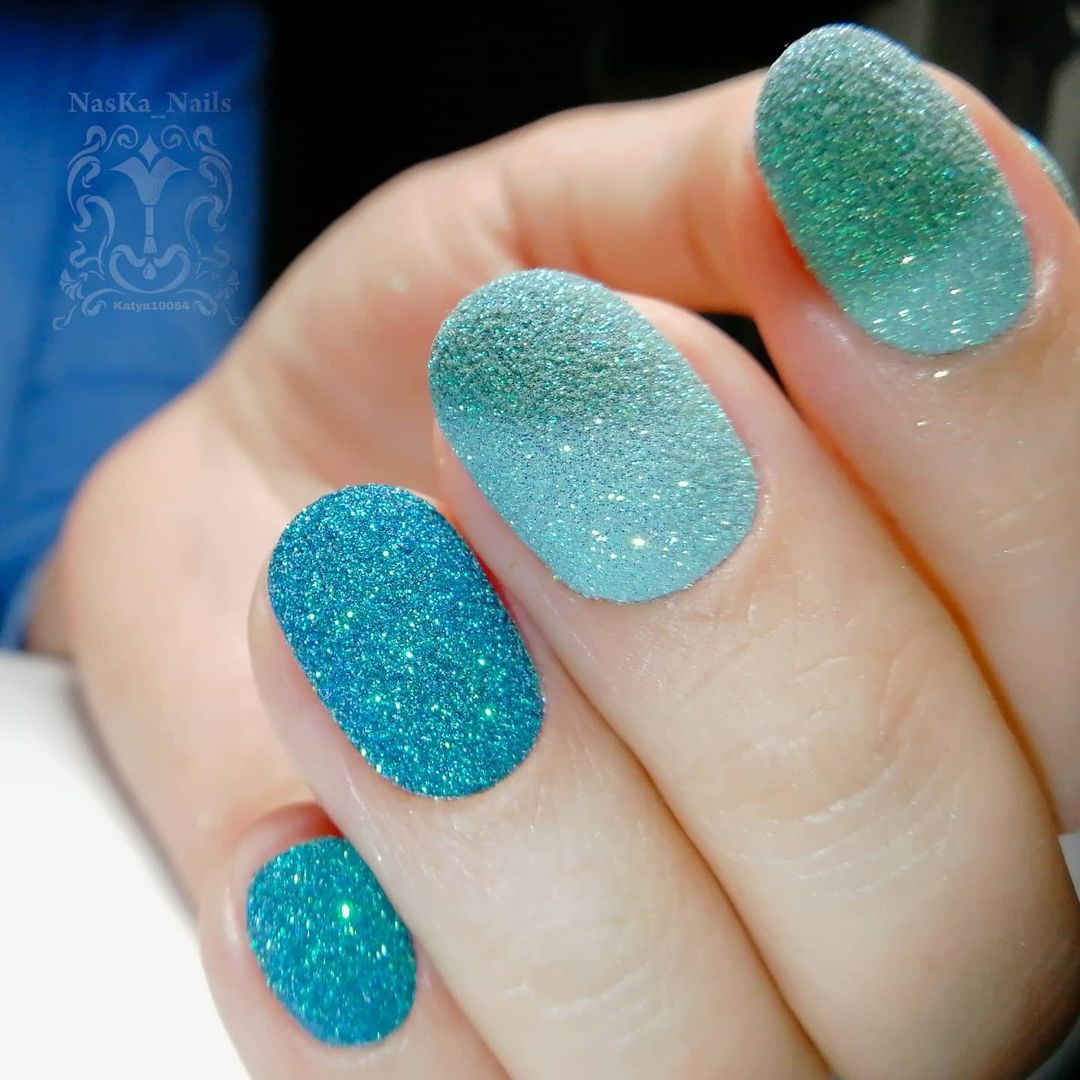
Shimmering Blue Ombre
This beautiful oval shape design features a captivating ombre effect transitioning from light blue to a deeper turquoise with a sparkling finish. The gradient and glitter create a magical look, making it perfect for those who want their nails to stand out with a touch of chrome and color pattern.
-
- Base coat
- Light blue gel polish
- Turquoise gel polish
- Fine glitter
- Sponge for ombre effect
- UV/LED lamp
- Top coat
- Nail file and buffer
How to Create This Look:
-
- Shape your nails into an oval shape.
- Apply a base coat and cure under the UV/LED lamp.
- Using a sponge, blend the light blue and turquoise gel polishes to create the ombre effect, then cure.
- Apply fine glitter to enhance the shimmer and cure.
- Finish with a top coat to seal the design and cure one last time.
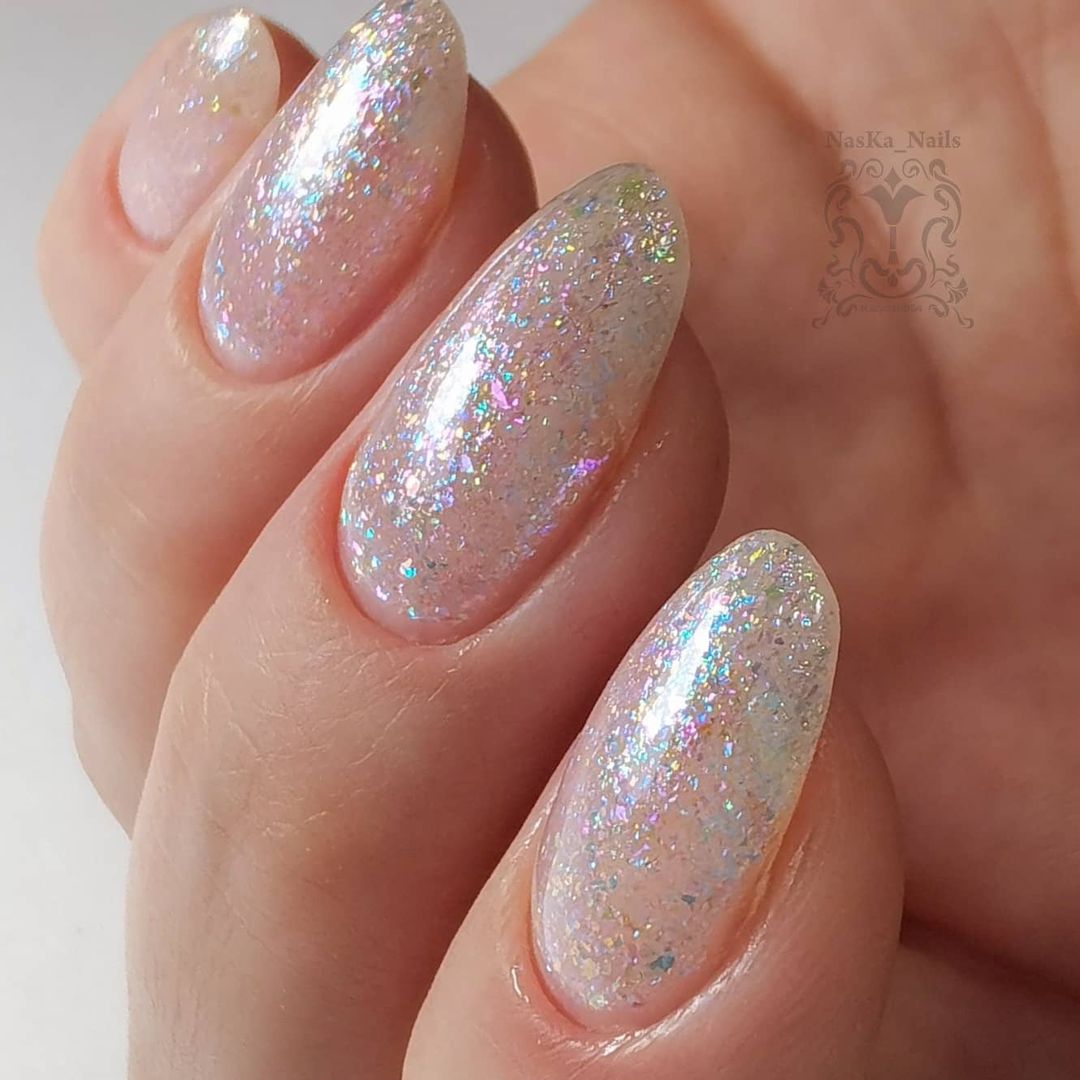
Iridescent Sparkle
This elegant manicure features a milky white base with an iridescent glitter overlay on a gel almond shape. The subtle yet stunning effect is perfect for those who love a natural-looking design with a hint of sparkle, making it ideal for both everyday wear and special occasions.
-
- Base coat
- Milky white gel polish
- Iridescent glitter top coat
- UV/LED lamp
- Top coat
- Nail file and buffer
How to Create This Look:
-
- Shape your nails into a gel almond shape.
- Apply a base coat and cure under the UV/LED lamp.
- Paint your nails with the milky white gel polish and cure.
- Apply the iridescent glitter top coat and cure.
- Seal the design with a top coat and cure one last time.
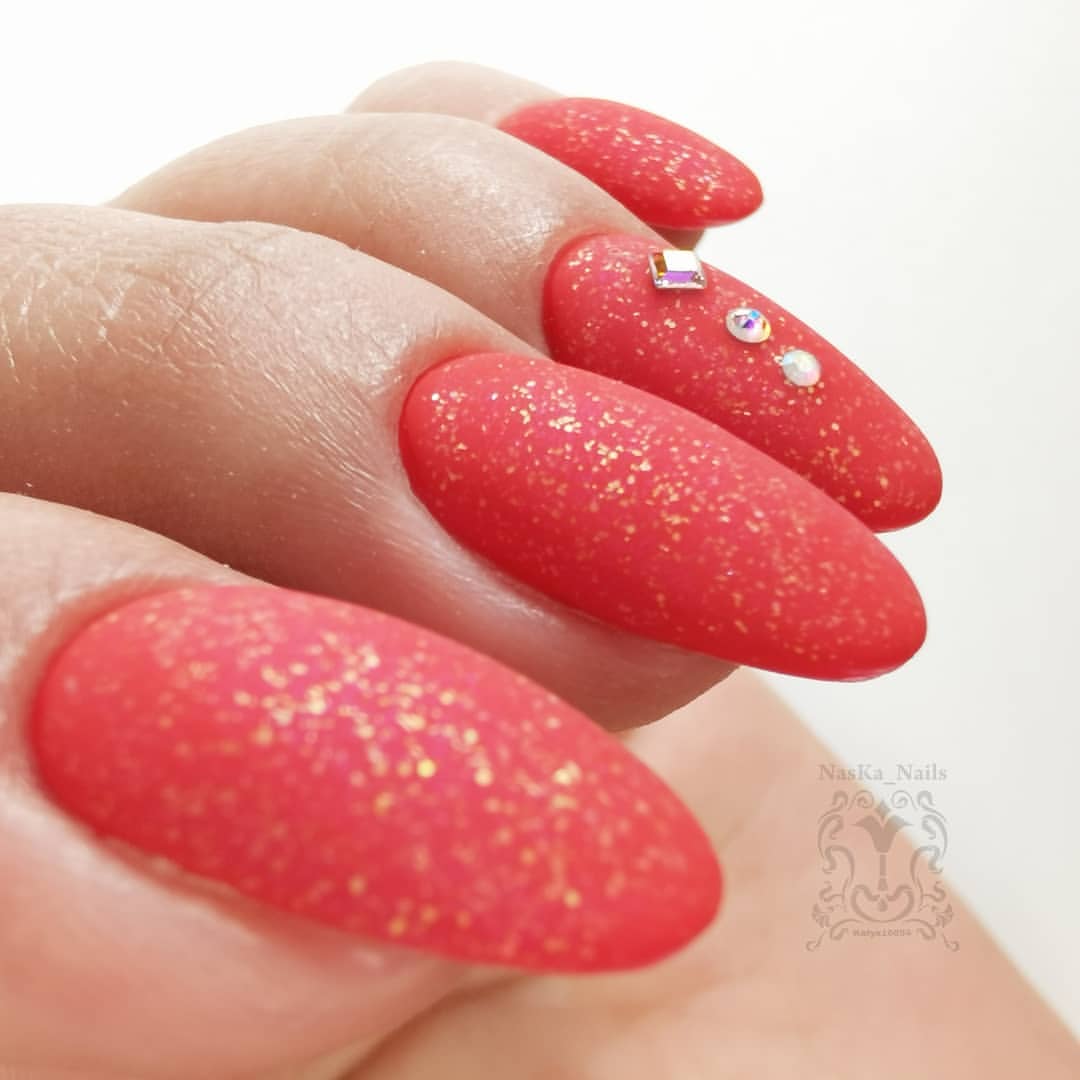
Festive Red Glitter
This vibrant and festive manicure features a bold red base with gold glitter on a medium almond shape. The added rhinestones give it a luxurious touch, perfect for the holiday season or any event where you want to make a statement.
-
- Base coat
- Red gel polish
- Gold glitter top coat
- Rhinestones
- UV/LED lamp
- Top coat
- Nail file and buffer
How to Create This Look:
-
- Shape your nails into a medium almond shape.
- Apply a base coat and cure under the UV/LED lamp.
- Paint your nails with the red gel polish and cure.
- Apply the gold glitter top coat and cure.
- Add rhinestones for extra sparkle, then seal with a top coat and cure.
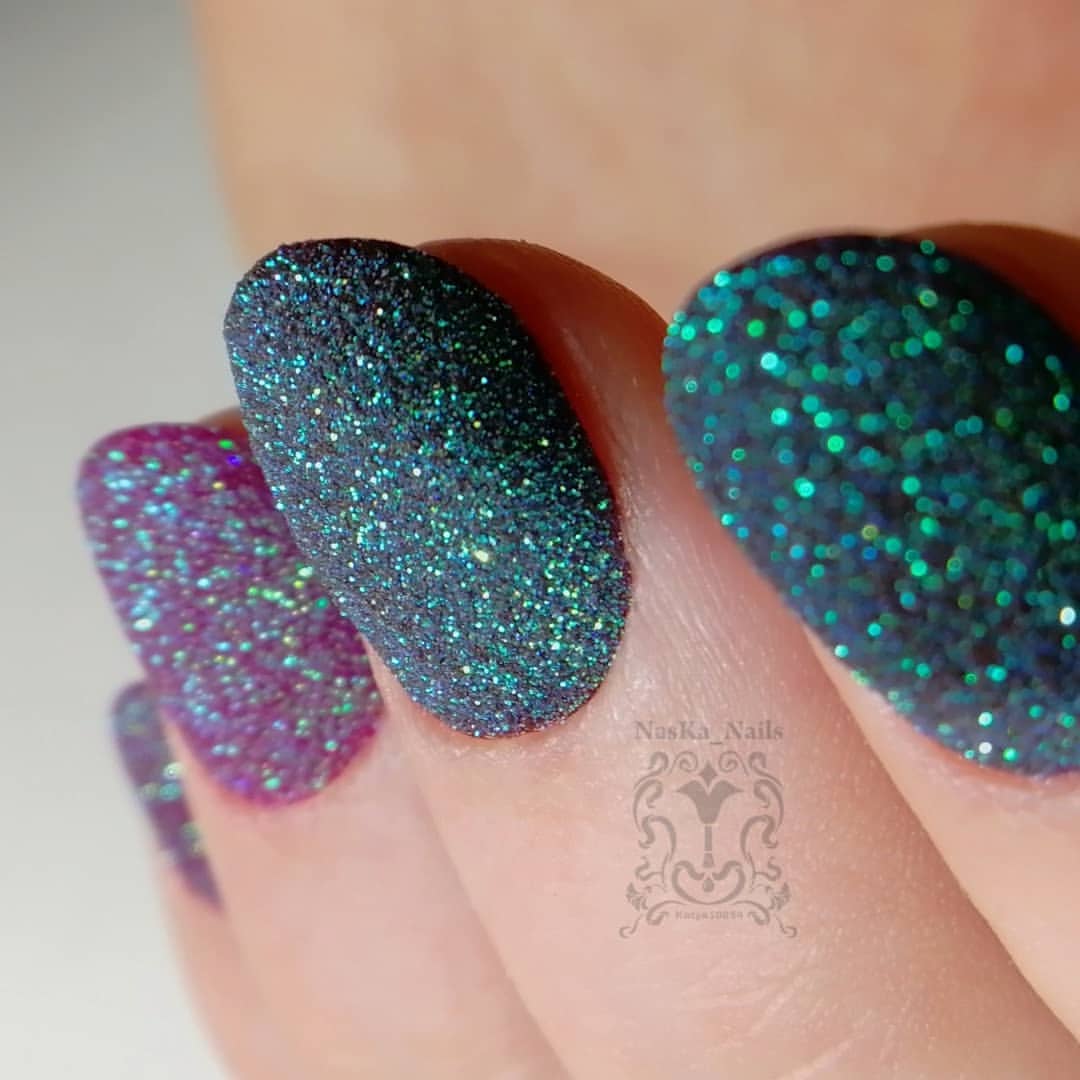
Multicolor Glitter Magic
This stunning manicure features a blend of purple, blue, and green glitter on a round shape, creating a mesmerizing and dynamic look. The multi-tonal glitter catches the light beautifully, making this design perfect for those who love bold and dazzling nails.
-
- Base coat
- Purple, blue, and green glitter gel polishes
- UV/LED lamp
- Top coat
- Nail file and buffer
How to Create This Look:
-
- Shape your nails into a round shape.
- Apply a base coat and cure under the UV/LED lamp.
- Paint your nails with the purple, blue, and green glitter gel polishes, curing after each application.
- Finish with a top coat to seal the design and cure one last time.
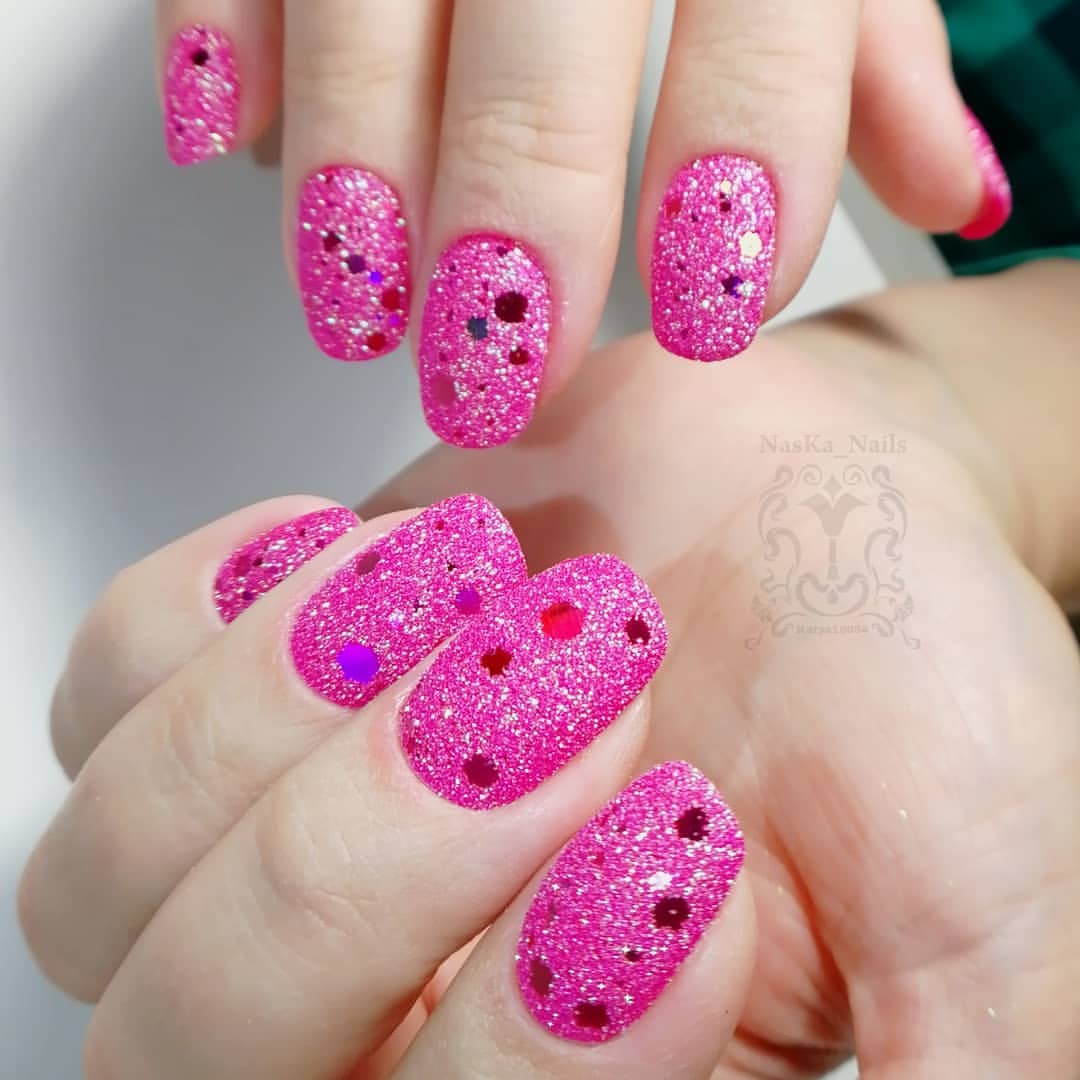
Vibrant Pink Confetti
This playful manicure features a vibrant pink base with confetti glitter accents on a short square shape. The fun and lively design is perfect for those who love to add a pop of color and a touch of whimsy to their nails.
-
- Base coat
- Pink gel polish
- Confetti glitter top coat
- UV/LED lamp
- Top coat
- Nail file and buffer
How to Create This Look:
-
- Shape your nails into a short square shape.
- Apply a base coat and cure under the UV/LED lamp.
- Paint your nails with the pink gel polish and cure.
- Apply the confetti glitter top coat and cure.
- Finish with a top coat to seal the design and cure one last time.
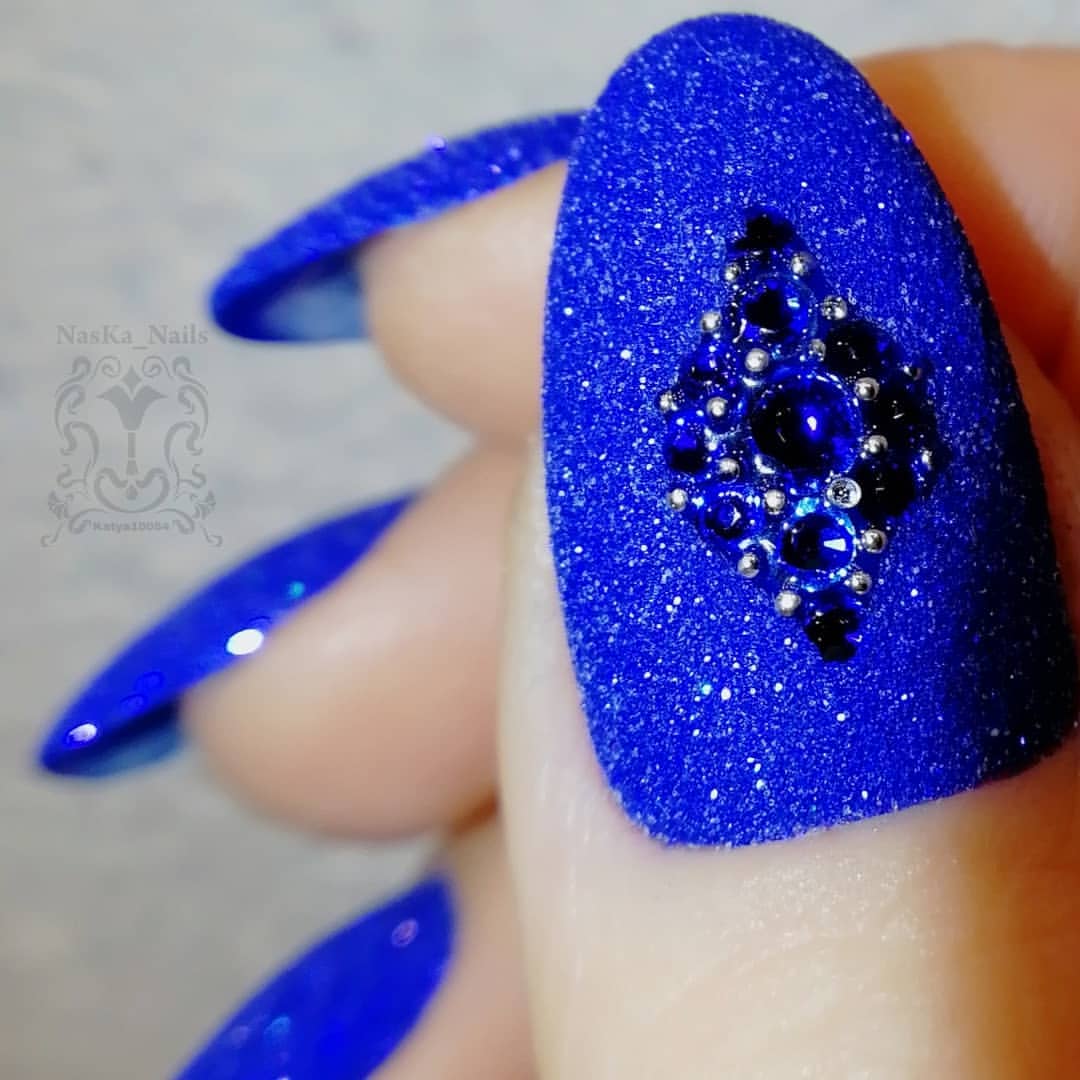
Royal Blue Elegance
This luxurious manicure features a rich navy blue base with intricate rhinestone detailing on a gel almond shape. The deep blue color and sparkling embellishments create a regal and elegant look, perfect for making a sophisticated statement.
-
- Base coat
- Navy blue gel polish
- Rhinestones
- Nail glue
- UV/LED lamp
- Top coat
- Nail file and buffer
How to Create This Look:
-
- Shape your nails into a gel almond shape.
- Apply a base coat and cure under the UV/LED lamp.
- Paint your nails with the navy blue gel polish and cure.
- Apply rhinestones using nail glue, then cure.
- Seal with a top coat and cure one final time.
Elegant Nude with Sparkle
This elegant manicure features a nude base with a sparkling accent nail and a line of rhinestones on a medium almond shape. The combination of the subtle nude color and the dazzling accents creates a sophisticated and stylish look.

-
- Base coat
- Nude gel polish
- Fine glitter top coat
- Rhinestones
- UV/LED lamp
- Top coat
- Nail file and buffer
How to Create This Look:
-
- Shape your nails into a medium almond shape.
- Apply a base coat and cure under the UV/LED lamp.
- Paint your nails with the nude gel polish and cure.
- Apply the fine glitter top coat to the accent nail and cure.
- Add a line of rhinestones and seal with a top coat, curing one last time.
Frequently Asked Questions
Q: How long do dip nails typically last? A: Dip nails can last anywhere from two to four weeks, depending on how well you care for them and the quality of the products used.
Q: Can I do dip nails at home, or should I go to a salon? A: While it’s possible to do dip nails at home with the right kit and some practice, visiting a salon can ensure professional results, especially for intricate designs.
Q: What are some trendy colors for fall dip nails? A: For fall 2024, popular colors include navy blue, deep reds, matte finishes, and milky white. Chrome accents are also making a statement this season.
Q: Are dip nails safe for my natural nails? A: When done correctly, dip nails are generally safe. However, improper removal can damage your natural nails, so it’s important to follow the right steps or visit a professional for removal.
Ready to try out these stunning fall dip nails? With these detailed descriptions and practical tips, you’re well on your way to creating beautiful, professional-looking nails at home. Get creative and let your nails shine this fall!
Save Pin