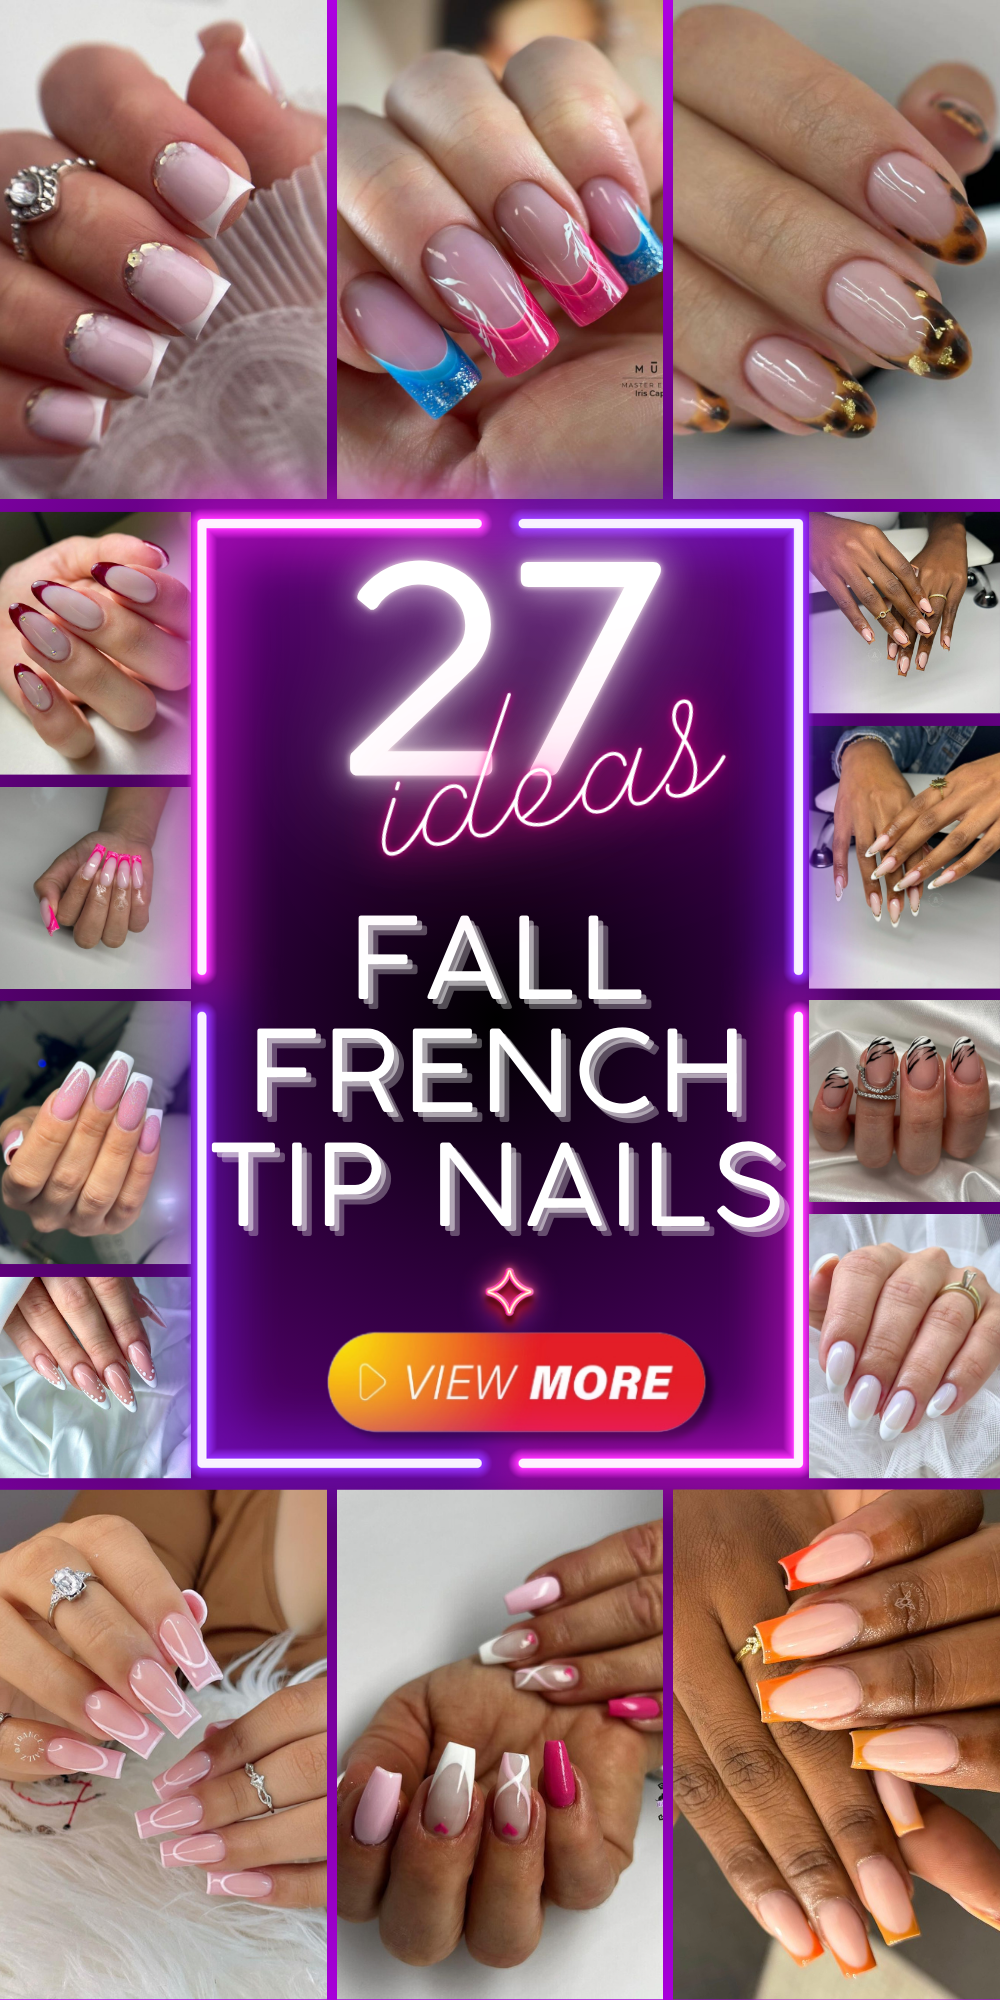
Fall French Tip Nails: 27 Chic Ideas for a Sophisticated Autumn Style
When it comes to nail trends for the fall season, fall french tip nails are taking center stage. But what makes these designs so special? How can you achieve these looks at home? This article will explore various designs, providing professional insights, consumable lists, and step-by-step instructions to help you recreate these stunning nail designs. Get ready to be inspired by some of the trendiest, cutest, and classiest nail ideas for this fall!
Classic Red French Tips
The classic red French tip is a timeless design that exudes elegance and sophistication. The deep red tips contrast beautifully with the neutral base, making this manicure perfect for any occasion. This design is particularly stunning for the fall, as the rich red hues complement the season’s warm tones. The nails are shaped into a short almond style, which adds to the overall classy look without being overly dramatic.

- Base Coat: OPI Natural Nail Base Coat
- Red Polish: Essie “A List”
- Top Coat: Seche Vite Dry Fast Top Coat
- Nail Shape Tools: Nail file and buffer
- Nail Art Brush: For precise application
At-Home Instructions
- Prep Your Nails: Start with clean, dry nails. Shape them into a short almond shape using a nail file.
- Apply Base Coat: Apply a thin layer of OPI Natural Nail Base Coat and let it dry completely.
- Create the Red Tips: Using Essie “A List,” carefully paint the tips of your nails. You can use a nail art brush for more precision.
- Finish with Top Coat: Seal your design with a layer of Seche Vite Dry Fast Top Coat to add shine and longevity.
Sparkling Glitter French Tips
For those who love a bit of sparkle, the glitter French tips are an excellent choice. This design incorporates a glittery top coat over the classic French tip, creating a dazzling effect that’s perfect for festive fall occasions. The nails are shaped into a square long style, providing ample space for the glitter to shine. This look is both fun and classy, making it a versatile option for various events.
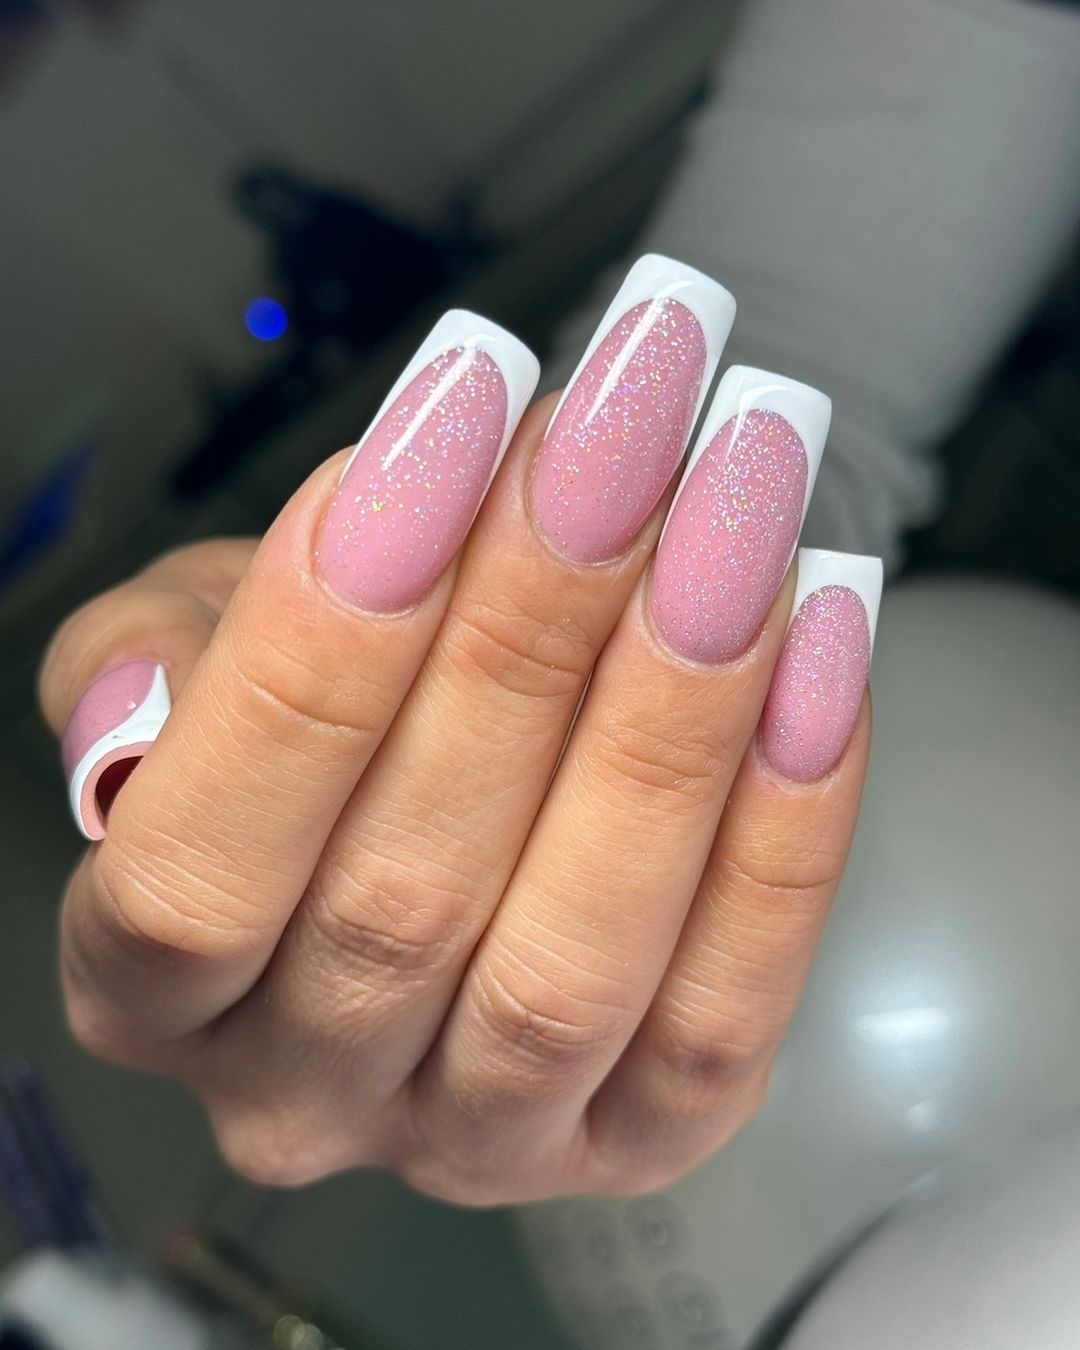
- Base Coat: Zoya Anchor Base Coat
- White Polish: Sally Hansen Xtreme Wear in “White On”
- Glitter Top Coat: China Glaze “Fairy Dust”
- Top Coat: Out the Door Top Coat
- Nail Shape Tools: Nail file and buffer
- Nail Art Brush: For precise application
At-Home Instructions
- Prep Your Nails: Shape your nails into a square long style using a nail file.
- Apply Base Coat: Use Zoya Anchor Base Coat and allow it to dry.
- Create the White Tips: Apply Sally Hansen Xtreme Wear in “White On” to the tips of your nails.
- Add Glitter: Once the white polish is dry, apply China Glaze “Fairy Dust” over the tips.
- Finish with Top Coat: Seal your design with Out the Door Top Coat for added shine and protection.
Zebra Stripes French Tips
For a more daring and unique look, the zebra stripes French tips are a standout choice. This design features black and white zebra stripes over a neutral base, creating a striking contrast. The nails are shaped into a short almond style, which adds a touch of elegance to the bold design. This trendy look is perfect for those who want to make a statement with their nails this fall.
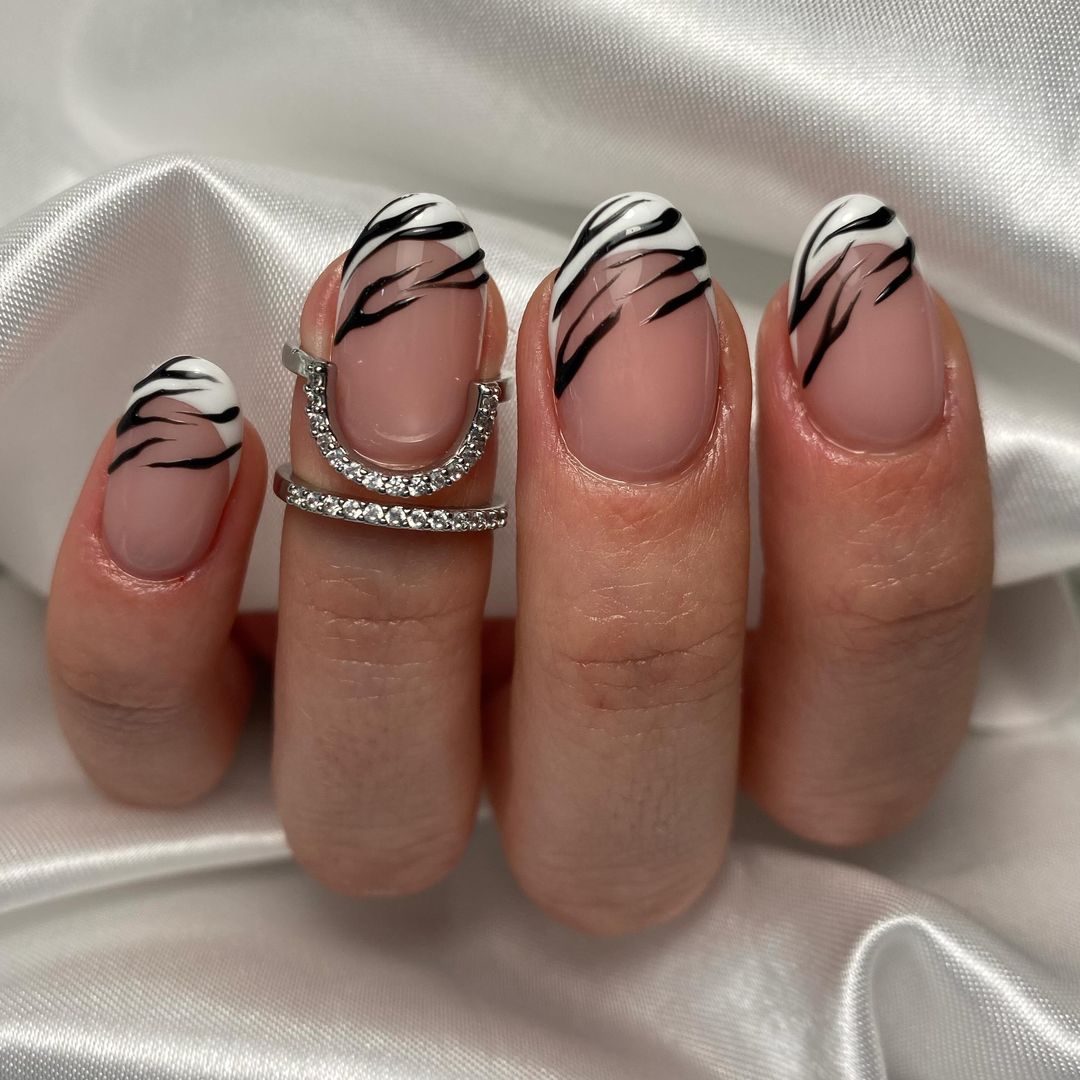
- Base Coat: Deborah Lippmann Hard Rock Base Coat
- White Polish: OPI “Alpine Snow”
- Black Nail Art Pen: Sally Hansen I Heart Nail Art Pen in “Black”
- Top Coat: Essie Gel Couture Top Coat
- Nail Shape Tools: Nail file and buffer
- Nail Art Brush: For precise application
At-Home Instructions
- Prep Your Nails: Shape your nails into a short almond style using a nail file.
- Apply Base Coat: Use Deborah Lippmann Hard Rock Base Coat and let it dry.
- Create the White Tips: Apply OPI “Alpine Snow” to the tips of your nails.
- Add Zebra Stripes: Using Sally Hansen I Heart Nail Art Pen in “Black,” draw zebra stripes over the white tips.
- Finish with Top Coat: Seal your design with Essie Gel Couture Top Coat for a glossy finish.
Polka Dot Elegance
This design features a delicate white French tip adorned with tiny white polka dots, creating a sophisticated and playful look. The tips are sharply defined, adding a modern twist to the traditional French manicure. The nails are shaped into a short almond style, which complements the design perfectly. The overall look is both classy and cute, making it ideal for any occasion.
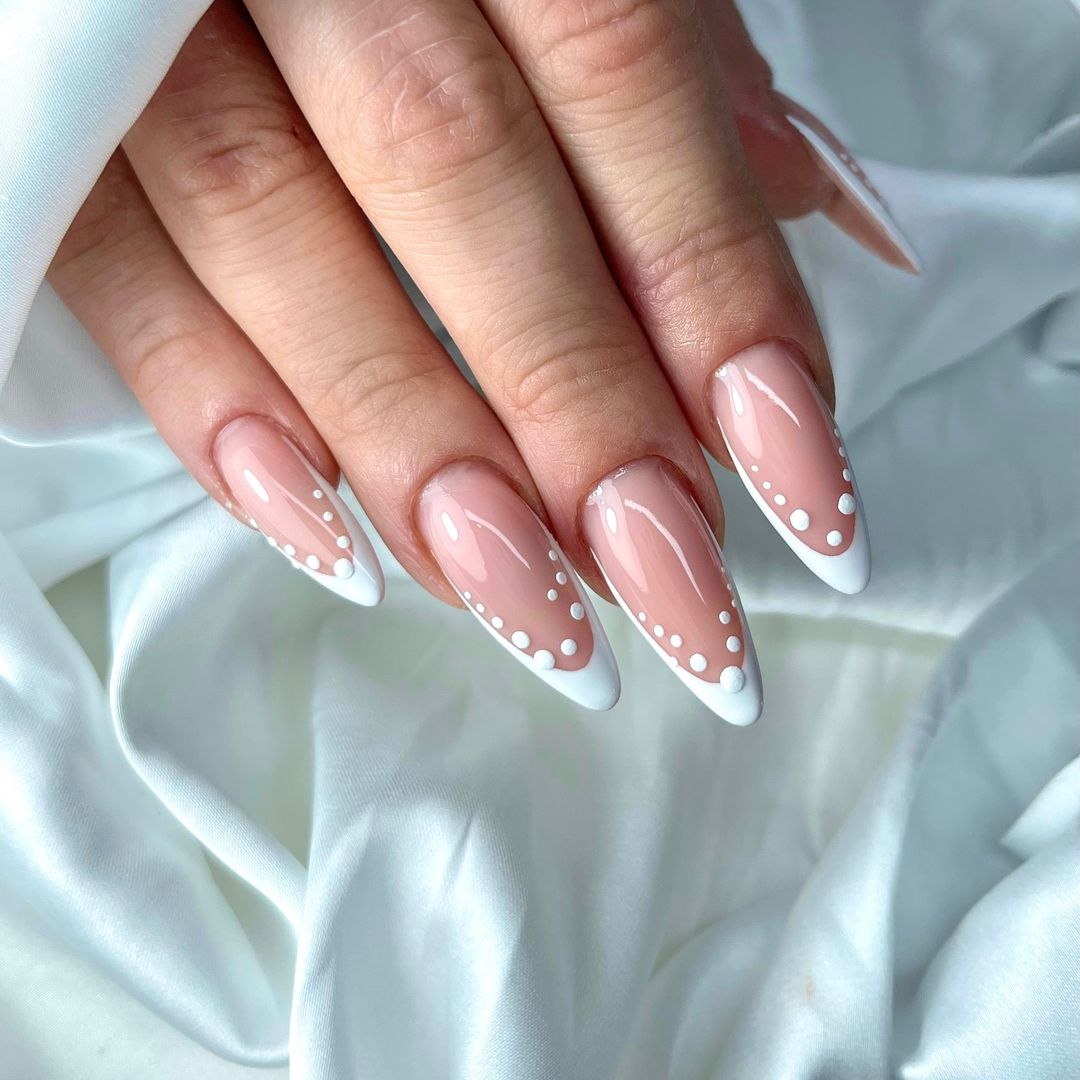
- Base Coat: OPI Nail Envy
- White Polish: Essie “Blanc”
- Top Coat: Sally Hansen Miracle Gel Top Coat
- Dotting Tool: Beetles Nail Art Dotting Tools
- Nail Shape Tools: Nail file and buffer
At-Home Instructions
- Prep Your Nails: Start with clean, dry nails and shape them into a short almond style using a nail file.
- Apply Base Coat: Apply a thin layer of OPI Nail Envy and let it dry completely.
- Create the French Tips: Using Essie “Blanc,” carefully paint the tips of your nails. Allow them to dry.
- Add Polka Dots: Use the Beetles Nail Art Dotting Tool to add small white dots along the border of the French tips.
- Finish with Top Coat: Seal your design with Sally Hansen Miracle Gel Top Coat for a glossy finish.
Save Pin

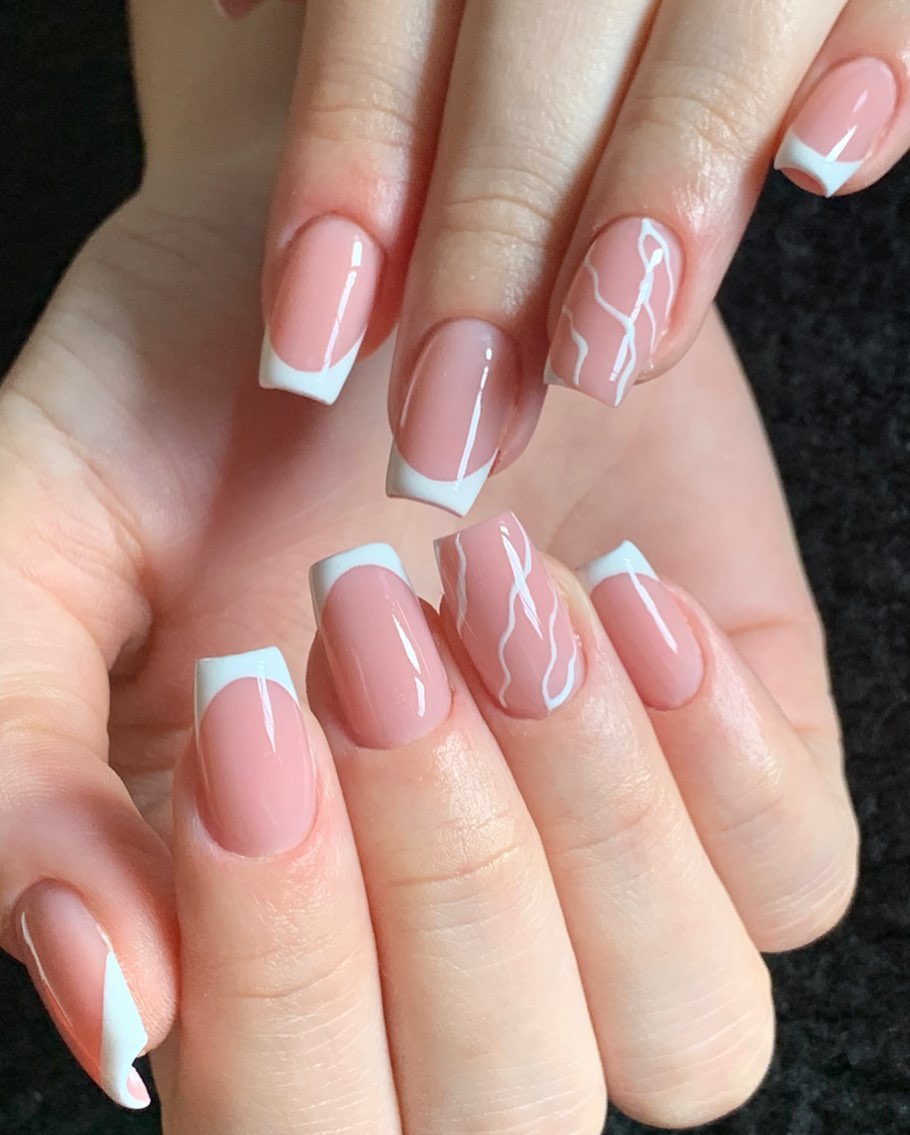
Minimalist White Lines
This design is a modern take on the classic French tip, featuring crisp white lines over a nude base. The lines are simple yet stylish, creating a minimalist aesthetic. The nails are shaped into a square short style, adding to the contemporary feel of the design. This look is perfect for those who prefer a subtle yet trendy manicure.
- Base Coat: Zoya Naked Manicure Base Coat
- White Polish: China Glaze “Snow”
- Top Coat: Essie Good To Go Top Coat
- Nail Art Brush: Winstonia Nail Art Brushes
- Nail Shape Tools: Nail file and buffer
At-Home Instructions
- Prep Your Nails: Shape your nails into a square short style using a nail file.
- Apply Base Coat: Use Zoya Naked Manicure Base Coat and let it dry.
- Create the White Lines: Using China Glaze “Snow” and a Winstonia Nail Art Brush, carefully paint thin white lines on the tips and across the nails.
- Finish with Top Coat: Seal your design with Essie Good To Go Top Coat for added shine and protection.
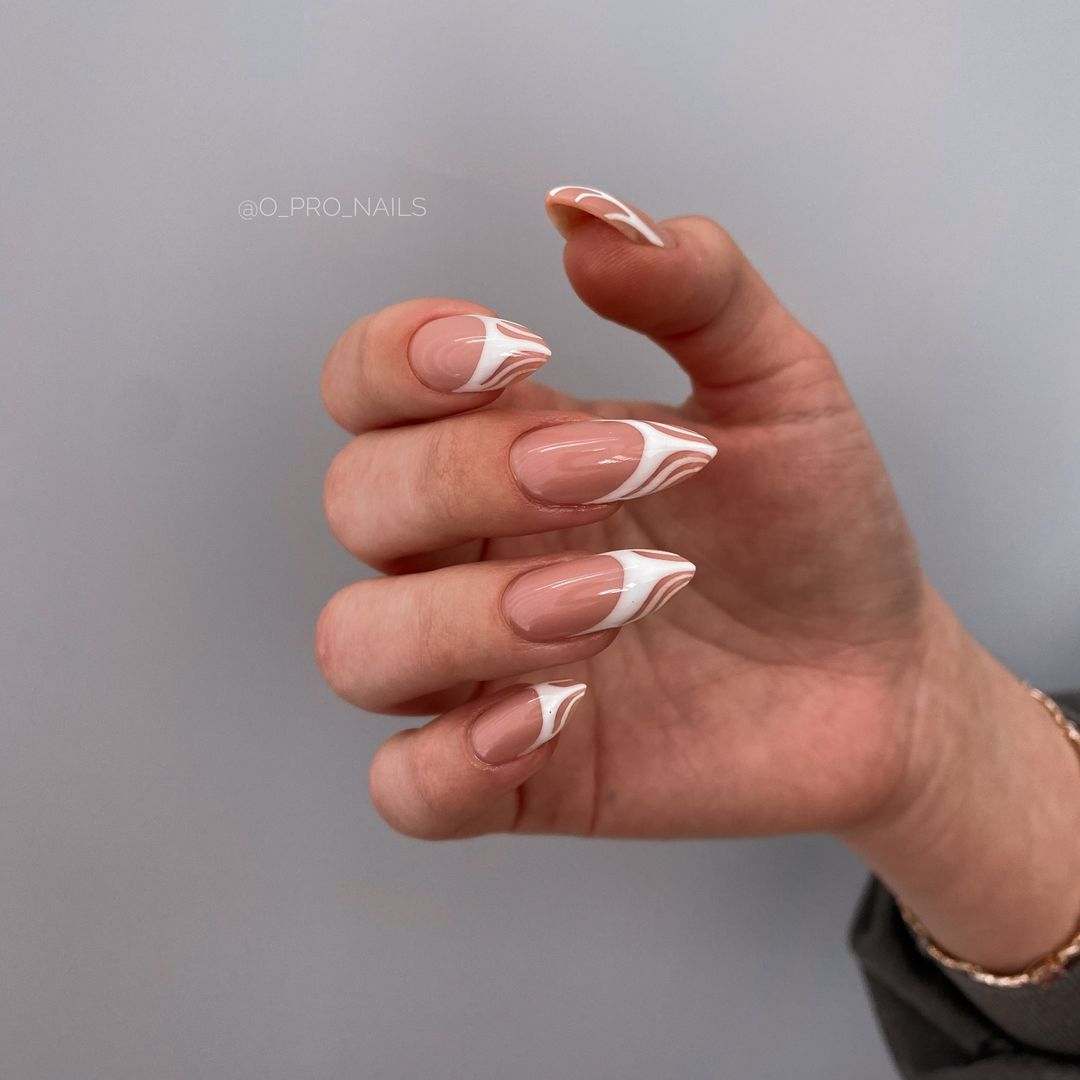
Swirled French Tips
This design features a unique swirl pattern in white, adding a dynamic twist to the classic French tip. The swirls are artfully placed on the tips, creating a sense of movement and flow. The nails are shaped into a long almond style, which enhances the elegance of the design. This look is both fun and aesthetic, making it perfect for those who want to stand out.
- Base Coat: Butter London Horse Power Nail Rescue Base Coat
- White Polish: OPI “Alpine Snow”
- Top Coat: CND Vinylux Weekly Top Coat
- Nail Art Brush: PUEEN Nail Art Brushes
- Nail Shape Tools: Nail file and buffer
At-Home Instructions
- Prep Your Nails: Shape your nails into a long almond style using a nail file.
- Apply Base Coat: Apply Butter London Horse Power Nail Rescue Base Coat and let it dry completely.
- Create the Swirls: Using OPI “Alpine Snow” and a PUEEN Nail Art Brush, carefully paint swirl patterns on the tips of your nails.
- Finish with Top Coat: Seal your design with CND Vinylux Weekly Top Coat for a long-lasting finish
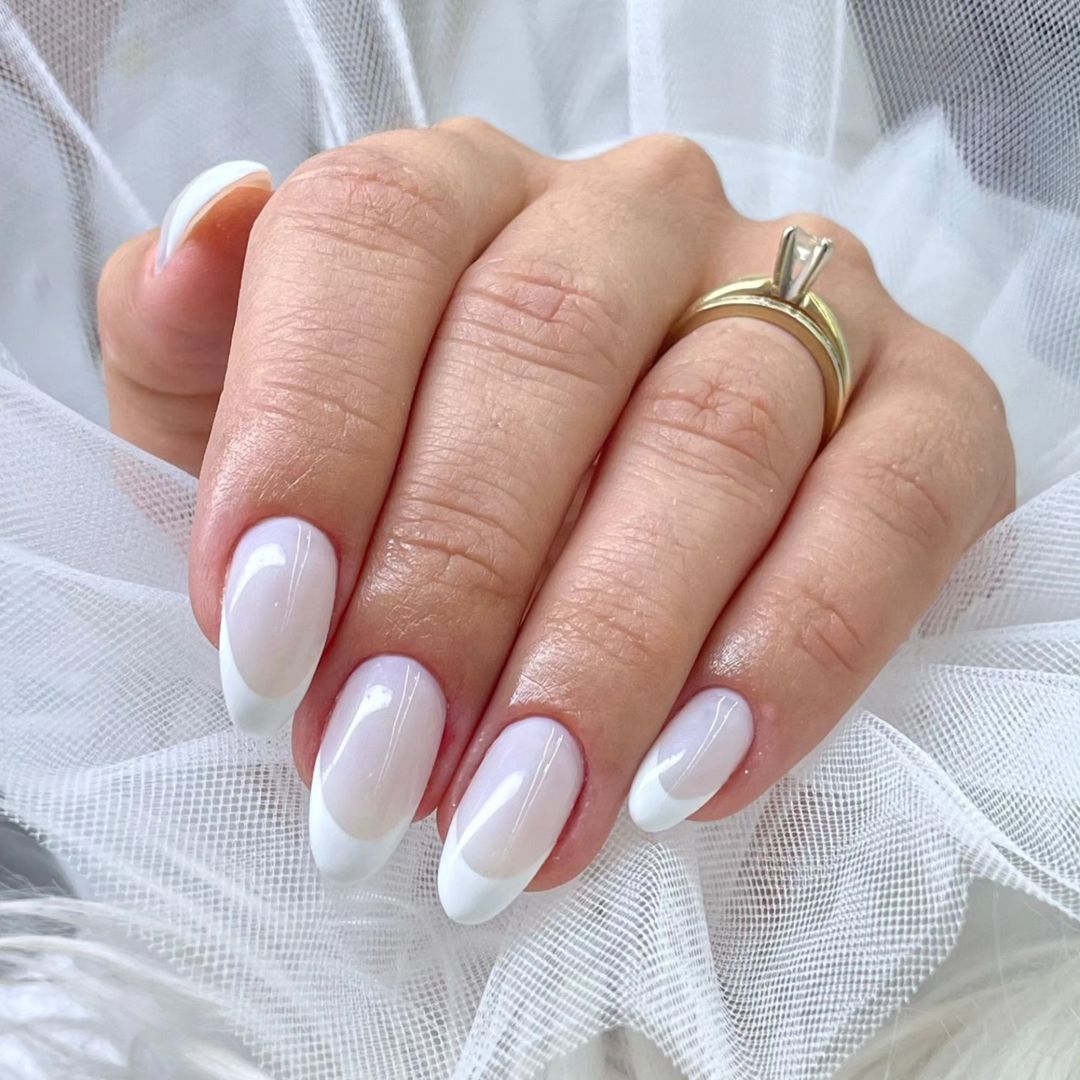
Elegant White French Tips
This design showcases a classic white French tip with a modern twist. The tips are subtly curved, creating an elegant and refined look. The nails are shaped into a short almond style, which enhances the overall gracefulness of the manicure. This look is perfect for anyone seeking a simple yet sophisticated design for the fall season.
- Base Coat: Essie “First Base”
- White Polish: OPI “Funny Bunny”
- Top Coat: Seche Vite Dry Fast Top Coat
- Nail Shape Tools: Nail file and buffer
- Nail Art Brush: For precise application
At-Home Instructions
- Prep Your Nails: Shape your nails into a short almond style using a nail file.
- Apply Base Coat: Apply a thin layer of Essie “First Base” and let it dry completely.
- Create the French Tips: Using OPI “Funny Bunny,” carefully paint the tips of your nails, following the natural curve.
- Finish with Top Coat: Seal your design with Seche Vite Dry Fast Top Coat for a glossy finish.
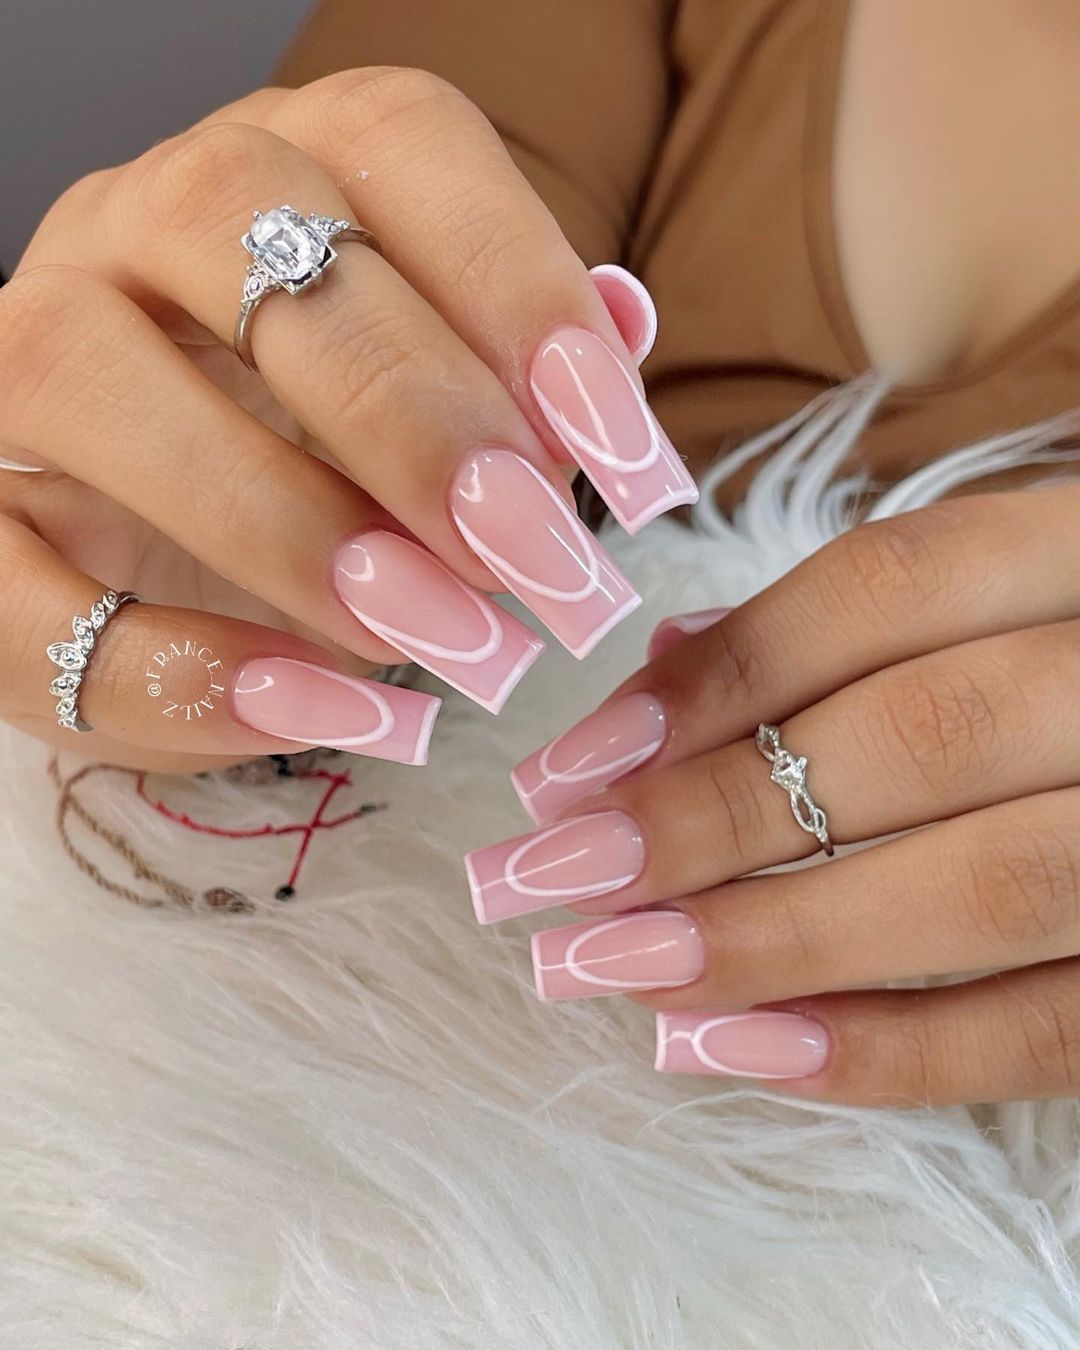
Pink Outline French Tips
This design features a chic pink outline around the classic French tip. The soft pink adds a feminine touch to the traditional design, making it both trendy and cute. The nails are shaped into a square long style, providing a perfect canvas for this detailed design. This manicure is ideal for those who love a combination of elegance and modern flair.
- Base Coat: Zoya Anchor Base Coat
- Pink Polish: Essie “Ballet Slippers”
- White Polish: China Glaze “White on White”
- Top Coat: Essie Gel Couture Top Coat
- Nail Shape Tools: Nail file and buffer
- Nail Art Brush: For precise application
At-Home Instructions
- Prep Your Nails: Shape your nails into a square long style using a nail file.
- Apply Base Coat: Use Zoya Anchor Base Coat and let it dry.
- Create the White Tips: Apply China Glaze “White on White” to the tips of your nails.
- Add the Pink Outline: Using Essie “Ballet Slippers” and a nail art brush, carefully outline the white tips.
- Finish with Top Coat: Seal your design with Essie Gel Couture Top Coat for added shine and protection.
Evil Eye French Tips
This design is a unique take on the French tip, incorporating an evil eye detail for added intrigue. The white tips are contrasted with a neutral base, and the evil eye accent adds a touch of fun and protection. The nails are shaped into a square short style, making this design both trendy and practical.
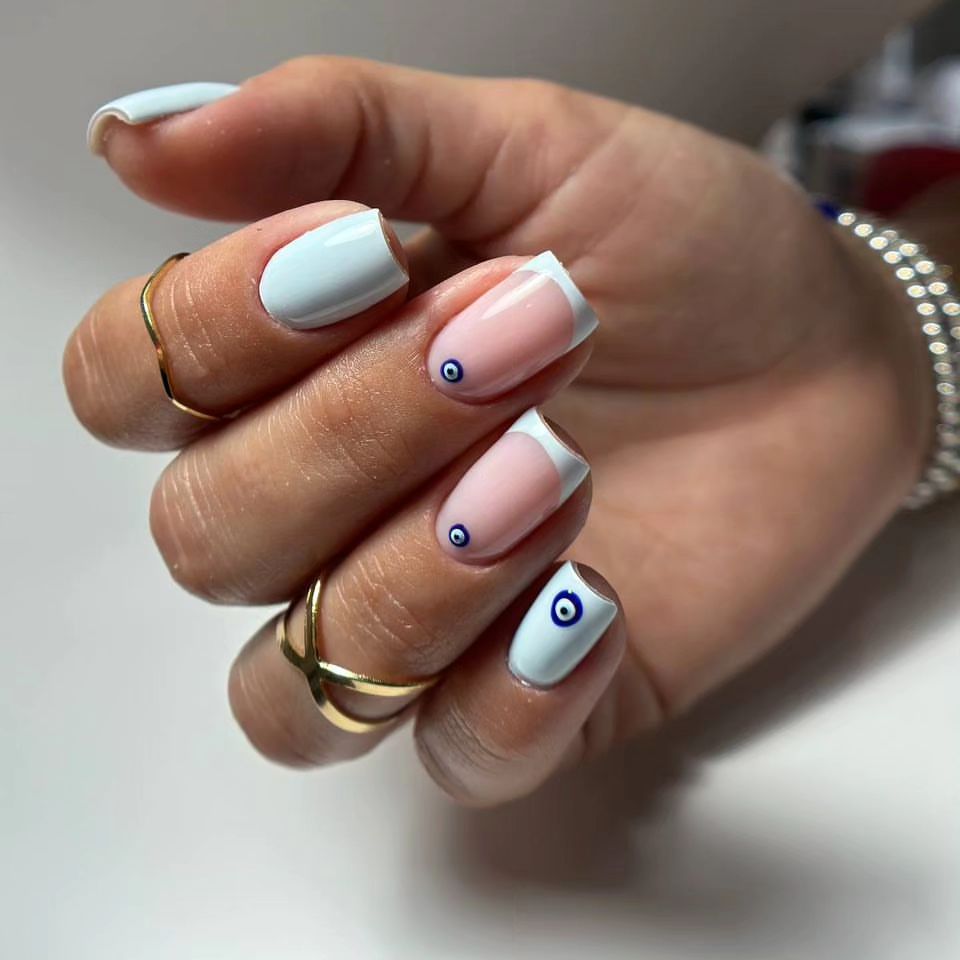
- Base Coat: OPI Nail Envy
- White Polish: Essie “Blanc”
- Blue Polish: OPI “No Room for the Blues”
- Black Polish: Sally Hansen “Black Out”
- Top Coat: Sally Hansen Miracle Gel Top Coat
- Dotting Tool: Beetles Nail Art Dotting Tools
- Nail Shape Tools: Nail file and buffer
At-Home Instructions
- Prep Your Nails: Shape your nails into a square short style using a nail file.
- Apply Base Coat: Apply a thin layer of OPI Nail Envy and let it dry completely.
- Create the French Tips: Using Essie “Blanc,” carefully paint the tips of your nails.
- Add the Evil Eye Detail: Using a dotting tool, create the blue and black circles for the evil eye with OPI “No Room for the Blues” and Sally Hansen “Black Out.”
- Finish with Top Coat: Seal your design with Sally Hansen Miracle Gel Top Coat for a glossy finish.
Save Pin
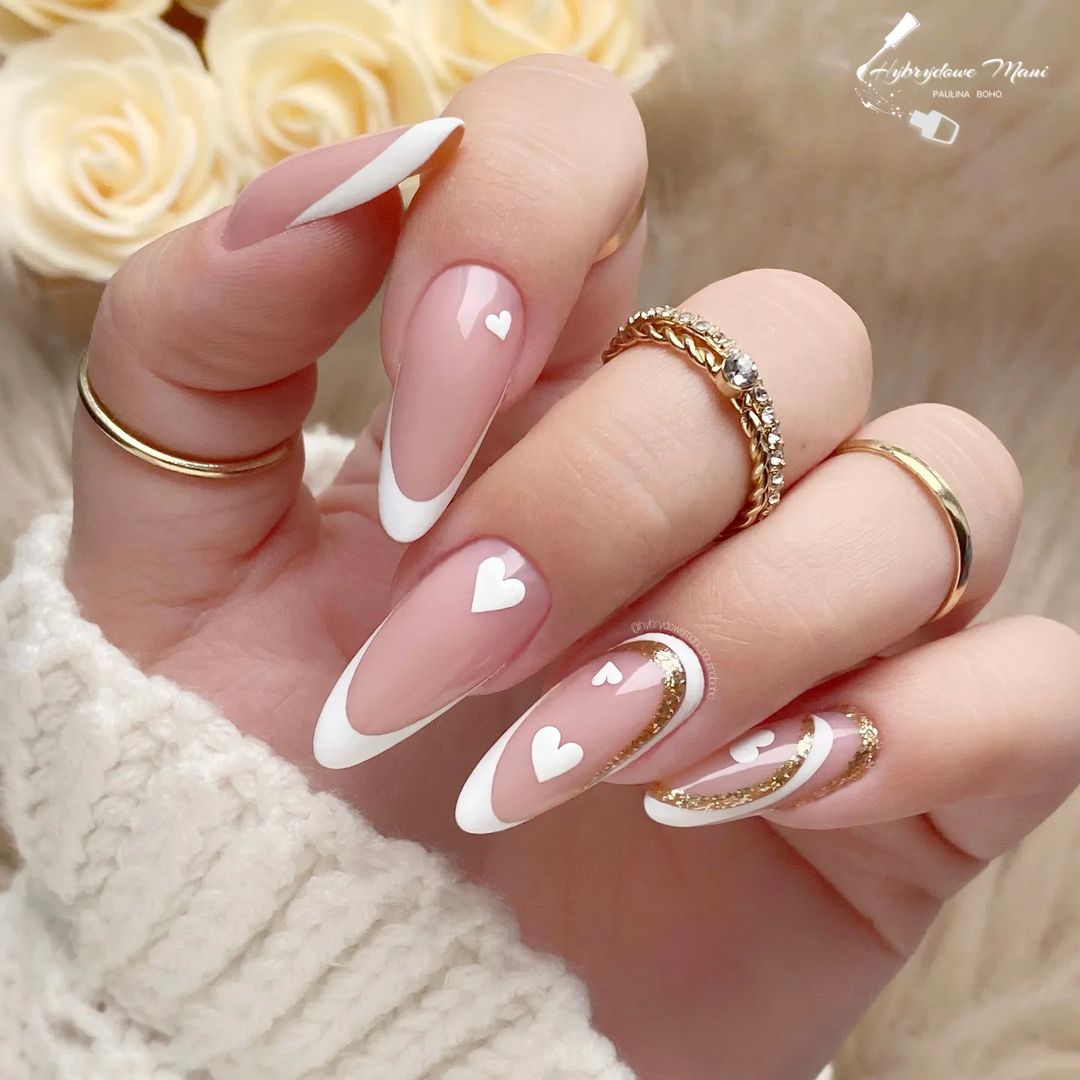
Heart Accented French Tips
This design combines the classic French tip with adorable heart accents, adding a touch of romance to your nails. The hearts are painted in white, complementing the French tips beautifully. The nails are shaped into a long almond style, which enhances the overall elegance and femininity of the design.
- Base Coat: Deborah Lippmann Hard Rock Base Coat
- White Polish: OPI “Alpine Snow”
- Top Coat: Essie Good To Go Top Coat
- Nail Art Brush: Winstonia Nail Art Brushes
- Nail Shape Tools: Nail file and buffer
At-Home Instructions
- Prep Your Nails: Shape your nails into a long almond style using a nail file.
- Apply Base Coat: Use Deborah Lippmann Hard Rock Base Coat and let it dry.
- Create the French Tips: Apply OPI “Alpine Snow” to the tips of your nails.
- Add the Heart Accents: Using the Winstonia Nail Art Brush, paint small hearts near the tips.
- Finish with Top Coat: Seal your design with Essie Good To Go Top Coat for a glossy finish.
Neon Pink and Orange French Tips
This design is a bold and vibrant take on the French tip, featuring neon pink and orange hues. The combination of these bright colors creates a striking and modern look. The nails are shaped into a short almond style, making this design both fun and practical for daily wear.
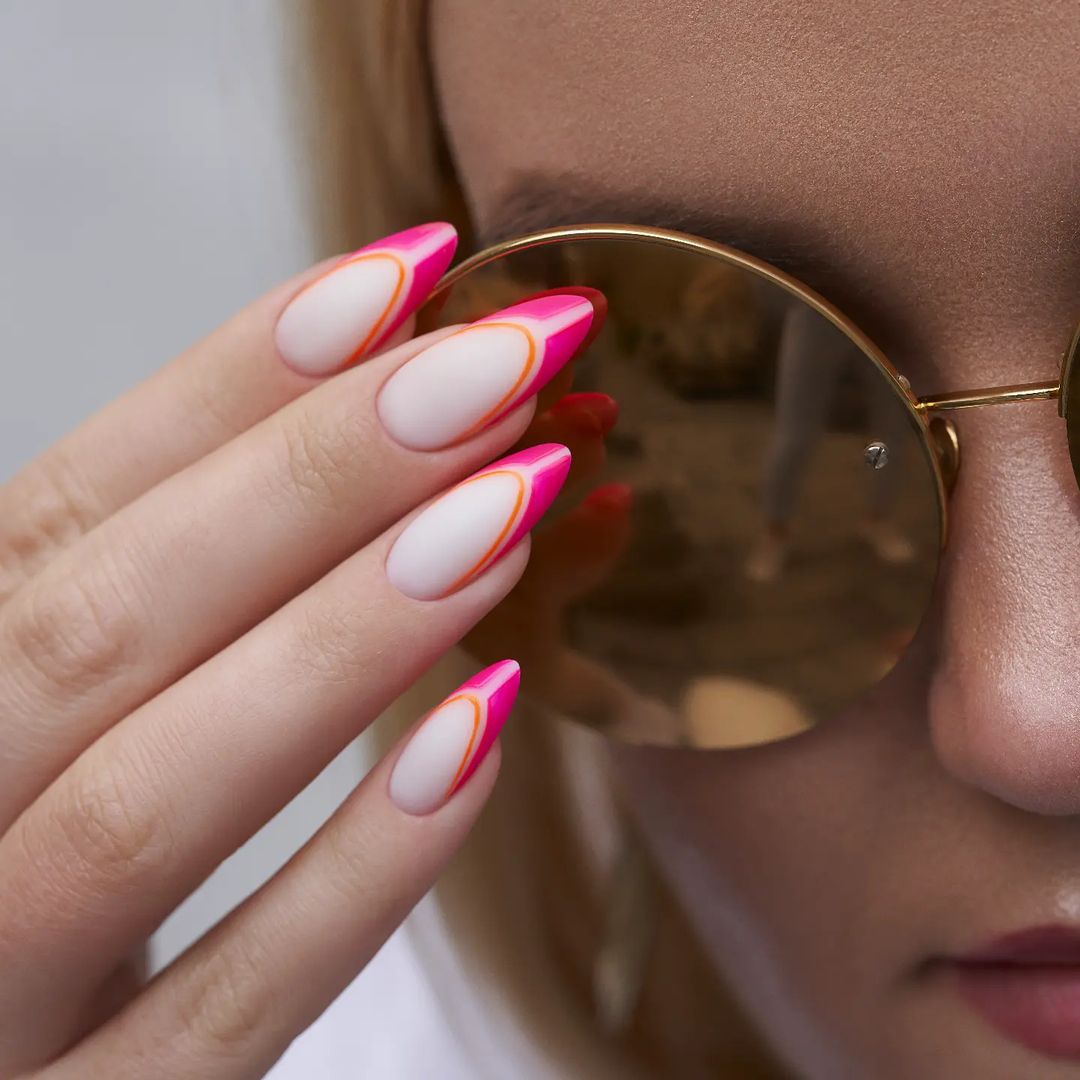
- Base Coat: Butter London Horse Power Nail Rescue Base Coat
- Neon Pink Polish: China Glaze “Neon & On & On”
- Neon Orange Polish: Essie “Tart Deco”
- Top Coat: CND Vinylux Weekly Top Coat
- Nail Shape Tools: Nail file and buffer
- Nail Art Brush: PUEEN Nail Art Brushes
At-Home Instructions
- Prep Your Nails: Shape your nails into a short almond style using a nail file.
- Apply Base Coat: Apply Butter London Horse Power Nail Rescue Base Coat and let it dry completely.
- Create the Neon Tips: Using China Glaze “Neon & On & On” and Essie “Tart Deco,” paint alternating tips in pink and orange.
- Finish with Top Coat: Seal your design with CND Vinylux Weekly Top Coat for a long-lasting finish.
Festive Red French Tips
This design is perfect for the holiday season, featuring bright red French tips with gold accents. The combination of red and gold creates a festive and glamorous look. The nails are shaped into a long almond style, making this design ideal for special occasions and holiday parties.
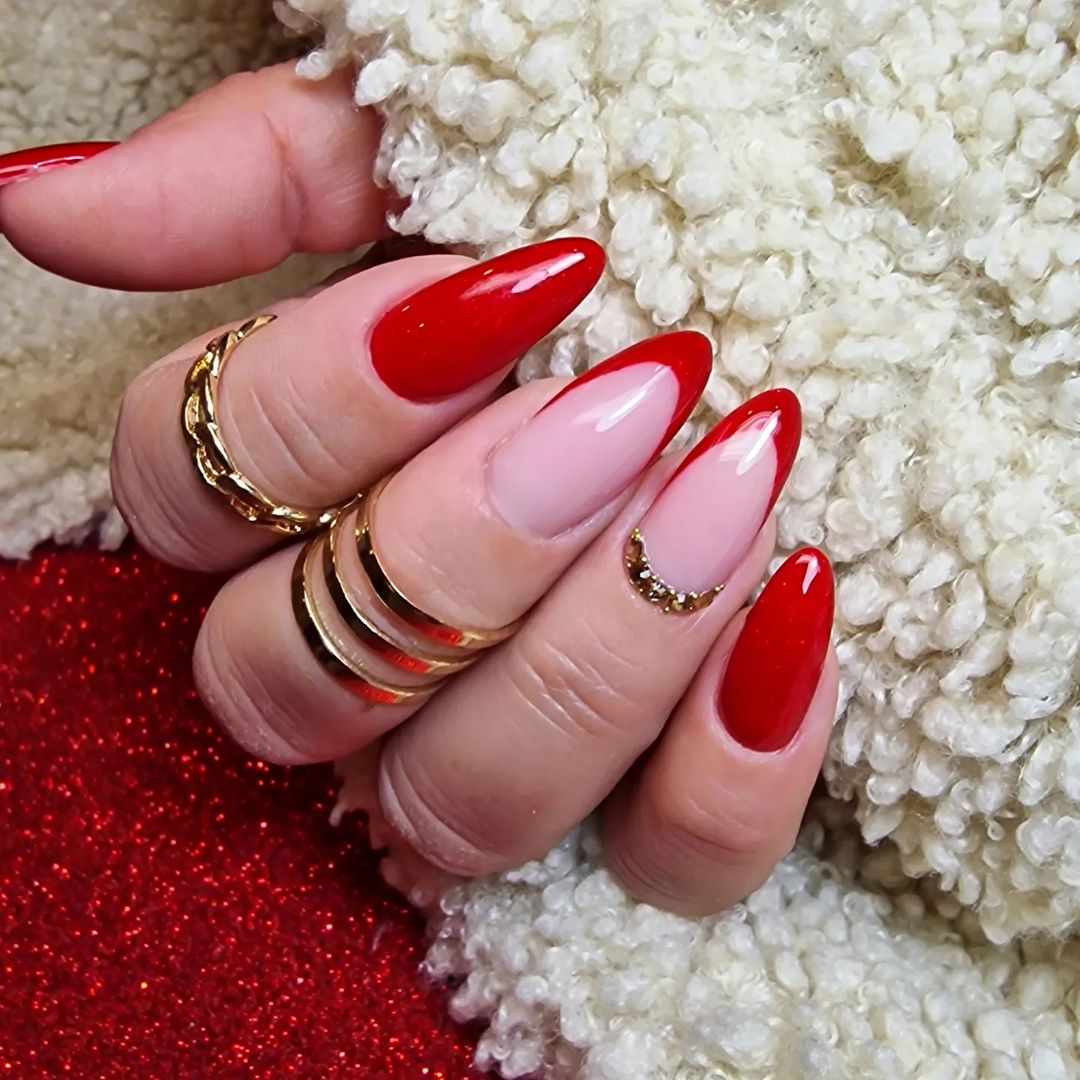
- Base Coat: Essie “First Base”
- Red Polish: Essie “Forever Yummy”
- Gold Glitter Polish: China Glaze “Gold Digger”
- Top Coat: Seche Vite Dry Fast Top Coat
- Nail Shape Tools: Nail file and buffer
- Nail Art Brush: For precise application
At-Home Instructions
- Prep Your Nails: Shape your nails into a long almond style using a nail file.
- Apply Base Coat: Apply a thin layer of Essie “First Base” and let it dry completely.
- Create the Red Tips: Using Essie “Forever Yummy,” carefully paint the tips of your nails.
- Add Gold Accents: Using China Glaze “Gold Digger,” apply gold glitter near the cuticles for a festive touch.
- Finish with Top Coat: Seal your design with Seche Vite Dry Fast Top Coat for a glossy finish
Pink and White Mixed French Tips
This design is a creative mix of pink and white shades, incorporating various elements of French tips and solid colors. The combination of pink hearts, white tips, and solid pink nails creates a vibrant and playful look. The nails are shaped into a square long style, which provides a perfect canvas for this fun and trendy design.
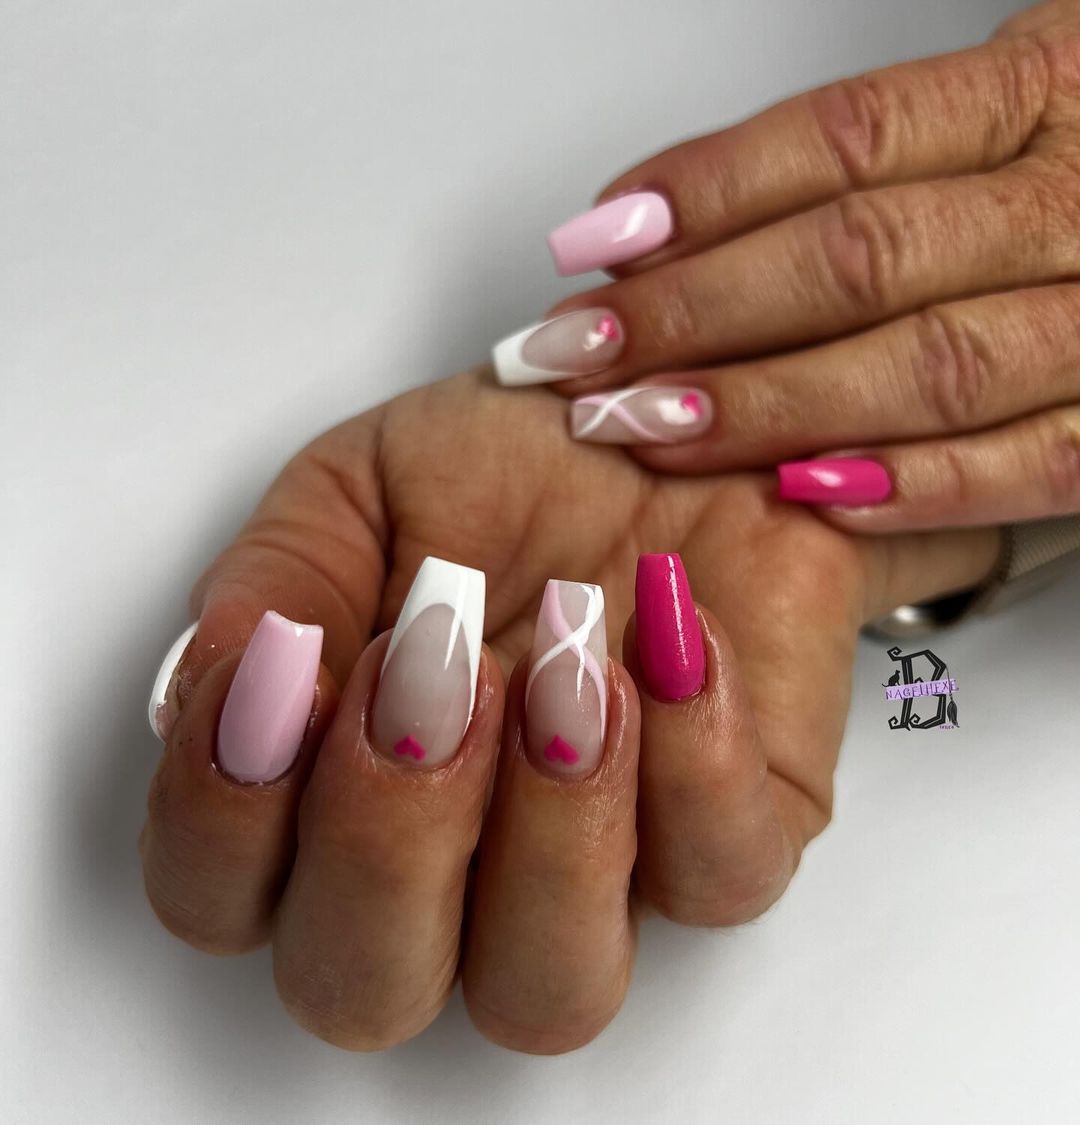
- Base Coat: OPI Natural Nail Base Coat
- Pink Polish: Essie “Ballet Slippers”
- White Polish: China Glaze “White on White”
- Hot Pink Polish: Zoya “Gilda”
- Top Coat: Seche Vite Dry Fast Top Coat
- Nail Shape Tools: Nail file and buffer
- Nail Art Brush: For precise application
At-Home Instructions
- Prep Your Nails: Shape your nails into a square long style using a nail file.
- Apply Base Coat: Apply a thin layer of OPI Natural Nail Base Coat and let it dry completely.
- Create the French Tips: Using China Glaze “White on White,” paint the tips of some nails, and create pink heart accents with Essie “Ballet Slippers.”
- Add Solid Colors: Paint a few nails with Zoya “Gilda” for a bold pop of color.
- Finish with Top Coat: Seal your design with Seche Vite Dry Fast Top Coat for a glossy finish.
Crystal Embellished French Tips
This design is an elegant French tip with added crystal embellishments at the cuticles. The subtle gradient from white to pink combined with the crystals creates a luxurious and sophisticated look. The nails are shaped into a long almond style, perfect for special occasions.
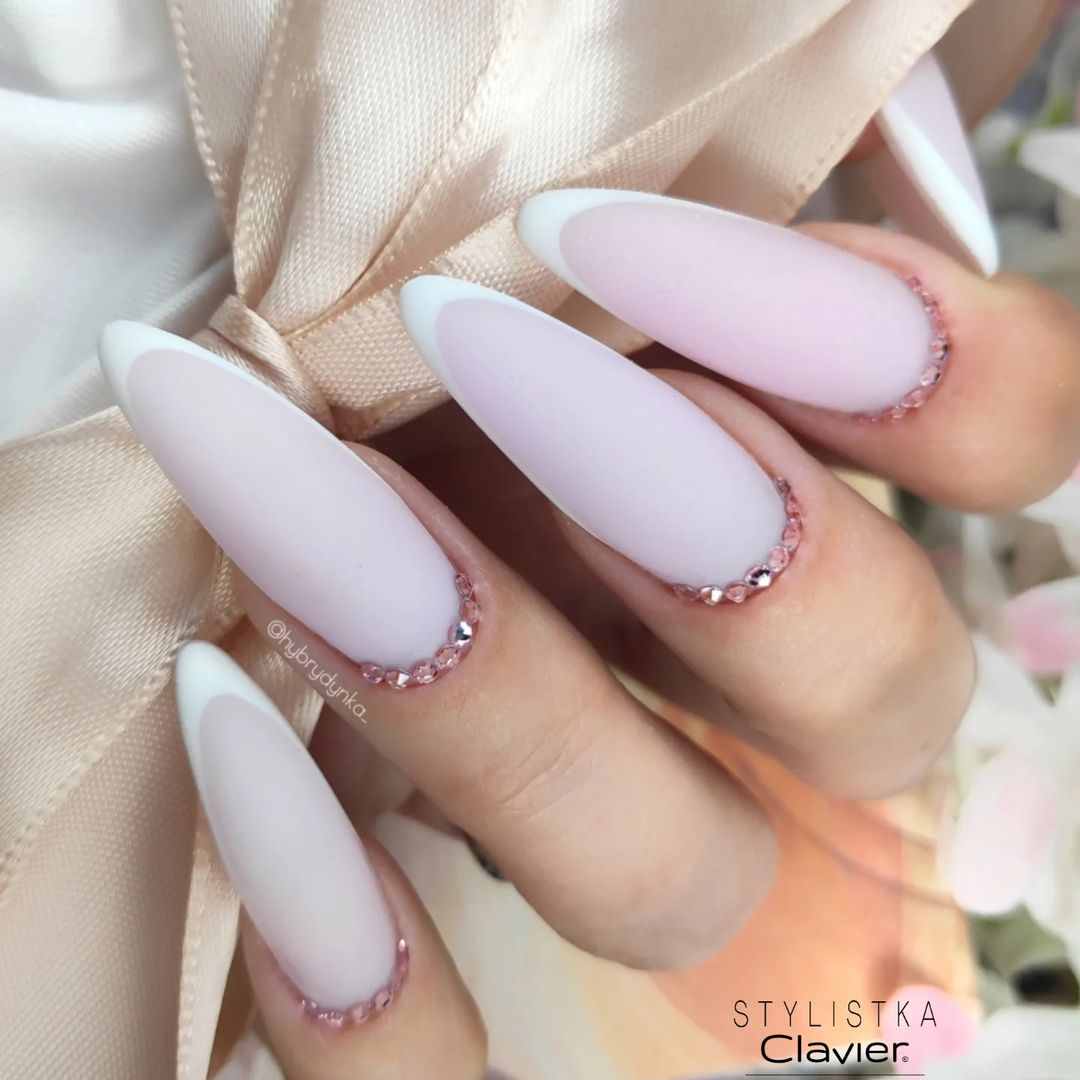
- Base Coat: Essie “First Base”
- White Polish: OPI “Funny Bunny”
- Pink Polish: Essie “Ballet Slippers”
- Crystals: Swarovski Crystal Nail Art Stones
- Top Coat: Seche Vite Dry Fast Top Coat
- Nail Shape Tools: Nail file and buffer
- Nail Art Brush: For precise application
- Nail Glue: For attaching crystals
At-Home Instructions
- Prep Your Nails: Shape your nails into a long almond style using a nail file.
- Apply Base Coat: Apply a thin layer of Essie “First Base” and let it dry completely.
- Create the Gradient Tips: Using OPI “Funny Bunny” and Essie “Ballet Slippers,” create a gradient effect from the tip to the base.
- Attach Crystals: Using nail glue, carefully place Swarovski crystals along the cuticles.
- Finish with Top Coat: Seal your design with Seche Vite Dry Fast Top Coat for a glossy and protective finish.
Green French Tips with Gold Accents
This design features elegant green French tips with gold accents. The combination of green and gold creates a chic and sophisticated look, perfect for the fall season. The nails are shaped into a short almond style, making this design both stylish and practical.
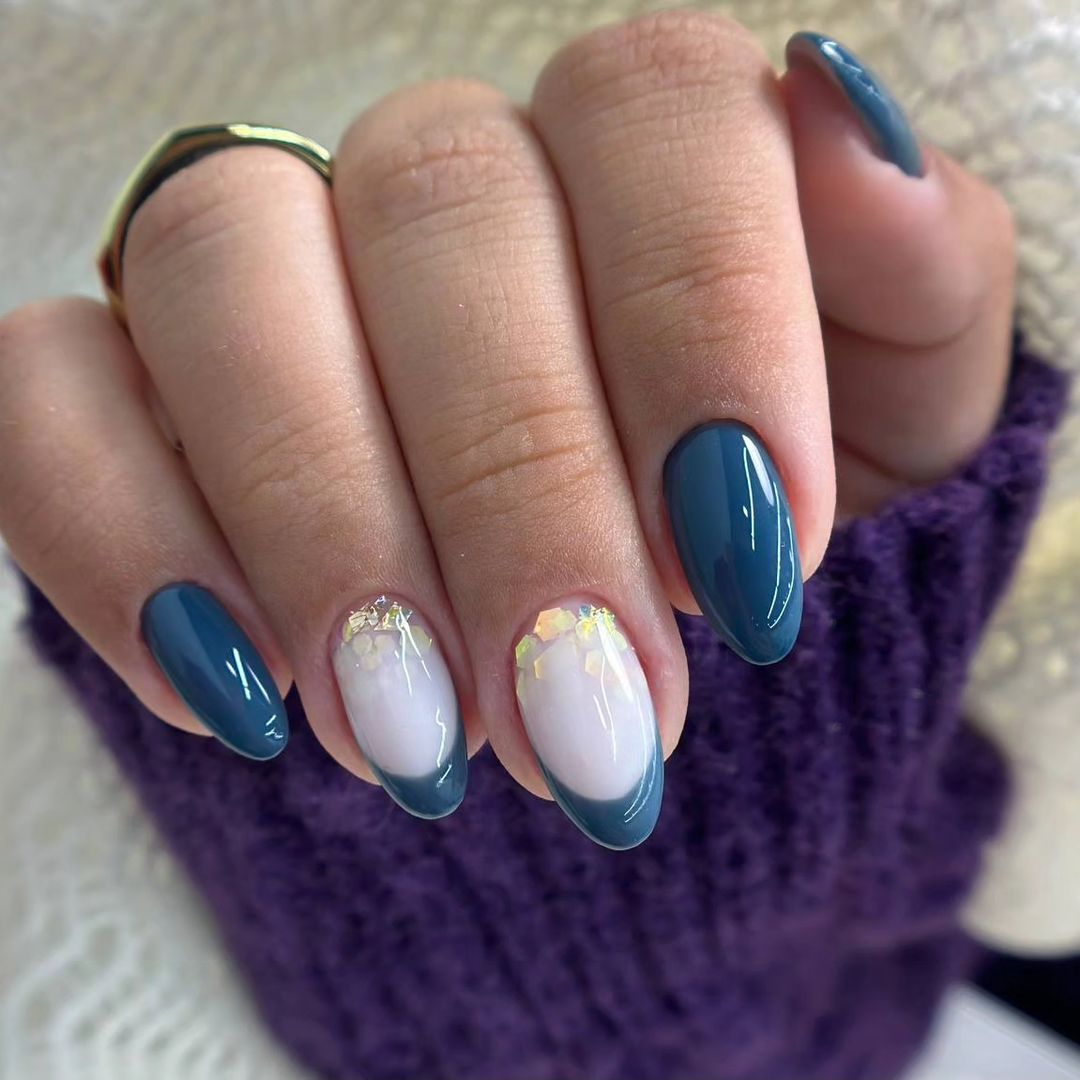
- Base Coat: Deborah Lippmann Hard Rock Base Coat
- Green Polish: Essie “Off Tropic”
- Gold Foil: Gold Leaf Nail Art Foil
- Top Coat: Essie Gel Couture Top Coat
- Nail Shape Tools: Nail file and buffer
- Nail Art Brush: For precise application
At-Home Instructions
- Prep Your Nails: Shape your nails into a short almond style using a nail file.
- Apply Base Coat: Use Deborah Lippmann Hard Rock Base Coat and let it dry.
- Create the Green Tips: Apply Essie “Off Tropic” to the tips of your nails.
- Add Gold Accents: Using nail glue, apply gold leaf foil to the tips for added elegance.
- Finish with Top Coat: Seal your design with Essie Gel Couture Top Coat for a glossy finish.
Red Heart French Tips
This design combines classic French tips with adorable red heart accents. The contrast between the white tips and the red hearts creates a romantic and playful look. The nails are shaped into a long almond style, which adds to the overall elegance of the design.
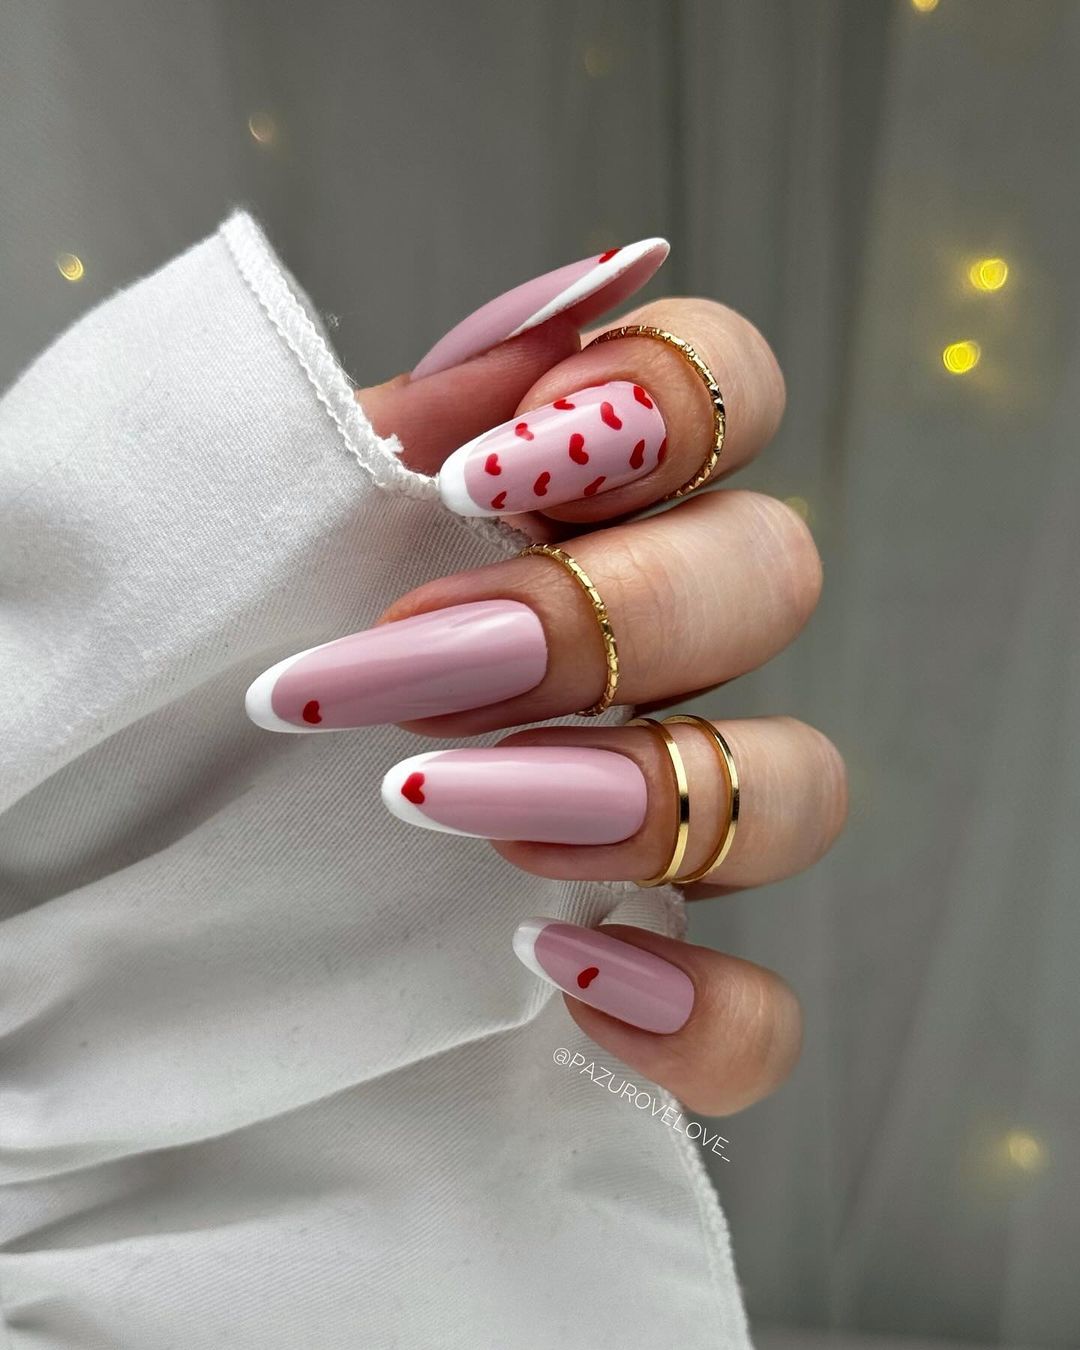
- Base Coat: Zoya Naked Manicure Base Coat
- White Polish: OPI “Alpine Snow”
- Red Polish: Essie “Forever Yummy”
- Top Coat: CND Vinylux Weekly Top Coat
- Nail Shape Tools: Nail file and buffer
- Nail Art Brush: For precise application
At-Home Instructions
- Prep Your Nails: Shape your nails into a long almond style using a nail file.
- Apply Base Coat: Apply a thin layer of Zoya Naked Manicure Base Coat and let it dry completely.
- Create the French Tips: Using OPI “Alpine Snow,” paint the tips of your nails.
- Add Red Hearts: Using Essie “Forever Yummy” and a nail art brush, paint small red hearts near the tips.
- Finish with Top Coat: Seal your design with CND Vinylux Weekly Top Coat for a long-lasting finish.
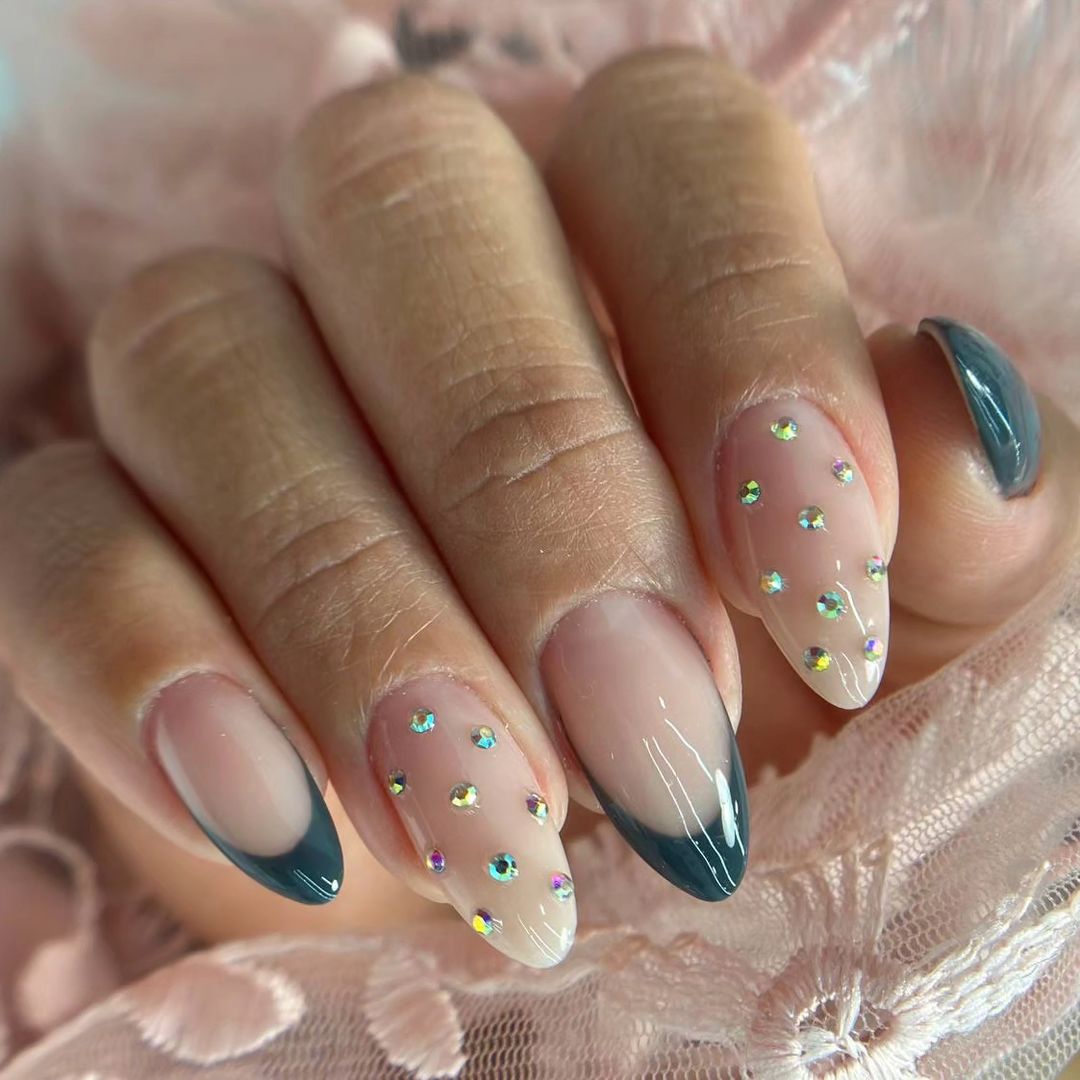
Blue Glitter French Tips
This design features blue French tips with a glittery twist. The combination of blue and glitter creates a dazzling and eye-catching look. The nails are shaped into a short almond style, making this design both trendy and practical.
- Base Coat: Butter London Horse Power Nail Rescue Base Coat
- Blue Polish: OPI “My Car Has Navy-gation”
- Glitter Top Coat: China Glaze “Fairy Dust”
- Top Coat: CND Vinylux Weekly Top Coat
- Nail Shape Tools: Nail file and buffer
- Nail Art Brush: For precise application
At-Home Instructions
- Prep Your Nails: Shape your nails into a short almond style using a nail file.
- Apply Base Coat: Apply Butter London Horse Power Nail Rescue Base Coat and let it dry completely.
- Create the Blue Tips: Using OPI “My Car Has Navy-gation,” paint the tips of your nails.
- Add Glitter: Apply China Glaze “Fairy Dust” over the blue tips for a sparkling effect.
- Finish with Top Coat: Seal your design with CND Vinylux Weekly Top Coat for a glossy and protective finish.
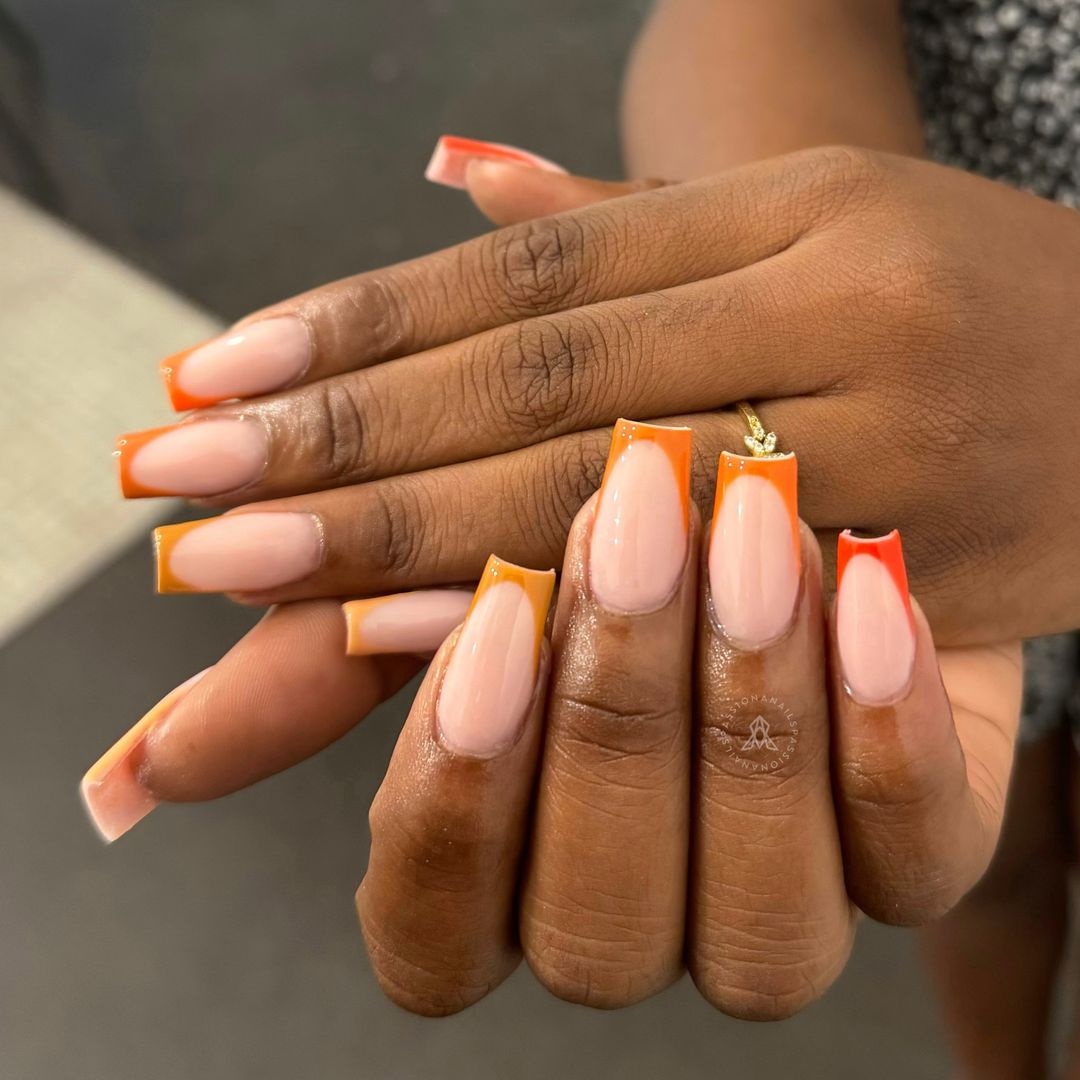
Orange Fall French Tips
This design is perfect for the fall season, featuring orange French tips with a glossy finish. The vibrant orange color captures the essence of autumn, creating a fun and seasonal look. The nails are shaped into a square short style, making this design both trendy and practical.
- Base Coat: Essie “First Base”
- Orange Polish: China Glaze “Orange Knockout”
- Top Coat: Seche Vite Dry Fast Top Coat
- Nail Shape Tools: Nail file and buffer
- Nail Art Brush: For precise application
At-Home Instructions
- Prep Your Nails: Shape your nails into a square short style using a nail file.
- Apply Base Coat: Apply a thin layer of Essie “First Base” and let it dry completely.
- Create the Orange Tips: Using China Glaze “Orange Knockout,” paint the tips of your nails.
- Finish with Top Coat: Seal your design with Seche Vite Dry Fast Top Coat for a glossy finish.
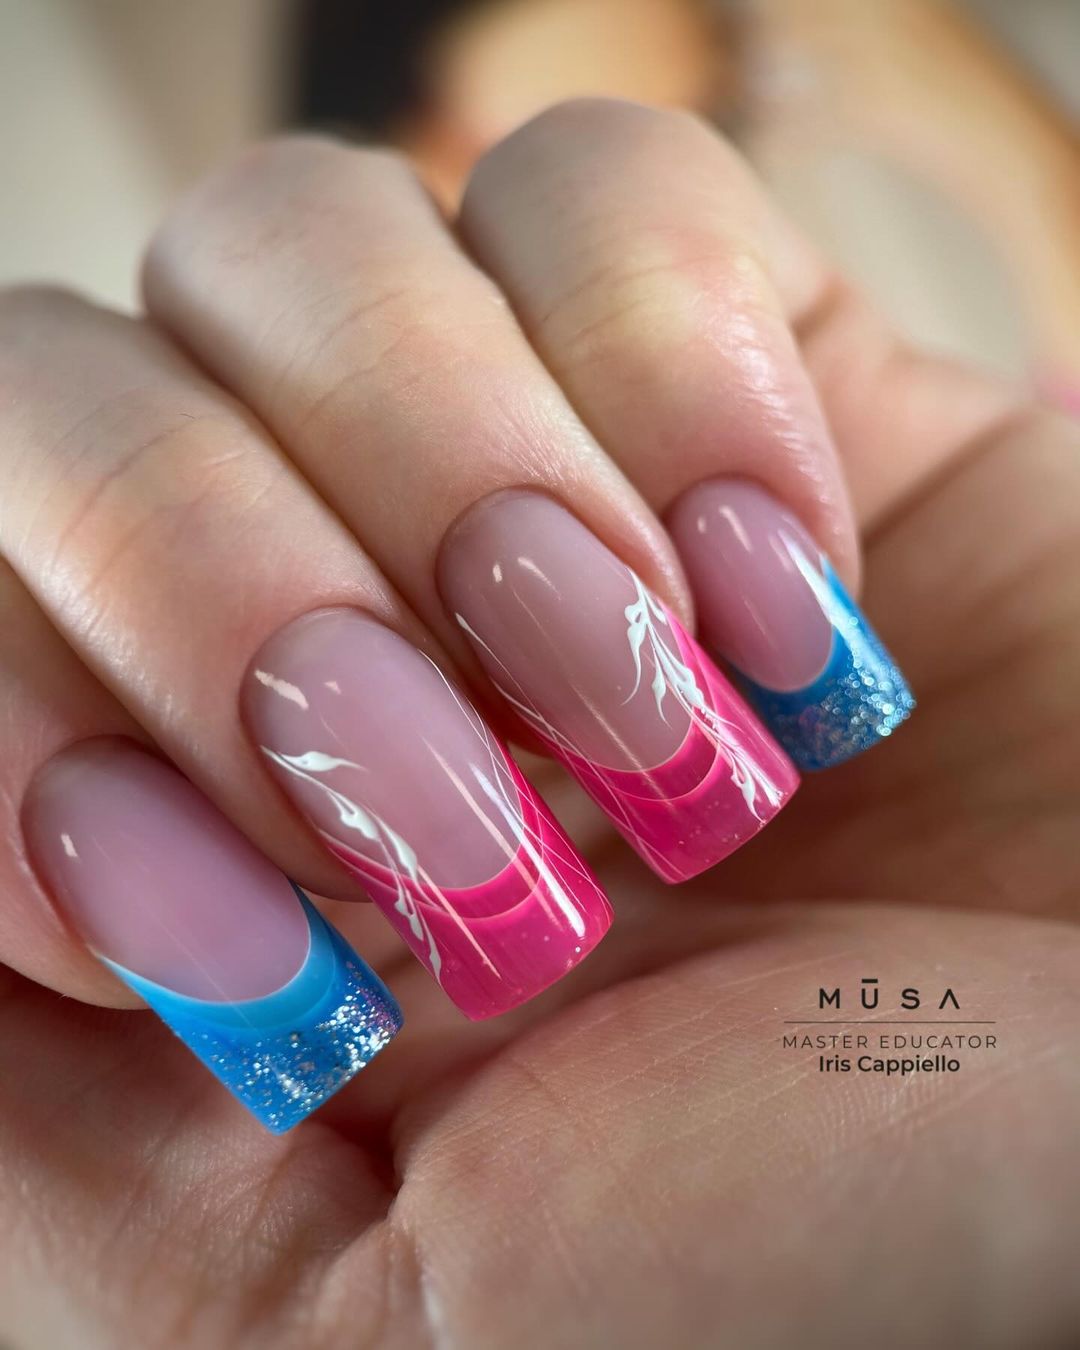
Vibrant Pink and Blue French Tips
This design features a bold combination of pink and blue French tips with a touch of glitter. The contrast between the two colors creates a vibrant and fun look. The nails are shaped into a square long style, providing a perfect canvas for this lively design. This manicure is ideal for those who love to make a statement with their nails.
- Base Coat: OPI Natural Nail Base Coat
- Pink Polish: China Glaze “Strawberry Fields”
- Blue Polish: Essie “Butler Please”
- Glitter Top Coat: China Glaze “Fairy Dust”
- White Nail Art Pen: Sally Hansen I Heart Nail Art Pen in “White”
- Top Coat: Seche Vite Dry Fast Top Coat
- Nail Shape Tools: Nail file and buffer
At-Home Instructions
- Prep Your Nails: Shape your nails into a square long style using a nail file.
- Apply Base Coat: Apply a thin layer of OPI Natural Nail Base Coat and let it dry completely.
- Create the French Tips: Using China Glaze “Strawberry Fields” and Essie “Butler Please,” paint alternating pink and blue tips.
- Add Glitter: Apply China Glaze “Fairy Dust” over the blue tips for a sparkling effect.
- Finish with Top Coat: Seal your design with Seche Vite Dry Fast Top Coat for a glossy finish.
Tortoiseshell French Tips
This design features trendy tortoiseshell French tips with gold foil accents. The warm brown and black pattern paired with the gold foil creates a sophisticated and chic look. The nails are shaped into a long almond style, making this design perfect for fall and winter seasons.
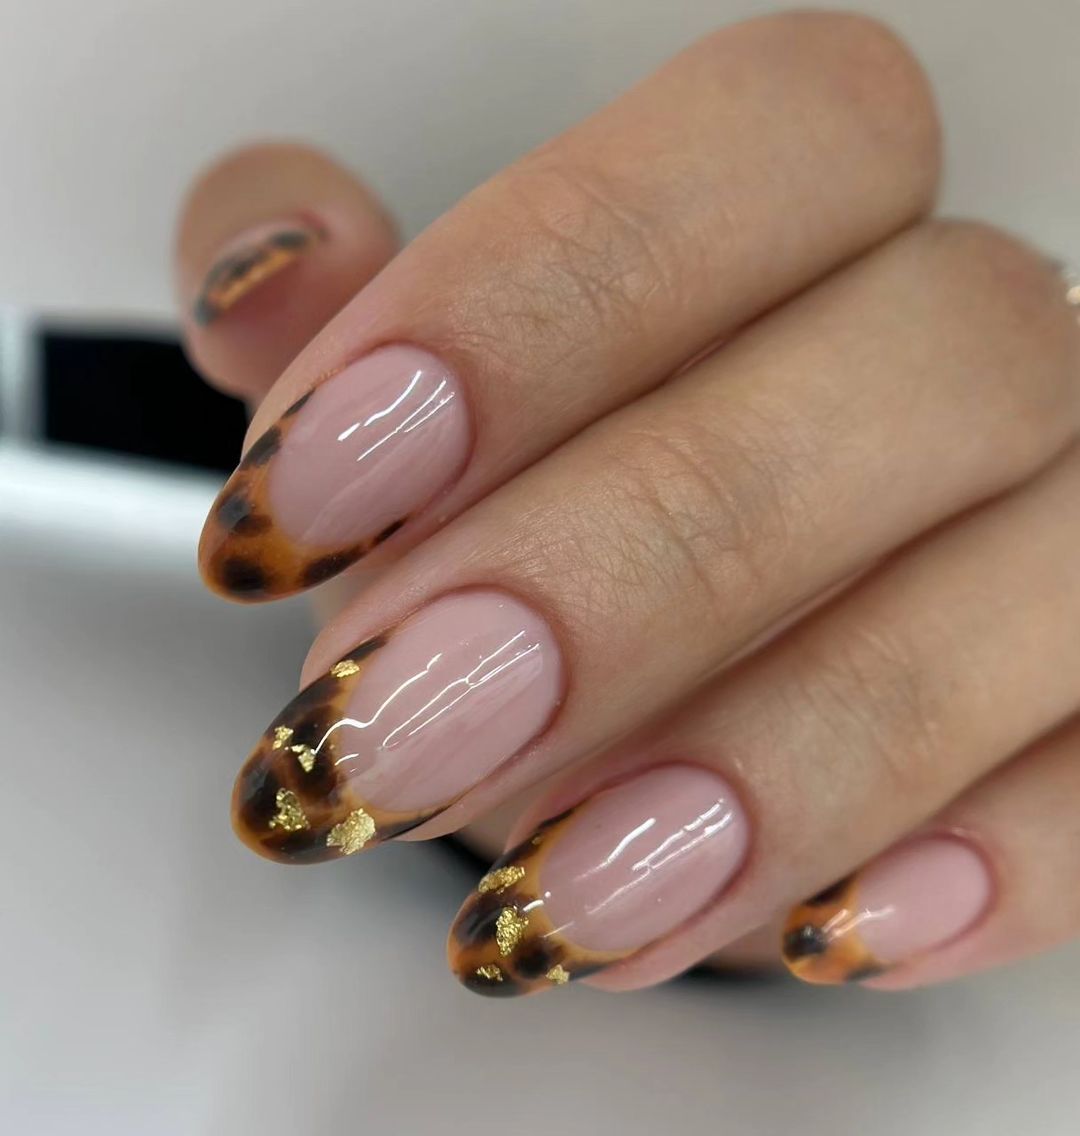
- Base Coat: Deborah Lippmann Hard Rock Base Coat
- Brown Polish: OPI “Chocolate Moose”
- Black Polish: Sally Hansen “Black Out”
- Gold Foil: Gold Leaf Nail Art Foil
- Top Coat: Essie Gel Couture Top Coat
- Nail Shape Tools: Nail file and buffer
- Nail Art Brush: For precise application
At-Home Instructions
- Prep Your Nails: Shape your nails into a long almond style using a nail file.
- Apply Base Coat: Use Deborah Lippmann Hard Rock Base Coat and let it dry.
- Create the Tortoiseshell Tips: Using OPI “Chocolate Moose” and Sally Hansen “Black Out,” create a tortoiseshell pattern on the tips.
- Add Gold Foil: Apply gold leaf foil to the tips for added elegance.
- Finish with Top Coat: Seal your design with Essie Gel Couture Top Coat for a glossy finish.
Neon Orange French Tips
This design features bright neon orange French tips on a white base. The bold color combination creates a striking and modern look, perfect for making a statement. The nails are shaped into a square short style, making this design both trendy and practical.
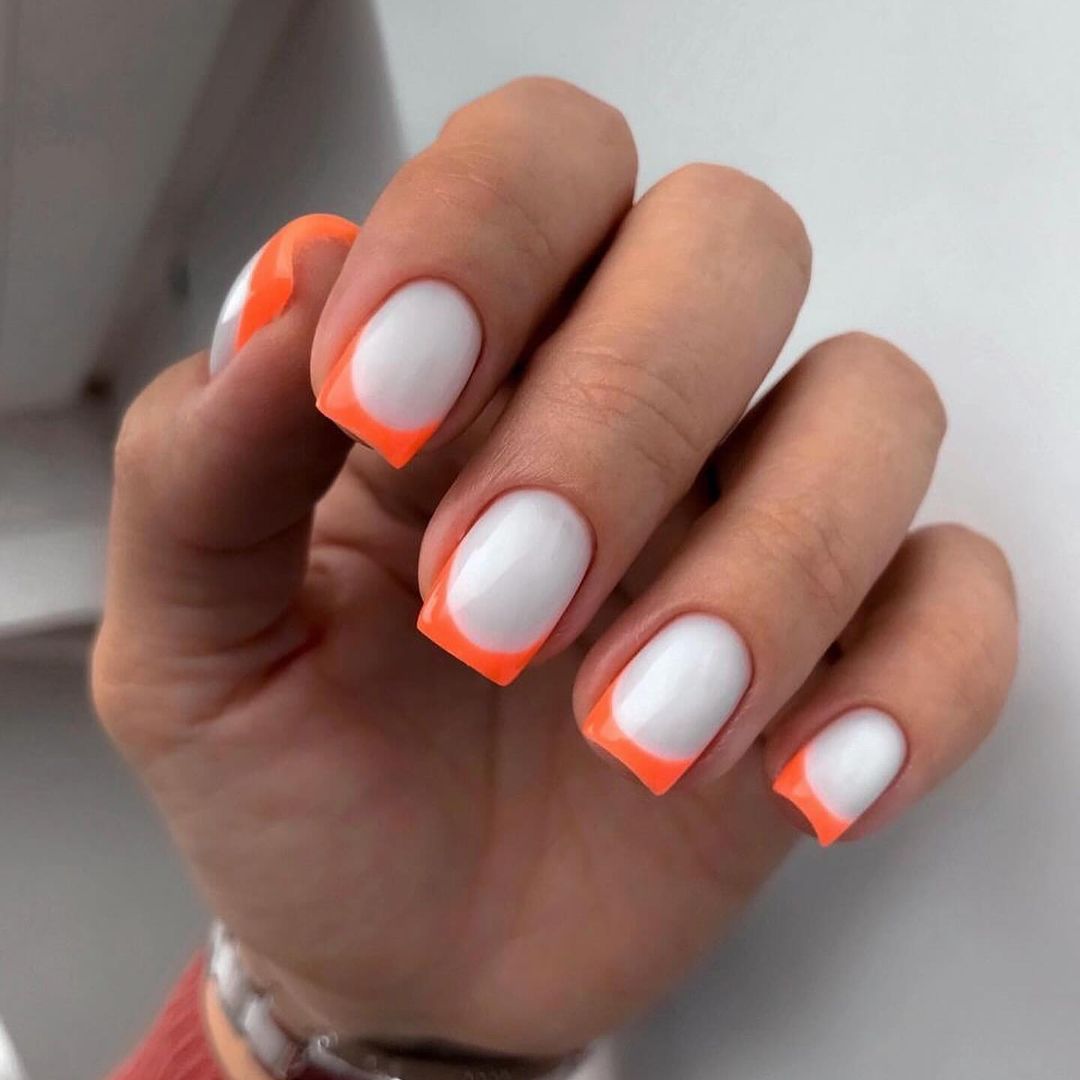
- Base Coat: Essie “First Base”
- White Polish: China Glaze “White on White”
- Neon Orange Polish: OPI “No Room for the Blues”
- Top Coat: Seche Vite Dry Fast Top Coat
- Nail Shape Tools: Nail file and buffer
- Nail Art Brush: For precise application
At-Home Instructions
- Prep Your Nails: Shape your nails into a square short style using a nail file.
- Apply Base Coat: Apply a thin layer of Essie “First Base” and let it dry completely.
- Create the French Tips: Using China Glaze “White on White” for the base and OPI “No Room for the Blues” for the tips, paint the tips of your nails.
- Finish with Top Coat: Seal your design with Seche Vite Dry Fast Top Coat for a glossy finish.
Gold Foil French Tips
This design features classic French tips with a modern twist of gold foil accents. The combination of white tips and gold foil creates a luxurious and elegant look, perfect for special occasions. The nails are shaped into a square short style, adding a contemporary edge to this timeless design.
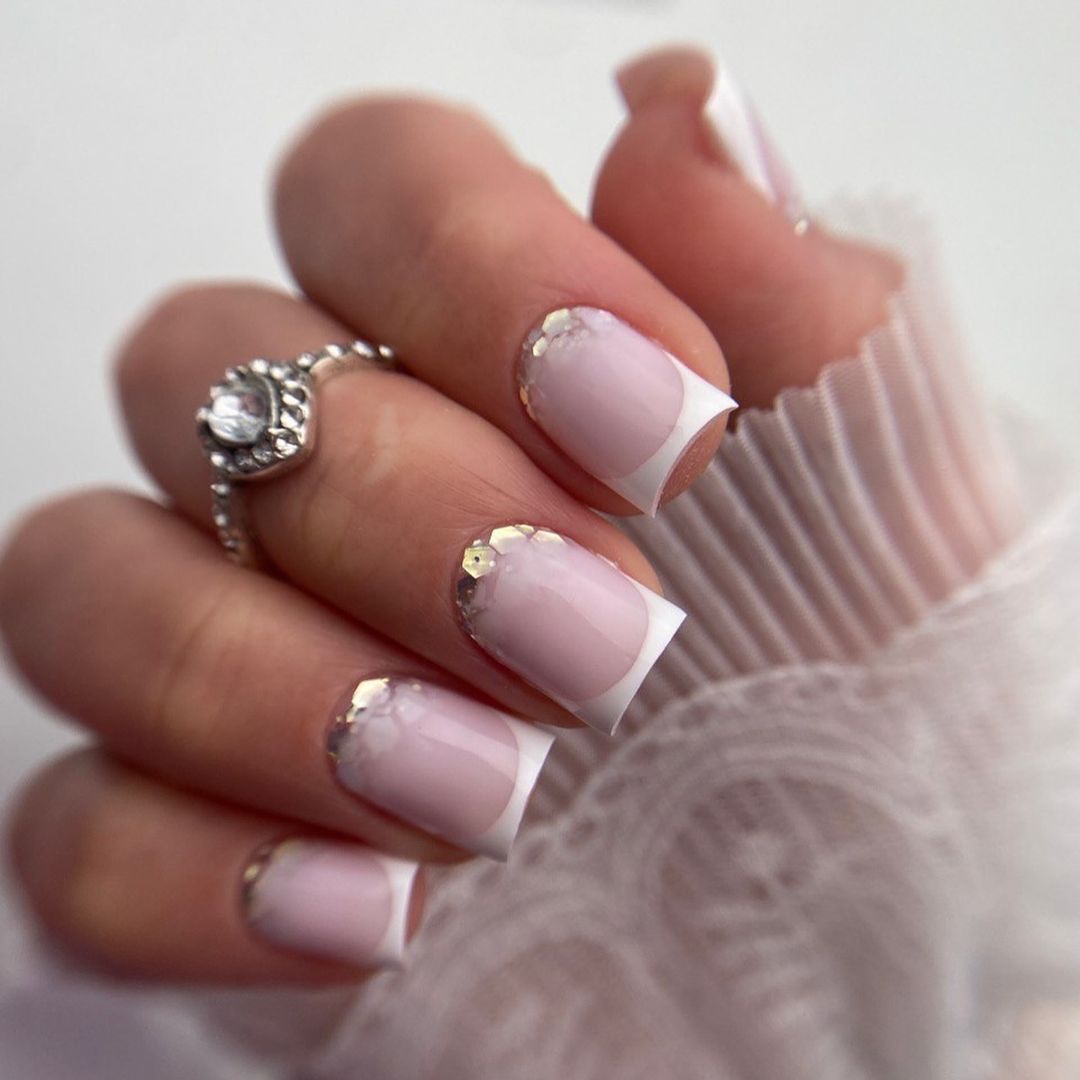
- Base Coat: Zoya Naked Manicure Base Coat
- White Polish: OPI “Alpine Snow”
- Gold Foil: Gold Leaf Nail Art Foil
- Top Coat: Essie Good To Go Top Coat
- Nail Shape Tools: Nail file and buffer
- Nail Art Brush: For precise application
- Nail Glue: For attaching foil
At-Home Instructions
- Prep Your Nails: Shape your nails into a square short style using a nail file.
- Apply Base Coat: Use Zoya Naked Manicure Base Coat and let it dry.
- Create the French Tips: Using OPI “Alpine Snow,” paint the tips of your nails.
- Attach Gold Foil: Using nail glue, carefully place gold leaf foil along the tips.
- Finish with Top Coat: Seal your design with Essie Good To Go Top Coat for a glossy finish.
Shiny Pink French Tips
This design features shiny pink French tips that add a pop of color to your nails. The combination of the soft pink base with the bright pink tips creates a fun and vibrant look. The nails are shaped into a long almond style, making this design perfect for those who love bold and colorful manicures.
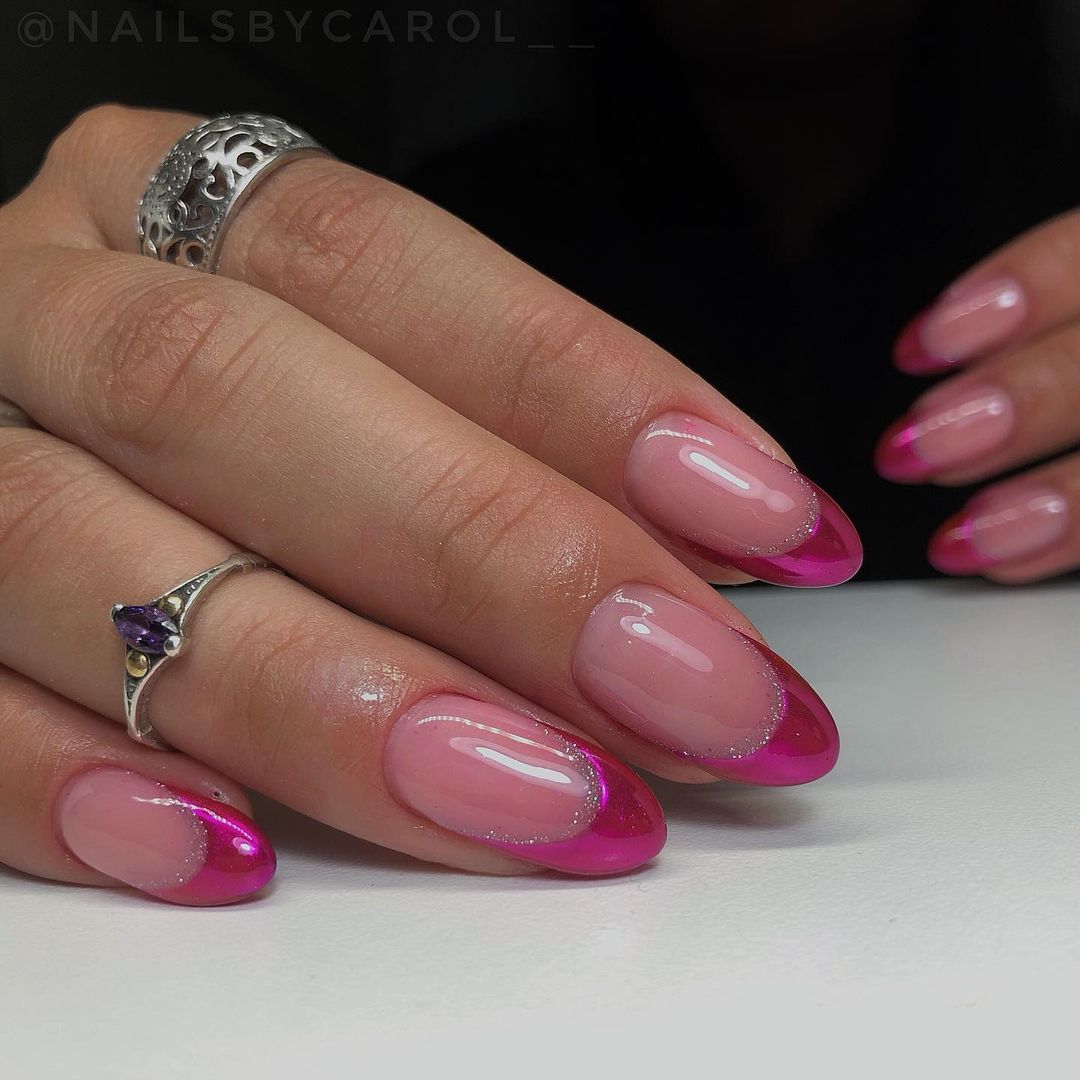
- Base Coat: Butter London Horse Power Nail Rescue Base Coat
- Pink Polish: Essie “Pink About It”
- Top Coat: CND Vinylux Weekly Top Coat
- Nail Shape Tools: Nail file and buffer
- Nail Art Brush: For precise application
At-Home Instructions
- Prep Your Nails: Shape your nails into a long almond style using a nail file.
- Apply Base Coat: Apply Butter London Horse Power Nail Rescue Base Coat and let it dry completely.
- Create the Pink Tips: Using Essie “Pink About It,” paint the tips of your nails.
- Finish with Top Coat: Seal your design with CND Vinylux Weekly Top Coat for a long-lasting finish.
Orange Swirl French Tips
This design features orange swirl patterns on the French tips, creating a dynamic and playful look. The combination of the orange swirls and the nude base makes this design both trendy and unique. The nails are shaped into a square long style, providing a perfect canvas for this creative design.
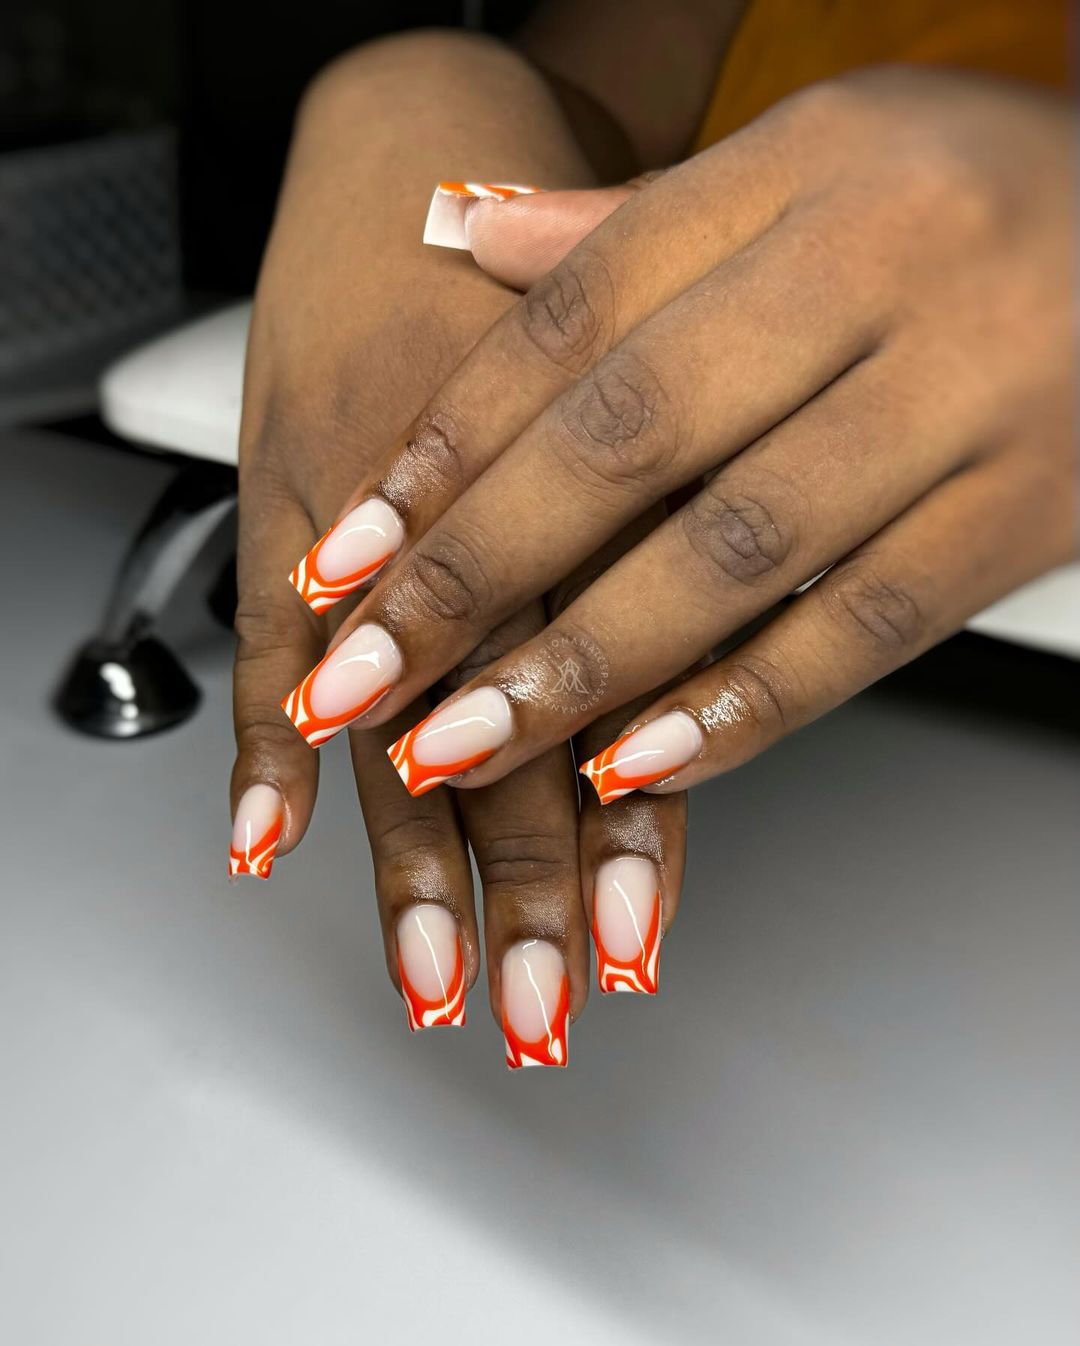
- Base Coat: Deborah Lippmann Hard Rock Base Coat
- Orange Polish: China Glaze “Orange Knockout”
- Top Coat: Essie Gel Couture Top Coat
- Nail Shape Tools: Nail file and buffer
- Nail Art Brush: For precise application
At-Home Instructions
- Prep Your Nails: Shape your nails into a square long style using a nail file.
- Apply Base Coat: Use Deborah Lippmann Hard Rock Base Coat and let it dry.
- Create the Swirl Tips: Using China Glaze “Orange Knockout,” paint swirl patterns on the tips of your nails.
- Finish with Top Coat: Seal your design with Essie Gel Couture Top Coat for a glossy finish.
Neon Pink Marble French Tips
This design features neon pink marble French tips that are sure to make a bold statement. The vibrant pink shade and marble effect create a dynamic and eye-catching look. The nails are shaped into a square long style, providing a perfect canvas for this playful and trendy design.
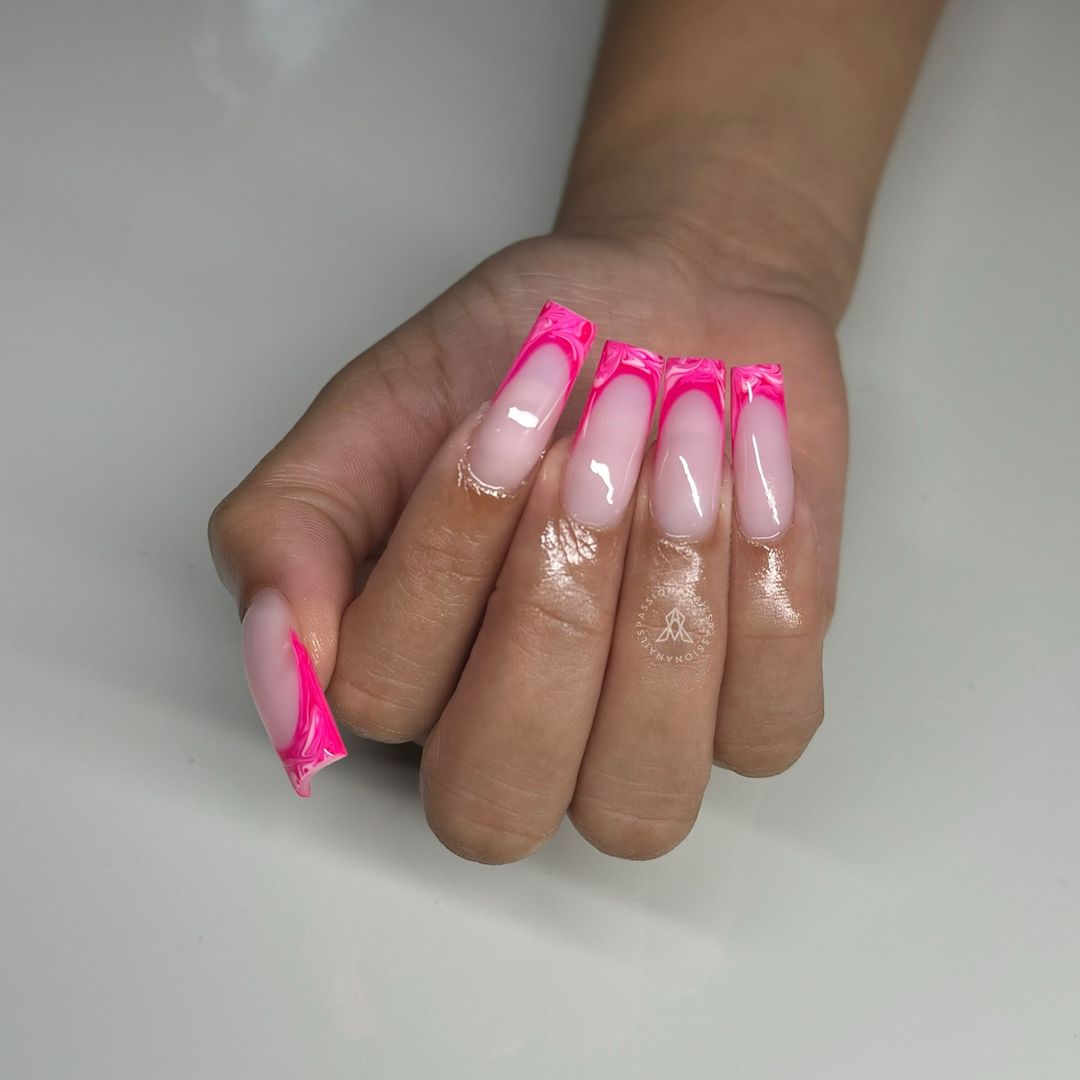
- Base Coat: OPI Natural Nail Base Coat
- Neon Pink Polish: China Glaze “Neon & On & On”
- White Polish: Essie “Blanc”
- Top Coat: Seche Vite Dry Fast Top Coat
- Nail Shape Tools: Nail file and buffer
- Nail Art Brush: For precise application
- Marble Effect Tool: Fan brush or water marbling tool
At-Home Instructions
- Prep Your Nails: Shape your nails into a square long style using a nail file.
- Apply Base Coat: Apply a thin layer of OPI Natural Nail Base Coat and let it dry completely.
- Create the Marble Tips: Apply China Glaze “Neon & On & On” to the tips. Using a fan brush or water marbling tool, add a touch of Essie “Blanc” to create the marble effect.
- Finish with Top Coat: Seal your design with Seche Vite Dry Fast Top Coat for a glossy finish.
Brown and Black French Tips
This design showcases a sophisticated combination of brown and black French tips. The contrast between the neutral base and the dark tips creates a chic and elegant look. The nails are shaped into a square short style, making this design both stylish and practical for everyday wear.
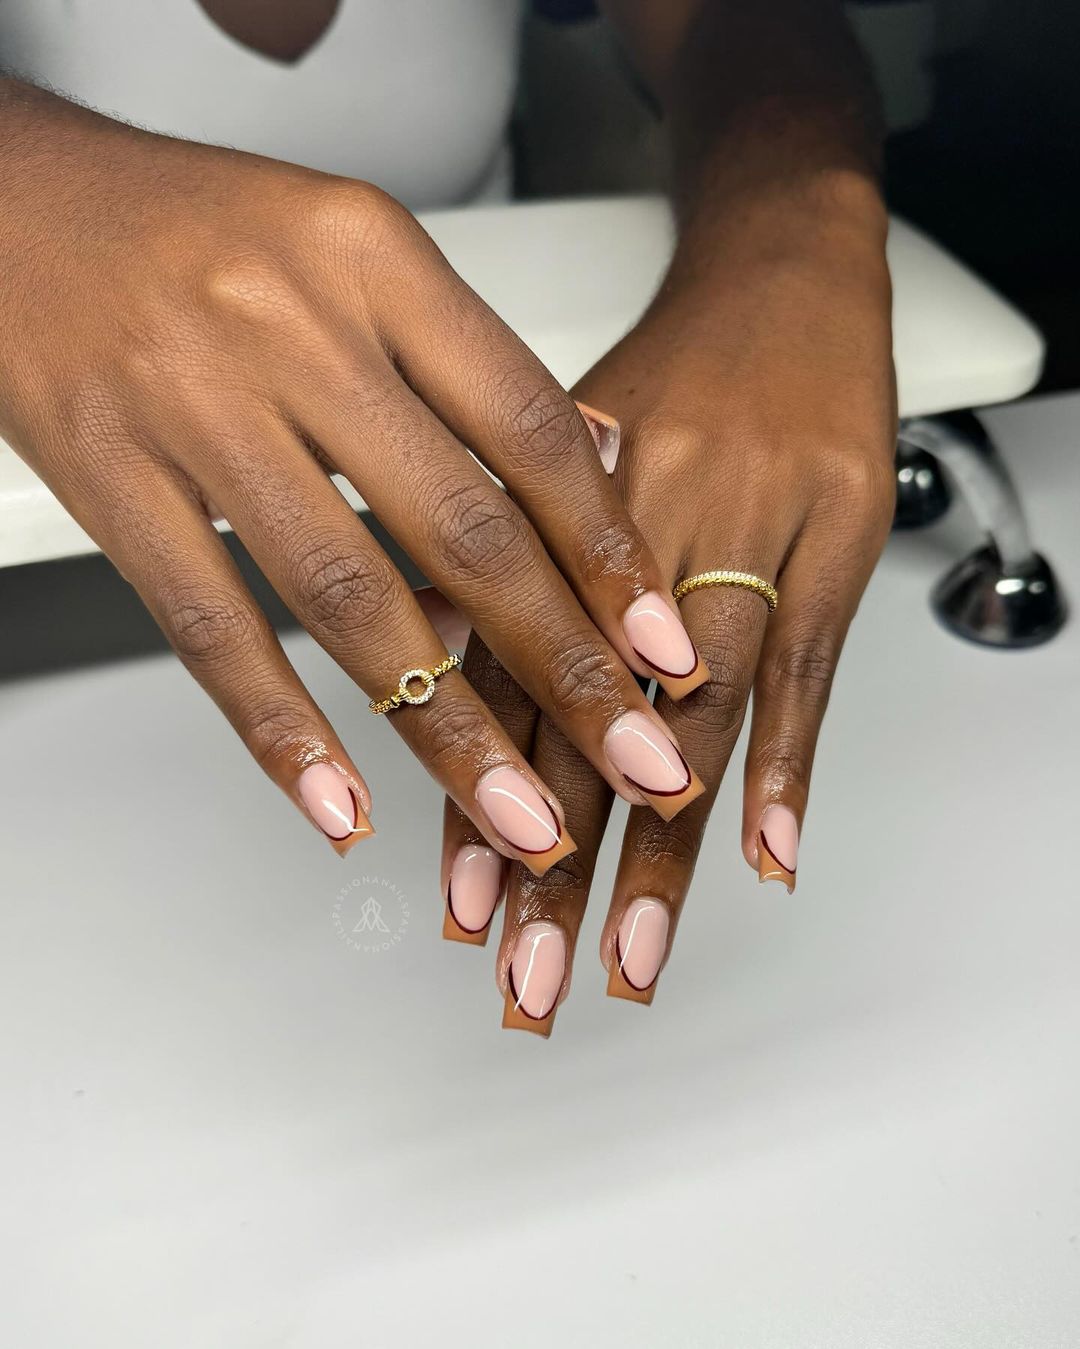
- Base Coat: Zoya Naked Manicure Base Coat
- Brown Polish: OPI “Chocolate Moose”
- Black Polish: Sally Hansen “Black Out”
- Top Coat: Essie Gel Couture Top Coat
- Nail Shape Tools: Nail file and buffer
- Nail Art Brush: For precise application
At-Home Instructions
- Prep Your Nails: Shape your nails into a square short style using a nail file.
- Apply Base Coat: Use Zoya Naked Manicure Base Coat and let it dry.
- Create the French Tips: Using OPI “Chocolate Moose” and Sally Hansen “Black Out,” paint the tips of your nails in a sleek, curved shape.
- Finish with Top Coat: Seal your design with Essie Gel Couture Top Coat for a glossy and protective finish.
Gold Glitter French Tips
This design features elegant French tips adorned with a delicate gold glitter border. The white tips combined with the gold glitter create a luxurious and refined look, perfect for special occasions. The nails are shaped into a long almond style, enhancing the overall sophistication of the design.
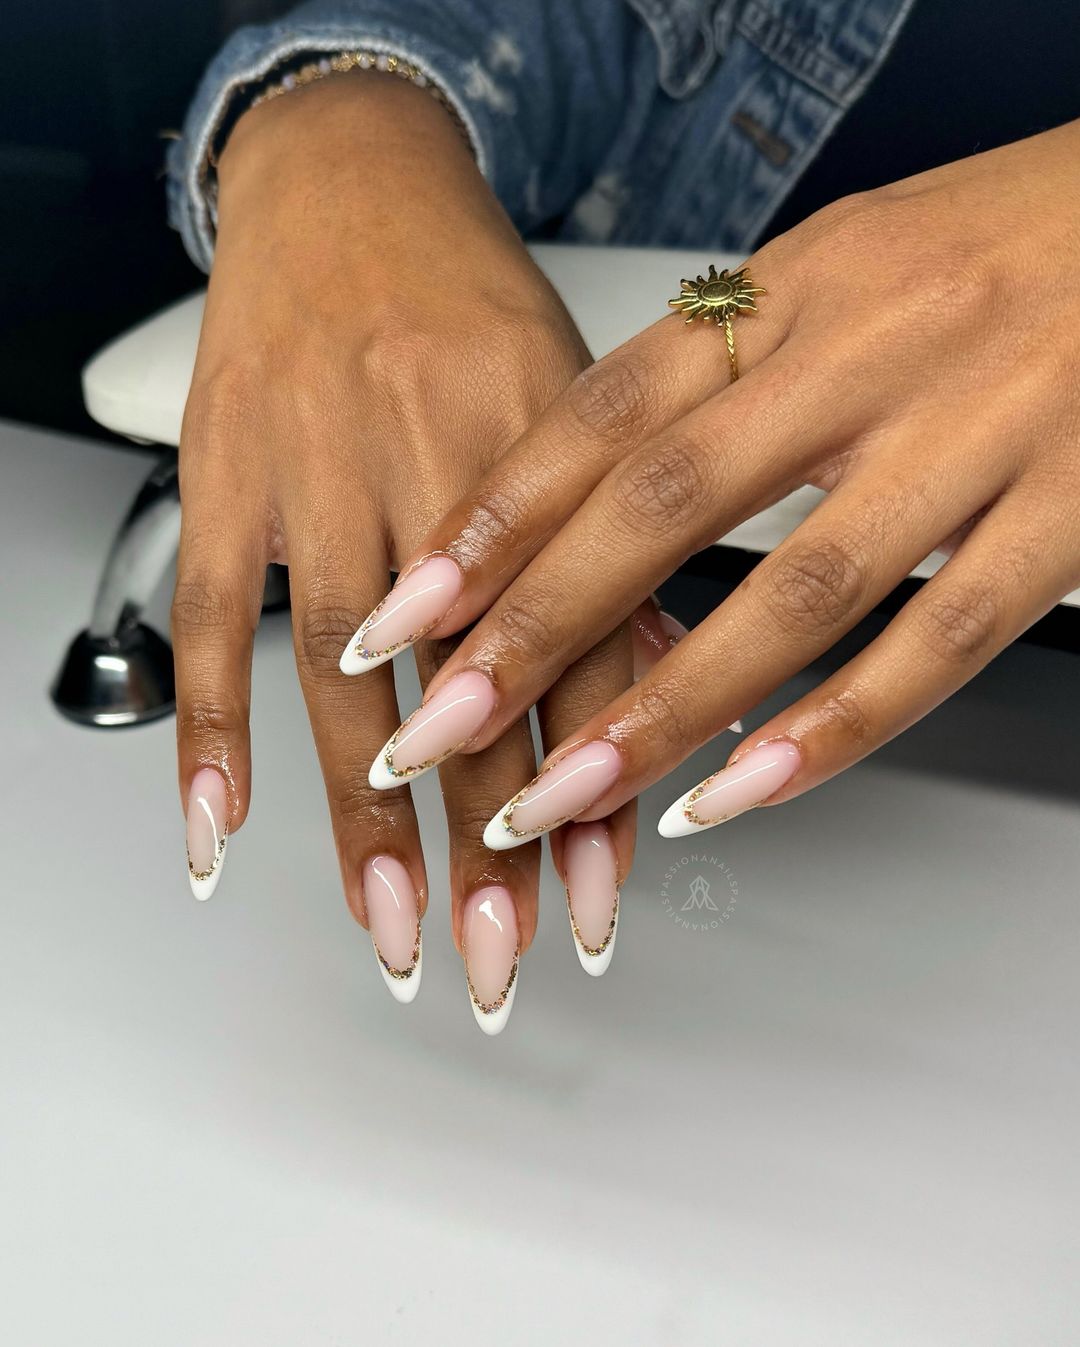
- Base Coat: Deborah Lippmann Hard Rock Base Coat
- White Polish: OPI “Alpine Snow”
- Gold Glitter Polish: China Glaze “Fairy Dust”
- Top Coat: Seche Vite Dry Fast Top Coat
- Nail Shape Tools: Nail file and buffer
- Nail Art Brush: For precise application
At-Home Instructions
- Prep Your Nails: Shape your nails into a long almond style using a nail file.
- Apply Base Coat: Apply a thin layer of Deborah Lippmann Hard Rock Base Coat and let it dry completely.
- Create the French Tips: Using OPI “Alpine Snow,” paint the tips of your nails.
- Add Gold Glitter: Apply China Glaze “Fairy Dust” along the border of the white tips for a touch of sparkle.
- Finish with Top Coat: Seal your design with Seche Vite Dry Fast Top Coat for a glossy finish.
FAQ
- What are the best colors for fall French tip nails?
The best colors for fall French tip nails include deep reds, oranges, browns, greens, and blacks. These colors complement the fall season’s aesthetic and can be mixed with glitter or other accents for a unique look.
- Can I create these nail designs at home?
Yes, with the right tools and products, you can create these nail designs at home. Follow the step-by-step instructions provided for each design to achieve professional-looking results.
- What nail shapes work best with French tip designs?
French tip designs can be adapted to various nail shapes, including short almond, square long, and short. Choose a shape that best suits your style and preferences.
- How can I make my manicure last longer?
To make your manicure last longer, ensure you properly prep your nails, use a high-quality base coat and top coat, and avoid activities that can cause chipping. Reapply top coat every few days to maintain the shine and protect the polish.
Save Pin
