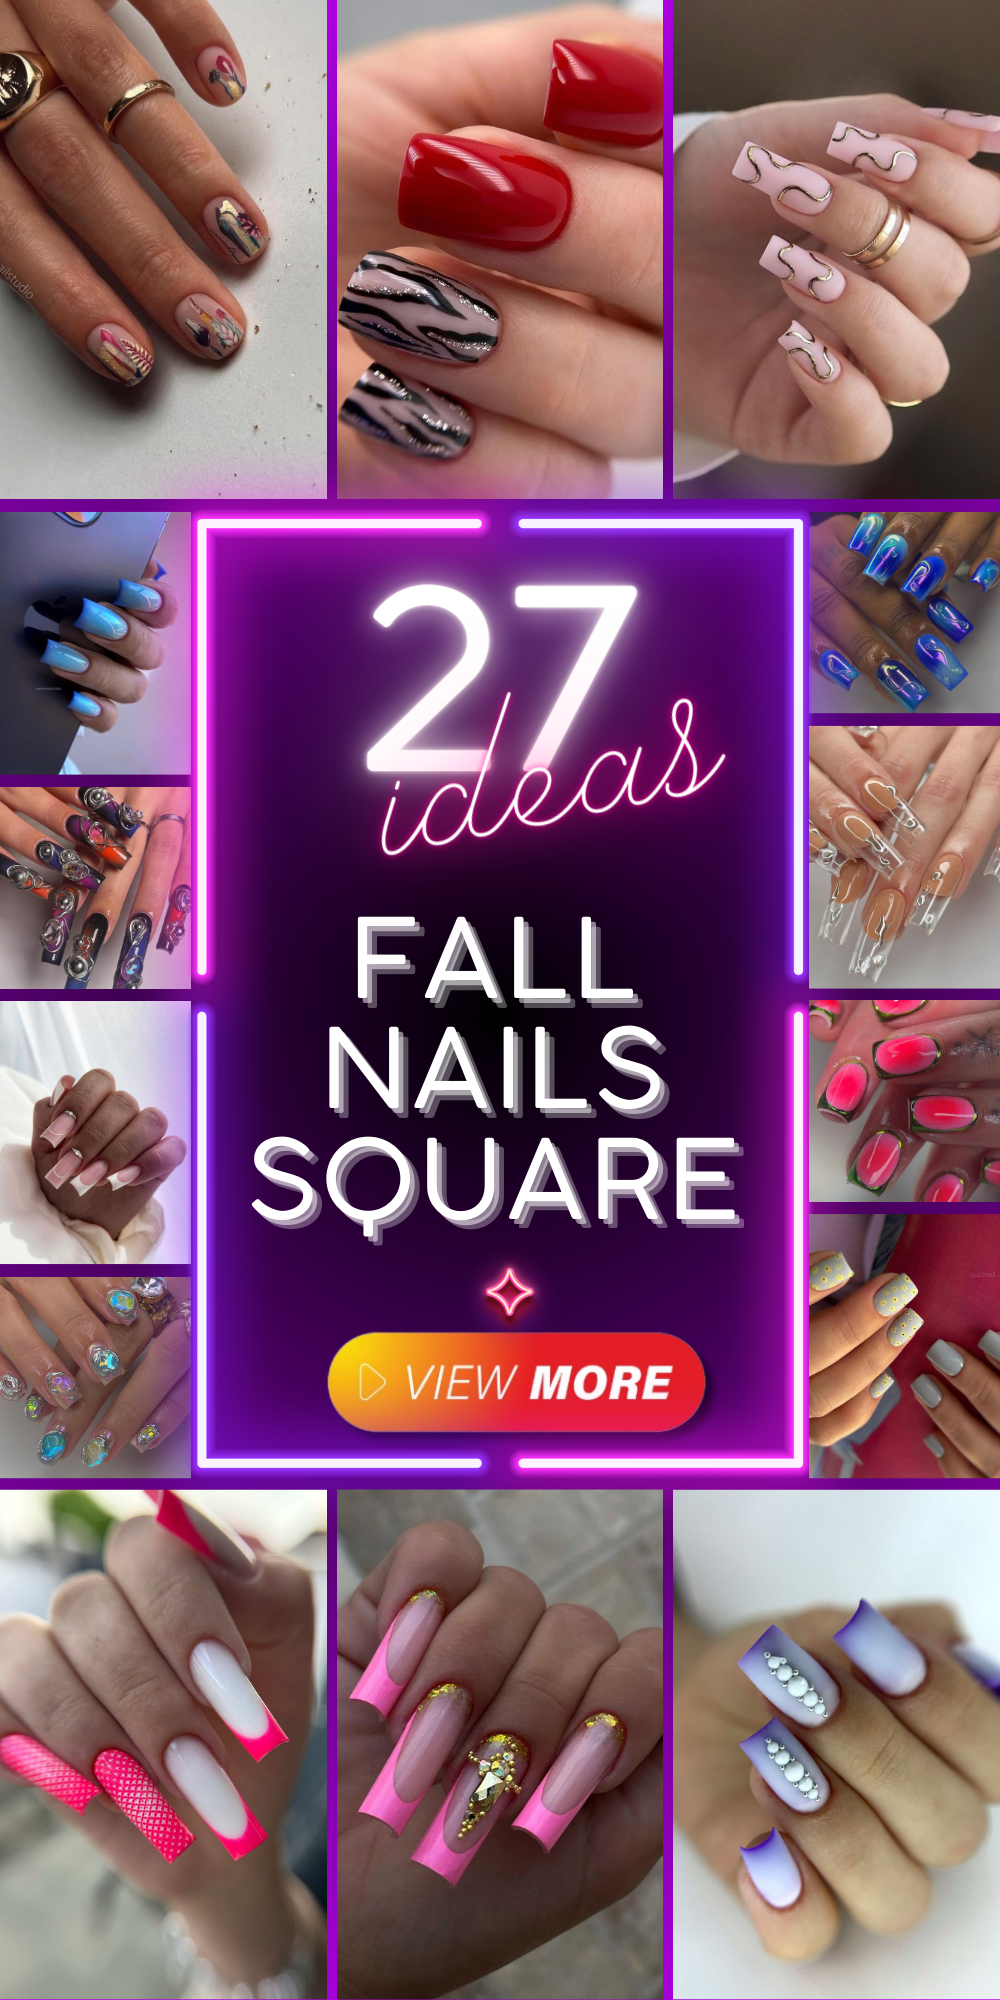
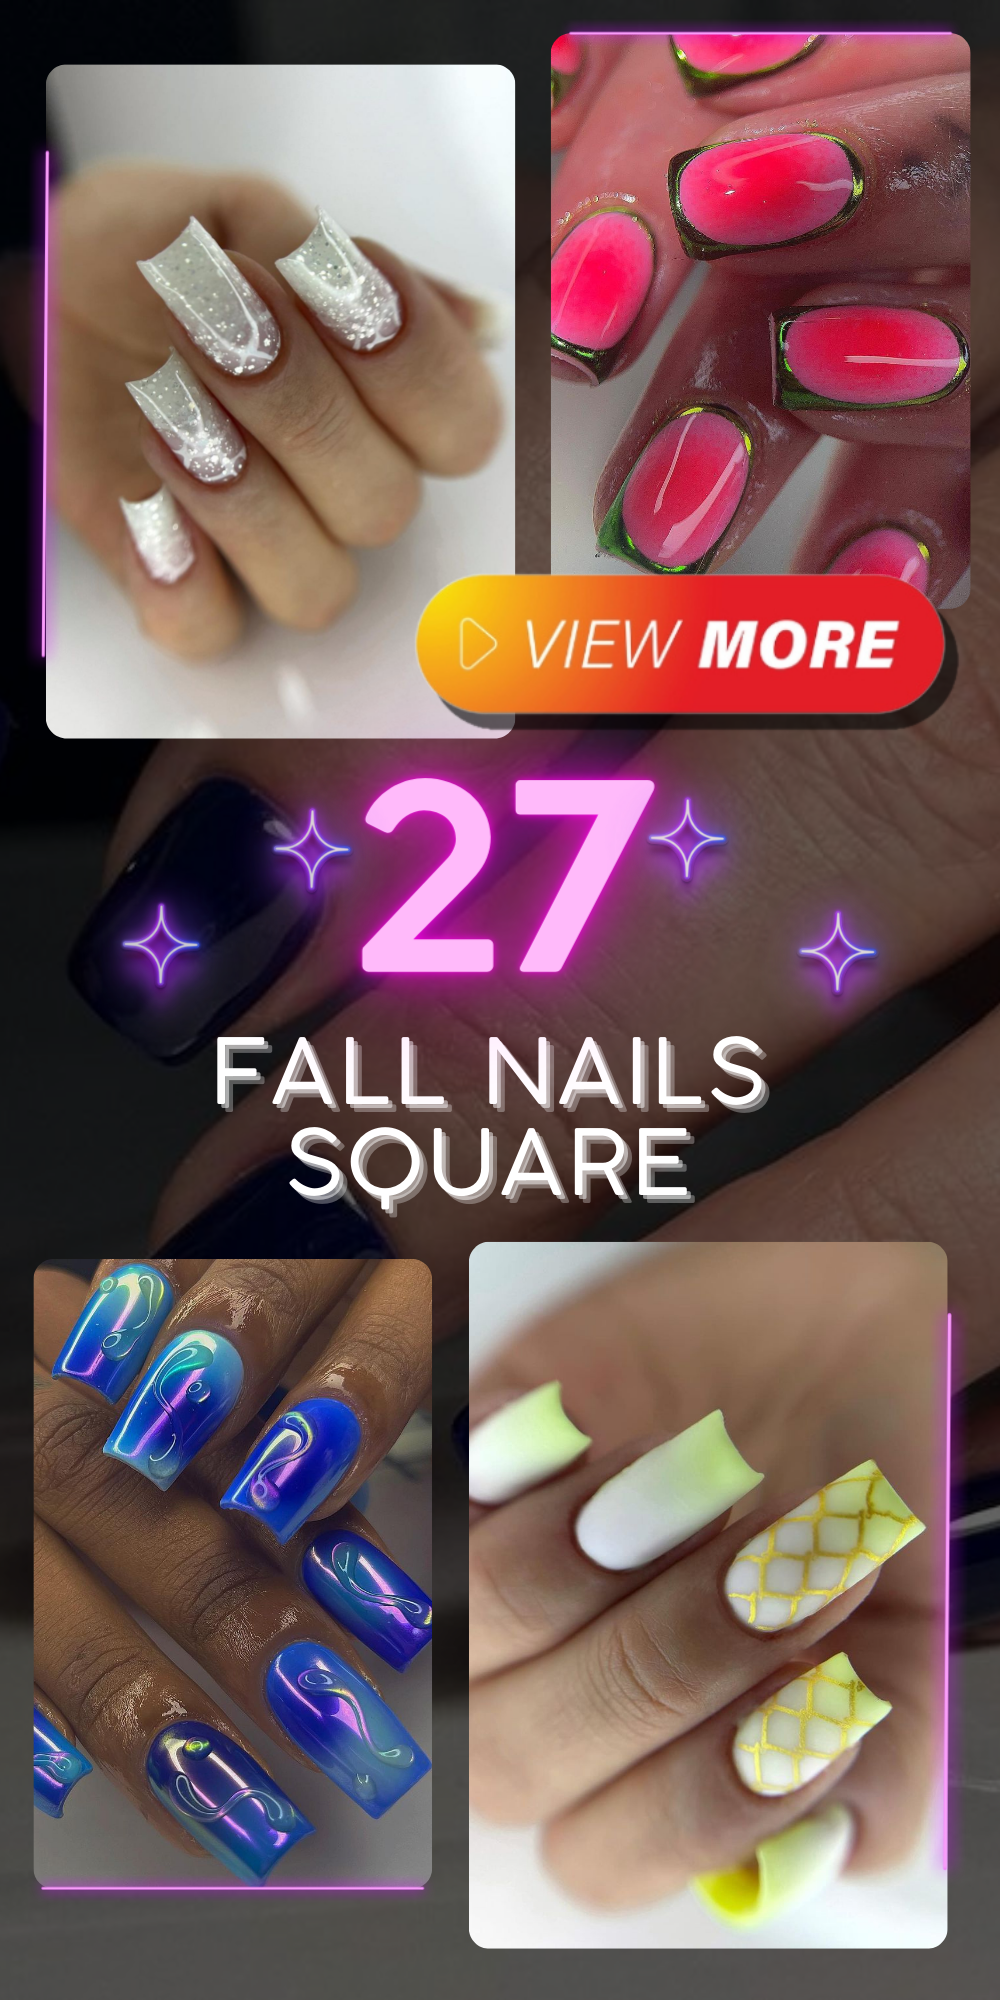
When the leaves start to change and the air gets crisp, it’s time to refresh your manicure to match the fall vibes. In this article, we’ll explore some stunning nail designs perfect for the autumn season. From short to long nails, acrylic to gel, we’ve got all the inspiration you need. Let’s dive into the world of fall nails square.
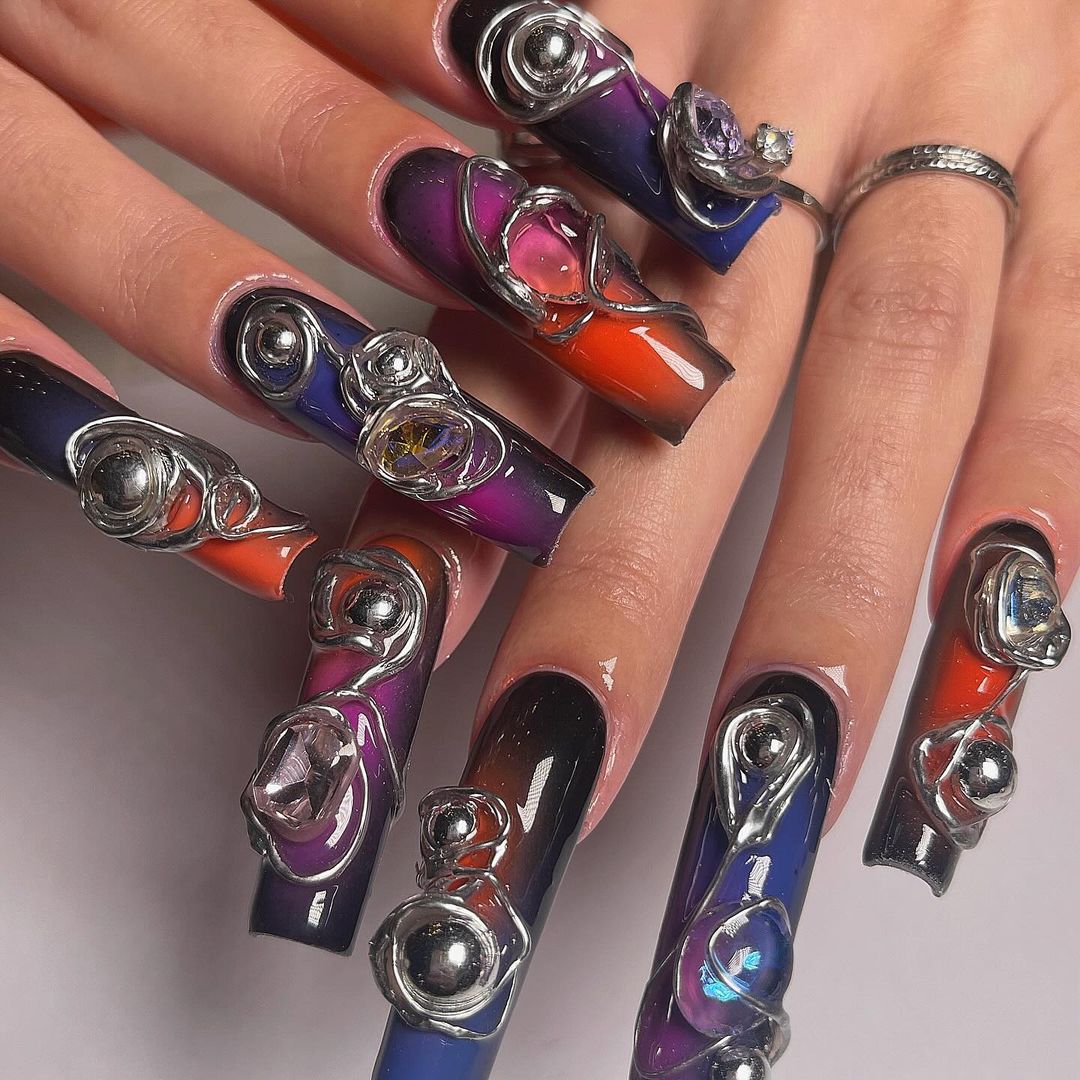
Cosmic Ombre with Metallic Accents
For a bold and edgy look this fall, the cosmic ombre with metallic accents is a show-stopper. This design features a gradient from deep maroon and purple to bright orange and blue, with striking metallic embellishments that create a 3D effect. The blend of dark and bright colors, along with the shiny metallic pieces, gives this manicure a futuristic and artistic flair.
-
- Deep maroon nail polish (e.g., OPI “Yes My Condor Can-do!”)
- Bright orange nail polish (e.g., Essie “Playing Koi”)
- Purple and blue gradient polish (e.g., China Glaze “Dawn of a New Reign”)
- Metallic nail embellishments (e.g., Daily Charme Metal Nail Art)
- Nail glue and top coat (e.g., Seche Vite Top Coat)
Instructions:
-
- Start with a base coat to protect your natural nails.
- Apply the gradient polish, blending from maroon to orange, and then to blue and purple.
- Once dry, carefully place the metallic embellishments using nail glue.
- Finish with a generous layer of top coat to seal and protect your design.
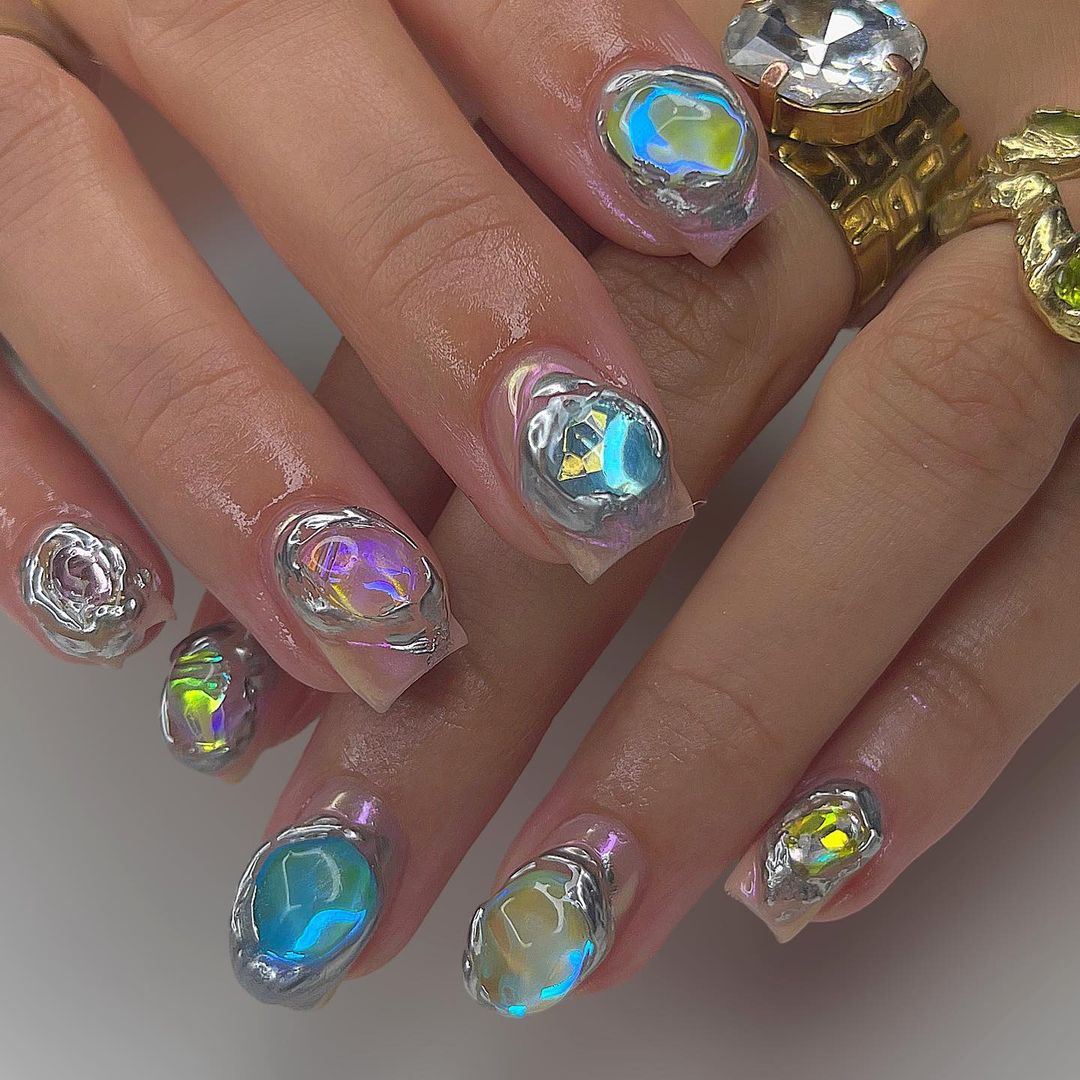
Holographic Elegance
This design features a short acrylic manicure with holographic accents, perfect for those who love a bit of sparkle. The nails are adorned with iridescent gems that catch the light beautifully, creating a rainbow effect. The overall look is both elegant and eye-catching, making it perfect for special occasions or just to add a touch of glamour to your everyday look.
-
- Holographic nail polish (e.g., ILNP “Mega”)
- Iridescent gems (e.g., Swarovski Crystals)
- Nail glue and top coat (e.g., Seche Vite Top Coat)
Instructions:
-
- Apply a base coat, then paint your nails with the holographic polish.
- Once the polish is dry, carefully place the iridescent gems on each nail using nail glue.
- Seal the design with a top coat to ensure the gems stay in place.
Watermelon Brightness
Bring a pop of color to your fall nails with this cute watermelon-inspired design. The bright pink and green hues create a fresh and fun look, reminiscent of summer but perfect for brightening up the cooler months. This design is simple yet vibrant, ideal for those who love playful and trendy nails.

-
- Bright pink nail polish (e.g., Sally Hansen “Back to the Fuchsia”)
- Green nail polish (e.g., Essie “Mojito Madness”)
- Fine nail art brush
- Nail glue and top coat (e.g., Seche Vite Top Coat)
Instructions:
-
- Paint your nails with the bright pink polish and let them dry.
- Using the fine nail art brush, paint the tips of your nails green to mimic the look of watermelon rind.
- Finish with a top coat to protect your design and add a glossy finish.
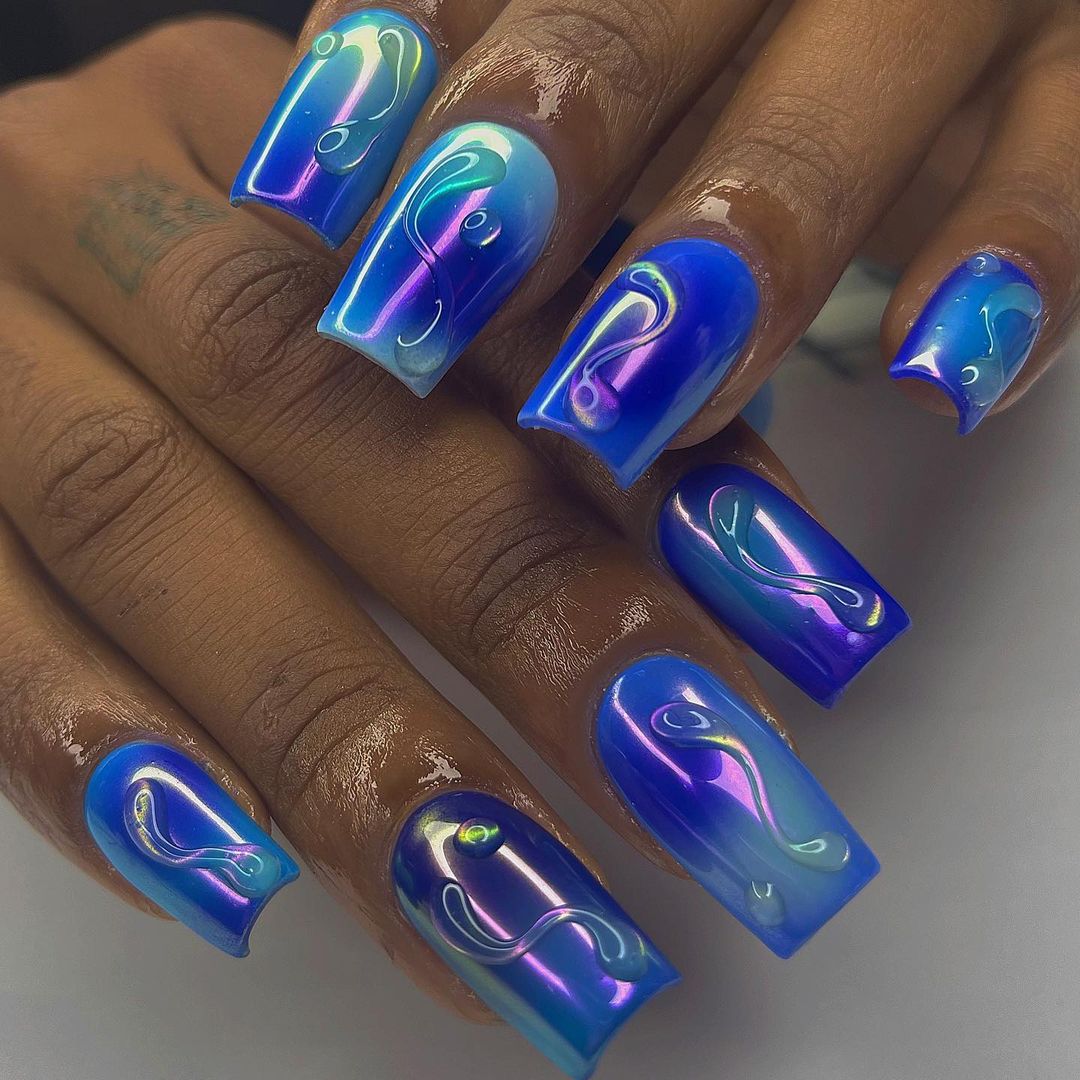
Oceanic Blue Gradient
For those who adore vibrant and cool tones, this oceanic blue gradient manicure is a perfect choice. The design transitions smoothly from deep blue at the tips to a lighter, almost ethereal blue closer to the cuticles. Adding to the mesmerizing effect are subtle, swirling metallic accents that catch the light beautifully, giving the nails an almost holographic appearance.
-
- Deep blue nail polish (e.g., OPI “My Car Has Navy-gation”)
- Light blue nail polish (e.g., Essie “Bikini So Teeny”)
- Metallic nail art liner (e.g., Sally Hansen Nail Art Pen in Silver)
- Top coat (e.g., Seche Vite Top Coat)
Instructions:
-
- Start with a base coat to protect your nails.
- Apply the deep blue polish to the tips of your nails.
- Gradually blend in the light blue polish towards the cuticles, creating a seamless gradient.
- Use the metallic nail art liner to draw delicate swirls and accents on the nails.
- Finish with a top coat to add shine and longevity to your manicure.
Save Pin
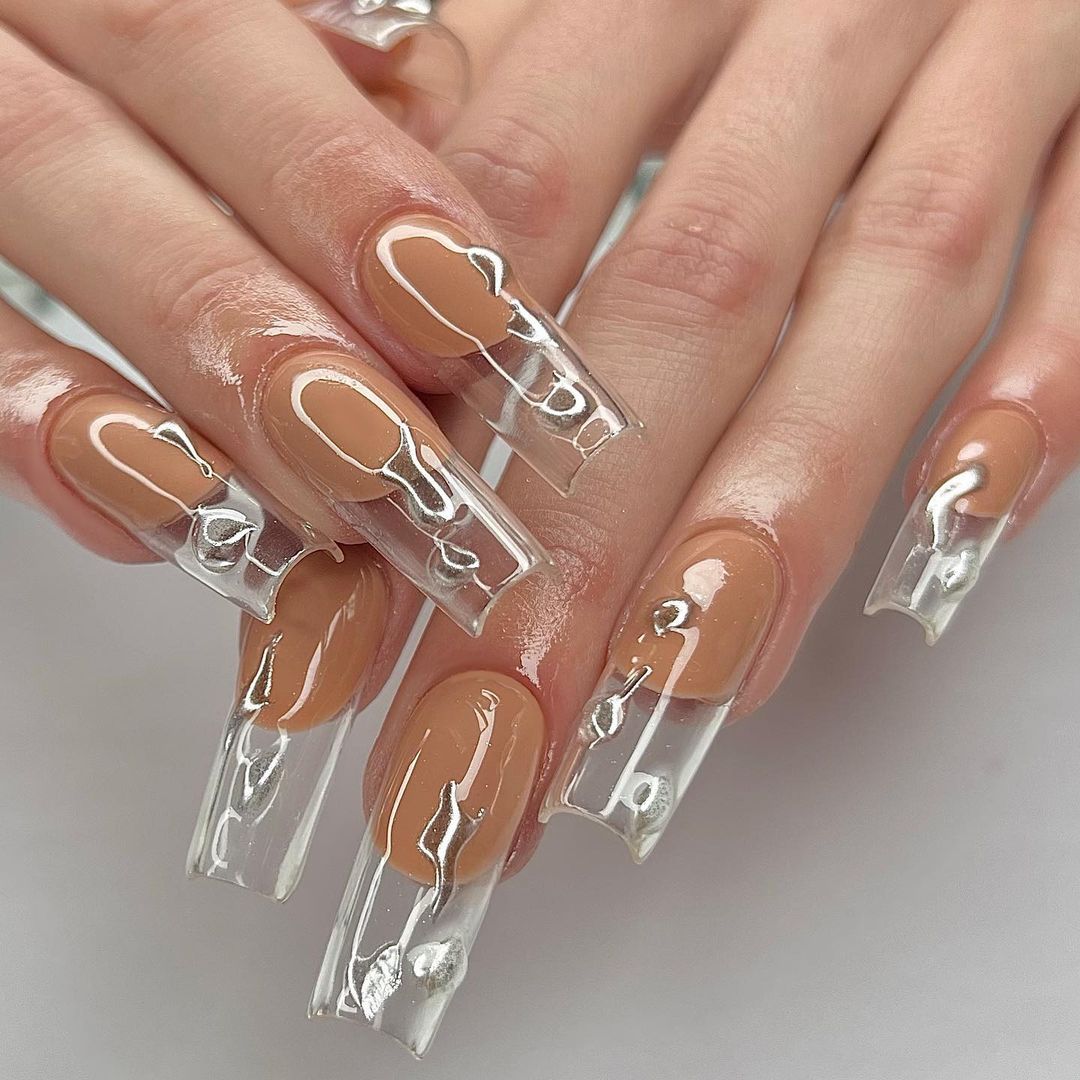
Nude and Clear Elegance
This design features a sophisticated combination of nude and clear elements. The nails are painted with a nude polish on the nail beds, transitioning into clear tips adorned with minimalist silver accents. This look is perfect for those who appreciate understated elegance and a minimalist aesthetic.
-
- Nude nail polish (e.g., Zoya “Sandy”)
- Clear nail polish (e.g., OPI “Clear”)
- Silver nail art tape or liner (e.g., Young Nails Striping Tape)
- Top coat (e.g., Seche Vite Top Coat)
Instructions:
-
- Apply a base coat to your nails.
- Paint the nail beds with nude polish, leaving the tips clear.
- Once the nude polish is dry, use silver nail art tape or a liner to create minimalist designs on the clear tips.
- Seal the design with a top coat for a glossy finish.
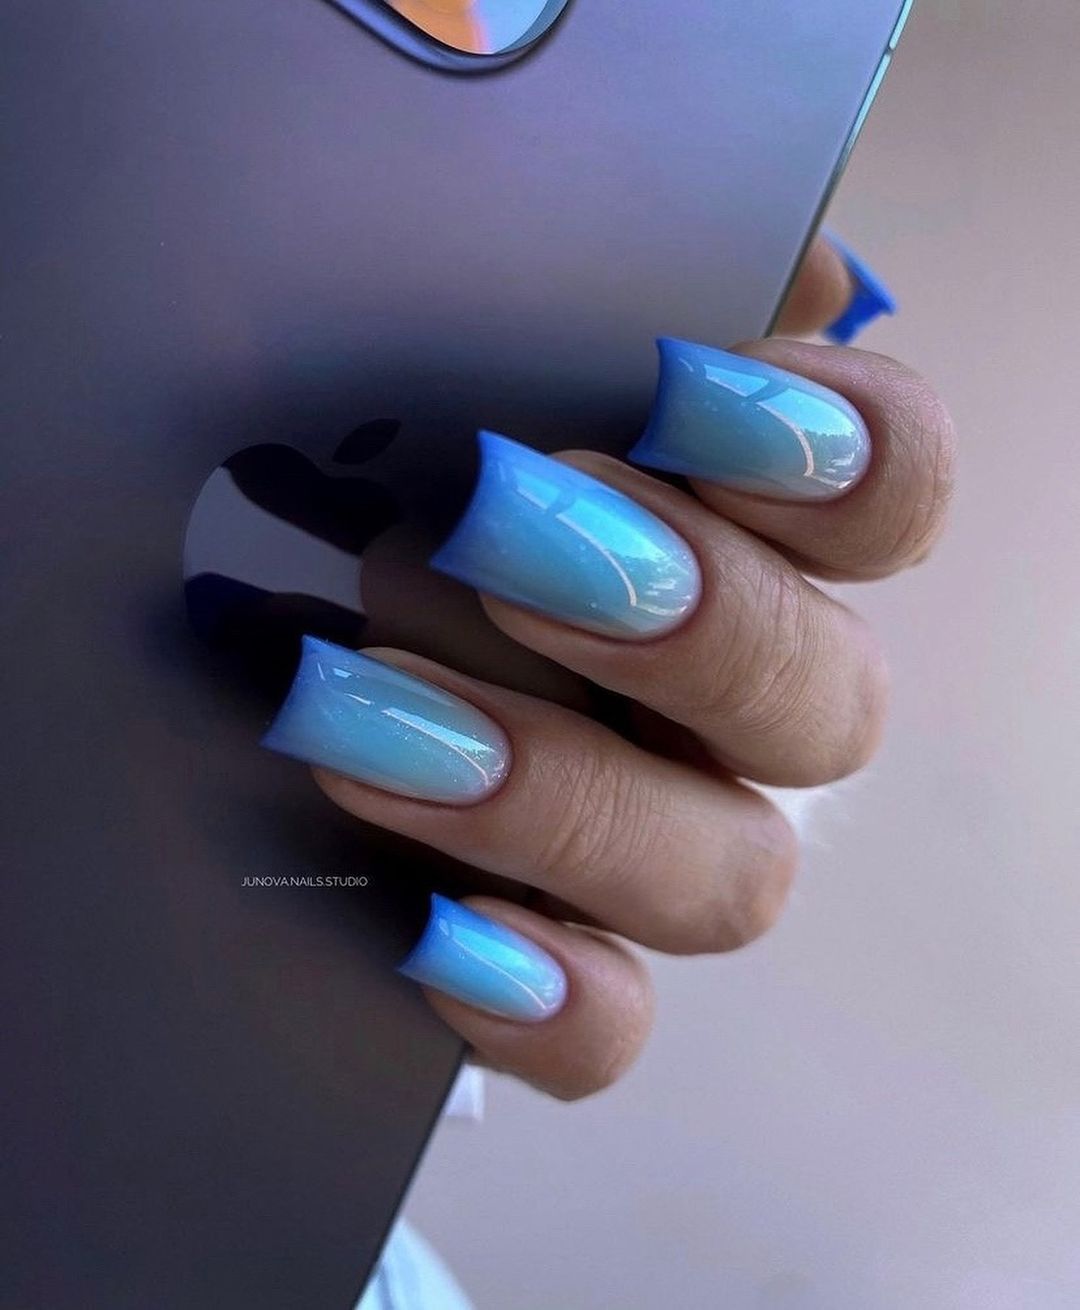
Sky Blue French Ombre
A modern twist on the classic French manicure, this sky blue French ombre design is both trendy and fresh. The nails feature a gradient from a clear base to a vivid sky blue at the tips, creating a soft and airy look. This design is perfect for those who love a subtle yet eye-catching manicure.
-
- Sky blue nail polish (e.g., Essie “Mint Candy Apple”)
- Clear nail polish (e.g., OPI “Clear”)
- Sponge for blending (e.g., Winstonia Nail Art Sponges)
- Top coat (e.g., Seche Vite Top Coat)
Instructions:
-
- Apply a base coat to protect your nails.
- Using a sponge, blend the sky blue polish from the tips towards the middle of the nails, creating a smooth ombre effect.
- Ensure the gradient is seamless by lightly dabbing the sponge with clear polish.
- Finish with a top coat to protect your design and add a beautiful shine.
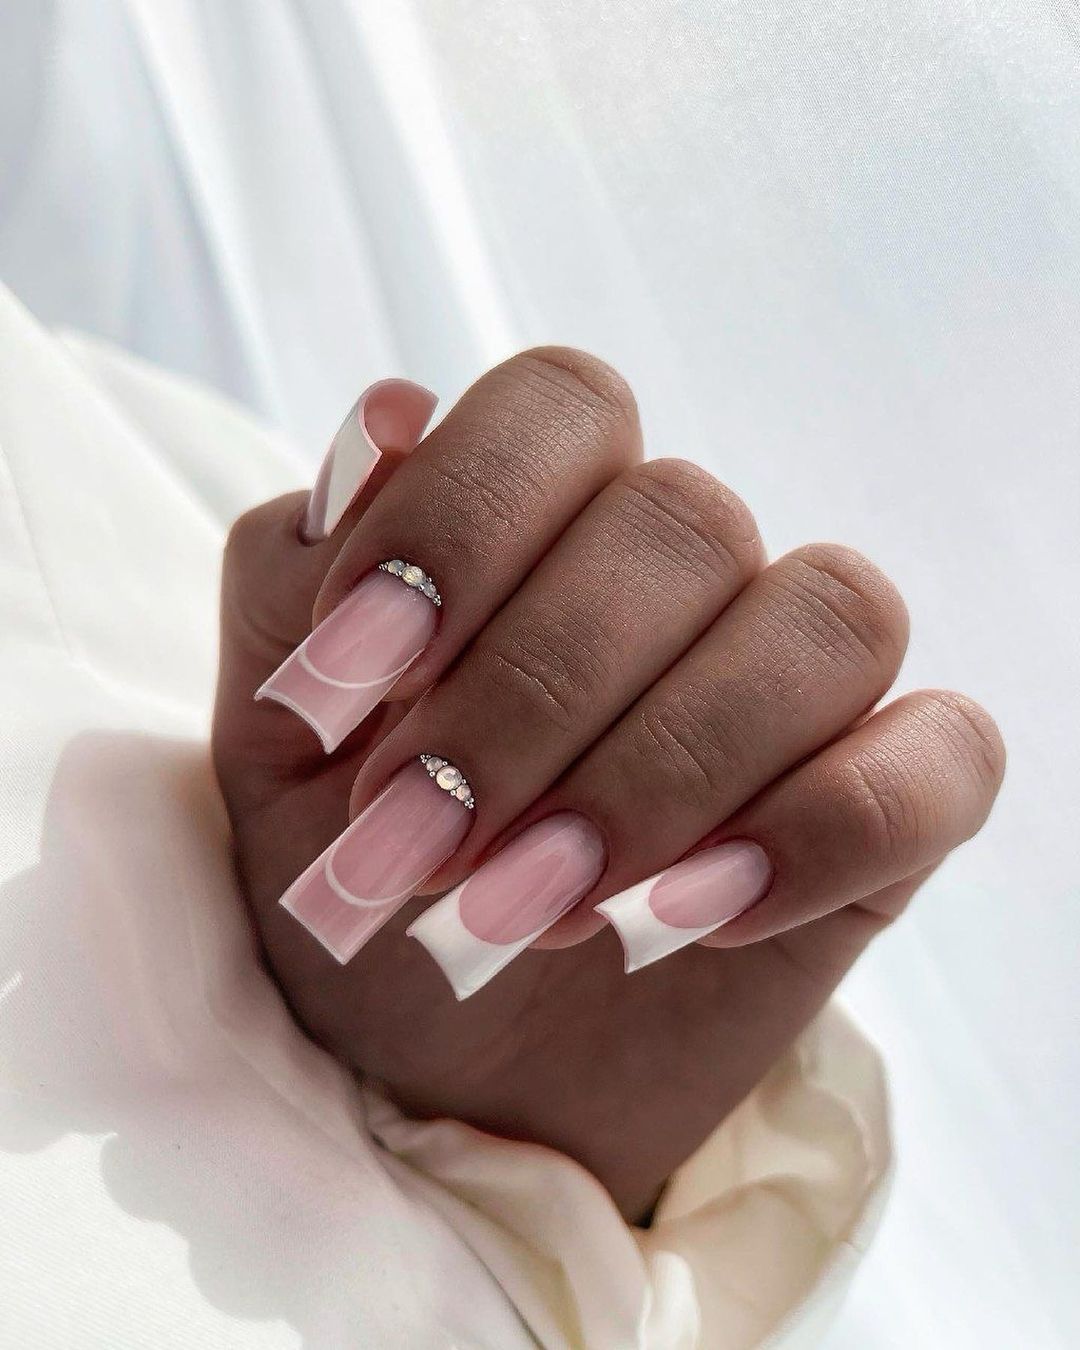
Classic French Tips with a Twist
This sophisticated manicure features a modern take on the classic French tip. The nails are painted with a soft pink base, transitioning into crisp white tips. What sets this design apart is the addition of small, delicate gemstones along the cuticle line of the ring finger, adding an elegant touch that elevates the entire look.
-
- Soft pink nail polish (e.g., Essie “Ballet Slippers”)
- White nail polish for tips (e.g., OPI “Alpine Snow”)
- Small gemstones or rhinestones (e.g., Swarovski Crystals)
- Nail glue and top coat (e.g., Seche Vite Top Coat)
Instructions:
-
- Apply a base coat to protect your nails.
- Paint the nails with the soft pink polish and let them dry completely.
- Use the white polish to create the French tips.
- Apply a small amount of nail glue to the cuticle line of the ring finger and carefully place the gemstones.
- Seal the design with a top coat for a glossy and durable finish.
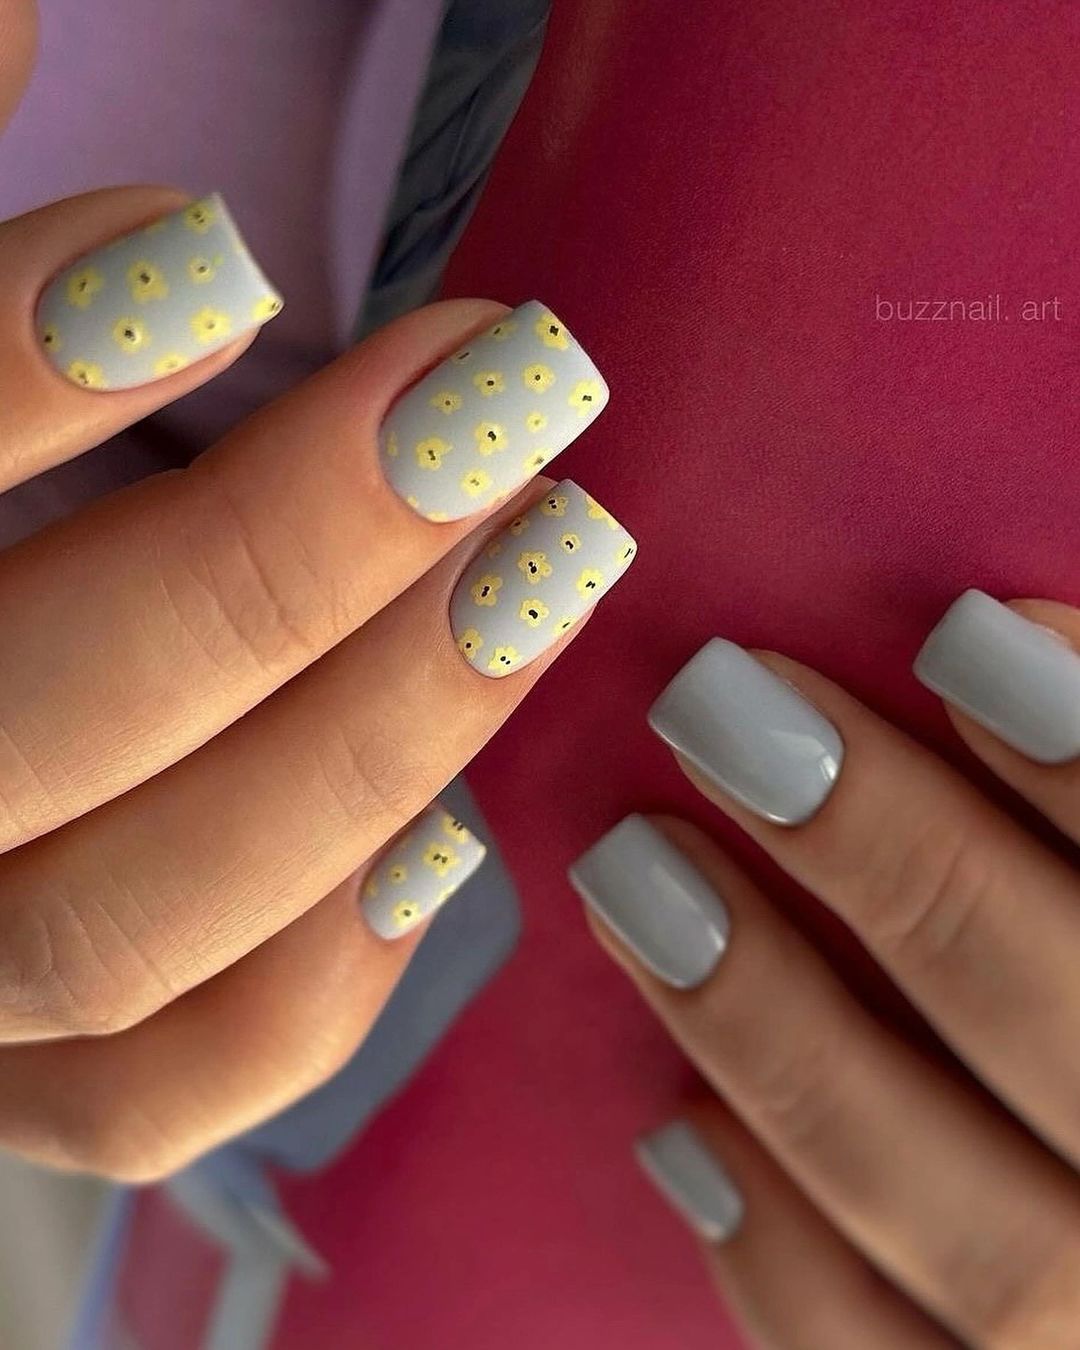
Pastel Polka Dot Delight
This fun and playful design features a pastel purple base with delicate yellow polka dots, creating a cute and trendy look perfect for any season. The matte finish gives it a modern twist, making it ideal for those who love minimalist yet eye-catching nail art.
-
- Pastel purple nail polish (e.g., Sally Hansen “Lacey Lilac”)
- Yellow nail polish (e.g., OPI “Sun, Sea, and Sand in My Pants”)
- Dotting tool or toothpick
- Matte top coat (e.g., Essie “Matte About You”)
Instructions:
-
- Start with a base coat to protect your nails.
- Apply the pastel purple polish and let it dry completely.
- Use a dotting tool or a toothpick to create small yellow polka dots on each nail.
- Finish with a matte top coat to seal the design and give it a trendy finish.
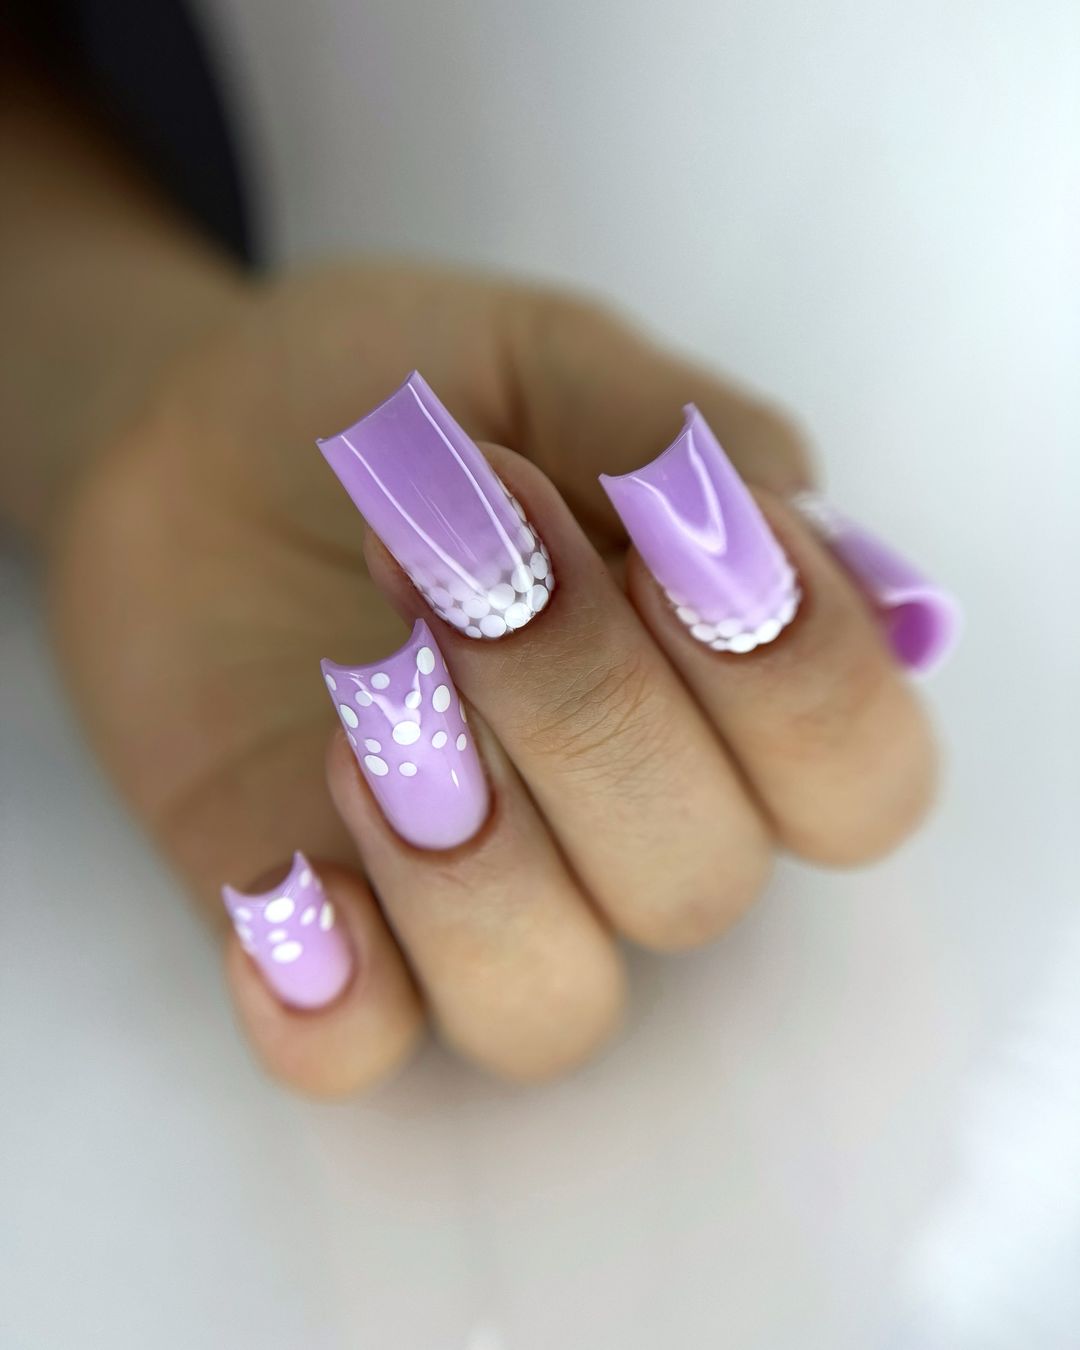
Lilac Dreams with Polka Accents
This dreamy lilac manicure features a charming gradient effect with white polka dot accents. The nails transition smoothly from a soft lilac at the base to a brighter purple at the tips, creating a soothing and visually appealing look. The addition of white polka dots adds a playful touch to this elegant design.
-
- Lilac nail polish (e.g., Essie “Go Ginza”)
- Bright purple nail polish (e.g., OPI “Do You Lilac It?”)
- White nail polish (e.g., Sally Hansen “White On”)
- Dotting tool or toothpick
- Top coat (e.g., Seche Vite Top Coat)
Instructions:
-
- Apply a base coat to your nails.
- Paint the nails with the lilac polish and let them dry.
- Using a sponge, blend the bright purple polish from the tips towards the middle of the nails to create a gradient effect.
- Use a dotting tool or toothpick to add white polka dots near the cuticles.
- Seal the design with a top coat for a glossy finish.
Save Pin
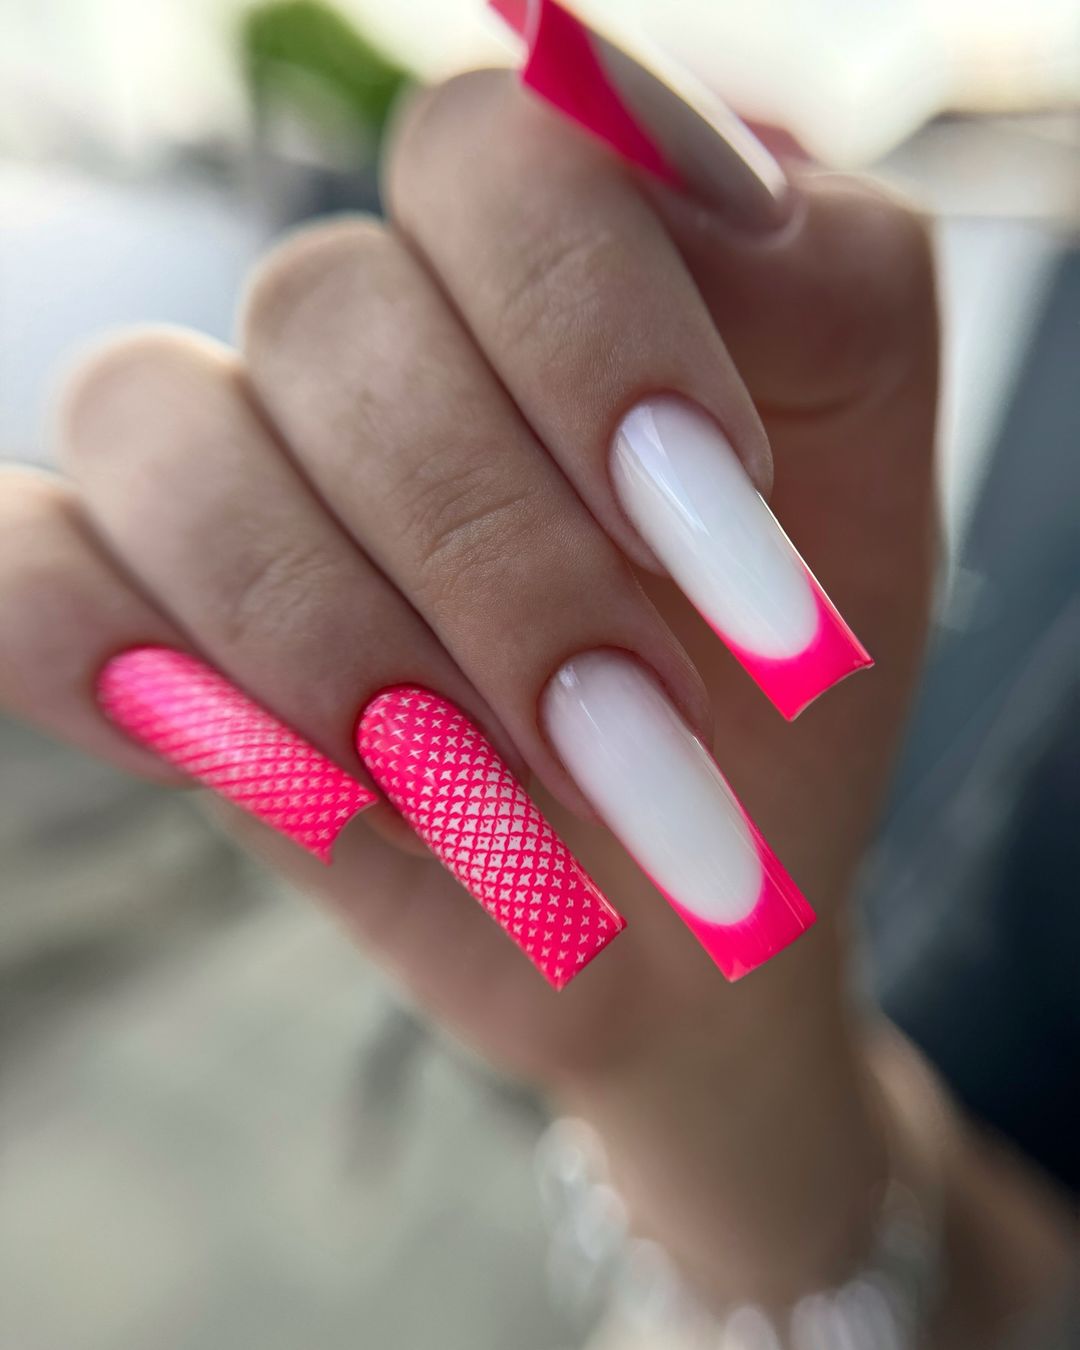
Neon Pink and White Combo
This bold and vibrant design features a striking combination of neon pink and white. The nails are painted with a white base, with neon pink tips and accents that create a fun and energetic look. This design is perfect for those who love to stand out and make a statement with their manicure.
-
- White nail polish (e.g., OPI “Alpine Snow”)
- Neon pink nail polish (e.g., China Glaze “Shocking Pink”)
- Nail art brush or striping tape
- Top coat (e.g., Seche Vite Top Coat)
Instructions:
-
- Apply a base coat to your nails.
- Paint the nails with the white polish and let them dry.
- Use a nail art brush or striping tape to create neon pink tips and accents.
- Finish with a top coat to protect the design and add shine.
Purple Gradient with Pearls
This elegant purple gradient manicure is enhanced with pearl accents, creating a luxurious and sophisticated look. The nails transition from a soft lavender at the base to a deep purple at the tips, with small pearls arranged along the center of the middle nail for a touch of glamour.
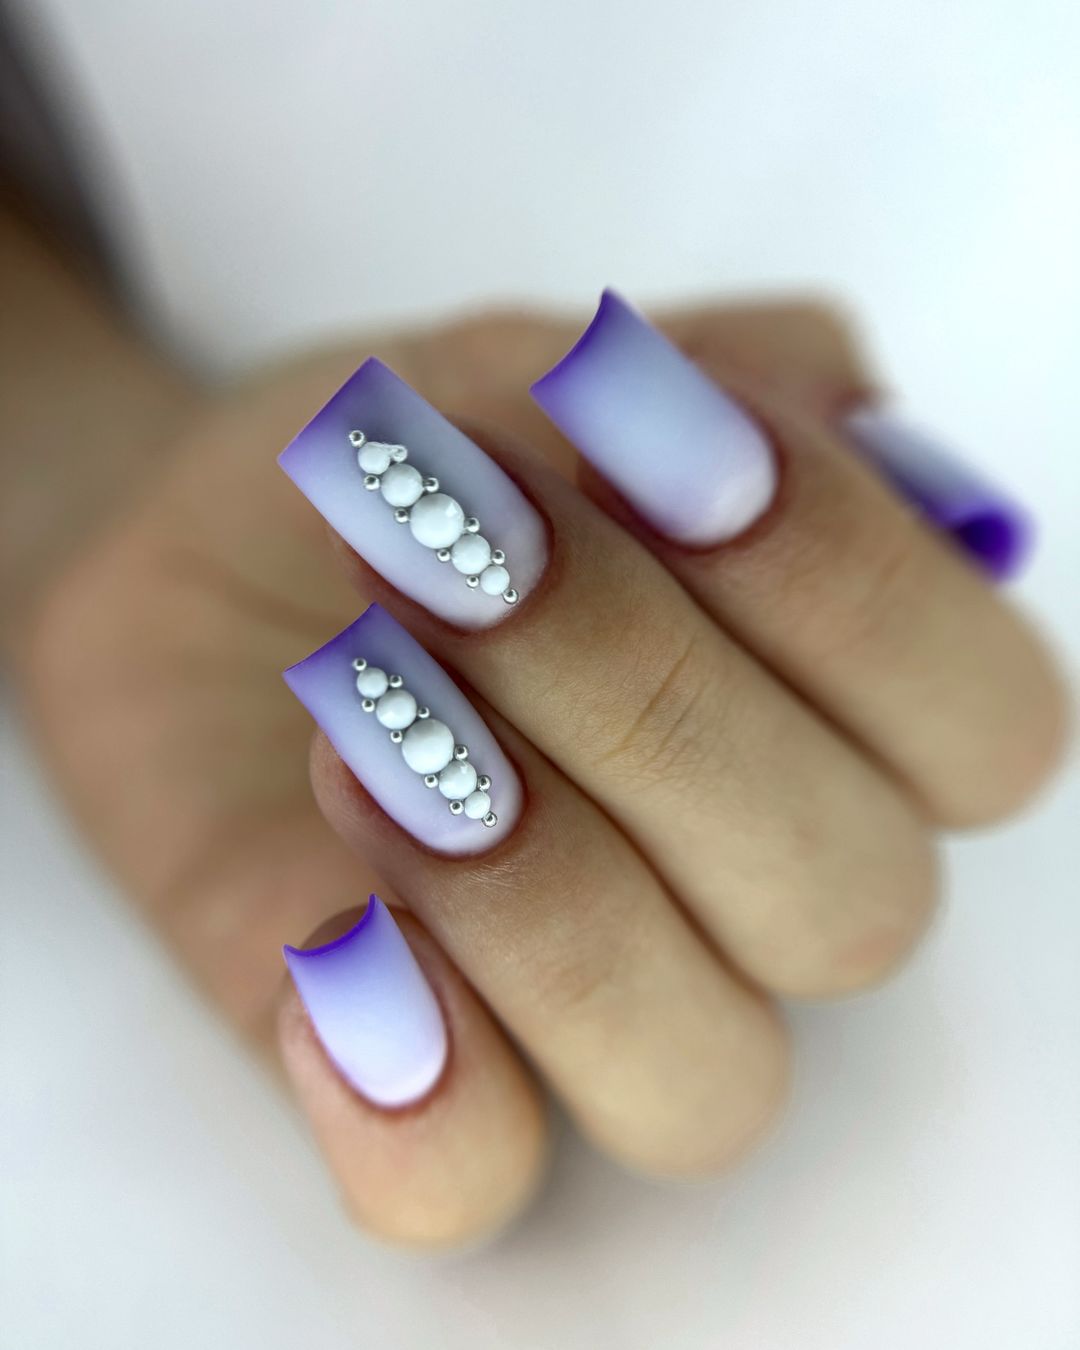
-
- Soft lavender nail polish (e.g., Essie “Lilacism”)
- Deep purple nail polish (e.g., OPI “Lincoln Park After Dark”)
- Small pearl embellishments
- Nail glue and top coat (e.g., Seche Vite Top Coat)
Instructions:
-
- Start with a base coat to protect your nails.
- Apply the soft lavender polish to the nails and let them dry.
- Using a sponge, blend the deep purple polish from the tips towards the middle to create a gradient effect.
- Apply nail glue to the center of the middle nail and place the pearls.
- Seal the design with a top coat for a polished finish.
Giraffe Print and White Mix
This unique design combines a fun giraffe print with a clean white polish for a chic and trendy look. The nails feature a pale pink base with white giraffe print accents on two nails, while the remaining nails are painted solid white, creating a striking contrast.
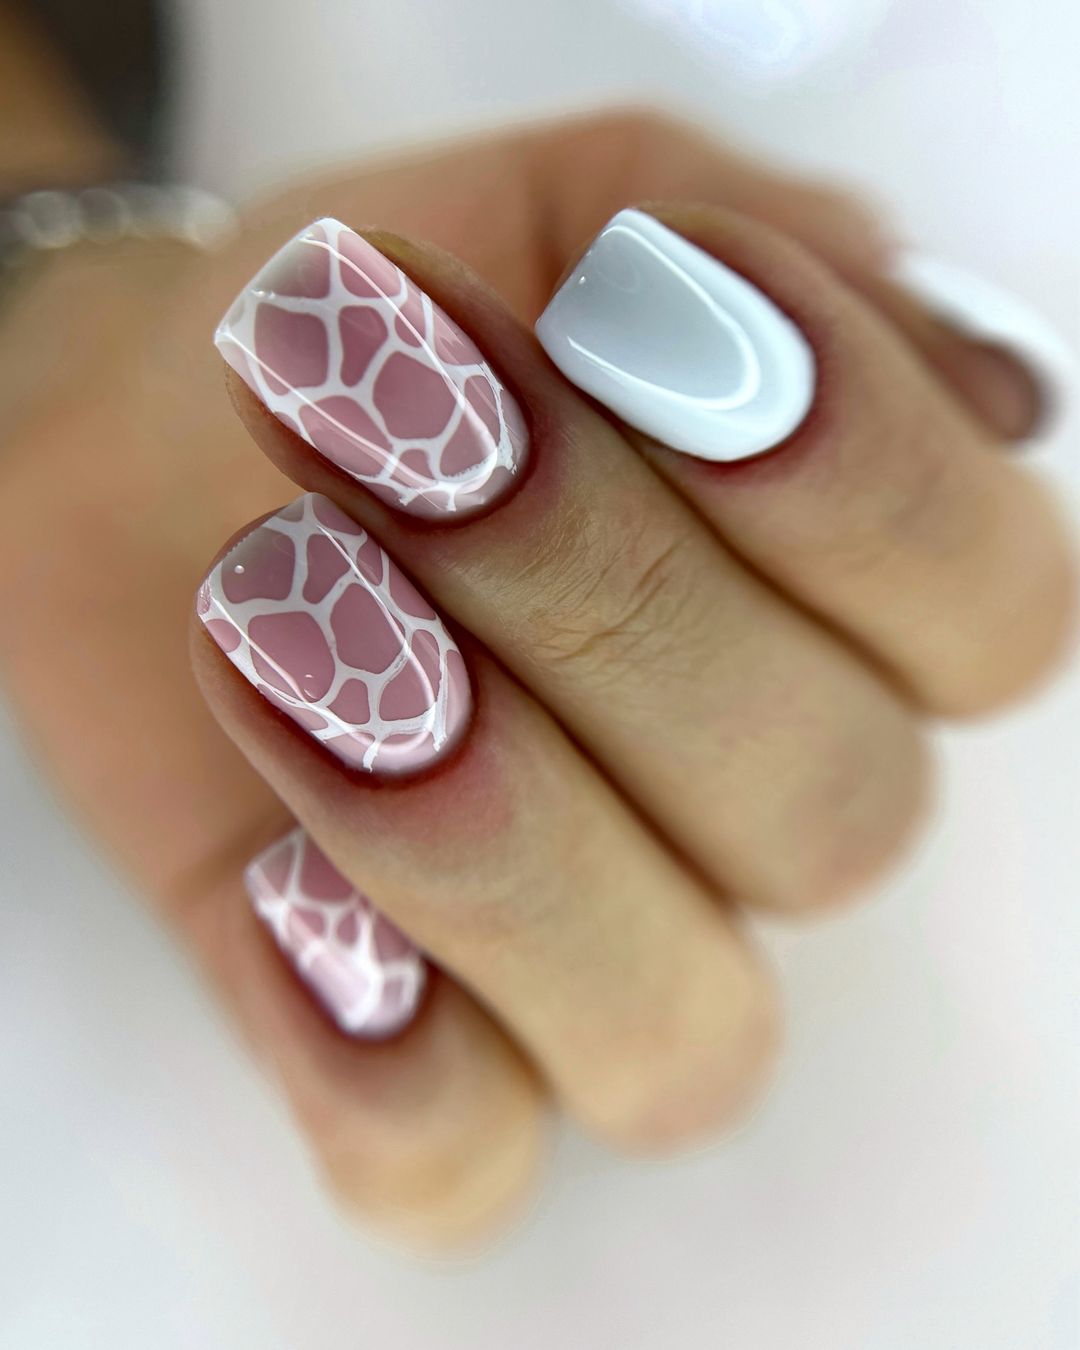
-
- Pale pink nail polish (e.g., OPI “Bubble Bath”)
- White nail polish (e.g., Essie “Blanc”)
- Nail art brush
- Top coat (e.g., Seche Vite Top Coat)
Instructions:
-
- Apply a base coat to your nails.
- Paint the nails with the pale pink polish and let them dry.
- Use a nail art brush to create white giraffe print patterns on two accent nails.
- Paint the remaining nails solid white.
- Finish with a top coat to seal the design and add shine.
Glittery White Snowfall
This stunning glittery white design is perfect for those who want a bit of sparkle on their nails. The manicure features a clear base that gradually transitions into a glittery white tip, mimicking the look of fresh snowfall. The glitter particles catch the light beautifully, adding a touch of magic to this elegant look.

-
- Clear base coat (e.g., OPI “Natural Nail Base Coat”)
- White glitter polish (e.g., China Glaze “Fairy Dust”)
- Sponge for gradient effect
- Top coat (e.g., Seche Vite Top Coat)
Instructions:
-
- Apply a clear base coat to your nails.
- Use a sponge to apply the white glitter polish to the tips of your nails, creating a gradient effect.
- Let the glitter polish dry completely.
- Finish with a top coat to seal the design and add shine.
Golden Flakes
This design features a sheer nude base with delicate golden flakes scattered across the nails. The subtle shimmer of the gold flakes creates a luxurious and sophisticated look that is both elegant and understated, perfect for any occasion.
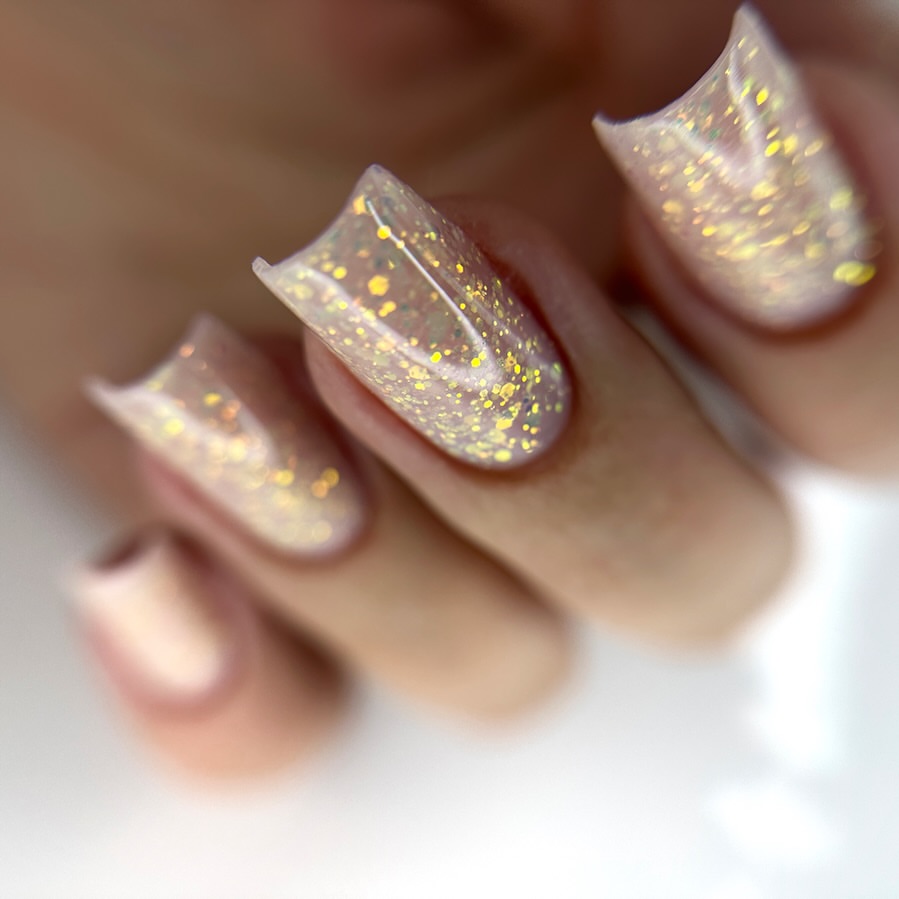
-
- Nude nail polish (e.g., Essie “Topless & Barefoot”)
- Gold foil flakes (e.g., Born Pretty Gold Foil)
- Top coat (e.g., Seche Vite Top Coat)
Instructions:
-
- Apply a nude base coat to your nails.
- While the polish is still tacky, place the gold flakes on your nails using a tweezer.
- Press the flakes gently to ensure they adhere to the nail surface.
- Finish with a top coat to seal the design and add a glossy finish.
Neon Yellow Gradient
This bold neon yellow gradient manicure is perfect for those who love vibrant and eye-catching designs. The nails feature a gradient from a nude base to a bright neon yellow tip, with gold foil accents on one nail for added flair.
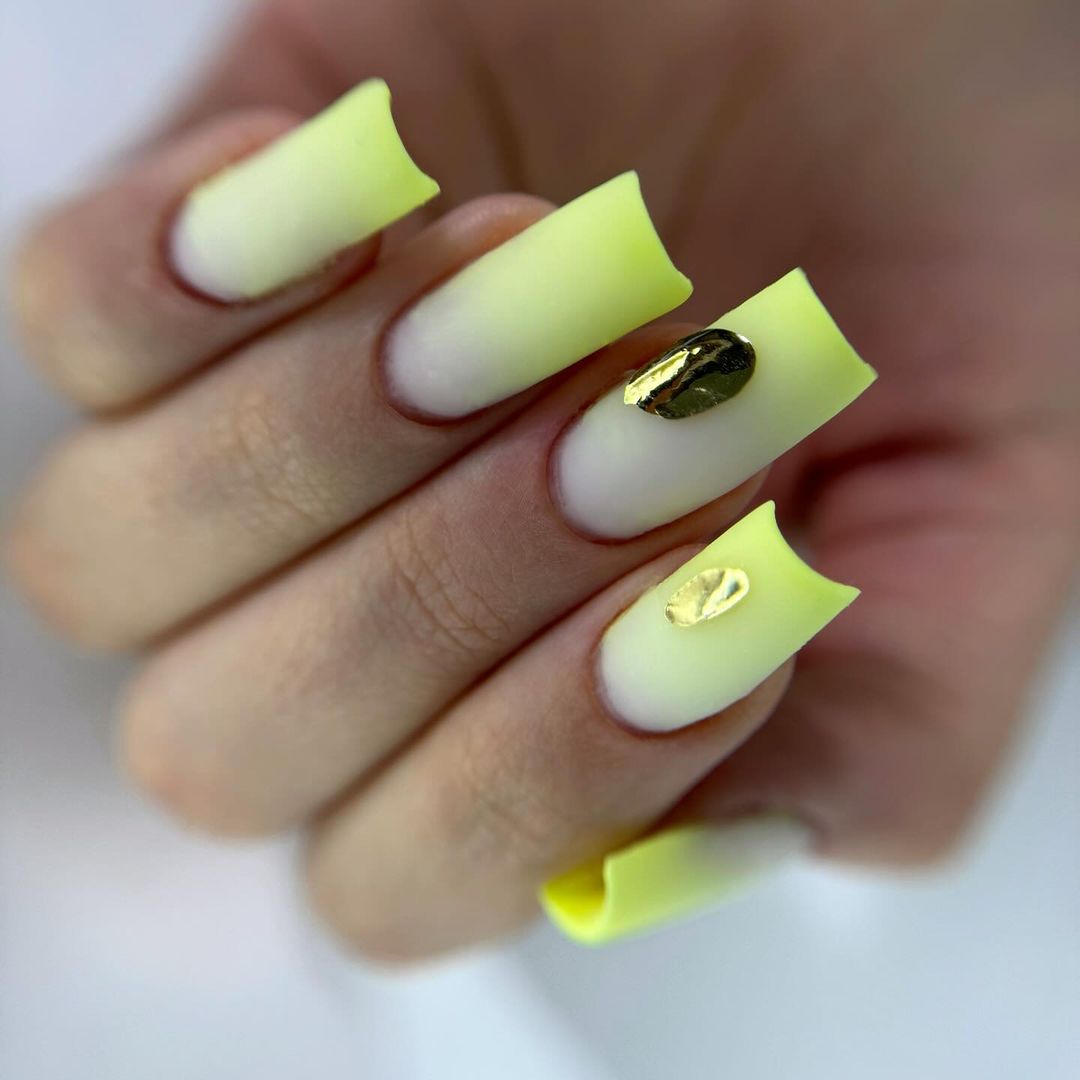
-
- Nude nail polish (e.g., OPI “Samoan Sand”)
- Neon yellow nail polish (e.g., China Glaze “Yellow Polka Dot Bikini”)
- Gold foil (e.g., Daily Charme Gold Foil)
- Sponge for gradient effect
- Top coat (e.g., Seche Vite Top Coat)
Instructions:
-
- Apply a nude base coat to your nails.
- Use a sponge to create a gradient effect with the neon yellow polish, blending it from the tips to the middle of the nails.
- Apply gold foil accents on one nail using a tweezer and nail glue.
- Finish with a top coat to seal the design and add shine.
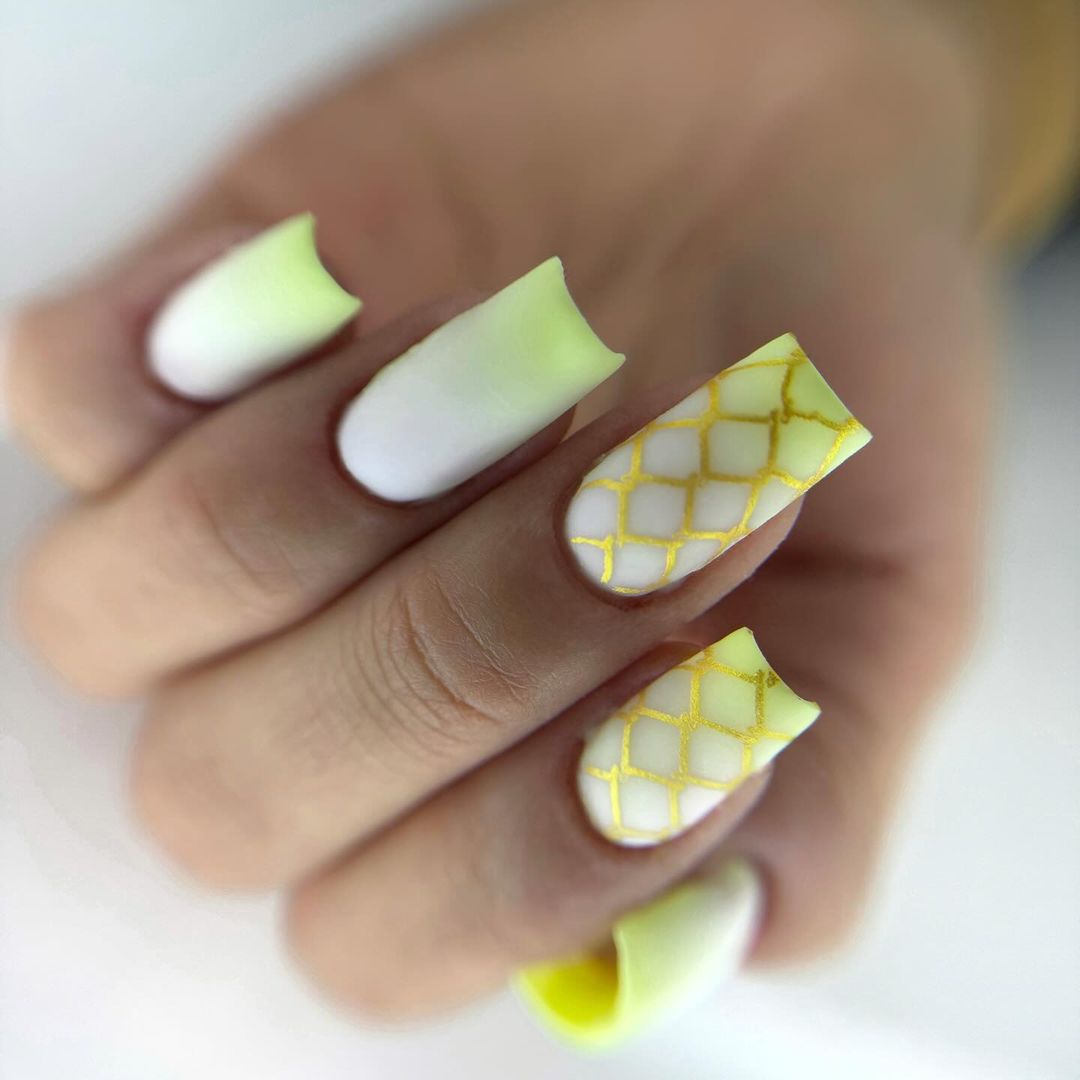
Yellow Grid Accent
This creative manicure combines a gradient from nude to neon yellow with a unique grid accent on the ring finger. The yellow grid pattern adds a fun and trendy twist to the design, making it perfect for those who want something different and stylish.
-
- Nude nail polish (e.g., Essie “Sand Tropez”)
- Neon yellow nail polish (e.g., China Glaze “Sun-Kissed”)
- Yellow nail art pen or brush
- Sponge for gradient effect
- Top coat (e.g., Seche Vite Top Coat)
Instructions:
-
- Apply a nude base coat to your nails.
- Use a sponge to blend the neon yellow polish from the tips towards the middle of the nails, creating a gradient effect.
- Use a yellow nail art pen or brush to draw a grid pattern on the ring finger.
- Seal the design with a top coat for a glossy finish.
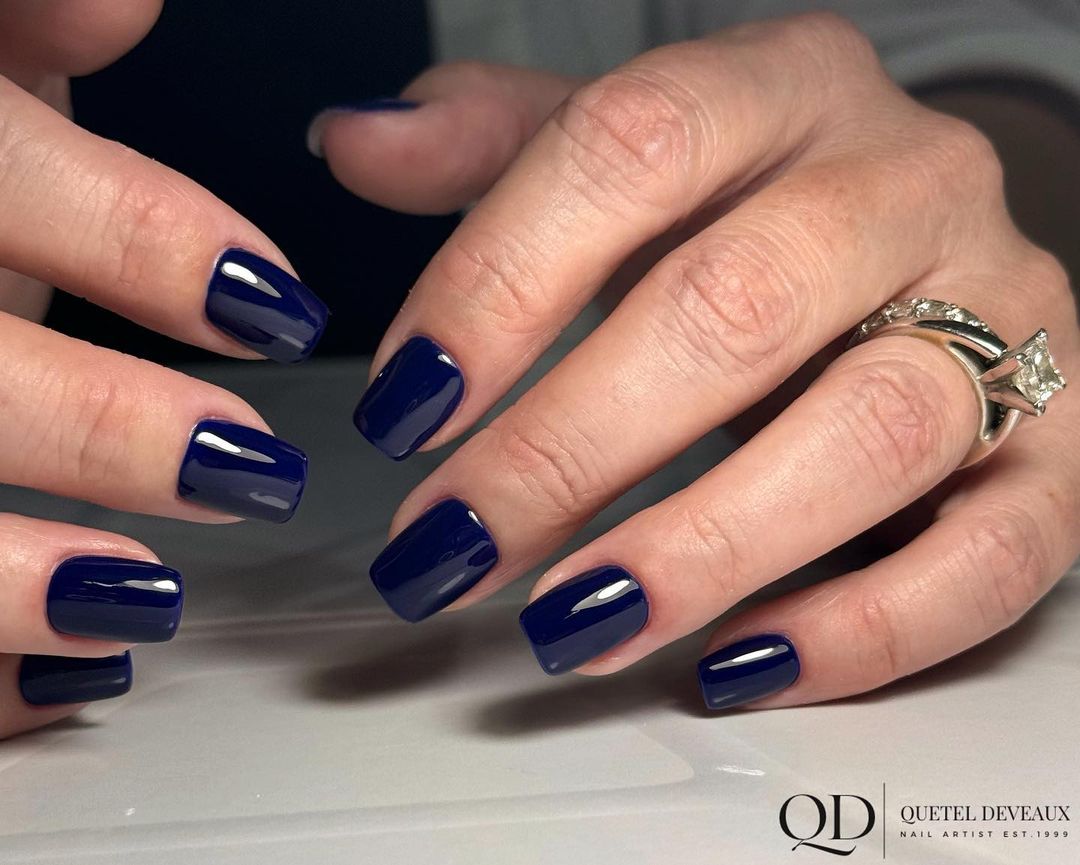
Midnight Blue Elegance
This elegant manicure features a deep midnight blue polish that is both sophisticated and timeless. The rich blue color is perfect for fall, adding a touch of mystery and elegance to your nails. This design is simple yet stunning, making it ideal for any formal occasion.
-
- Deep blue nail polish (e.g., OPI “Russian Navy”)
- Top coat (e.g., Seche Vite Top Coat)
Instructions:
-
- Apply a base coat to protect your nails.
- Paint your nails with the deep blue polish and let them dry completely.
- Finish with a top coat to add shine and durability to your manicure.
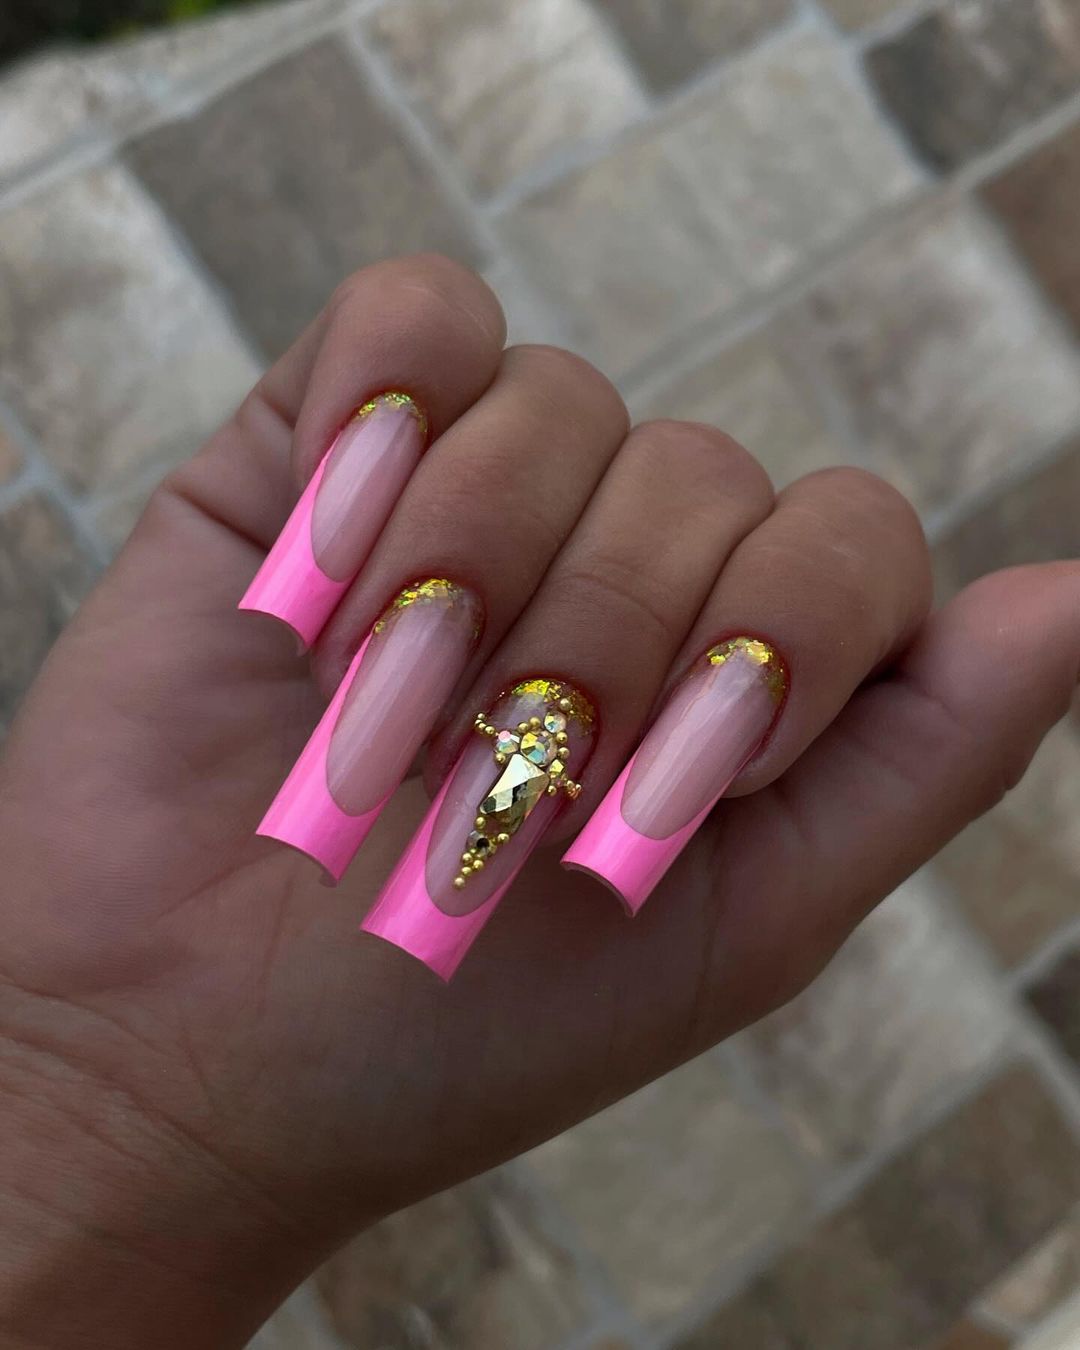
Pink and Gold Glam
This glamorous manicure features a bold combination of neon pink and gold. The nails are painted with a neon pink base and adorned with gold glitter accents and rhinestones. This design is perfect for those who love to make a statement with their nails.
-
- Neon pink nail polish (e.g., Essie “Pinking About You”)
- Gold glitter polish (e.g., OPI “Goldeneye”)
- Rhinestones (e.g., Swarovski Crystals)
- Nail glue and top coat (e.g., Seche Vite Top Coat)
Instructions:
-
- Apply a base coat to protect your nails.
- Paint the nails with the neon pink polish and let them dry.
- Apply gold glitter polish along the cuticle line and add rhinestones using nail glue.
- Finish with a top coat to seal the design and add shine.
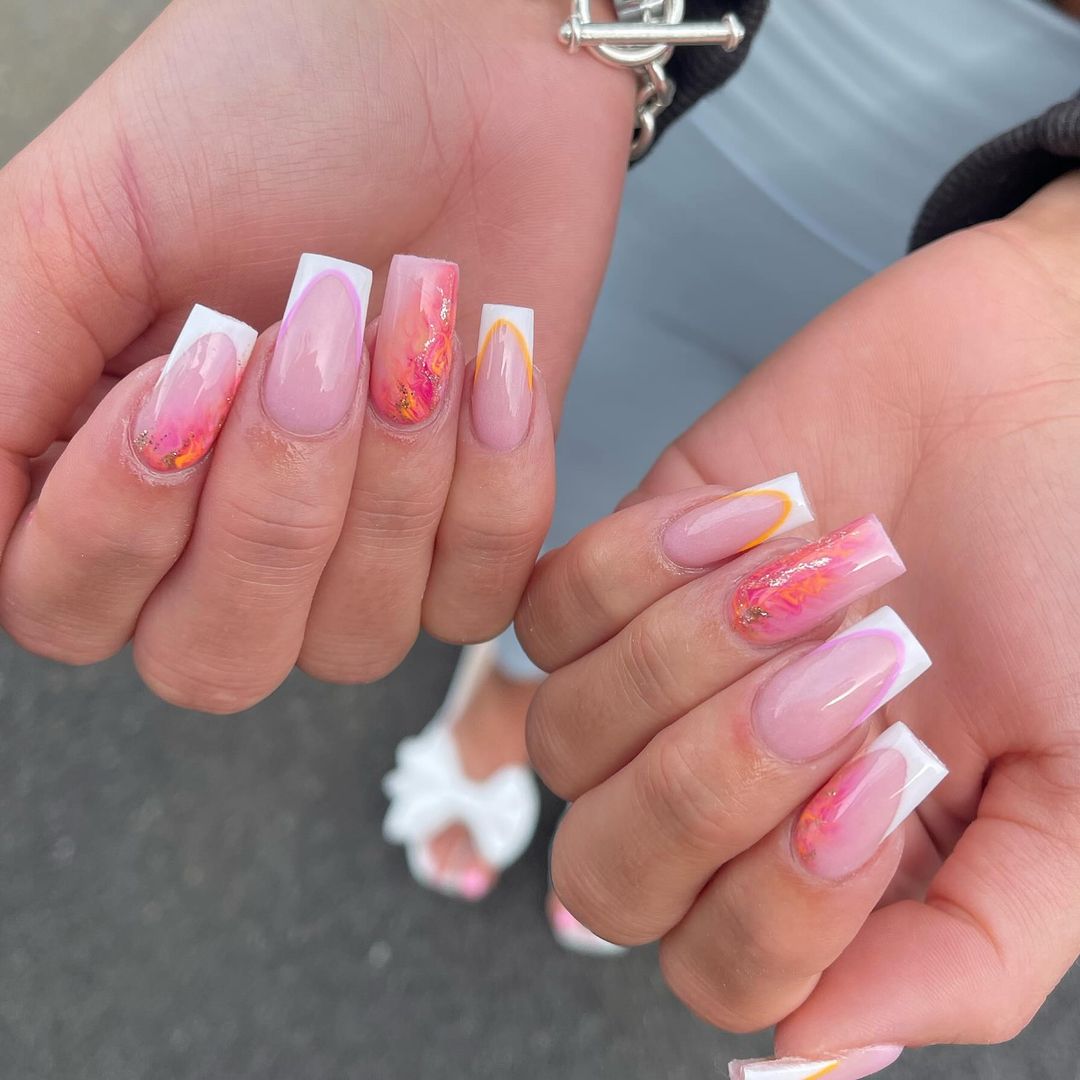
Sunset Marble
This beautiful design captures the essence of a sunset with its warm, vibrant colors. The nails feature a soft pink base with intricate marble accents in shades of orange, yellow, and pink. The white French tips add a classic touch, making this manicure both trendy and timeless.
-
- Soft pink nail polish (e.g., Essie “Ballet Slippers”)
- Orange, yellow, and pink nail polishes for marble effect (e.g., OPI “Mod About You”, Essie “Tart Deco”, China Glaze “Sun Worshipper”)
- White nail polish for French tips (e.g., OPI “Alpine Snow”)
- Nail art brush
- Top coat (e.g., Seche Vite Top Coat)
Instructions:
-
- Apply a base coat to your nails.
- Paint the nails with the soft pink polish and let them dry.
- Use a nail art brush to create marble patterns with the orange, yellow, and pink polishes on accent nails.
- Paint the tips of the remaining nails with the white polish to create French tips.
- Seal the design with a top coat for a glossy finish.
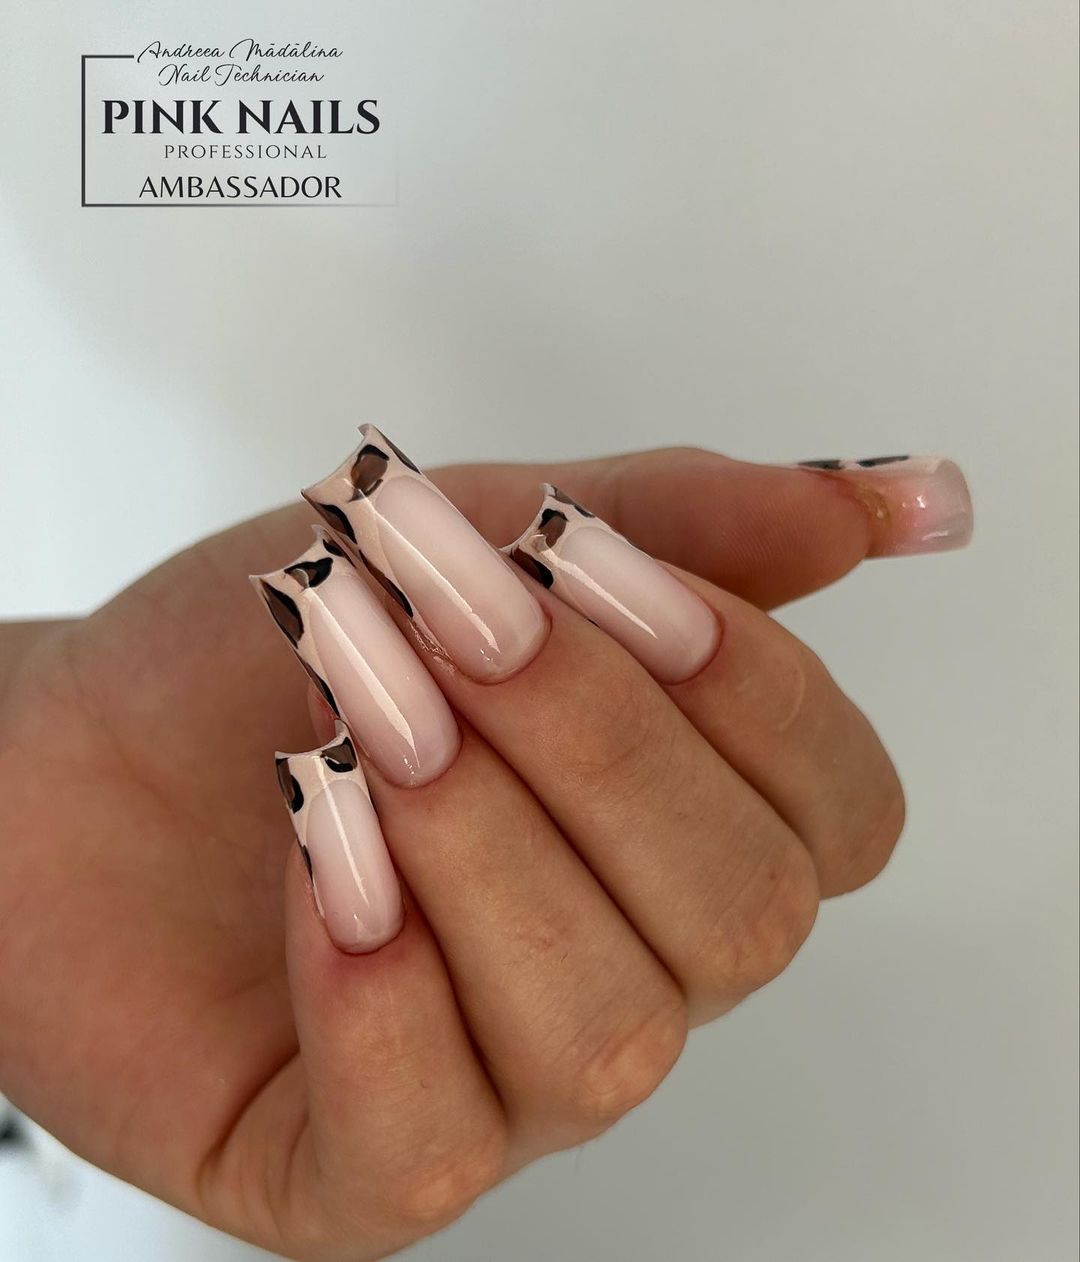
Chic Leopard French
This chic manicure combines the classic French tip with a modern twist. The nails feature a nude base with black leopard print tips, creating a sophisticated and trendy look. This design is perfect for those who want to add a bit of edge to their classic manicure.
-
- Nude nail polish (e.g., Essie “Topless & Barefoot”)
- Black nail polish for leopard print (e.g., OPI “Black Onyx”)
- Nail art brush or stamping tool
- Top coat (e.g., Seche Vite Top Coat)
Instructions:
-
- Apply a base coat to your nails.
- Paint the nails with the nude polish and let them dry.
- Use a nail art brush or stamping tool to create black leopard print tips.
- Finish with a top coat to seal the design and add shine.
Neon Coral Pop
This bold manicure features a vibrant neon coral color that is sure to stand out. The nails are painted with a bright coral polish, with one accent nail featuring coral dots on a nude base. This design is fun and playful, perfect for those who love bold colors.

-
- Neon coral nail polish (e.g., China Glaze “Flip Flop Fantasy”)
- Nude nail polish (e.g., OPI “Samoan Sand”)
- Dotting tool
- Top coat (e.g., Seche Vite Top Coat)
Instructions:
-
- Apply a base coat to your nails.
- Paint the nails with the neon coral polish and let them dry.
- Use the dotting tool to create coral dots on the accent nail with the nude base.
- Seal the design with a top coat for a glossy finish.
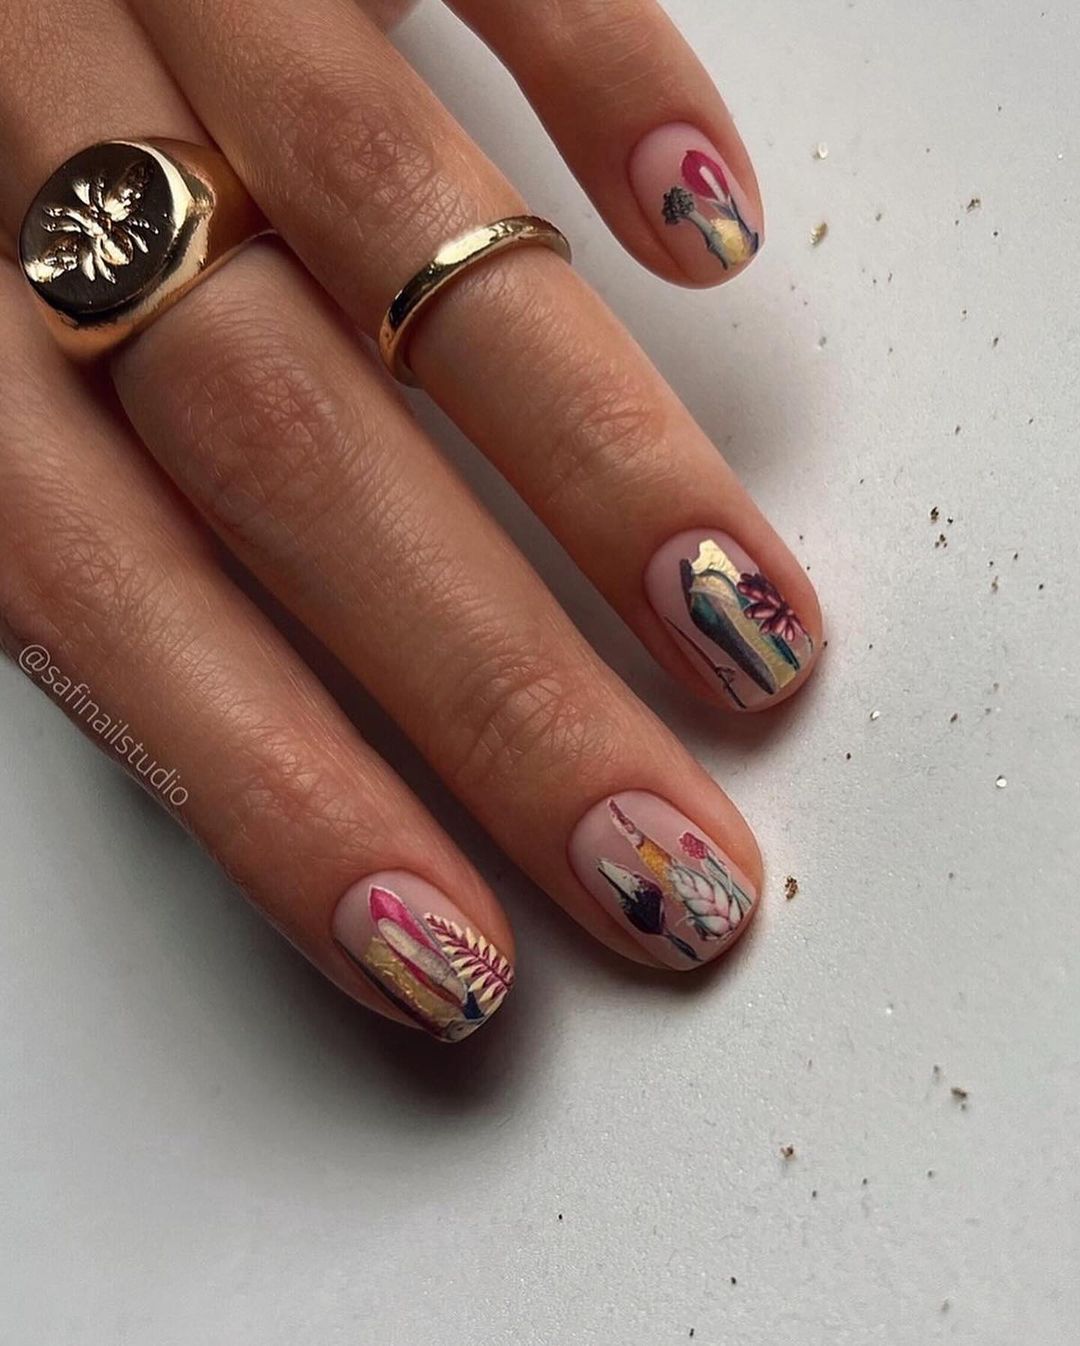
Artistic Botanical
This delicate and artistic design features intricate botanical patterns on a nude base. The nails are adorned with detailed floral and leaf designs in various colors, creating a beautiful and sophisticated look that is perfect for any occasion.
-
- Nude nail polish (e.g., Essie “Mademoiselle”)
- Various colors for botanical designs (e.g., OPI “Tiramisu for Two”, Essie “Mint Candy Apple”, China Glaze “Sunset Sail”)
- Nail art brush
- Top coat (e.g., Seche Vite Top Coat)
Instructions:
-
- Apply a base coat to your nails.
- Paint the nails with the nude polish and let them dry.
- Use a nail art brush to create intricate botanical designs on each nail.
- Finish with a top coat to seal the design and add shine.
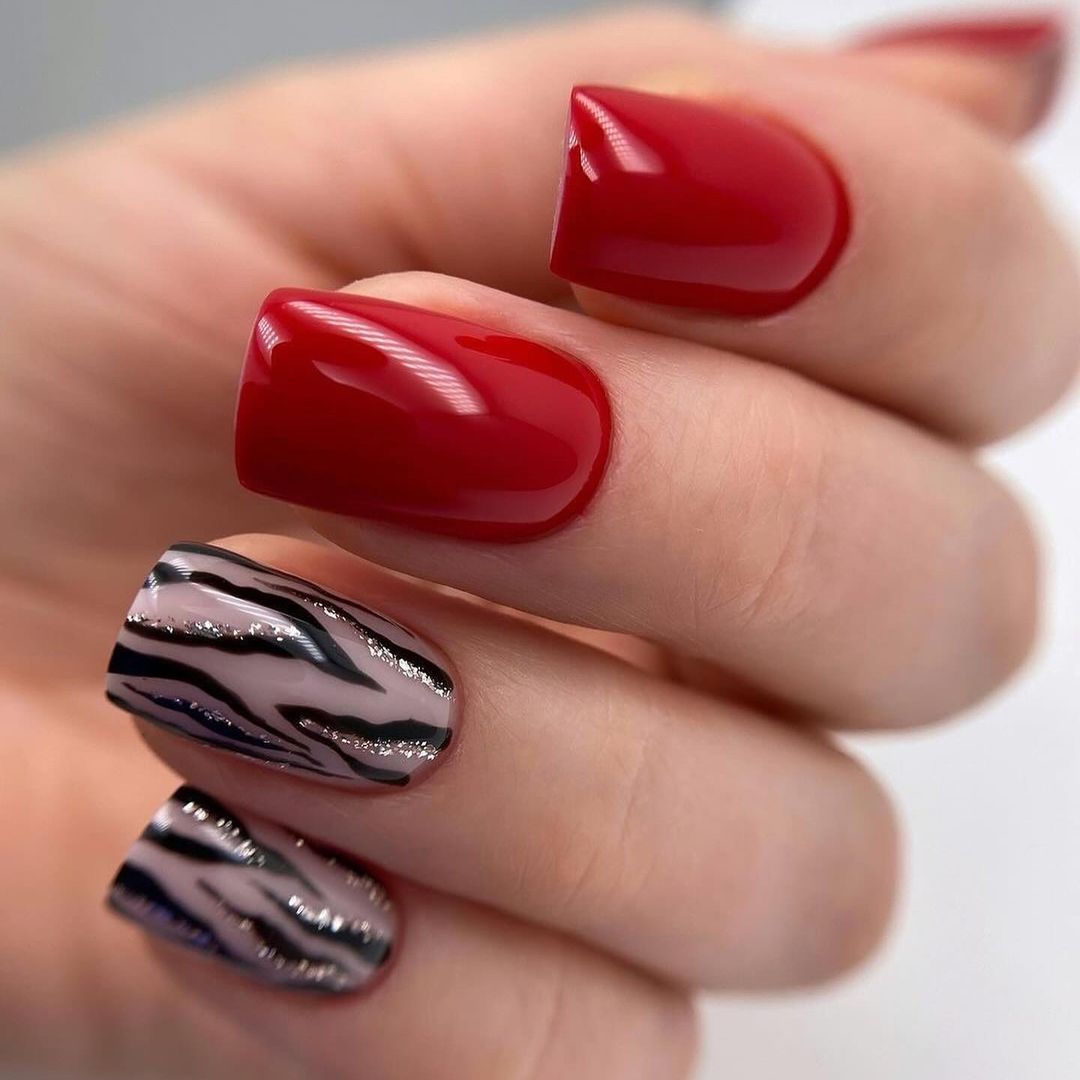
Red and Zebra Accent
This striking manicure features a combination of bold red polish and zebra print accents. The nails are painted with a vibrant red color, while two accent nails showcase a chic zebra print design. This look is perfect for those who want a daring and stylish manicure.
-
- Red nail polish (e.g., OPI “Big Apple Red”)
- Black and white nail polishes for zebra print (e.g., OPI “Black Onyx”, Essie “Blanc”)
- Nail art brush or stamping tool
- Top coat (e.g., Seche Vite Top Coat)
Instructions:
-
- Apply a base coat to your nails.
- Paint the nails with the red polish and let them dry.
- Use a nail art brush or stamping tool to create zebra print designs on the accent nails with black and white polishes.
- Finish with a top coat to seal the design and add shine.
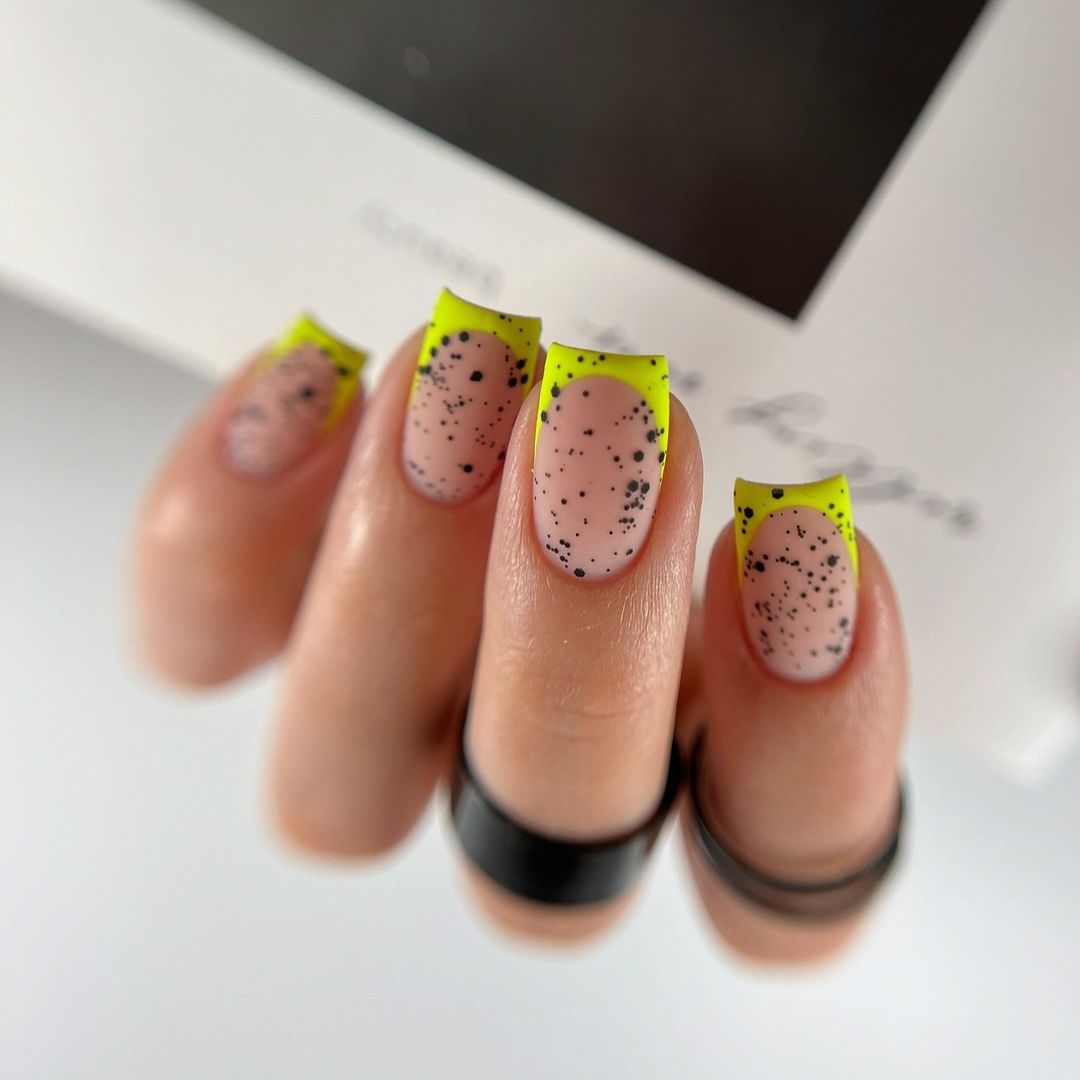
Neon Speckled Tips
This fun and quirky design features neon yellow tips with black speckled accents on a nude base. The combination of bright neon and playful speckles creates a unique and eye-catching manicure that is perfect for those who love bold and creative designs.
-
- Nude nail polish (e.g., Essie “Topless & Barefoot”)
- Neon yellow nail polish (e.g., China Glaze “Yellow Polka Dot Bikini”)
- Black nail polish for speckles (e.g., OPI “Black Onyx”)
- Nail art brush or dotting tool
- Top coat (e.g., Seche Vite Top Coat)
Instructions:
-
- Apply a base coat to your nails.
- Paint the nails with the nude polish and let them dry.
- Use a nail art brush or dotting tool to apply neon yellow tips.
- Create black speckles on the tips using a dotting tool or brush.
- Seal the design with a top coat for a glossy finish.
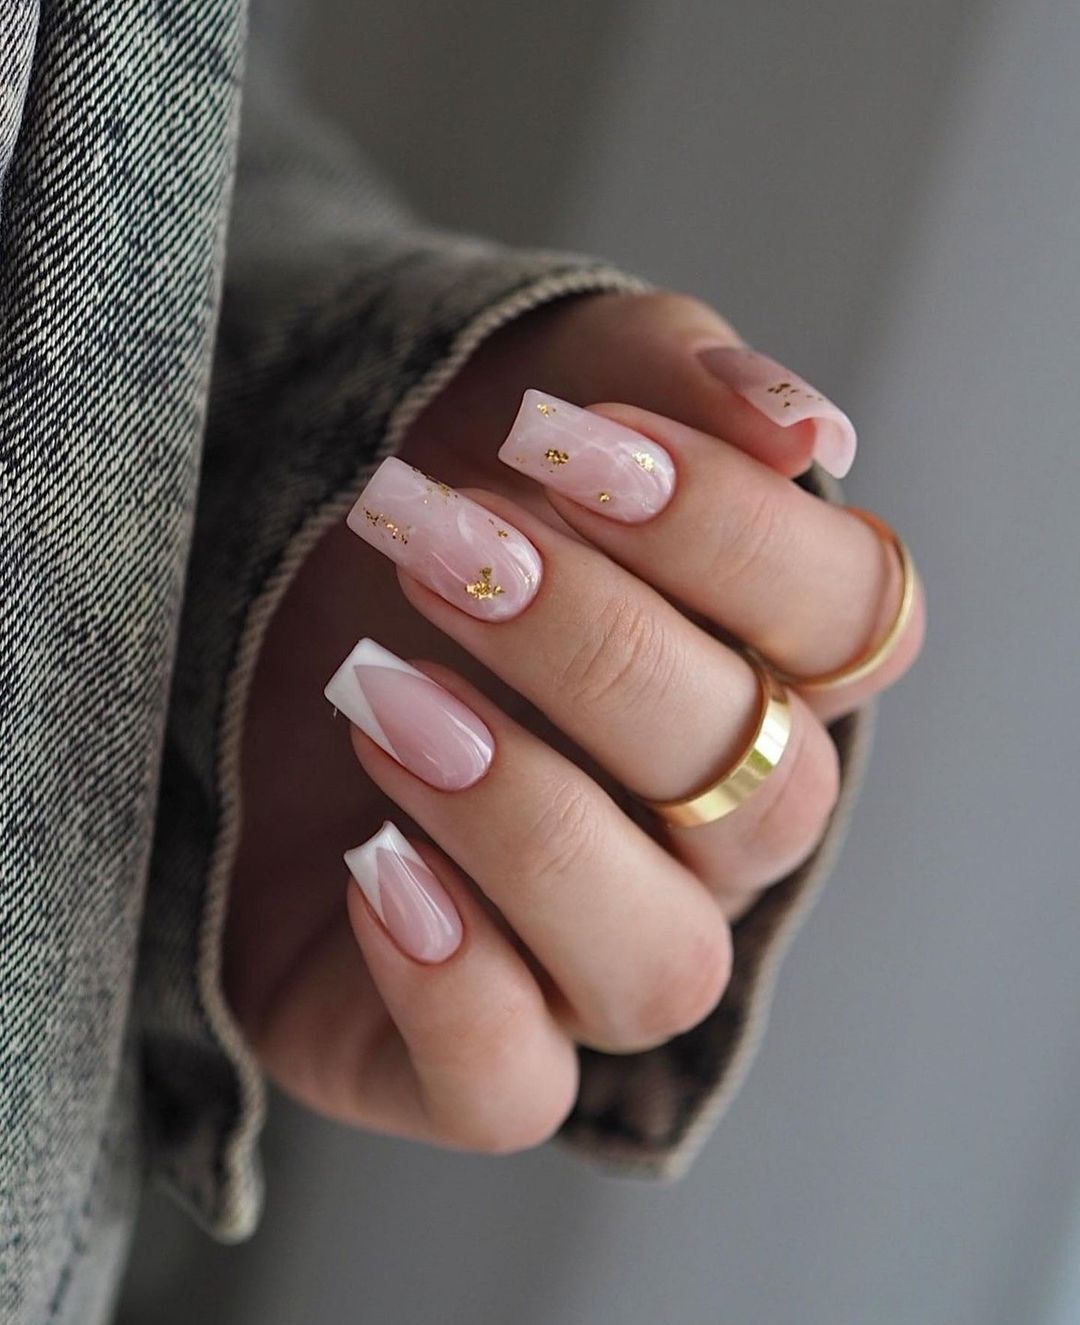
Pink Marble with Gold Flakes
This elegant design features a soft pink marble base accented with delicate gold flakes. The combination of the smooth marble effect and the shimmering gold flakes creates a sophisticated and luxurious look that is perfect for any special occasion.
-
- Soft pink nail polish (e.g., Essie “Ballet Slippers”)
- Gold foil flakes (e.g., Daily Charme Gold Foil)
- Nail art brush
- Top coat (e.g., Seche Vite Top Coat)
Instructions:
-
- Apply a base coat to protect your nails.
- Paint the nails with the soft pink polish and let them dry.
- Use a nail art brush to create a marble effect by swirling a slightly darker pink polish.
- Apply gold foil flakes randomly on the nails for a touch of shimmer.
- Finish with a top coat to seal the design and add shine.
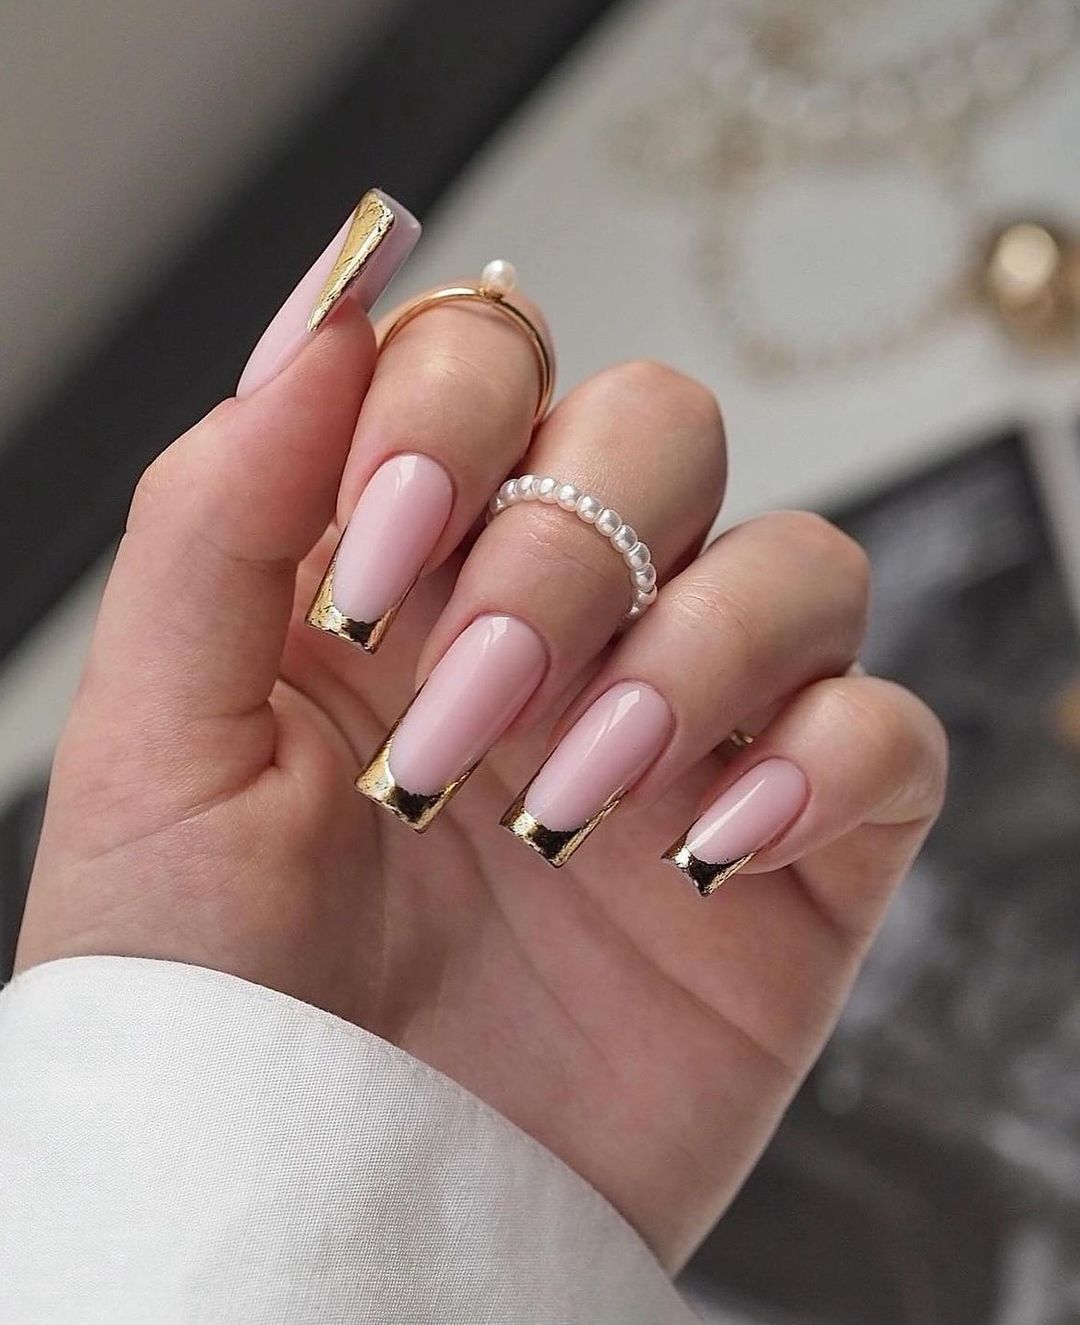
Gold-Tipped French Manicure
This modern twist on the classic French manicure features gold tips on a nude pink base. The metallic gold adds a chic and trendy touch to the timeless French tip, making it perfect for those who want a bit of glamour in their everyday look.
-
- Nude pink nail polish (e.g., OPI “Bubble Bath”)
- Gold nail polish or foil (e.g., Essie “Good as Gold”)
- Nail art brush
- Top coat (e.g., Seche Vite Top Coat)
Instructions:
-
- Apply a base coat to your nails.
- Paint the nails with the nude pink polish and let them dry.
- Use a nail art brush to paint the tips with gold polish or apply gold foil for a metallic effect.
- Seal the design with a top coat to ensure durability and shine.
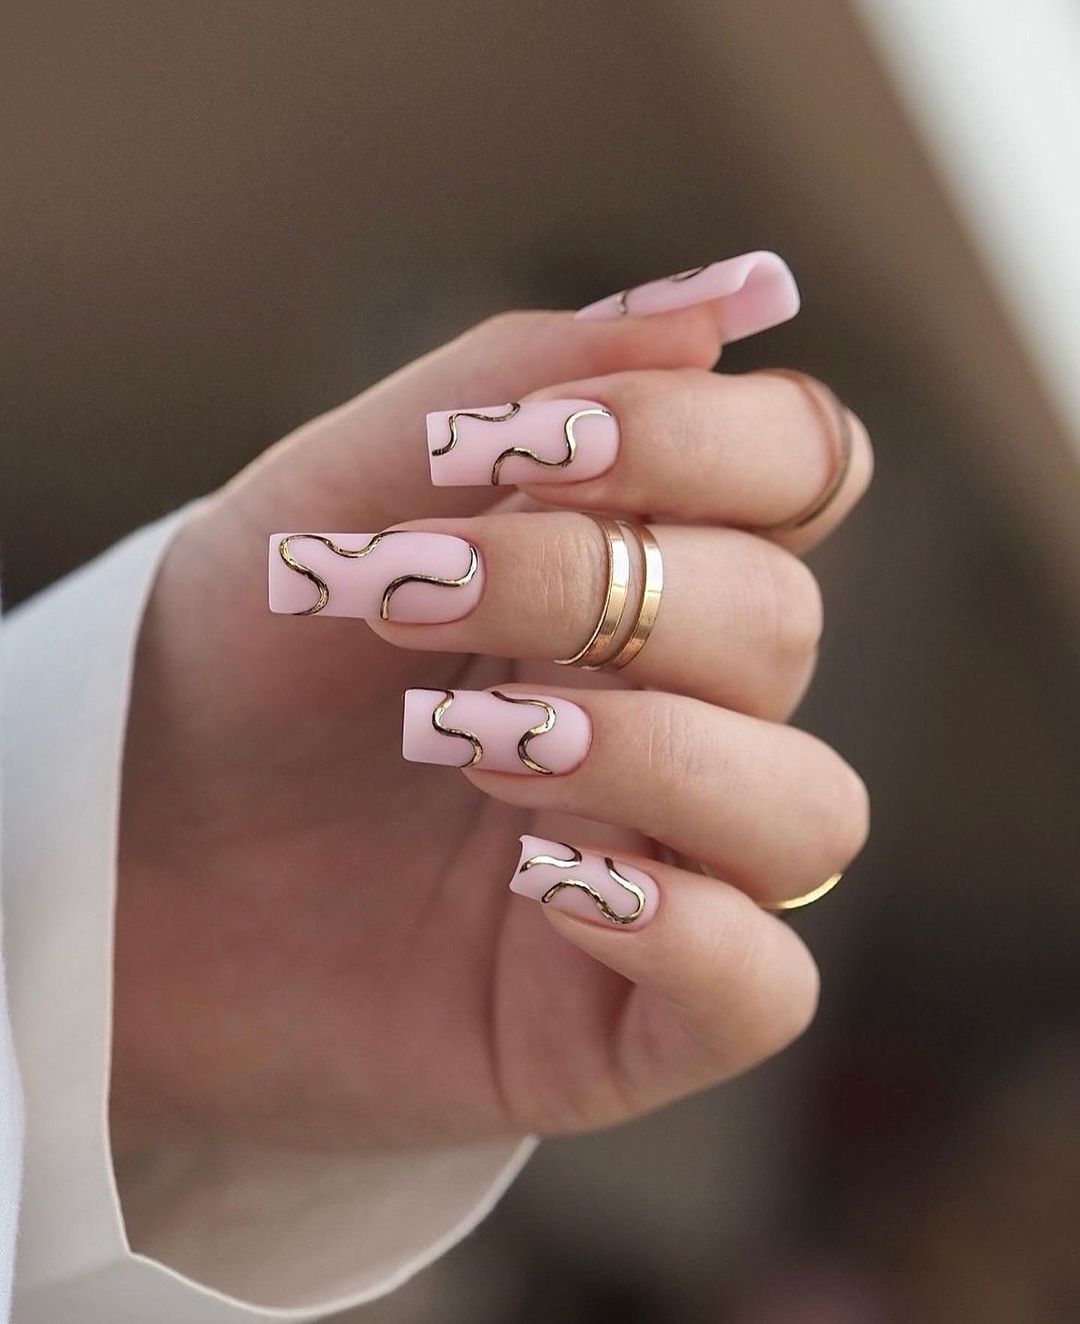
Abstract Gold Lines
This stylish design features abstract gold lines on a soft pink base. The flowing lines create a modern and artistic look that is both elegant and unique, perfect for those who love creative and trendy nail art.
-
- Soft pink nail polish (e.g., Essie “Ballet Slippers”)
- Gold nail polish or nail art pen (e.g., Sally Hansen I Heart Nail Art Pen in Gold)
- Nail art brush
- Top coat (e.g., Seche Vite Top Coat)
Instructions:
-
- Apply a base coat to protect your nails.
- Paint the nails with the soft pink polish and let them dry.
- Use a nail art brush or nail art pen to draw abstract gold lines on each nail.
- Finish with a top coat to seal the design and add a glossy finish.
FAQ
Q: How long does an acrylic manicure typically last? A: An acrylic manicure can last anywhere from 2 to 3 weeks, depending on your nail growth and how well you take care of them.
Q: Can I do these nail designs on natural nails? A: Yes, most of these designs can be adapted for natural nails. However, using acrylics or gels can help the designs last longer.
Q: What’s the best way to remove gel polish at home? A: Soak a cotton ball in acetone, place it on your nail, and wrap it in aluminum foil. Leave it on for about 15-20 minutes, then gently push off the gel with an orange stick.
Q: Are these nail designs suitable for all nail shapes? A: While these designs are showcased on square nails, they can be adapted to other shapes like round or almond. Just adjust the design elements to suit your preferred shape.
With these tips and designs, you’re all set to create some stunning fall nails that will make you stand out this season. Happy nail painting!
Save Pin