
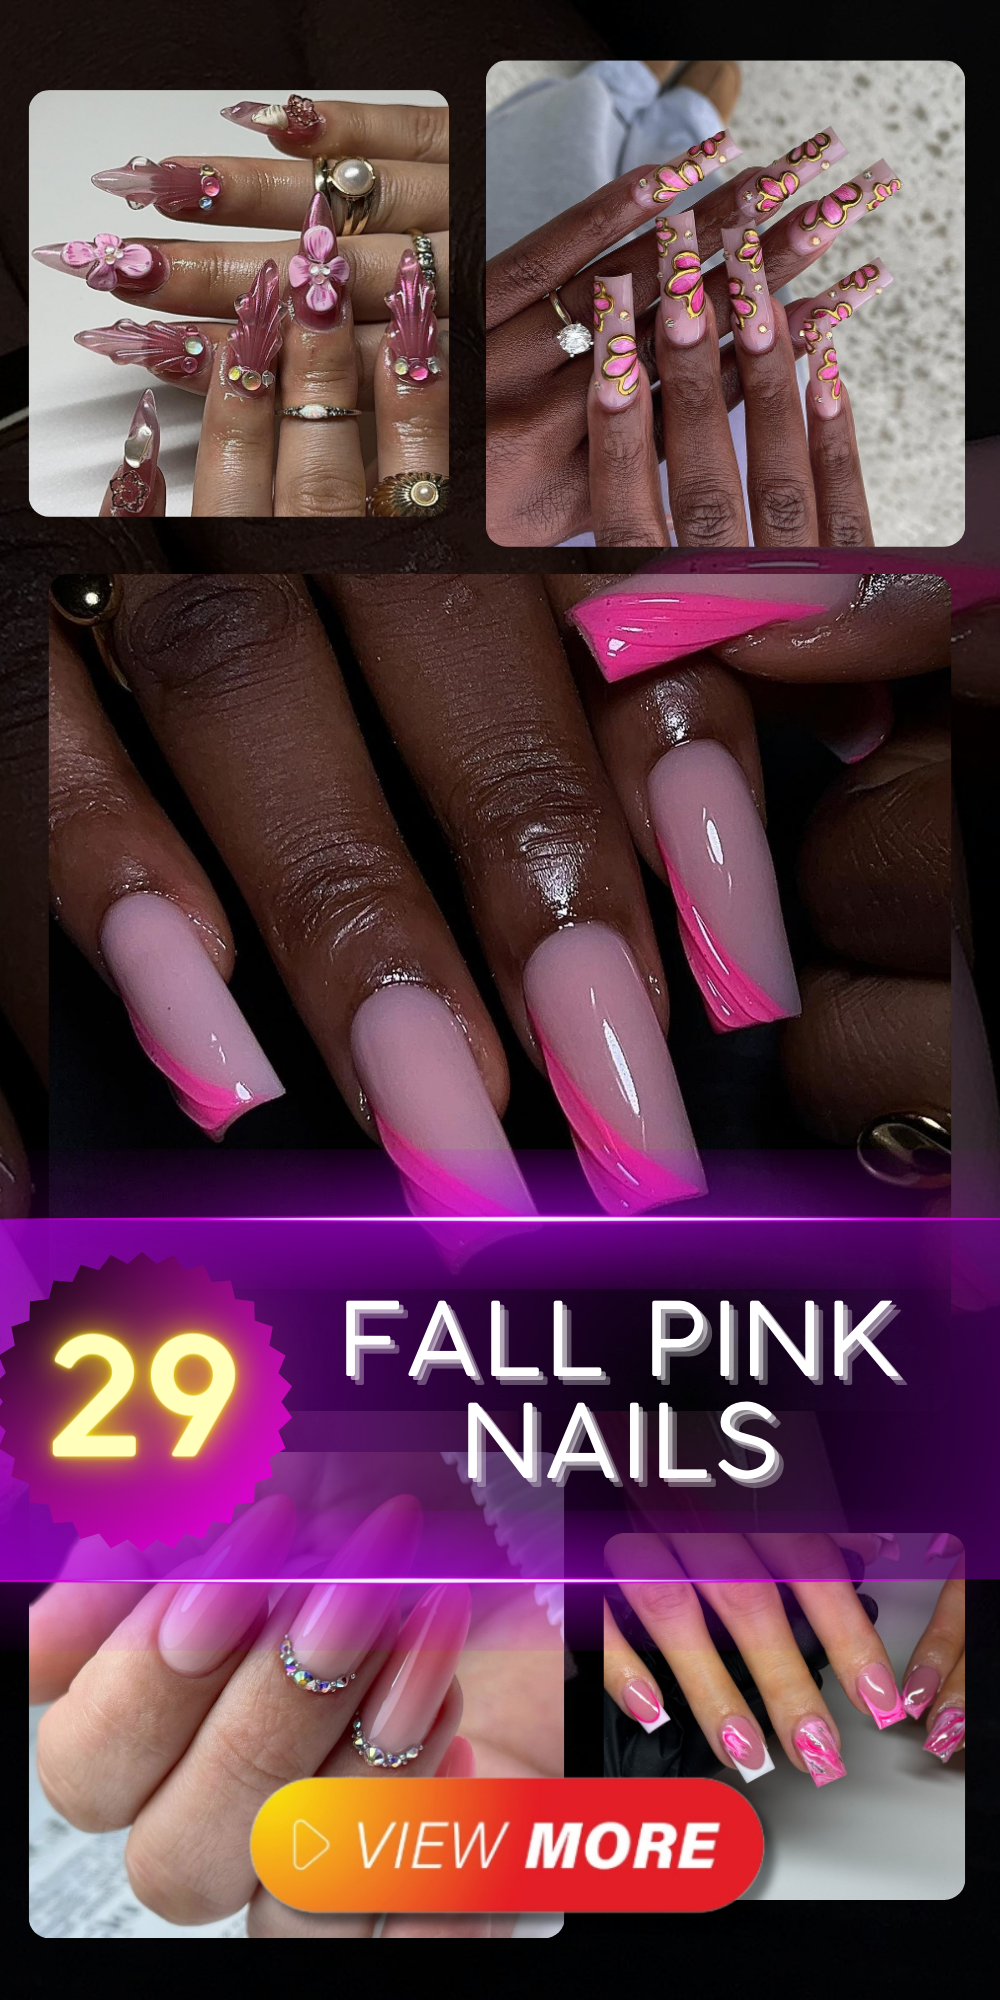
Fall is the perfect season to play with your nail designs and embrace the rich palette of colors that the season brings. This year, pink nails are making a bold statement, offering a versatile range of styles from subtle to vibrant. Whether you’re looking to add a touch of elegance with delicate floral patterns or make a bold statement with vivid pink French tips, there’s a pink nail design to match every mood and occasion. In this article, we’ll explore some of the most stunning fall pink nail ideas that will keep your manicure looking fresh and trendy all season long.
The Allure of Subtle Pink Elegance
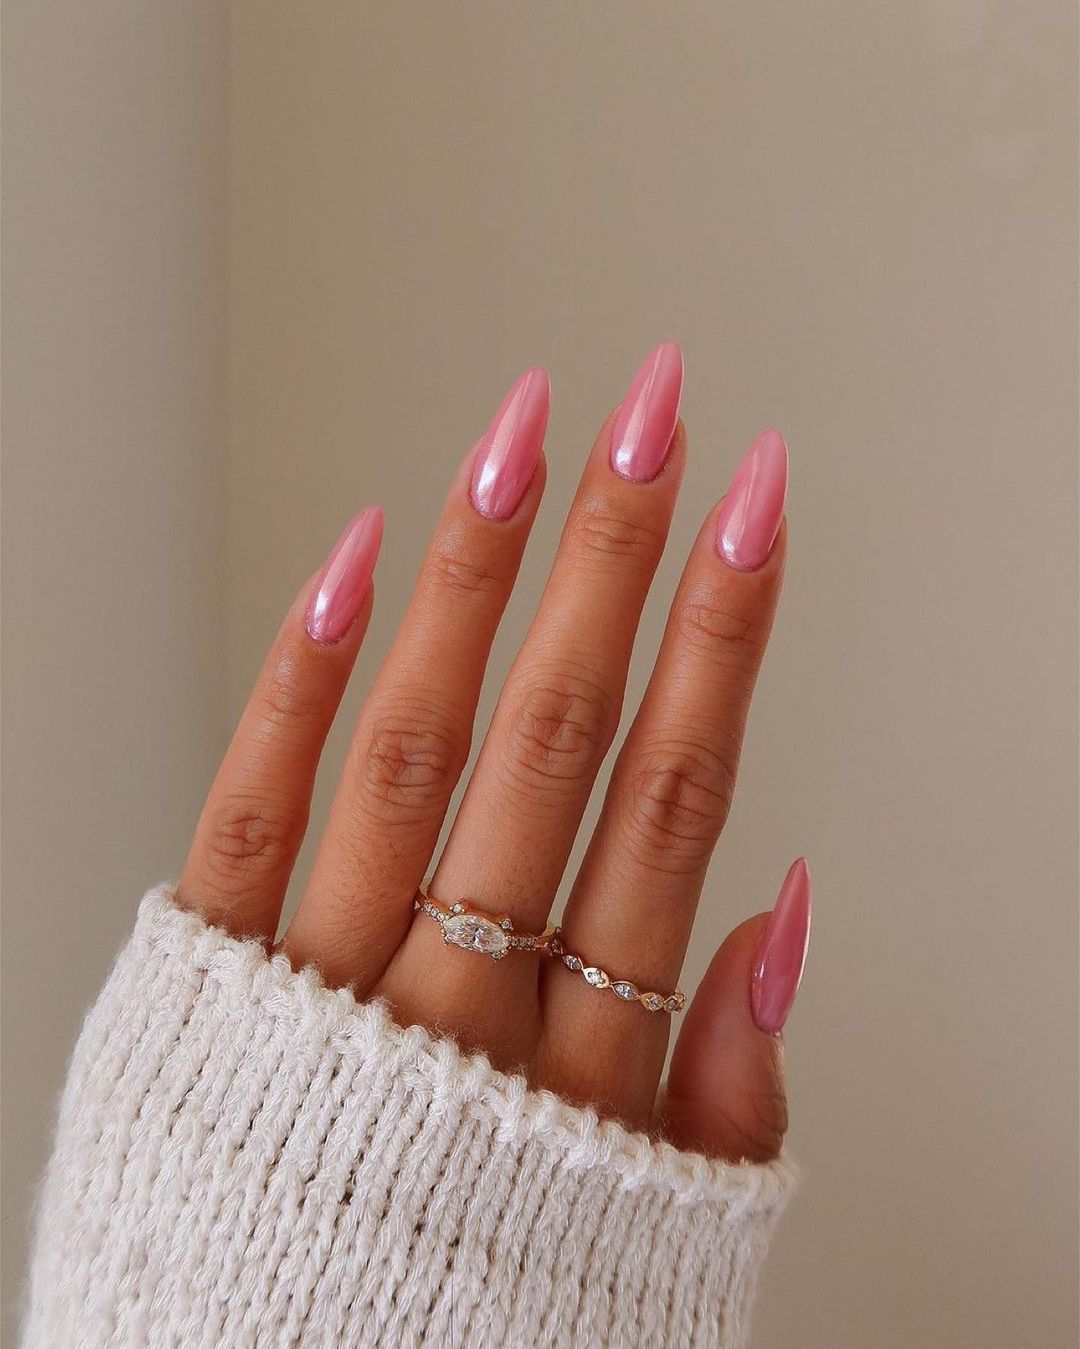
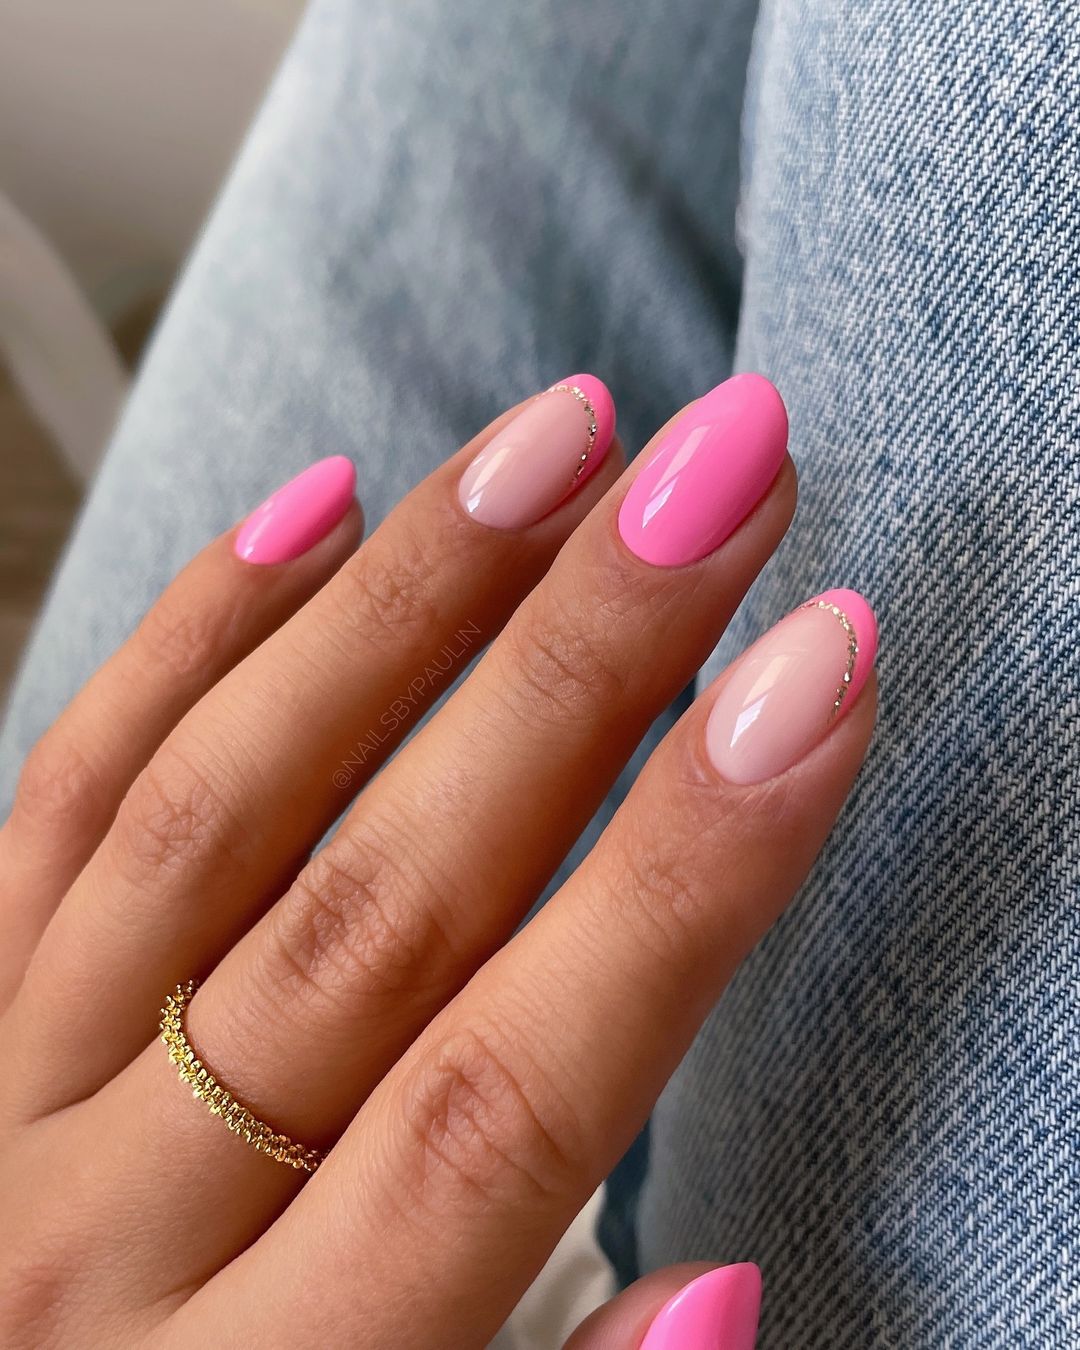
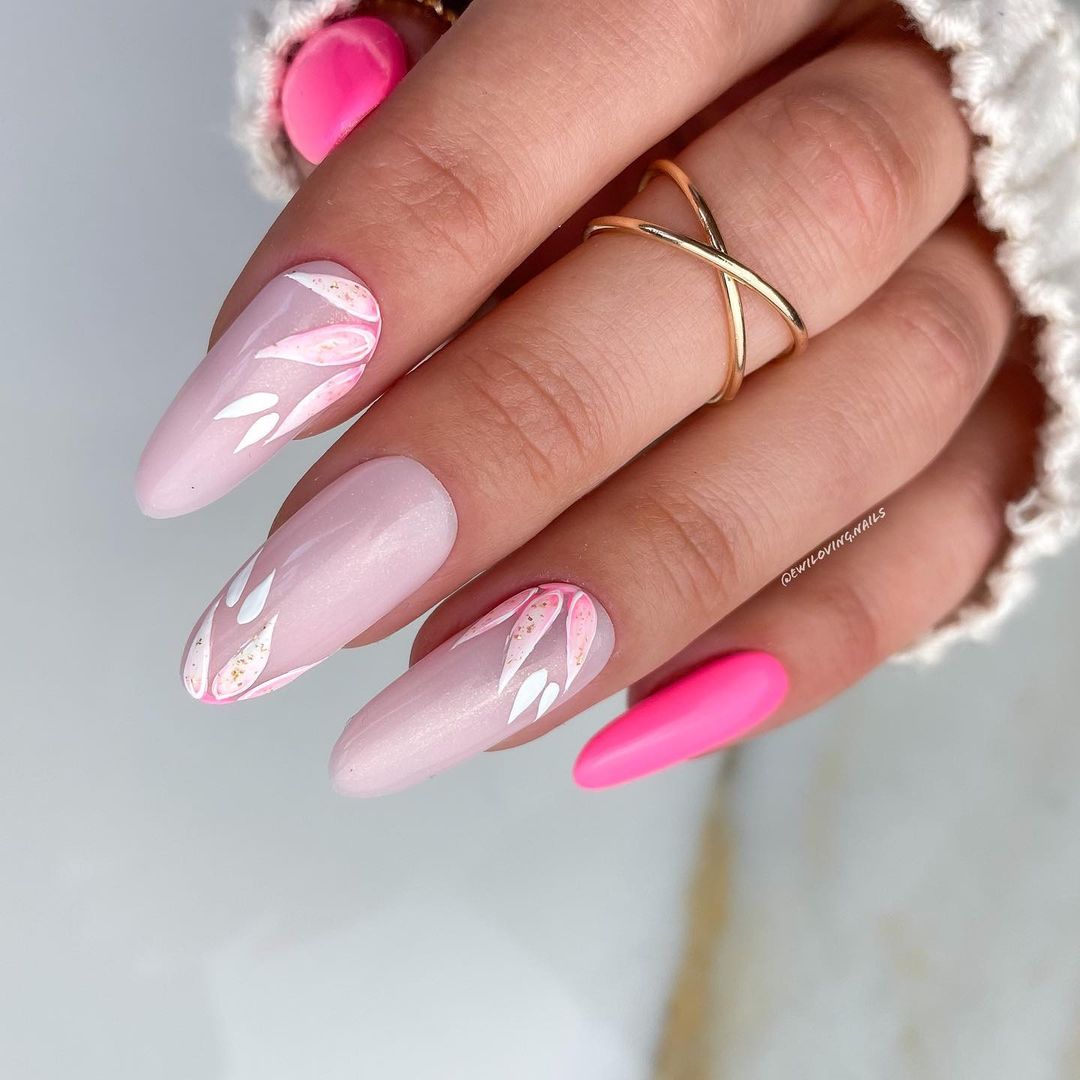
When it comes to fall pink nails, nothing speaks sophistication like this blend of soft pinks with a hint of whimsy. The delicate pink tones on this manicure are perfect for those who love a cute yet elegant look. The design features a mix of solid pink nails and translucent ones with fine, wavy pink lines, adding a touch of playful artistry. The gold chain accent seen in the photo complements the pink shades beautifully, making this design ideal for both casual outings and formal events.
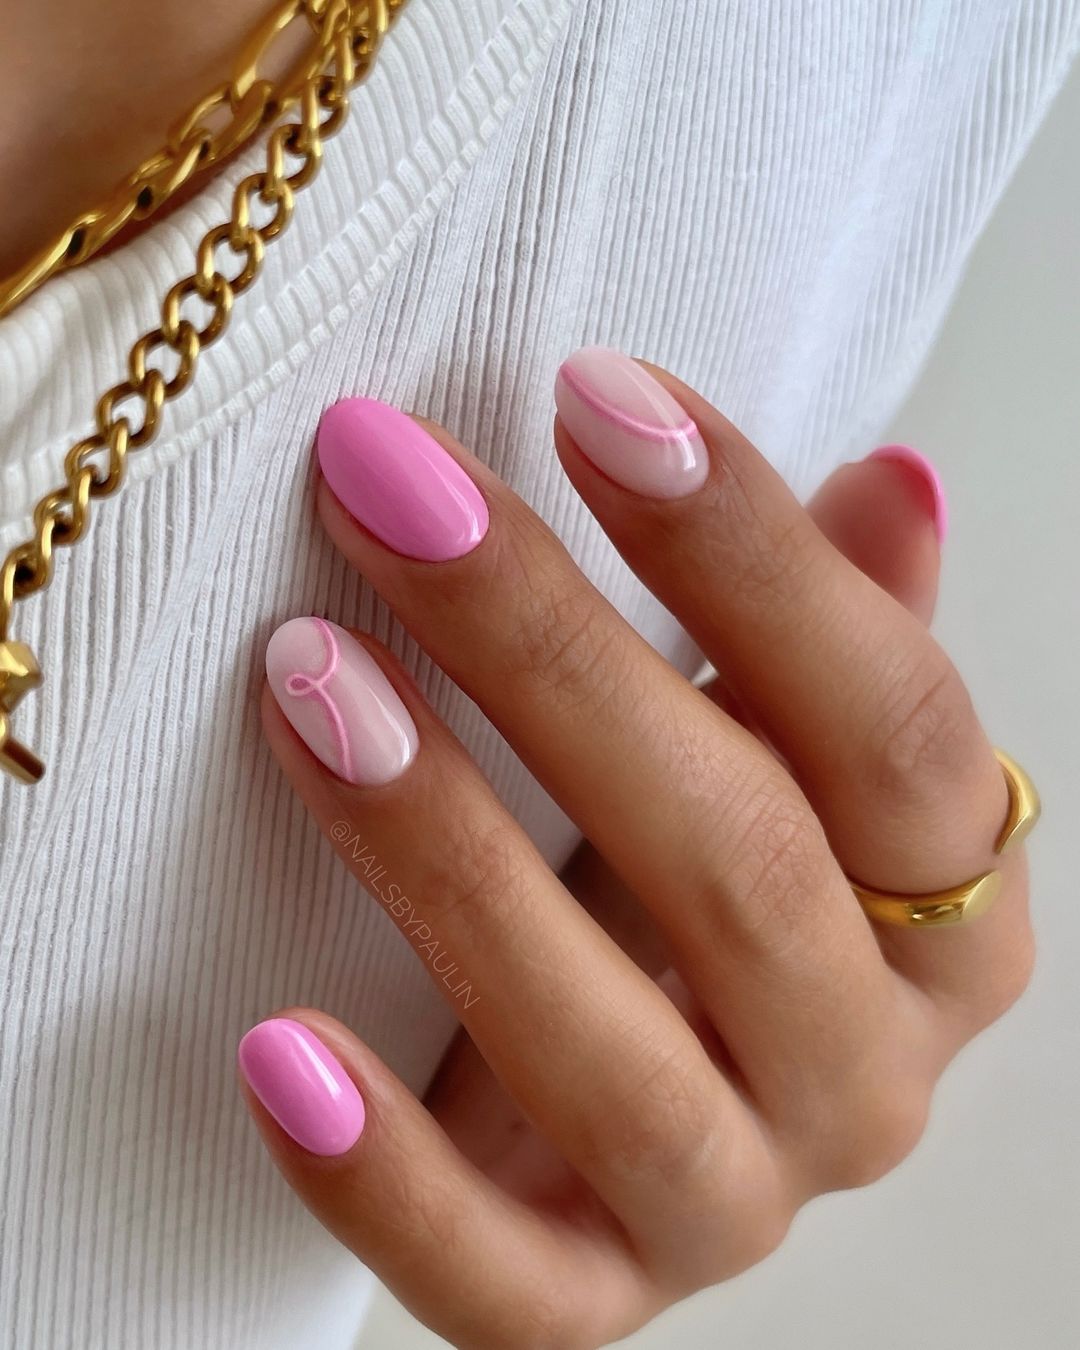
- DND Gel Polish in “Soft Pink”
- OPI GelColor in “Princesses Rule!”
- Fine nail art brush for detailing
- Gold chain or striping tape for accents
- Top coat for a glossy finish
Recommendations:
-
- For the DND Gel Polish, I recommend “Soft Pink” for its smooth application and long-lasting finish.
- OPI GelColor in “Princesses Rule!” offers a subtle shimmer that enhances the overall look.
- Use a fine nail art brush for precision in creating the wavy lines.
- Gold chain accents can be purchased from any nail art supply store or crafted using thin gold striping tape.
DIY Instructions:
-
- Prep your nails by cleaning and shaping them into an almond or oval shape.
- Apply a base coat to protect your natural nails.
- Apply two coats of DND Gel Polish in “Soft Pink” on half of your nails.
- On the remaining nails, apply OPI GelColor in “Princesses Rule!” and cure under a UV lamp.
- Use a fine nail art brush dipped in Soft Pink polish to draw delicate wavy lines on the translucent nails.
- Carefully place the gold chain or striping tape on the accent nails.
- Seal with a top coat and cure under a UV lamp for a long-lasting finish.
Glamorous Stiletto Pink
This nail design is all about glamour and sparkle. Featuring a combination of matte pink and glossy finishes, along with dazzling glitter accents and star motifs, this manicure is sure to turn heads. The stiletto shape adds to the dramatic effect, making these nails perfect for a night out or a special occasion.
- OPI GelColor in “Suzi Calls the Paparazzi”
- DND Gel Polish in “Pink Panther”
- Matte top coat
- Fine glitter in silver
- Star and rhinestone embellishments
- Nail adhesive and fine detailing brush
Recommendations:
-
- OPI GelColor in “Suzi Calls the Paparazzi” provides a perfect base with its vibrant pink hue.
- DND Gel Polish in “Pink Panther” offers a bold and striking contrast.
- Matte top coat to create a sophisticated matte finish on some nails.
- Use high-quality fine glitter and embellishments to avoid any rough texture.
DIY Instructions:
-
- Shape your nails into a stiletto form using a nail file.
- Apply a base coat to your nails.
- Apply OPI GelColor in “Suzi Calls the Paparazzi” on all nails and cure.
- On alternating nails, apply DND Gel Polish in “Pink Panther” and cure.
- Use the matte top coat on the pink nails and cure under a UV lamp.
- Add fine glitter to the matte nails while the top coat is still tacky, and press star embellishments into place.
- Seal with a glossy top coat on the glittery nails and cure.
Timeless Almond Pink
For a timeless and versatile look, these almond-shaped nails in varying shades of pink are a must-try. The design is simple yet stunning, featuring a glossy finish that highlights the natural beauty of the pink hues. This manicure is ideal for both everyday wear and special occasions, offering a chic and sophisticated vibe.
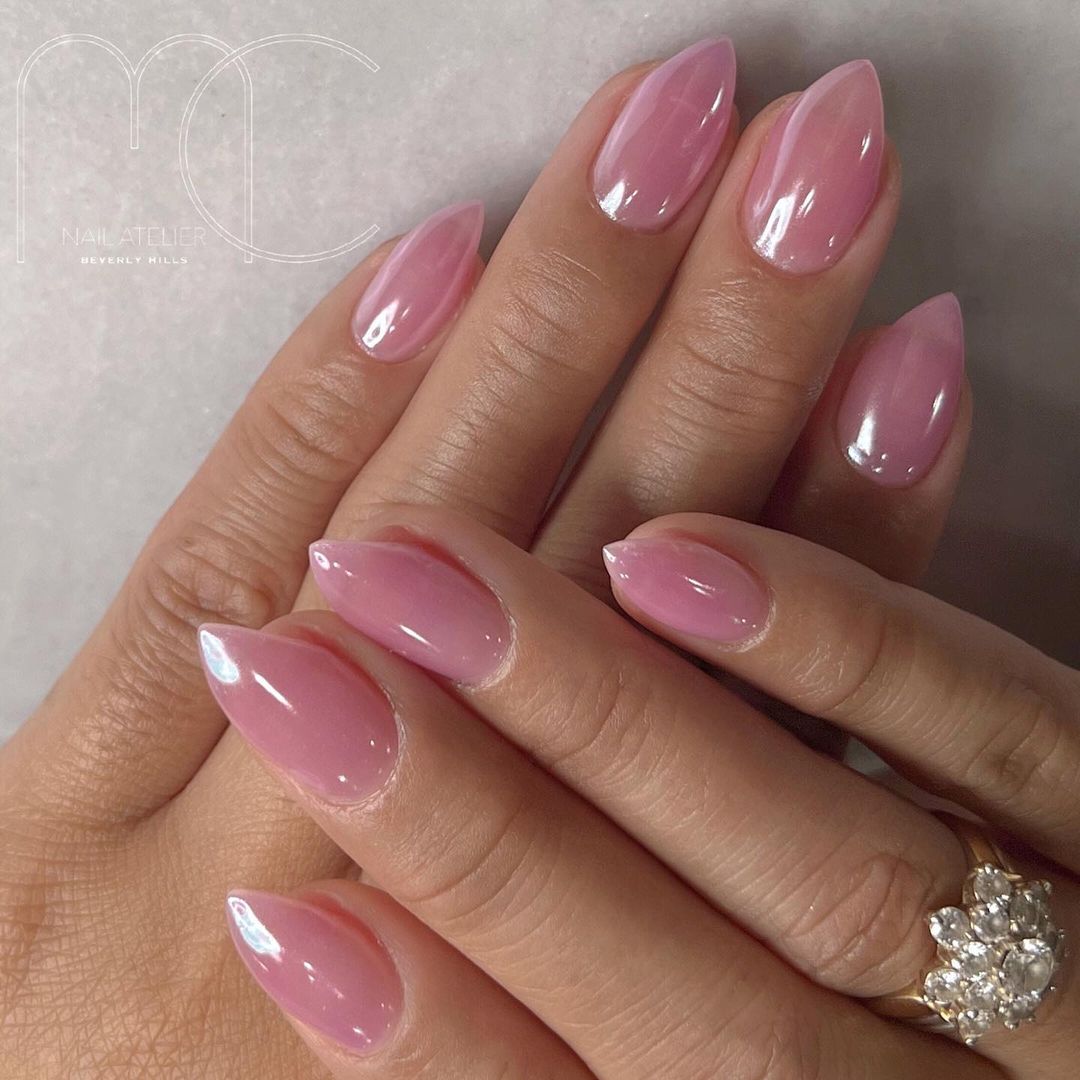
- OPI GelColor in “Mod About You”
- DND Gel Polish in “Bubblegum Pink”
- Glossy top coat
- Nail buffer and file
Recommendations:
-
- OPI GelColor in “Mod About You” is a light pink shade that complements any skin tone.
- DND Gel Polish in “Bubblegum Pink” adds a brighter, playful element to the manicure.
- A high-quality glossy top coat is essential to achieve a long-lasting shine.
DIY Instructions:
-
- Shape your nails into an almond shape and buff the surface for smooth application.
- Apply a base coat to your nails.
- Apply OPI GelColor in “Mod About You” on half of your nails and cure under a UV lamp.
- Apply DND Gel Polish in “Bubblegum Pink” on the other half of your nails and cure.
- Finish with a glossy top coat and cure to achieve a brilliant shine.
Elegant Pink Fusion
This manicure features a stunning blend of light and dark pink shades, perfect for the fall season. The design includes solid pink nails with one nail accented by white and gold lines, creating a delicate and sophisticated look. The almond shape adds to the elegance, making it suitable for any occasion.
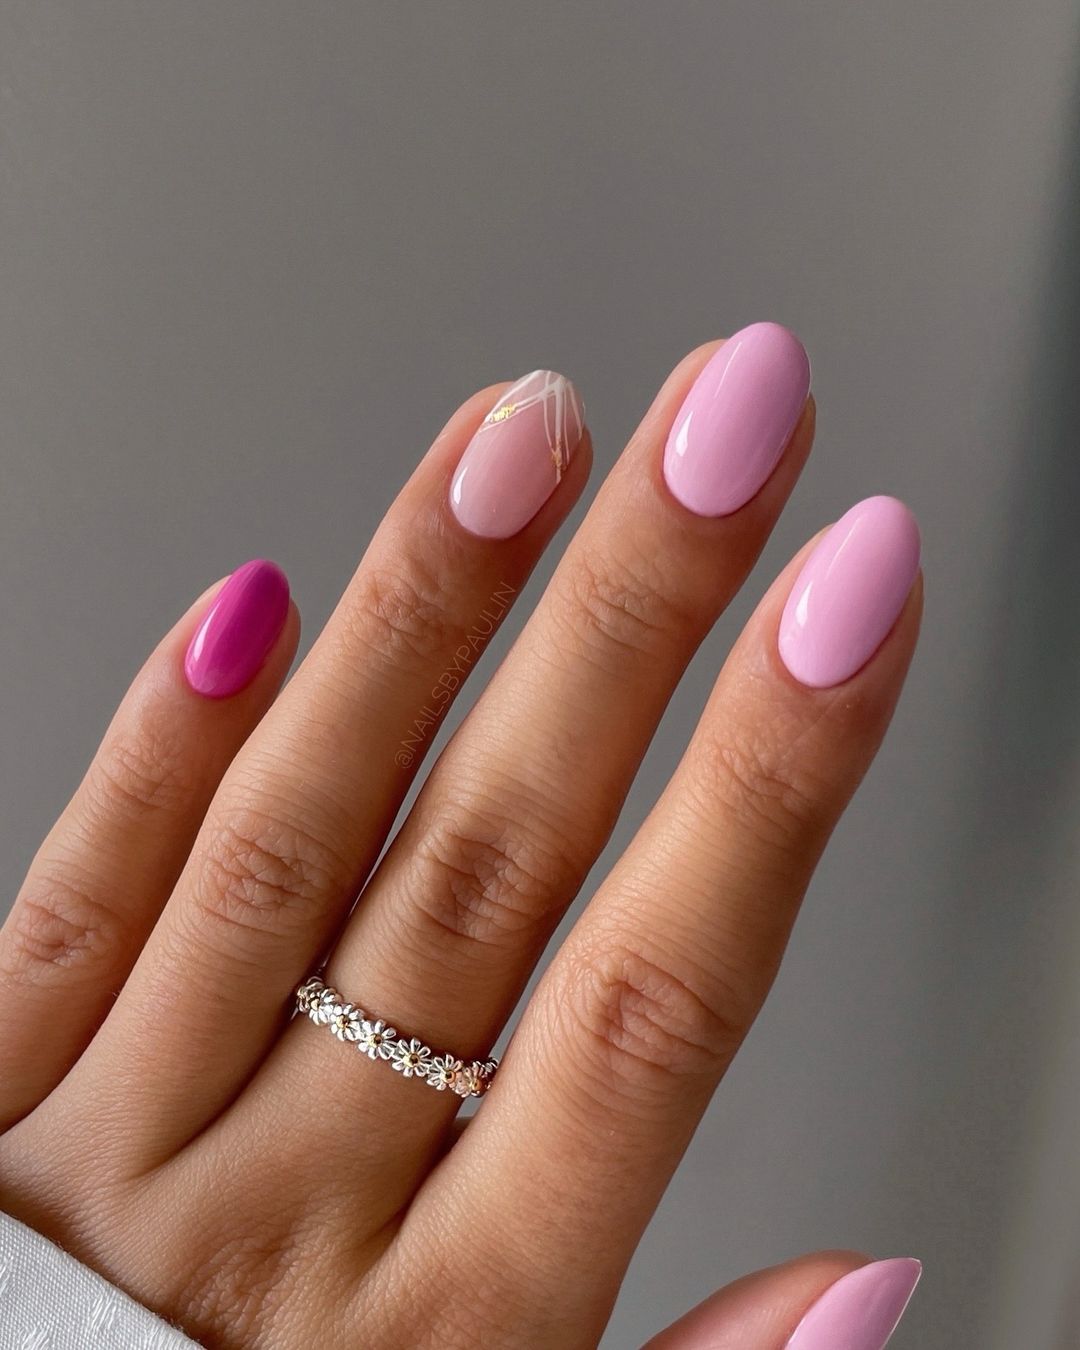
- OPI GelColor in “Mod About You”
- DND Gel Polish in “Barbie Pink”
- White striping polish
- Gold striping tape or nail foil
- Glossy top coat
Recommendations:
-
- OPI GelColor in “Mod About You” provides a soft, pastel pink base that is both timeless and trendy.
- DND Gel Polish in “Barbie Pink” adds a vibrant contrast, perfect for an accent nail.
- White striping polish and gold striping tape/foil are essential for the detailed lines and accents.
DIY Instructions:
-
- Shape your nails into an almond shape and buff them smooth.
- Apply a base coat to all nails.
- Paint most of your nails with OPI GelColor in “Mod About You” and cure under a UV lamp.
- Use DND Gel Polish in “Barbie Pink” for the accent nail and cure.
- Apply white striping polish to create delicate lines on the accent nail.
- Add gold striping tape or nail foil to enhance the design.
- Seal with a glossy top coat and cure for a durable finish.
Save Pin

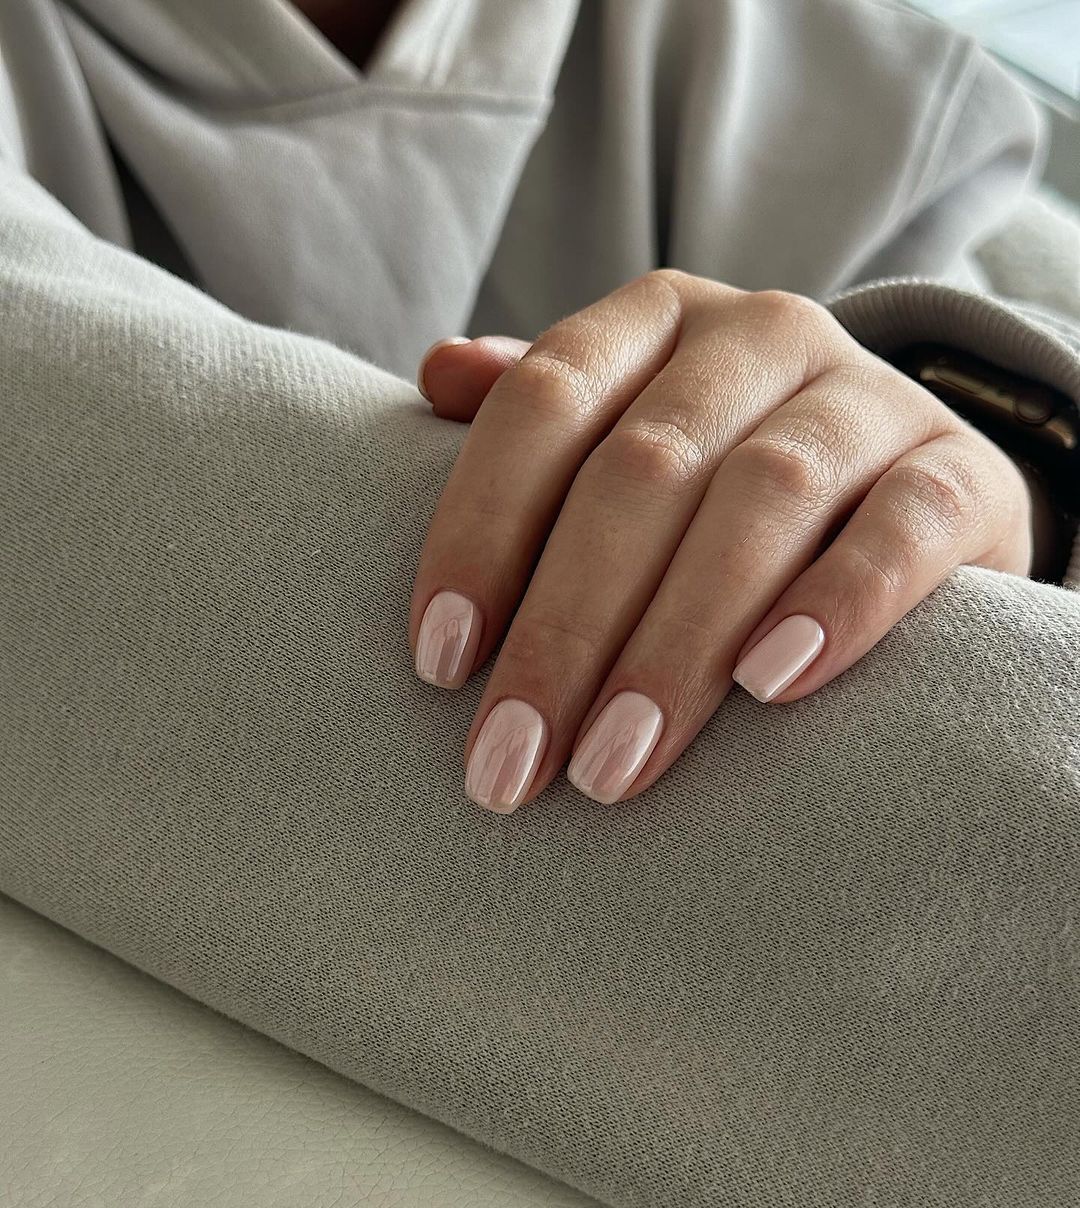
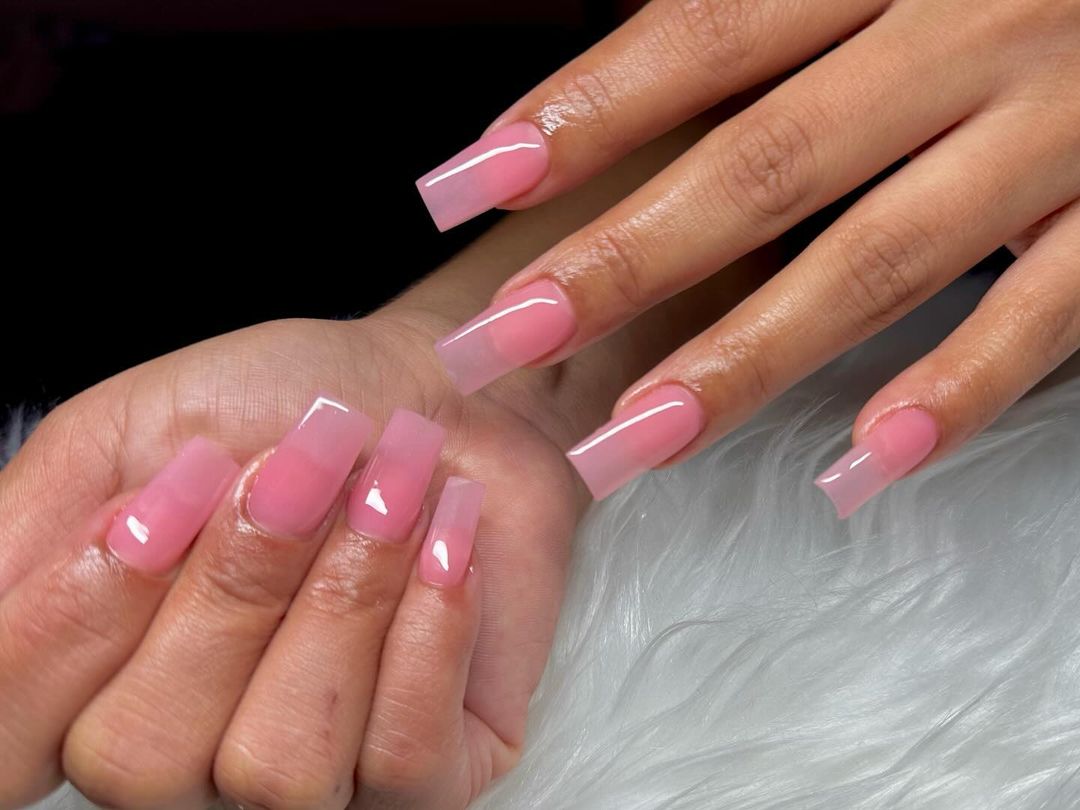
Chic Minimalist Pink
This manicure showcases a simple yet chic design with short, square nails in a soft pink shade. The minimalistic approach makes it perfect for everyday wear, exuding a natural and elegant vibe. The glossy finish highlights the beauty of the light pink polish.
- OPI GelColor in “Bubble Bath”
- Glossy top coat
- Nail file and buffer
Recommendations:
-
- OPI GelColor in “Bubble Bath” is a classic light pink that offers a clean and polished look.
- A high-quality glossy top coat will ensure the nails maintain their shine and durability.
DIY Instructions:
-
- File your nails into a short, square shape and buff the surface.
- Apply a base coat to protect your nails.
- Apply two coats of OPI GelColor in “Bubble Bath” to all nails and cure under a UV lamp.
- Finish with a glossy top coat and cure to achieve a sleek and shiny finish.
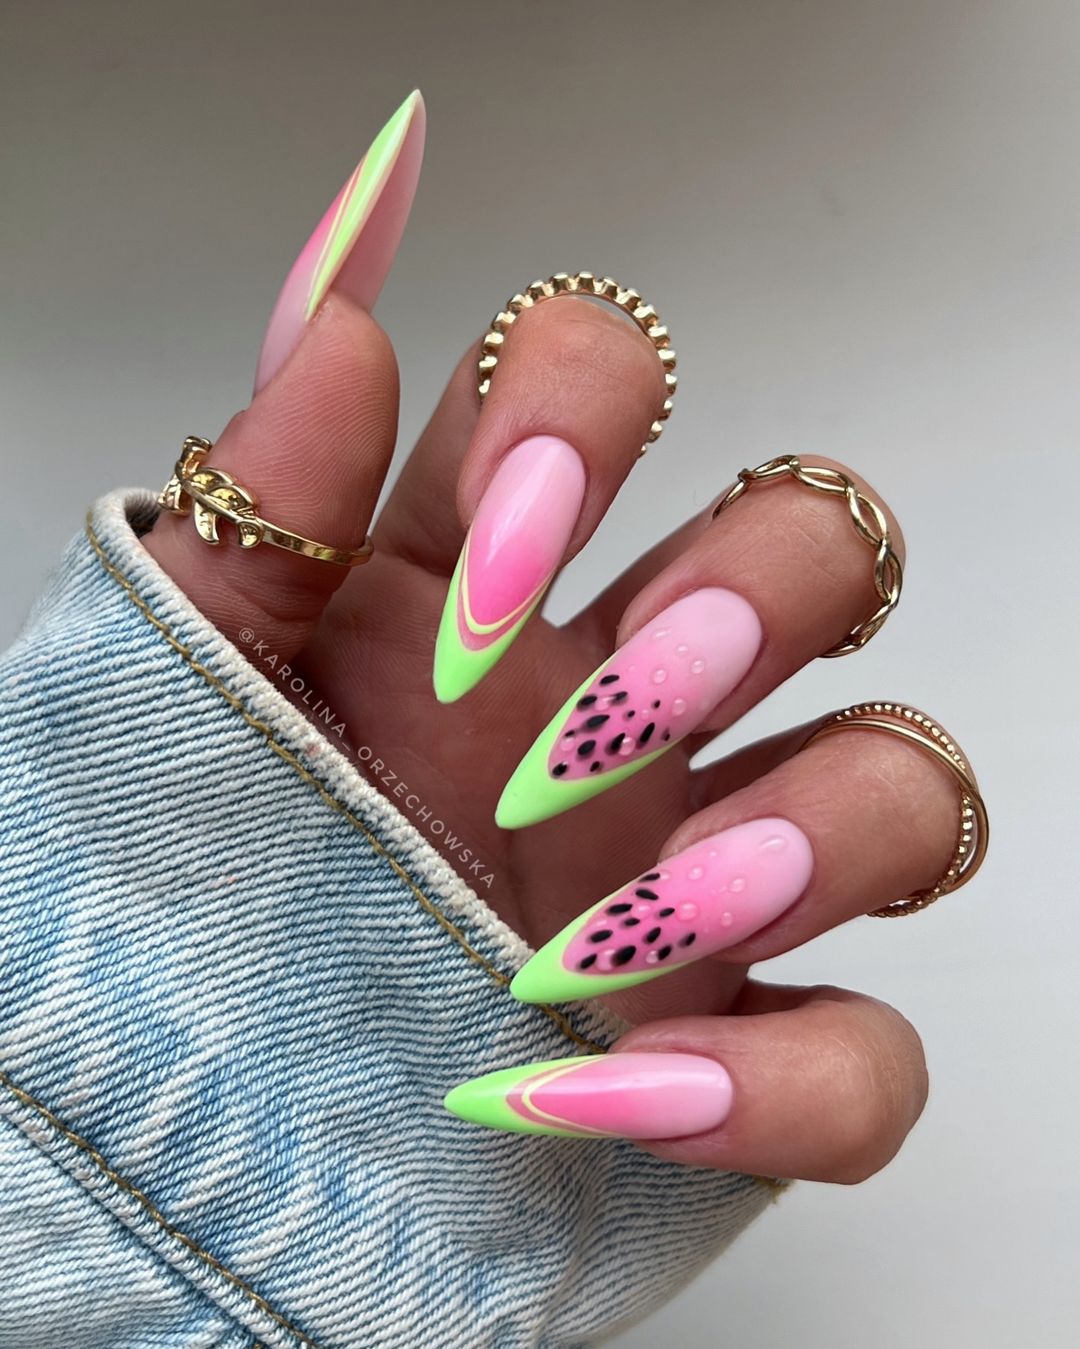
Neon Watermelon Delight
This bold and playful manicure is perfect for those looking to make a statement. The design features stiletto-shaped nails with a neon pink base, accented by green tips and watermelon-inspired dots. The vibrant colors and fun patterns make this manicure a standout choice for fall.
- DND Gel Polish in “Neon Pink”
- DND Gel Polish in “Neon Green”
- Black dotting tool
- Glossy top coat
Recommendations:
-
- DND Gel Polish in “Neon Pink” and “Neon Green” offer highly pigmented colors that are perfect for creating bold designs.
- A dotting tool is essential for achieving the precise watermelon dots.
DIY Instructions:
-
- Shape your nails into a stiletto form using a nail file.
- Apply a base coat to your nails.
- Paint your nails with DND Gel Polish in “Neon Pink” and cure.
- Apply DND Gel Polish in “Neon Green” to the tips and cure.
- Use a dotting tool dipped in black polish to create watermelon-inspired dots on the accent nails.
- Finish with a glossy top coat and cure for a vibrant, long-lasting look.
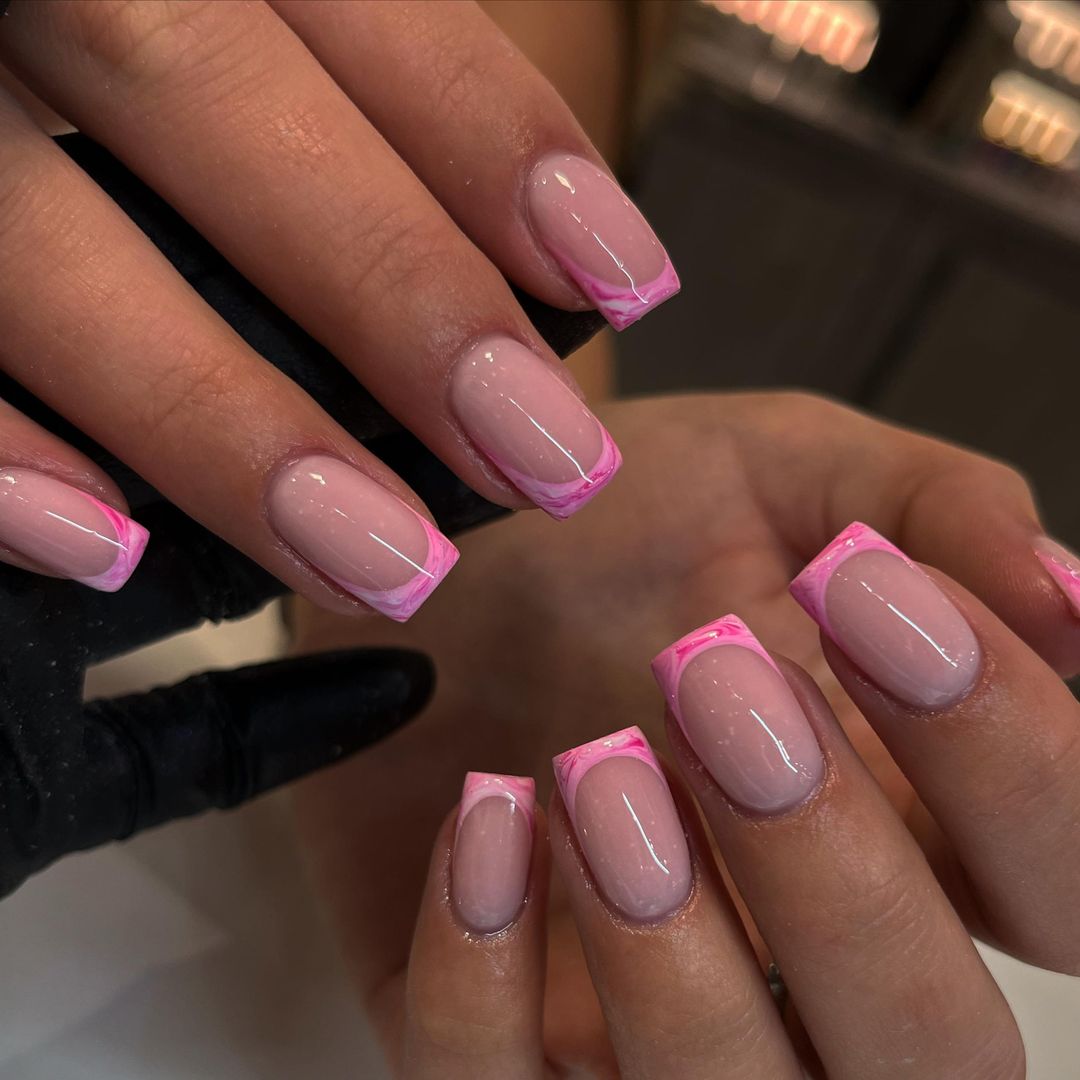
Pink Marble French Tips
This design takes the classic French tip and gives it a modern twist with a pink marble effect. The combination of clear and pink gel polish creates a chic and sophisticated look. The short square shape of the nails makes this design perfect for both everyday wear and special occasions.
- OPI GelColor in “Bubble Bath”
- DND Gel Polish in “Pink Marble”
- Clear gel polish
- Glossy top coat
- Nail art brush for marble effect
Recommendations:
-
- OPI GelColor in “Bubble Bath” for a subtle pink base.
- DND Gel Polish in “Pink Marble” for creating the intricate marble effect.
- A high-quality nail art brush is essential for achieving the fine marble lines.
DIY Instructions:
-
- Shape your nails into a short square form and buff the surface.
- Apply a base coat to your nails.
- Use OPI GelColor in “Bubble Bath” as the base color and cure under a UV lamp.
- Apply DND Gel Polish in “Pink Marble” to the tips and use a nail art brush to create the marble effect.
- Seal with a glossy top coat and cure for a long-lasting finish.
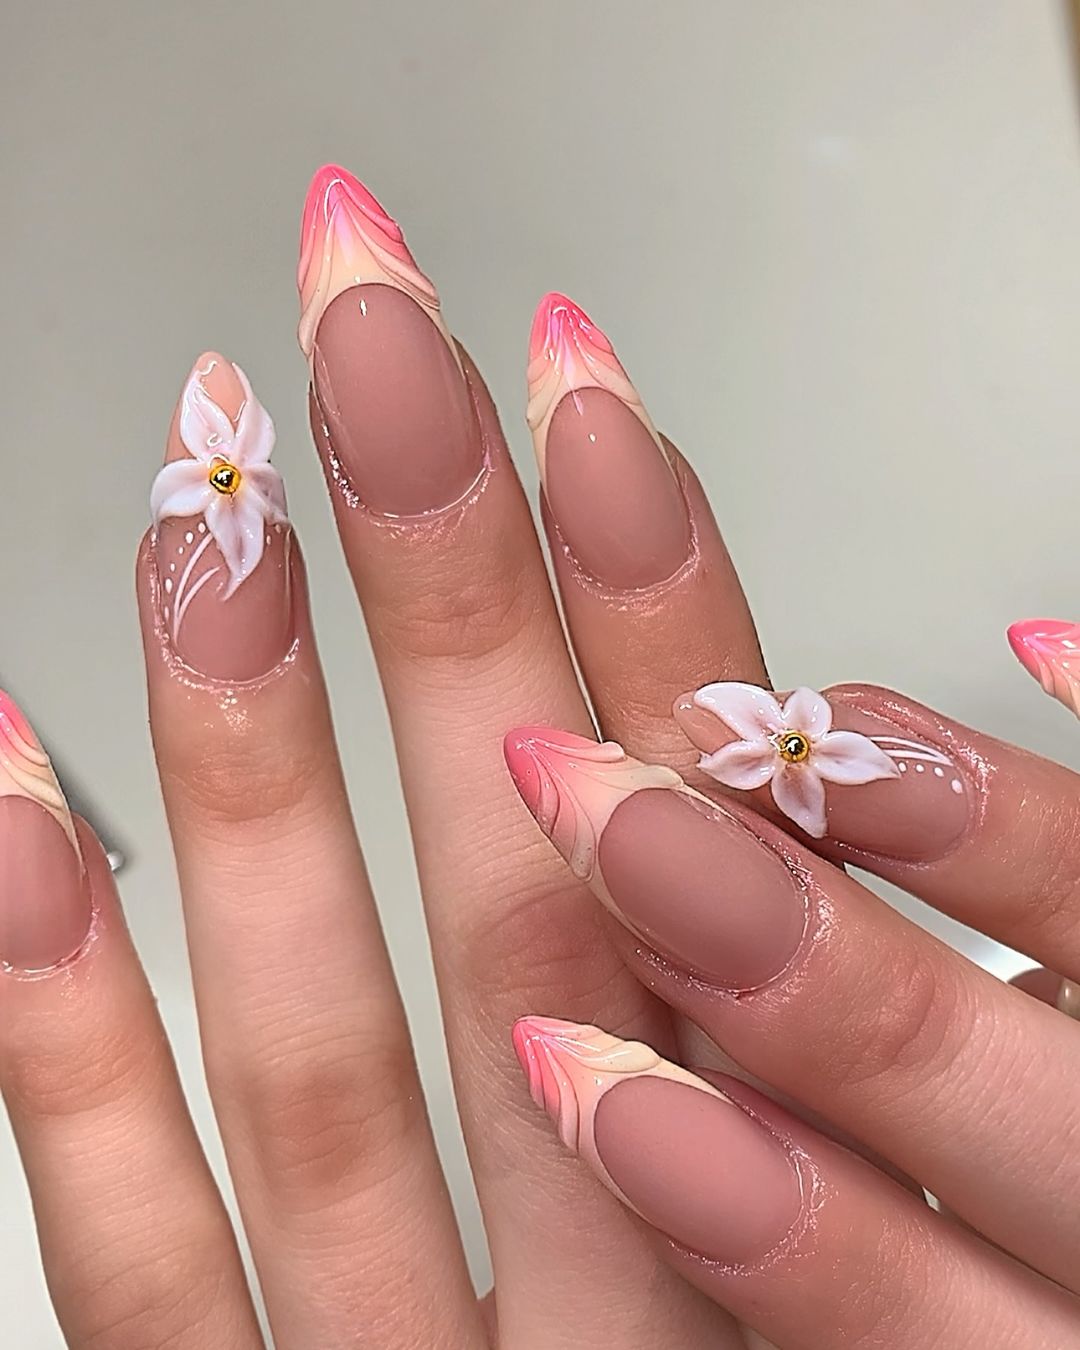
Floral Pink Accents
This intricate nail design features a beautiful blend of pink hues with delicate floral accents. The combination of pink tips and 3D floral embellishments creates a stunning and unique look. The stiletto shape adds to the elegance and sophistication of this design.
- DND Gel Polish in “Neon Pink” and “Pastel Pink”
- 3D floral nail art decorations
- Clear gel polish
- Nail art brush for detailing
- Glossy top coat
Recommendations:
-
- DND Gel Polish in “Neon Pink” for vibrant tips and Pastel Pink for a softer base.
- Use high-quality 3D floral decorations to ensure they stay in place.
- A precise nail art brush will help in detailing the floral designs.
DIY Instructions:
-
- Shape your nails into a stiletto form and buff the surface.
- Apply a base coat to your nails.
- Use DND Gel Polish in “Pastel Pink” for the base color and cure.
- Apply Neon Pink to the tips and cure.
- Use a nail art brush to detail the 3D floral decorations onto the nails.
- Seal with a glossy top coat and cure for a long-lasting finish.
Glossy Pink Perfection
For a sleek and timeless look, these glossy pink nails are perfect. The simple yet stunning design features a high-shine finish that highlights the elegance of the almond-shaped nails. This manicure is ideal for both everyday wear and special events.
- OPI GelColor in “Mod About You”
- Glossy top coat
- Nail buffer and file
Recommendations:
-
- OPI GelColor in “Mod About You” offers a beautiful, soft pink shade.
- A high-quality glossy top coat will ensure a lasting shine and durability.
DIY Instructions:
-
- Shape your nails into an almond form and buff the surface.
- Apply a base coat to your nails.
- Apply two coats of OPI GelColor in “Mod About You” and cure under a UV lamp.
- Finish with a glossy top coat and cure to achieve a sleek and shiny finish.
Save Pin
Ombre Pink Elegance
This design showcases a beautiful ombre effect, blending soft pinks for a sophisticated and trendy look. The long coffin shape adds a touch of drama, making this manicure perfect for those who love to make a statement with their nails.
- OPI GelColor in “Lisbon Wants Moor OPI”
- DND Gel Polish in “Bubblegum Pink”
- Sponge for ombre effect
- Glossy top coat
Recommendations:
-
- OPI GelColor in “Lisbon Wants Moor OPI” for the base color.
- DND Gel Polish in “Bubblegum Pink” for the ombre effect.
- A makeup sponge is perfect for blending the colors seamlessly.
DIY Instructions:
-
- Shape your nails into a coffin form and buff the surface.
- Apply a base coat to your nails.
- Apply OPI GelColor in “Lisbon Wants Moor OPI” as the base color and cure.
- Use a sponge to apply DND Gel Polish in “Bubblegum Pink” to create the ombre effect, and cure.
- Finish with a glossy top coat and cure for a lasting shine.
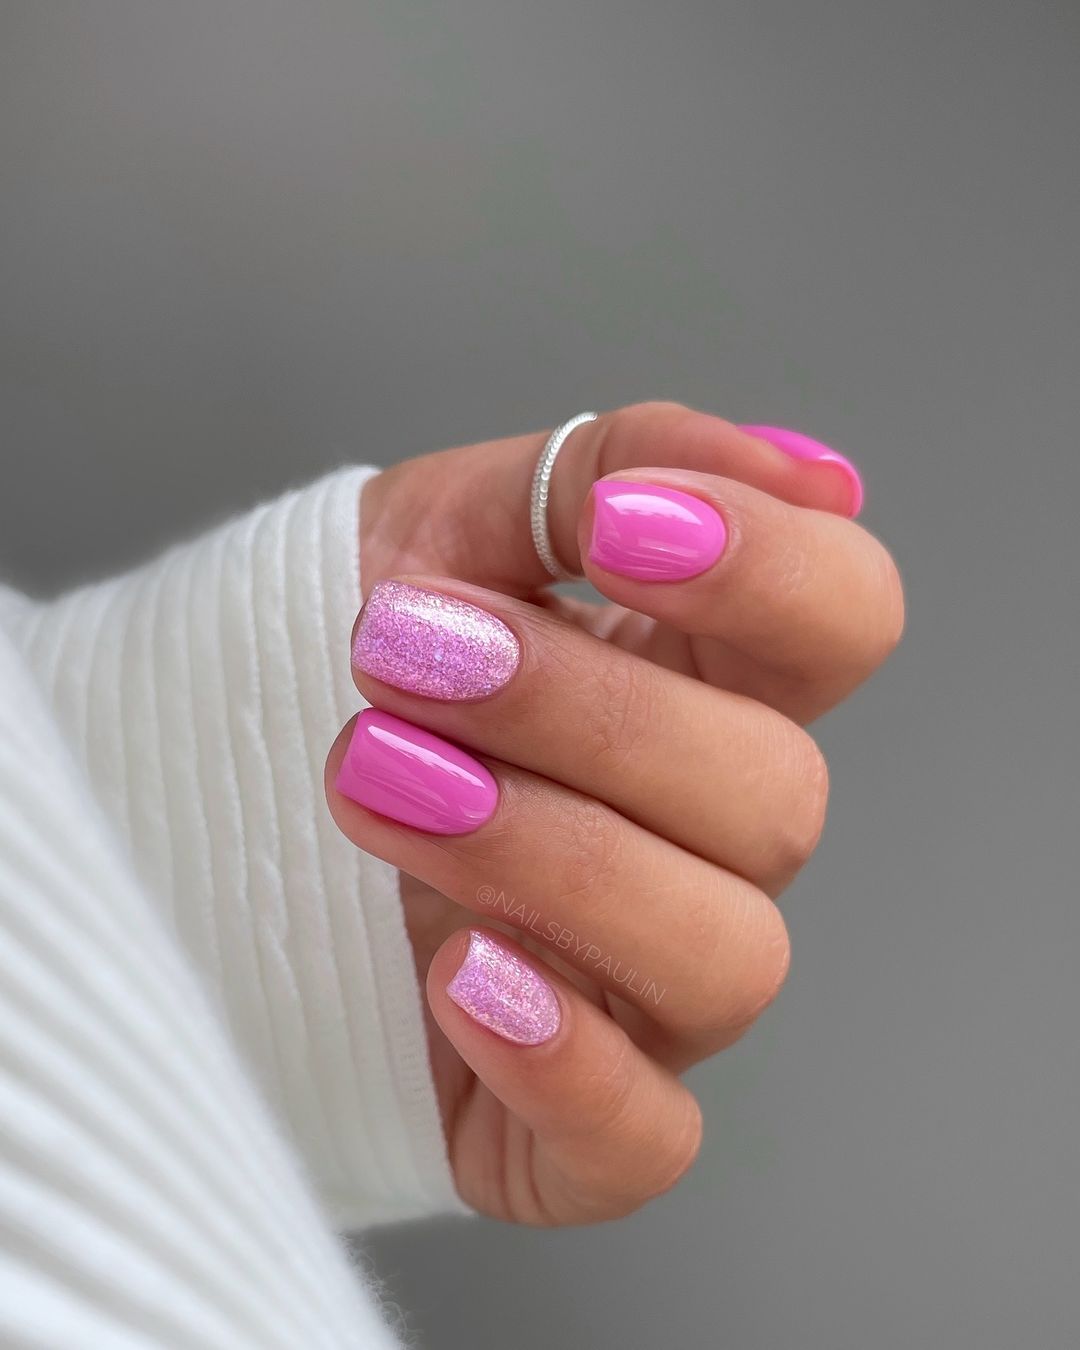
Sparkling Pink Accents
This manicure combines the beauty of pink with the glamour of glitter accents. The short almond shape is both practical and stylish, making this design perfect for everyday wear. The glitter accent nail adds a touch of sparkle to the overall look.
- DND Gel Polish in “Pink Panther”
- Pink glitter polish
- Glossy top coat
- Nail buffer and file
Recommendations:
-
- DND Gel Polish in “Pink Panther” for a vibrant pink base.
- Use a high-quality pink glitter polish for the accent nails to add sparkle.
DIY Instructions:
-
- Shape your nails into a short almond form and buff the surface.
- Apply a base coat to your nails.
- Apply DND Gel Polish in “Pink Panther” to most of your nails and cure.
- Apply pink glitter polish to the accent nail and cure.
- Seal with a glossy top coat and cure for a shiny finish.
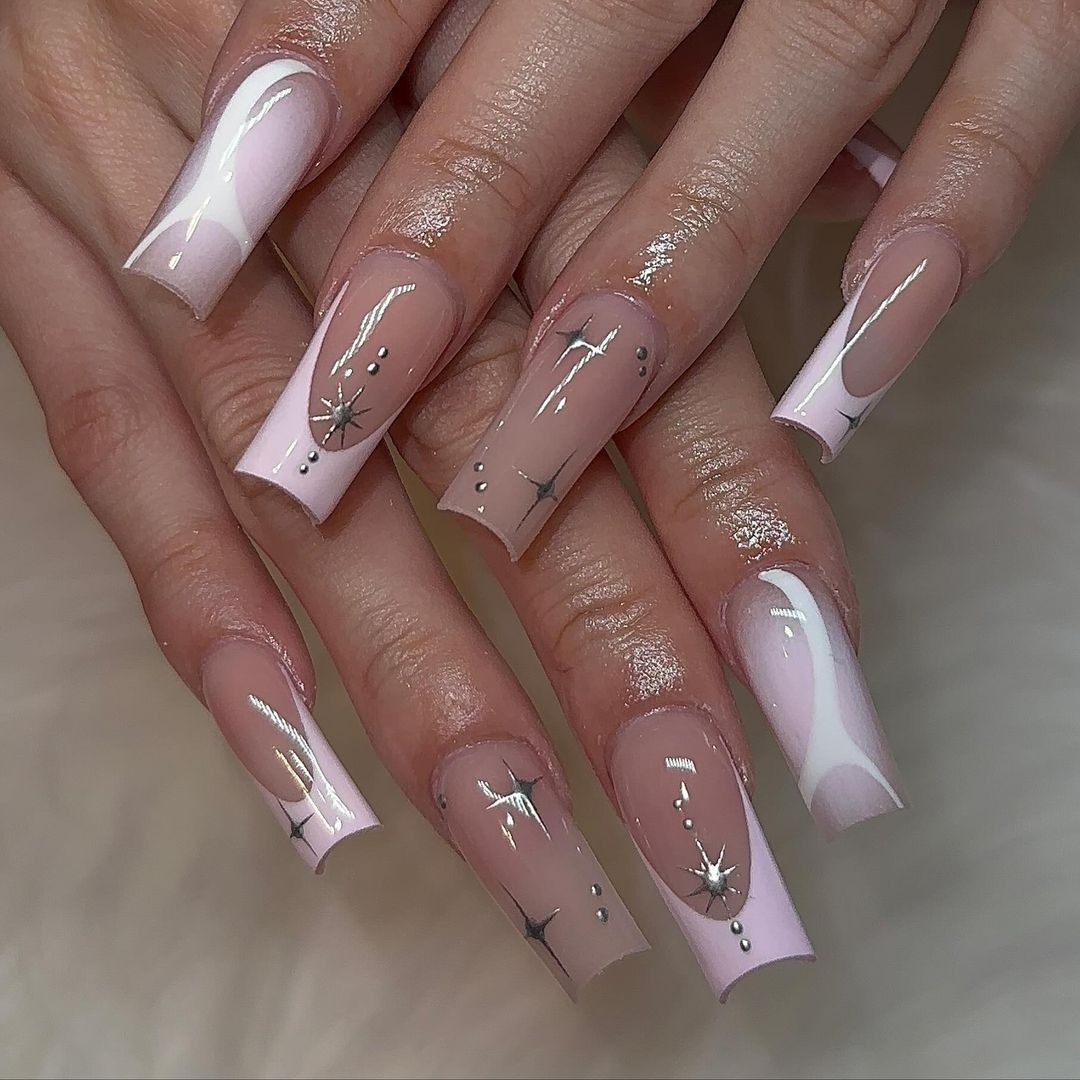
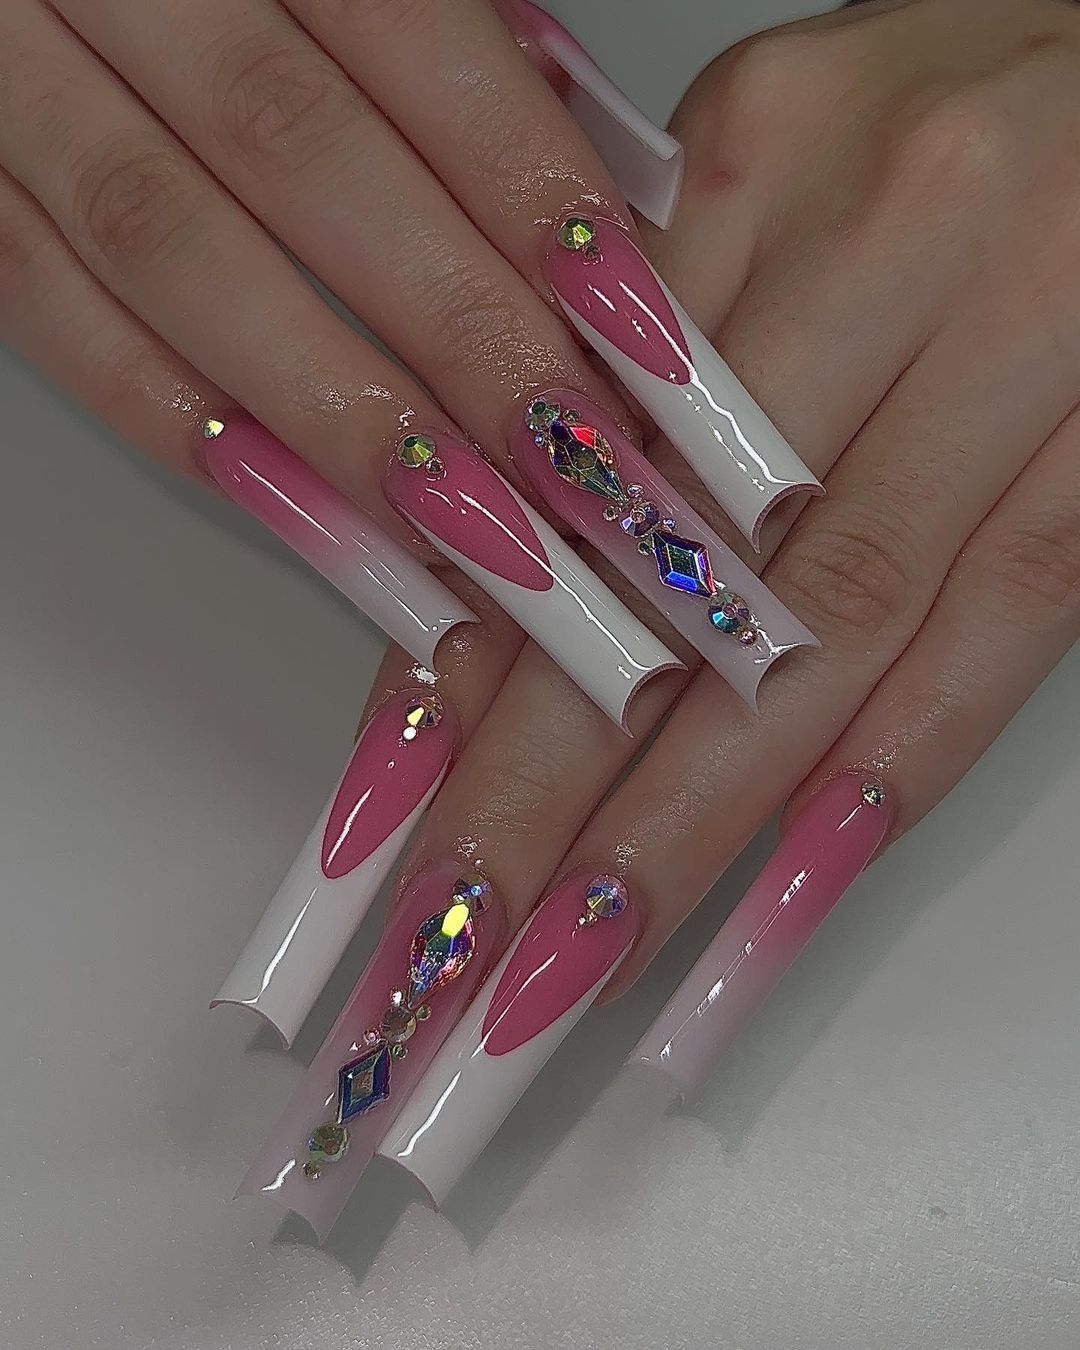
Rhinestone Pink Extravaganza
For a truly glamorous look, this design features long pink and white nails with rhinestone accents. The combination of pink and white creates a chic base, while the rhinestones add a touch of luxury and sparkle.
- OPI GelColor in “Princesses Rule!”
- DND Gel Polish in “Blushing Pink”
- Rhinestones and nail adhesive
- Clear gel polish
- Nail art brush for detailing
Recommendations:
-
- OPI GelColor in “Princesses Rule!” for a soft pink base with a hint of shimmer.
- DND Gel Polish in “Blushing Pink” for the white accents.
- High-quality rhinestones and nail adhesive to ensure they stay in place.
DIY Instructions:
-
- Shape your nails into a long form and buff the surface.
- Apply a base coat to your nails.
- Apply OPI GelColor in “Princesses Rule!” to most of your nails and cure.
- Use DND Gel Polish in “Blushing Pink” for the white accents and cure.
- Apply rhinestones using nail adhesive and a detailing brush.
- Seal with a clear gel polish and cure for a long-lasting finish.
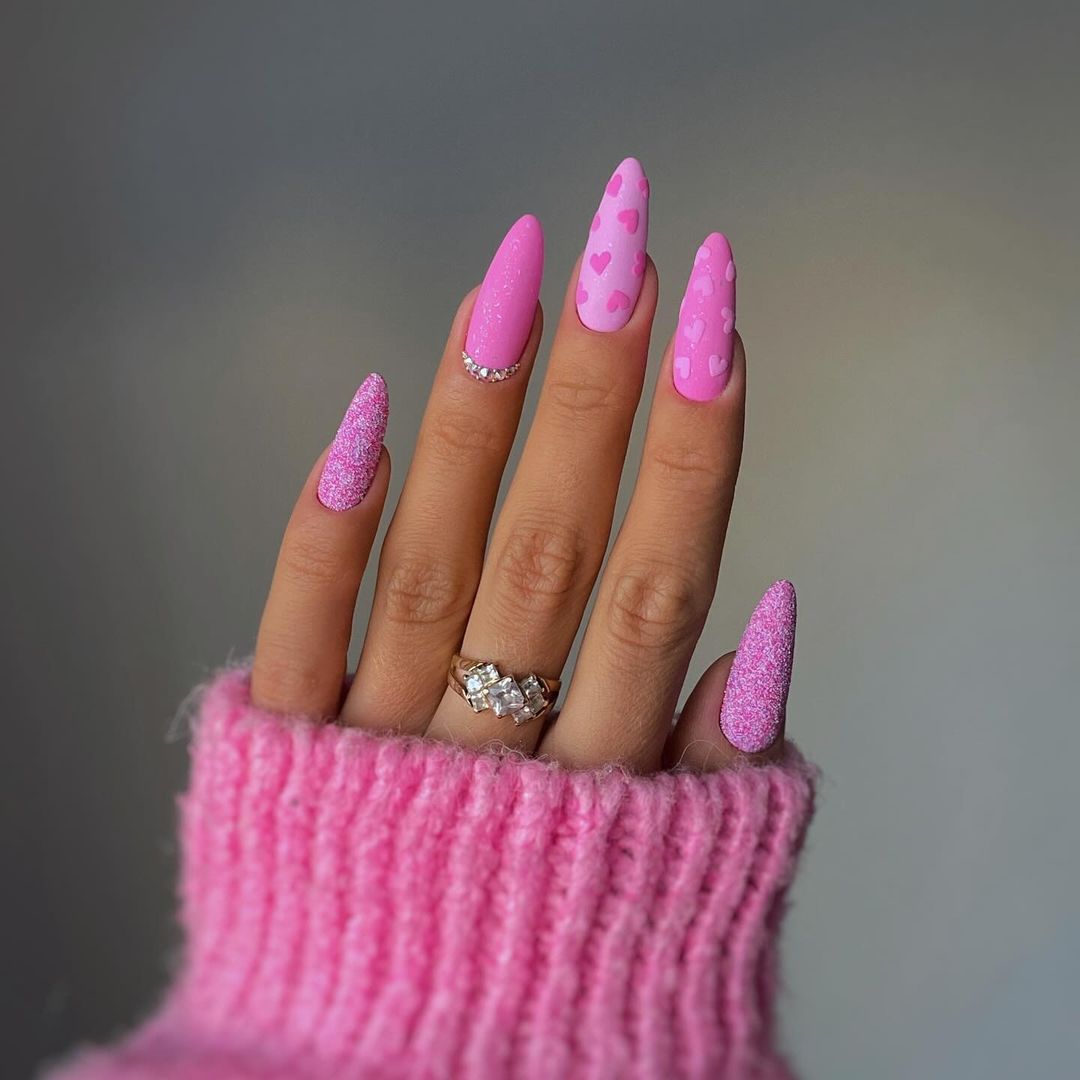
Matte Pink with Heart Accents
This adorable nail design features a matte pink base with heart accents and glitter embellishments. The stiletto shape adds a dramatic flair, making it perfect for those who love to stand out. The combination of solid pink, heart designs, and glitter creates a playful yet sophisticated look.
- OPI GelColor in “Mod About You”
- DND Gel Polish in “Pink Lady”
- Matte top coat
- Pink glitter polish
- Heart nail stickers or stencils
- Rhinestones and nail adhesive
Recommendations:
-
- OPI GelColor in “Mod About You” for a soft, matte pink base.
- DND Gel Polish in “Pink Lady” for vibrant pink accents.
- A high-quality matte top coat will ensure the nails have a smooth, non-shiny finish.
DIY Instructions:
-
- Shape your nails into a stiletto form and buff the surface.
- Apply a base coat to your nails.
- Apply OPI GelColor in “Mod About You” as the base color and cure.
- Use DND Gel Polish in “Pink Lady” for the heart accents and apply pink glitter polish to the designated nails, then cure.
- Apply heart stickers or use stencils to create heart designs on a few nails.
- Attach rhinestones with nail adhesive for added sparkle.
- Seal with a matte top coat and cure for a long-lasting finish.
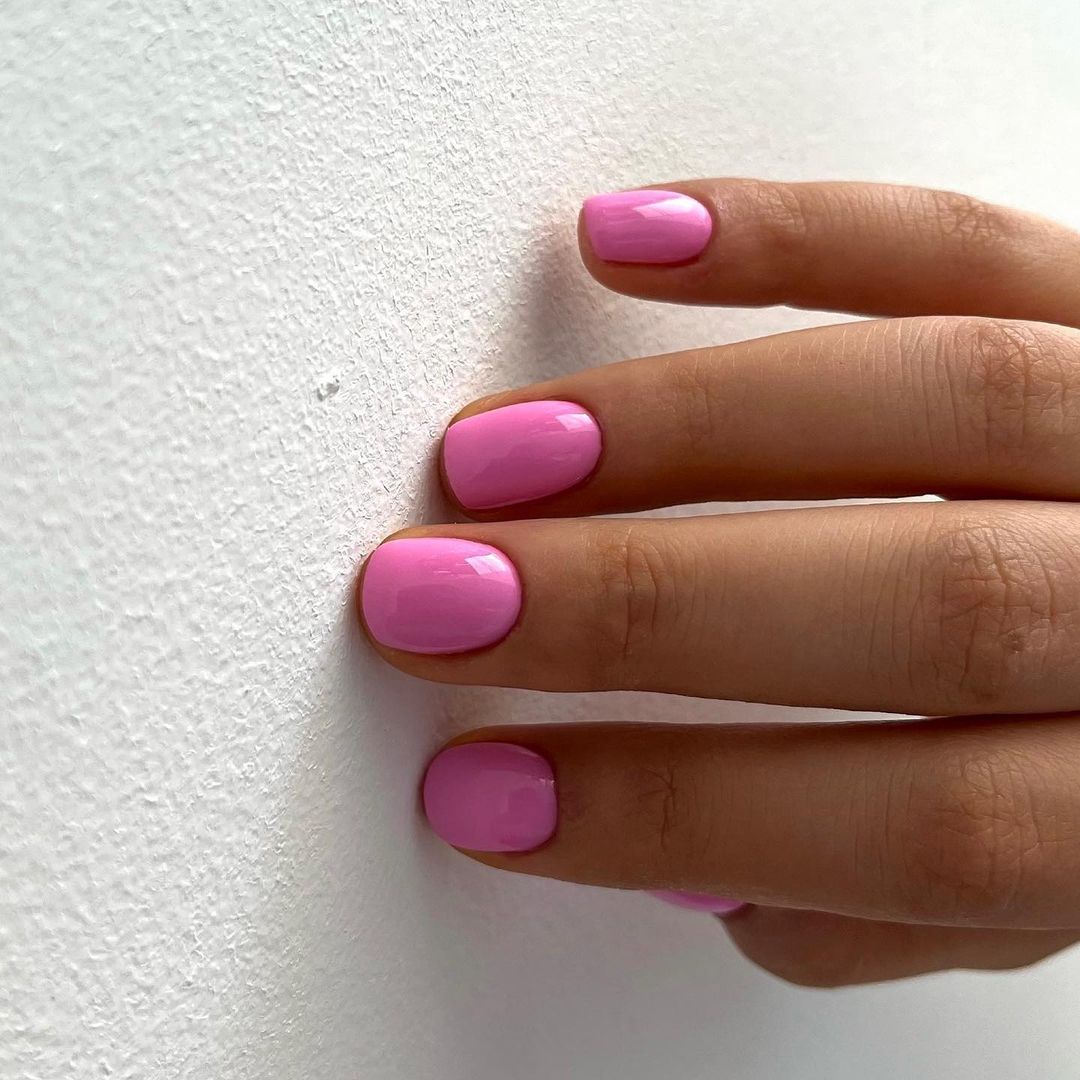
Simple Glossy Pink
This minimalist design features a glossy pink polish on short, rounded nails. The simplicity of the design makes it versatile and suitable for any occasion. The high-shine finish adds a touch of elegance to this classic look.
- OPI GelColor in “Passion”
- Glossy top coat
- Nail buffer and file
Recommendations:
-
- OPI GelColor in “Passion” offers a beautiful, soft pink shade with a glossy finish.
- A high-quality glossy top coat is essential to maintain the shine and durability of the manicure.
DIY Instructions:
-
- Shape your nails into a short, rounded form and buff the surface.
- Apply a base coat to your nails.
- Apply two coats of OPI GelColor in “Passion” to all nails and cure under a UV lamp.
- Finish with a glossy top coat and cure to achieve a sleek and shiny finish.
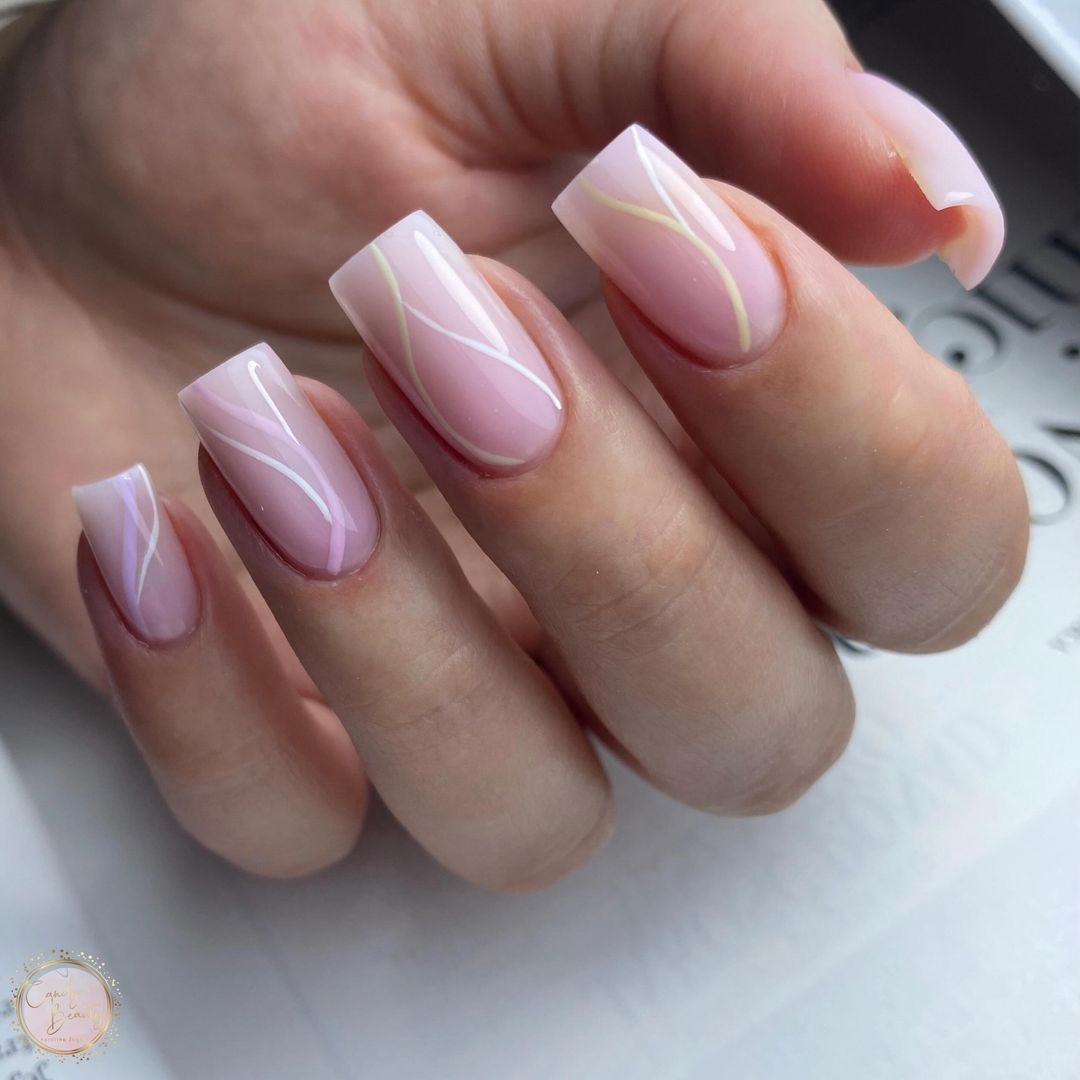
Soft Pink with White Swirls
This elegant nail design features a soft pink base with delicate white swirl accents. The medium-length square shape adds a modern twist, making this manicure perfect for both casual and formal settings. The white swirls add a touch of sophistication to the overall look.
- DND Gel Polish in “Soft Pink”
- White striping polish
- Glossy top coat
- Nail art brush for detailing
Recommendations:
-
- DND Gel Polish in “Soft Pink” provides a beautiful, soft pink base.
- Use a fine nail art brush to create the precise white swirl accents.
DIY Instructions:
-
- Shape your nails into a medium-length square form and buff the surface.
- Apply a base coat to your nails.
- Apply DND Gel Polish in “Soft Pink” to all nails and cure under a UV lamp.
- Use white striping polish and a nail art brush to create delicate swirl designs on each nail.
- Seal with a glossy top coat and cure for a long-lasting finish.
Pink and Yellow French Tips
This fun and unique nail design features pink nails with yellow French tips. The addition of rhinestone accents adds a touch of glamour, making this manicure perfect for special occasions. The square shape gives the nails a modern and stylish look.
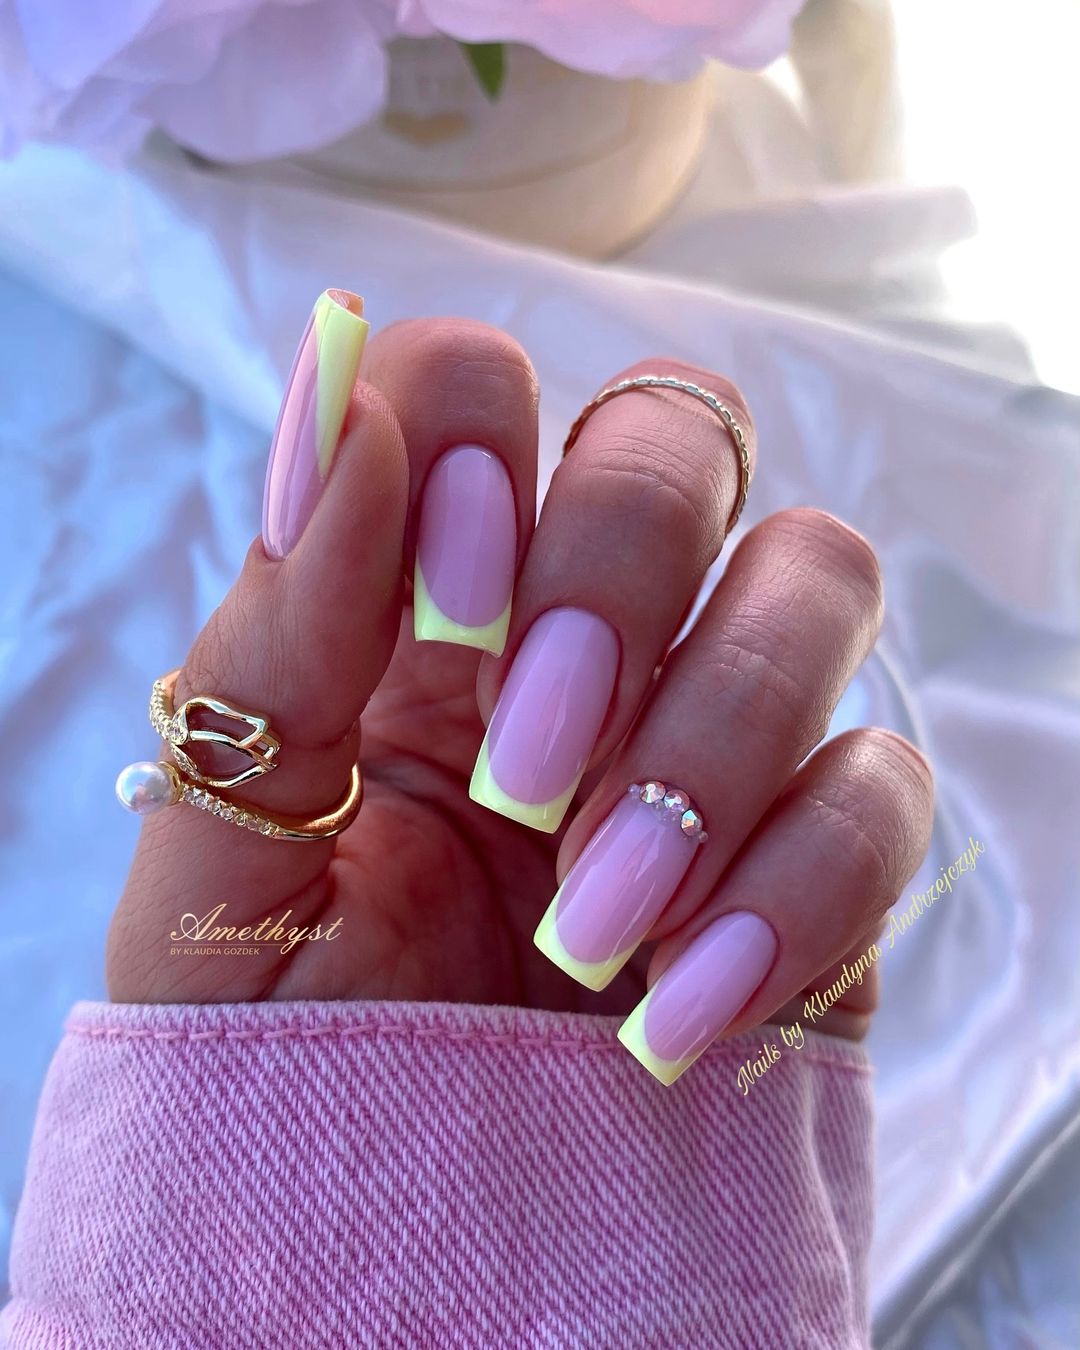
- OPI GelColor in “Princesses Rule!”
- Yellow striping polish
- Rhinestones and nail adhesive
- Glossy top coat
Recommendations:
-
- OPI GelColor in “Princesses Rule!” offers a soft pink base with a hint of shimmer.
- Use a high-quality yellow striping polish for the French tips.
DIY Instructions:
-
- Shape your nails into a square form and buff the surface.
- Apply a base coat to your nails.
- Apply OPI GelColor in “Princesses Rule!” as the base color and cure.
- Use yellow striping polish to create the French tips and cure.
- Attach rhinestones with nail adhesive for added sparkle.
- Seal with a glossy top coat and cure for a lasting finish.
Gradient Pink Almond Nails
This chic nail design features a gradient effect from light to dark pink on almond-shaped nails. The glossy finish highlights the gradient, making the nails look sophisticated and stylish. This design is perfect for those who love a subtle yet eye-catching manicure.
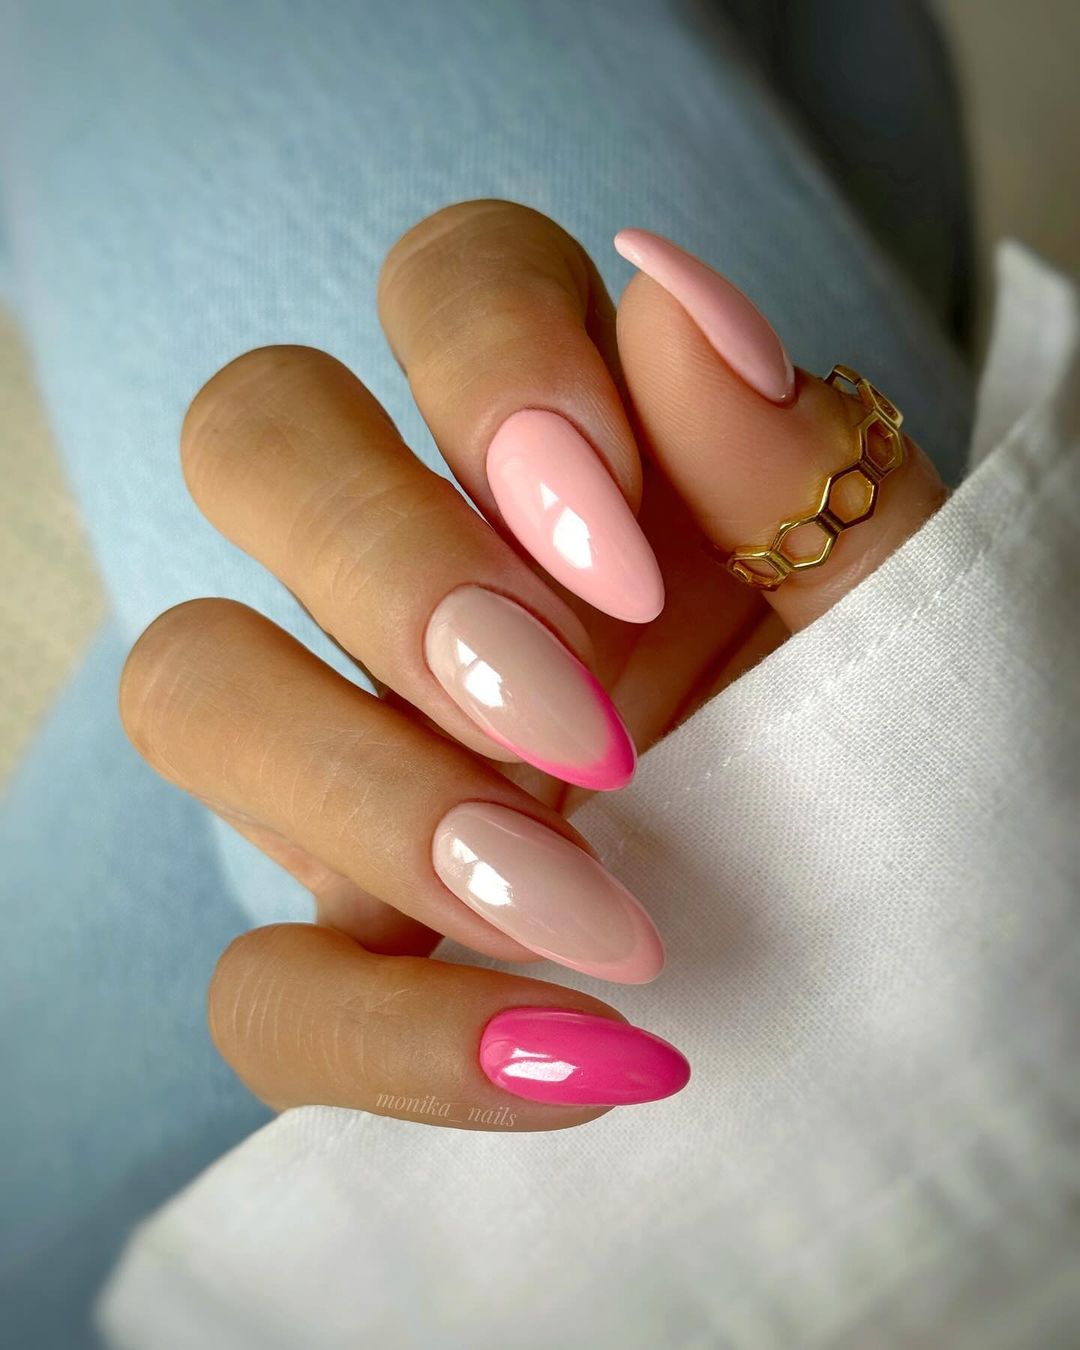
- OPI GelColor in “Lisbon Wants Moor OPI”
- DND Gel Polish in “Bubblegum Pink”
- Sponge for gradient effect
- Glossy top coat
Recommendations:
-
- OPI GelColor in “Lisbon Wants Moor OPI” for a light pink base.
- DND Gel Polish in “Bubblegum Pink” for a vibrant pink gradient.
DIY Instructions:
-
- Shape your nails into an almond form and buff the surface.
- Apply a base coat to your nails.
- Apply OPI GelColor in “Lisbon Wants Moor OPI” as the base color and cure.
- Use a sponge to apply DND Gel Polish in “Bubblegum Pink” to create the gradient effect, and cure.
- Finish with a glossy top coat and cure for a shiny finish.
Pink French Tips with Heart Accents
This adorable nail design features pink French tips on a nude base with heart accents. The combination of pink tips and delicate heart designs makes this manicure cute and stylish. The short square shape is practical and perfect for everyday wear.
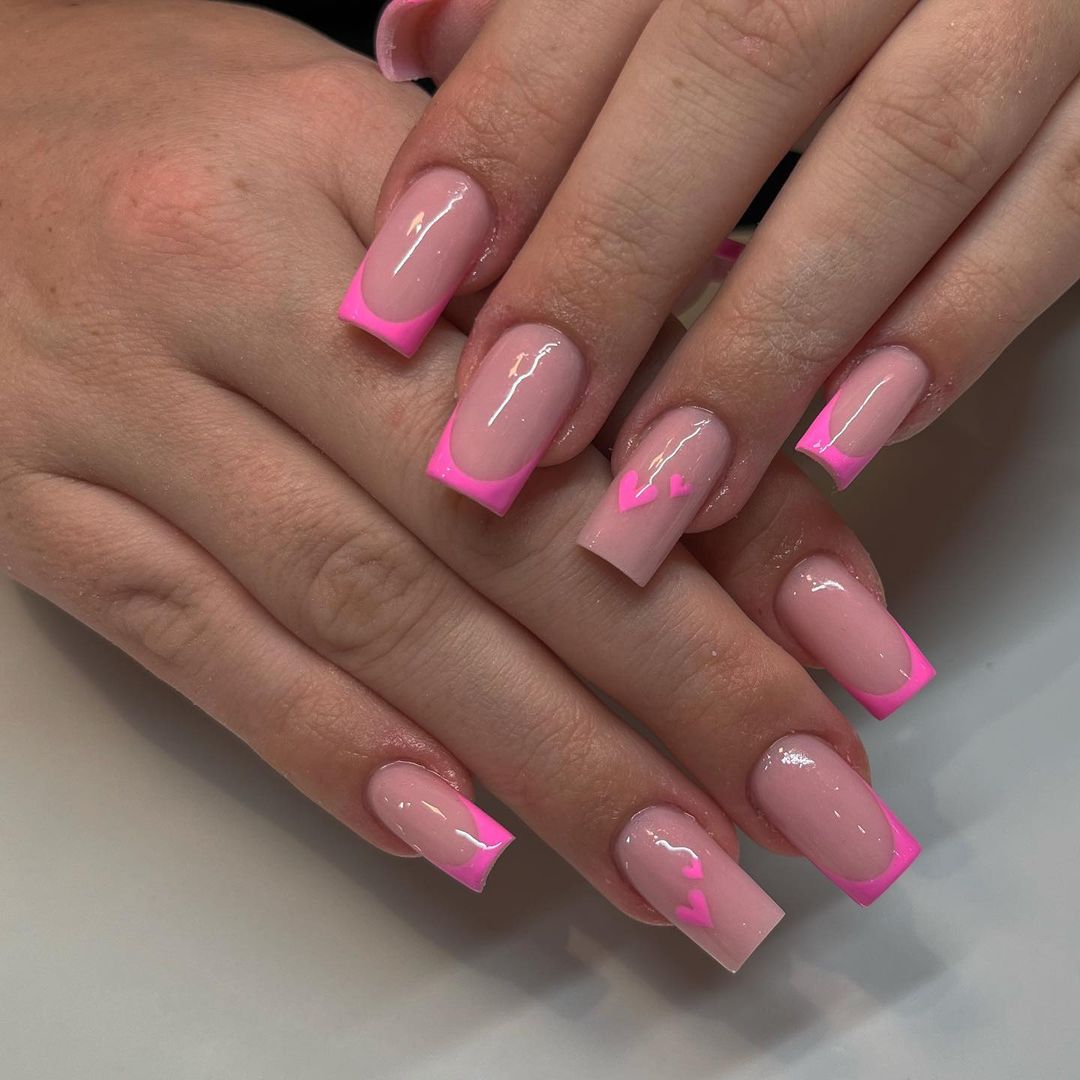
- DND Gel Polish in “Pink Panther”
- Nude gel polish
- Heart nail stickers or stencils
- Glossy top coat
Recommendations:
-
- DND Gel Polish in “Pink Panther” for vibrant pink French tips.
- Use high-quality nude gel polish for the base.
DIY Instructions:
-
- Shape your nails into a short square form and buff the surface.
- Apply a base coat to your nails.
- Apply nude gel polish to all nails and cure.
- Use DND Gel Polish in “Pink Panther” for the French tips and cure.
- Apply heart stickers or use stencils to create heart designs on a few nails.
- Seal with a glossy top coat and cure for a long-lasting finish.
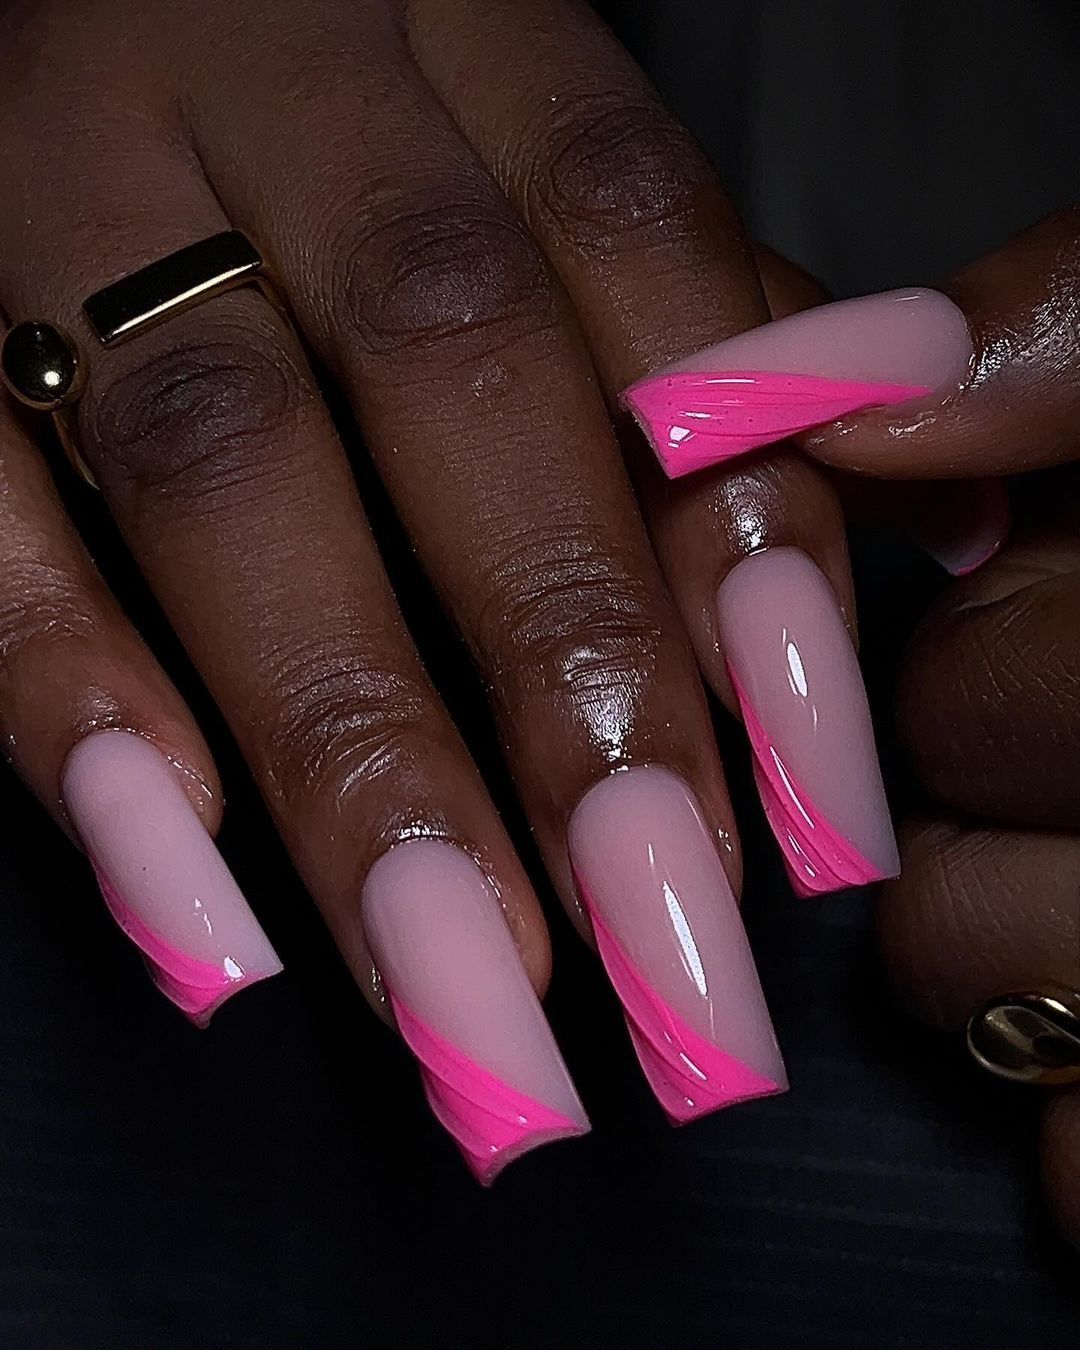
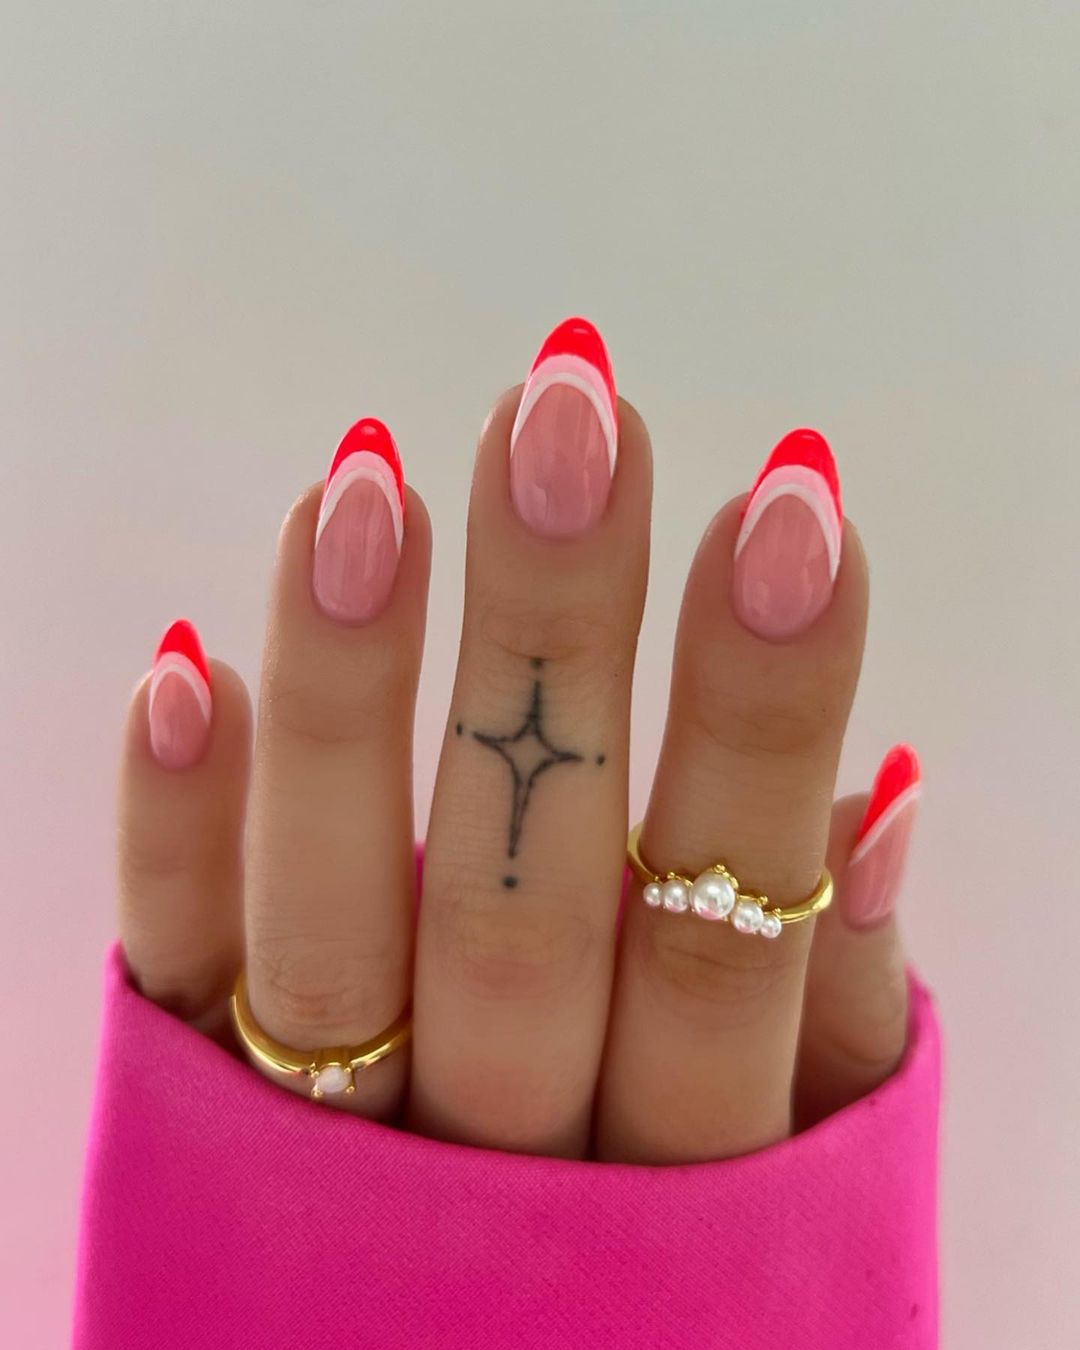
Vivid Pink French Tips
This bold and vibrant nail design features French tips in various shades of pink, creating a dynamic and eye-catching look. The long coffin shape enhances the dramatic effect, making this manicure perfect for those who love to stand out.
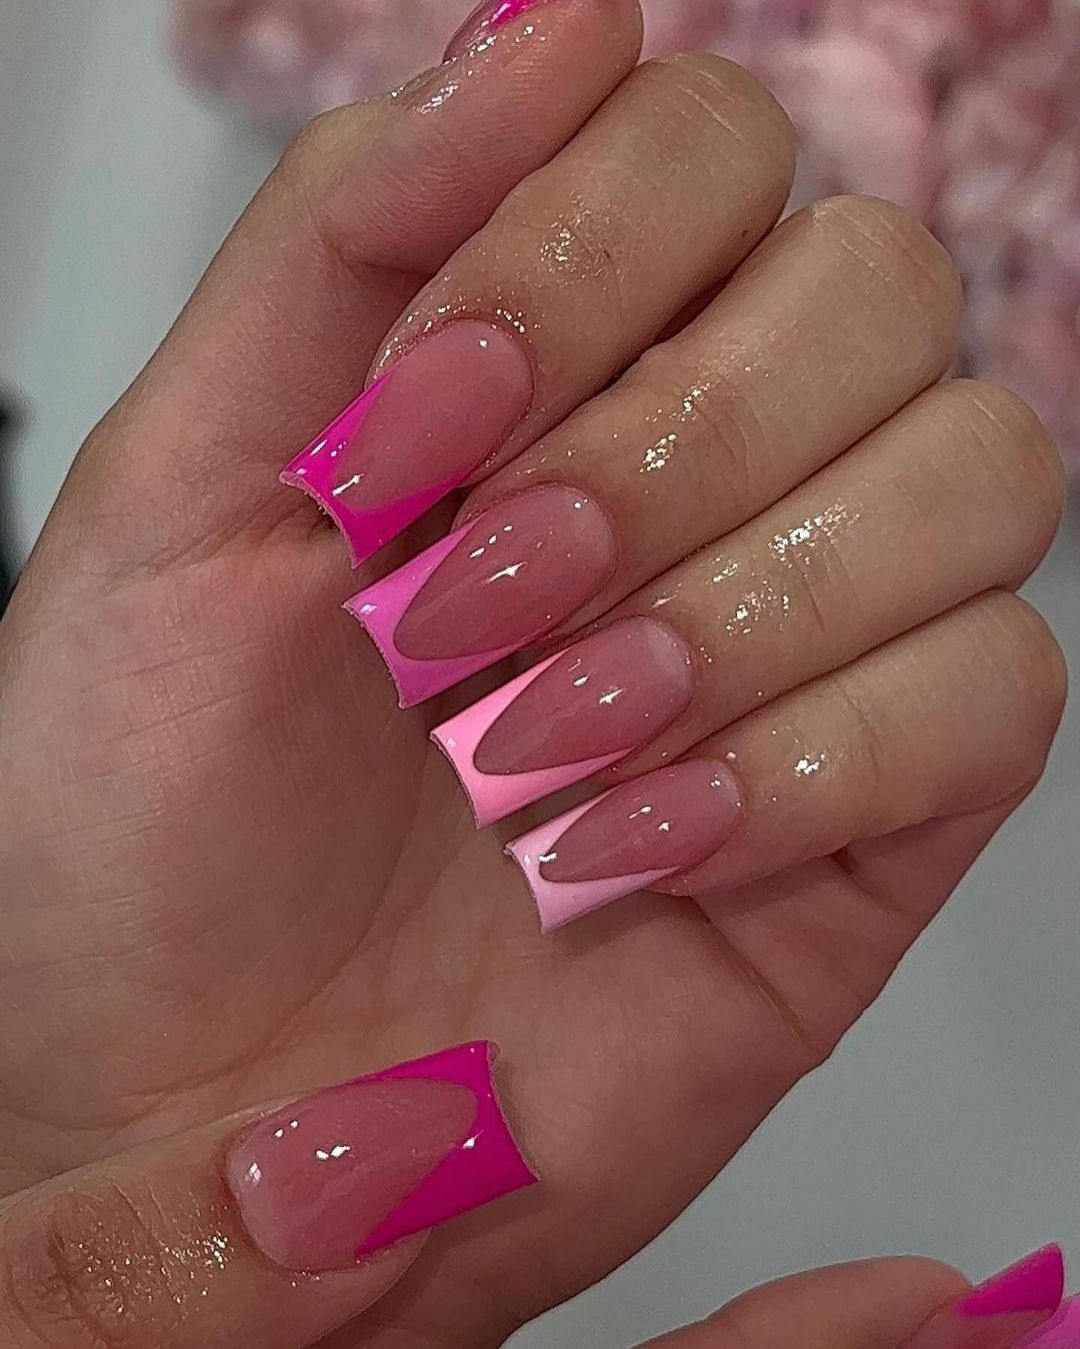
- OPI GelColor in “Lisbon Wants Moor OPI”
- DND Gel Polish in “Bubblegum Pink”
- DND Gel Polish in “Neon Pink”
- Glossy top coat
Recommendations:
-
- OPI GelColor in “Lisbon Wants Moor OPI” for a soft pink base.
- Use DND Gel Polish in “Bubblegum Pink” and “Neon Pink” to create the vibrant French tips.
DIY Instructions:
-
- Shape your nails into a long coffin form and buff the surface.
- Apply a base coat to your nails.
- Apply OPI GelColor in “Lisbon Wants Moor OPI” as the base color and cure.
- Use DND Gel Polish in “Bubblegum Pink” and “Neon Pink” to create the French tips, and cure.
- Finish with a glossy top coat and cure for a long-lasting finish.
Pink Nails with Glitter Accent
This stunning nail design features a mix of solid pink nails and a glitter accent nail, perfect for adding a touch of sparkle to your look. The short almond shape is both practical and stylish, making this manicure ideal for everyday wear.
- DND Gel Polish in “Pink Panther”
- Pink glitter polish
- Glossy top coat
Recommendations:
-
- DND Gel Polish in “Pink Panther” for a vibrant pink base.
- Use high-quality pink glitter polish for the accent nail to add sparkle.
DIY Instructions:
-
- Shape your nails into a short almond form and buff the surface.
- Apply a base coat to your nails.
- Apply DND Gel Polish in “Pink Panther” to most of your nails and cure.
- Apply pink glitter polish to the accent nail and cure.
- Seal with a glossy top coat and cure for a shiny finish.
Pink Swirl Nails
This elegant nail design features a nude base with pink swirl accents, creating a sophisticated and trendy look. The long coffin shape adds a touch of drama, making this manicure perfect for special occasions.
- OPI GelColor in “Bubble Bath”
- DND Gel Polish in “Neon Pink”
- Nail art brush for detailing
- Glossy top coat
Recommendations:
-
- OPI GelColor in “Bubble Bath” for a subtle nude base.
- DND Gel Polish in “Neon Pink” for the swirl accents.
DIY Instructions:
-
- Shape your nails into a long coffin form and buff the surface.
- Apply a base coat to your nails.
- Apply OPI GelColor in “Bubble Bath” as the base color and cure.
- Use a nail art brush dipped in DND Gel Polish in “Neon Pink” to create swirl designs, and cure.
- Seal with a glossy top coat and cure for a long-lasting finish.
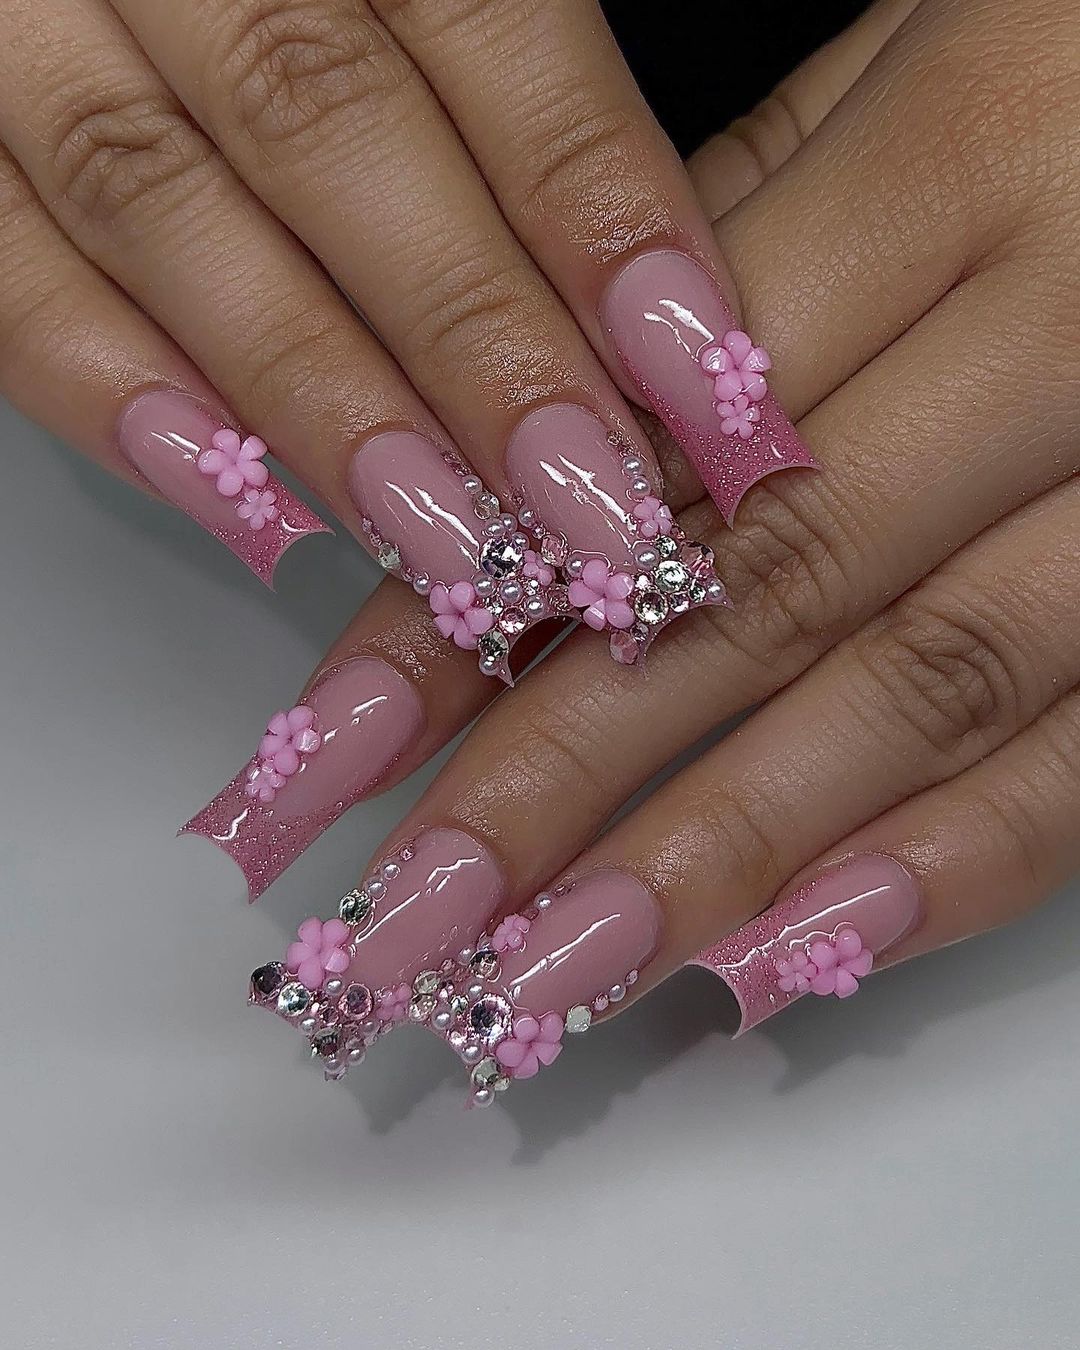
Rhinestone and Floral Pink Nails
This extravagant nail design features pink nails adorned with rhinestones and floral decorations, perfect for those who love a glamorous and intricate look. The long coffin shape enhances the dramatic effect, making this manicure ideal for special events.
- OPI GelColor in “Princesses Rule!”
- Pink rhinestones and floral decorations
- Nail adhesive
- Glossy top coat
Recommendations:
-
- OPI GelColor in “Princesses Rule!” for a soft pink base with a hint of shimmer.
- Use high-quality pink rhinestones and floral decorations to ensure they stay in place.
DIY Instructions:
-
- Shape your nails into a long coffin form and buff the surface.
- Apply a base coat to your nails.
- Apply OPI GelColor in “Princesses Rule!” to all nails and cure.
- Use nail adhesive to attach rhinestones and floral decorations.
- Seal with a glossy top coat and cure for a long-lasting finish.
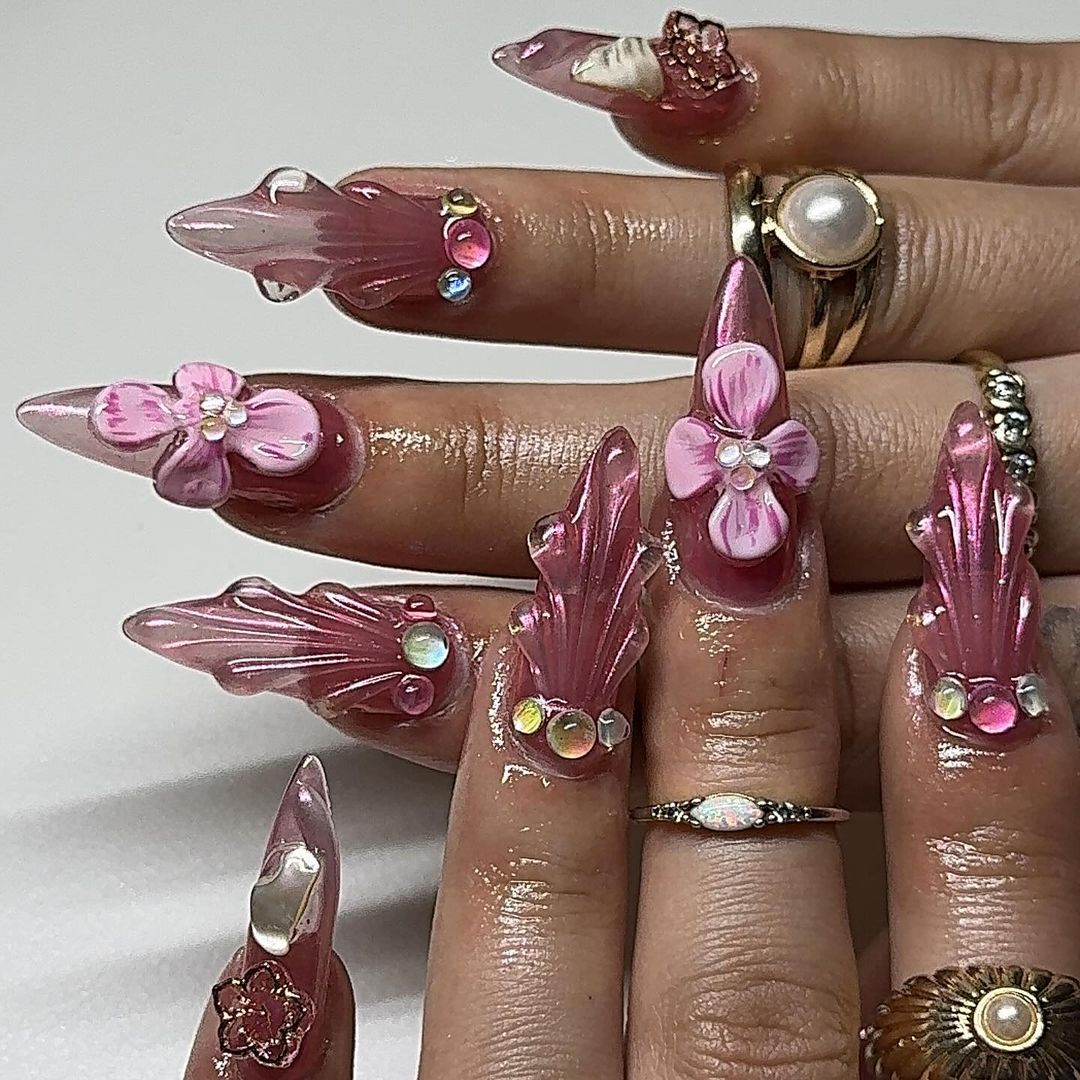
3D Floral Pink Nails
This unique nail design features pink nails with intricate 3D floral decorations, perfect for those who love to make a statement with their manicure. The stiletto shape adds to the boldness, making this look ideal for special occasions.
- DND Gel Polish in “Neon Pink”
- 3D floral nail art decorations
- Nail art brush for detailing
- Glossy top coat
Recommendations:
-
- DND Gel Polish in “Neon Pink” for a vibrant pink base.
- Use high-quality 3D floral decorations to ensure they stay in place.
DIY Instructions:
-
- Shape your nails into a stiletto form and buff the surface.
- Apply a base coat to your nails.
- Apply DND Gel Polish in “Neon Pink” to all nails and cure.
- Use a nail art brush and adhesive to attach 3D floral decorations.
- Seal with a glossy top coat and cure for a long-lasting finish.
Neon Pink French Tips
This bold and trendy nail design features neon pink French tips on a nude base, creating a striking and modern look. The short almond shape is practical yet stylish, making this manicure perfect for everyday wear.
- OPI GelColor in “Bubble Bath”
- DND Gel Polish in “Neon Pink”
- Glossy top coat
Recommendations:
-
- OPI GelColor in “Bubble Bath” for a subtle nude base.
- DND Gel Polish in “Neon Pink” for vibrant French tips.
DIY Instructions:
-
- Shape your nails into a short almond form and buff the surface.
- Apply a base coat to your nails.
- Apply OPI GelColor in “Bubble Bath” as the base color and cure.
- Use DND Gel Polish in “Neon Pink” to create the French tips, and cure.
- Seal with a glossy top coat and cure for a long-lasting finish.
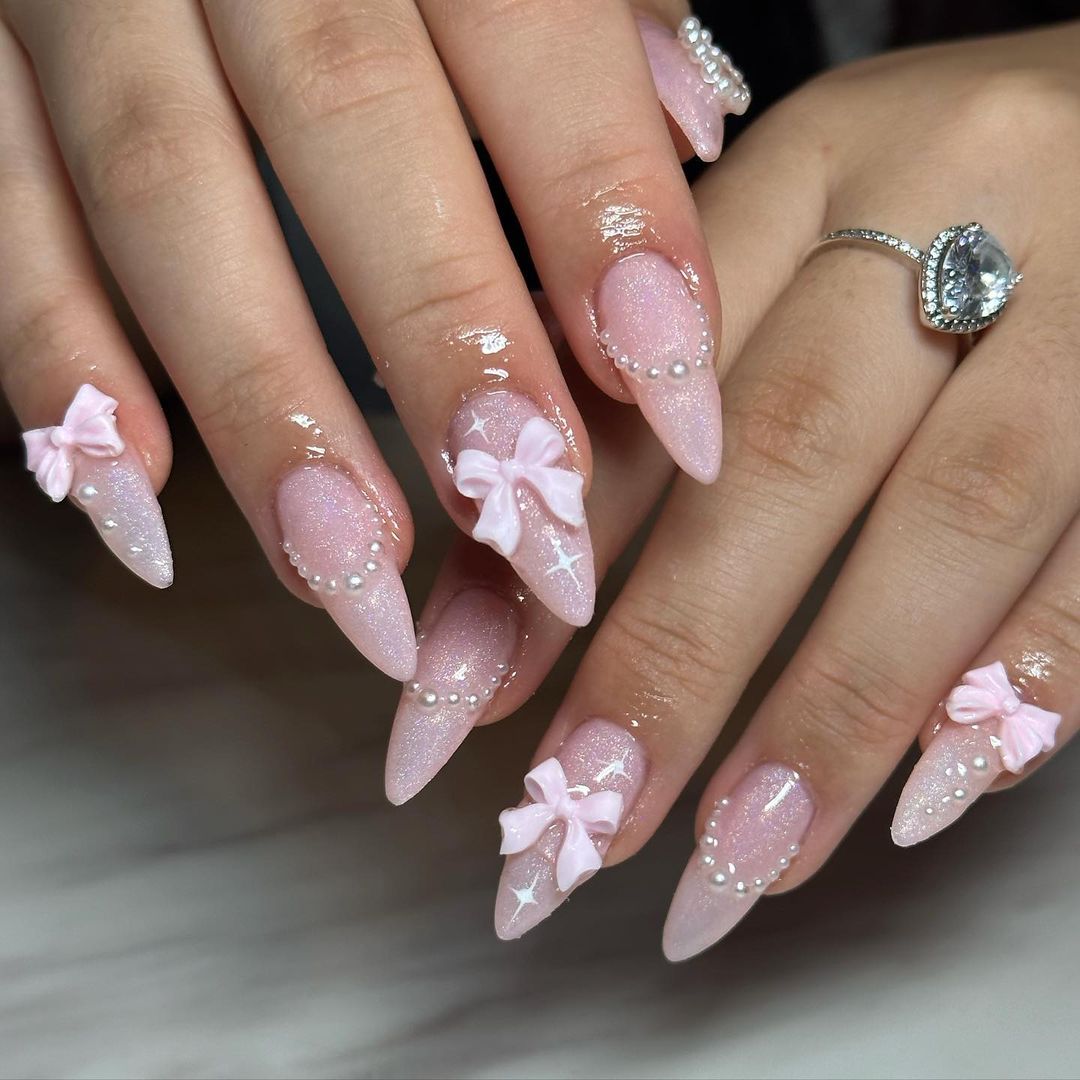
Delicate Pink Bows and Pearls
This delightful nail design features a soft pink base with delicate bows and pearl accents, creating a sweet and feminine look. The stiletto shape adds elegance, making this manicure perfect for special occasions or simply to feel a bit more glamorous every day.
- OPI GelColor in “Princesses Rule!”
- White pearl beads
- Pink bow decorations
- Nail adhesive
- Glossy top coat
Recommendations:
-
- OPI GelColor in “Princesses Rule!” offers a soft pink base with a hint of shimmer.
- Use high-quality white pearl beads and pink bow decorations to ensure they stay in place.
DIY Instructions:
-
- Shape your nails into a stiletto form and buff the surface.
- Apply a base coat to your nails.
- Apply OPI GelColor in “Princesses Rule!” to all nails and cure.
- Use nail adhesive to attach the pearl beads and pink bow decorations.
- Seal with a glossy top coat and cure for a long-lasting finish.
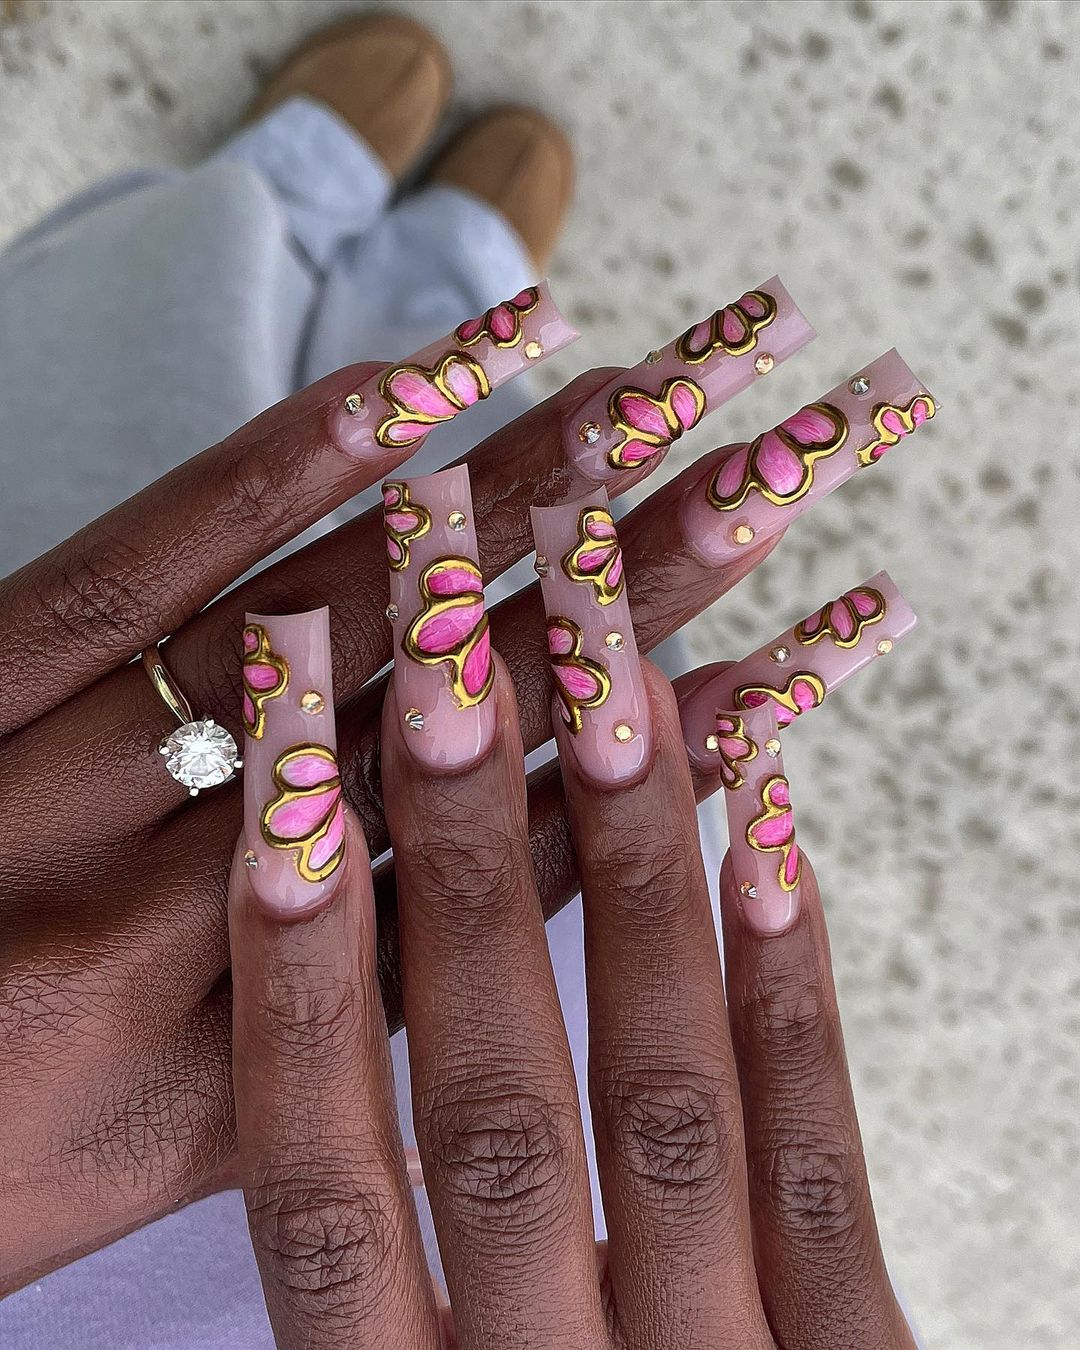
Artistic Floral Pink Nails
This artistic nail design features intricate pink floral patterns on a nude base, creating a striking and unique look. The long coffin shape enhances the dramatic effect, making this manicure ideal for those who love to make a statement with their nails.
- DND Gel Polish in “Pink Lady”
- Nude gel polish
- Nail art brush for detailing
- Glossy top coat
Recommendations:
-
- DND Gel Polish in “Pink Lady” for the vibrant floral accents.
- Use a fine nail art brush to create the detailed floral patterns.
DIY Instructions:
-
- Shape your nails into a long coffin form and buff the surface.
- Apply a base coat to your nails.
- Apply nude gel polish to all nails and cure.
- Use a nail art brush dipped in DND Gel Polish in “Pink Lady” to create the floral patterns, and cure.
- Seal with a glossy top coat and cure for a long-lasting finish.
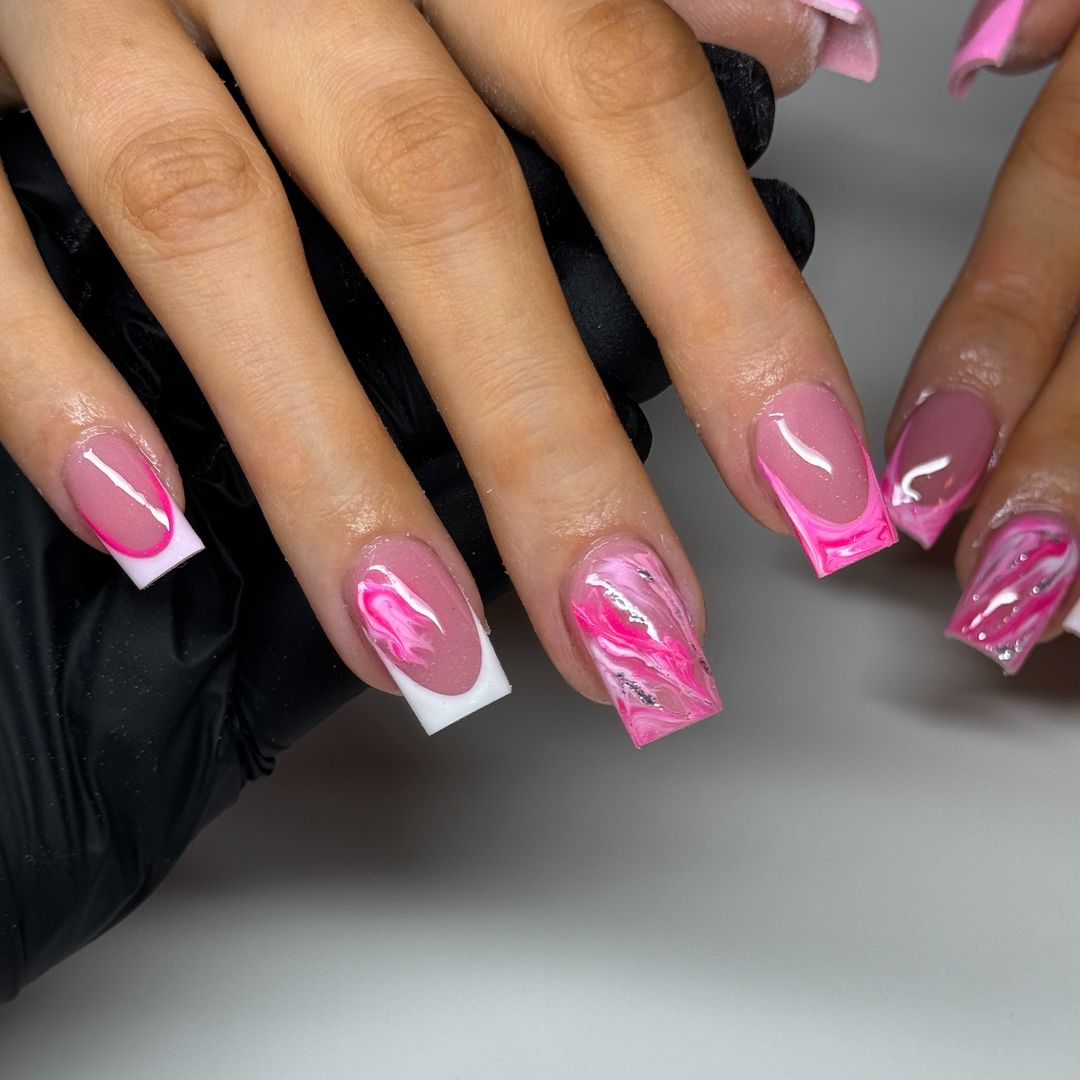
Pink and White Marble Nails
This chic nail design features a mix of pink and white marble effects, creating a sophisticated and trendy look. The short square shape is both practical and stylish, making this manicure perfect for everyday wear.
- OPI GelColor in “Lisbon Wants Moor OPI”
- DND Gel Polish in “Pink Panther”
- White gel polish
- Nail art brush for marble effect
- Glossy top coat
Recommendations:
-
- OPI GelColor in “Lisbon Wants Moor OPI” for a soft pink base.
- DND Gel Polish in “Pink Panther” for vibrant pink accents.
- Use a fine nail art brush to create the marble effect.
DIY Instructions:
-
- Shape your nails into a short square form and buff the surface.
- Apply a base coat to your nails.
- Apply OPI GelColor in “Lisbon Wants Moor OPI” as the base color and cure.
- Use a nail art brush dipped in DND Gel Polish in “Pink Panther” and white gel polish to create the marble effect, and cure.
- Seal with a glossy top coat and cure for a long-lasting finish.
Ombre Pink with Rhinestones
This elegant nail design features a beautiful ombre effect from light to dark pink, accented with rhinestones for added glamour. The almond shape adds a touch of sophistication, making this manicure perfect for special occasions.

- DND Gel Polish in “Soft Pink” and “Neon Pink”
- Rhinestones and nail adhesive
- Sponge for ombre effect
- Glossy top coat
Recommendations:
-
- DND Gel Polish in “Soft Pink” and “Neon Pink” for the gradient effect.
- Use high-quality rhinestones to ensure they stay in place.
DIY Instructions:
-
- Shape your nails into an almond form and buff the surface.
- Apply a base coat to your nails.
- Apply DND Gel Polish in “Soft Pink” as the base color and cure.
- Use a sponge dipped in DND Gel Polish in “Neon Pink” to create the ombre effect, and cure.
- Use nail adhesive to attach rhinestones.
- Seal with a glossy top coat and cure for a long-lasting finish.
Pink Petal Art Nails
This artistic nail design features delicate pink petal patterns on a nude base, accented with a vibrant pink nail for contrast. The almond shape adds elegance, making this manicure perfect for those who love a unique and stylish look.
- OPI GelColor in “Bubble Bath”
- DND Gel Polish in “Pink Panther”
- White striping polish
- Nail art brush for detailing
- Glossy top coat
Recommendations:
-
- OPI GelColor in “Bubble Bath” for a subtle nude base.
- DND Gel Polish in “Pink Panther” for vibrant pink accents.
- Use a fine nail art brush to create the petal patterns.
DIY Instructions:
-
- Shape your nails into an almond form and buff the surface.
- Apply a base coat to your nails.
- Apply OPI GelColor in “Bubble Bath” as the base color and cure.
- Use a nail art brush dipped in DND Gel Polish in “Pink Panther” and white striping polish to create the petal patterns, and cure.
- Seal with a glossy top coat and cure for a long-lasting finish.
FAQ
Q: How long do gel nails typically last?
A: Gel nails can last up to three weeks with proper care, including avoiding harsh chemicals and using cuticle oil regularly.
Q: Can I do these nail designs at home without professional tools?
A: While professional tools can make the process easier, these designs can be done at home with patience and precision. Investing in a UV lamp and quality gel polishes will help achieve the best results.
Q: What’s the best way to remove gel nails?
A: The safest way to remove gel nails is by soaking them in acetone. First, file the top layer to break the seal, then soak cotton balls in acetone, place them on your nails, and wrap them in aluminum foil. After 10-15 minutes, gently push the gel off with a cuticle pusher.
Q: Are there any specific trends in fall pink nails for 2024?
A: This fall, trends include mixing matte and glossy finishes, incorporating glitter accents, and using delicate nail art like fine lines and star motifs. Almond and stiletto shapes are also very popular.
Feel free to ask more questions in the comments below. Happy styling!
Save Pin
