Fall Toe Nail Art 2024: 25 Creative Ideas for the Season
Fall is the perfect time to experiment with new toe nail designs that reflect the vibrant and cozy vibes of the season. Whether you’re looking for something simple and chic or bold and trendy, this guide will walk you through the best fall toe nail art 2024 has to offer. We’ll dive into detailed descriptions of each design, list the necessary supplies, and provide step-by-step instructions for achieving these looks at home. Let’s get started on transforming your toenails into stunning autumn masterpieces!
French Elegance with a Twist
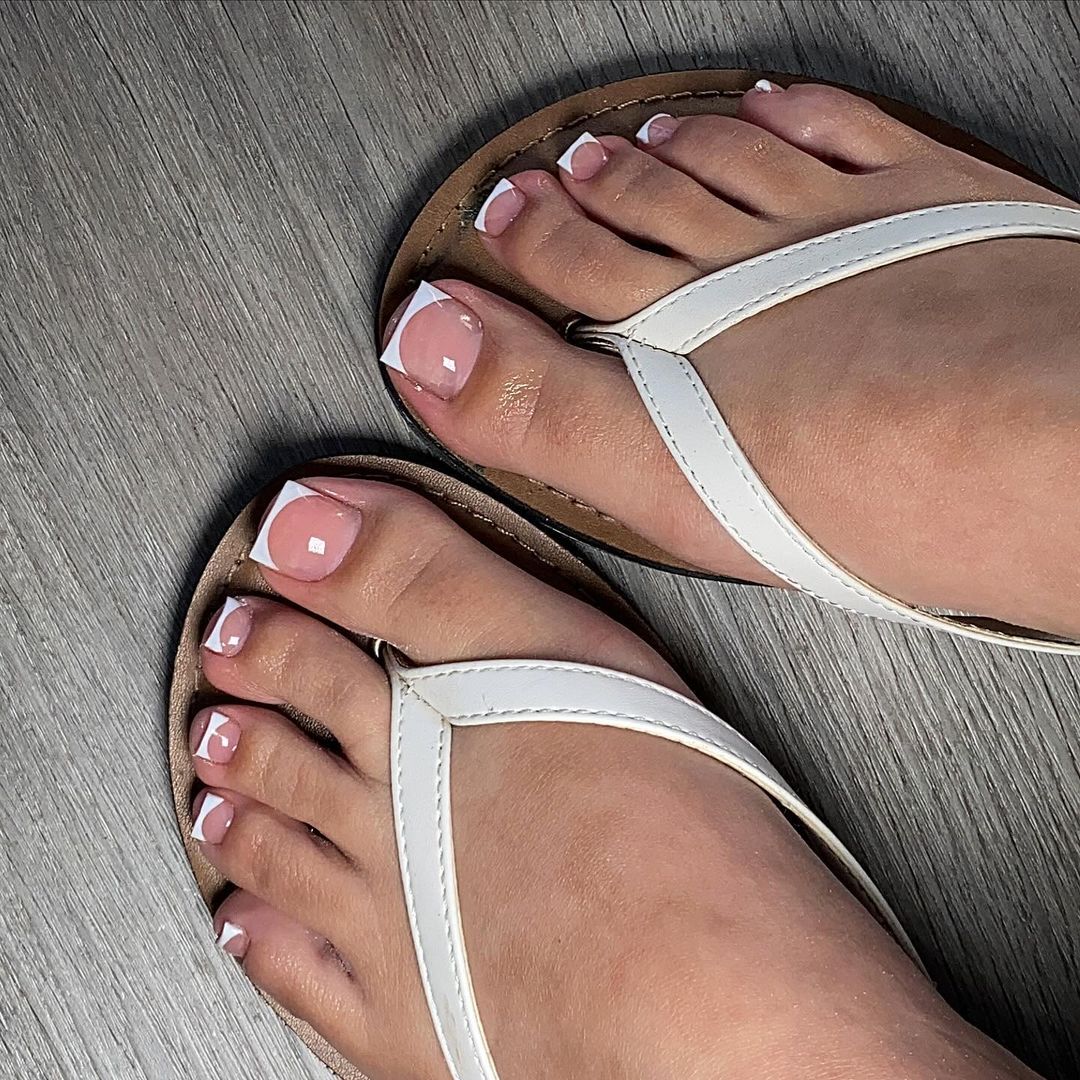
The classic French pedicure gets a seasonal twist with this elegant design. The clean white tips are paired with a subtle nude base, creating a timeless look that’s perfect for any occasion. The square shape of the toenails enhances the neatness of the design, making it suitable for both everyday wear and special events.
Consumables
- Nude base polish: Essie Ballet Slippers
- White tip polish: OPI Alpine Snow
- Top coat: Seche Vite Dry Fast Top Coat
- Nail tape for precise lines
- Cuticle pusher and trimmer
Practical Advice
- Preparation: Start by cleaning your nails and pushing back your cuticles. Trim and file your toenails into a square shape.
- Base Coat: Apply a base coat to protect your nails, followed by two coats of the nude polish.
- White Tips: Use nail tape to mark off the tips of your toenails. Apply the white polish carefully, ensuring clean, straight lines.
- Top Coat: Finish with a top coat to seal in the design and add shine.
Playful Character Accents
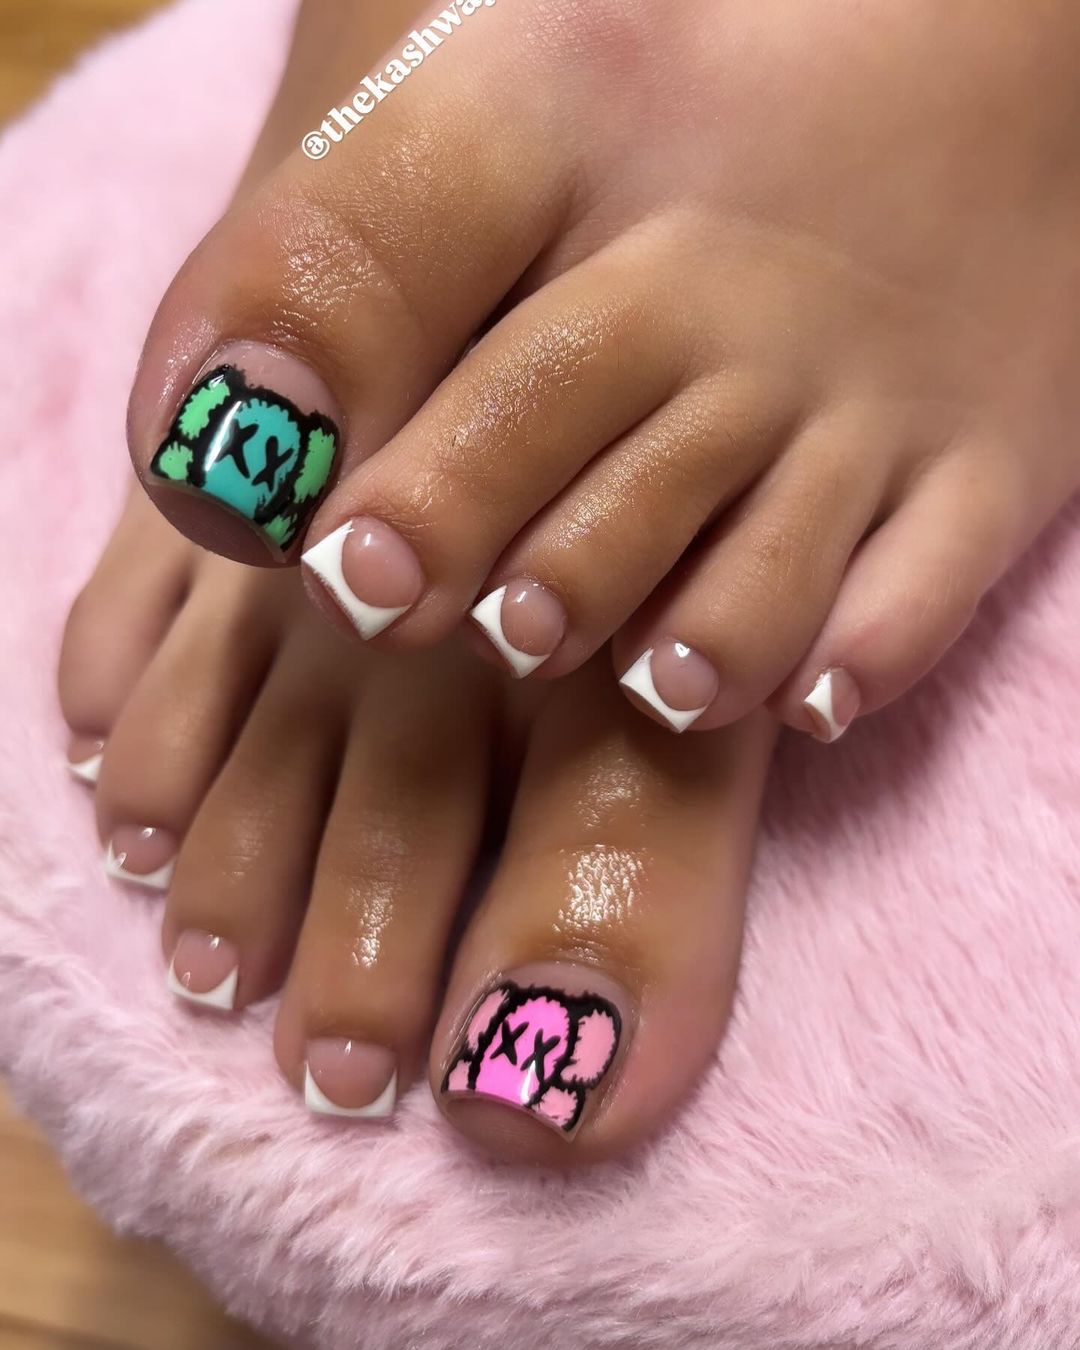
This playful design features a mix of classic French tips and vibrant character art. The standout elements are the adorable cartoon faces on the big toes, which add a fun and whimsical touch to the overall look. The use of bright colors and bold outlines makes this design perfect for those who love to express their personality through their nails.
Consumables
- Nude base polish: Essie Ballet Slippers
- White tip polish: OPI Alpine Snow
- Black outline polish: Sally Hansen Black Heart
- Bright green and pink polishes for character art: Zoya Tiana (green), Zoya Gigi (pink)
- Fine nail art brush
- Top coat: Seche Vite Dry Fast Top Coat
Practical Advice
- Preparation: Start with clean, trimmed, and filed toenails. Push back the cuticles.
- Base Coat: Apply a base coat, followed by two coats of the nude polish.
- French Tips: Use nail tape to mark off the tips and apply the white polish.
- Character Art: Using a fine nail art brush, carefully paint the character faces on the big toes with the bright green and pink polishes. Outline the characters with black polish for definition.
- Top Coat: Seal the design with a top coat for added durability.
Neon Green Glam
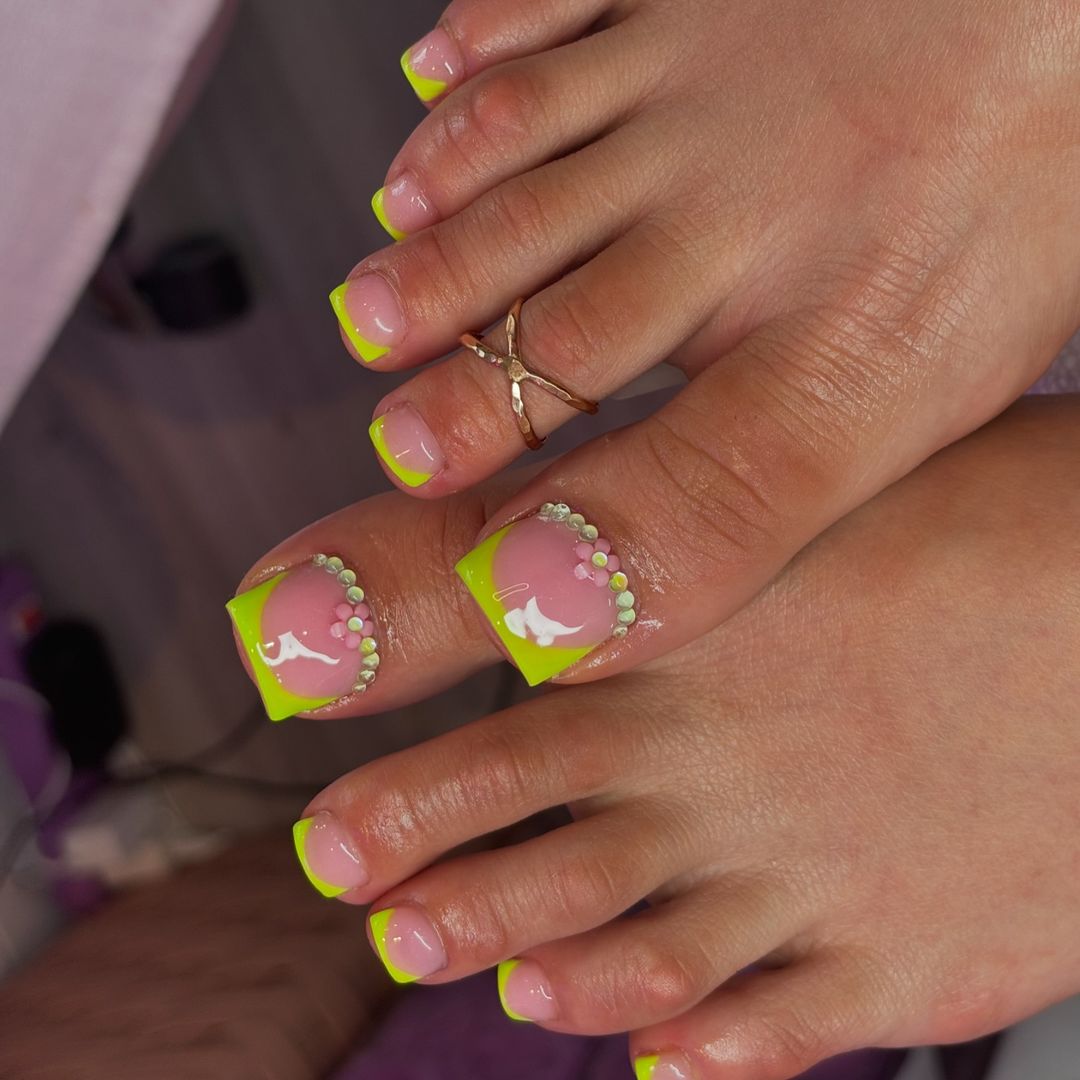
Neon green French tips with added glam make for a bold and trendy pedicure. This design features neon green tips adorned with small rhinestones, creating a dazzling effect that’s sure to turn heads. The clean lines and vibrant color make this design perfect for those looking to make a statement.
Consumables
- Nude base polish: Essie Ballet Slippers
- Neon green polish: China Glaze Celtic Sun
- Rhinestones: Swarovski Clear Crystals
- Nail glue for rhinestones
- Top coat: Seche Vite Dry Fast Top Coat
- Nail tape for precise lines
Practical Advice
- Preparation: Clean, trim, and file your toenails. Push back your cuticles.
- Base Coat: Apply a base coat, followed by two coats of the nude polish.
- Neon Tips: Use nail tape to mark off the tips and apply the neon green polish.
- Rhinestones: Carefully place the rhinestones along the tips using nail glue.
- Top Coat: Finish with a top coat to secure the rhinestones and add shine.
Leopard Print Glam
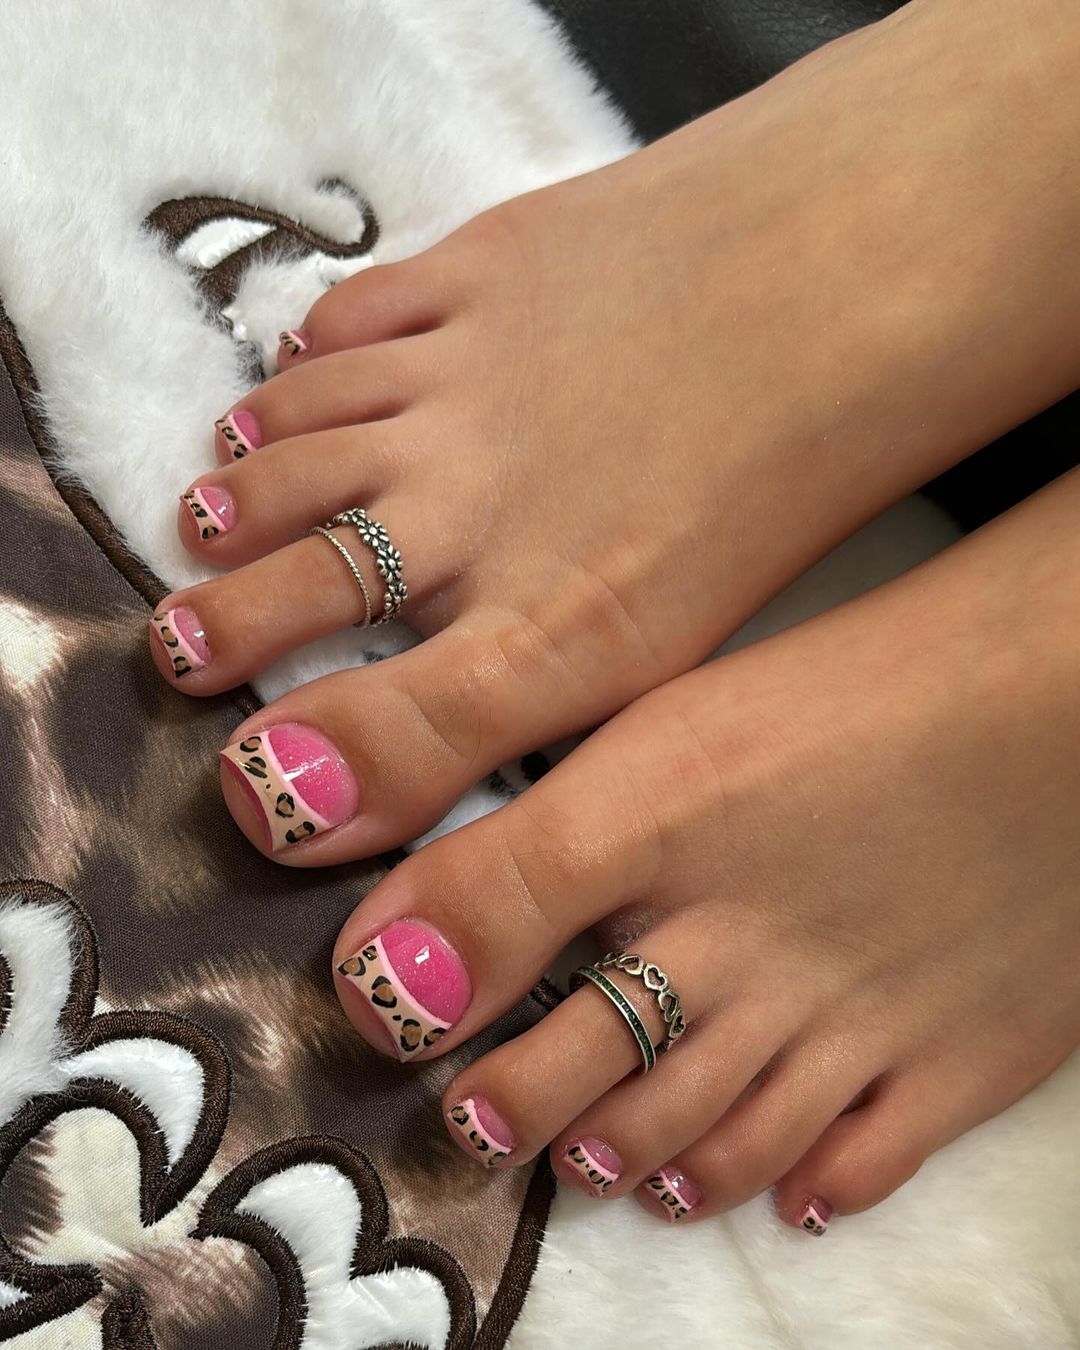
Leopard print nails have always been a classic, and this design gives them a fresh twist for fall. The mix of pink and nude bases with leopard print accents creates a fun and stylish look. The alternating patterns on each toe add variety and keep the design interesting. This manicure is perfect for someone who wants to showcase their wild side while still keeping things chic and polished.
Consumables
- Nude base polish: OPI Bubble Bath
- Pink polish: Zoya Sweet
- Leopard print polish: Essie Licorice
- Fine nail art brush
- Top coat: Seche Vite Dry Fast Top Coat
Practical Advice
- Preparation: Start with clean, trimmed toenails. Push back the cuticles and file the nails to your desired shape.
- Base Colors: Apply a base coat to protect your nails, followed by two coats of the nude polish on some nails and the pink polish on others.
- Leopard Print: Using a fine nail art brush, create small irregular spots with the black polish to mimic a leopard print. Focus on the tips or corners of the nails for a modern look.
- Top Coat: Seal the design with a top coat to add shine and protect your artwork.
Save Pin

Autumn Sparkle
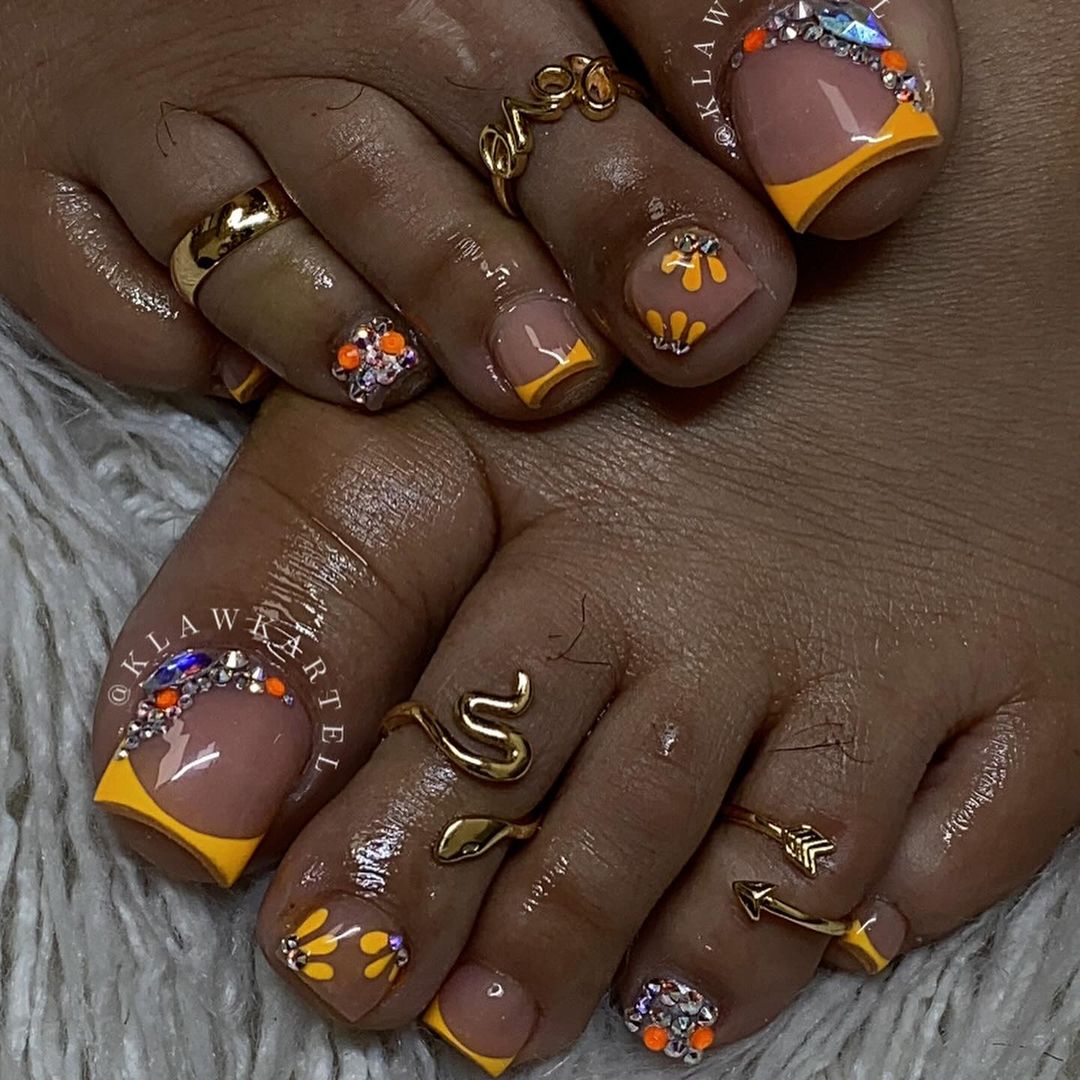
This dazzling design combines autumnal colors with sparkling rhinestones for a truly eye-catching pedicure. The yellow French tips paired with orange and gold accents capture the essence of fall. The rhinestones add a touch of glamour, making this design perfect for special occasions or whenever you want to add a bit of sparkle to your step.
Consumables
- Nude base polish: Essie Ballet Slippers
- Yellow polish: China Glaze Happy Go Lucky
- Orange and gold rhinestones: Swarovski Crystal Pixie
- Nail glue for rhinestones
- Top coat: Seche Vite Dry Fast Top Coat
- Fine nail art brush
Practical Advice
- Preparation: Clean and trim your toenails, pushing back the cuticles and filing to the desired shape.
- Base Colors: Apply a base coat, followed by two coats of the nude polish.
- French Tips: Use the yellow polish to create French tips on each nail. A fine nail art brush can help with precision.
- Rhinestones: Apply a small amount of nail glue where you want to place the rhinestones. Carefully place the rhinestones using tweezers or a nail art tool.
- Top Coat: Finish with a top coat to secure the rhinestones and add a glossy finish.
Neon Green Abstract
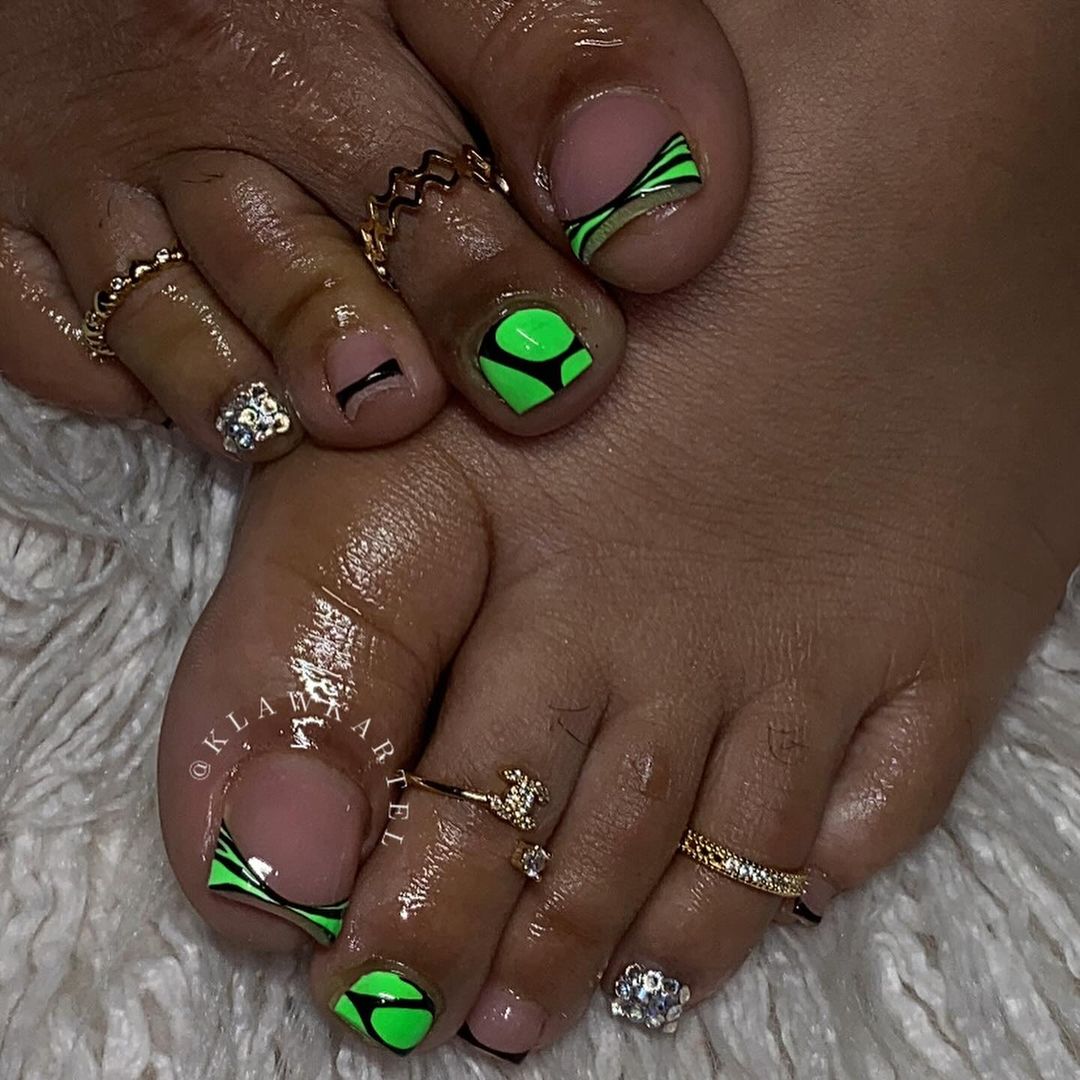
For those who love bold and modern designs, this neon green abstract pedicure is a must-try. The bright green contrasts beautifully with the nude base, and the black accents add a graphic, contemporary touch. This design is perfect for making a statement and is sure to draw attention to your feet.
Consumables
- Nude base polish: OPI Bubble Bath
- Neon green polish: China Glaze Celtic Sun
- Black polish: Sally Hansen Black Heart
- Fine nail art brush
- Top coat: Seche Vite Dry Fast Top Coat
Practical Advice
- Preparation: Begin with clean, trimmed toenails. Push back your cuticles and file the nails to your preferred shape.
- Base Colors: Apply a base coat, followed by two coats of the nude polish.
- Abstract Design: Using the fine nail art brush, create abstract shapes and lines with the neon green polish. Add black accents to enhance the design and create contrast.
- Top Coat: Seal the design with a top coat to protect your artwork and give it a glossy finish.
Classic French Pedicure
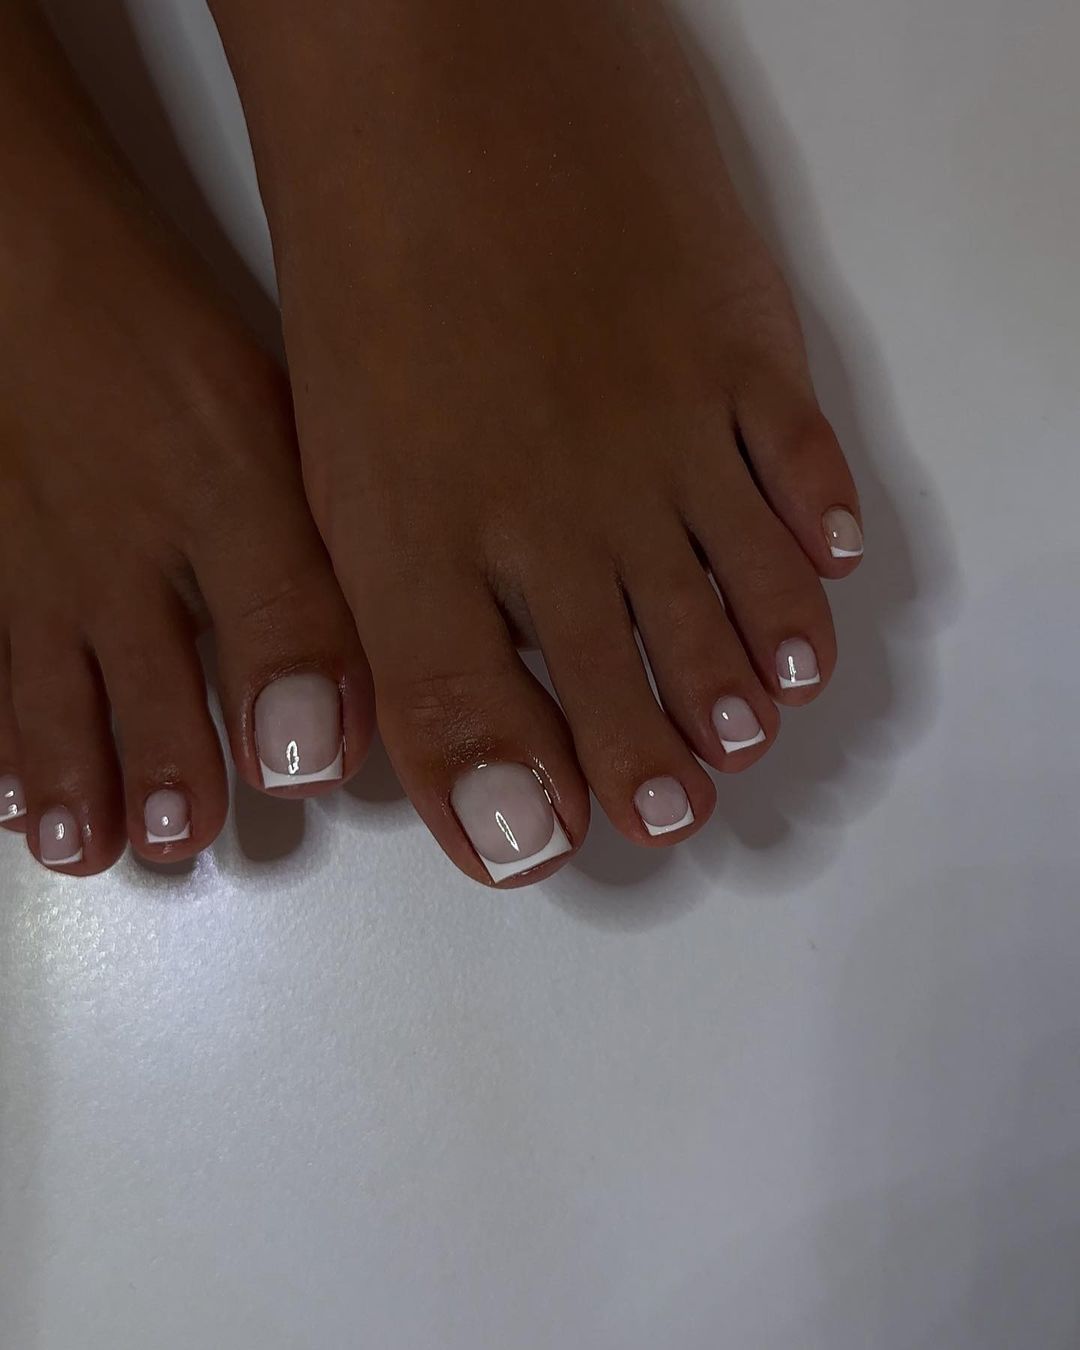
This timeless French pedicure exudes simplicity and elegance. The design features a soft white tip against a delicate pinkish-nude base, perfect for any occasion. The clean lines and minimalist approach make it an ideal choice for those who prefer understated sophistication.
Consumables
- Base polish: OPI Bubble Bath
- White tip polish: OPI Alpine Snow
- Top coat: Seche Vite Dry Fast Top Coat
- Nail tape for precise lines
Practical Advice
- Preparation: Clean, trim, and file your toenails. Push back the cuticles.
- Base Coat: Apply a base coat to protect your nails, followed by two coats of the nude polish.
- White Tips: Use nail tape to mark off the tips of your toenails and apply the white polish carefully.
- Top Coat: Seal the design with a top coat to add shine and durability.
Neon Splash
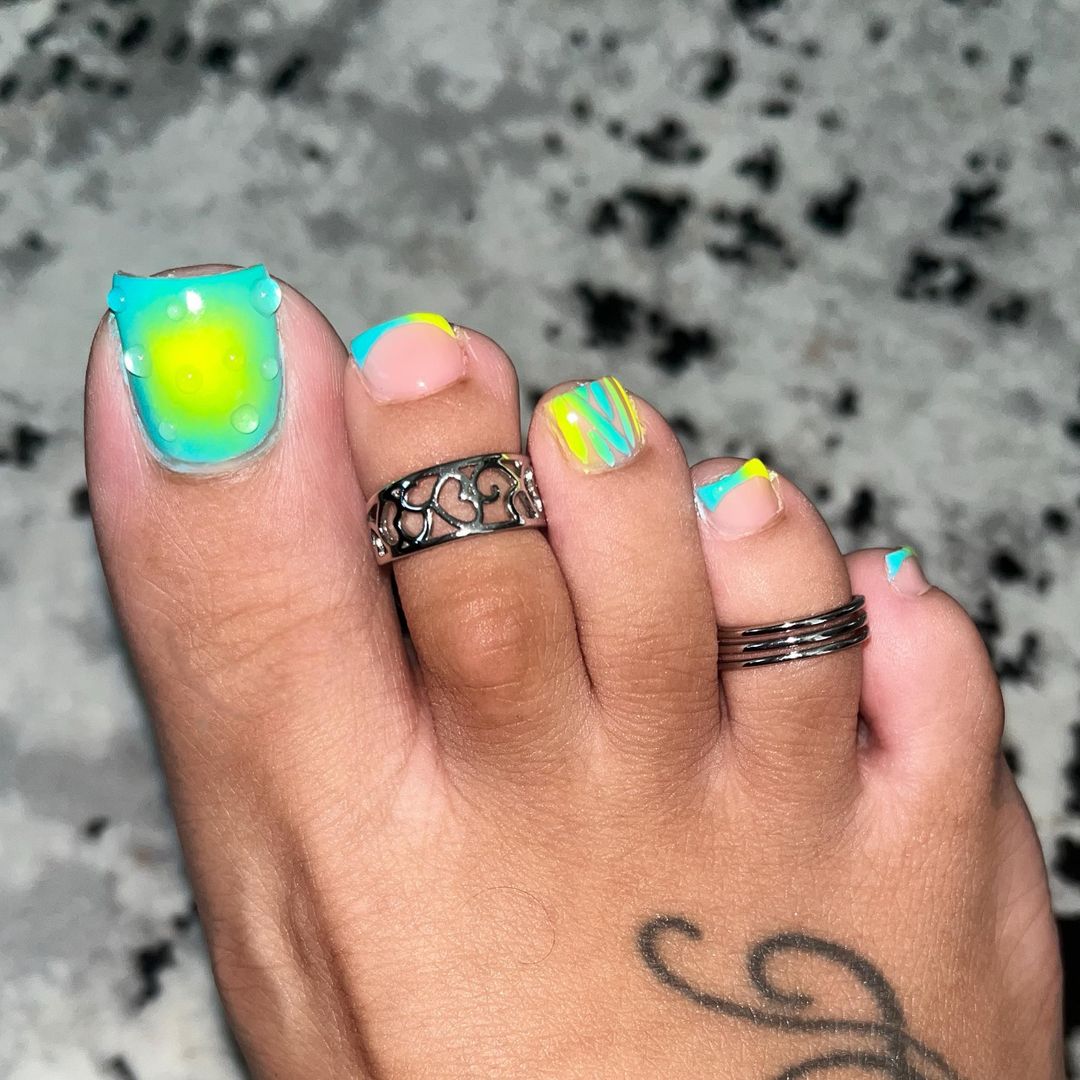
This vibrant and playful design features a burst of neon colors perfect for making a statement. The combination of bright yellow, blue, and green hues creates a lively and energetic look. The abstract patterns and color blending make this pedicure a standout choice for summer or any fun occasion.
Consumables
- Base polish: OPI Put It In Neutral
- Neon yellow polish: China Glaze Celtic Sun
- Neon blue polish: Essie Butler Please
- Neon green polish: Zoya Tilda
- Top coat: Seche Vite Dry Fast Top Coat
- Dotting tool and fine nail art brush
Practical Advice
- Preparation: Start with clean, trimmed toenails. Push back the cuticles and file the nails to your preferred shape.
- Base Coat: Apply a base coat, followed by two coats of the nude polish.
- Neon Design: Use the dotting tool and nail art brush to create abstract patterns with the neon polishes. Let your creativity flow with swirls, dots, and lines.
- Top Coat: Seal the design with a top coat for a glossy finish.
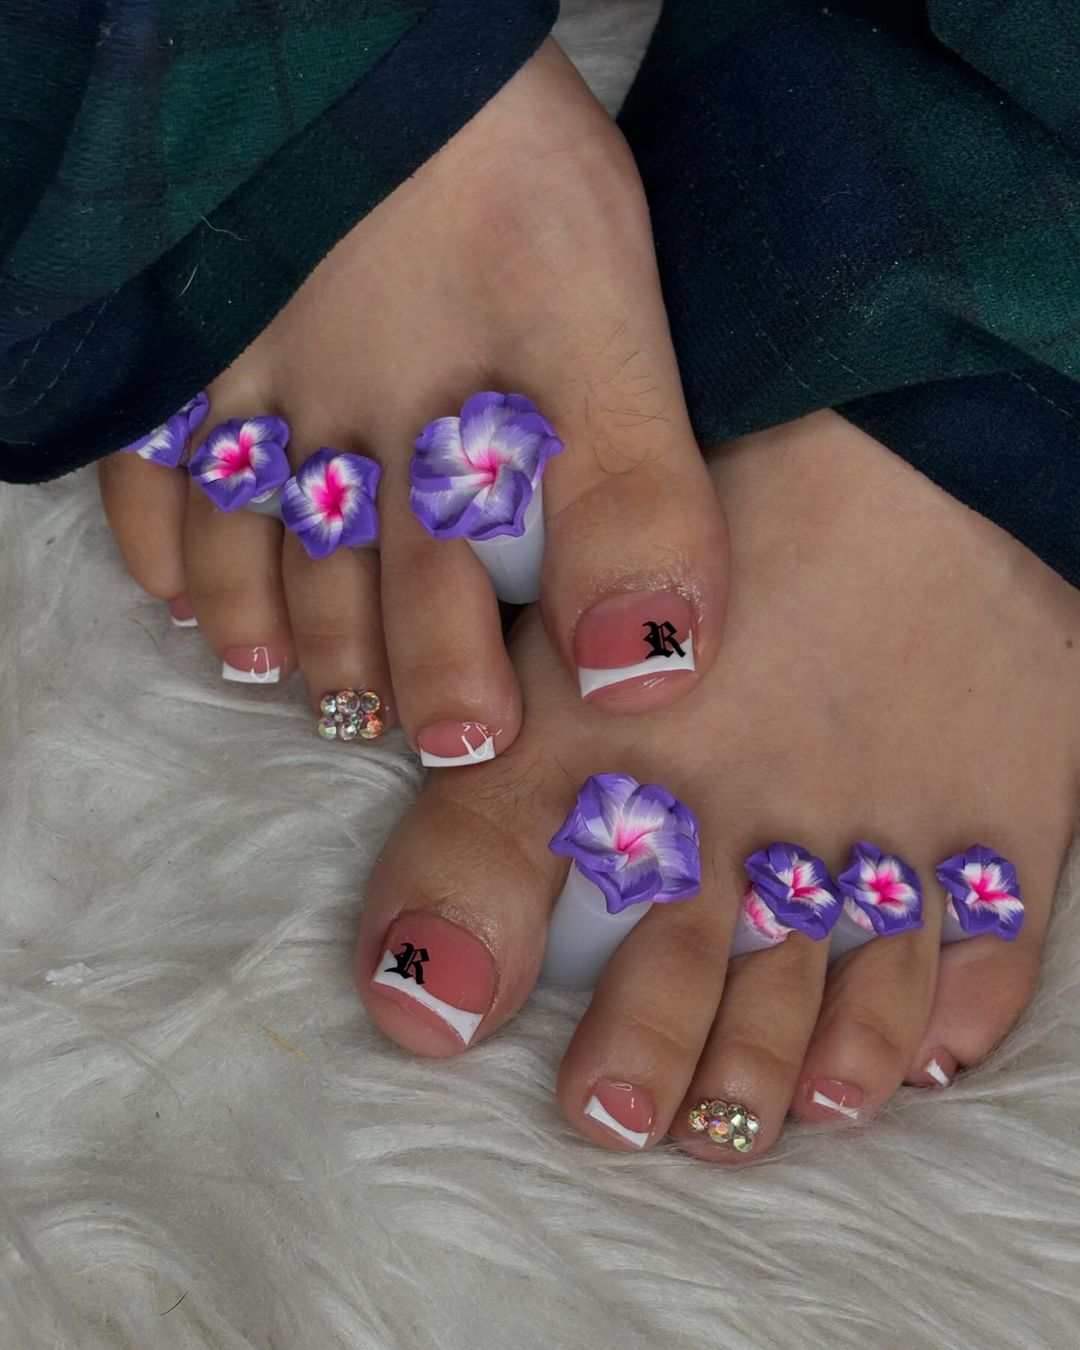
Floral Delight
This beautiful pedicure design combines classic French tips with floral accents for a charming and feminine look. The delicate white flowers and crystal embellishments add a touch of elegance and sparkle, making this design perfect for special occasions or a romantic date night.
Consumables
- Base polish: Essie Ballet Slippers
- White tip polish: OPI Alpine Snow
- White and pink acrylic paints for flowers
- Crystal embellishments: Swarovski Clear Crystals
- Nail glue for crystals
- Top coat: Seche Vite Dry Fast Top Coat
- Fine nail art brush
Practical Advice
- Preparation: Clean, trim, and file your toenails. Push back the cuticles.
- Base Coat: Apply a base coat, followed by two coats of the nude polish.
- French Tips and Flowers: Create the French tips with white polish. Use the fine nail art brush to paint the flowers and add the crystal embellishments with nail glue.
- Top Coat: Finish with a top coat to secure the design and add a glossy finish.
Save Pin
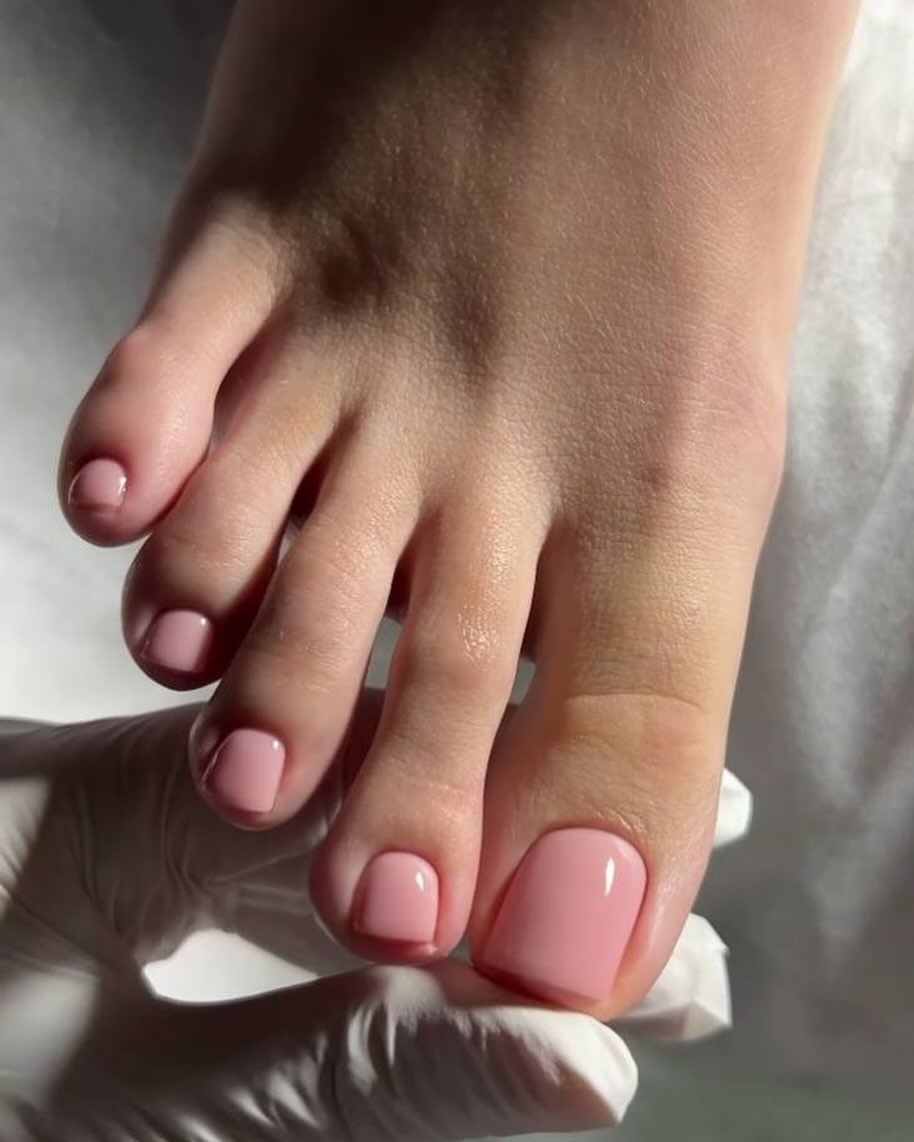
Soft Pink Perfection
This soft pink pedicure is the epitome of elegance and simplicity. The gentle pink hue is perfect for a polished and sophisticated look. This design is versatile and can easily match any outfit or occasion, making it a go-to choice for many.
Consumables
- Pink base polish: Essie Ballet Slippers
- Top coat: Seche Vite Dry Fast Top Coat
Practical Advice
- Preparation: Clean and trim your toenails, pushing back the cuticles and filing them to your preferred shape.
- Base Coat: Apply a base coat to protect your nails, followed by two coats of the pink polish.
- Top Coat: Seal the design with a top coat for a glossy, long-lasting finish.
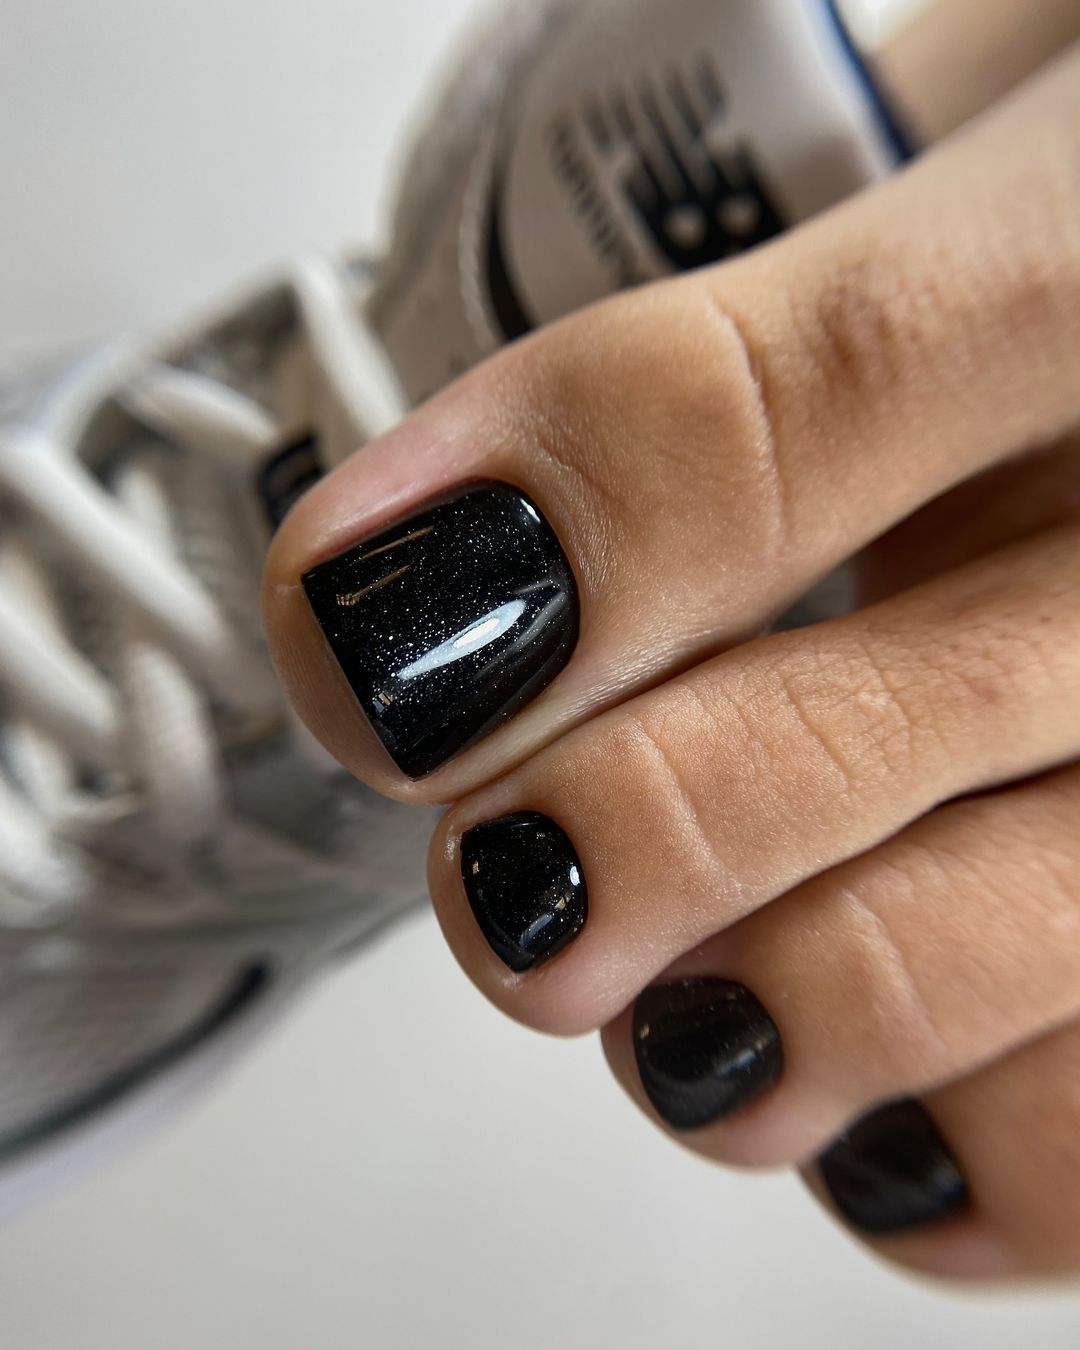
Black Sparkle
This chic and edgy pedicure design features a glossy black base with subtle sparkles, creating a sophisticated and modern look. Perfect for those who love to make a bold statement, this design is ideal for evenings out or special events.
Consumables
- Black base polish: OPI Black Onyx
- Sparkle top coat: China Glaze Fairy Dust
- Top coat: Seche Vite Dry Fast Top Coat
Practical Advice
- Preparation: Clean and trim your toenails, pushing back the cuticles and filing them to your desired shape.
- Base Coat: Apply a base coat to protect your nails, followed by two coats of the black polish.
- Sparkle Top Coat: Apply a layer of the sparkle top coat for added shine and glamour.
- Top Coat: Finish with a top coat to seal the design and enhance the gloss.
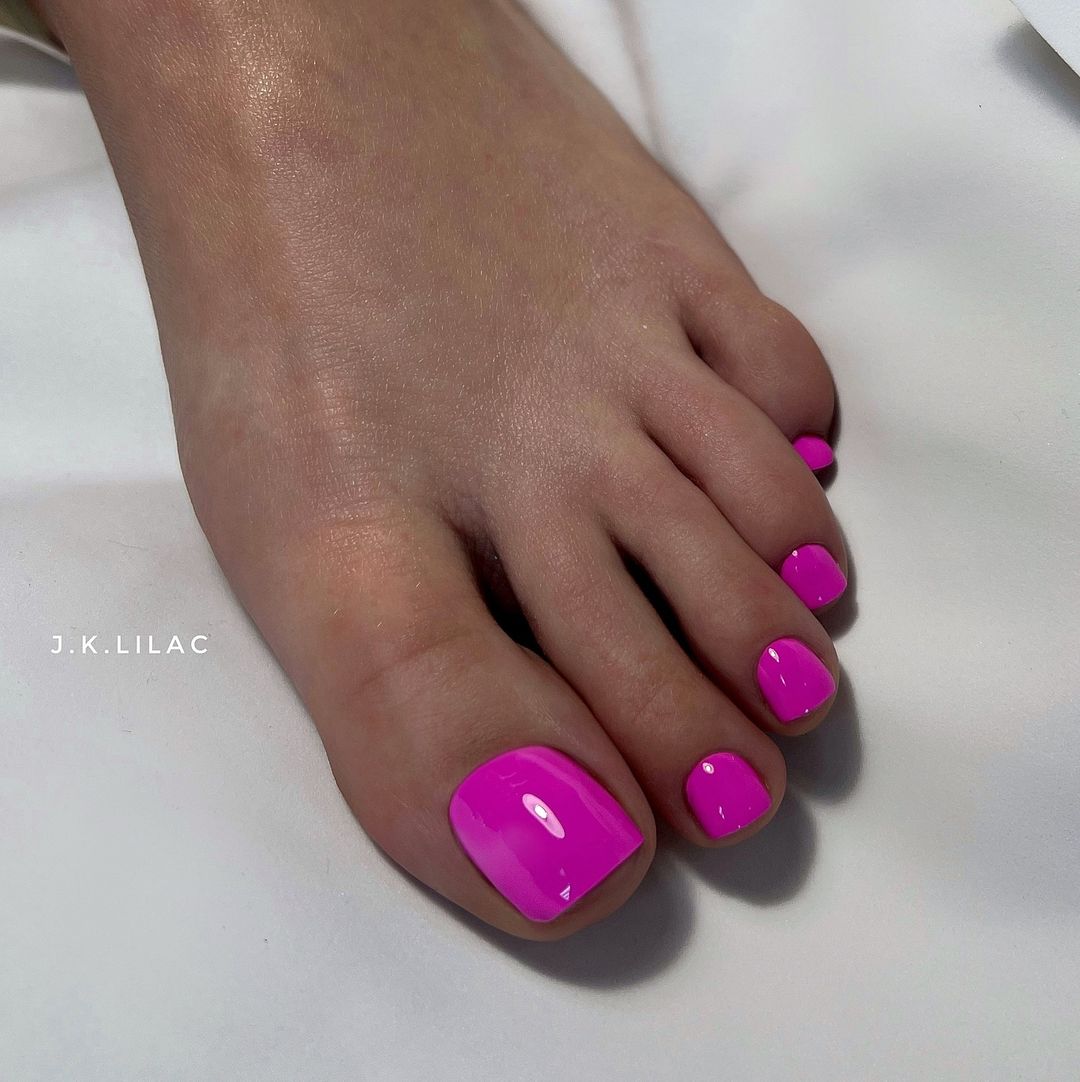
Vibrant Pink
This eye-catching vibrant pink pedicure is perfect for those who love bold and bright colors. The vivid pink hue is playful and fun, making it a great choice for summer or any occasion where you want to stand out.
Consumables
- Pink base polish: China Glaze Shocking Pink
- Top coat: Seche Vite Dry Fast Top Coat
Practical Advice
- Preparation: Clean, trim, and file your toenails. Push back the cuticles.
- Base Coat: Apply a base coat to protect your nails, followed by two coats of the vibrant pink polish.
- Top Coat: Seal the design with a top coat for a glossy, long-lasting finish.
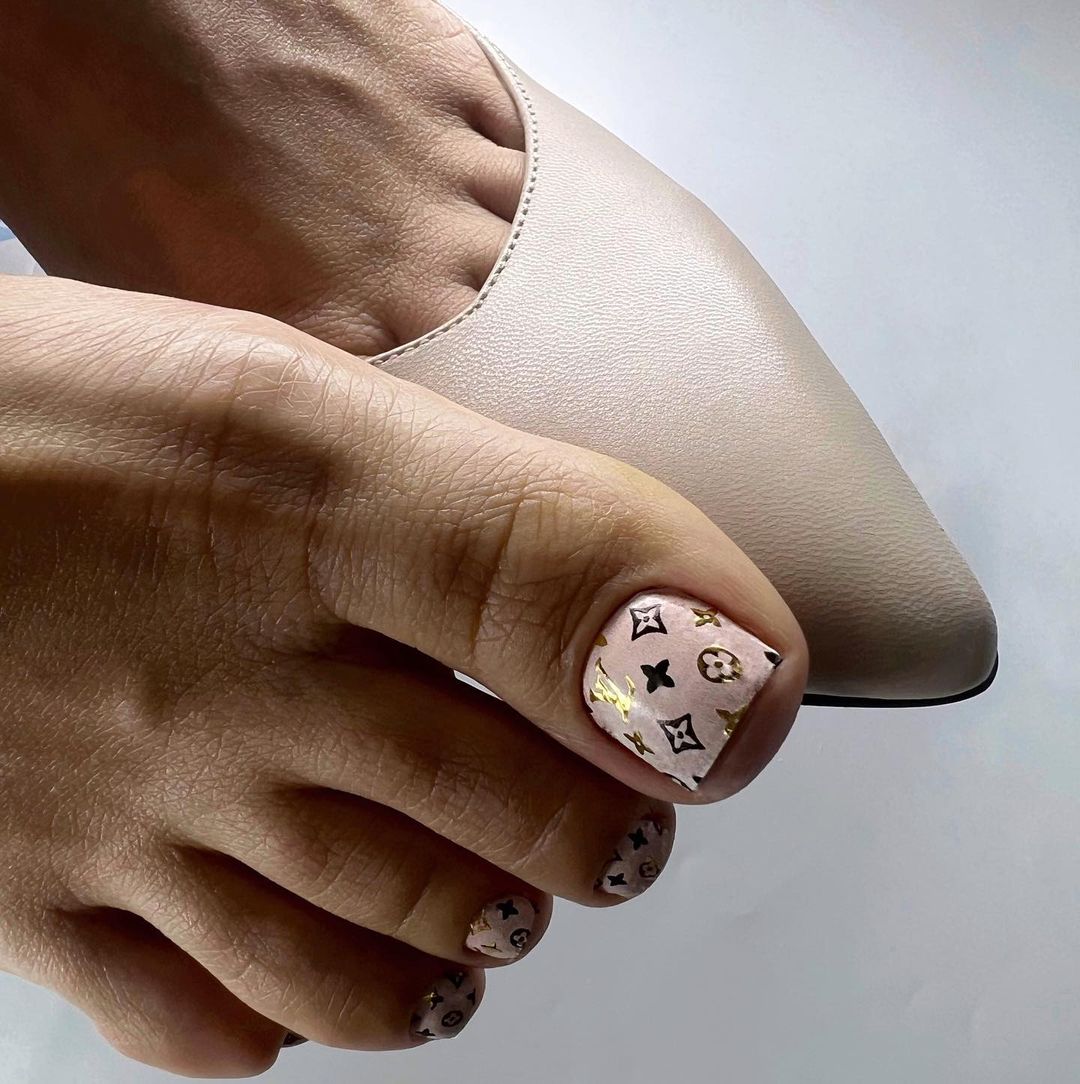
Luxurious Monogram
This chic and luxurious design features a nude base with gold and black monogram accents, reminiscent of high-end fashion brands. The intricate details on the big toe are complemented by simpler, matching designs on the other toes, making it a statement piece that is both elegant and sophisticated.
Consumables
- Nude base polish: OPI Be There in a Prosecco
- Gold and black monogram decals: available on Etsy or specialized nail art stores
- Top coat: Seche Vite Dry Fast Top Coat
Practical Advice
- Preparation: Clean, trim, and file your toenails. Push back the cuticles.
- Base Coat: Apply a base coat to protect your nails, followed by two coats of the nude polish.
- Monogram Decals: Apply the monogram decals carefully on the nails. Use tweezers for precision placement.
- Top Coat: Seal the design with a top coat to ensure the decals stay in place and add a glossy finish.
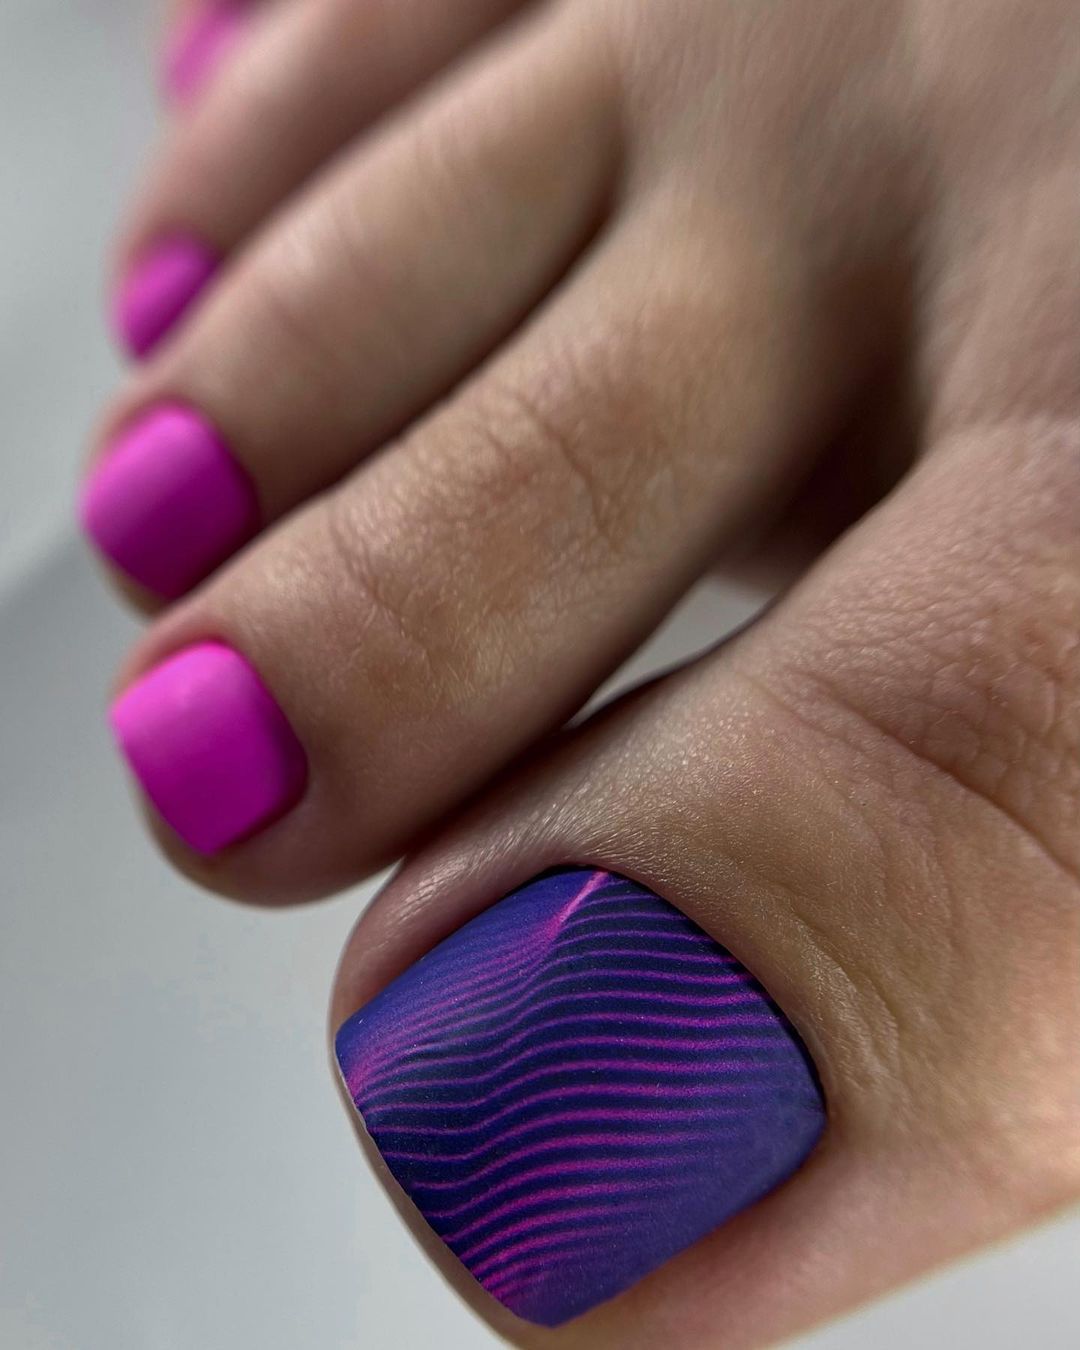
Neon Gradient and Stripes
This vibrant and edgy design features a gradient of neon colors with sleek stripe accents. The mix of pink and purple creates a striking contrast, making this pedicure perfect for those who love bold and trendy looks.
Consumables
- Pink base polish: China Glaze Shocking Pink
- Purple polish: OPI Do You Lilac It?
- Striping tape for clean lines
- Top coat: Seche Vite Dry Fast Top Coat
Practical Advice
- Preparation: Start with clean, trimmed toenails. Push back the cuticles and file to your preferred shape.
- Base Coat: Apply a base coat to protect your nails, followed by two coats of the pink polish.
- Gradient and Stripes: Use a sponge to create the gradient effect with the purple polish. Apply striping tape and paint over with the contrasting color for clean lines.
- Top Coat: Seal the design with a top coat to smooth out the layers and add shine.
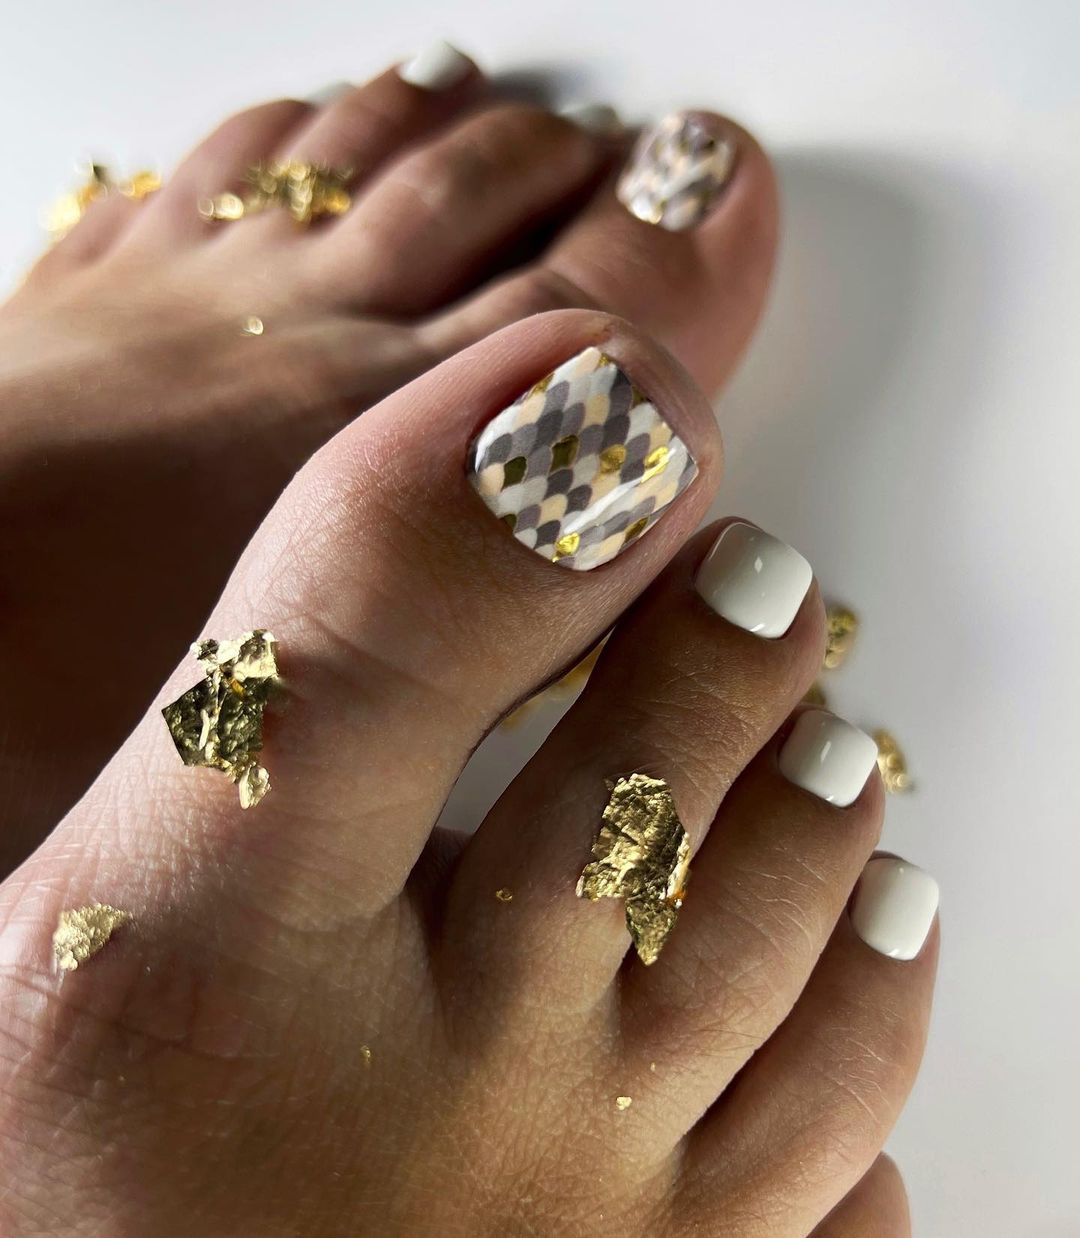
Golden Checkerboard
This eye-catching design features a bold checkerboard pattern with gold accents. The combination of white and gold creates a striking, glamorous look that’s perfect for making a statement.
Consumables
- White base polish: OPI Alpine Snow
- Gold foil: available at nail art stores or online
- Top coat: Seche Vite Dry Fast Top Coat
- Fine nail art brush
Practical Advice
- Preparation: Clean, trim, and file your toenails. Push back the cuticles.
- Base Coat: Apply a base coat, followed by two coats of the white polish.
- Checkerboard Pattern: Use a fine nail art brush to apply the gold foil in a checkerboard pattern. Alternatively, use nail stickers for precision.
- Top Coat: Finish with a top coat to secure the foil and add a glossy finish.
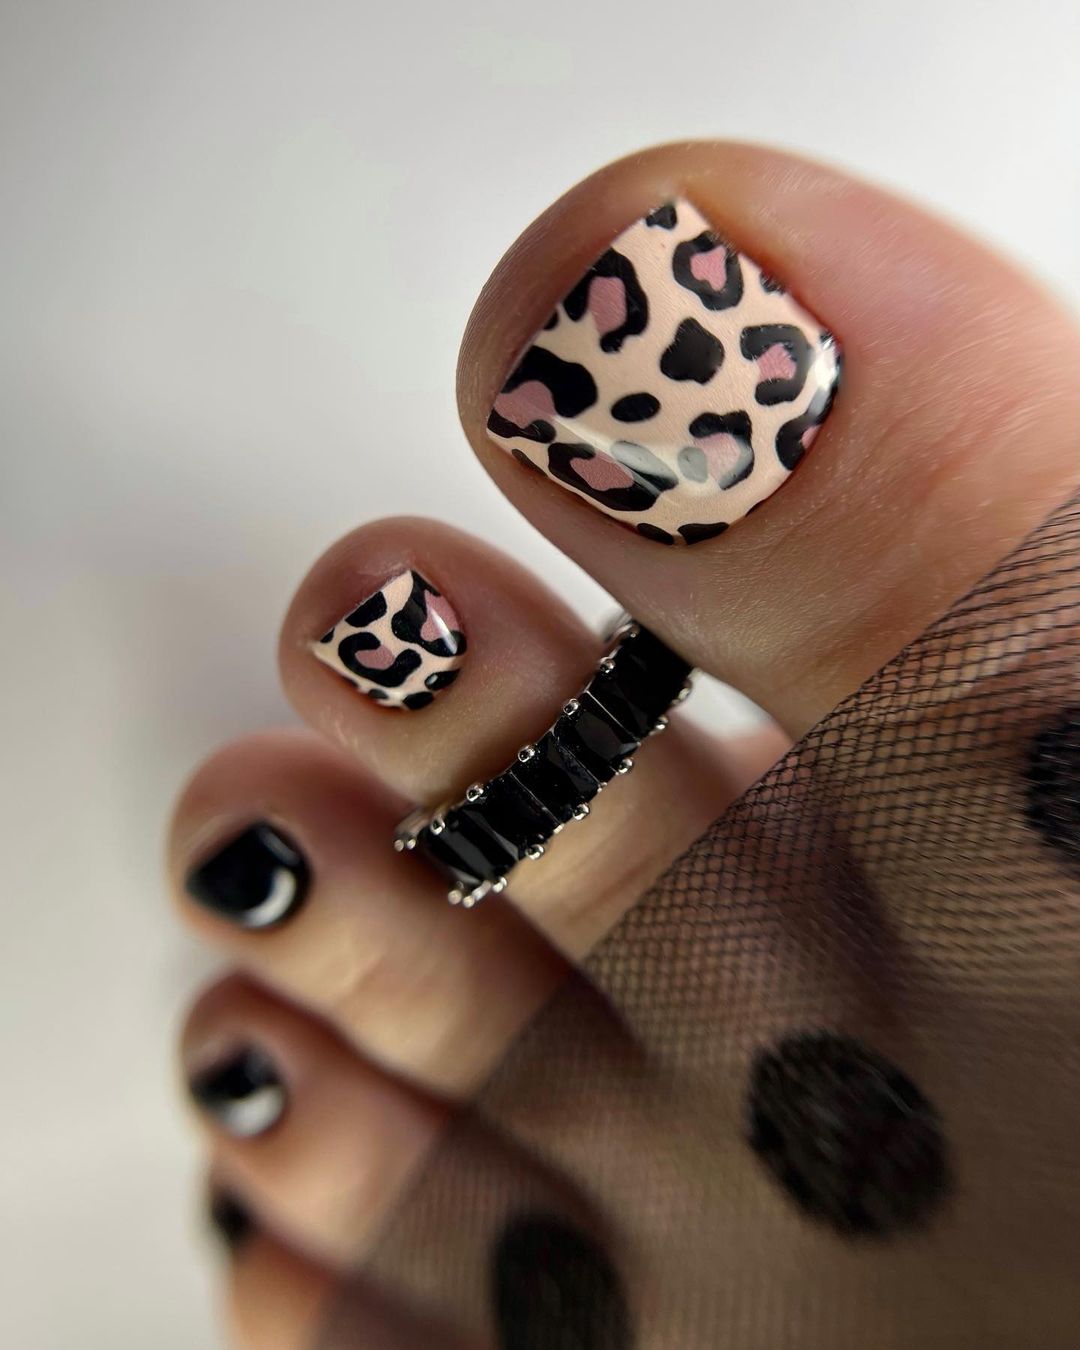
Leopard Print
This trendy and fierce design features a classic leopard print on a nude base. The bold spots create a striking contrast, making this pedicure perfect for those who love to stand out with their fashion choices.
Consumables
- Nude base polish: Essie Ballet Slippers
- Black and brown polishes for leopard spots: Sally Hansen Black Heart and Essie Mink Muffs
- Fine nail art brush
- Top coat: Seche Vite Dry Fast Top Coat
Practical Advice
- Preparation: Start with clean, trimmed toenails. Push back the cuticles and file to your desired shape.
- Base Coat: Apply a base coat, followed by two coats of the nude polish.
- Leopard Print: Use a fine nail art brush to create the leopard spots with black and brown polishes. Make irregular spots for a natural look.
- Top Coat: Seal the design with a top coat to protect your artwork and add shine.
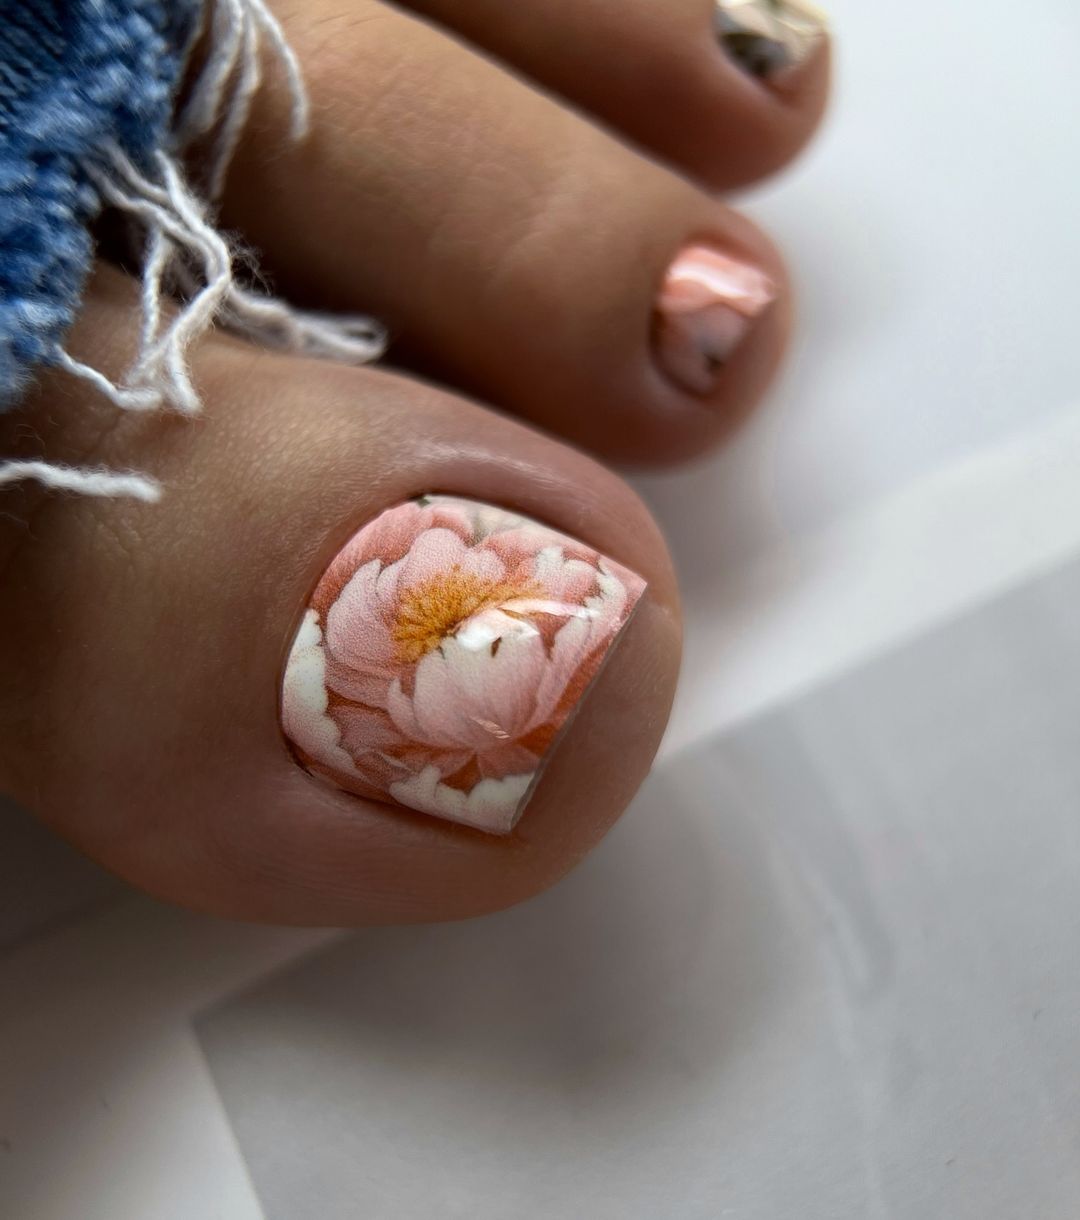
Delicate Floral
This soft and feminine design features delicate floral patterns on a gentle pink base. The intricate details make this pedicure perfect for spring or any occasion where you want a touch of elegance and beauty.
Consumables
- Pink base polish: Essie Ballet Slippers
- White and yellow polishes for floral designs: OPI Alpine Snow and Zoya Pippa
- Fine nail art brush
- Top coat: Seche Vite Dry Fast Top Coat
Practical Advice
- Preparation: Clean, trim, and file your toenails. Push back the cuticles.
- Base Coat: Apply a base coat, followed by two coats of the pink polish.
- Floral Design: Use a fine nail art brush to paint delicate flowers with white and yellow polishes. Focus on the big toe for a statement look.
- Top Coat: Seal the design with a top coat to protect the floral patterns and add a glossy finish.
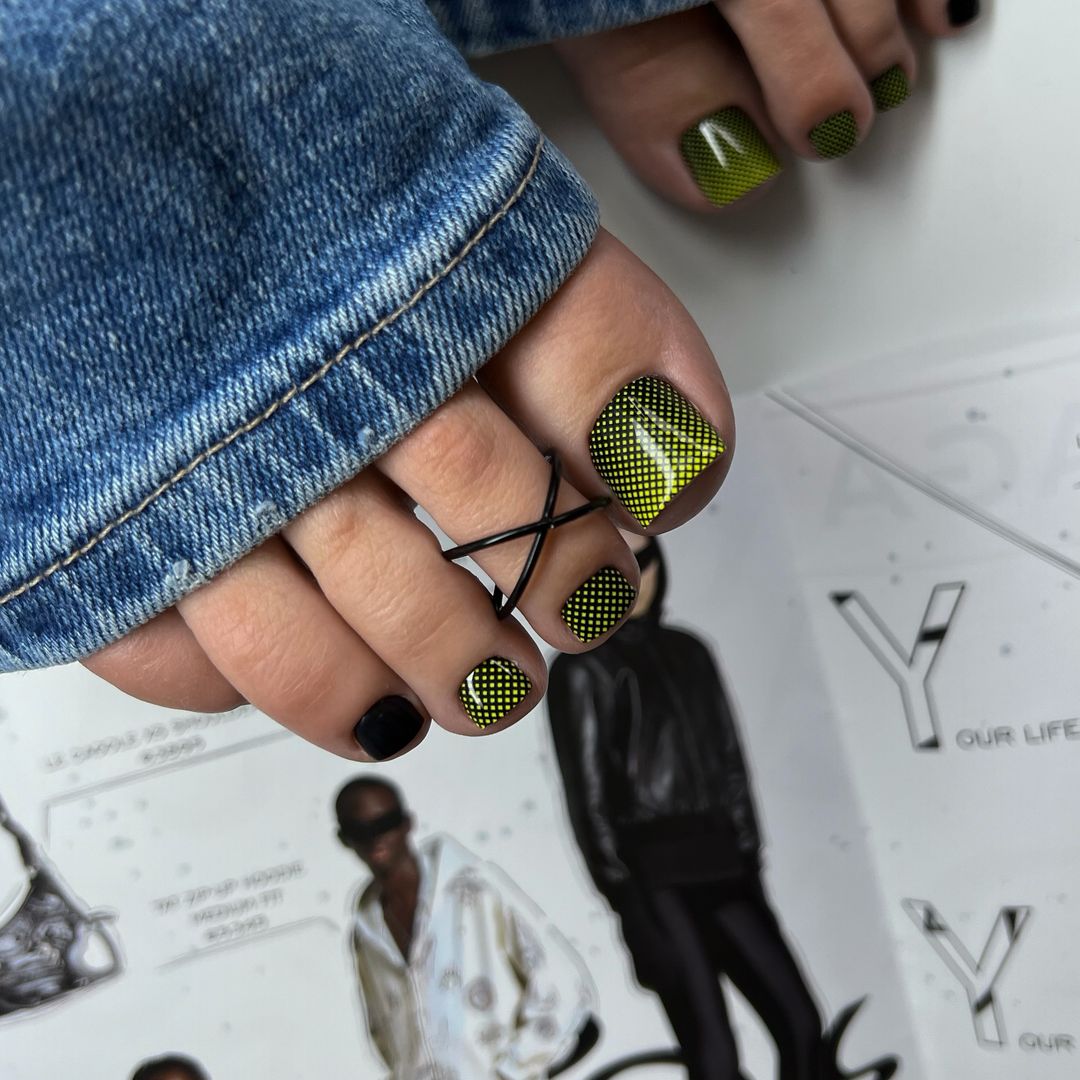
Green Geometric
This modern and edgy design features a green geometric pattern on a black base. The contrasting colors and sharp lines create a bold and eye-catching look that’s perfect for those who love contemporary styles.
Consumables
- Black base polish: OPI Black Onyx
- Green polish: China Glaze Four Leaf Clover
- Striping tape for clean lines
- Top coat: Seche Vite Dry Fast Top Coat
Practical Advice
- Preparation: Start with clean, trimmed toenails. Push back the cuticles and file to your preferred shape.
- Base Coat: Apply a base coat, followed by two coats of the black polish.
- Geometric Pattern: Use striping tape to create geometric shapes and fill them in with the green polish. Ensure clean, crisp lines for a professional look.
- Top Coat: Seal the design with a top coat to protect the geometric pattern and add a glossy finish.
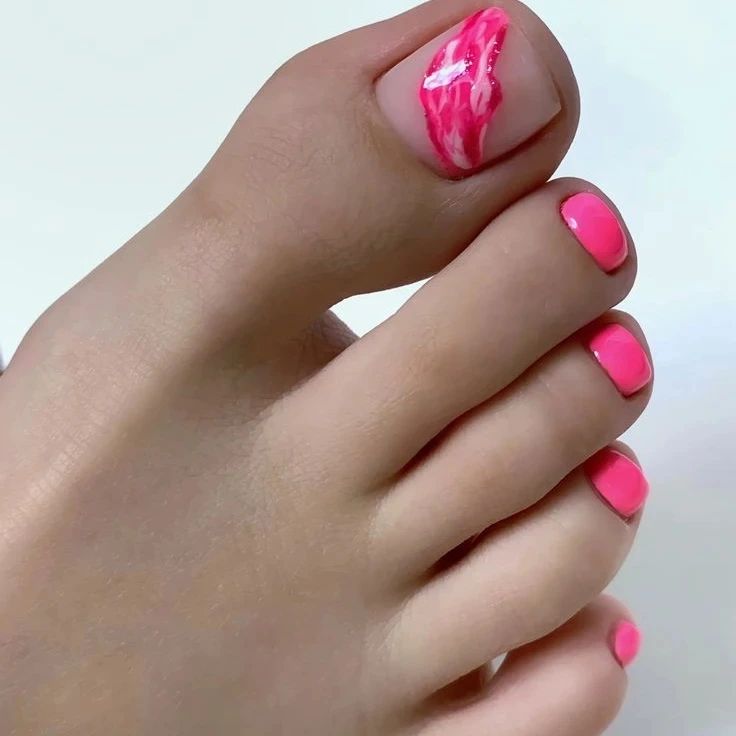
Pink Marble Accent
This playful pedicure features a bright pink base with a stunning marble accent on the big toe. The marble effect is created using swirls of white and pink, giving a unique and eye-catching design. It’s perfect for adding a pop of color and a touch of elegance to your look.
Consumables
- Bright pink base polish: OPI Kiss Me on My Tulips
- White polish for marbling: Essie Blanc
- Top coat: Seche Vite Dry Fast Top Coat
- Thin nail art brush or toothpick
Practical Advice
- Preparation: Clean, trim, and file your toenails. Push back the cuticles.
- Base Coat: Apply a base coat to protect your nails, followed by two coats of the bright pink polish.
- Marble Effect: Drop small amounts of the white polish on the big toe while the pink polish is still wet. Use a thin brush or toothpick to swirl the colors gently.
- Top Coat: Finish with a top coat to seal the design and add a glossy finish.
Deep Burgundy Gloss
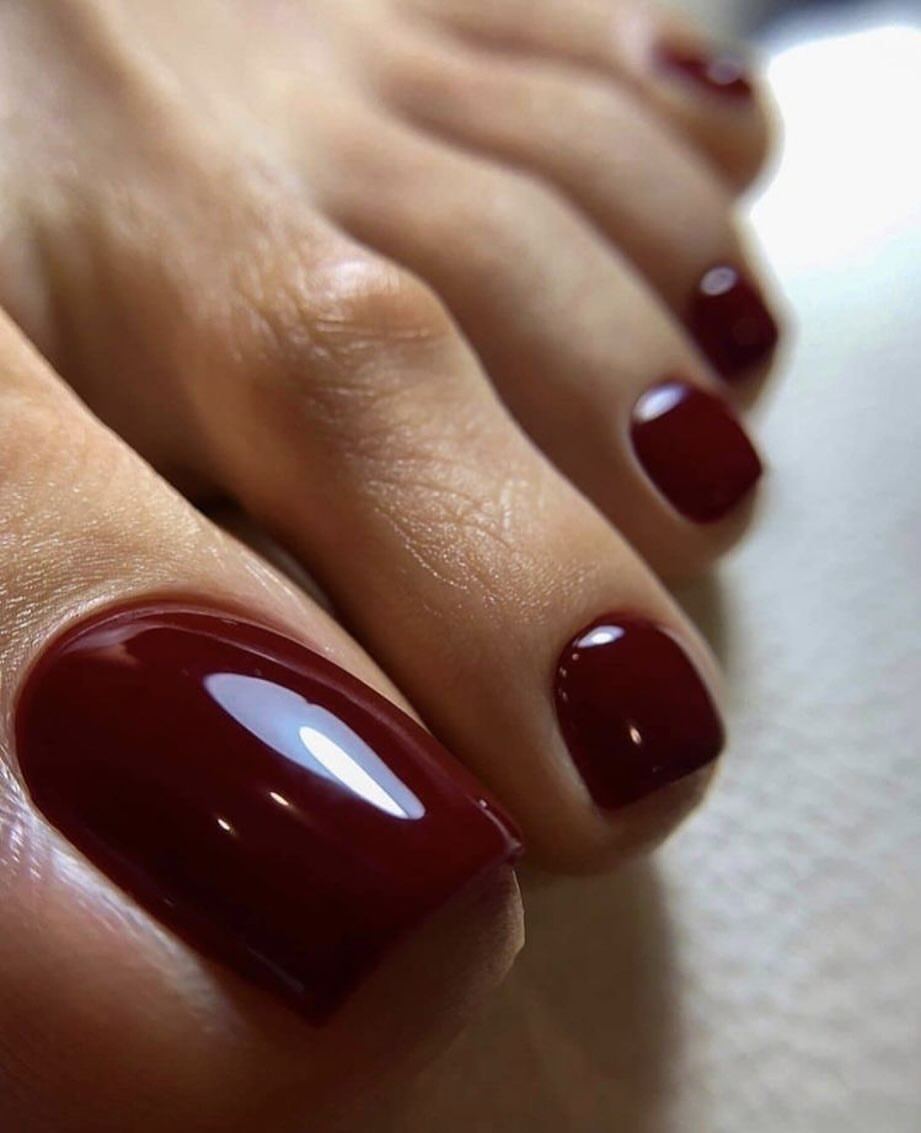
This rich and elegant design features a deep burgundy polish that exudes sophistication and class. The glossy finish enhances the depth of the color, making it perfect for a glamorous and polished look.
Consumables
- Burgundy base polish: Essie Wicked
- Top coat: Seche Vite Dry Fast Top Coat
Practical Advice
- Preparation: Clean and trim your toenails, pushing back the cuticles and filing them to your preferred shape.
- Base Coat: Apply a base coat to protect your nails, followed by two coats of the burgundy polish.
- Top Coat: Seal the design with a top coat to enhance the shine and longevity of the polish.
Neon Abstract Art
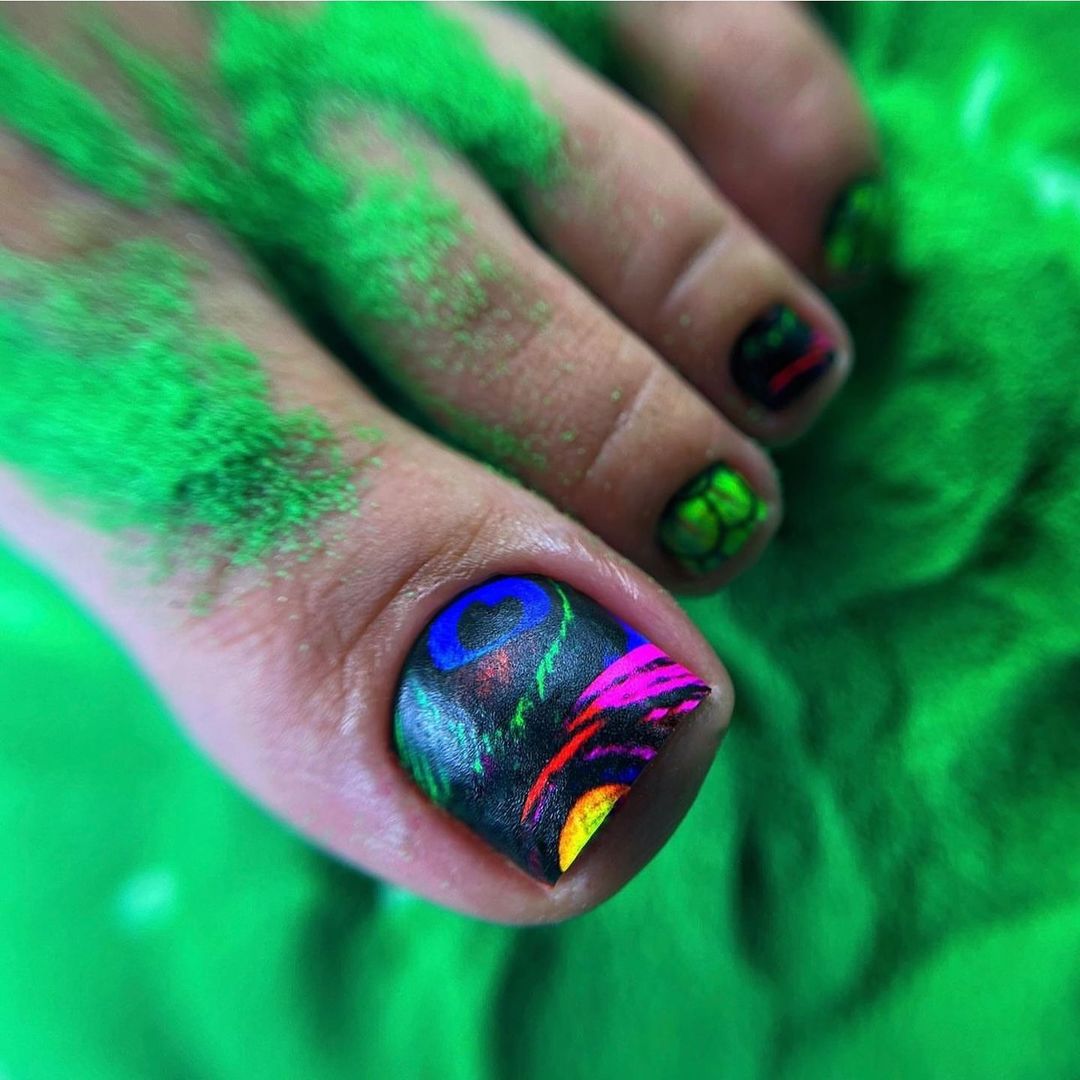
This vibrant and daring pedicure showcases a mix of neon colors and abstract designs. The bold use of green, blue, pink, and yellow creates a striking and energetic look, perfect for those who love to stand out.
Consumables
- Black base polish: OPI Black Onyx
- Neon polishes: China Glaze Flip Flop Fantasy (pink), Yellow Polka Dot Bikini (yellow), Blue Sparrow (blue), and Celtic Sun (green)
- Top coat: Seche Vite Dry Fast Top Coat
- Fine nail art brush
Practical Advice
- Preparation: Start with clean, trimmed toenails. Push back the cuticles and file to your preferred shape.
- Base Coat: Apply a base coat to protect your nails, followed by two coats of the black polish.
- Abstract Design: Use the fine nail art brush to create abstract patterns with the neon polishes. Let your creativity flow with swirls, dots, and lines.
- Top Coat: Seal the design with a top coat for a glossy, long-lasting finish.
Heart Pattern Delight
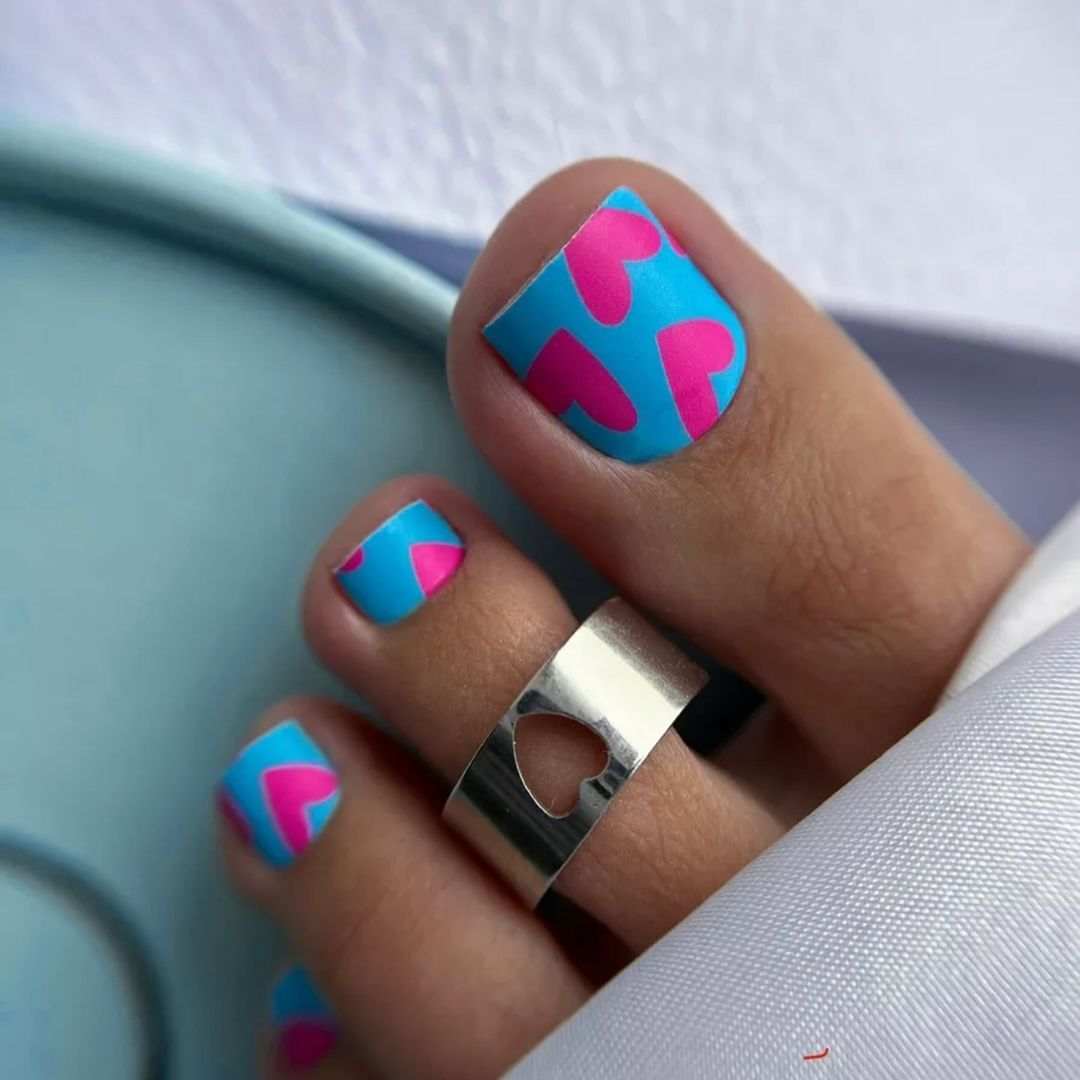
This cute and cheerful design features pink hearts on a bright blue base, creating a fun and lively look. The heart patterns add a playful touch, making this pedicure perfect for any fun occasion or simply to brighten up your day.
Consumables
- Blue base polish: Essie Butler Please
- Pink polish for hearts: OPI Strawberry Margarita
- Top coat: Seche Vite Dry Fast Top Coat
- Fine nail art brush or heart-shaped nail stickers
Practical Advice
- Preparation: Clean, trim, and file your toenails. Push back the cuticles.
- Base Coat: Apply a base coat to protect your nails, followed by two coats of the blue polish.
- Heart Patterns: Use the fine nail art brush to paint pink hearts or apply heart-shaped nail stickers.
- Top Coat: Seal the design with a top coat for a glossy finish.
Rubber Duckie Fun
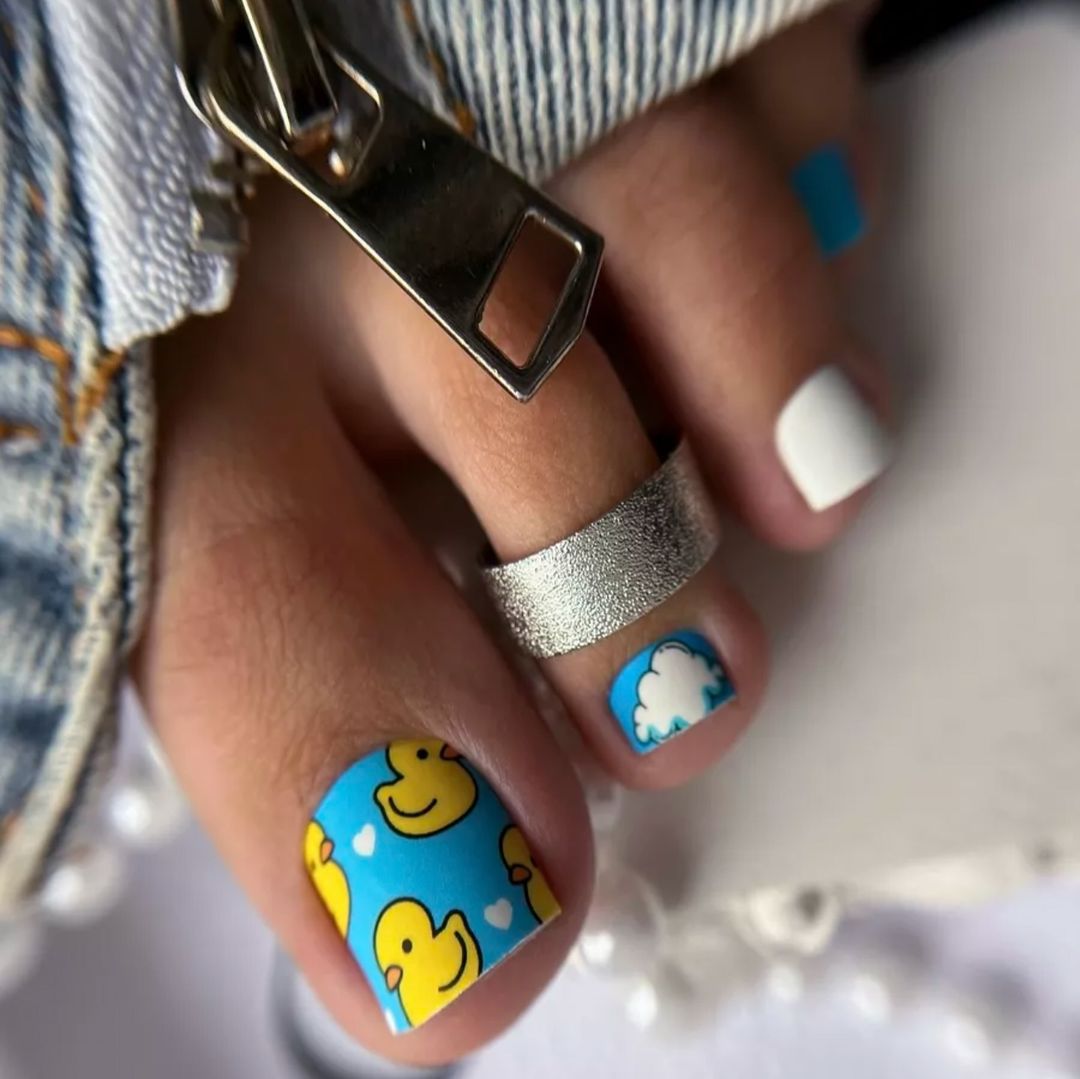
This adorable and whimsical design features rubber duckie and cloud patterns on a blue base, creating a playful and cute look. It’s perfect for adding a bit of fun to your pedicure, especially for casual or beach outings.
Consumables
- Blue base polish: OPI Gelato on My Mind
- Yellow polish for ducks: Essie Sunshine State of Mind
- White polish for clouds: OPI Alpine Snow
- Top coat: Seche Vite Dry Fast Top Coat
- Fine nail art brush
Practical Advice
- Preparation: Clean, trim, and file your toenails. Push back the cuticles.
- Base Coat: Apply a base coat to protect your nails, followed by two coats of the blue polish.
- Duck and Cloud Patterns: Use the fine nail art brush to paint the ducks and clouds, or apply stickers if available.
- Top Coat: Seal the design with a top coat for a glossy finish.
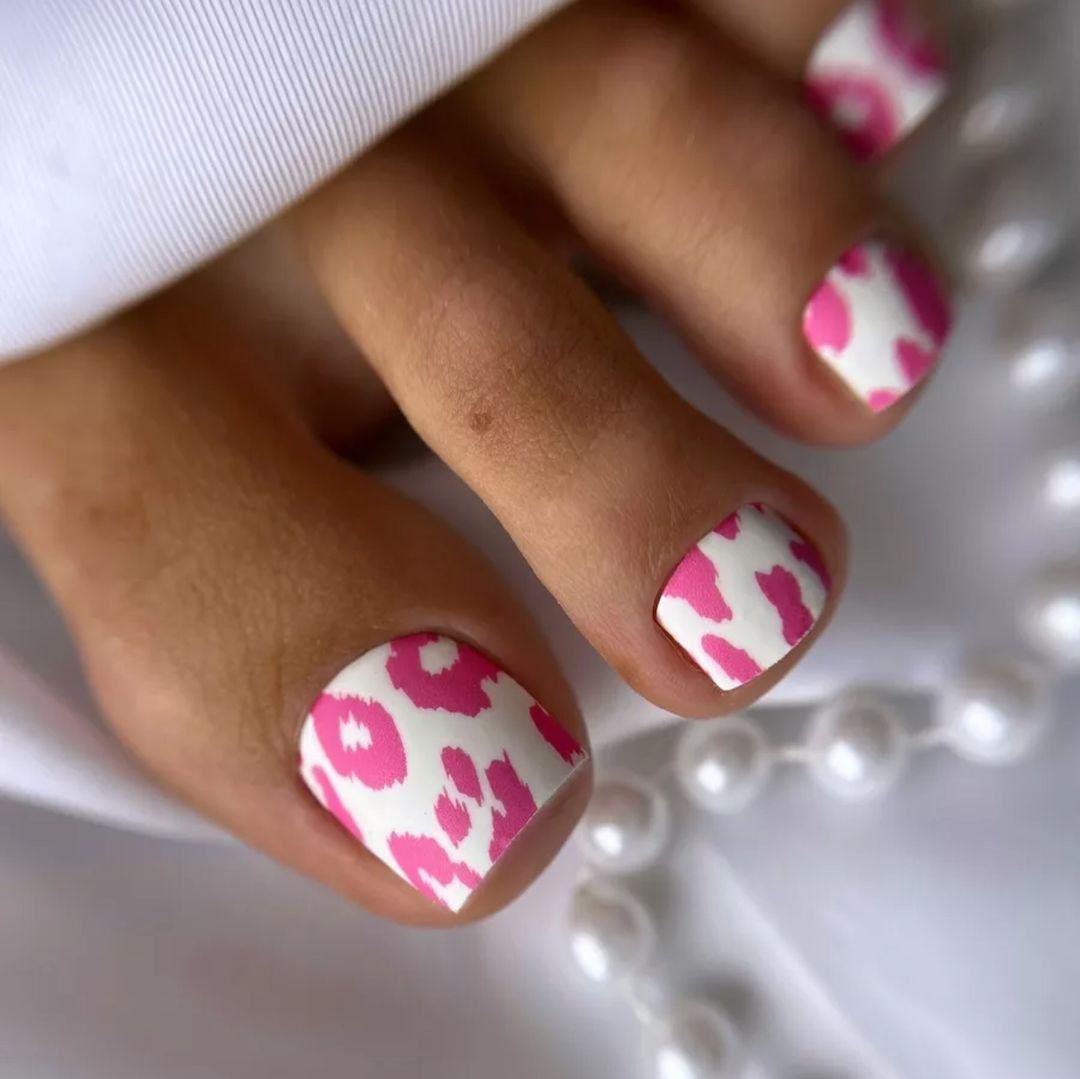
Pink Cheetah Print
This trendy and fierce design features a pink cheetah print on a white base, creating a bold and eye-catching look. It’s perfect for those who love animal prints and want to add a fun twist to their pedicure.
Consumables
- White base polish: OPI Alpine Snow
- Pink polish for cheetah spots: Essie Fiesta
- Top coat: Seche Vite Dry Fast Top Coat
- Fine nail art brush
Practical Advice
- Preparation: Start with clean, trimmed toenails. Push back the cuticles and file to your preferred shape.
- Base Coat: Apply a base coat to protect your nails, followed by two coats of the white polish.
- Cheetah Print: Use the fine nail art brush to create irregular cheetah spots with the pink polish.
- Top Coat: Seal the design with a top coat for a glossy, long-lasting finish.
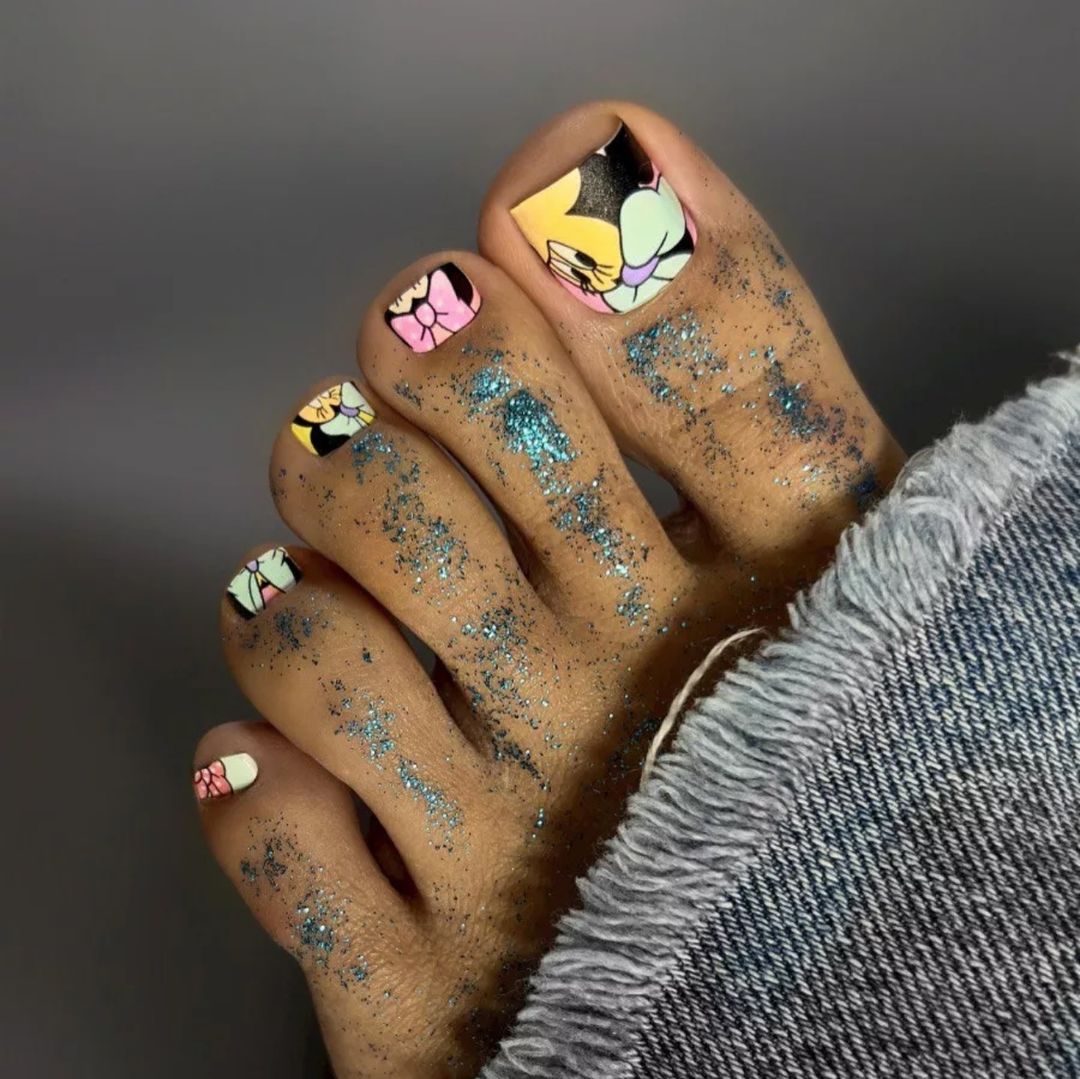
Cartoon Fun
This playful and colorful pedicure features cartoon characters and elements on a vibrant base. The mix of pastel colors and cute designs makes this look perfect for adding a bit of fun and whimsy to your nails.
Consumables
- Base polishes: OPI Alpine Snow (white), Essie Bikini So Teeny (blue), and Essie Peach Side Babe (peach)
- Assorted colors for details: Essie Licorice (black), Essie Butler Please (blue), and China Glaze Flip Flop Fantasy (pink)
- Top coat: Seche Vite Dry Fast Top Coat
- Fine nail art brush
Practical Advice
- Preparation: Clean, trim, and file your toenails. Push back the cuticles.
- Base Coats: Apply a base coat to protect your nails, followed by two coats of the chosen base colors.
- Cartoon Details: Use the fine nail art brush to paint the cartoon characters and elements with assorted colors.
- Top Coat: Seal the design with a top coat for a glossy finish.
FAQ
Q: How long does a gel pedicure last? A: A gel pedicure typically lasts around 2-4 weeks, depending on how well you care for your nails.
Q: Can I do these designs on my fingernails as well? A: Absolutely! These designs can be adapted for fingernails, making for a matching manicure-pedicure set.
Q: What is the best way to remove gel polish at home? A: Soak a cotton ball in acetone, place it on your nail, and wrap it in aluminum foil. Leave it on for about 10-15 minutes, then gently push off the gel with a cuticle pusher.
With these stunning fall toe nail art ideas for 2024, you’re all set to create gorgeous and trendy pedicures at home. Enjoy experimenting with these designs and let your creativity shine!
Save Pin

