
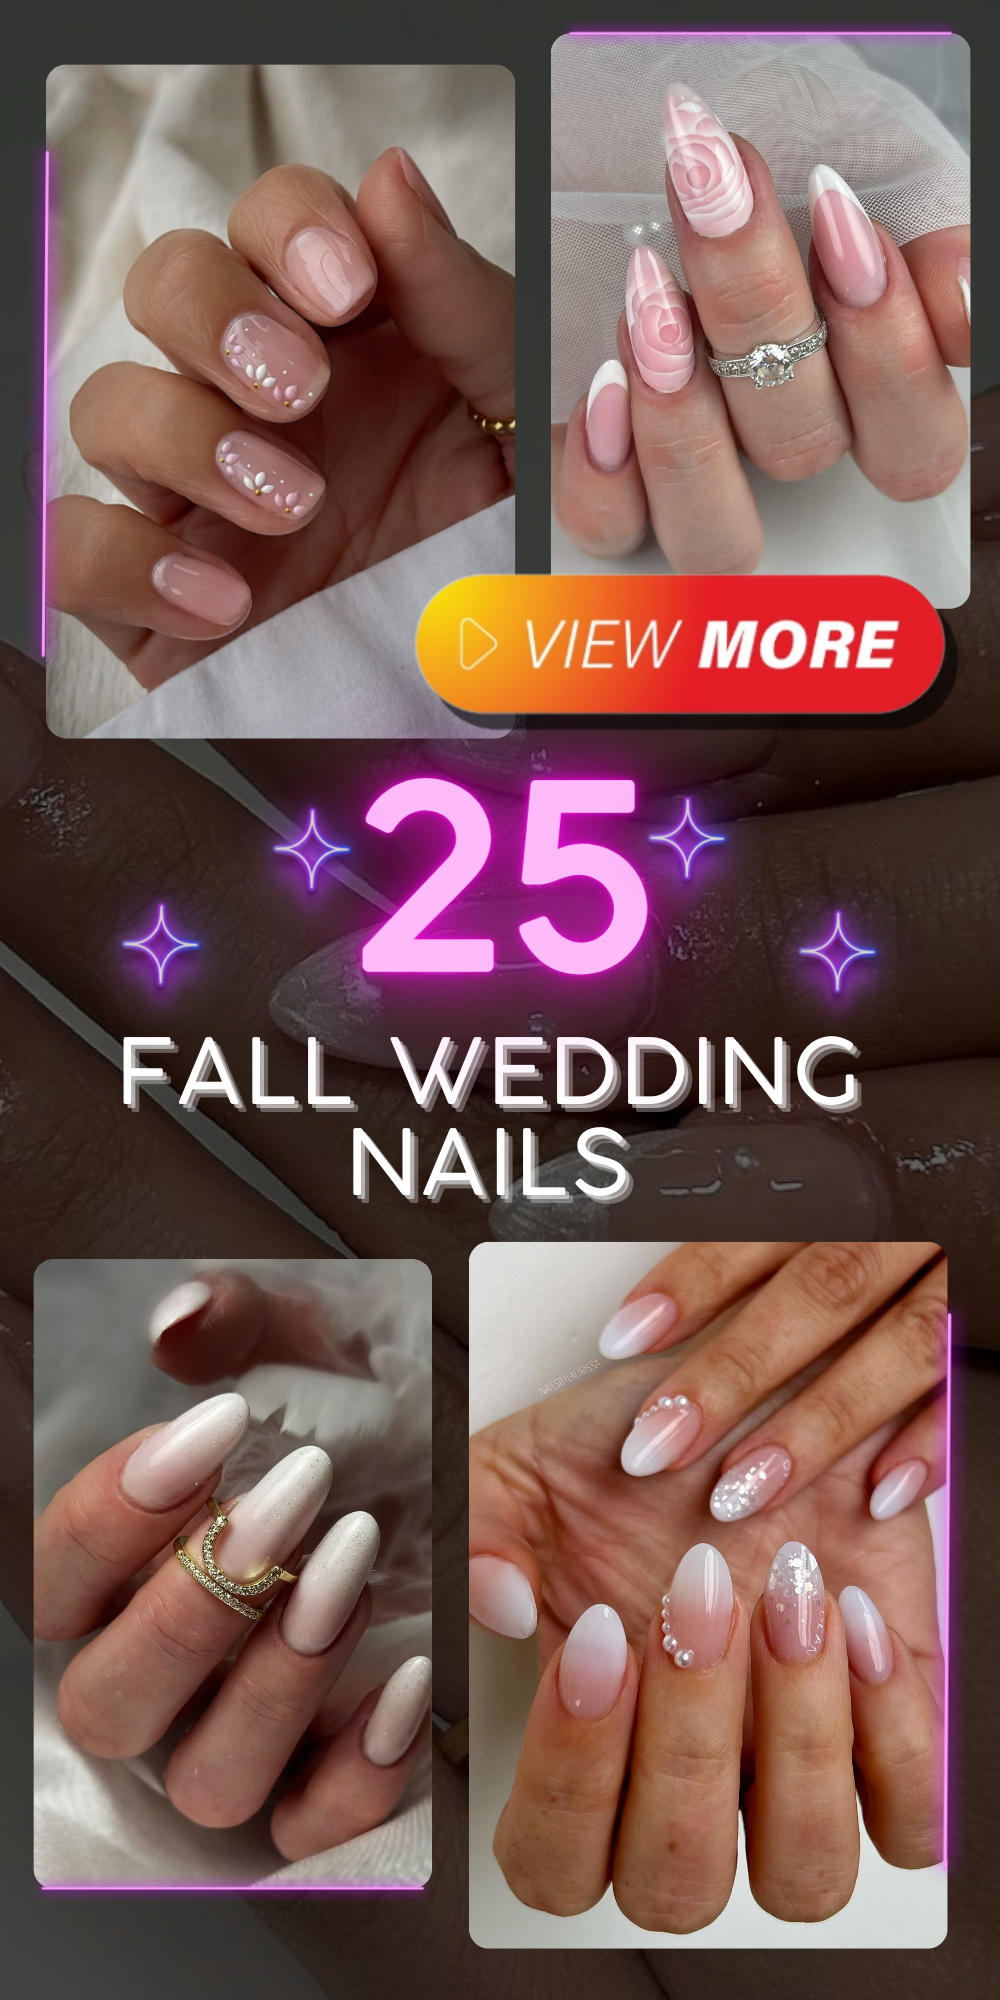
As the leaves turn golden and the air becomes crisp, fall weddings bring a unique charm and elegance. One detail that can make a significant impact on your overall look is your nails. Whether you’re the bride, a bridesmaid, or a guest, having the perfect nail design can add that extra touch of sophistication to your ensemble. In this article, we’ll explore various nail designs perfect for fall weddings, detailing everything from colors to intricate art. Get ready to be inspired!
Chic French Elegance
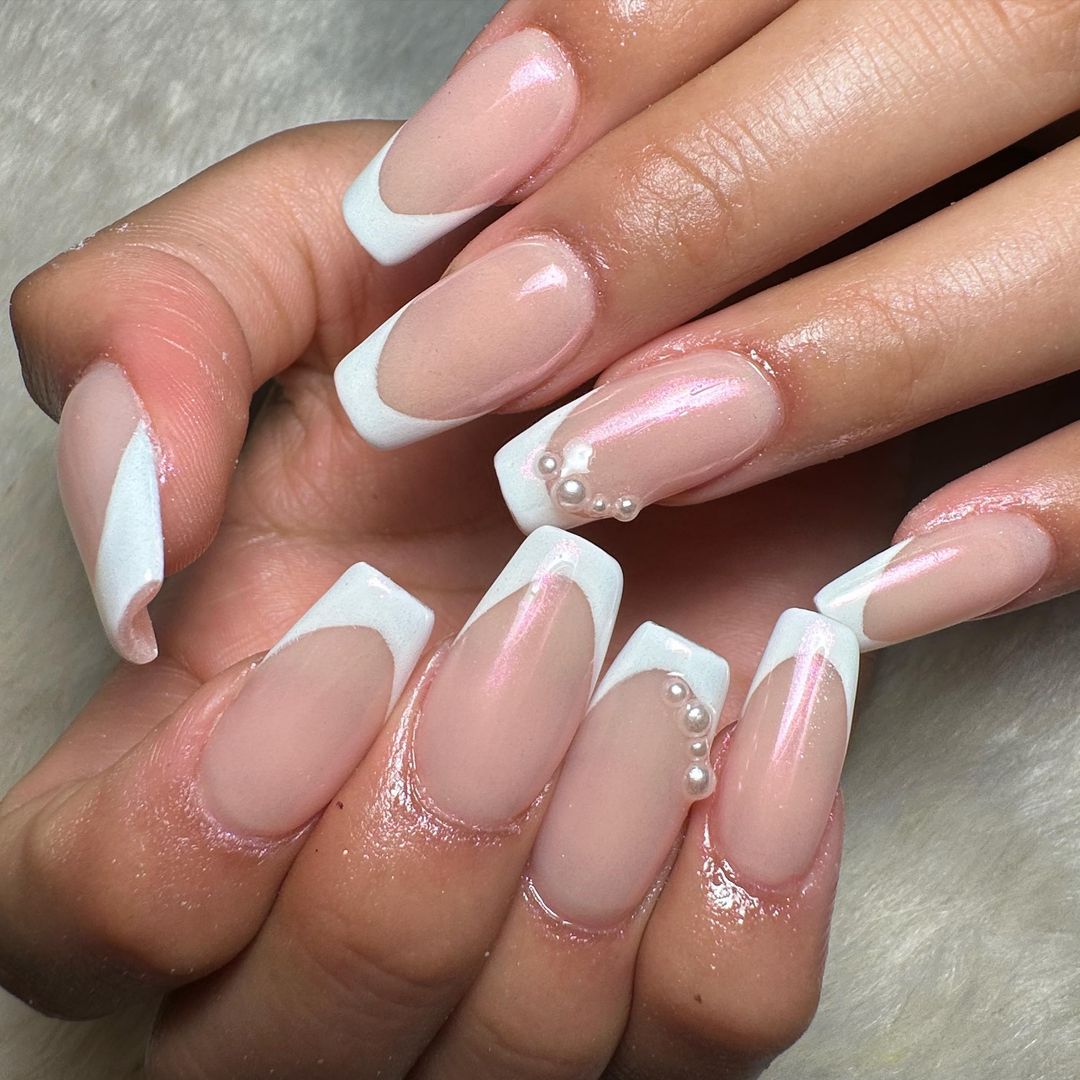
When it comes to fall wedding nails, nothing beats the timeless elegance of a chic French manicure with a twist. This design features a classic white tip with a soft pink base, accented with delicate pearls that add a touch of luxury.
- OPI Nail Lacquer in Alpine Snow
- Essie Nail Polish in Ballet Slippers
- Swarovski Pearls
- Seche Vite Dry Fast Top Coat
Step-by-Step Guide:
- Start by applying a base coat to protect your natural nails.
- Apply two coats of Essie’s Ballet Slippers for a sheer pink base.
- Using OPI’s Alpine Snow, create a French tip on each nail.
- Add Swarovski pearls along the cuticle line for an elegant accent.
- Finish with Seche Vite top coat to seal in the design and add a glossy finish.
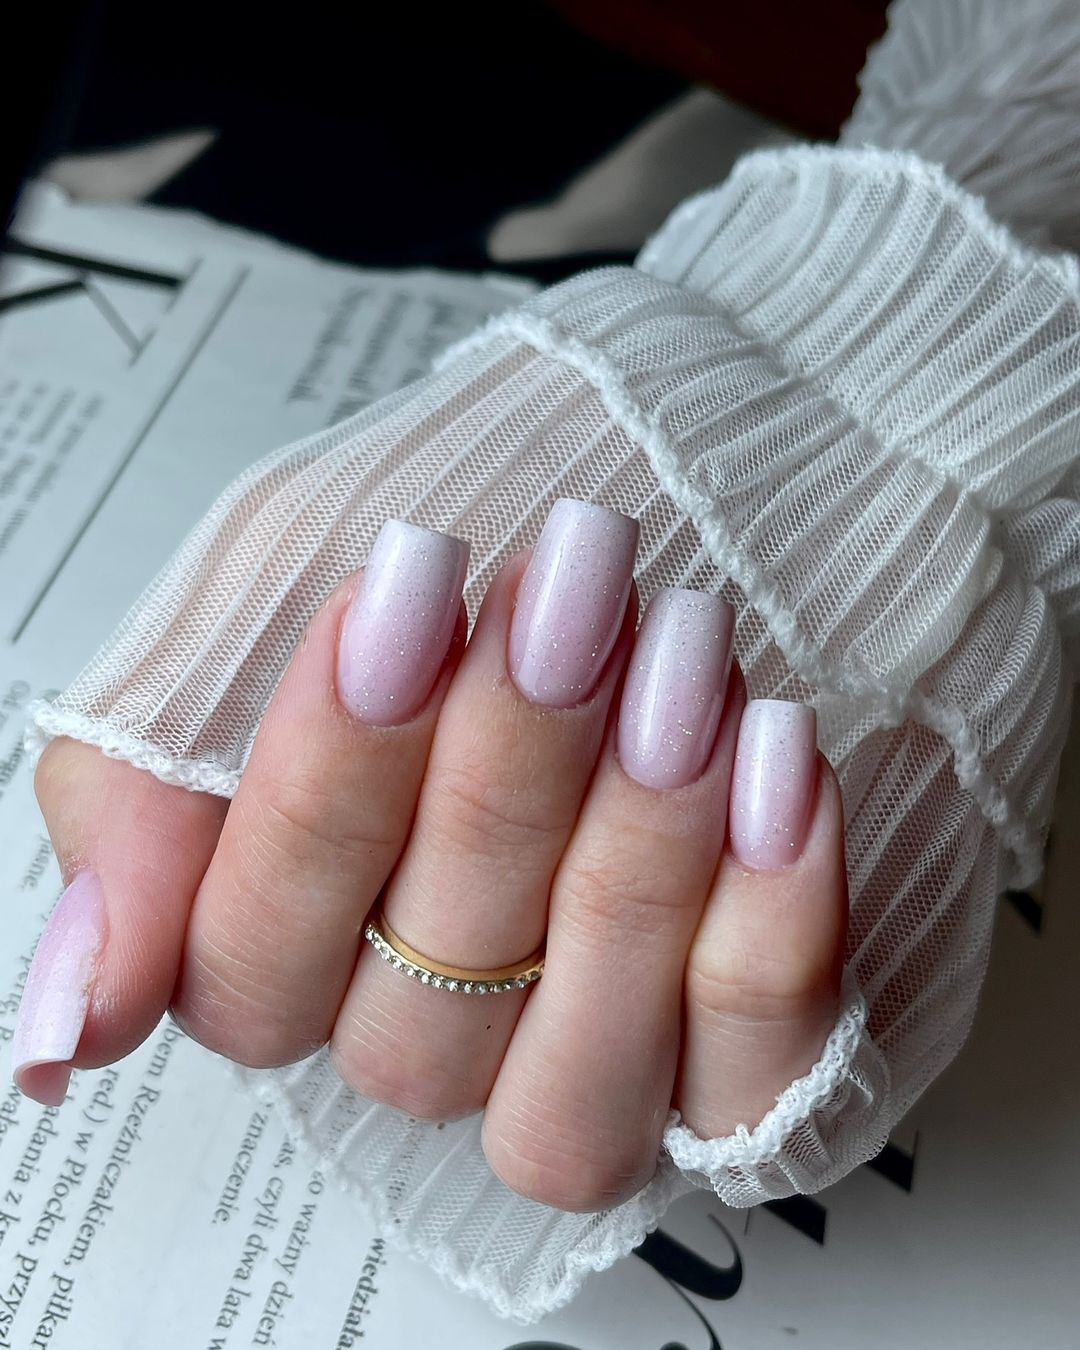
Soft Glitter Gradient
For those looking to add a bit of sparkle, this soft glitter gradient is perfect. It combines a subtle pink base with a delicate gradient of silver glitter, creating a dreamy look that’s ideal for any wedding setting.
- Zoya Nail Polish in Dot
- China Glaze Fairy Dust
- Makeup sponge
- CND Vinylux Top Coat
Step-by-Step Guide:
- Apply a base coat to each nail.
- Paint two layers of Zoya’s Dot for a soft pink base.
- Dab China Glaze Fairy Dust onto a makeup sponge and gently press onto the tips of your nails to create a gradient effect.
- Apply CND Vinylux top coat to smooth out the glitter and give a lasting shine.
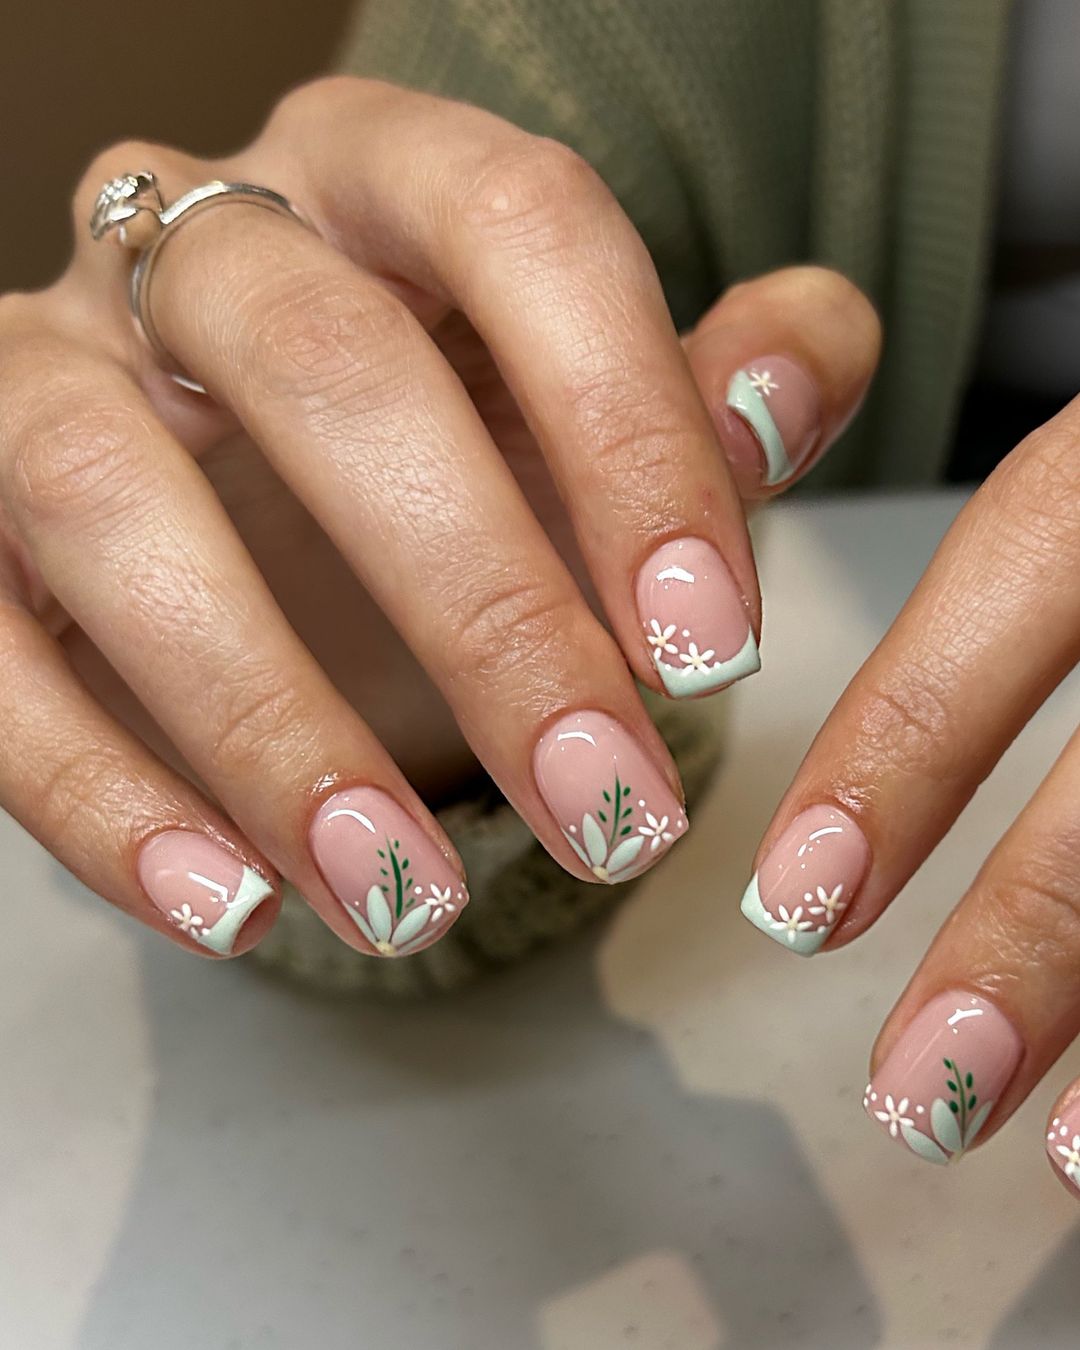
Floral French Tips
This design brings a fresh twist to the traditional French manicure by incorporating floral elements. Perfect for a bride or a bridesmaid, this look features delicate white flowers on a pale green tip, adding a touch of nature-inspired elegance.
- OPI Nature Strong in A Great Fig World
- Sally Hansen Insta-Dri in White On Time
- Nail art brush
- Dotting tool
Step-by-Step Guide:
- Begin with a base coat to prep your nails.
- Apply two coats of OPI Nature Strong in A Great Fig World.
- Using Sally Hansen’s White On Time and a nail art brush, create small flower designs on each nail.
- Use a dotting tool to add tiny white dots around the flowers for added detail.
- Seal with a top coat for a polished finish.
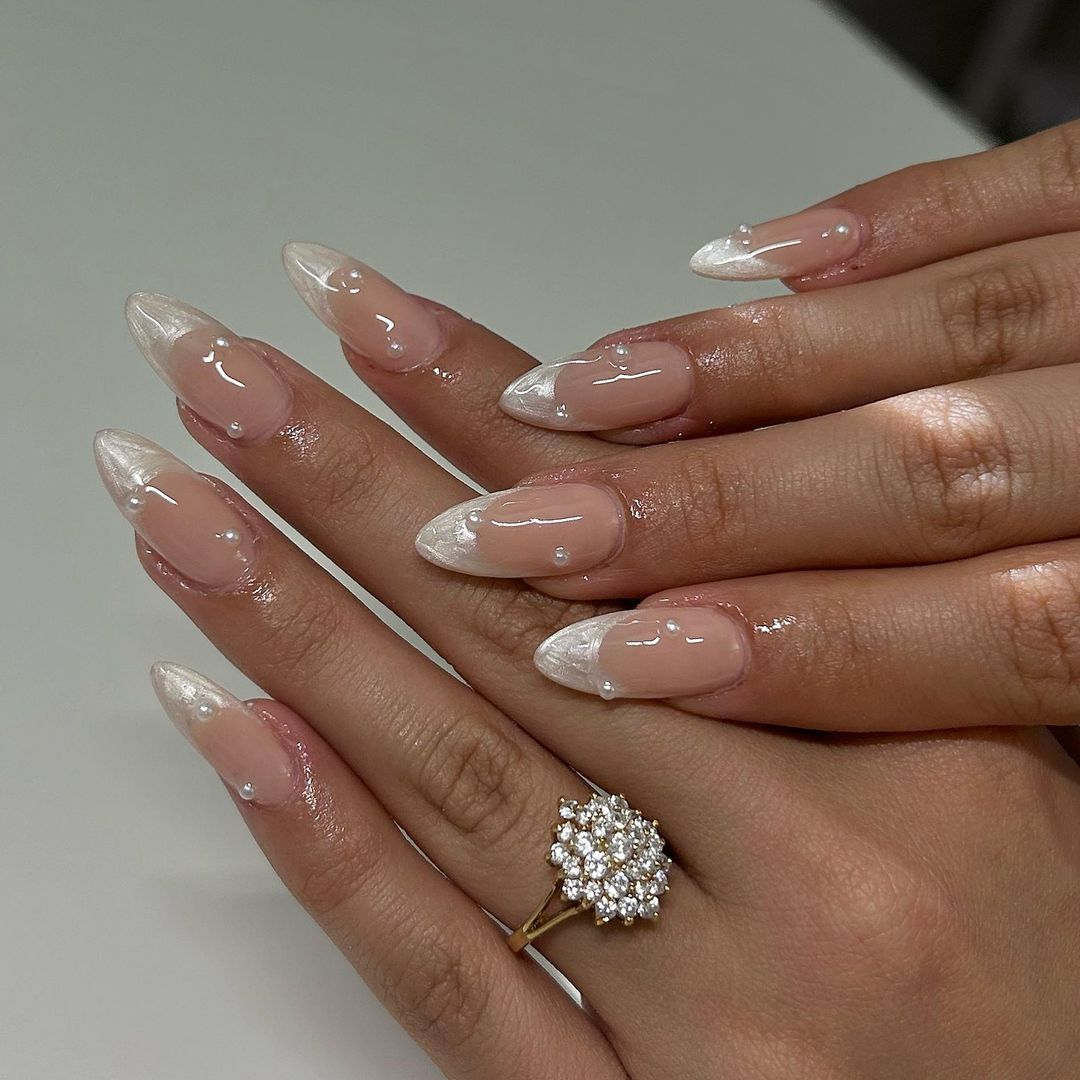
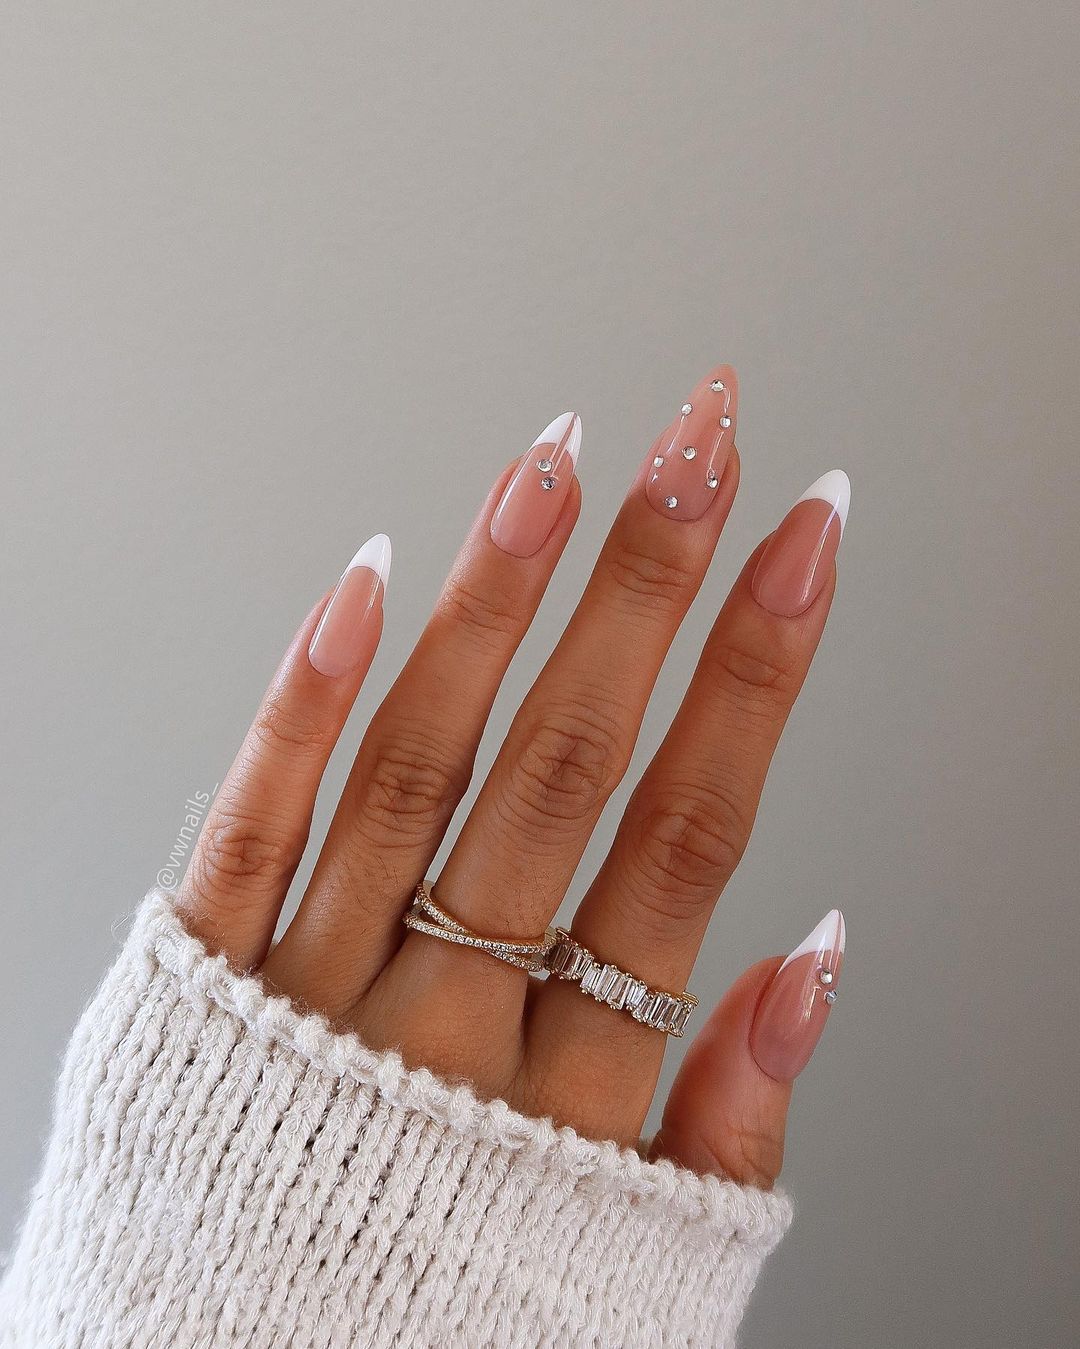
Classic Pearl Elegance
This nail design exudes a timeless elegance with its almond shape and subtle pearl accents. The natural, sheer base color creates a sophisticated look, perfect for a bride or even the mother of the bride. The pearlescent tips add a touch of luxury without being overly flashy, making it ideal for those who prefer a more understated look.
- Essie Gel Couture in Sheer Fantasy
- OPI Infinite Shine in Kyoto Pearl
- Swarovski Pearls
- Nail glue
- Seche Vite Dry Fast Top Coat
Step-by-Step Guide:
- Begin with clean, filed nails and apply a base coat.
- Apply two coats of Essie Gel Couture in Sheer Fantasy for a translucent base.
- Carefully paint the tips with OPI Infinite Shine in Kyoto Pearl to achieve a pearlescent finish.
- Use nail glue to attach Swarovski pearls near the cuticle or along the tips as desired.
- Finish with a top coat to seal the design and add shine.
Save Pin
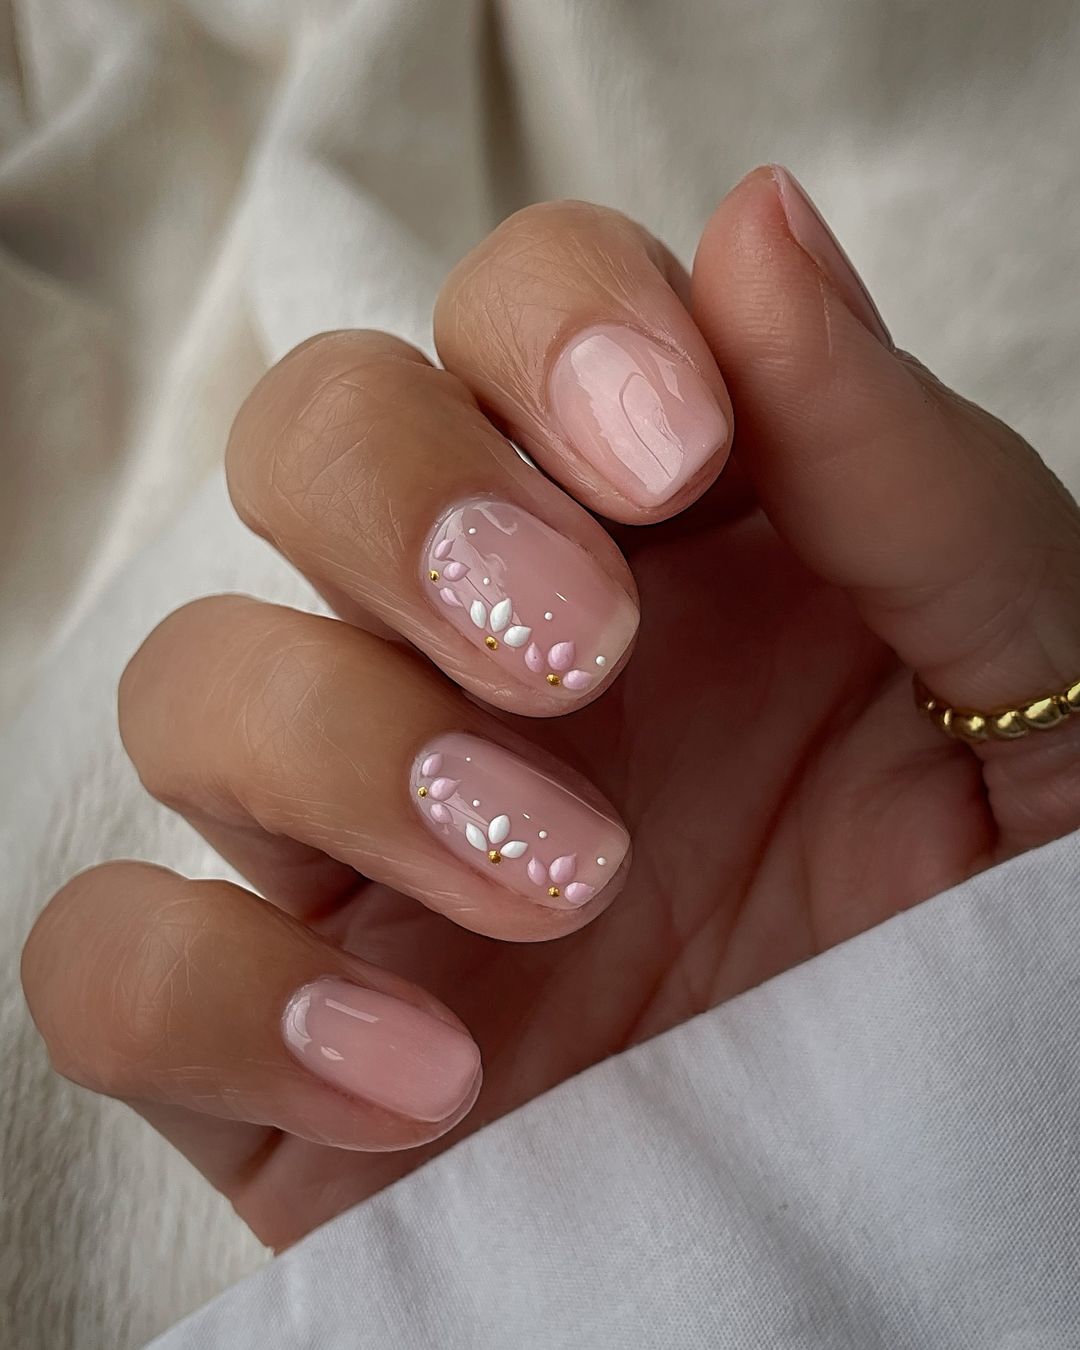
Delicate Floral Accents
This design is perfect for those who love a touch of whimsy and femininity. The short nails are painted with a soft pink base and adorned with delicate white and pink flowers, ideal for a bridesmaid or a guest looking to add a cute yet elegant touch to their look.
- Essie Nail Polish in Mademoiselle
- OPI Nail Lacquer in Alpine Snow
- Zoya Nail Polish in Jordan
- Nail art brush
- Dotting tool
- Top coat
Step-by-Step Guide:
- Apply a base coat to protect your nails.
- Paint two layers of Essie’s Mademoiselle for a soft pink base.
- Use a nail art brush and OPI’s Alpine Snow to create small white flowers on the accent nails.
- Add dots of Zoya’s Jordan in the center of each flower using a dotting tool.
- Seal with a top coat to ensure your design lasts.
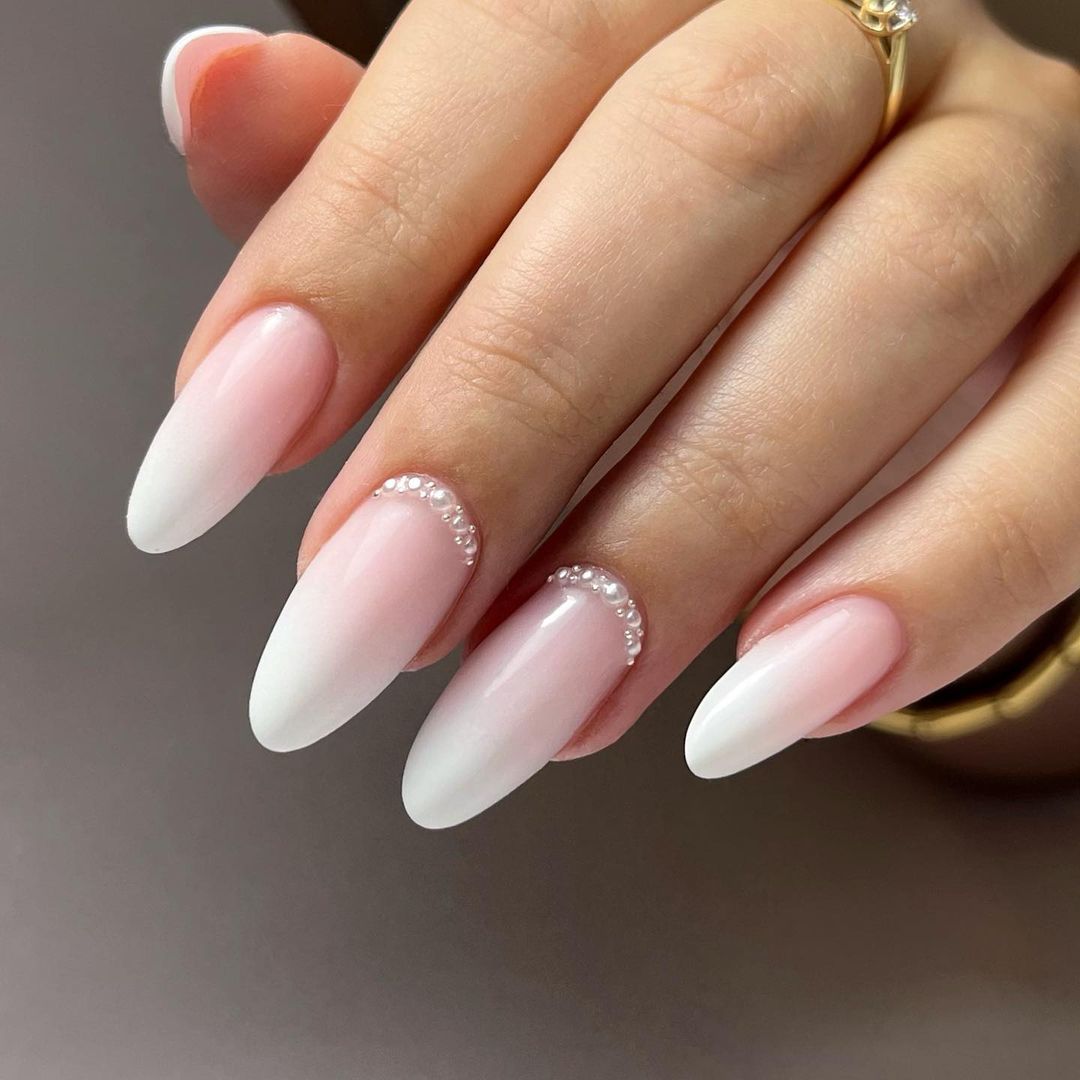
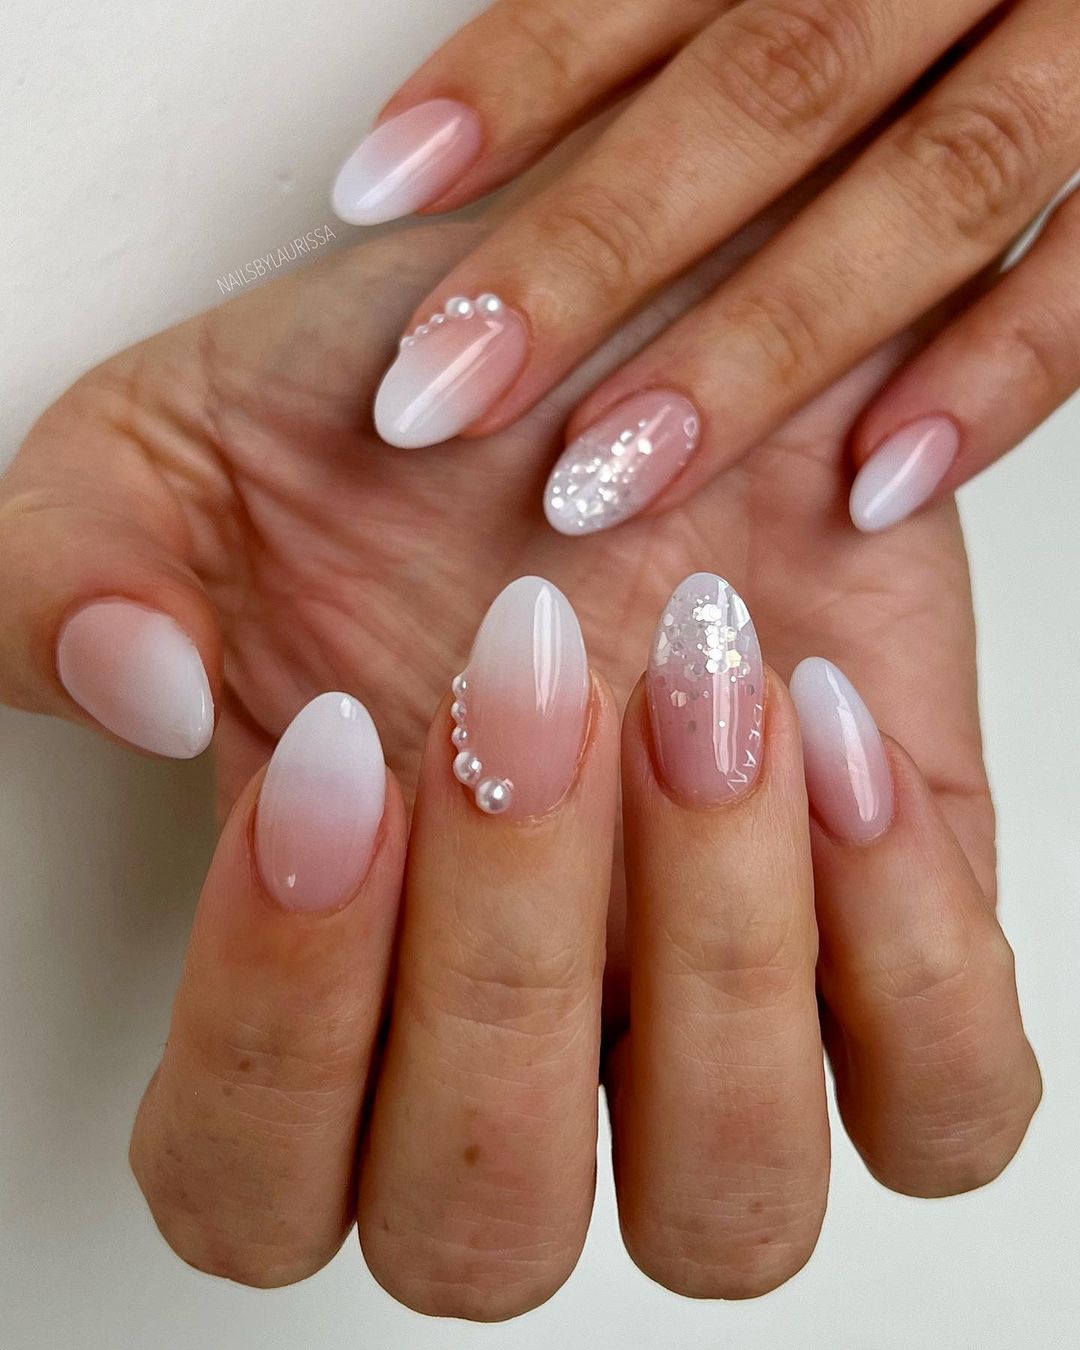
Elegant Ombre with Pearl Details
This ombre nail design transitions from a soft pink to white, creating a beautiful gradient effect. The addition of pearls near the cuticles adds a luxurious touch, perfect for a bride who wants to combine simplicity with elegance. The almond shape enhances the classy and trendy look.
- CND Shellac in Beau
- OPI GelColor in Funny Bunny
- Swarovski Pearls
- Nail art brush
- Top coat
Step-by-Step Guide:
- Apply a base coat to each nail.
- Start with CND Shellac in Beau at the base and gradually blend it with OPI GelColor in Funny Bunny towards the tips to create an ombre effect.
- Use a nail art brush to place Swarovski pearls along the cuticle line.
- Finish with a top coat to secure the pearls and add a glossy finish.
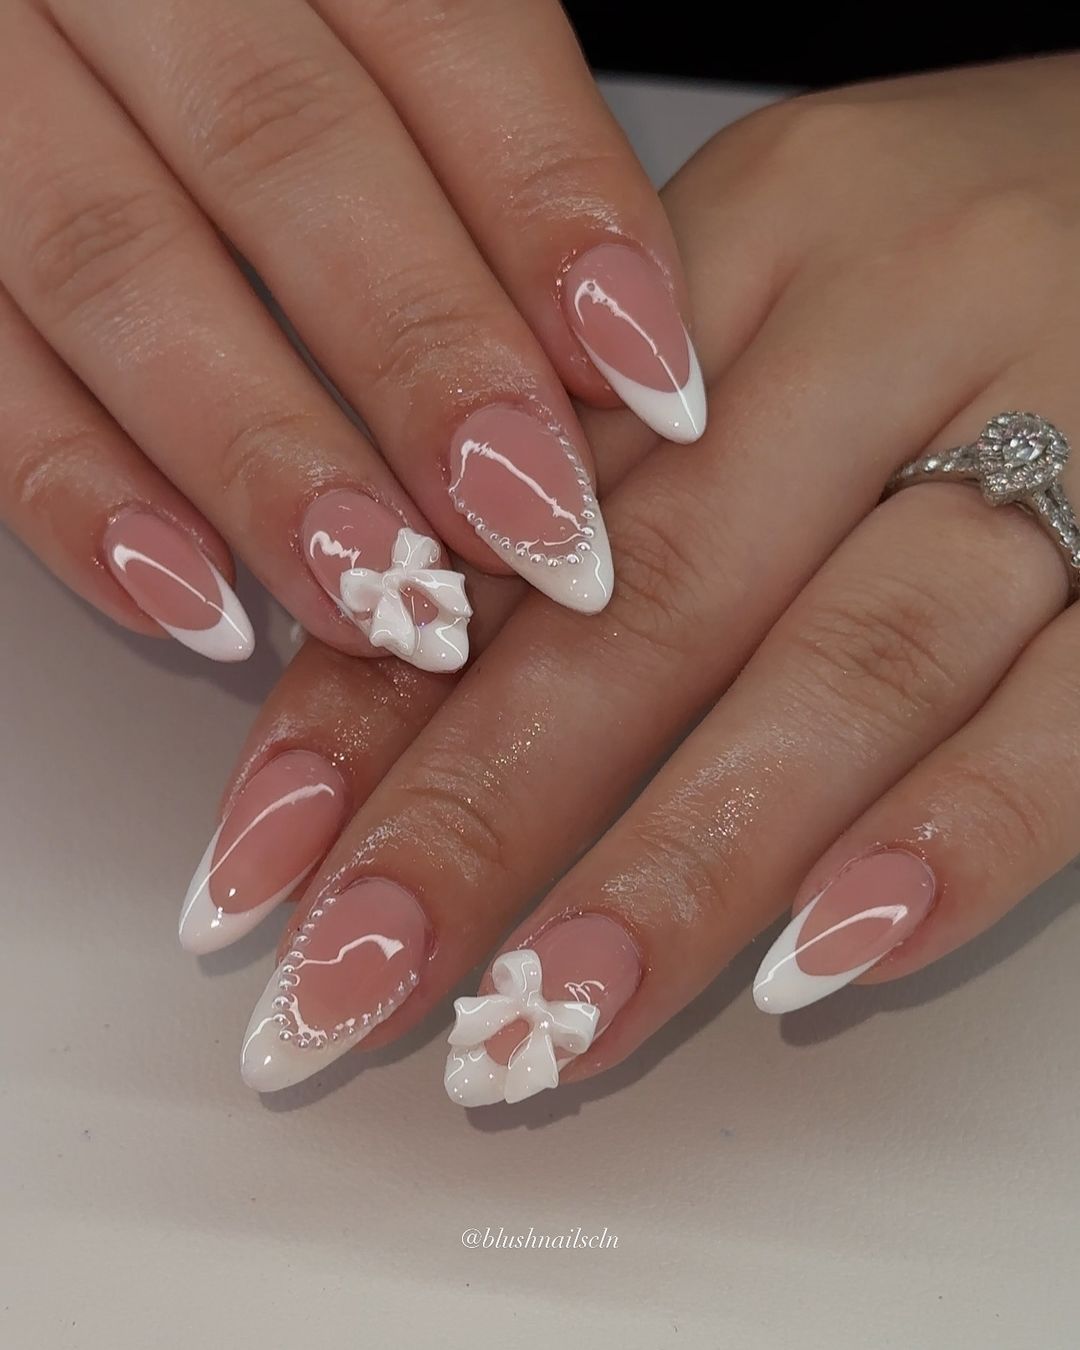
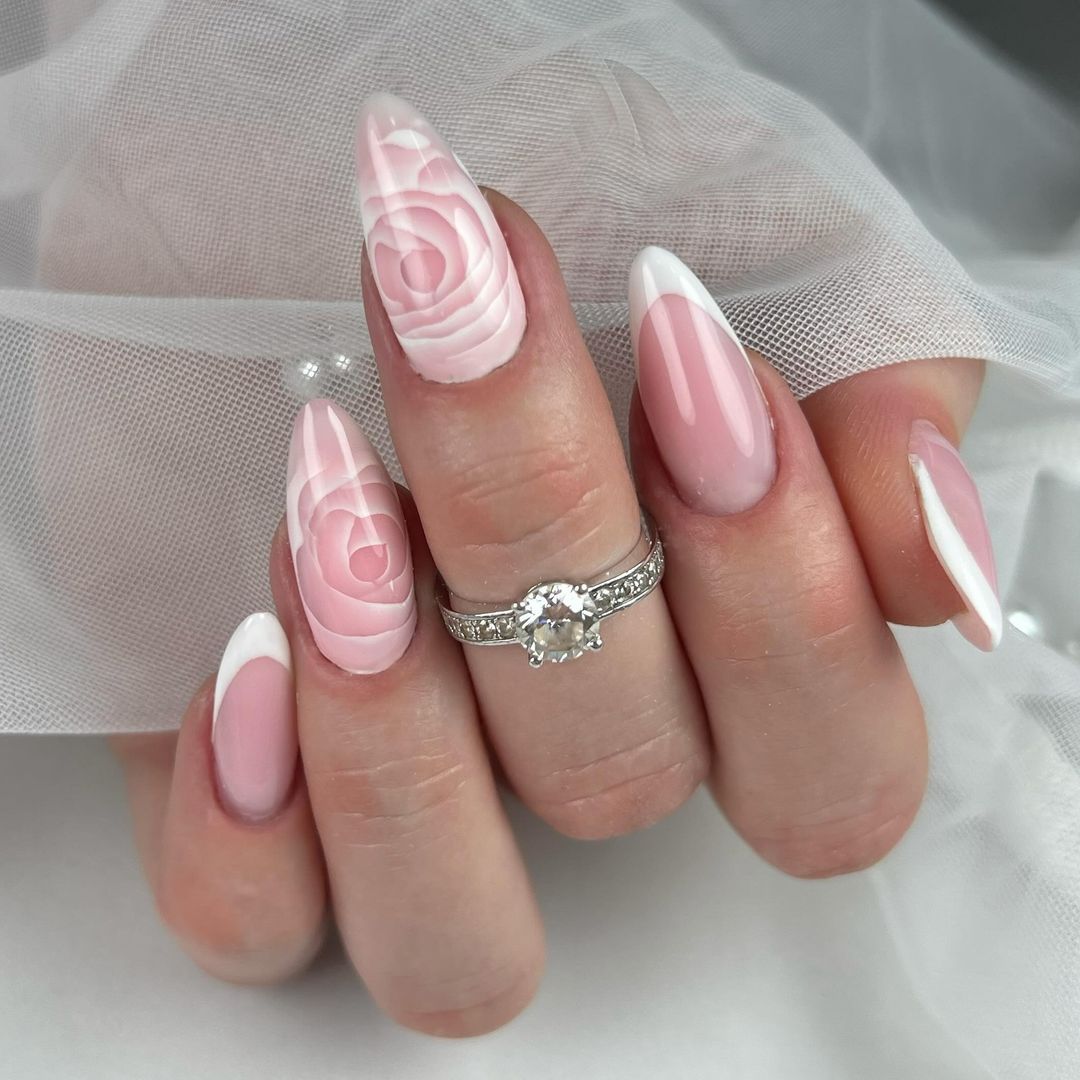
Romantic Bow Accents
This design beautifully combines the classic French manicure with romantic 3D bow accents, making it perfect for a bride looking for a touch of whimsy. The white tips are elegantly paired with a sheer pink base, and the bows add a playful yet sophisticated element.
- OPI GelColor in Bubble Bath
- Essie Nail Polish in Blanc
- 3D Bow Nail Charms
- Swarovski Crystals
- Nail glue
- Seche Vite Dry Fast Top Coat
Step-by-Step Guide:
- Apply a base coat to your nails.
- Paint two coats of OPI GelColor in Bubble Bath for a soft pink base.
- Using Essie’s Blanc, create a French tip on each nail.
- Attach the 3D bow charms and Swarovski crystals using nail glue.
- Seal with a top coat to ensure the design stays intact.
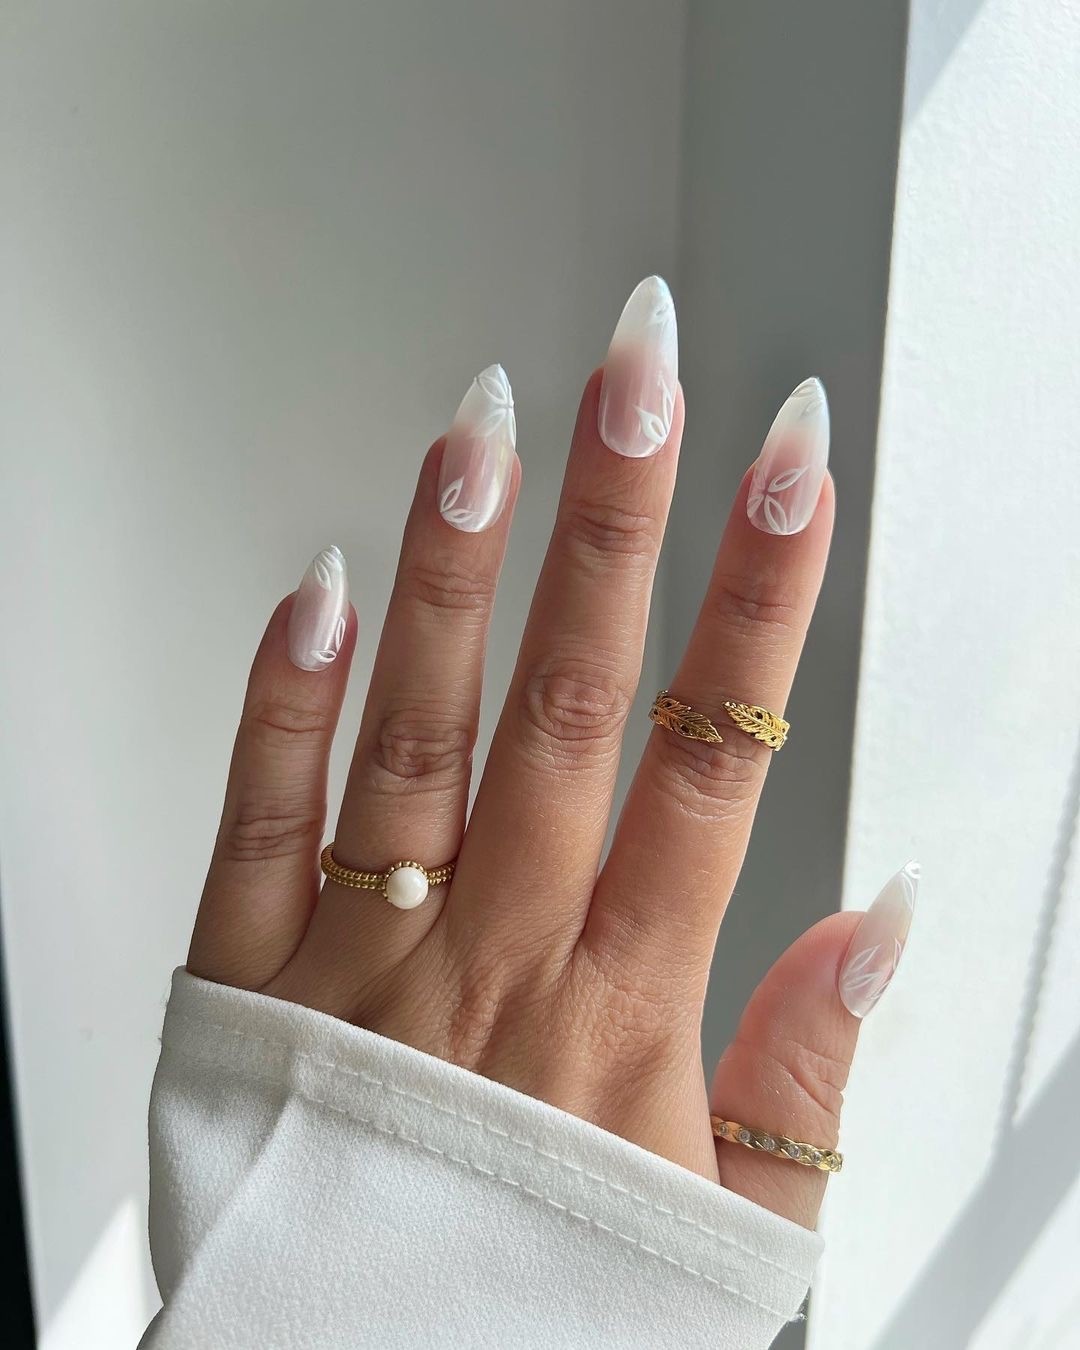
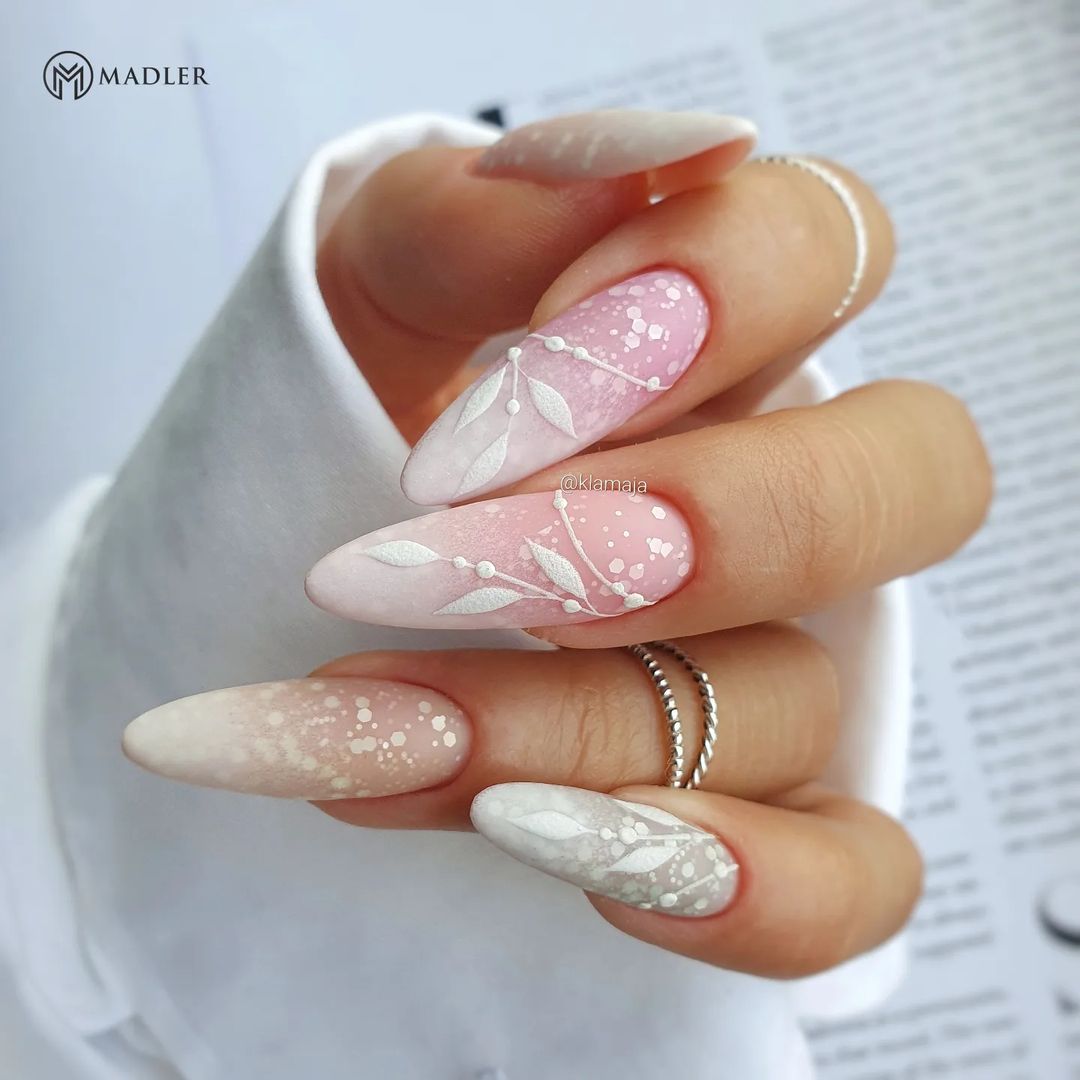
Rose Petal Elegance
This nail design features intricate rose petal art that is perfect for a bride who loves floral themes. The soft pink and white gradient provides a delicate backdrop for the detailed rose designs, creating a look that is both romantic and timeless.
- CND Shellac in Romantique
- OPI GelColor in Alpine Snow
- Nail art brush
- Dotting tool
- Top coat
Step-by-Step Guide:
- Start with a base coat to protect your nails.
- Apply two coats of CND Shellac in Romantique.
- Using OPI GelColor in Alpine Snow and a nail art brush, create rose designs on each nail.
- Use a dotting tool to add small details and enhance the floral design.
- Finish with a top coat to seal the design and add shine.
Glitter and Pearl Ombre
This ombre design transitions from a soft pink to white and is adorned with pearls and glitter, making it an ideal choice for a bride seeking a glamorous look. The almond shape enhances the elegance of the design.
- Zoya Nail Polish in Bela
- OPI Nail Lacquer in Funny Bunny
- Swarovski Pearls
- Loose glitter
- Nail art brush
- Top coat
Step-by-Step Guide:
- Apply a base coat to each nail.
- Paint the base of your nails with Zoya’s Bela and blend it with OPI’s Funny Bunny towards the tips for an ombre effect.
- Use a nail art brush to apply loose glitter and Swarovski pearls for added sparkle.
- Finish with a top coat to secure the embellishments and give a glossy finish.
Save Pin
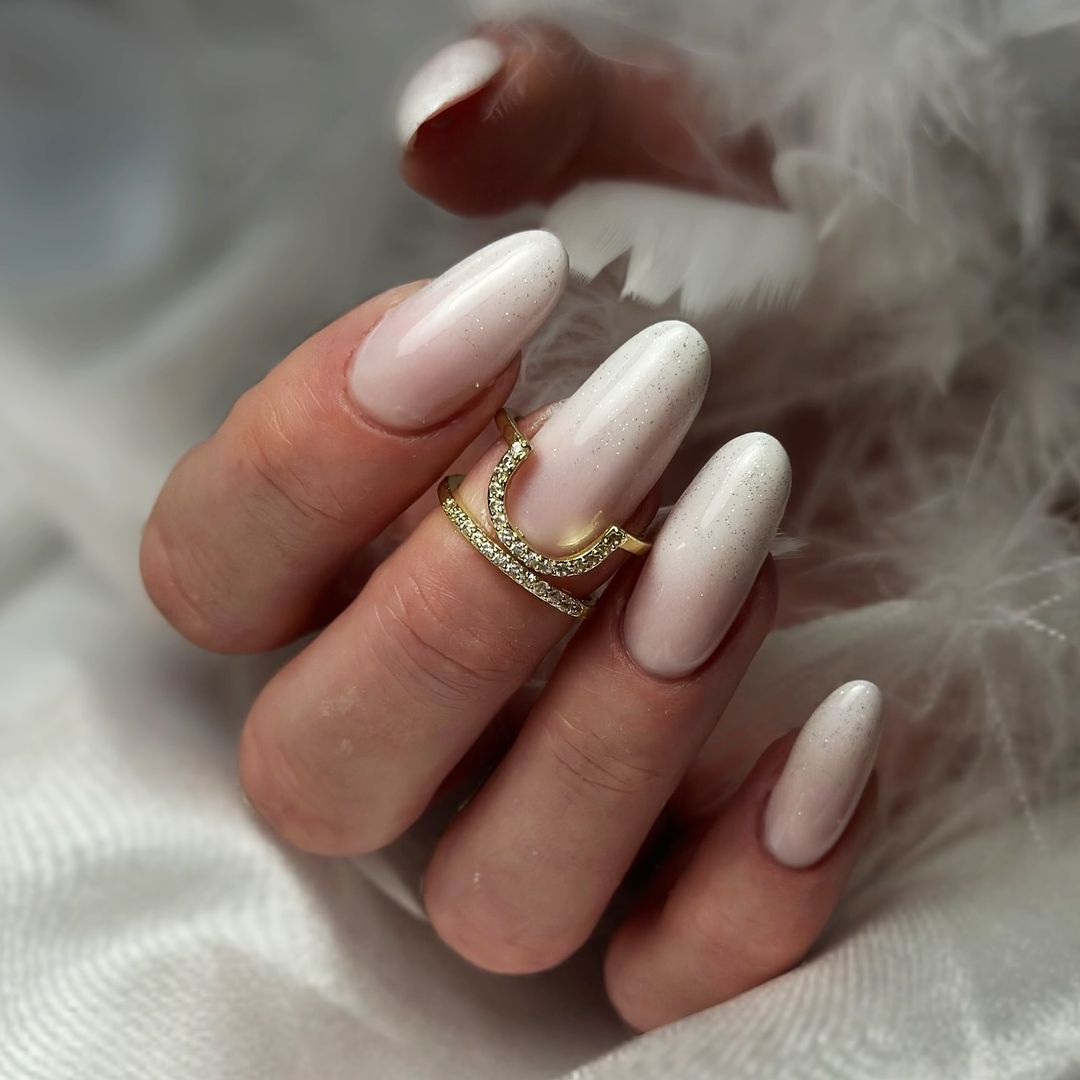
Snow White Elegance
This design is perfect for a winter wedding, featuring a pure white base with a subtle shimmer that adds a touch of magic to the look. The simplicity and elegance make it ideal for any bride seeking a classic and timeless style.
- OPI GelColor in Funny Bunny
- Essie Nail Polish in Blanc
- Glitter top coat
- Seche Vite Dry Fast Top Coat
Step-by-Step Guide:
- Start with clean, filed nails and apply a base coat.
- Apply two coats of OPI GelColor in Funny Bunny for a white base.
- Add a layer of Essie’s Blanc for extra opacity.
- Finish with a glitter top coat for a subtle shimmer and Seche Vite top coat for lasting shine.
Minimalist Pearl Accents
For those who prefer a minimalist yet chic look, this design features clear tips with pearl accents. The simplicity of the design makes it suitable for a bride or a guest looking for a trendy yet understated nail art.
- OPI GelColor in Bubble Bath
- Clear nail tips
- Swarovski Pearls
- Nail glue
- Top coat
Step-by-Step Guide:
- Apply a base coat to your nails.
- Attach clear nail tips and paint the base with OPI GelColor in Bubble Bath.
- Use nail glue to attach Swarovski pearls near the cuticles.
- Finish with a top coat to secure the design and add shine.
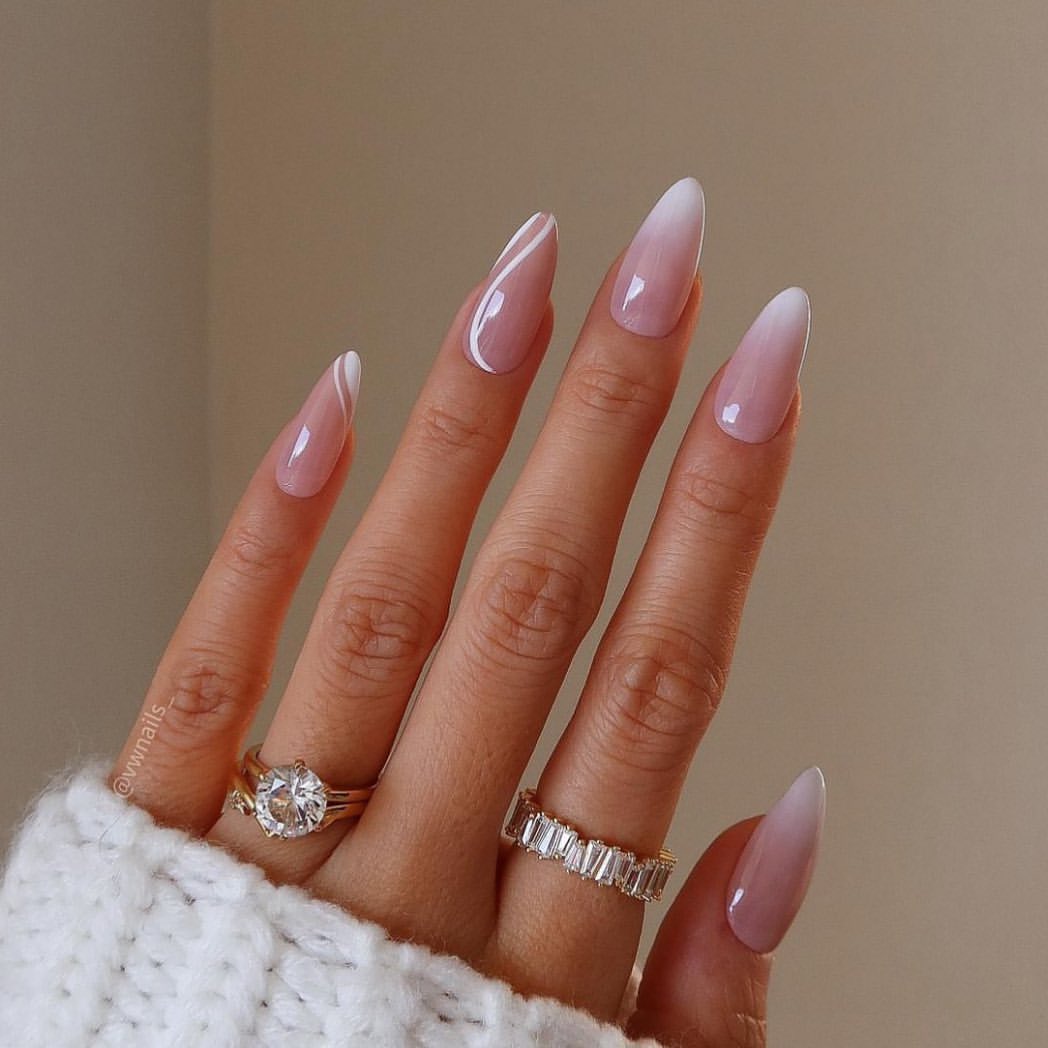
Gradient Elegance
This design features a beautiful gradient from pink to white, creating a soft and elegant look perfect for any bride. The simplicity of the gradient makes it versatile and timeless, ideal for complementing any wedding attire.
- Essie Gel Couture in Sheer Fantasy
- OPI Infinite Shine in Alpine Snow
- Makeup sponge
- CND Vinylux Top Coat
Step-by-Step Guide:
- Apply a base coat to protect your nails.
- Use Essie Gel Couture in Sheer Fantasy as the base color.
- Create a gradient effect by dabbing OPI Infinite Shine in Alpine Snow on a makeup sponge and gently pressing it onto the tips of your nails.
- Finish with CND Vinylux Top Coat to blend the colors smoothly and add shine.
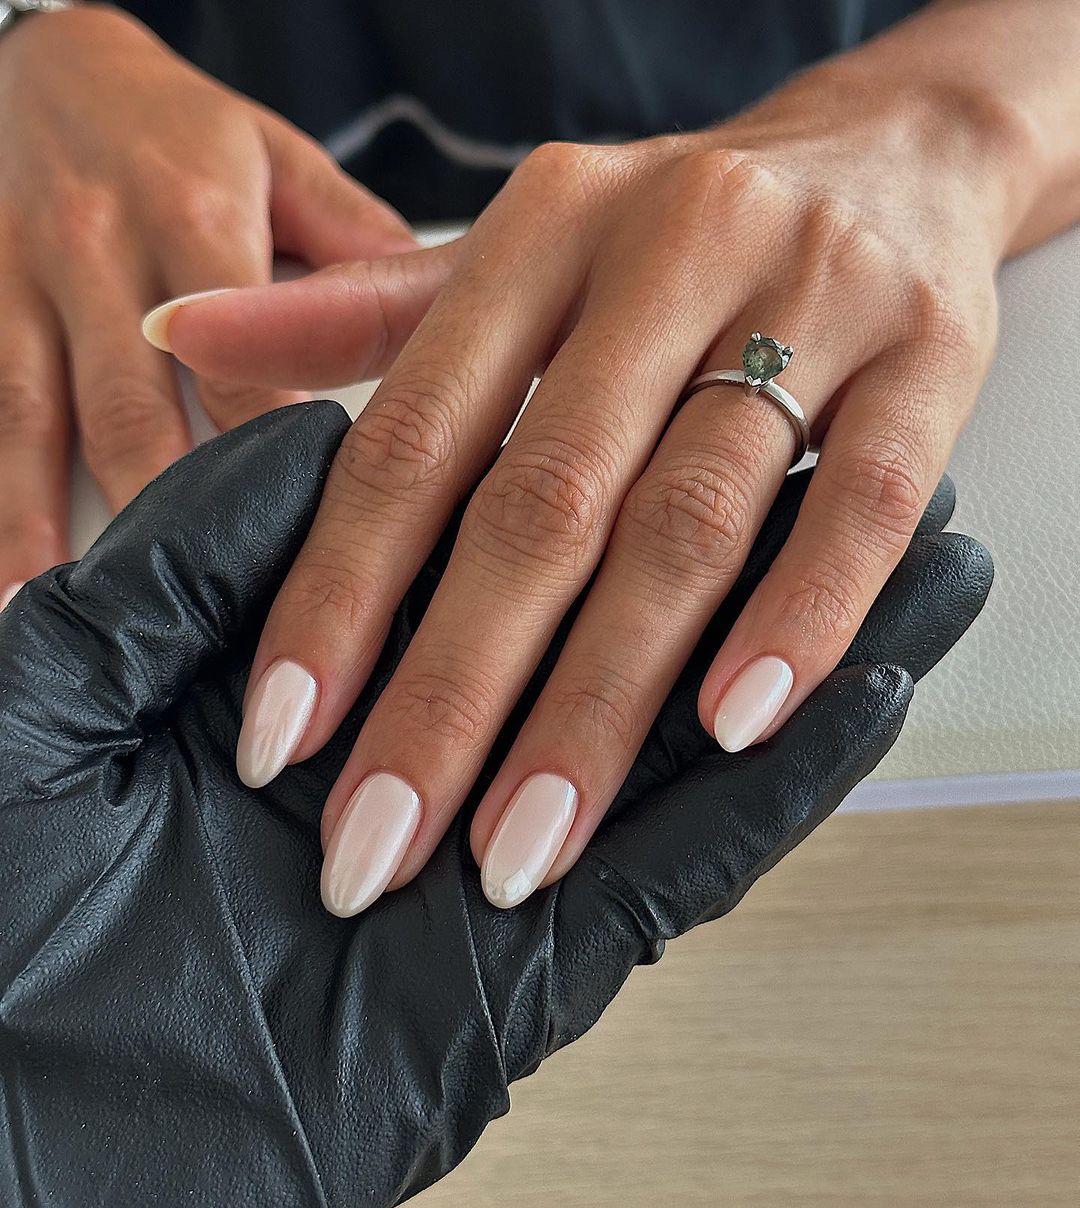
Elegant Almond Nails
These elegant almond-shaped nails feature a soft, pearlescent finish, making them a perfect choice for a bride. The subtle shimmer adds just the right amount of glamour without being overpowering, creating a classic and timeless look.
- OPI GelColor in Bubble Bath
- Essie Nail Polish in Hi Maintenance
- Pearl nail powder
- Top coat
Step-by-Step Guide:
- Apply a base coat to protect your nails.
- Paint two layers of OPI GelColor in Bubble Bath.
- Apply a thin layer of Essie’s Hi Maintenance for added sheen.
- Use a pearl nail powder to gently rub onto the nails for a soft shimmer.
- Finish with a top coat to seal the design and add a glossy finish.
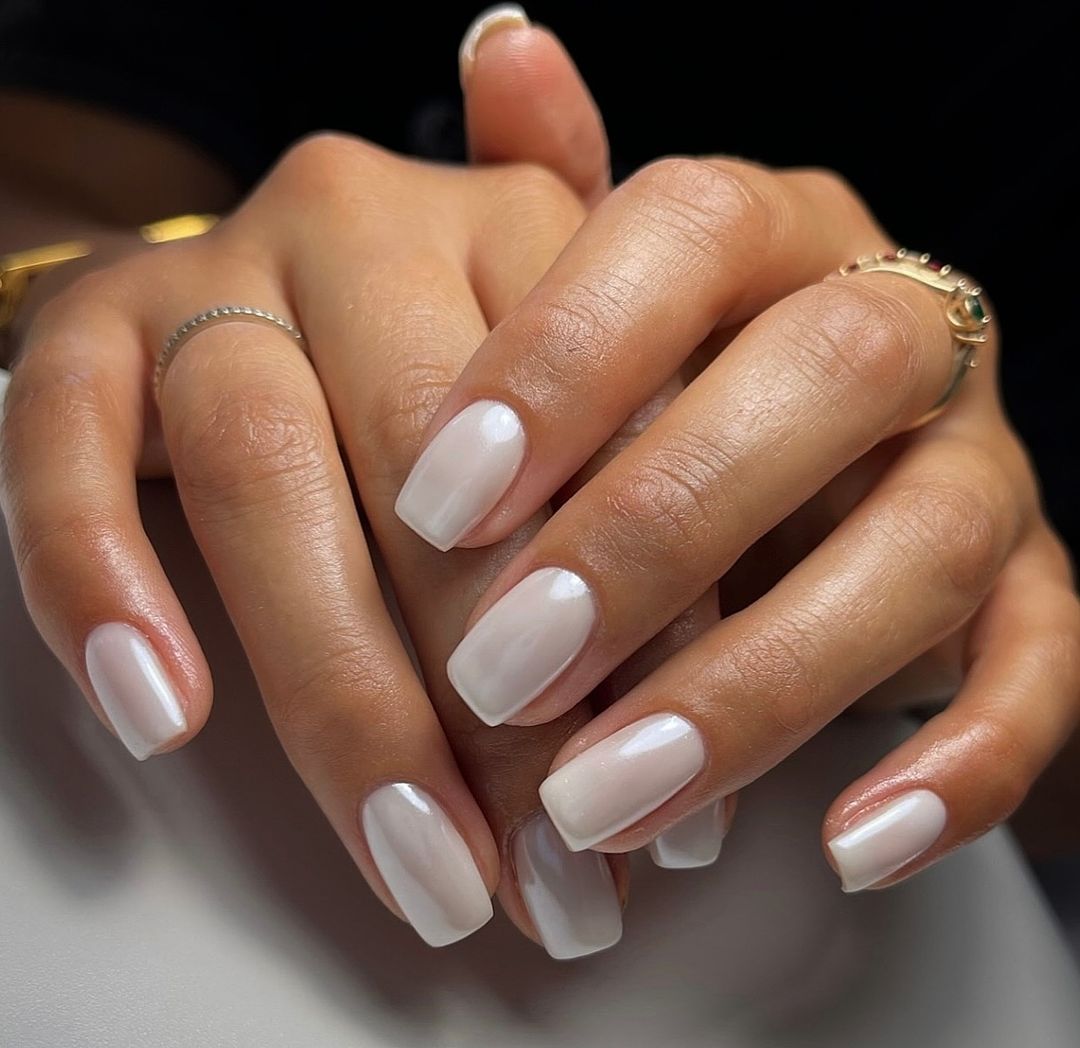
Classic Short Pearlescent Nails
These short, square-shaped nails with a pearlescent finish are ideal for a bridesmaid or a guest looking for a simple yet elegant look. The pearly sheen adds a touch of sophistication to the classic shape.
- Zoya Nail Polish in Bela
- Essie Nail Polish in Ballet Slippers
- Pearl nail powder
- Seche Vite Dry Fast Top Coat
Step-by-Step Guide:
- Start with clean, filed nails and apply a base coat.
- Apply two coats of Zoya’s Bela.
- Add a layer of Essie’s Ballet Slippers for a subtle pink hue.
- Gently rub pearl nail powder onto the nails for a luminous finish.
- Seal with Seche Vite top coat to enhance the shine and durability.
Dramatic Pearl Accents
For a more dramatic look, these long nails feature swirling designs and pearl accents. Perfect for a bride who wants to make a statement, this design combines elegance with a touch of boldness.

- OPI GelColor in Funny Bunny
- Essie Nail Polish in Blanc
- Pearl nail charms
- Nail glue
- Top coat
Step-by-Step Guide:
- Apply a base coat to your nails.
- Paint two layers of OPI GelColor in Funny Bunny.
- Use Essie’s Blanc to create swirling designs on each nail.
- Attach pearl nail charms using nail glue.
- Finish with a top coat to secure the design and add a glossy finish.
Celestial Gold Accents
This nail design features delicate gold celestial accents on a sheer white base, creating a magical look perfect for a bridesmaid or guest. The golden stars and moons add a whimsical touch to the elegant design.
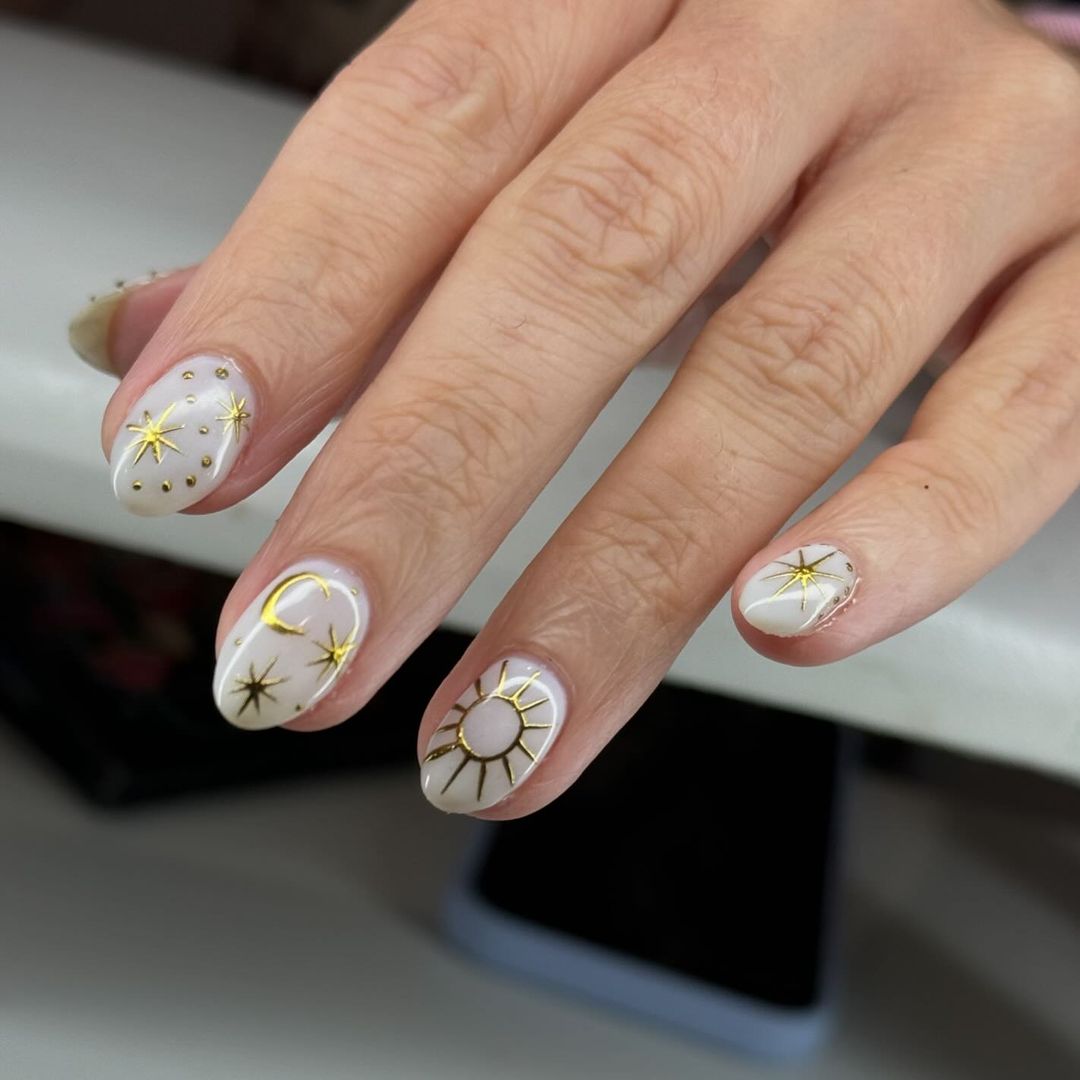
- OPI GelColor in Funny Bunny
- Gold nail stickers (stars, moons)
- Nail glue
- Seche Vite Dry Fast Top Coat
Step-by-Step Guide:
- Apply a base coat to protect your nails.
- Paint two layers of OPI GelColor in Funny Bunny.
- Apply gold nail stickers in the shape of stars and moons onto each nail.
- Use nail glue to ensure the stickers stay in place.
- Finish with a top coat to seal the design and add shine.
Shimmering Natural Almond Nails
These nails feature a natural almond shape with a subtle shimmer, making them perfect for a bride or mother of the bride who prefers a simple yet elegant look. The natural color enhances the beauty of the nails while adding a delicate shimmer.
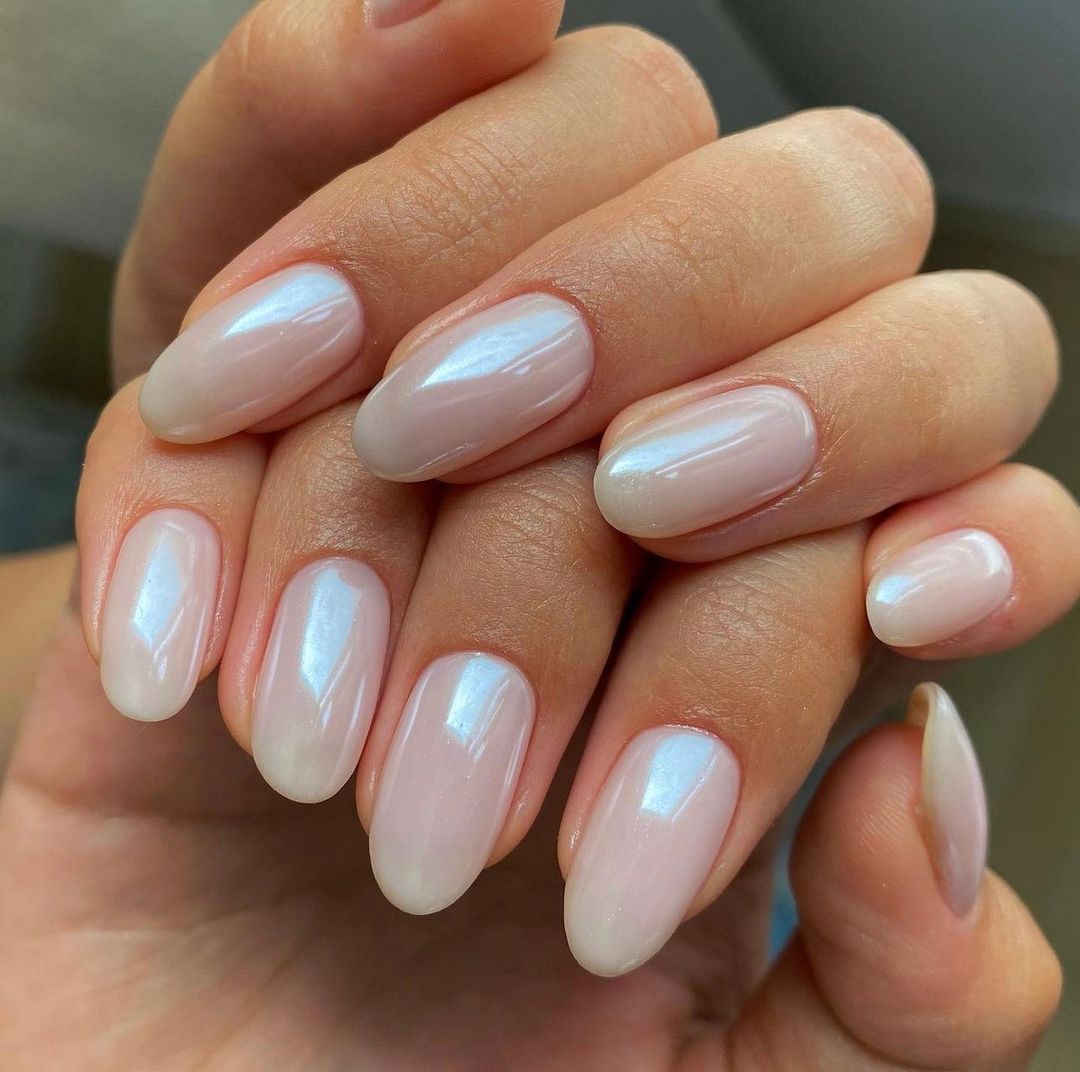
- Essie Gel Couture in Sheer Fantasy
- OPI Nail Lacquer in Kyoto Pearl
- Pearl nail powder
- Top coat
Step-by-Step Guide:
- Start with clean, filed nails and apply a base coat.
- Apply two coats of Essie Gel Couture in Sheer Fantasy.
- Add a thin layer of OPI Nail Lacquer in Kyoto Pearl for a subtle shimmer.
- Gently rub pearl nail powder onto the nails.
- Finish with a top coat to seal the design and add a glossy finish.
Floral White Accents
This design features long nails with intricate white floral accents, perfect for a bride looking for a sophisticated yet delicate look. The sheer base color allows the white floral designs to stand out beautifully.
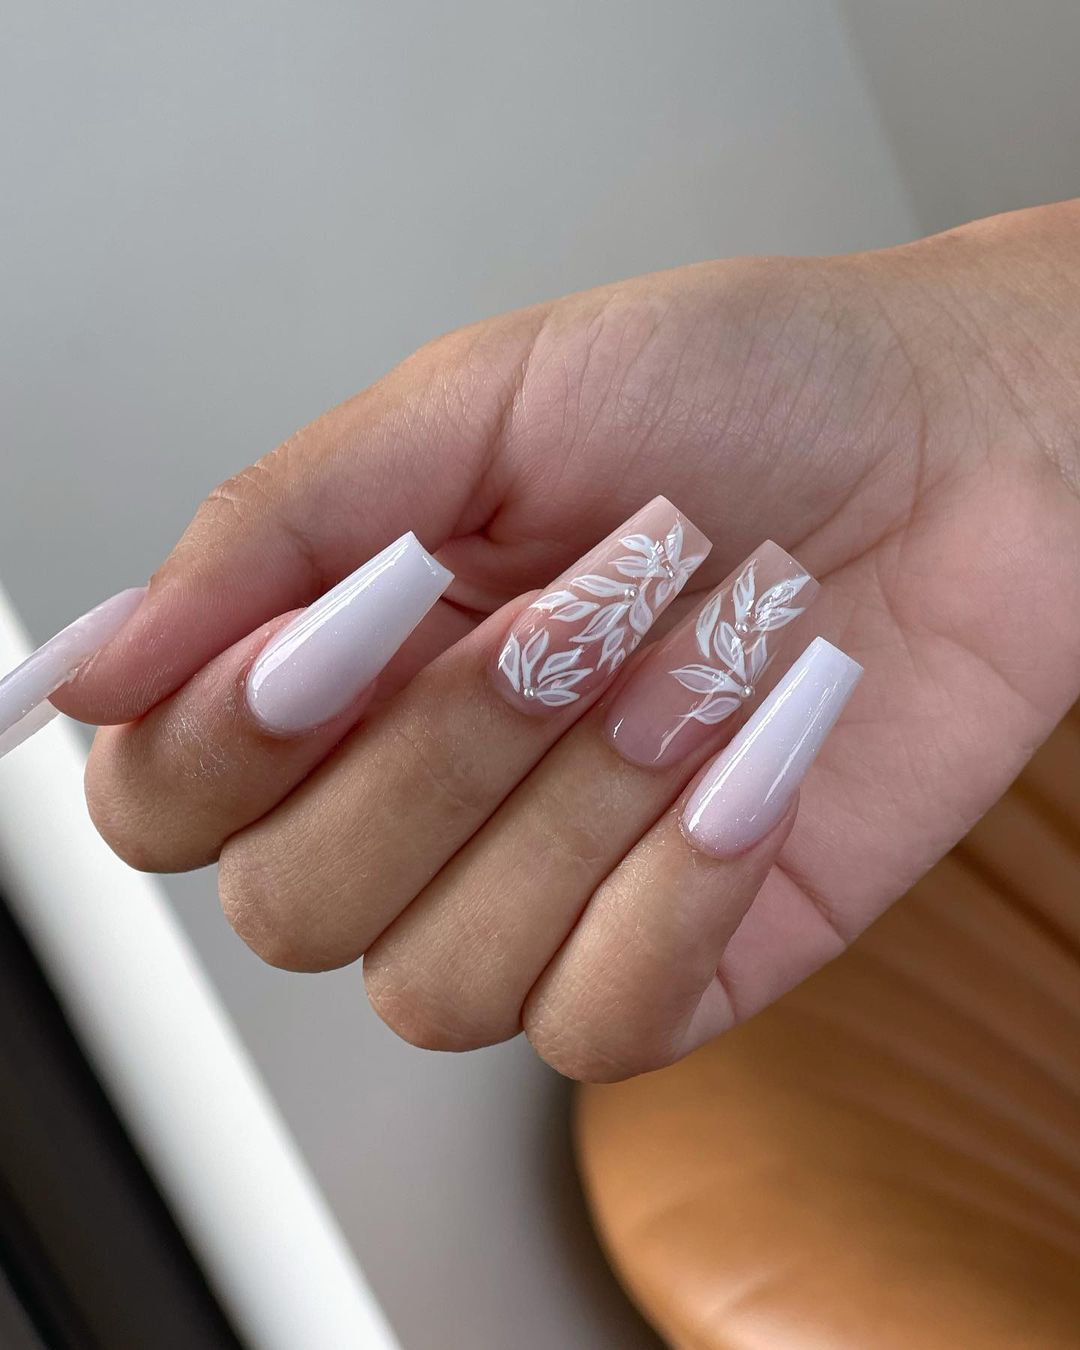
- OPI GelColor in Funny Bunny
- White nail art paint
- Nail art brush
- Top coat
Step-by-Step Guide:
- Apply a base coat to your nails.
- Paint two layers of OPI GelColor in Funny Bunny.
- Use white nail art paint and a nail art brush to create delicate floral designs on each nail.
- Finish with a top coat to seal the design and add shine.
Crystal Floral Nails
This intricate nail design combines crystal accents with delicate floral patterns, creating a stunning look for a bride. The white flowers are elegantly detailed, and the added crystals bring a touch of sparkle, perfect for a glamorous wedding.
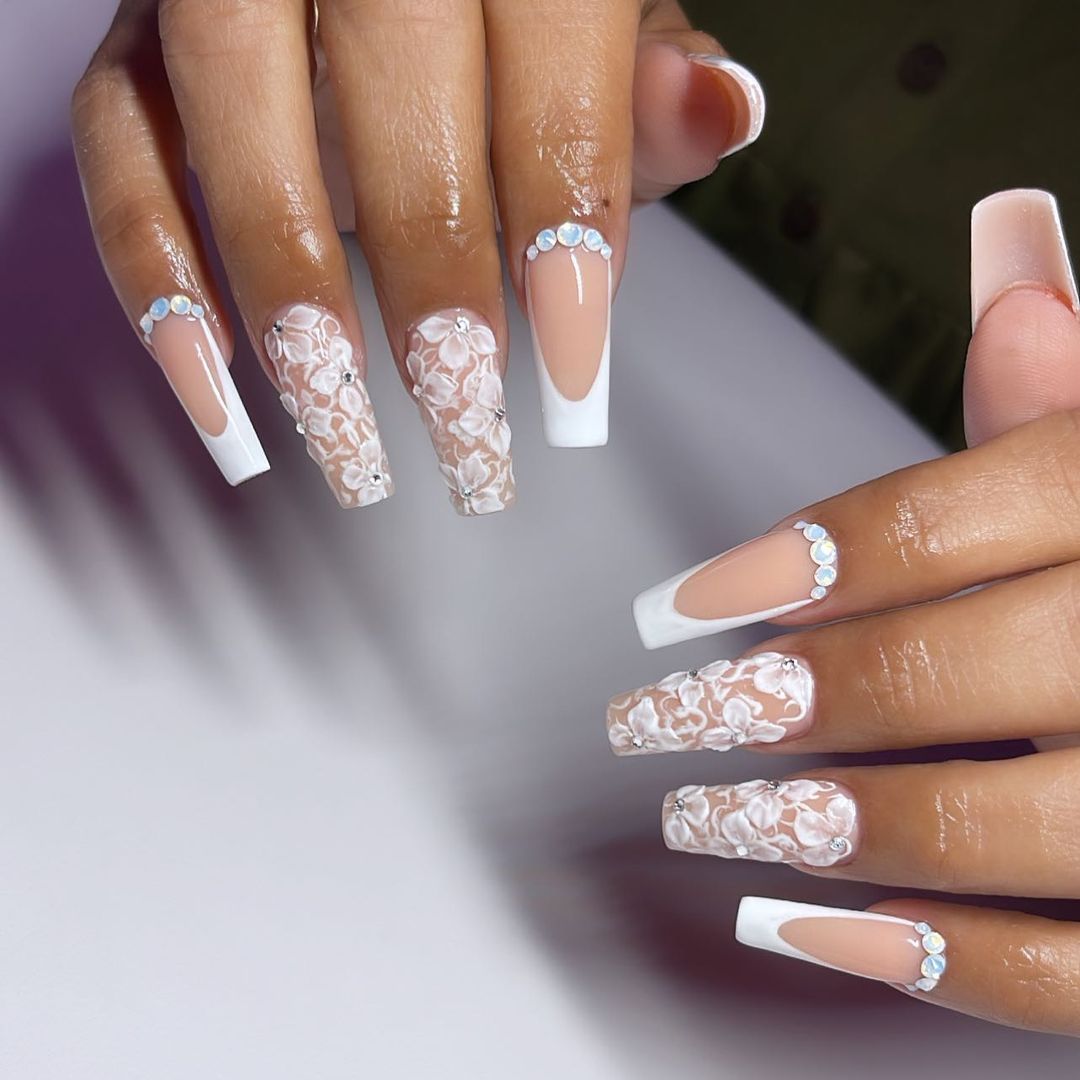
- OPI GelColor in Put it in Neutral
- Essie Nail Polish in Blanc
- Swarovski Crystals
- Nail art brush
- Nail glue
- Top coat
Step-by-Step Guide:
- Apply a base coat to your nails.
- Paint two layers of OPI GelColor in Put it in Neutral.
- Using Essie’s Blanc and a nail art brush, create detailed floral patterns on each nail.
- Attach Swarovski crystals using nail glue for added sparkle.
- Finish with a top coat to seal the design and add shine.
Pearl Ombre Elegance
This elegant ombre design transitions from a soft pink to white, adorned with pearl accents. Perfect for a bride, this look combines simplicity with sophistication, making it ideal for a chic and timeless style.

- OPI GelColor in Bubble Bath
- Essie Nail Polish in Blanc
- Pearl nail charms
- Nail glue
- Top coat
Step-by-Step Guide:
- Start with clean, filed nails and apply a base coat.
- Apply two coats of OPI GelColor in Bubble Bath.
- Create an ombre effect by blending Essie’s Blanc towards the tips of the nails.
- Attach pearl nail charms near the cuticles using nail glue.
- Seal with a top coat to secure the design and add a glossy finish.
Delicate White Petals
These nails feature delicate white petal designs on a translucent base, creating a soft and ethereal look. Perfect for a bridesmaid or a guest, this design adds a touch of elegance without overpowering the overall look.
- CND Shellac in Romantique
- OPI Nail Lacquer in Alpine Snow
- Nail art brush
- Top coat
Step-by-Step Guide:
- Apply a base coat to your nails.
- Paint two layers of CND Shellac in Romantique for a translucent base.
- Use OPI’s Alpine Snow and a nail art brush to create delicate petal designs on each nail.
- Finish with a top coat to seal the design and add shine.
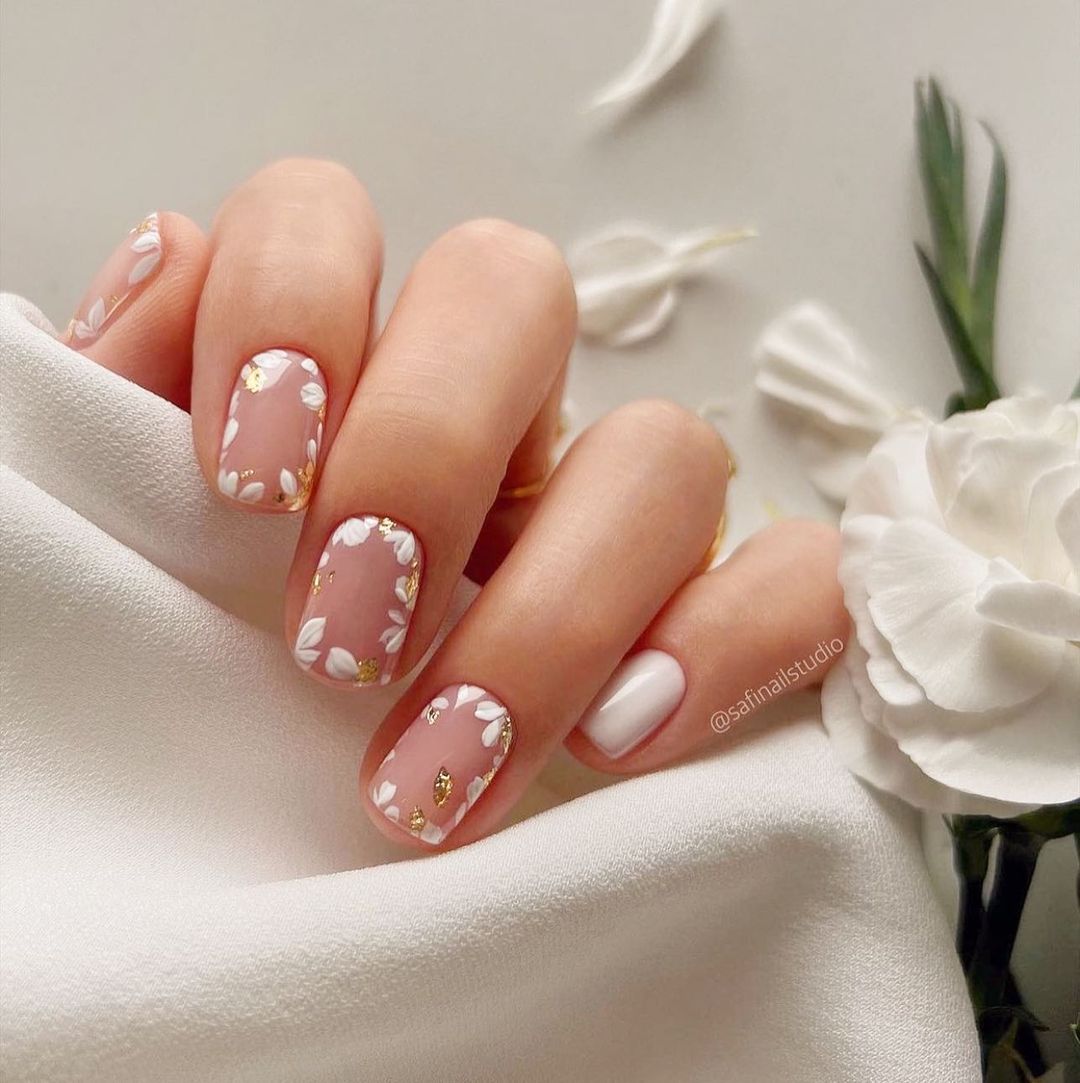
Gold Leaf Floral Accents
This nail design features intricate white floral patterns accented with gold leaf, creating a luxurious look perfect for a bride or mother of the bride. The gold leaf adds a touch of opulence to the delicate floral designs.
- Essie Nail Polish in Ballet Slippers
- OPI Nail Lacquer in Alpine Snow
- Gold leaf
- Nail art brush
- Nail glue
- Top coat
Step-by-Step Guide:
- Apply a base coat to your nails.
- Paint two layers of Essie’s Ballet Slippers.
- Create floral designs using OPI’s Alpine Snow and a nail art brush.
- Carefully apply gold leaf accents using nail glue.
- Finish with a top coat to secure the design and add a glossy finish.
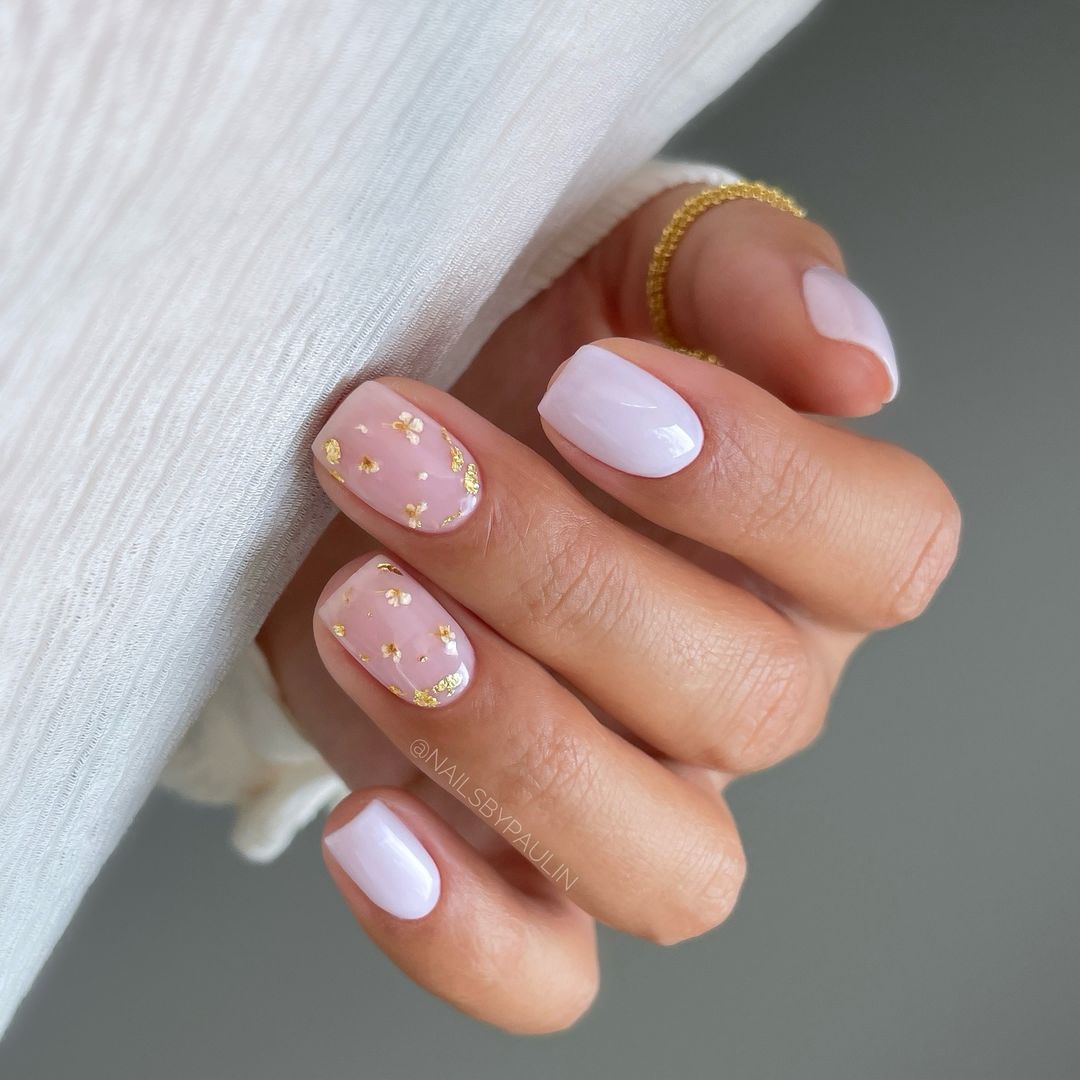
Subtle Gold Details
These nails feature short, square shapes with delicate gold details on a soft pink base, perfect for a bridesmaid or guest. The subtle gold accents add a touch of sophistication to the simple design.
- Zoya Nail Polish in Bela
- Essie Nail Polish in Ballet Slippers
- Gold nail stickers
- Nail glue
- Seche Vite Dry Fast Top Coat
Step-by-Step Guide:
- Start with clean, filed nails and apply a base coat.
- Apply two coats of Zoya’s Bela.
- Add a layer of Essie’s Ballet Slippers for a soft pink hue.
- Apply gold nail stickers onto each nail for subtle detailing.
- Seal with Seche Vite top coat to enhance the shine and durability.
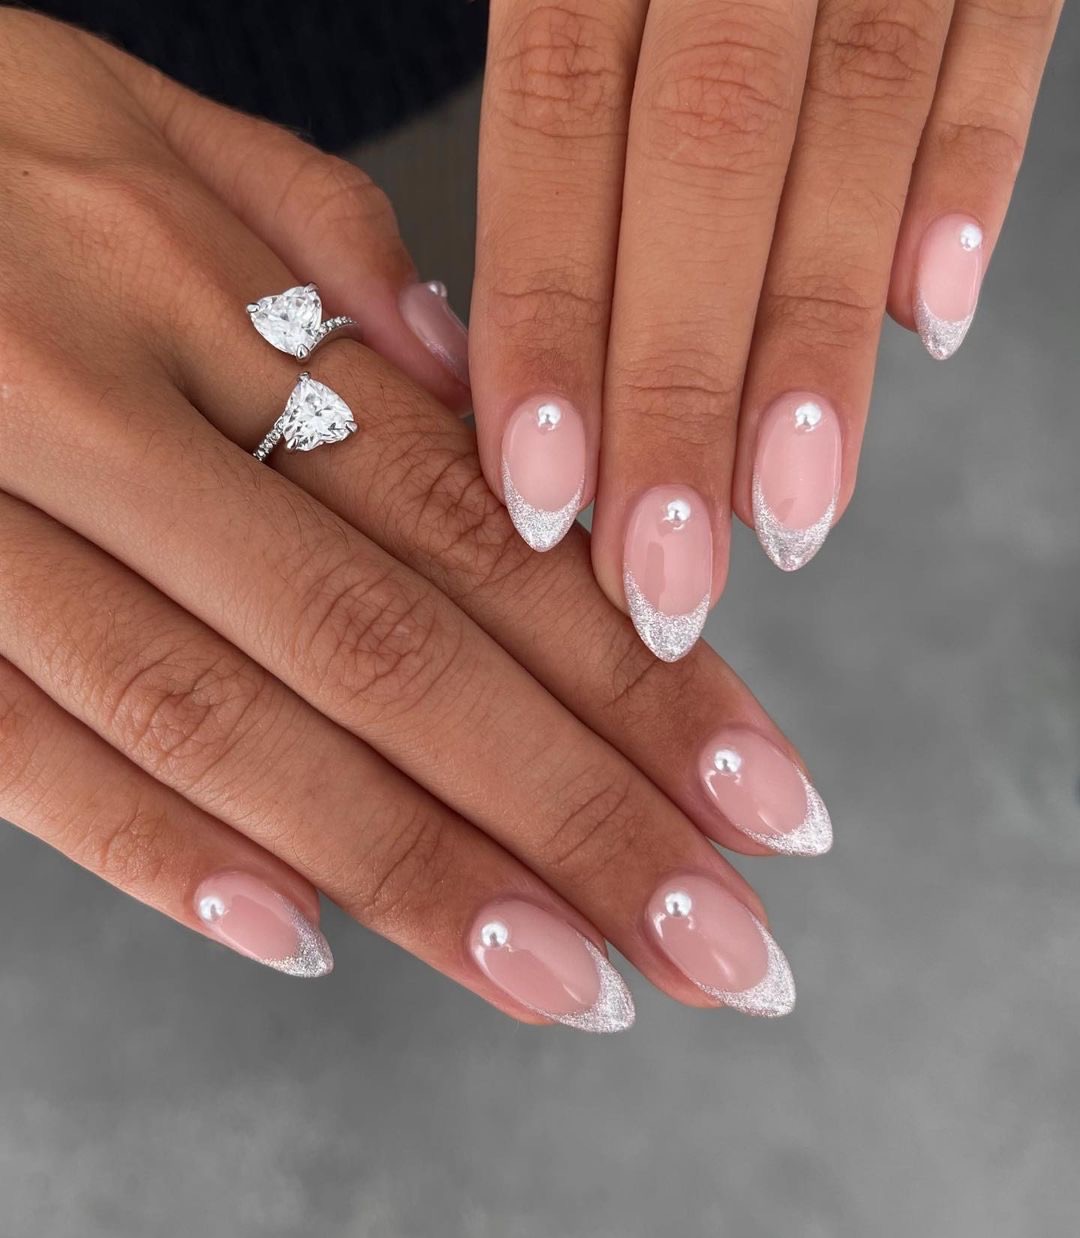
Glitter and Pearl French Tips
This nail design combines classic French tips with glitter and pearl accents, creating a stunning look for a bride. The glitter adds a touch of sparkle, while the pearls enhance the elegance of the design.
- OPI GelColor in Funny Bunny
- Essie Nail Polish in Blanc
- Silver glitter
- Pearl nail charms
- Nail glue
- Top coat
Step-by-Step Guide:
- Apply a base coat to your nails.
- Paint two layers of OPI GelColor in Funny Bunny.
- Create French tips using Essie’s Blanc and add silver glitter for extra sparkle.
- Attach pearl nail charms using nail glue.
- Finish with a top coat to secure the design and add a glossy finish.
Soft Floral Matte Nails
These nails feature a soft pink to white gradient with delicate white floral designs, perfect for a bride looking for a sophisticated yet understated look. The matte finish adds a modern twist to the classic floral design.
- OPI GelColor in Mod About You
- Essie Nail Polish in Blanc
- Matte top coat
- Nail art brush
Step-by-Step Guide:
- Start with clean, filed nails and apply a base coat.
- Apply two coats of OPI GelColor in Mod About You.
- Create floral designs using Essie’s Blanc and a nail art brush.
- Finish with a matte top coat to add a modern touch and ensure the design lasts.
FAQ
- What are the best colors for fall wedding nails?
The best colors for fall wedding nails include deep burgundies, muted neutrals, rich chocolates, and metallic golds. These shades complement the autumnal theme and add warmth to your overall look.
- How can I ensure my nail design lasts through the wedding day?
To ensure your nail design lasts, start with a high-quality base coat, use durable polishes, and finish with a strong top coat. Additionally, avoid activities that might damage your nails, such as heavy lifting or extensive hand washing without gloves.
- Can I create intricate nail designs at home?
Absolutely! With the right tools and a bit of practice, you can create stunning nail designs at home. Investing in quality nail art brushes, dotting tools, and a variety of polishes can make the process easier and more enjoyable.
Save Pin