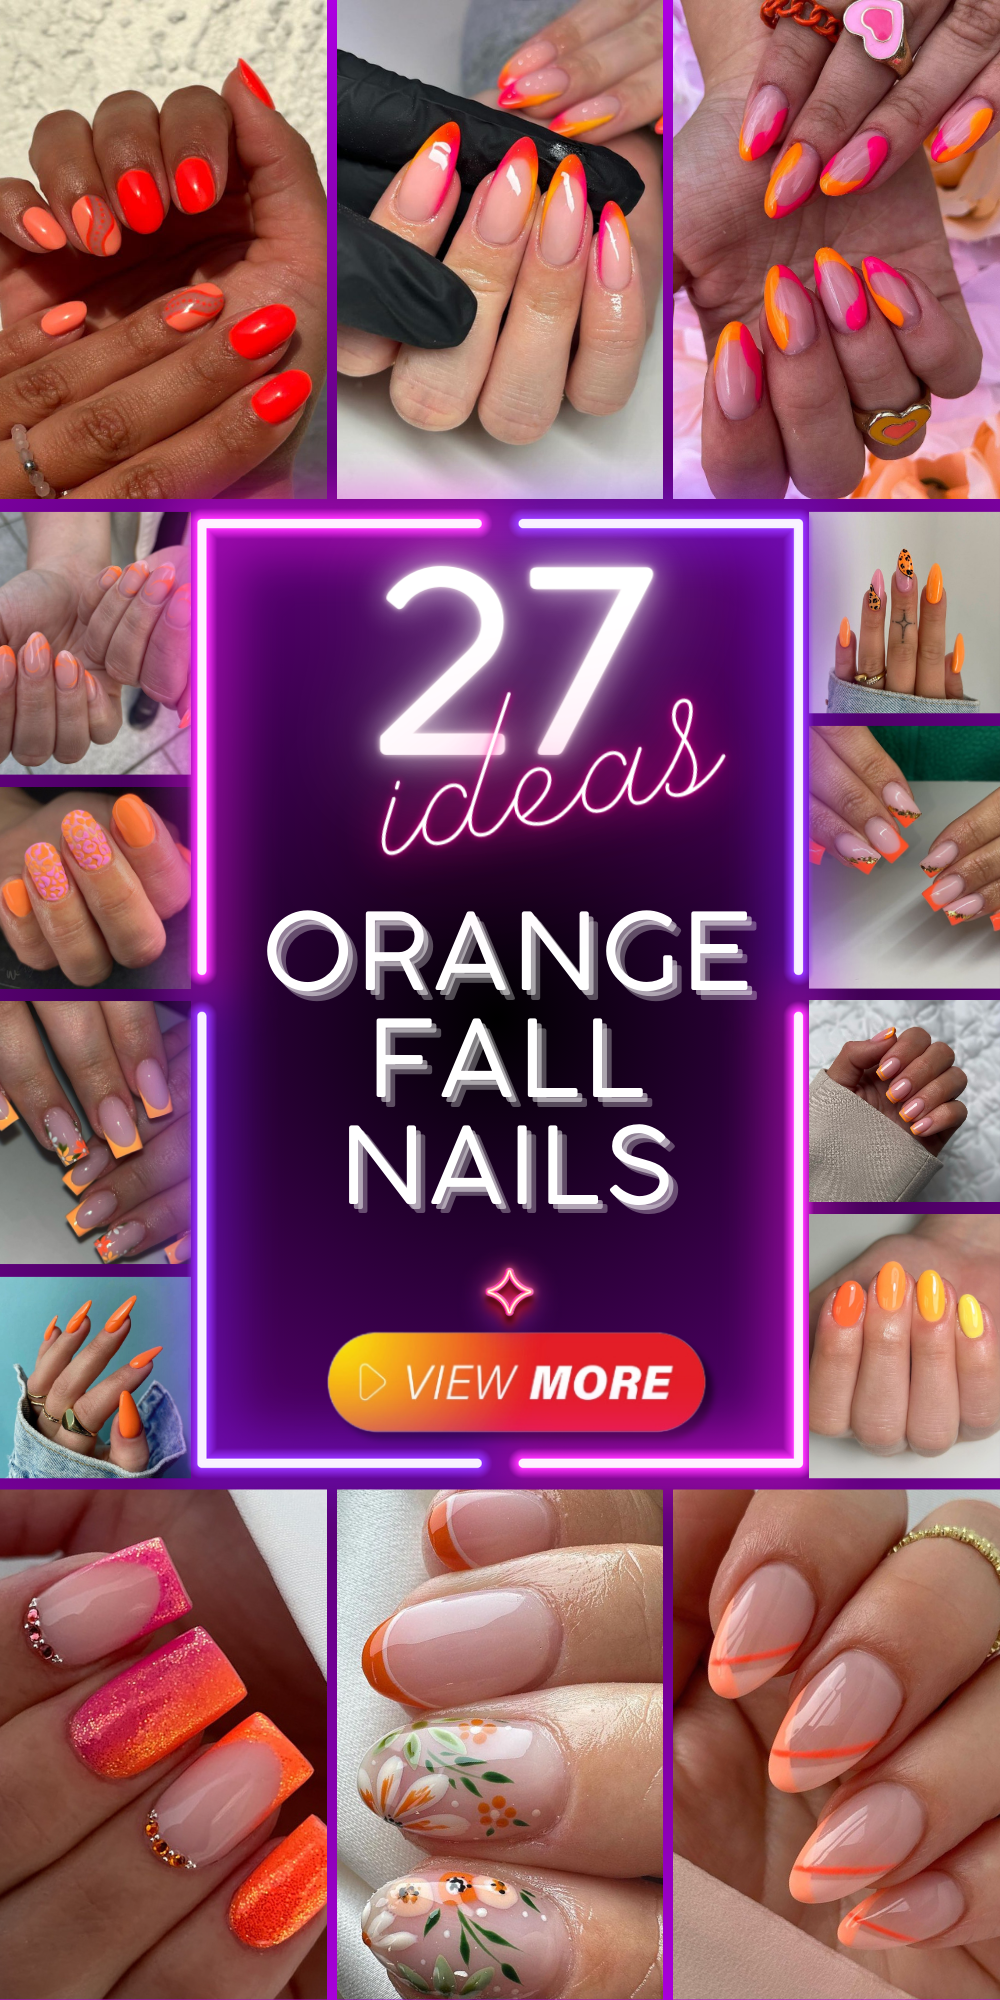
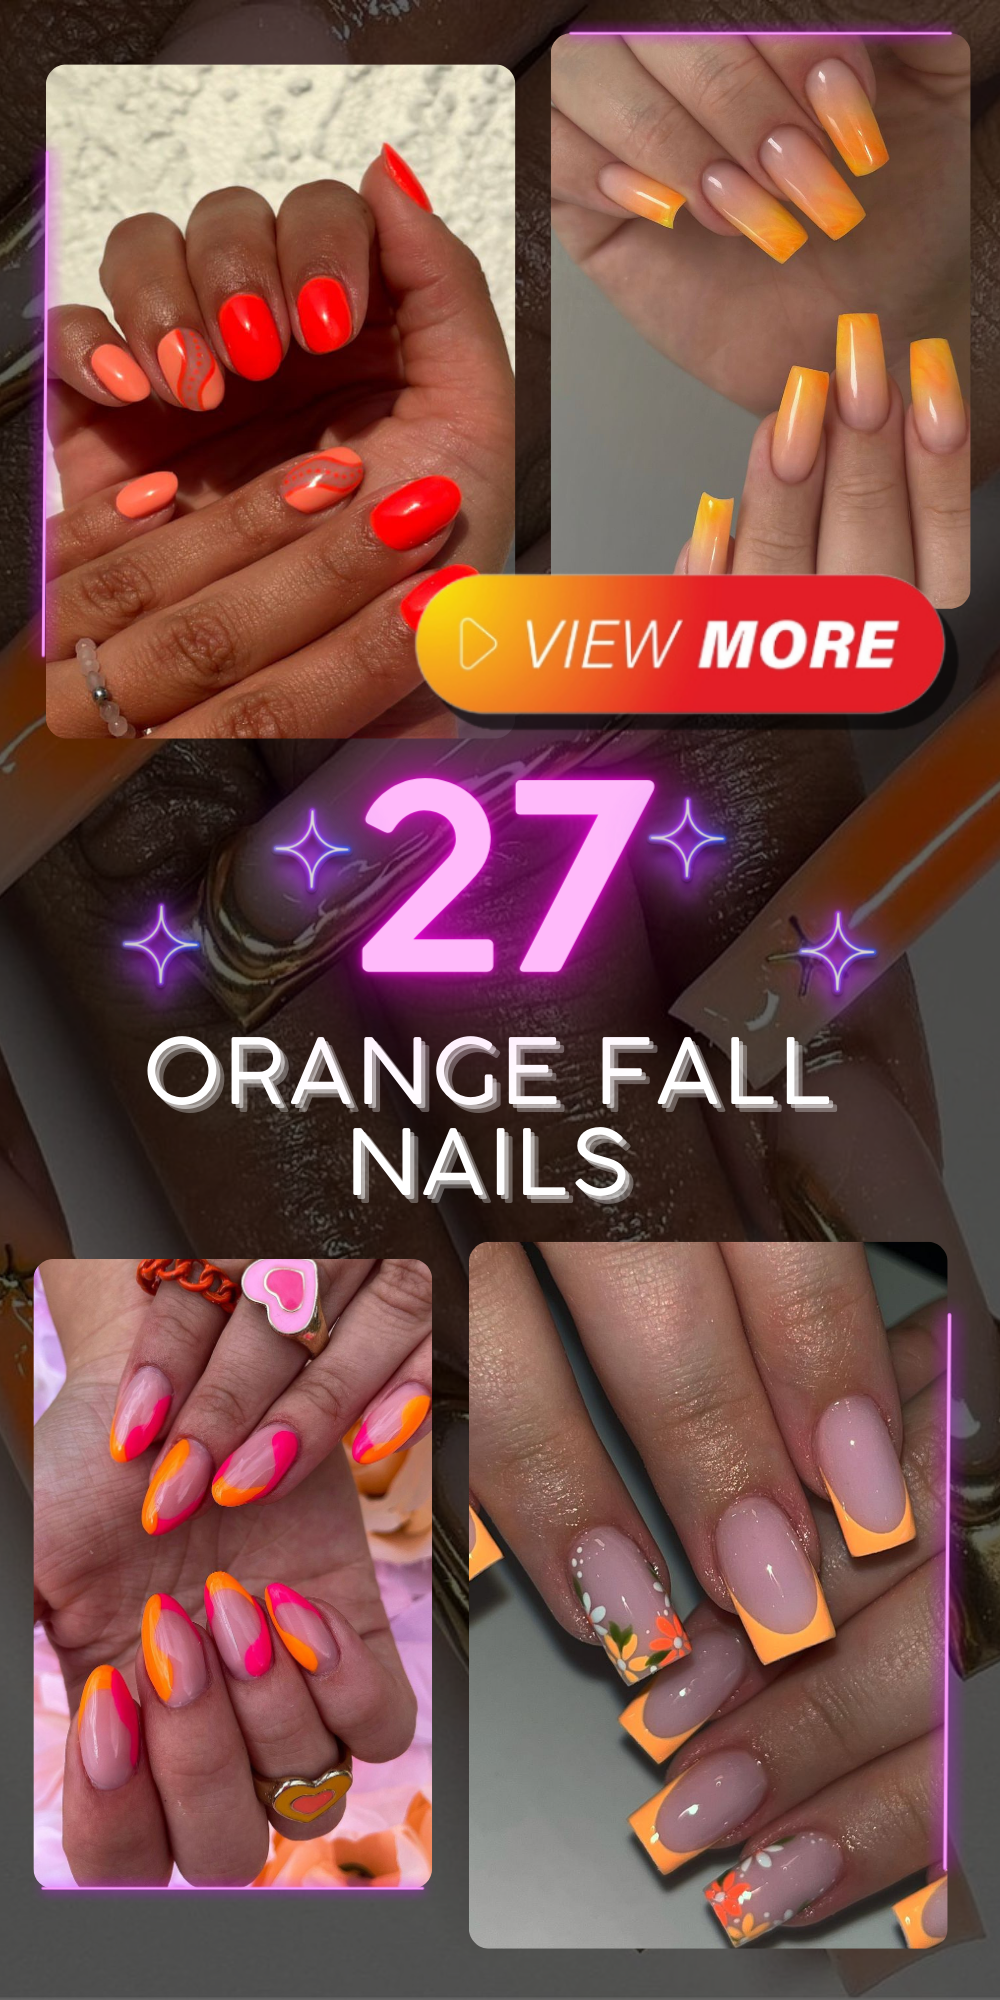
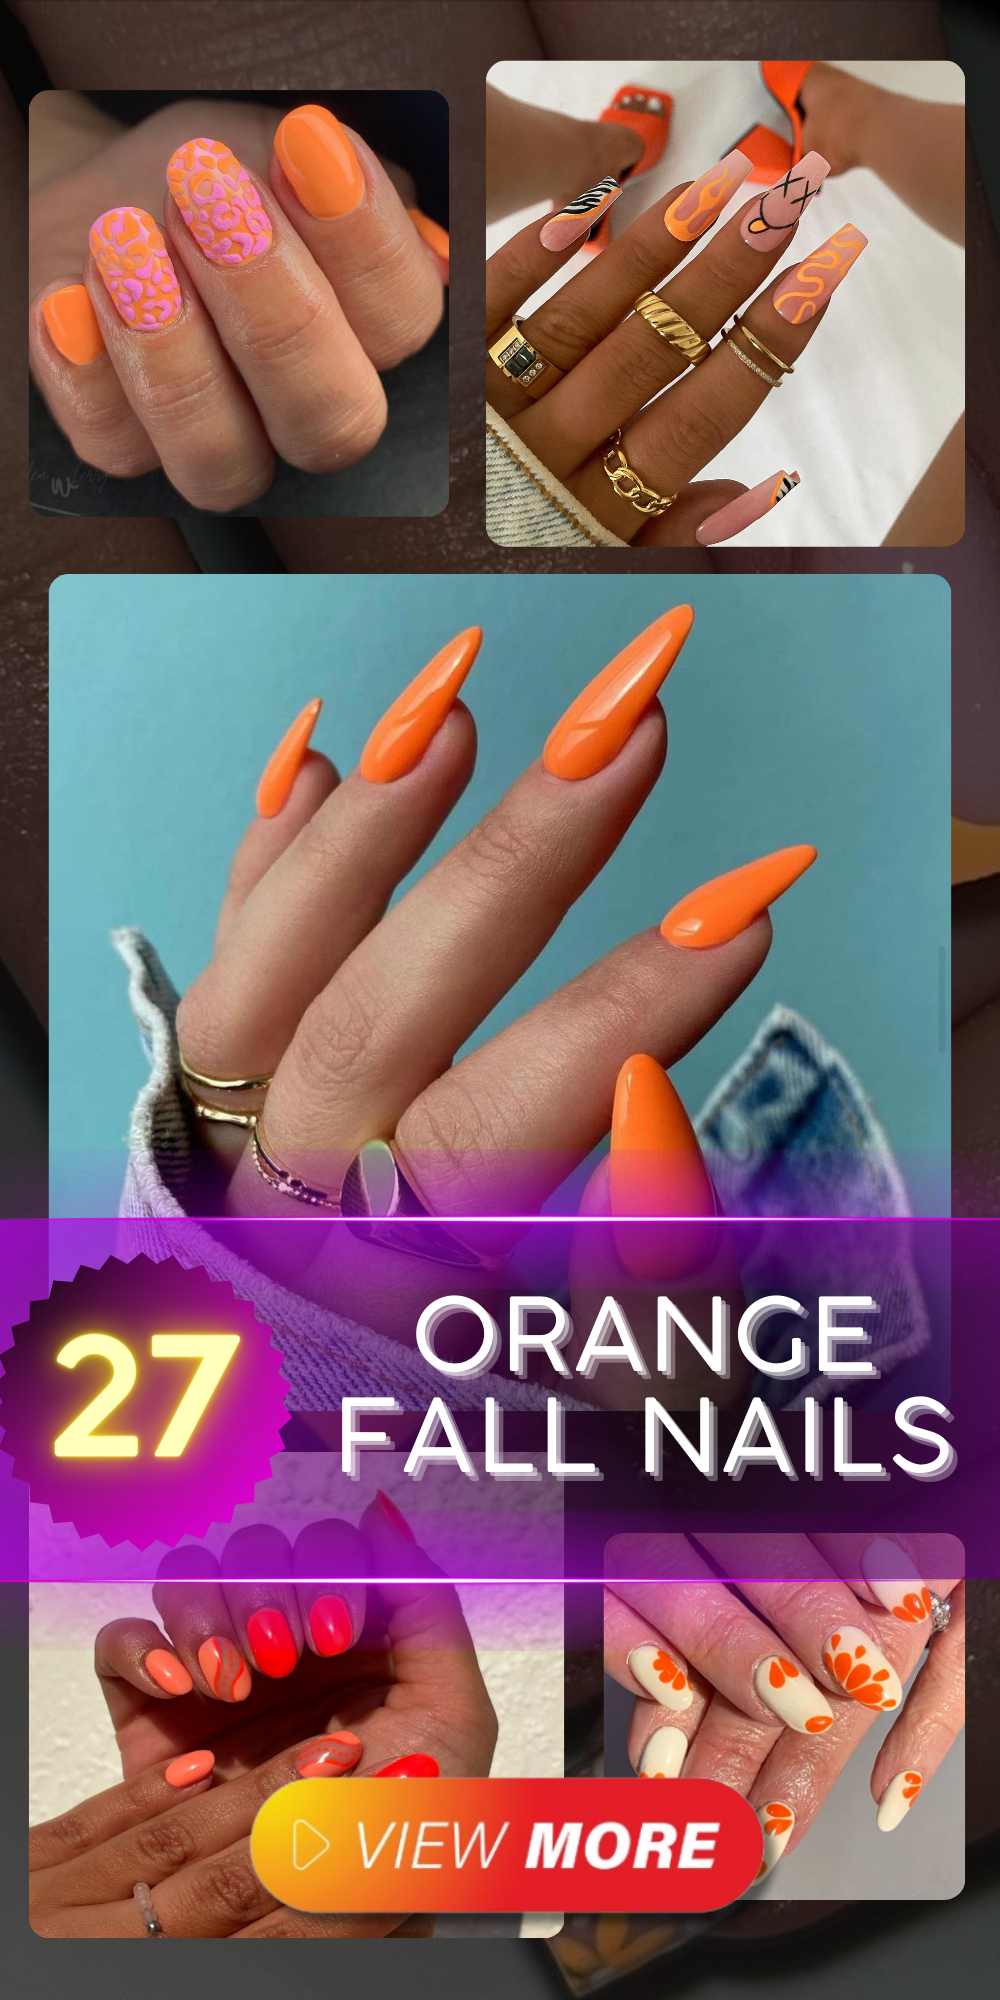
Fall is the perfect time to experiment with orange fall nails, and I’ve got just the right designs to inspire you. Whether you’re looking for a subtle hint of autumn or a bold statement, these ideas will elevate your nail game. Let’s dive into the latest trends and see how you can recreate these stunning looks at home.
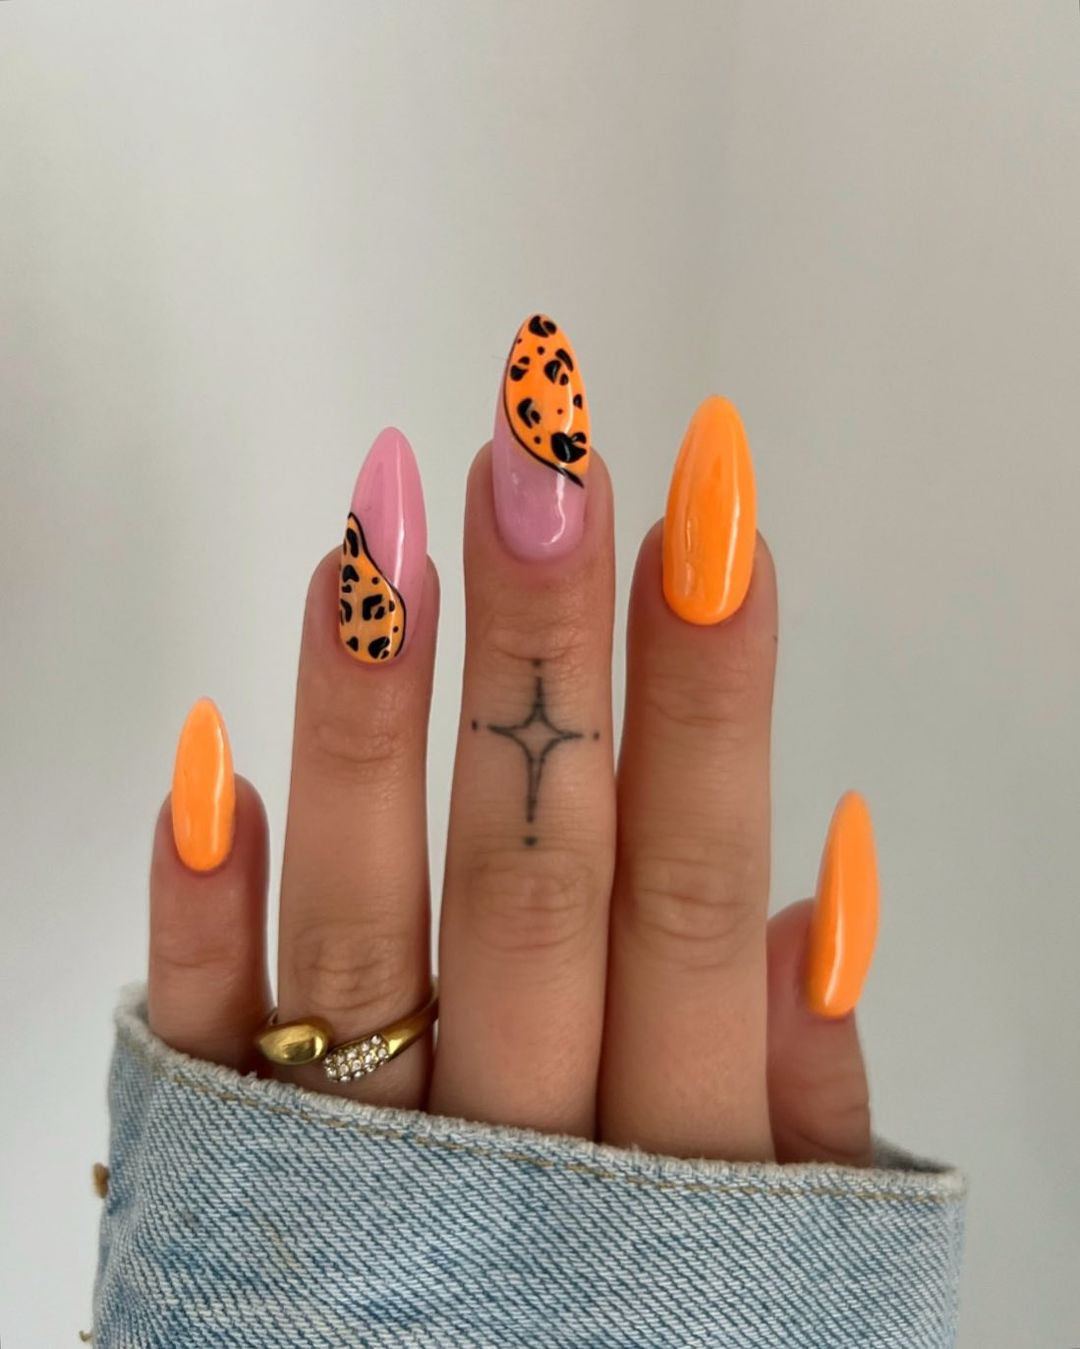
Vibrant Leopard Accents
When it comes to standout orange fall nails, this design is a game-changer. The combination of neon orange and soft pink, paired with leopard print accents, creates a dynamic and eye-catching look. The stiletto shape adds a touch of fierceness, perfect for those who love to make a statement. This manicure balances boldness and sophistication effortlessly.
-
- Neon orange nail polish: OPI GelColor in “No Tan Lines”
- Soft pink nail polish: Essie Gel Couture in “Touch Up”
- Leopard print nail decals: Le Mini Macaron Leopard Print Stickers
- Top coat: Seche Vite Dry Fast Top Coat
Application Tips:
-
- Start with a base coat to protect your nails.
- Apply two coats of the soft pink polish to all nails.
- On alternating nails, use a thin brush to create leopard spots with the neon orange polish.
- Seal the design with a top coat for a lasting finish.
Creating this look at home is easier than it seems. Begin with a base coat to protect your natural nails. Apply two coats of the soft pink polish, ensuring each layer dries completely. For the leopard spots, use a thin nail art brush dipped in neon orange polish, and create irregular dots and shapes. Finish with a top coat to keep your orange fall nails vibrant and shiny.
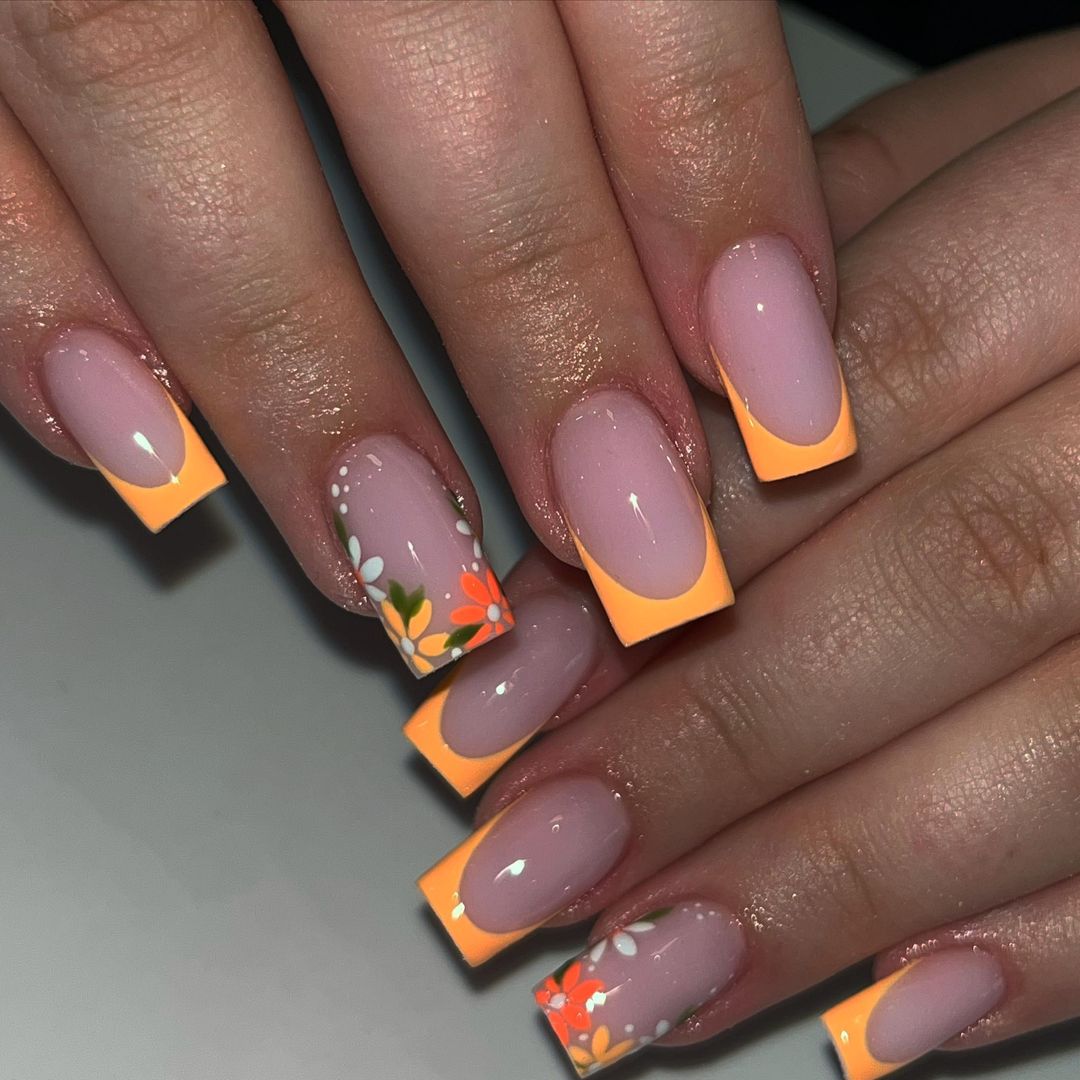
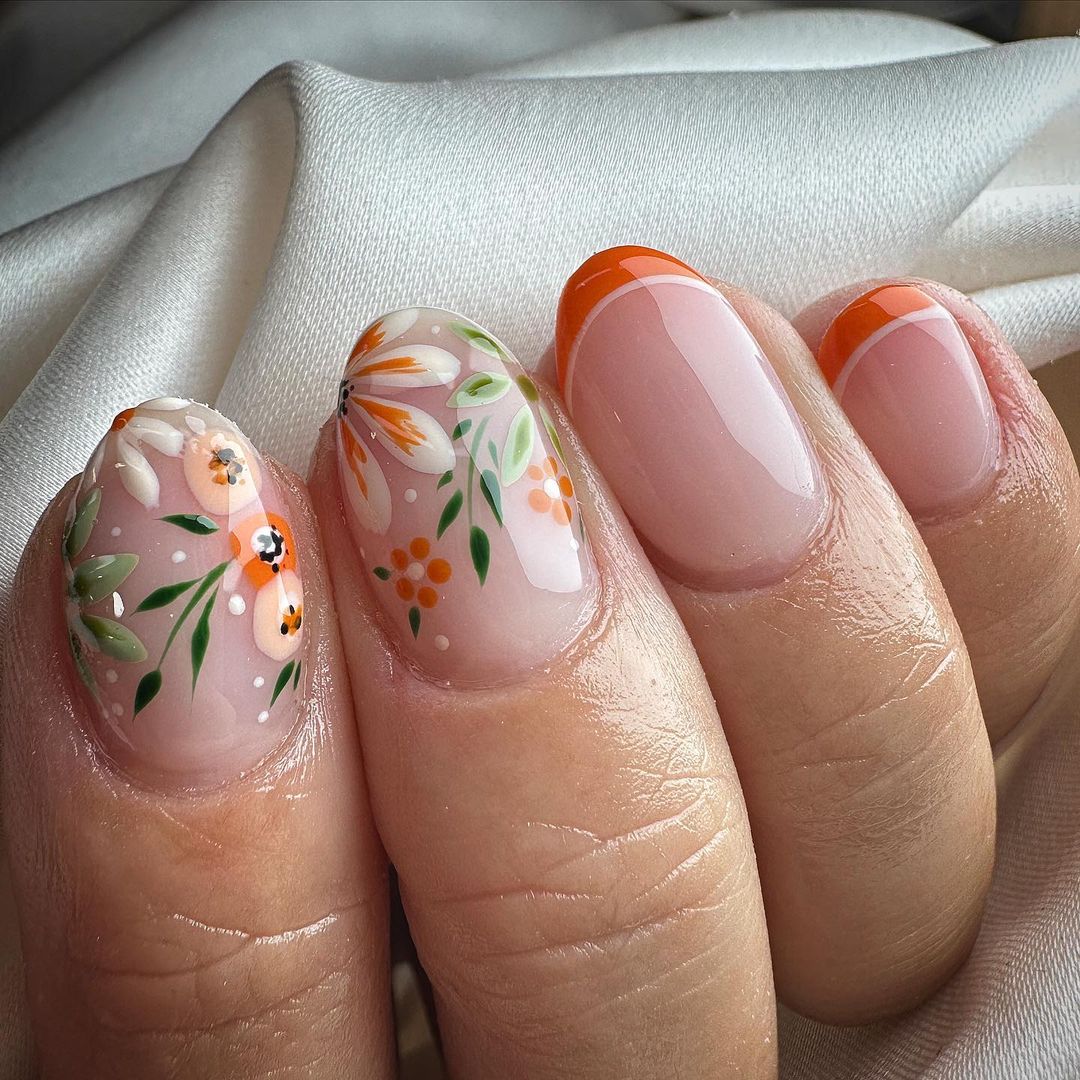
Floral French Tips
French tips get an autumnal twist with these orange floral accents. The gel short square shape provides a neat and classic canvas for the bright orange tips and delicate floral designs. This look combines elegance and playful charm, perfect for both everyday wear and special occasions.
-
- Bright orange nail polish: Sally Hansen Miracle Gel in “Electra-cute”
- Nude base polish: OPI Infinite Shine in “Bubble Bath”
- Floral nail art stickers: Dashing Diva Gloss Ultra Shine Gel Strips in “Floral Crown”
- Top coat: CND Vinylux Weekly Top Coat
Application Tips:
-
- Apply a nude base polish to all nails.
- Using a fine brush, paint bright orange tips.
- Add floral stickers to accent nails.
- Seal with a top coat.
To recreate this look, start with a nude base polish. Once dry, use a fine nail art brush to paint the tips with bright orange polish. Place the floral stickers on one or two accent nails to add a touch of autumn charm. Finish with a top coat to protect your design and add shine.
Glittering Gold and Orange
This design combines the warmth of orange with the glamour of gold glitter. The gel almond shape enhances the elegance of this look, making it perfect for the fall season. The subtle nude base contrasts beautifully with the bright orange and shimmering gold accents, creating a luxurious feel.
-
- Nude base polish: Zoya Naked Manicure in “Pink Perfector”
- Bright orange polish: China Glaze in “Orange Knockout”
- Gold glitter polish: Butter London in “Gold Rush”
- Top coat: Essie Gel Setter Top Coat
Application Tips:
-
- Start with a nude base on all nails.
- Paint bright orange tips.
- Apply gold glitter polish at the base or tips.
- Finish with a top coat.
For a DIY version, begin with a nude base polish. Once it’s dry, apply the bright orange polish to the tips. For added glamour, use a gold glitter polish either at the base or over the tips. Seal everything with a top coat to ensure your orange fall nails stay stunning.
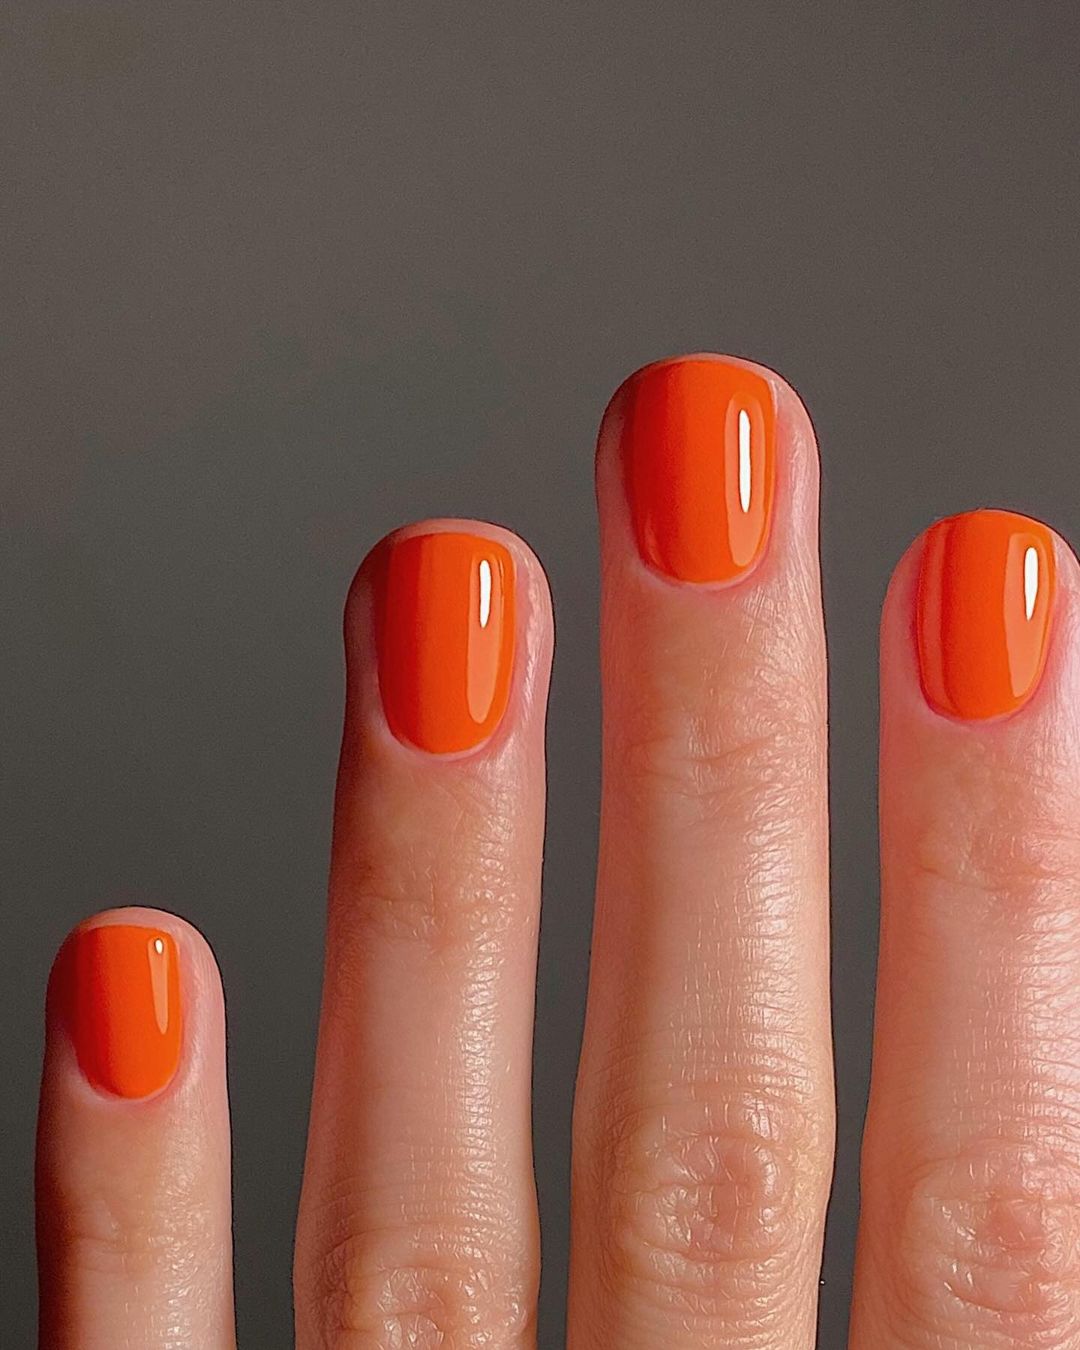
Classic Orange Short Nails
These bold orange nails are perfect for the fall season, especially if you prefer a clean, classic look. The bright, vivid orange color is a standout, and it pairs beautifully with shorter nail lengths. This design is simple yet striking, making it an excellent choice for those who want a pop of color without intricate designs. The rounded shape enhances the natural elegance of the nails, giving a polished and professional appearance.
-
- Bright orange nail polish: Essie Nail Polish in “Tangerine Tease”
- Base coat: OPI Natural Nail Base Coat
- Top coat: Sally Hansen Insta-Dri Top Coat
Application Tips:
-
- Begin with a base coat to protect your nails.
- Apply two to three coats of the bright orange polish for full coverage.
- Finish with a top coat to add shine and longevity to your manicure.
To achieve this look at home, start with a good base coat to prevent staining. Apply two to three layers of the bright orange polish, ensuring each layer dries completely before applying the next. Seal the look with a high-gloss top coat for a professional finish.
Save Pin
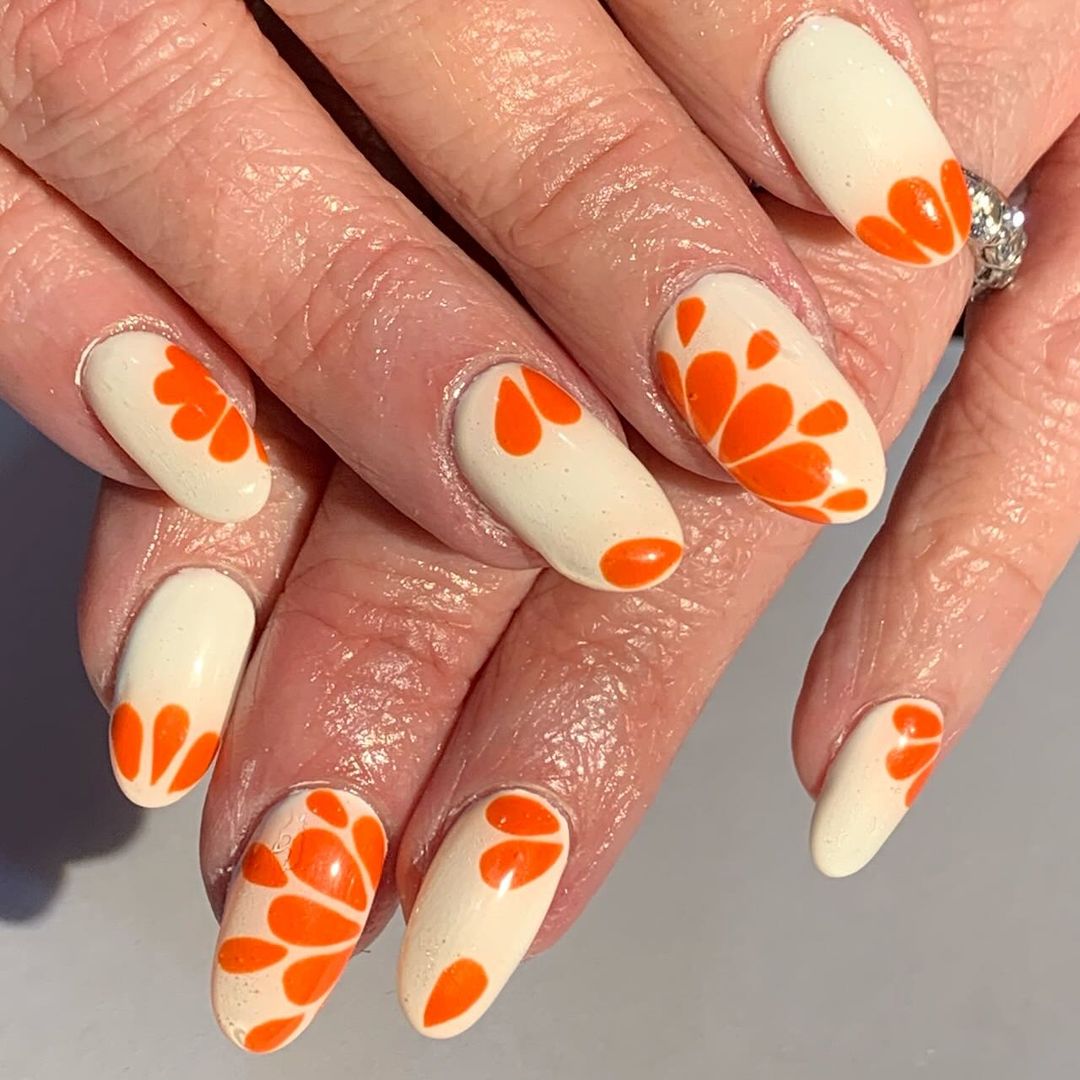
Retro Floral Design
This retro floral design combines a creamy base with bold orange flower petals, creating a fun and playful look. The almond shape of the nails adds to the retro feel, making it a perfect choice for those who love vintage-inspired styles. This manicure is both unique and cheerful, ideal for adding a touch of whimsy to your fall look.
-
- Cream base polish: Butter London Patent Shine 10X Nail Lacquer in “Cotton Buds”
- Bright orange nail polish: China Glaze Nail Lacquer in “Orange Knockout”
- Nail art brushes for detail work
- Top coat: Essie Gel Couture Top Coat
Application Tips:
-
- Apply the cream base polish to all nails and let dry.
- Using a fine nail art brush, paint orange flower petals on each nail.
- Seal the design with a top coat to protect the artwork.
To recreate this design, start with a base layer of cream polish. Once it’s completely dry, use a fine nail art brush to paint the orange flower petals on each nail. Vary the size and placement of the petals for a more natural, playful look. Finish with a top coat to protect your floral design and add a glossy shine.
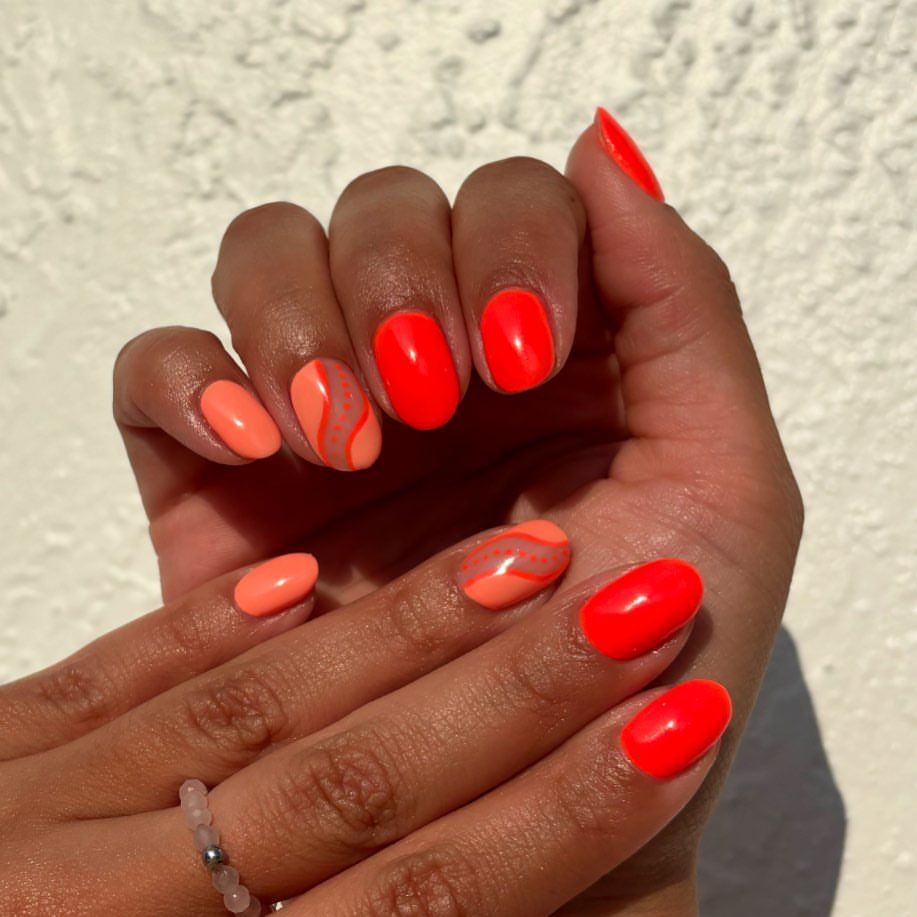
Bright Orange and Coral Swirls
These bright orange and coral swirl nails are a vibrant and fun way to embrace the fall season. The combination of the two colors creates a dynamic and energetic look, while the round shape keeps it elegant and wearable. This design is perfect for those who love a bit of art on their nails without going overboard.
-
- Bright orange nail polish: OPI Nail Lacquer in “A Good Man-darin is Hard to Find”
- Coral nail polish: Zoya Nail Polish in “Thandie”
- Thin nail art brush for creating swirls
- Base coat: Orly Bonder Rubberized Base Coat
- Top coat: Seche Vite Dry Fast Top Coat
Application Tips:
-
- Start with a base coat to ensure long-lasting wear.
- Paint alternating nails with bright orange and coral polish.
- Use a thin brush to create swirl patterns on the accent nails.
- Finish with a top coat to seal the design and add shine.
To achieve this look at home, start with a base coat. Apply the bright orange and coral polishes to alternating nails. Once the base colors are dry, use a thin nail art brush to create swirl patterns on the accent nails. Finish with a top coat to ensure your swirls stay vibrant and intact.
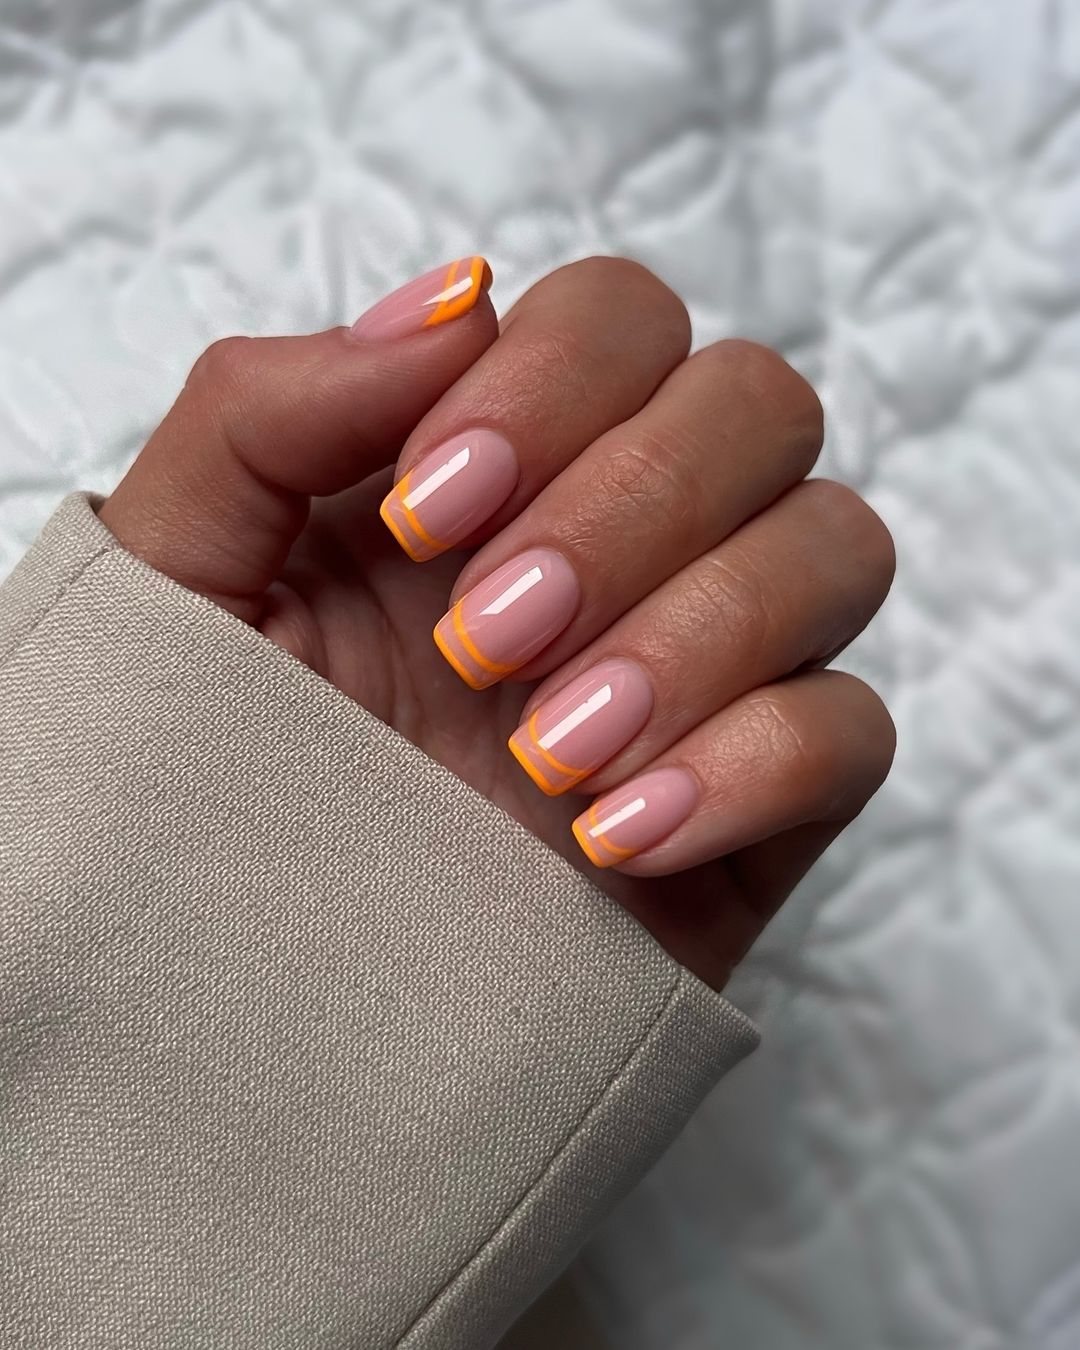
Double French Tips
This double French tip design is a sophisticated twist on the classic French manicure, featuring a bold orange and a lighter orange strip. The clean lines and the contrast between the bright colors and the nude base create a chic and modern look. This design works well with a square shape, adding a refined touch to your nails.
-
- Nude base polish: Essie Gel Couture in “Fairy Tailor”
- Bright orange nail polish: OPI Nail Lacquer in “A Roll in the Hague”
- Light orange nail polish: Sally Hansen Miracle Gel in “Electra-cute”
- Thin nail art brush for precision
- Top coat: Seche Vite Dry Fast Top Coat
Application Tips:
-
- Apply the nude base polish to all nails and let it dry.
- Using a thin nail art brush, create a bright orange tip on each nail.
- Add a lighter orange line just below the bright orange tip for a double French effect.
- Seal with a top coat to protect your design.
To achieve this look at home, start with a base coat followed by the nude polish. Once dry, use a thin nail art brush to paint the bright orange tips. Add a second line of light orange below the first for the double French tip effect. Finish with a top coat to ensure your design stays pristine.
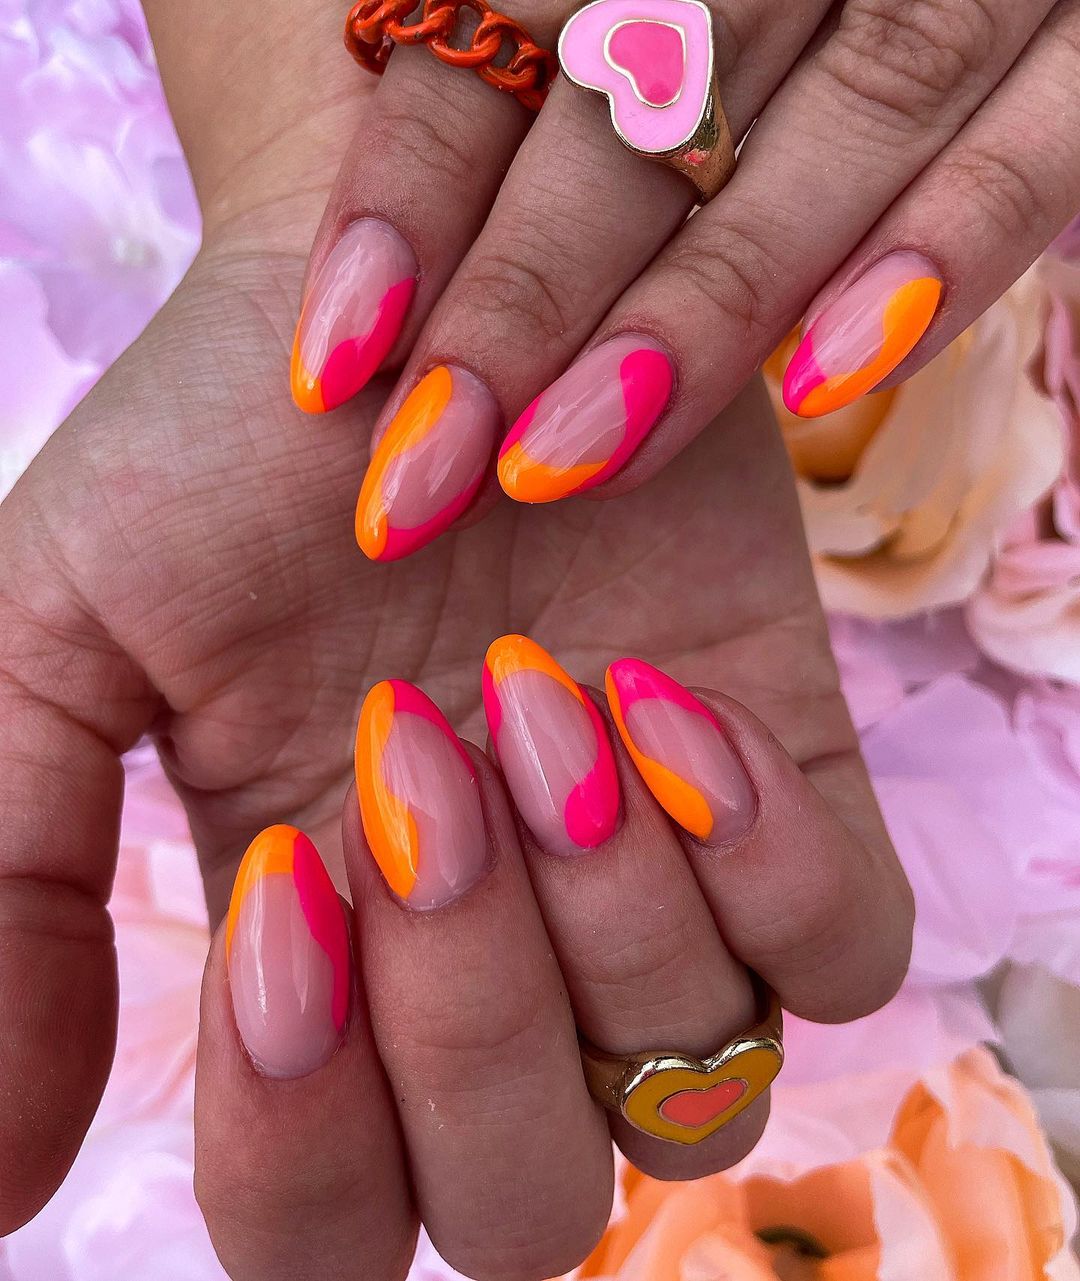
Neon Swirls
This vibrant design features neon pink and orange swirls that bring a fun and energetic vibe to your manicure. The almond shape enhances the fluidity of the swirls, making them look dynamic and lively. This look is perfect for those who love bright and playful nail designs.
-
- Nude base polish: OPI Nail Lacquer in “Samoan Sand”
- Neon pink nail polish: China Glaze Nail Lacquer in “Shocking Pink”
- Neon orange nail polish: Essie Nail Polish in “Tangerine Tease”
- Thin nail art brush for creating swirls
- Top coat: CND Vinylux Weekly Top Coat
Application Tips:
-
- Apply the nude base polish and let it dry completely.
- Using a thin nail art brush, create random swirls with neon pink and orange polishes.
- Ensure the swirls are smooth and cover different parts of the nails.
- Seal with a top coat to protect the vibrant design.
For a DIY version, start with a base coat and apply the nude polish. Once dry, use a thin brush to create swirling patterns with the neon pink and orange polishes. Vary the direction and size of the swirls for a unique look. Finish with a top coat to add shine and durability.
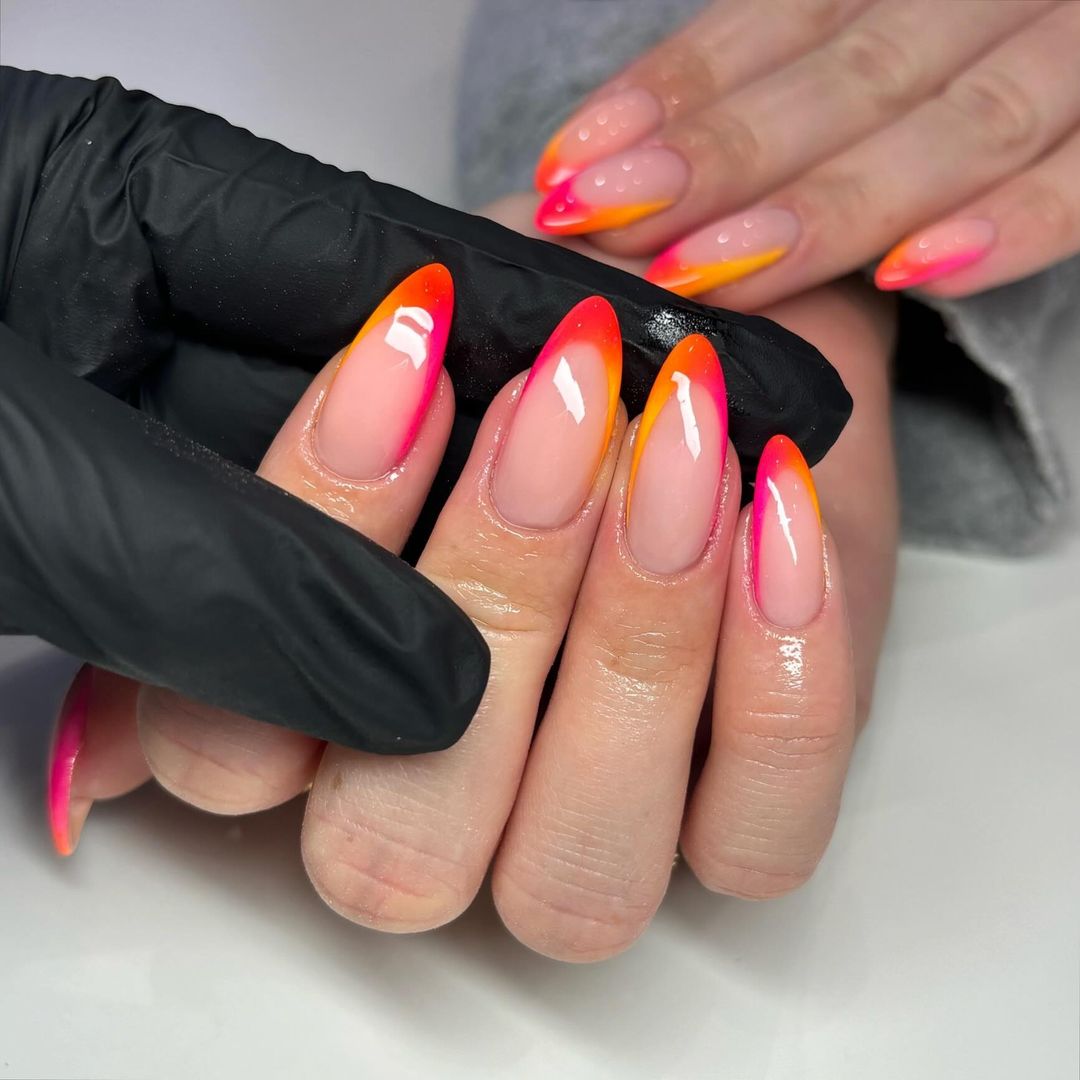
Ombre Tips
This ombre design blends bright orange and neon pink, creating a striking gradient effect on almond-shaped nails. The smooth transition between colors adds depth and dimension, making this manicure both bold and elegant. Perfect for those who love a bit of color but want a sophisticated finish.
-
- Nude base polish: Zoya Naked Manicure in “Pink Perfector”
- Bright orange nail polish: OPI Nail Lacquer in “A Good Man-darin is Hard to Find”
- Neon pink nail polish: Orly Nail Lacquer in “Oh Cabana Boy”
- Makeup sponge for blending colors
- Top coat: Essie Gel Setter Top Coat
Application Tips:
-
- Start with a nude base coat and let it dry.
- On a makeup sponge, apply both bright orange and neon pink polishes, blending them slightly.
- Dab the sponge onto the tips of the nails to create the ombre effect.
- Seal with a top coat for a smooth finish.
To recreate this at home, begin with a nude base coat. On a makeup sponge, apply the bright orange and neon pink polishes side by side, blending them slightly in the middle. Dab the sponge onto your nail tips to achieve the gradient effect. Finish with a top coat to ensure longevity and shine.
Save Pin
Matte Leopard Print
This fun and quirky design features a mix of matte orange and pink leopard print on round nails. The contrast between the matte and shiny finishes, along with the playful pattern, makes this a standout look for any occasion.

-
- Bright orange nail polish: Essie Nail Polish in “Tangerine Tease”
- Matte pink nail polish: OPI Nail Lacquer in “Pink Ladies Rule the School”
- Leopard print nail art brush or dotting tool
- Matte top coat: Sally Hansen Big Matte Top Coat
Application Tips:
-
- Apply the bright orange polish to all nails and let it dry.
- Use a dotting tool to create leopard spots with the matte pink polish on a couple of accent nails.
- Apply a matte top coat over the entire nail for a cohesive look.
To achieve this look at home, start with a base coat and apply the bright orange polish. Once dry, use a dotting tool to create the leopard spots with the matte pink polish. Apply a matte top coat over the accent nails to ensure the design is smooth and long-lasting.
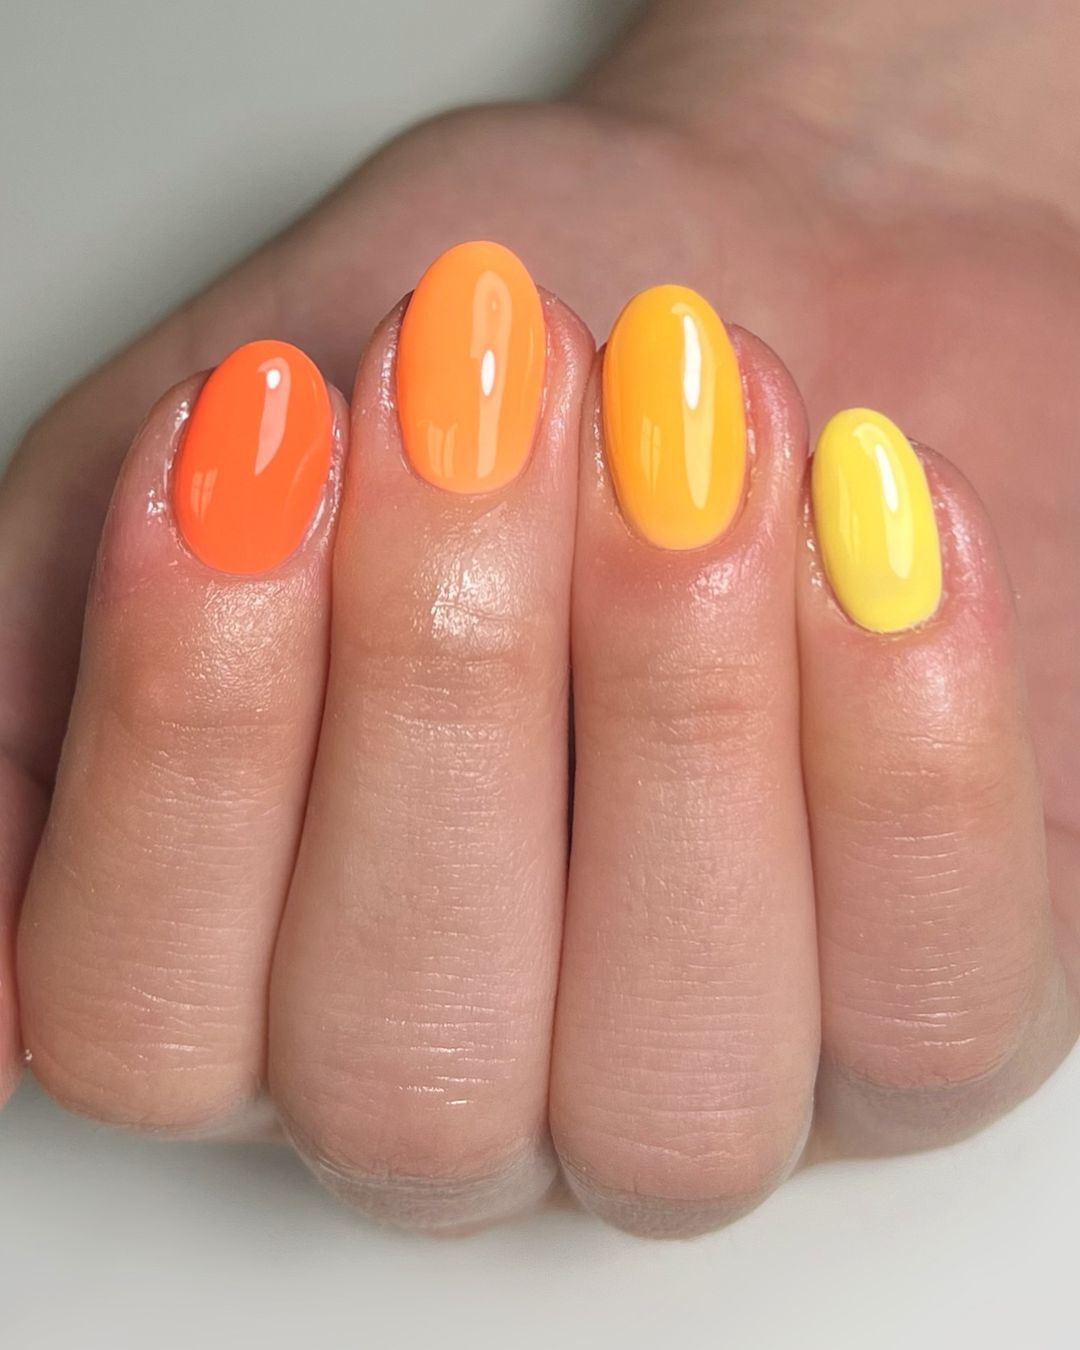
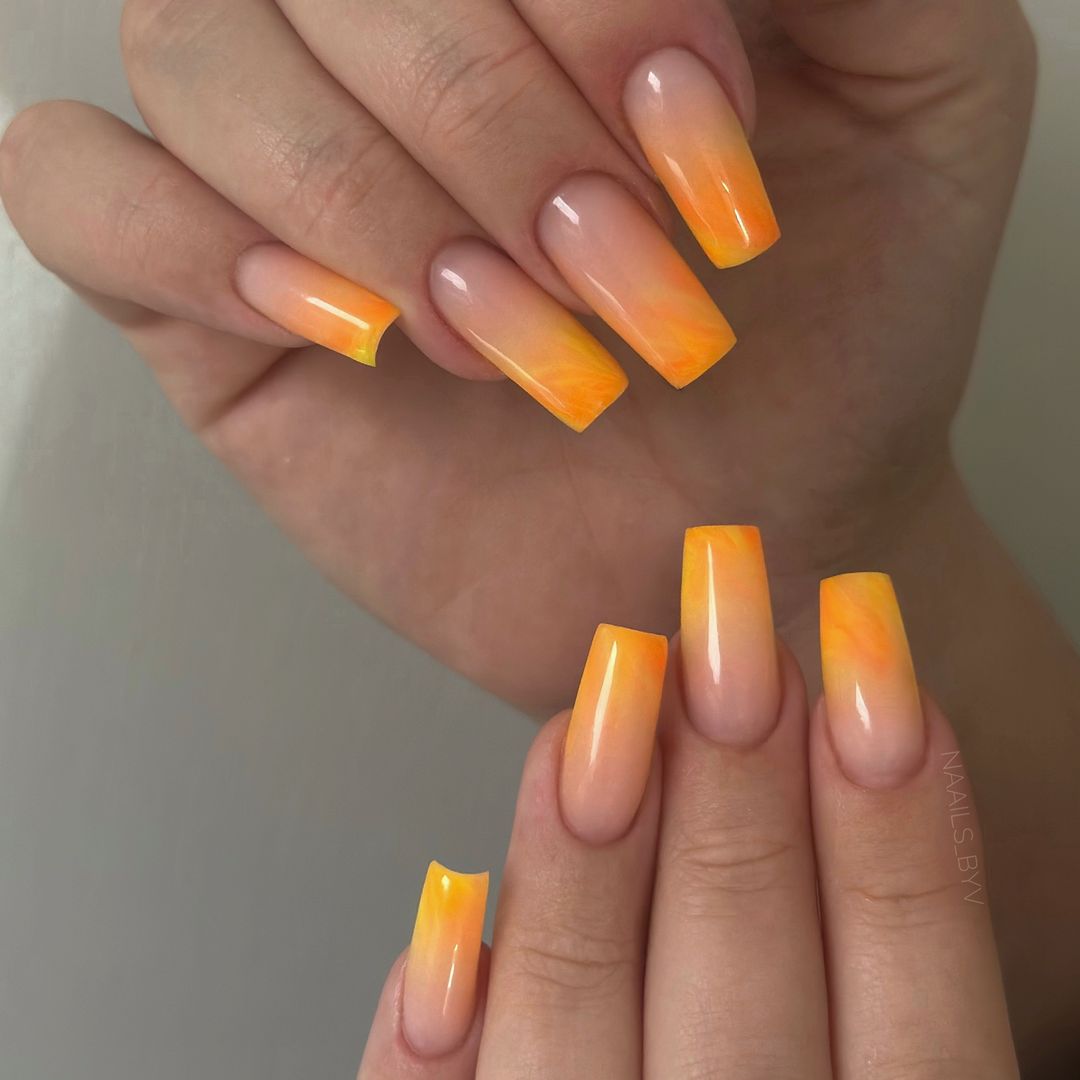
Sunset Ombre
This beautiful ombre design transitions from bright orange to sunny yellow, mimicking the colors of a sunset. The oval shape of the nails adds to the smoothness and elegance of the gradient, making it a perfect look for any occasion.
-
- Bright orange nail polish: China Glaze Nail Lacquer in “Orange Knockout”
- Sunny yellow nail polish: Essie Nail Polish in “Hay There”
- Makeup sponge for blending colors
- Top coat: Seche Vite Dry Fast Top Coat
Application Tips:
-
- Apply a base coat and let it dry.
- On a makeup sponge, apply both bright orange and sunny yellow polishes, blending them slightly.
- Dab the sponge onto the nails to create the gradient effect.
- Seal with a top coat for a glossy finish.
For a DIY version, start with a base coat. On a makeup sponge, apply the bright orange and sunny yellow polishes side by side, blending them slightly in the middle. Dab the sponge onto your nails to create the ombre effect. Finish with a top coat to ensure the colors stay vibrant and the design lasts.
Tiger Stripes
This fierce design features orange tiger stripes on a nude base, perfect for making a bold statement. The stiletto shape enhances the wild look, making it ideal for those who love daring and unique nail art.

-
- Nude base polish: OPI Infinite Shine in “Bubble Bath”
- Bright orange nail polish: Sally Hansen Miracle Gel in “Electra-cute”
- Black nail polish for stripes: OPI Nail Lacquer in “Black Onyx”
- Thin nail art brush for creating stripes
- Top coat: CND Vinylux Weekly Top Coat
Application Tips:
-
- Apply the nude base polish and let it dry.
- Use a thin nail art brush to create black tiger stripes on the tips of the nails.
- Add a bright orange tip below the stripes for added dimension.
- Seal with a top coat to protect your design.
To recreate this look at home, start with a base coat followed by the nude polish. Once dry, use a thin brush to paint black tiger stripes on the tips of your nails. Add a bright orange tip below the stripes for extra flair. Finish with a top coat to keep your design intact and vibrant.
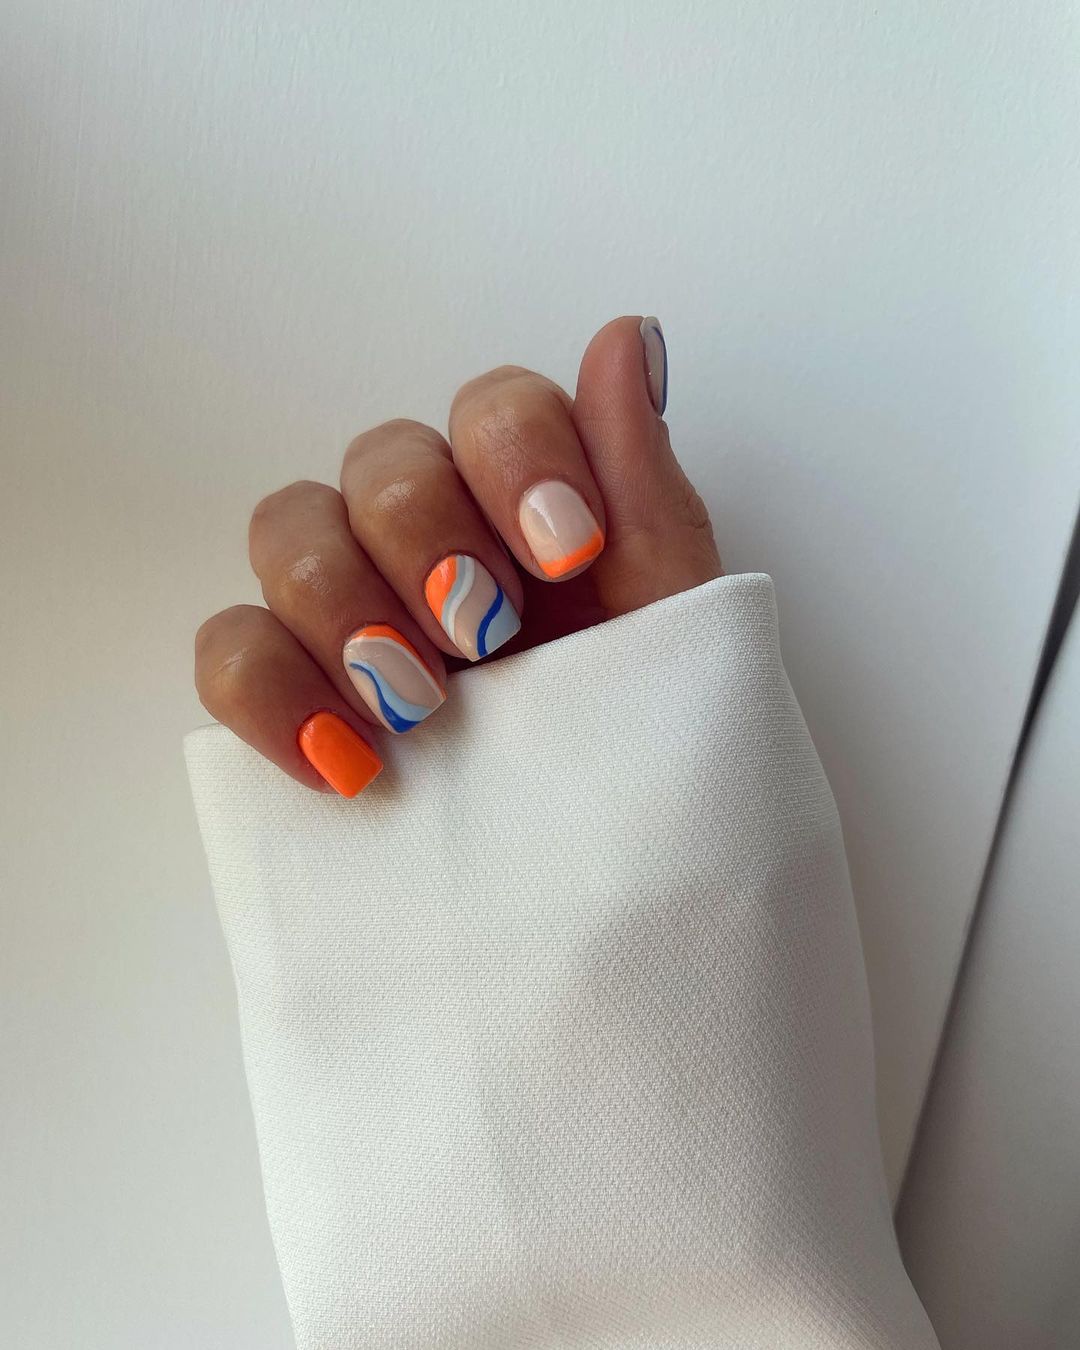
Abstract Orange and Blue Swirls
This design combines bold orange with soothing blue and white swirls on a nude base, creating a dynamic yet balanced look. The square shape of the nails allows for a broader canvas, making it easier to showcase the intricate swirls. The bright colors make this a fun and vibrant choice, perfect for those looking to add some creativity to their fall manicure.
-
- Nude base polish: Essie Gel Couture in “Fairy Tailor”
- Bright orange nail polish: OPI Nail Lacquer in “A Roll in the Hague”
- Blue nail polish: Sally Hansen Miracle Gel in “Beatnik”
- White nail polish: OPI Nail Lacquer in “Alpine Snow”
- Thin nail art brush for precision
- Top coat: Seche Vite Dry Fast Top Coat
Application Tips:
-
- Apply the nude base polish to all nails and let it dry.
- Use a thin nail art brush to create abstract swirls with the orange, blue, and white polishes.
- Seal with a top coat to protect your design and add shine.
To achieve this look at home, start with a base coat followed by the nude polish. Once dry, use a thin brush to create the abstract swirls with the orange, blue, and white polishes. Vary the direction and thickness of the swirls for a unique look. Finish with a top coat to ensure the colors stay vibrant and the design lasts.
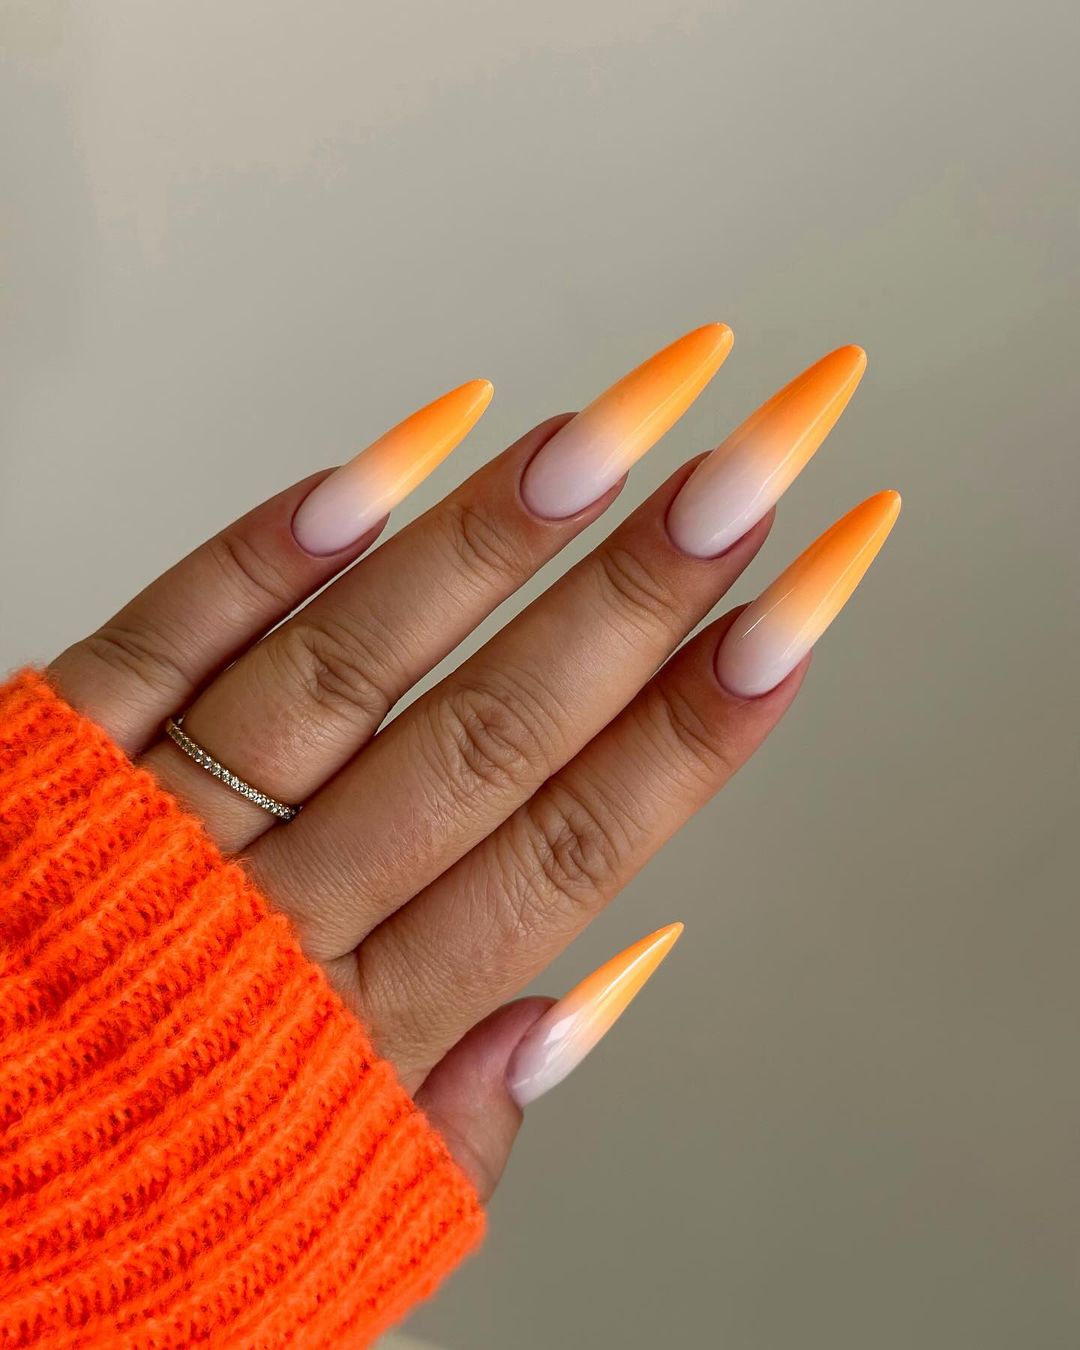
Gradient Orange Stilettos
These gradient orange stilettos feature a seamless blend from a soft nude base to a bright, fiery orange tip. The stiletto shape adds drama and elegance to the gradient, making this a perfect choice for those who love bold and striking nail designs.
-
- Nude base polish: Zoya Naked Manicure in “Pink Perfector”
- Bright orange nail polish: China Glaze Nail Lacquer in “Orange Knockout”
- Makeup sponge for blending colors
- Top coat: Essie Gel Setter Top Coat
Application Tips:
-
- Apply the nude base polish and let it dry completely.
- On a makeup sponge, apply both the nude and bright orange polishes, blending them slightly.
- Dab the sponge onto the nails to create the gradient effect.
- Seal with a top coat for a smooth, glossy finish.
For a DIY version, start with a base coat and apply the nude polish. On a makeup sponge, apply the nude and bright orange polishes side by side, blending them slightly in the middle. Dab the sponge onto your nail tips to achieve the gradient effect. Finish with a top coat to ensure longevity and shine.
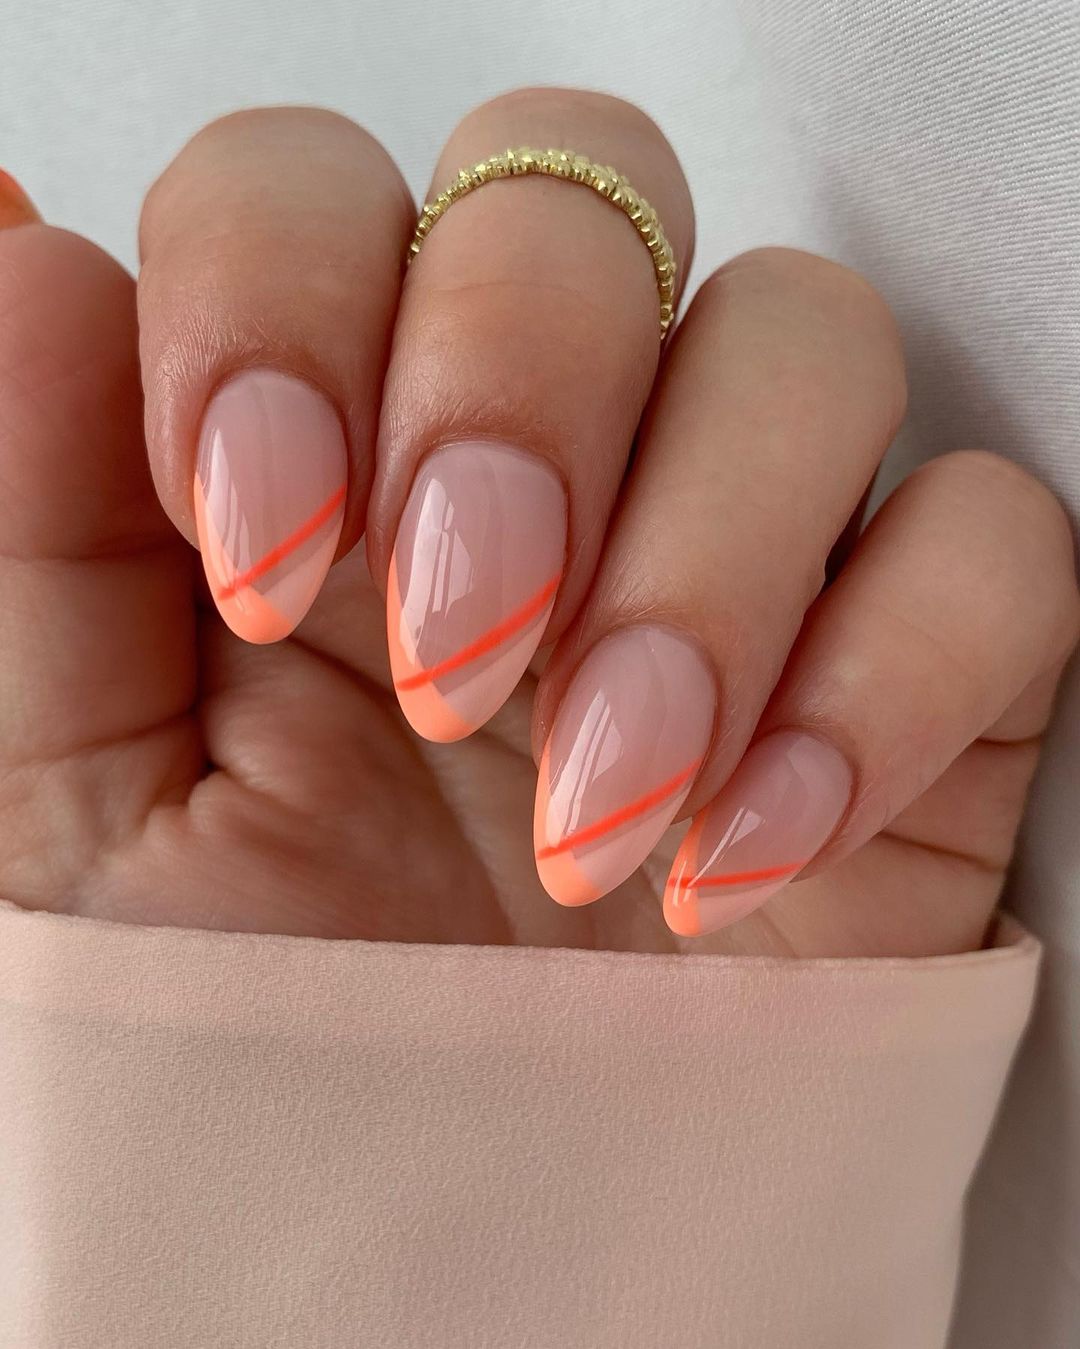
Diagonal Orange Tips
This elegant design features diagonal orange tips on a nude base, creating a sophisticated and modern look. The almond shape enhances the clean lines of the diagonal tips, making it a chic choice for any occasion.
-
- Nude base polish: OPI Infinite Shine in “Bubble Bath”
- Bright orange nail polish: Essie Nail Polish in “Tangerine Tease”
- Thin nail art brush for creating diagonal lines
- Top coat: CND Vinylux Weekly Top Coat
Application Tips:
-
- Apply the nude base polish and let it dry.
- Use a thin nail art brush to create diagonal tips with the bright orange polish.
- Seal with a top coat to protect your design and add shine.
To recreate this look at home, start with a base coat followed by the nude polish. Once dry, use a thin brush to paint diagonal tips with the bright orange polish. Finish with a top coat to keep your design pristine and glossy.
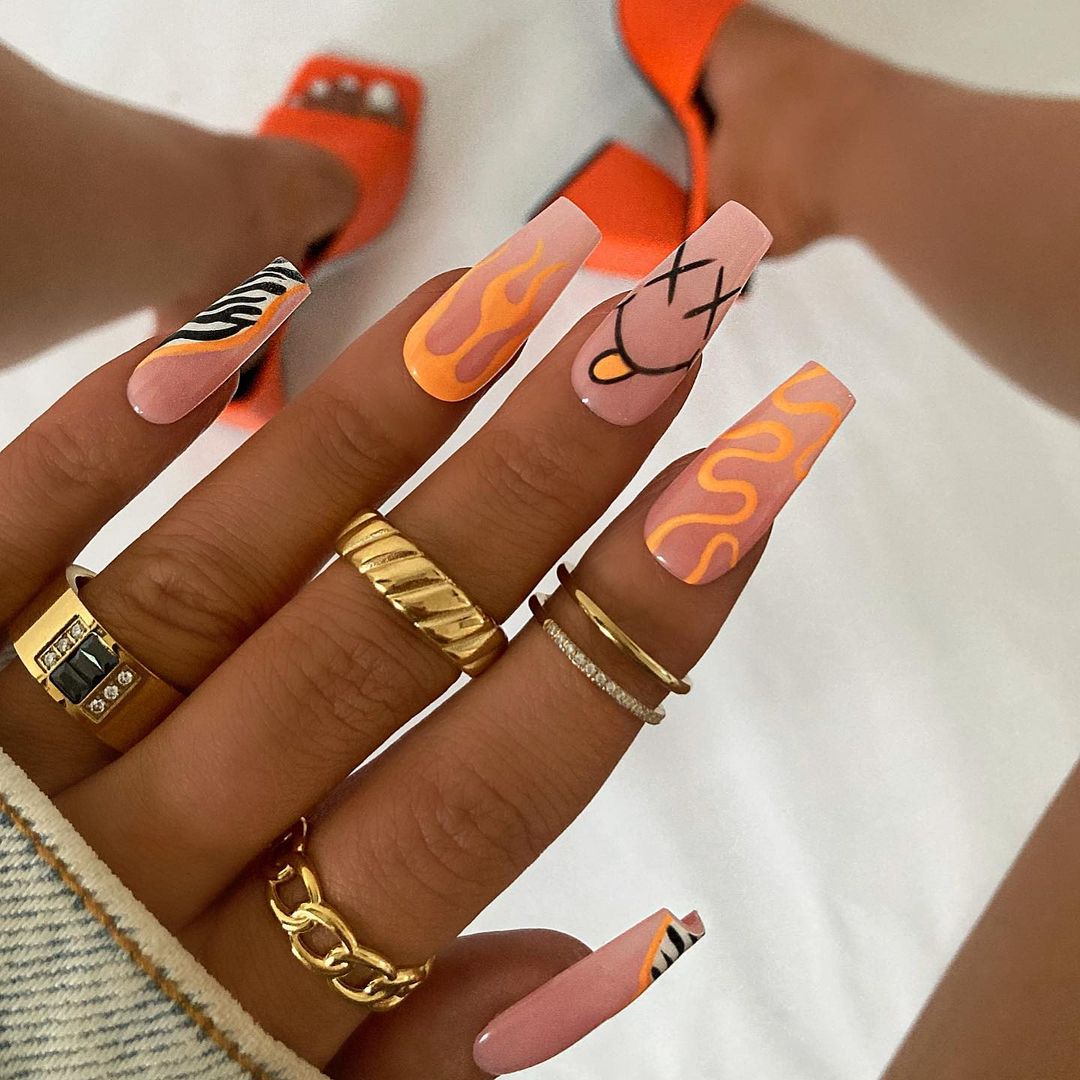
Fun Orange Accents
This playful design combines various fun elements such as flames, abstract lines, and cute smiley faces on a nude base with orange accents. The square shape provides ample space to showcase these creative elements, making it a perfect choice for those who love unique and whimsical nail art.
-
- Nude base polish: Essie Gel Couture in “Fairy Tailor”
- Bright orange nail polish: OPI Nail Lacquer in “A Roll in the Hague”
- Black nail polish for details: OPI Nail Lacquer in “Black Onyx”
- Thin nail art brush for precision
- Top coat: Seche Vite Dry Fast Top Coat
Application Tips:
-
- Apply the nude base polish and let it dry.
- Use a thin nail art brush to create various designs such as flames, lines, and smiley faces with the orange and black polishes.
- Seal with a top coat to protect your design and add shine.
To achieve this look at home, start with a base coat and apply the nude polish. Once dry, use a thin brush to create the different designs with the orange and black polishes. Let your creativity flow with flames, lines, and smiley faces. Finish with a top coat to ensure your design stays intact and vibrant.
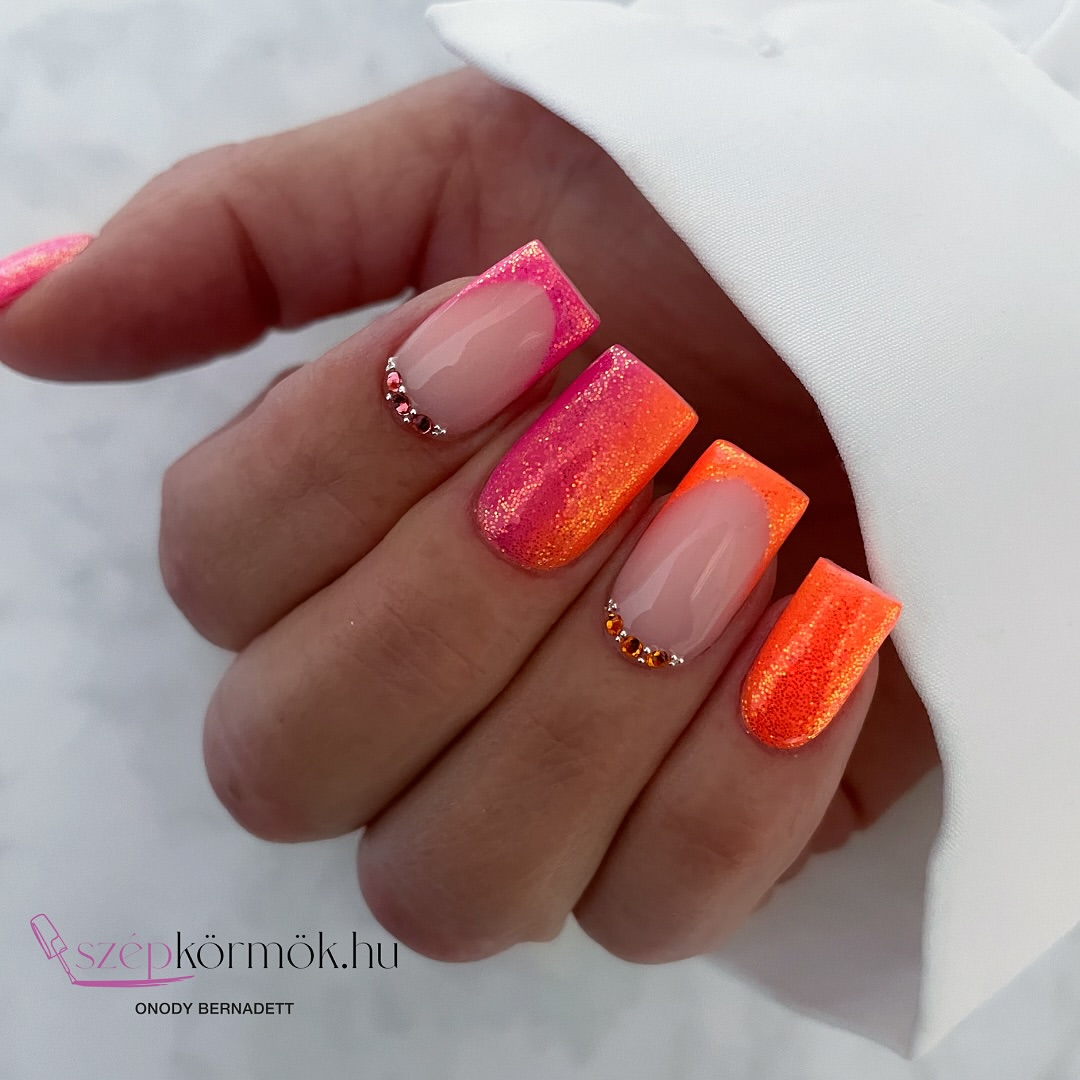
Glitter Ombre with Rhinestones
This glamorous design features a glitter ombre effect with bright orange and pink hues, accented with rhinestones for added sparkle. The square shape enhances the elegance of the glitter, making this a stunning choice for special occasions.
-
- Nude base polish: Zoya Naked Manicure in “Pink Perfector”
- Bright orange glitter polish: Butter London in “Gold Rush”
- Pink glitter polish: OPI Nail Lacquer in “Princesses Rule!”
- Rhinestones for accent
- Top coat: Essie Gel Couture Top Coat
Application Tips:
-
- Apply the nude base polish and let it dry.
- On a makeup sponge, apply the bright orange and pink glitter polishes, blending them slightly.
- Dab the sponge onto the nails to create the ombre effect.
- Apply rhinestones to accent nails for added sparkle.
- Seal with a top coat for a smooth finish.
For a DIY version, start with a base coat and apply the nude polish. On a makeup sponge, apply the bright orange and pink glitter polishes side by side, blending them slightly in the middle. Dab the sponge onto your nails to achieve the ombre effect. Apply rhinestones to accent nails and finish with a top coat to keep the design intact and sparkling.
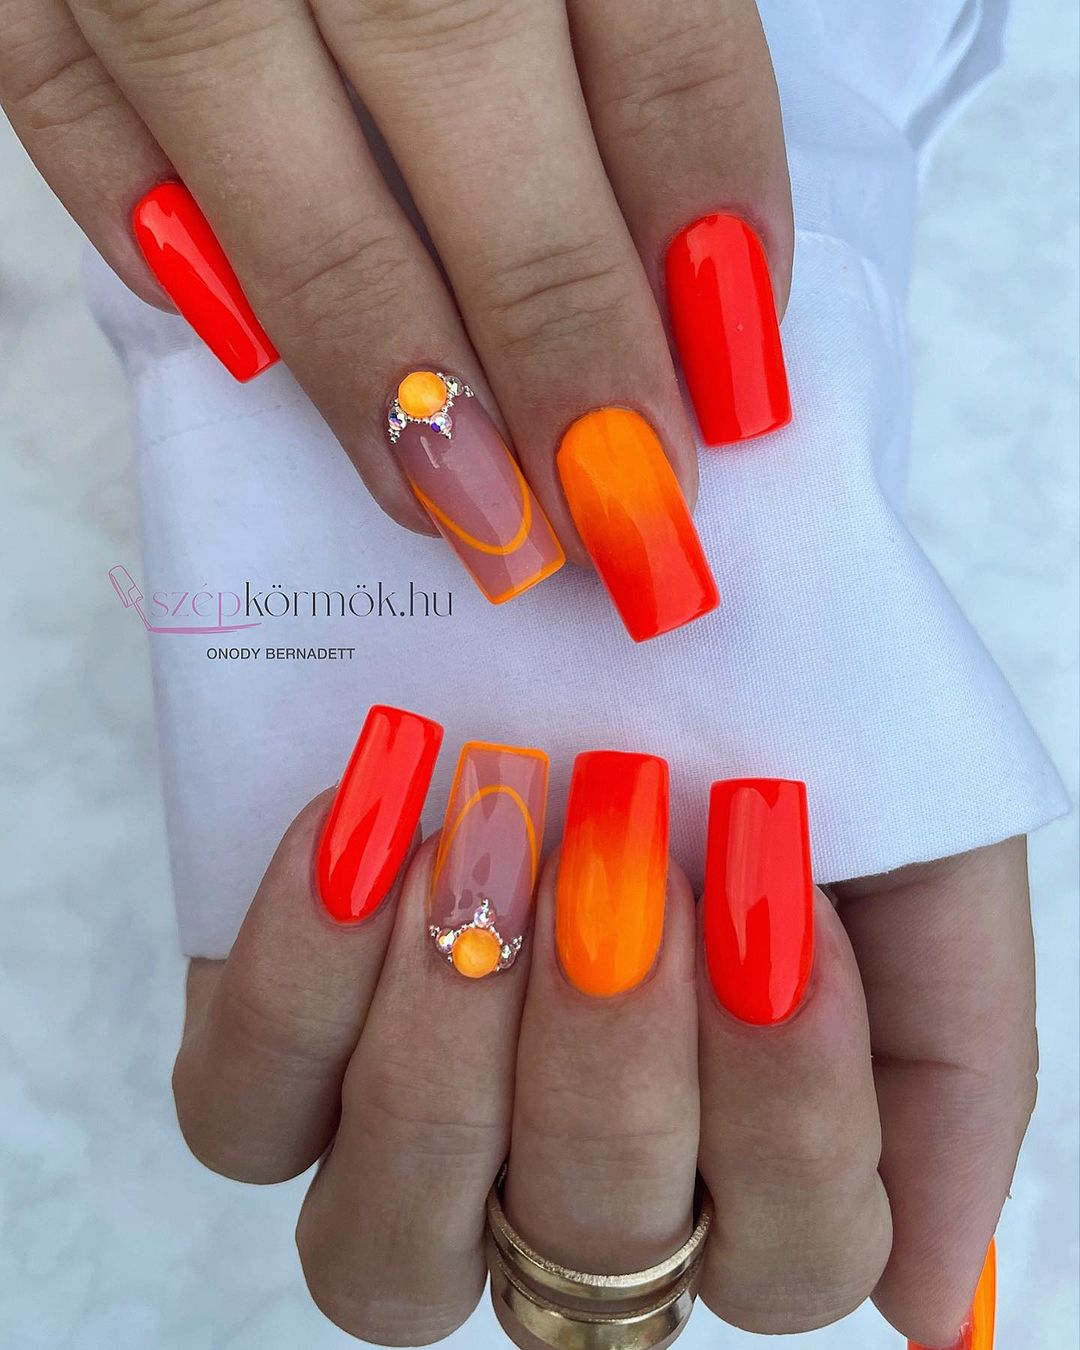
Neon Orange with Bling
This bold design features neon orange nails with bling accents, perfect for making a statement. The bright neon color is eye-catching, while the added rhinestones on a few nails add a touch of glamour. The square shape enhances the boldness of the neon, making it a perfect choice for those who love to stand out.

-
- Bright neon orange nail polish: China Glaze Nail Lacquer in “Orange Knockout”
- Rhinestones for accent
- Nail glue for rhinestones
- Top coat: Seche Vite Dry Fast Top Coat
Application Tips:
-
- Apply the bright neon orange polish to all nails and let it dry.
- Use nail glue to apply rhinestones to accent nails.
- Seal with a top coat to protect your design and add shine.
To achieve this look at home, start with a base coat followed by the neon orange polish. Once dry, use nail glue to apply rhinestones to a few accent nails. Finish with a top coat to ensure the colors stay vibrant and the rhinestones stay secure.
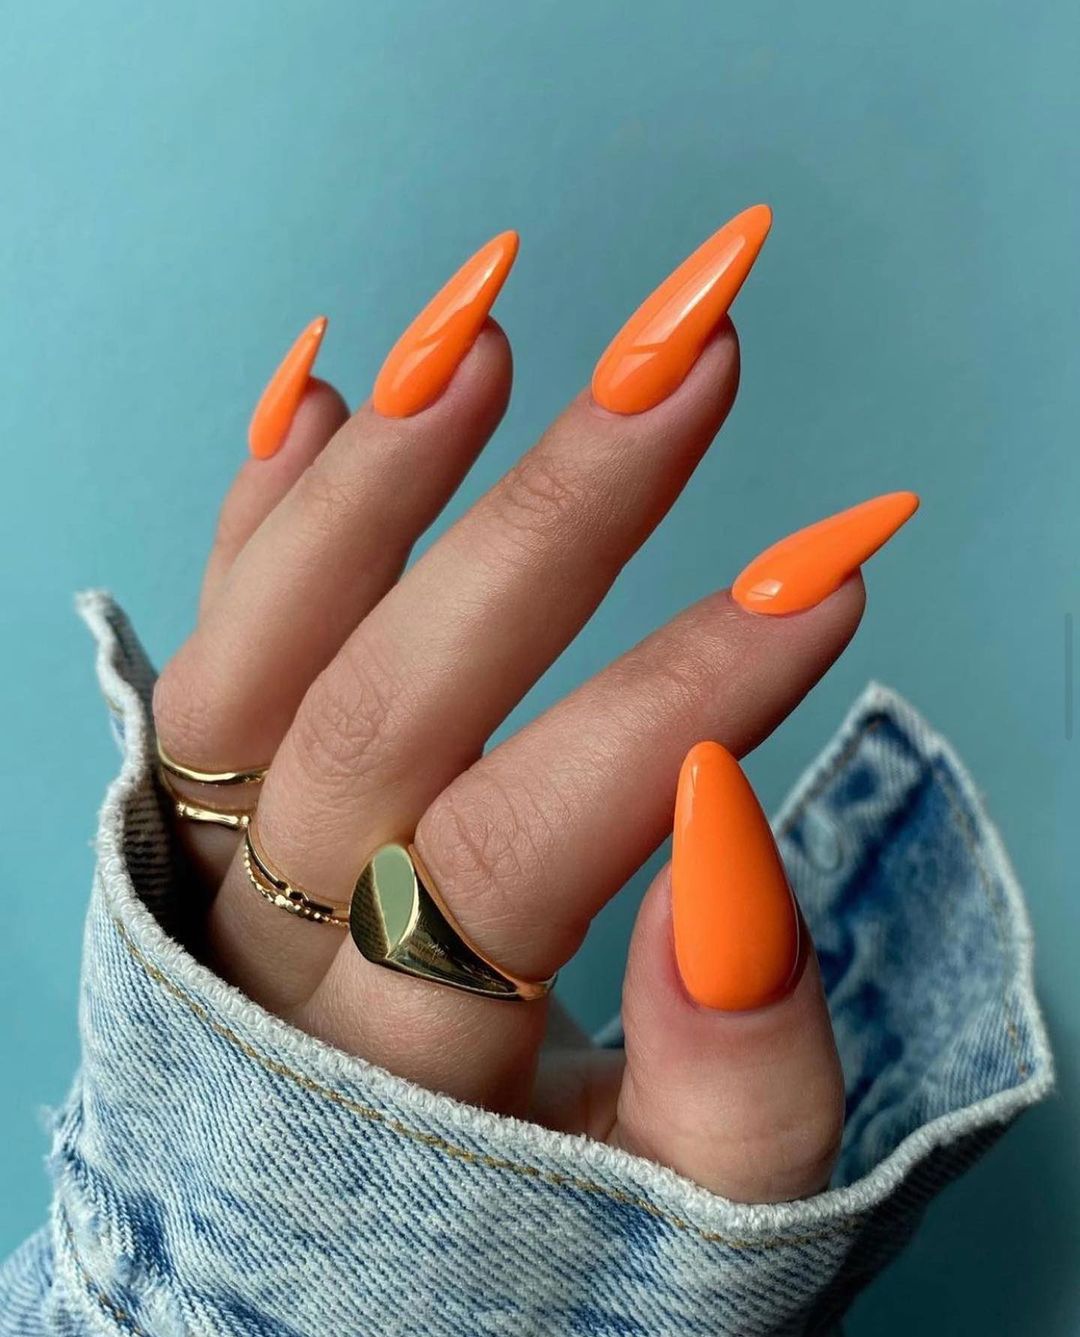
Bright Orange Stilettos
This bold, bright orange manicure on stiletto nails is both eye-catching and stylish. The sharp, pointed shape enhances the vivid color, making a striking statement that’s perfect for those who love to stand out. The glossy finish adds a touch of sophistication to this daring look.
-
- Bright orange nail polish: China Glaze Nail Lacquer in “Orange Knockout”
- Base coat: Orly Bonder Rubberized Base Coat
- Top coat: Seche Vite Dry Fast Top Coat
Application Tips:
-
- Start with a base coat to protect your nails and ensure longevity.
- Apply two coats of the bright orange polish, allowing each layer to dry completely.
- Finish with a top coat to add shine and durability.
To achieve this look at home, begin with a base coat followed by two coats of bright orange polish. Ensure each layer dries thoroughly before applying the next. Seal with a high-gloss top coat to keep the color vibrant and protect against chipping.
Orange Marble Coffin Nails
These elegant coffin nails feature a soft nude base with a delicate orange marble effect. The gradient transition from the nude base to the orange tips adds a touch of sophistication, making this design perfect for any occasion.
-
- Nude base polish: OPI Infinite Shine in “Bubble Bath”
- Bright orange nail polish: Essie Nail Polish in “Tangerine Tease”
- Nail art brush for creating the marble effect
- Top coat: CND Vinylux Weekly Top Coat
Application Tips:
-
- Apply the nude base polish and let it dry.
- Use a nail art brush to create a marble effect with the bright orange polish.
- Blend the colors for a smooth transition.
- Seal with a top coat to protect your design.
For a DIY version, start with a base coat and apply the nude polish. Use a nail art brush to blend the bright orange polish into the nude base, creating a marble effect. Finish with a top coat to ensure the design stays pristine and glossy.
Floral Orange Tips
This beautiful design features delicate floral patterns on a nude base with orange tips. The round shape adds to the soft and elegant look, making it perfect for those who appreciate subtle, yet intricate nail art.
-
- Nude base polish: Essie Gel Couture in “Fairy Tailor”
- Bright orange nail polish: OPI Nail Lacquer in “A Roll in the Hague”
- Nail art brush for floral details
- Top coat: Seche Vite Dry Fast Top Coat
Application Tips:
-
- Apply the nude base polish and let it dry.
- Paint bright orange tips on each nail.
- Use a nail art brush to add delicate floral patterns on the accent nails.
- Seal with a top coat to protect your design.
To recreate this look at home, start with a base coat followed by the nude polish. Paint the bright orange tips, then use a fine nail art brush to add floral details. Finish with a top coat to keep the design intact and glossy.
Neon Orange Gradient
This striking neon orange gradient on square nails is both bold and modern. The transition from bright orange to a softer shade creates a dynamic and energetic look, perfect for those who love to make a statement with their nails.
-
- Bright neon orange nail polish: China Glaze Nail Lacquer in “Orange Knockout”
- Lighter orange nail polish: OPI Nail Lacquer in “Cant-A-Loupe”
- Makeup sponge for blending colors
- Top coat: Essie Gel Setter Top Coat
Application Tips:
-
- Apply the bright neon orange polish and let it dry.
- Use a makeup sponge to blend the lighter orange polish into the neon base, creating a gradient effect.
- Seal with a top coat to add shine and durability.
To achieve this look at home, start with a base coat followed by the neon orange polish. Use a makeup sponge to blend the lighter orange polish into the neon base, creating a smooth gradient. Finish with a top coat to ensure the colors stay vibrant and the design lasts.
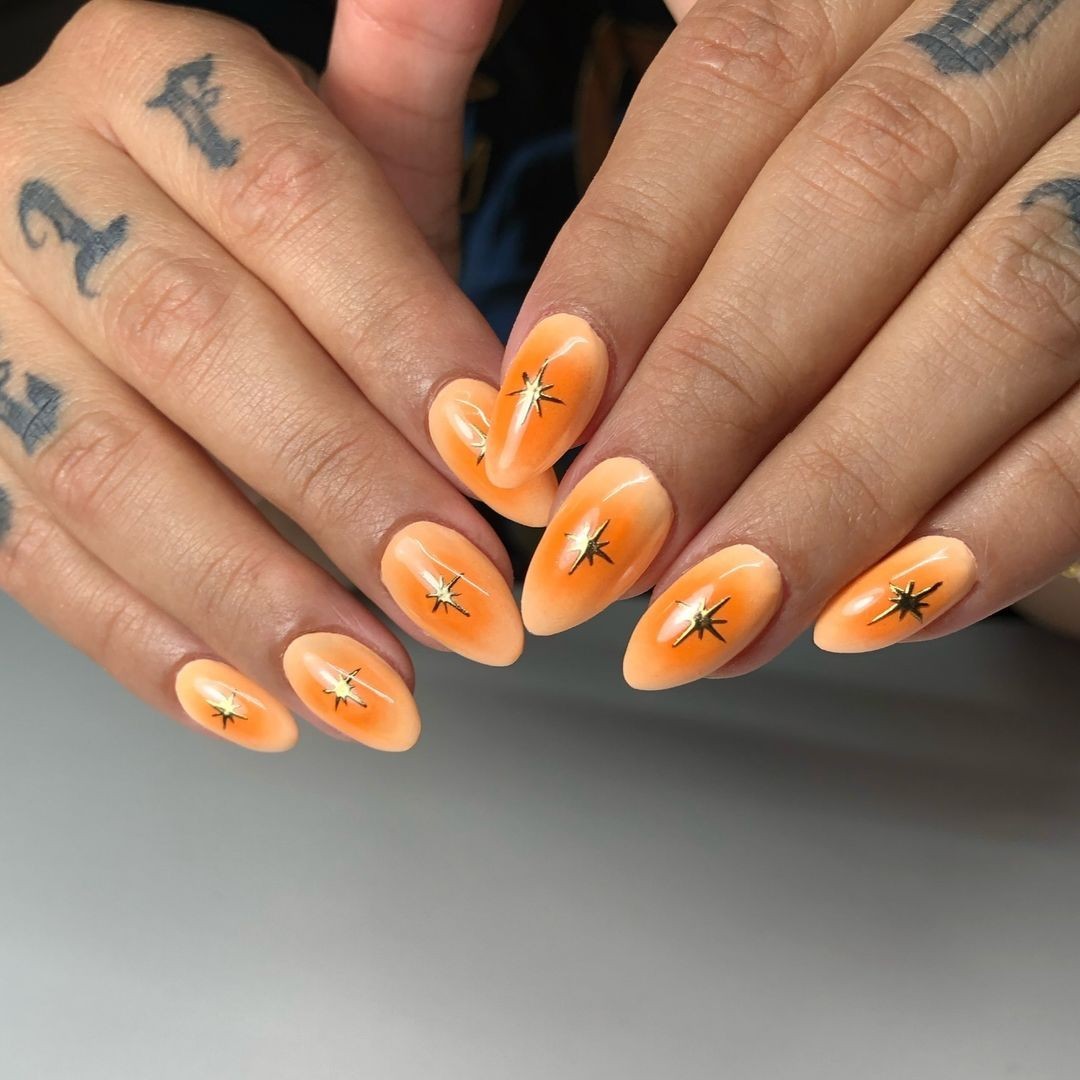
Starburst Orange Nails
These fun and whimsical orange nails feature tiny starburst designs, adding a playful touch to a bold color. The almond shape complements the design, making it a great choice for those who love unique and creative nail art.
-
- Bright orange nail polish: Essie Nail Polish in “Tangerine Tease”
- Nail art brush for starburst details
- Black and white nail polish for starbursts
- Top coat: Seche Vite Dry Fast Top Coat
Application Tips:
-
- Apply the bright orange polish to all nails and let it dry.
- Use a nail art brush to paint tiny starbursts with black and white polishes.
- Seal with a top coat to protect your design.
To recreate this look at home, start with a base coat followed by the bright orange polish. Use a fine nail art brush to paint the starburst designs with black and white polishes. Finish with a top coat to keep the design intact and glossy.
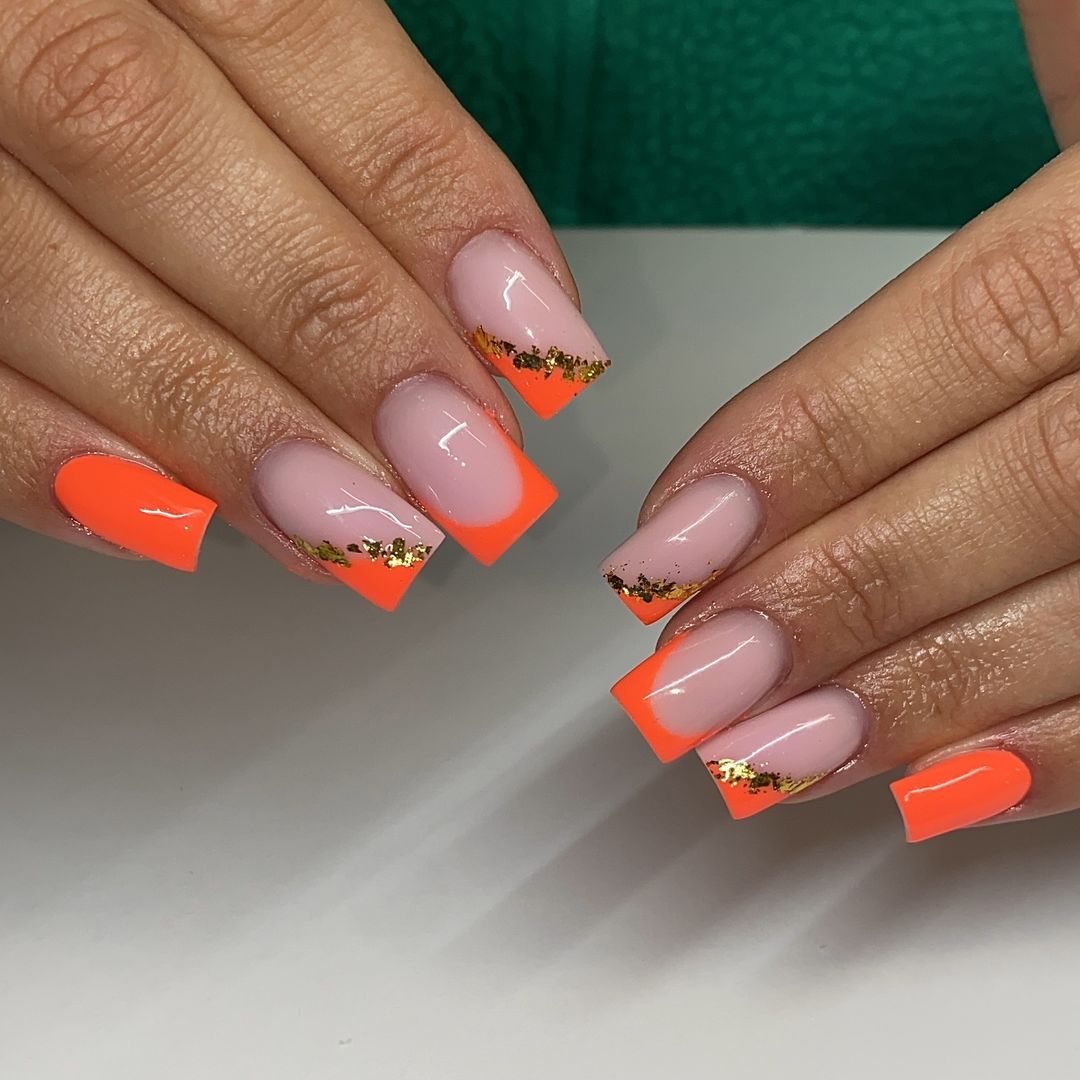
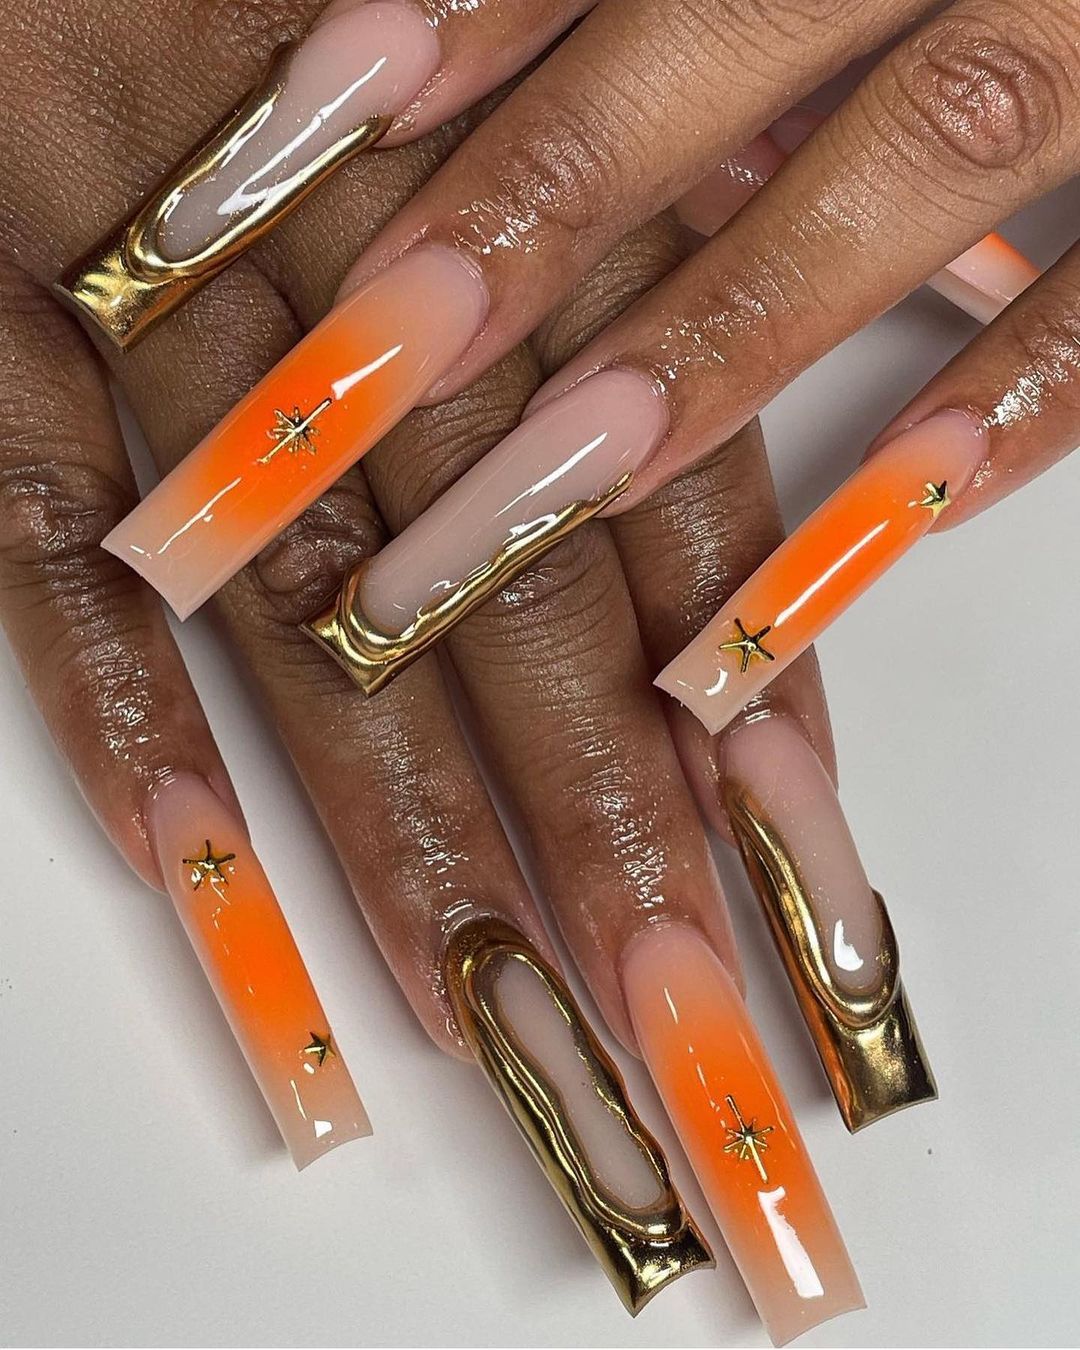
Orange and Gold Accents
This luxurious design features a soft nude base with bold orange tips and gold accents. The combination of colors and the addition of gold details create a rich and opulent look, perfect for special occasions or everyday glamour.
-
- Nude base polish: OPI Infinite Shine in “Bubble Bath”
- Bright orange nail polish: Essie Nail Polish in “Tangerine Tease”
- Gold nail polish or foil for accents
- Nail art brush for precision
- Top coat: CND Vinylux Weekly Top Coat
Application Tips:
-
- Apply the nude base polish and let it dry.
- Paint bright orange tips on each nail.
- Add gold accents using nail polish or foil.
- Seal with a top coat to protect your design.
To achieve this look at home, start with a base coat followed by the nude polish. Paint the bright orange tips, then use a fine nail art brush or foil to add gold accents. Finish with a top coat to ensure the colors stay vibrant and the design lasts.
Orange Swirl Tips
This design features a gradient orange base with intricate white swirl patterns on the tips, creating a mesmerizing and elegant look. The square shape provides a perfect canvas for the detailed artwork, making it a great choice for those who love unique and sophisticated nail designs.
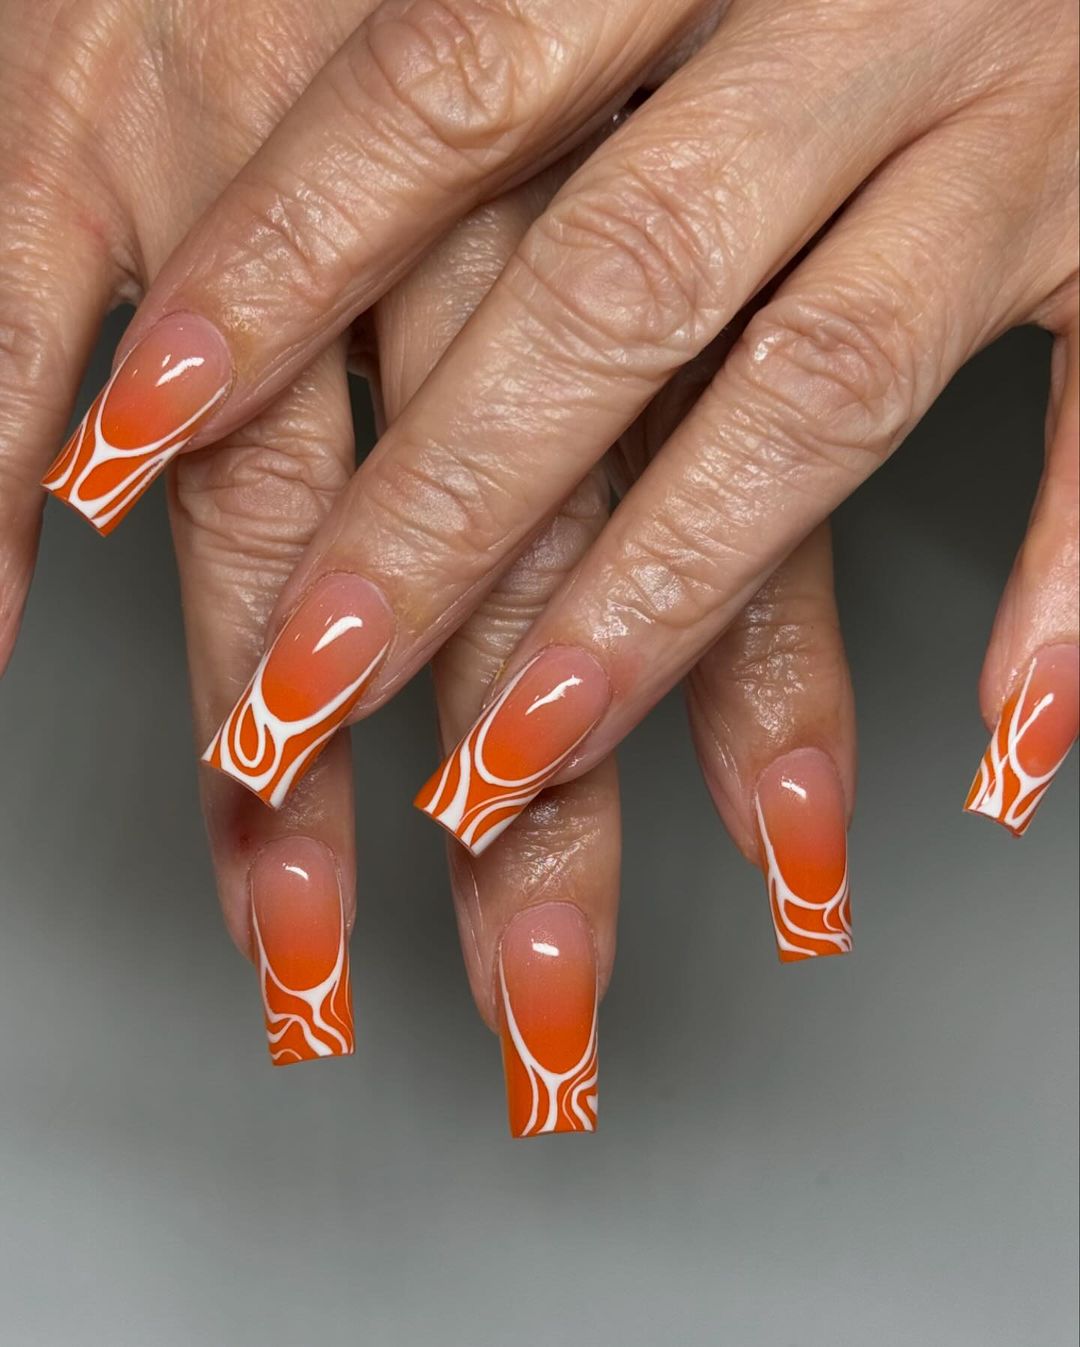
-
- Nude base polish: OPI Infinite Shine in “Bubble Bath”
- Bright orange nail polish: Essie Nail Polish in “Tangerine Tease”
- White nail polish for swirls: OPI Nail Lacquer in “Alpine Snow”
- Thin nail art brush for precision
- Top coat: CND Vinylux Weekly Top Coat
Application Tips:
-
- Apply the nude base polish and let it dry completely.
- Create a gradient effect by blending the bright orange polish from the tips towards the middle of the nail.
- Use a thin nail art brush to paint white swirl patterns on the orange tips.
- Seal with a top coat to protect your design and add shine.
To achieve this look at home, start with a base coat and apply the nude polish. Blend the orange polish from the tips toward the middle using a makeup sponge. Once dry, use a fine nail art brush to create intricate white swirl patterns on the orange tips. Finish with a top coat to keep the design intact and glossy.
Orange Wave Accents
This playful design features subtle orange wave patterns on a nude base, enhancing the natural elegance of the almond-shaped nails. The simplicity of the waves combined with the bright color makes this a fun and chic choice for any occasion.

-
- Nude base polish: Essie Gel Couture in “Fairy Tailor”
- Bright orange nail polish: OPI Nail Lacquer in “A Roll in the Hague”
- Thin nail art brush for creating waves
- Top coat: Seche Vite Dry Fast Top Coat
Application Tips:
-
- Apply the nude base polish and let it dry completely.
- Use a thin nail art brush to paint orange wave patterns on each nail.
- Seal with a top coat to protect your design and add shine.
To recreate this look at home, start with a base coat followed by the nude polish. Use a fine nail art brush to paint subtle wave patterns with the bright orange polish. Finish with a top coat to ensure the design stays pristine and glossy.
Bold Orange and Blue Nails
This bold and vibrant design features alternating bright orange and blue nails with fun, squiggly patterns. The combination of colors and the playful design make this manicure a standout choice, perfect for those who love to experiment with their nail art.
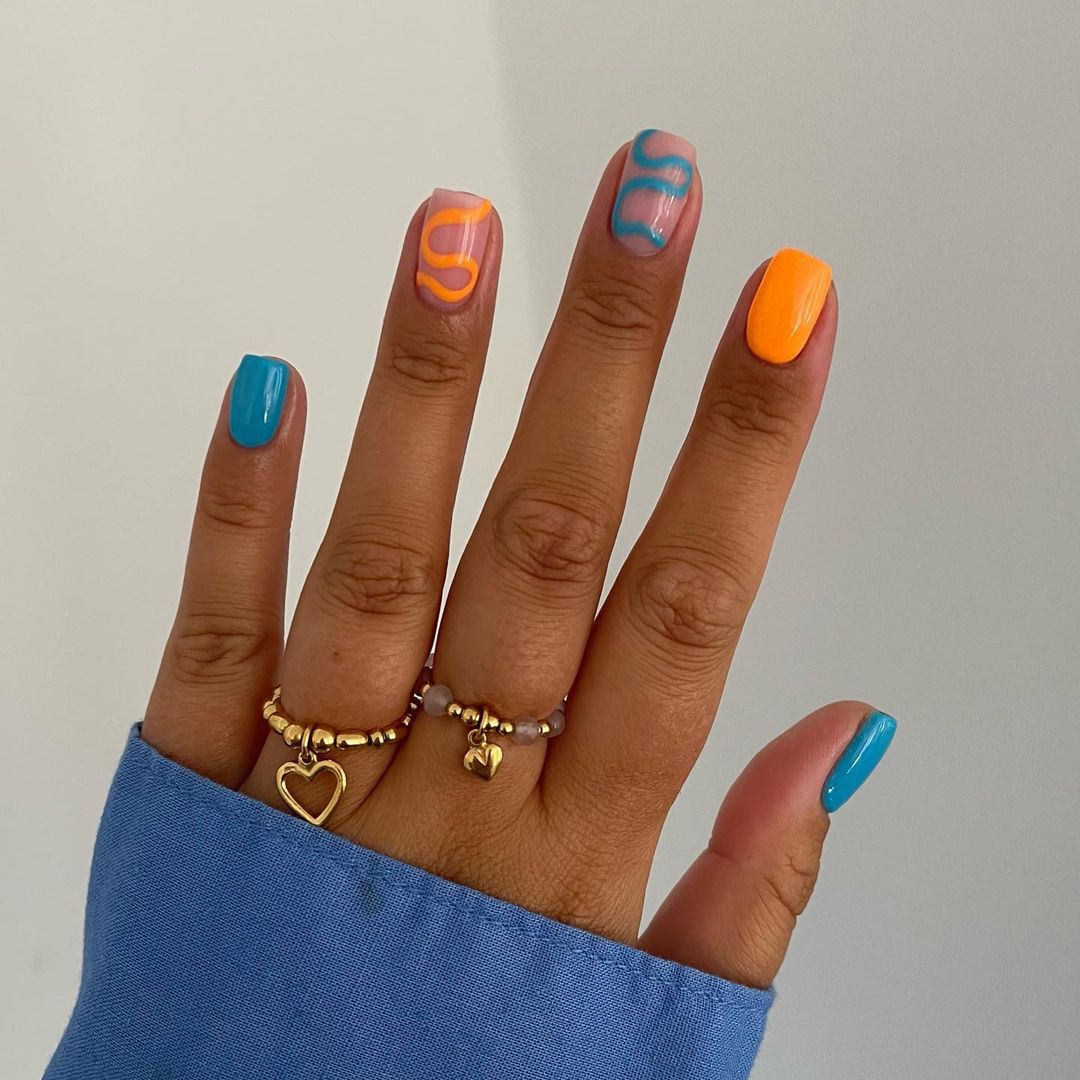
-
- Bright orange nail polish: Essie Nail Polish in “Tangerine Tease”
- Bright blue nail polish: China Glaze Nail Lacquer in “Frostbite”
- Nude base polish: OPI Infinite Shine in “Bubble Bath”
- Thin nail art brush for squiggly patterns
- Top coat: CND Vinylux Weekly Top Coat
Application Tips:
-
- Apply the nude base polish on the nails designated for squiggly patterns and let it dry.
- Paint the remaining nails with bright orange and bright blue polishes.
- Use a thin nail art brush to create squiggly patterns with the orange and blue polishes on the nude base nails.
- Seal with a top coat to protect your design and add shine.
To achieve this look at home, start with a base coat and apply the nude polish on selected nails. Paint the rest of the nails with bright orange and blue polishes. Use a fine nail art brush to create squiggly patterns on the nude base nails. Finish with a top coat to ensure the colors stay vibrant and the design lasts.
FAQ
Q: How do I make my manicure last longer? A: Always start with a base coat and finish with a top coat. Reapply the top coat every few days to maintain the shine and protect the polish.
Q: Can I achieve these designs on short nails? A: Absolutely! These designs can be adapted for gel short almond, gel short square, and other short nail shapes.
Q: What’s the best way to remove glitter polish? A: Soak a cotton ball in acetone, place it on the nail, and wrap it in foil. Let it sit for 10-15 minutes before gently removing.
Q: How do I prevent my nails from staining with bright colors? A: Always use a good quality base coat to protect your natural nails from staining.
Get creative with your orange fall nails this season. Whether you prefer a subtle hint of color or a bold statement, these designs offer something for everyone. Happy painting!
Save Pin