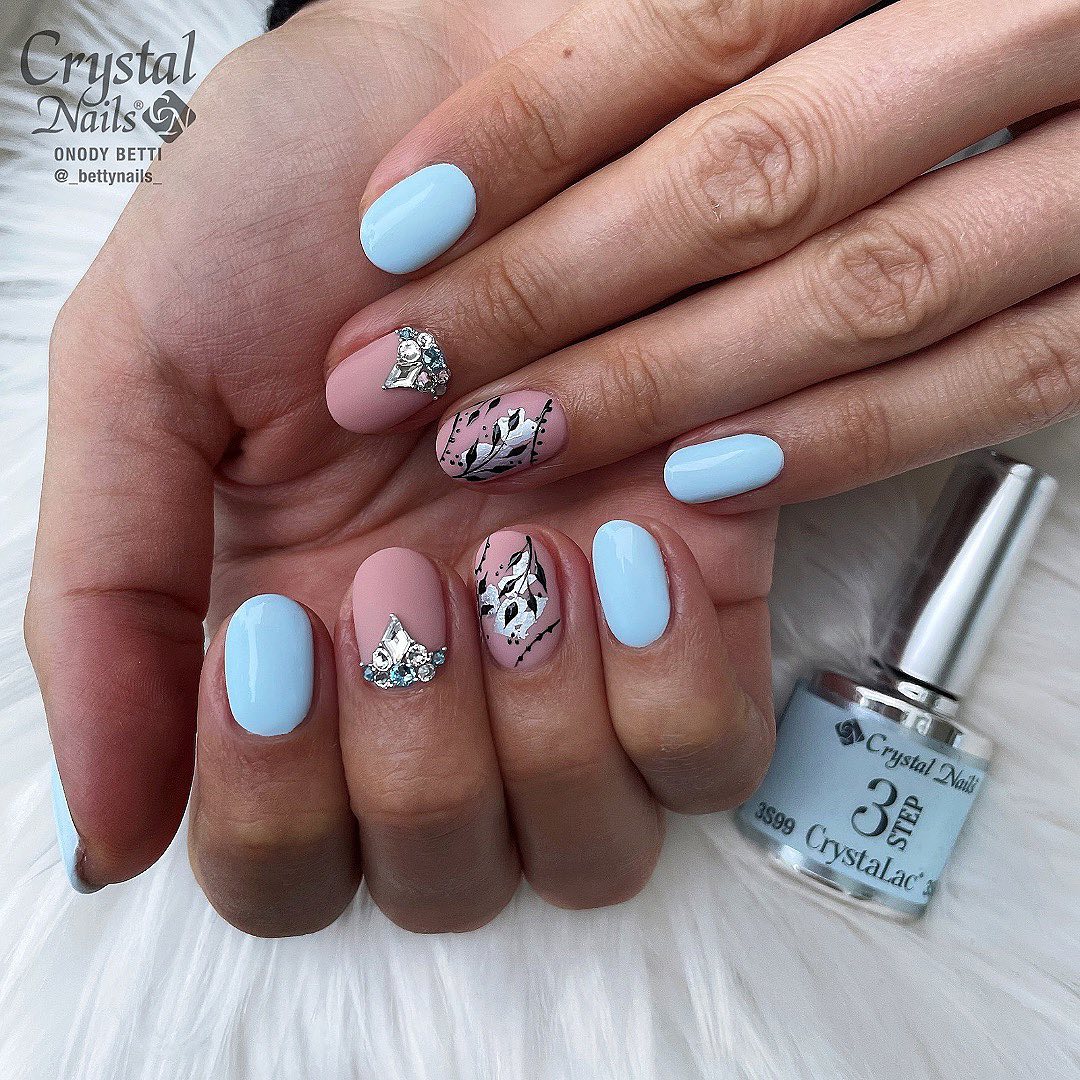
Ever wondered why blue and silver nails have captured the hearts of so many? Is it their icy elegance or their bold, eye-catching presence? Whether for a glittering night out or a stylish day at work, these hues elevate any look to royal heights. Let’s explore how these colors blend to create styles that range from boldly chic to subtly elegant.
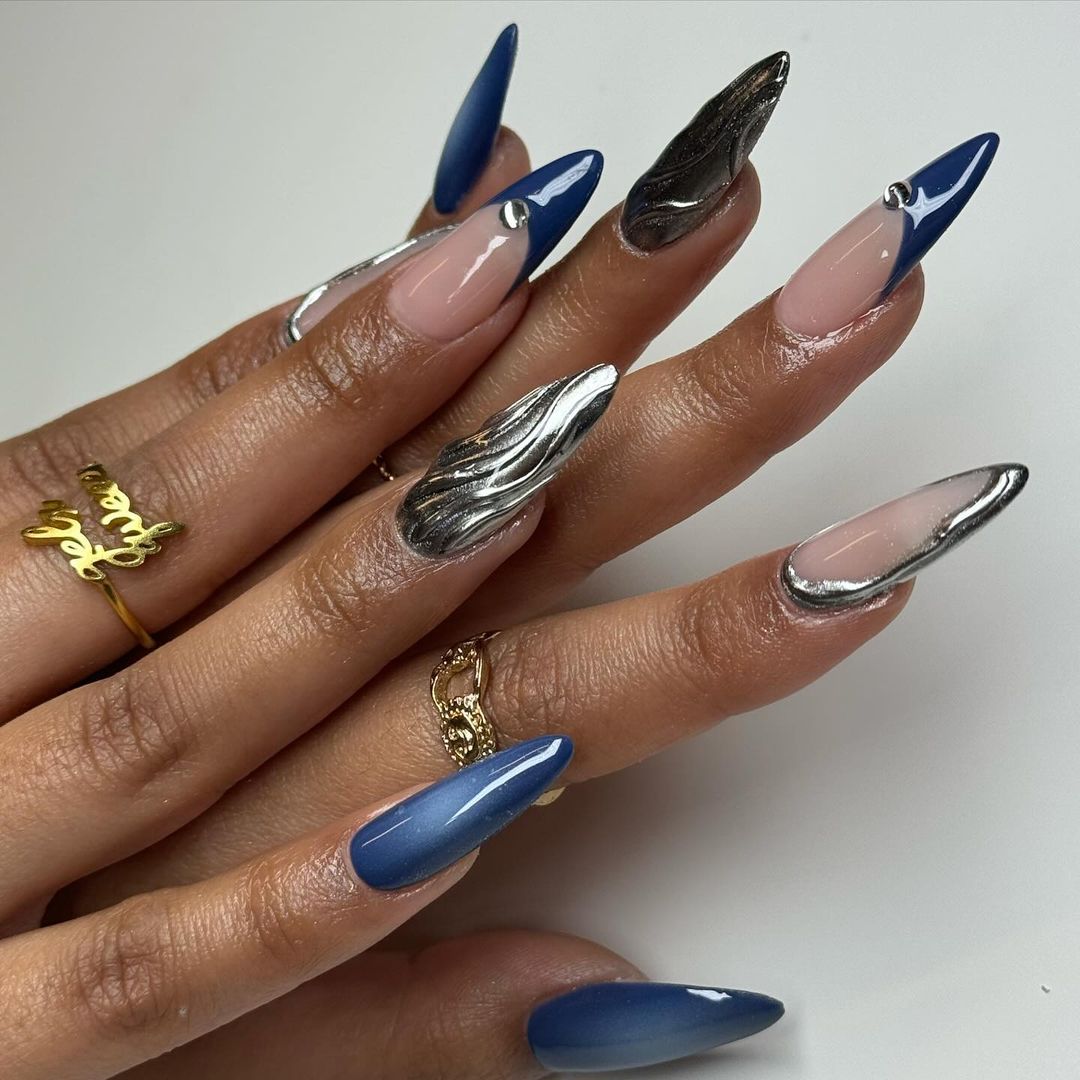
Electrifying Elegance with an Icy Twist
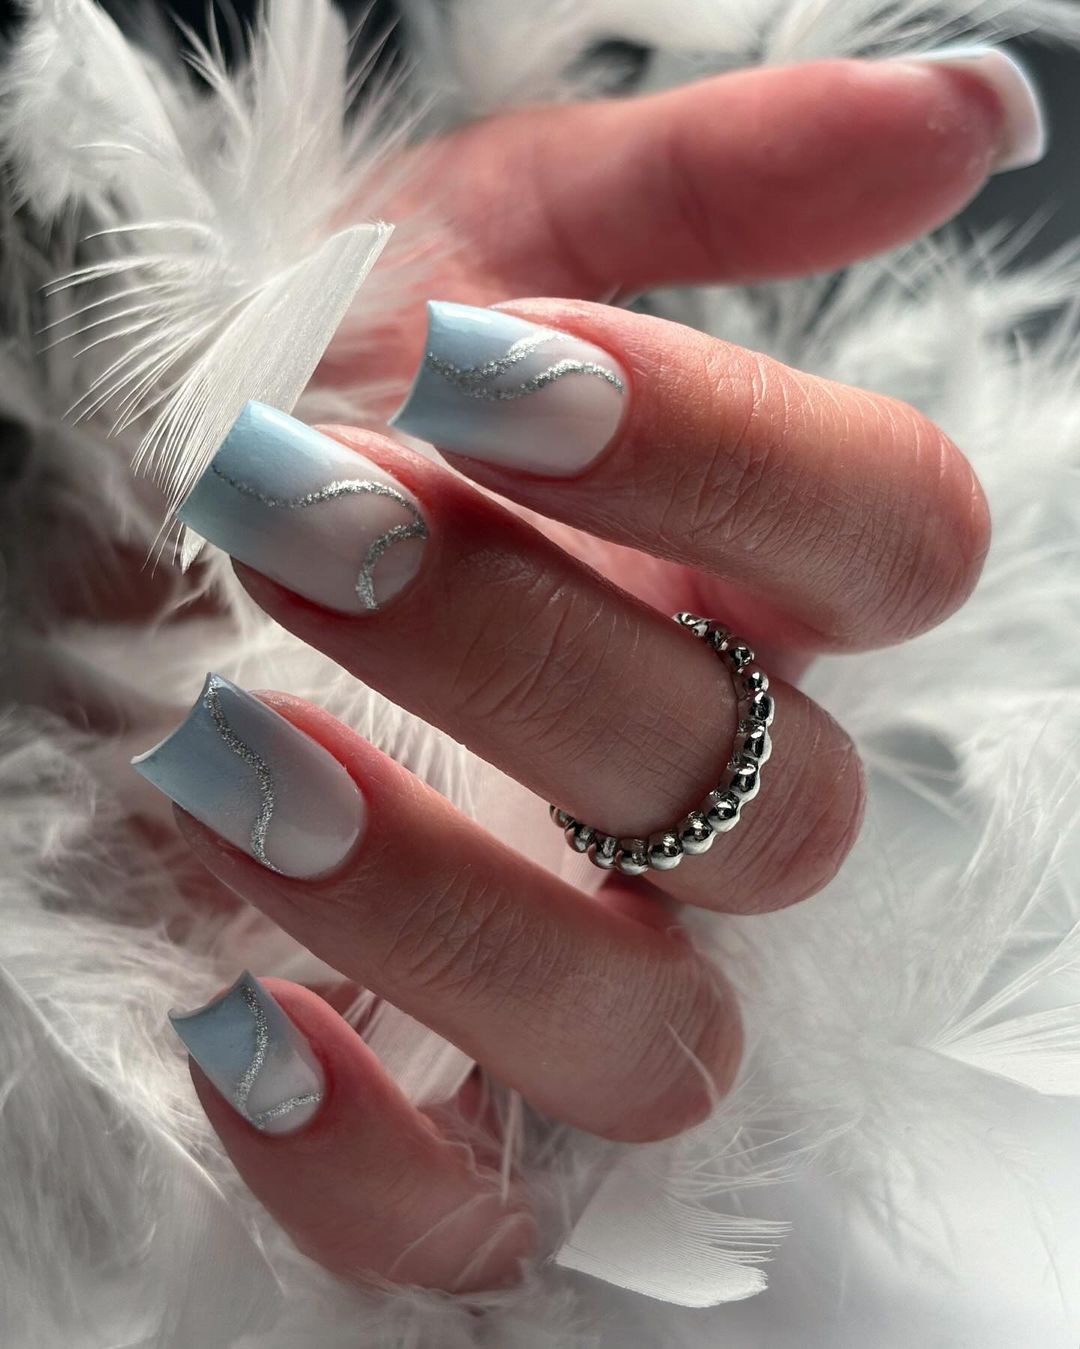
This design captivates with its winter wonderland allure, intertwining pale blue and silver swirls with delicate sparkly accents. Rhinestones placed with precision add a hint of bling, enhancing the ethereal feel without overwhelming the design’s subtle grace.
- Pale blue gel polish
- Silver glitter gel polish
- Fine-tip nail art brush
- Clear rhinestones
- Top coat for sealing
- Recommended products include OPI’s Gel Color in “Polar-ized” for the silver and Essie Gel Couture in “First View” for the blue, alongside a precision brush from Sally Hansen for the intricate swirls.
Apply a base of pale blue. Once set, use a fine-tip brush to add silver glitter swirls. Position rhinestones at the swirls’ intersections while the polish is tacky. Seal with a robust top coat to keep your sparkly artwork intact.
Royal Blue with a Touch of Starlight
This design embodies royal blue sophistication, enhanced by sharp contrasts and star-shaped embellishments—perfect for any prom or gala. The extended nail shape accentuates the deep blue, crafting a bold statement.
- Royal blue gel polish
- Nude gel polish
- Star-shaped rhinestones
- Fine glitter powder
- Top coat for a glossy finish
- Gelish’s “Navy Blue” offers a rich base, while CND’s “Bare Chemise” provides subtle nude accents.
Start with a nude base. Use tape or stencils for precise blue sections. Apply royal blue polish, place star-shaped rhinestones while wet, and dust with glitter along the edges. Finish with a top coat for enhanced shine and longevity.
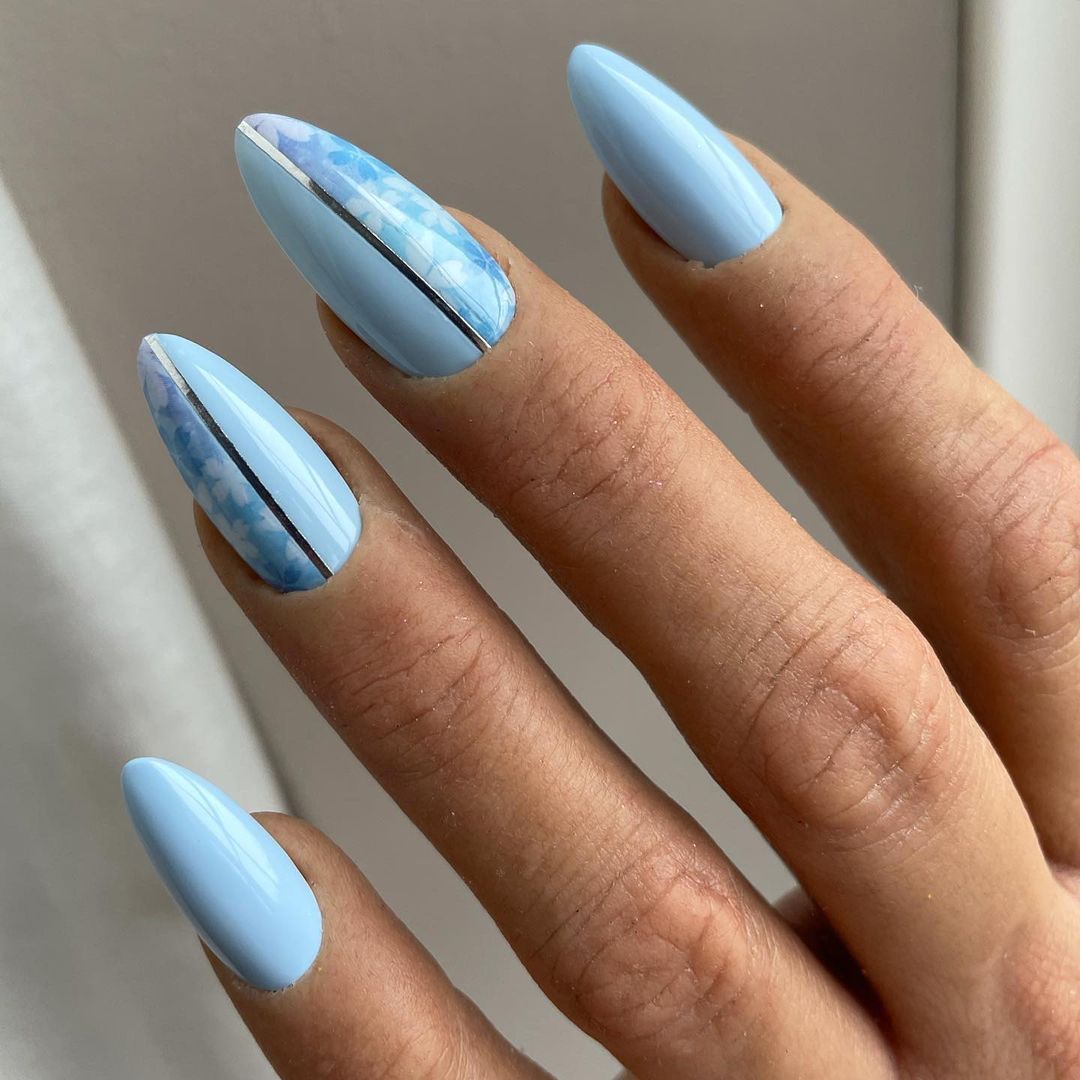
Pastel Perfection
This subtle transition from pastel blue to soft pink, highlighted by a silver glitter line, suits those preferring simple, elegant designs. It’s perfect for everyday elegance or special occasions.
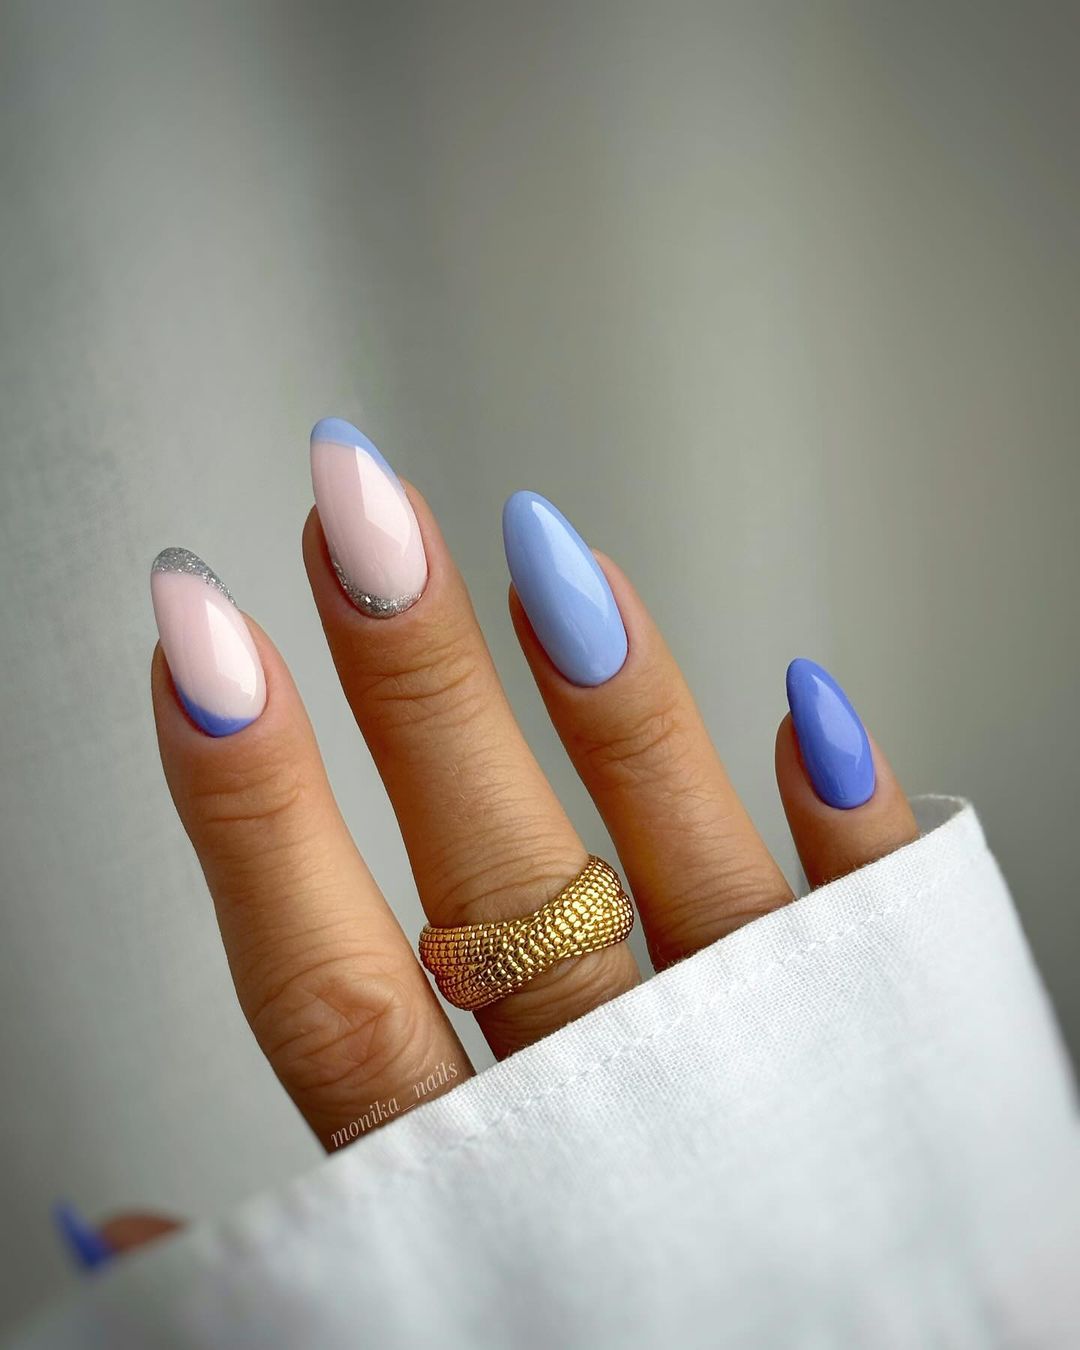
- Pastel blue gel polish
- Soft pink gel polish
- Silver glitter striping tape
- Matte top coat
- Use Deborah Lippmann’s “Blue Orchid” for a tender pastel blue and “Modern Love” for the pink, finishing with a contemporary matte coat.
Apply a soft pink base, followed by pastel blue from the middle upward. Define the junction with silver glitter tape and finish with a matte top coat for a sleek look.
Translucent Charm with Subtle Sparkles
This nail design epitomizes understated elegance with its long, translucent nails accented with subtle sparkles. The strategic placement of tiny rhinestones gives it a twinkling starry effect, ideal for those who prefer a hint of glamour without overwhelming bling.
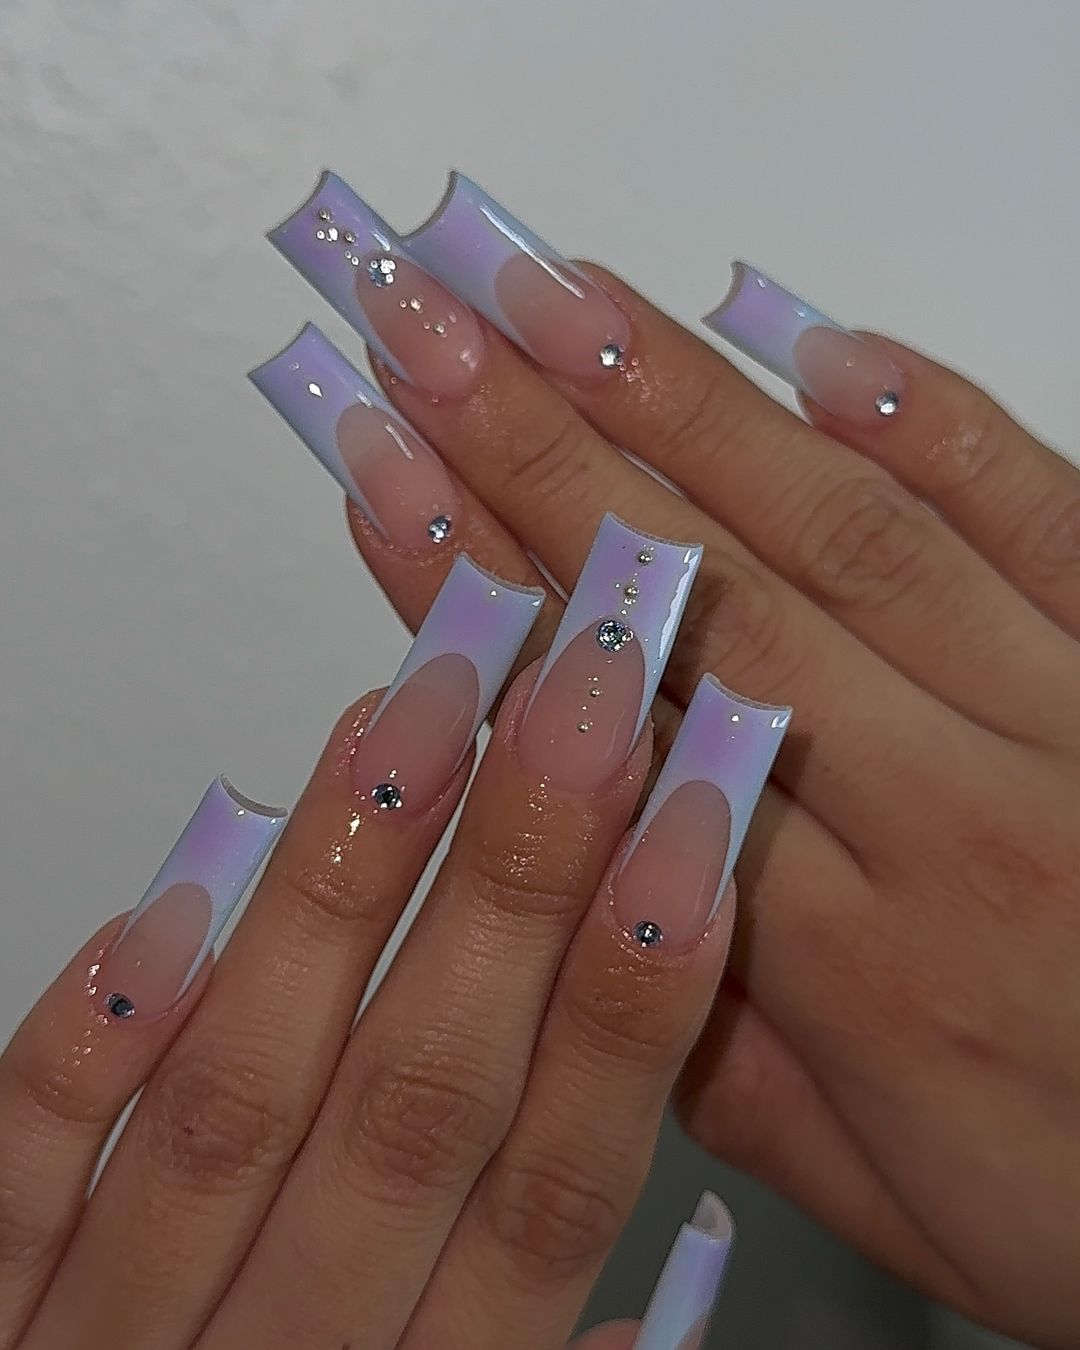
- Clear gel polish
- Small rhinestones
- Gel top coat
- For a perfect base, I recommend using a high-quality clear polish from CND’s Shellac range, known for its durability and shine.
Apply a coat of clear gel polish and delicately place small rhinestones while the polish is still tacky. Ensure even spacing to achieve the light-catching effect, then seal with a gel top coat for a long-lasting finish.
Save Pin
Whimsical Skies and Silver Linings
Embrace a touch of the ethereal with this sky-themed design. The light blue background painted with delicate birds and stars in silver offers a dreamy escape. This look is perfect for daydreamers and lovers of whimsical art designs.
- Light blue gel polish
- Silver nail art pen
- Matte top coat
- Opt for Essie’s “Bikini So Teeny” for the base and a silver Sally Hansen nail art pen for precise detailing.
Start with a base of light blue polish. Once dry, use a silver nail art pen to draw birds and stars. Apply a matte top coat to give your nails an artful, soft-focus finish.
Modern French Twist with a Blue Edge
This modern take on the French manicure adds a vibrant twist with electric blue tips, contrasting beautifully against the sheer pink base. It’s a fresh and fun approach to a classic style, making it perfect for both casual outings and formal events.
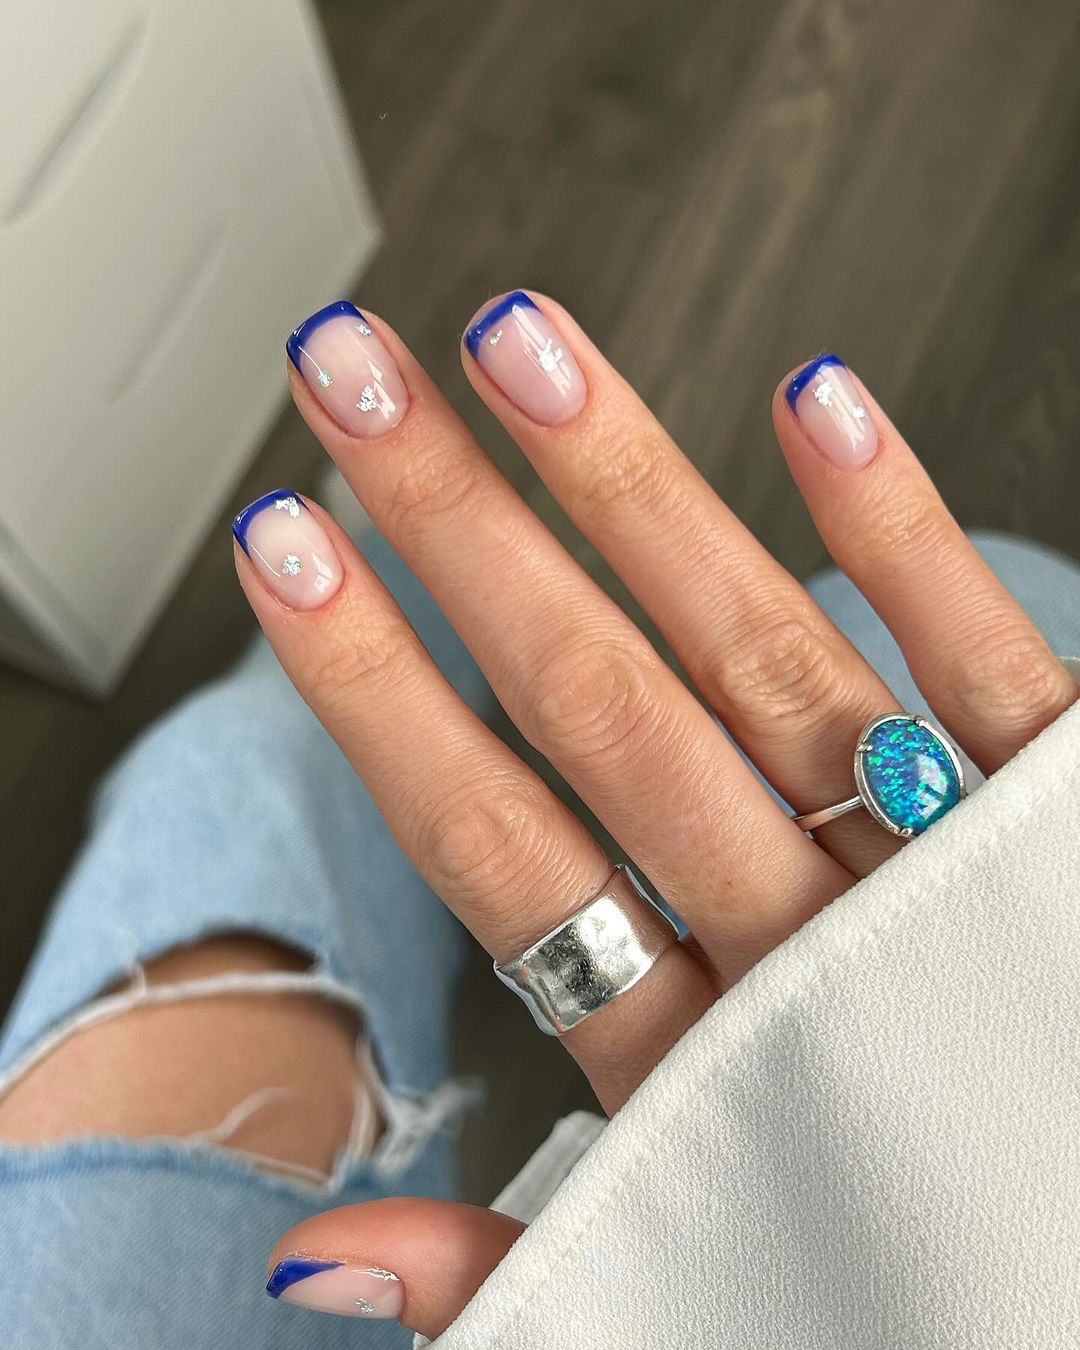
- Sheer pink gel polish
- Electric blue gel polish
- Fine-tip brush
- Top coat
- Lechat’s Perfect Match in “Pink Lace” provides an excellent sheer base, while OPI’s “Blue My Mind” is ideal for the vivid tips.
Apply a base layer of sheer pink. Carefully paint the tips with electric blue using a fine-tip brush for precision. Finish with a clear top coat to enhance durability and shine.
Sleek Silver Swirls on Soft Blue
This design brings a fresh twist to the classic French manicure by incorporating a soft blue base with elegant silver swirls. The semi-transparent tips enhance the airy, light feel, perfect for those seeking a sophisticated yet subtle look.
- Soft blue gel polish
- Silver glitter gel
- Fine-tip nail art brush
- Top coat
- I suggest using Orly’s “Sky Blue” for the base and a silver glitter gel from Gelish for the detailing.
Apply two coats of soft blue gel polish for a solid base. Using a fine-tip brush, draw delicate silver swirls along the tips. Seal with a top coat for a flawless finish.
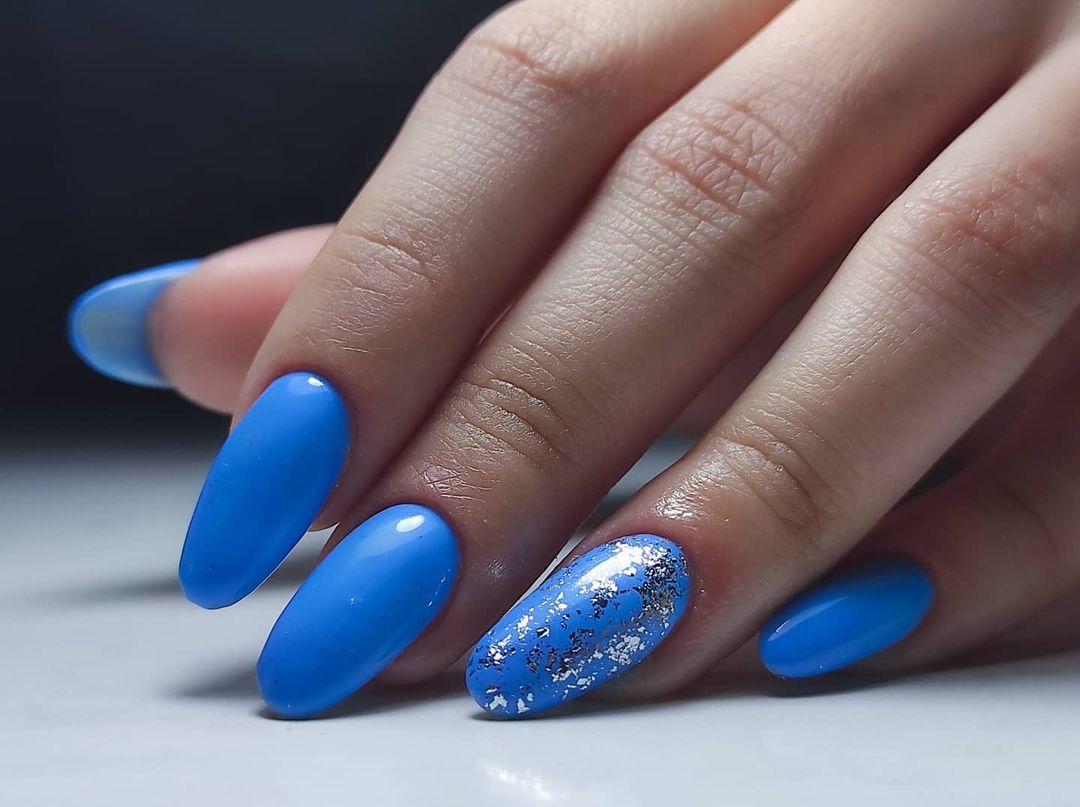
Cobalt and Sparkle
This nail design showcases a beautiful balance of bold cobalt blue with a sparkling accent nail. The simplicity of the solid color paired with the glittery finish offers a dynamic look for any season.
- Cobalt blue gel polish
- Silver glitter polish
- Top coat
- For vibrant color and sparkle, choose OPI’s “Cobalt Blue” and their “Silver Sparkle” polish.
Paint all nails with cobalt blue except for one accent nail, which should be done in silver glitter. Apply a top coat to enhance the colors and ensure longevity.
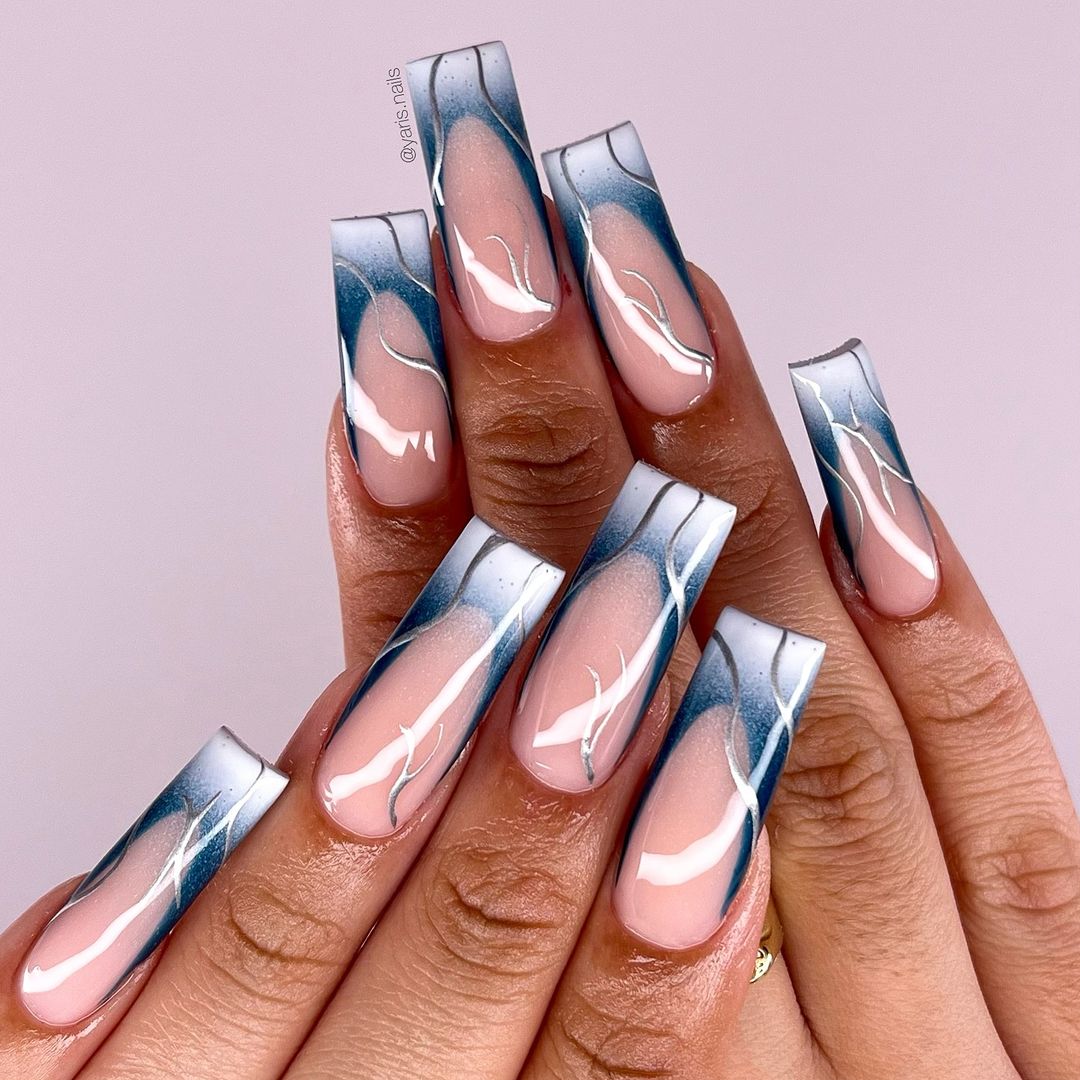
Dynamic Blue Waves on a Milky Base
Embodying the fluidity and mystery of the ocean, this design features dynamic blue swirls over a translucent milky white base. The flowing patterns and bold blue hues make it a striking choice for those looking to make a statement.
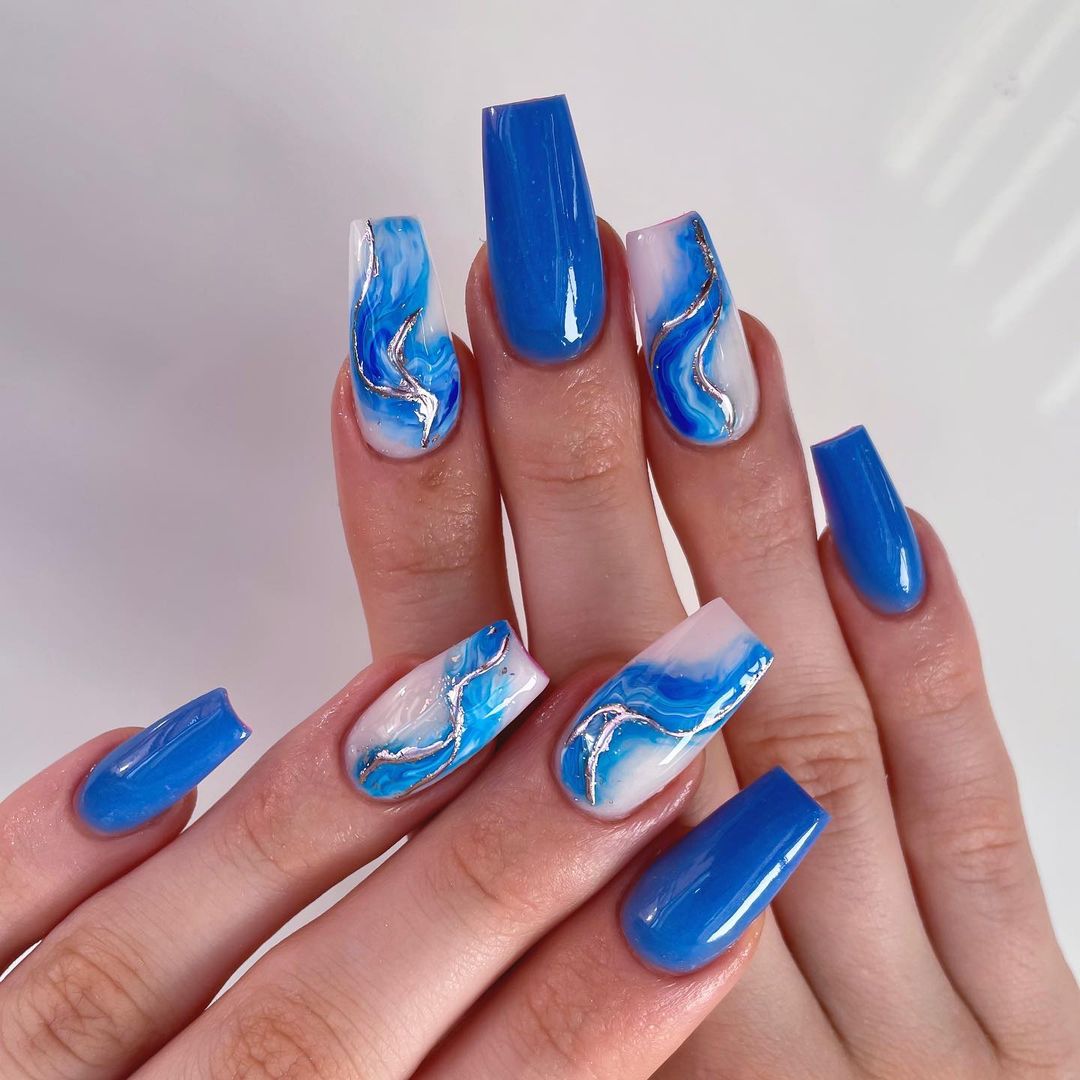
- Milky white gel polish
- Dark blue gel polish
- Fine-tip nail art brush
- Top coat
- Use Essie’s “Treat Love & Color” for the base and “After School Boy Blazer” by Essie for the swirls.
Start with a milky white base. Once dry, use a fine-tip brush to add swirling patterns with dark blue polish. Finish with a top coat to seal the design and add shine.
Save Pin
Playful Pastels with Artistic Flair
This charming design features a playful mix of pastel pink and soft blue, adorned with artistic sketches of animal faces. It’s a creative and fun choice that combines subtle elegance with whimsical details, making it perfect for those who enjoy expressive and cute nail art.
- Pastel pink gel polish
- Soft blue gel polish
- Black nail art pen
- Rhinestones
- Top coat
- I recommend “Pink Smoothie” by Gelish for the pink and “Borrowed & Blue” by Essie for the blue, complemented by a precise Sally Hansen nail art pen for the sketches.
Apply a base of pastel pink on some nails and soft blue on others. Use the nail art pen to draw animal faces and add small rhinestones for a bit of sparkle. Finish with a top coat to protect the designs.
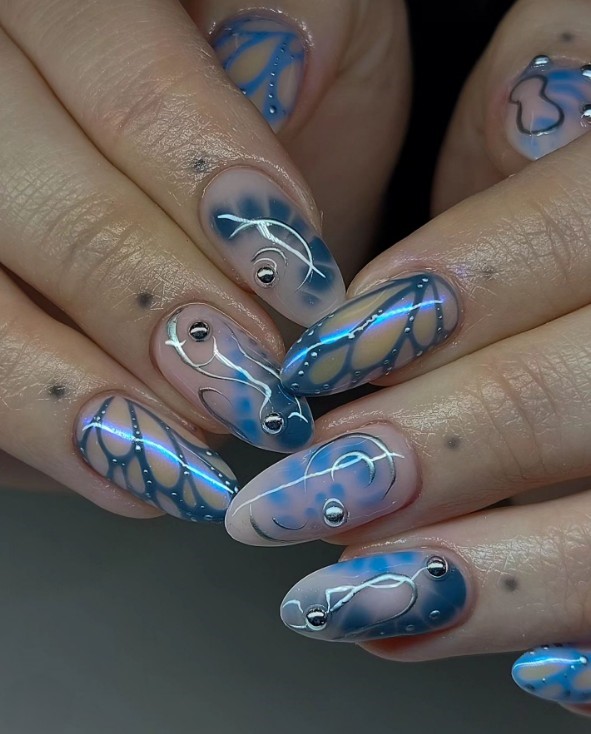
Ethereal Blue Strokes on Transparent Nails
This design features ethereal blue strokes on a transparent base, offering a modern twist on the classic nail look. The wispy, watercolor-like strokes give it a lightweight, airy feel that’s both innovative and stylish, ideal for those seeking a minimalist yet striking appearance.
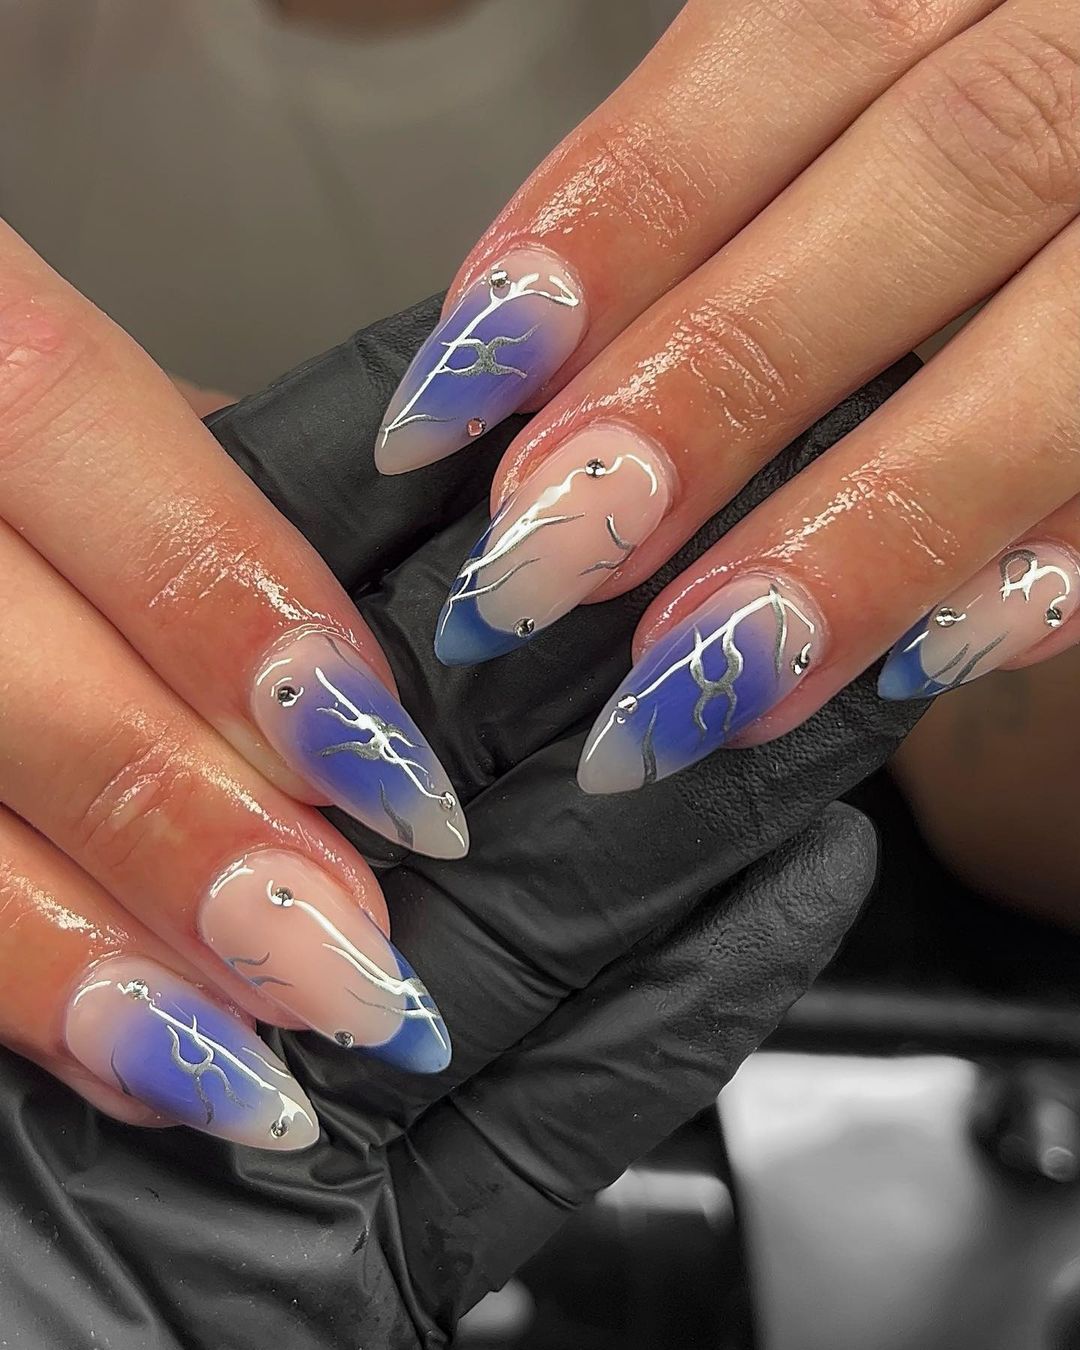
- Transparent gel polish
- Light blue gel polish
- Fine-tip brush
- Top coat
- Use a high-quality transparent polish like OPI’s “Clear” and a light blue such as “Bikini So Teeny” by Essie for the strokes.
Start with a clear base. Dip a fine-tip brush in light blue polish and gently create stroke patterns. Seal with a top coat for a glass-like finish.
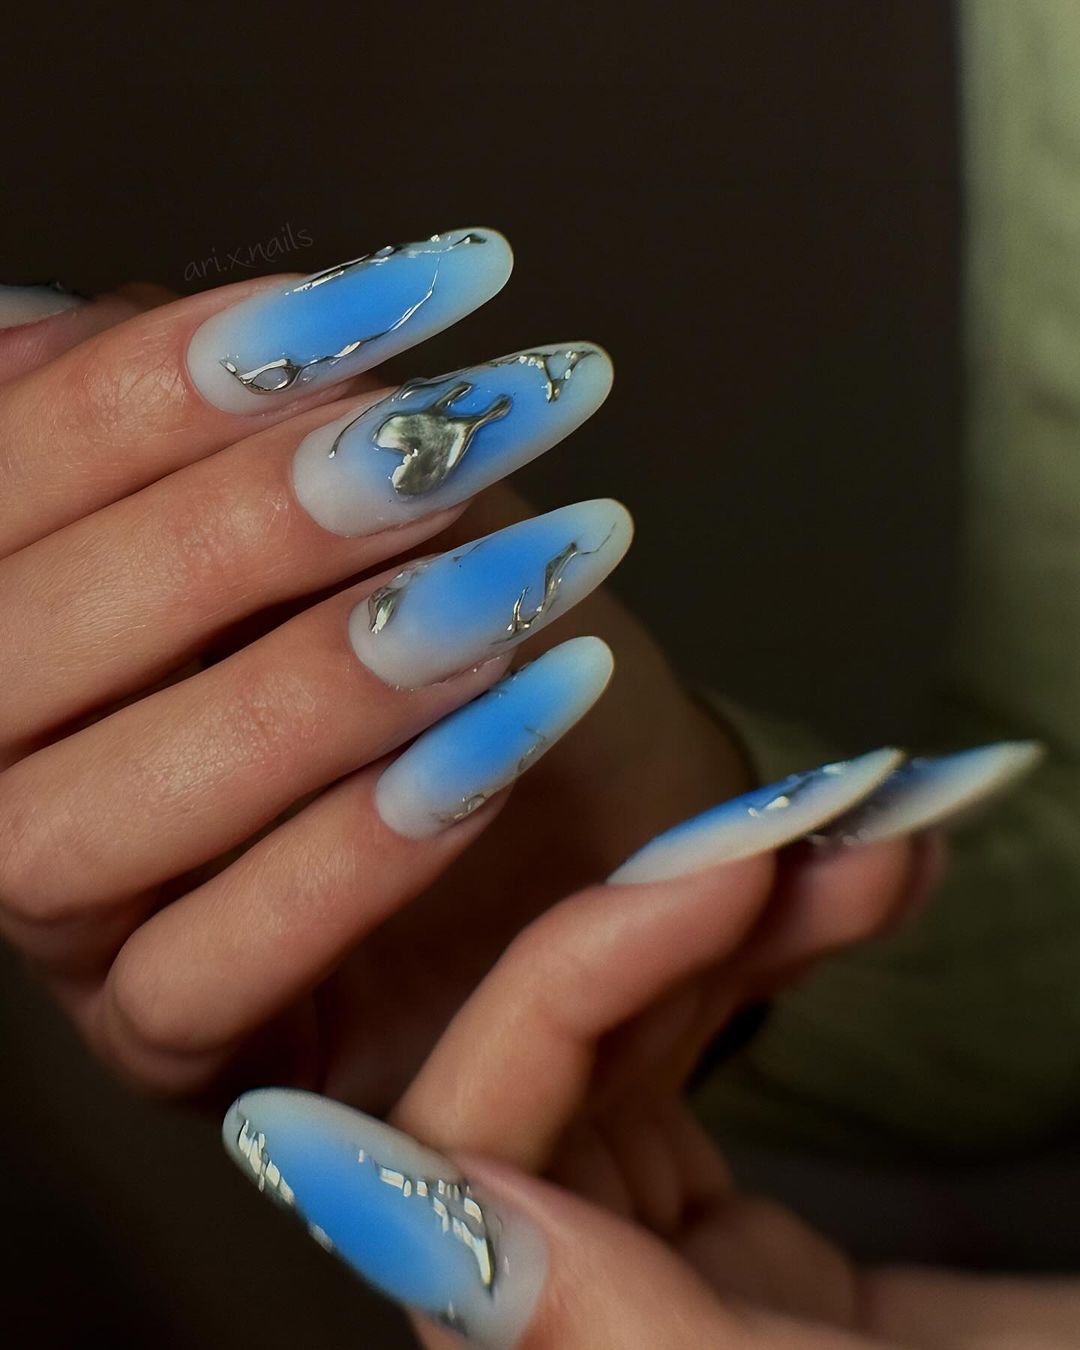
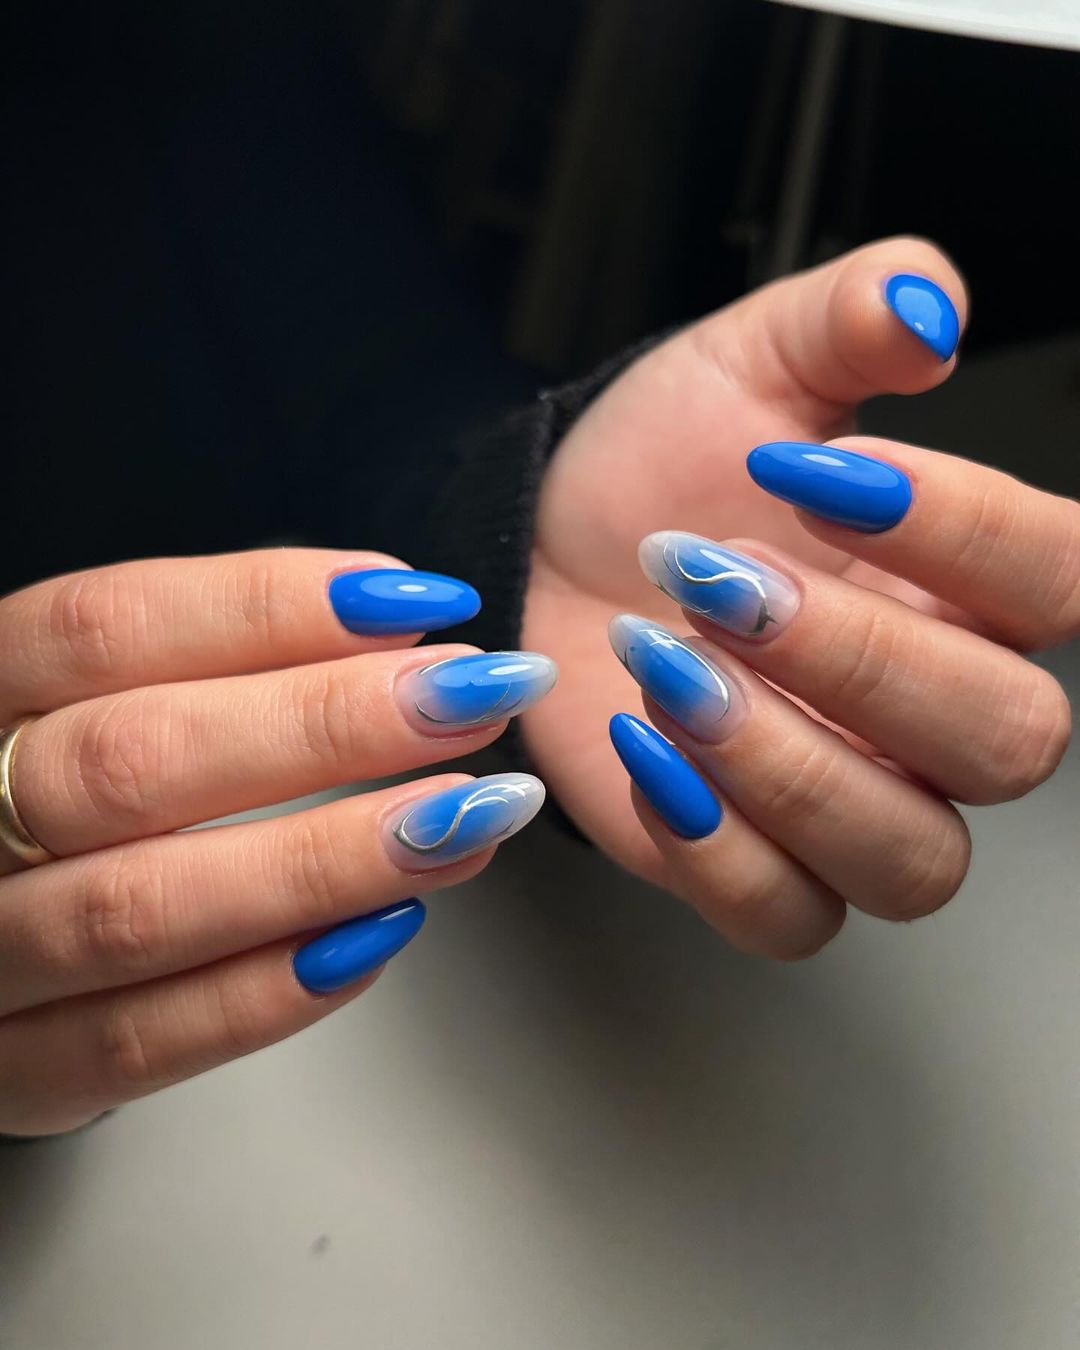
Sleek Ombre with a Metallic Twist
This sleek ombre design transitions from a milky white to clear tips, edged with metallic blue for a sharp, defined look. The addition of small rhinestones enhances its elegance, making this style perfect for those who appreciate refined and sophisticated nail art.
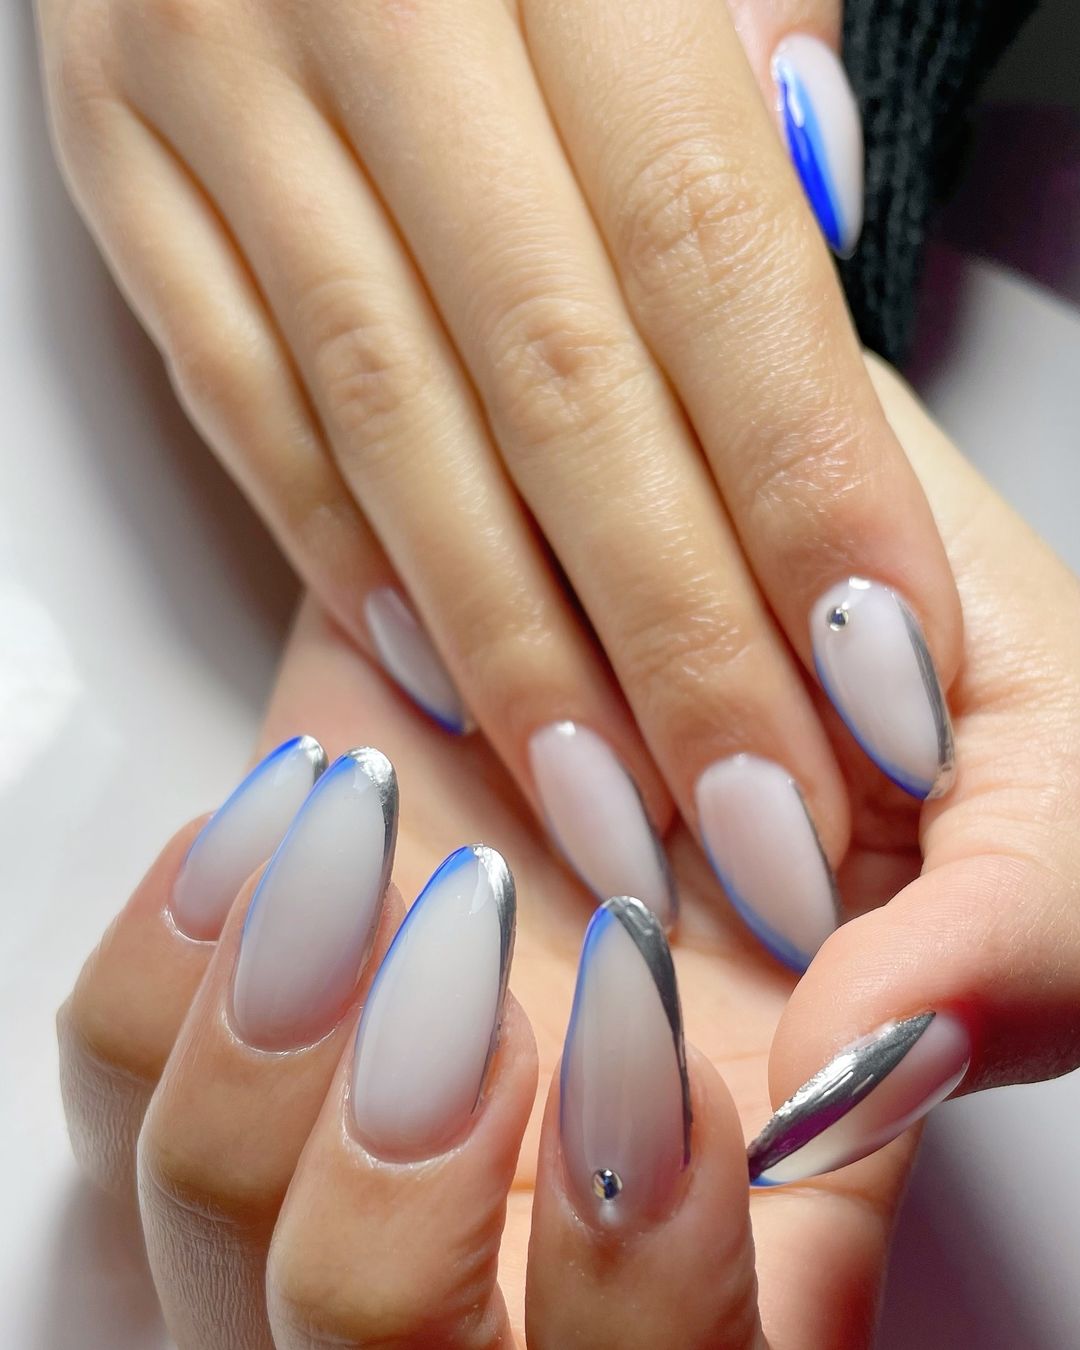
- Milky white gel polish
- Clear gel polish
- Metallic blue nail paint
- Rhinestones
- Top coat
- For the ombre effect, blend CND’s “Cream Puff” with their “Clearly Pink” for a seamless transition, and use “Blue Rhapsody” by Essie for the metallic edges.
Apply a base of milky white and blend towards the tip with clear polish. Once dry, outline the tips with metallic blue paint. Add rhinestones for an elegant finish and seal with a top coat.
Bold Blue and Sparkling Silver
This nail art exemplifies contemporary chic with a unique blend of bold blue and sparkling silver accents. The black and white polka dots add a playful touch to the sleek design, creating a stylish and trendy statement perfect for any occasion.
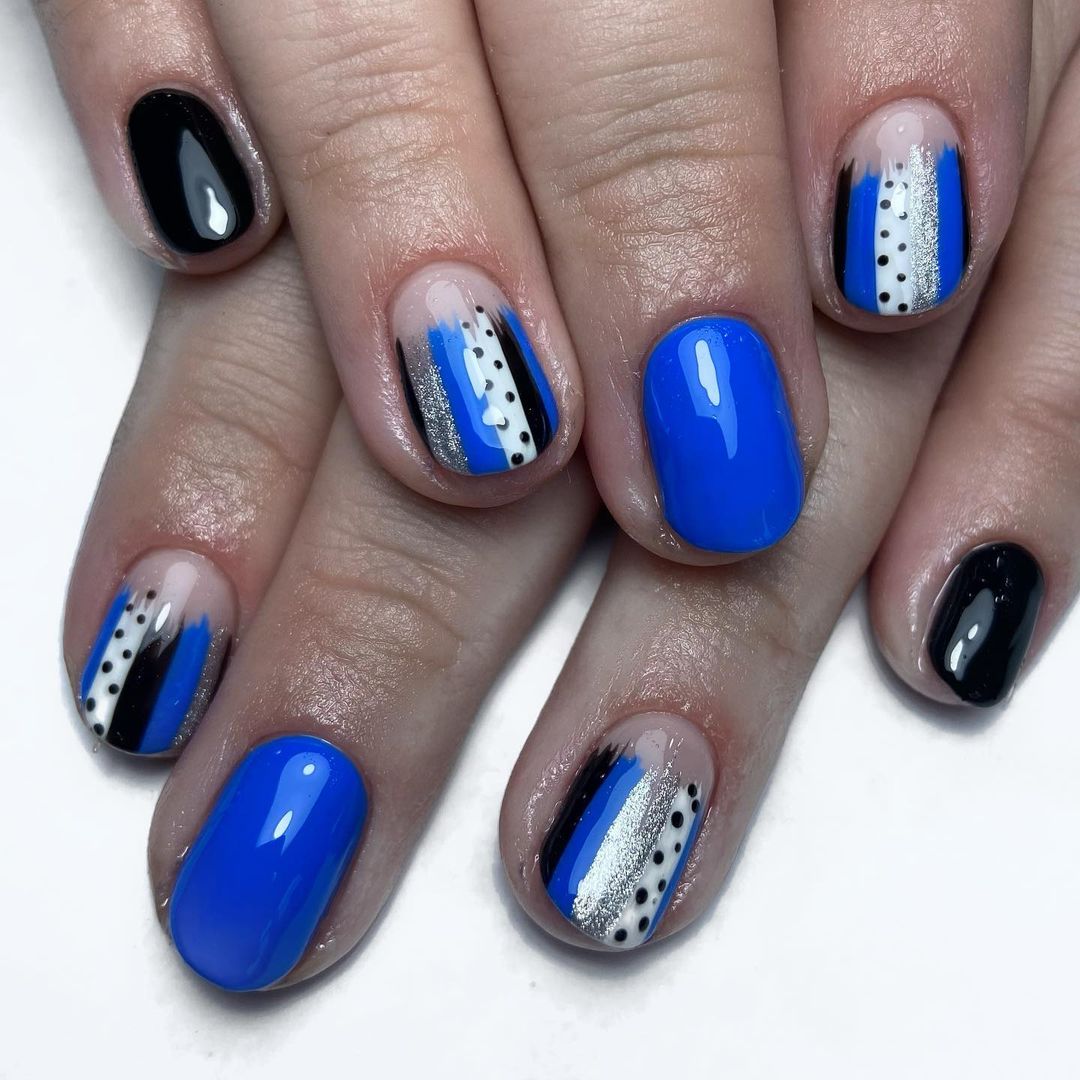
- Bold blue gel polish
- Black gel polish
- White gel polish
- Silver glitter polish
- Dotting tool
- Top coat
- For best results, I recommend using “Blue My Mind” by OPI for the blue and Essie’s “Licorice” and “Blanc” for the black and white details, respectively.
Paint some nails with bold blue and others with a blend of black and white for the base. Use a dotting tool to create polka dots. Accentuate with silver glitter on selective nails. Seal all designs with a top coat for durability and shine.
Silver Swirls on Nude
This design features luxurious silver swirls on a nude base, offering an elegant and sophisticated look. The metallic finish provides a modern edge, while the long, almond-shaped nails lend an air of drama and sophistication.
- Nude gel polish
- Silver metallic polish
- Fine-tip nail art brush
- Top coat
- For this look, “Bare With Me” by Essie is an excellent nude base, paired with Sally Hansen’s “Sterling Silver” for the swirls.
Apply a nude base coat. Using a fine-tip brush, delicately draw silver swirls over the nails. Finish with a top coat to enhance the metallic sheen and protect the design.
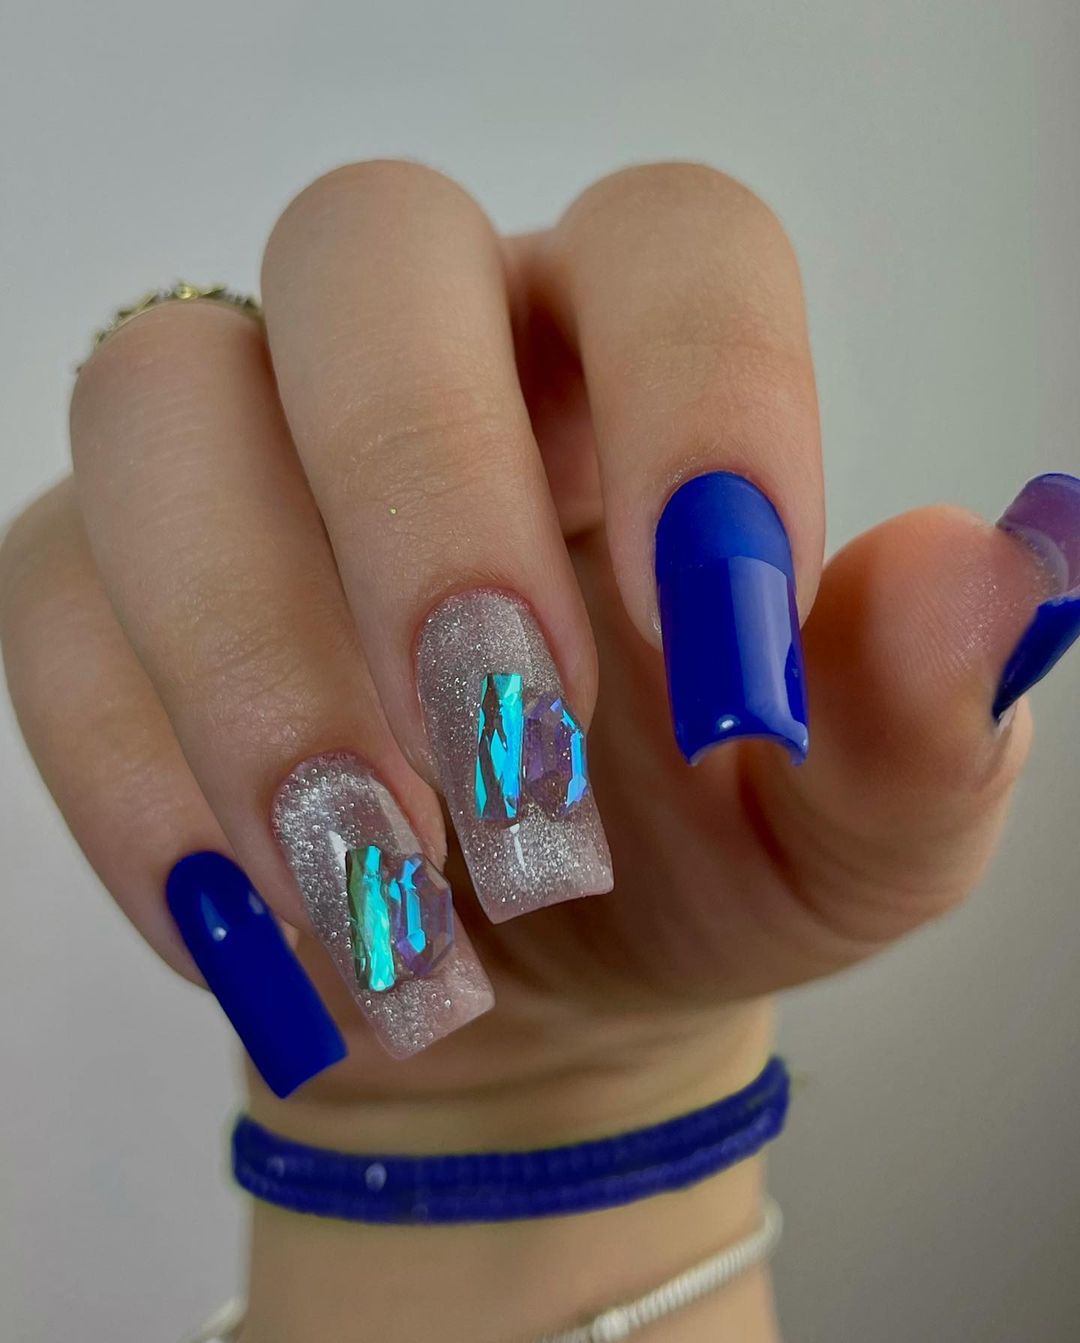
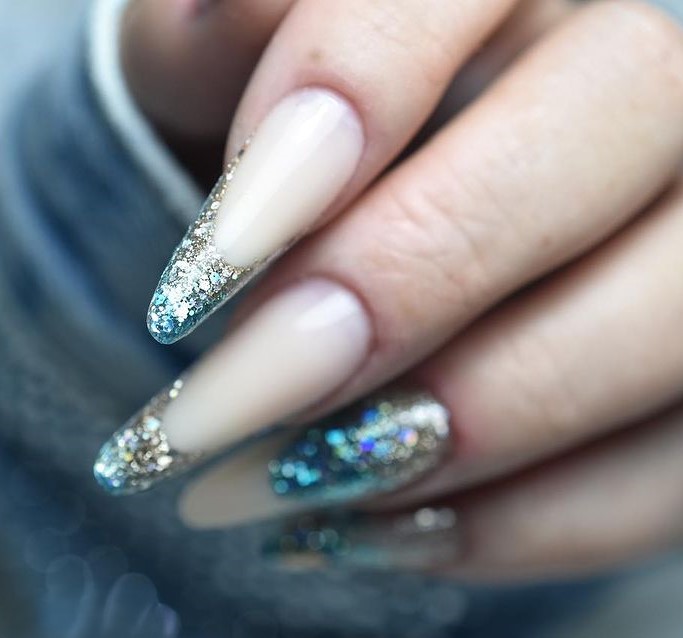
Blue Ice Crystals on Frosted Nails
Capturing the essence of winter, this design pairs icy blue crystals on a frosted glitter base, creating a stunning visual effect reminiscent of frozen landscapes. It’s a perfect choice for those who love a bit of sparkly drama on their nails.
- Frosted glitter gel polish
- Blue gel polish
- Large crystal embellishments
- Top coat
- Use “Frosted Cupcake” by Gelish for the base and “Electric Blue” by Orly for accenting crystals.
Apply a frosted glitter polish as the base. While the base is still tacky, strategically place blue crystal embellishments. Seal with a top coat to ensure longevity and enhance the sparkle.
Silver Lining on Cloudy Blue
These nails bring a captivating sky theme to life, with fluid silver accents that mimic the unpredictable patterns of clouds against a serene blue sky. The use of gradient shades and the glossy finish creates an illusion of depth, offering a dynamic and artistic look.
- Light blue gel polish
- Silver metallic polish
- Sponge for gradient effect
- Top coat
- “Sky Blue” by Orly is perfect for the base, and “Metallic Silver” by Essie for the accents.
Start with a base of light blue gel polish. Dab silver metallic polish with a sponge to create a gradient effect. Finish with a glossy top coat for a smooth and shiny appearance.
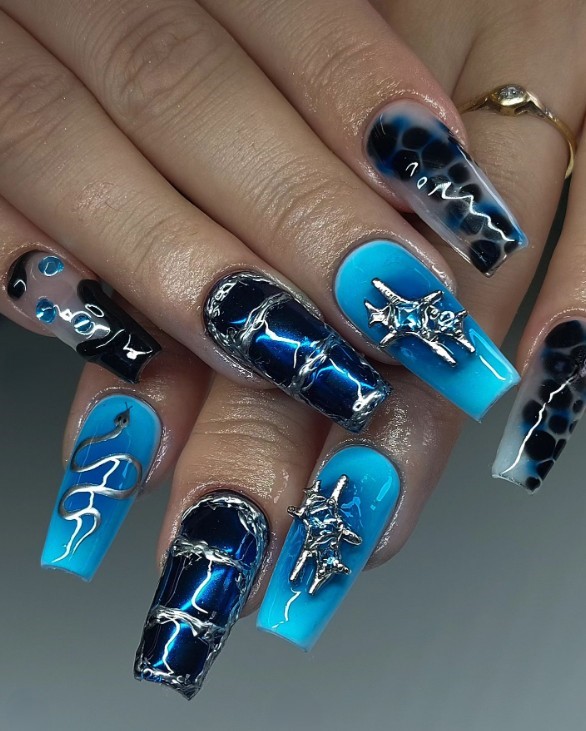
Edgy Artistry with Metallic Charms
This design is a bold expression of creativity, combining vivid blue tones with sleek black accents and metallic charms. It’s a statement piece that blends glossy finishes with matte textures for a multifaceted and contemporary look.
- Electric blue gel polish
- Black gel polish
- Metallic charms
- Matte and glossy top coats
- I recommend “Electric Blue” by OPI and “Blackout” by Sally Hansen, with a variety of metallic charms available from craft stores.
Apply electric blue and black gel polish in alternating patterns. Affix metallic charms on designated nails. Use matte top coat on black sections and glossy on blue for a striking contrast.
Soft Blue and White Swirls
This marble design showcases soft blue and white swirls, creating a refined and elegant look. The smooth, flowing patterns emulate natural marble textures, making this nail art sophisticated and ideal for those who appreciate subtle yet impactful designs.
- Soft blue gel polish
- White gel polish
- Detailing brush
- Top coat
- “Bikini So Teeny” by Essie for blue and “Alpine Snow” by OPI for white are excellent choices for achieving the marble effect.
Apply a base of soft blue. While still wet, dot white polish and use a detailing brush to swirl the colors together. Seal with a top coat to enhance the marble effect and ensure longevity.
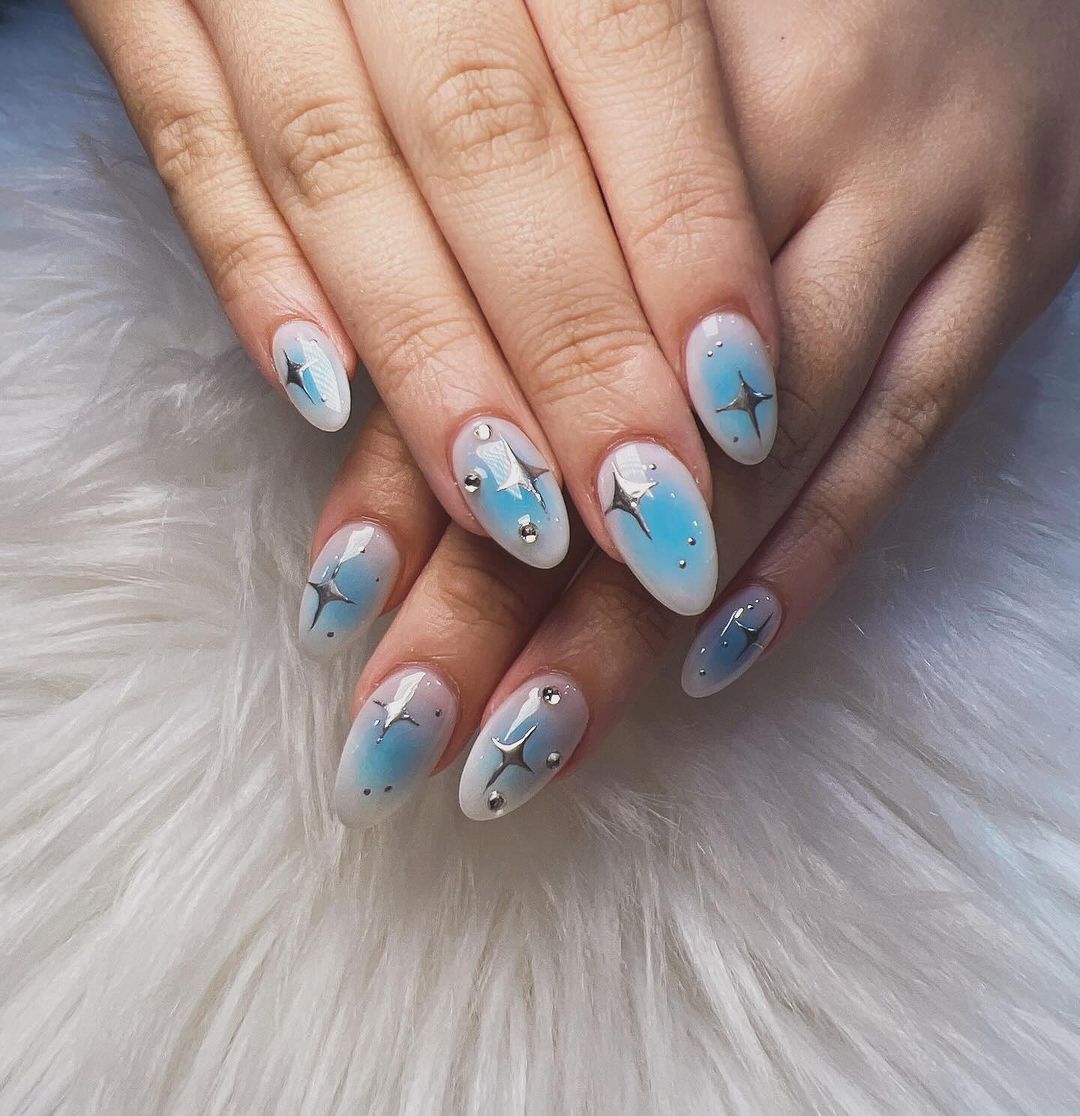
Celestial Beauty
This whimsical design combines ethereal elements like stars, swirls, and subtle celestial motifs across a pastel blue and white canvas. It’s perfect for those who adore nail art with a magical, dreamy vibe, adding a touch of fantasy to everyday looks.
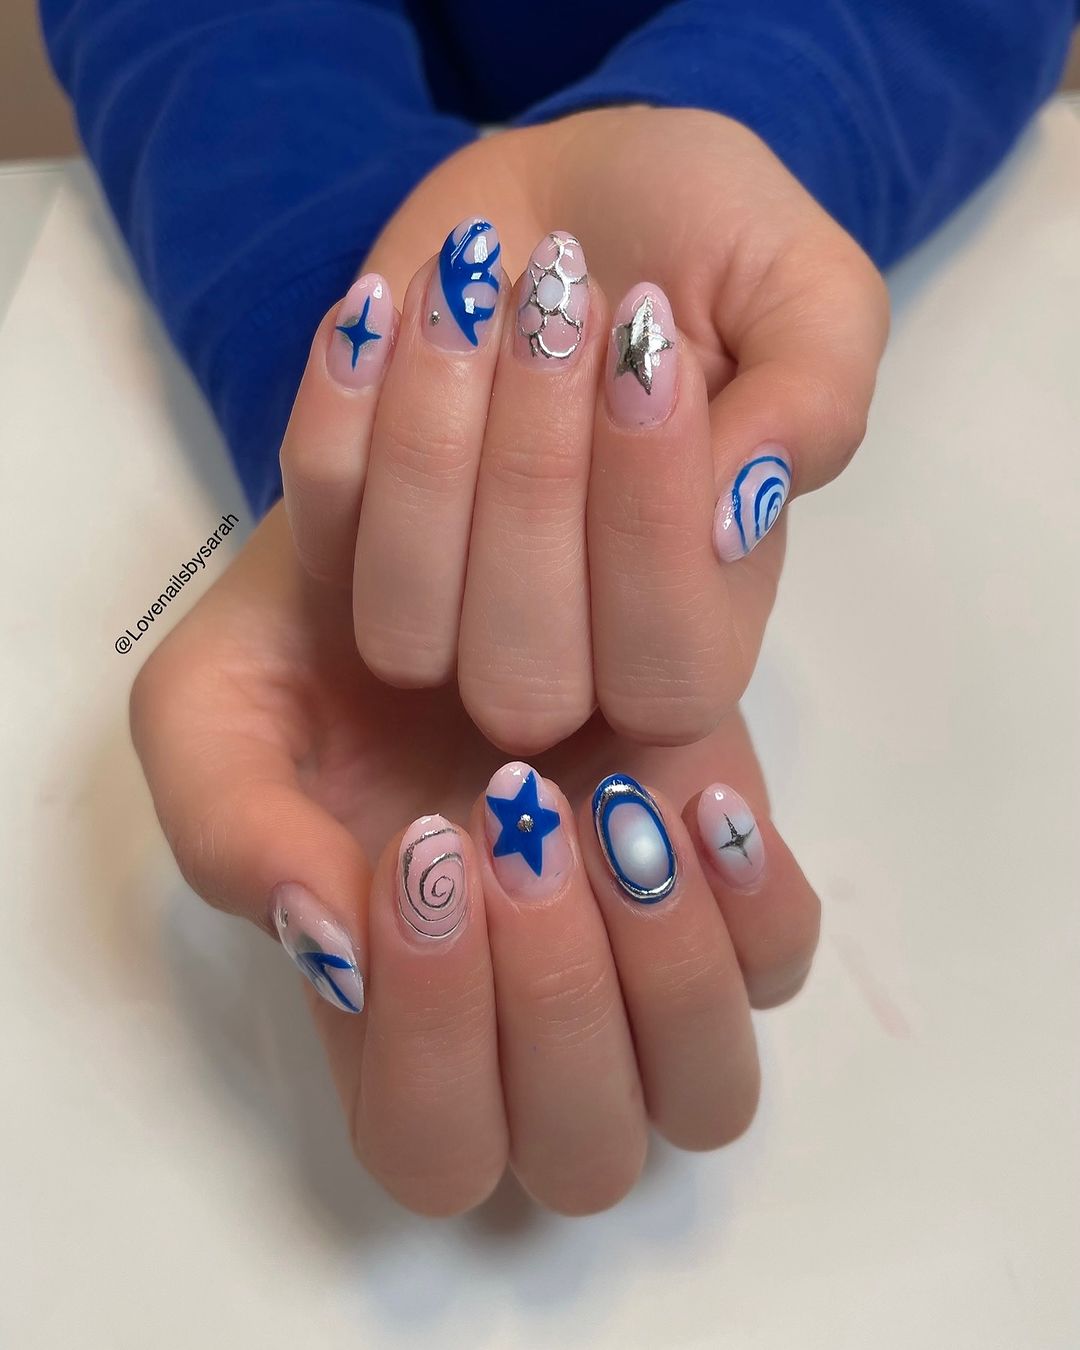
- Pastel blue gel polish
- White gel polish
- Silver glitter
- Star-shaped decals
- Fine-tip nail art brush
- Top coat
- Use “Borrowed & Blue” by Essie for the base and white accents with “Alpine Snow” by OPI.
Apply a base of pastel blue. Use a fine-tip brush to add white celestial designs and swirls. Place star-shaped decals and a touch of silver glitter for a starry effect. Seal with a top coat for lasting beauty.
Dynamic Swirls
This nail art showcases vibrant blue swirls over a clear base, creating a striking visual flow. It embodies dynamism and fluidity, perfect for making a bold fashion statement while keeping the aesthetic clean and striking.
- Vibrant blue gel polish
- Clear gel polish
- Fine-tip nail art brush
- Top coat
- “Pacific Blue” by Sally Hansen is ideal for the swirls, combined with a clear base from OPI.
Start with a clear base coat. Use a fine-tip brush to apply vibrant blue swirls in a flowing design. Finish with a top coat to ensure the design’s durability and gloss.
Iridescent Magic
This set offers a psychedelic twist with iridescent colors that shift and shimmer under different lights. The intricate designs include metallic accents and holographic effects, making the nails a focal point of any ensemble.
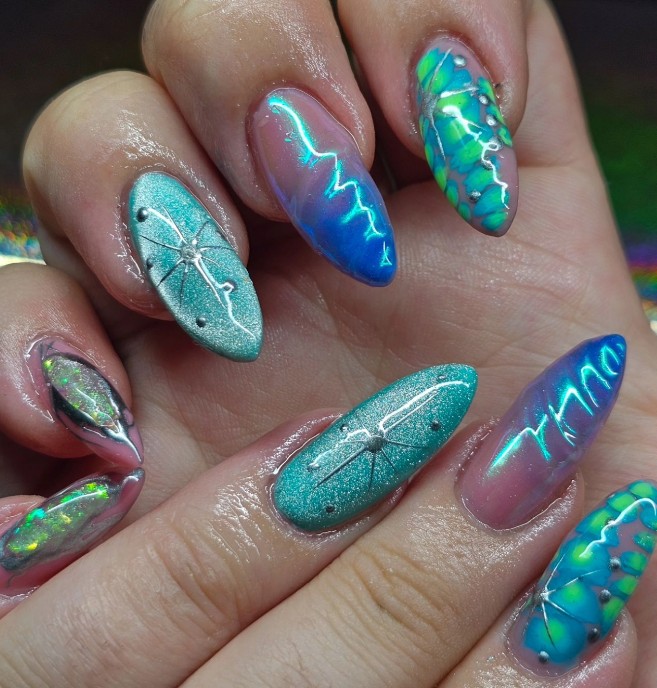
- Teal iridescent gel polish
- Holographic powder
- Metallic nail strips
- Fine-tip nail art brush
- Top coat
- A teal iridescent base from ILNP’s Holographic collection, paired with a holographic powder from Born Pretty, creates this look.
Apply a teal iridescent gel polish as the base. While wet, sprinkle holographic powder over the nails. Use metallic strips and a brush to add detailed designs. Seal everything with a top coat for a mesmerizing finish.
Sleek and Modern
This design embodies modern art with abstract lines and fluid forms over a soft pink and white base, accentuated by sleek blue highlights. Perfect for those who appreciate nail art that speaks volumes through minimalistic yet bold statements.
- Soft pink gel polish
- White gel polish
- Electric blue gel polish
- Fine-tip nail art brush
- Top coat
- “Romantique” by CND for the pink and “Alpine Snow” by OPI for the white base are recommended, with “Blue My Mind” by OPI for the highlights.
Apply a base of soft pink and white gel polish. Using a fine-tip brush, draw abstract lines and shapes with electric blue. Finish with a glossy top coat to enhance the design’s clarity and shine.
Vibrant Blue with a Twist
Featuring a vibrant blue ombre effect with a sparkling accent nail, this design is a classic yet refreshing take on nail art. The blue transitions smoothly into a lighter shade, while the silver glitter adds a luxurious touch, making it perfect for any festive occasion.
- Vibrant blue gel polish
- Light blue gel polish
- Silver glitter polish
- Sponge for ombre effect
- Top coat
- “Pacific Blue” by Sally Hansen for the darker shade and “Bikini So Teeny” by Essie for the lighter ombre effect, with a silver glitter overlay from Essie’s “Set in Stones.”
Start with the darker blue at the base, blending upward into light blue using a sponge. Apply silver glitter polish on one accent nail for a dazzling effect. Seal with a top coat for lasting wear and extra shine.
Glacial Elegance
This sophisticated design presents a frosty glamour look with a gradient of silver and icy blue that mimics a winter morning. Adorned with sparkling elements that transition into a clear base, this nail art is perfect for those who appreciate subtle yet impactful elegance.
- Icy blue gel polish
- Silver glitter polish
- Clear gel polish
- Fine glitter flakes
- Top coat
- “Arctic Freeze” by Harmony for the icy blue base, paired with “Silver Spark” by Essie for the glitter accents.
Apply icy blue gel polish at the tip and blend it downward to the middle using a sponge. Add silver glitter polish over the blue for a frosty effect. Towards the cuticle, apply clear gel polish and sprinkle with fine glitter flakes for a seamless gradient. Seal with a glossy top coat for durability and shine.
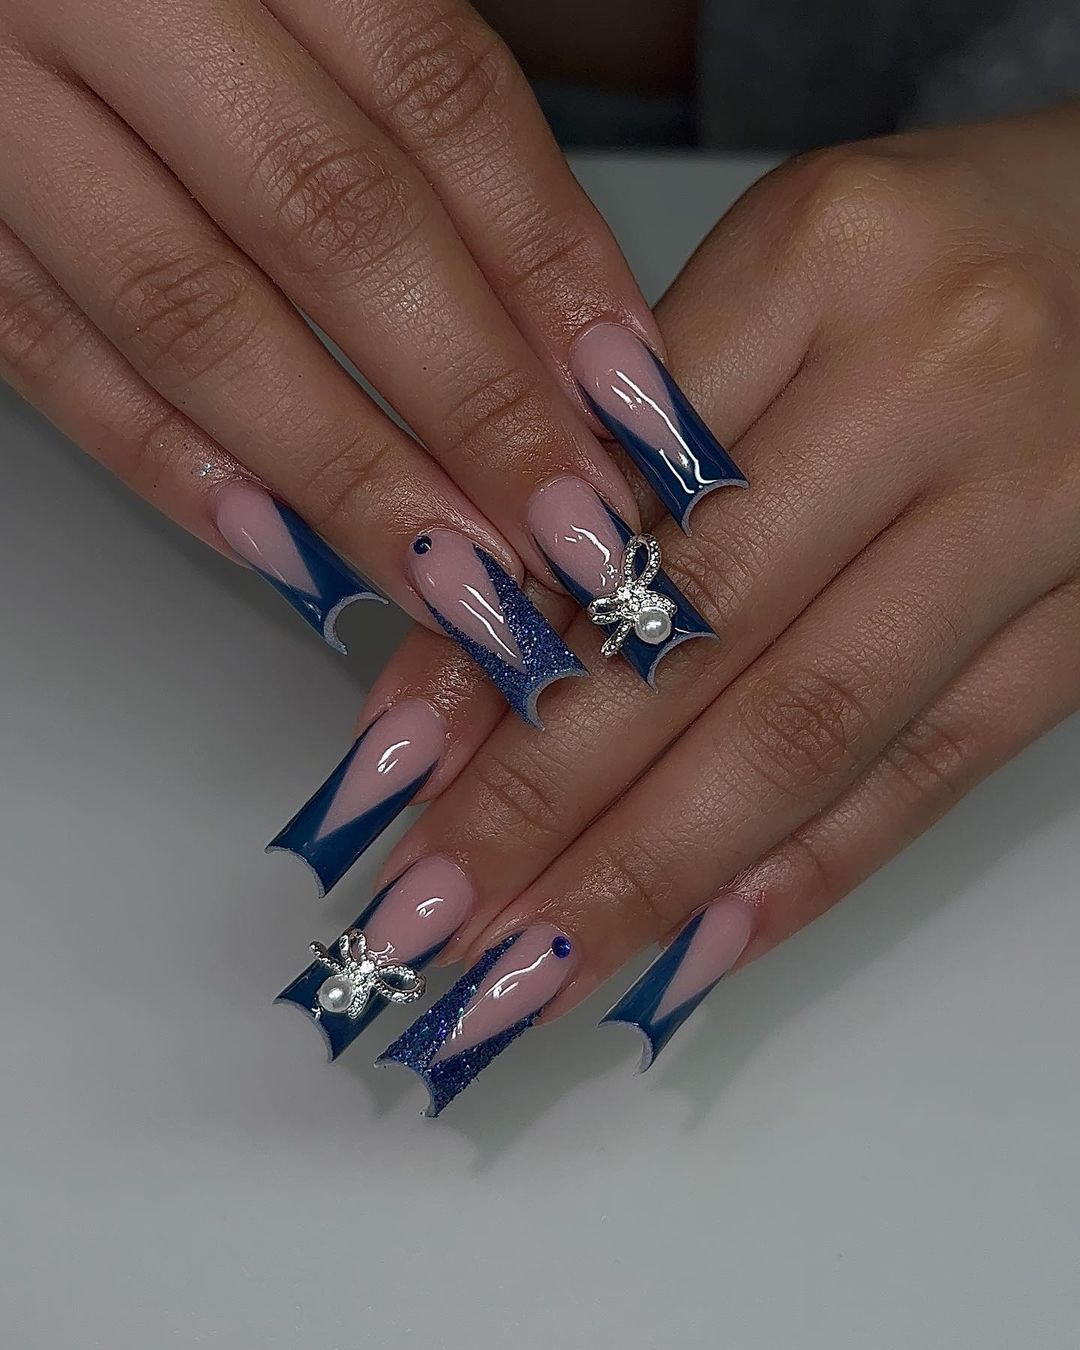
Bold Blue and Rhinestone Glamour
Featuring deep royal blue with elegant rhinestone accents along the cuticle, this design is all about bold colors and luxurious embellishments. It’s ideal for formal events or as a statement piece in a sophisticated ensemble.
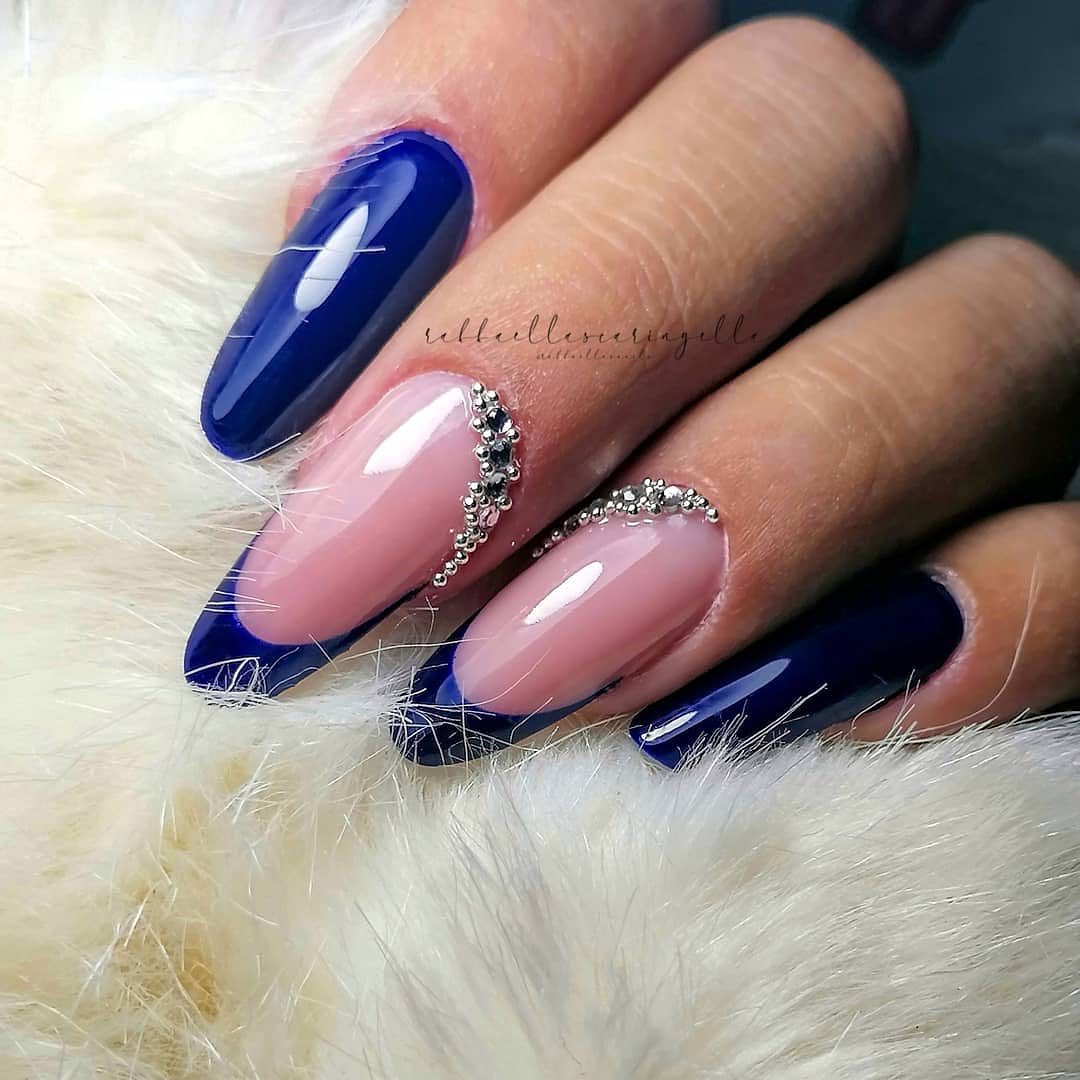
- Royal blue gel polish
- Rhinestones
- Adhesive for rhinestones
- Top coat
- “Royal Rage” by Gelish for the vivid blue and high-quality rhinestones from Swarovski for the accents.
Apply two coats of royal blue gel polish for a rich, opaque finish. Arrange rhinestones near the cuticle with adhesive for a precise and glamorous look. Finish with a top coat to secure the rhinestones and enhance the overall shine.
FAQ
- What are the best colors for creating elegant nail designs?
For elegant nail designs, classic colors like soft pink, nude, icy blue, and deep royal blue work exceptionally well. Adding elements like silver or gold glitter can elevate the sophistication of these designs.
- How do I apply rhinestones so they last longer on my nails?
To ensure rhinestones last longer on your nails, use a small dot of nail glue or a clear gel polish to adhere them to your nail. Place the rhinestone with tweezers for precision, then seal around the edges with a top coat. Avoid touching the rhinestone’s top to maintain its shine.
- Can I achieve professional-looking nail art at home?
Yes, you can achieve professional-looking nail art at home with the right tools and techniques. Start with basic designs and gradually move to more complex techniques like gradients and using embellishments. High-quality polishes and a steady hand are key.
- How do I prevent my nail polish from chipping?
To prevent your nail polish from chipping, start with a clean, dry nail surface. Apply a base coat to help the polish adhere better, followed by two coats of your color, and finish with a durable top coat. Reapply the top coat every few days to extend the life of your manicure.
- What is the best way to remove gel polish at home?
The best way to remove gel polish at home is to buff the shine off the top coat, soak cotton balls in acetone, place them on your nails, and wrap each nail in aluminum foil. Let it sit for about 15-20 minutes, then gently push the polish off with a cuticle pusher.
- How often should I let my nails “breathe” between manicures?
Nails do not technically need to “breathe” since they are made of keratin, not living tissue. However, giving your nails a break from polish can help maintain their health and strength. A good practice is to leave nails polish-free for a week after wearing gel or acrylics for an extended period.
- What are some quick tips for nail care?
Keep your nails clean and trimmed, moisturize your cuticles regularly, wear gloves while doing household chores to protect your manicure, and ensure a balanced diet that supports nail health. Regular use of a nourishing nail oil can also significantly improve the condition of your nails and cuticles.
Save Pin