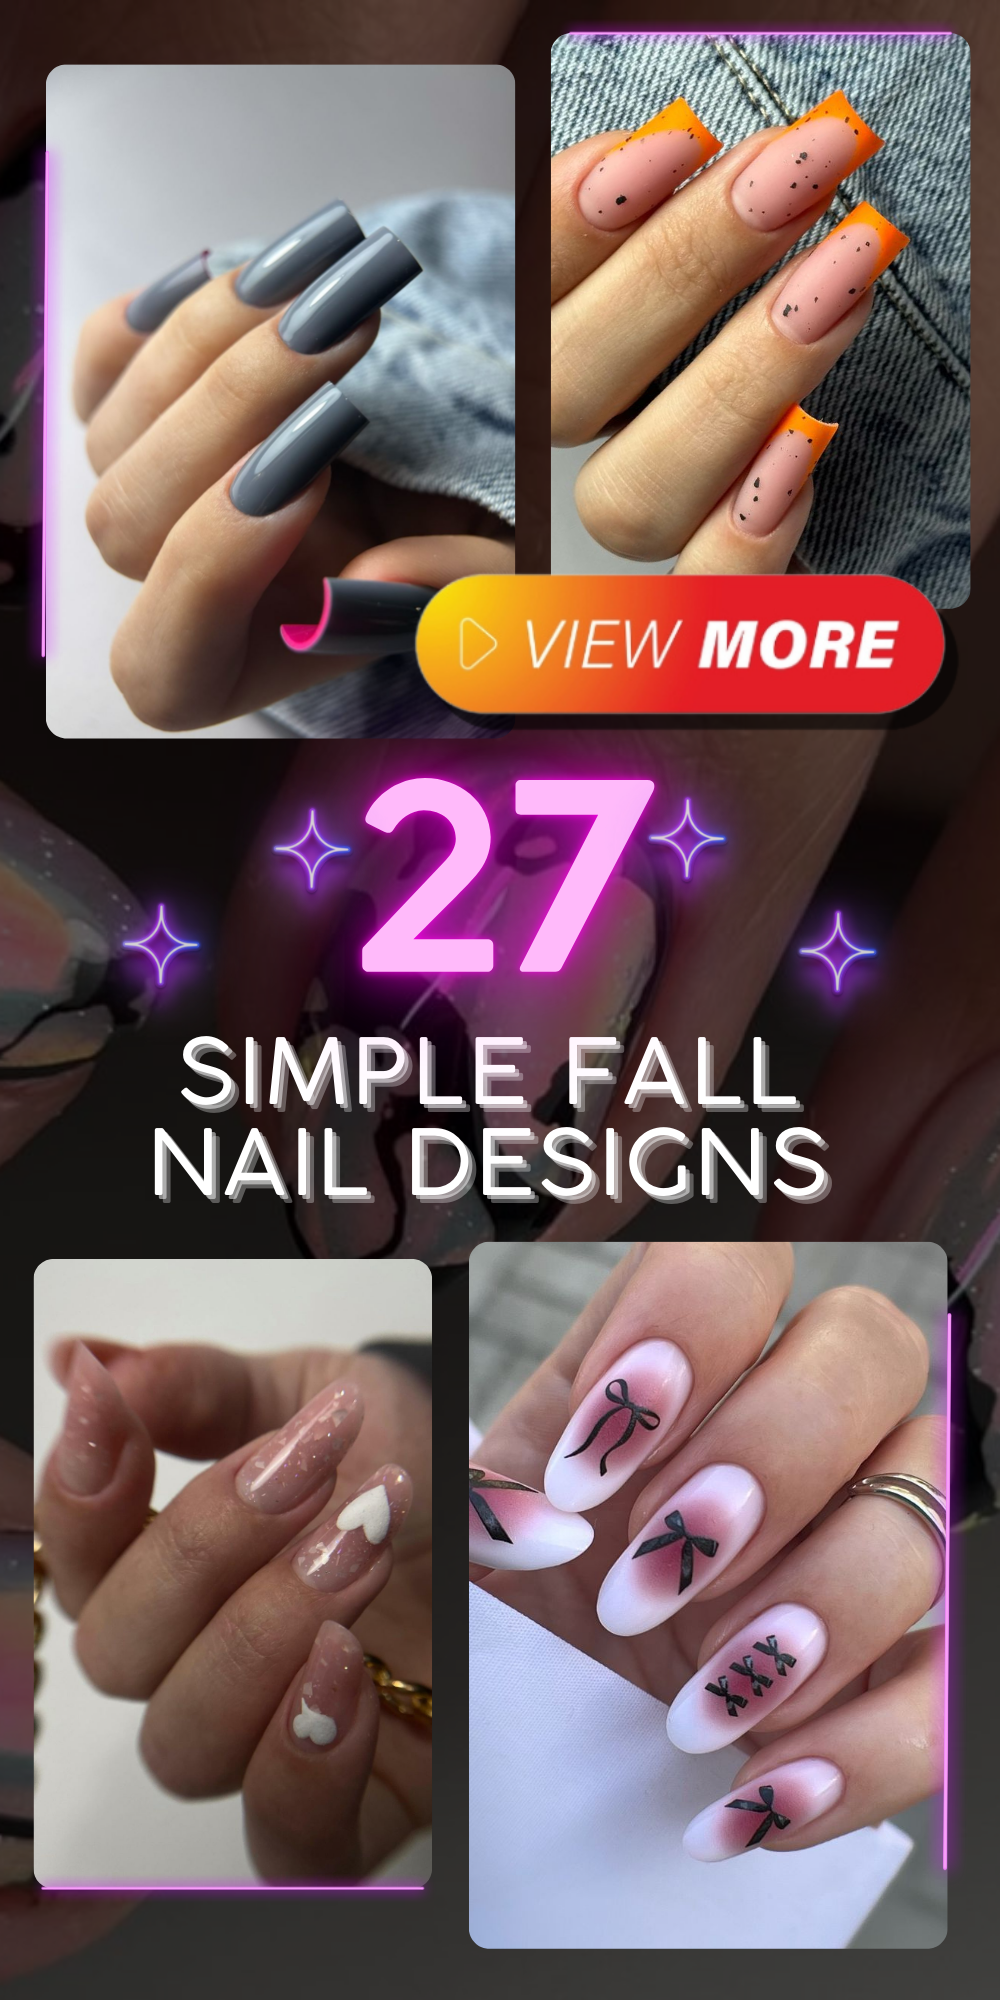
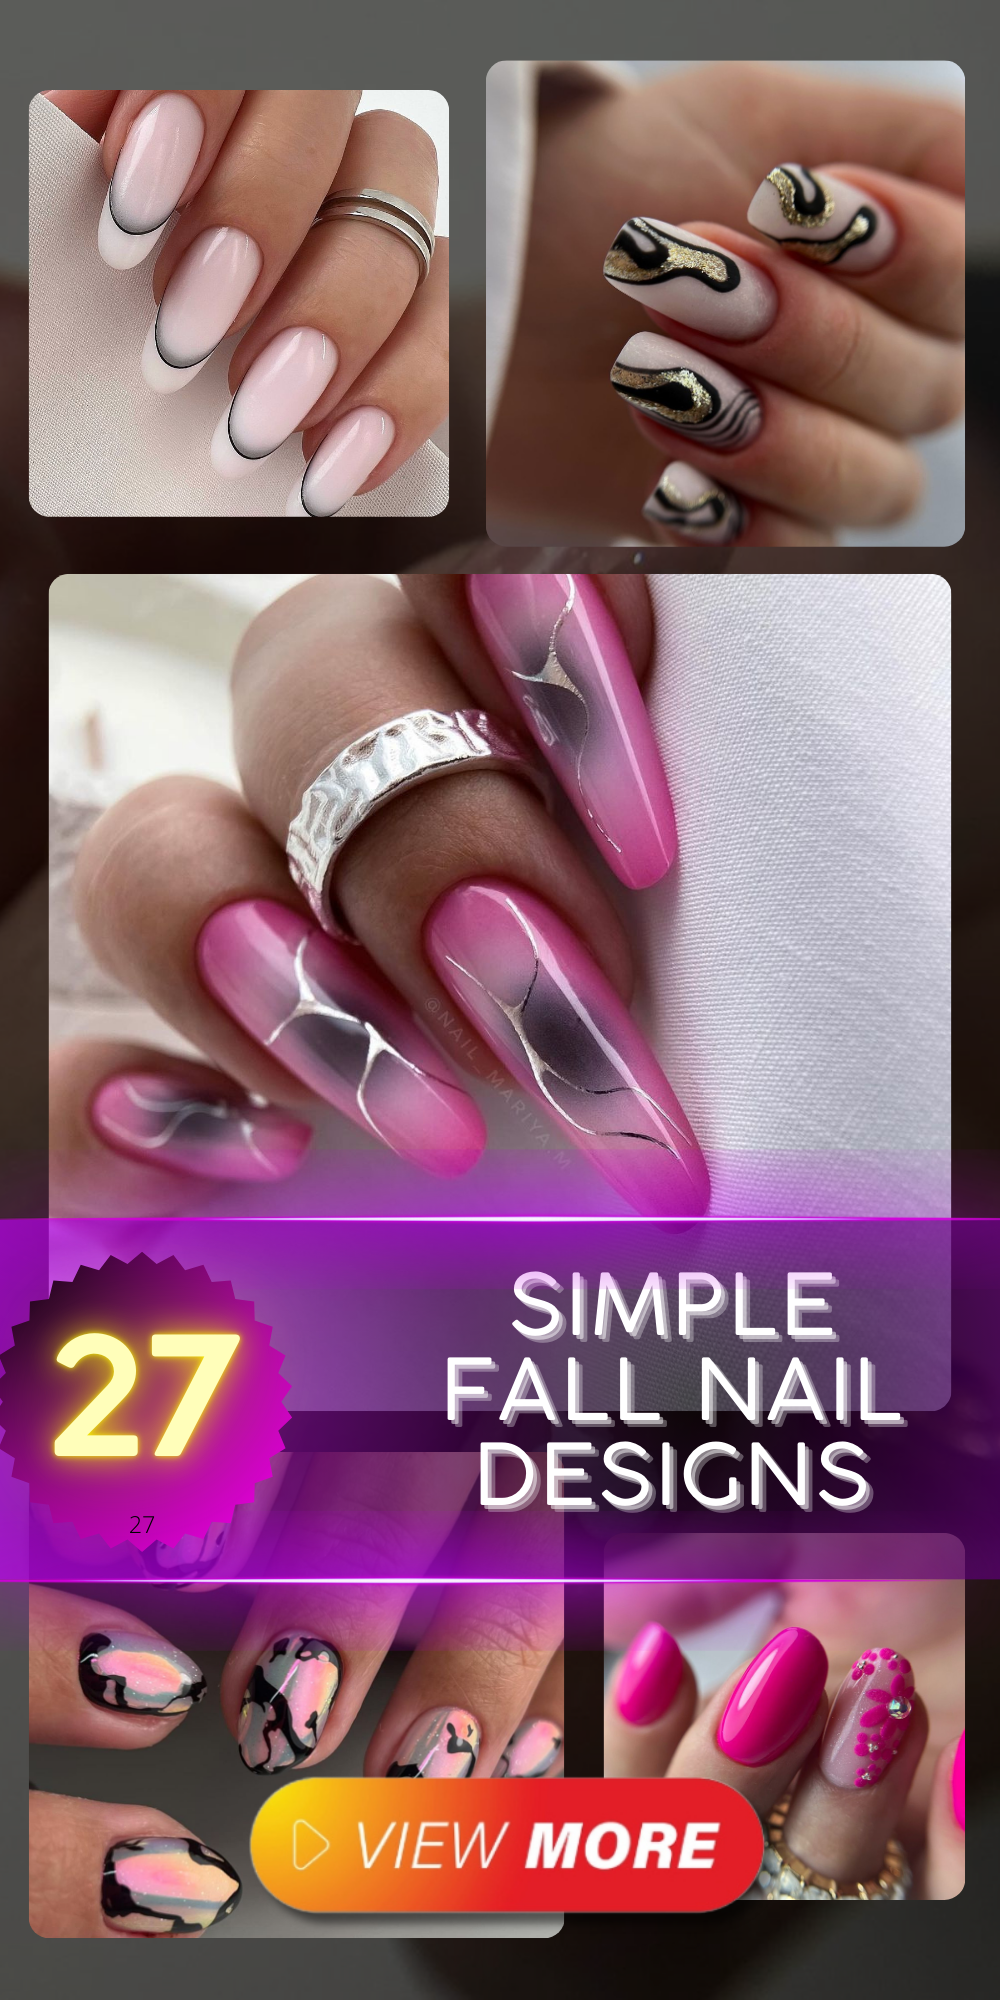
As the leaves turn and the air gets crisp, our style transforms to embrace the warm and rich tones of autumn. But it’s not just our wardrobes that deserve a seasonal update—our nails do too! Looking for some simple fall nail designs to complement your cozy sweaters and pumpkin spice lattes? Whether you’re into short nails or prefer a bit more length, we’ve got you covered with the latest fall trends. From classy and sophisticated to cute and playful, these nail ideas will inspire your next manicure. Let’s dive into the best autumn nail designs that will have your fingertips looking fabulous all season long.
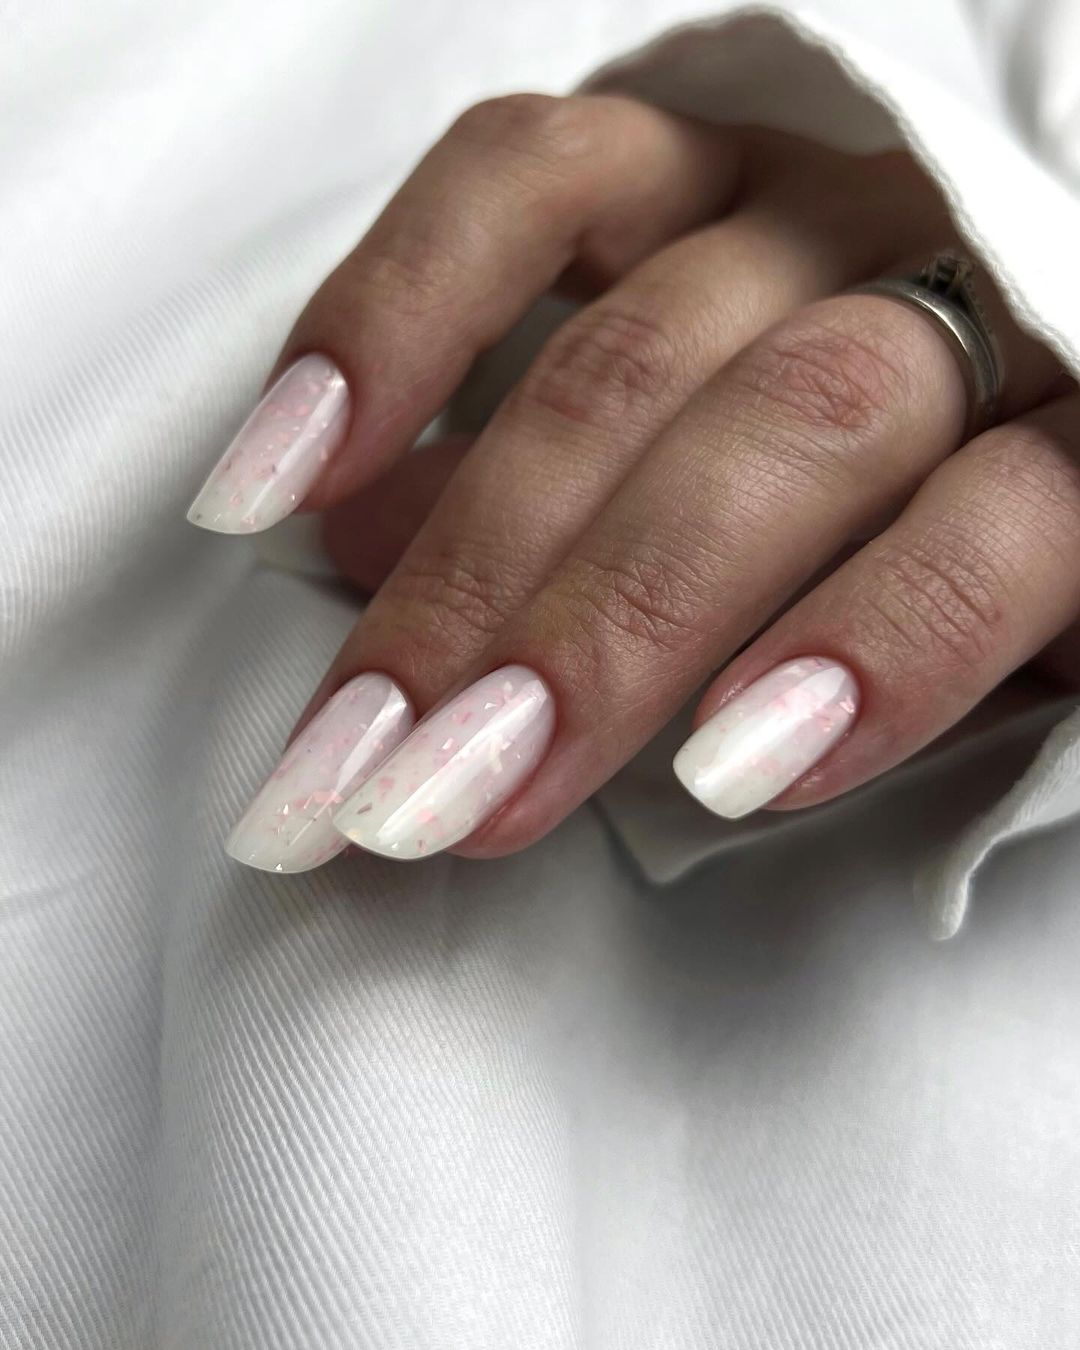
Almond Shaped Elegance
The almond shape is timeless and sophisticated, perfect for a classy autumn look. This design features a soft, gradient ombre in shades of milky white, providing a natural yet chic appearance. The subtle hint of sparkle adds just the right amount of bling, making it suitable for both everyday wear and special occasions.
-
- Base coat: OPI Natural Nail Base Coat
- White polish: Essie Blanc
- Glitter top coat: Sally Hansen Miracle Gel Shiny Top Coat
- Almond shape file: Tweezerman Neon Hot Nail File
DIY Steps:
-
- Start with clean, filed almond nails.
- Apply a base coat to protect your natural nails.
- Use the white polish to create a soft gradient, starting from the tips and fading towards the base.
- Once dry, apply the glitter top coat for a subtle sparkle.
- Finish with a high-shine top coat to seal the design.
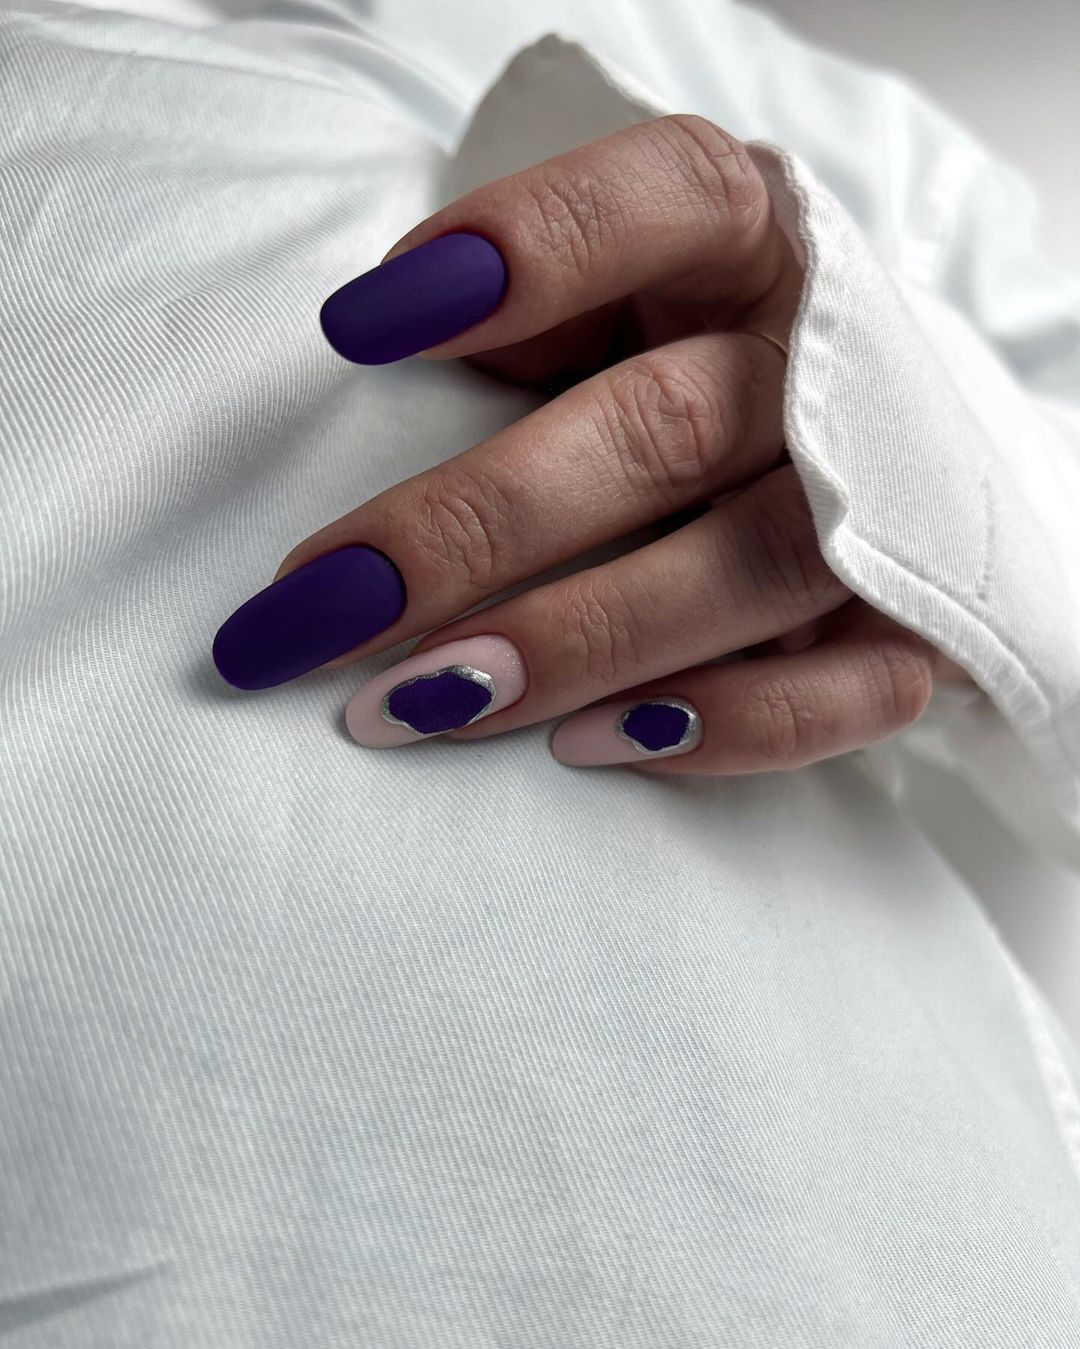
Matte Purple Majesty
This matte purple design is a bold statement for fall trends. The rich purple color exudes confidence and pairs beautifully with autumn wardrobes. The accent nails feature a silver-rimmed purple geode design, adding a touch of bling to this otherwise minimalist look.
-
- Base coat: Butter London Nail Foundation
- Matte purple polish: Zoya Velvet Matte Lacquer in Iris
- Silver foil: Ciaté London Foil Finish in Silver
- Detail brush: PUEEN 6 Pcs Nail Art Brushes
DIY Steps:
-
- File your nails into a short square shape.
- Apply the base coat and let it dry completely.
- Paint your nails with the matte purple polish, ensuring even coverage.
- Use the detail brush to apply the silver foil around the accent nails.
- Finish with a matte top coat to preserve the look.
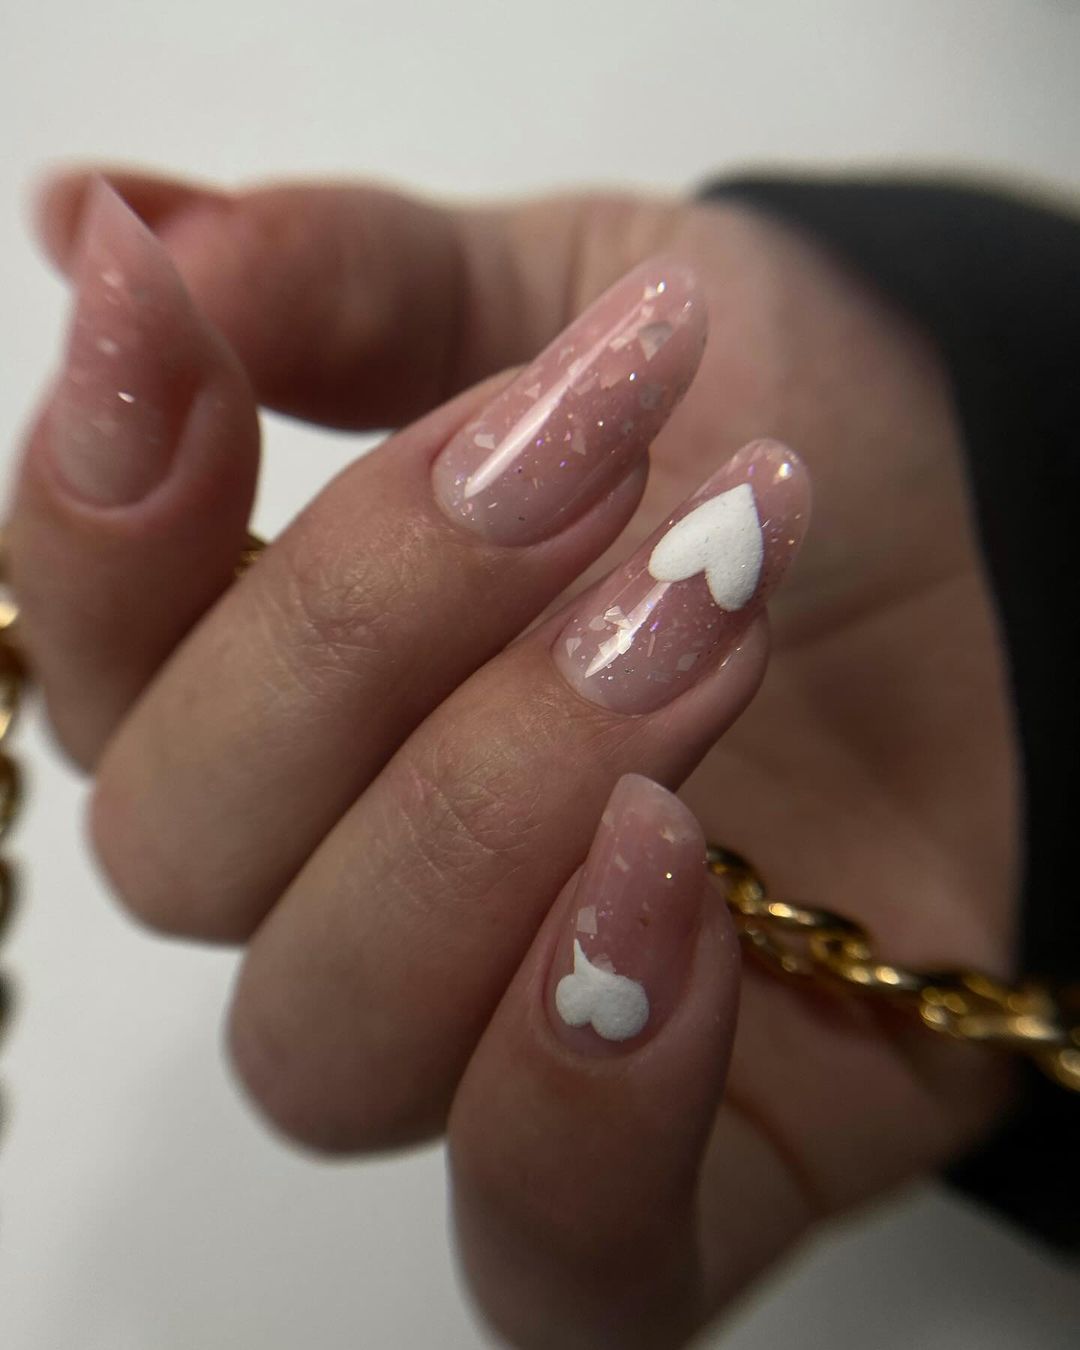
Heartfelt Glitter Glam
For those who love a bit of sparkle and charm, this design features delicate glitter with white heart accents on a nude base. This look is both cute and elegant, perfect for adding a whimsical touch to your autumn style.
-
- Base coat: Deborah Lippmann Hard Rock
- Nude polish: Essie Ballet Slippers
- White heart stickers: Olive & June The Sweet Set
- Glitter top coat: ILNP My Private Rainbow
DIY Steps:
-
- Start with short almond shaped nails.
- Apply the base coat and let it dry.
- Paint your nails with the nude polish and allow it to dry thoroughly.
- Apply the white heart stickers on your accent nails.
- Seal the design with a glitter top coat for a magical finish.
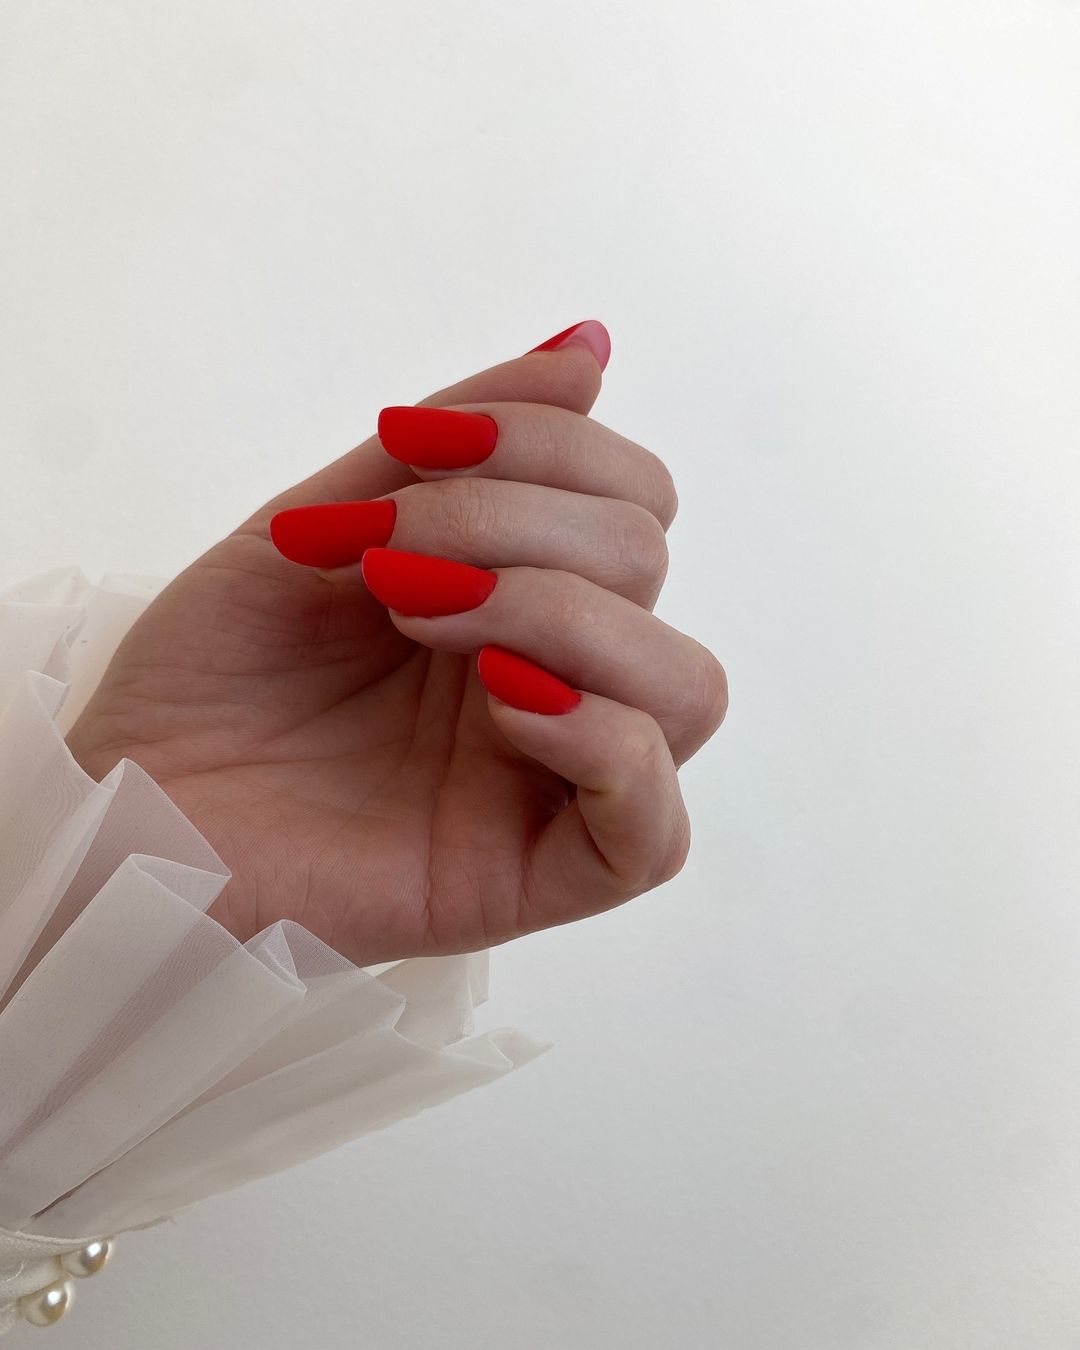
Bold Red Matte Nails
This vibrant red manicure is an instant classic for autumn. The matte finish gives the nails a sophisticated and modern look, while the bold color makes a strong statement. The almond shape is perfect for elongating the fingers and adds a touch of elegance to this otherwise striking design.
-
- Base coat: OPI Natural Nail Base Coat
- Red matte polish: Zoya Velvet Matte Lacquer in Posh
- Almond shape file: Tweezerman Neon Hot Nail File
- Top coat: Sally Hansen Miracle Gel Matte Top Coat
DIY Steps:
-
- Shape your nails into an almond form using a nail file.
- Apply a base coat to protect your natural nails.
- Apply two coats of the red matte polish, allowing each coat to dry thoroughly.
- Finish with a matte top coat to seal the color and add extra durability.
Save Pin
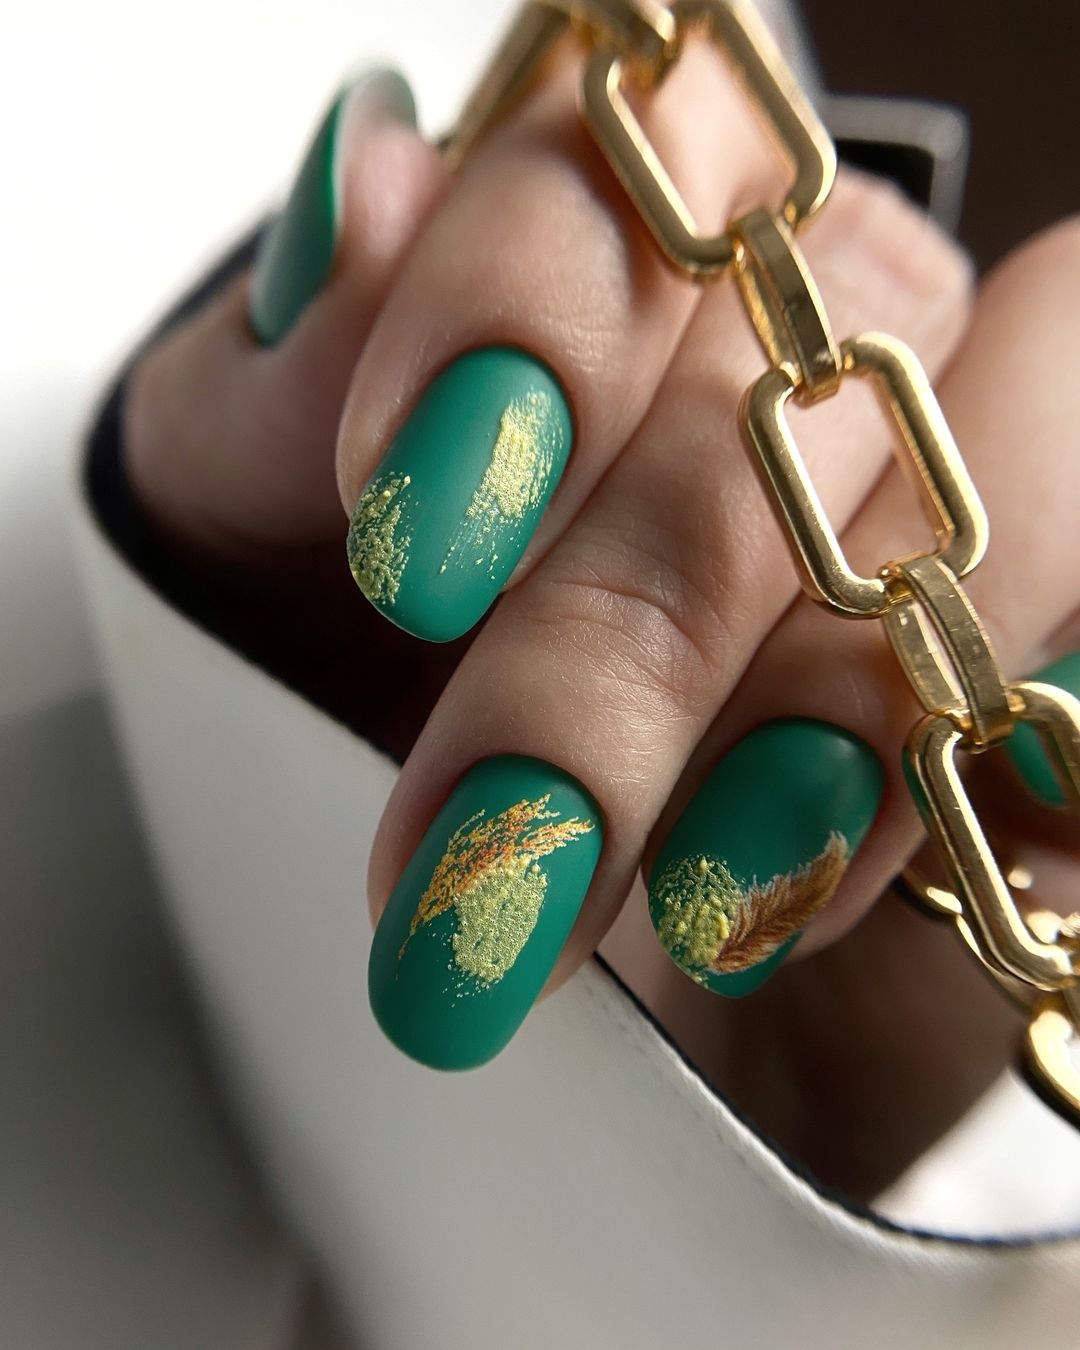
Green and Gold Leaf Art
This green manicure with gold leaf accents is perfect for embracing fall trends. The rich green base color paired with the delicate gold leaf designs creates a look that is both classy and festive. The short nail length makes this design easy to maintain, while the intricate art adds a unique flair.
-
- Base coat: Essie Strong Start
- Green polish: OPI Stay Off the Lawn!!
- Gold leaf foil: Born Pretty Nail Art Foil
- Nail glue: Makartt Nail Art Foil Glue
- Top coat: Seche Vite Dry Fast Top Coat
DIY Steps:
-
- Shape your nails into a short square form.
- Apply a base coat to ensure a smooth application.
- Paint your nails with the green polish, applying two coats for full coverage.
- Use nail glue to apply the gold leaf foil in desired patterns.
- Finish with a top coat to secure the foil and add shine.
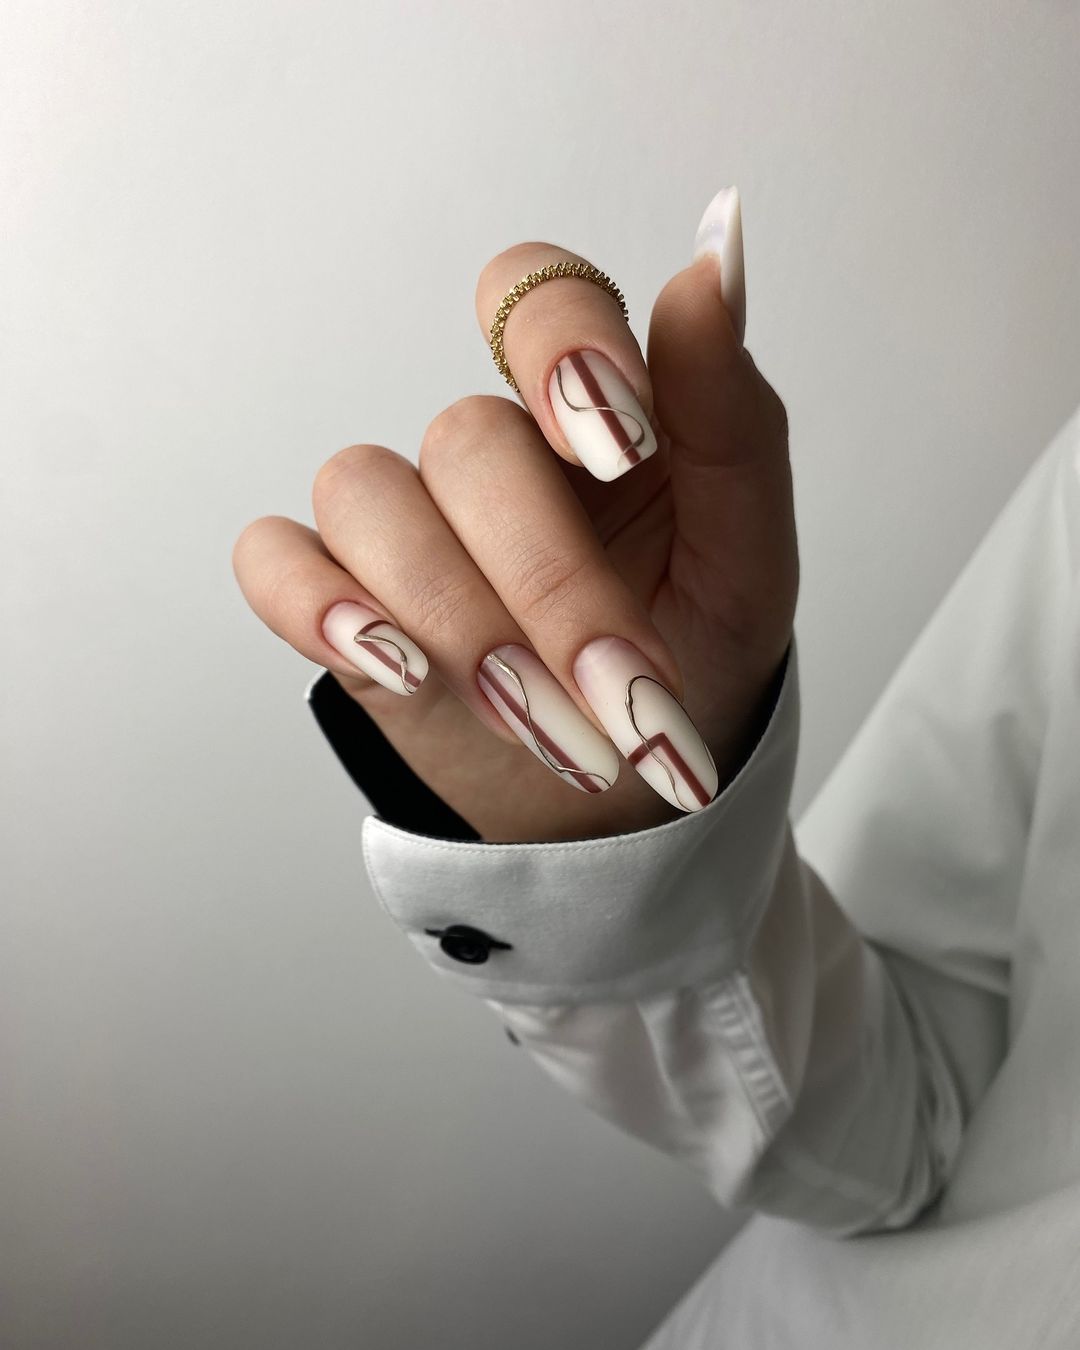
Abstract Maroon and White Swirls
This almond shape nail design features elegant maroon and white swirls, perfect for a classy and sophisticated autumn look. The intricate patterns are reminiscent of abstract art, making this design a true statement piece. The neutral base color ensures that the maroon accents stand out beautifully.
-
- Base coat: Orly Bonder Rubberized Base Coat
- Nude polish: Essie Ballet Slippers
- Maroon polish: OPI Lincoln Park After Dark
- Detail brush: Winstonia Nail Art Brushes
- Top coat: CND Vinylux Long Wear Top Coat
DIY Steps:
-
- File your nails into an almond shape.
- Apply a base coat to protect your natural nails.
- Paint your nails with the nude polish and let it dry completely.
- Use a detail brush to create maroon swirls on each nail.
- Finish with a top coat to seal the design and add durability.
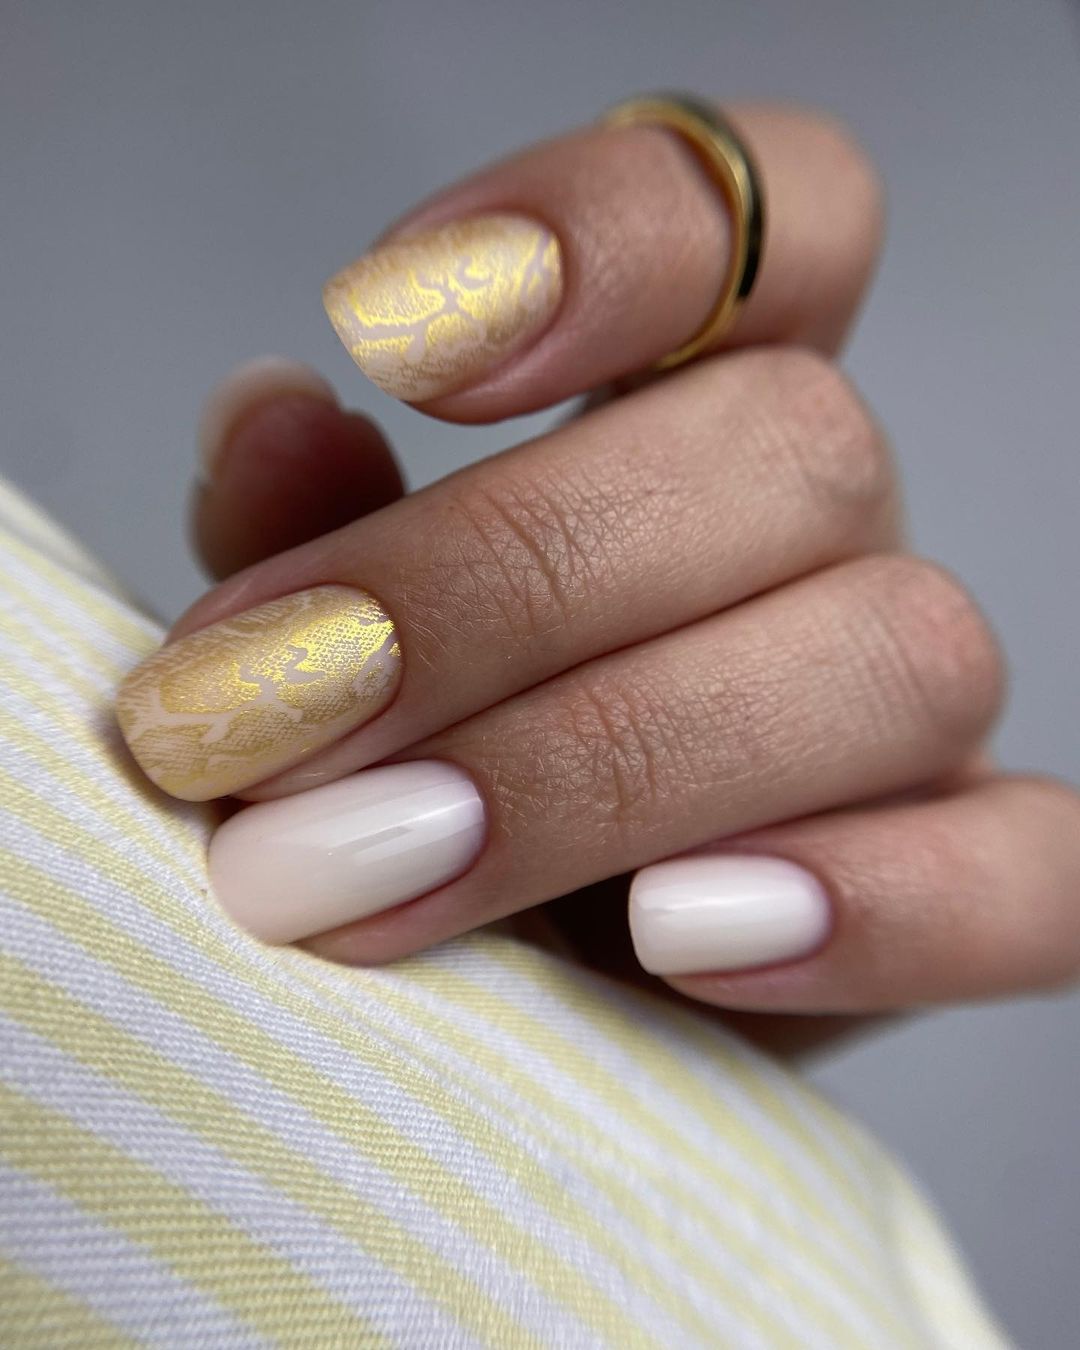
Golden Lace and White Elegance
This design combines the elegance of white nails with the intricate beauty of golden lace accents. The subtle gold patterns on the ring finger provide a luxurious touch to the otherwise simple and classy manicure, making it perfect for the autumn season.
-
- Base coat: OPI Natural Nail Base Coat
- White polish: Essie Blanc
- Gold lace stickers: Born Pretty Lace Nail Art Stickers
- Top coat: Seche Vite Dry Fast Top Coat
DIY Steps:
-
- Start by filing your nails into a short square shape.
- Apply a base coat to protect your nails and create a smooth surface.
- Paint your nails with the white polish, applying two coats for opacity.
- Once the white polish is dry, apply the gold lace stickers to the ring finger.
- Finish with a top coat to secure the stickers and add shine.
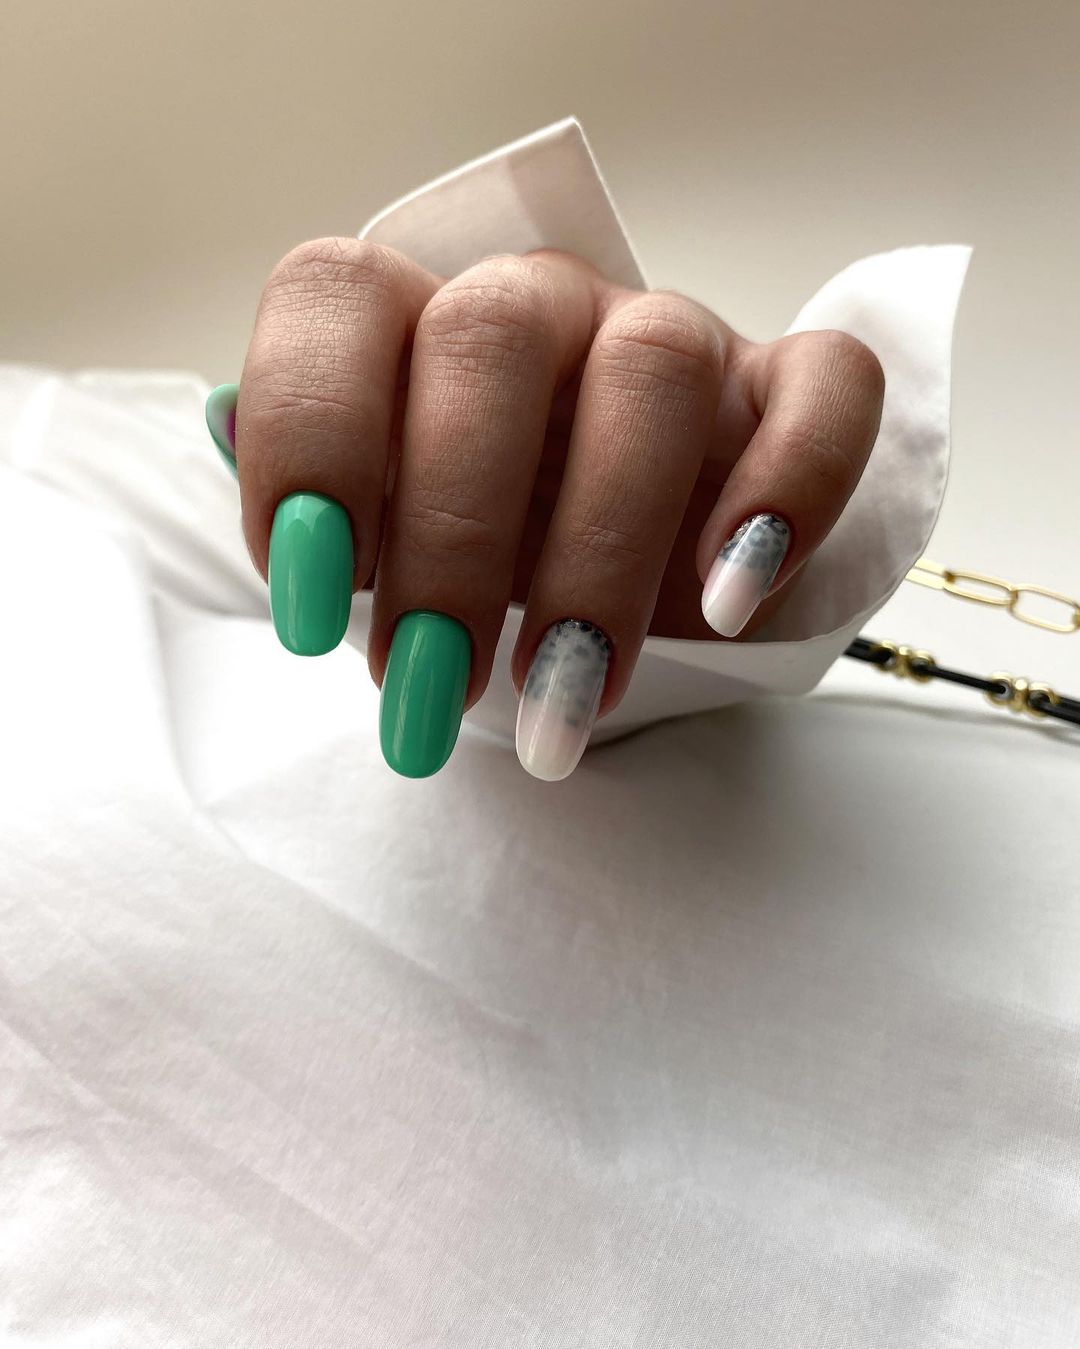
Green and Marble Magic
This nail design features a striking combination of vibrant green polish and marble accent nails. The mix of solid green and intricate marble patterns creates a classy and modern look, ideal for fall trends.
-
- Base coat: Deborah Lippmann Hard Rock
- Green polish: OPI Stay Off the Lawn!!
- White polish: Essie Blanc
- Marble nail decals: Whats Up Nails Marble Decals
- Top coat: CND Vinylux Long Wear Top Coat
DIY Steps:
-
- Shape your nails into an almond shape using a nail file.
- Apply the base coat and let it dry completely.
- Paint the thumb, index, and pinky nails with the green polish.
- Apply the white polish to the middle and ring fingers.
- Once dry, place the marble nail decals on the white nails.
- Finish with a top coat to seal the design.
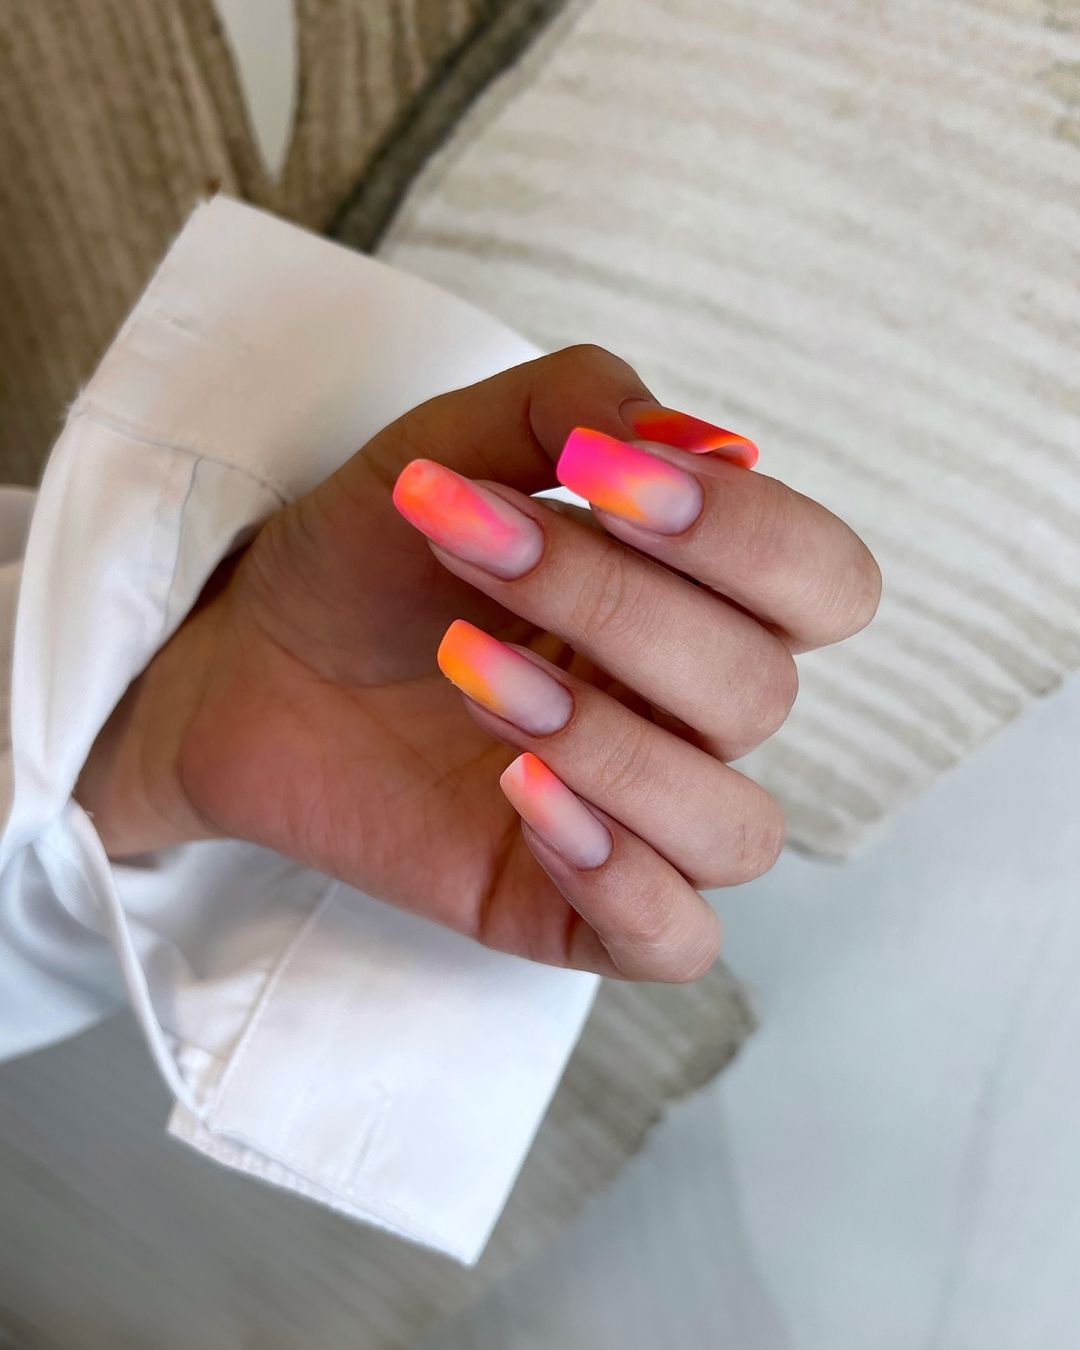
Neon Ombre Delight
This neon ombre design is perfect for those who love bold and cute nails. The bright gradient from pink to orange is eye-catching and fun, making it an excellent choice for autumn.
-
- Base coat: Orly Bonder Rubberized Base Coat
- Pink polish: China Glaze Shocking Pink
- Orange polish: Zoya Arizona
- Sponge: Real Techniques Miracle Complexion Sponge
- Top coat: Sally Hansen Miracle Gel Top Coat
DIY Steps:
-
- File your nails into a short square shape.
- Apply the base coat and let it dry.
- Use a sponge to apply the pink and orange polishes, creating a gradient effect.
- Repeat the sponging until the desired opacity is achieved.
- Finish with a top coat to smooth out the gradient and add shine.
Save Pin
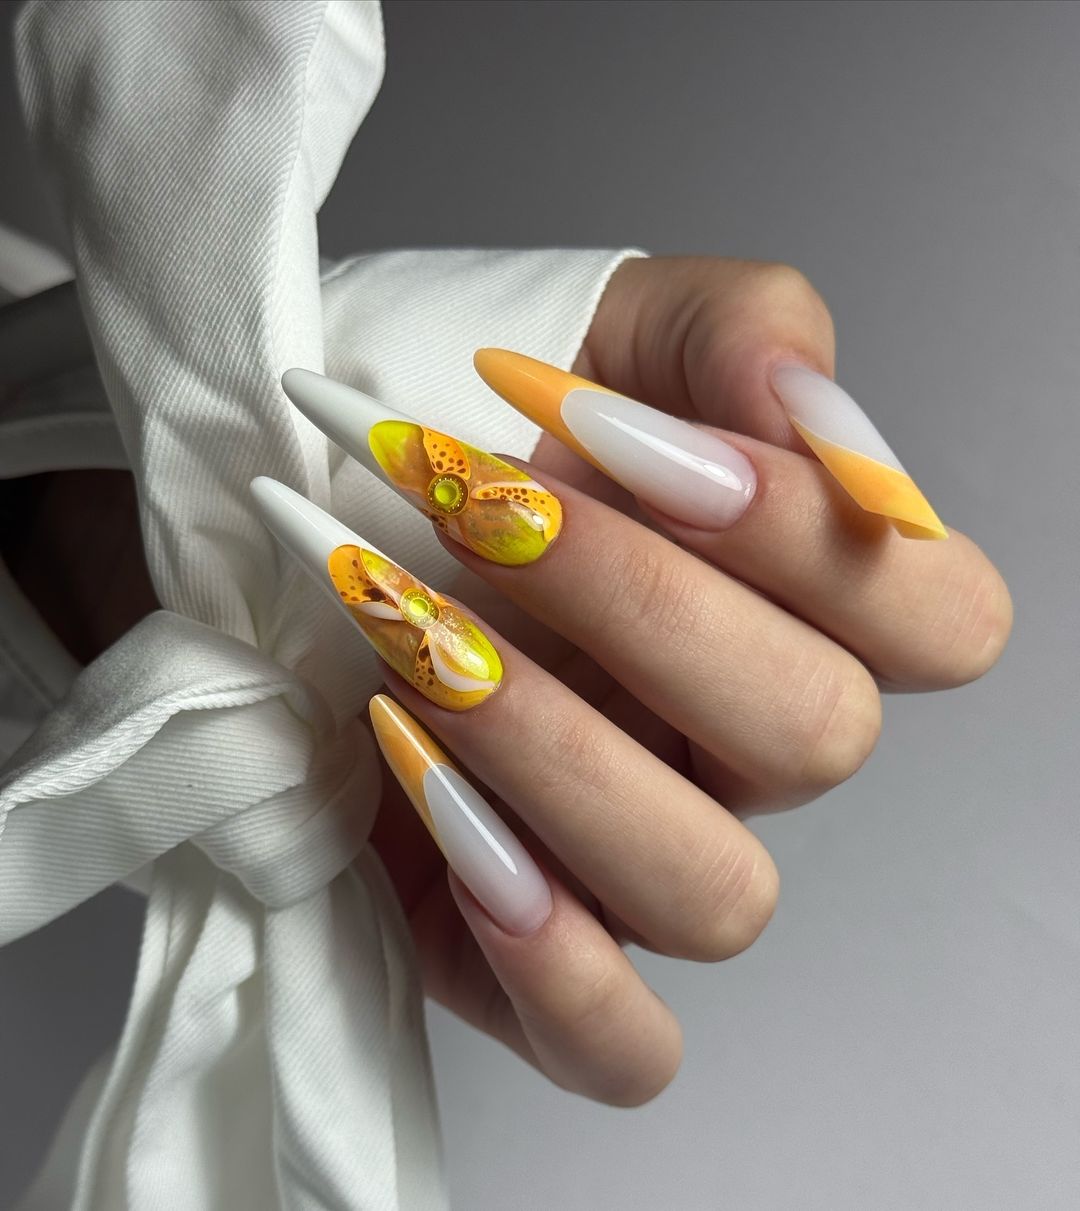
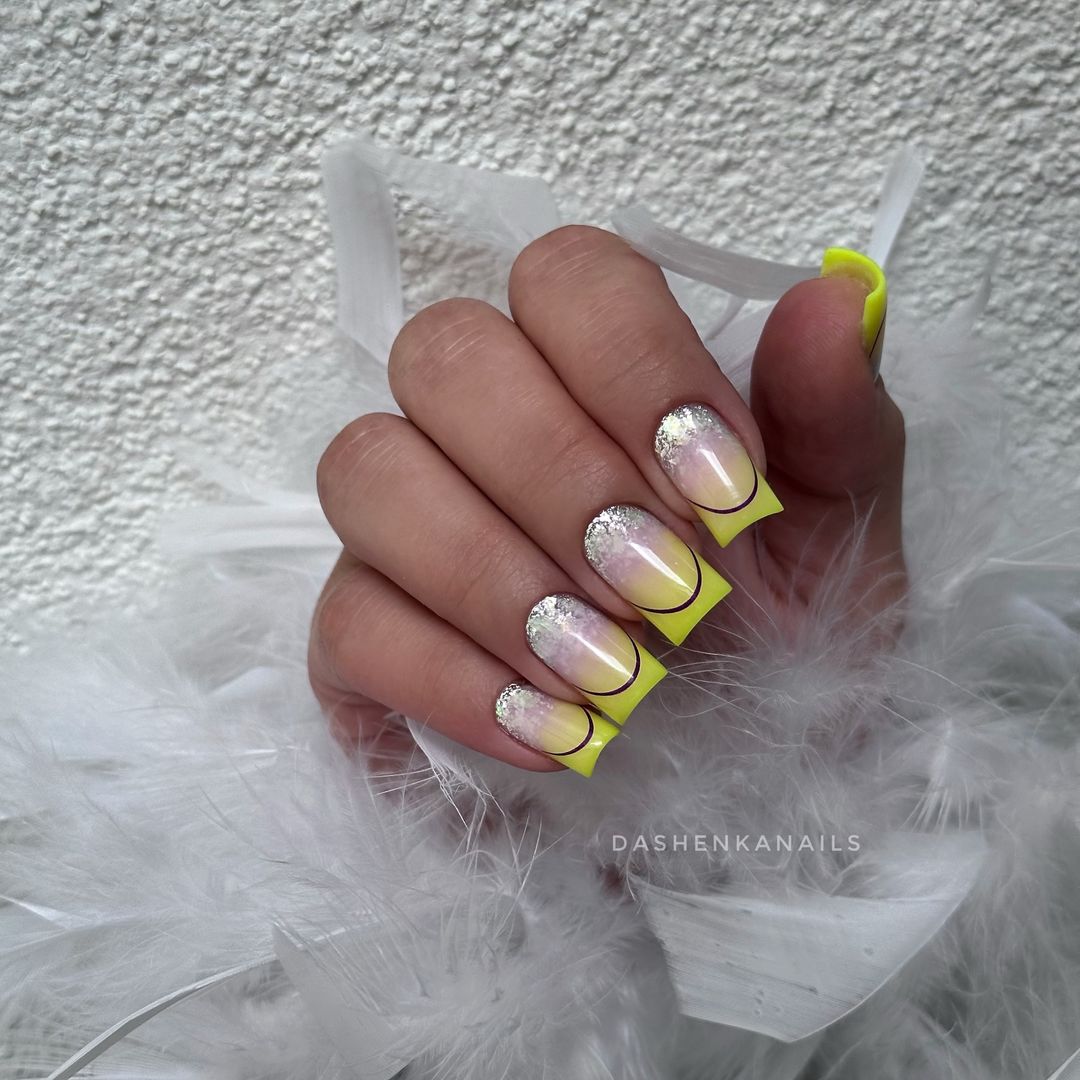
Sunshine and Floral Fantasy
This design is a burst of sunshine with a floral twist. The long nails feature a combination of bright yellow and white, accented with intricate flower designs. The vibrant colors and detailed artwork make this a standout look for autumn.
-
- Base coat: Essie Strong Start
- Yellow polish: OPI Sun, Sea, and Sand in My Pants
- White polish: Essie Blanc
- Flower nail stickers: Kiss Nail Art Stickers
- Top coat: Seche Vite Dry Fast Top Coat
DIY Steps:
-
- Shape your nails into a long, tapered form.
- Apply the base coat and let it dry.
- Paint some nails with the yellow polish and others with the white polish.
- Apply flower nail stickers to the accent nails.
- Finish with a top coat to secure the stickers and add shine.
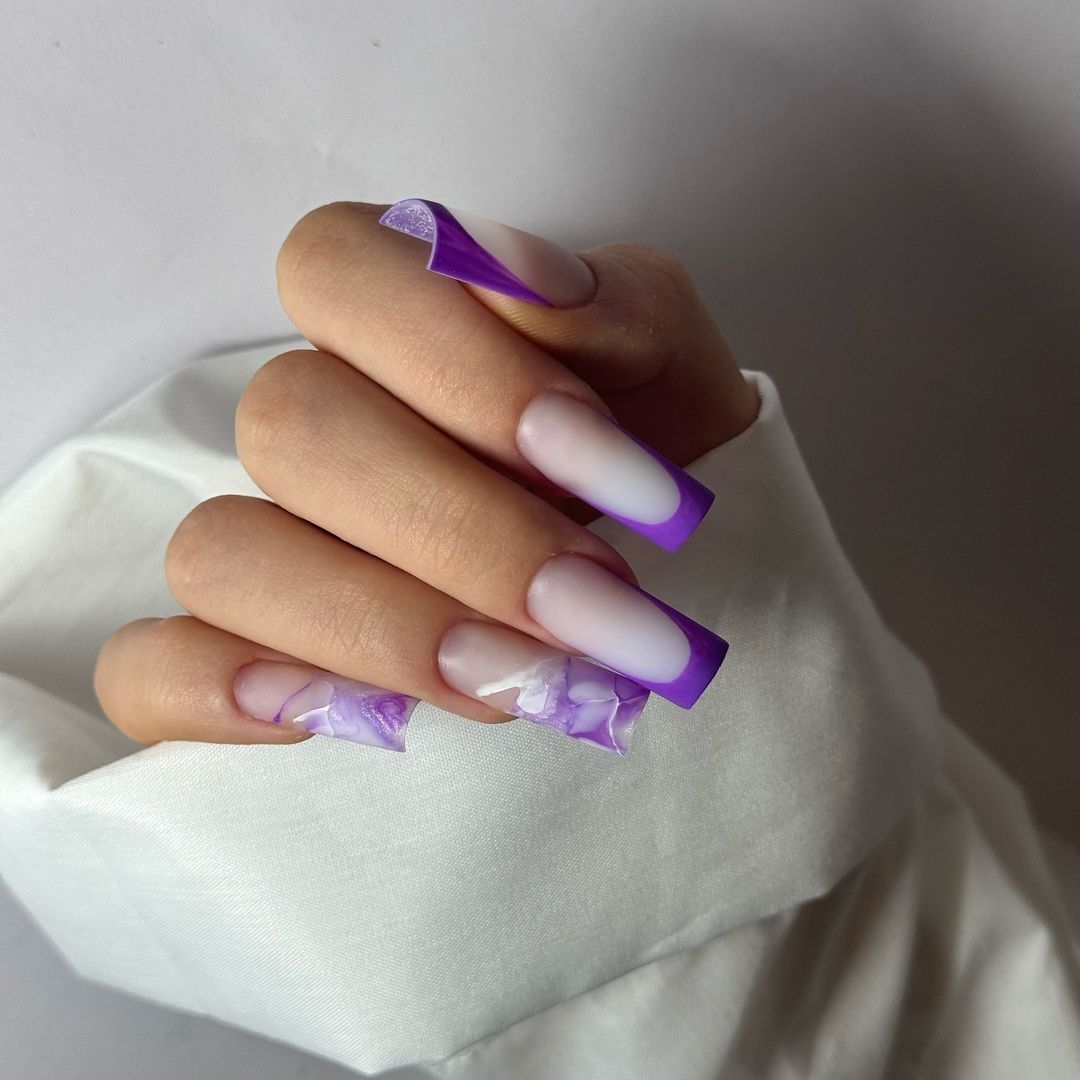
Purple French Tips
This purple french tip design adds a playful twist to the classic French manicure. The vibrant purple tips contrast beautifully with the nude base, making this design both elegant and fun for fall.
-
- Base coat: Butter London Nail Foundation
- Nude polish: OPI Bubble Bath
- Purple polish: Zoya Serenity
- French tip guides: Sally Hansen French Manicure Guides
- Top coat: CND Vinylux Long Wear Top Coat
DIY Steps:
-
- File your nails into a short and square shape.
- Apply the base coat and let it dry.
- Paint your nails with the nude polish.
- Use the French tip guides to apply the purple polish to the tips of your nails.
- Finish with a top coat to seal the design.
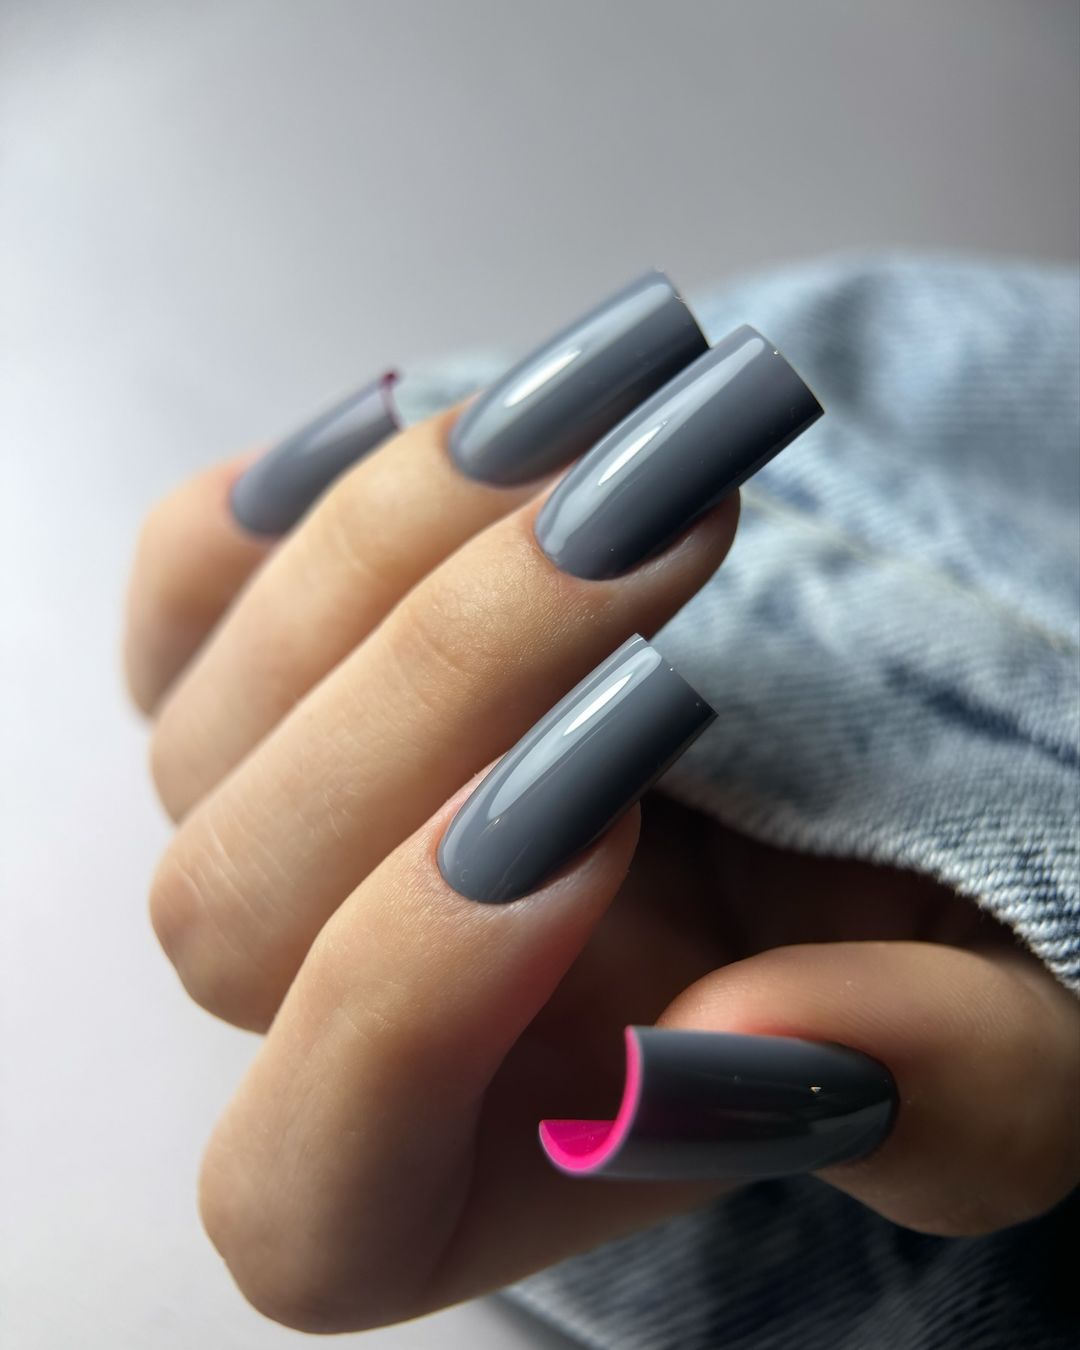
Gray and Pink Peekaboo
This design features a sophisticated gray polish with a playful peekaboo pink accent on the underside of the nails. This look is subtle yet unique, perfect for those who want a classy and understated autumn manicure.
-
- Base coat: OPI Natural Nail Base Coat
- Gray polish: Essie Master Plan
- Pink polish: Essie Pink About It
- Top coat: Seche Vite Dry Fast Top Coat
DIY Steps:
-
- Shape your nails into a long and tapered form.
- Apply the base coat and let it dry.
- Paint your nails with the gray polish.
- Once dry, carefully apply the pink polish to the underside of the nails.
- Finish with a top coat to add shine and durability.
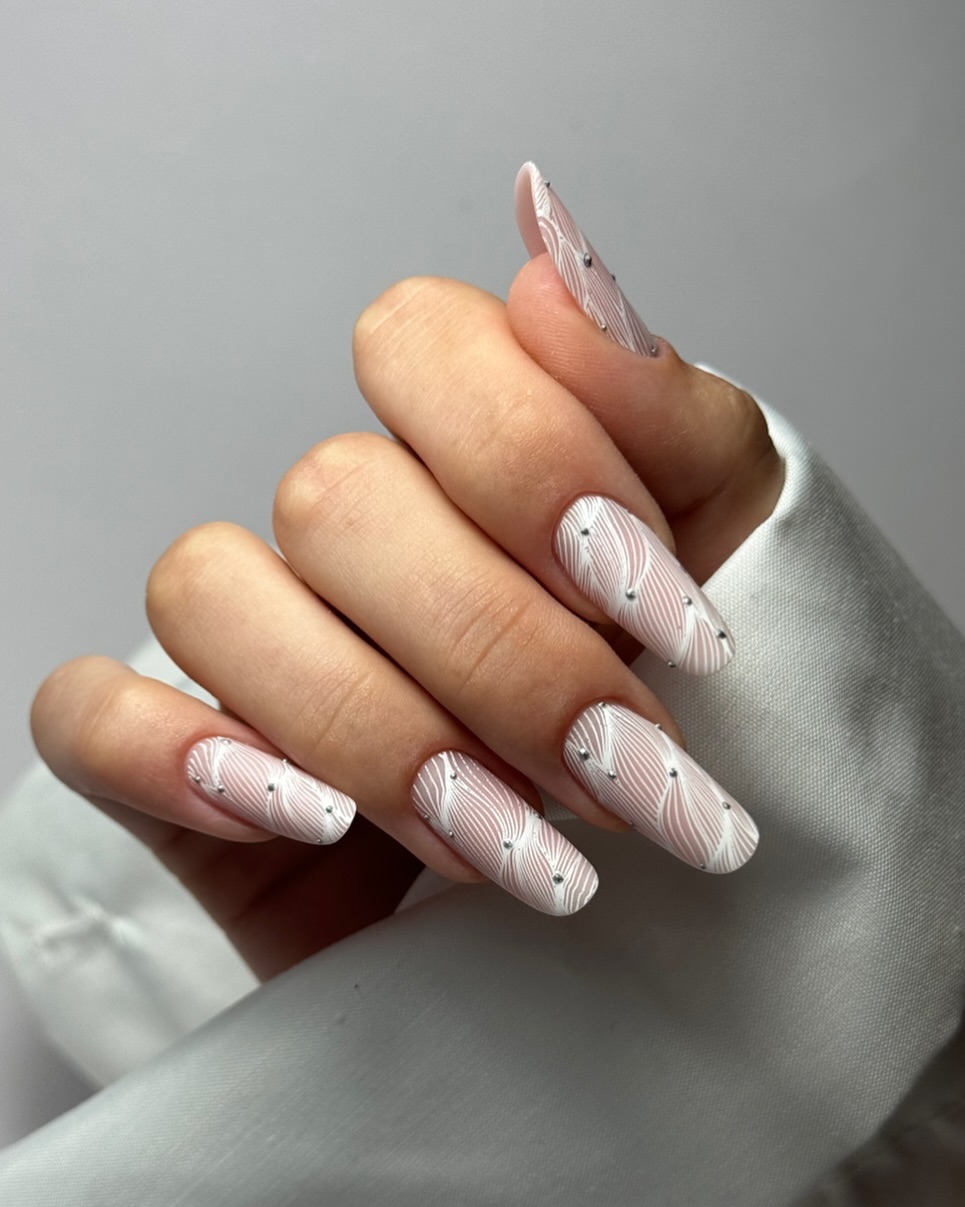
Delicate Line Art with Rhinestones
This intricate design features delicate white line art on a soft pink base, adorned with tiny rhinestones. The pattern adds a subtle texture, making the nails look sophisticated and classy. This design is perfect for those who appreciate detailed nail art without it being too bold.
-
- Base coat: OPI Natural Nail Base Coat
- Pink polish: Essie Ballet Slippers
- White striping polish: Orly Instant Artist in Crisp White
- Rhinestones: Swarovski Flatback Crystals
- Top coat: Seche Vite Dry Fast Top Coat
DIY Steps:
-
- File your nails into a long almond shape.
- Apply the base coat and let it dry completely.
- Paint your nails with the pink polish, ensuring even coverage.
- Use the white striping polish to create delicate line art designs.
- Apply a small amount of nail glue and place the rhinestones strategically.
- Finish with a top coat to secure the design and add shine.
Lemonade Ombre
This refreshing ombre design transitions from a natural nude base to a bright lemon yellow at the tips. The gradient effect is enhanced with a touch of glitter, making it both playful and cute for autumn.

-
- Base coat: Deborah Lippmann Hard Rock
- Nude polish: Essie Ballet Slippers
- Yellow polish: OPI Exotic Birds Do Not Tweet
- Glitter top coat: ILNP The Magician
- Sponge: Real Techniques Miracle Complexion Sponge
- Top coat: Sally Hansen Miracle Gel Top Coat
DIY Steps:
-
- Shape your nails into an almond form.
- Apply the base coat and let it dry.
- Use a sponge to apply the nude and yellow polishes, creating a gradient effect.
- Add a layer of glitter top coat for extra sparkle.
- Finish with a high-shine top coat to seal the design.
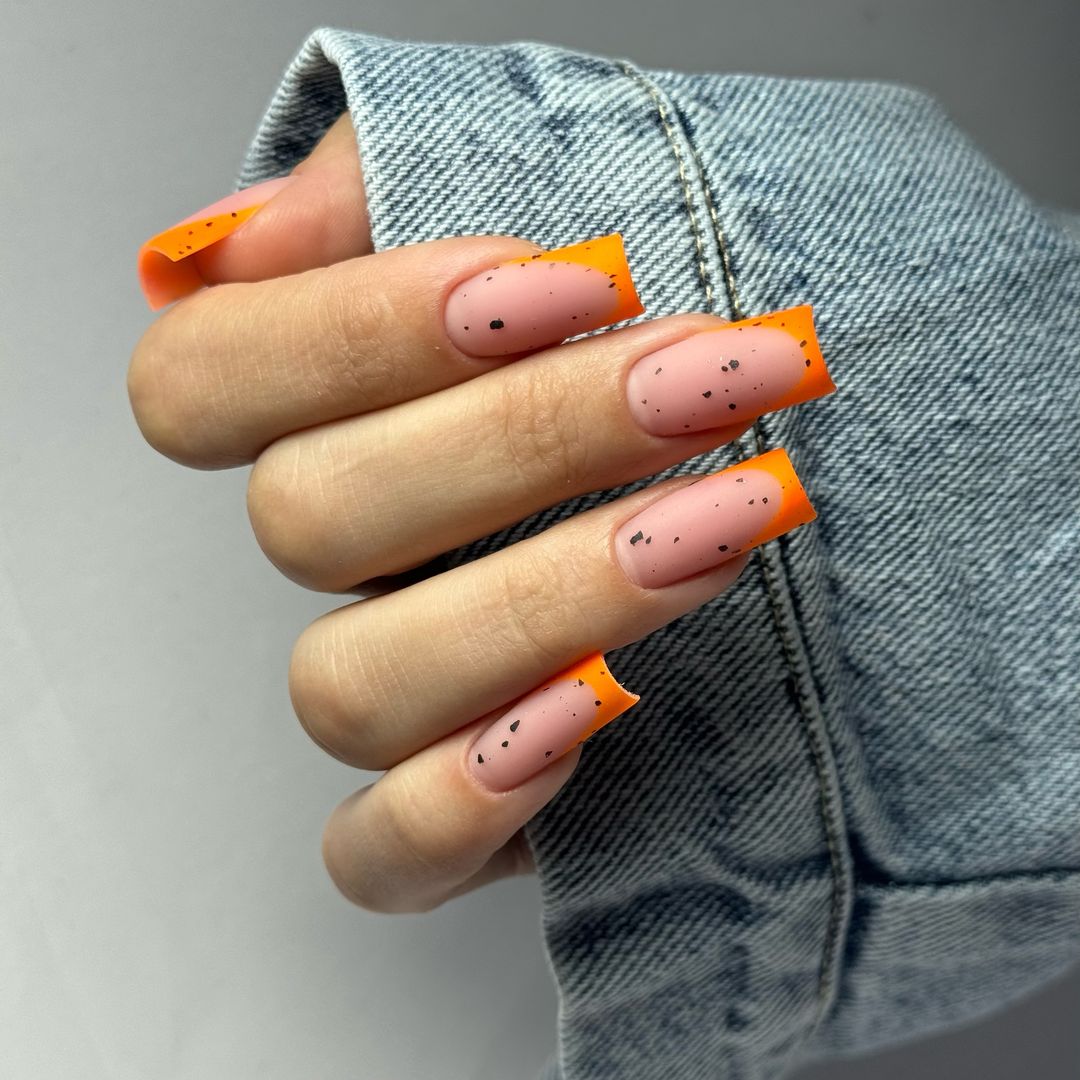
Speckled Orange French Tips
This modern twist on the French manicure features bright orange tips with black speckles on a nude base. The short square shape adds a contemporary feel, making it perfect for those who love fall trends and bold colors.
-
- Base coat: Orly Bonder Rubberized Base Coat
- Nude polish: Essie Bare With Me
- Orange polish: China Glaze Sun Worshiper
- Black speckle polish: Sally Hansen Insta-Dri in Black to Black
- French tip guides: Kiss French Tip Guides
- Top coat: CND Vinylux Long Wear Top Coat
DIY Steps:
-
- File your nails into a short square shape.
- Apply the base coat and let it dry.
- Paint your nails with the nude polish.
- Use the French tip guides to apply the orange polish to the tips of your nails.
- Add black speckles using a dotting tool or a speckle polish.
- Finish with a top coat to seal the design.
Glitter and Yellow French Tips
This design combines the elegance of French tips with the fun of glitter. The nude base transitions into a yellow tip, accented with a glitter gradient for a classy yet playful look. Perfect for adding a touch of autumn brightness.
-
- Base coat: OPI Natural Nail Base Coat
- Nude polish: Essie Ballet Slippers
- Yellow polish: OPI Exotic Birds Do Not Tweet
- Glitter top coat: China Glaze Fairy Dust
- French tip guides: Orly French Manicure Tip Guides
- Top coat: Seche Vite Dry Fast Top Coat
DIY Steps:
-
- Shape your nails into a long form.
- Apply the base coat and let it dry.
- Paint your nails with the nude polish.
- Use the French tip guides to apply the yellow polish to the tips of your nails.
- Apply the glitter top coat, focusing on the tip area to create a gradient effect.
- Finish with a top coat to seal the design.
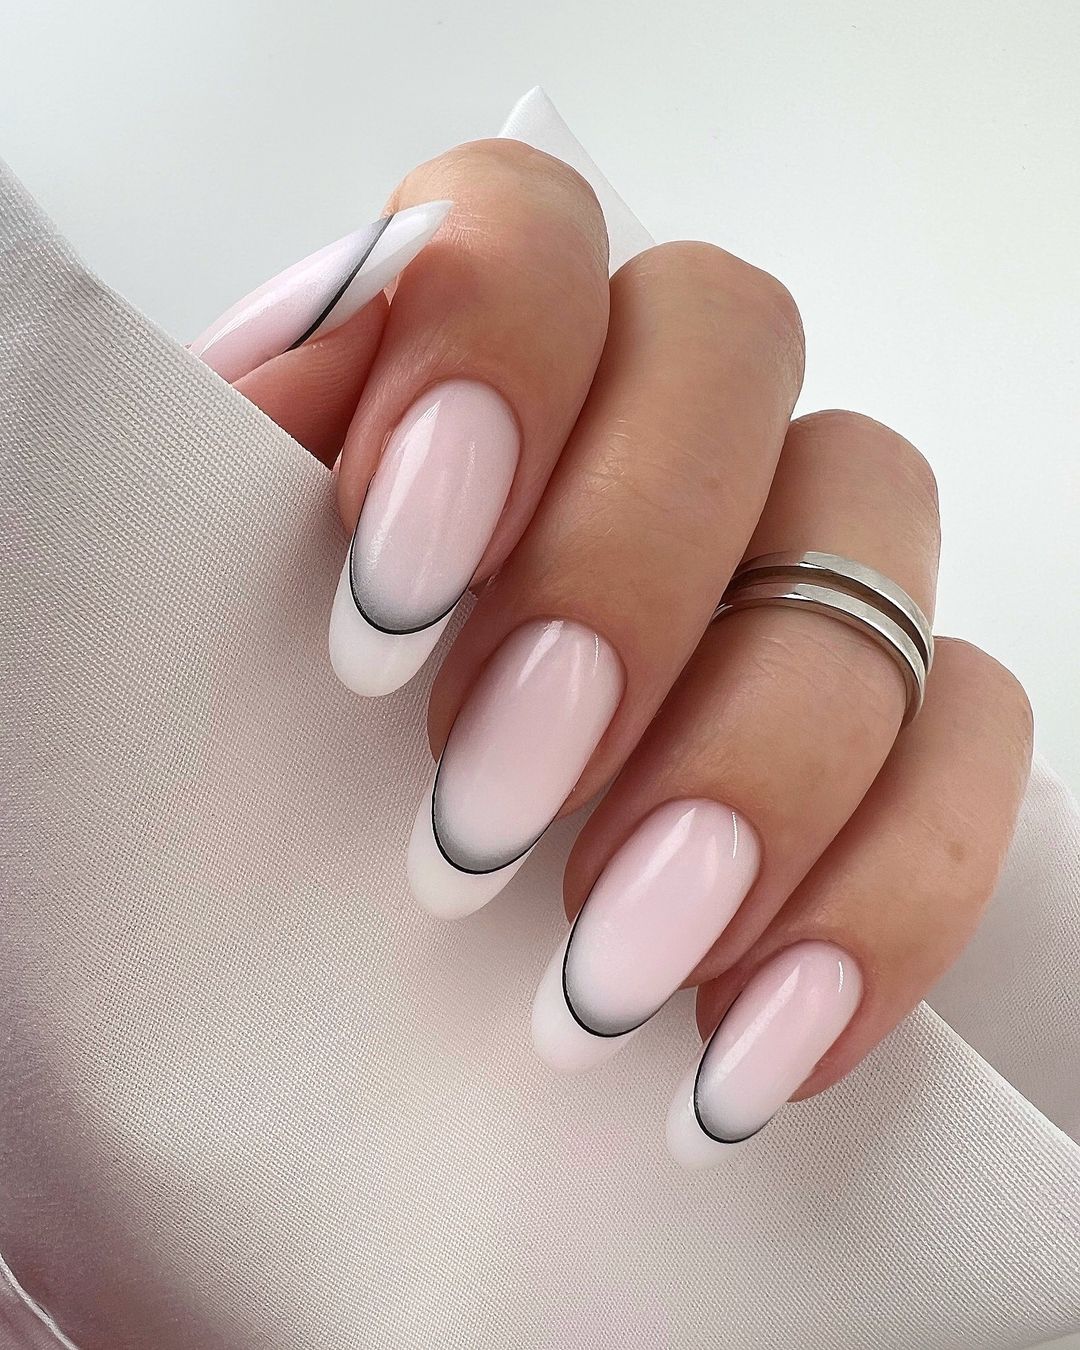
Minimalist White and Black French Tips
This minimalist design features classic French tips with a modern twist. The white tips are outlined with a thin black line, adding sophistication and elegance. Ideal for a classy autumn look.
-
- Base coat: Essie Strong Start
- Nude polish: OPI Bubble Bath
- White polish: Essie Blanc
- Black striping polish: Orly Instant Artist in Jet Black
- French tip guides: Sally Hansen French Manicure Guides
- Top coat: CND Vinylux Long Wear Top Coat
DIY Steps:
-
- Shape your nails into an almond form.
- Apply the base coat and let it dry.
- Paint your nails with the nude polish.
- Use the French tip guides to apply the white polish to the tips of your nails.
- Outline the white tips with the black striping polish.
- Finish with a top coat to seal the design.
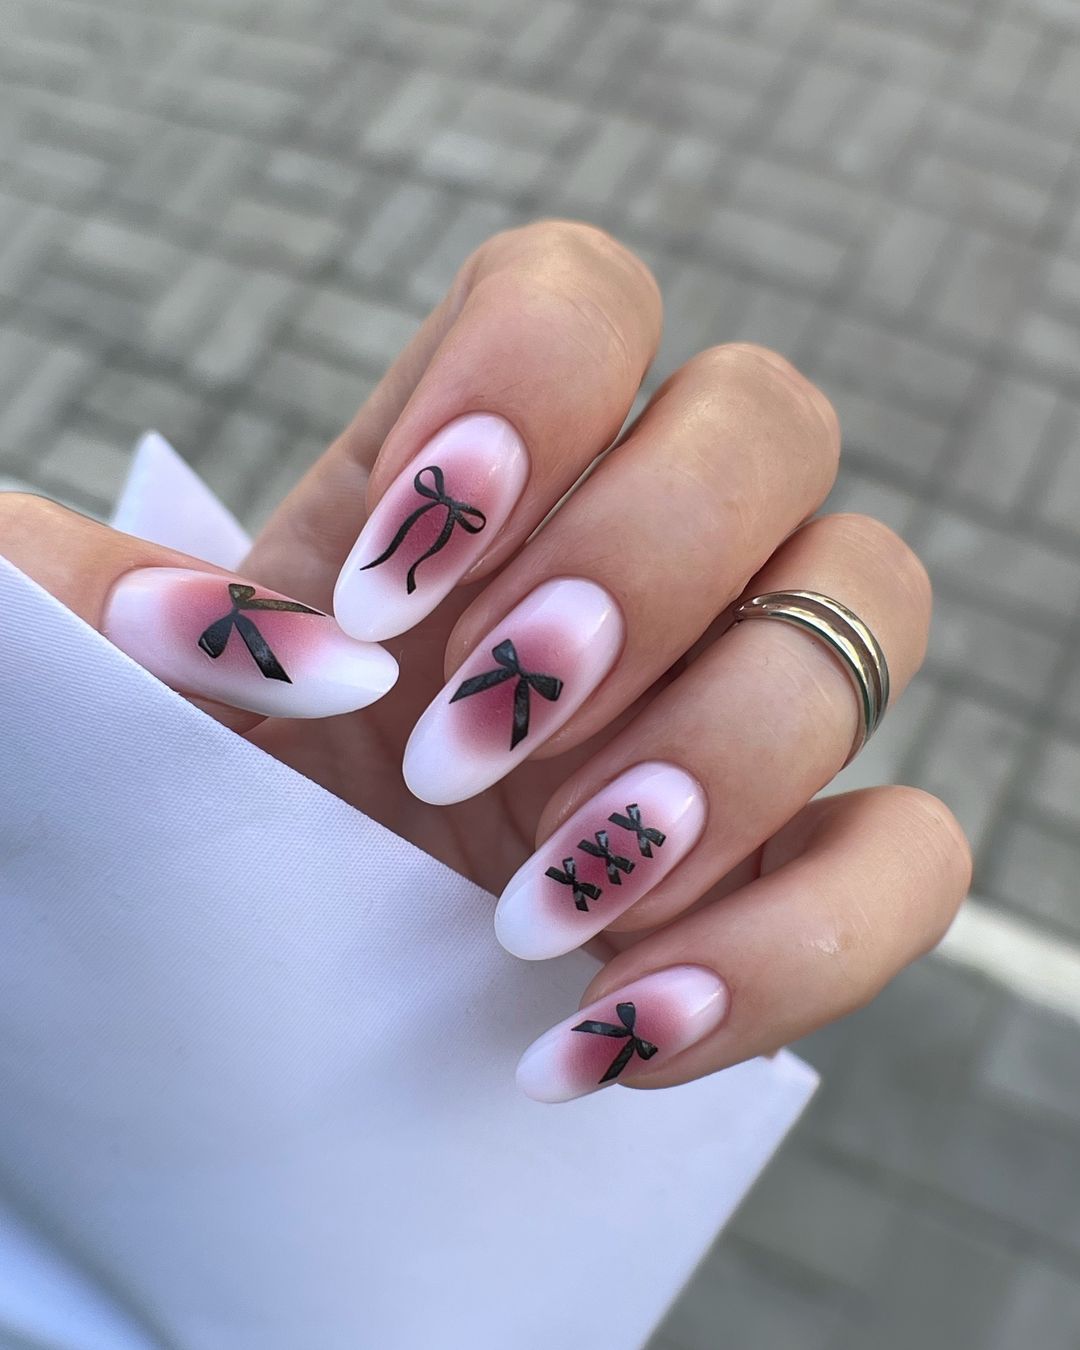
Bow Tie Nail Art
This whimsical design features adorable black bow ties on a soft pink and white gradient base. The almond shape enhances the feminine and cute look, making it perfect for autumn.
-
- Base coat: Butter London Nail Foundation
- Pink polish: Essie Fiji
- White polish: OPI Alpine Snow
- Black bow stickers: Kiss Nail Art Stickers
- Top coat: Seche Vite Dry Fast Top Coat
DIY Steps:
-
- File your nails into an almond shape.
- Apply the base coat and let it dry.
- Create a gradient effect with the pink and white polishes using a sponge.
- Apply the black bow stickers to the accent nails.
- Finish with a top coat to secure the stickers and add shine.
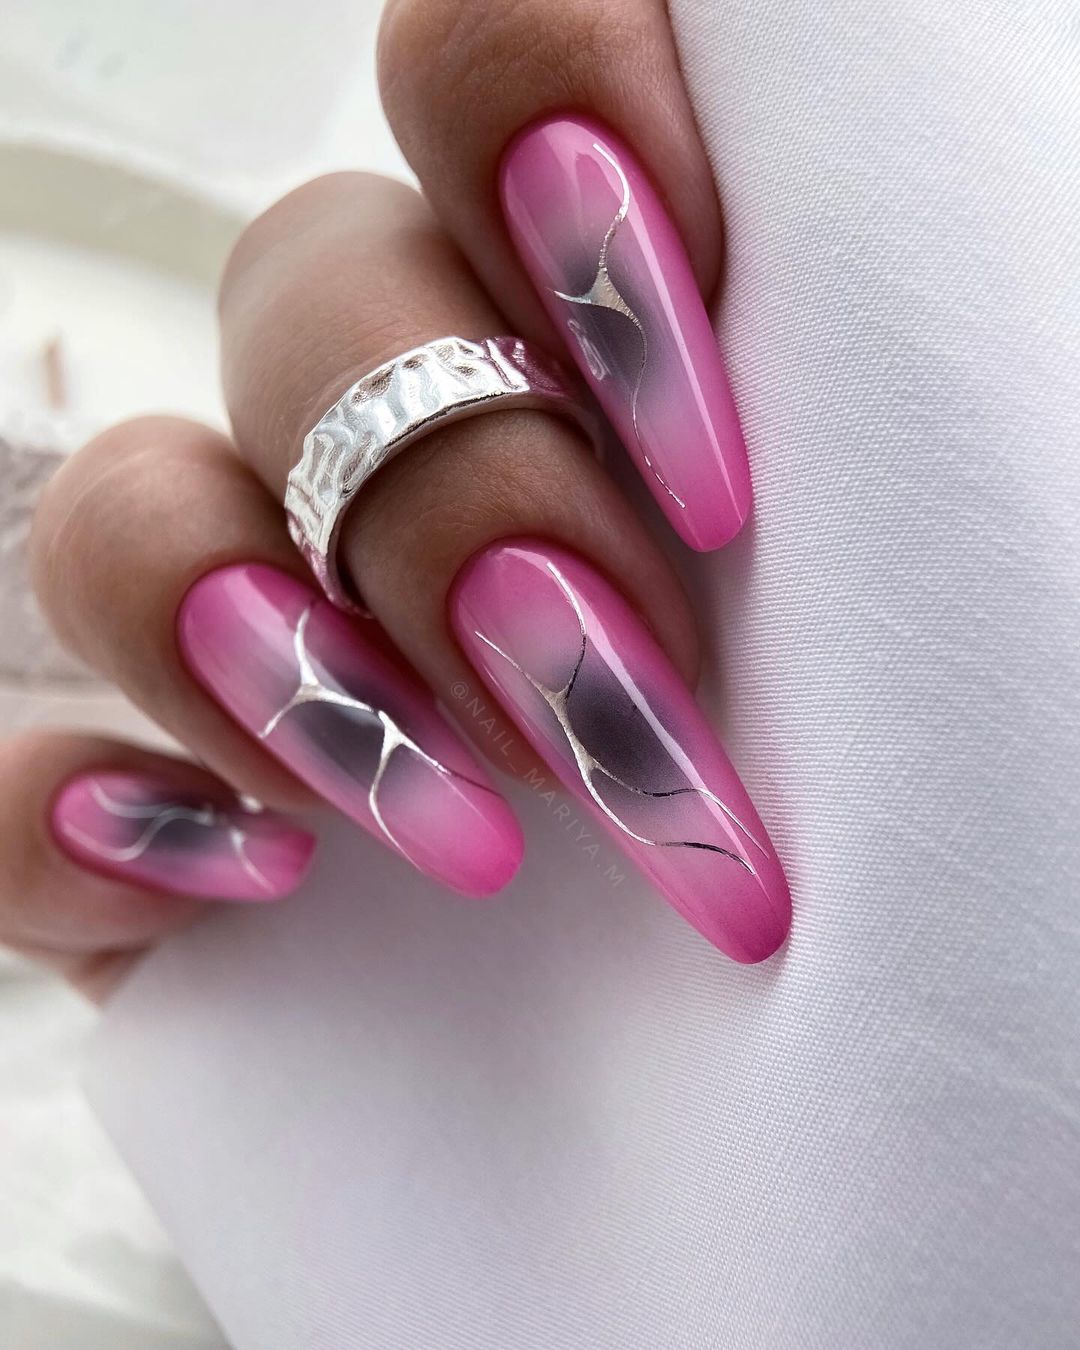
Metallic Pink Waves
This stunning design features a rich pink base with metallic silver waves that create an elegant and modern look. The long, almond-shaped nails add sophistication, making this design perfect for both everyday wear and special occasions.
-
- Base coat: OPI Natural Nail Base Coat
- Pink polish: Essie Cascade Cool
- Silver striping tape: Nail Art Silver Striping Tape
- Top coat: Seche Vite Dry Fast Top Coat
DIY Steps:
-
- Shape your nails into a long almond form.
- Apply the base coat and let it dry.
- Paint your nails with the pink polish.
- Once dry, apply the silver striping tape in wave patterns across each nail.
- Finish with a top coat to secure the tape and add shine.
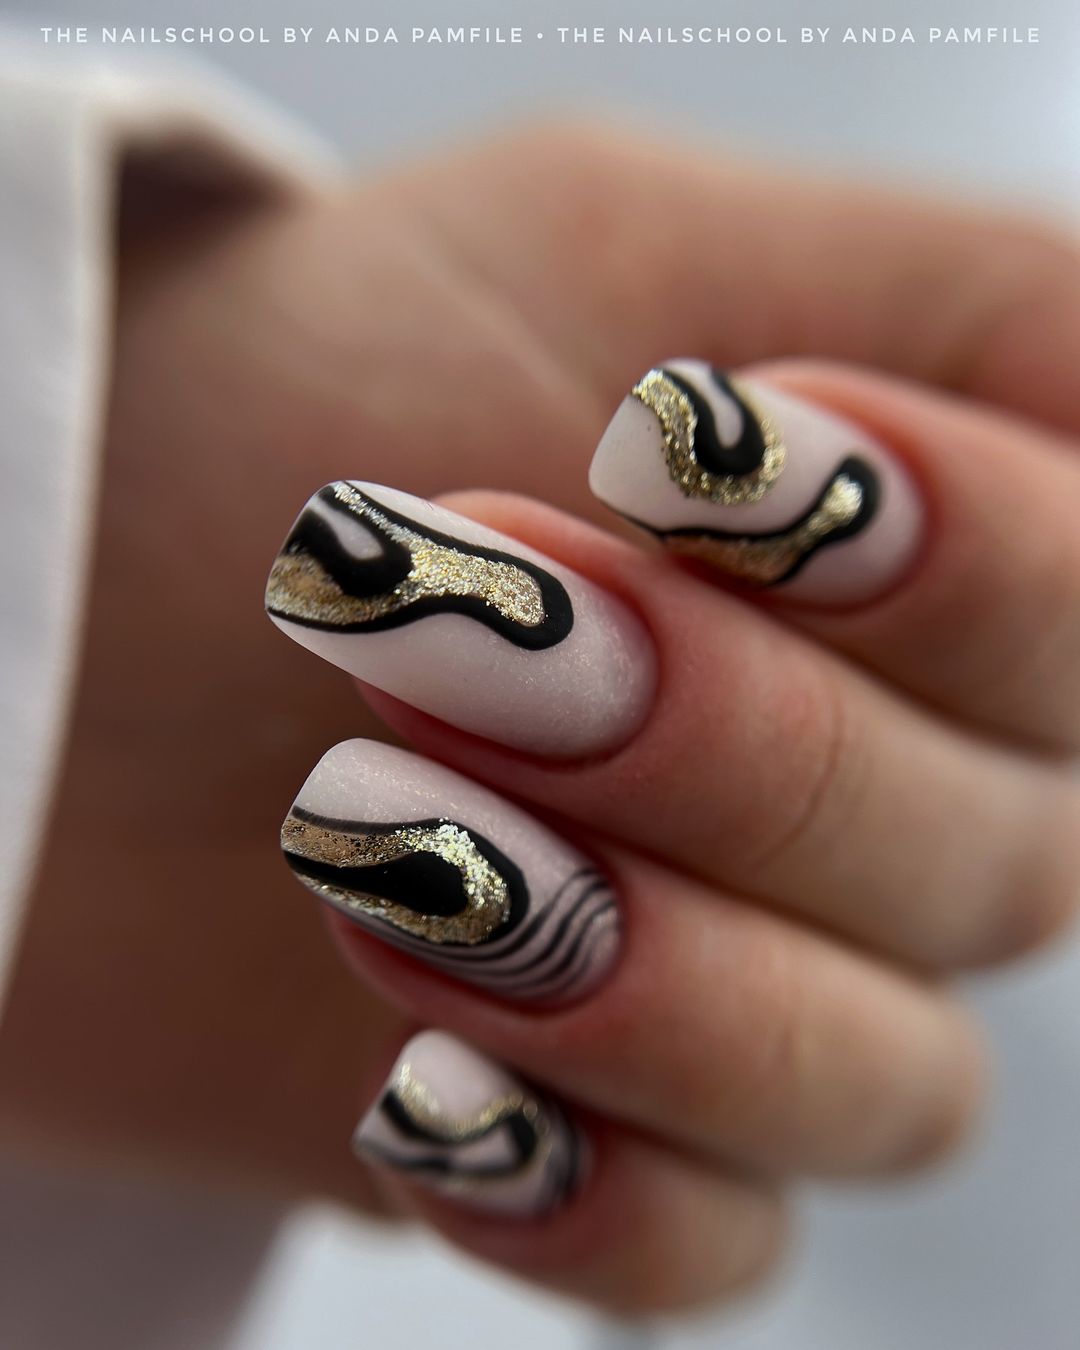
Abstract Gold and Black
This bold design combines matte black and gold with an abstract art style, perfect for making a statement. The short square shape provides a modern look that is both classy and trendy.
-
- Base coat: Deborah Lippmann Hard Rock
- Matte black polish: Zoya Velvet Matte Lacquer in Dovima
- Gold glitter polish: China Glaze Gold Digger
- Detail brush: PUEEN Nail Art Brushes
- Top coat: CND Vinylux Long Wear Top Coat
DIY Steps:
-
- File your nails into a short square shape.
- Apply the base coat and let it dry.
- Paint your nails with the matte black polish.
- Use the detail brush to apply the gold glitter polish in abstract patterns.
- Finish with a top coat to seal the design.
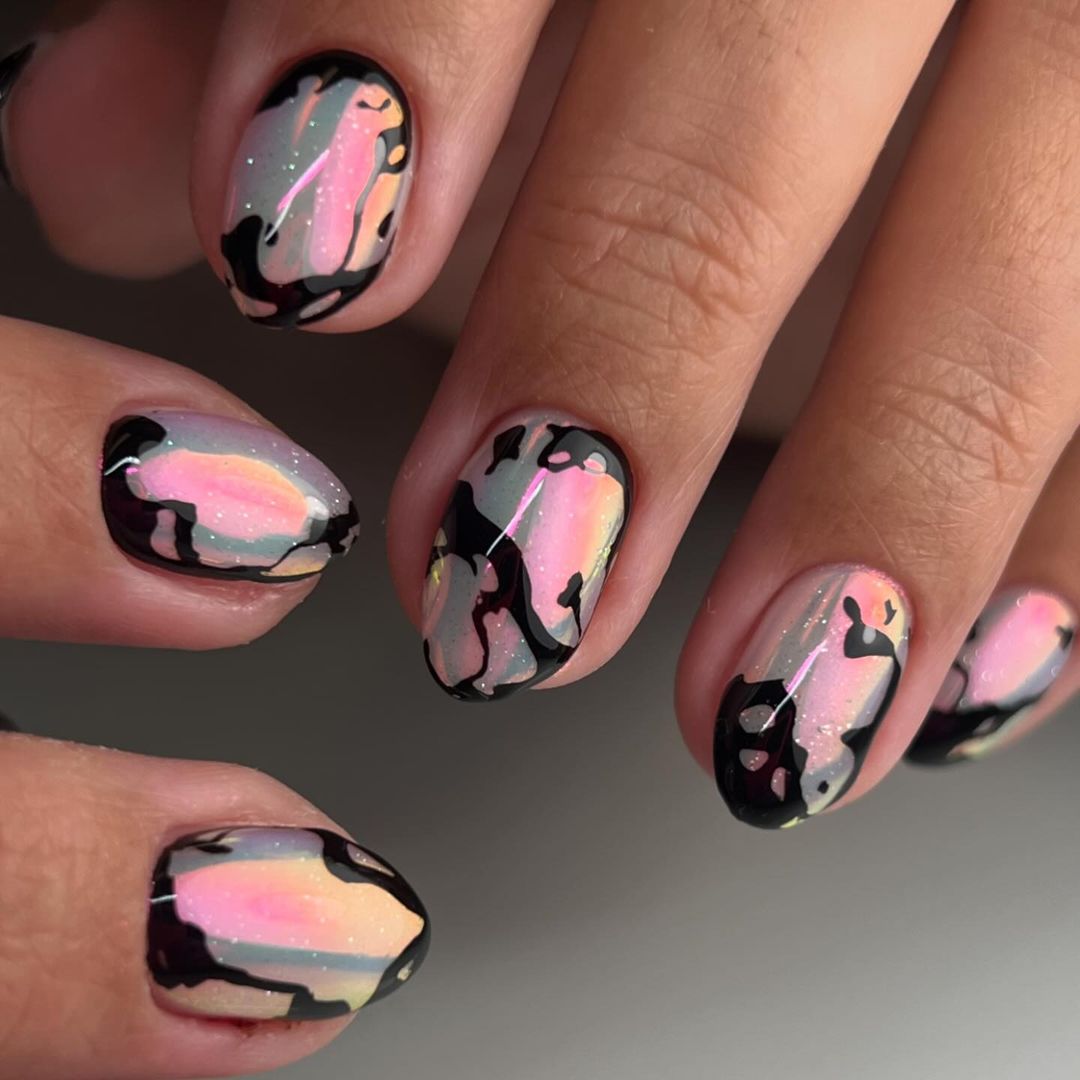
Holographic Black Overlay
This design features a holographic base with black abstract overlays, creating a mesmerizing and unique look. The short nails make it easy to maintain while still being eye-catching.
-
- Base coat: Orly Bonder Rubberized Base Coat
- Holographic polish: ILNP Mega
- Black polish: OPI Black Onyx
- Detail brush: Winstonia Nail Art Brushes
- Top coat: Seche Vite Dry Fast Top Coat
DIY Steps:
-
- Shape your nails into a short almond form.
- Apply the base coat and let it dry.
- Paint your nails with the holographic polish.
- Use the detail brush to apply black abstract patterns on top of the holographic base.
- Finish with a top coat to seal the design.
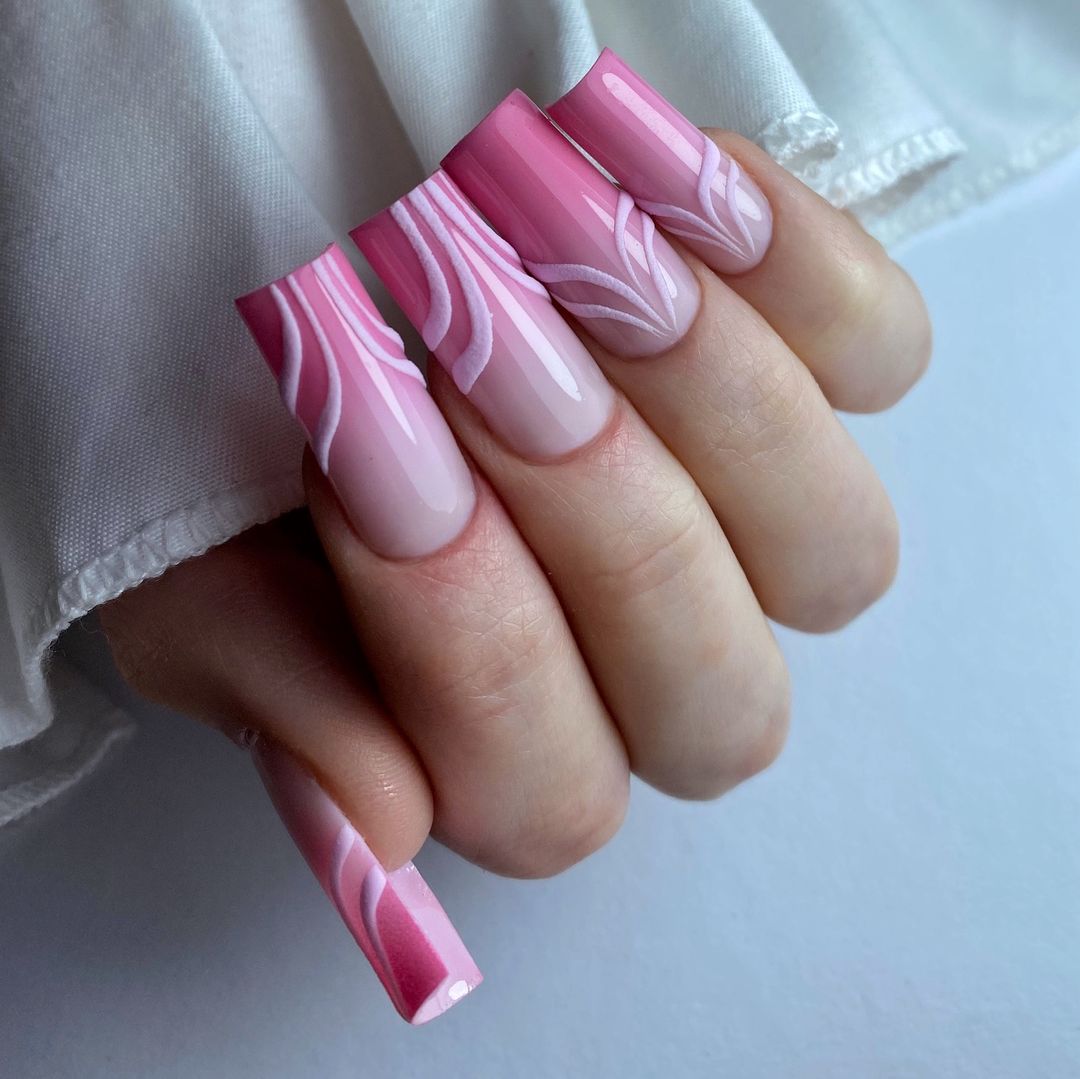
Pink and White Gradient Stripes
This elegant design features a pink to white gradient with delicate white stripes, creating a beautiful and soft look. The long nails enhance the design, making it perfect for special occasions.
-
- Base coat: OPI Natural Nail Base Coat
- Pink polish: Essie Ballet Slippers
- White striping polish: Orly Instant Artist in Crisp White
- Sponge: Real Techniques Miracle Complexion Sponge
- Top coat: Sally Hansen Miracle Gel Top Coat
DIY Steps:
-
- Shape your nails into a long square form.
- Apply the base coat and let it dry.
- Use a sponge to create a gradient effect with the pink and white polishes.
- Once dry, use the white striping polish to add delicate stripes.
- Finish with a top coat to seal the design.
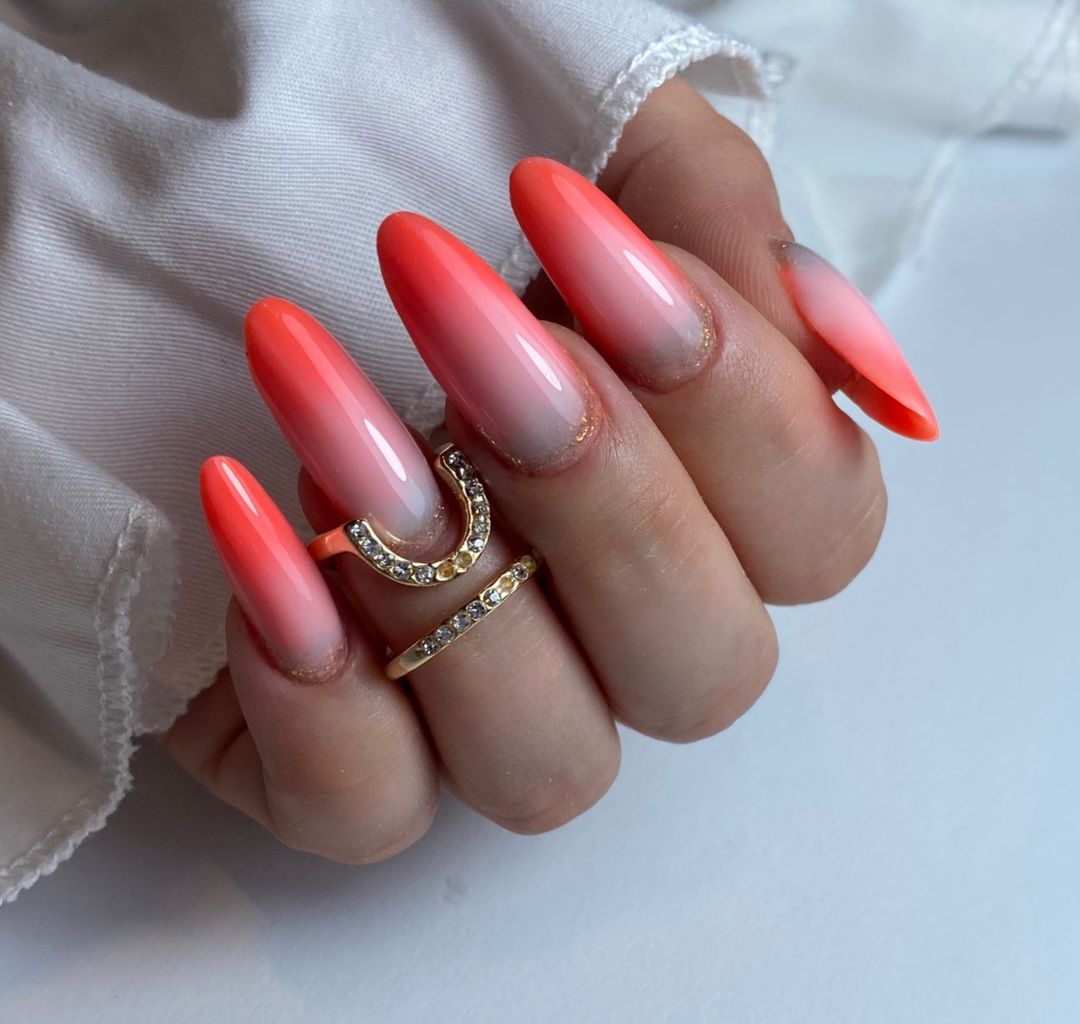
Orange Ombre
This vibrant design features a gradient from natural nude to bright orange, perfect for adding a pop of color to your autumn look. The almond shape enhances the elegance of this fun and playful design.
-
- Base coat: Butter London Nail Foundation
- Nude polish: OPI Bubble Bath
- Orange polish: Zoya Arizona
- Sponge: Real Techniques Miracle Complexion Sponge
- Top coat: CND Vinylux Long Wear Top Coat
DIY Steps:
-
- File your nails into an almond shape.
- Apply the base coat and let it dry.
- Use a sponge to apply the nude and orange polishes, creating a gradient effect.
- Finish with a top coat to add shine and durability.
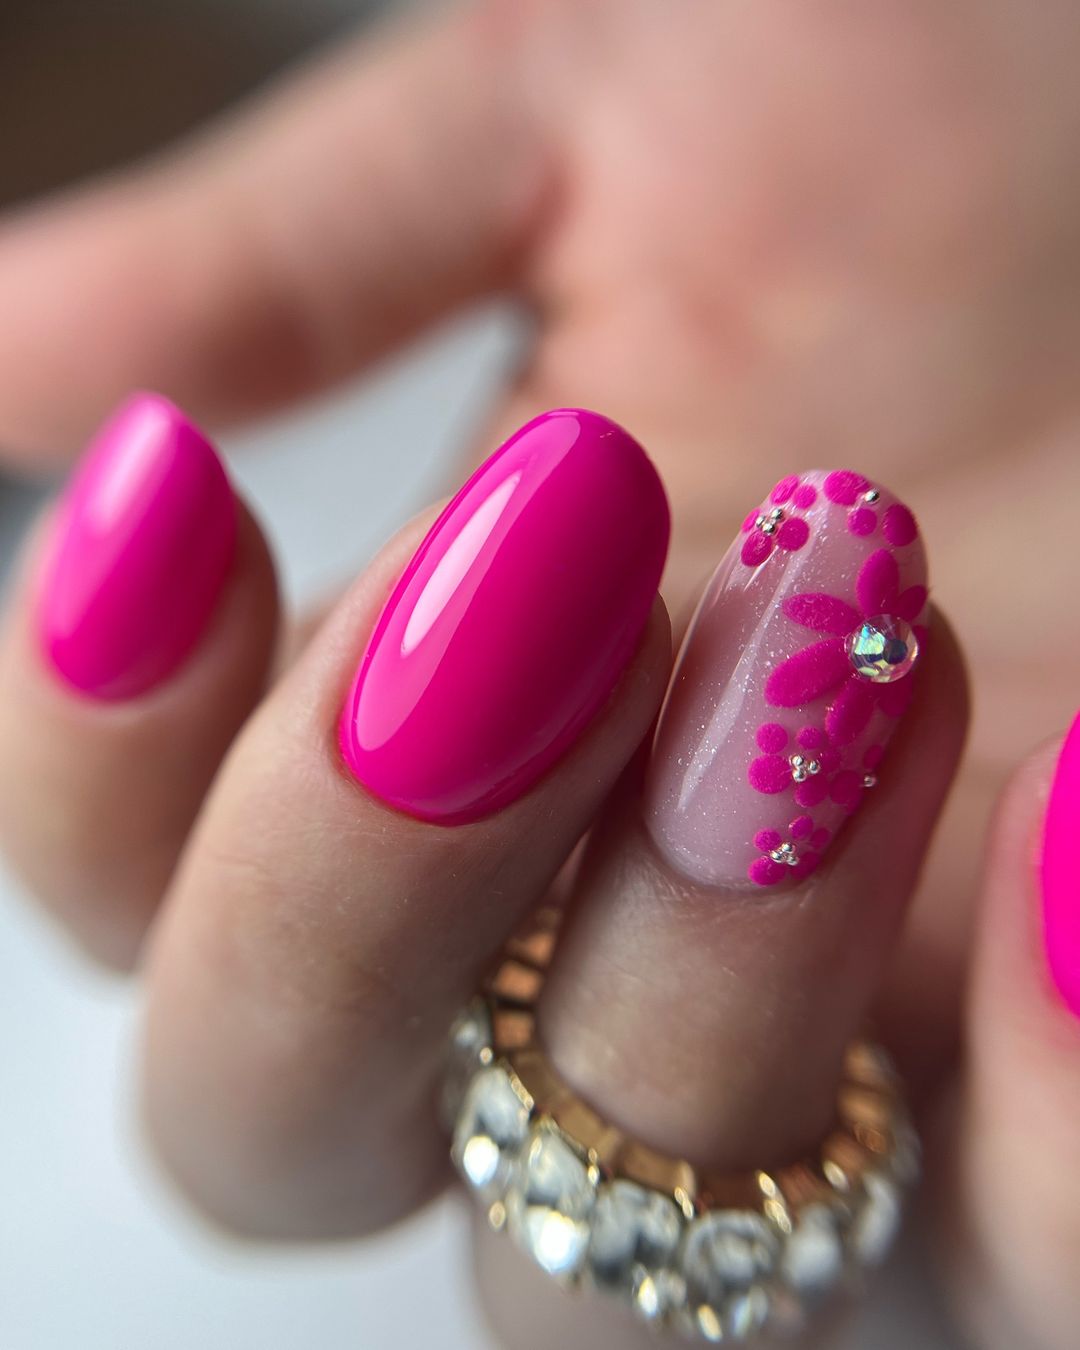
Hot Pink with Rhinestones
This design features a bold hot pink polish with delicate rhinestone accents on the ring finger. The bright color and added bling make this design perfect for those who love to stand out.
-
- Base coat: Essie Strong Start
- Pink polish: OPI Hotter Than You Pink
- Rhinestones: Swarovski Flatback Crystals
- Nail glue: Makartt Nail Art Rhinestone Glue
- Top coat: Seche Vite Dry Fast Top Coat
DIY Steps:
-
- Shape your nails into an almond form.
- Apply the base coat and let it dry.
- Paint your nails with the pink polish.
- Apply the rhinestones to the ring finger using nail glue.
- Finish with a top coat to secure the rhinestones and add shine.
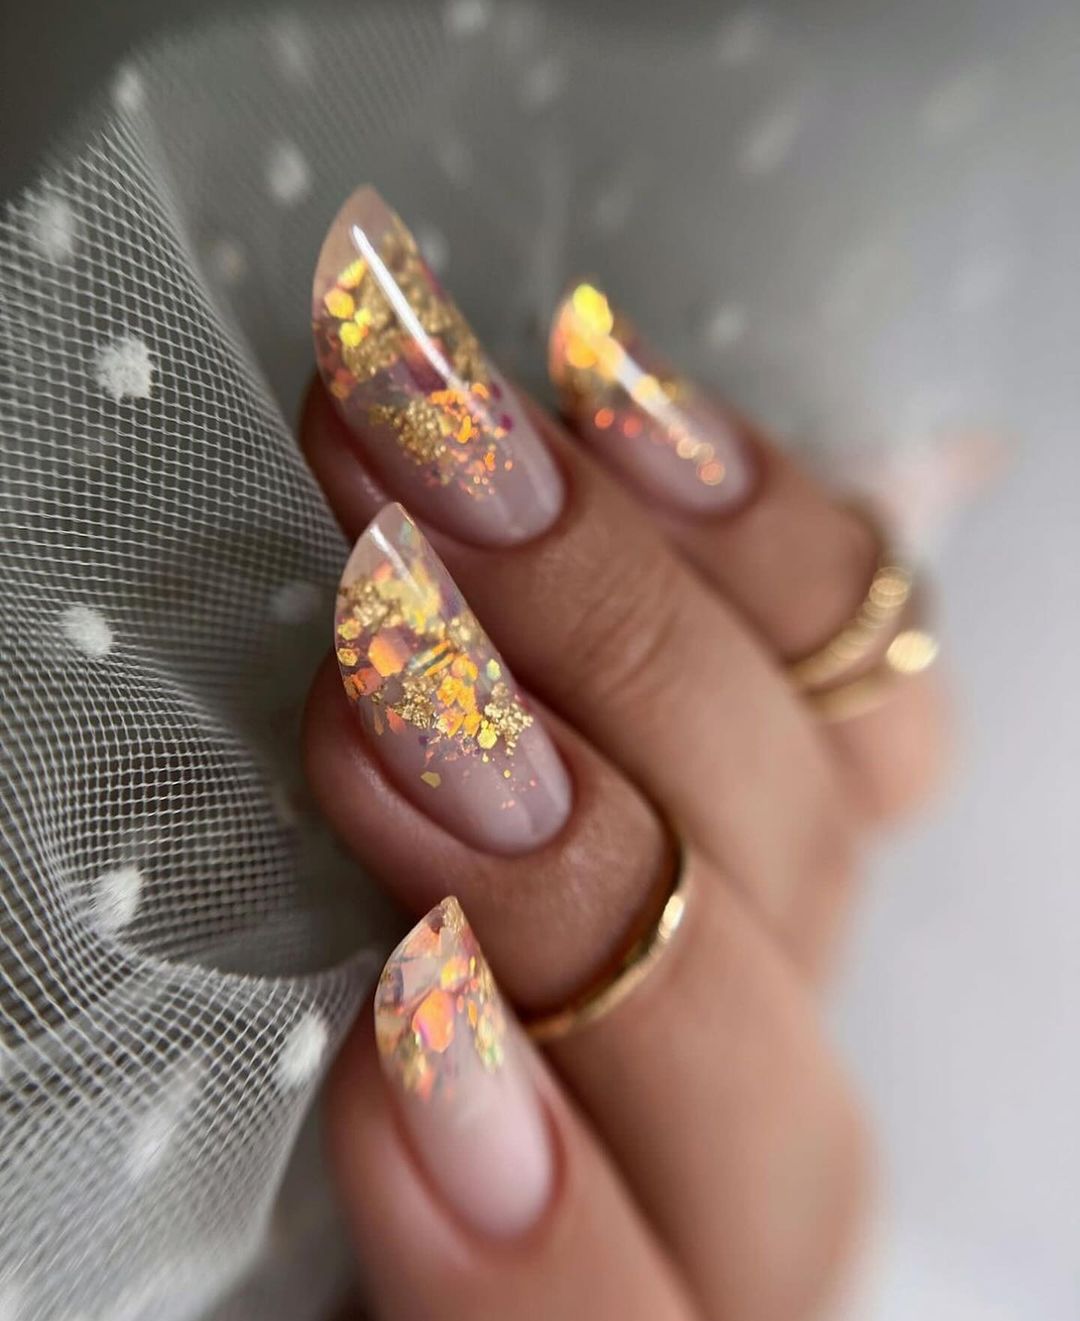
Golden Flake French Tips
This design features clear tips adorned with golden flakes, creating a luxurious and eye-catching look. The golden flakes catch the light beautifully, making these nails perfect for a glamorous autumn night out. The clean lines and natural base color keep the design sophisticated and classy.
-
- Base coat: OPI Natural Nail Base Coat
- Clear polish: Essie Clear
- Gold flake foil: Born Pretty Nail Art Gold Foil
- Top coat: Seche Vite Dry Fast Top Coat
DIY Steps:
-
- Shape your nails into an almond form.
- Apply the base coat and let it dry.
- Apply the clear polish to the tips of your nails.
- While the polish is still tacky, carefully place the gold flake foil on the tips.
- Finish with a top coat to seal the design and add shine.
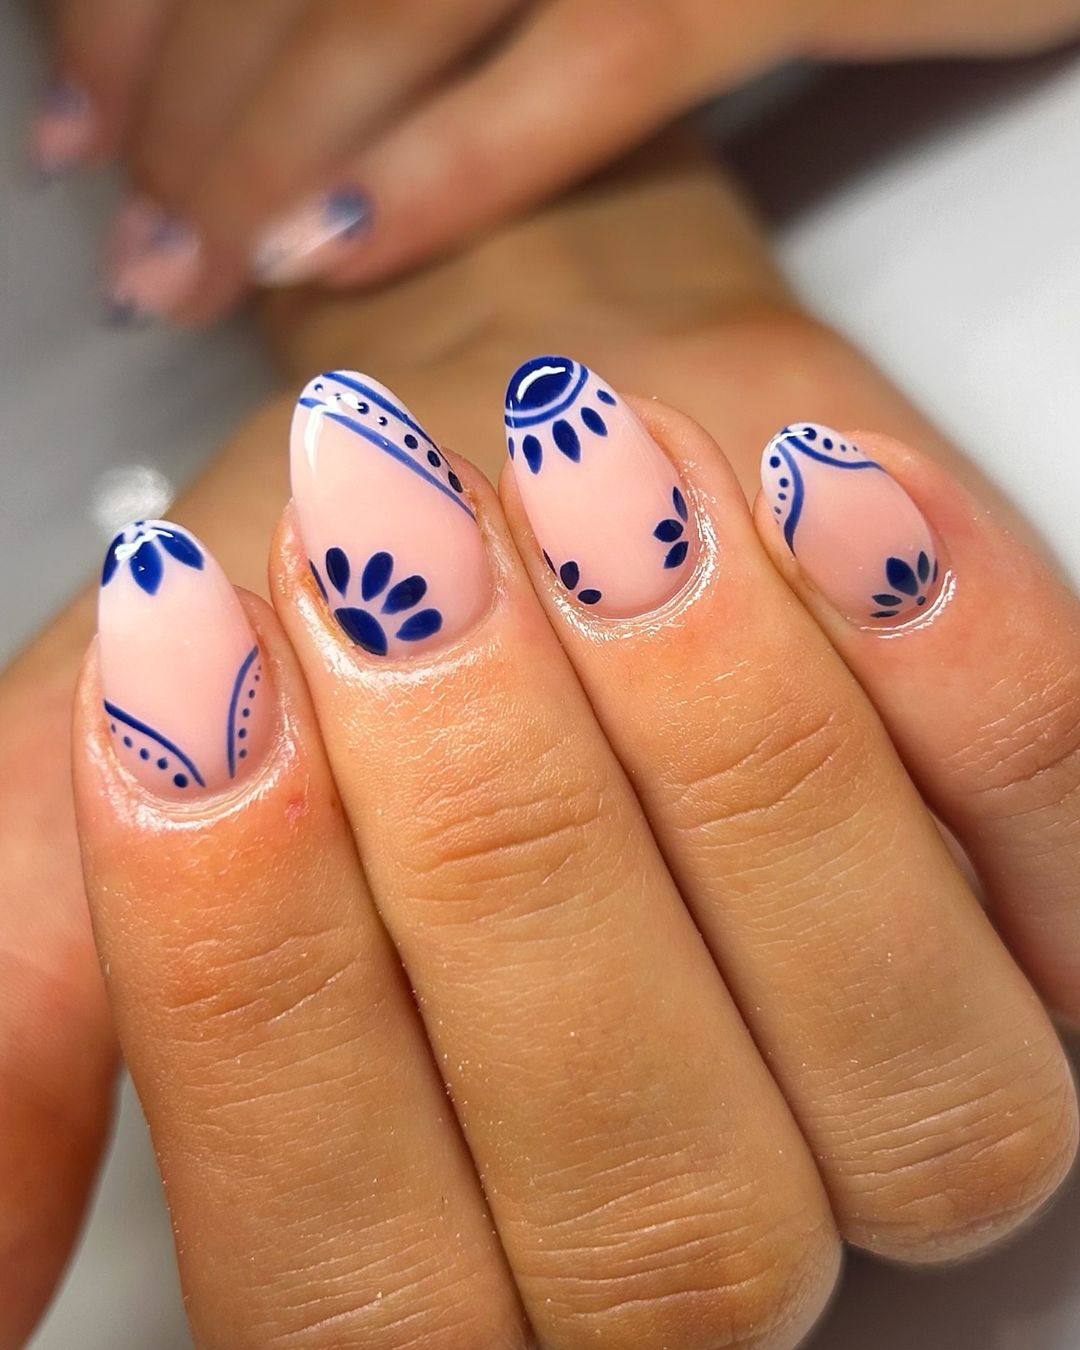
Navy Blue Abstract Accents
This design combines a nude base with bold navy blue abstract accents, creating a modern and artistic look. The intricate patterns and dots give a playful yet sophisticated vibe, perfect for adding a touch of creativity to your autumn style.
-
- Base coat: Essie Strong Start
- Nude polish: OPI Bubble Bath
- Navy blue polish: Essie Midnight Cami
- Detail brush: PUEEN Nail Art Brushes
- Top coat: CND Vinylux Long Wear Top Coat
DIY Steps:
-
- File your nails into an almond shape.
- Apply the base coat and let it dry.
- Paint your nails with the nude polish.
- Use the detail brush to create navy blue abstract patterns and dots on each nail.
- Finish with a top coat to seal the design and add durability.
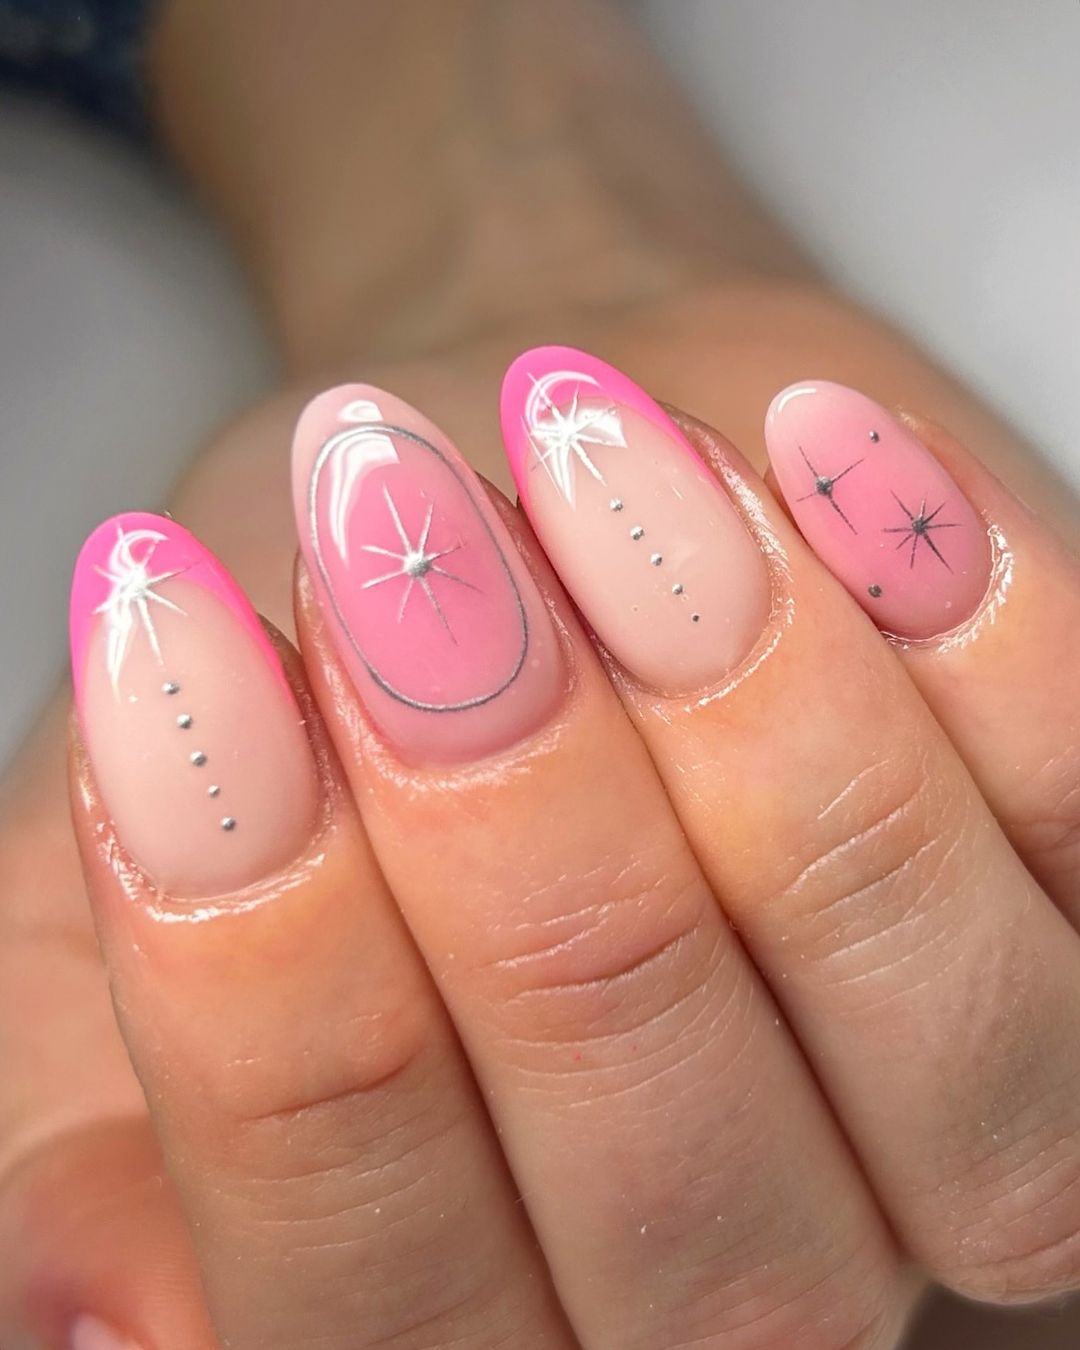
Pink Cosmic Nail Art
This design features a soft pink base with cosmic-inspired silver accents and delicate star patterns. The bright pink tips add a playful twist to the sophisticated cosmic theme, making these nails perfect for an eye-catching autumn look.
-
- Base coat: Deborah Lippmann Hard Rock
- Pink polish: Essie Cascade Cool
- Silver polish: OPI Silver On Ice
- Star stickers: Whats Up Nails Star Nail Stickers
- Top coat: Sally Hansen Miracle Gel Top Coat
DIY Steps:
-
- Shape your nails into an almond form.
- Apply the base coat and let it dry.
- Paint your nails with the pink polish.
- Apply the silver polish to create cosmic patterns and accent designs.
- Add star stickers to complete the cosmic look.
- Finish with a top coat to seal the design and add shine.
FAQ
Q: How can I make my nail designs last longer? A: Always start with a high-quality base coat and finish with a durable top coat. Avoid exposing your nails to harsh chemicals and wear gloves when doing household chores.
Q: Can I achieve these designs with gel polish? A: Absolutely! Using gel polish can enhance the longevity of your designs and provide a smoother finish.
Q: Are there any specific colors trending for fall 2024? A: Yes, this fall, deep purples, rich browns, and muted oranges are very popular. These colors reflect the natural beauty of the autumn season and pair well with any fall wardrobe.
By following these tips and getting creative with your designs, your nails can be a true reflection of the beautiful autumn season. Enjoy experimenting with these simple fall nail designs and make your nails the highlight of your autumn look!
Save Pin