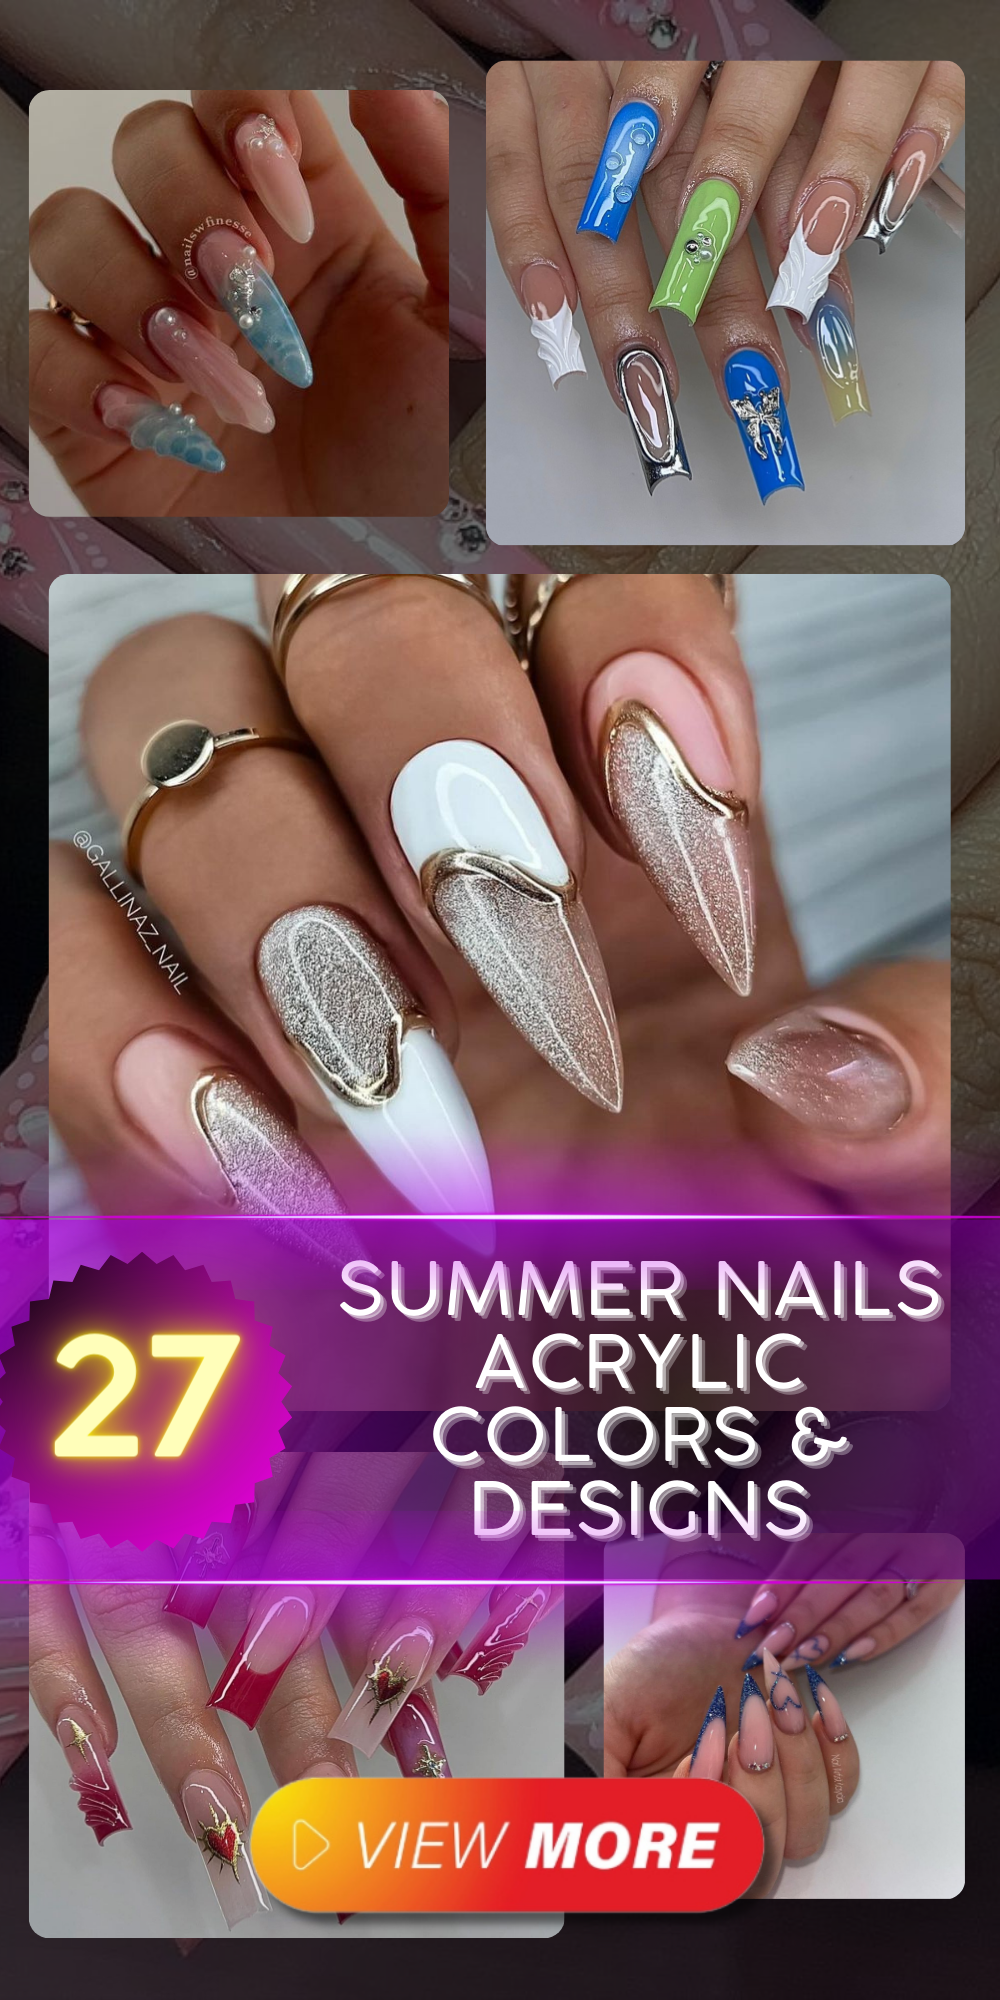
Ever wondered why summer feels incomplete without the perfect manicure? Why do certain shades of polish seem to sing in harmony with the warm breeze and the bright, bold sun? Well, grab your sunnies and your flip-flops, because we’re about to explore the world of summer nails acrylic colors & designs that are set to sizzle this season!
The Pinnacle of Pink Perfection
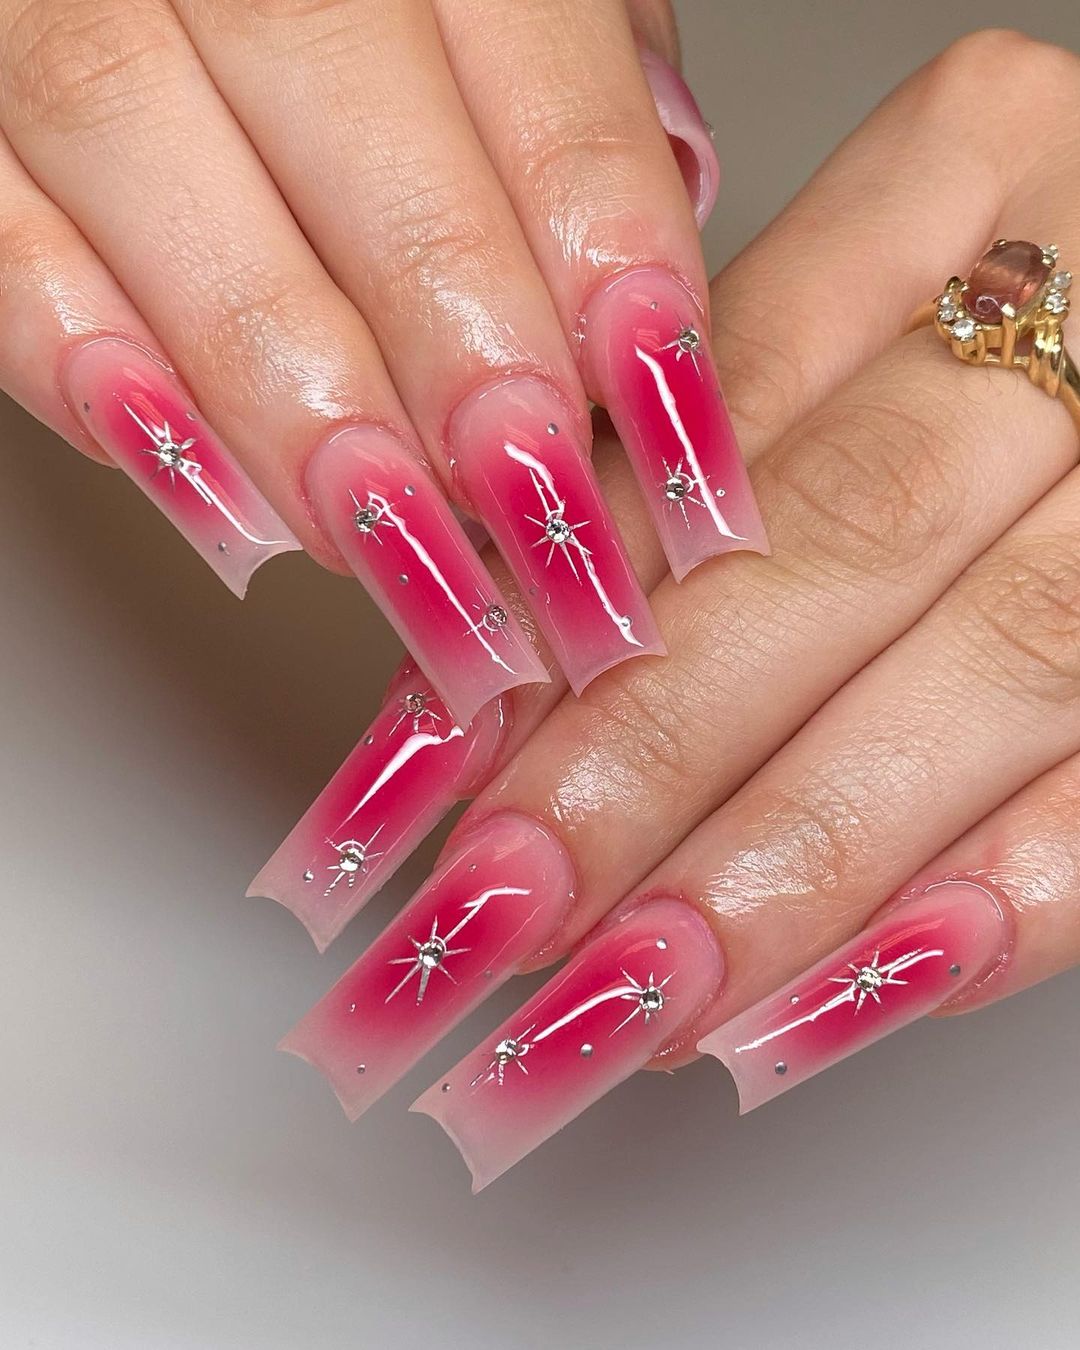
As a manicurist to the stars and color connoisseur, I can attest that this manicure is nothing short of stellar. The transition from a bright pink to a light pink ombre is seamless, and the addition of star-shaped sparkles makes it a constellation of beauty on your nails. The neon stars pop against the gradient base, creating a unique and classy summer look.
Consumables:
-
- Base color: L’Oreal Paris Colour Riche Nail, ‘Berry Persistent’
- Top color: Essie Nail Polish in ‘Fiji’
- Sparkles: Sally Hansen Big Glitter Top Coat in ‘Star Burst’
- My tip: Apply the base coat thicker at the tip for a natural fade into the lighter color.
Creating this look at home is a breeze. Begin with two coats of your base color. While still tacky, gently sponge on your lighter tip color, blending as you go. Finish with your sparkly top coat and voilà—summer nights encapsulated on your fingertips!
The Classically Bold French Twist
Who says French tips can’t be fun? Here’s proof they’re not just for the conservative at heart. A bright blue statement on an otherwise subtle manicure brings the spirit of the beach to your hands. It’s a simple twist that speaks volumes about your creative flair.
Consumables:
-
- White polish: OPI Alpine Snow
- Blue accent: Orly Gel FX in ‘Scenic Route’
- Top coat: Seche Vite Dry Fast Top Nail Coat
- My tip: Use thin striping tape to achieve crisp lines for your French tip, and remember to seal with a durable top coat.
To nail this look (pun intended), apply your white base coat and let it dry completely. Position the striping tape just below where you want your blue tip to start. Paint the tip, peel away the tape while the polish is still wet, and finish with a top coat for lasting power.
Summer’s Sweetheart Bow Design
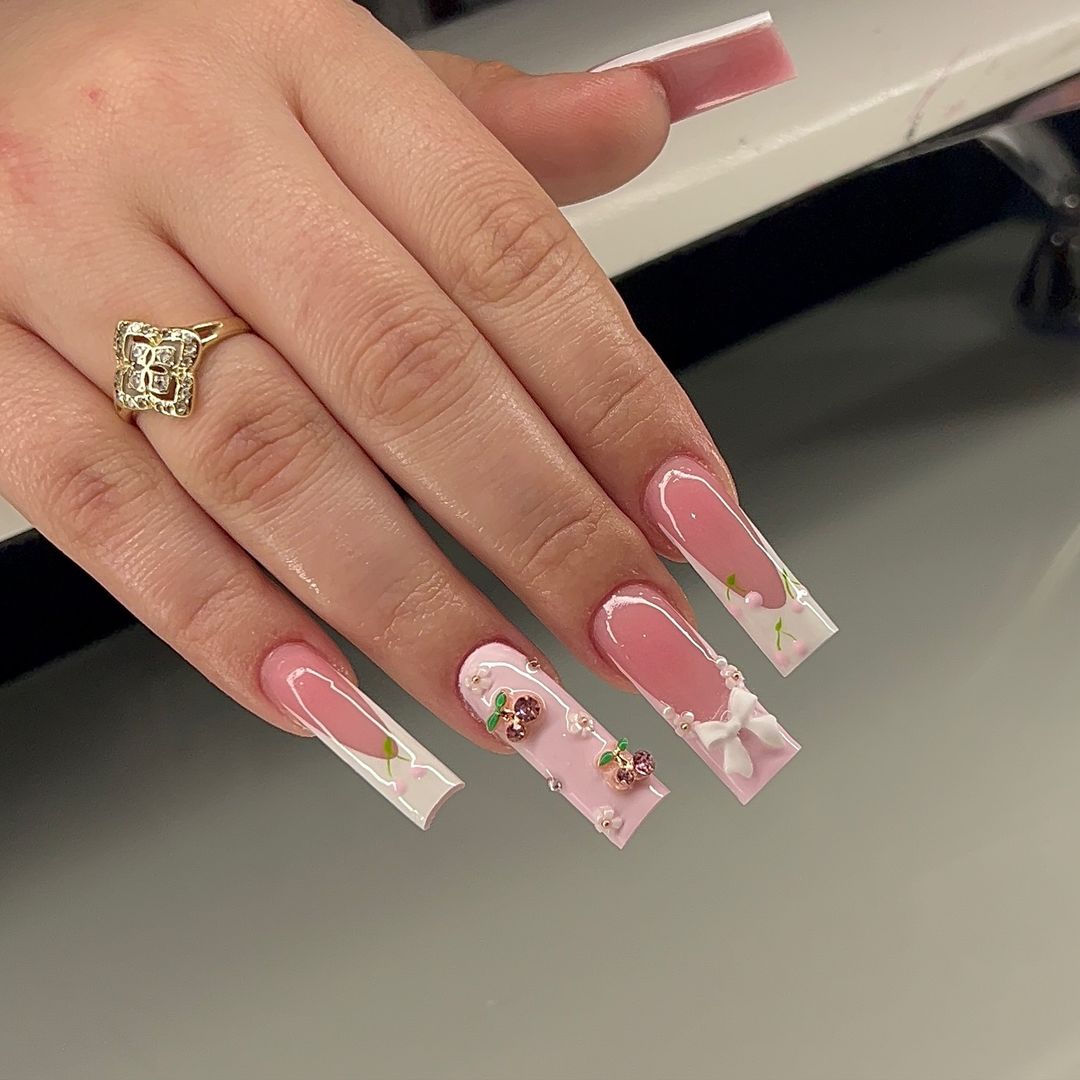
Nothing says “sweet summer” quite like this pink neon bow design, delicately placed over a pastel pink base. The tiny green leaves add a touch of whimsy, making it the perfect manicure for picnics and garden parties.
Consumables:
-
- Base polish: China Glaze ‘Bottoms Up’
- Bow decals: Handmade 3D bows from Etsy
- Leaf accents: Mini green rhinestones
- My tip: To keep decals secure, apply a gel top coat like Orly Gel FX for extra longevity.
For the at-home artist, start with a pale pink base. Once it’s dry, carefully apply the 3D bow decal using a dab of nail glue. Add the green rhinestone leaves as the final touch. Remember, it’s all about a steady hand and a pinch of patience.
Botanical Elegance with a Metallic Flair
This design is the epitome of what happens when classy meets earthy. The transparent tips filled with dried flowers and a sprinkle of gold dust are a testament to summer’s endless beauty. This nail idea whispers simple yet sophisticated, with an organic feel that’s both delicate and daring.
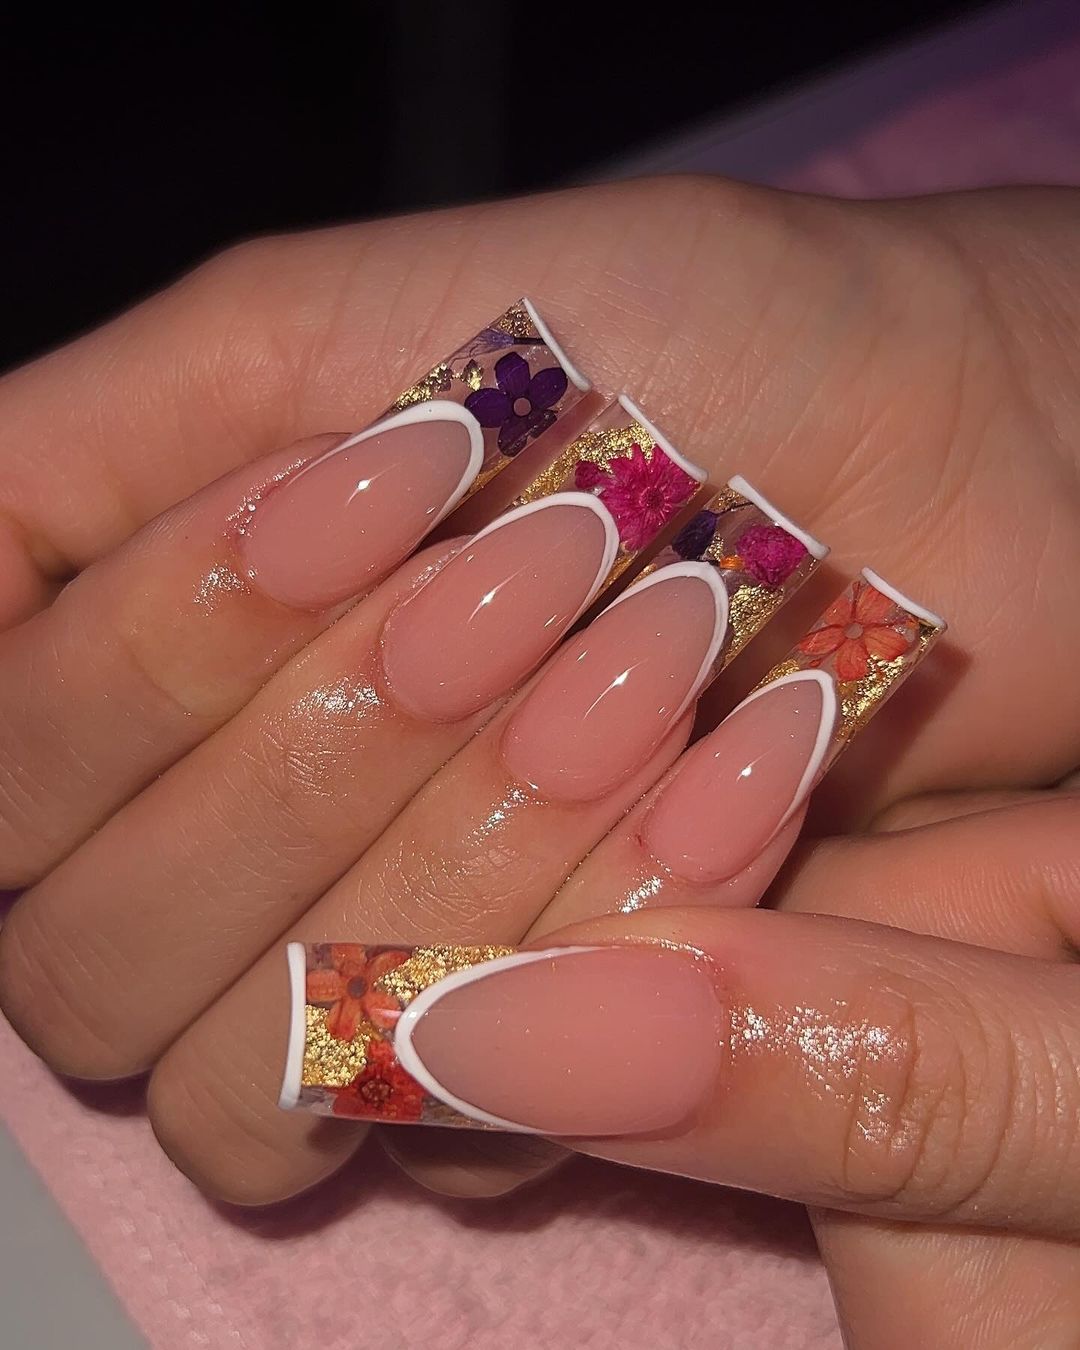
Consumables:
-
- Nude base: Essie ‘Ballet Slippers’
- Dried flowers: Mixed variety from a local craft store
- Gold leaf: Artisanal Metallic Gold Flake
- My tip: Arrange the flowers and gold flakes with tweezers before sealing with a clear acrylic overlay.
At home, after your nude base is dry, apply a clear adhesive where you’ll place the flowers and gold. Gently press in your design elements, then cap with clear acrylic. It’s a meticulous process but results in a unique and natural fade.
Save Pin
Pink Waves and Floral Days
Imagine a design that sings the song of summer with every hand wave. These hot pink waves embellished with dainty flowers and bright rhinestones capture the playful essence of summertime. It’s a colorful combo that’s fun, flirty, and fabulous for any summer day out.
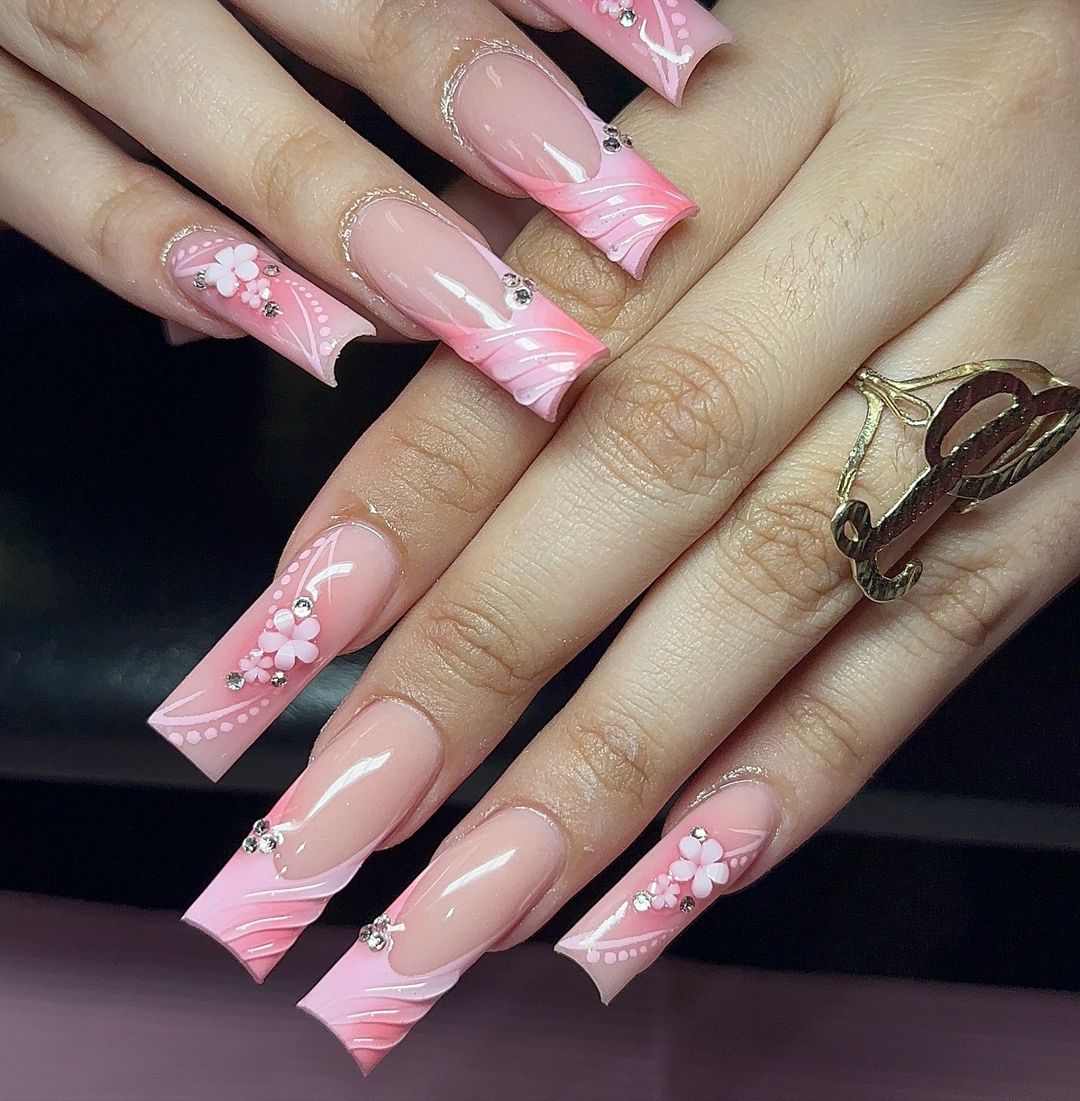
Consumables:
-
- Base color: Sally Hansen Miracle Gel in ‘Pink Cadillaquer’
- Wave detail: Acrylic paint in white
- Flowers and rhinestones: Preciosa crystals and hand-painted flowers
- My tip: For precise waves, use a fine-tip brush, and for the flowers, a dotting tool can create perfect petals.
For DIY enthusiasts, paint your pink base and let it set. Then, with a steady hand, draw your waves with white paint. Add a drop of adhesive for your rhinestones and paint on your flowers. It’s playful, it’s pastel, and it’s all about the details.
Aqua Marine Dream
Here’s a design that’s as refreshing as a dip in the ocean. These elongated nails with Tiffany blue accents and embossed details are a bold statement of summer fun. They play with neon art ideas and give a nod to aquatic themes, perfect for those who love a little neon fun in their style.

Consumables:
-
- Base polish: OPI ‘Let’s Be Friends!’
- Aqua accents: Hand-mixed acrylic powder
- Embellishments: Mini clear beads and silver glitter
- My tip: Use a mixture of monomer and powder to get the right consistency for the 3D effects.
For the mermaids at heart, start with your favorite pale pink. Mix your aqua acrylic and sculpt while wet. Embed beads and sprinkle glitter as you wish. It might be intricate, but the result is a mesmerizing nod to the beach vibes we all crave.
Blossoming in Pink Fluidity
These nails are like a summer breeze made visible, with a pink neon and bright pink blend that flows like petals in the wind. The use of gold foil accentuates a luxurious feel, making each nail a miniature canvas of unique artistry and elegance.
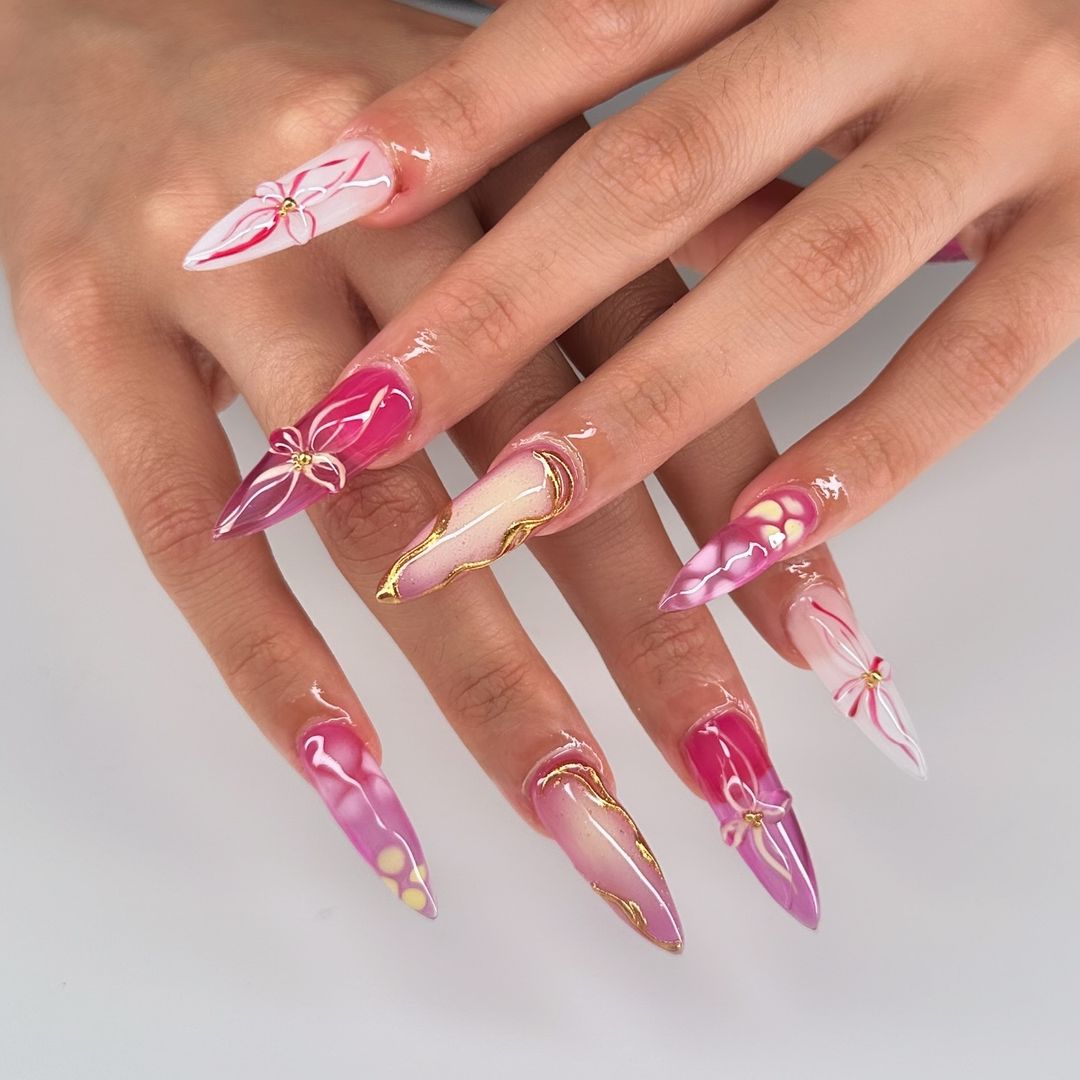
Consumables:
-
- Pink shades: OPI ‘Pink Flamenco’ and ‘Kiss Me I’m Brazilian’
- Gold foil: 24K Gold Leaf Sheets
- Gems: Swarovski Small Crystal Pixies
- My tip: Apply the gold foil sparingly to maintain a delicate balance and avoid overpowering the design.
To recreate this, start with a pink gradient effect, using a sponge to blend the two shades smoothly. Carefully apply the gold foil in thin, torn pieces for an organic look, and finish by placing the gems with a dotting tool and sealing everything with a gel top coat.
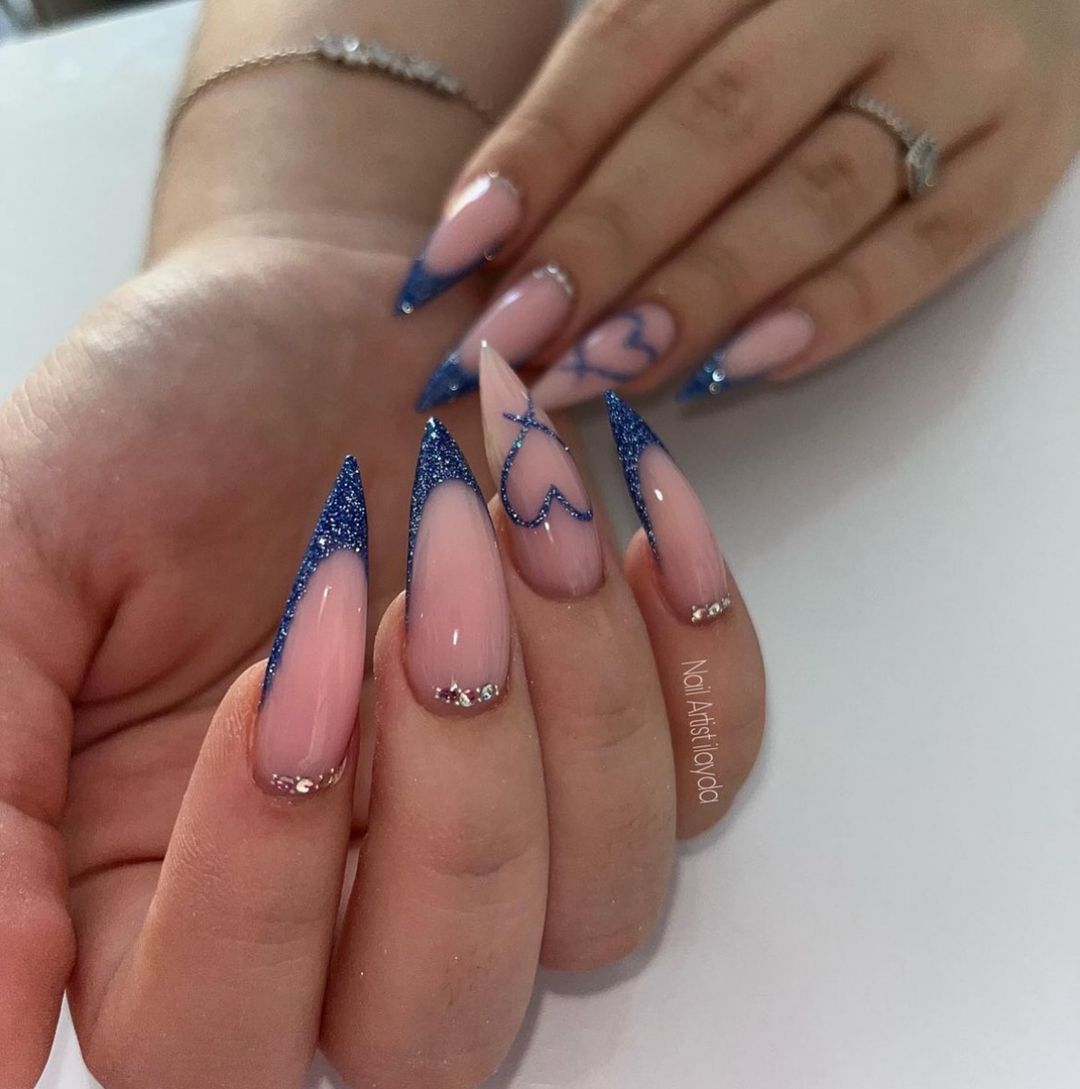
Starry Night in Blue Satin
This manicure captures the essence of a starlit night with its bright blue glittered tips and delicate heart accents. It’s a simple yet classy combination that evokes the romantic allure of summertime escapades under the stars.
Consumables:
-
- Nude base: Essie ‘Topless and Barefoot’
- Blue glitter: China Glaze ‘Dorothy Who?’
- Accent polish: Sally Hansen ‘Blue My Mind’
- My tip: For an even glitter coat, tap the brush instead of stroking it, and use a fine brush for the hearts.
To achieve this celestial wonder at home, paint your nude base and let it dry. Then, apply the blue glitter polish to the tips, gradually lessening the amount as you move down for an ombre effect. Lastly, draw the hearts and apply a crystal at each center for a touch of sparkle.
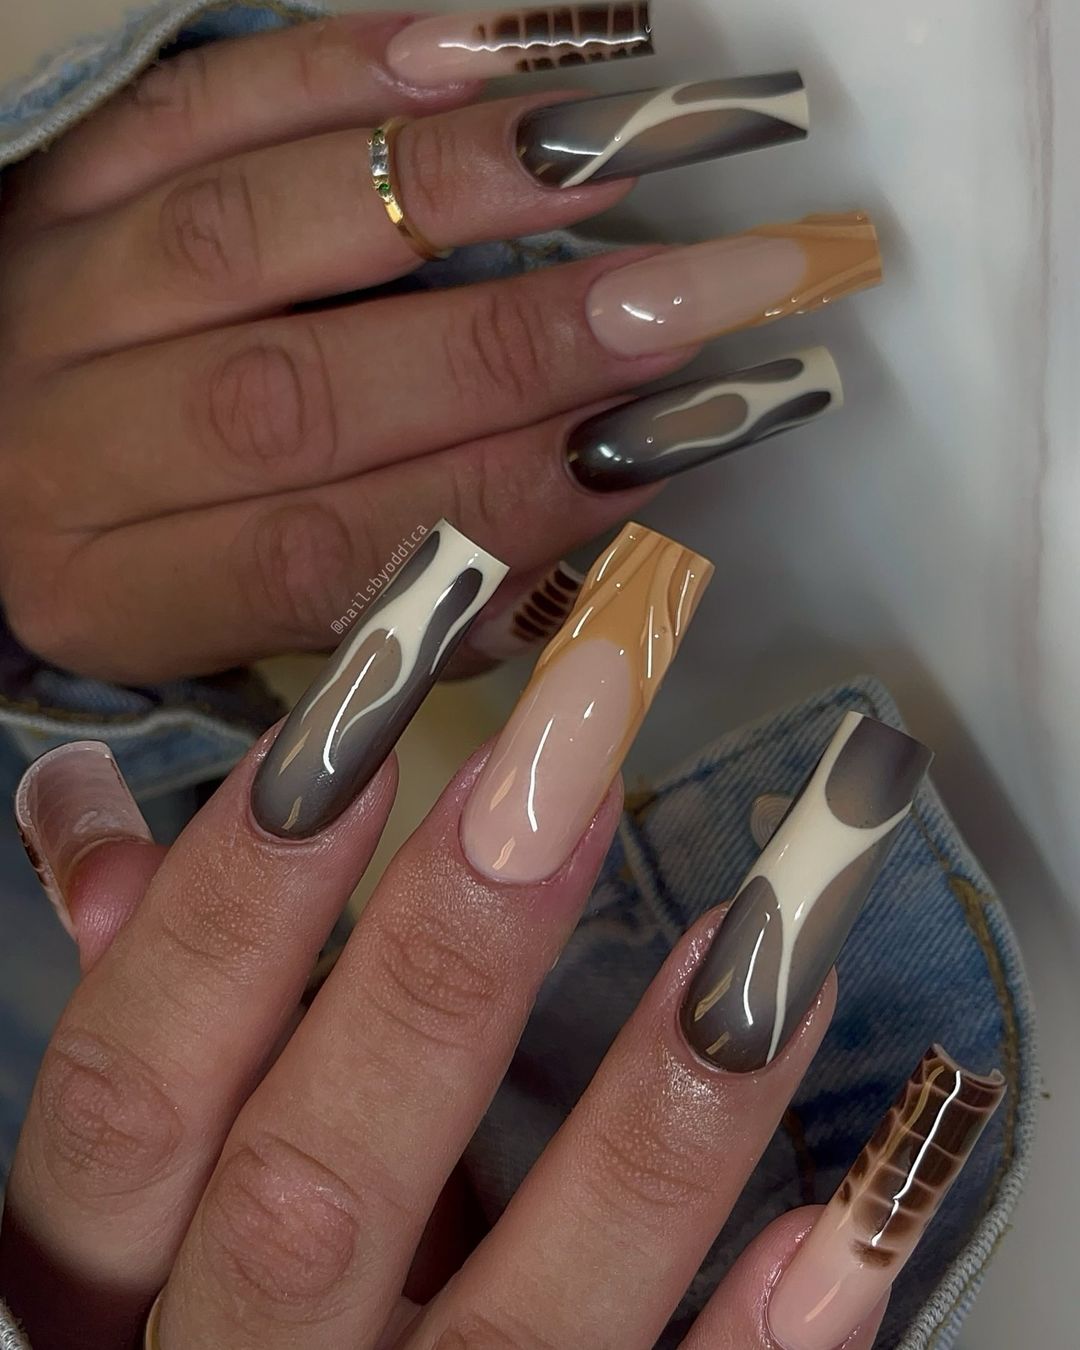
Molten Metal and Coffee Cream Swirls
Dive into the sumptuous blend of tan skin-flattering coffee and cream swirls, lined with a luxurious molten metal accent. This ombre look brings a warm and inviting polish to any ensemble, embodying a perfect mix of sophistication and trend-setting style.
Consumables:
-
- Nude base: CND Vinylux in ‘Uncovered’
- Metallic polish: Essie ‘Good as Gold’
- Swirl accents: Hand-mixed brown and white acrylic paint
- My tip: Swirl the metallic polish while it’s wet with a fine brush to get the perfect fade.
Creating this indulgent design starts with a smooth nude base. While the base is tacky, swirl in your brown and white paints to create a marbled effect. Add a stroke of metallic polish and use a fine brush to swirl it into the design. Top it off with a glossy finish, and you’re ready to make heads turn.
Save Pin
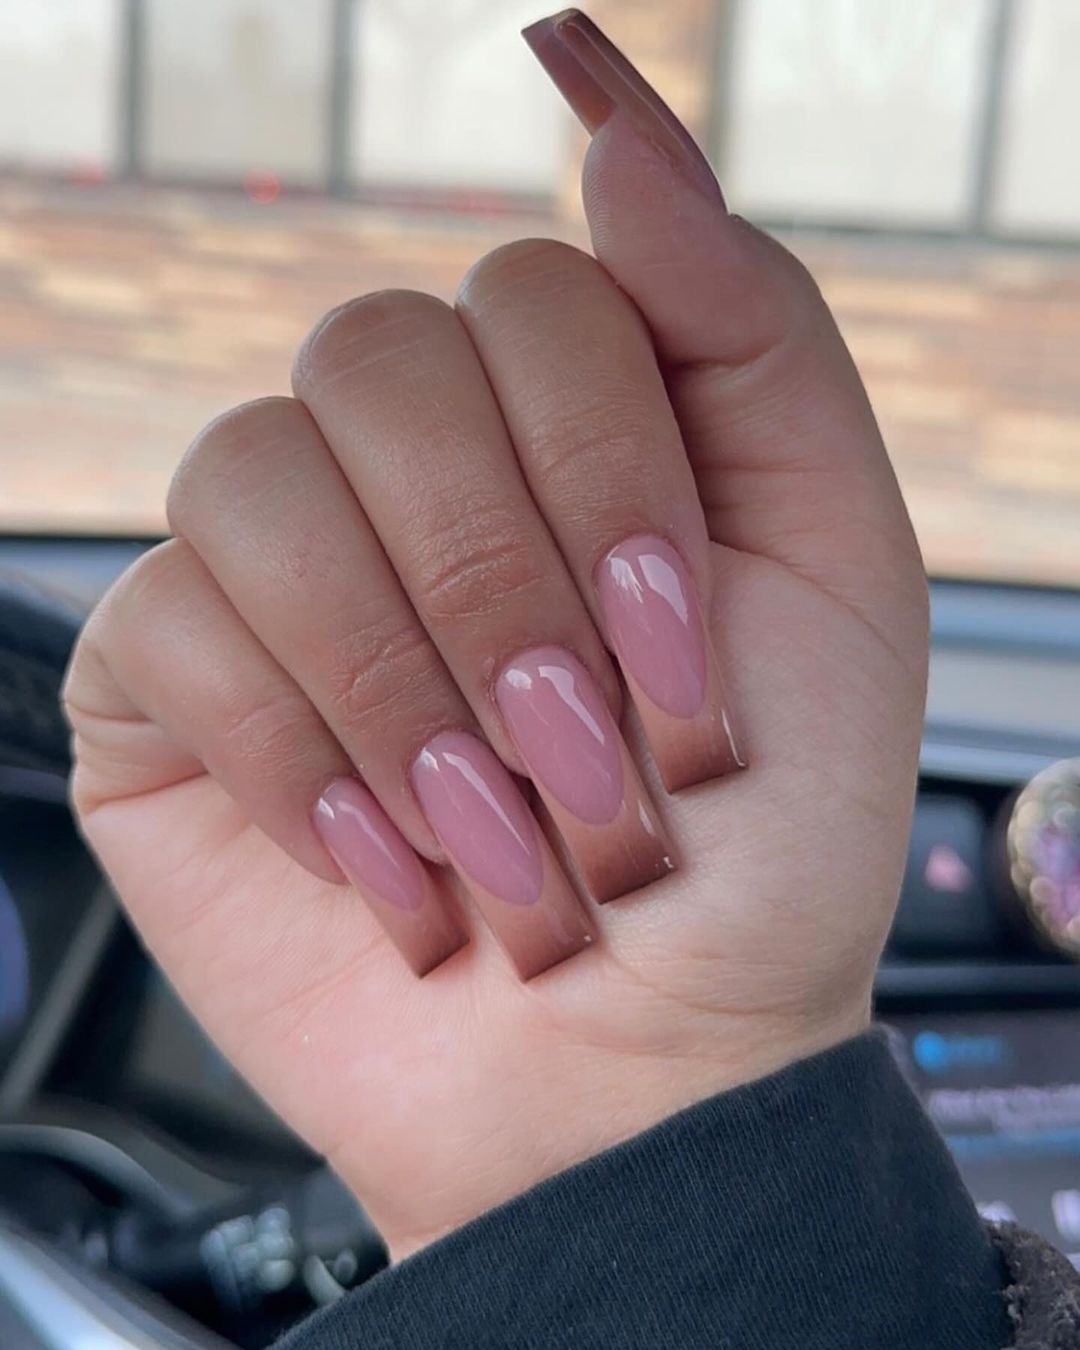
Serenity in Simplicity
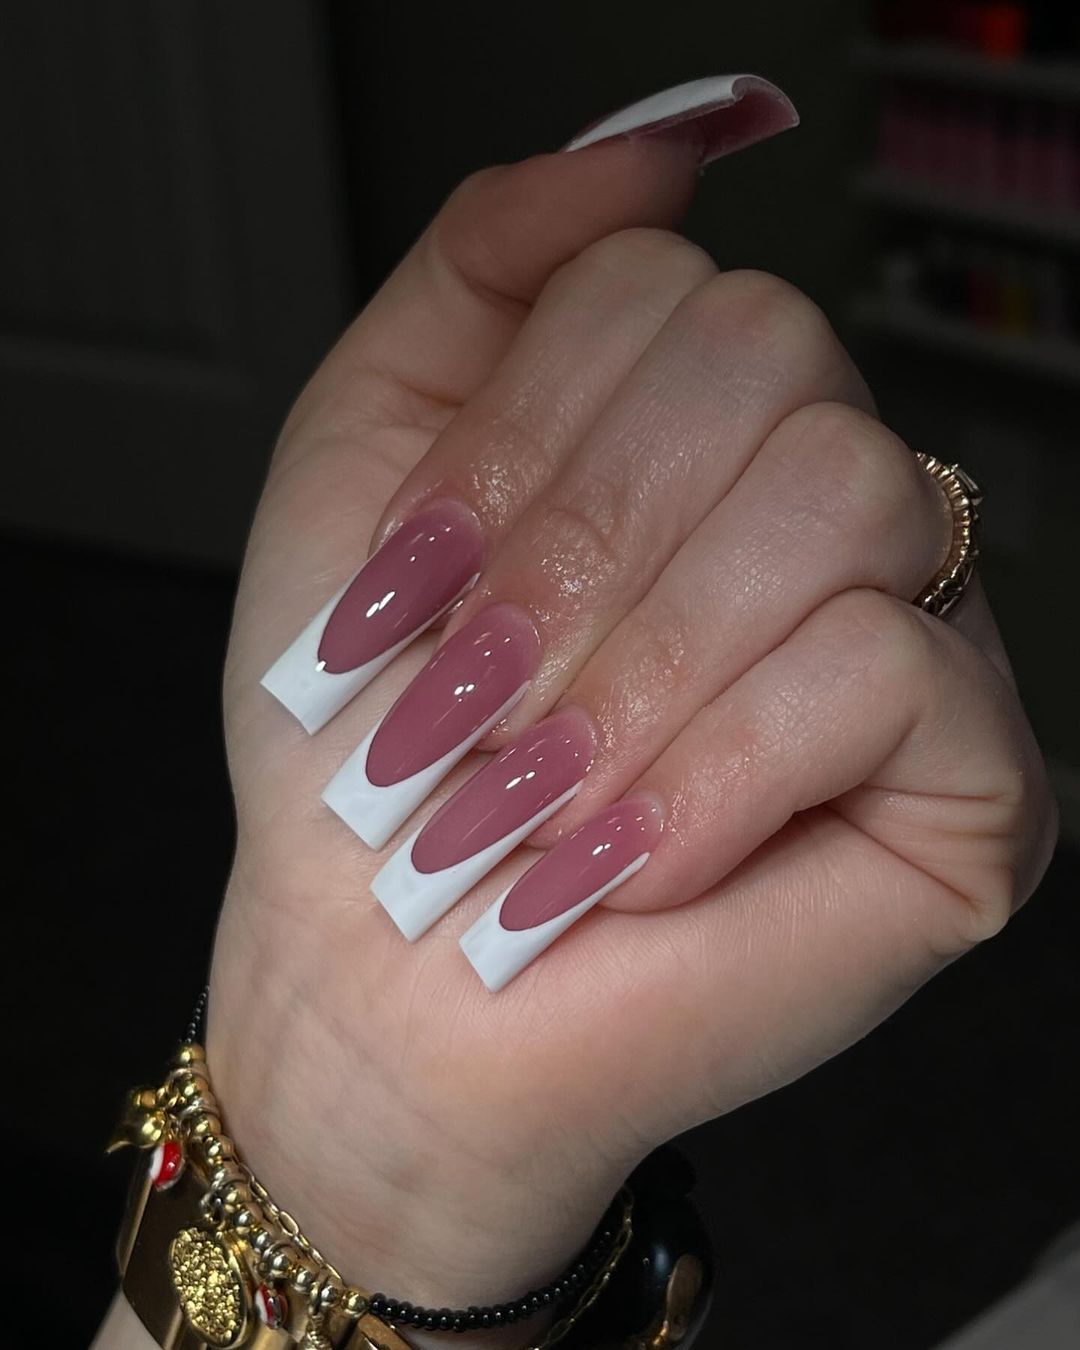
Embrace the understated elegance of a dusty rose polish that speaks volumes in its simplicity. This design’s clean lines and light pink hue are the very definition of classy, making it a timeless choice that complements every skin tone and setting, whether it’s an office meeting or a beach getaway.
Consumables:
-
- Polish: Essie ‘Lady Like’
- Top coat: OPI Infinite Shine Gloss
- My tip: Apply two thin coats of polish instead of one thick layer to avoid bubbles and promote even drying.
To get this look, apply a base coat, then two coats of your chosen polish, allowing each to dry thoroughly. Finish with a glossy top coat for a durable, high-shine effect that will carry you through the longest of summer days.
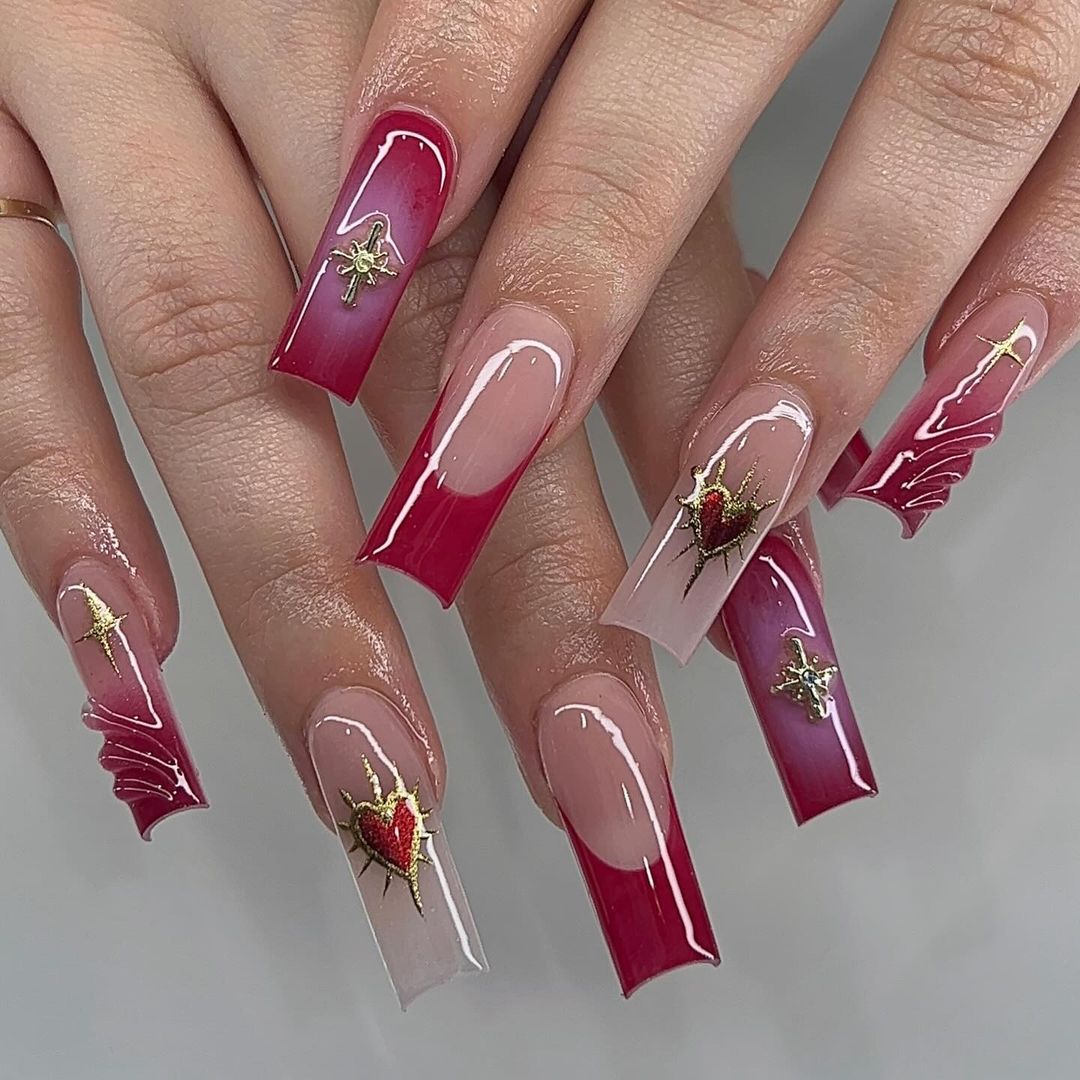
Ombre Opulence with Golden Accents
Here’s an ombre effect that dazzles, transitioning from a rich hot pink to a translucent tip. Each nail is adorned with golden embellishments, making this multi-colored design a piece of wearable art. It’s colorful, it’s bright, and it’s a bold statement for the daring fashionista.
Consumables:
-
- Pink polish: China Glaze ‘Bottoms Up’
- Clear tips: Acrylic nail tips
- Gold stickers: Metallic nail stickers
- My tip: For a smooth ombre, use a makeup sponge to dab and blend the colors.
To achieve this stunning look at home, start with a clear tip and apply a coat of pink, blending upwards. Once dry, add the gold stickers, and seal with a top coat for a gleaming finish.
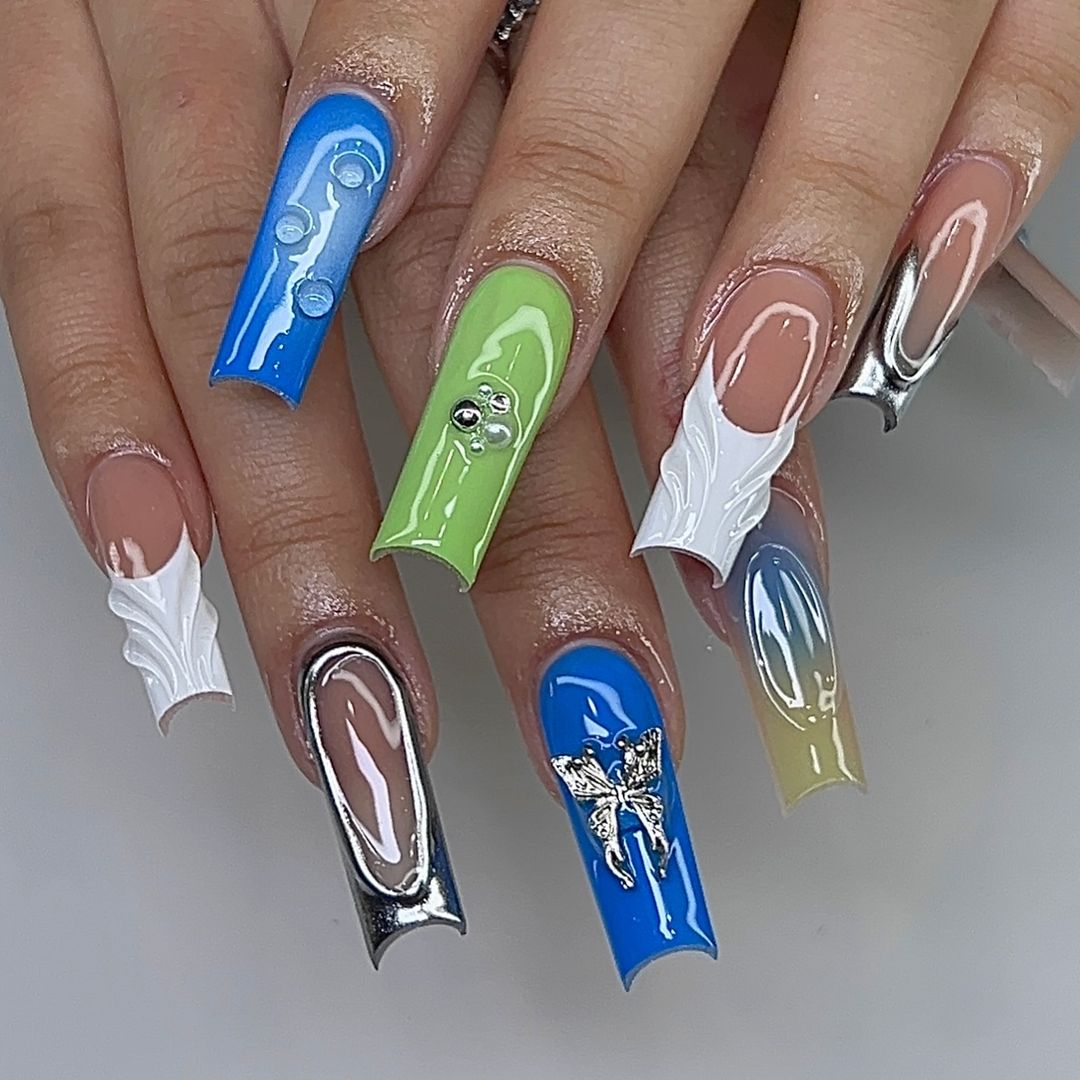
Abstract Artistry in Acrylic
This look is an avant-garde celebration of summer’s playful palette. Combining bright blue, green, and silver in an abstract design, complete with a regal bee embellishment, it’s an eclectic mix that mirrors neon art ideas and summer nails acrylic colors & designs in the most fantastical way.
Consumables:
-
- Base colors: A mix of Sally Hansen’s ‘Mint Sorbet’, ‘Blue Me Away!’, and Essie ‘No Place Like Chrome’
- Bee charm: 3D nail art charm
- Silver polish: Essie ‘No Place Like Chrome’
- My tip: Place the bee charm using nail glue, and don’t shy away from mixing colors directly on the nail for a unique effect.
Starting with a nude base, paint abstract shapes with your colored polishes. Add the silver accents, then carefully glue on the bee charm. Finish with a high-gloss top coat for durability and shine.
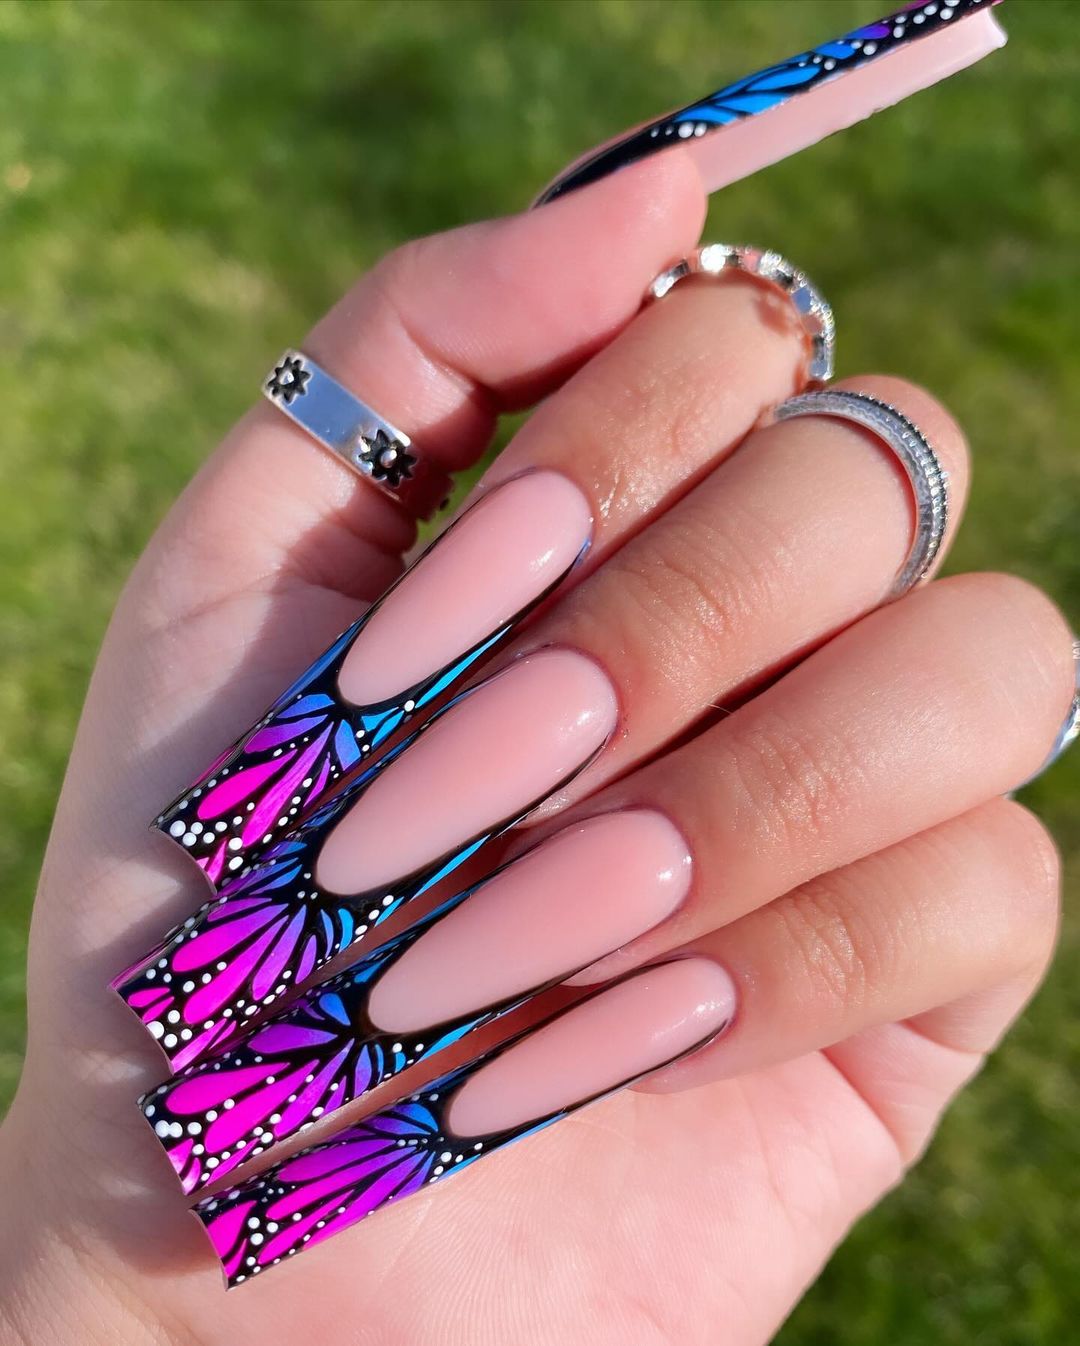
Neon Butterfly Dreams
Fluttering onto the scene are these nails that combine the natural beauty of butterflies with an electric neon touch. It’s a unique and bright expression that’s as bold as it is beautiful, embodying the transformative energy of summer.
Consumables:
-
- Base color: Essie ‘Muchi, Muchi’
- Neon paints: Acrylic neon set for detailed art
- Top coat: Seche Vite Dry Fast Top Coat
- My tip: Use a fine brush for the butterfly details and a dotting tool for precision in the dots.
To bring these nails to life, apply your base color, then with a steady hand, paint on the butterfly wings. Add pops of neon for a vivid contrast and finish with a top coat to seal in your masterpiece.
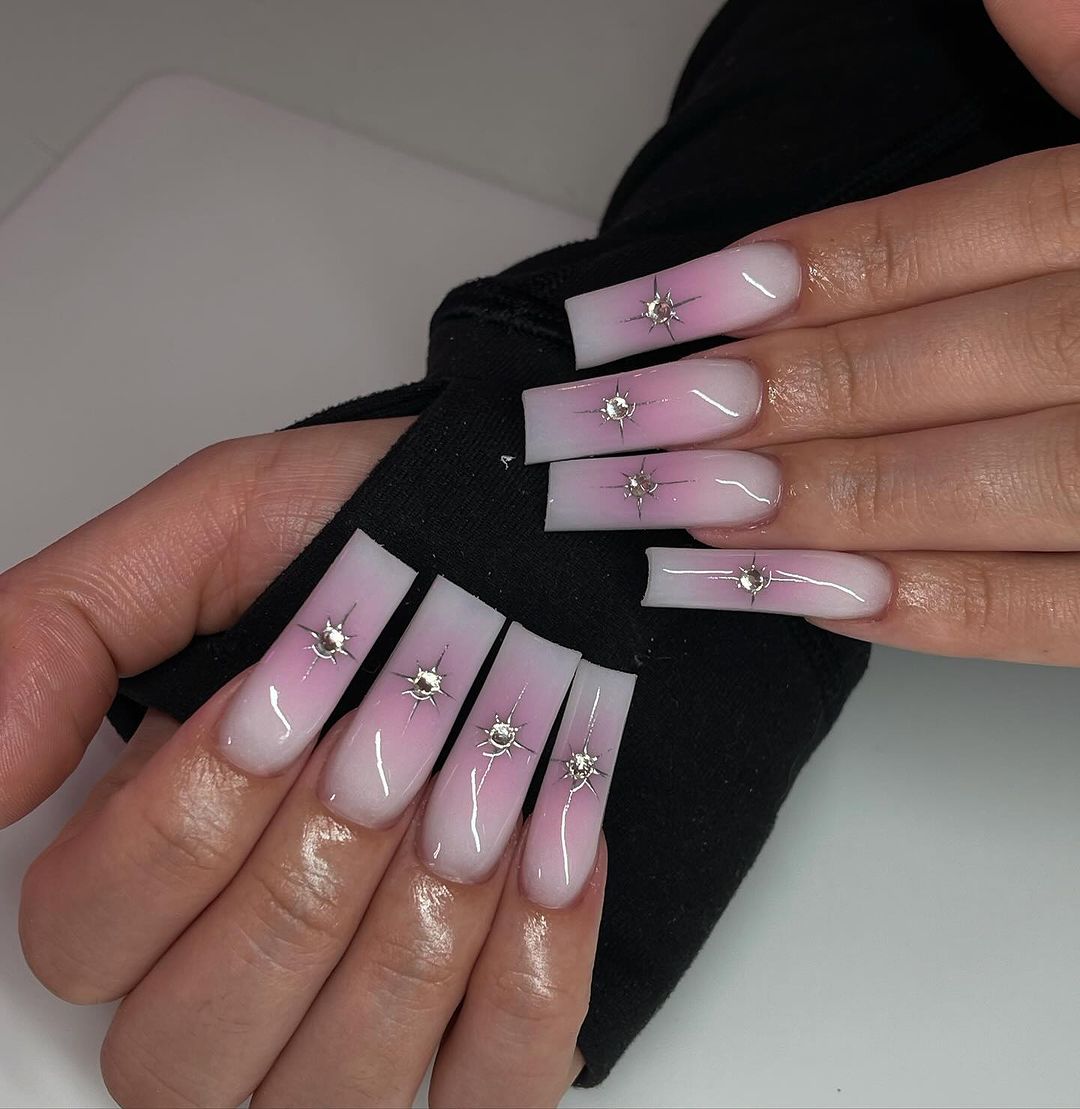
Starlit Gradient
The gradation from light pink to purple in this design is nothing short of celestial, with tiny stars that add a touch of the night sky. It’s a look that says simple, classy, yet undeniably unique.
Consumables:
-
- Base color: OPI ‘Mod About You’
- Gradient colors: OPI ‘Do You Have this Color in Stock-holm?’ and ‘Polly Want a Lacquer?’
- Stars: Silver nail art stickers
- My tip: For a flawless gradient, use a sponge and apply the colors side by side, then dab onto the nail.
At home, after your base coat, apply your colors to the sponge and press onto the nail for the gradient effect. Then, add your stars and seal with a glossy top coat for a look that’s out of this world.
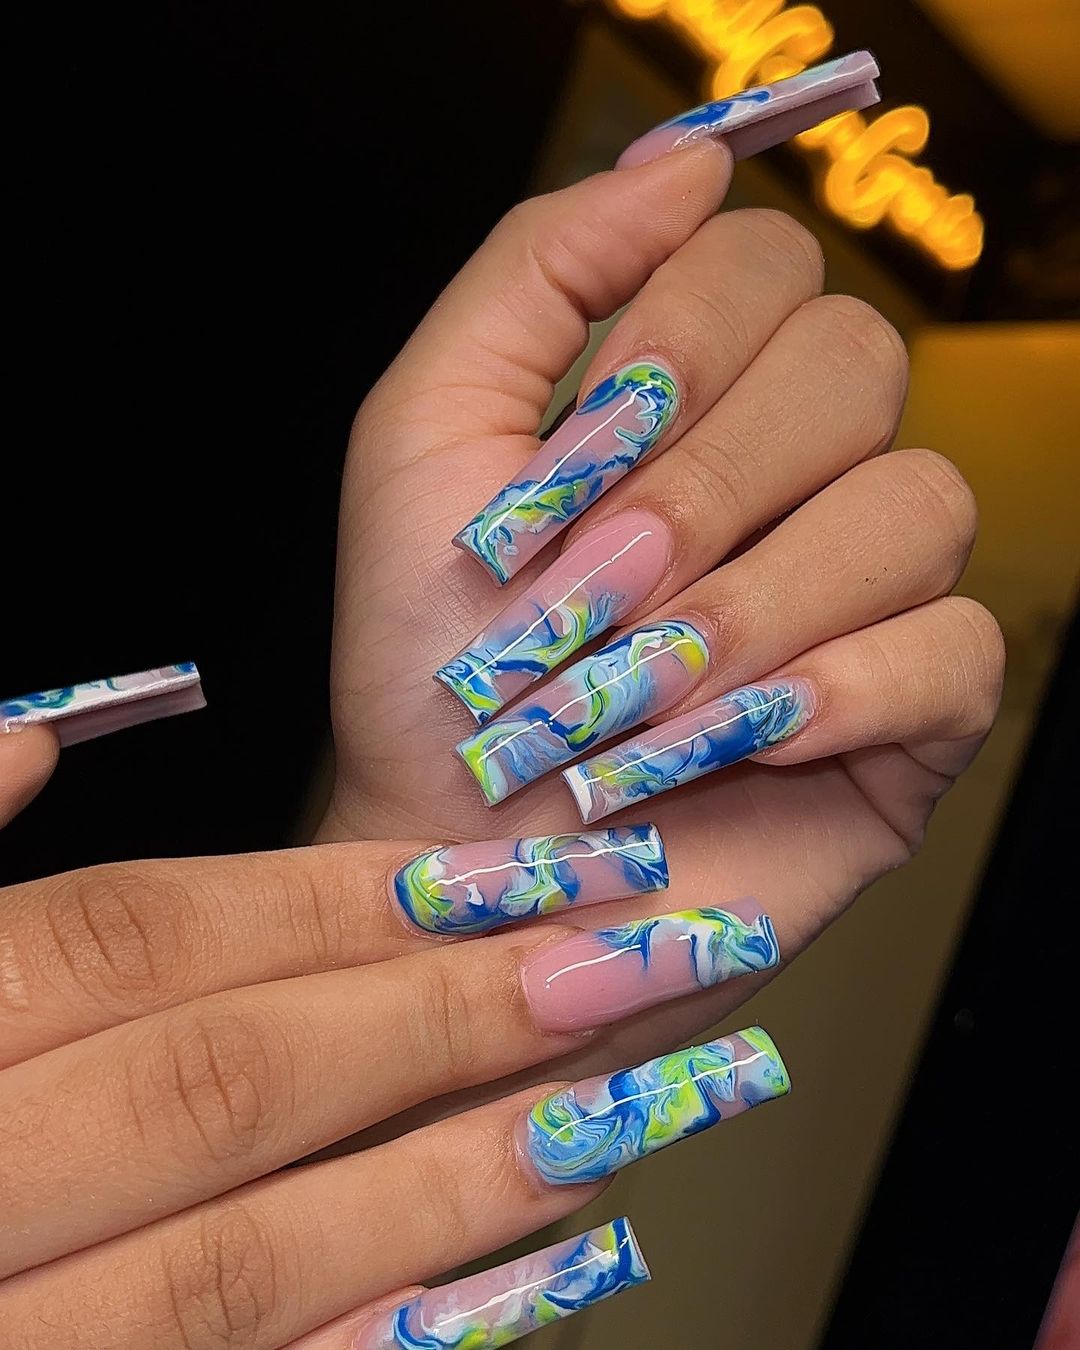
Marbleized Magic
Here we have a design that’s as fluid as the ocean and as colorful as a summer festival. The marbled effect in blue, green, and yellow hues, sealed with a shiny coat, creates an impression of movement and depth.
Consumables:
-
- Base color: Essie ‘Ballet Slippers’
- Marbling colors: A selection of neon acrylic paints
- Top coat: Sally Hansen Insta-Dri Anti-Chip Top Coat
- My tip: Swirl the colors on a palette before applying to achieve the perfect marbled blend.
To achieve this mesmerizing effect, start with a nude base. Drop your marbling colors onto the nail and use a fine brush to swirl the colors together. Work quickly before the paint dries, then apply a top coat for a glossy finish.
Delicate Dusty Rose with Golden Flecks
A serene yet sophisticated design, this manicure balances the softness of dusty rose with the opulence of gold flecks. Perfect for those summer evenings where elegance is key, this nail idea adds a touch of classy without saying a word.
Consumables:
-
- Base color: ‘OPI Stop it I’m Blushing!’
- Gold leaf: Thin sheets for nail art
- Top coat: Seche Vite Dry Fast Top Coat
- My tip: Apply gold leaf with tweezers for precision placement, and always seal with a top coat.
For DIY application, start with a smooth base coat, layer on your rose polish, and then strategically place the gold leaf where desired. Finish with a protective top coat for a simple, unique, and refined look.
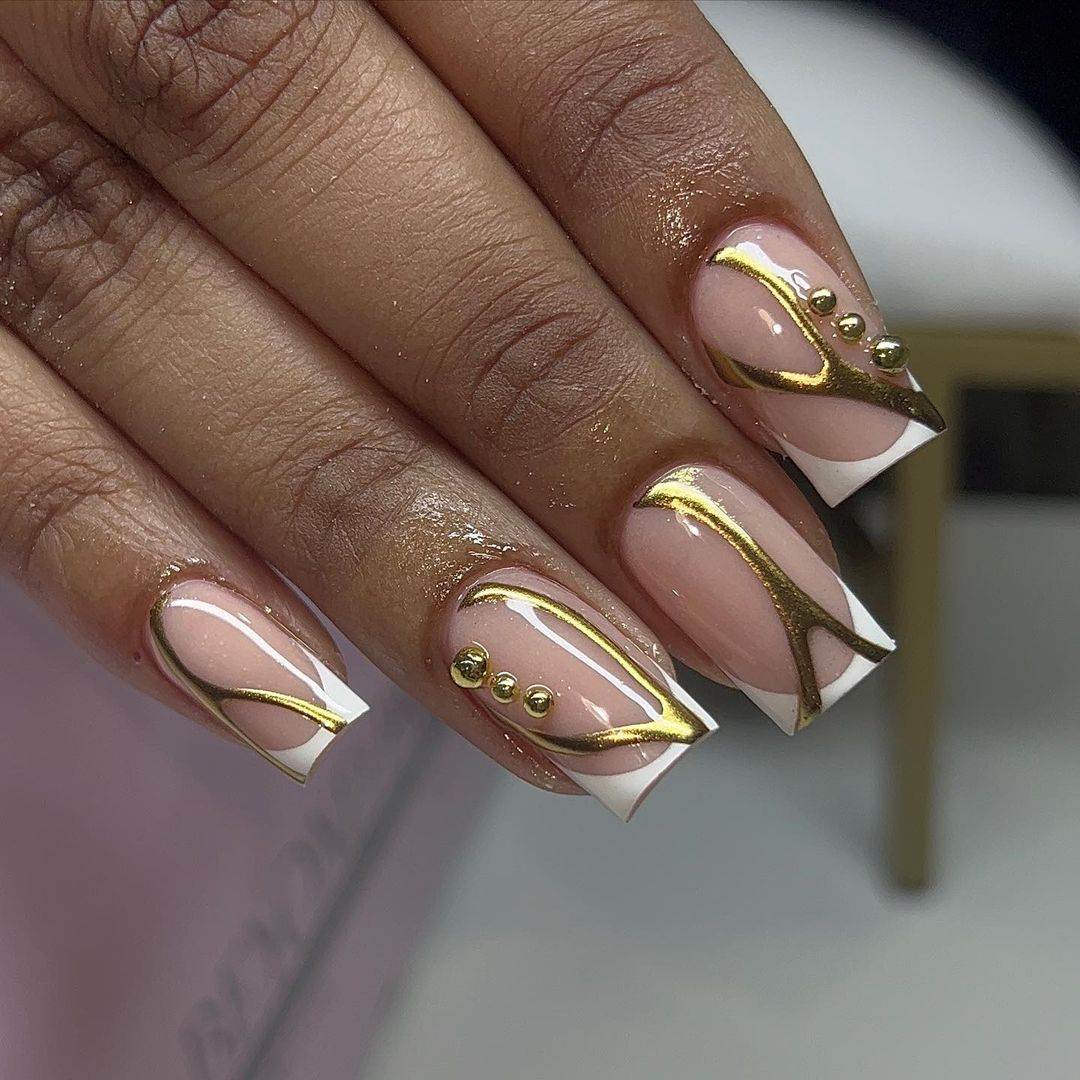
Abstract French with a Metallic Twist
Reinventing the French manicure, this design pairs the traditional with a modern twist. The golden lines curve and dip, creating an abstract pattern that’s both unique and colorful. It’s a perfect blend of creativity and tradition for the summer season.
Consumables:
-
- Base color: OPI ‘Pale to the Chief’
- Gold paint: Nail art metallic polish
- Top coat: Essie Gel Setter Top Coat
- My tip: Use striping tape for sharp metallic lines, and a dotting tool for the gold balls.
To achieve this nail design at home, paint your nails with the base color, then use the tape to guide your metallic strokes. Add the gold balls as accents and seal the design with a gel-like top coat for extra shine and longevity.
Aquatic Elegance
Embracing the coolness of the ocean, this look combines the clarity of seafoam with the sparkle of crystal water droplets. It’s multi-colored and bright, perfect for those who love to make a splash with their style during summertime.

Consumables:
-
- Base colors: A mix of ‘Essie Mint Candy Apple’ and ‘Bikini So Teeny’
- Crystal embellishments: Swarovski crystals in various sizes
- Top coat: INM Out the Door Top Coat
- My tip: For a watery effect, blend the base colors with a sponge before applying crystals while the polish is still tacky.
Craft this aquatic fantasy by applying a soft gradient of blue and green on your nails. While the polish is still tacky, gently place the crystals to mimic water droplets. Seal your design with a fast-drying top coat to keep every element in place.
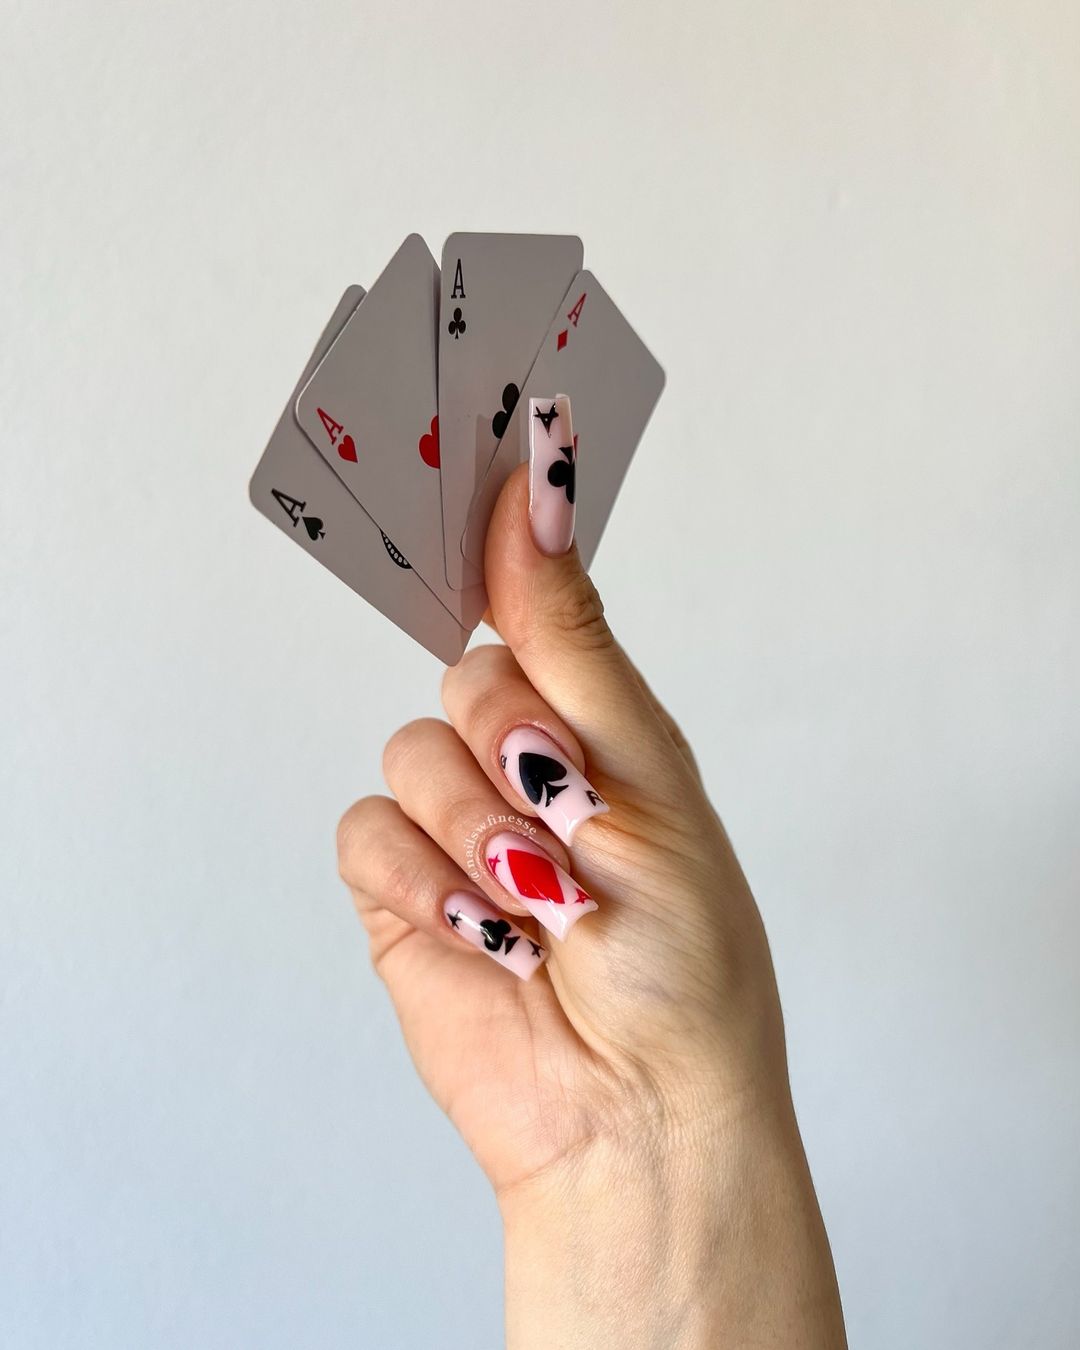
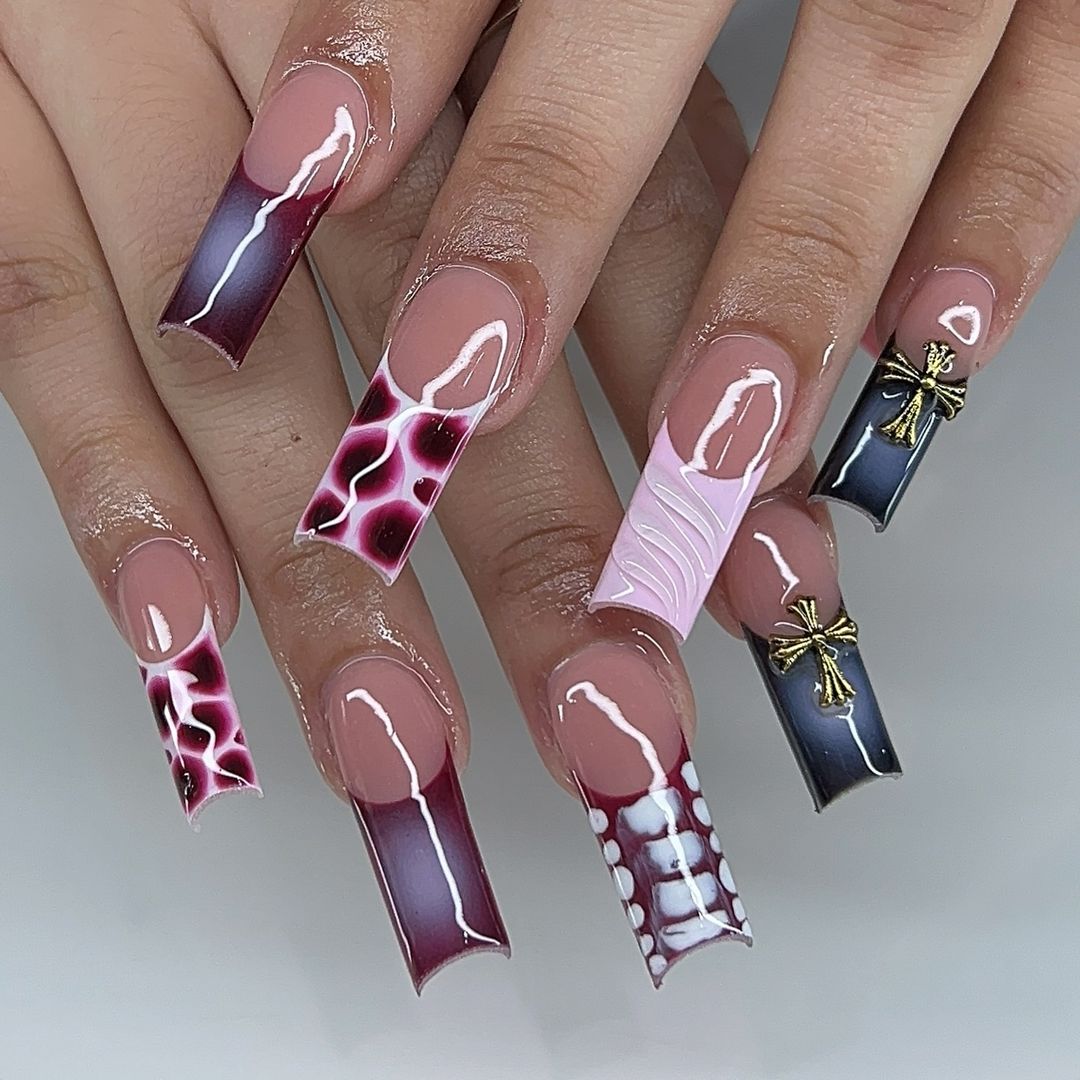
Playful Card-Inspired Tips
Get ready to deal a hand of style with these playful, card-inspired nail tips. They’re not just unique; they’re a conversation starter. Perfect for game night or just adding a bit of fun to your daily ensemble.
Consumables:
-
- Base color: Essie ‘Blanc’
- Card symbols: Hand-painted with black and red acrylic paint
- Top coat: Sally Hansen Insta-Dri Anti-Chip
- My tip: Use a very fine brush for the intricate details and work with a steady hand.
Create this look by applying a white base coat and painting the card symbols with precision. Finish with a clear top coat for a glossy, lasting finish.
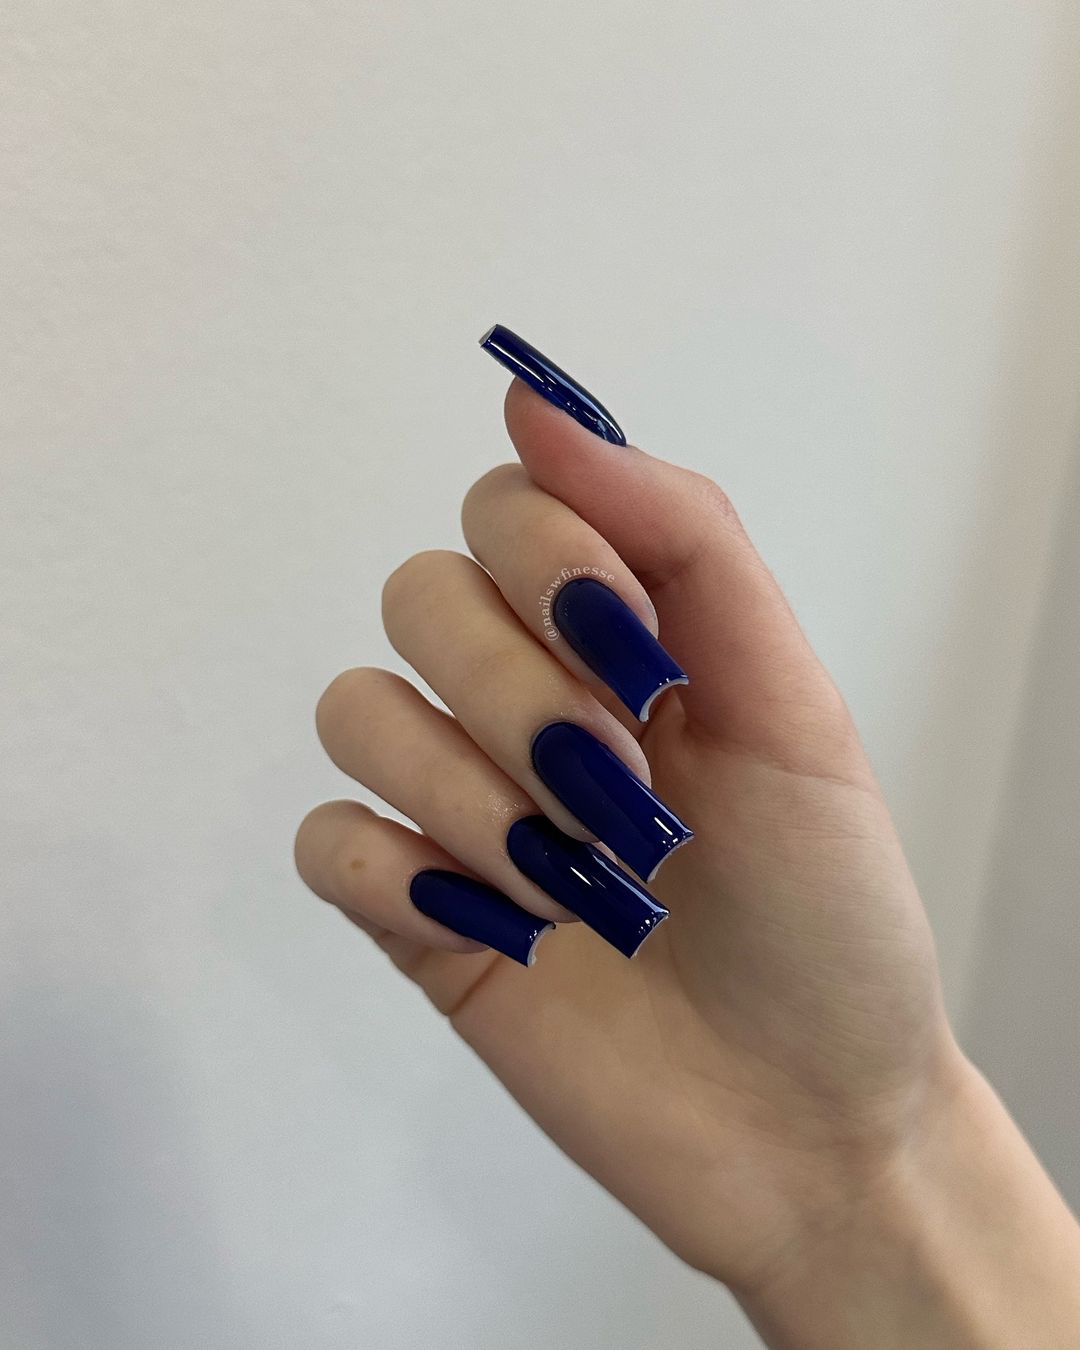
Deep Blue Shine
This nail design takes the bright blue of the ocean depths and brings it to your fingertips. It’s bold, it’s beautiful, and it’s bright. It’s perfect for both a day by the water and an evening at a chic restaurant.
Consumables:
-
- Blue polish: OPI ‘Russian Navy’
- Top coat: OPI Top Coat for a flawless finish
- My tip: Apply the color in thin layers to build up a rich, even tone.
Apply your base coat, then two coats of the blue polish. Allow each coat to dry thoroughly before applying the next, and finish with a top coat for an enviable shine.
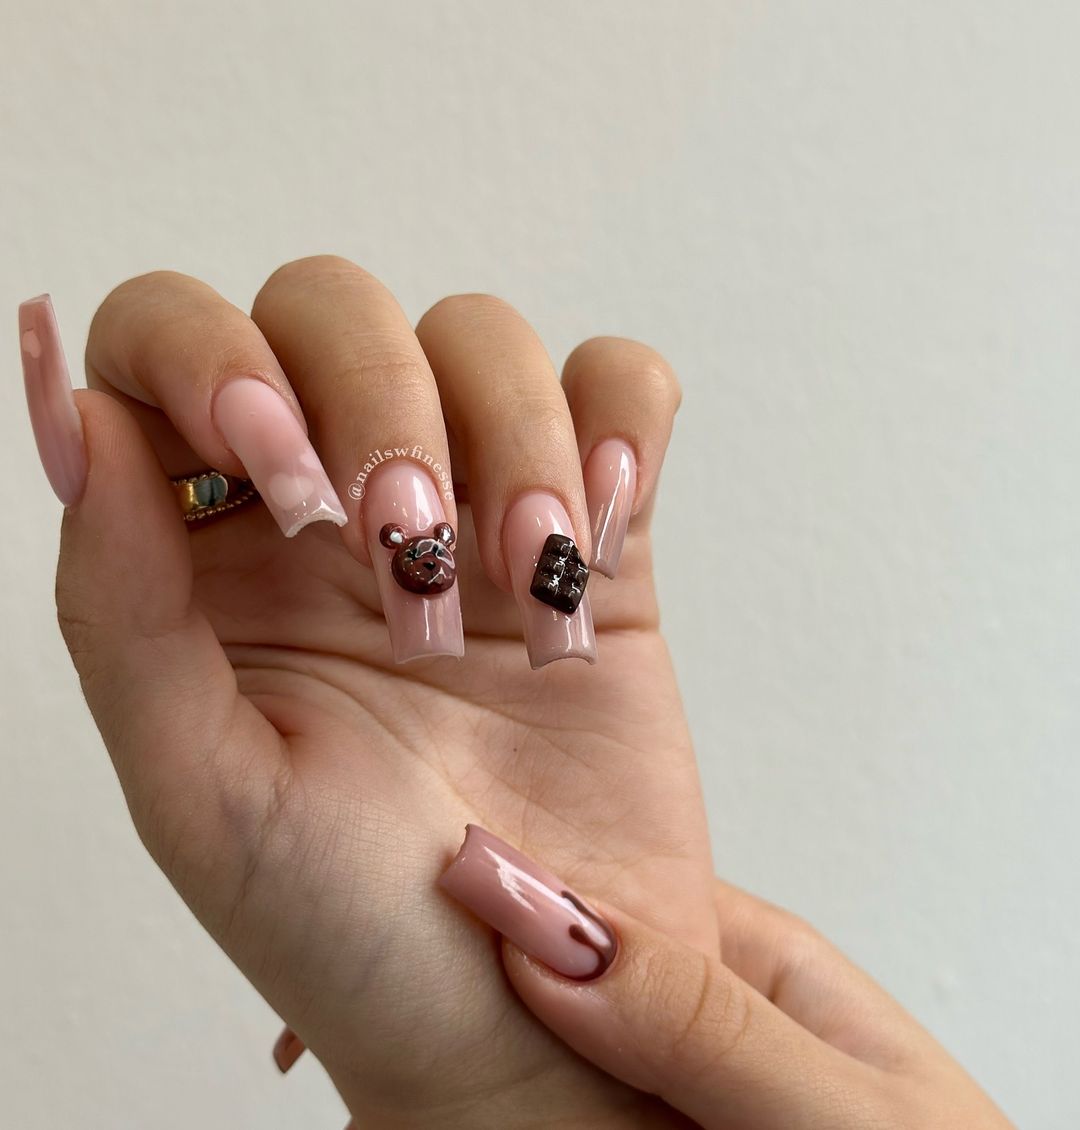
Sweet Teddy Accents
This nail art is as sweet as it is stylish, with light pink tones and adorable teddy bear accents. It’s simple, unique, and perfect for adding a playful yet classy touch to your summer look.
Consumables:
-
- Base color: ‘Essie Bubble Bath’
- Teddy bear decals: Pre-made nail art stickers
- Top coat: INM Out the Door Top Coat
- My tip: Apply the stickers while the base coat is tacky to help them adhere better.
Paint on your base color, then carefully place the teddy bear stickers on the nail. Finish with a clear top coat to seal in the design and add a glossy sheen.
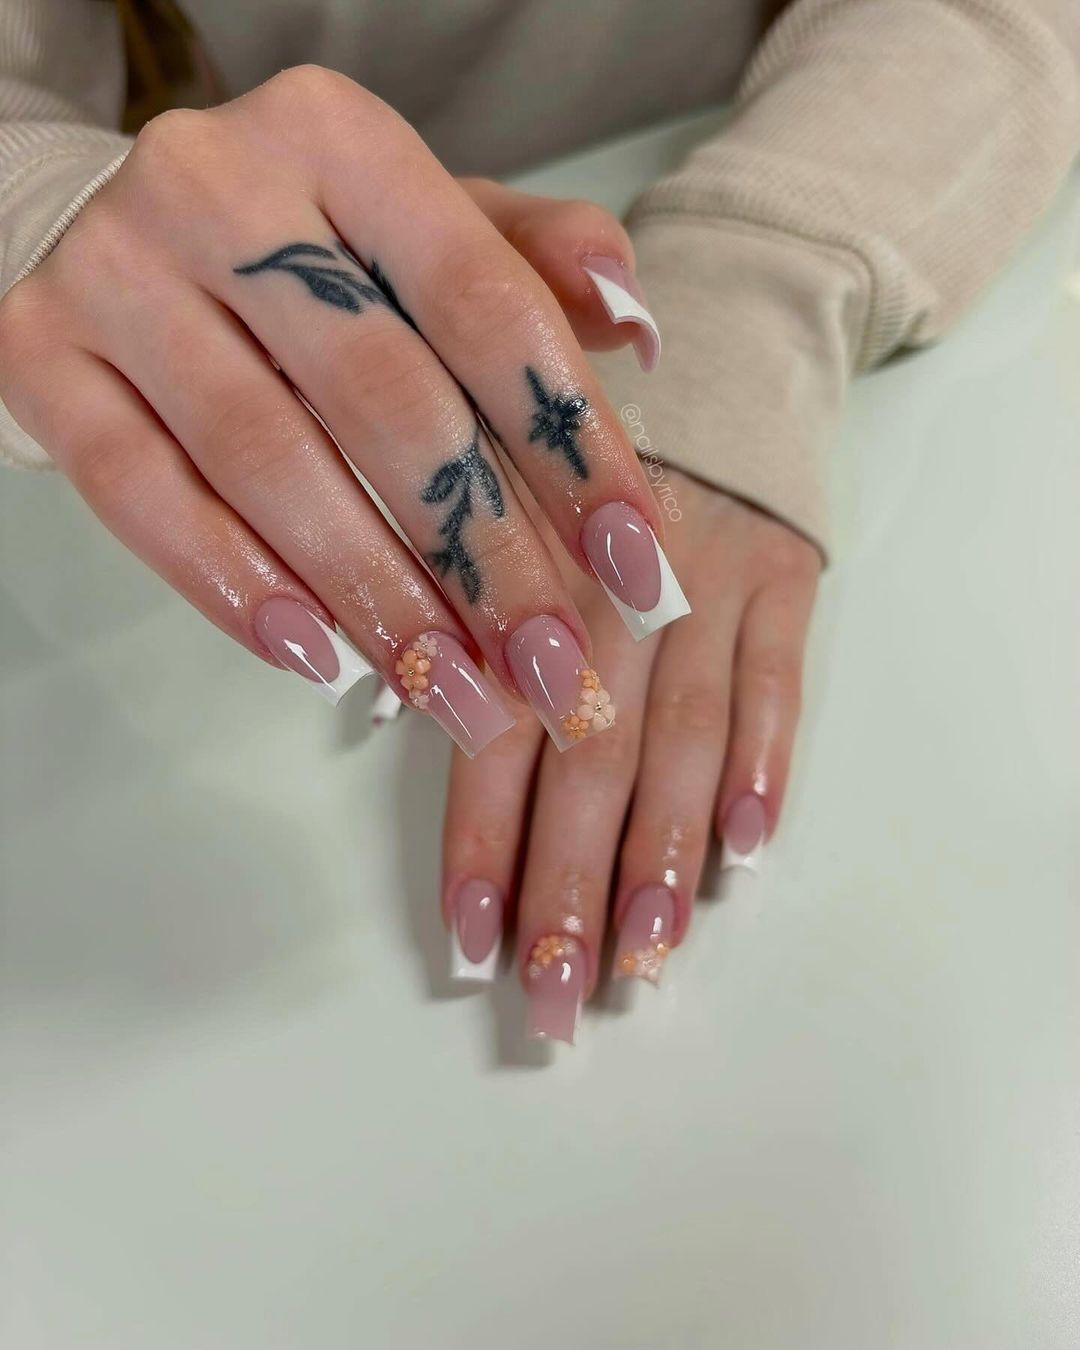
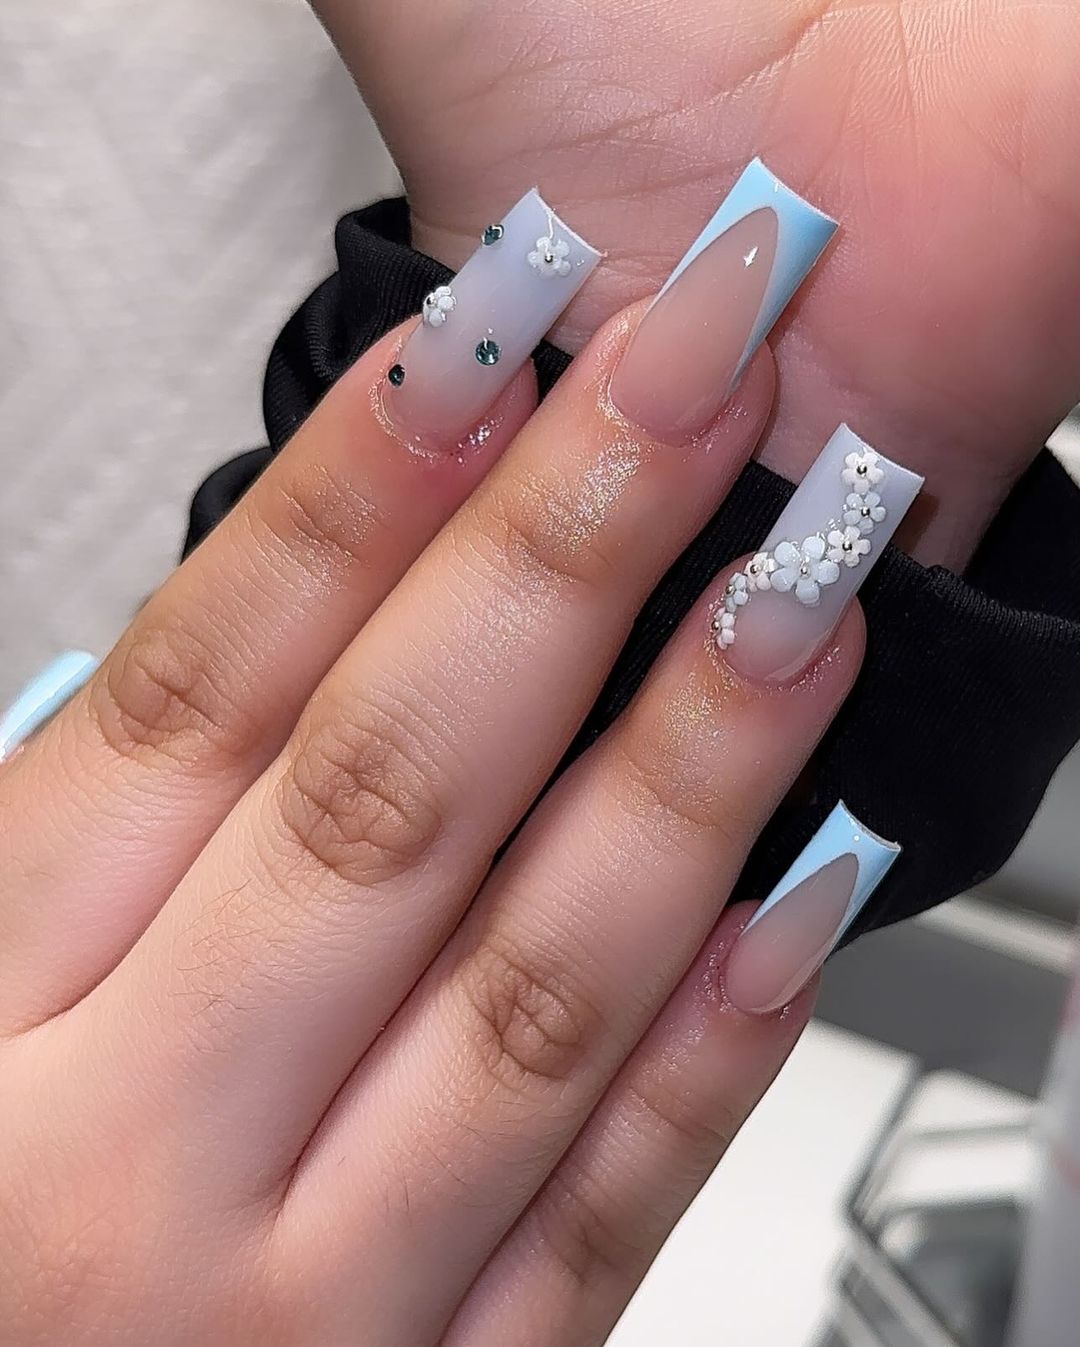
Ethereal White and Emerald Florals
This nail design is like a breath of fresh air with its pure white backdrop and delicate floral details. A touch of emerald brings a pop of summer’s natural vibrancy, while the floral arrangement adds a timeless elegance.
Consumables:
-
- Base color: OPI Alpine Snow
- Emerald accents: Green nail jewels or studs
- Top coat: INM Out the Door Top Coat
- My tip: Place the jewels while the second coat of white is still tacky for extra hold.
Start with a clean, white base, adding a second coat to create a flawless canvas. Before it dries, carefully place your emerald accents and add the top coat for a lasting finish.
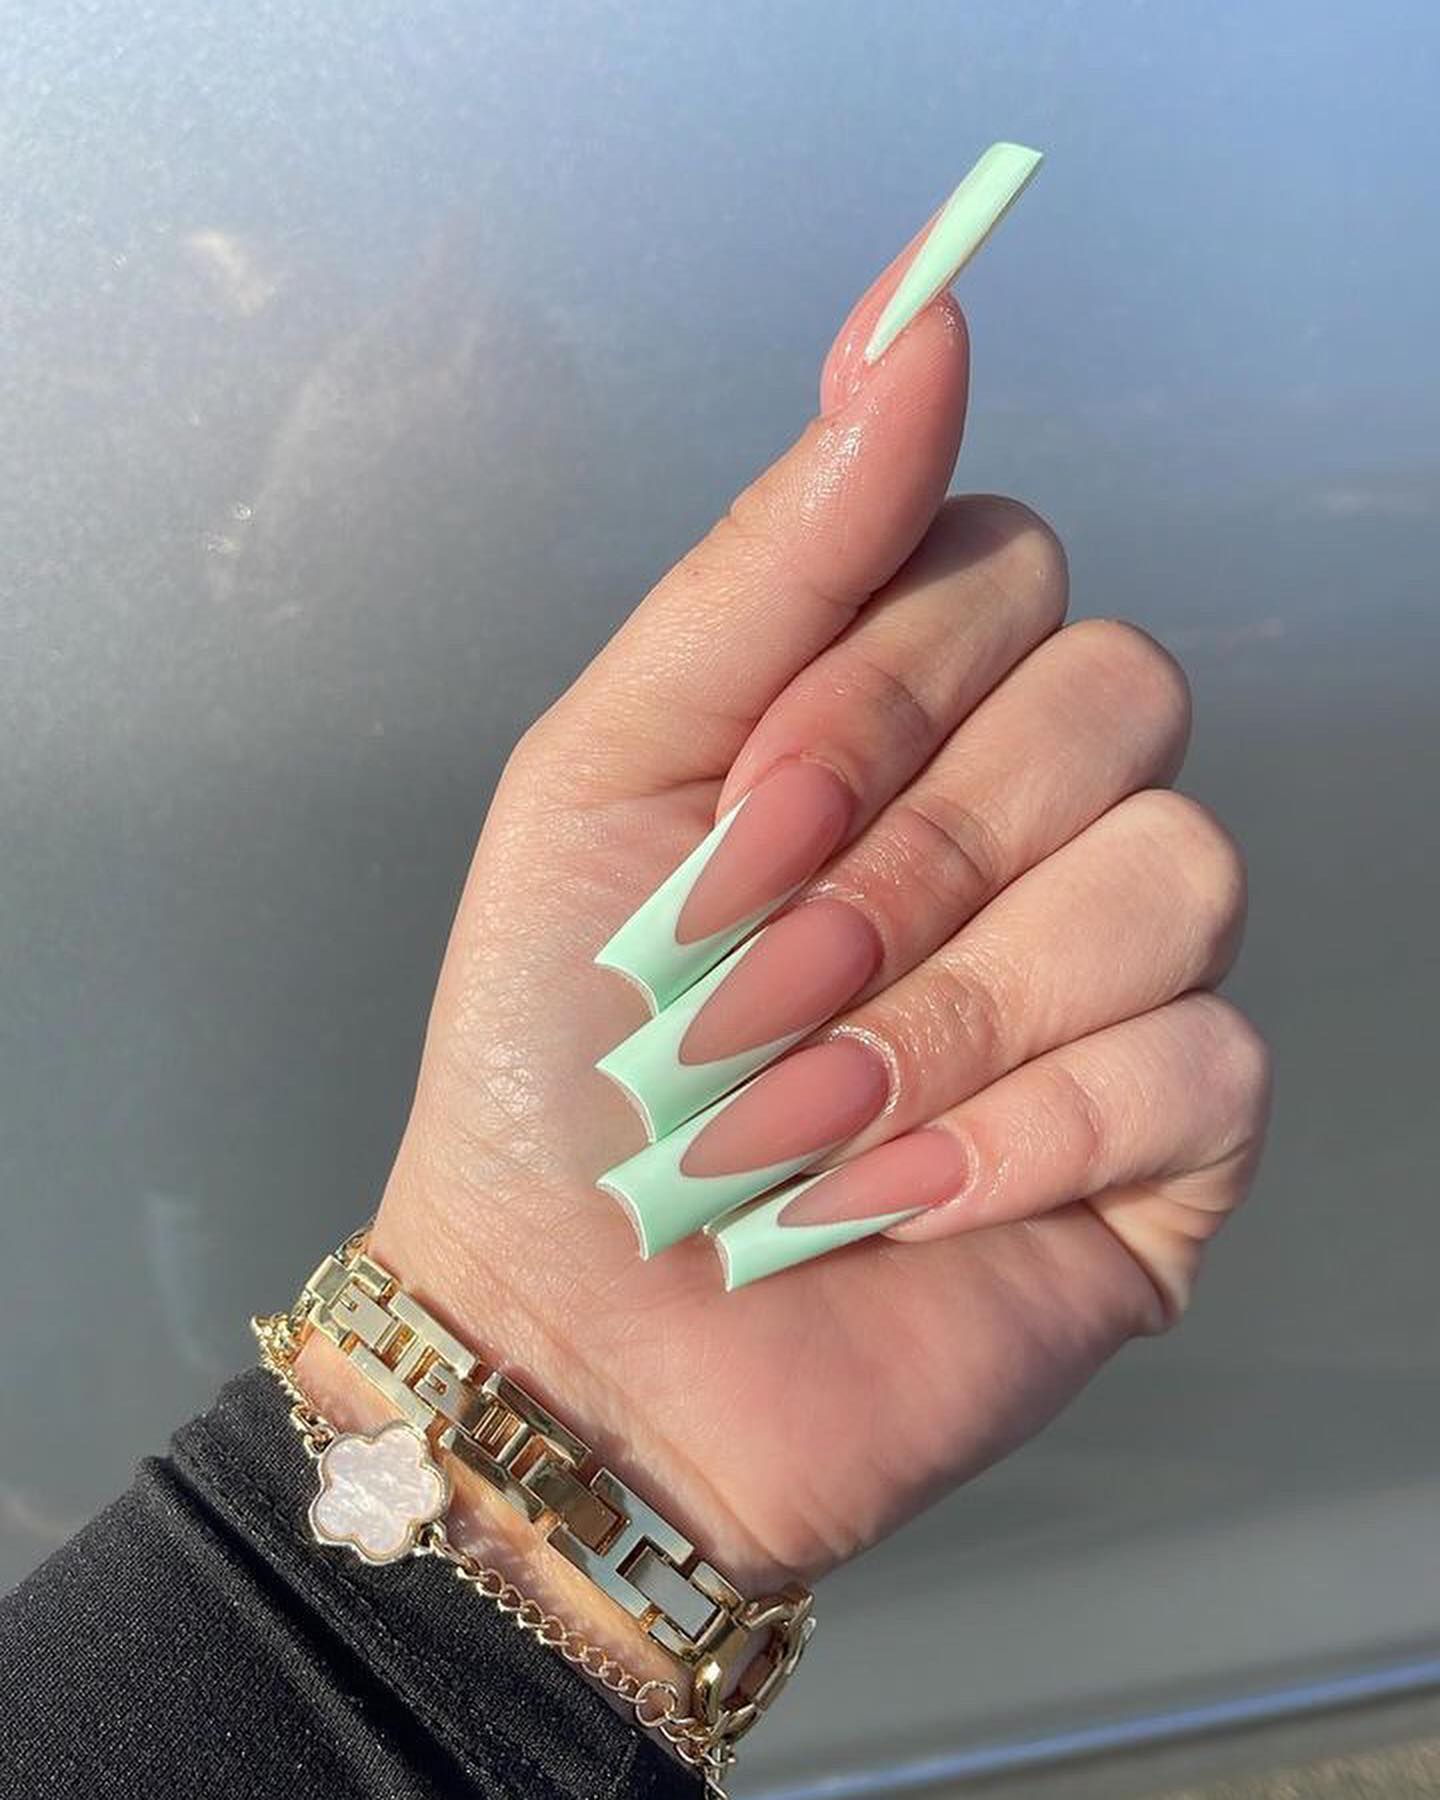
Minty Fresh Cut-Outs
This design exudes coolness with a minty hue, perfectly cut out to create a unique and modern twist on the traditional manicure. It’s ideal for a summer day out or an evening cocktail party by the pool.
Consumables:
-
- Mint polish: Essie Mint Candy Apple
- Top coat: Seche Vite Dry Fast Top Coat
- My tip: Use nail vinyls or stickers to achieve the perfect cut-out shape.
Apply a base coat and let it dry. Position your nail vinyl or sticker and apply the mint polish, then remove the vinyl while the polish is still wet. Seal with a top coat for a smooth, crisp edge.
Modern Art on Tips
Inspired by the fluidity and vibrancy of modern art, these nails showcase a blend of colors and textures that make each nail a standalone piece of art. It’s an embodiment of bright, mixed, neon fun for the bold at heart.
Consumables:
-
- Base color: A mix of pastel gel polishes
- Art accents: Black and white acrylic paint
- Top coat: Gelish Top It Off Gel Top Coat
- My tip: Work with gel polish for a long-lasting art piece on each nail.
Paint a light pastel base and cure under a UV lamp. Use acrylic paints to create your modern art designs. Cure again, then seal with a gel top coat for an eye-catching and durable finish.
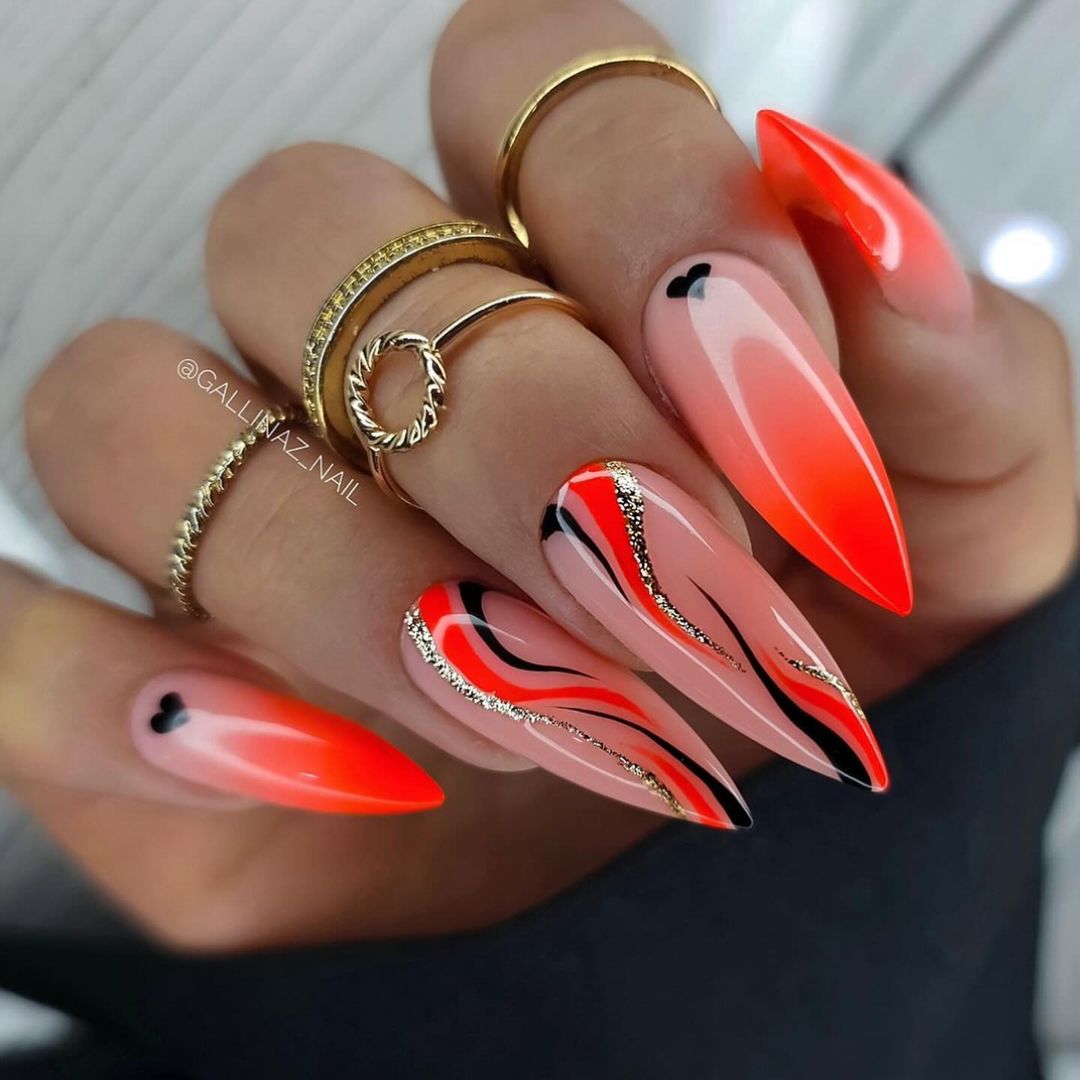
Sizzling Neon Flame Tips
Turn up the heat with these fiery neon flame tips, an absolute summer stunner. The interplay of black, white, and neon orange mimics the mesmerizing dance of flames, making each nail a dynamic work of art.
Consumables:
-
- Neon orange polish: Orly ‘Melt Your Popsicle’
- Black accent polish: China Glaze ‘Liquid Leather’
- White polish: OPI ‘Alpine Snow’
- Top coat: Glisten & Glow Top Coat
- My tip: For the flames, sketch out the design with a thin brush before filling in the color.
Start with a neon orange base and let it dry. Use a fine brush to paint the flame outlines with black, then fill in the details and add white accents. Finish with a glossy top coat to make the design pop.
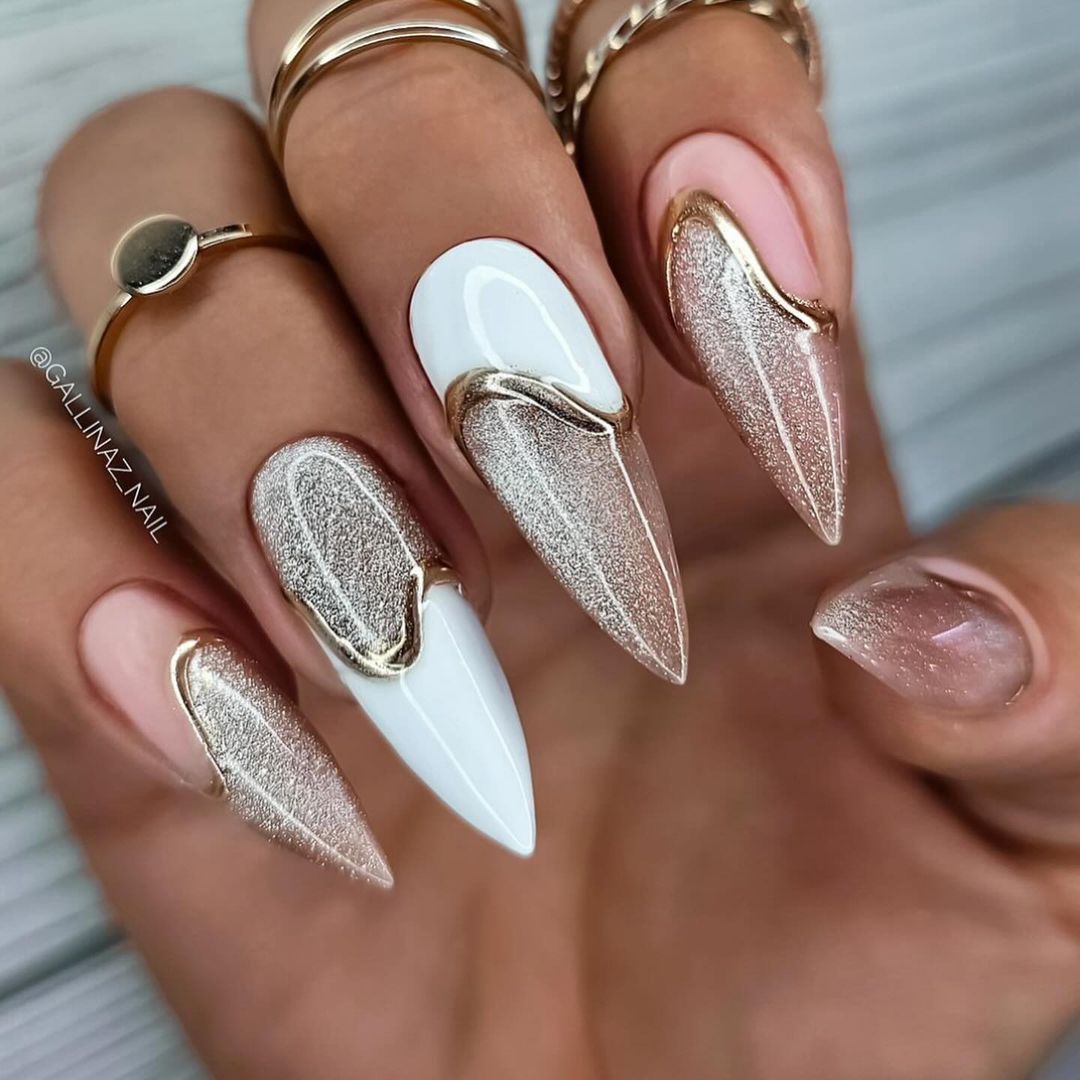
Golden Glitz and Glamour
These nails are pure luxury, featuring a bold golden sheen that transitions into a pristine white. Perfect for those summer nights when you want to add a touch of glamour to your look.
Consumables:
-
- White polish: Essie ‘Blanc’
- Gold chrome powder: High-quality nail chrome powder
- Top coat: Essie Gel Setter Top Coat
- My tip: Apply the chrome powder with a sponge applicator for even coverage.
Apply your white base coat, then dab on the chrome powder at the tips, blending slightly into the white. Seal it with a top coat for a stunning mirrored finish.
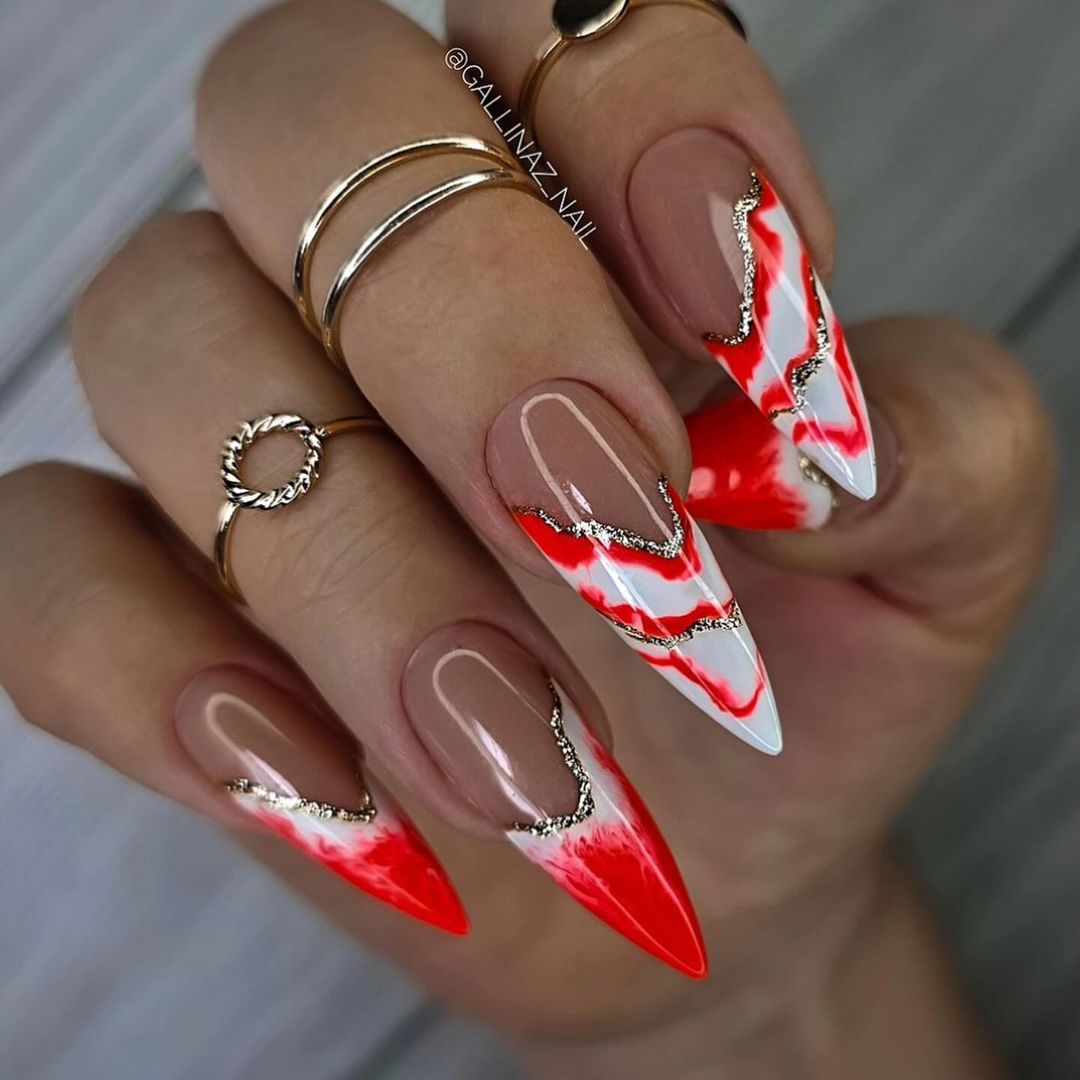
Abstract Red Swirls with Glitter
A bold and artistic choice, these nails combine the passion of red with the sparkle of glitter, creating an abstract design that’s as unpredictable as it is beautiful.
Consumables:
-
- Red polish: Essie ‘Really Red’
- White polish: OPI ‘Alpine Snow’
- Glitter liner: Silver glitter nail striper
- Top coat: Seche Vite Dry Fast Top Coat
- My tip: Use a thin nail art brush to create fluid swirls.
Paint a nude base, then add swirls of red and white polish. While the paint is wet, trace the swirls with a glitter liner for a touch of sparkle. Finish with a top coat to protect your artwork.
FAQ
Q: Can these designs be done on natural nails, or do I need acrylics?
A: Absolutely, these designs can dazzle on natural nails, though acrylics offer a more durable canvas for the art.
Q: How long should I wait for each coat to dry?
A: Give each coat at least five minutes to set before proceeding to the next step. It’s tempting to rush, but patience pays off with a smudge-free finish.
Q: Are these designs poolside-proof?
A: Yes, but always apply a high-quality top coat to protect your artwork from the summer elements.
With these guidelines, we’re not just ready for the summer; we’re setting the trend. Keep your nails flashy, fun, and fabulous, and remember: the only thing brighter than the sun should be your nails!
Save Pin