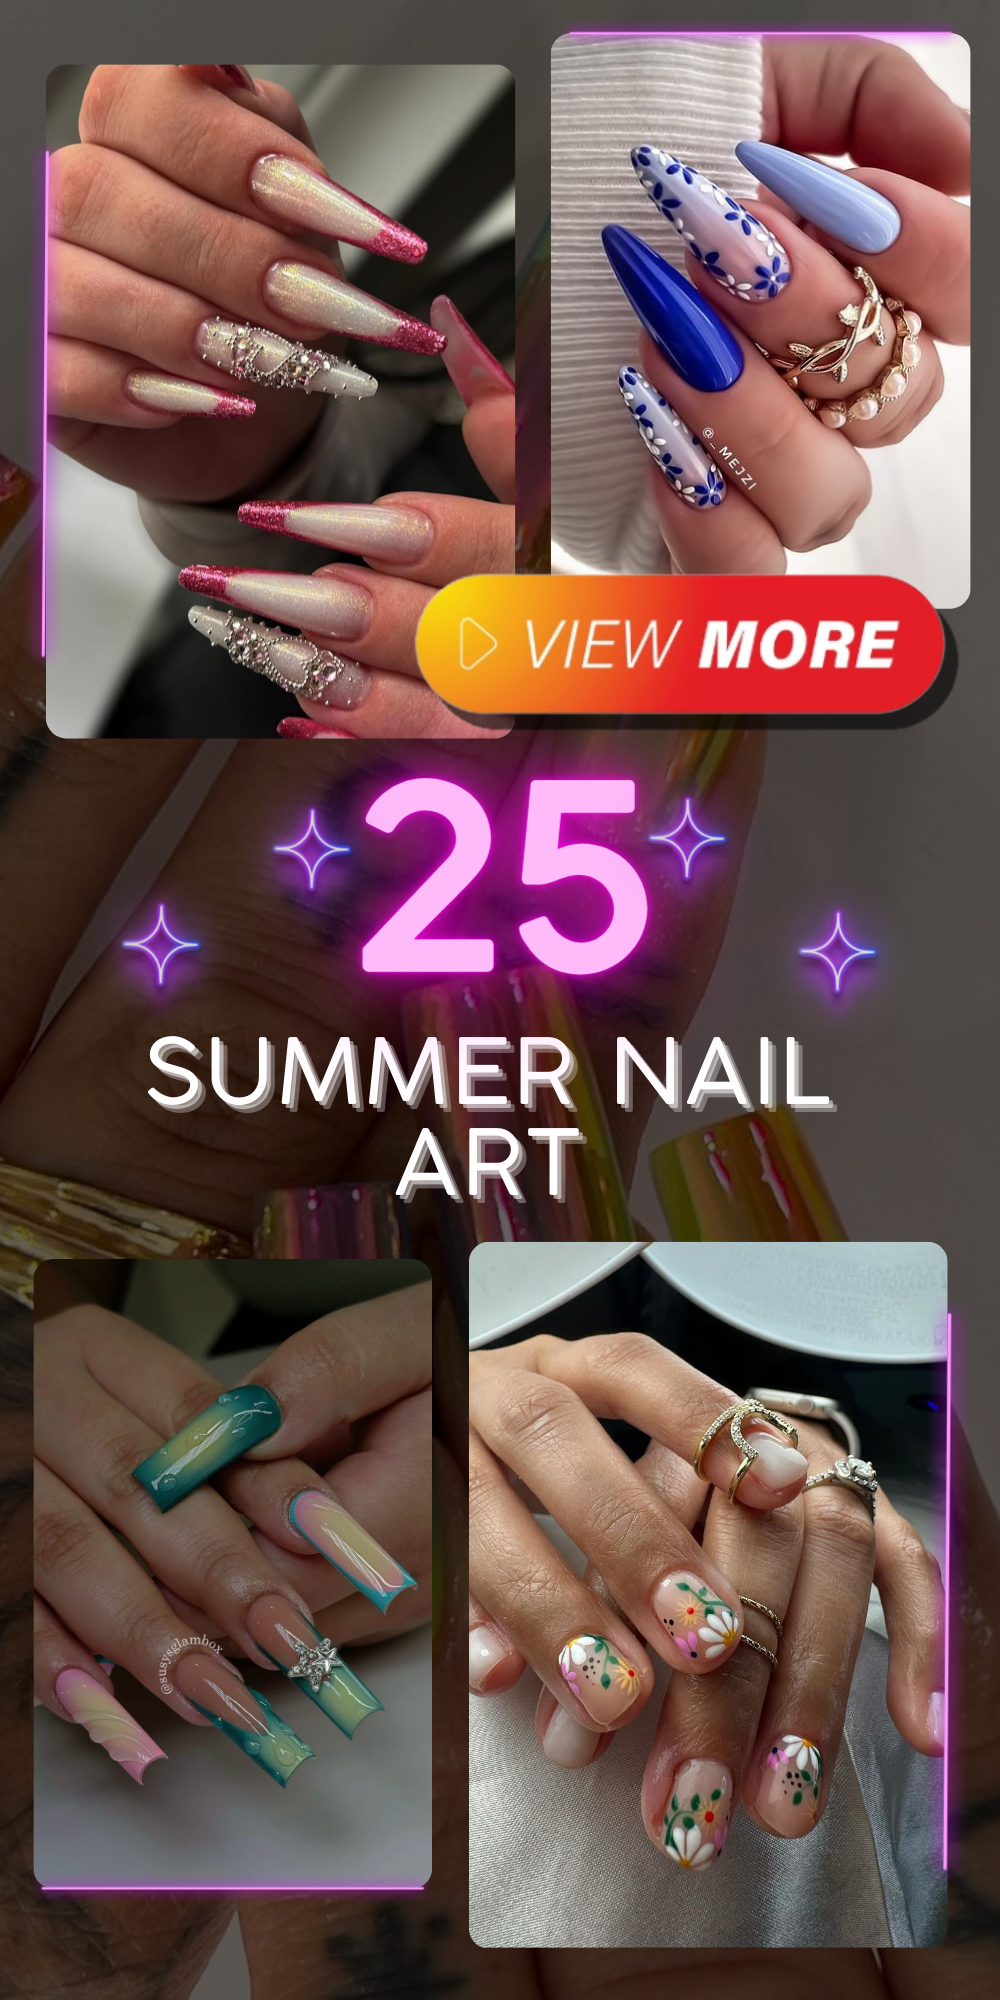
When the sun is shining and days grow longer, our souls crave for some burst of colors in the end. Have you ever thought about how summer nail art can match your fashion style as well as boost your mood? This summer, let us plunge into the world of colors, shapes and designs that speak of joy, style and excitement. From neon tones to simplicity, there are plenty of nail art ideas that will blow off one’s mind. Are you set to ride on this season’s most enticing wave?
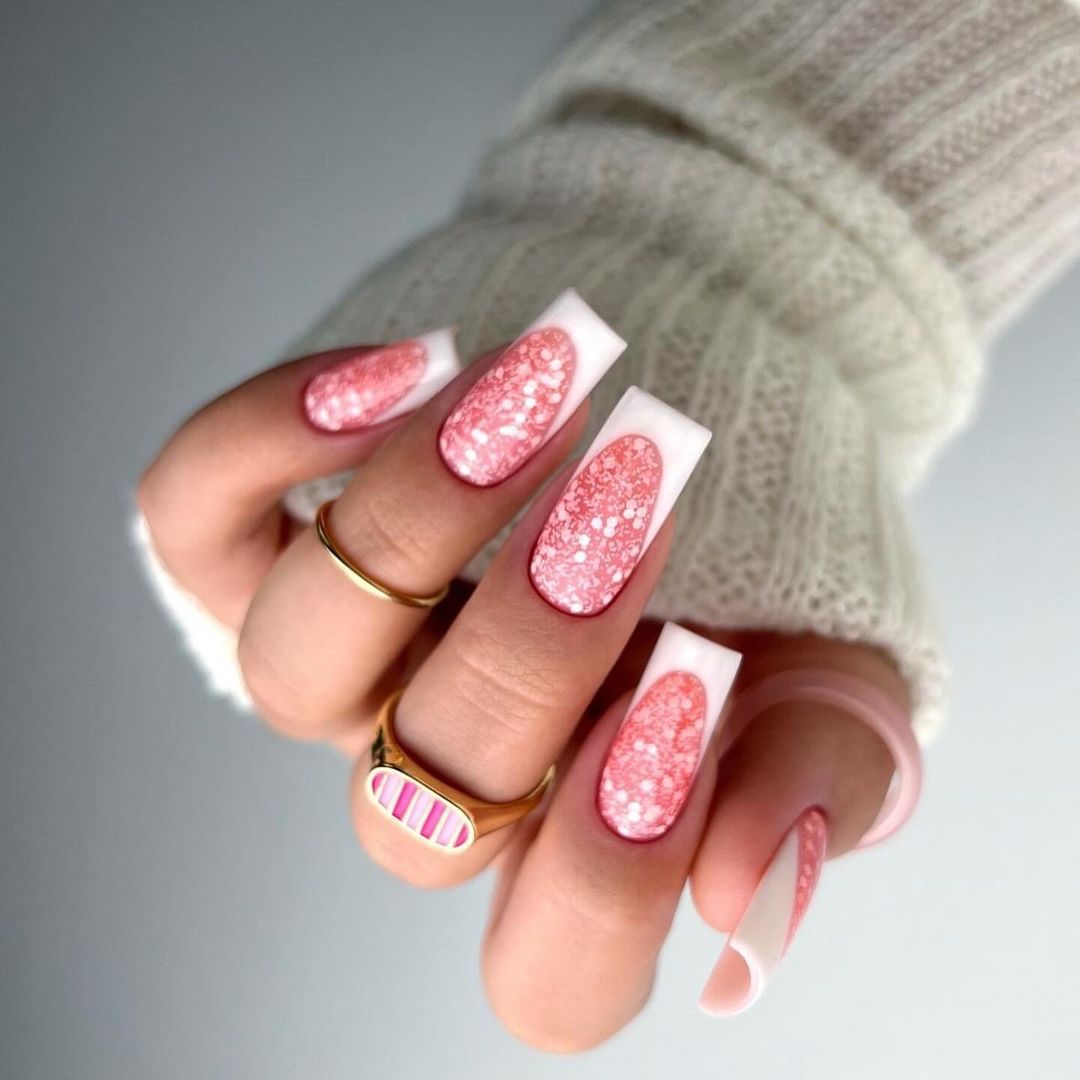
The Essence of Summer Pink
Using a lively pink gradient that merges into a deep fuchsia, these nails evoke the spirit of summer and take me back to lazy strolls through gardens in full bloom. This design completes its frivolous side with sparkly rhinestones, making it enjoyable and chic.
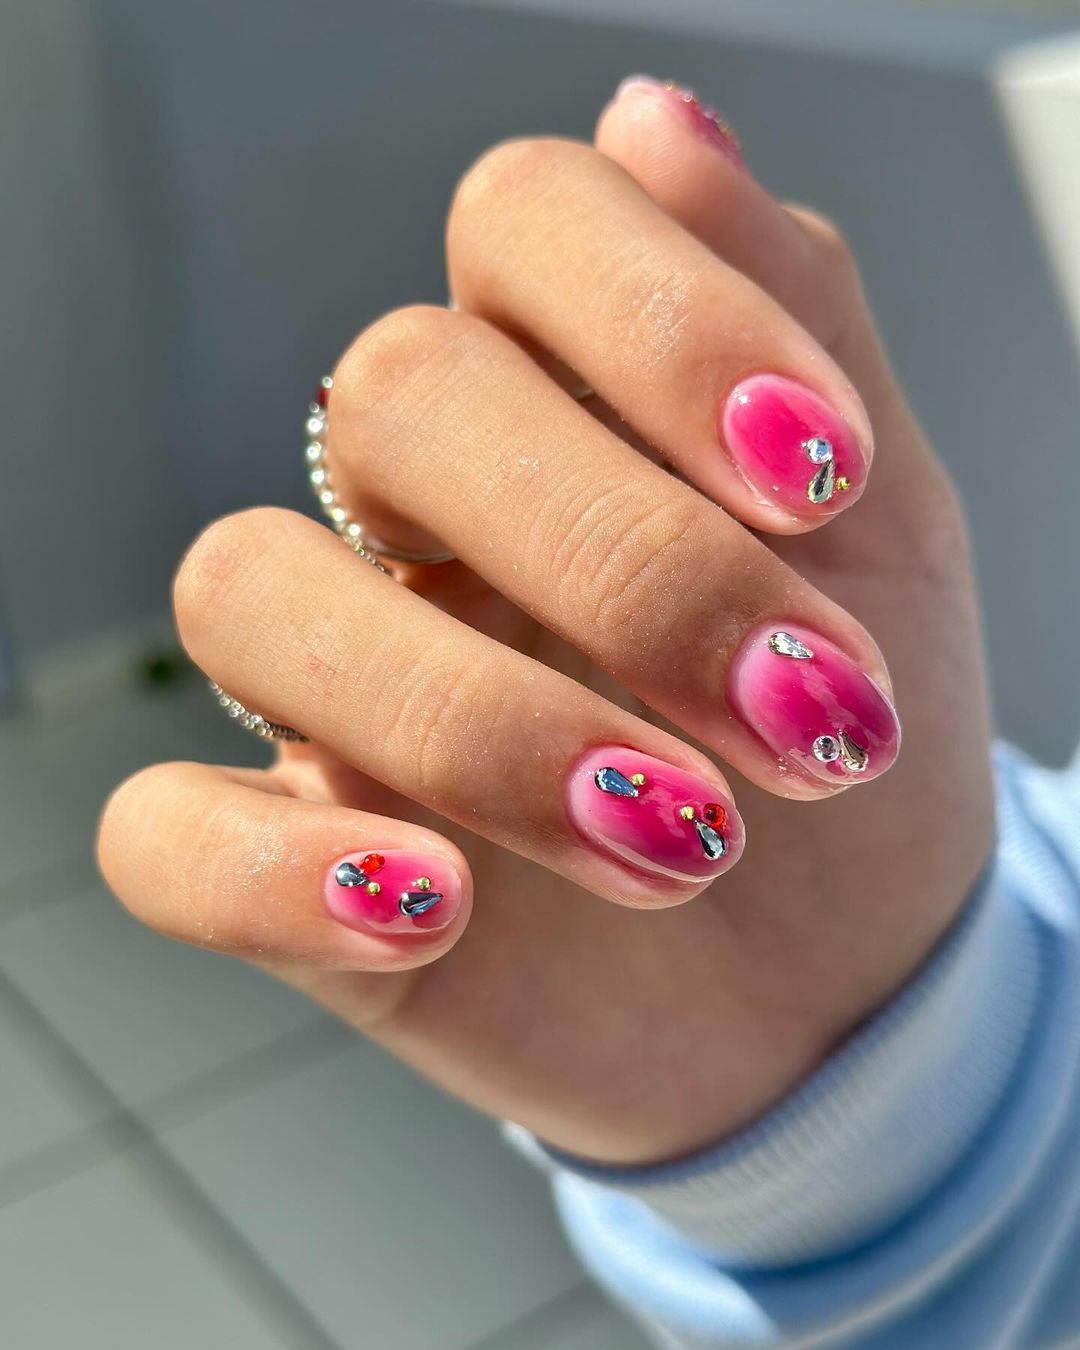
- Base Coat: Long-lasting Strengthening
- Pink Polish: High Pigment Pastel Pink
- Fuchsia Polish: Deep Berry Pink
- Top Coat: High Glossy Finish
- Embellishments: Petite Rhinestone Accents
Square or oval nails look more recent, start there. Apply the base coat first then when it dries apply pastel pink polish. The tips should then be sponged with deep berry pink while still wet; softly blending into the lighter shade. One drop of top coat dry will adhere the rhinestones to your nail; wait for it to dry before continuing to paint on another layer of top coat ensuring they are well fixed.
Whimsical Waves
This design is a little bit of sky blue and deep sea navy, swirling in harmony with the summer’s playful caress and ocean’s serene dance. A new wavey pattern that nicely blends stylish innovation into a calming but exciting sense of movement.
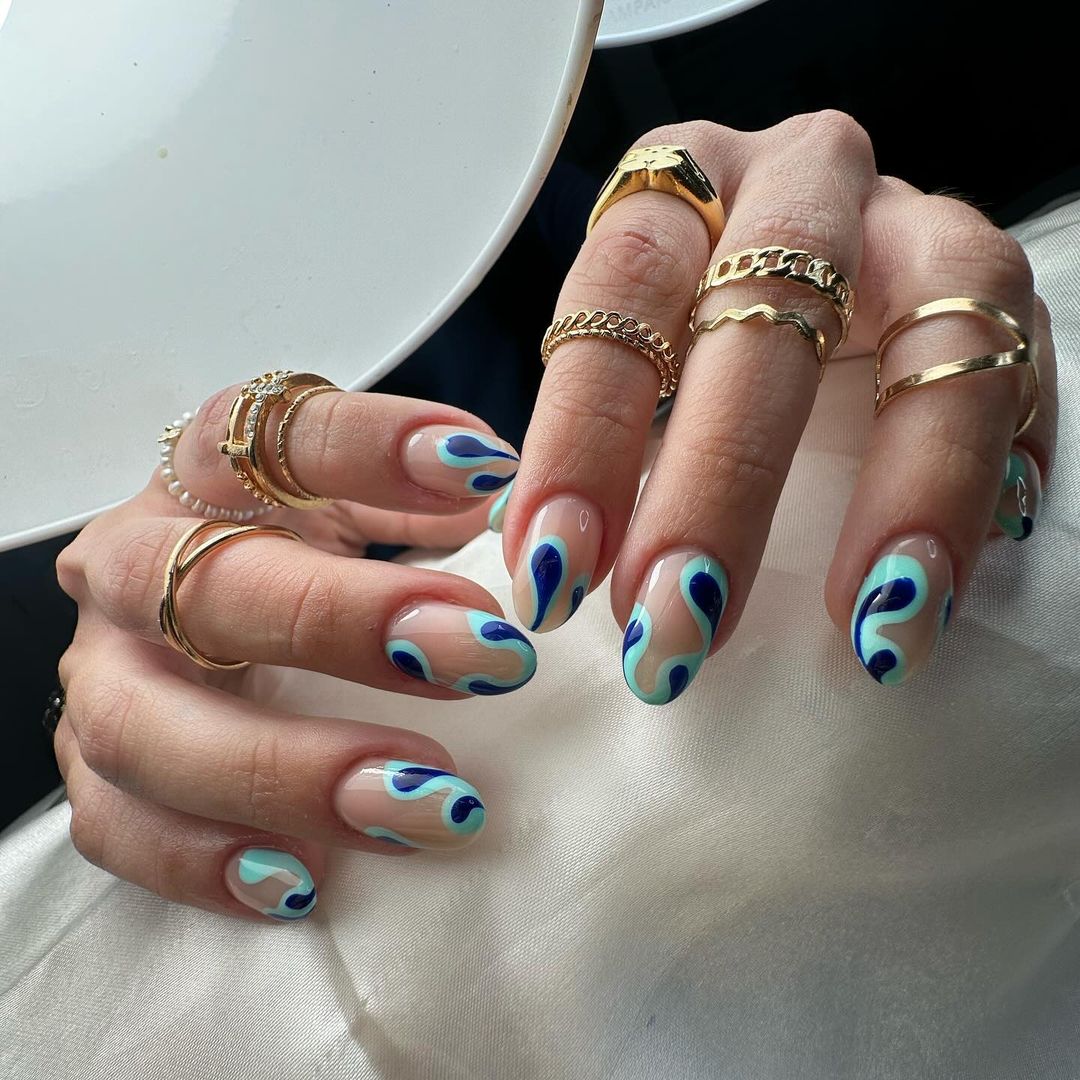
- Base coat: Clear Armor Strengthening Formula
- Sky Blue Polish: Azure serenity
- Navy Blue Polish: Midnight Tide
- White polish: Snowcap Purity
- Detailing tool – Precision Art brush
- Top coat – Diamond Shine Protectant
Ensure you paint a sheer layer of sky-blue after your base coat sets. Draw the whimsical navy lines using precision brush then add white to accentuate the waves with it. This work should be done very quickly in order to allow for blending. Use gel top coat to seal off a durable and vibrant summer statement.
Playful Pelicans
These nails capture the whimsical feel of summer, and have cute pelican drawings on a white milky surface that bring together aesthetic fun and minimal elegance. It’s a cute allusion to the beach and an on-trend option for ladies who prefer storytelling in their nail art.
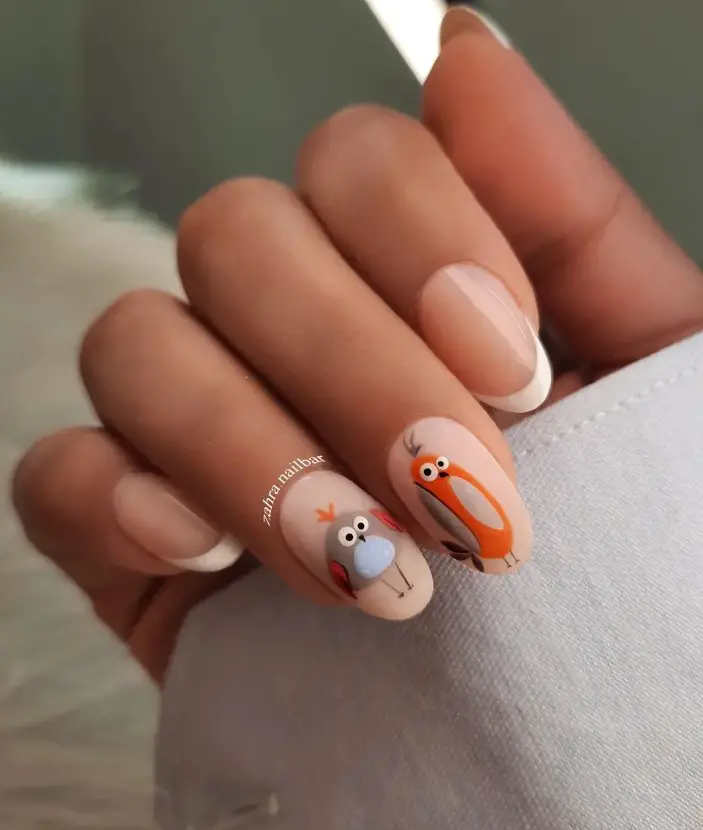
- Ground Coat: Superbond Extra Strength
- Milky White Nail Polish: Mountain Fog
- Orange Nail Polish: Tangerine Dreams
- Gray Nail Polish: Slate Whisper
- Detailing Brushes: Fine-tip Artists’ Set
- Overcoat: Fast Glass Finish
Start with an immaculate white opaque canvas. Using grey paint for the body and bright orange for the beak, you can draw your pelican friends with a fine brush. Let each color dry before applying another one so as not to smudge it. Finally apply top coat to give it a smooth finish which will last throughout summer.
Sunset Chic
This appearance is a daring statement about summer’s fiery sunsets, which merge together red, pink and gold in amazing ombre effect finalized by luxurious golden foil accents. It’s a grown-up but playful approach to summer nails that are perfect for those sultry evenings.
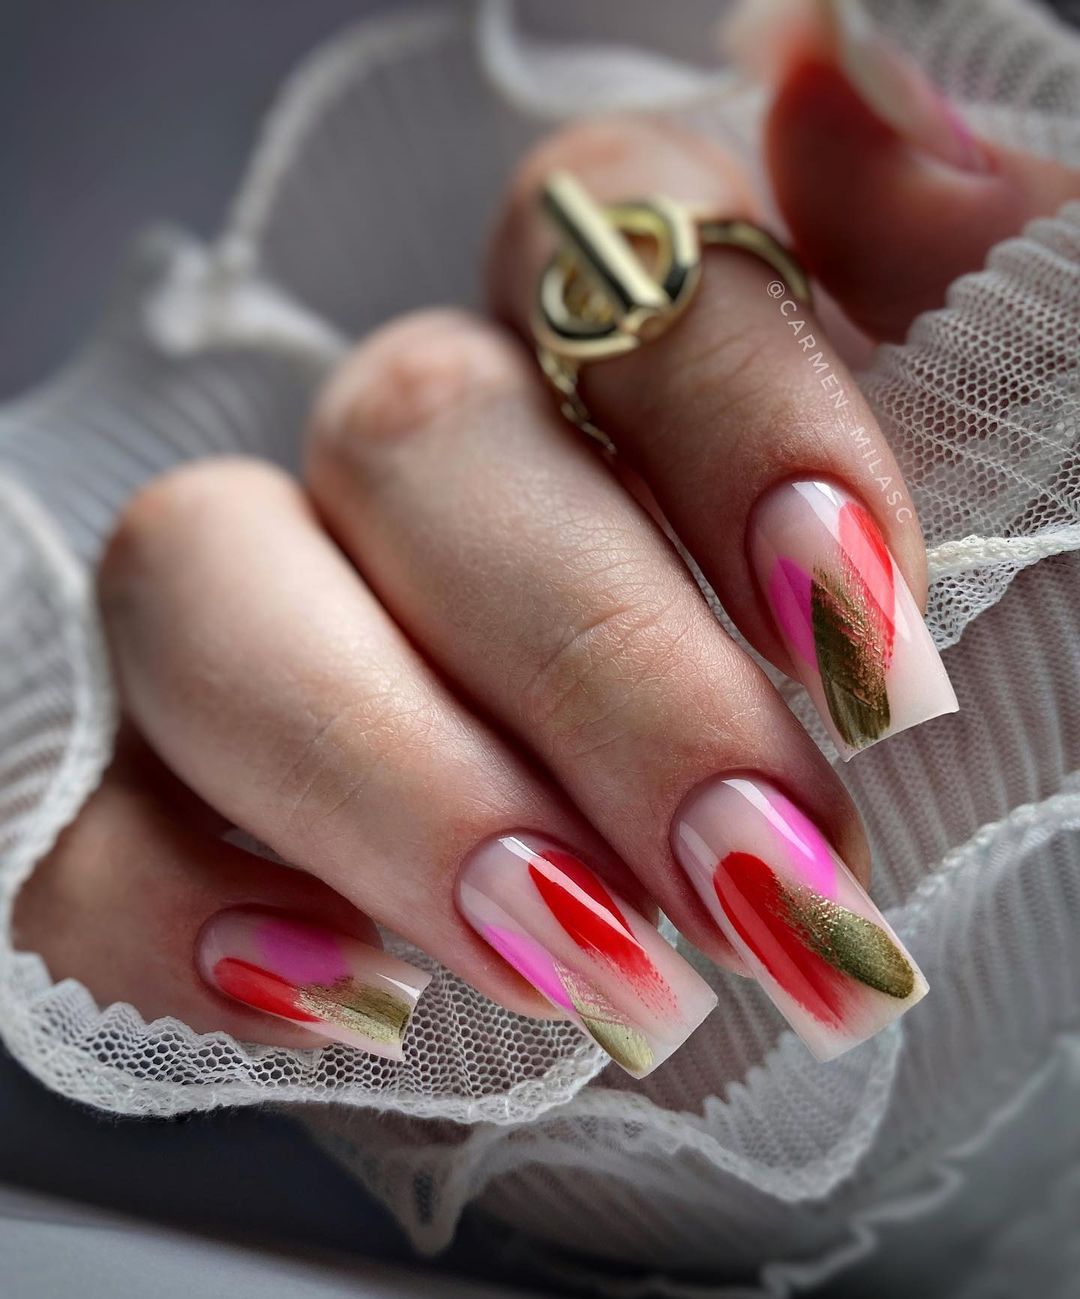
- Primer: Silk Undercoat
- Pink Nail Polish: Sunset Blush
- Red Nail Polish: Crimson Wave
- Gold Foil: 24K Shimmer Sheets
- Top Coat: Ultra-Gloss Sealer
- Adhesive: Foil Transfer Glue
After the base coat, put a layer of pink polish as the first layer. Use red on the tips first and then work downwards to produce an intense gradient. Cut off some gold foil and use adhesive to apply it gently so that it sticks onto your nail. Afterward, you can enshroud its surface with a top coat to have a celestial gleam that remains even during late summer nights.
Save Pin
Fluid Elegance
The design is encapsulated in this nail because it has sinuous lines that meander and wend their way across a canvas of a shadowy nude. It embodies the simplicity of elegance as depicted from the geometric flow reminiscent of contemporary art. It is also a style translated by many women who prefer to maintain minimalist charm.
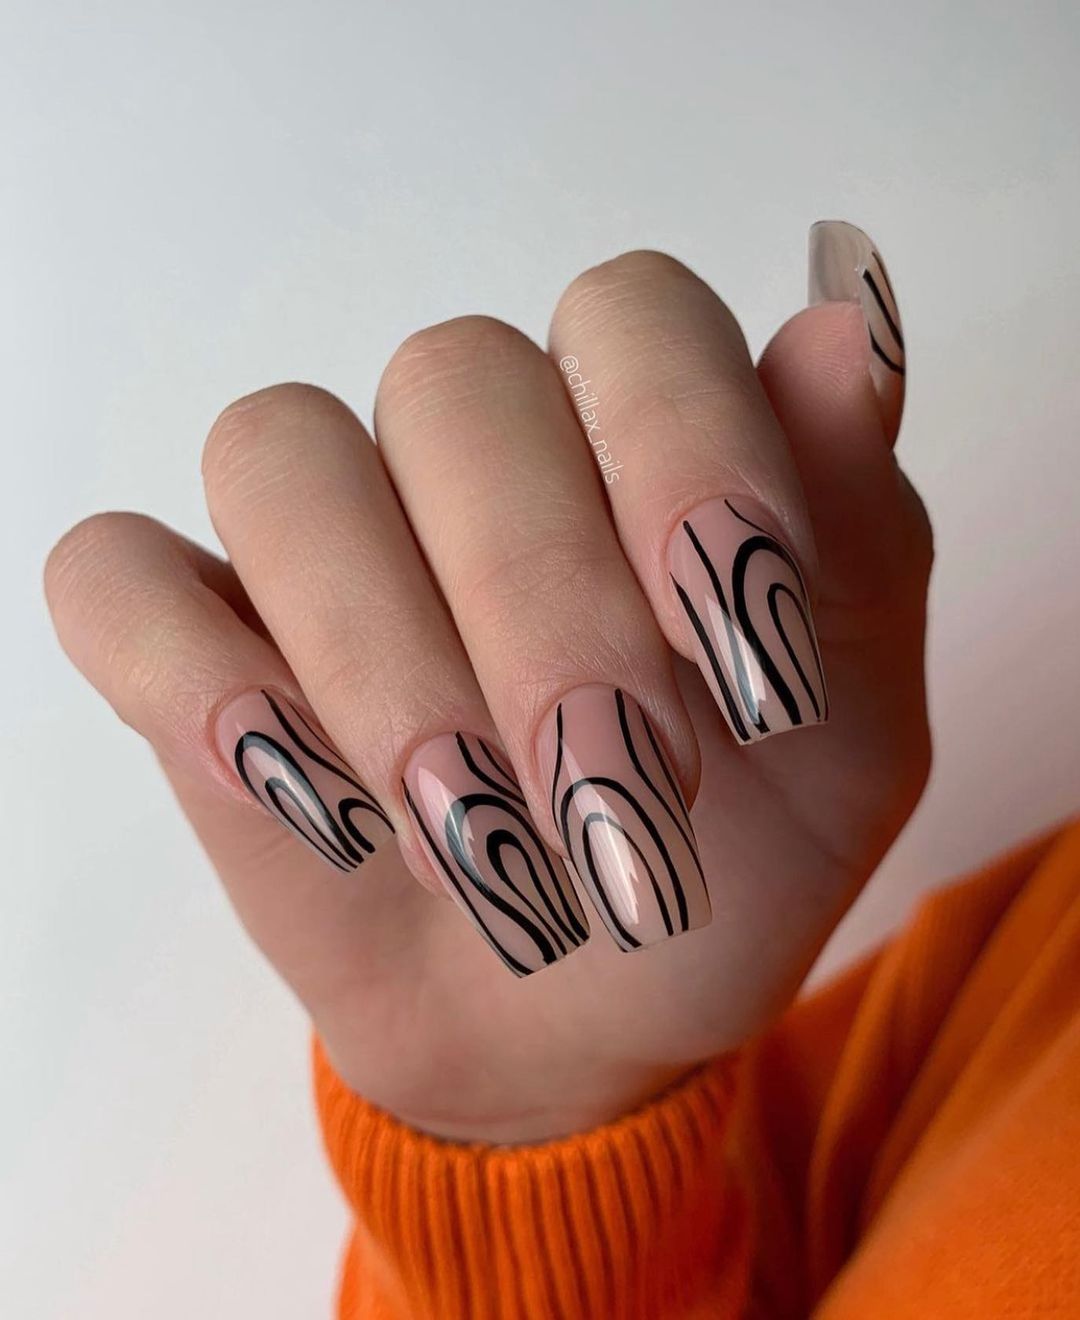
- Base Coat: Sheer Nude Perfection
- Black Polish: Onyx Elegance
- Detailing Brush: Ultra-Thin Line Expert
- Top Coat: Gel Finish Protector
Start with a clean, subtle base coat on your short nails design. After drying, use thin brush to make artistic freehand curves in black as they mingle tastefully. This entire design can be so effortlessly accomplished at home if you have an astute hand and some imagination. Finally, seal everything together with gel top coat to hold onto all your stylish summer escapades.
Speckled Sophistication
The geometric matte finish on this beachy texture echoes the ruggedness of a pebbled beach. By having speckles going from light grey to black, its gradient has a modern ocean feel that deviates from the usual bright summer palette, well-suited for a woman who likes feeling connected to natural earthly things.
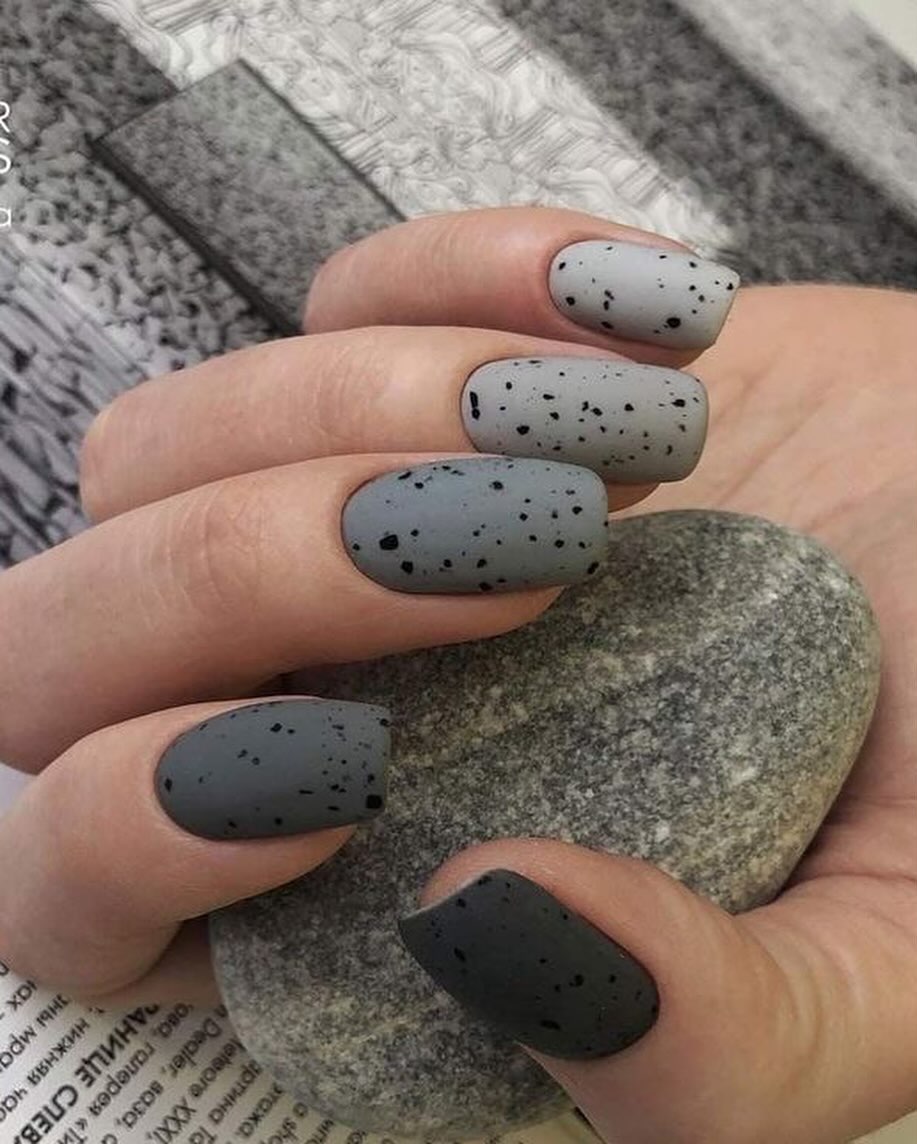
- Base Coat: Mattifying Primer
- Light Grey Polish: Misty Mornings
- Black Speckle Polish: Starry Night Flecks
- Matte Top Coat: Velvet Veil Finish
For those beginners that want to expand their repertoire in DIY nail art, this is an easy one. Apply mattifying undercoat and then put on the light grey polish. Once it dries, apply the black speckled polish from the tip downwards thus creating a natural fade into each other effect. The finishing touch is applying the matte top coat which will take your funky design to an understated elegant masterpiece.
Gilded Glamour
The design is meant to celebrate luxury and combines vibrancy of matte summer pink with the decadence of shiny gold. The contrast here is not only visual but also tactile; the impulse to stroke the matte’s smoothness against a rough textured sparkle. This blend is as extravagant as an evening summer soiree.
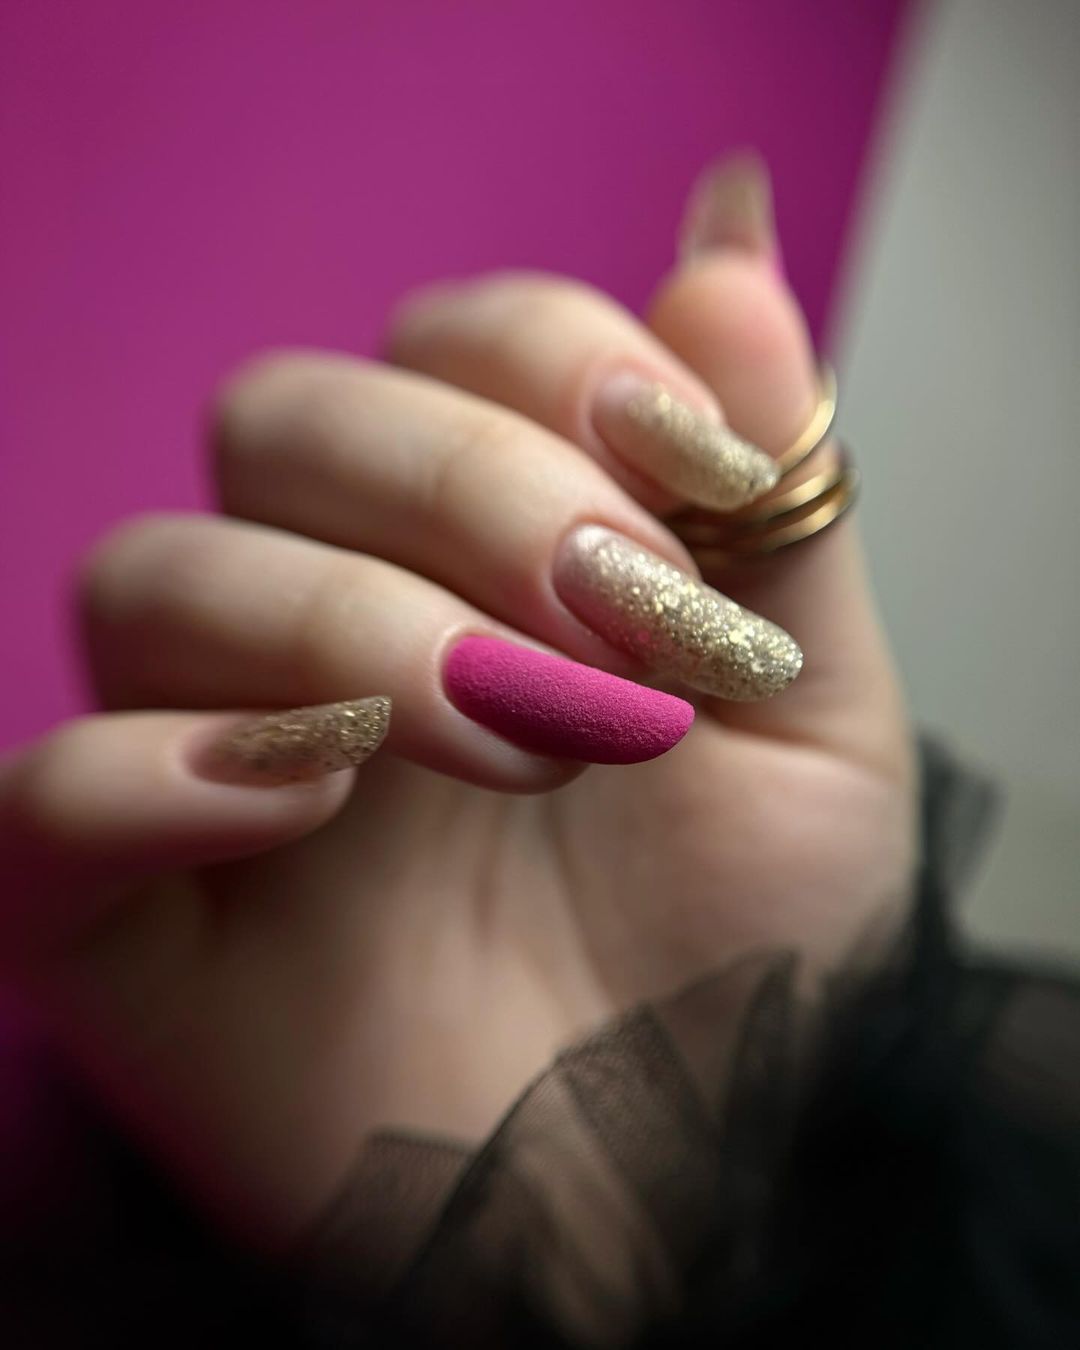
- Matte Magic Primer (base coat)
- Plush Rose Velvet (matte pink nail polish_
- Gilded Flakes Luxury (gold glitter nail polish)
- Matte Finish Sealant (top coat)
Begin with two layers of your base making it velvety and matt in texture. Apply the selected nails with the Plush Rose Velvet leaving some others without any paint or else use gold glitters on top of other nails to create variety and attract attention. Once again, layer glitter until you get full coverage on gold nails. Moreover, top coat adds dimension to gold nails while matte ones maintain their flat finish.
Iridescent Dream
This nail art resembles a mirage of the sun reflecting on the surface of an ocean. The warm pink base with iridescent sheen creates an enchanting view that changes with light and motion, which is perfect for fantasy summer feelings.
- Base Coat: Smooth Start Protective Layer
- Pink Iridescent Polish: Mirage Glow
- Top Coat: High Shine Reflective Seal
The important thing to note here is simplicity—start with a well-applied base coat in order to make it last longer. Apply the iridescent polish thinly layer by layer, building up its captivating effect. When dry, the high shine top coat boosts the reflective properties making it ideal for an easy but stylish summer look.
Bold in Fuchsia
This fuchsia nail art is assertive and unapologetically bold, just like confidence. It’s a pure summer color; vibrant, alive, and passionate. For those who want to make a statement with their summer style, this is the ultimate choice.
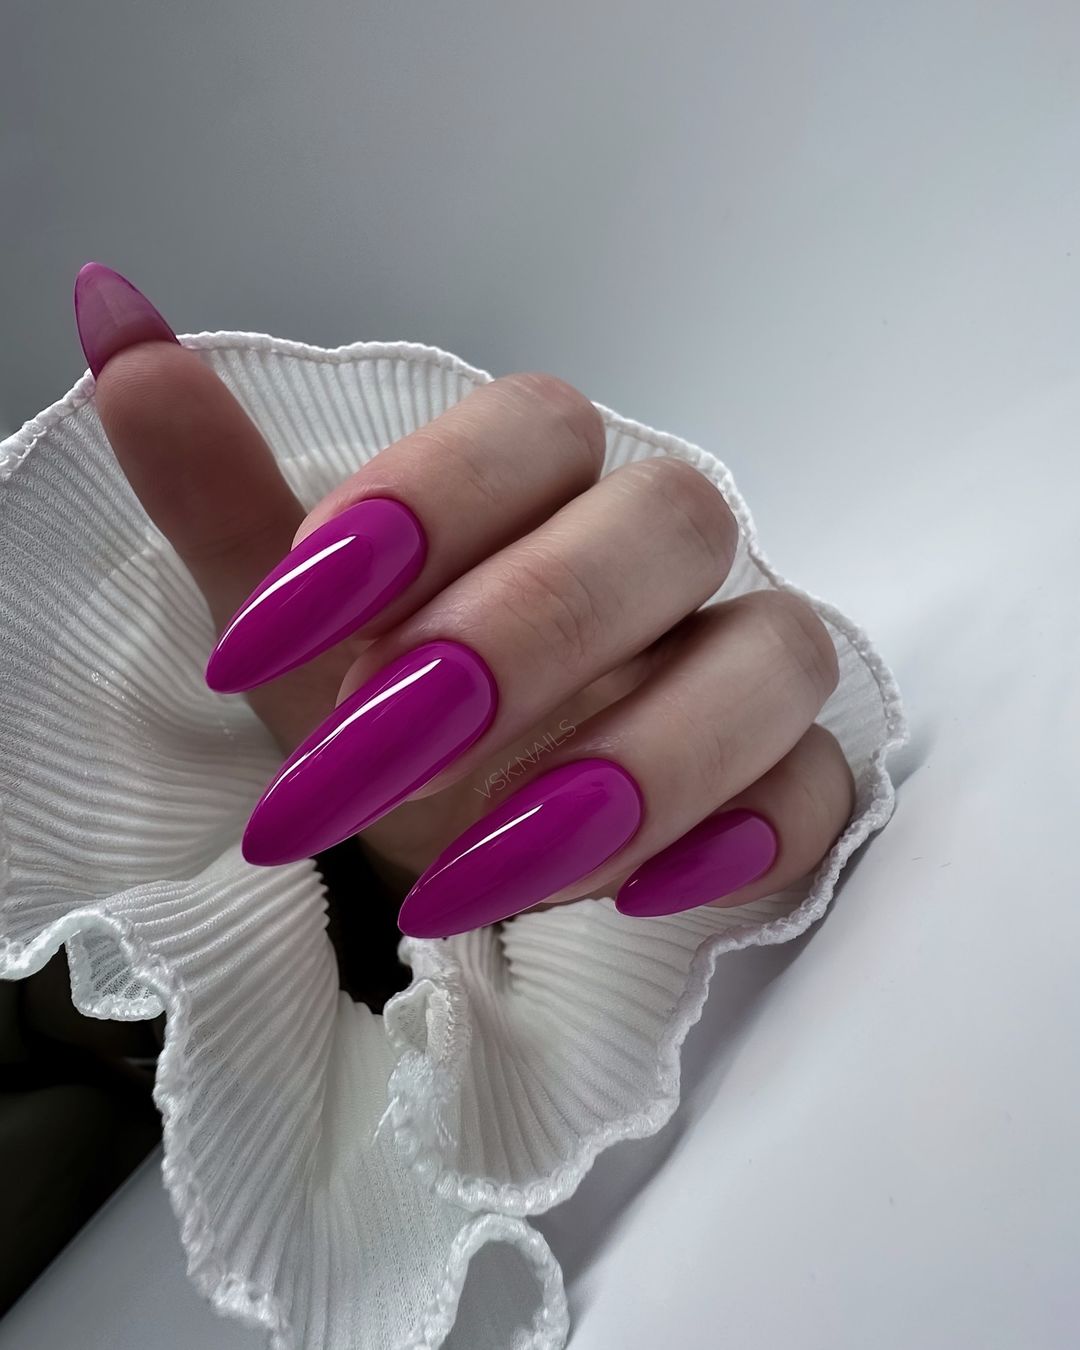
- Base Coat: Strengthening Glue Foundation
- Fuchsia Polish: Electric Fuchsia Fury
- Top Coat: Ultra-Glossy Protective Overlay
Start by applying a base coat. For maximum opacity layer the fuchsia polish twice. The glossy top coat will not only protect the color but also give it a glass-like sheen that’s as tempting as any summer cocktail.
Save Pin
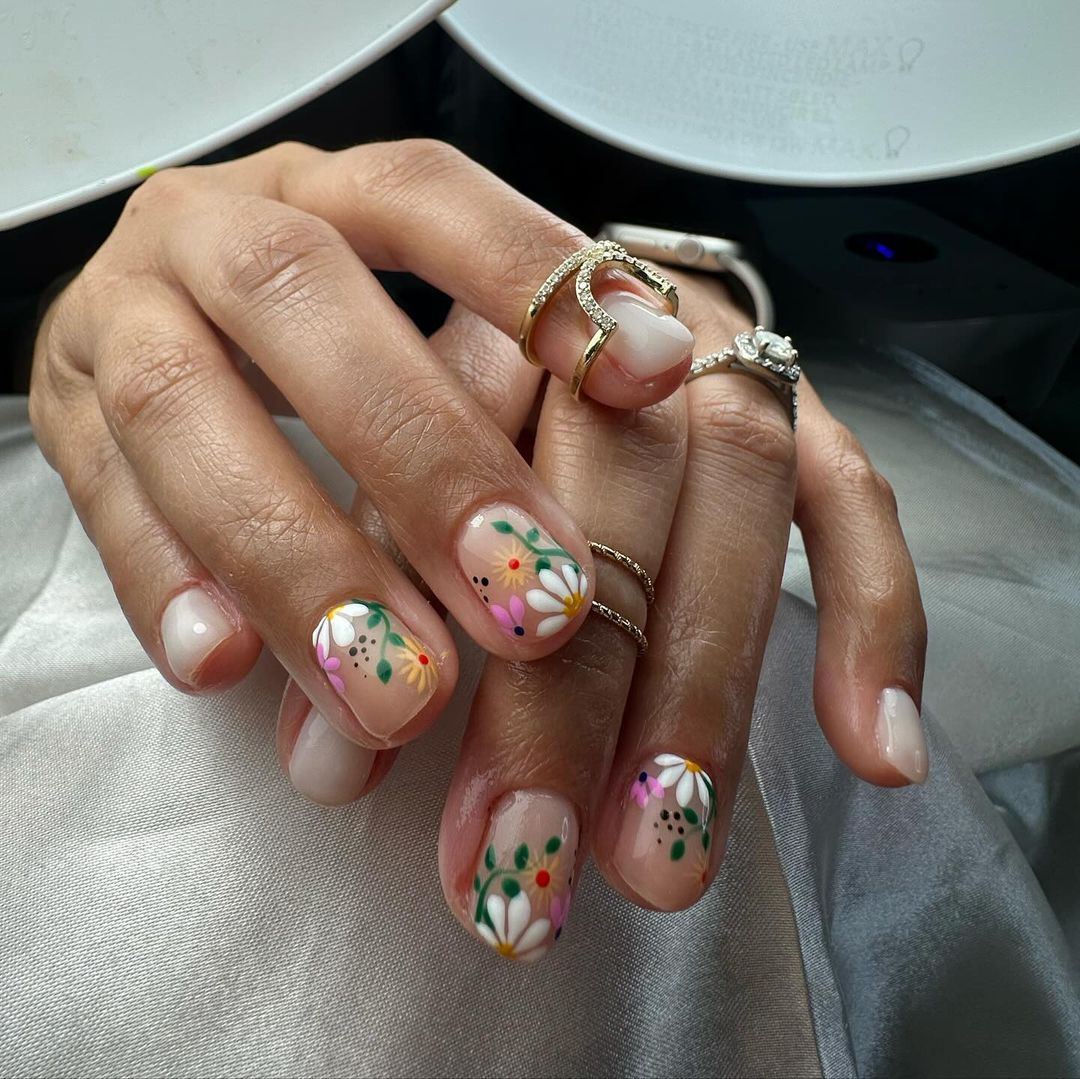
Floral Finesse
The vivid pinkish purple base of this design with dainty sakura art creates the feeling of a fresh summer flower bloom. One nail is used to showcase this delicate artwork, while the tiny precious stone adds some luxury. It is femininity and beautiful intricacies of nature.
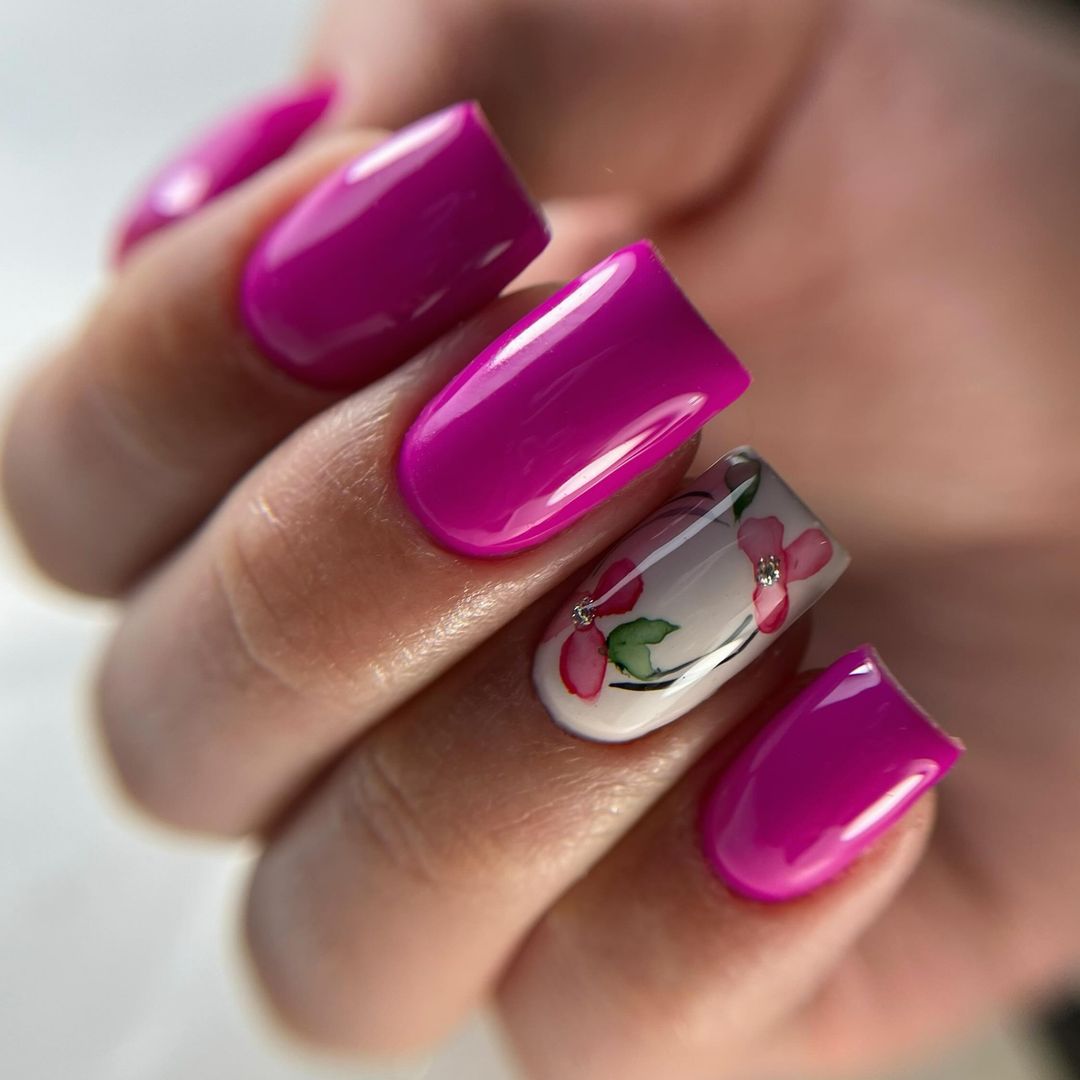
- Base Coat: Crystal Clear Foundation
- Fuchsia Polish: Vibrant Orchid Opulence
- White Polish: Pure Porcelain
- Art Brushes: Fine Detailing Set
- Gemstones: Petite Diamond Sparkles
- Top Coat: Long-Lasting Shine Enhancer
Apply a smooth base coat, followed by two coats of the fuchsia polish. Use a fine brush to paint cherry blossoms on the accent nail, adding a dot of glue for the gemstone. Seal with a glossy top coat to ensure the design’s vibrancy and longevity through the sunny season.
Heartfelt Harmony
The design uses a soft pink background with accents of gold and red to steal the atmosphere of summer love. The heart motifs made with great care, featuring tiny gems, indicate a whimsical lovely energy that is best suited for fashionable female lovers of story-telling nail art.
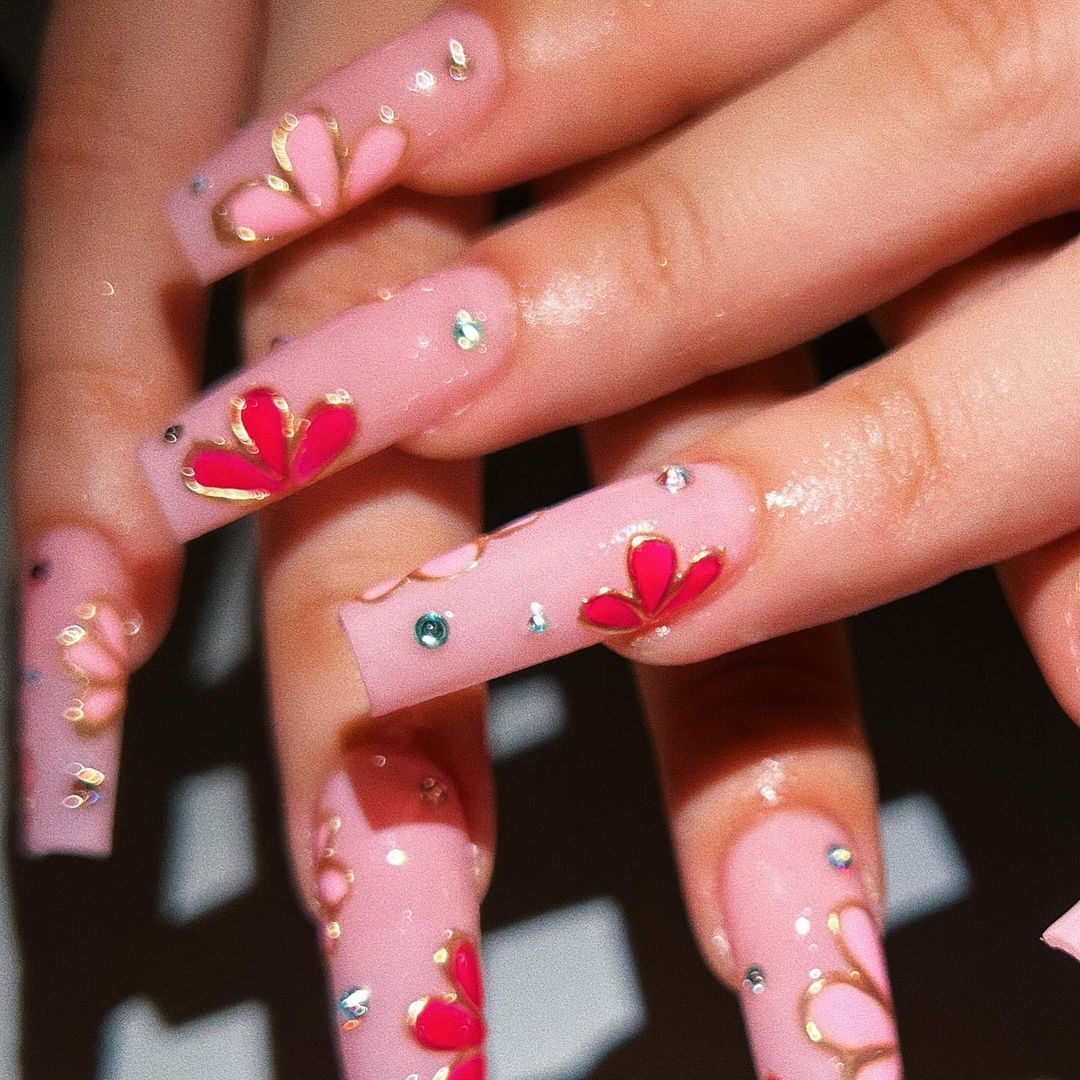
- Initial Coat: Silk Protein Enriched
- Light Pink Polish: Whispering Blush
- Golden Additions: Liquid Gold Leaf
- Crimson Polish: Ruby Reflections
- Gems: Micro Crystal Hearts
- Final Coat: Quick-Dry Enamel Armor
Start by using a base coat to have a firm ground. When the light pink nail polish becomes dry, make use of detail brush in making hearts with bits of golden and red. Decorate them further using micro gems for 3D effect. After that apply quick-drying topcoat in order to protect it from damages and give it some shine.
Delicate Blossoms
This nail art design exemplifies this with its delicate, sheer base and carefully applied white flowers. The tiny gold flecks and miniature pearls give a luxurious feel to it, making it look like a magical piece for any summer occasion.
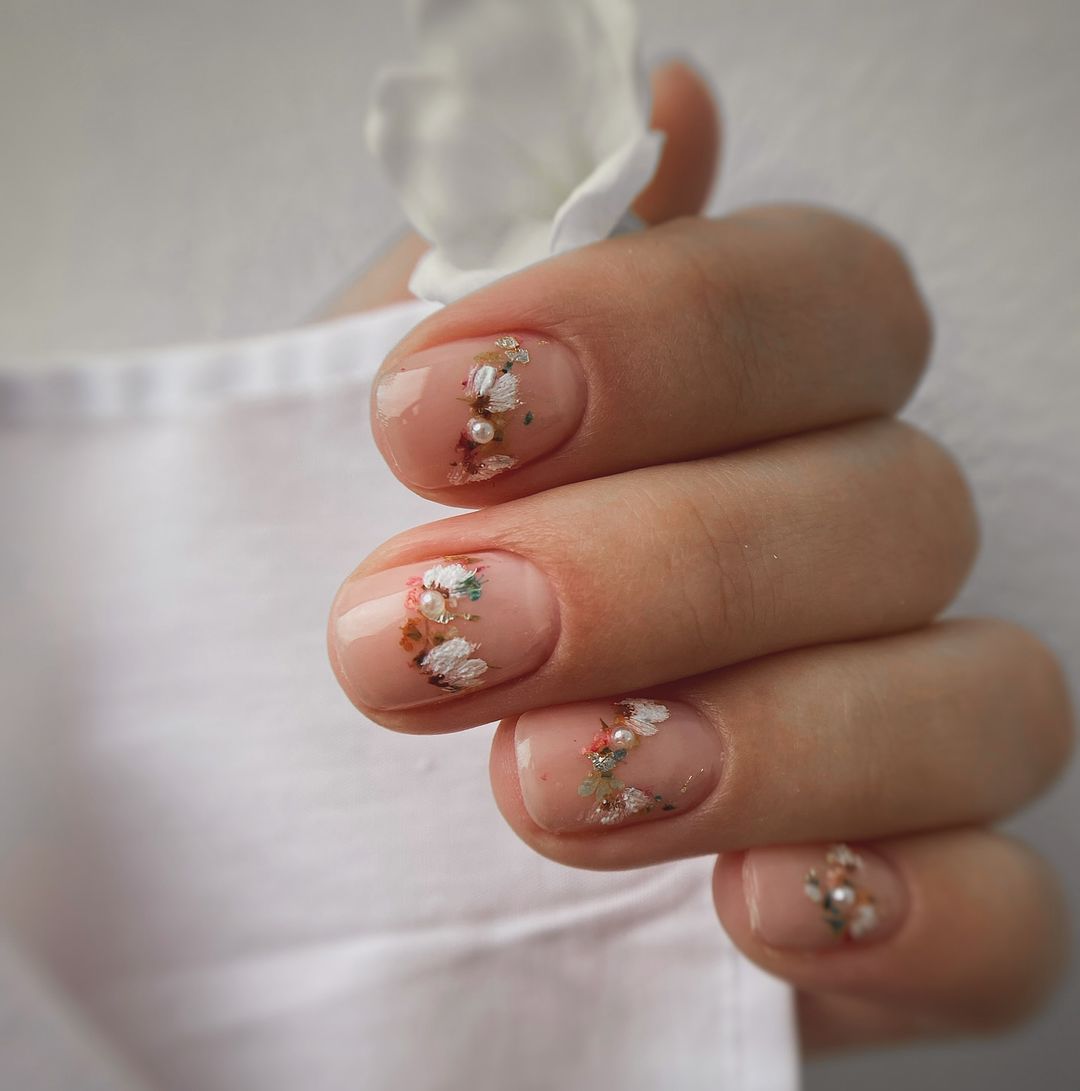
- Covering Layer: Nude Illusion
- Milk White Nail Polish: Moonlit Lace
- White Detailing Polish: Snow Drift
- Golden Foil Pieces: Golden Specks
- Pearls: Tiny Luster Beads
- Overcoat: Sealing Glaze
First apply a neutral foundation coat on the nails then paint them using pale milky white polish to make them appear see-through. Use the snow drift white to draw fine lines of the petals. Place gold flakes and pearls right away before the lacquer hardens. Enclose all this in a top coat to preserve your artistic masterpiece details.
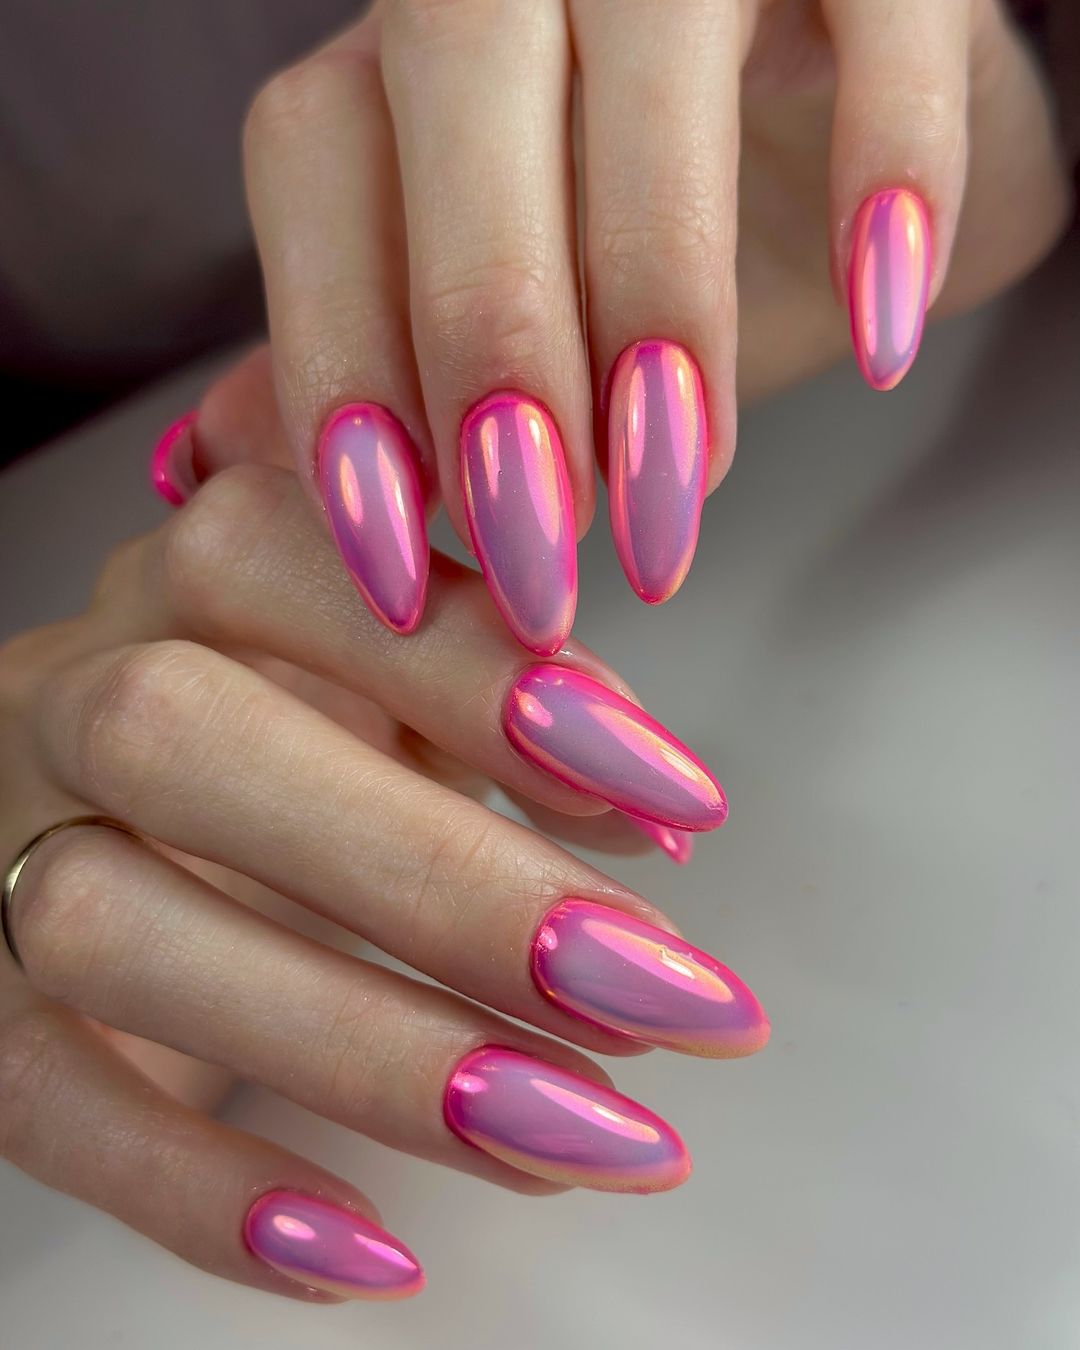
Chromatic Radiance
The design is about the beautiful colors that are seen in the sky at sunset during summertime. These nails are shaped like they were modeled using an elongated coffin and you can see right through them because they have been completed with neon colors.
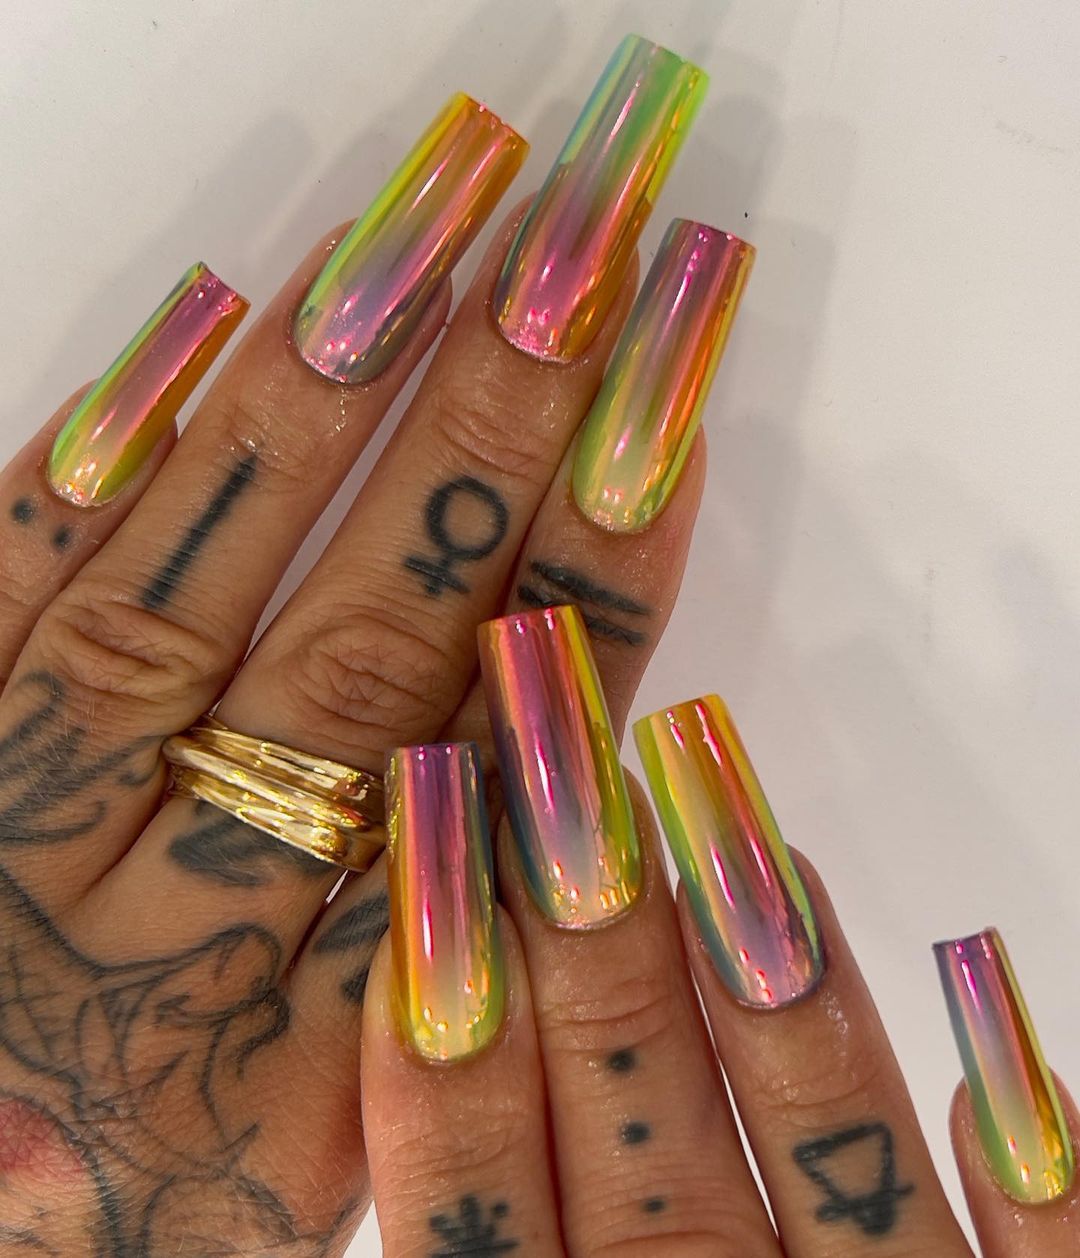
- Holo Prep Primer–Base Coat
- Neon Prism Blaze: Holographic Polish
- Mirror Shine Overlay–Top Coat
Cover your nails with a base coat for nail protection and better holo effect. Start from the base of your nail and sweep up to the tip, layering on holographic polish until your nails shimmer like a rainbow of neons. Finally, use a top coat that gives you the entire color range and makes it last longer.
Monochrome Whimsy
It mixes simplicity and creativity by incorporating monochromatic design and French twist into it. The abstract shapes and the undulating curves give these short nails a modern touch that is both fashionable and amusing.
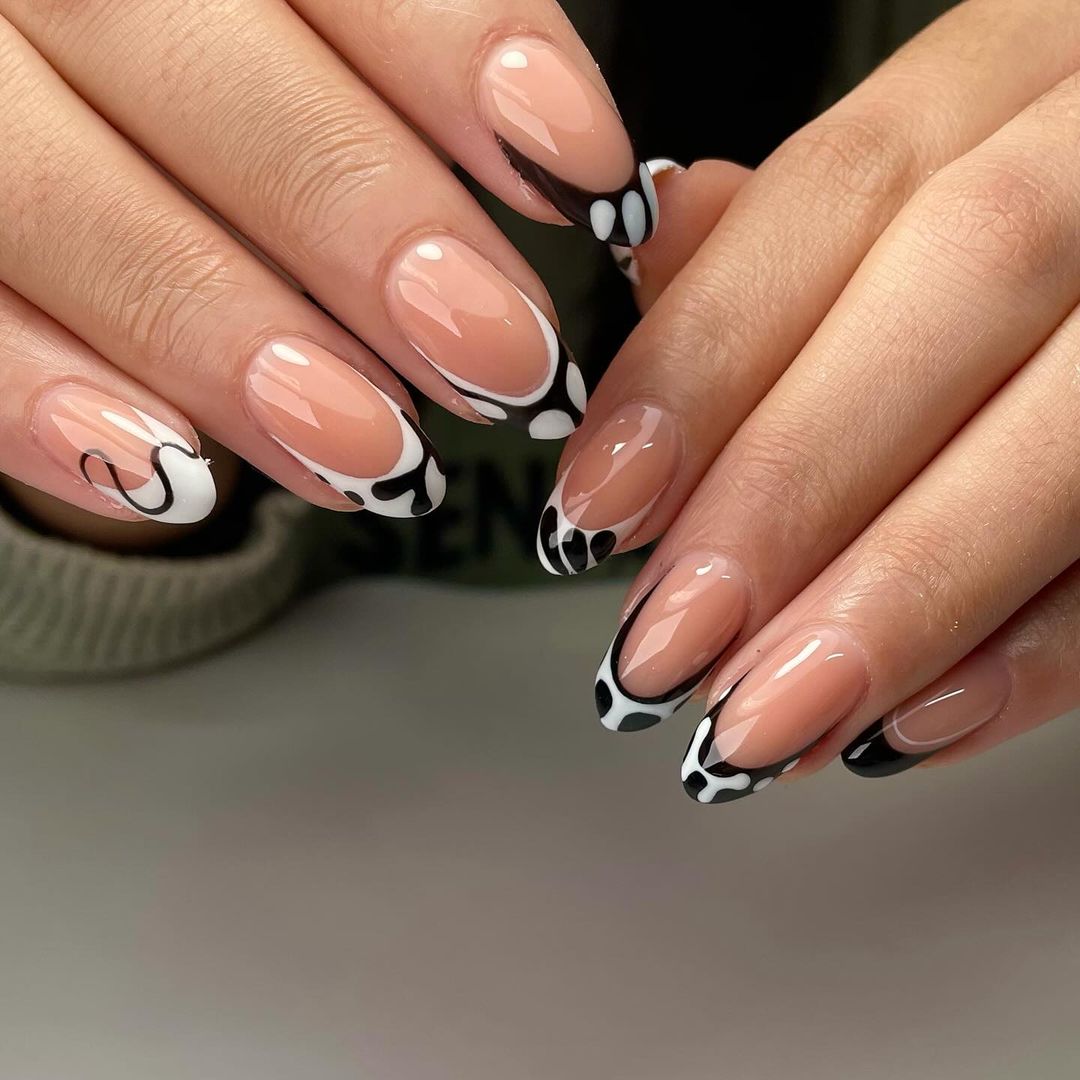
- Base Coat: Adhesive Strengthener
- Nude Nail Polish: Almost Invisible
- Black Detailing Polish: Night’s Contrast
- Top Coat: Shiny Armour Sealant
After applying the base coat, use nude polish for a natural appearance on the nails. Using black polish with a fine brush, form whimsical shapes at the tips of the nails. A glossy top coat gives this simple elegant design a protective shine that makes it pop.
Tropical Mirage
The nails portray the enticing charm of tropical sea waters, which mix greens, blues, and pinks into a smooth transition. They are decorated with just one crystal-like ornament that resembles an oceanic theme giving it an expensive look for a summertime getaway.
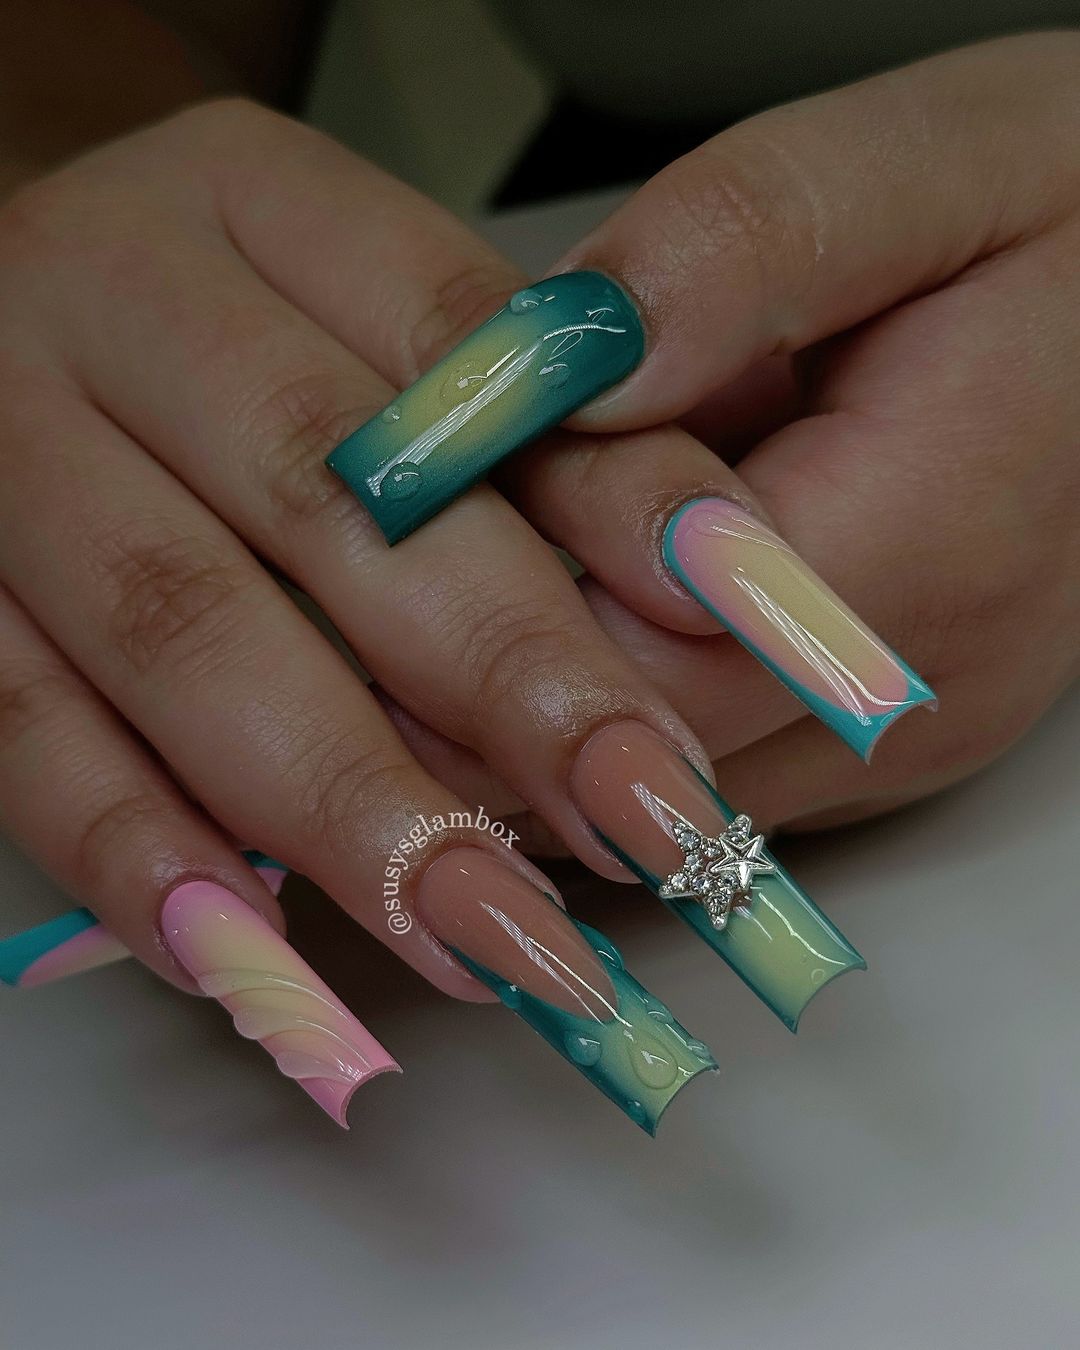
- Base Coat: Ocean Darkening Gel
- Gradient Polishes: Misty Beach, Turquoise Lake and Pink Coral
- Charm: Shimmering Starfish
- Top Coat: Smearless Glass Finish
Apply a base coat then sponge the gradient blend on top while working with wet polishes to form a seamless shift. Fasten the charm using some top coat. Finally, put on one layer of waterproof top coat thereby preserving your fade in addition to securing your trinket.
Sugar Sparkle
They have an almond shape and are soaked in summer’s sweetness, giving a sugar spun neon pink effect finished with generous sparkle. The glossy and matte finishes provide a sensuous dimension that is both alluring and fashionable.
- Base Coat: Ultra Bond Primer
- Matte Polish: Cotton Candy Cloud
- Gloss Polish: Neon Pink Radiance
- Embellishments: Crystal Pixie Dust
- Top Coat: Matte & Gloss Duo Finish
Cover every nail in a matte base; after which alternate between mattes and glosses. Put some crystal dust on the wet gloss nails to make it shine. Use both matte and gloss top coats accordingly so as to maintain the juxtaposition of textures.
Sunrise Whorls
These nails are a visual representation of the sun rising in full bloom as they have pink and purple marbleized pattern that seems like a dreamlike painting. This is an elegant option for lovers of brave, artistic expression.
- Silk canvas base coat
- Lavender Mist and Pink Sunrise marbling polishes
- Marbling Wand detailer
- Crystal Clarity Protector topcoat
Prepare your nails with a base coat. Spot some lavender and pink polish on the nail surface and then use marbling tool to blend them together. Apply a top coat to secure the design and provide its durability.
Neon Doodles
This design is a doodle on a sunny afternoon that brings out the spontaneity and energy of its channeling. The neon yellows and pinks burst out, popping with dashes of black for juxtaposition . They are also dotted with shining gemstones. This is a fun and funky approach to summer nails for the non-conformist.
- Base Coat: Sticky Base Layer
- Neon Polishes: Lemon Zest & Hot Pink Frenzy
- Black Accent Polish: Jet Set Detailer
- Gemstones: Summer Sparkle Collection
- Top Coat: Quick-Dry Shine Lock
In this case, paint your neon polish as the background for your drawing which can be doodles. In order to make free-form dark designs, use detailer pen. Lastly, stick your gems onto them before they dry up completely. Paint the piece with quick-drying top coat so as to maintain their vibrancy.
Glittering Frost
A frosty morning is represented by this particular nail art whose sugar coated shimmering effect is overlaid on a pale pink background. However, there are still some modern touches by the other Art Nails in form of lively lines created using various colors.
- Base Coat: Pink Whisper Primer
- Glitter Polish: Frosted Sugar
- White Polish: Snowcap Elegance
- Striped Decals: Rainbow Zest
- Top Coat: No-Chip Crystal Shine
After applying Pink Whisper Primer to nails , apply one coat of pink glitter polish. Use white polish with tape or stencils to make French tips that are nice and sleek. For the accent nail, use the striped decals and make sure all air bubbles are out. A top coat will then be used to seal the design so as to give a smooth finish.
Lavender Whirl
This nail fancy design is a mixture of different shades of lavender with glittery finishing that creates a playful and sophisticated effect, inspired by the swirling patterns found in marbles. In addition, this effect is enhanced by black wavy lines that appears to be artistic coinciding with summer winds in a field of lavender.
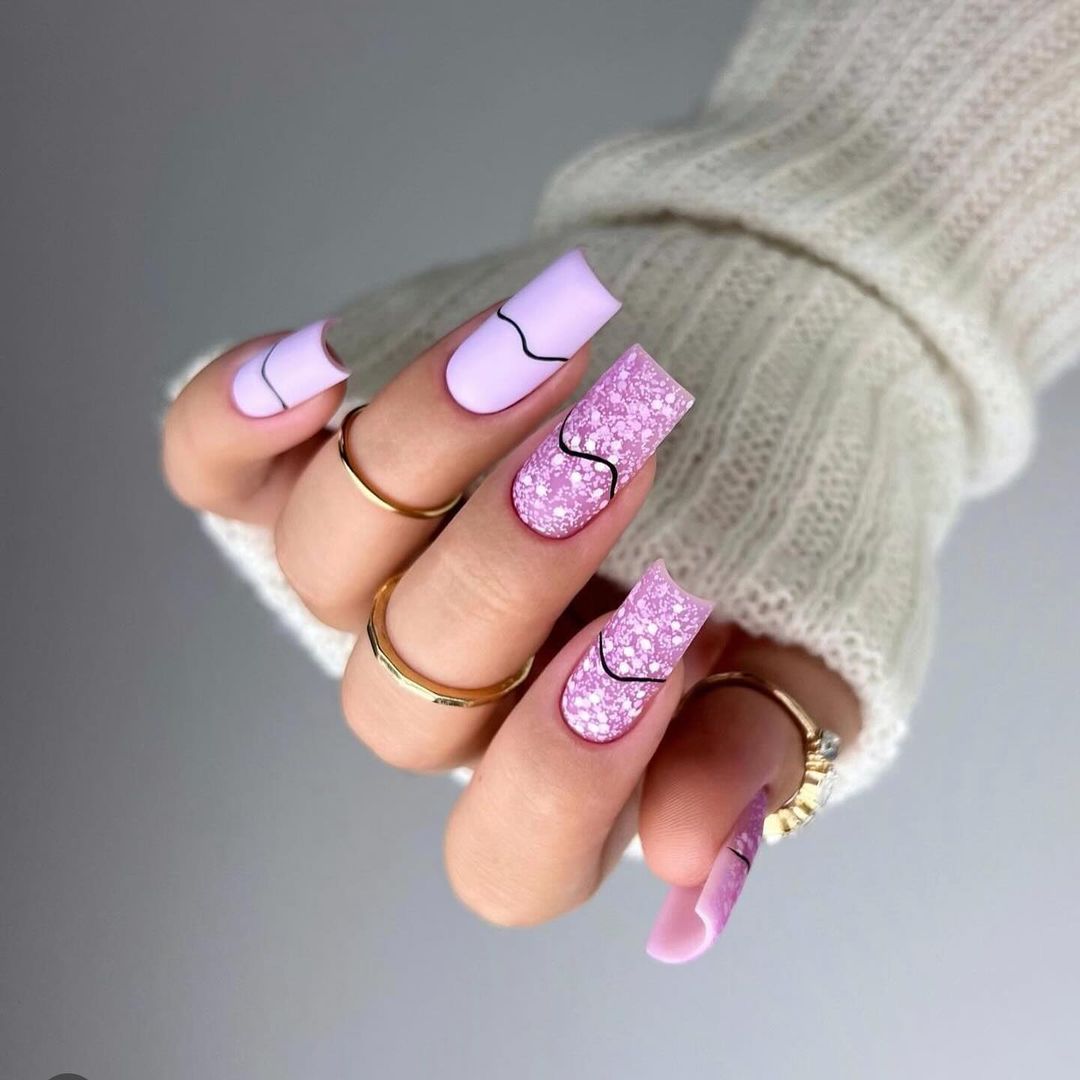
- Basic Coat: Lavender Lush
- Glitter Overlay: Lilac Shimmer
- Black Liner Polish: Night’s Silhouette
- Top Coat: Gel-like Gloss
Begin by applying the base coat of serene lavenders color. Secondly, put on a layer of lilac glitter overlay to make it shiny. Then, use a small brush to paint curvy black lines for marble texture. Finally, apply gel-like top coat for extended wear and glossy surface.
Blue Blossoms
This porcelain matte base coat is tinged with vivid blues and whites that remind one of fragile porcelains adorned with intricate floral patterns. The nails have a play on textures with the alternating matte and glossy finishes, each nail serving as a small expression canvas.
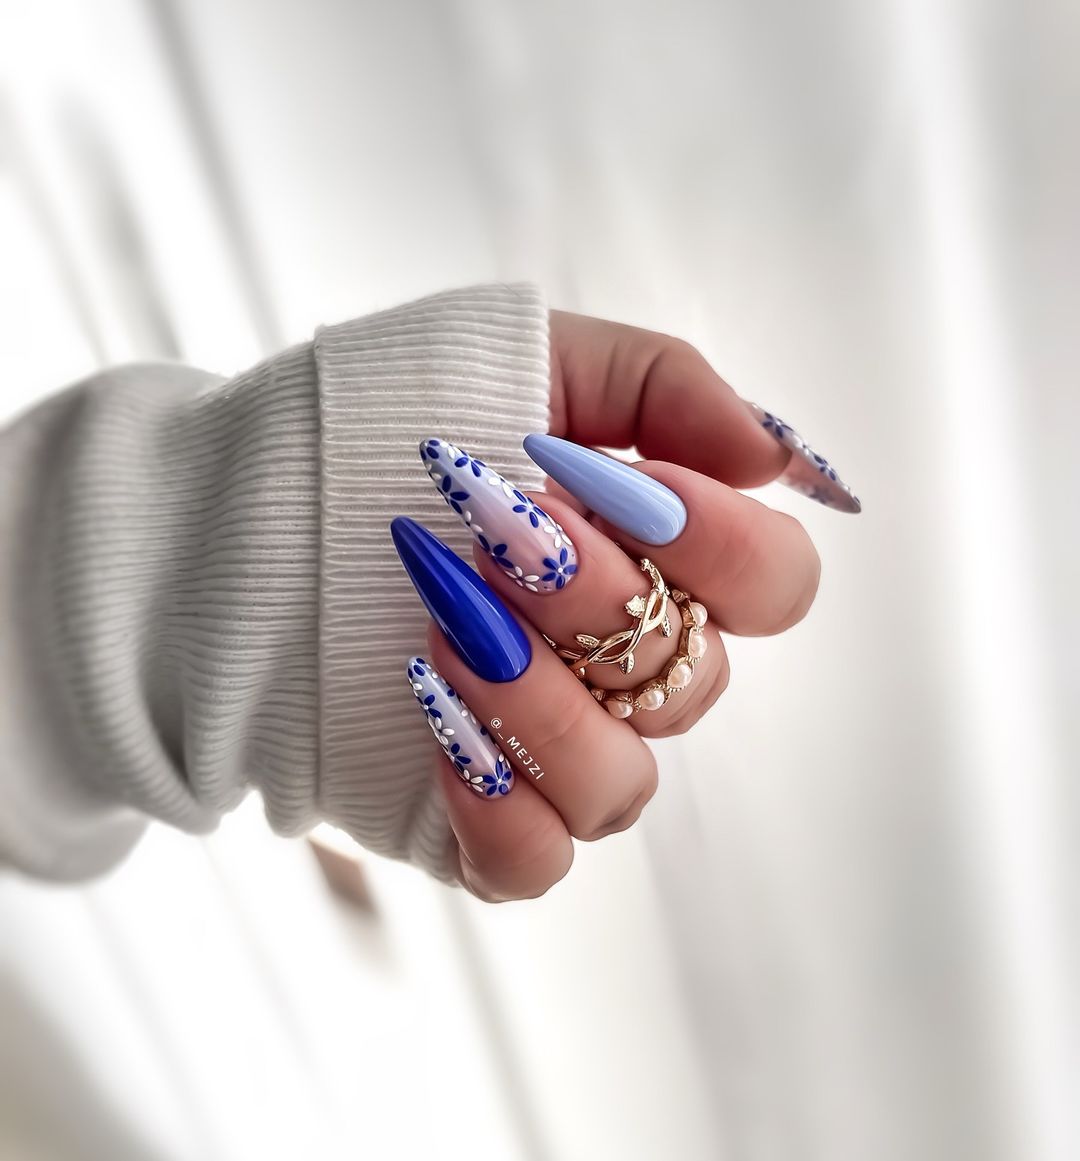
- Porcelain Matte Base Coat: Cobalt Charm
- Cobalt Blue Nail Polish: Matte & Gloss Top Coats: Texture Twins
- White Art Gel: Alpine Precision
Put a matte base coat on all your fingers. Also, you will need cobalt blue polish for glossy nails. Introduce white art gel to make it more detailed and delicate. Afterwards, go for matte or gloss top coats to bring out clear contrasts in texture from different nails; thereby, enhancing such fine details.
Enchanted Garden
This design, evoking the serenity of a magical garden, makes use of green shades that gradually change and are decorated with golden pins. Nail art raises to a new level when it is enhanced with delicate bubbles filled with pearls giving it a 3D look of richness and playfulness.
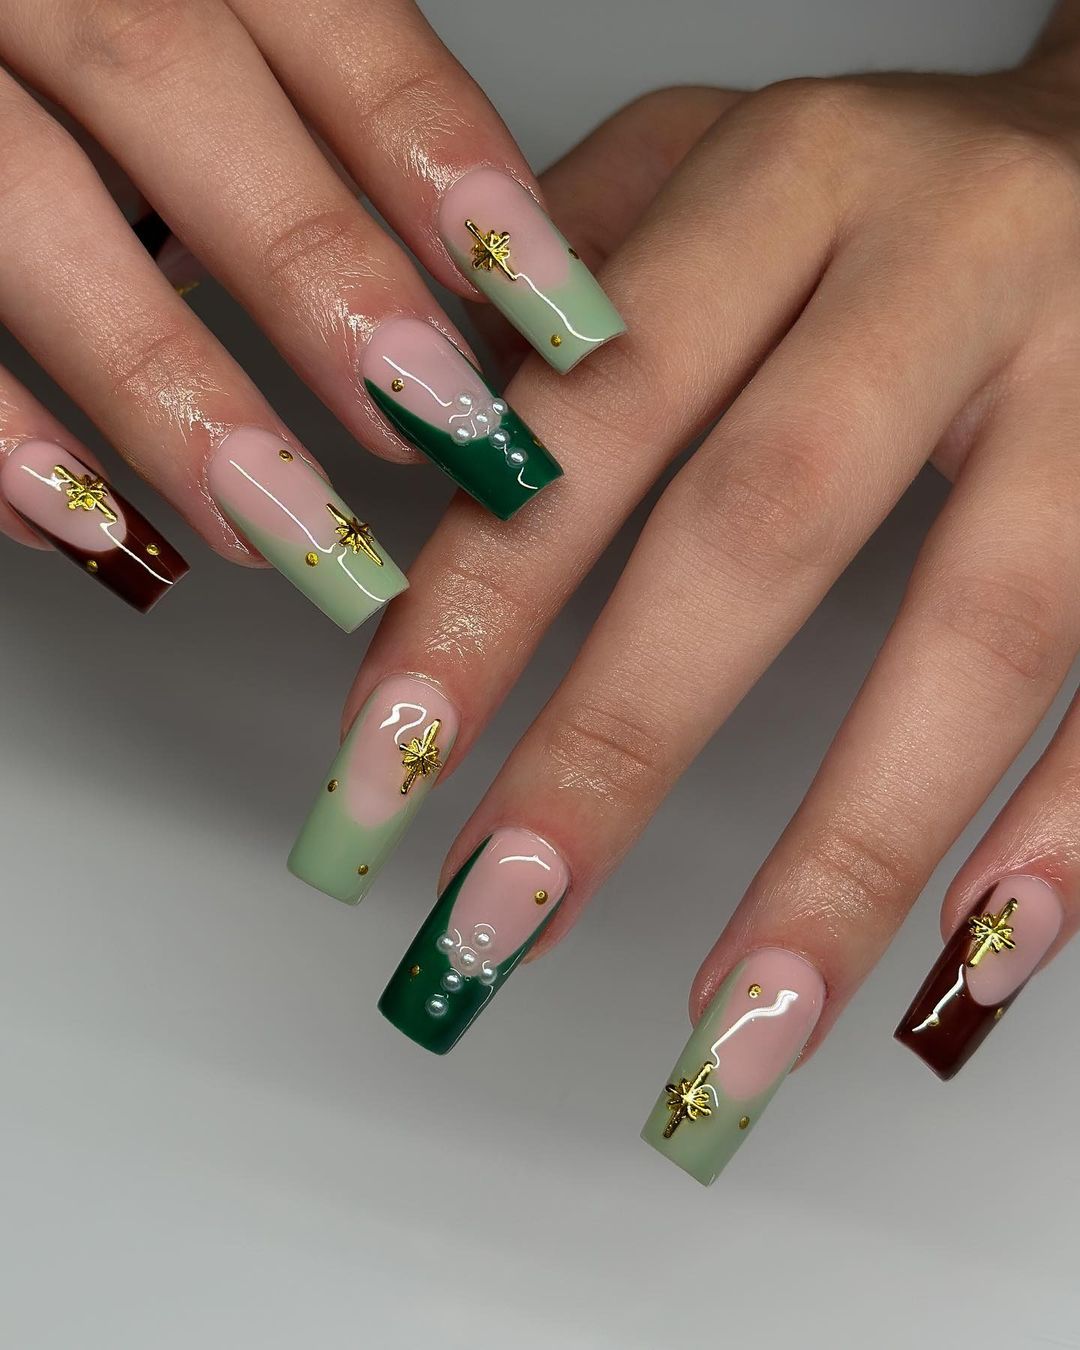
- Base Coat: Green Tea Tint
- Gradient Polishes: Mint Dew, Forest Majesty
- Embellishments: Golden Leaves, Pearl Droplets
- Top Coat: Encapsulating Sculpture Gel
Commence by applying the lightest green tinted base; after which start sponging on darker greens from the tip moving upwards. As soon as the topcoat starts to dry, place golden leaf embellishments together with pearl droplets over this surface. Finally, use gobs of sculpture gel so as to safeguard all those three-dimensional aspects.
Summer Garden Party
The design of the nail is similar to that of a beautiful summer garden where there are pastel shades and flowers that remind one of full bloom nature. It is like petals in the breeze, a thin and joyful experience as every nail speaks for itself.
- Sheer Elegance (Base Coat)
- Spring Lavender, Soft Peach, Mint Cream (Pastel Polishes)
- Fine Tip Set (Detailing Brushes)
- Summer Florals (Nail Art Decals)
- Ultra-Gloss Sealant (Top Coat)
Begin by applying a sheer base coat to enhance the natural beauty of your nails. Paint each nail with different pastels. Use fine-tip brushes to create flowers or use pre-designed nail art stickers. Finish it off with a glossy top coat that will look good at any summer event and lasts long too.
Tropical Punch
This nail design bursts with the shining energy of a tropical fruit punch, full of bright purples, refreshing emeralds and flecked accents. It is a fun and funky mix that can only be labeled as the life of any summer beach party.
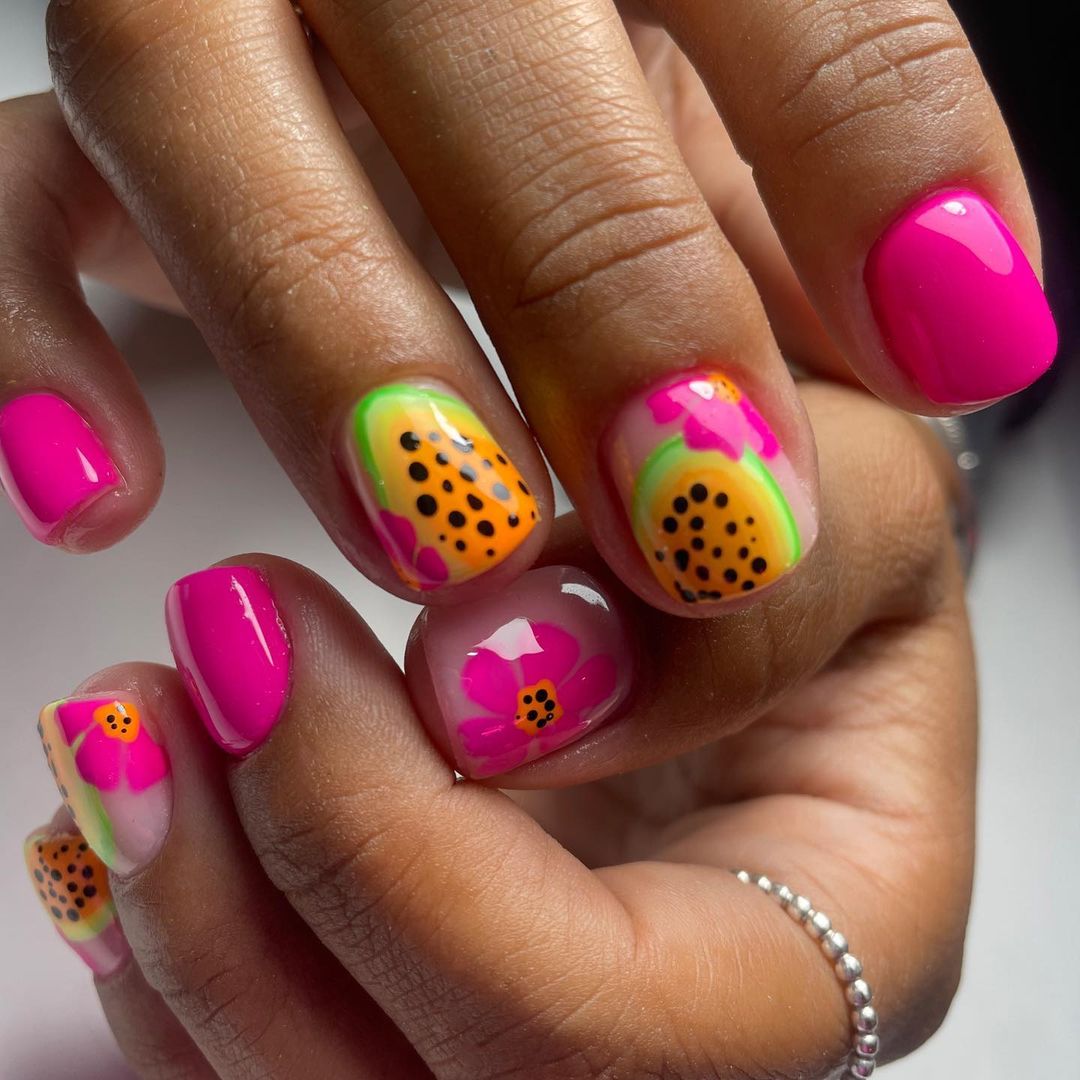
- Vitamin-Enriched Primer: Base Coat
- Electric Watermelon, Citrus Splash: Neon Polishes
- Precision Dots: Dotting Tool
- Quick-Dry Shine Enhancer: Top Coat
Apply two coats of neon polish in watermelon or citrus hues after your base. Use a dotting tool to add contrasting dots or speckles. A quick-dry top coat is vital for maintaining its freshness and luminosity throughout the day.
Soft Sunrise
The nail art is reminiscent of a calm sunrise with a white base that looks like milk and has touches of gold and peach that hint at elegance. The golden leaves detailing it are ideal for those long summer days that seem to never end.
- Silky Matte Primer: Base Coat
- Peachy Sheen: Peach Polish
- Golden Finesse Flakes: Gold Leaf
- Satin Smooth Finish: Top Coat
- Instructions for Do It Yourself (DIY):
Start by applying a matte undercoat to create a delicate background. Put on some pale pink polish on the tips, which fades into the nail bed. Opt for golden leaf flake as an extravagant adornment. Finally, apply a satin top coat creating an understated sophisticated gleam.
FAQ
Q: What are some good nail shapes for summer designs?
A: Although virtually any nail shape can work for summer designs, typical alternatives may include oval, almond and coffin styles. They are a great canvas for intricate designs and bright colors. Squoval or round nails are ideal for those who like a classic look with an edge to it.
Q: Can I do these summer nail art designs at home?
A: Definitely! Many of the summer designs are easy to do on your own. Stock up on different shades of polishes; brushes of good quality; dotting tools among others and add patience as you start out with simpler ones like one color nails with one special accent nail that will help build you up into more complicated patterns.
Q: How can I make my nail art last all through the summer?
A: To prolong your nail art’s life, use a good base coat first to safeguard your nails. Next, employ a fine top coat once done applying design onto your nails. Every few days reapply another top coat to avoid chipping from happening while you still keep your hands moisturized plus use gloves when performing tasks that may harm your nails.
Q: What kind of summer nail art is popular this year?
A: This year’s trends involve neon colors that pop out at you, pastel ombres and fun patterns like floral prints or abstract paintings. Nail art which has various textures or finishes (matte/gloss) is also trending right now.
Q: What colors should I wear on my nails this summer?
A: Summer means bright and bold colors. Think of neon pinks, electric blues, bright yellows and vivid greens. Another hit in the warmer months is pastels which provide soft contrasts from the usual brightness.
Q: Can anything be done quickly about poorly-done nail art?
A: In case of a mistake, one can sometimes blot polish remover using brush cautiously over an error. For bigger bloopers, removing the polish from that particular nail and starting again would be less strenuous. Also, if one is in a fix, nail stickers or gems can be used to conceal any flaws.
Q: How can I make a simple nail design really stand out?
A: If you want to take a simple design up a notch, try using a glitter top coat, a metallic accent or some innovative nice decals. Even just one statement nail bearing intricate art or 3-dimensional features such as rhinestones could change an ordinary manicure into something unexpected.
Q: Is it possible to do summer nail art on shorter nails?
A: Short nails are perfect for summer nail art! On shorter nails, bright colors, simple dots or stripes can look sophisticated and stylish. Furthermore, short nails require less maintenance when it comes to doing nail art on them most of the time.
Save Pin