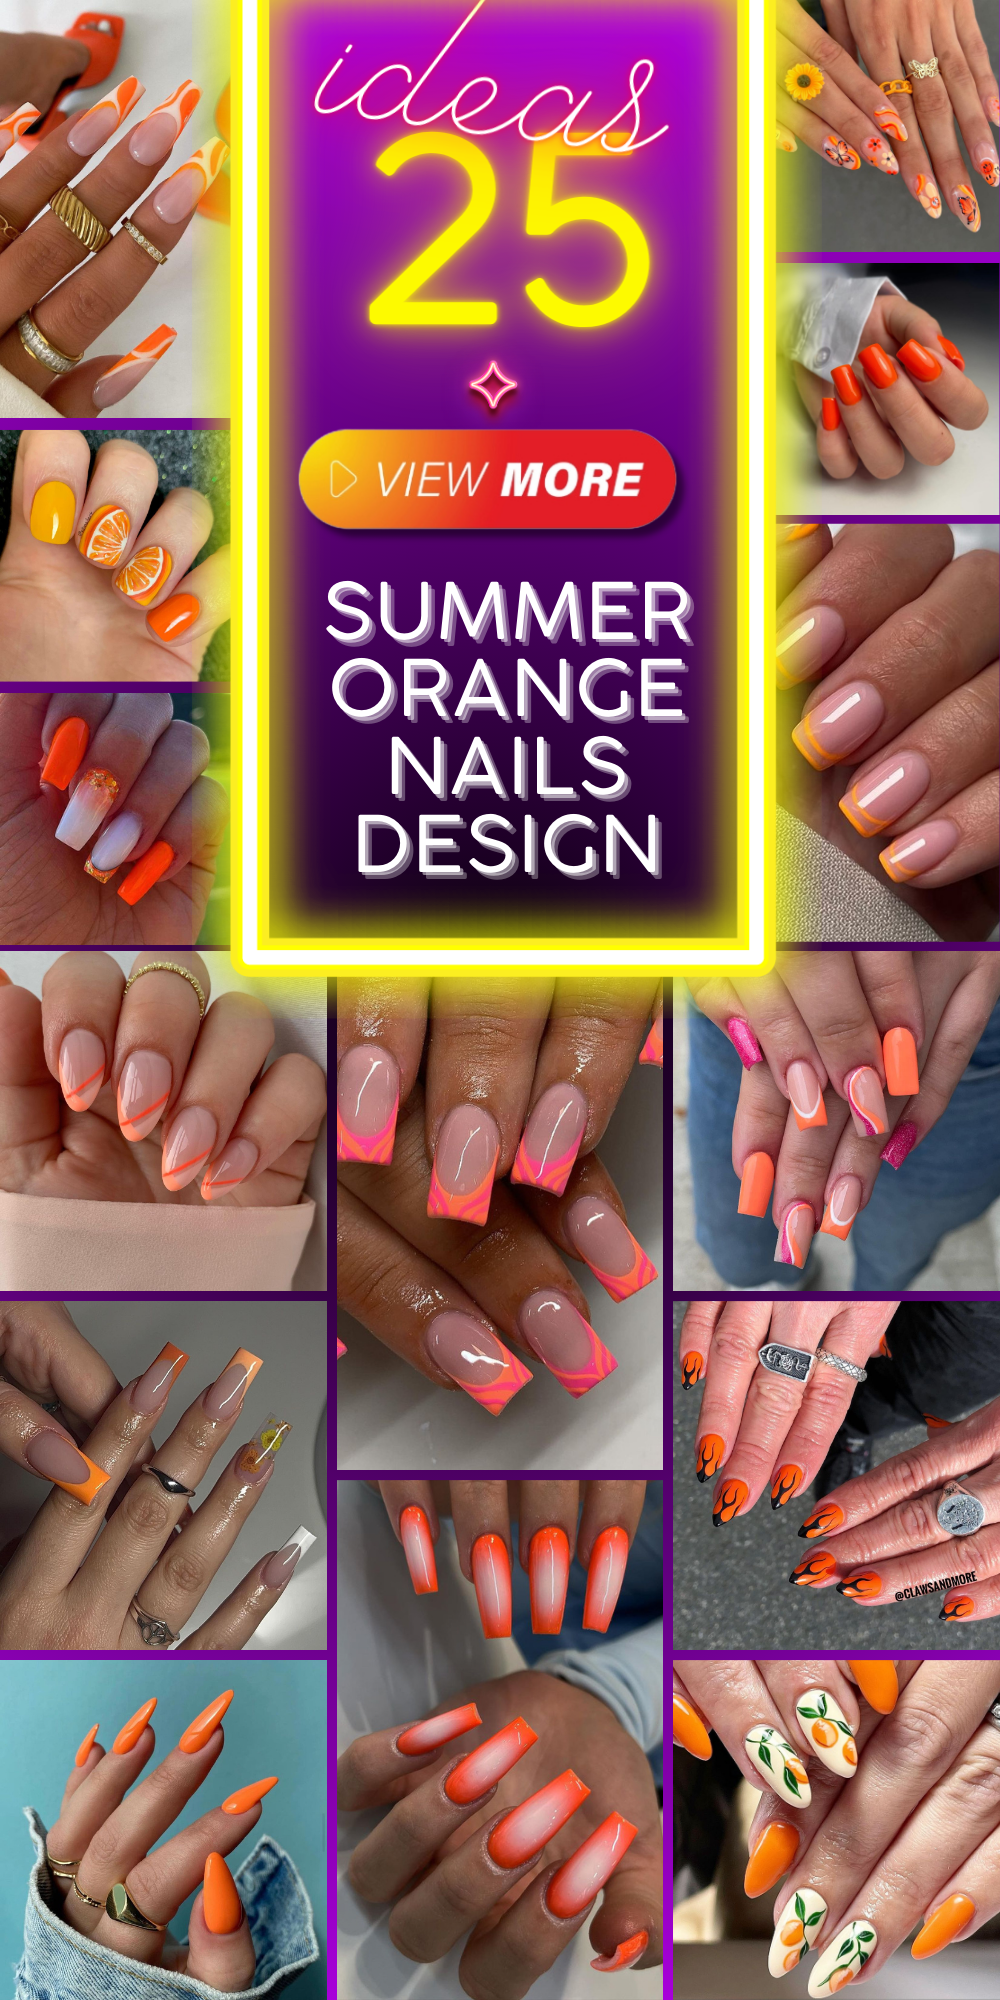
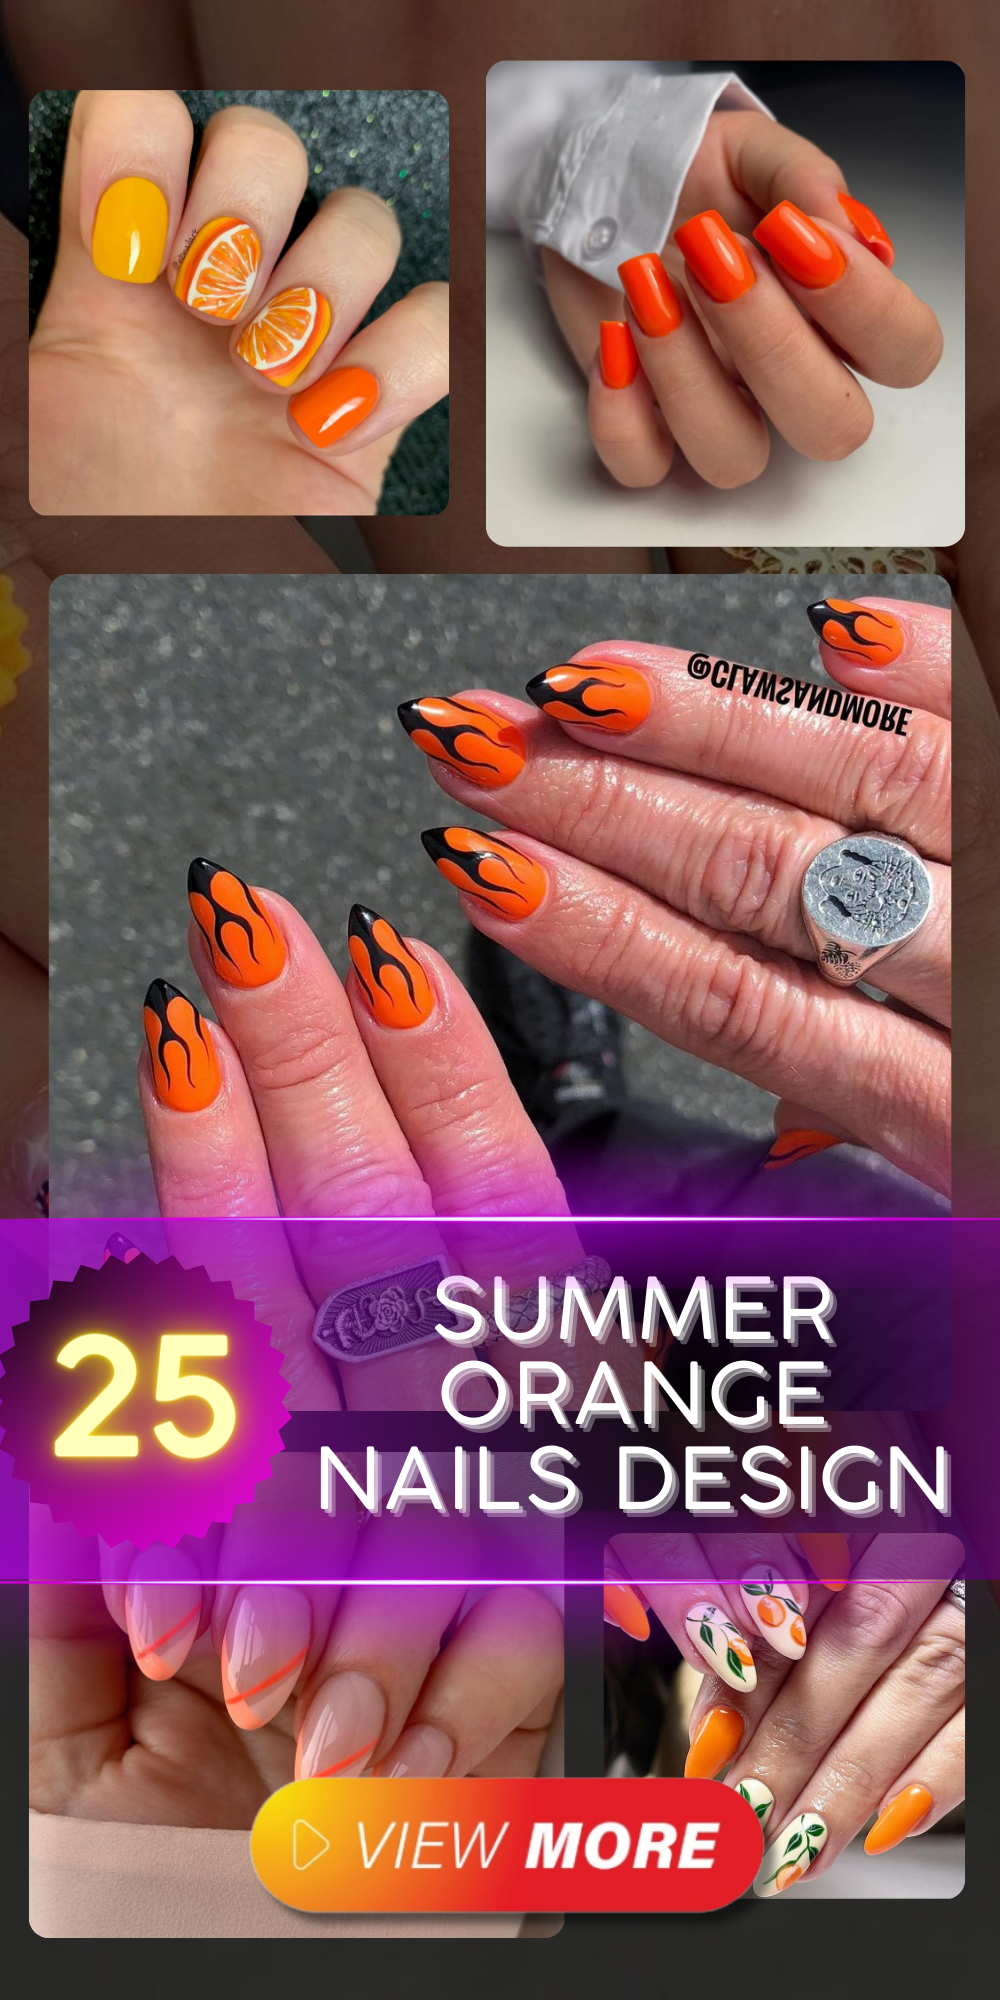
Isn’t it great to have a splash of color that mirrors the vibrancy of summer when the weather gets hotter and the days get longer? A summer orange nails design is an excellent option for doing just that! So, are you prepared to look at some shades that reflect this season’s energy and see how they can enhance your overall look?
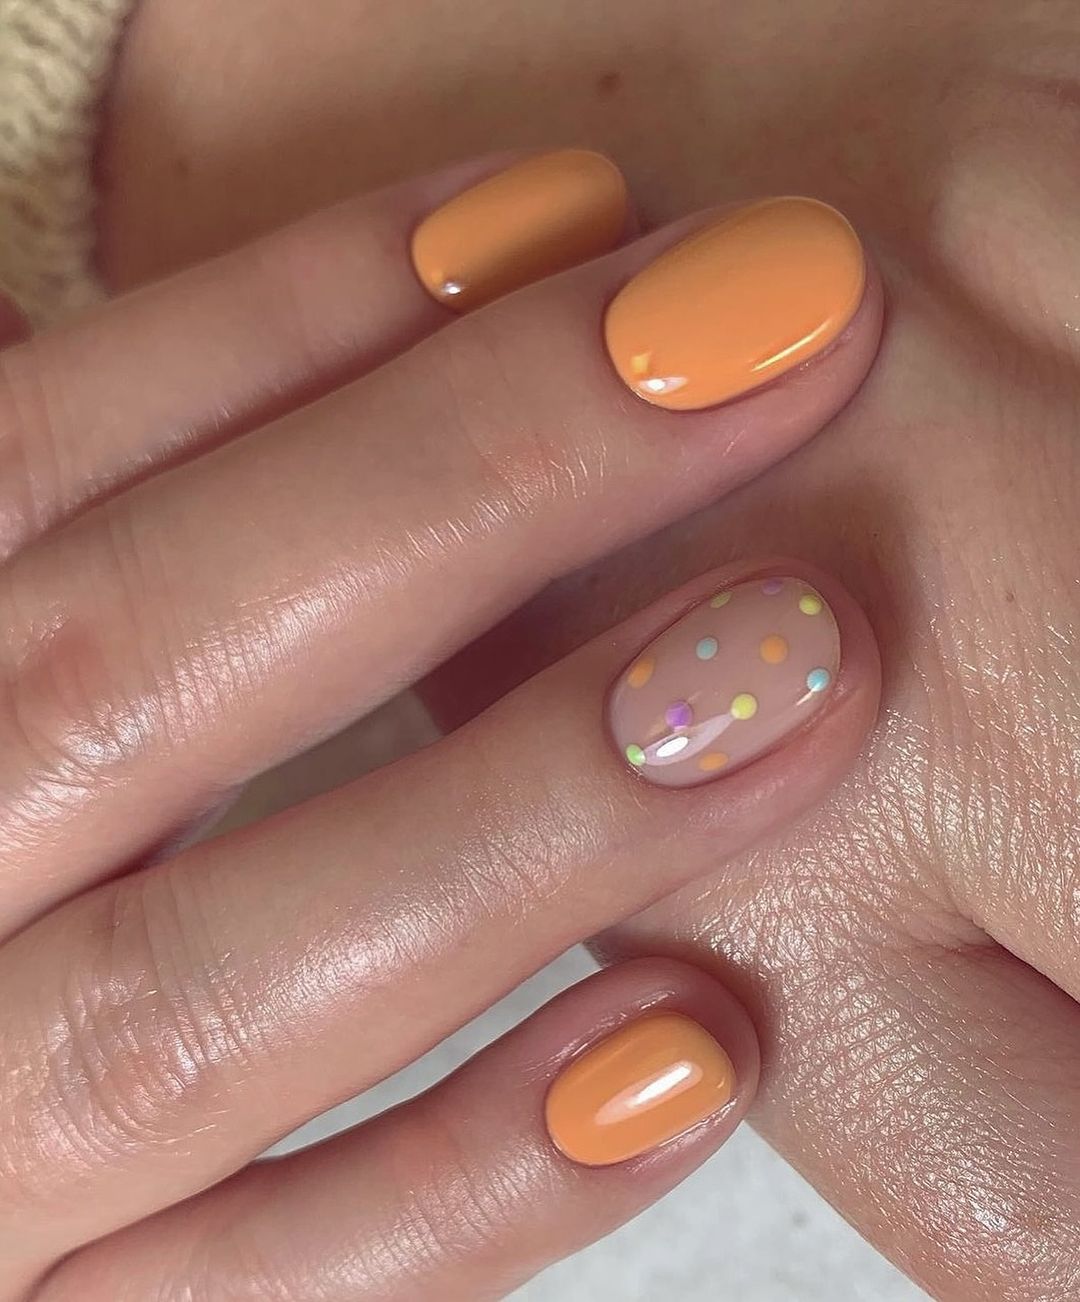
A Playful Twist on Short Nails
There is an attractiveness in a mani that combines the blazing bold of summer orange with the gentle fun of pastel touches. Envision nails covered in a smooth, creamy orange — each nail is a blank canvas for creativity. On one finger, little polka dots dance haphazardly; on others, the orange sings solo. This design isn’t just cute; it’s an ode to the joy of summer.
- A base coat to prep
- A bright orange polish that screams summer
- Pastel polishes for dotting
- A dotting tool for precision
- A glossy top coat for shine
Start off strong with a good quality base coat. Choose an orange polish that’s pigmented enough to get away with just one coat. Use your dotting tool to apply pastels in any pattern you like – this part is all about you! Don’t forget – seal it all in with a top coat so your design can survive even the wildest summer adventures.
A Splash of Neon on Long Nails
As far as summer is concerned, nothing beats neon. It’s just so alive — vibrant and energetic. And applied on elongated nails, it becomes a symbol for fashion-forwardness. But don’t get me wrong, not all neons are created equal. This particular one mixes fiery corals with green accents to create visions of tropical sunsets and lush palm fronds.
- A neon coral polish
- Some green polish for accenting
- A thin brush for detailed work
- And finally a matte top coat to finish it off
How to do it yourself:
- Start with clean, buffed nails.
- Apply the neon base in coats, letting each dry completely.
- Using a thin brush, add your green details — think abstract, think tropical.
- Finish with a matte top coat instead of the usual glossy finish; this will give your nails an artistic touch!
Classic Elegance with a Citrus Twist
Picture a design that combines the classic allure of a French manicure with the lively exuberance of summer orange. What does it create? A refined yet jaunty nail art for offices and beach gatherings.
- A sheer pink base polish to achieve natural look
- Bright orange polish for tips
- Thin striping tape for accuracy
- Fast-drying top coat for perfect finish
Once you have applied your base, use striping tape to mark out where the sheer pink meets bright orange tips. The trick is to keep hands steady and aim symmetry. If applied well, you will get something professional-looking but fun at the same time.
Bright Orange: The Neon Glow
Can you picture the most thrilling summer orange? The kind of orange that represents neon lights on a hot summer night. This is what the nails in this design look like; they are not afraid to be different. There is a balance between vibrant colors and elegant sparkles in this design, which is achieved through decorating it with thin silver lines and adding some bling.
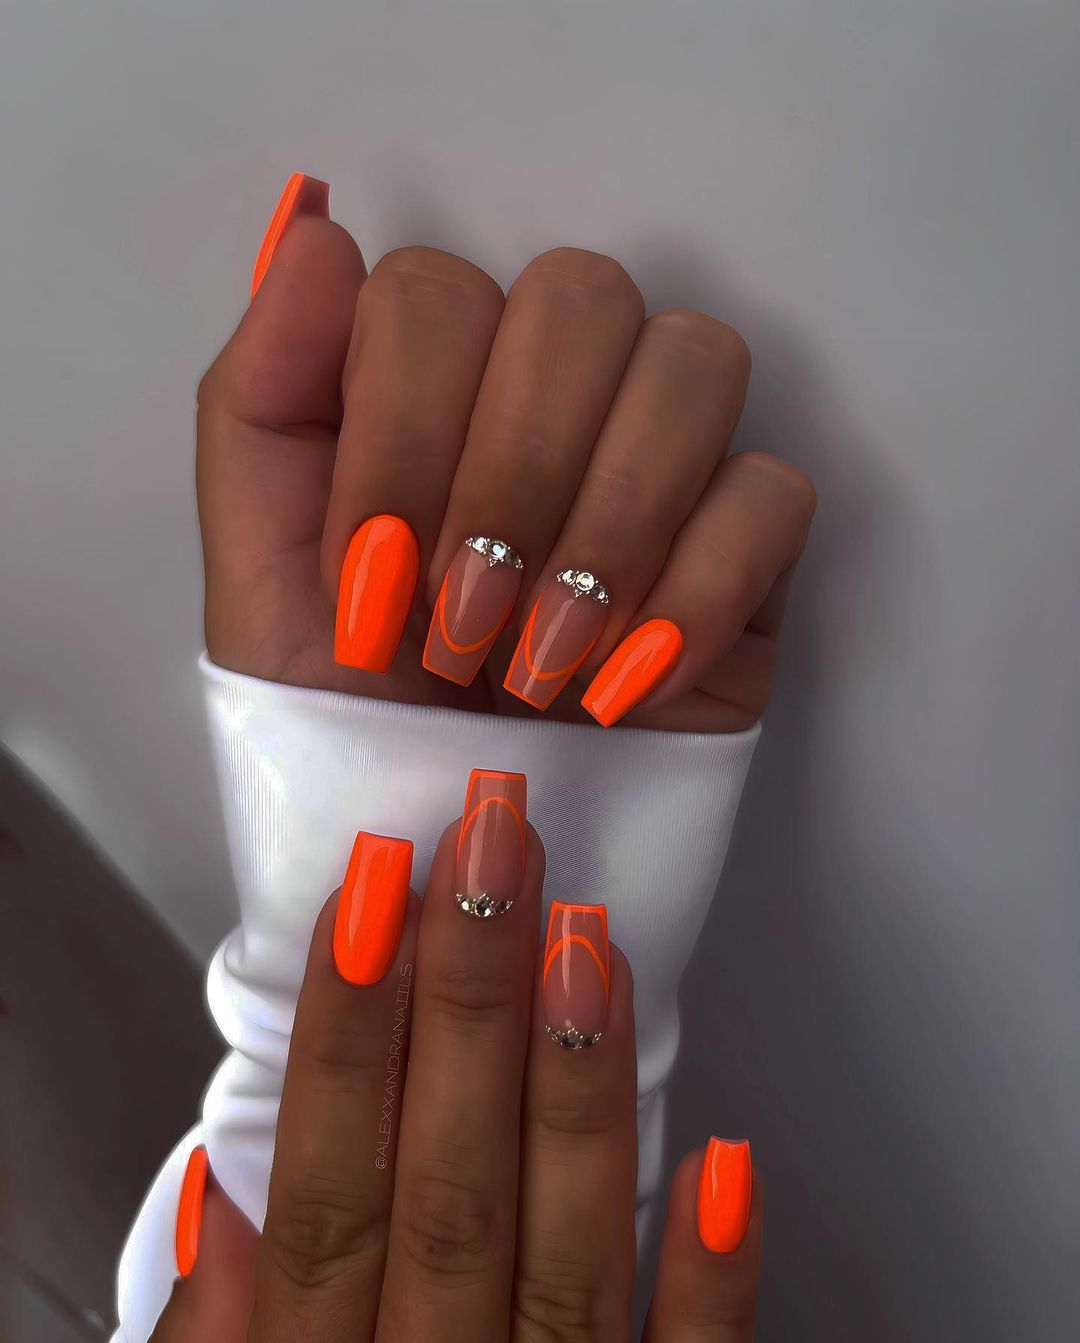
- High-voltage neon orange gel polish
- Sleek silver striping tape
- Glamorous rhinestones
- UV or LED lamp (for curing gel polish)
- Shiny topcoat (to seal in shine)
Start by prepping your nail well, ensuring it’s shaped perfectly. Apply the neon orange gel, then cure under lamp. With steady hands, apply striping tape and place rhinestones strategically for that luxurious feel. Finish off with top coat so that your gems stay put and your neon glow doesn’t fade away.
Save Pin

Sunset Ombre: The Gradient of Dreams
Envision the blending of colors during sunset; gentle merging and mixing of soft corals with bright oranges. This type of shading is what resembles the summer sky most, a fade that tells you about hot nights and cold drinks. It’s a quiet but mighty design which is both fashionable and classic.
- Several orange varnishes that range from light to dark
- A makeup sponge (to create the gradient)
- Top coat (for smooth transition)
- Nail polish remover + clean-up brush for excesses
Apply a thin layer of light orange onto your nails as a base. On a makeup sponge, paint strips of polish going from darkest to lightest shade then press it on your nail. Repeat until you’re satisfied with how blended it looks; use clean-up brush to get rid off stray paints, finish with top coat for perfection.
Geometric Chic: Orange and Art
This is a modern design masterpiece. Angular geometric designs coupled with playful application of empty space bring about an artistic yet sophisticated appearance. The orange hues are the main attraction; however, it’s the precision of lines that keeps you engaged.
- A bottom coat to shield natural nails
- Orange polish for base color
- Tape or nail stencils for geometrical accuracy
- A detail brush for freehand drawing
- A top coat to give final touch
Apply the groundwork and let it dry. Make your design using tape or stencils; then stay within the lines when painting for sharpness. Detail brush will help in making a sketch by hands. Finally, put on a protective top coat which will give it some shine.
The Canvas of Summer: Marbled Orange Elegance
In the beauty of marbled art, the nails are all about contrast – bright orange swirls against soft white backgrounds and a touch of gold foil to take it up a notch. It’s a design that speaks wealth but also mixes in summer trends with timeless elegance.
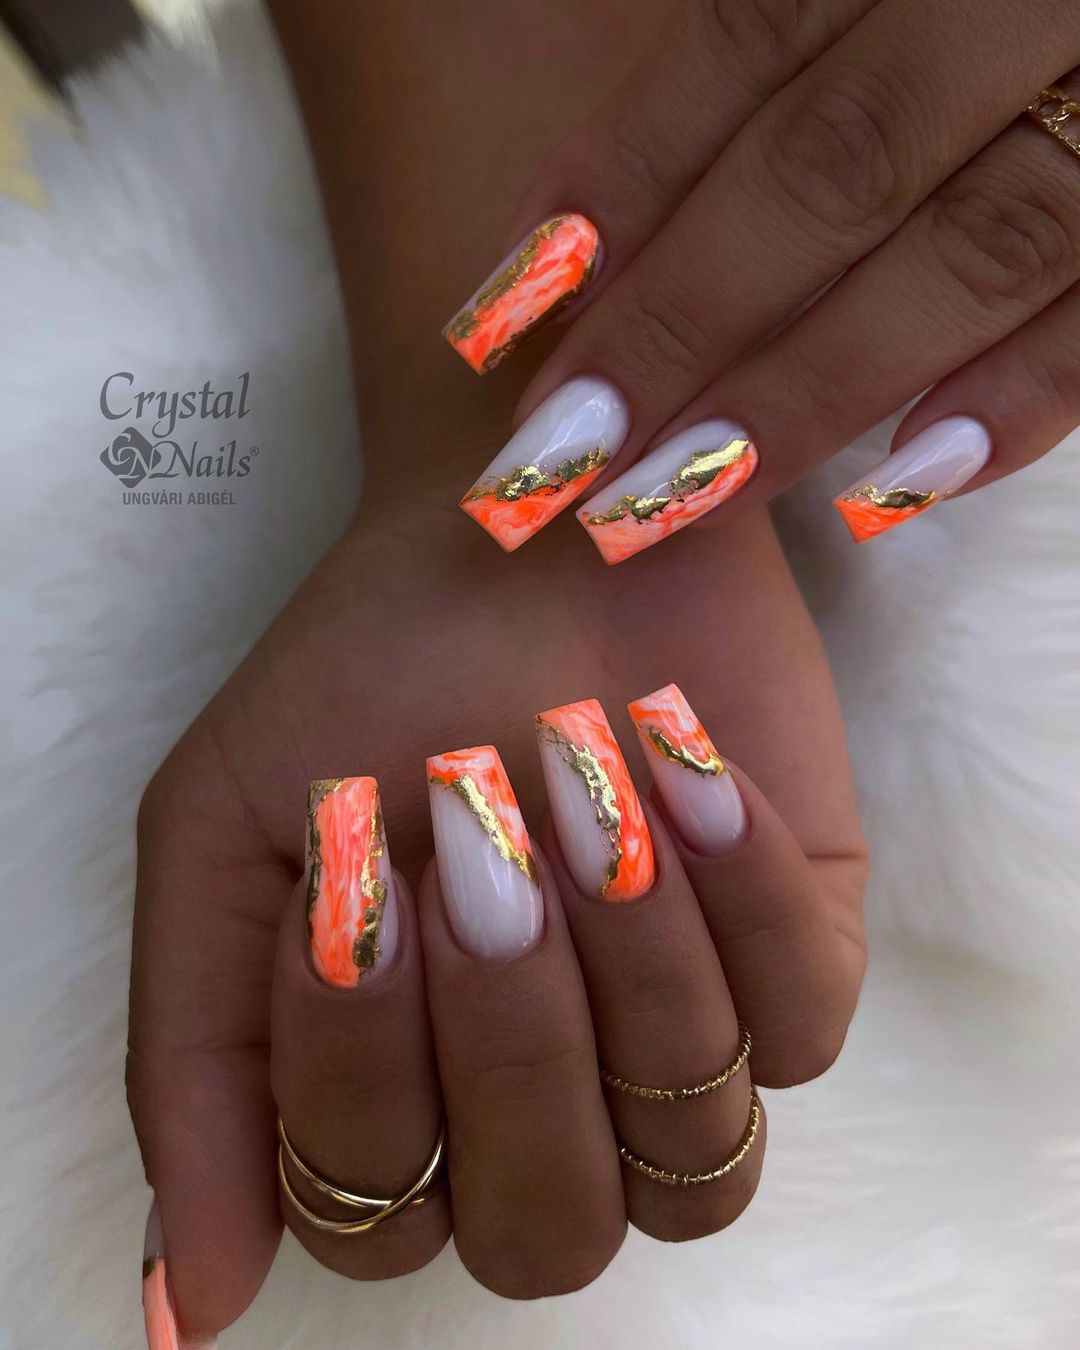
- Gel polish in white for the base
- Acrylic paint in orange and gold for marbling
- Gold leaf for embellishing
- Dotting tools and fine brushes for detailing
- Non-wipe glossy top coat for long-lasting shine
Start off by painting your nail solid white then curing it. Next, drop orange paint onto the nail with a dotting tool. Using a fine brush, swirl the color around into a marble pattern and add small pieces of gold leaf. Finish it all off with some top coat to seal in that beautiful shine!
Coral French Tips: A Modern Take on a Classic
A French tip with a coral edge is the idea behind this design. This classic with a twist is perfect for anyone looking to add some color without being too flashy or over the top. What makes it stunning is how well it blends from your actual nail into the painted part.
- A sheer pink polish (for the base coat)
- Bright coral polish (to create an accent)
- Protective clear coat (for shine and durability)
- Thin strips or stencils (for clean lines)
Apply two coats of sheer pink onto clean nails, letting each layer dry completely before moving on. Once they are dry, place one strip across each fingertip where your natural nail ends, then paint just above it with two strokes of bright coral. While the polish is still wet, remove both strips at once and finish by applying a clear coat over everything in order to blend colors together smoothly.
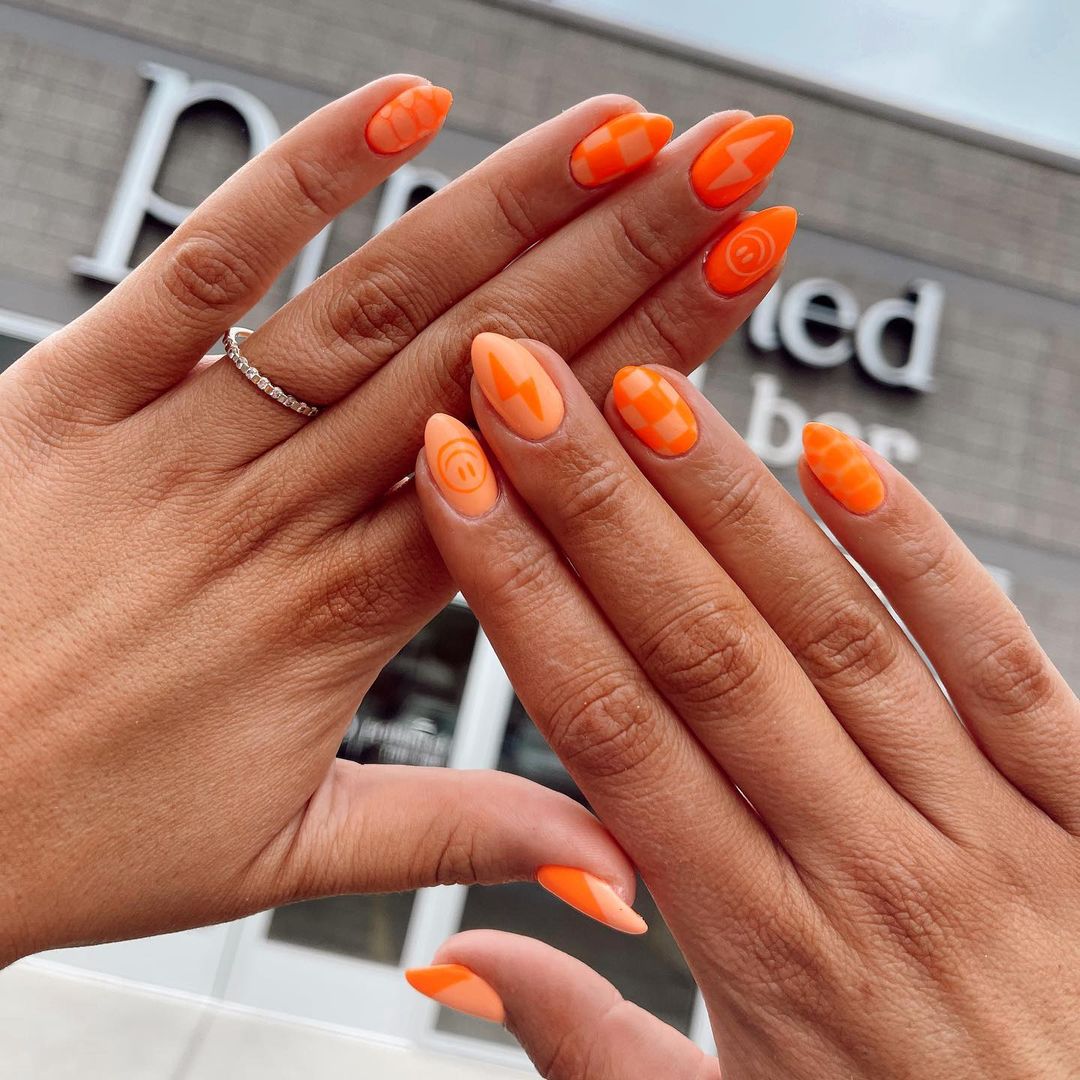
Citrus Delight: Bold and Playful
Fun, vibrant orange is highlighted by quirky designs indicative of individuality and panache. This plan is all about being playful and embracing the fun side of summer. It’s an ice breaker, a way to show how much you love life.
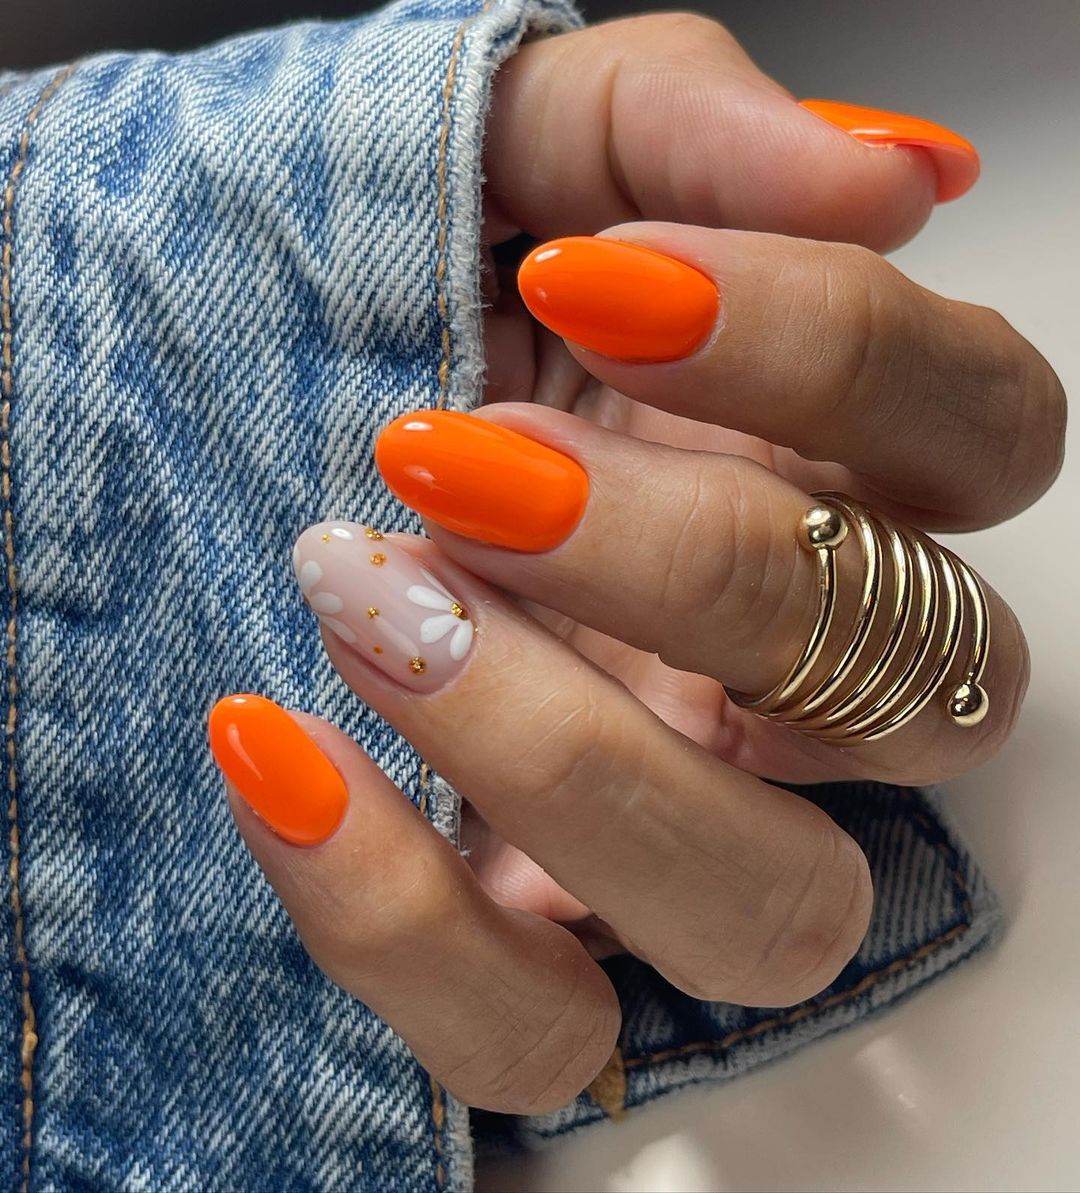
- Bright orange nail polish
- White nail polish
- Fine detail brush
- Glossy or matte top coat
Apply an orange base and let it dry. Use your detail brush dipped in white polish to create patterns that represent your playfulness; whether they’re stripes, checks or dots – make them yours! Finish off your design with a glossy or matte topcoat that adds some personalization.
Save Pin
Festival of Colors: Floral and Blue Accents
These nails celebrate the arrangement and color, communicating an artistic synthesis of floral patterns and a vibrant summertime palette. They are creative in that they blend blue with orange to convey a new-season feel which is sophisticated yet fun at the same time.
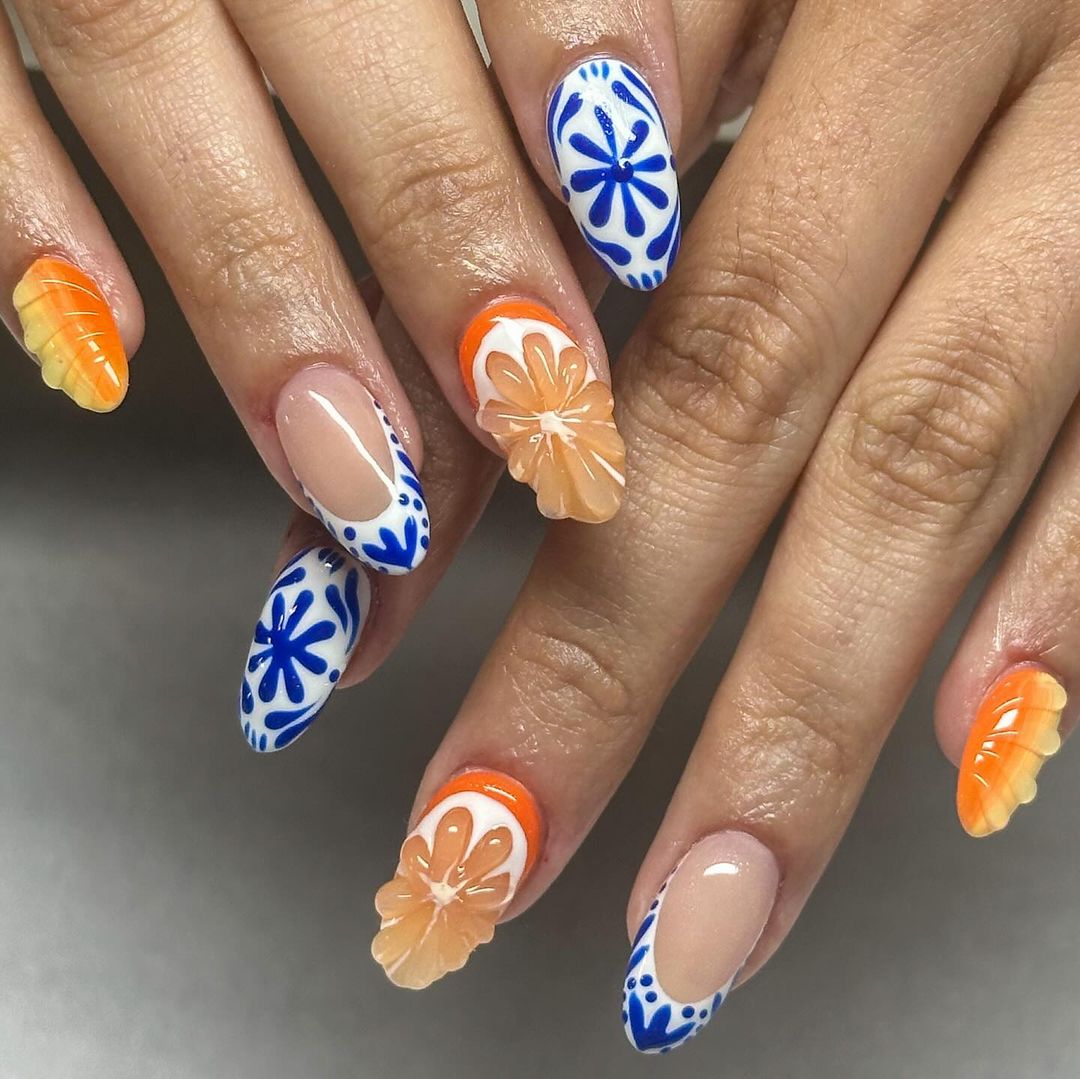
- Use light pink gel polish for a soft background
- Acrylic paints in orange and blue for your flowers
- Fine-tipped brushes to paint delicate petals
- A shiny top coat to protect your design
Start by applying the light pink base, then hand-paint your orange and blue flowers using a small brush. It’s all about stroke delicacy, petal shape accuracy, and playing with colors that scream summer on each design.
Sunset Glitter Stripes: Glow with Elegance
Just think about the soft colors of the dying sun as it sets, orange lines on the horizon, and now put that look on your nails with some sparkle. This can be achieved by covering the nails with glitter stripes over a soft peach base which represents the shine of an evening summer sky.
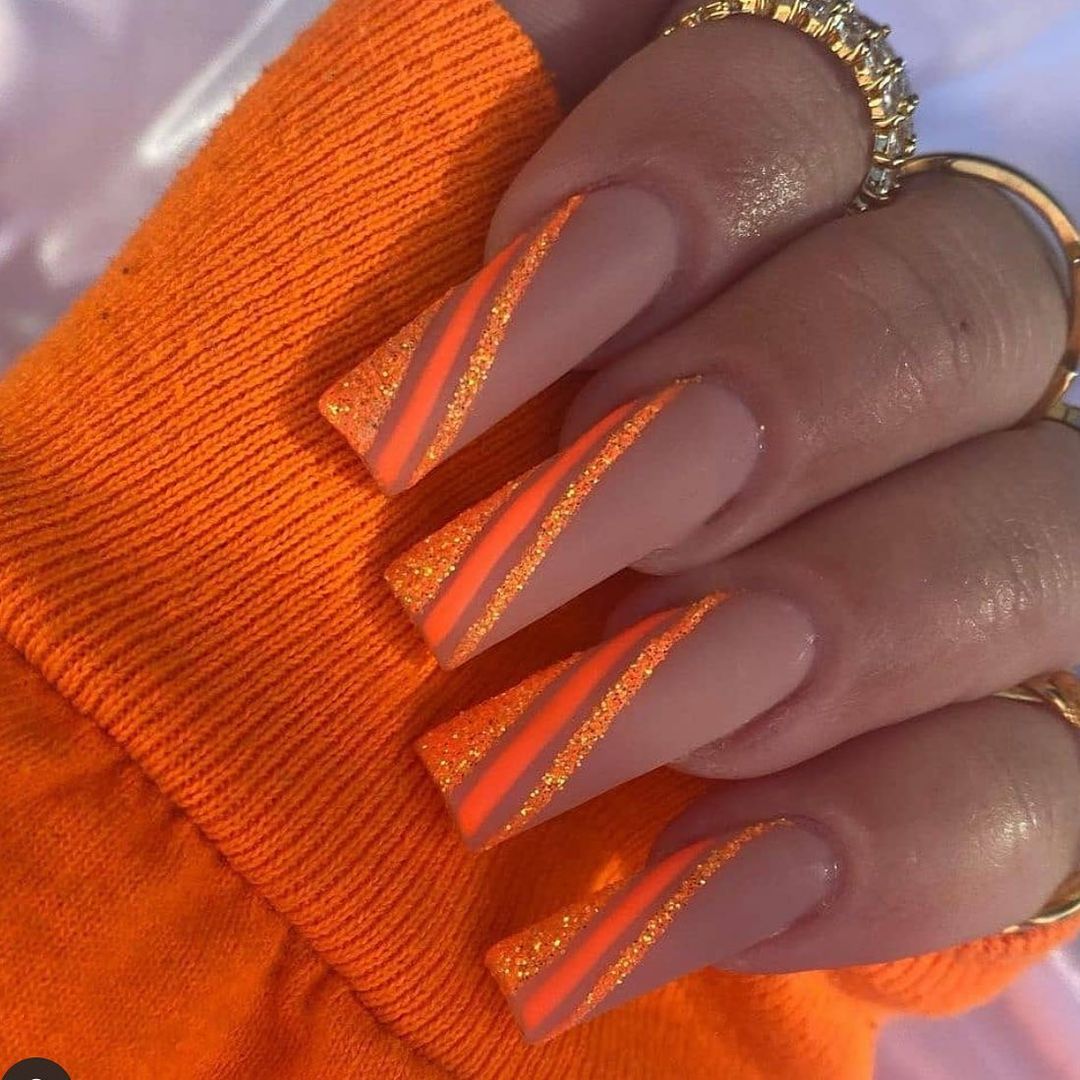
- Warm base with peach gel polish
- Striking stripes made from orange glitter
- Perfectly straight lines thanks to striping tape
- A contrasting finish achieved by using matte top coat
Apply one layer of peach polish onto your nail beds. After drying completely, place striping tape horizontally across each nail bed. Next apply even layer(s) of orange shimmer making sure you cover between each striping tape. Once all polish is applied remove tape immediately revealing clean crisp lines filled with sparkling color. Finish off with a coat or two of matte topcoat to really make those glitters pop in any lighting especially sunlight!
Abstract Orange Waves: The Bold Swirl
This means that the design has a nude surface with orange curves and swirls which are confident and leading in fashion. The design is an acknowledgement of abstraction, where the freedom of curvilinear shapes dominates like the rhapsodic summer moments.
- A base coat to give you a neutral look
- Waves color is vibrant orange
- Swirls can be drawn using a small brush
- For a glassy finish, apply a top coat.
Apply your nude base and let it set. Dip your detail brush in orange polish and freehand the swirls and curves with confidence. The look is about movement and fluidity, a perfect pairing for long, laid-back summer days. Finish with a glossy top coat for durability and shine.
Whimsical Wonderland: Butterflies and Blooms
In this collection, nature’s own art comes alive as butterflies flutter among flowers in bloom. The soft pastels mixed with vibrant summer orange make for a joyful story told through manicure — it combines the delicate with the brave.
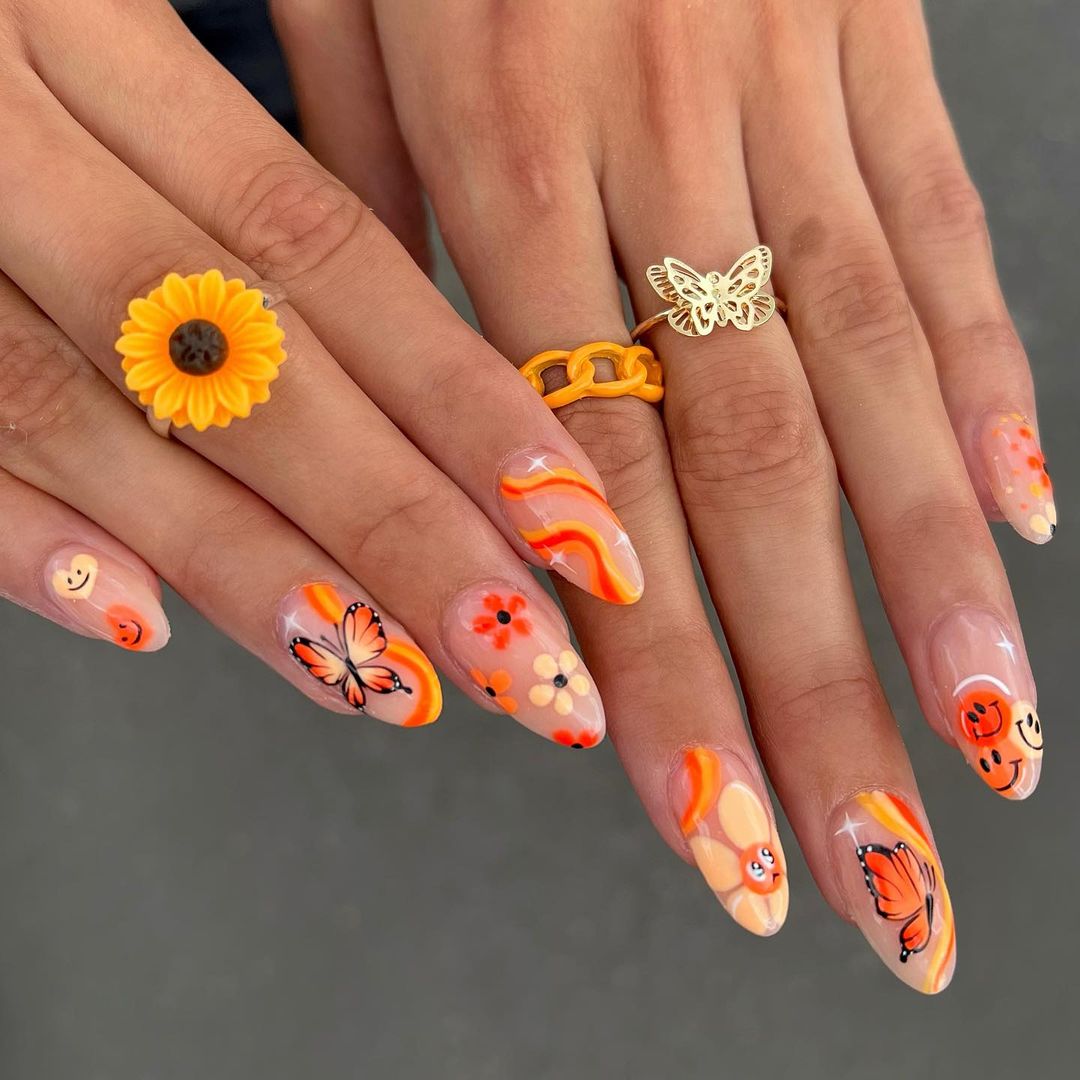
- A barely-there base coat with a sheer nude polish
- Polishes in pastel shades, white, and orange for butterflies and flowers
- Dotting tools and detail brushes to ensure accuracy
- Glossy topcoat that provides long-lasting ethereal shine
Begin by applying the base color then paint your blooms and butterflies with a steady hand. Stroke thinly across wings while using dots at centers of petals before finishing off bright splashes of orange representing vibrancy found within gardens during summertime.
Summer Citrus: Fresh and Zesty
Nothing like citrus screams summer, with its vibrant and tangy flavor. The inspiration for this manicure is the fruit itself; against a bright yellow backdrop, refreshing juicy slices of orange make quite a statement.
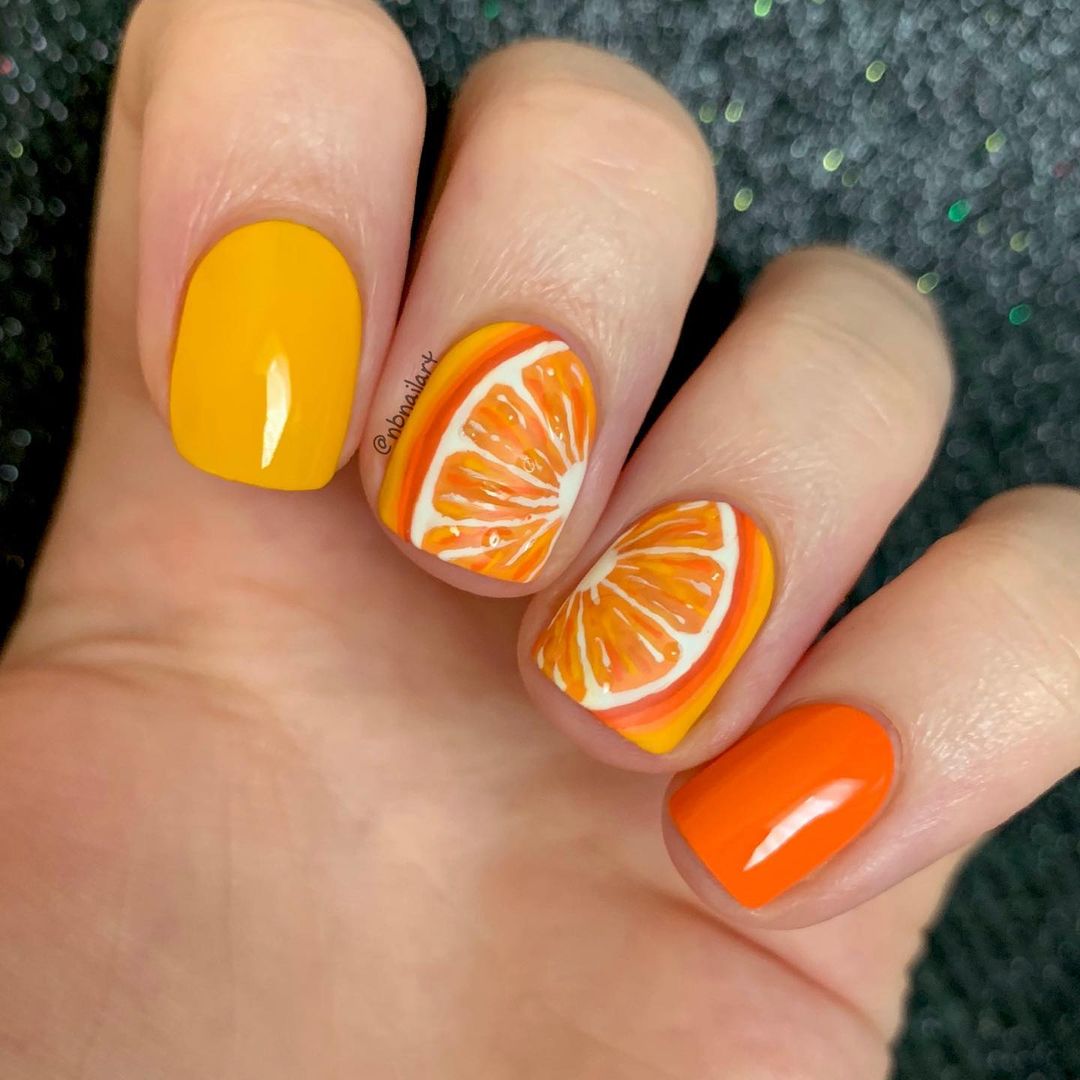
- Bright yellow nail polish for the sunny base
- Orange nail polish to create citrus wedges
- White and light orange polishes for fruit details
- A glossy top coat to add that juicy shine
Paint on the orange sections using a thin brush over your yellow foundation. Use white or light orange hues for these segments in order to mimic them accurately. Don’t forget about making it look as cooling as eating an actual piece of this fruit when designing!
The Classic: Bold Orange Full Cover
At times, simplicity can say so much. A single color can be loud and confident in a way that nothing else quite matches up to it like the full coverage of a deep, rich orange does for example. This timeless aesthetic is perfect for anyone who wants their love of vibrant colors to show through every season–and especially during the warmest months.
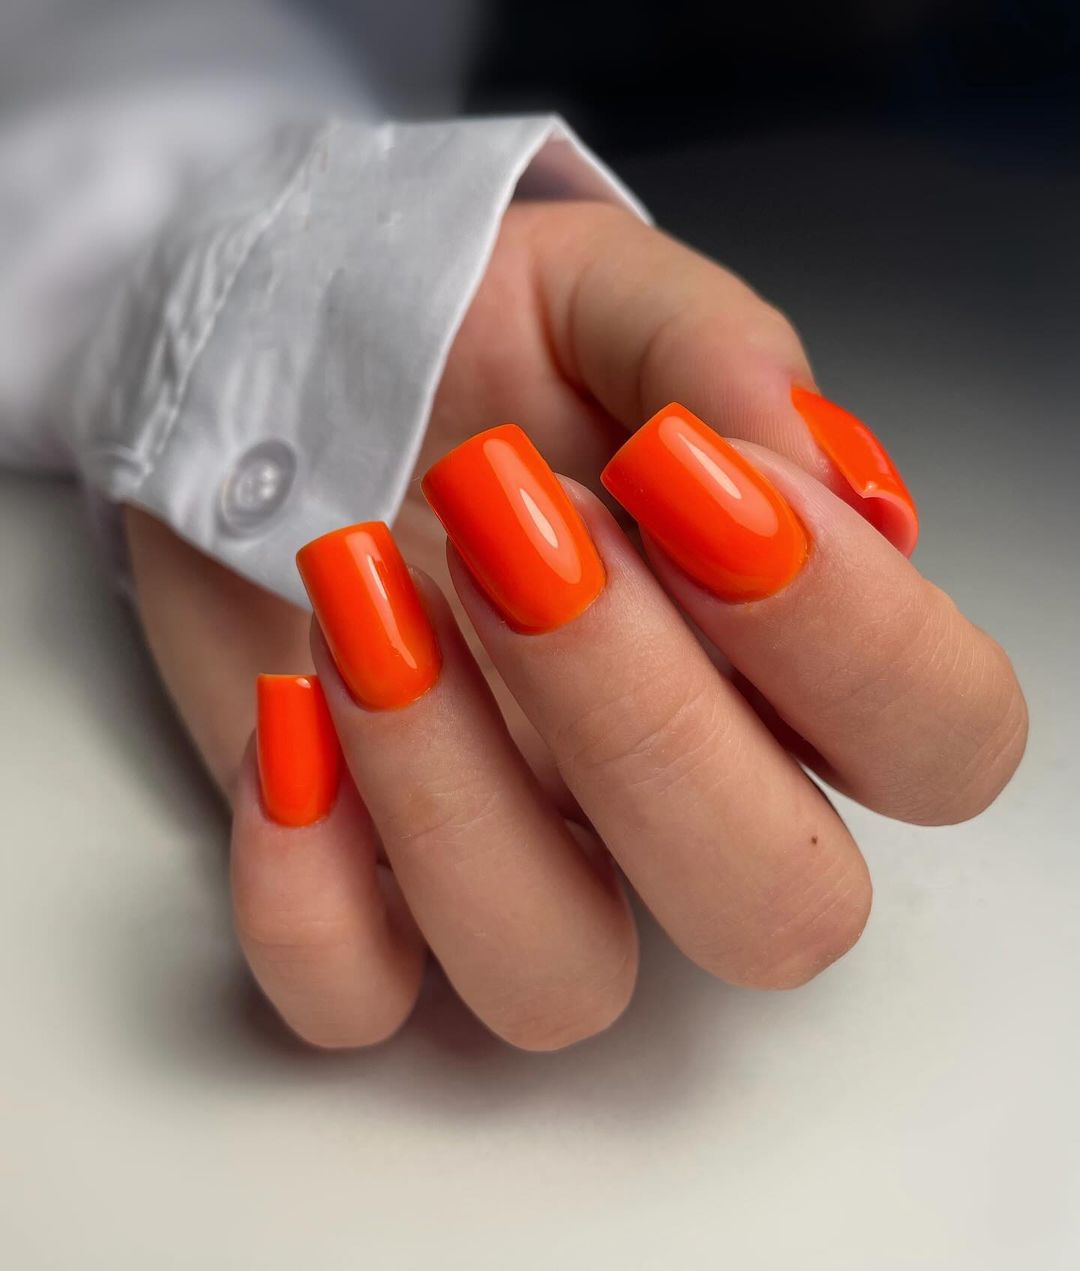
- Full-coverage deep orange polish
- Base coat (for protection and smoothing)
- Glossy topcoat (for extra shine)
Start with clean nails; apply base coat. Next, paint on two coats of your chosen hue for complete opacity. Once dry, finish with high-shine gloss – this simple design is sure to catch attention all summer long!
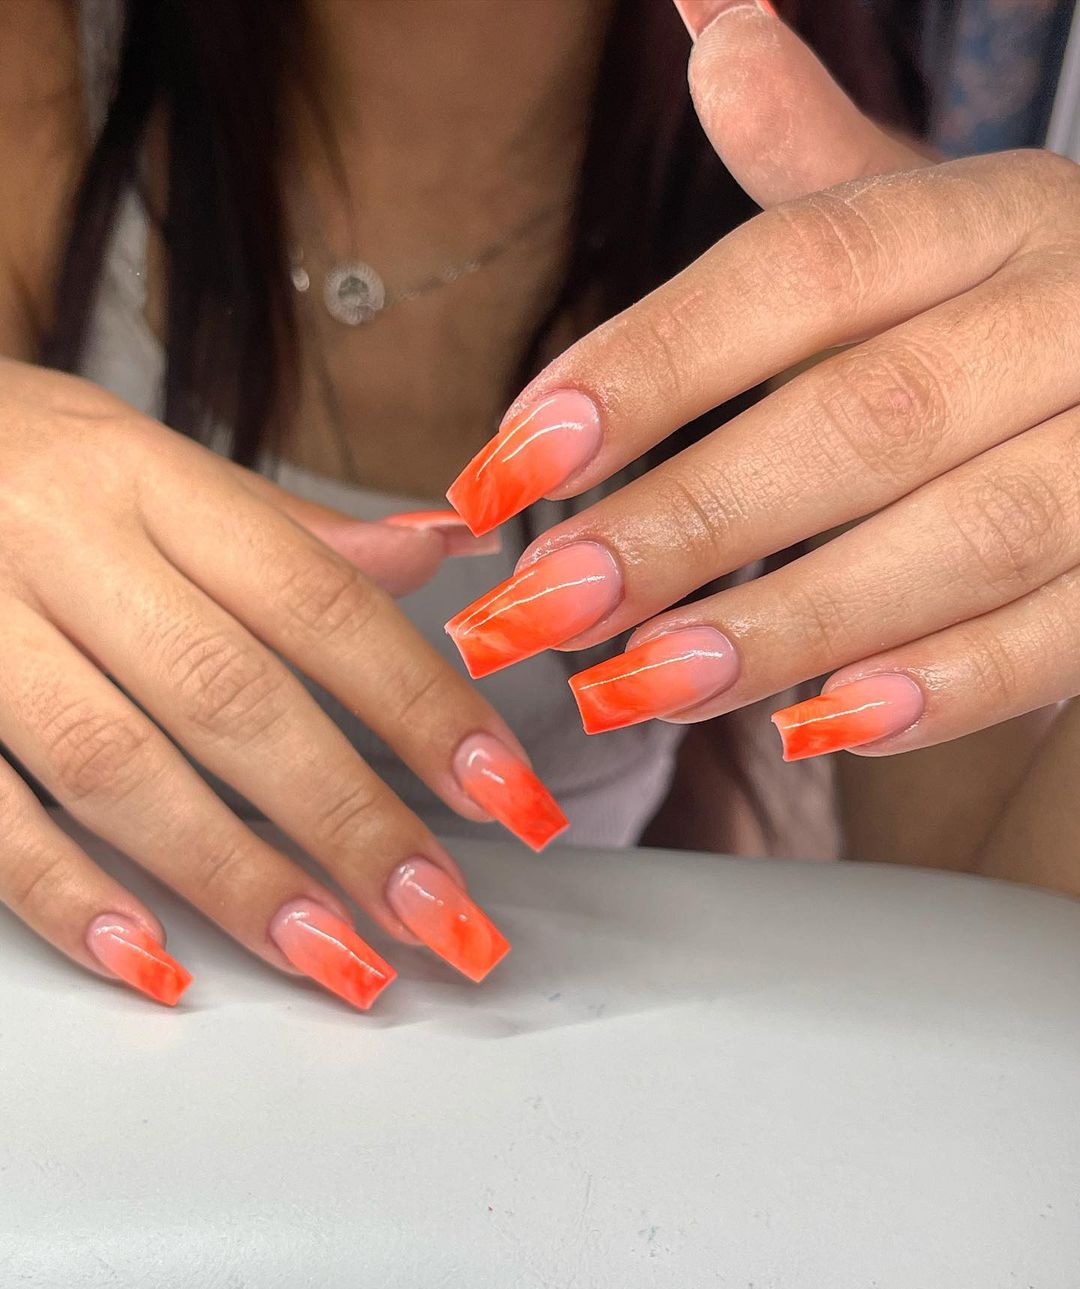
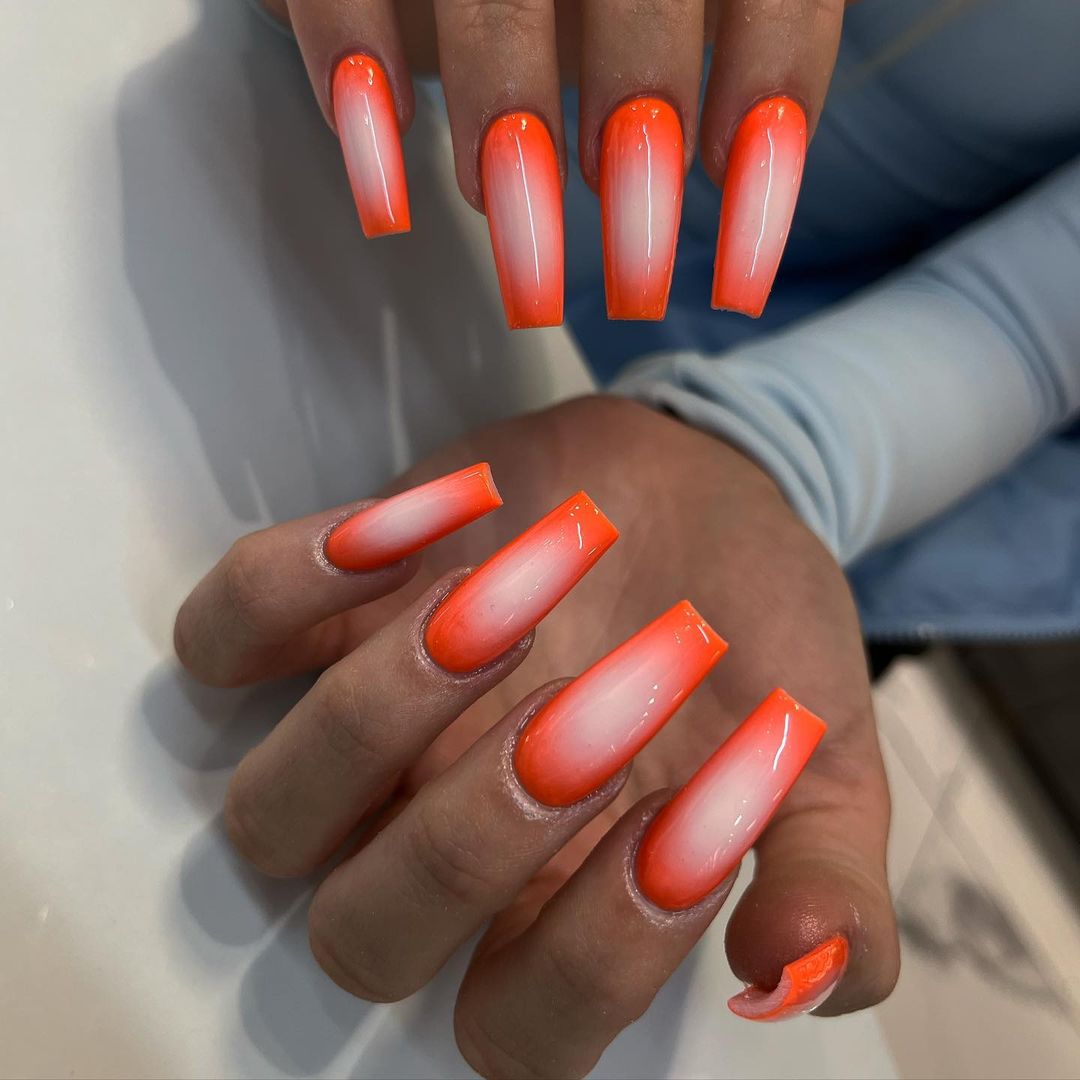
Gradient Dreams: Orange Sunshine to Sheer Elegance
At the beginning, this design has an entire burst of orange at the ends, but then it fades into a clear beauty near the cuticle. This is a lovely gradient that imitates the slow ebbing of a summer sunset. Like having a piece of twilight sky right at your fingertips.
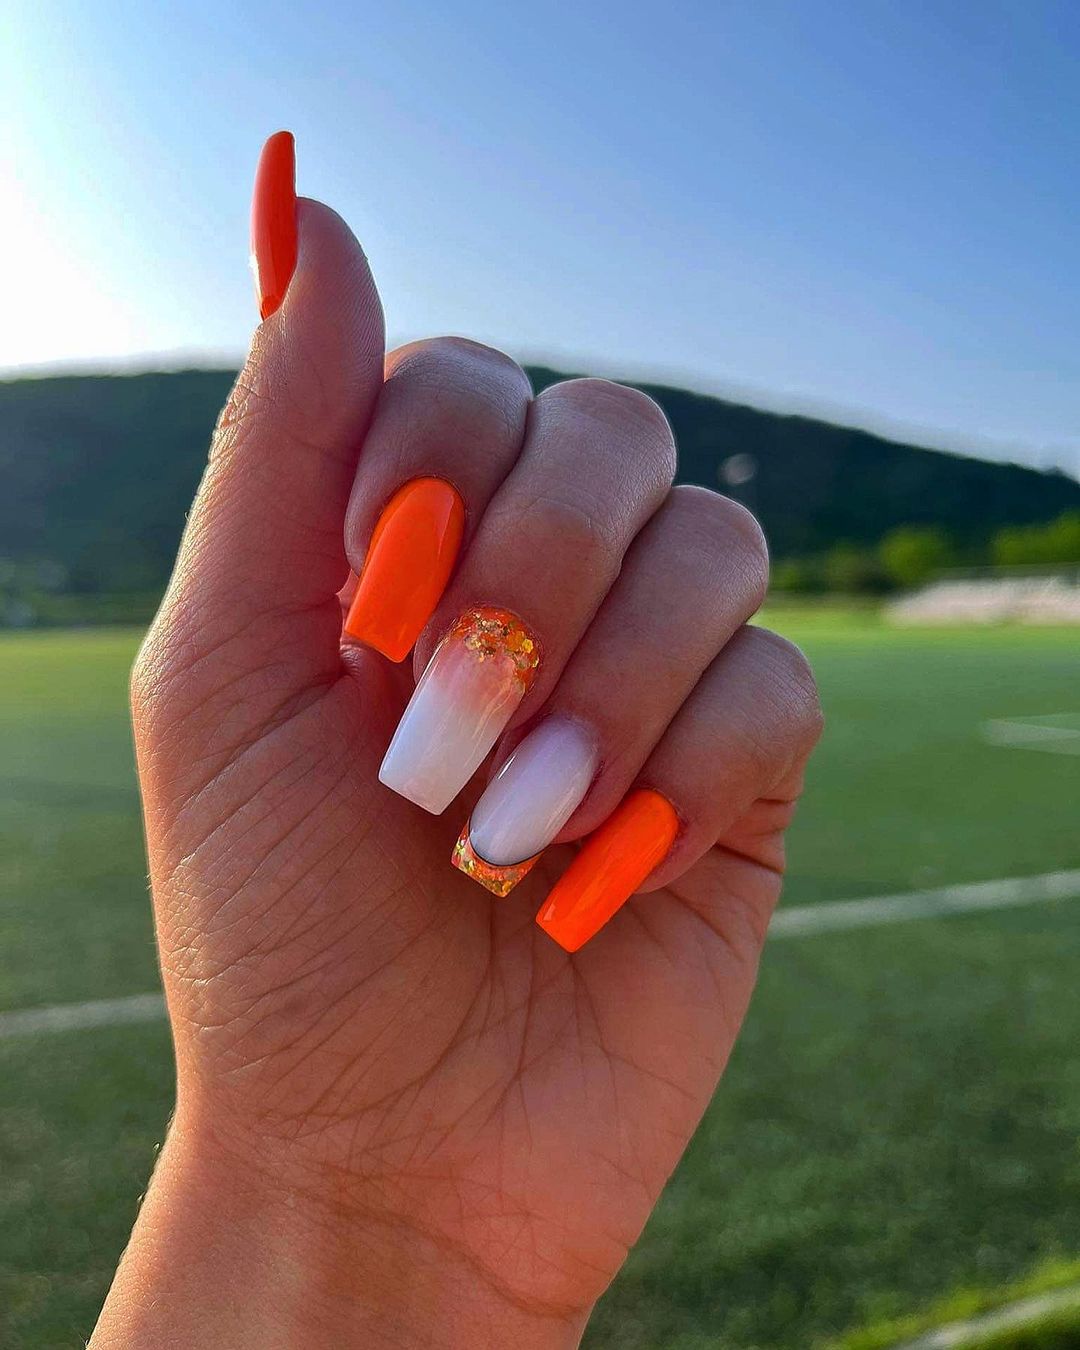
- Vibrant orange polish for tips
- Sheer nude or clear polish for gradient effect
- Touch of glamour gold foil
- A sponge to blend perfectly
- High shine top coat to seal everything in place
Put on sheer base and while still tacky, use sponge to dab orange polish starting from tip downwards creating soft fade. Add some lux with bits of gold foil. Finish off with top coat for glass like sheen that lasts.
Line Art: Minimalistic Chic
Here’s minimalism meeting liveliness. This layout contains plain but daring lines on a pinkish-tinged foundation; the combination is quite bold and classy. It’s a nail art that shows sometimes less is more.
- Blush nude polish for a soft, feminine base
- Orange striping polish or tape for precision
- A steady hand or a nail art brush for the fine lines
- A durable top coat for a lasting impression
Paint your nails with the blush polish. Once dry, use striping tape or a brush dipped in orange polish to create those crisp, clean lines. Whether you opt for straight lines or playful geometrics, the key is precision.
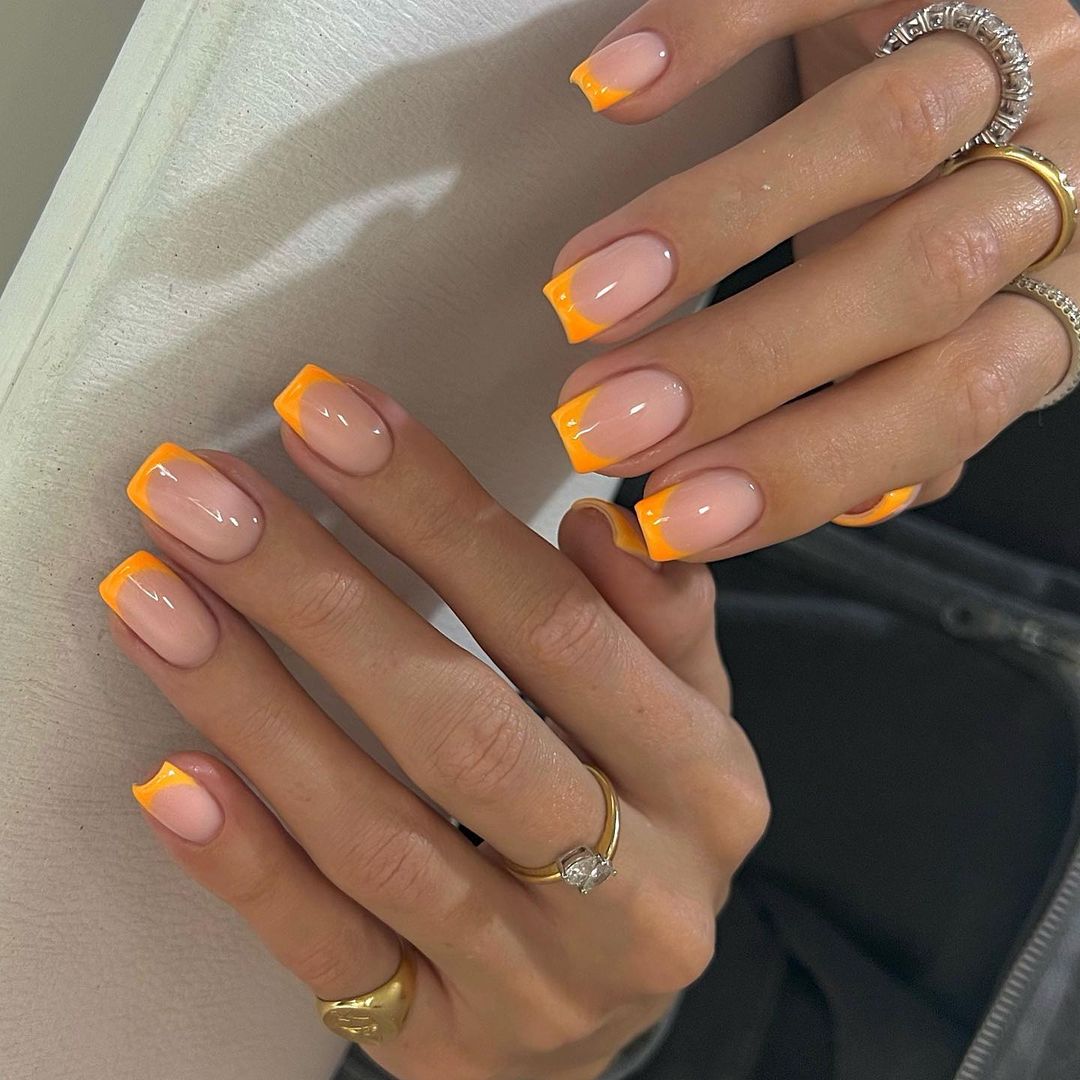
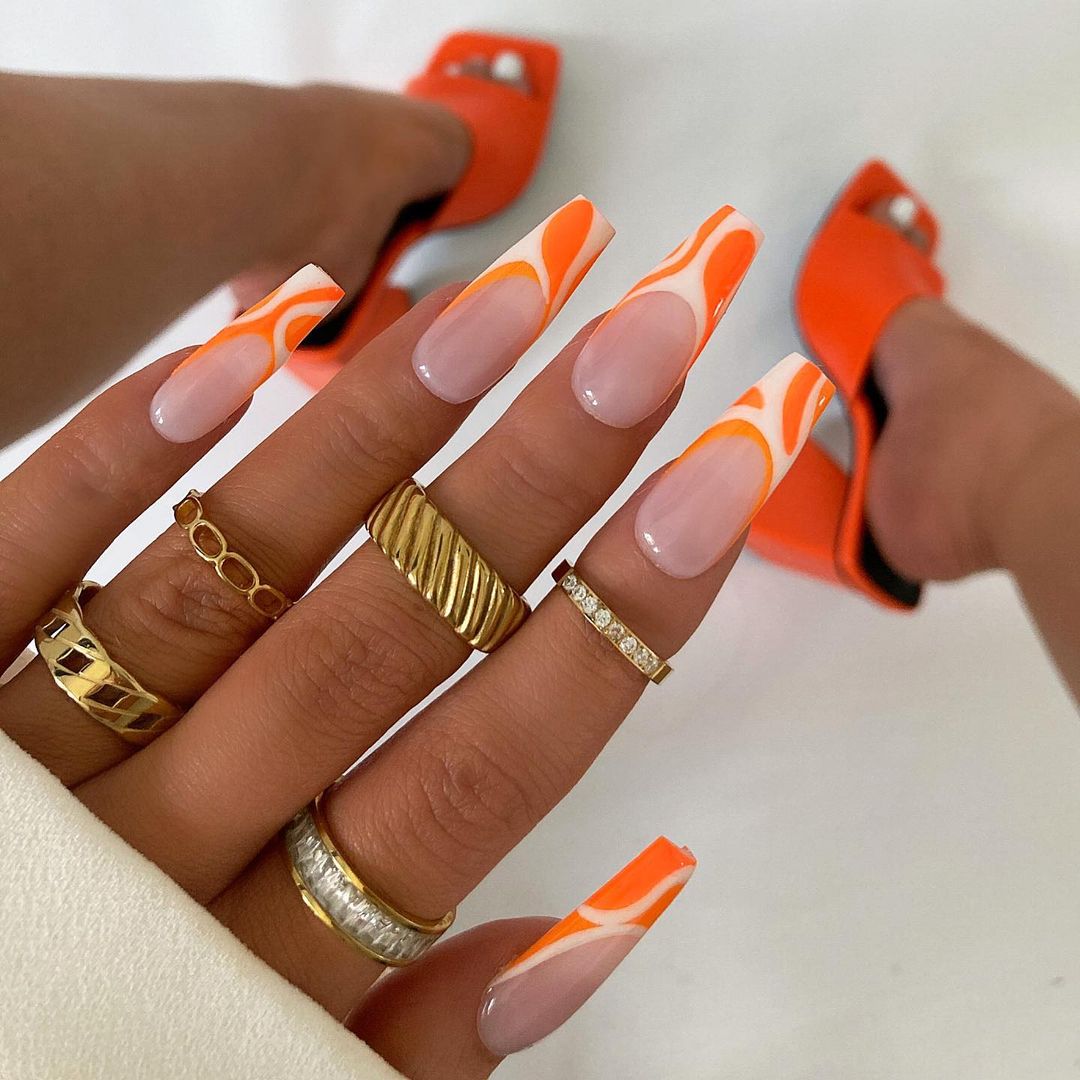
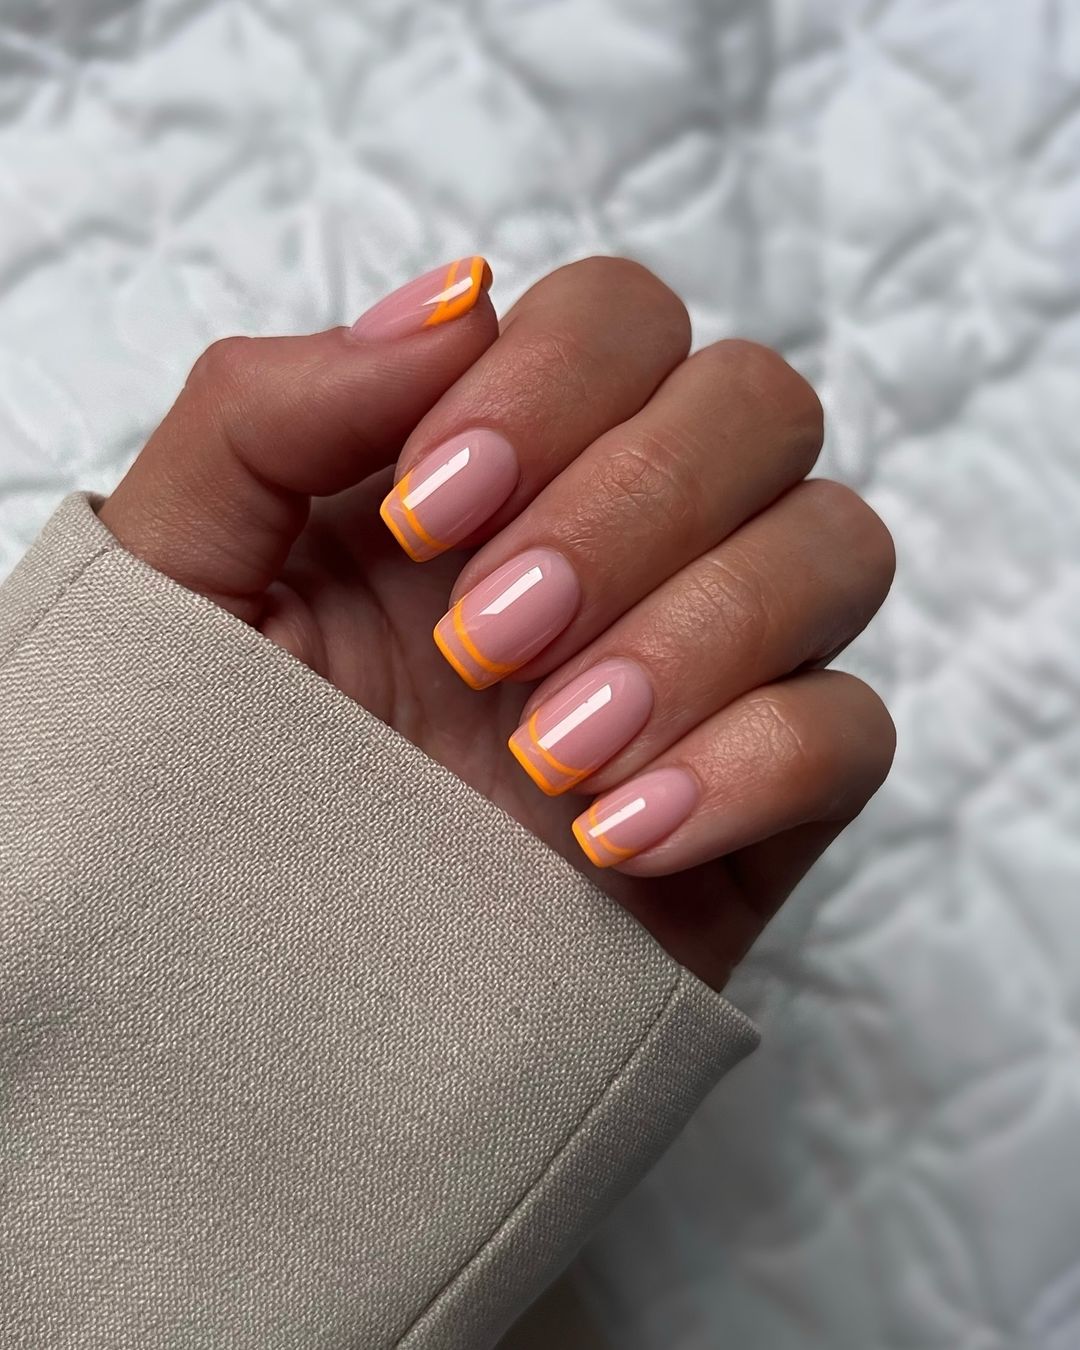
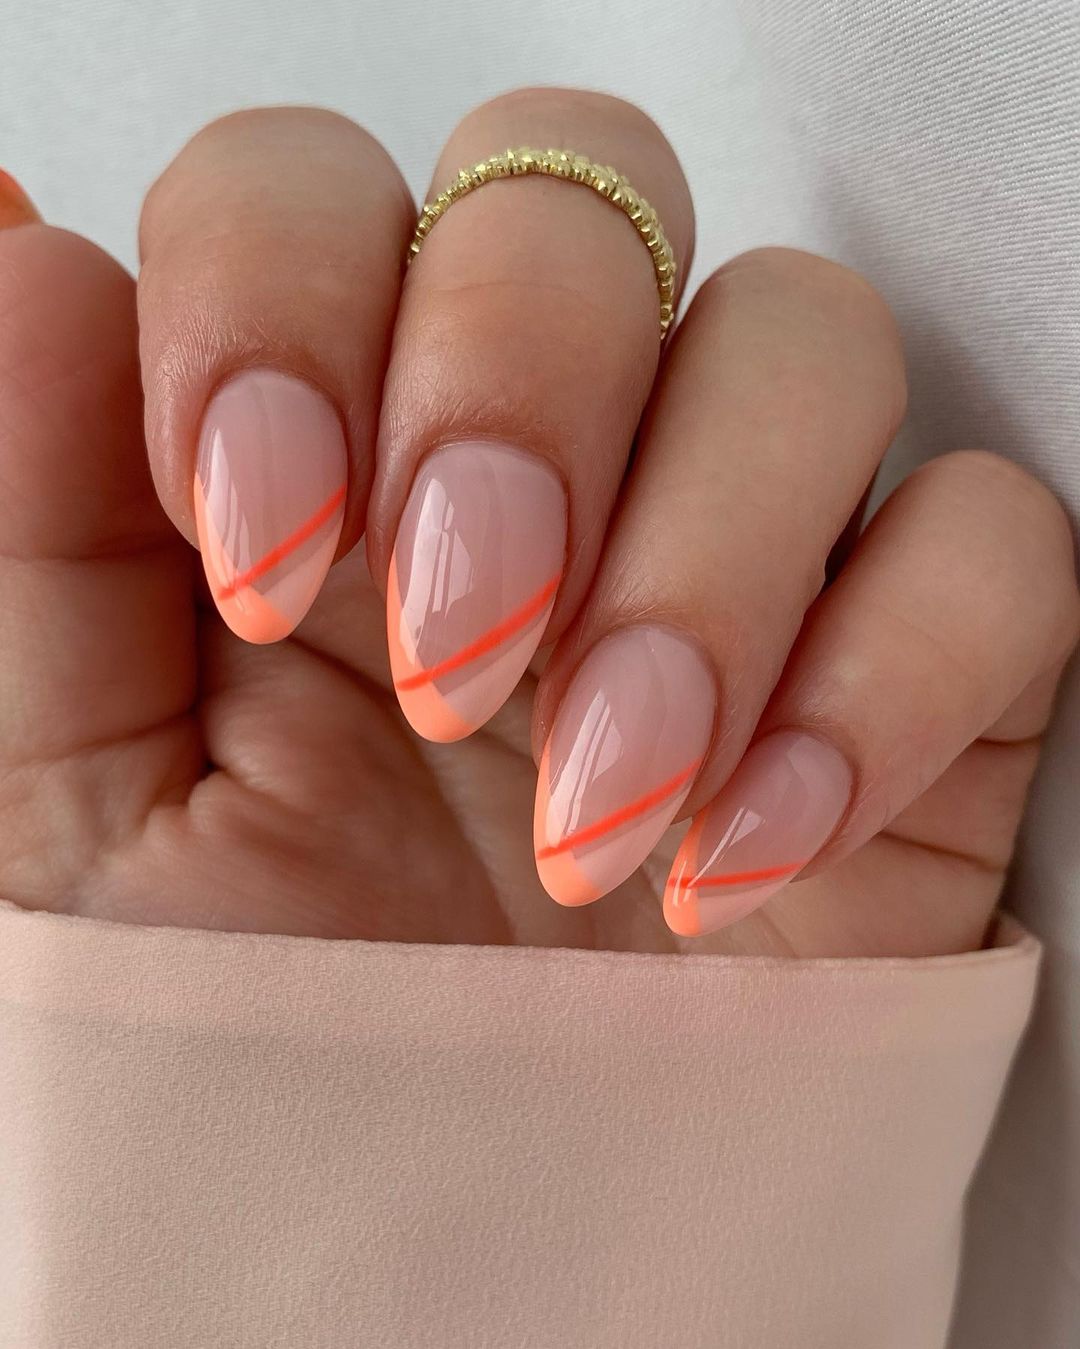
The Modern French: A Twist on the Classic
A playful pop of orange outlines the nail’s natural shape giving it a modern twist on the classic French tip. In doing so, this design has a cheeky yet refined appearance, nodding to tradition while making a bold summer statement that will definitely not go unnoticed.
- A sheer nude polish for an elegant base
- Bright orange polish that outlines
- A detail brush or striping tape for the edges
- A top coat for a sleek and protective finish
Start with painting your nails using a sheer nude base. After it dries, grab your detail brush and meticulously line each corner with orange nail polish. The secret is to keep your hands steady so as to achieve that distinct clear-cut mark. End up by applying a top coat for extra shine and longevity in case of modern French mani .
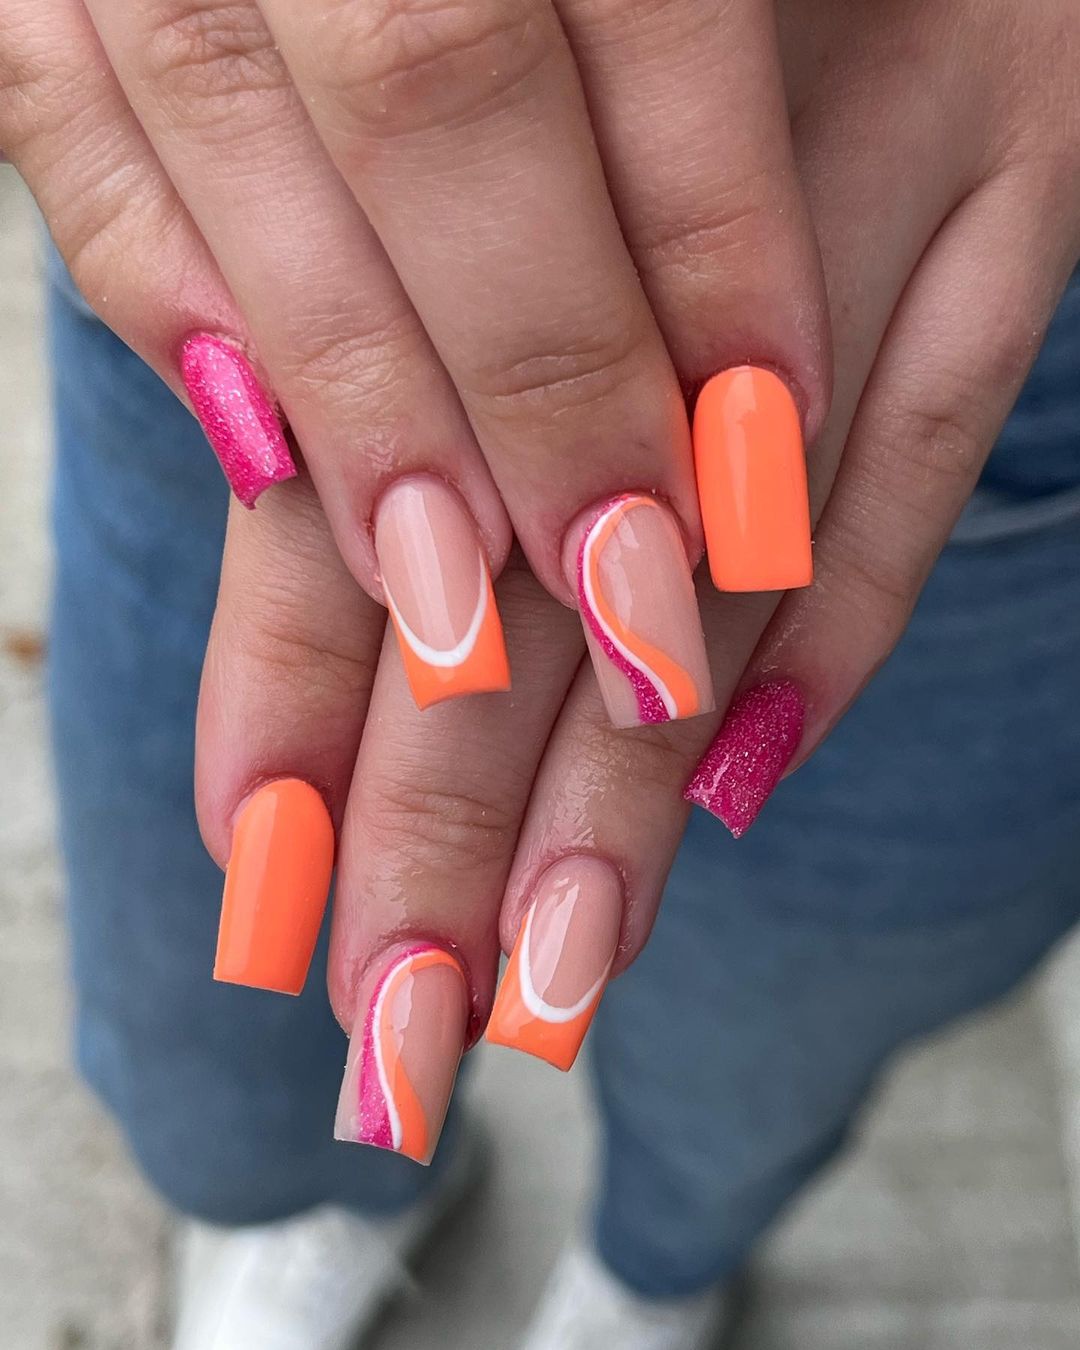
Pink Sparkle Meets Summer Orange
To have more fun this summer, this design combines the boldness of neon orange with the playful shine of pink glitter. The result is a lively and luxurious set of nails that are perfect for summer parties or just adding some extra light to your day.
- Vibrant base – neon orange polish
- Sparkling accent – pink glitter polish
- Clean swirls – detail brush
- Irresistible finish – glossy top coat
Use the neon orange as your base color and let it dry. Then apply the pink glitter polish on every other nail for statement sparkle. Take the detail brush and create a soft swirl on each remaining nail to connect them together. Finish off with a top coat to keep your fingertips shining through all celebrations.
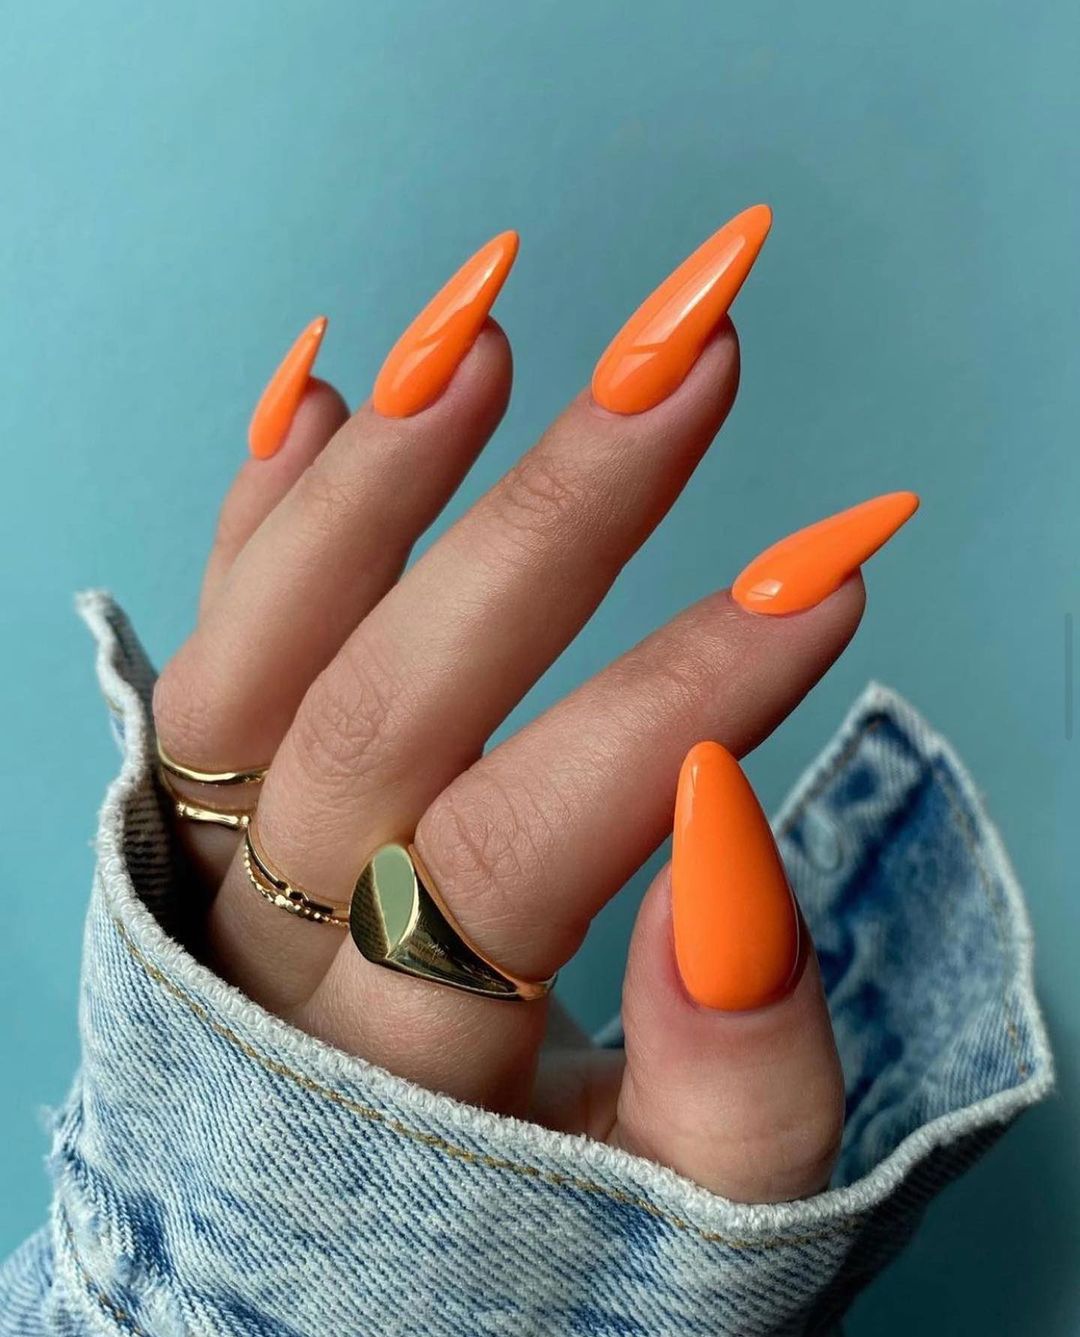
Pure Orange Vibrance
Fitting for the spirit of summer, this design is about undiluted, brazen luminosity. A full cover of shiny orange polish as bright as the afternoon sun. Simple. Bold. Breathtaking.
- Bright summer orange nail polish
- Base coat to protect and make your mani last
- Glossy top coat for smooth, high-shine finish
Start with a base coat to protect your nails. Apply two coats of the orange polish — let each layer dry completely — and finish with a glossy top coat for sleek vibrancy that’s sure to catch eyes.
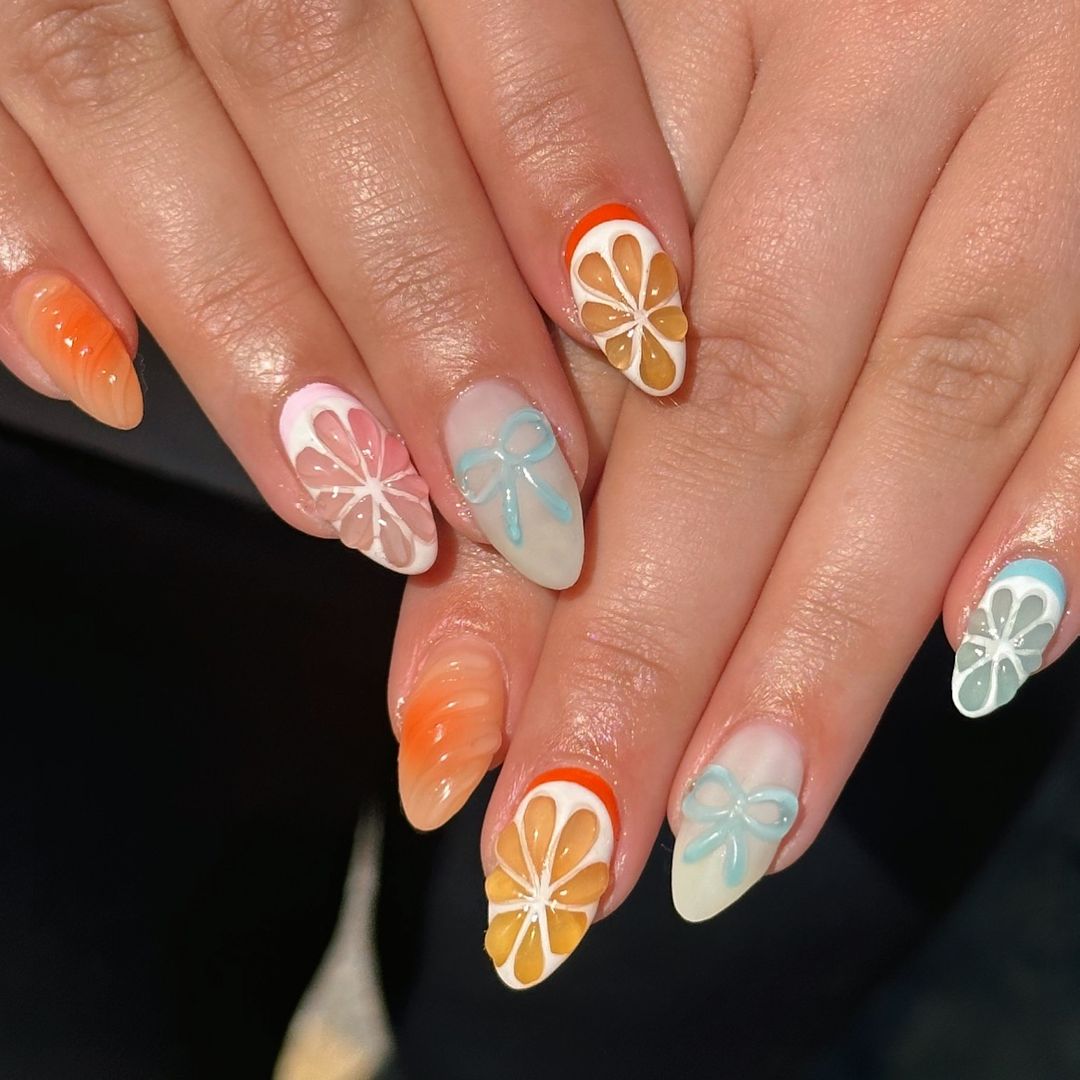
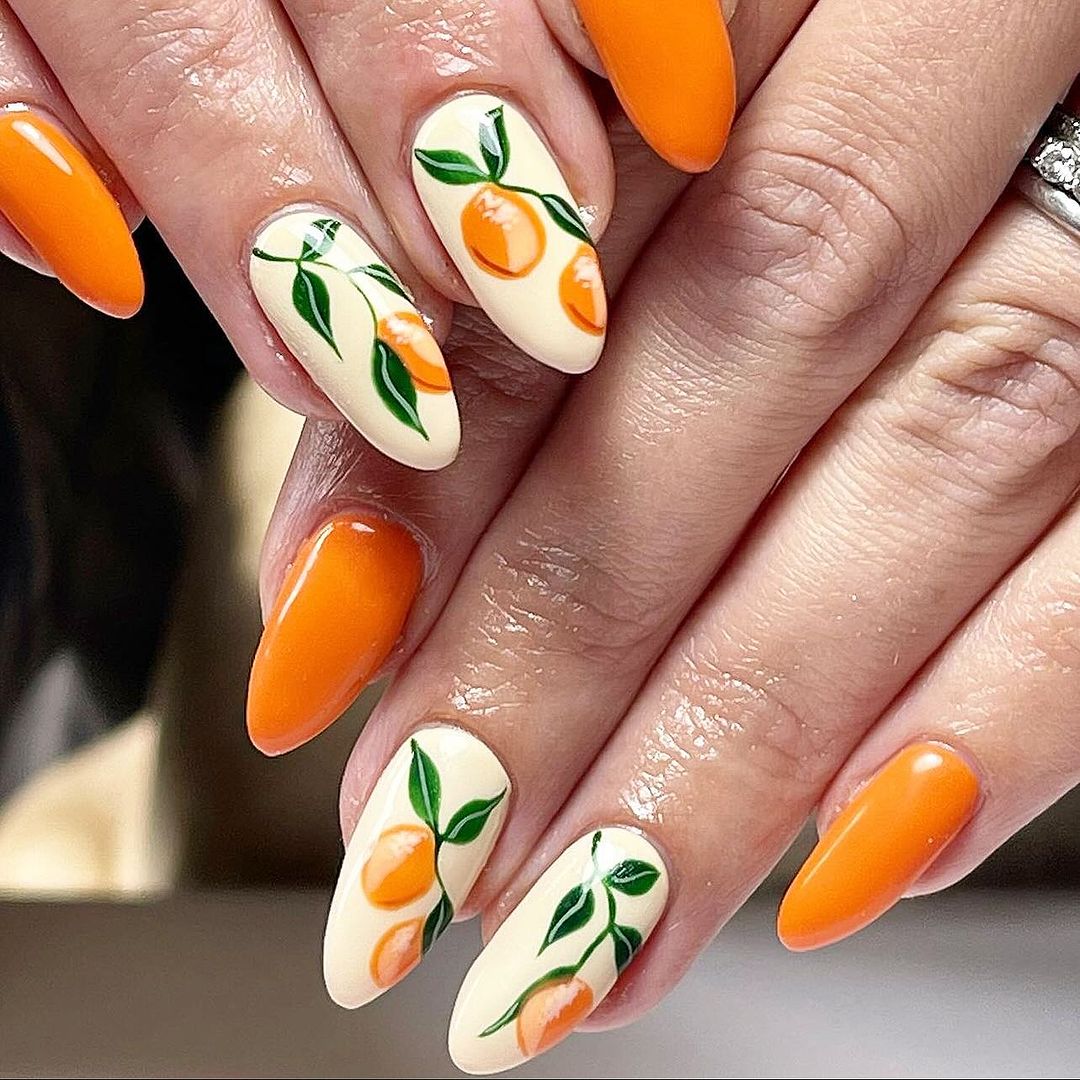
Fresh Picked: Citrus Nail Art
This nail art brings the freshness of citrus groves right to your fingertips. On a clean white background, it features hand-painted orange fruits and green leaves—a summer delight that is as cool as a glass of freshly squeezed orange juice.
- White polish for base
- Orange and green polishes for fruit and foliage
- Fine detail brush for painting the miniatures
- Glossy top coat to seal and protect your work
Using the white polish as your canvas, paint on oranges and leaves with a fine brush. The details are intricate, capturing both the beauty of these fruits and how lush their environment can be. Once everything has dried off nicely, apply another layer (or two) for added protection so that your little grove can stay fresh all day long!
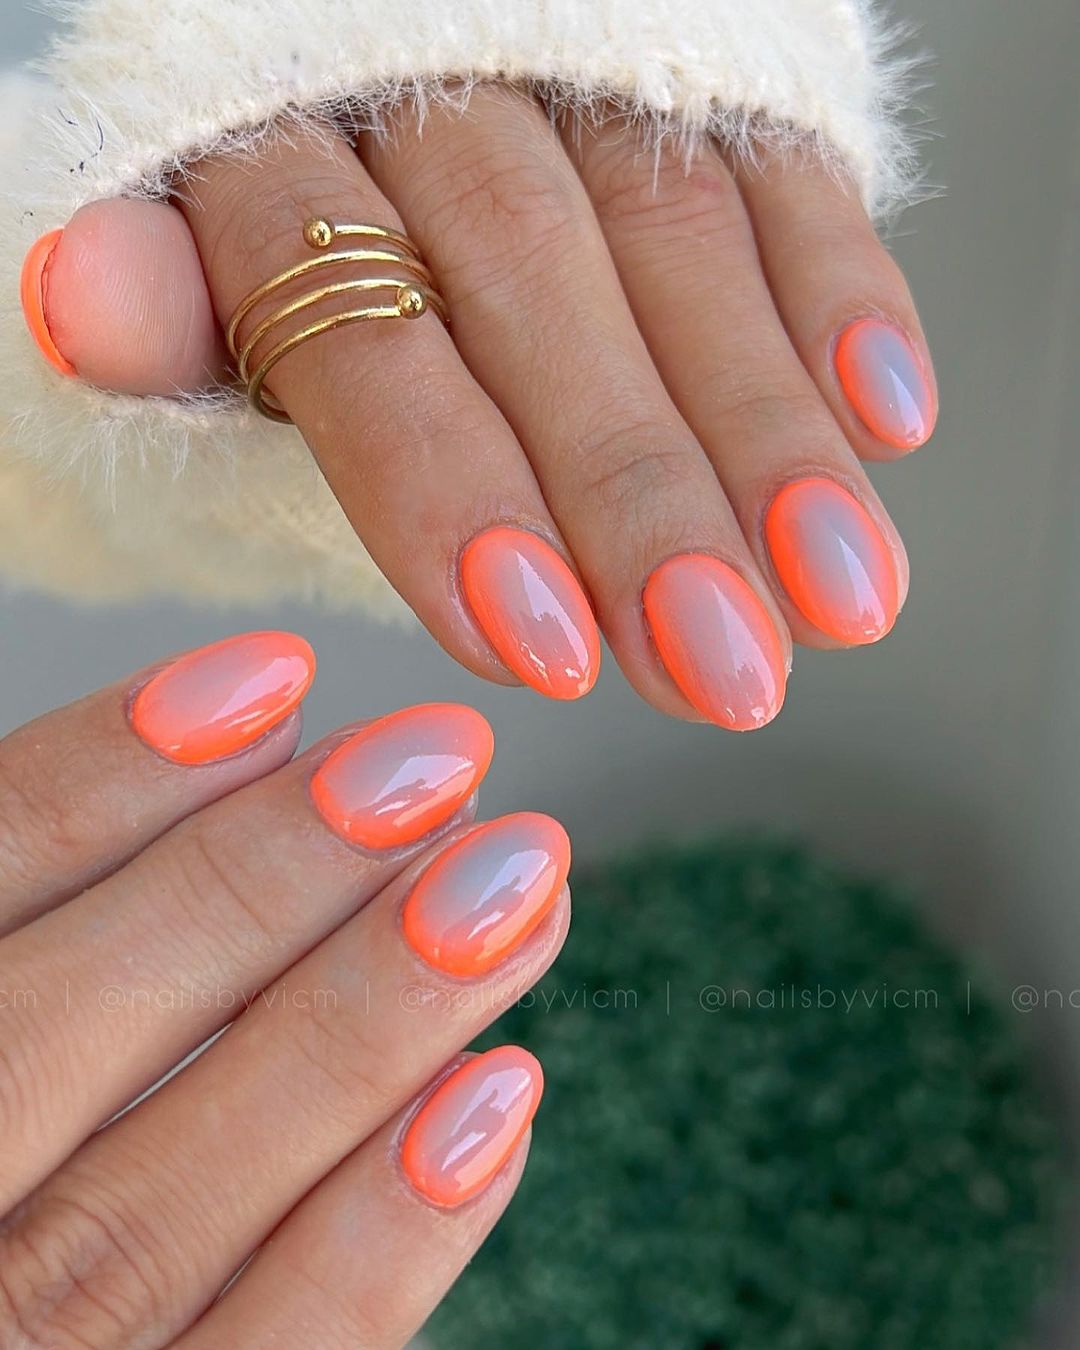
Sunset Ombre Elegance
Comparable to the sky at sundown, this design contains an exquisite ombre that shifts from a blazing orange to a calm clear shade. It represents the gentle fading away of colors in this serene gradient look which is bound to steal anybody’s attention during any summer event.
- Bright Orange Gel polish
- Sponge
- Sheer Polish (For blending)
- No-wipe top coat (For glossy finish)
Apply a coat of bright orange gel polish as your base. While it is still tacky, use a sponge and softly pat on some sheer polish starting from middle going towards the nail bed thus creating a faded effect. Cure under lamp then seal with top coat for that perfect summer evening gleam.
Flames of Summer
This audacious design is not for the weak. It’s a bold, seasonal contrast: a fiery flame motif against a black base. Orange flames dance across the dark background, making it as hot as any summer fire.
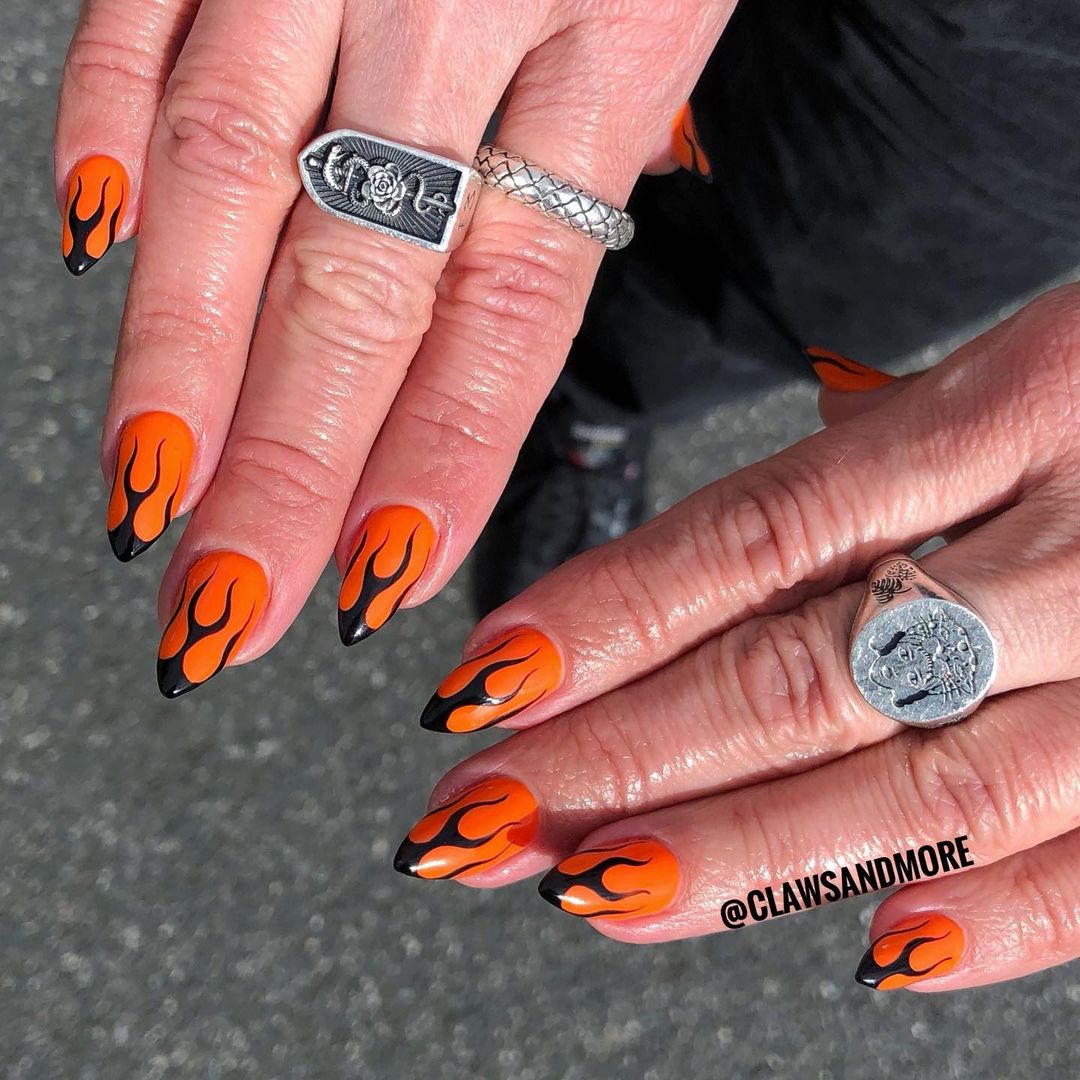
- Black polish (for the base)
- Neon orange polish (to create the flames)
- A small detail brush (for precision)
- High-gloss top coat (for extra drama)
Start with a layer of black polish. Once that dries, use your detail brush to hand-paint flickering flames in neon orange polish. The trick is to let your brushwork do the work—the more natural and uneven, the better. Finish with high-gloss top coat to give depth and shine to each flame.
Neon Tips: Vibrant Edge
The glowing electric at the end of these nails brings a charge on them. The contrast is striking with neon pink and orange emitting a glow reminiscent to those of the summer’s most brilliant sunsets.
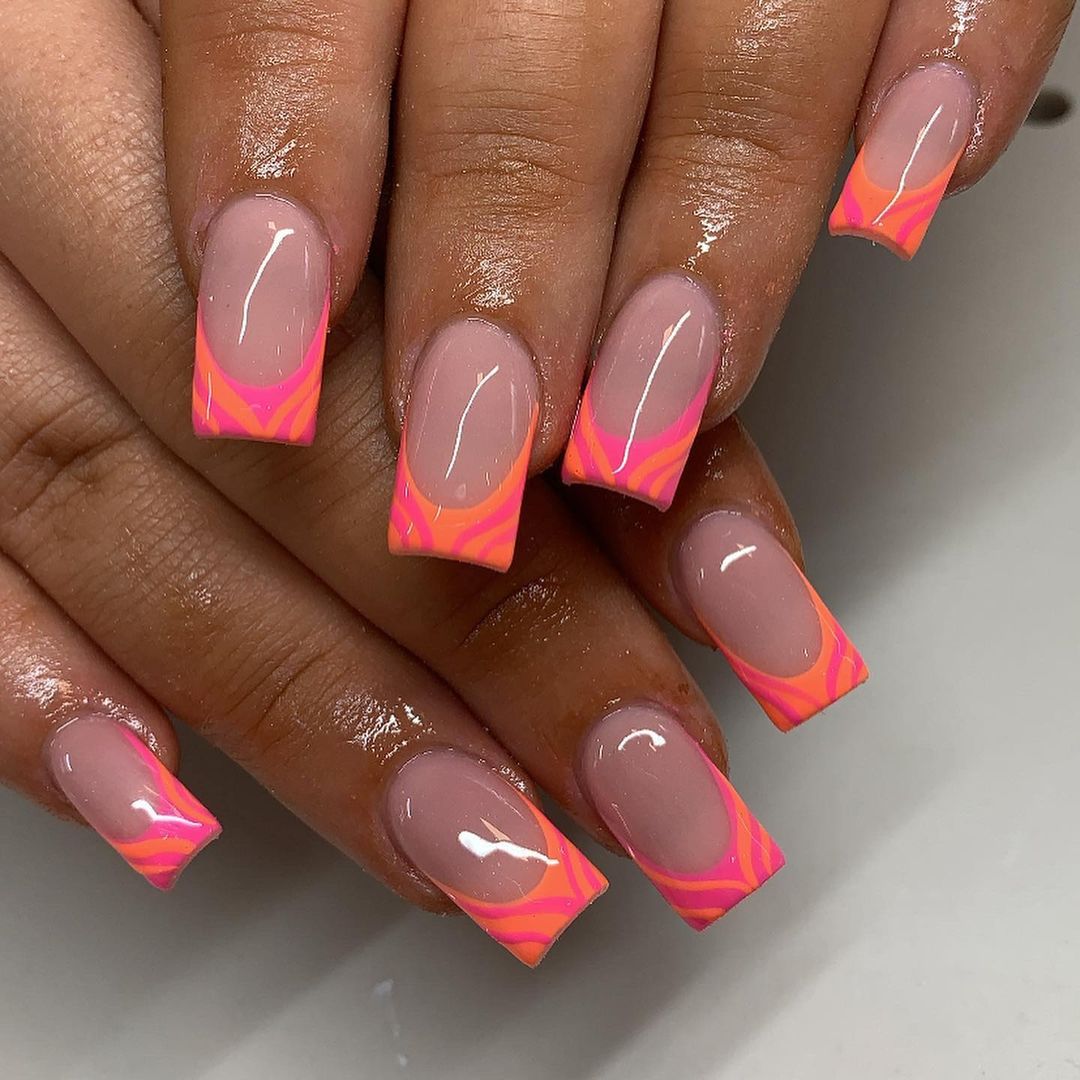
- Sheer nude polish that gives it a natural look
- Neon pink/orange nail polish used to accentuate the tips
- A small brush or sponge applicator in order to achieve ombre effect
- A shiny top coat to give it shine and glossiness.
Start by applying the sheer base color which makes your design look clean and natural. Use a detail brush or dab on using a sponge for an ombre blend, this can be done by putting a straight line using neon polish across tips. Then glossy topcoat adds vibrancy as well as protecting them.
Clear Orange with Floral Charm
This nail design marries the simple elegance of a clear foundation with bold orange edges and delicate floral decorations – an ideal choice for a calm summer day or refined evening occasion.
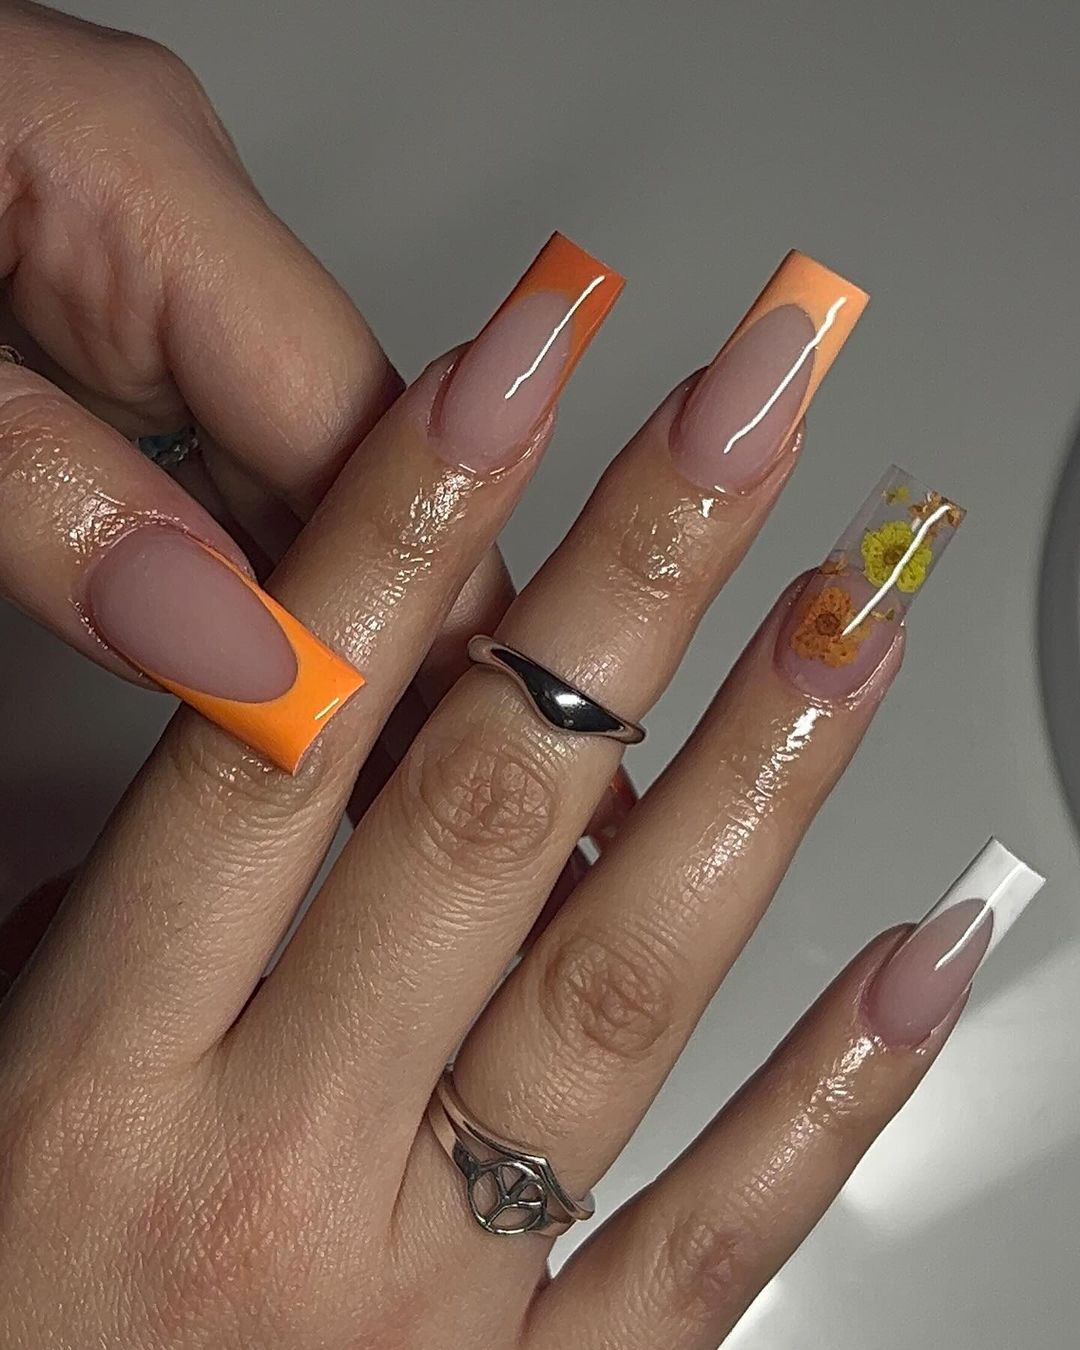
- Transparent polish for that see-through charm
- Borders painted in bright orange
- Miniature dried flowers or flower stickers designed for nails
- A precise detail brush
- A top coat with shine to protect your artwork
Begin by applying a translucent base, which will reveal the innate beauty of your nails. Use an orange polish to paint borders around them with your detail brush. Finally, attach tiny dried flowers (or flower stickers) wherever you’d like them on top; just make sure everything looks balanced!
FAQ
Q: How can I stop my neon polish from chipping?
A: Keep your neon polish from chipping by starting with a good base coat that will protect your natural nails and give them a smooth surface to work with. Once you’ve applied your neon polish, seal it in place with a high-quality top coat. To keep the integrity of the polish intact and its shine at its best, reapply the top coat every few days.
Q: Can I get an ombre effect without using a sponge?
A: Yes, you can use a detail brush to lightly feather the colors together for an ombre effect. Another method is to dab the colors onto the nail with a small piece of plastic wrap; this can also create more of a soft blended look.
Q: How do I apply thin straight lines of polish without striping tape?
A: You’ll need a steady hand and thin striping brush for this one. Dip the brush into polish and lightly drag it across your nail in one fluid motion. If at first you don’t succeed, practice makes perfect – so don’t be discouraged if it takes several tries before getting right.
Q: Do all types of nail polish need to be cured under a lamp?
A: No, only gel polishes require being cured under a UV or LED lamp. Regular nail polishes air dry, but there are quick-dry top coats available that speed up this process.
Q: What can I do to make my nail art last longer in the summer?
A: To help ensure that your nail art lasts as long as possible during hot weather months, try to avoid prolonged exposure to water and harsh chemicals such as chlorine (found in swimming pools). Wear gloves when cleaning or using products like bleach around surfaces where they might come into contact with painted nails; also consider applying cuticle oil daily – which will not only nourish but strengthen too! And finally touch up your top coat every few days so that it doesn’t wear away at all easily.
Q: What is the best way to take off glitter polish?
A: Glitter polish can be more difficult to remove than regular polish. To do this, soak a cotton ball in nail polish remover and place it over the nail. Then wrap the finger in foil, leaving it on for a couple of minutes. This method should help to make removing glitter easier.
Q: How can I add nail art if I don’t have a steady hand?
A: For those who lack dexterity and precision when painting designs onto nails freehand – or simply want something quicker but still equally stunning! – stickers, stamps or pre-designed wraps are fantastic options for adding intricate patterns instead. They’re easy to use and apply, yet can look as detailed as any hand-painted creation!
Q: What should I do if my neon polish is too sheer?
A: Apply white polish underneath if you find that your neon color is appearing too sheer once applied alone; this will make the hue pop much more vibrantly whilst requiring fewer coats overall to achieve opacity.
Save Pin