
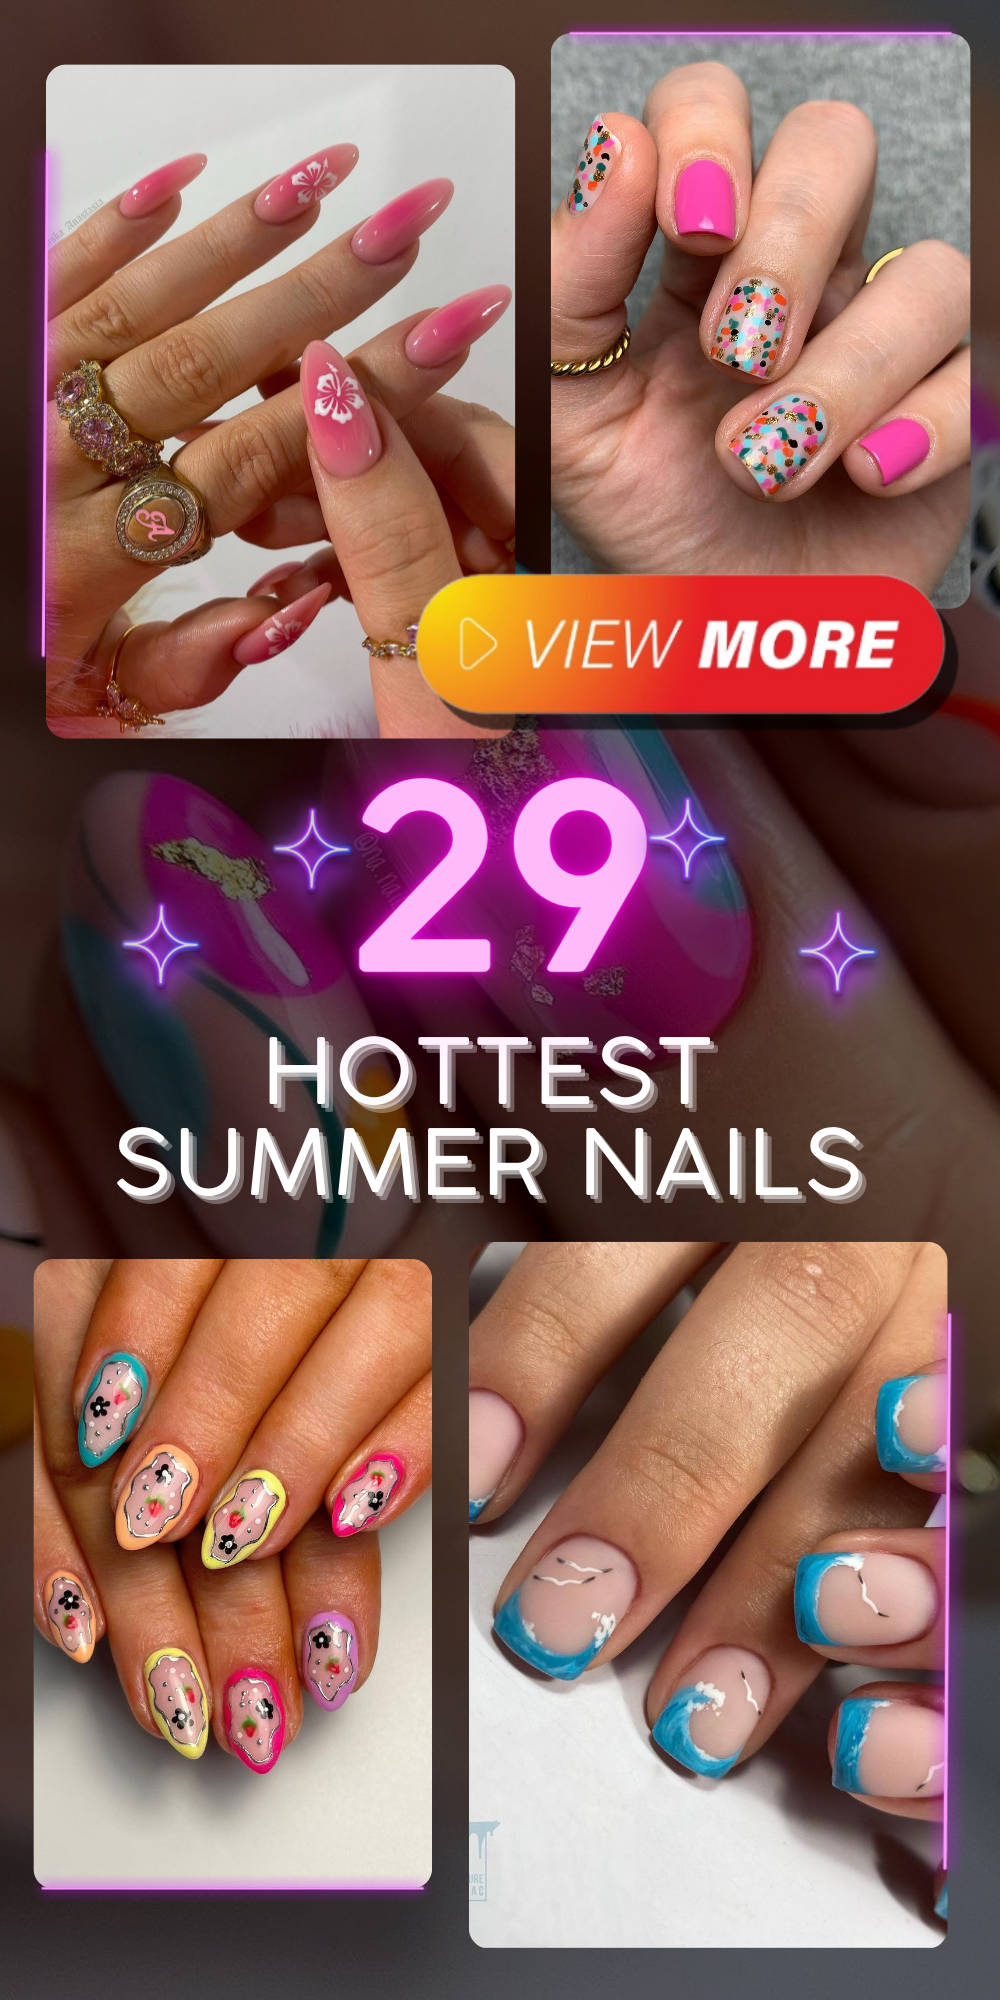
Let’s embark on a journey through the hottest summer nails of the season. This isn’t just about flaunting a set of nails; it’s about embracing a piece of the sun-kissed horizon at your fingertips. Ready to explore the zenith of summer flair? Let’s dive in.
A Sizzling Dance of Lemon and Lime
Think about the essence of a lemon grove soaked in sunlight, your fingers will feel it without ever touching one. This nail art is here to help—two eye-popping shades that are sure to turn heads. A neon yellow base is dragged through by bright lime green strokes for a bold look that’s perfect for beach days or vacation phoneography.
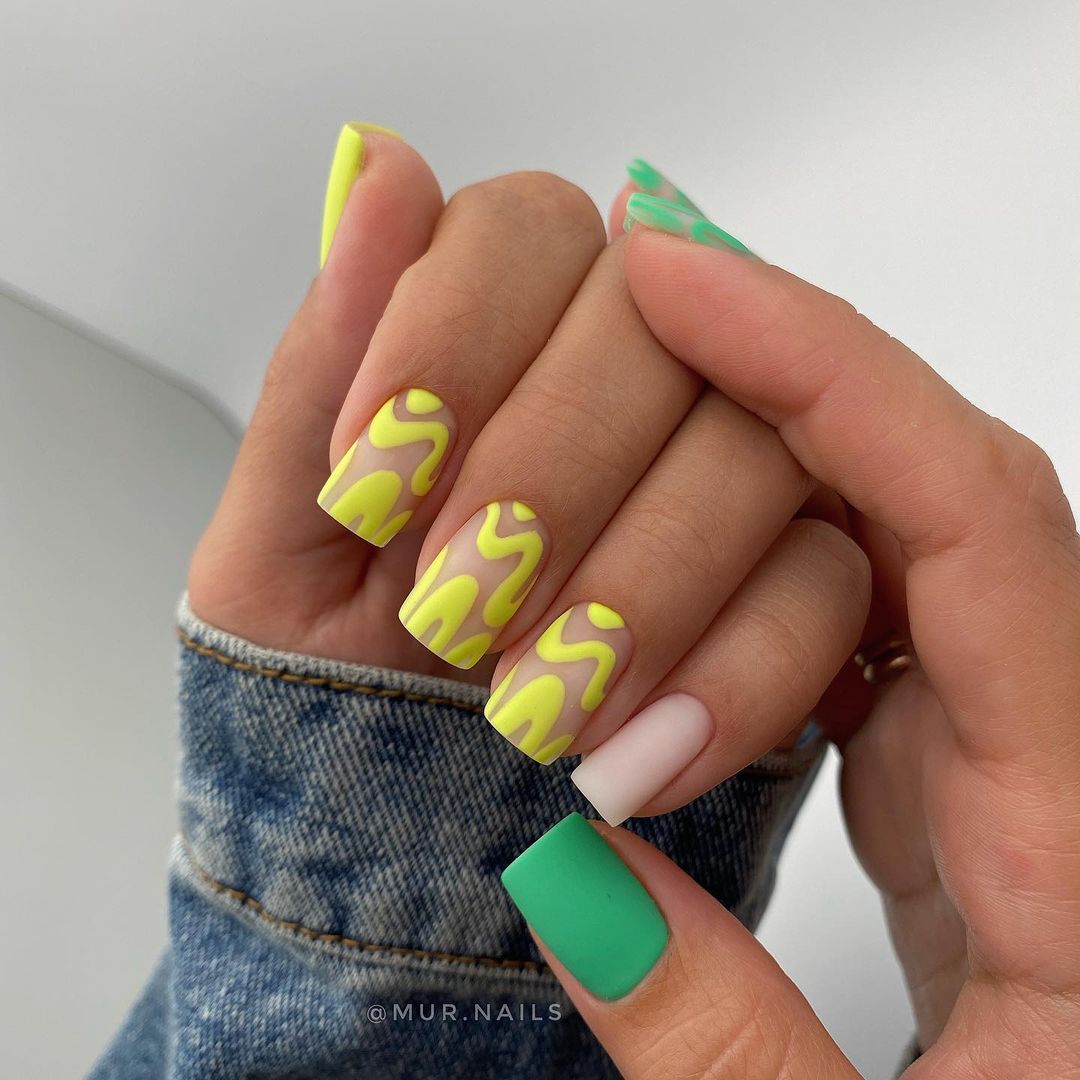
- What you’ll need: Choose an on-trend chip-resistant neon yellow polish as your vibrant base and a long-lasting lime green for the art.
- Pro Tip: Apply a matte topcoat to these hottest summer nails to contrast the bright colors with a modern finish.
This look starts with painting the base of neon yellow. With a detail brush you then draw the lime green patterns overtop. Pick whichever topcoat suits your mood—matte or glossy—to complete this stunning design.
Fuchsia Fantasia with a Metallic Twist
A high fashion fuchsia is playing a game of tag with gold foil, and the addition of coral and turquoise make it a trendy summer night design. It’s versatile enough to wear on a beach walk or to dinner at a fancy restaurant. The pink is simple elegance all its own and makes this art piece an influence in the nail scene right now.
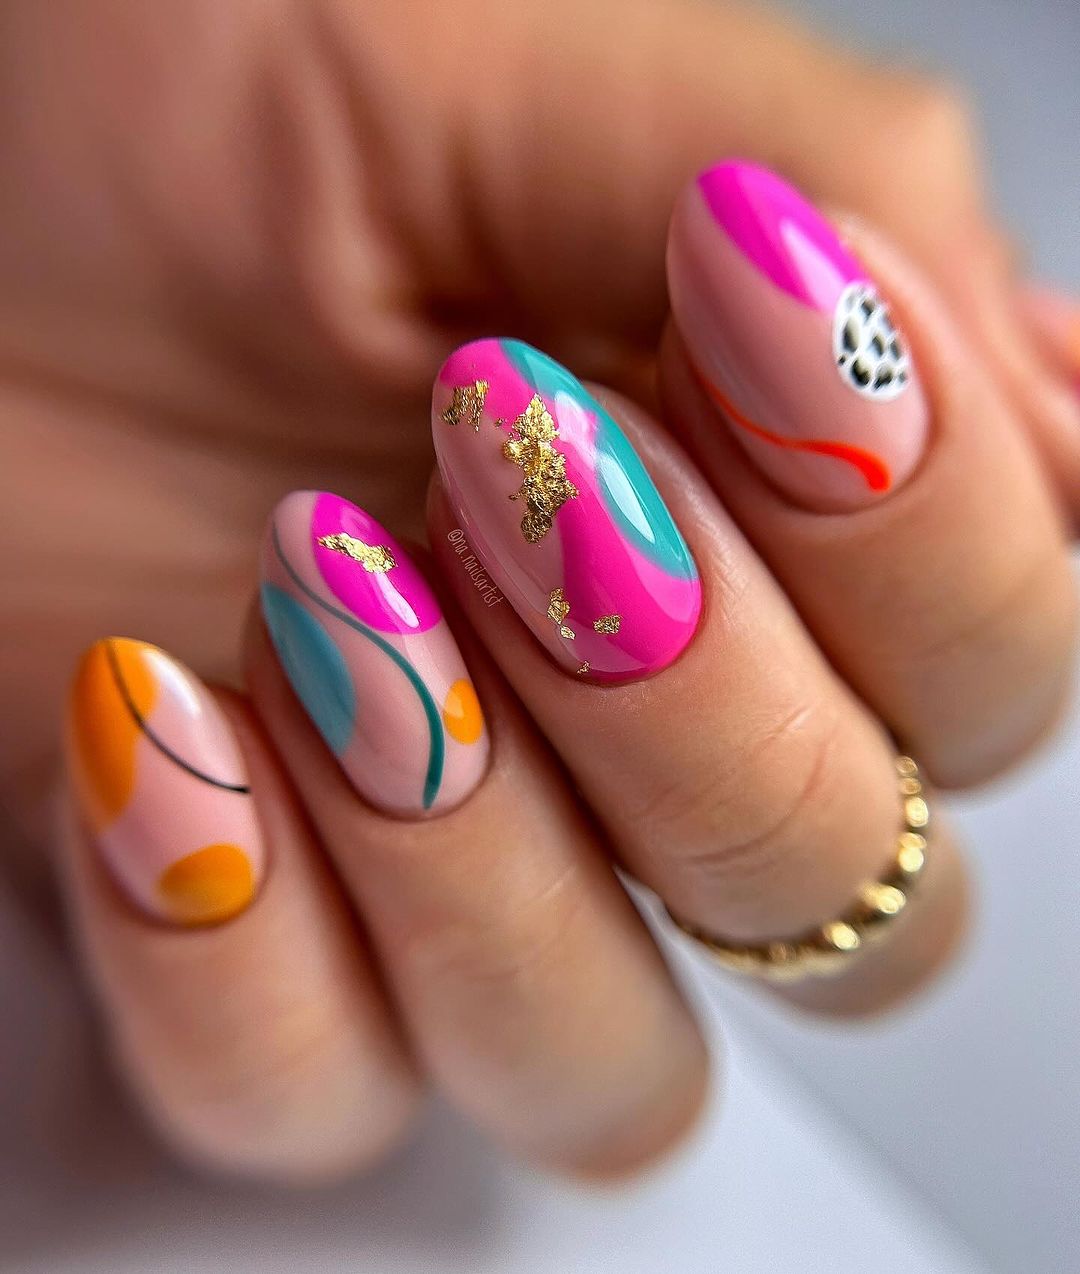
- Materials: A rich fuchsia polish, adhesive for gold foil, and accent colors in coral and turquoise.
- Pro Tip: Take your time applying the gold foil—it’ll be worth it once you see how flawless it looks.
Apply fuchsia as your base color. Then carefully place gold foil for a luxurious vibe. Add coral and turquoise dots in between. Seal it up with a glossy topcoat so everyone can admire your work.
Geometric Play on Pastels
With the summer in full swing, these nails are a geometric dream with its pastel patterns. It’s a simple design with vibrant and aesthetic colors that seem to scream trendy summer. Along with being trendy, it is also quite laid back and easy on the eyes for that person wanting something more lowkey on their short nails.
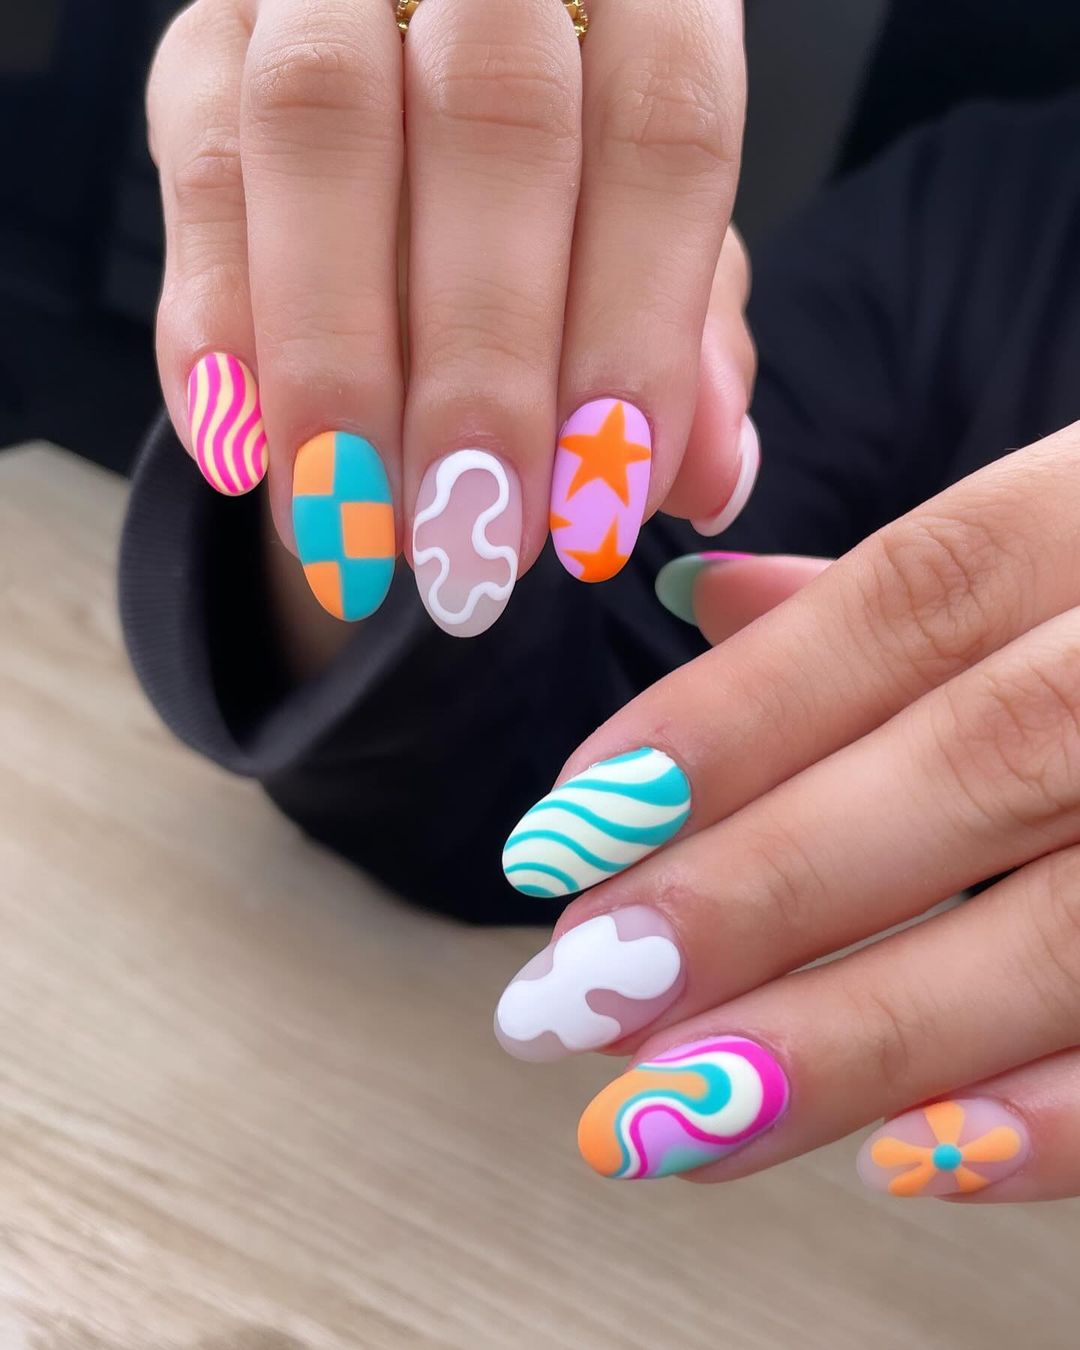
- List of needed items: To achieve this look you’ll need your choice of pastel polishes, a white base coat, and for precision striping tape.
- Pro Tip: When painting over the tape make sure it is slightly sticky still to achieve those crisp lines.
Start with your white base coat as the canvas and place striping tape strategically around your nailbeds. Once everything is placed neatly fill in the blanks with your chosen pastels. Then just take off the tapes to reveal a perfect colorful masterpiece.
Oceanic Bliss in Blue and White
This nail art design ingeniously captures the freedom of the ocean waves. The crisp white base is adorned with deep blue shapes that are both abstract and remind you of the ebb and flow of the sea. It’s a perfect way to commemorate those beach vacations, marrying trendy with timeless.
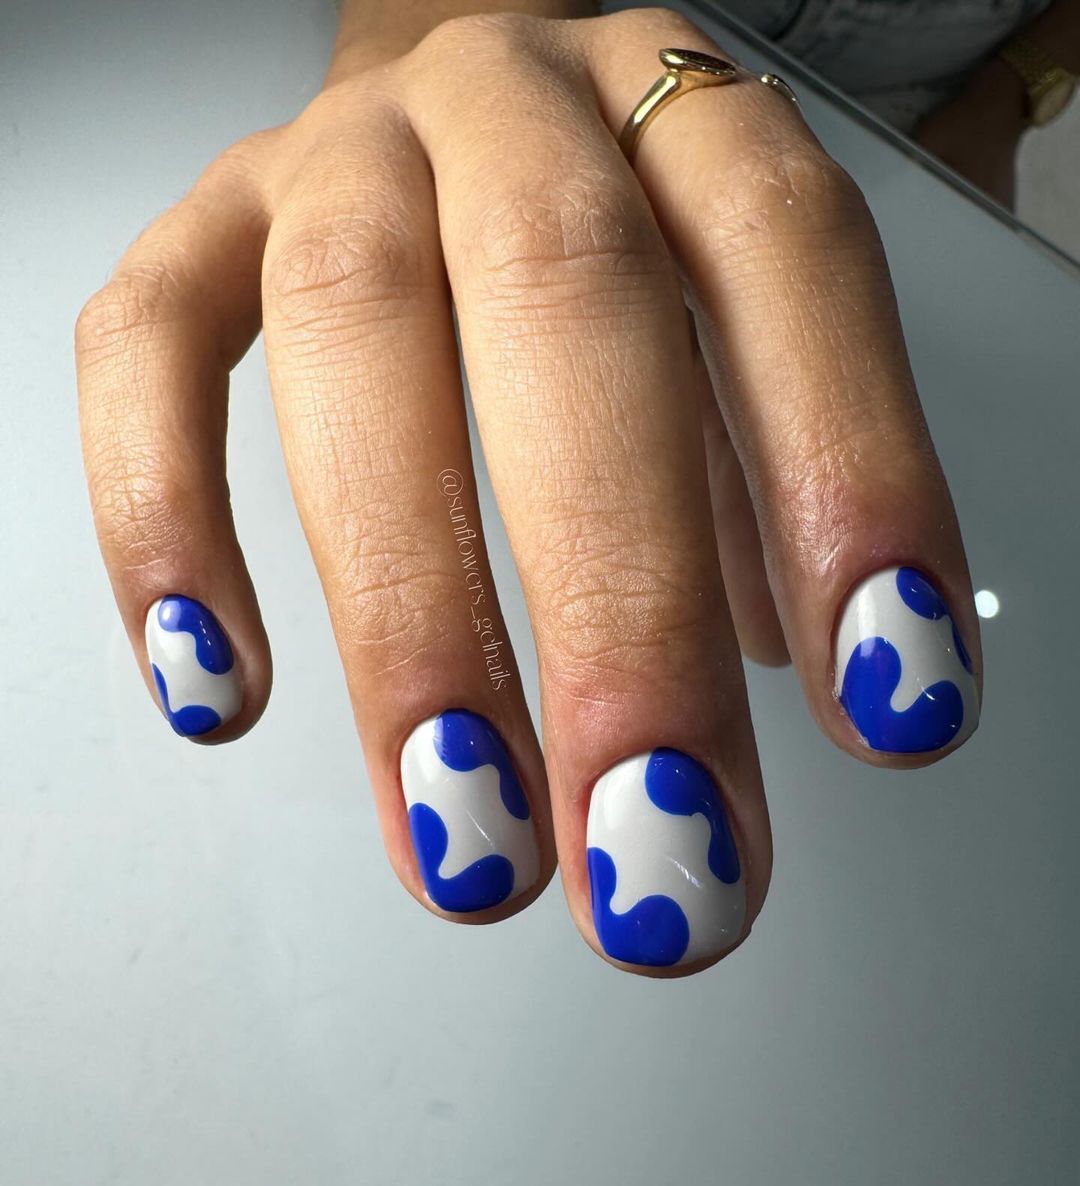
- Materials: White gel polish for your smooth canvas and deep blue polish to build your oceanic patterns.
- Fyi: Use a thin brush for your blue designs to make sure you’re getting that precise, fluid motion that water has when it moves.
To achieve this nail look, apply your white base and let it set. Then use a detail brush to create the blue shapes while allowing some white space to show through, giving you that splash effect. Applying a glossy topcoat will give the illusion of glistening water.
Save Pin
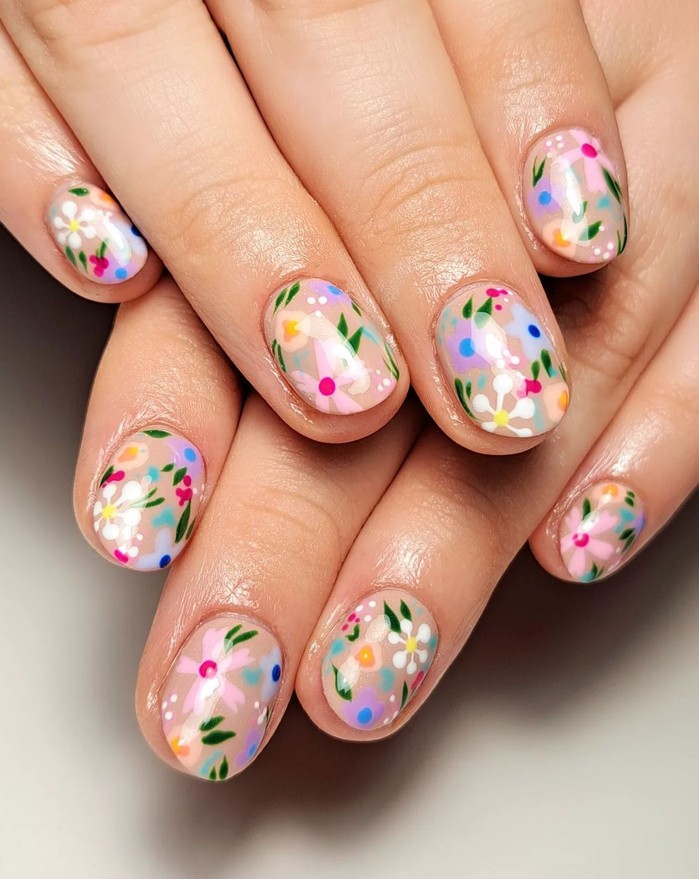
Garden Party on Your Fingertips
Get ready to be transported to a summer garden party with this nail art that combines a clear base and colorful floral designs. It’s a fun, vibrant look that’s perfect for those who love natural aesthetics. The pops of pinks, greens, and whites against the clear polish will make your nails the perfect accessory for any summer occasion.
You’ll need:
- A clear base coat
- Assorted nail colors (for the floral accents)
- Fine-tip brush or dotting tool
- Pro Tip: Add extra durability to your design by sealing it with a UV topcoat, especially if you plan on spending time in the sun!
Directions:
- Apply your clear base coat and allow it to dry.
- Use a dotting tool to place your flower bases in different colors.
- Add details using a fine brush.
- Once everything is completely dry, apply a top coat to seal in your design.
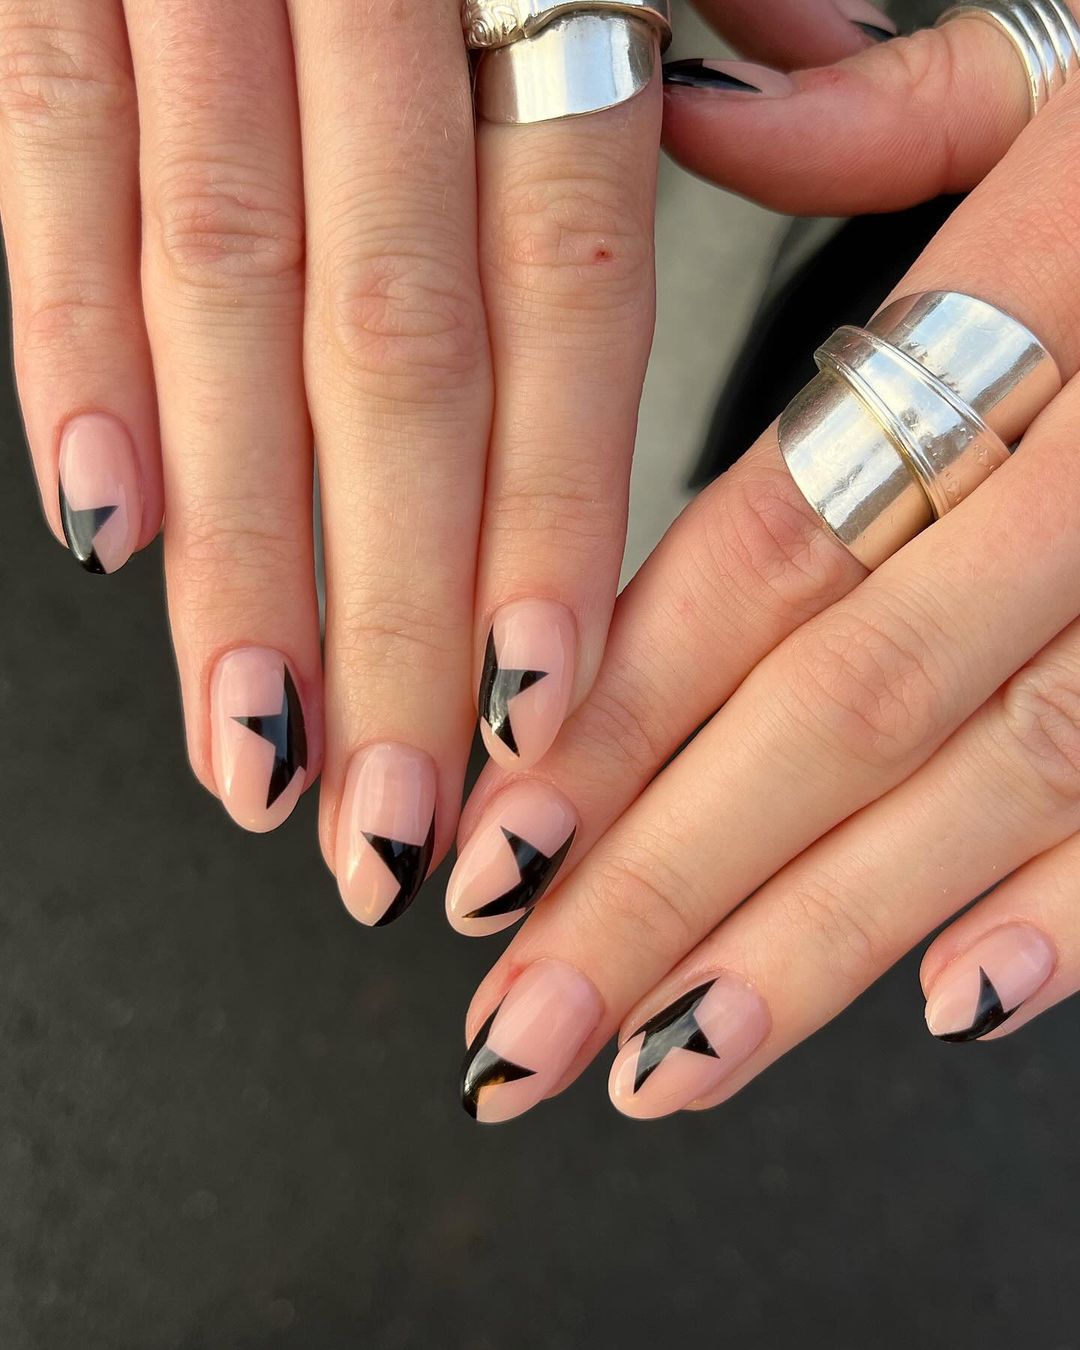
Geometric Chic with a Monochrome Twist
Black and white can be boring, but it can also be daring. This design is proof of that. The sharp angles in black over a nude base scream sophistication and ambition. It’s perfect for the artsy individual who wants to make a statement with simple designs.
- Supplies: Nude polish for the background, black polish for the shapes, matte topcoat for a fresh finish
- Pro Tip: Make sure to use striping tape or stencils for clean lines. Also, take this opportunity to revive your steady hand.
Apply a coat of the nude polish as the foundation and let it completely dry. Then position striping tape into angular patterns across your nails and apply two coats of black polish within each triangle or square — depending on what you’re feeling at that moment. Remove the tape while the polish is wet, and then apply a matte topcoat after everything has dried to complete the contemporary look.
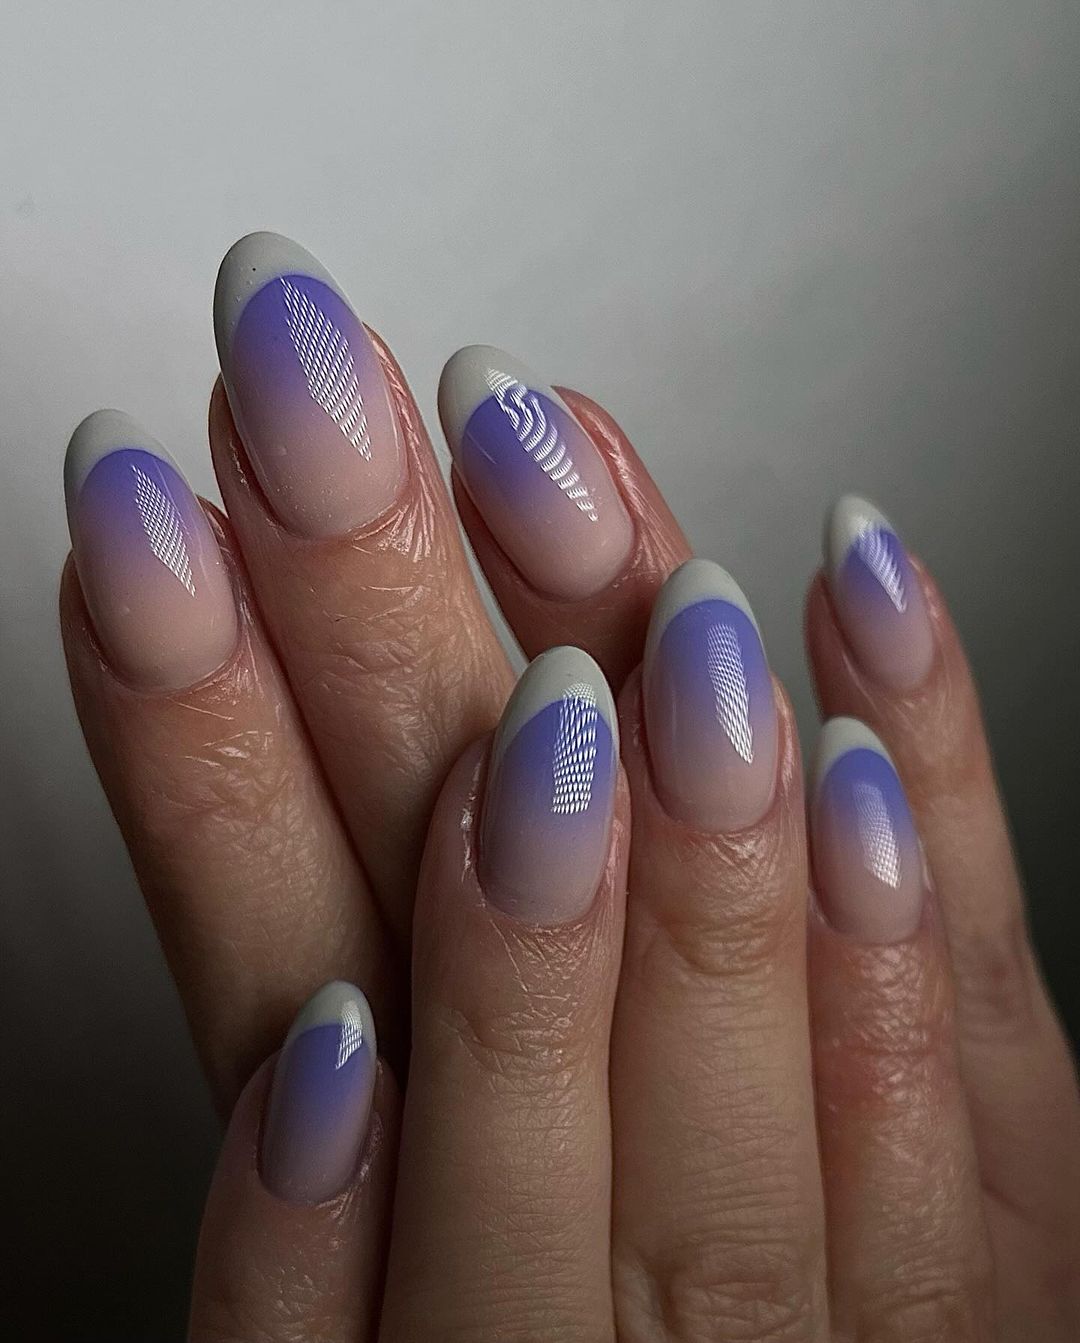
Subtle Elegance
The future is now, and these summer nails are here to prove it. A delicate lavender bleeds into a sleek gray, both smooth as silk. But the true star of the show is the wave pattern that adds a digital touch to this traditional look.
What you’ll need:
- Lavender polish
- Gray polish
- Digital wave pattern stencil
- Glossy top coat
- Pro Tip: Press down on the stencil well before applying any polish so it doesn’t bleed under and create smudges.
Get started with the soft gradient from lavender to gray, then let dry. Once it’s set, get your white polish ready for the second layer – don’t forget to position the stencil perfectly! Round things off with a glossy topcoat for that extra shine.
A Festival of Confetti
Here’s a nail design that pretty much screams “party time!” Colorful confetti dots are randomly dotted over a clear base, and then neon pink is used to add accent dots. The confetti dots should be applied with joy and playfulness in mind — there’s no such thing as too many when it comes to this manicure. The polishes used for the dots should be bright and happy; right now all colors of polish are trending, but the brighter the better.
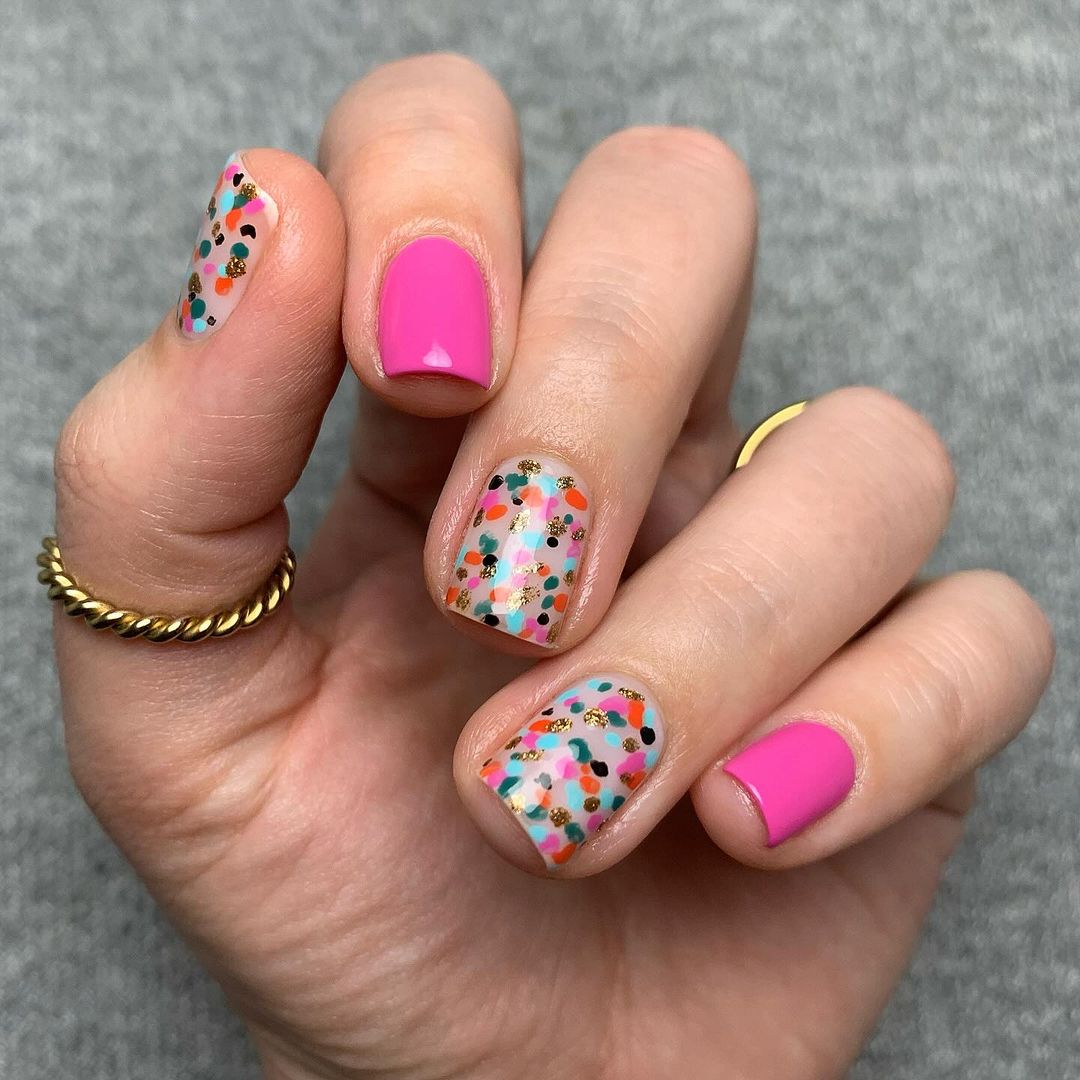
- Supplies needed: A clear base coat, several different colors of polish for the confetti effect, and a neon pink polish for accent nails.
- Pro Tip: Use a dotting tool to apply the confetti dots. Alternate between colors as you go along so that you end up with a dynamic final look.
Begin by applying a clear base coat, then have fun with your random confetti dots! There’s really no right or wrong way to do it here. Just make sure to cover every inch of your nails with color. For an extra pop of fun use neon pink on one of your nails.
Sweet Treats for Your Nails
Step right into a world where nails are filled with the spirit of your favorite desserts. Each nail is a deliciously painted canvas of adorableness and sweetness. So sweet, in fact, that you might just eat them. This bold style might not be for everyone but it’s surely perfect for those who want their love for sweets to be front and center. These pastel colored nails will catch the hearts of anyone looking to keep summer alive all year round.
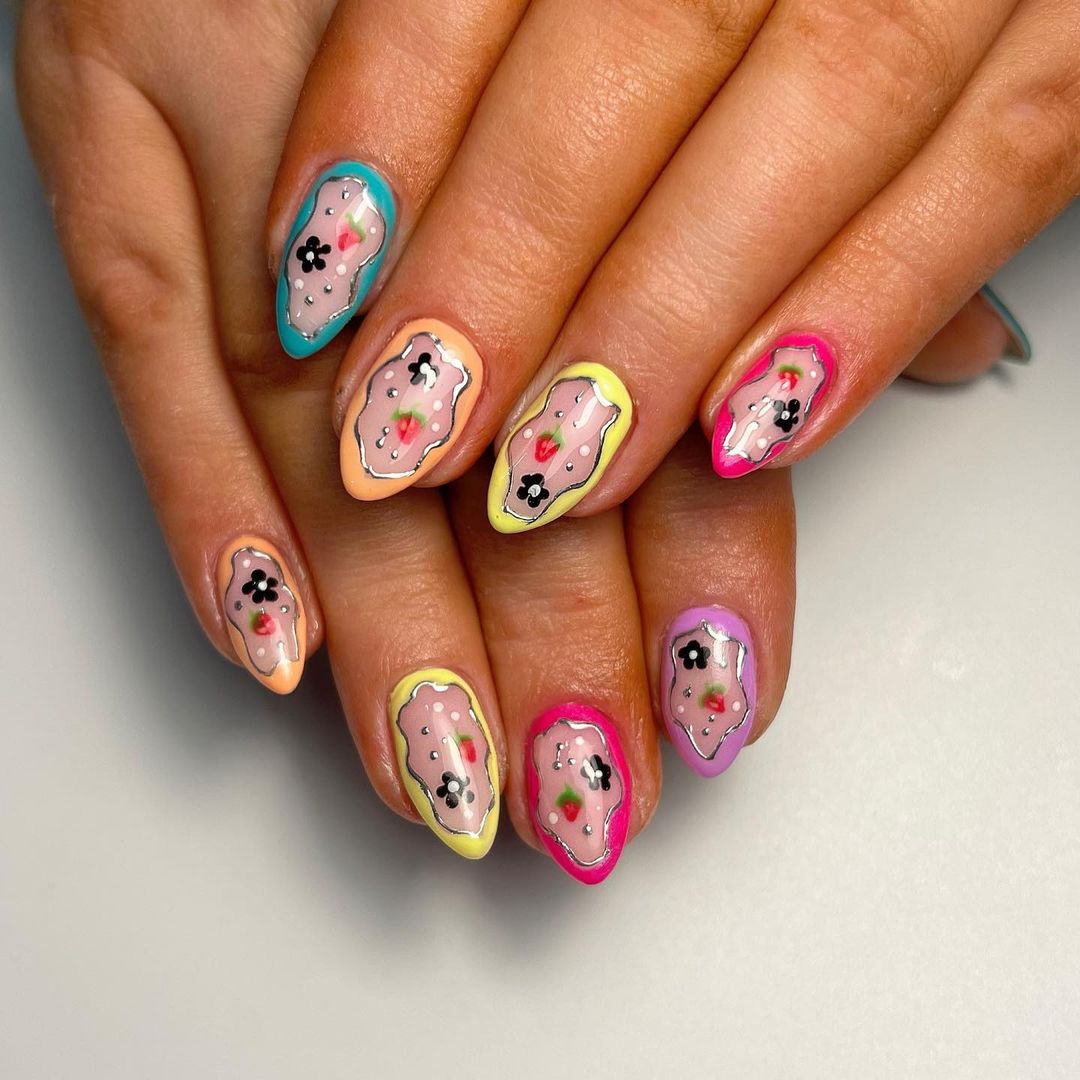
- What you’ll need: A bunch of pastel polishes, black and white for details, and a high-shine topcoat.
- Pro Tip: When working on intricate designs make sure you have a fine-tip nail art brush!
Each nail needs one basic color as its base; then, taking it nice and slow, paint on your dreamy dessert designs. Lastly, add that layer of glossy shine to really bring these bad boys to life.
Save Pin

Animated Whimsy
With a ton of personality, this design is bound to turn heads. Instead of just slapping on some paint, take the time to transform your nails into their own story with adorable characters. The pink foundation keeps everything together while giving you the freedom to be as whimsical as possible. And don’t be afraid to go crazy! This design is all about bringing ideas and personality forward in the boldest way possible.
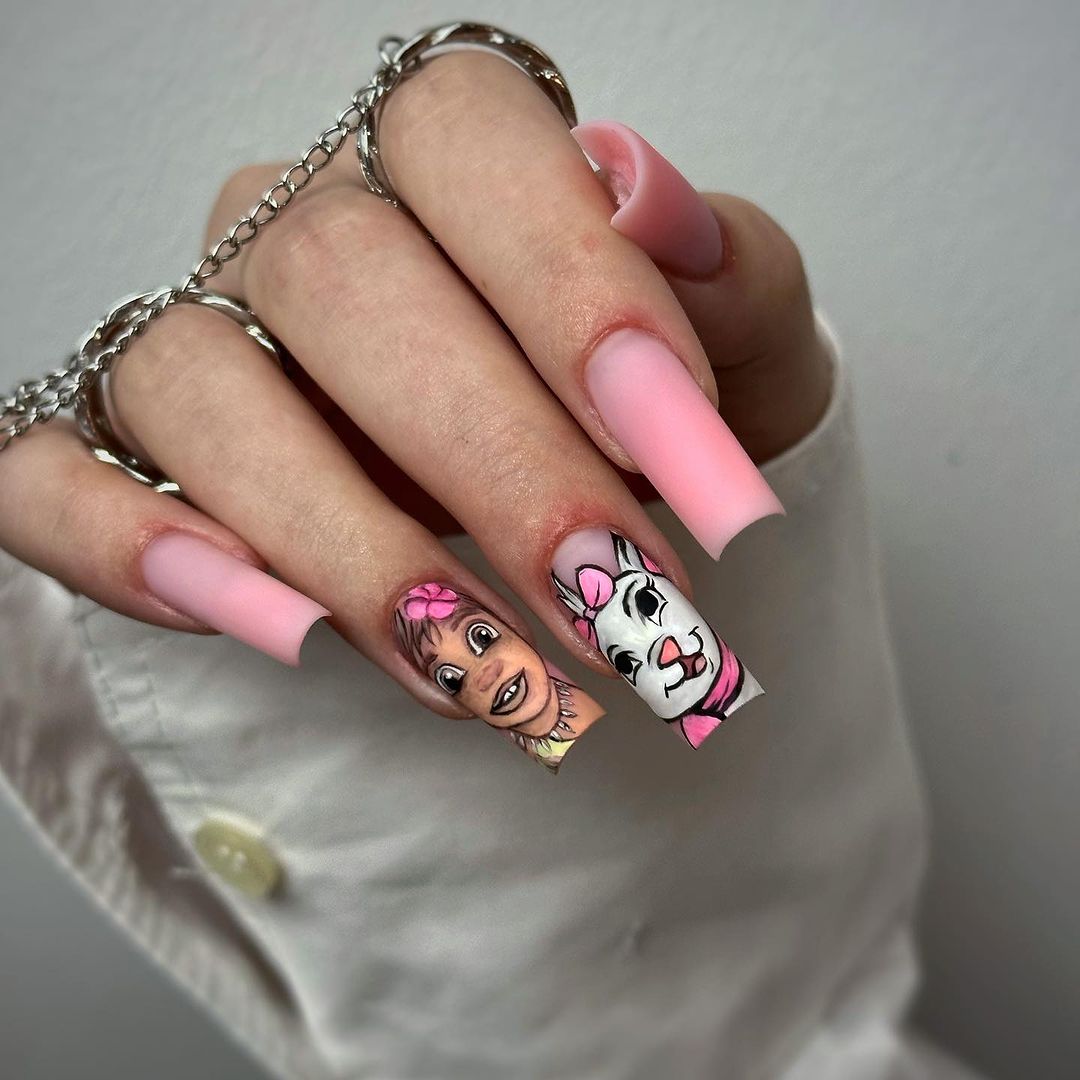
- Consumables: Soft pink nail polish, brushes for detailed artwork, multiple colors for said designs.
- Pro Tip: Before you put brush to nail, practice using a piece of paper or something else similar. This will help you get comfortable with your chosen characters so it’s easier when you’re actually working on the final product.
Start off by painting your nails with a soft pink base coat. Once that dries, use a fine brush to paint your characters in vibrant colors. Finish it off with a topcoat so they stay nice and shiny for as long as possible!
The New French: Pink Precision
The French manicure is a classic but we’re giving it a modern twist with bright pink edges that redefine chic. The straight lines and contrasting colors make this style trendy yet timeless, perfect for anyone looking to shine in the summer.
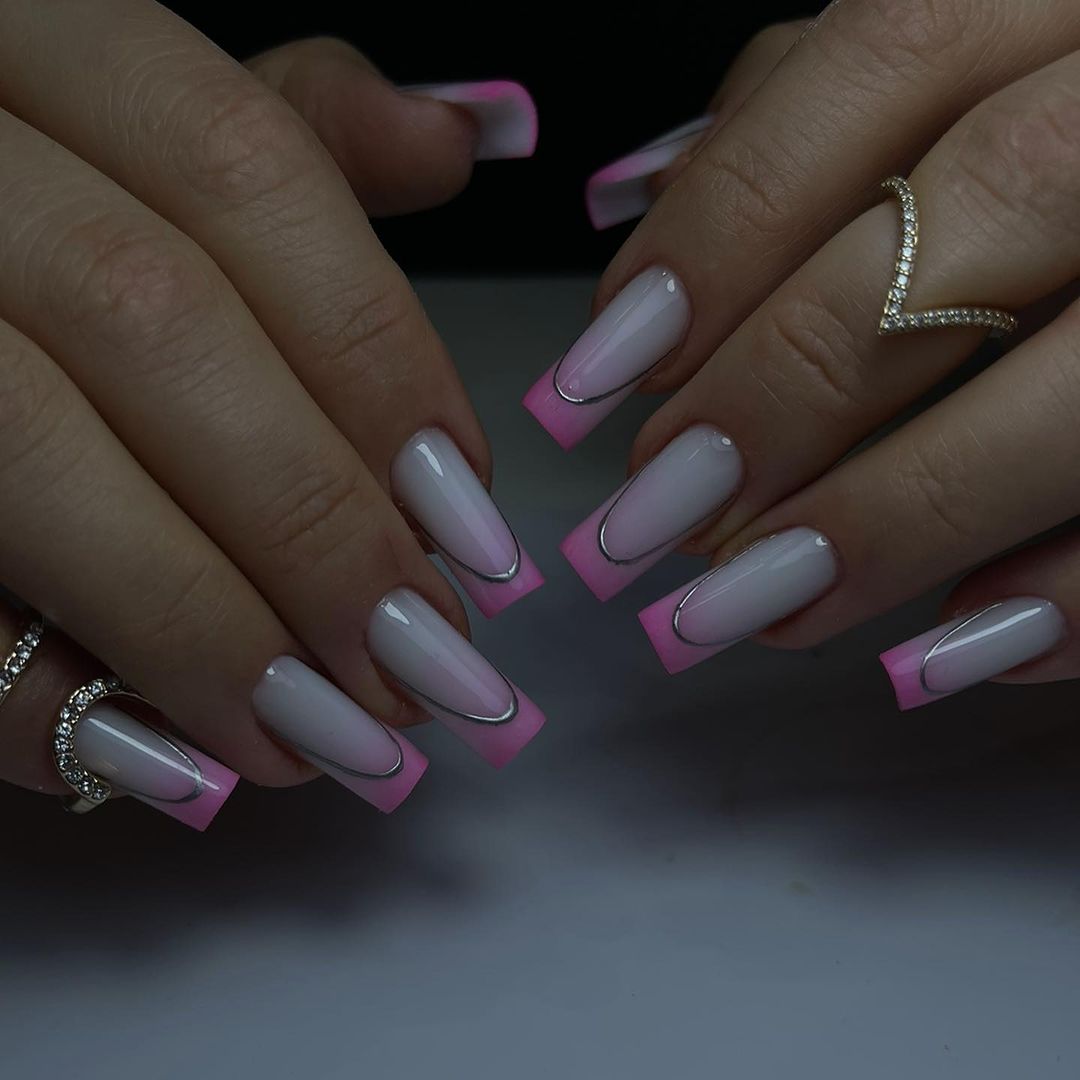
- Supplies: Any neutral base polish will do, bright pink for your tips, and adhesive guides to ensure clean lines.
- Pro Tip: If you’ve got a steady hand and the confidence to boot, paint your pink tip freehand. But if you’re like me and can’t draw a straight line to save your life, find some adhesive guides.
Step 1: Apply your base coat and let it dry.
Step 2: Paint on the pink tips carefully!
Option A: Test those skills by going freehand.
Option B: Use adhesive guides for cleaner lines.
Step 3: Finish off with a glossy topcoat for that sleek look.
Frosted Elegance
Pink and glitter are a dream team with this design. It’s got some lovely frosty vibes, if you haven’t noticed already. A little sparkle goes a long way though and this look is versatile enough to go from day to night.
- You’ll need Matte soft pink polish, glitter polish for the frosted tips, and a matte topcoat to unify the texture.
- Pro Tip: Use a sponge to dab the glitter onto the tips so it coats densely and evenly.
Start with two coats of your matte pink base. Then use a sponge applicator to apply one coat of glitter polish at the tip. Make sure it’s dense enough but even as well. Lastly, cover the entire nail with a matte topcoat!
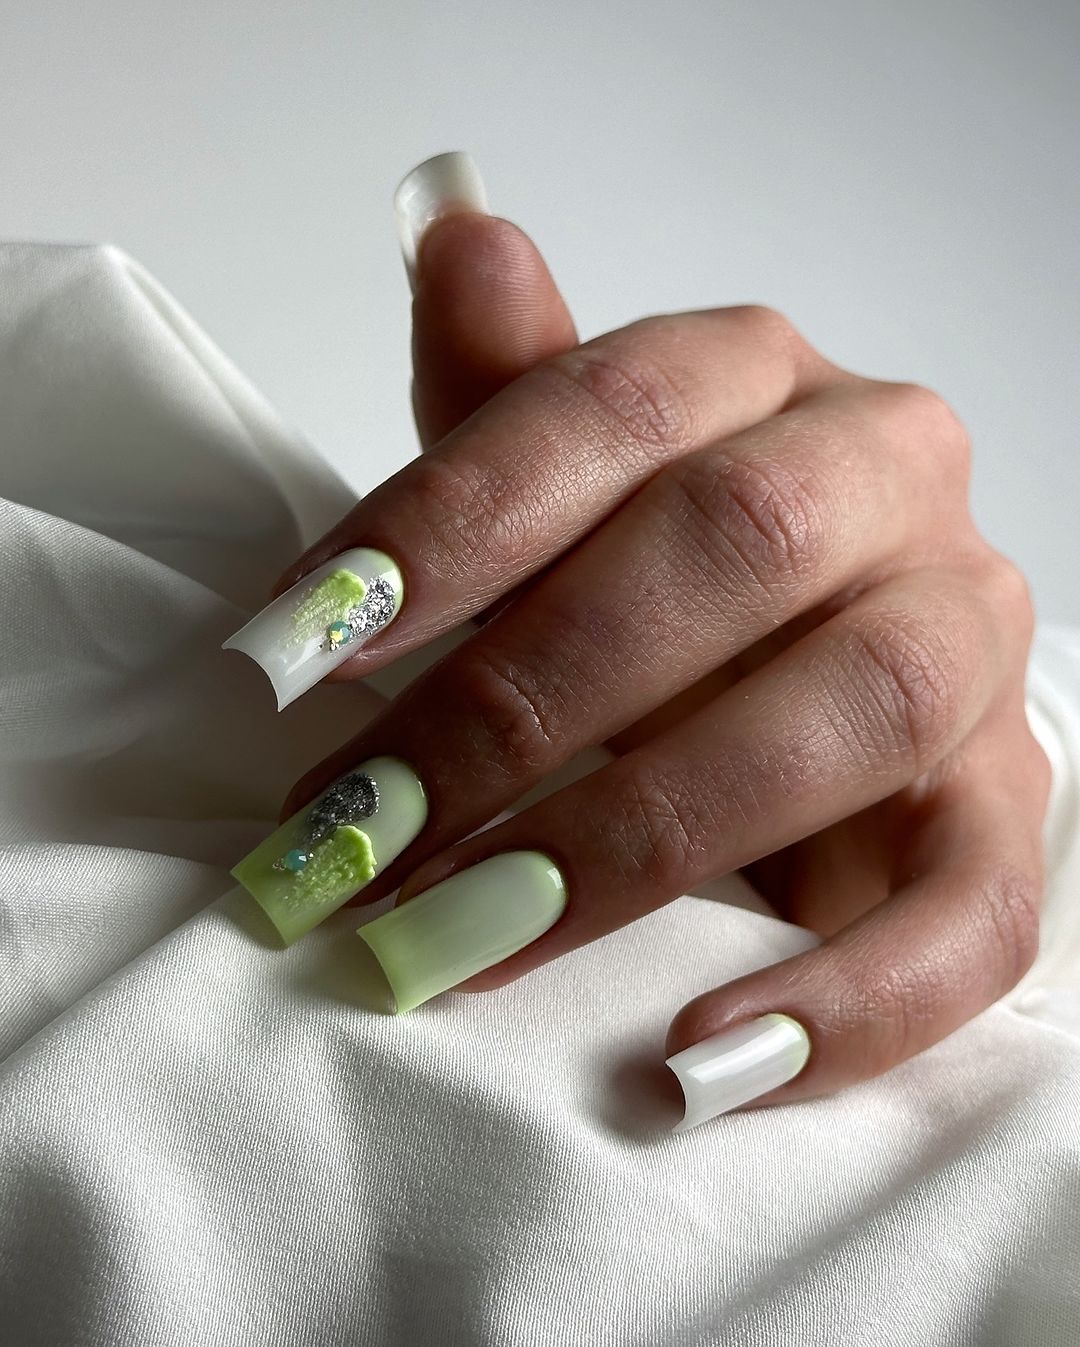
Pastel Perfection with Artistic Flair
This design is the season’s airy aesthetic. It’s a perfect look on a serene beach vacation or those balmy days out and about. I’ve always loved how nail art can be so versatile, it’s a fantastic way to express yourself and your style.
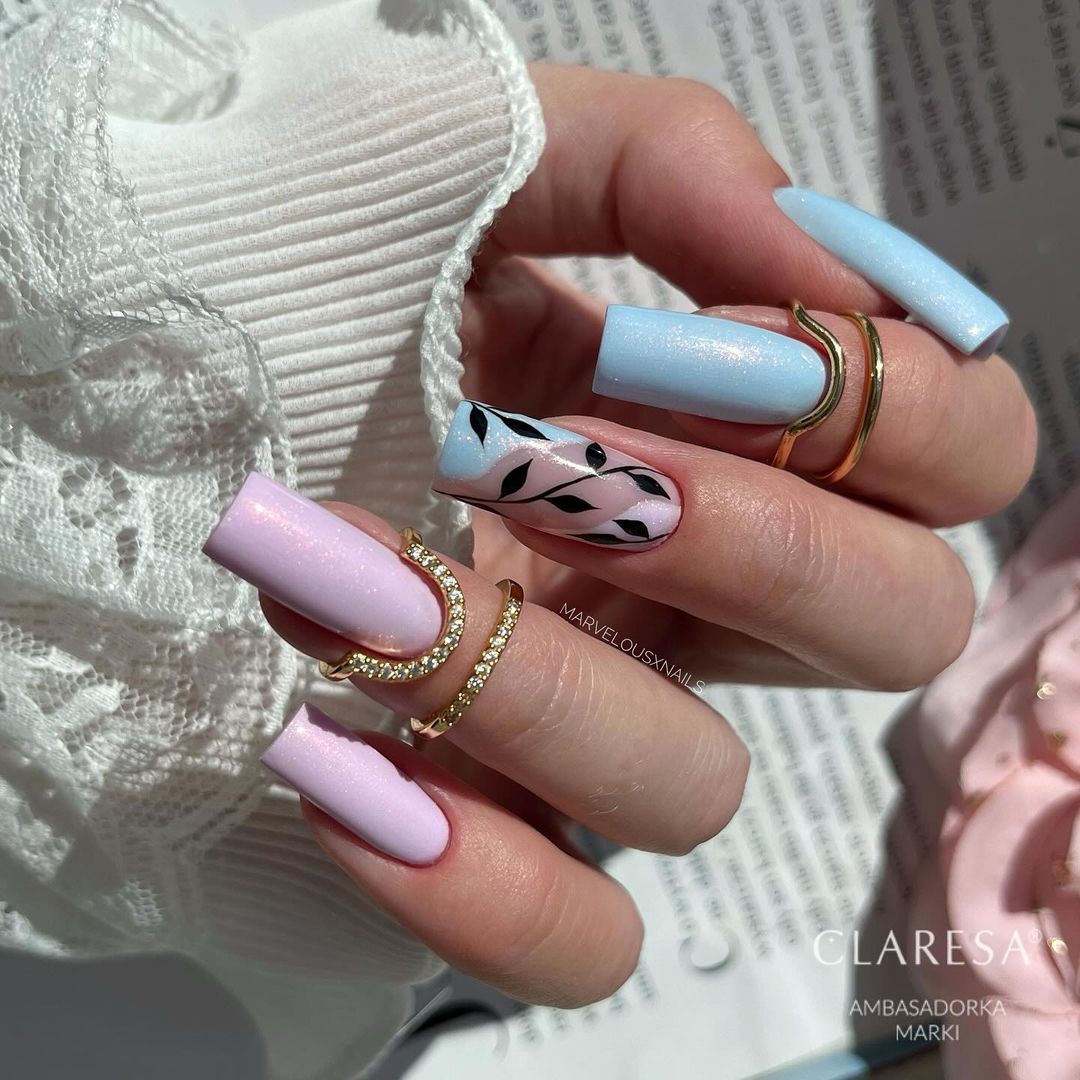
- It was created with pastel blue and lilac polish, detailed with black and white leaves, then finished off with a glossy top coat.
- Pro Tip: When painting the delicate leaf accents, work in thin layers to avoid smudging and to allow for clean, precise lines.
Begin with a pastel base. Then, using a fine brush create the leafy designs. Finish with topcoat to enhance the colors and protect your artistry.
Dark Allure with Neon Accents
Breaking the mold of this summer’s typical vivid hues, this nail art dares to go dark with its deep matte black foundation. But don’t worry, it won’t stay that way for long! Beautiful and bold neon green accents burst through the darkness making a statement that’s unexpectedly harmonious and undeniably trendy.
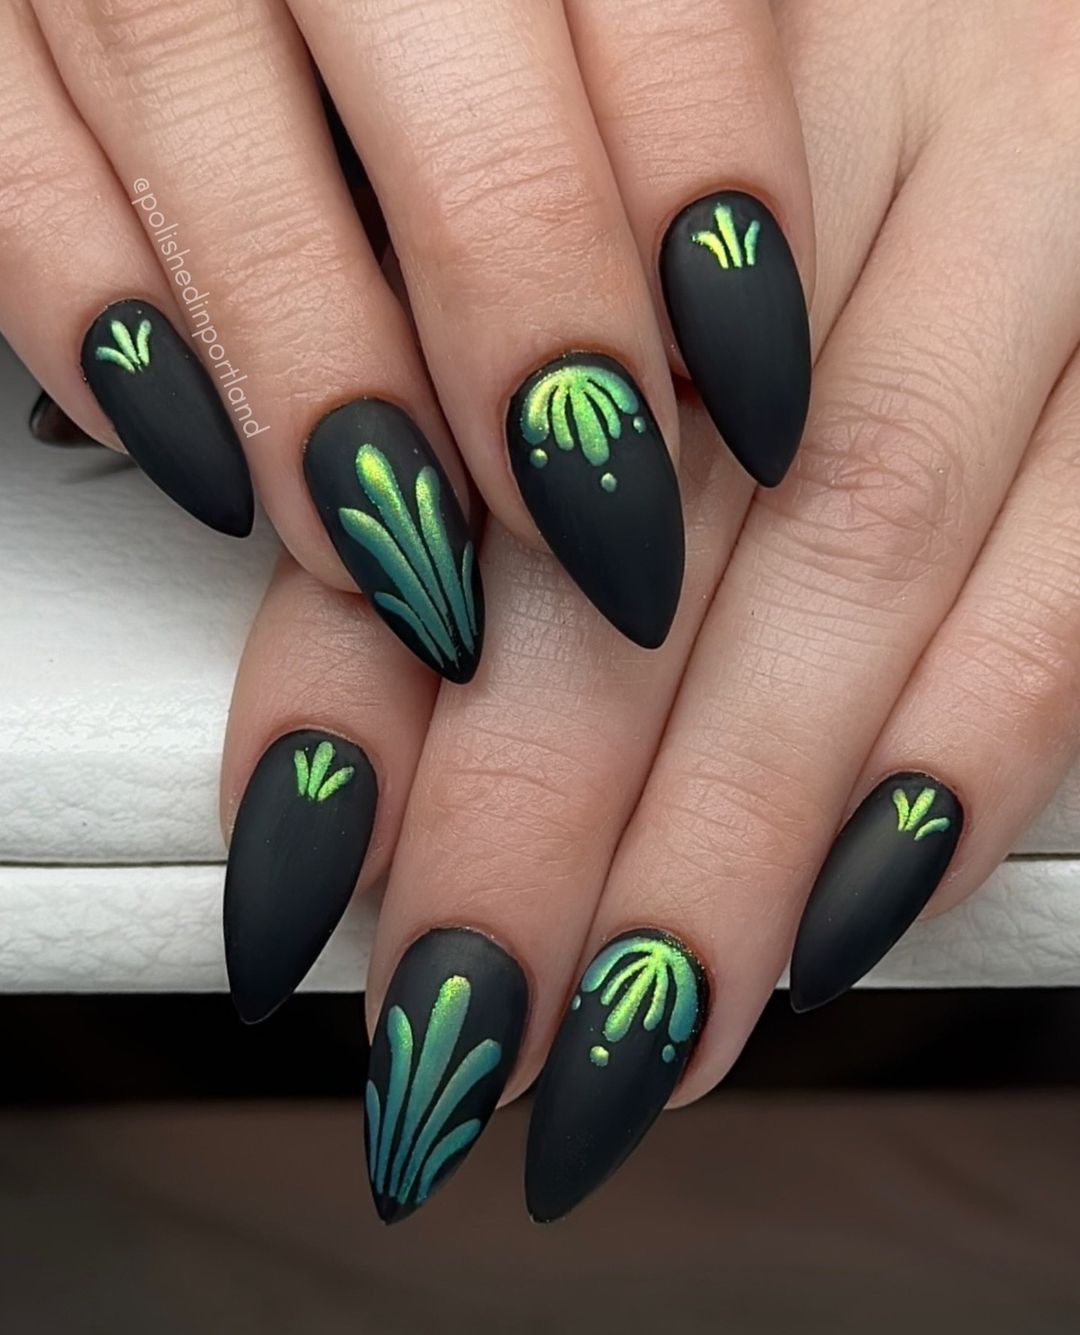
- Supplies: A matte black polish for the base. Neon green polish for the accents. And a dotting tool to create those precise dots.
- Pro Tip: Use a thin brush to paint the leaf-like shapes so your lines come out clean and crisp against the matte background.
Start by painting your nails with the matte black base coat. Once dry, get creative with your neon green designs. Add in some strategic dots where you see fit…and voilà!
Modern Edge with Neon Pink
This nail design is anything but basic. It’s a modern twist on the classic French manicure. The inverted sculpture design in neon pink is eye-catching and bold. This unique take on nails mixes trendy shape and art design, making it perfect for those nights when you want your look to make a statement.
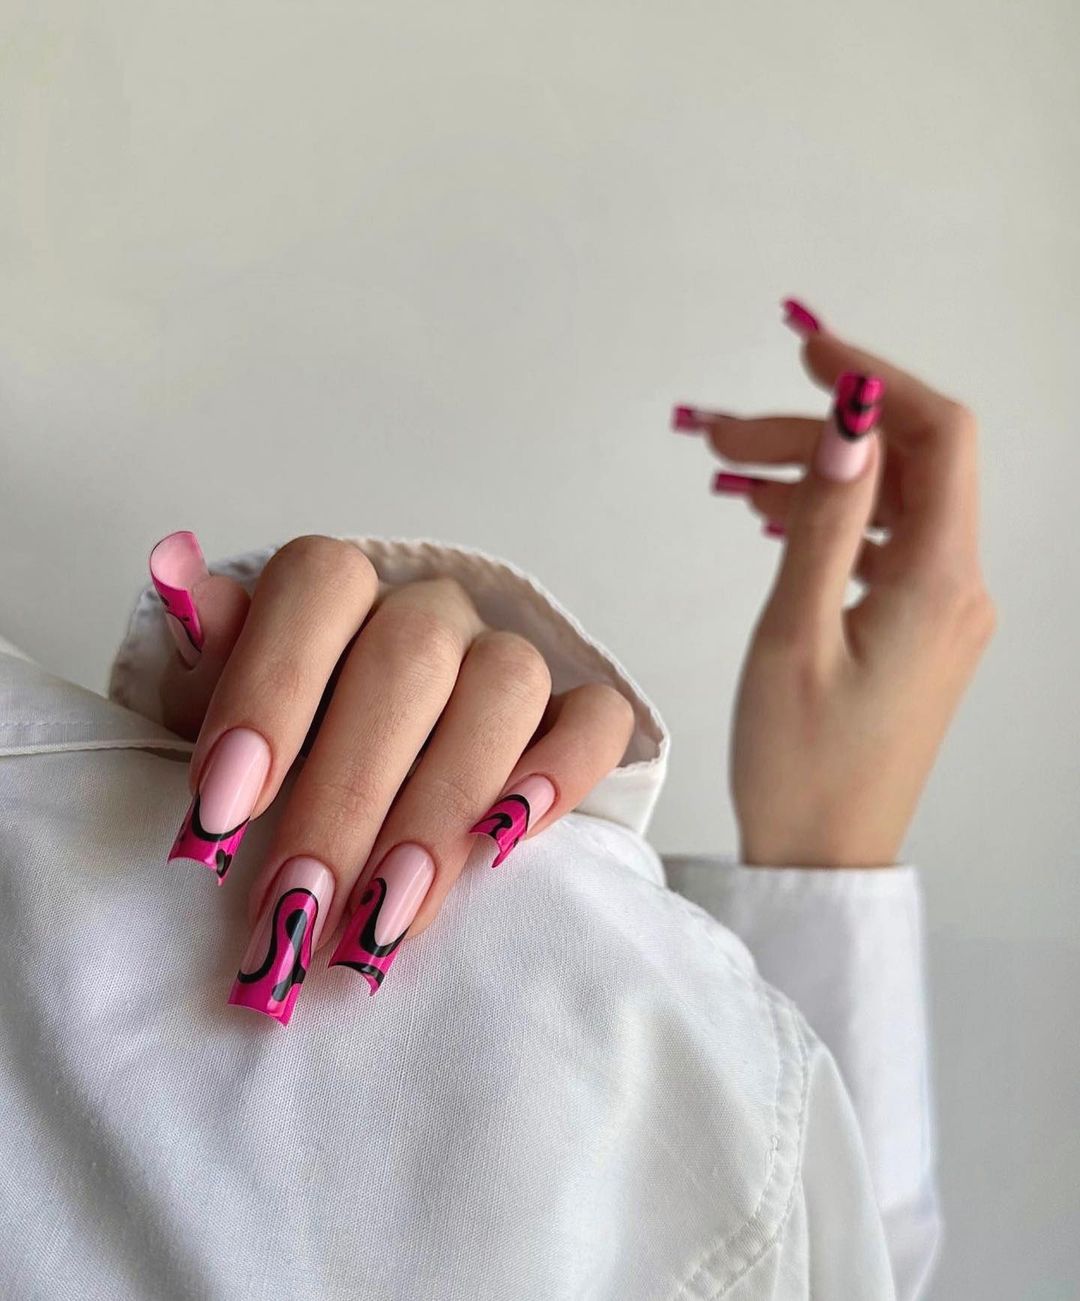
- What You’ll Need: A base polish coat in nude, sculptural design in neon pink, topcoat
- Pro Tip: For a perfectly sculpted line, use adhesive guides to shape the pink polish before filling it in.
Start with a base coat of nude polish. Allow it to dry completely. Apply adhesive guides where you want the pink to go. Fill in the guides with the neon polish. Carefully remove the guides once they’re filled in and apply one layer of topcoat for a smooth finish
Classic Red with a Lustrous Twist
Look at this red. Just look. It’s timeless. And yet, it shines so bright. The elongated shaped nails give a dramatic effect that says I’m confident in every way possible. You could say it’s the perfect embodiment of the word classic.
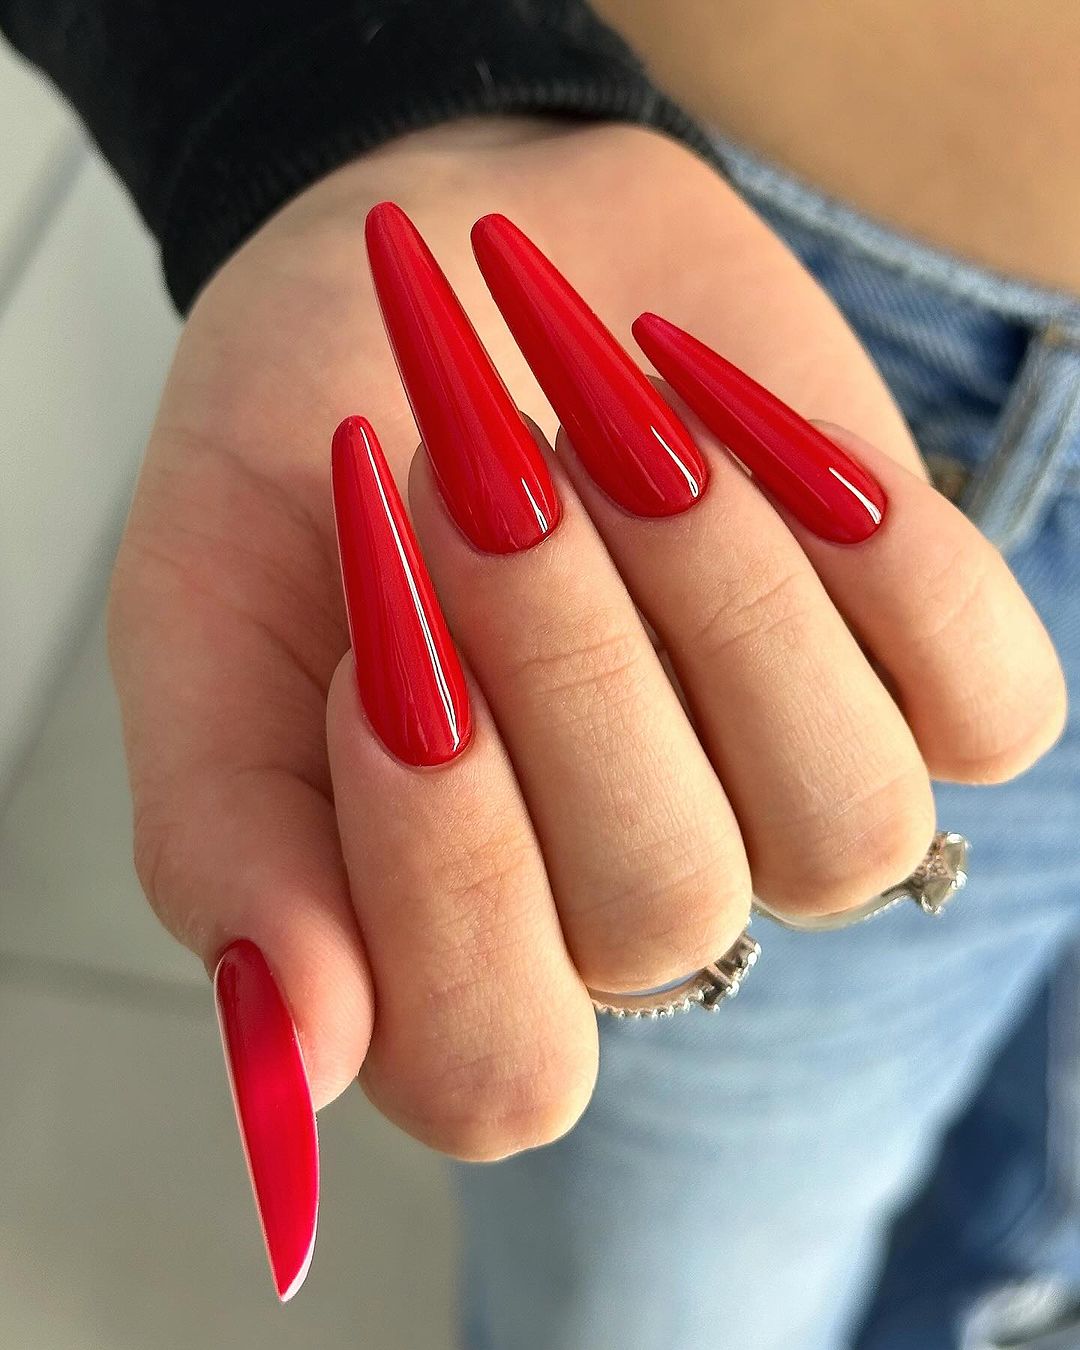
- What you’ll need: A high-gloss red polish, base and topcoats for longevity.
- Pro Tip: Thin coats, thin coats, thin coats. They will make sure this polish is the smoothest thing you’ve ever seen or felt.
To achieve this glossy look follow these steps:
- Apply your base coat.
- Add two coats of that one-of-a-kind red polish.
- Finish it off with a high-gloss topcoat to get that finish everybody wants but can’t seem to find anywhere else
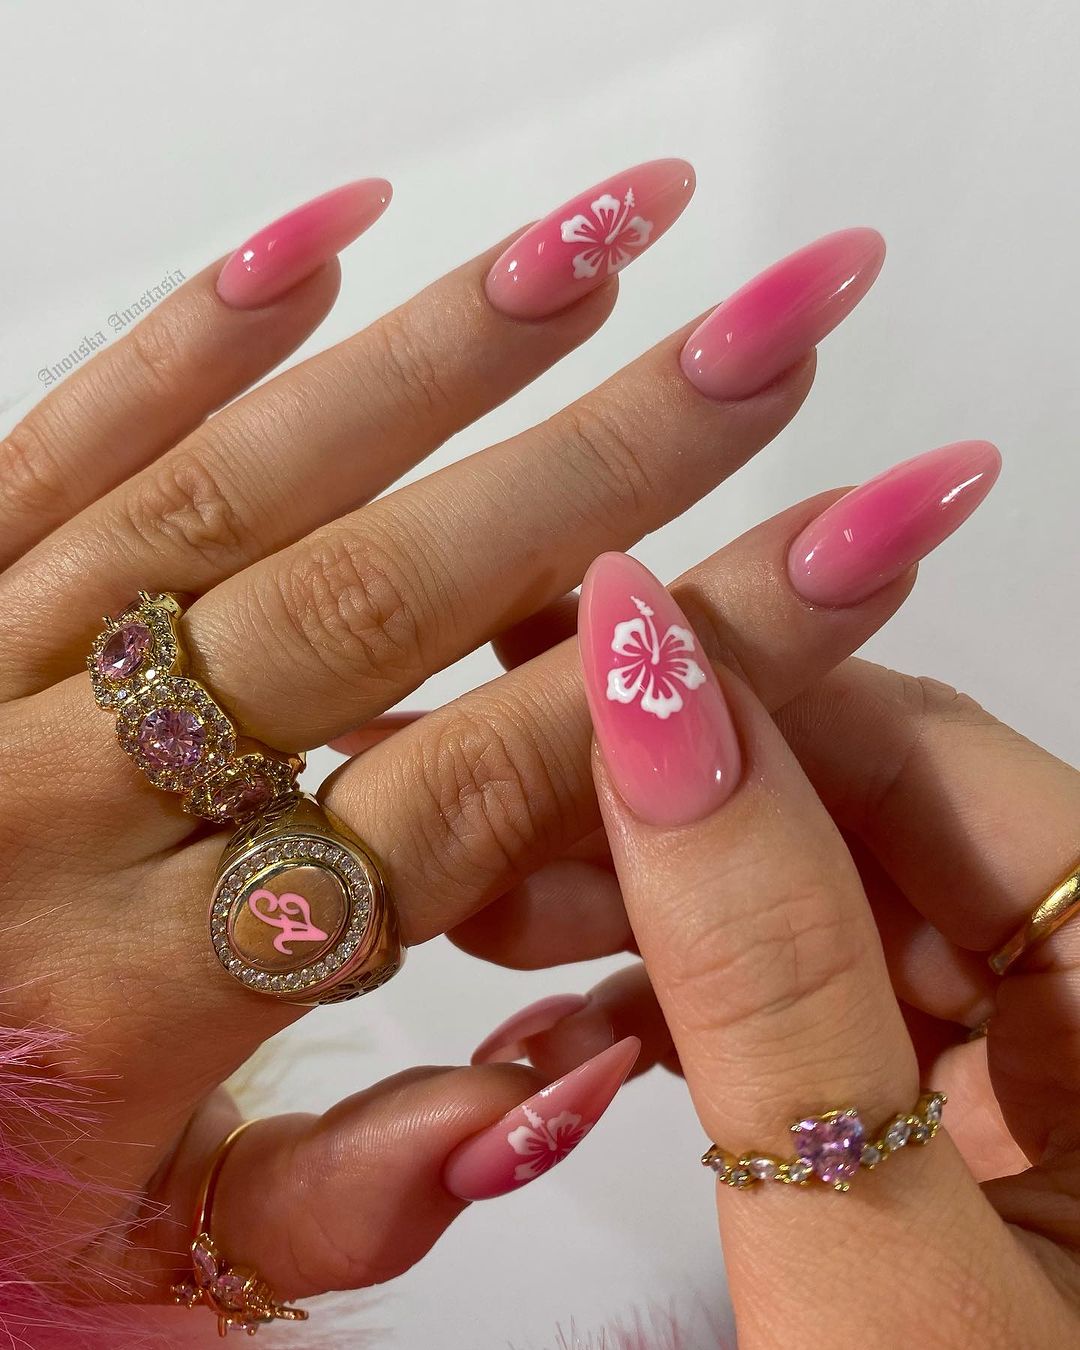
Soft Pink Elegance with Floral Accents
The background for this design uses a soft, pink gradient. On top of it are white, delicate flowers that give off the feel of summer gardens and romance. This style would look great on any vacation to the beach and will catch eyes at fancy events.
Things you need:
- Pink polish for the gradient
- White polish for the flowers
- Topcoat to keep everything together
- Pro Tip: To make sure your gradient looks perfect, apply it with a sponge. And if you’re having trouble with fine details of the flowers after painting them on, try using a small brush.
First, create a gradient effect with your pink polish. Then add the intricate designs of your flowers gently with white paint. After letting it all dry, finish the job with another layer of topcoat to protect your art.
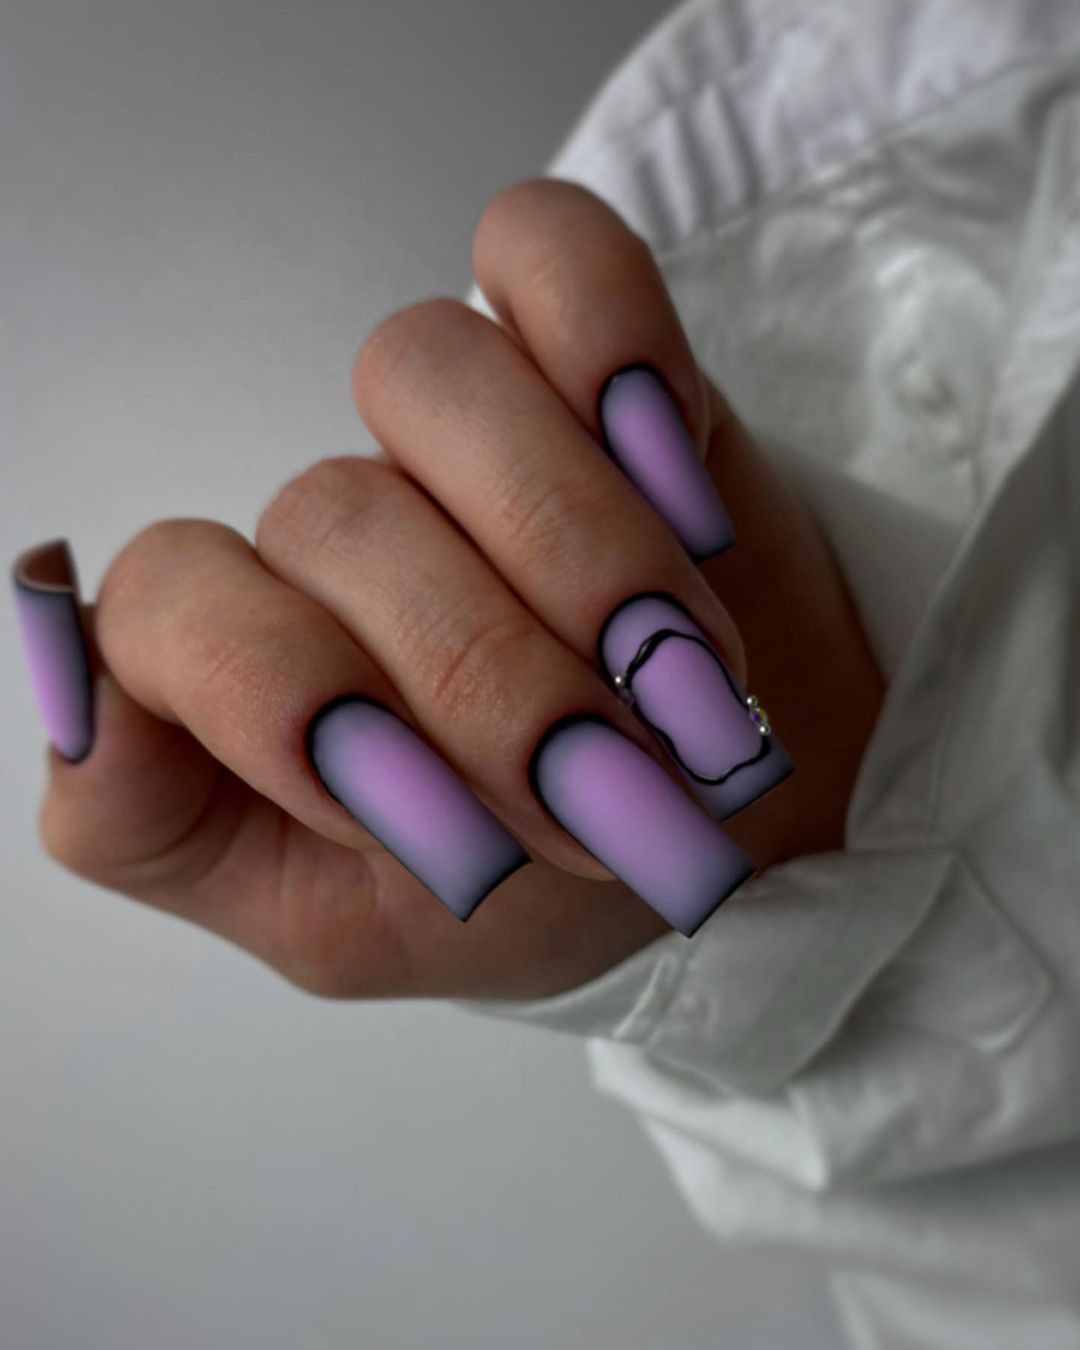
Matte Lavender with a Pop of Bling
In this design, the subtlety of matte lavender meets the unapologetic glam of rhinestones. It’s a balancing act that will make your nails both understatedly sophisticated and a little extravagant. This is the look you need if you want simple and spectacular to merge — it’s one of the most in-demand looks this season.
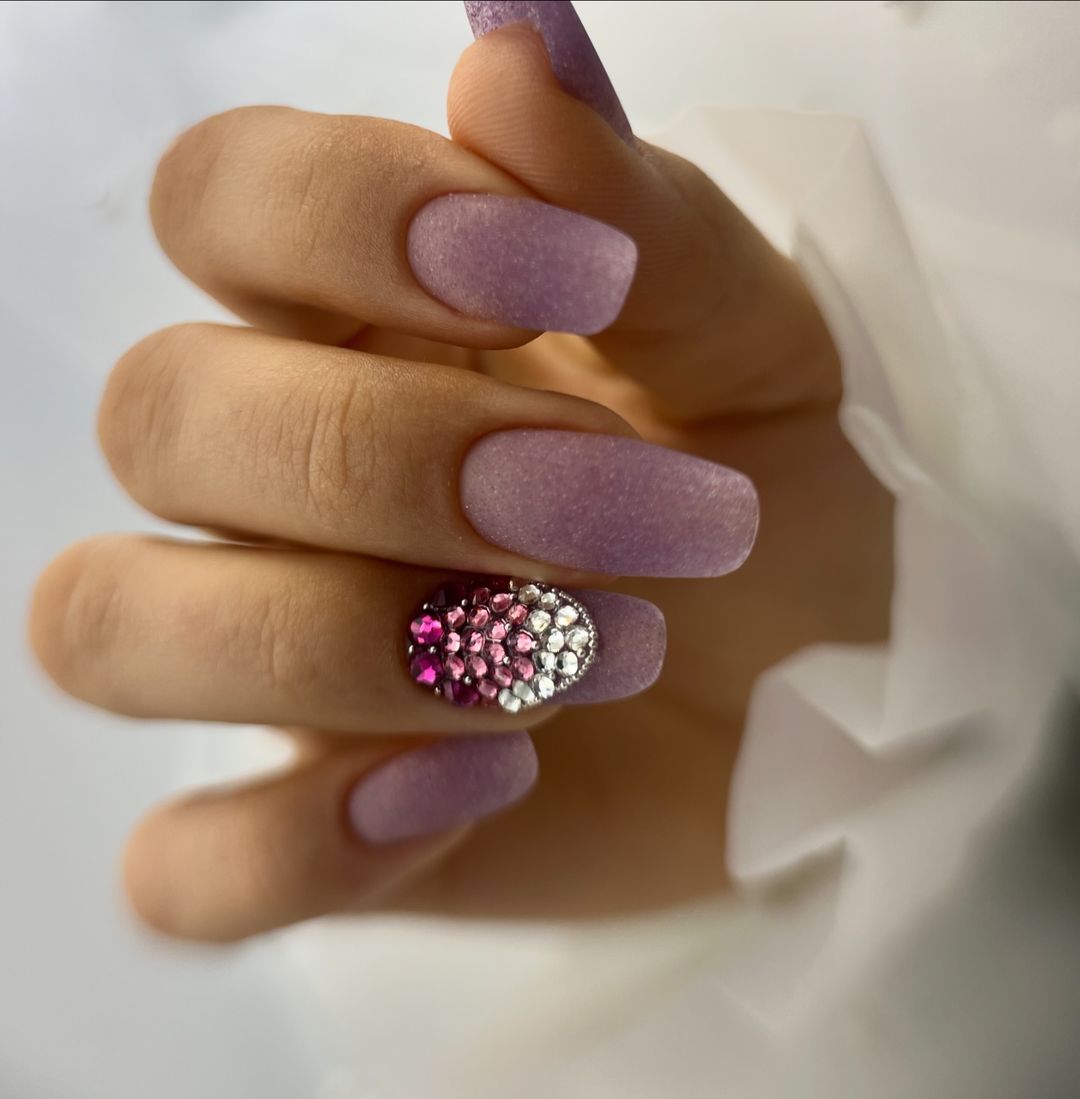
- You’ll need: Matte lavender polish, assorted rhinestones, and adhesive for secure embellishment placement.
- Pro Tip: After applying the matte polish, place the rhinestones while the topcoat is tacky so that they stick without additional adhesive.
Paint your nails with the matte lavender polish. Arrange the rhinestones on the accent nail in a gradient pattern. Press them gently into place.
Contemporary Pink with a Matte Finish
The look is a study in opposites, with a matte finish that sets off the bright pink tips. Crisp white lines add a modern, geometric feel — it’s not your typical negative space mani and we’re into it. Together, bold and subtle elements harmonize to create something trendy but timeless.
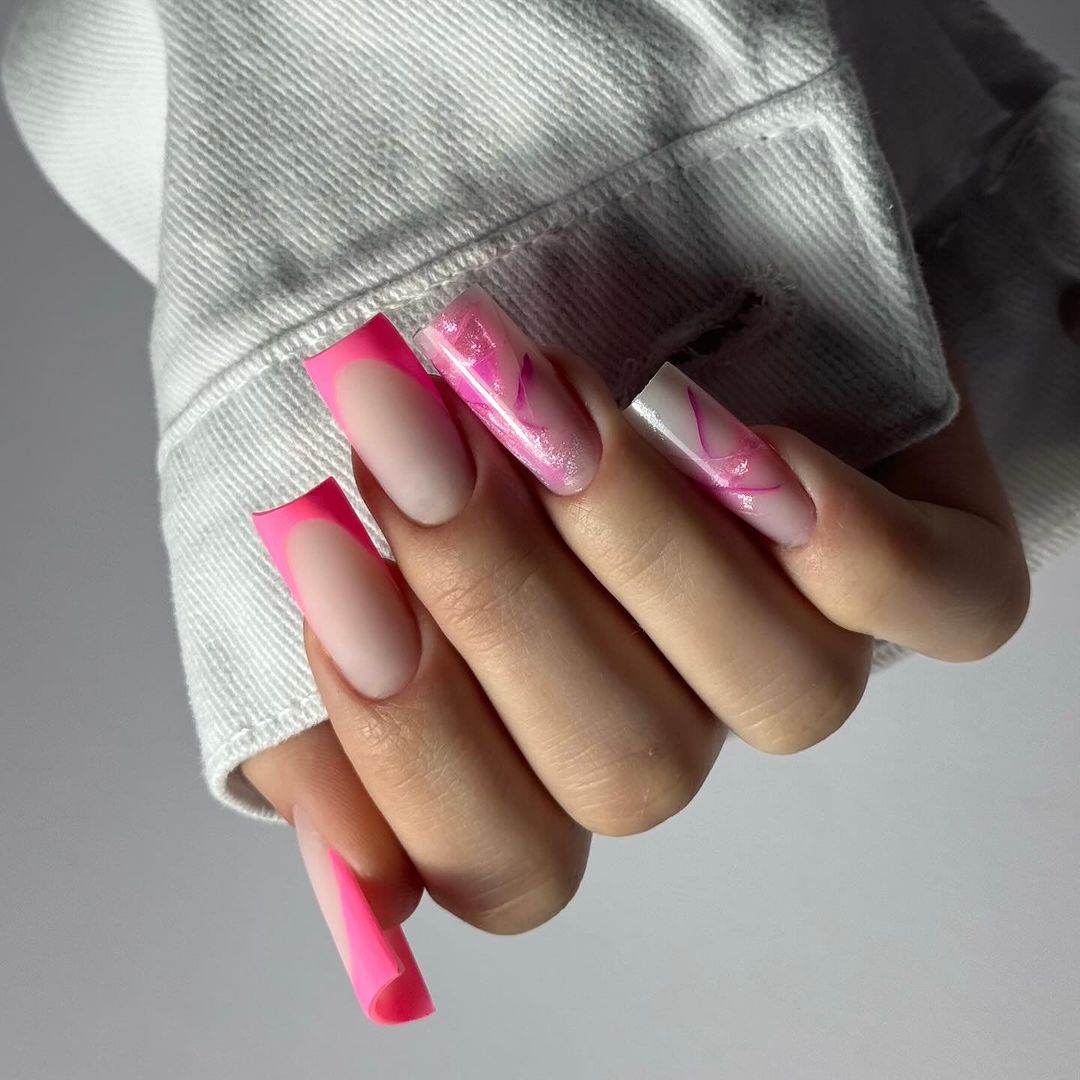
- You’ll need: Matte topcoat, bright pink polish, white striping polish
- Pro Tip: Apply the matte topcoat all over nails before adding glossy pink tip for a duo texture effect.
Start with nude base color then add matte topcoat. Once dry, carefully apply pink polish only to tips of nails. Use a fine brush to draw on white lines for extra precision.
Swirling Yellows and Magnetic Oranges
This nail art design creates a swirl of yellow and orange for a hypnotic effect. It’s hard not to think of fire or the patterns seen in a sunset when looking at it. The colors blend together perfectly, which is only made more visible by the elongated nail shape. This one was made for statement-makers.
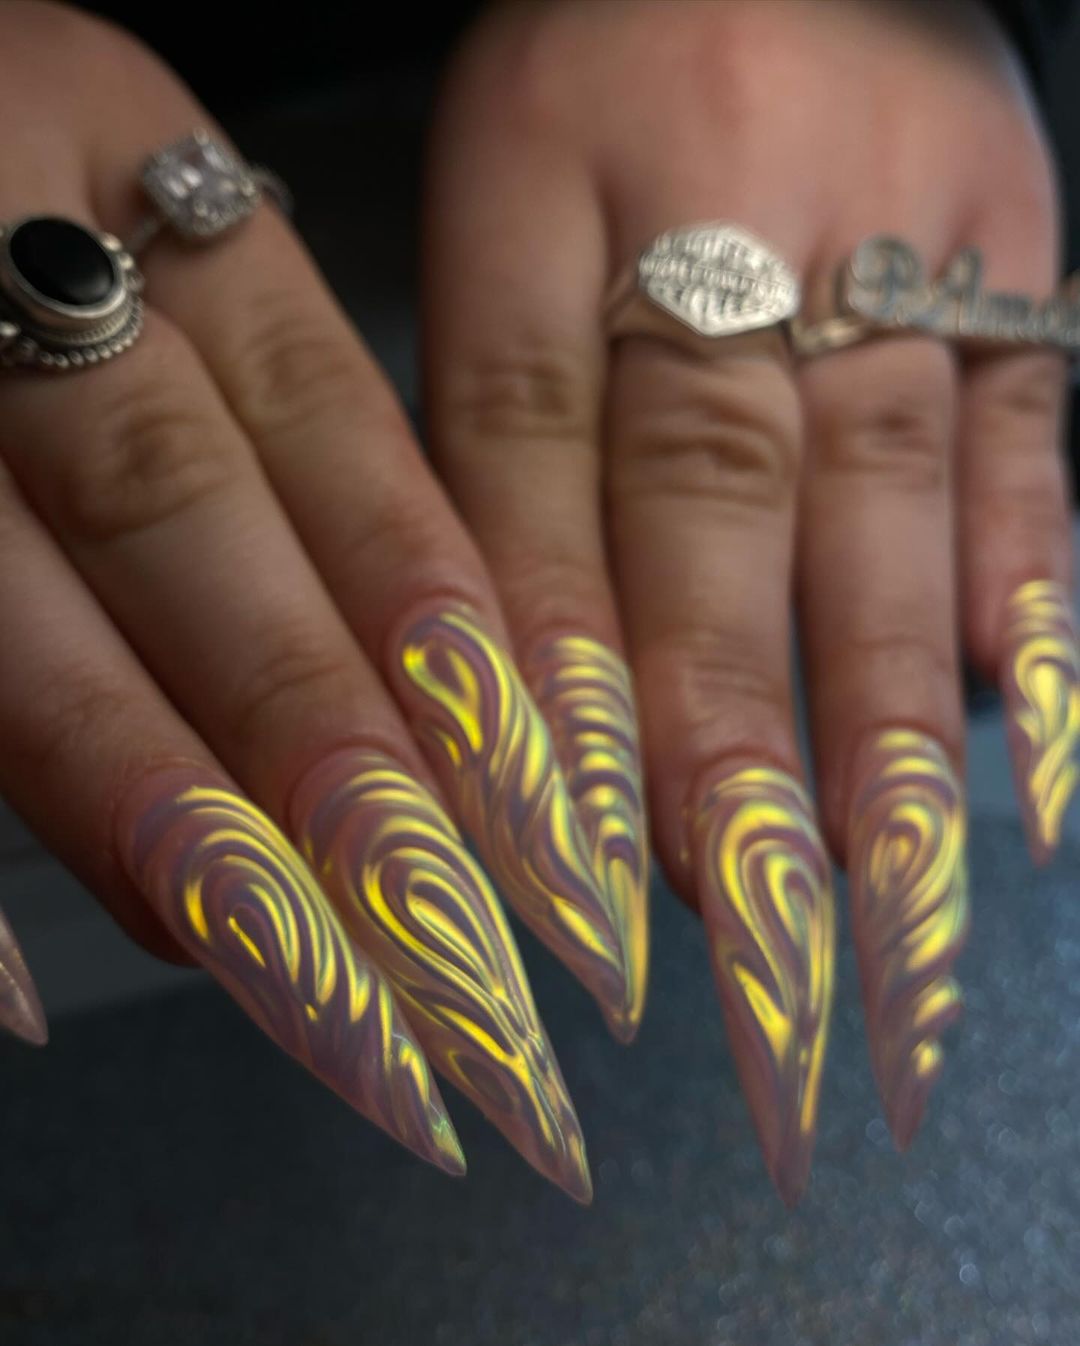
- You’ll need: Yellow and orange polishes, a detail brush, high-gloss topcoat
- Pro Tip: Make sure you’re blending the colors while they are wet to achieve the smooth swirl outcome pictured above.
Begin on a black base coat. While still wet, start layering on and swirling in your yellows and oranges with your detail brush. Seal everything up with your glossy topcoat for that extra pop.
Liquid Gold Glamour
For those who want the most luxurious look possible, this design is gold. Literally. With golden polish that flows like lava, it’s a smooth, rich look that’ll impress everyone in the room. It’s extravagant and fancy – perfect for any event this summer.
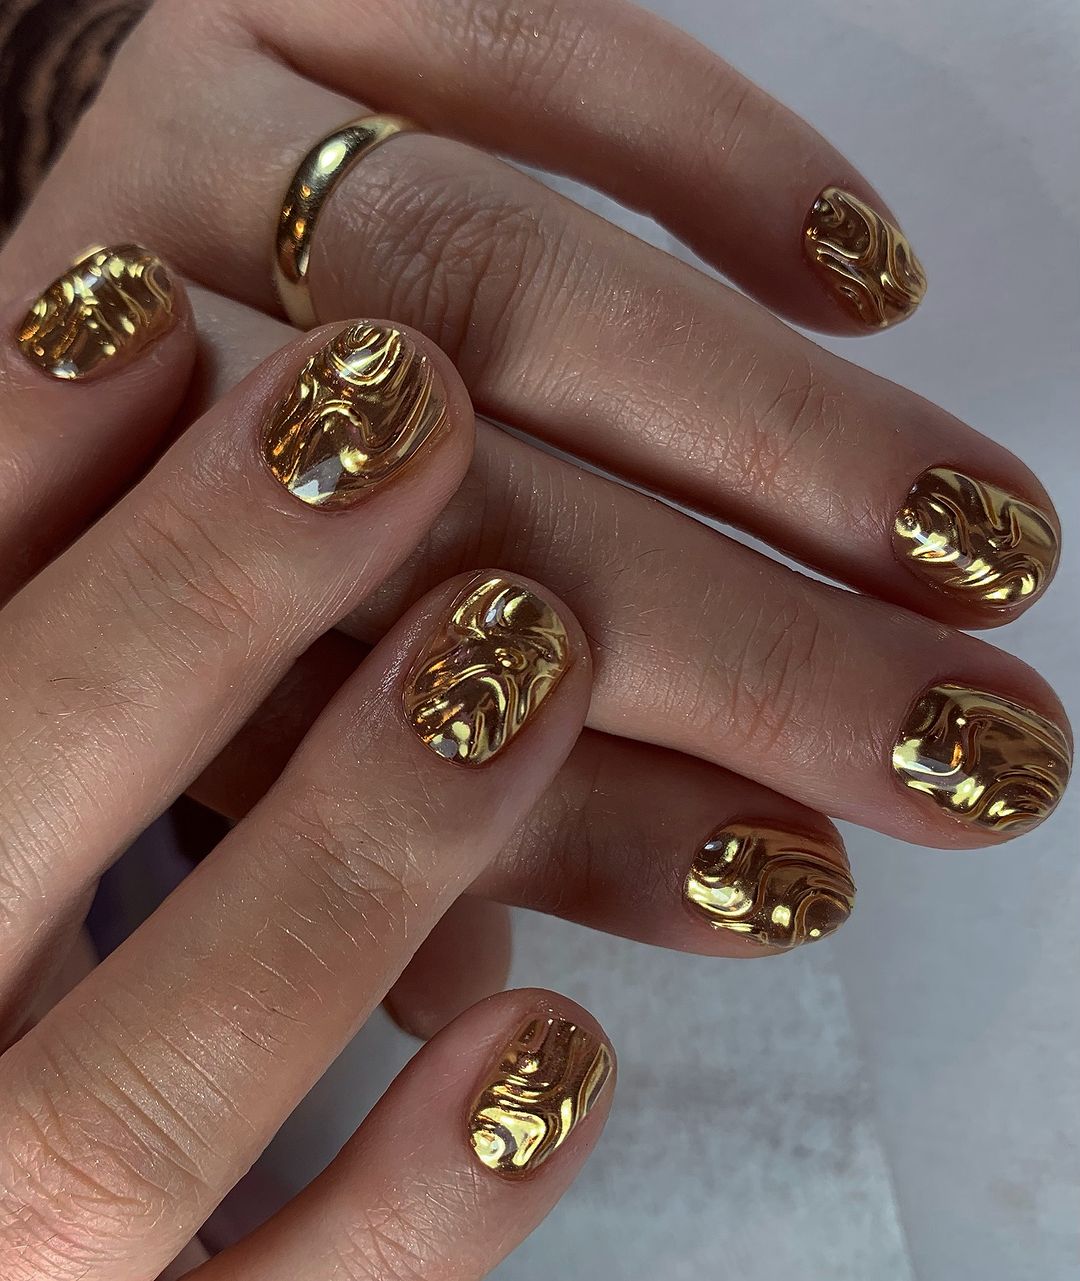
- Items needed: Metallic gold polish, a glossy topcoat to make everything shine.
- Pro tip: Work fast with the gold polish before it dries to keep the liquid effect alive.
Apply the metallic gold polish in sleek waves to make it look like you just poured metal on your fingers. Once you’ve got the design you want, put a glossy topcoat on to make everything shine even more than it already does.
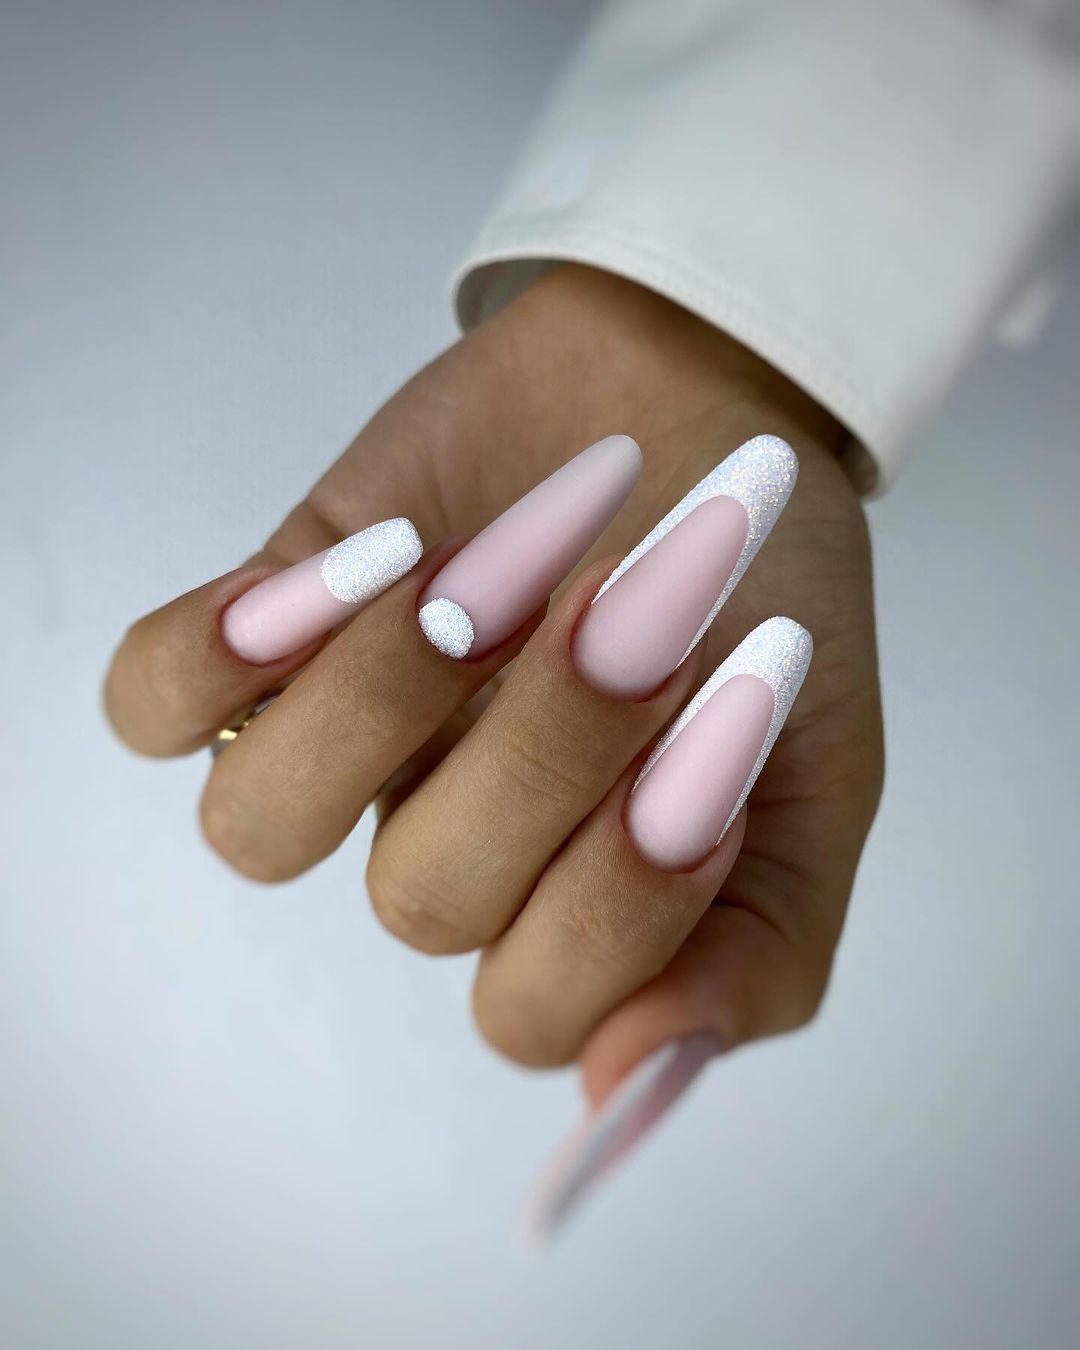
Luminous Fade with a Sparkle
The design is done in a gradient from an opaque, creamy color to a translucent tip, the colors softly blend and look perfect with any of summer’s softest hues. It adds just the right amount of sparkle with some glitter near the cuticles. This elegant look would work well anywhere on vacation or for a summertime outing.
- Consumables: A builder gel that’s translucent, white cream polish for your base, fine glitter.
- Pro Tip: After applying cream polish on top of builder gel, use an orange wood stick to blend them together while they are uncured for a smoother fade.
To get this look start with your base of builder gel and then add your white cream polish. Blend it into each other while they’re both uncured to achieve a smooth fade. Cure under UV light before adding glossy topcoat.
Playful Leopard Print with Love
This fresh design brings an exciting twist to your nails with playful leopard spots and heart detailing layered over a nude base. Be prepared to make a statement when you wear these sassy red accents, for the passionate and bold at heart. It’s the perfect way to celebrate timeless patterns with a modern take.
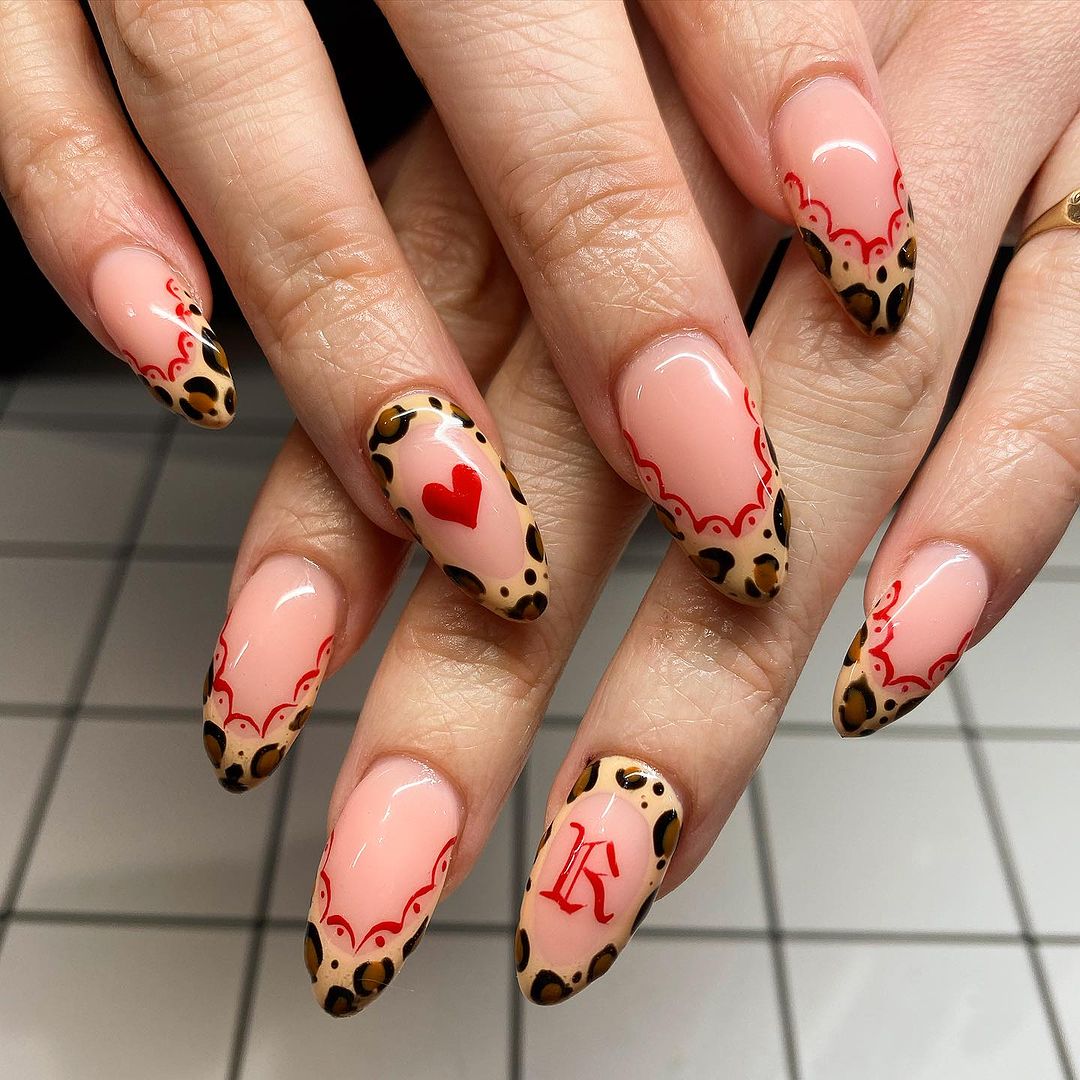
- Materials You’ll Need: nude polish, black polish, red polish, fine-tip brush
- Pro Tip: To get the leopard spots right, use a dotting tool to apply random splotches of black polish. Then outline each spot unevenly with more black.
First, apply your favorite nude polish. Once dry, use a fine-tip brush to create leopard spots and hearts around them. Finally, seal it all in with a long-lasting topcoat.
Matte Lavender Elegance with a Frame
This one is a stunner, pure and simple. Matte lavender nails. Glossy black lines that follow the architecture of the nail. It’s minimalism with a punch and it’s here to make a statement without even using words.
- Shopping List: Matte lavender polish, glossy black polish or liner for framing and matte topcoat
- Pro Tip: Use striping tape if you want to get hyper-precise with your lines.
Paint nails with the base color in matte lavender, use linear tape to frame the edges with glossy black, remove tape and let dry.
Subtlety and Surprise
It’s like painting through fog. Your nails will go from vivid white to see-through tips, encapsulating the ethereal beauty of a summer mist. One red dot per nail adds some pops of color and a pinch of whimsy/joy.
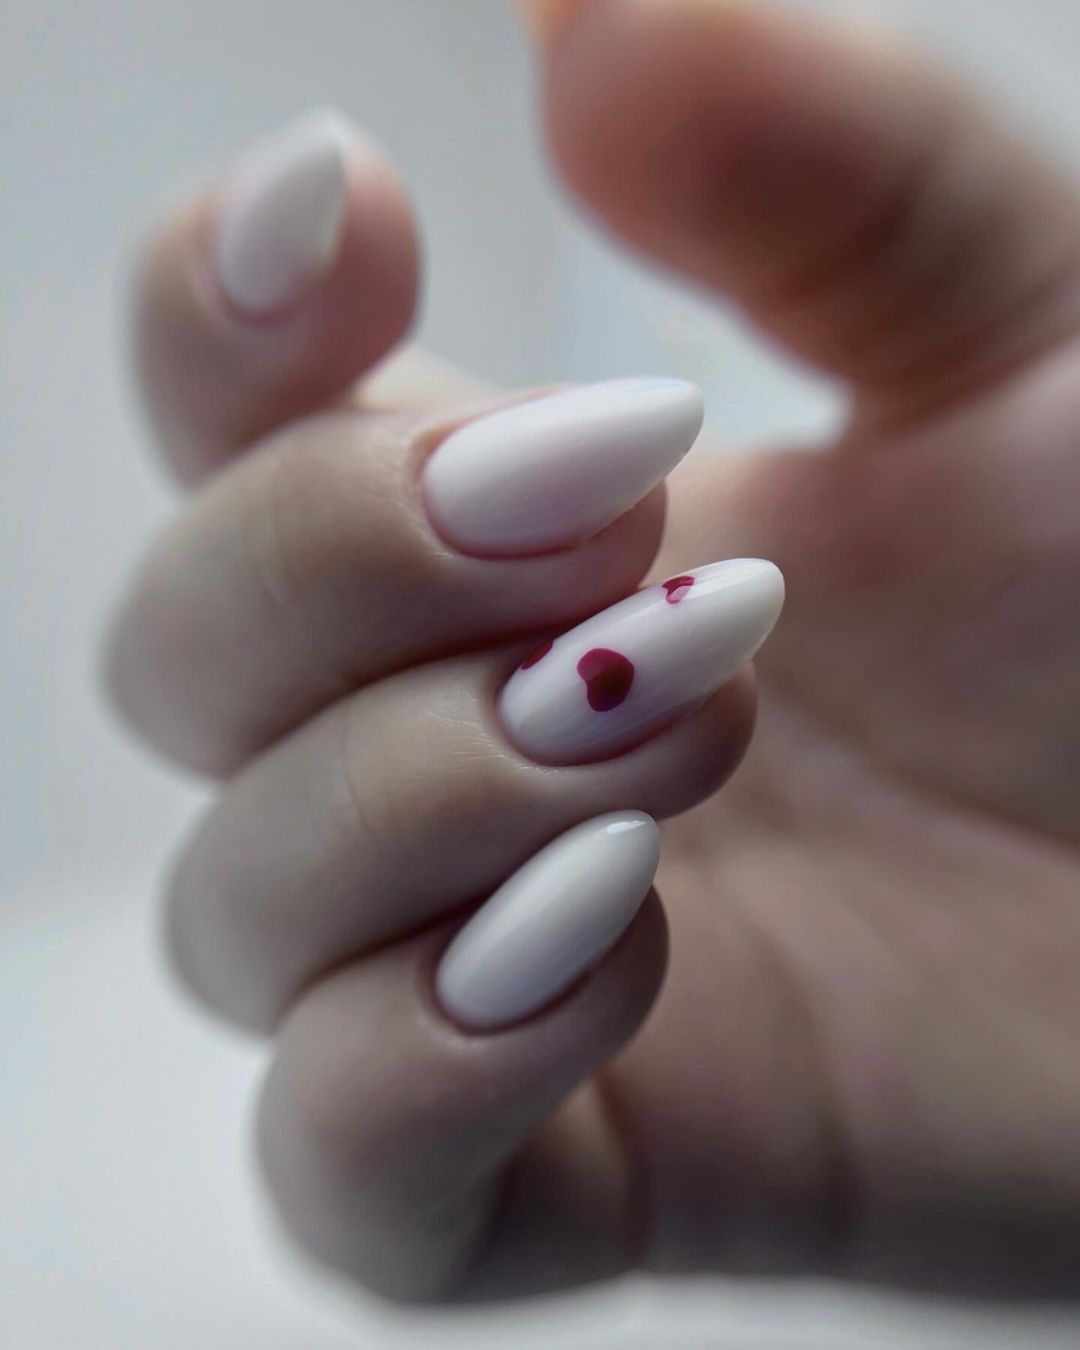
- Things You’ll Need: Matte white polish, glossy red polish (for dots), clear top coat
- Pro Tip: To transition from matte to clear, use a sponge to softly diffuse the while until it’s transparent.
Instructions:
1. Start with your matte white base.
2. As it dries/settles, gently sponge towards the tip of your nail to create that translucent effect.
3. Dip the end of the brush in your glossy red polish and add one dot to each nail for some playful pizazz.
Flirtation with Florals and Patterns
Pink and red are the stars of the show in these flirtatious summer nail design. In a daring move, it combines delicate flowers with bold animal print to create a pattern that embodies all things summer: playful, passionate, and free.
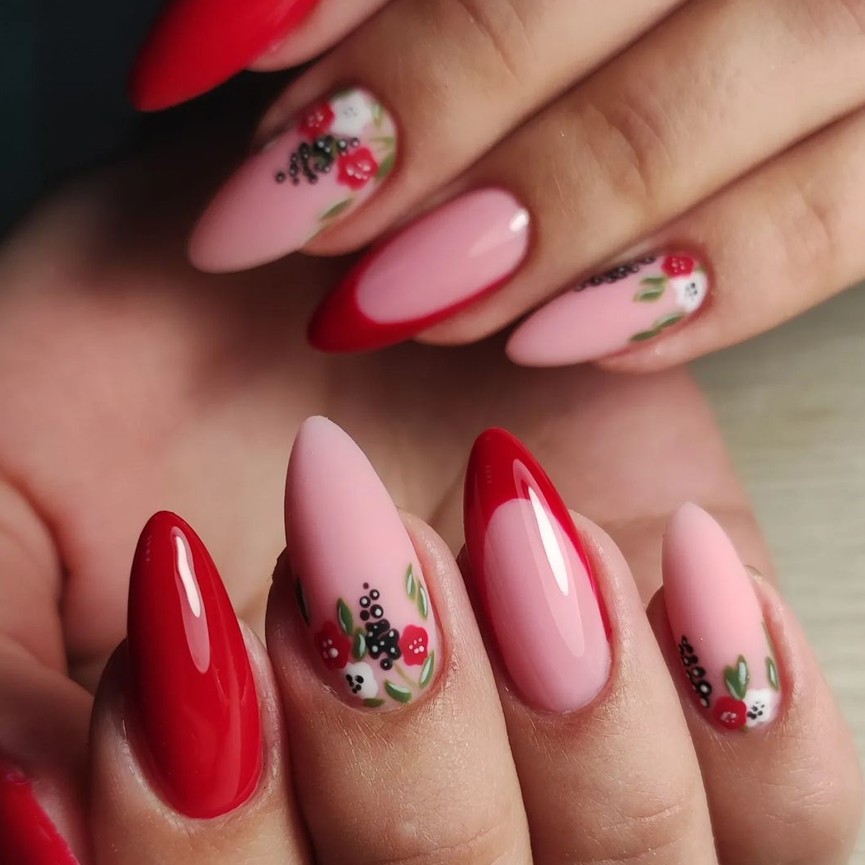
- Tools: Pink, red, black polish (and a clear topcoat to seal up the design).
- Pro Tip: Use a thin brush for precise lines in the animal print. For small dots in the floral pattern, use a dotting tool.
Keep your nails simple with pink polish as a base coat. Then dip into red polish to start creating an animal print at the tip. Finish by adding delicate flowers throughout for one cohesive look.
Pearlescent Droplets
A transparent nude polish adorned with small beads is the final design. It’s simple yet extravagant, for those who enjoy the more delicate and detailed side of summer.
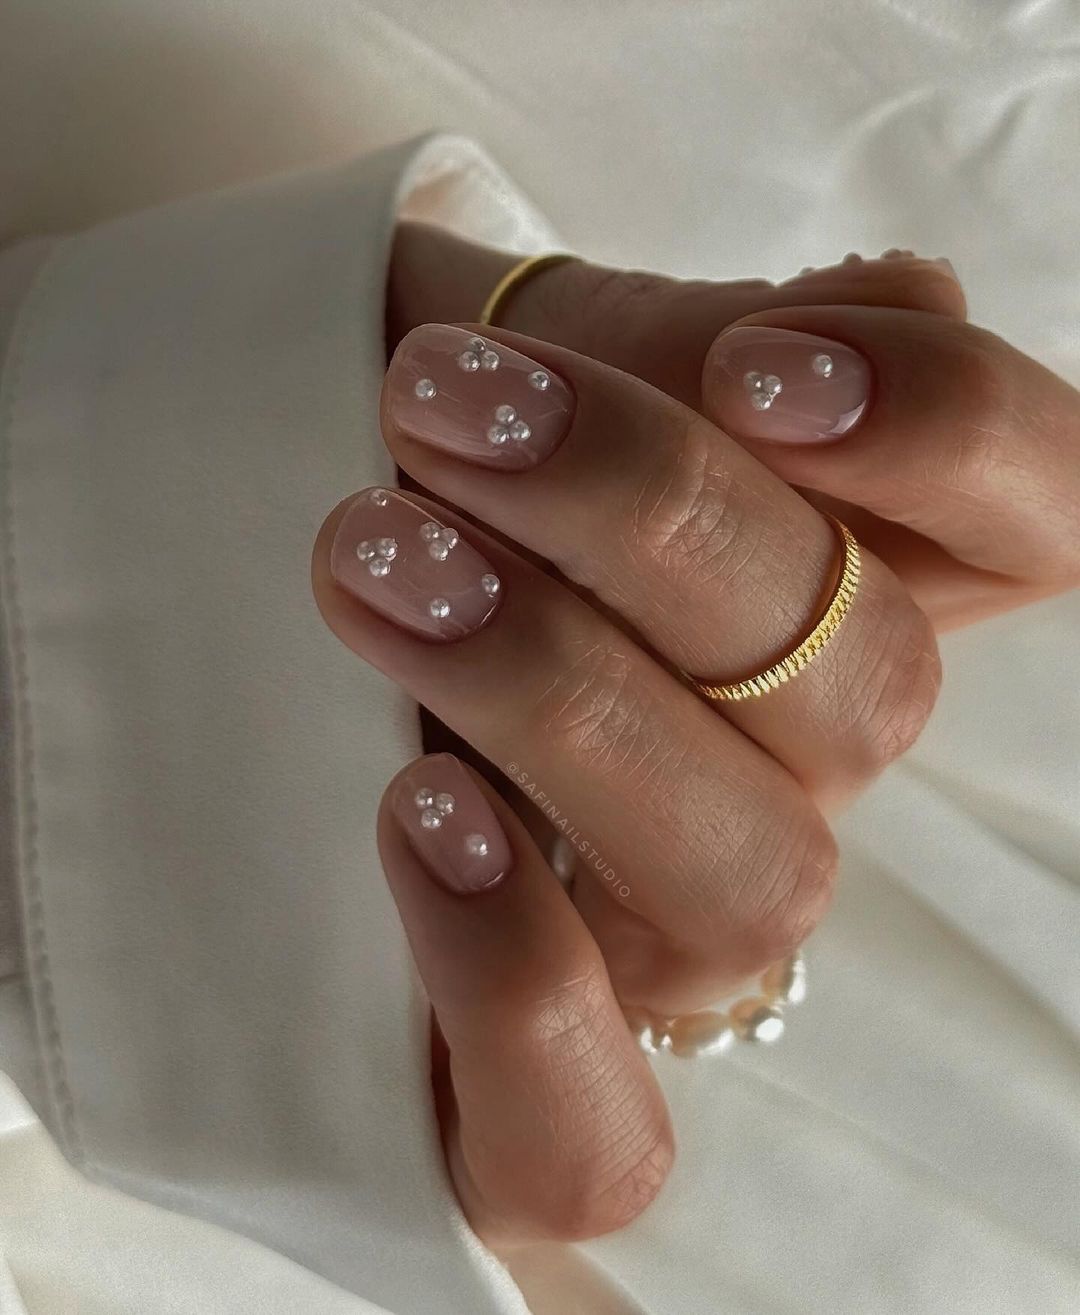
- Supplies: Transparent nude nail polish, small pearls or beads that you’d like to use as accents, clear coat finish.
- Pro tip: Use glue to make sure the beads stay in place.
After applying the nude polish, strategically place your beads while your clear coat is still sticky. Finish off with another layer of the clear coat for long lasting results.
Elegant Print with Gold Accents
This design takes a soft, nude base and adds bold black patches layered with delicate golden lines. It is a modern twist on the cow print that plays with matte and gloss textures. The matte finish dominates, but the glossy accents bring out a luxurious feel.
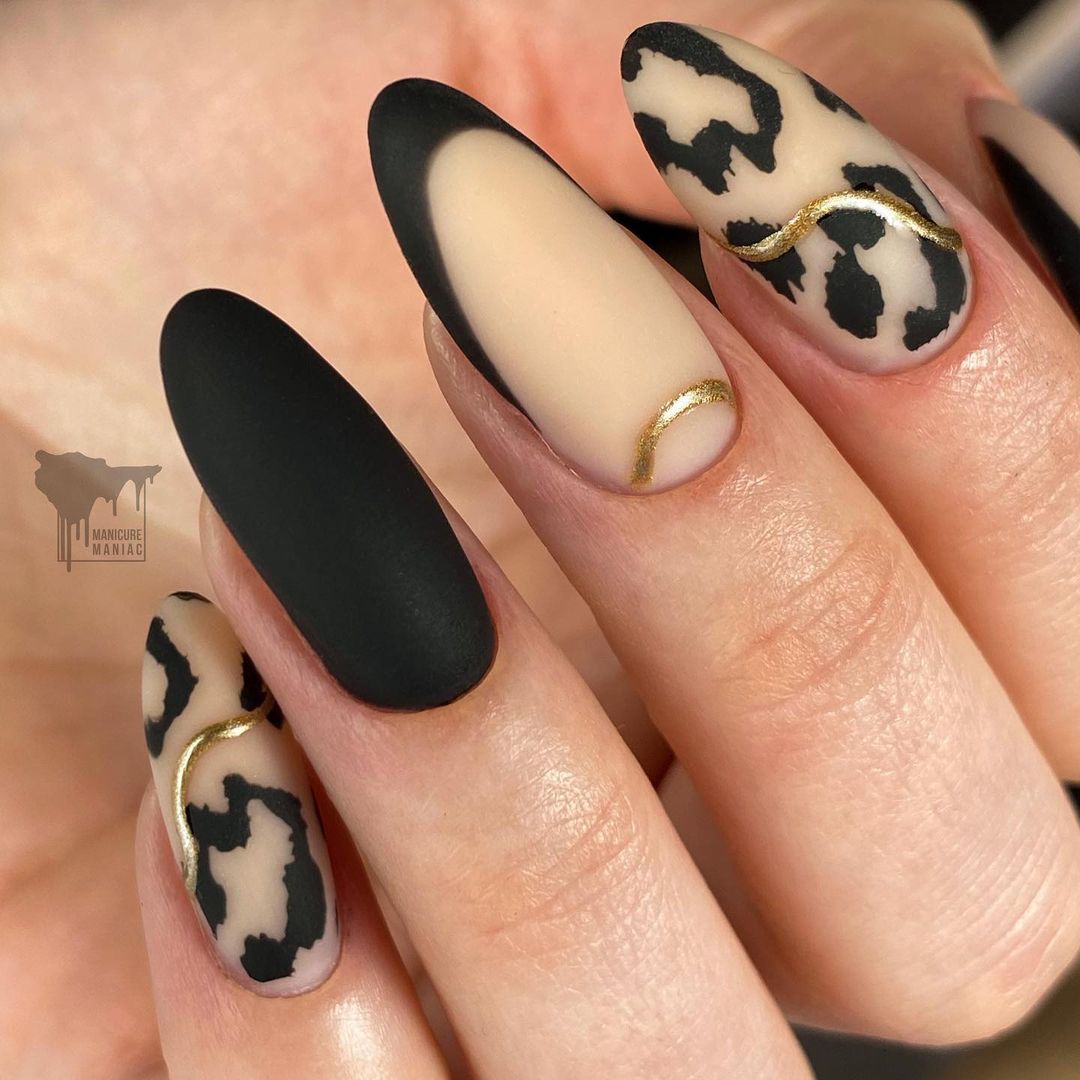
- Products: Nude matte polish (base), Black polish (cow print), Gold striping polish (accents), Matte topcoat
- Pro Tip: Let your brush dance freely to create unique shapes and patterns for the cow print spots. Use a fine striping brush to add the gold outlines.
Apply the nude matte base, then hand-paint in your cow spots using the black polish. Outline each spot with gold and finish it all off with a layer of matte topcoat for that sophisticated texture contrast.
Ocean’s Edge
With it’s pink base and blue wave tips, this design is dedicated to the sound of waves crashing against the shore. The detail in the white layer of foam adds a touch of realism to capture ocean movement. It’s a perfect design for anyone who carries the calming essence of the sea within their hearts.
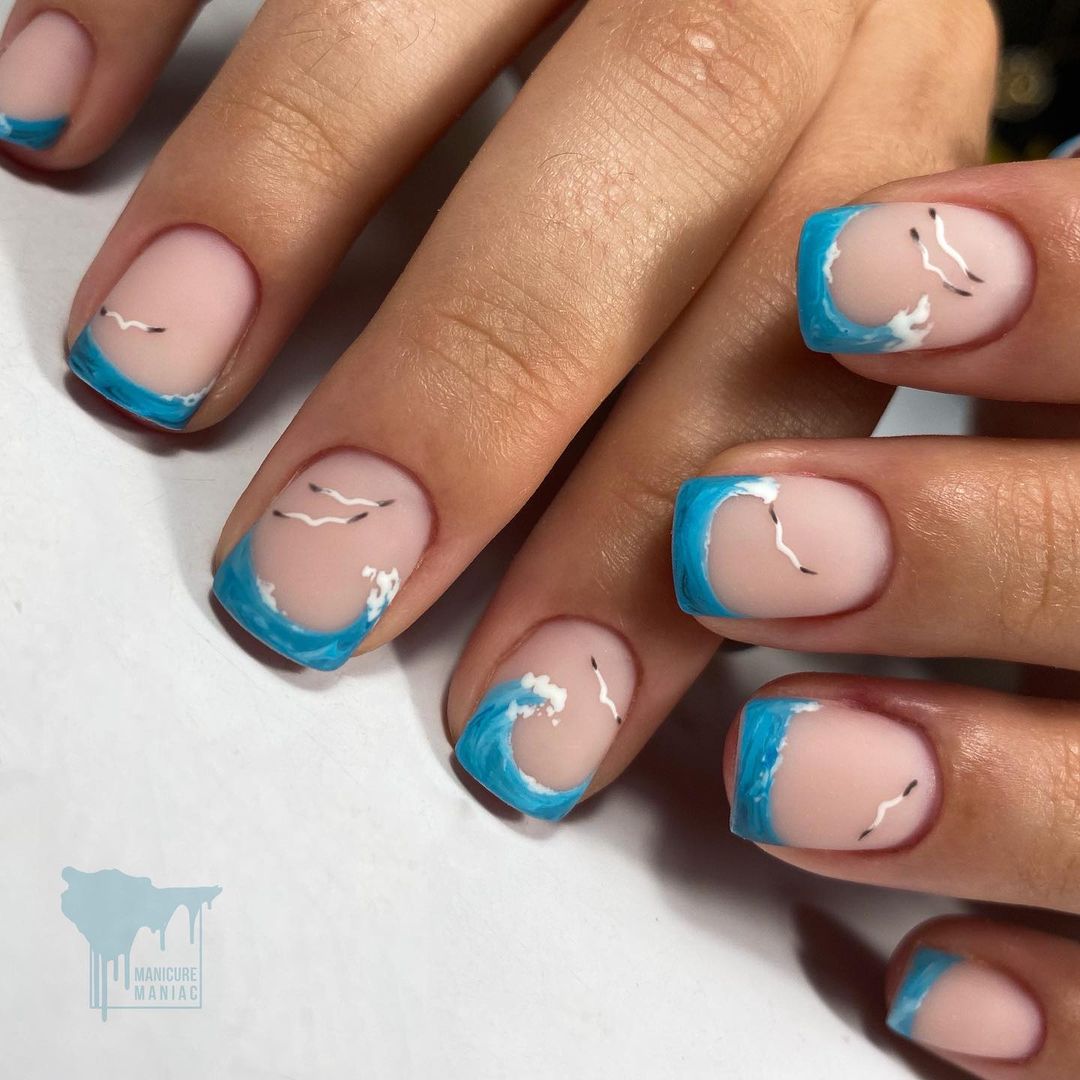
- Materials: Pink polish for the base, blue polish for wave, white polish for foam details, glossy topcoat
- Pro tip: Use a thin brush when painting blue waves and then dab on white paint to make your nails look like seafoam.
Start with pink base, add blue wave tips, add white foam detail and finish it off with a glossy topcoat to get that just out of the water look.
FAQ
Q: How do I choose the perfect summer nail design that fits my style?
A: Think about your personal style and the colors you’re drawn to during the summer months. Consider vibrant and bold patterns if you love making a statement, or opt for soft pastels and delicate designs if you prefer understated elegance. Remember, the best design is one that makes you feel confident and joyful.
Q: Can I achieve these nail art designs at home, or do I need a professional?
A: Many nail art designs can be done at home with the right tools and a bit of practice. Start with simpler designs and as your skills improve, move on to more intricate art. Of course, for complex designs with detailed artistry, a professional manicurist can ensure a flawless finish.
Q: How long do these nail art designs typically last?
A: Depending on the type of polish (regular, gel, or acrylic), and how well you take care of your nails, designs can last anywhere from a few days to several weeks. Gel designs tend to last longer, often up to two weeks or more without chipping.
Q: What are some trending colors for summer nail art?
A: This summer, we’re seeing a range of trending colors from bright neons and classic reds to soft pastels and matte finishes. Metallic accents are also popular, adding a touch of luxury to any design.
Q: How can I make sure my nail art stays looking fresh?
A: To keep your nail art looking its best, apply a clear topcoat every few days to prevent chipping. Also, wear gloves when doing tasks that could damage your nails, like washing dishes, and keep your hands moisturized.
Q: Are there eco-friendly nail polish options for creating summer nail art?
A: Absolutely! There are many brands that offer non-toxic, vegan, and cruelty-free polishes. These environmentally conscious options don’t sacrifice color or quality, so you can enjoy your summer nail art and be kind to the planet.
Q: What if I want to change my nail art frequently throughout the summer?
A: If you love to switch up your look, consider using peel-off base coats or opting for regular polish over gel, as these can be changed more frequently without damaging the nails. Stick-on nail art and press-ons are also a great alternative for quick, commitment-free style changes.
Save Pin
