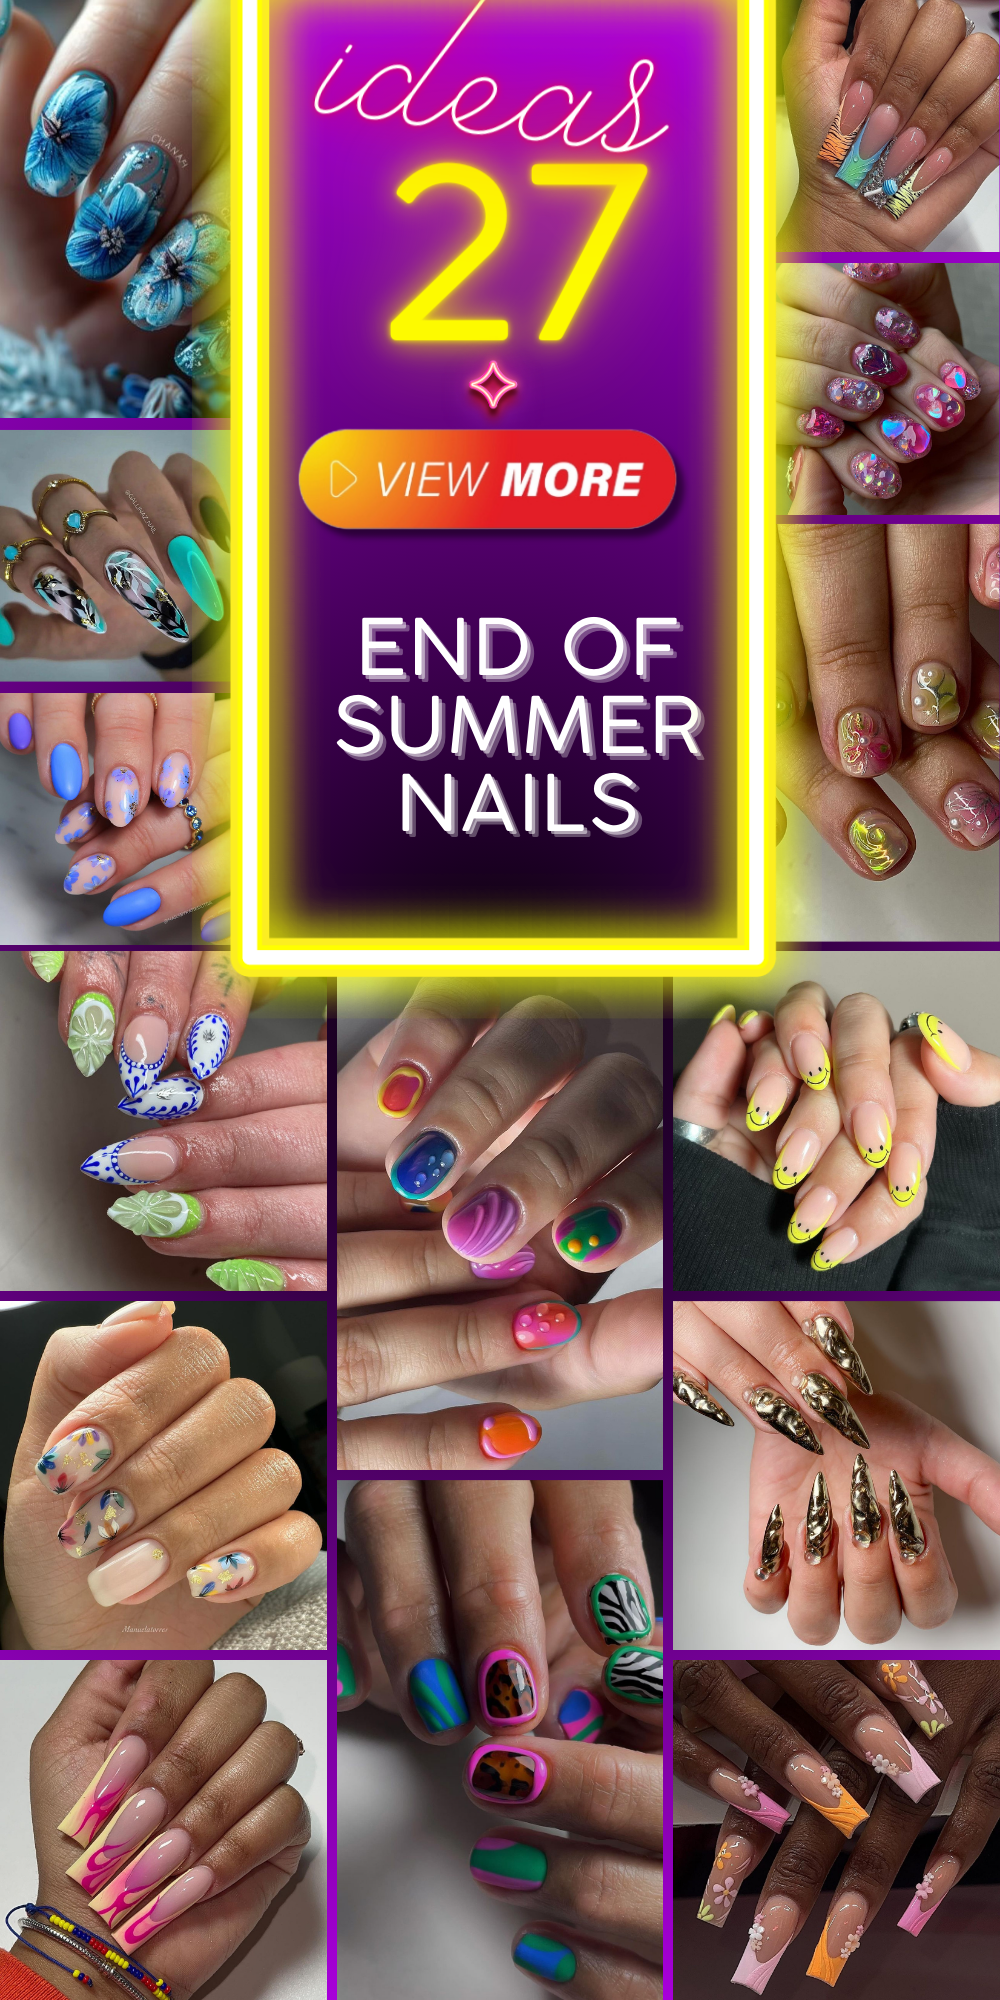
Are you ready to say farewell to summer in style? As the warm, vibrant days slowly transition to the cooler hues of fall, it’s the perfect time to explore end of summer nails that capture the essence of both seasons. What designs, colors, and styles best embody this seasonal shift? Whether you’re into simple manicures or trendy art, this guide will walk you through a myriad of chic end of summer nails ideas that will ensure your fingertips are as ready for the season change as you are. What kind of nail shape suits the season’s end best? How can you incorporate summer vibes with a hint of autumnal flair? Keep reading to discover these exciting transitions!
Exquisite Summer Sunset
This nail design epitomizes the vibrant colors of a summer sunset. The use of pink and blue shades blends seamlessly to mirror the sky as the sun dips below the horizon, creating a color pattern that’s both inspiring and soothing.
-
- Base coat – OPI Natural Nail Base Coat
- Pink polish – Essie’s “Party on a Platform”
- Blue polish – CND’s “Cerulean Sea”
- Top coat – Seche Vite Dry Fast Top Coat
- Sponge (for gradient effect)
From my professional stance, the gradient technique here is executed with perfection, providing a smooth transition between hues, which is essential for mimicking the serene sky. The choice of a high-quality top coat ensures a glossy finish that lasts.
DIY Instructions:
-
- Apply a base coat to protect your nails.
- Use a sponge to dab on the blue and pink polishes, overlapping them slightly to create a gradient effect.
- Seal with a top coat for a durable, glossy finish.
This look is perfect for those who appreciate the beauty of simple yet vibrant designs, capturing the mood of late summer evenings.
Glistening Blue Waves
Our next exploration brings the coolness of ocean waves to your fingertips, perfect for reminiscing about beach days. This blue color gel design is sprinkled with subtle glitter, mimicking the sunlight sparkling on the sea surface.
-
- Base coat – Sally Hansen Hard as Nails
- Blue color gel – Gelish “Arctic Freeze”
- Silver glitter – NYX Face and Body Glitter
- Top coat – Sally Hansen Miracle Gel Top Coat
As a manicurist, I appreciate the depth this design offers through the clever use of glitter over a deep blue base. It’s an ideal representation of summer transitioning into fall.
DIY Instructions:
-
- Apply a base coat to protect your nails.
- Paint two coats of the blue gel, curing under a UV lamp after each.
- While the second coat is tacky, sprinkle the silver glitter.
- Finish with a gel top coat and cure for durability.
This design is for those who love to carry the essence of summer adventures into the cooler months, providing a trendy yet simple way to say goodbye to summer.
Sparkling Pink Symphony
This design is a true celebration of all that glitters, featuring a gorgeous array of pink tones enriched with varied sizes of sequins and gems. The interplay of light and color creates a dazzling effect that is both playful and sophisticated.
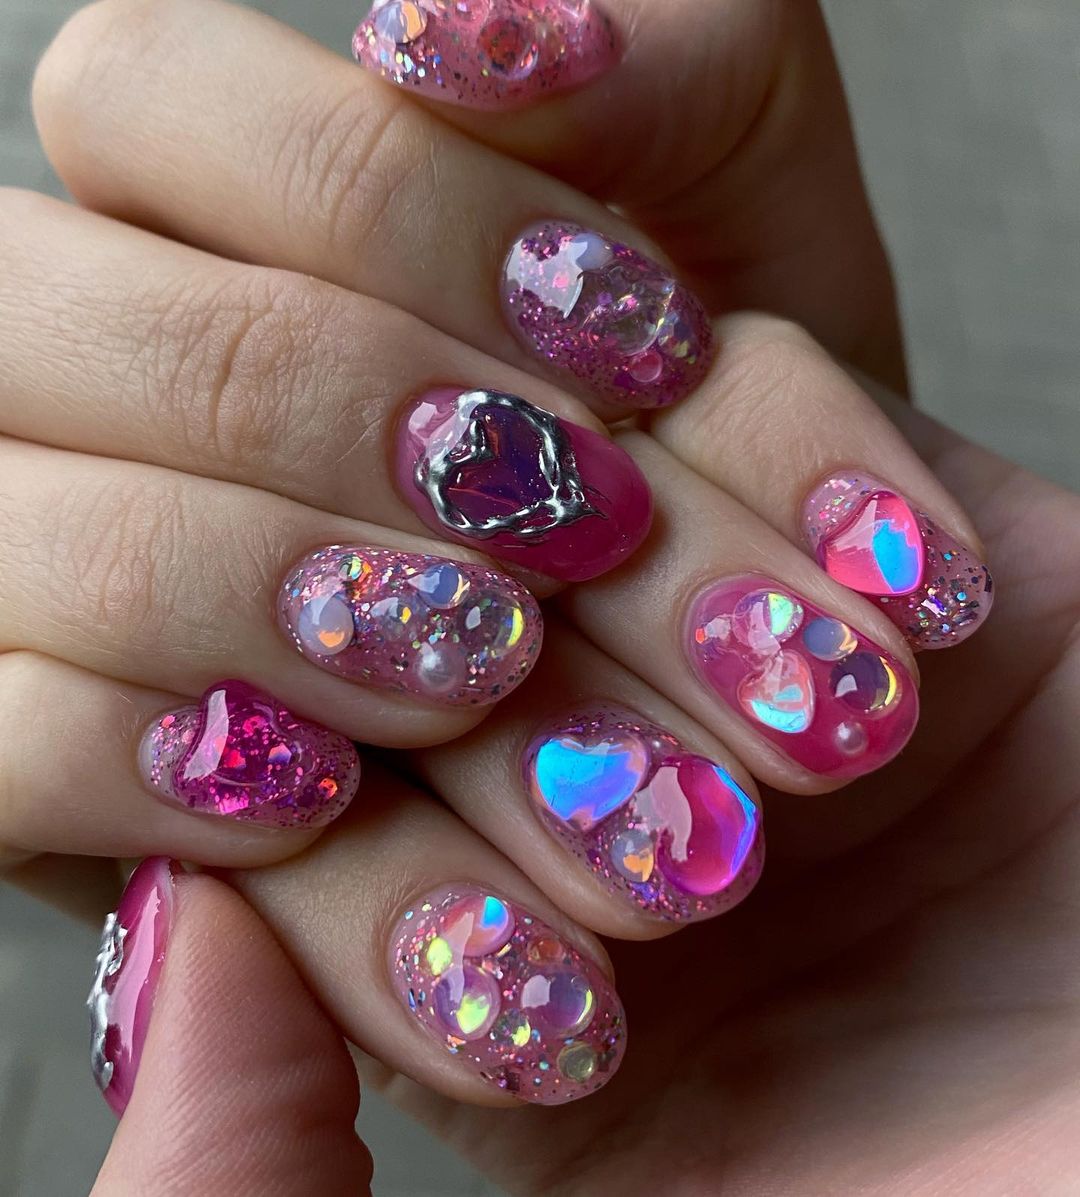
-
- Base coat – Butter London Nail Foundation
- Pink polish – Deborah Lippmann “Chantilly Lace”
- Assorted sequins and gemstones
- Nail glue for gems
- Top coat – Butter London Hardwear P.D. Quick Topcoat
The meticulous placement of each gem and sequin on these acrylic nails reflects a mastery of nail art. It’s an expressive piece that shows how combining different textures and sizes can elevate a simple color base into something extraordinary.
DIY Instructions:
-
- Apply a base coat to smooth the nail surface.
- Apply two coats of pink polish as the base color.
- While the second coat is still tacky, carefully place sequins and gems using tweezers and a dab of nail glue.
- Once the design is set, apply a thick top coat to secure the embellishments.
This design is perfect for those who love their nails to be a focal point of their style, blending vibrant artistry with intricate detailing.
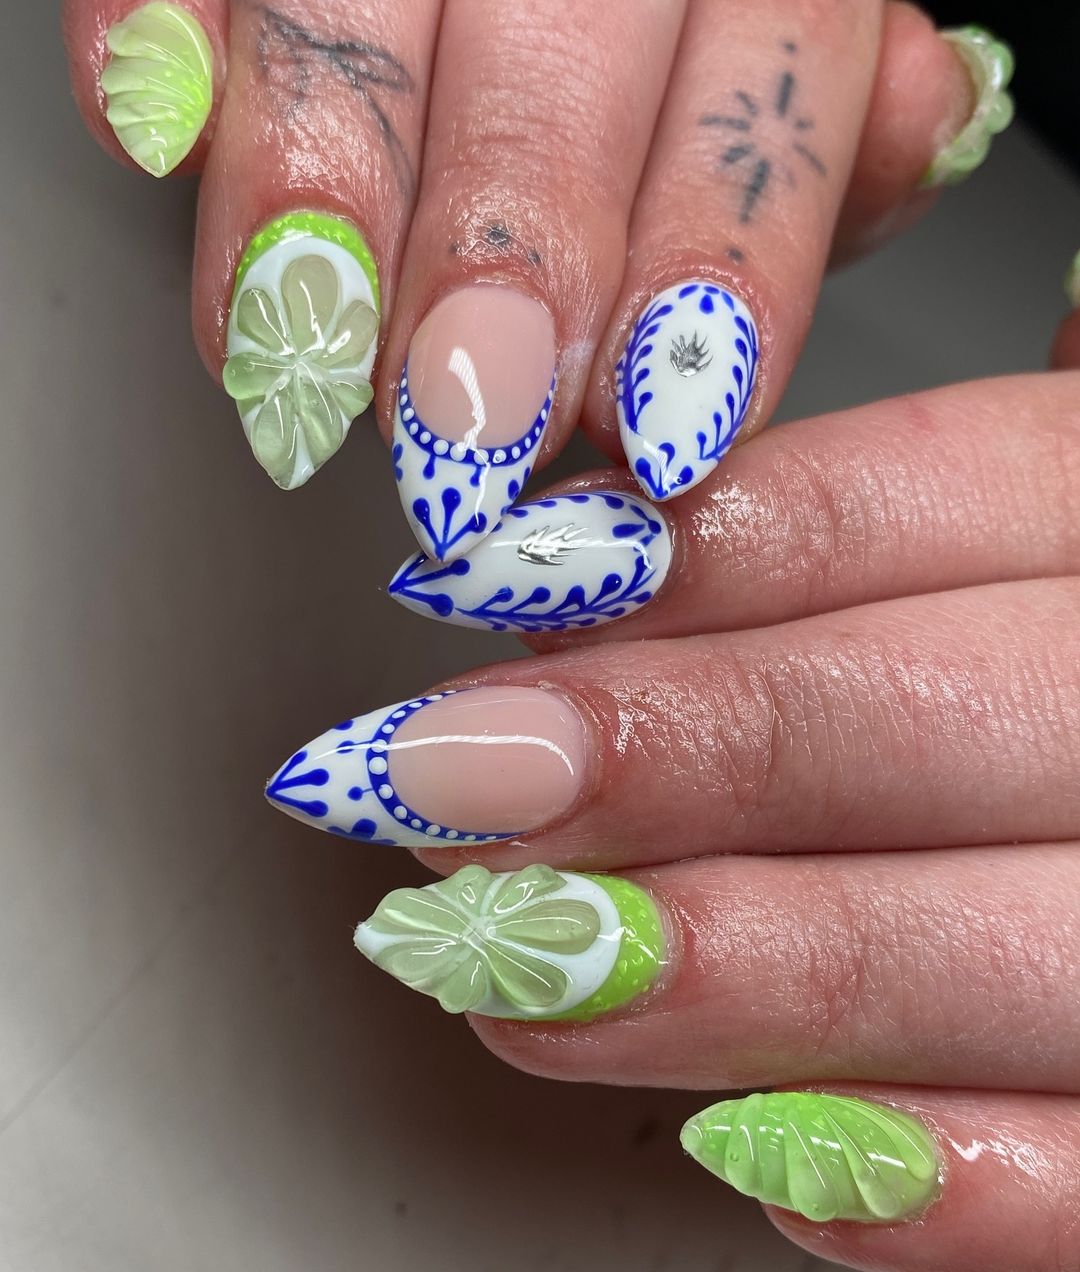
Mediterranean Dreams
Inspired by the crisp whites and deep blues of the Mediterranean, this nail design uses art and color to mimic intricate ceramic patterns, paired with fresh green accents reminiscent of summer foliage.
-
- Base coat – Essie Ridge Filling Base Coat
- White polish – OPI Alpine Snow
- Blue detailing polish – Sally Hansen Insta-Dri in “In Prompt Blue”
- Green polish – Zoya “Tilda”
- Detailing brush
- Top coat – Essie Gel Setter
I find this design striking for its clarity and precision in pattern execution. The use of negative space accentuates the detailed hand-painting, making each nail a miniature canvas of European art.
DIY Instructions:
-
- Begin with a base coat to ensure an even canvas.
- Apply two coats of white polish.
- Use a fine detailing brush to create blue patterns. Allow it to dry.
- Add green polish accents as needed.
- Seal everything with a glossy top coat to enhance the colors and ensure longevity.
This nail style is ideal for those who appreciate the elegance of handcrafted designs, offering a sophisticated yet simple nod to inspo from abroad.
Save Pin
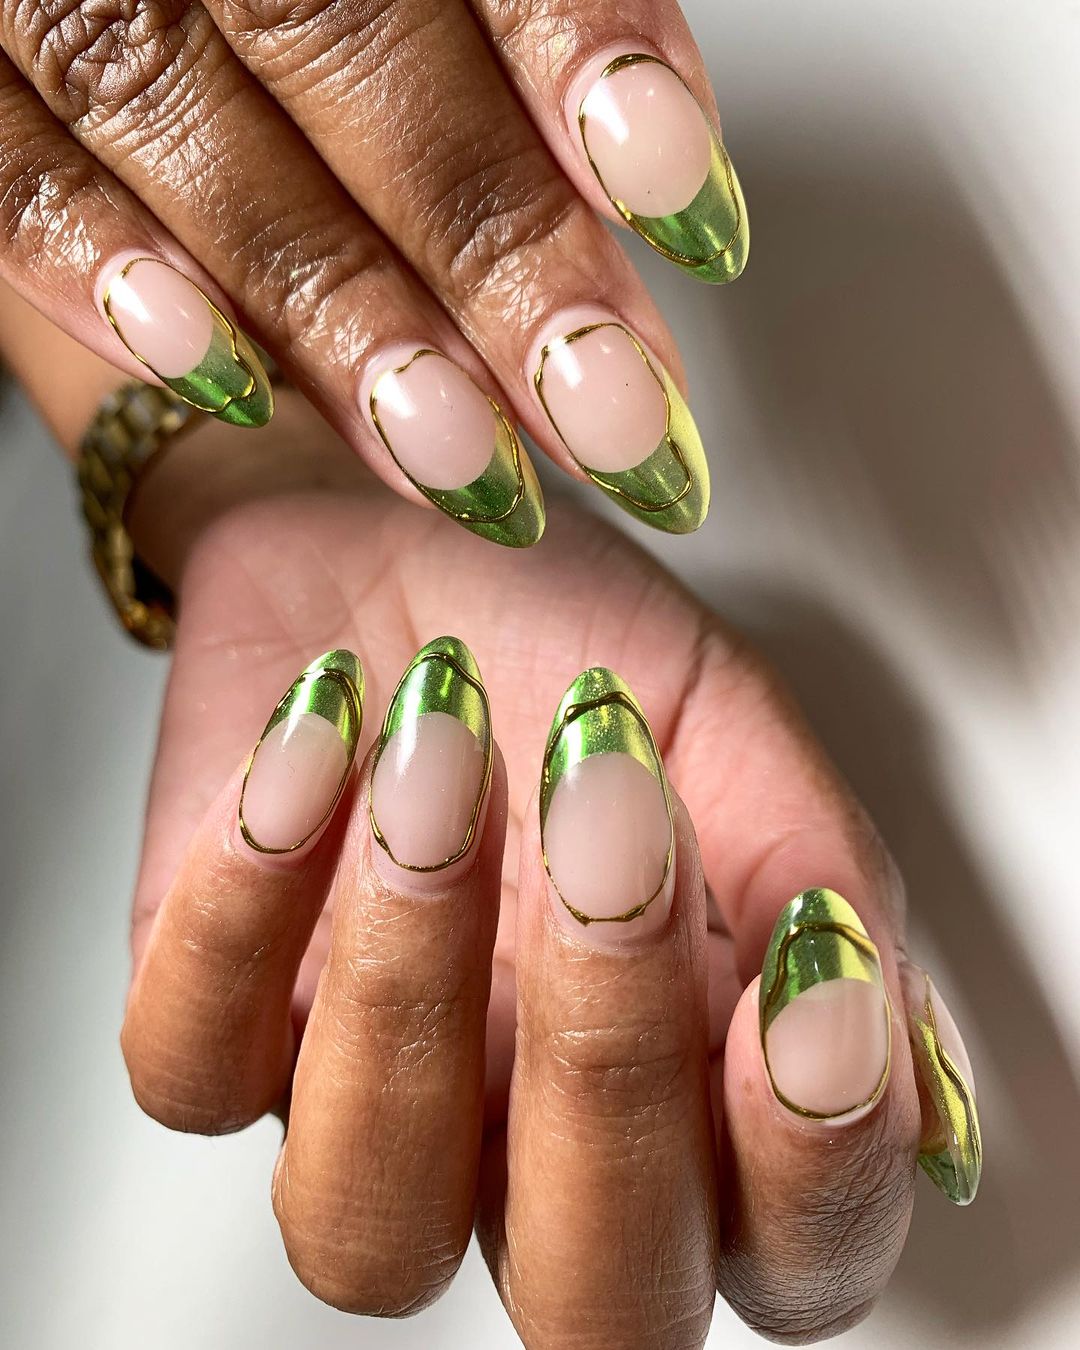
Golden Green Elegance
This nail design is a sophisticated example of minimalism with a twist, featuring a stunning contrast between the natural nail and bold metallic green tips. The outline design not only emphasizes the natural beauty of the nail but also adds a touch of luxury with its metallic finish.
-
- Base coat – OPI Natural Nail Base Coat
- Sheer pink polish – Essie “Ballet Slippers”
- Metallic green polish – China Glaze “Emerald Fitzgerald”
- Striping tape
- Top coat – OPI Top Coat
This look demonstrates the beauty of simplicity, where less is more. The green metallic tip catches the light and adds an element of trendy surprise to an otherwise simple and elegant design.
DIY Instructions:
-
- Apply a base coat to protect the nail.
- Apply two coats of sheer pink polish for a clean, natural look.
- Use striping tape to delineate the tip area and apply metallic green polish.
- Remove the tape while the green polish is still wet for a sharp line.
- Finish with a top coat to enhance durability and shine.
This manicure is perfect for those who prefer a neutral, understated look with a pop of vibrant color to make a subtle yet striking statement.
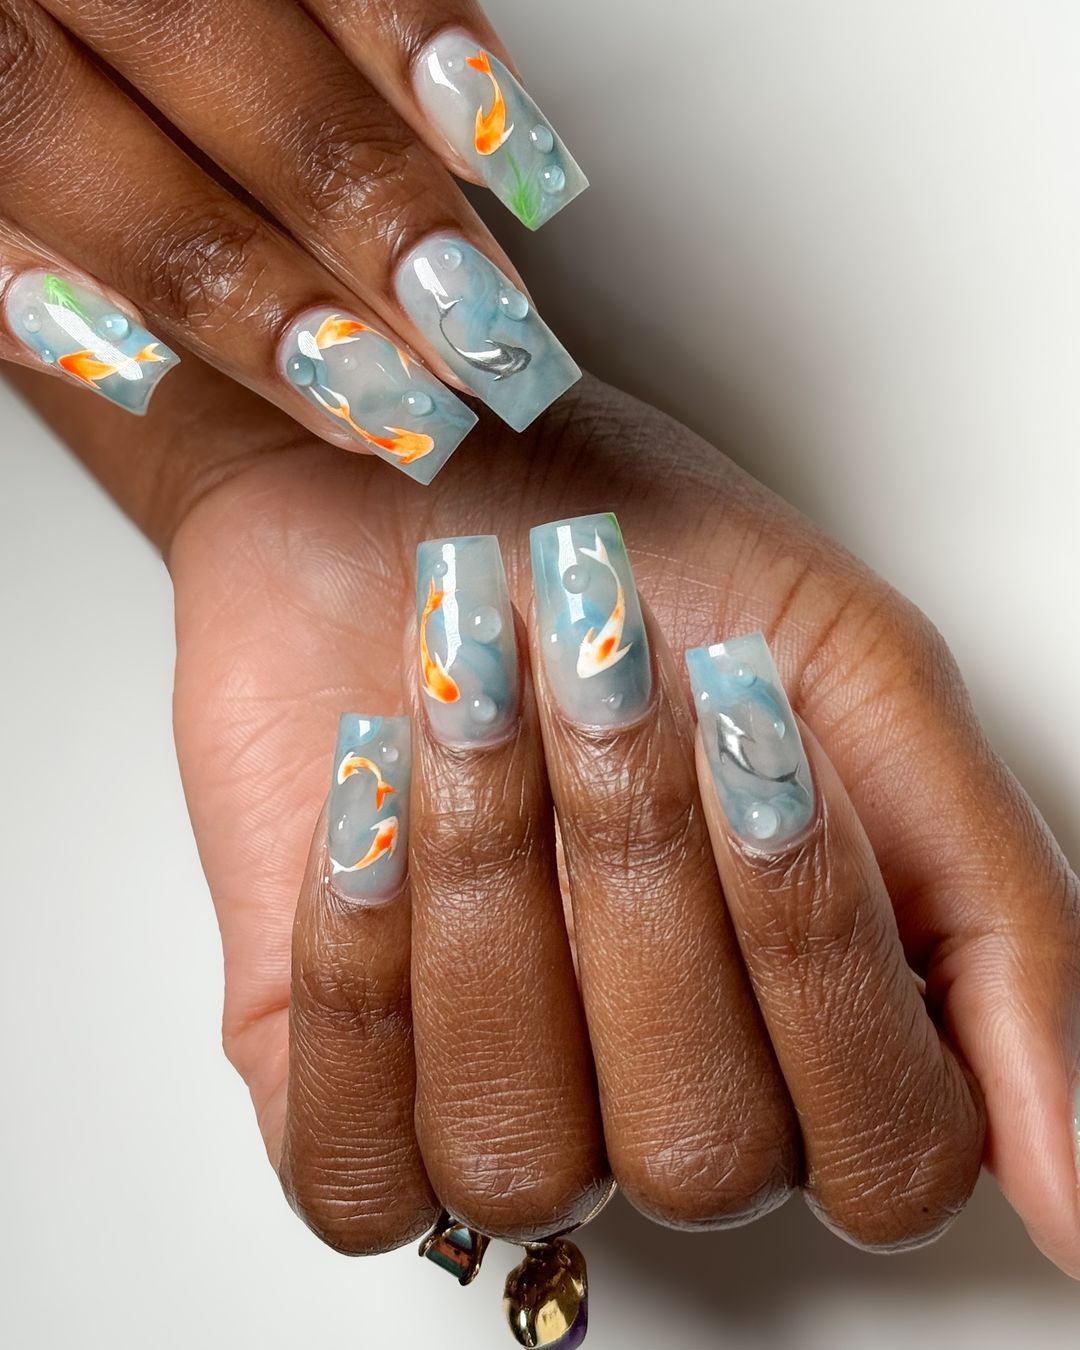
Serene Koi Pond
Evoking the tranquility of a koi pond, this detailed acrylic design features intricate koi fish painted over a serene blue base, completed with subtle ripples and lily pads. The art here is both calming and captivating, offering a unique nail narrative.
-
- Acrylic nails – clear tips
- Base color – pale blue gel polish
- White, orange, and black nail paint for koi details
- Green polish for lily pads
- Top coat – UV Gel Top Coat
I find this style absolutely enchanting for its storytelling through art. Each nail is meticulously crafted, showcasing skilled hand painting that brings the peaceful koi to life.
DIY Instructions:
-
- Prepare nails with a base coat and apply clear acrylic tips.
- Paint a pale blue base to simulate water.
- Hand-paint the koi fish using white, black, and orange nail paints.
- Add small green lily pads to complete the aquatic theme.
- Seal the design with a UV gel top coat for gloss and longevity.
This design is ideal for those who love expressive, inspiring nail art that goes beyond traditional color patterns, offering a piece of wearable art that tells a story.
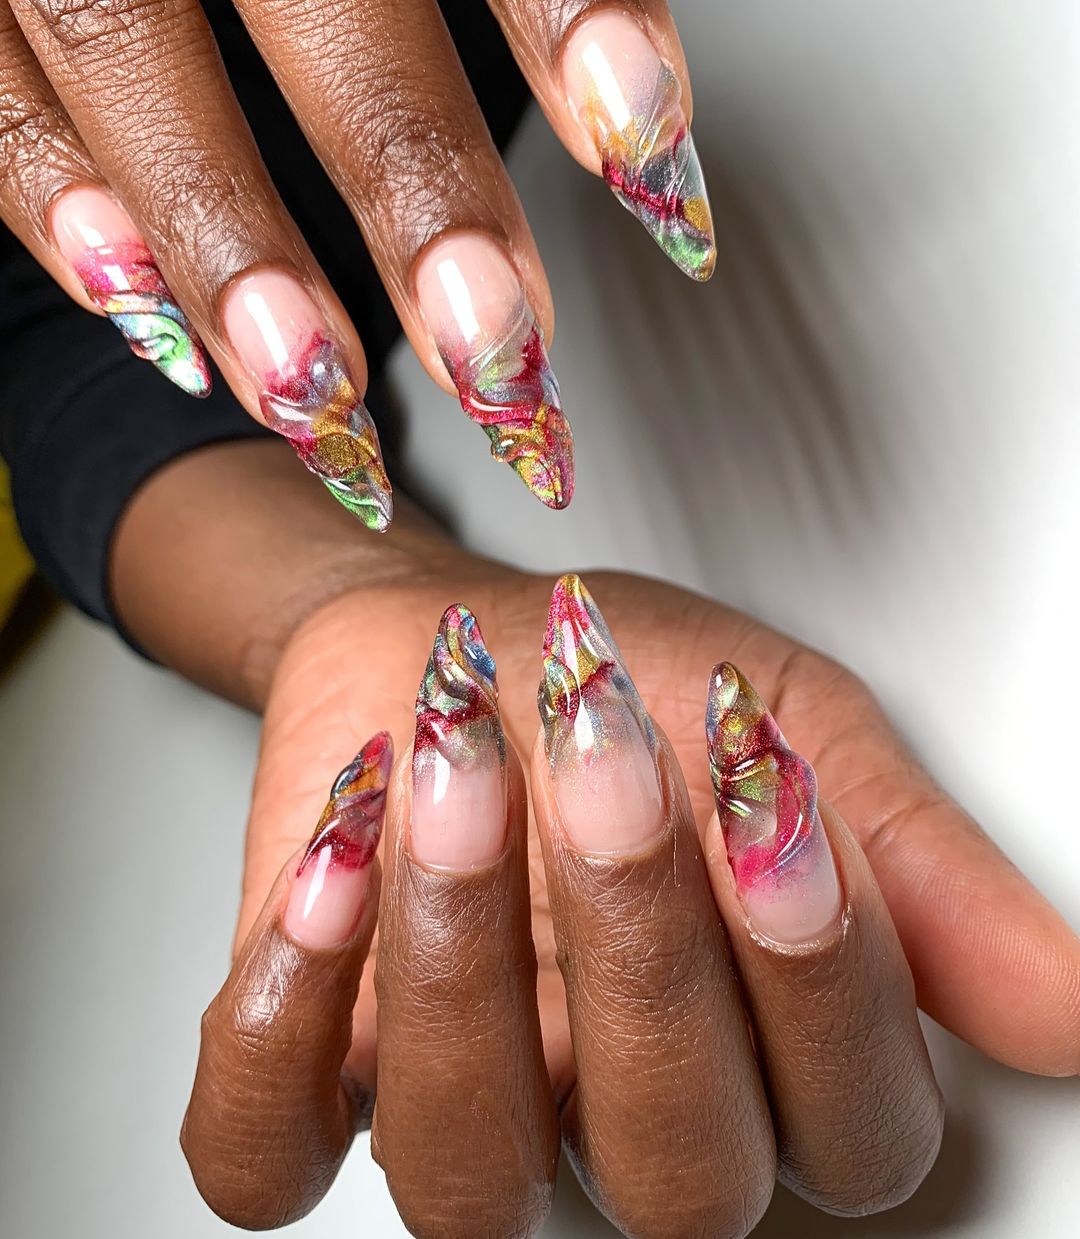
Abstract Fluid Art
This nail design is a vivid explosion of colors, swirling together in a dynamic abstract pattern that appears almost fluid. The combination of translucent tips and bold, iridescent strokes gives these nails a glass-like finish, making each one a unique piece of art.
-
- Clear acrylic tips
- High-gloss top coat – Seche Vite
- Alcohol inks in red, yellow, and blue
- Gold leaf accents
- Iridescent top coat
The ethereal quality of the design is enhanced by the strategic placement of color and the use of a high-gloss finish, creating depth and movement. The inclusion of gold leaf adds a luxurious touch to the vibrant artistry.
DIY Instructions:
-
- Apply clear acrylic tips to your nails.
- Drop alcohol inks on the nail surface and allow them to flow and blend naturally.
- Add small pieces of gold leaf for an elevated artistic effect.
- Seal with an iridescent top coat for a multi-dimensional finish.
This style is ideal for those who appreciate nails as a form of personal expression and art, standing out with their bold and artistic flair.
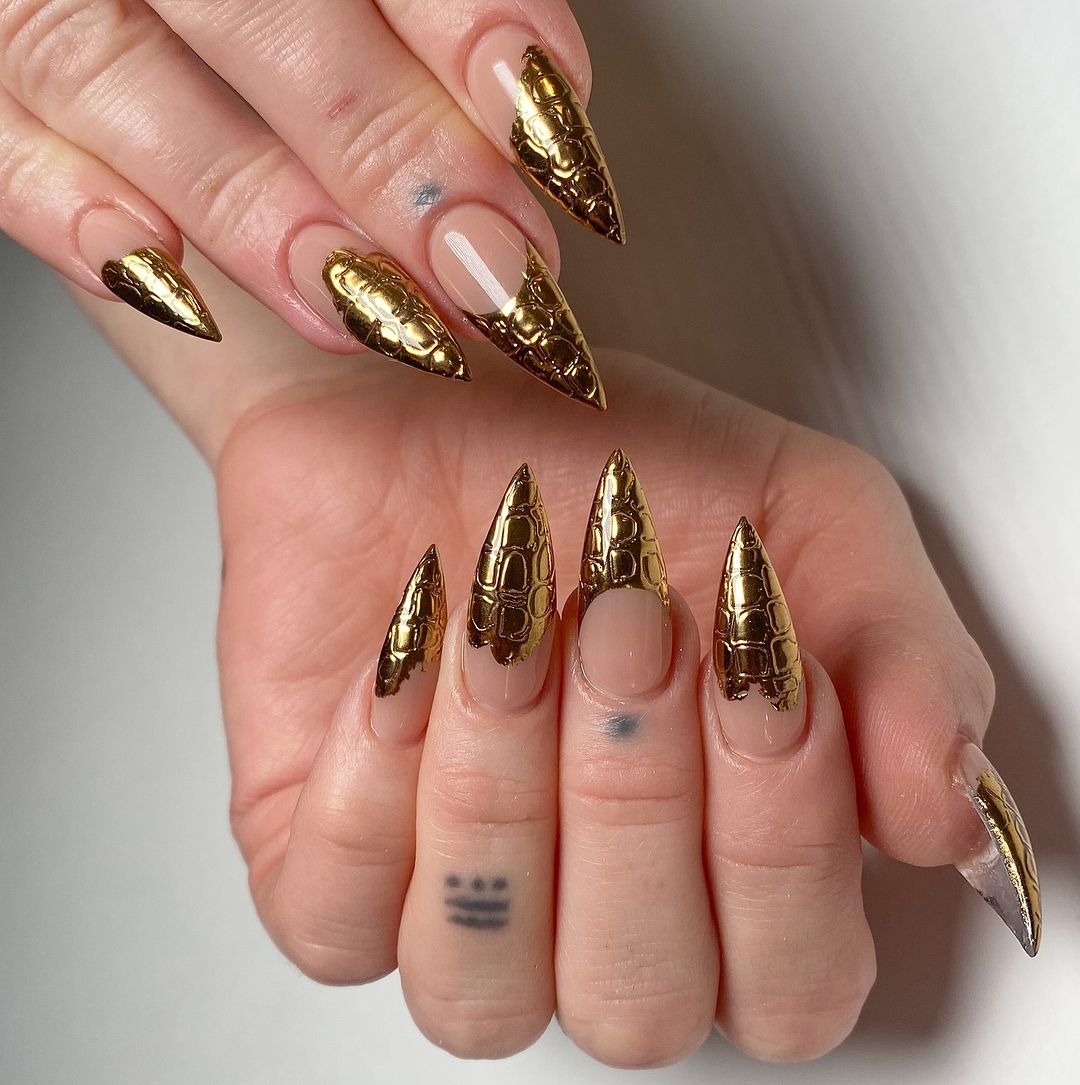
Golden Armor
These nails transform your fingertips into a statement of power and glamour with their bold, sculptural golden armor. The metallic gold nails are crafted to resemble ancient armor, complete with detailed texturing and strategic shaping for a dramatic effect.
-
- Gold metallic polish – OPI “Goldeneye”
- Structured gel for building and sculpting
- Fine detail brush
- Matte top coat for texturing
The precision in sculpting these nails speaks to a high level of craftsmanship, with each nail shaped to not only look striking but also embody a piece of wearable art.
DIY Instructions:
-
- Sculpt the nails using a structured gel to achieve the desired shape.
- Paint with a gold metallic polish using a fine detail brush to enhance textures.
- Apply a matte top coat selectively to add contrast and highlight the intricate details.
This design is for those who dare to make a bold fashion statement, merging historical inspiration with contemporary nail art techniques.
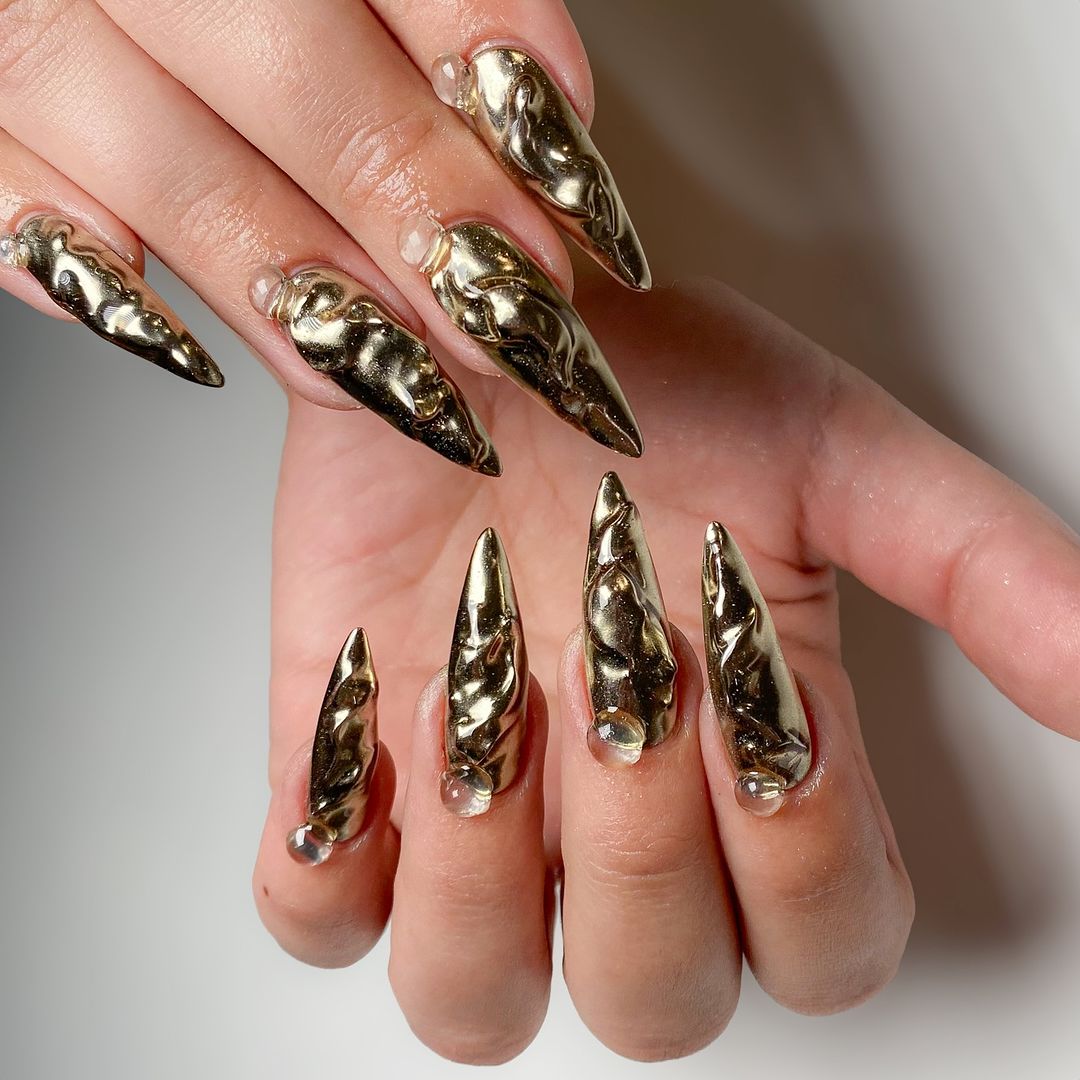
Liquid Metal Flow
Echoing the molten flows of metal, these nails are a masterpiece of metallic design. The seamless gradient from natural nail to a metallic finish gives the impression of metal being poured over the fingers, providing a striking visual continuity.
-
- Silver chrome polish – Sally Hansen “Sterling Silver”
- Chrome powder
- Black gel paint for depth and shading
- High-shine top coat
The fluidity and reflective quality of the chrome create an almost liquid metal effect, which is both modern and mesmerizing.
DIY Instructions:
-
- Apply a base coat and a layer of black gel paint for depth.
- Once cured, rub chrome powder over the nails for a mirror-like finish.
- Use silver chrome polish to blend into the natural nail.
- Seal with a high-shine top coat to maintain the metallic sheen and ensure longevity.
These nails are perfect for those looking to incorporate futuristic elements into their style, highlighting advanced techniques in nail design.
Save Pin
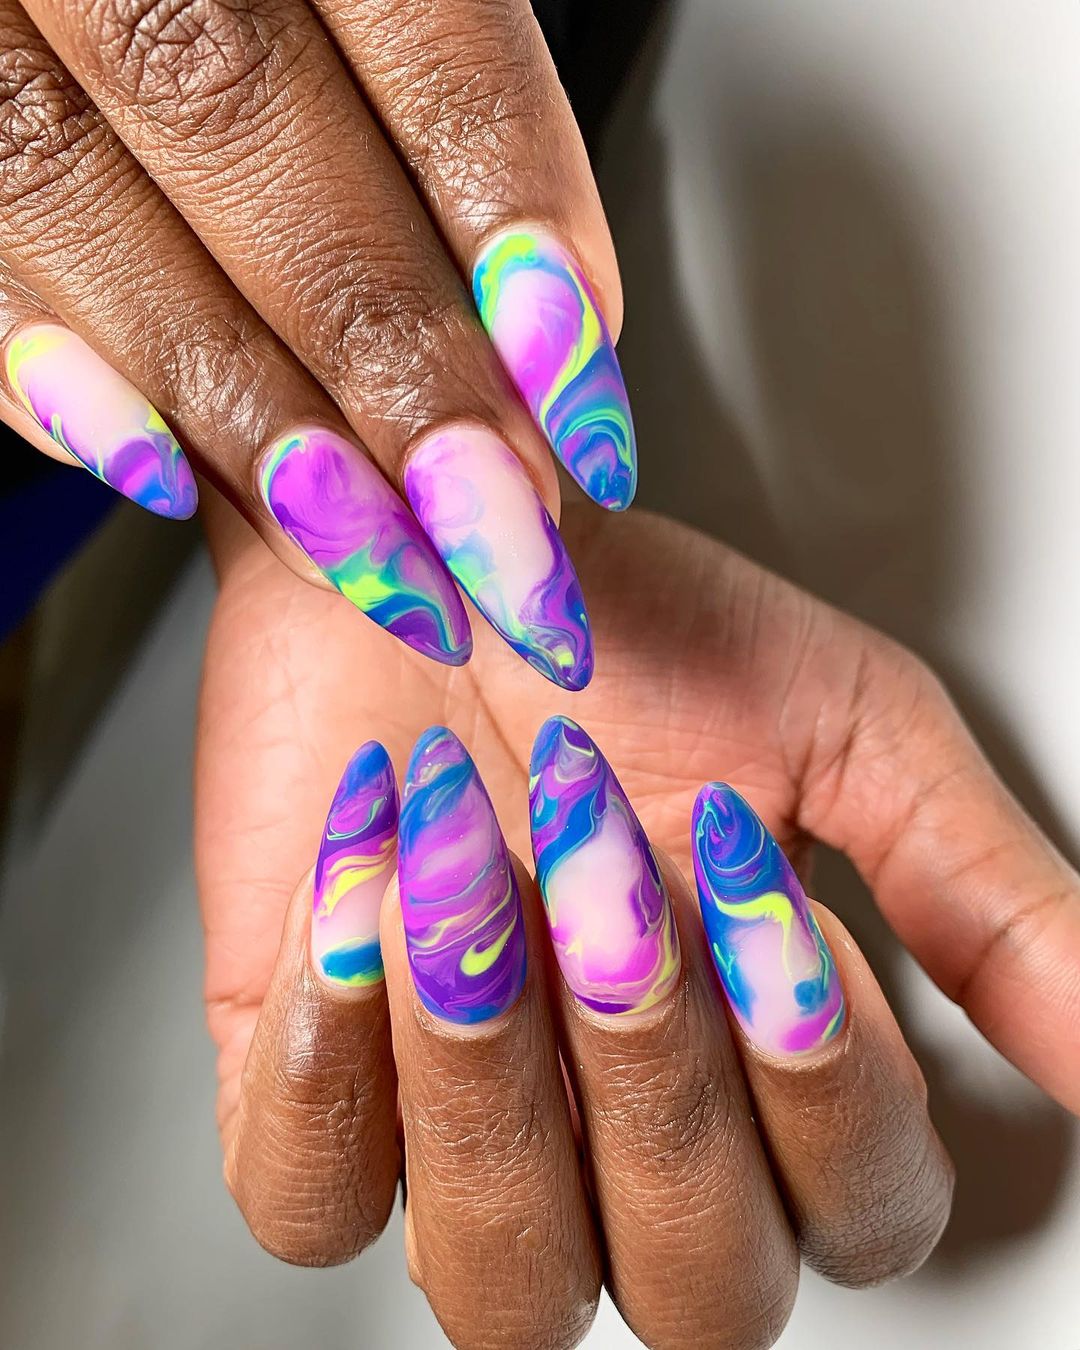
Psychedelic Swirls
This nail design showcases a mesmerizing swirl of neon colors, creating a psychedelic effect reminiscent of fluid art. The vibrant mix of pink, blue, green, and yellow flows beautifully, giving the appearance of a seamless, colorful ribbon wrapped around each nail.
-
- Base coat – Essie Ridge Filling
- Neon nail paints in pink, blue, green, and yellow
- Swirling tool or toothpick
- High gloss top coat – INM Out the Door
The fluidity of the colors perfectly encapsulates a playful and artistic expression, ideal for those looking to showcase their bold, creative side.
DIY Instructions:
-
- Apply a base coat for an even surface.
- While the base is tacky, add drops of neon paint in various colors.
- Use a swirling tool to gently mix the colors to create a marble effect.
- Finish with a high gloss top coat for a shiny, eye-catching look.
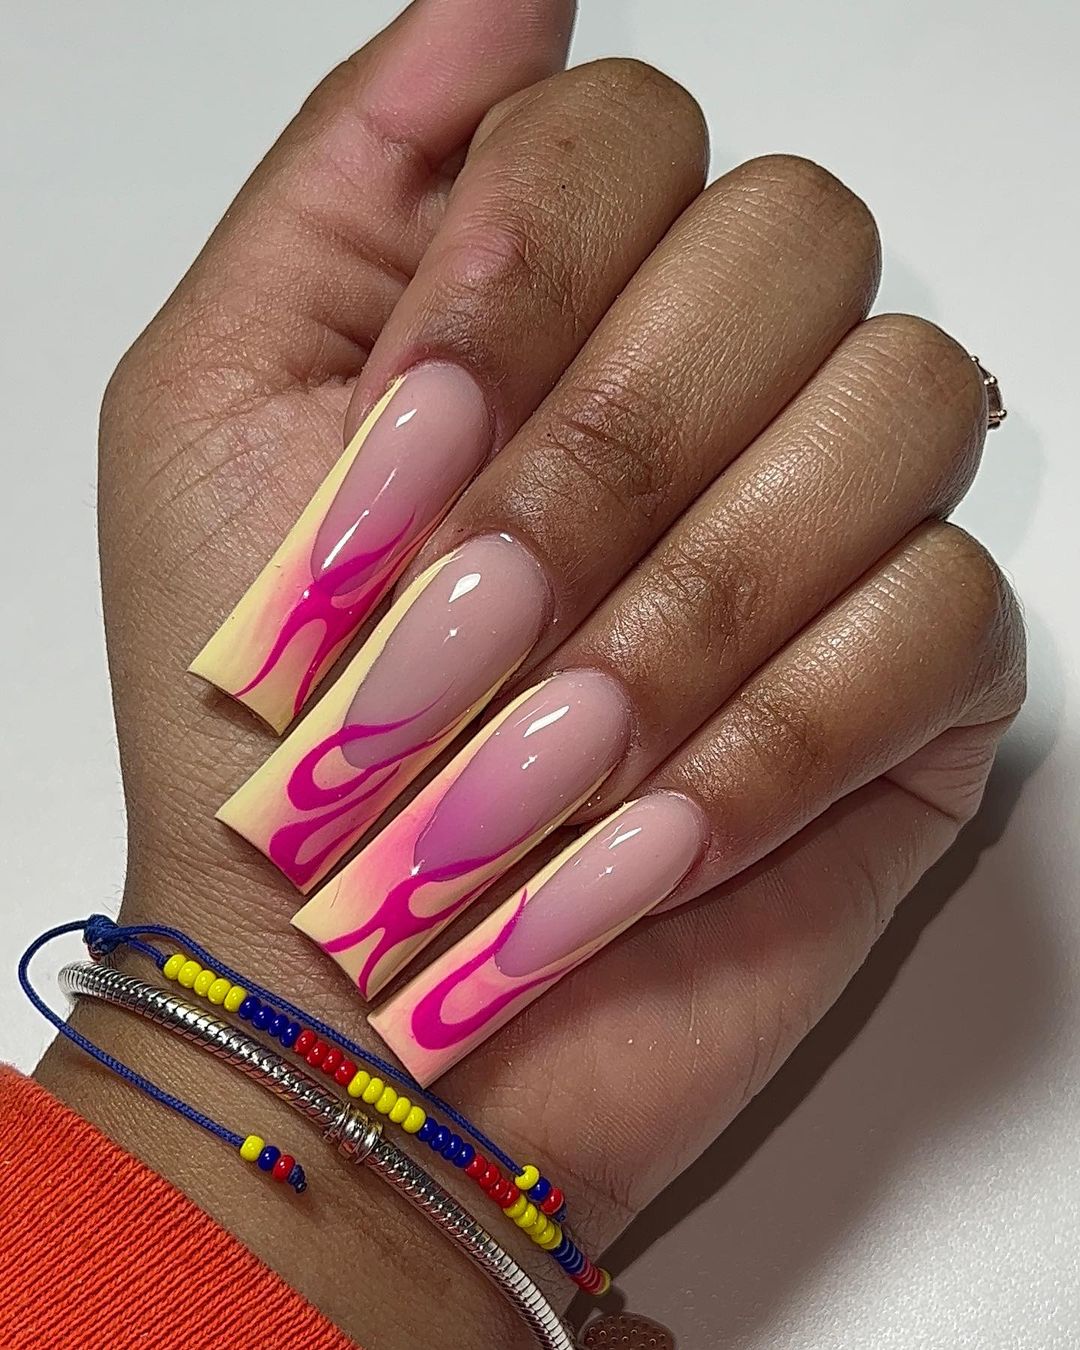
Neon Flame Manicure
This nail design features a striking contrast with its sharp, flame-like pink swirls on a sheer nude base, providing a dramatic yet chic look. The neon pink used here adds a modern twist to the classic French manicure, making it vibrant and eye-catching.
-
- Sheer nude polish – OPI Bubble Bath
- Neon pink polish – China Glaze “Shocking Pink”
- Detail brush
- Top coat – Seche Vite Dry Fast
The sharp, clean lines of the pink swirls require a steady hand and precise detailing, making this a fantastic choice for someone who enjoys a minimalist yet bold nail design.
DIY Instructions:
-
- Apply a sheer nude polish as the base.
- Use a detail brush to paint neon pink swirls from the nail bed outward.
- Seal the design with a fast-drying top coat to enhance durability and maintain the vivid color.
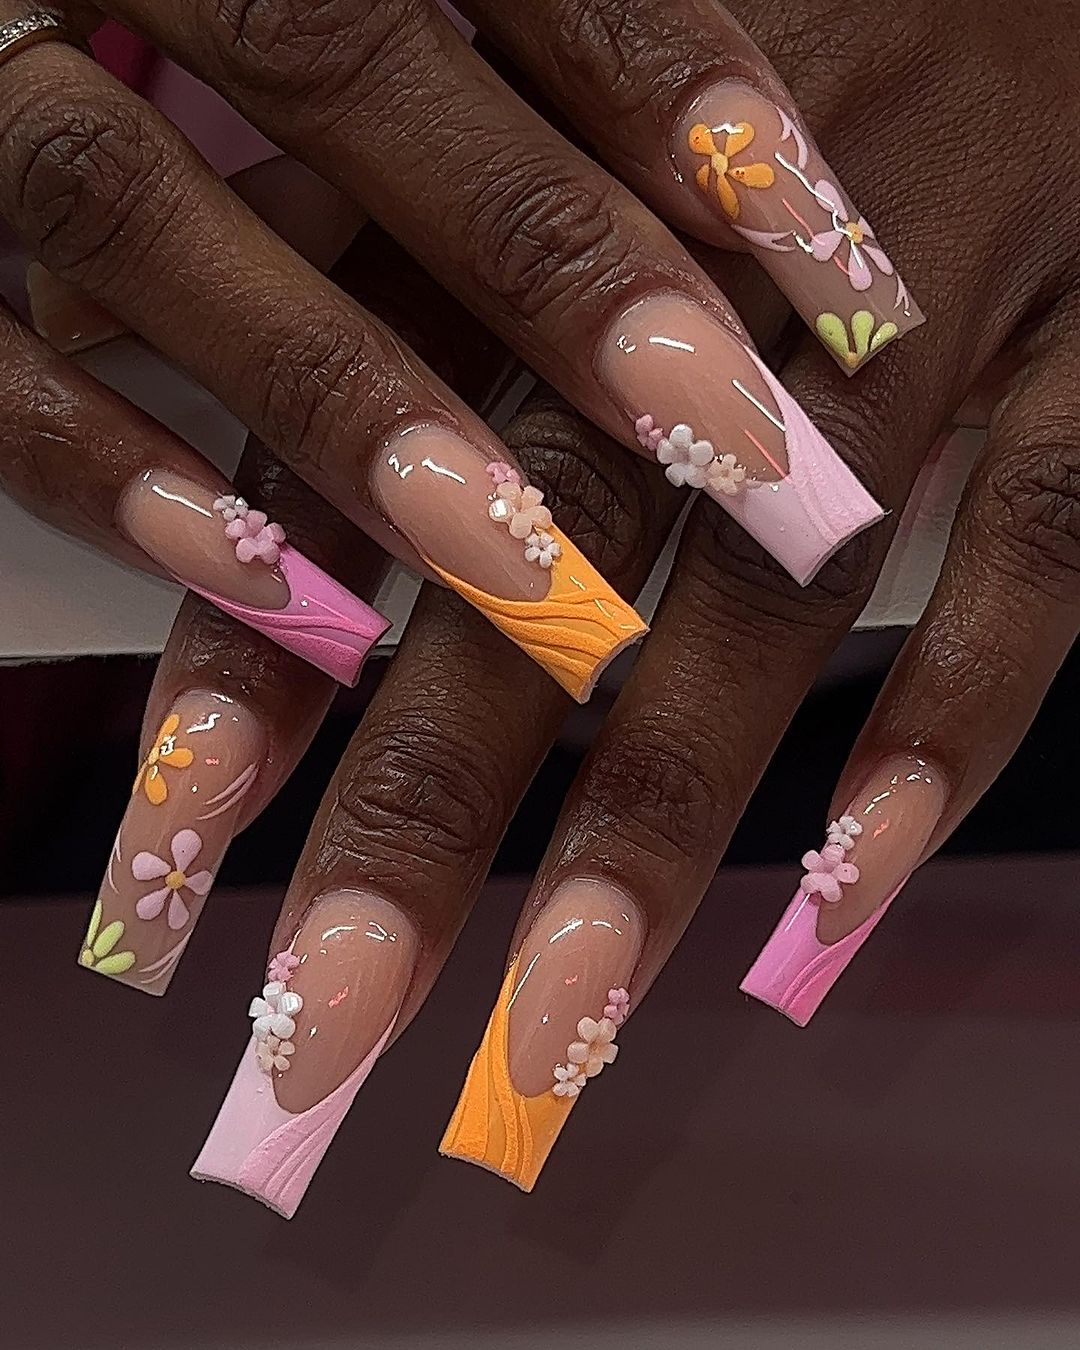
Blossom Tips
This charming design uses the French manicure style as a canvas for delicate floral artwork, featuring soft pink and yellow blossoms with green leaf accents. The pastel colors and detailed flower patterns offer a refreshing and elegant look, perfect for welcoming fall.
-
- Sheer pink base polish – OPI Alpine Snow
- Acrylic paints in pink, yellow, and green
- Fine detail brush
- Top coat – INM Out the Door
The intricate detail of the blossoms and leaves shows meticulous artistry, ideal for anyone who appreciates subtle yet beautiful nail designs.
DIY Instructions:
-
- Start with a base of sheer pink.
- Paint small blossoms at the tips using pink and yellow acrylic paint.
- Add green leaves for a natural touch.
- Finish with a clear top coat to protect the design and add shine.
These designs offer a variety of styles, from bold and vibrant to delicate and subtle, ensuring there is something for everyone to finish the summer with flair.
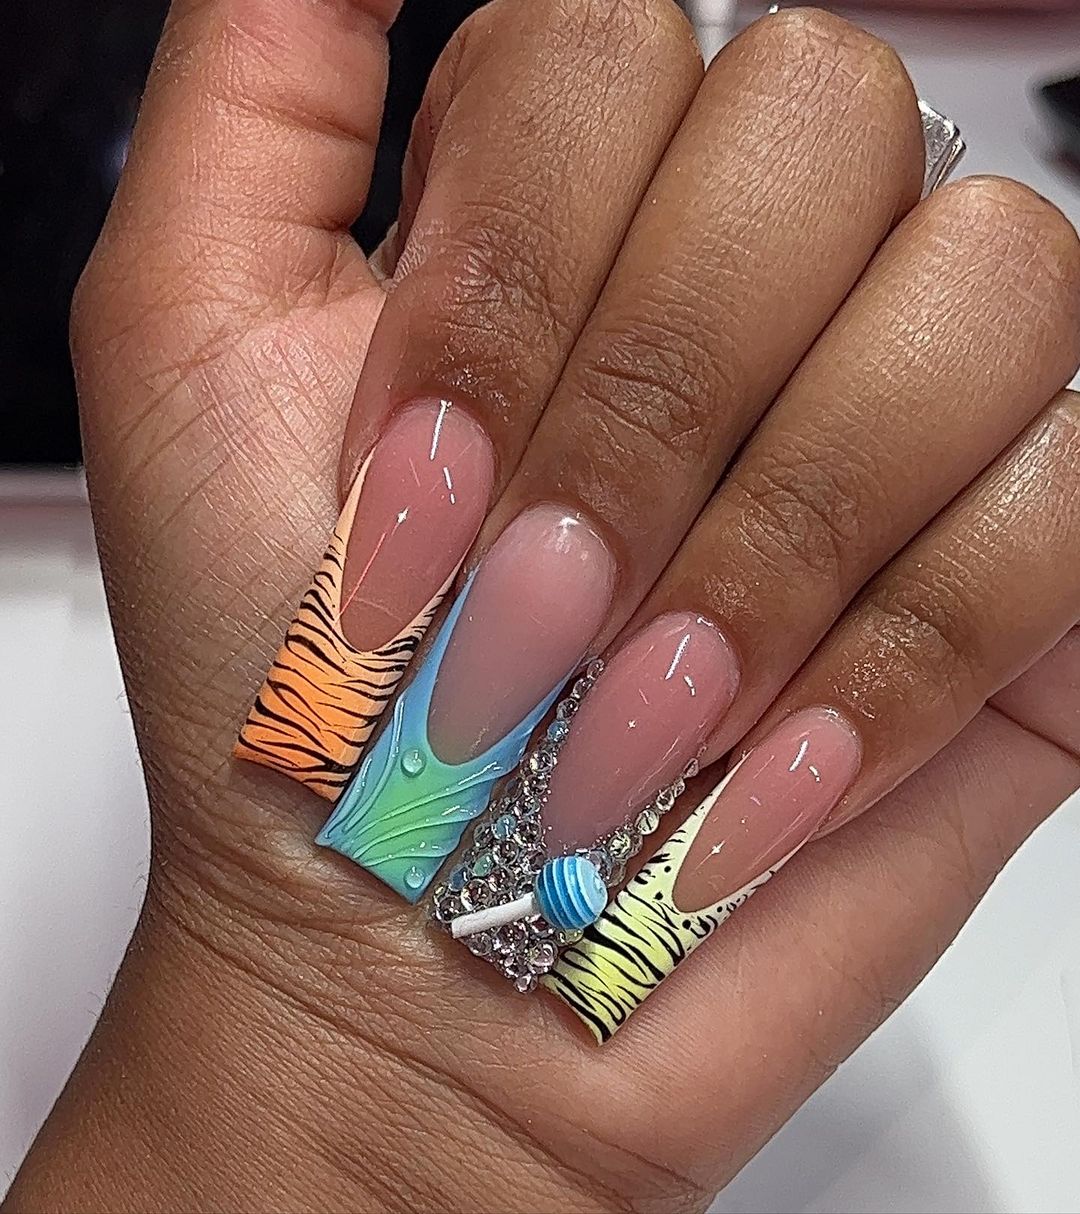
Tropical Beach Vibes
This design transports you directly to a tropical beach with its vibrant and playful use of color and pattern. Each nail tells a part of the beach story, from deep blue waters and sandy shores to exotic orange tiger stripes and lush greenery, completed with intricate jewel accents that emulate treasures found in the ocean.
-
- Sheer nude polish – Essie “Bare With Me”
- Acrylic paints in blue, green, and orange for the art
- Small rhinestones and beads
- High gloss top coat – OPI Top Coat
The addition of rhinestones and detailed painting makes this design perfect for anyone who loves a bold, narrative-driven nail art style.
DIY Instructions:
-
- Start with a base of sheer nude polish.
- Paint each nail with a different pattern using acrylic paints.
- Add rhinestones and beads while the paint is tacky.
- Seal with a high gloss top coat for a shiny, durable finish.
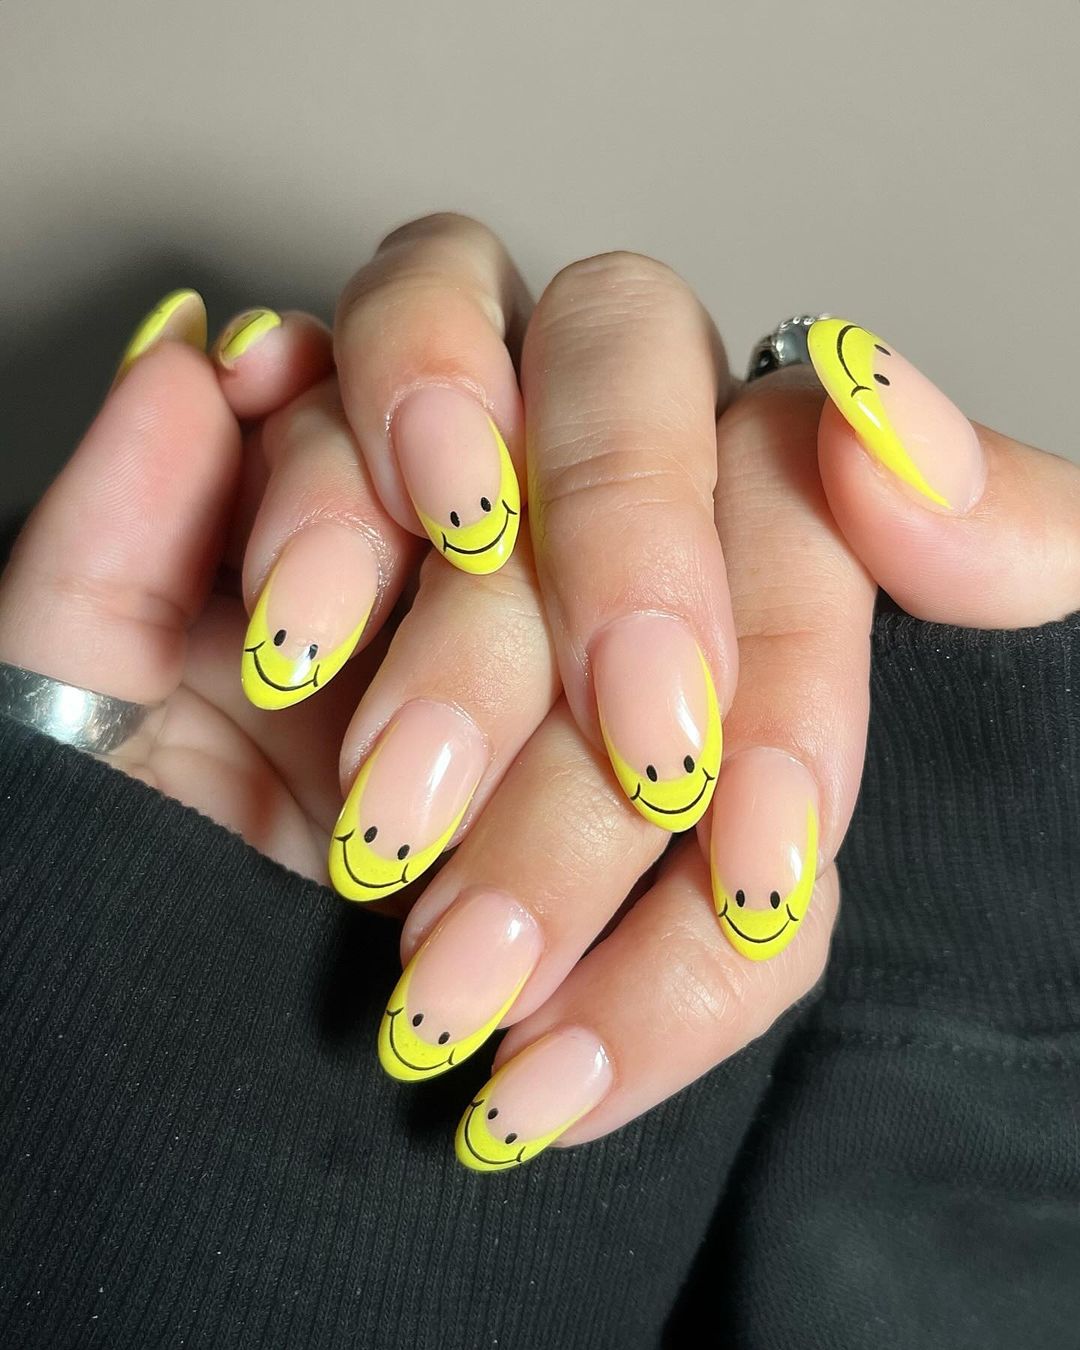
Sunshine Smiles
This cheerful nail design features a bright yellow smiley face on a subtle French tip, radiating positivity and warmth. The simplicity of the design coupled with the striking yellow creates a playful yet stylish look that’s perfect for uplifting any mood.
-
- Sheer pink polish – OPI “Bubble Bath”
- Yellow polish for the smiley and tips – Sally Hansen “Mellow Yellow”
- Detailing tool or fine brush
- Top coat – Seche Vite Dry Fast
This design is a wonderful choice for those who prefer a minimalist approach with a touch of whimsy.
DIY Instructions:
-
- Apply a base of sheer pink polish.
- Paint the tips with a thin stripe of yellow.
- Add a simple smiley face on the accent nails using a fine brush or tool.
- Finish with a fast-drying top coat to seal the design and enhance the shine.
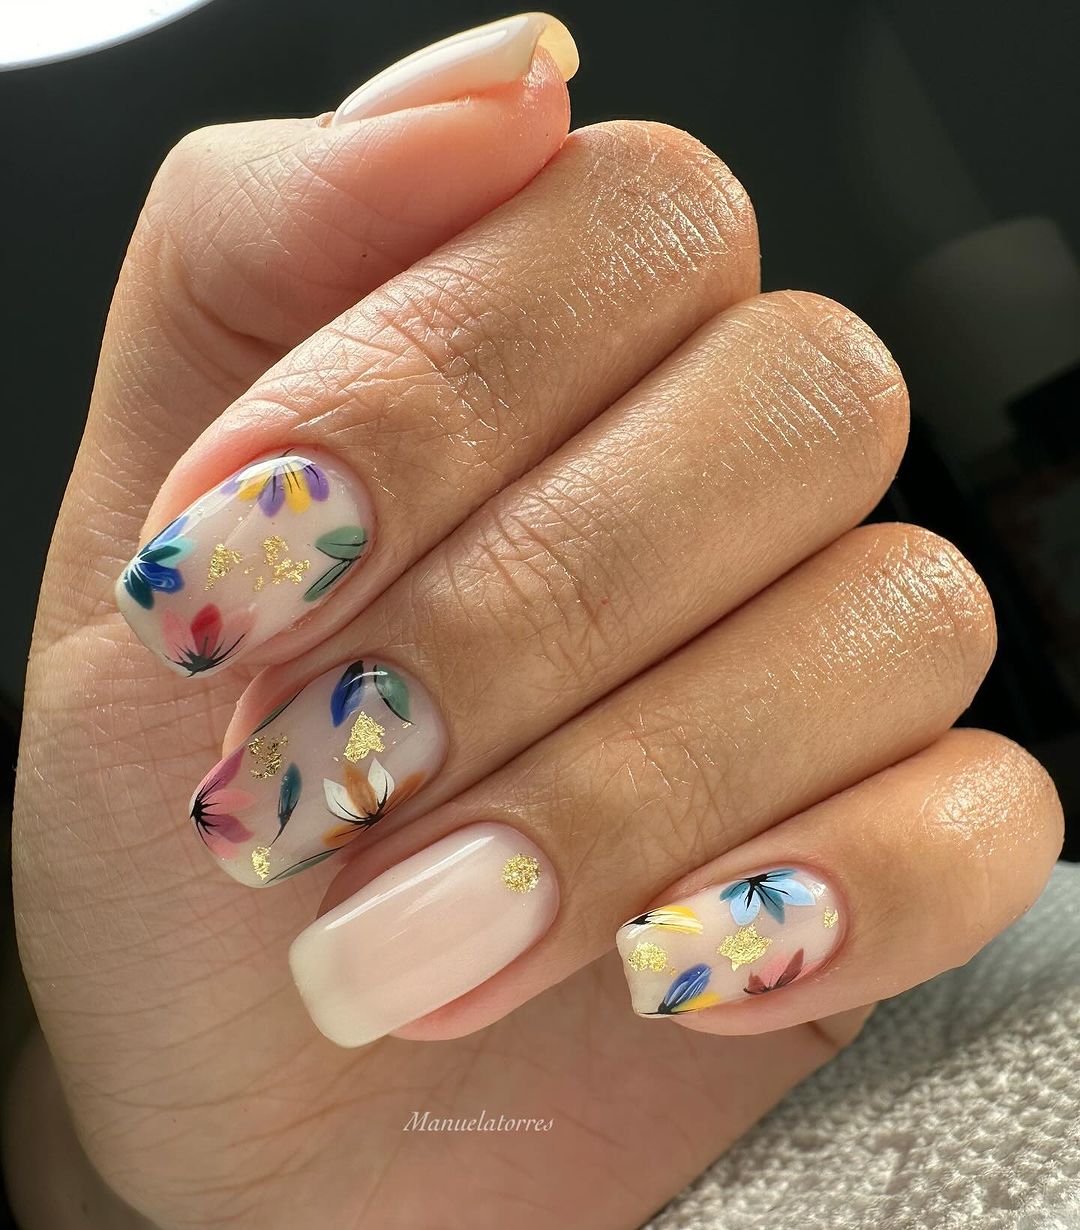
Floral Elegance
This design combines delicate hand-painted flowers with soft pastel backgrounds, offering a sophisticated and romantic nail art choice. Gold flakes add a touch of luxury, making the nails look elegant and refined.
-
- Sheer nude polish – Essie “Ballet Slippers”
- Acrylic paints for the flowers in pink, blue, and yellow
- Gold leaf flakes
- Top coat – OPI Top Coat
The meticulous flower details and the use of gold leaf in this design are perfect for those who love a detailed and artisanal approach to their nail art.
DIY Instructions:
-
- Apply a base coat of sheer nude polish.
- Hand-paint flowers on each nail using different pastel shades.
- Add small pieces of gold leaf for an elegant finish.
- Seal the design with a top coat for durability and gloss.
These designs are tailored to suit a variety of tastes, from the vivid and adventurous to the subtle and elegant, ensuring there’s a perfect style for any end of summer occasion.
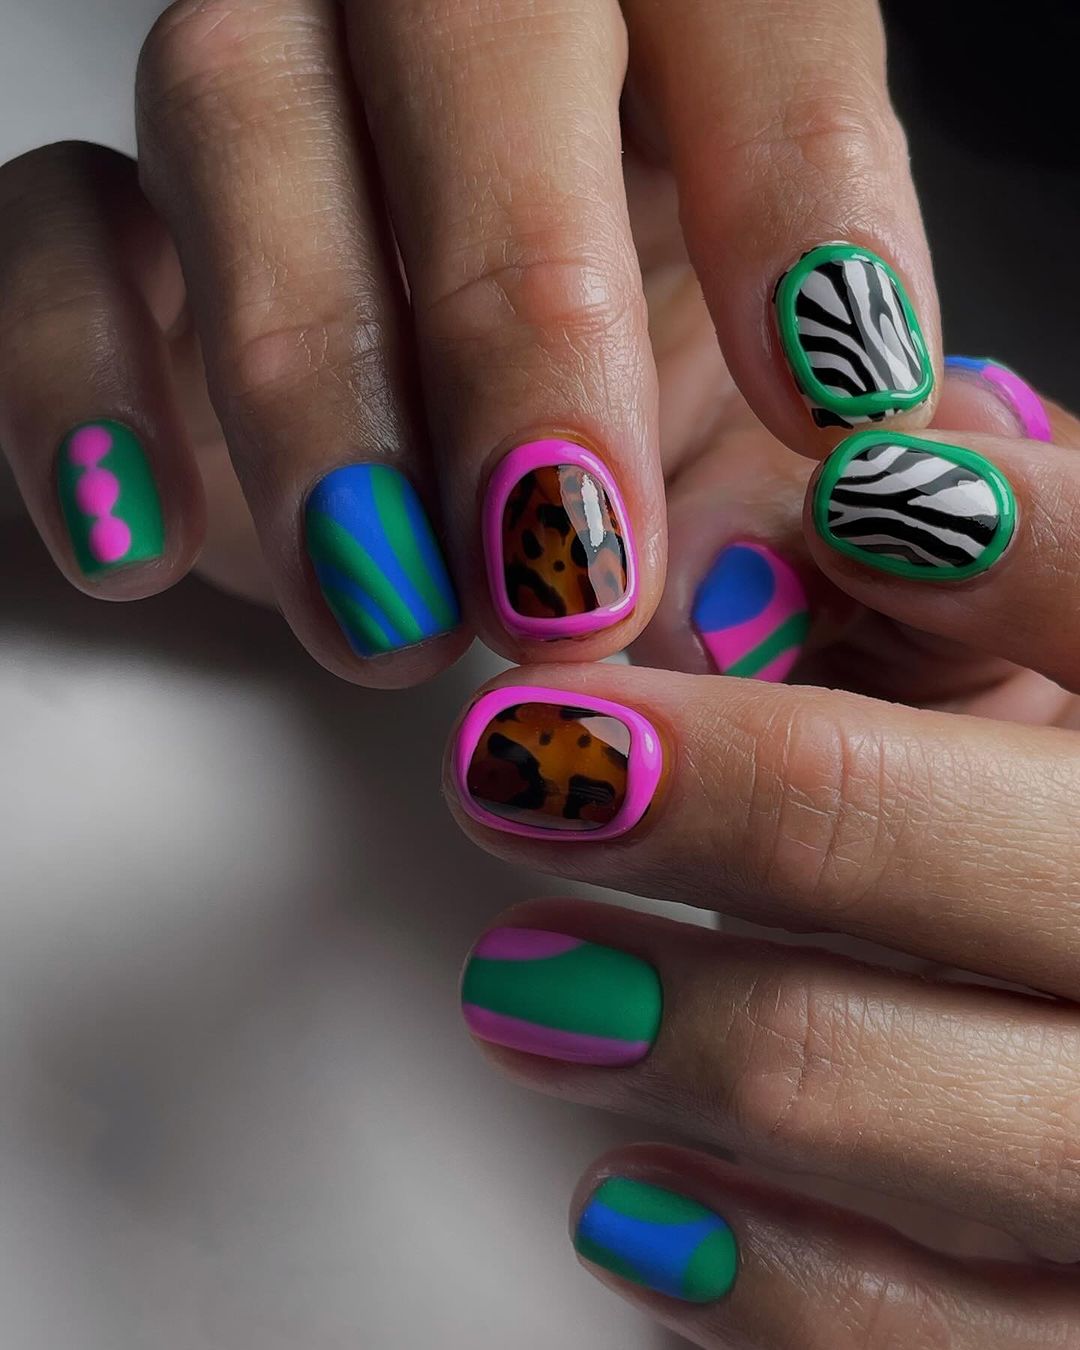
Playful Pop Art
These nails are a vibrant canvas of pop art, featuring a mixture of graphic patterns like zebra stripes and leopard spots, paired with bold, bright colors that stand out with a neon glow. Each nail offers a different design, showcasing a fun and eclectic mix that’s full of energy.
-
- Neon polishes in pink, green, and blue
- Black polish for the animal patterns
- Detailing brushes
- Matte top coat – OPI Matte Finish
The combination of different patterns with neon colors creates a playful, attention-grabbing look that’s perfect for those who love to express their vibrant personality through their nails.
DIY Instructions:
-
- Apply a base coat of neon polish, choosing a different color for each nail.
- Use a fine brush to draw animal patterns over the neon base.
- Apply a matte top coat to give the vibrant colors a modern, flat finish.
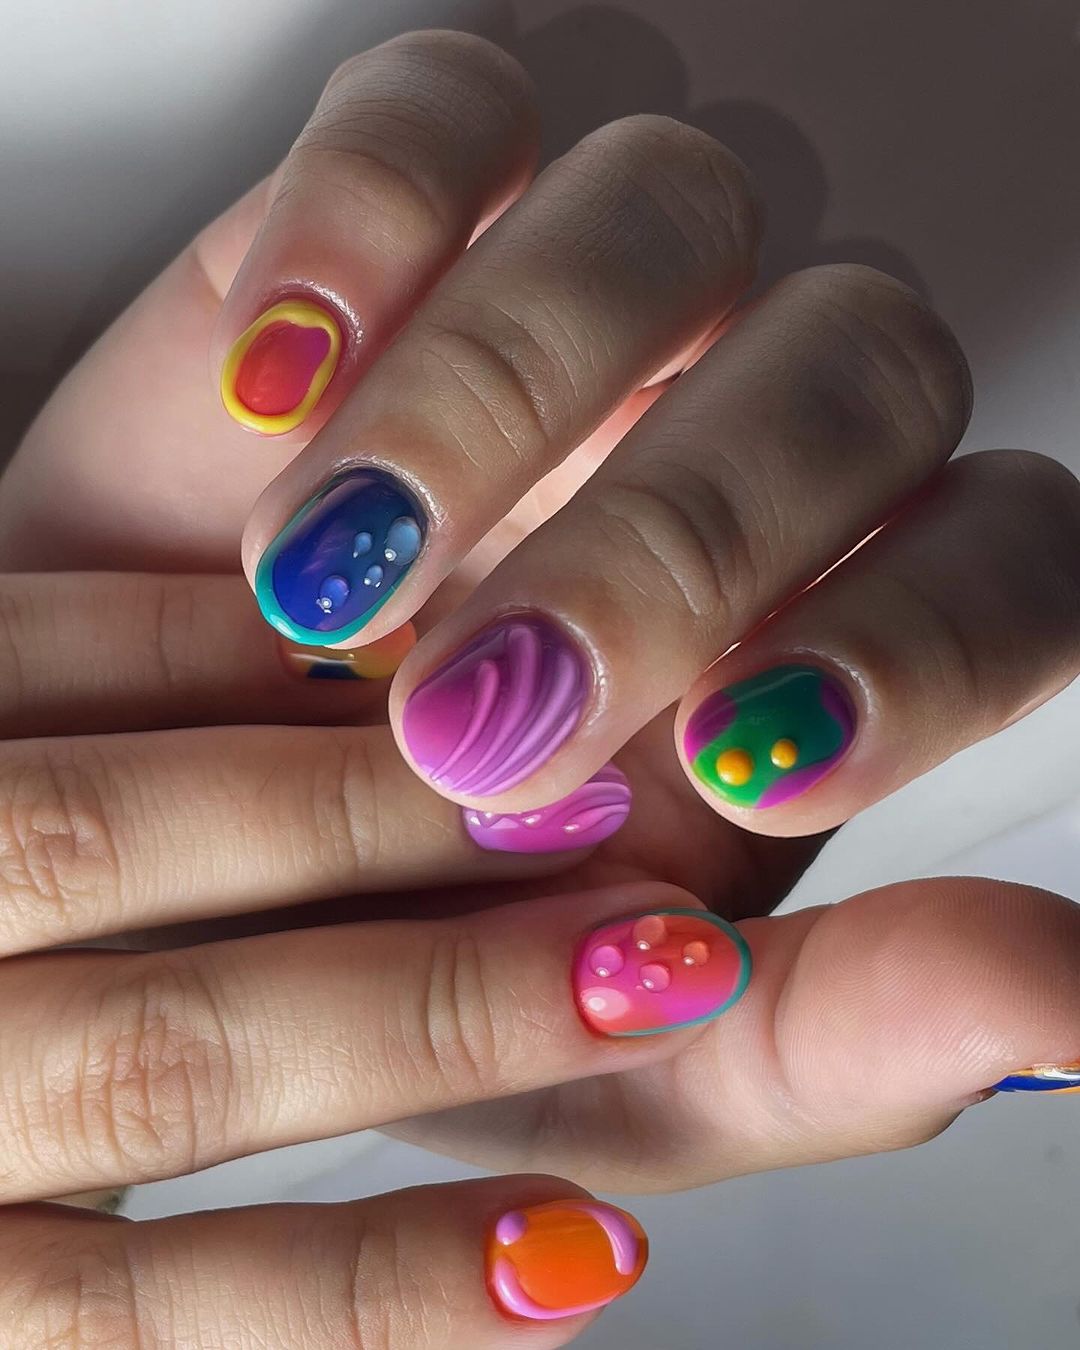
Neon Dream Drops
This design features a whimsical arrangement of colorful blobs and dots, creating an effect that looks like droplets of neon paint suspended in mid-air. The use of vivid colors on a clear base makes each droplet pop, giving the nails a playful and artistic appearance.
-
- Base coat – Clear polish
- Neon polishes in yellow, pink, and orange
- Dotting tools
- High gloss top coat – Seche Vite Dry Fast
This nail design is ideal for those who prefer a minimalist yet colorful look, with each neon droplet providing a burst of cheerful color.
DIY Instructions:
-
- Start with a clear base coat.
- Randomly place drops of neon polish on the nails using a dotting tool.
- Allow the drops to slightly blend into each other at the edges.
- Finish with a high gloss top coat to enhance the droplets’ visual impact.
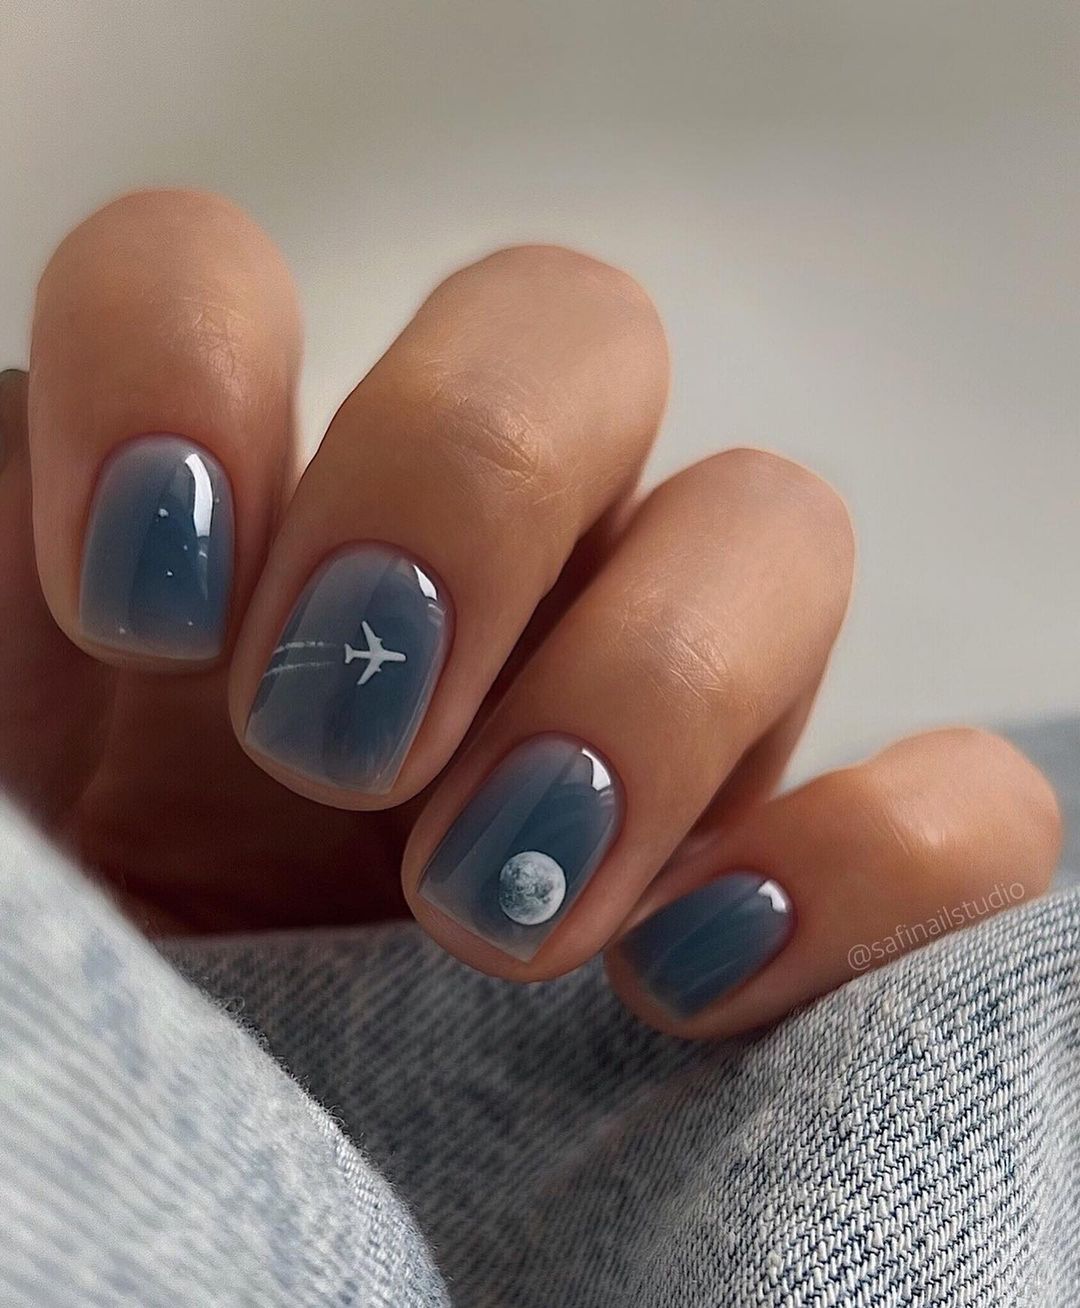
Tranquil Night Sky
Emulating a peaceful night sky, this design uses shades of deep blue combined with delicate images of stars and a crescent moon, creating a serene and thoughtful nail art. The use of glossy and matte finishes adds depth, making the celestial elements appear more vivid against the twilight backdrop.
-
- Base polish in gradient shades of blue
- White polish for the stars and moon
- Matte top coat – Essie Matte About You
- Glossy top coat for selective shine
This look is perfect for those who seek a subtle yet meaningful nail design, with its soothing colors and celestial motifs providing a touch of night-time magic.
DIY Instructions:
-
- Paint a gradient with different shades of blue.
- Use a small brush to add stars and a crescent moon with white polish.
- Apply a matte top coat over the entire nail.
- Add a touch of glossy top coat over the celestial elements to make them stand out.
Each of these designs brings a unique artistic approach to nail art, from the playful and vibrant to the calm and contemplative, offering something special for every taste and occasion.
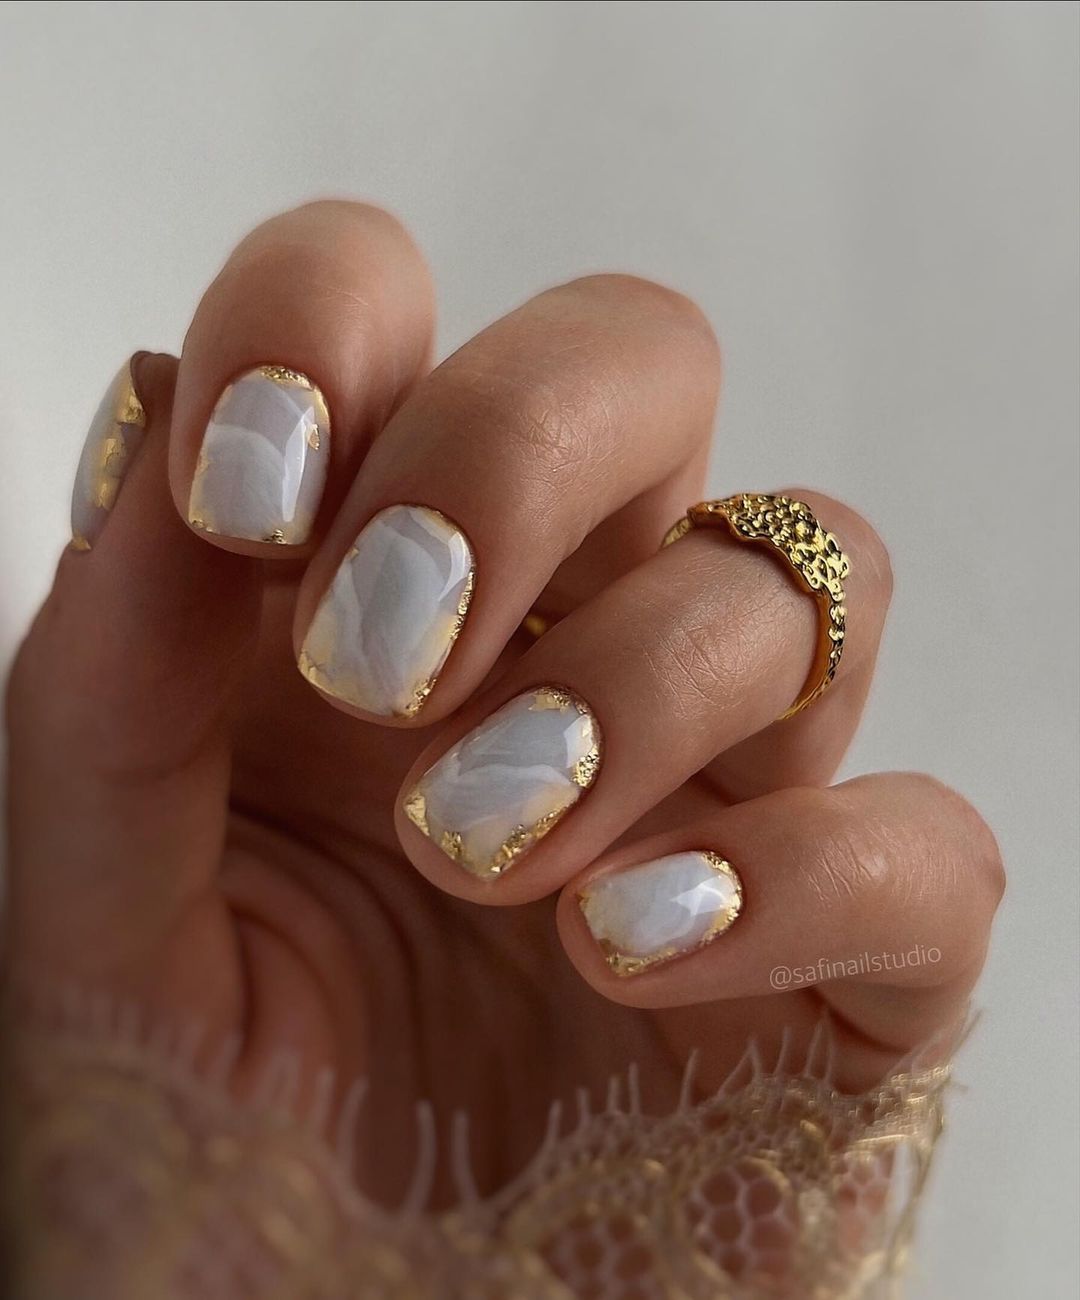
Elegant Marbled Gold
This nail design exudes luxury with its white and gold marbled effect, complemented by intricate gold leaf detailing along the edges. The combination of crisp white and rich gold creates a sophisticated and refined look that’s perfect for any glamorous occasion.
-
- White polish – Essie “Blanc”
- Gold leaf sheets
- Marbling tool
- Clear polish for marbling
- High gloss top coat – Seche Vite
The marbling effect, achieved by skillfully swirling gold leaf with white polish, offers an elegant aesthetic that is both timeless and modern.
DIY Instructions:
-
- Apply a base coat of white polish.
- While still wet, place pieces of gold leaf on the nail and use a marbling tool to gently swirl.
- Apply a clear polish to blend the edges of the gold leaf into the white base.
- Finish with a high gloss top coat for a smooth, shiny surface.
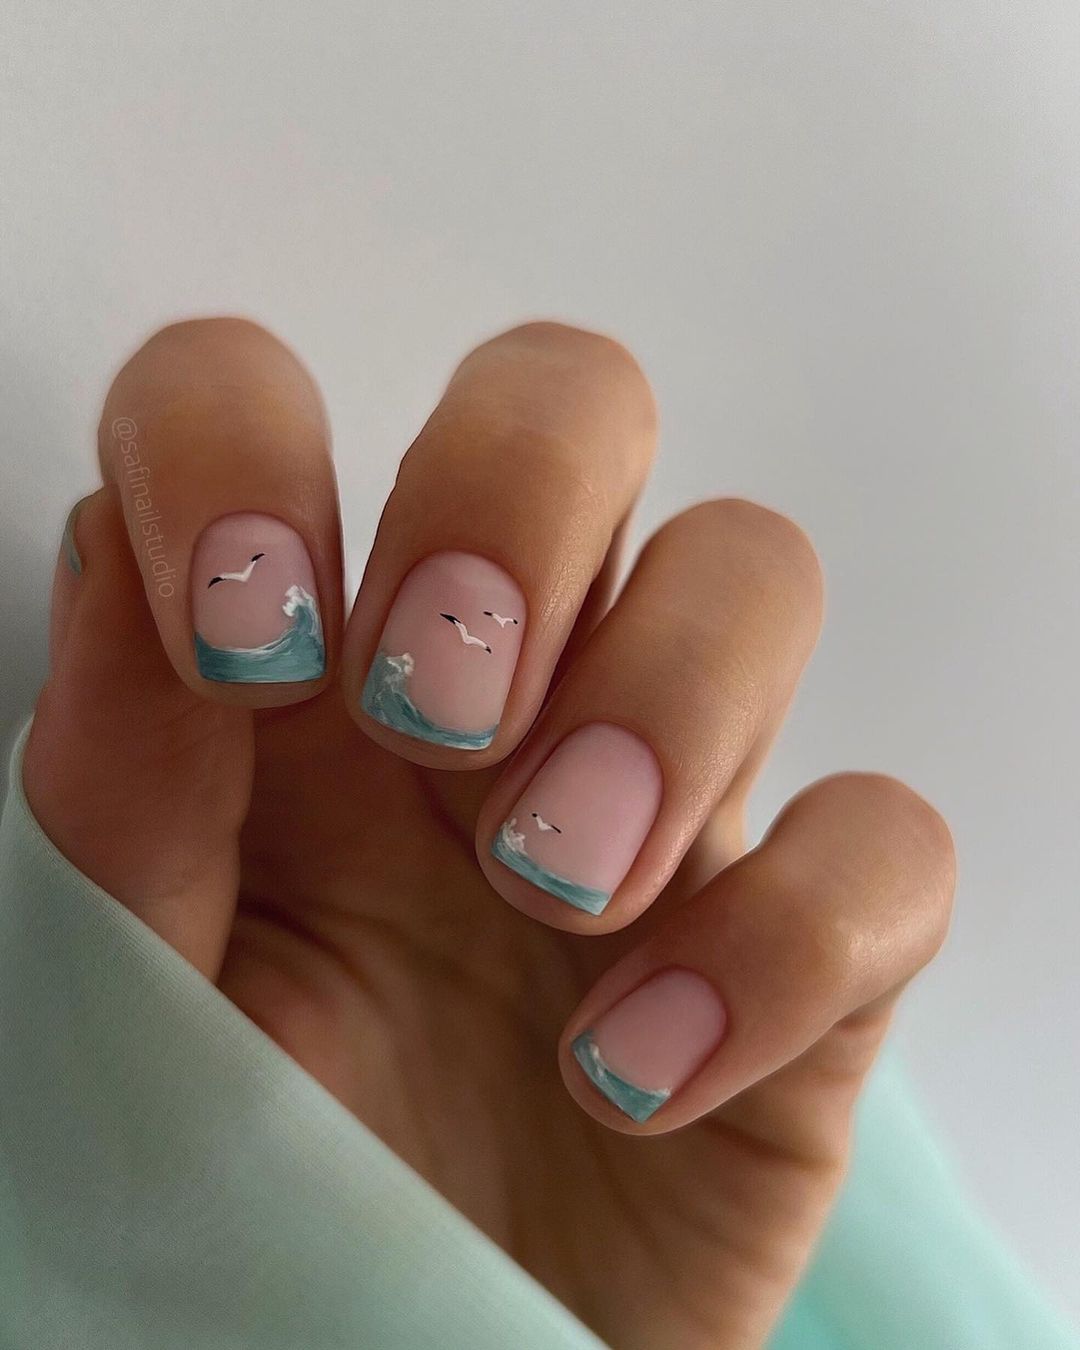
Serene Seaside
Capturing the essence of the ocean, this design features soft blue and white gradients that mimic the gentle waves of the sea, adorned with simple seagull silhouettes. The peaceful color palette and minimalistic art are reminiscent of a tranquil beach day.
-
- Light blue polish – OPI “Gelato on My Mind”
- White polish – Essie “Blanc”
- Detailing brush for seagull silhouettes
- Matte top coat – OPI Matte Finish
The use of a matte top coat enhances the soft, serene feel of the design, making it a subtle yet beautiful choice for everyday wear.
DIY Instructions:
-
- Create a gradient effect using light blue and white polish.
- Paint seagull silhouettes with a detailing brush.
- Apply a matte top coat to unify the serene theme.
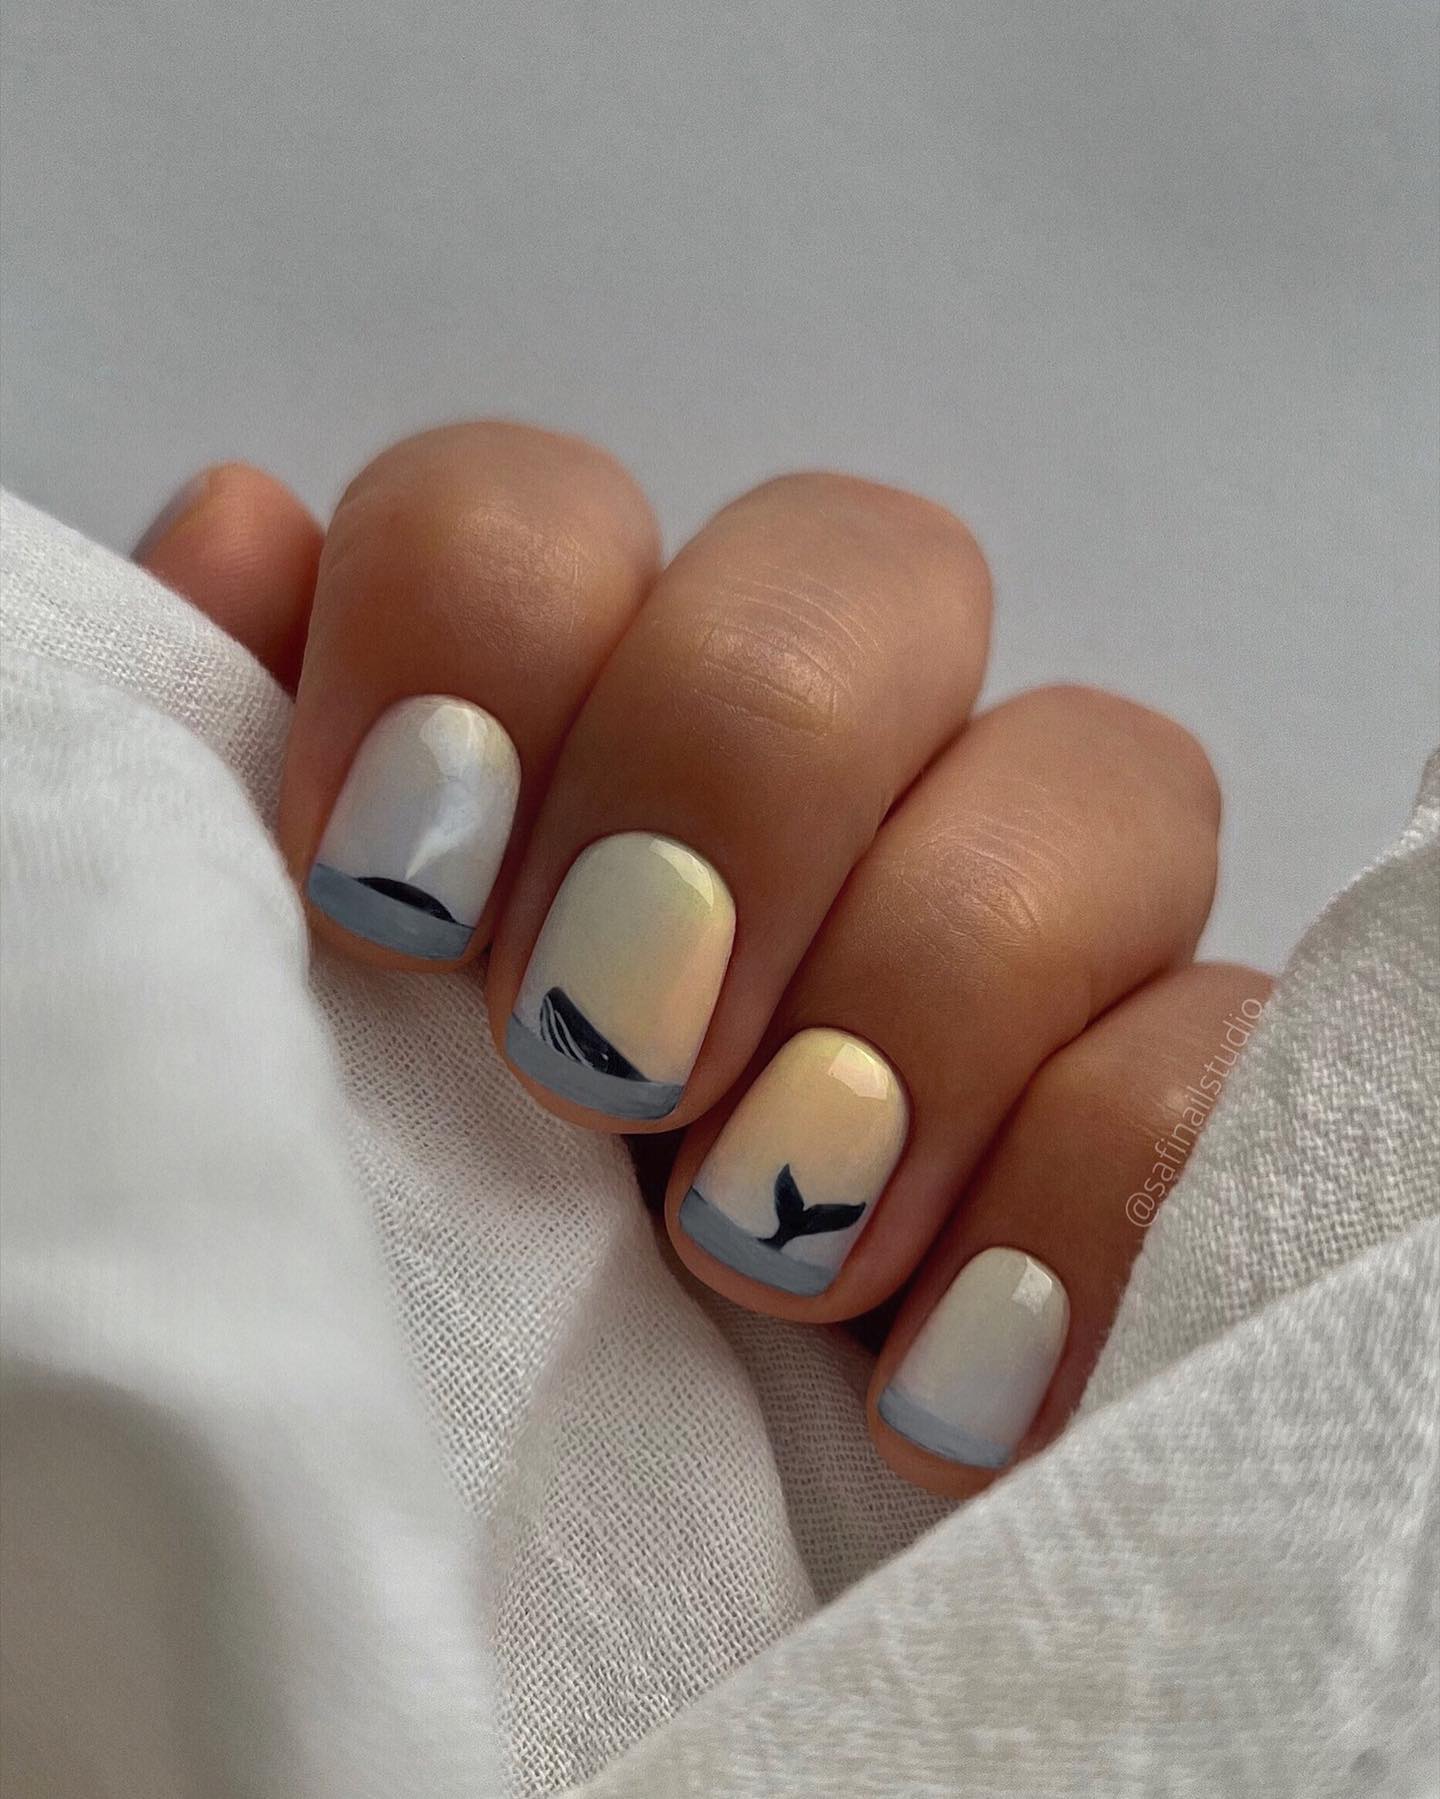
Whispering Whales
This whimsical design features playful whale tails peeking out from a foggy sea, set against a backdrop of muted gray. The minimalist approach, with just a hint of whimsy, makes this nail art both charming and understated.
-
- Gray polish – Essie “Master Plan”
- White polish for whale tails
- Detailing brush
- Glossy top coat for a wet look
The choice to use a glossy top coat adds depth to the design, suggesting the reflective surface of water.
DIY Instructions:
-
- Apply a base of gray polish.
- Using a white polish, paint small whale tail silhouettes near the tips of the nails.
- Finish with a glossy top coat to enhance the appearance of depth and shine.
These nail designs provide a range of aesthetics from the sophisticated and luxurious to the calm and playful, ensuring that there is a style to match any personality and occasion.
Minimalist Artistry
This nail design embraces the beauty of minimalism with its clean, artistic strokes on a plain white base. Each nail features a unique, hand-painted design ranging from abstract foliage to geometric patterns and subtle line art, creating a gallery of modern art at your fingertips.

-
- White polish – OPI “Alpine Snow”
- Green, blue, and black polish for detailing
- Fine detail brush
- Matte top coat – Essie Matte About You
The use of a matte finish enhances the contemporary art feel, making each design stand out with its understated elegance.
DIY Instructions:
-
- Apply a white base coat.
- Using a detail brush, paint different designs on each nail.
- Seal with a matte top coat for a sophisticated finish.
Summertime Blossoms
This cheerful nail design features soft pastel backgrounds adorned with vibrant blue and white flowers, making each nail look like a tiny canvas of summer blossoms. The subtle addition of gold accents gives a touch of luxury, enhancing the floral motif.

-
- Pastel yellow polish – Essie “Pale to the Chief”
- Blue and white acrylic paint for flowers
- Gold leaf or gold polish for accents
- High gloss top coat – Seche Vite
This design is perfect for those who love romantic and intricate details on a soft, inviting background.
DIY Instructions:
-
- Paint a pastel yellow base.
- Hand-paint blue and white flowers.
- Add small touches of gold to the center of each flower.
- Finish with a glossy top coat for durability and shine.
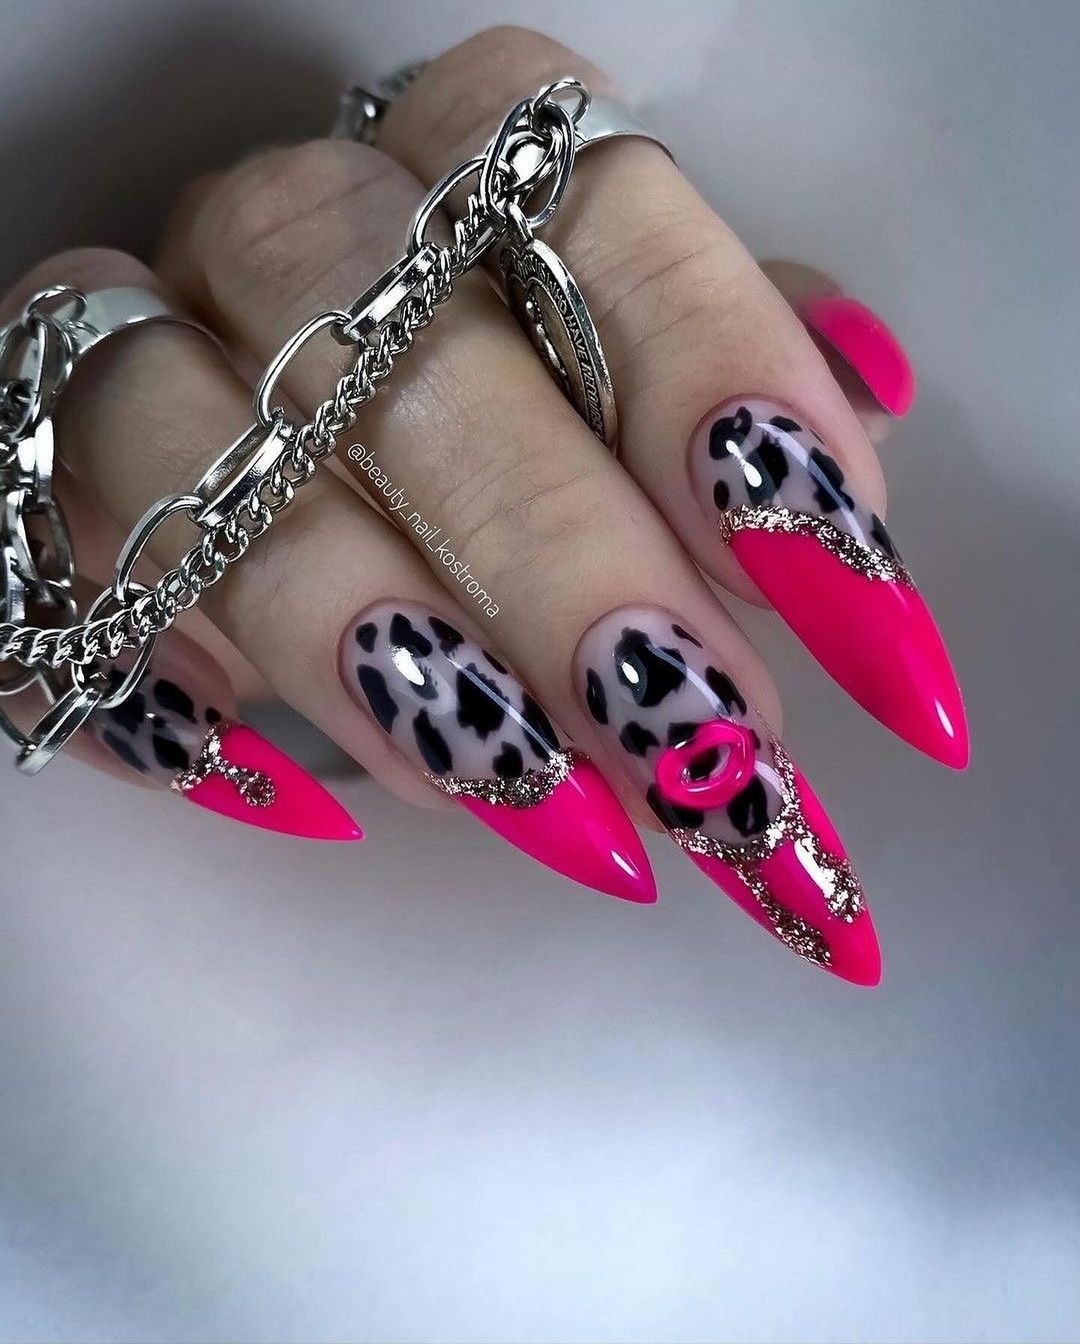
Edgy Pink Leopard
Bold and vibrant, this nail design combines hot pink with black and white leopard spots, accented with silver chains and jewel embellishments. The use of intense color and daring patterns makes a statement of confidence and style.
-
- Hot pink polish – OPI “Kiss Me I’m Brazilian”
- Black and white polish for leopard spots
- Silver chain and small rhinestones for decoration
- High gloss top coat – Seche Vite
This look is designed for those who embrace bold fashion choices and want their nails to stand out with a pop of edgy, high-fashion detail.
DIY Instructions:
-
- Apply hot pink polish as the base.
- Paint leopard spots with black and fill in some with white.
- Attach small sections of silver chain and rhinestones with nail glue.
- Seal with a high gloss top coat to ensure the embellishments stay in place and to add shine.
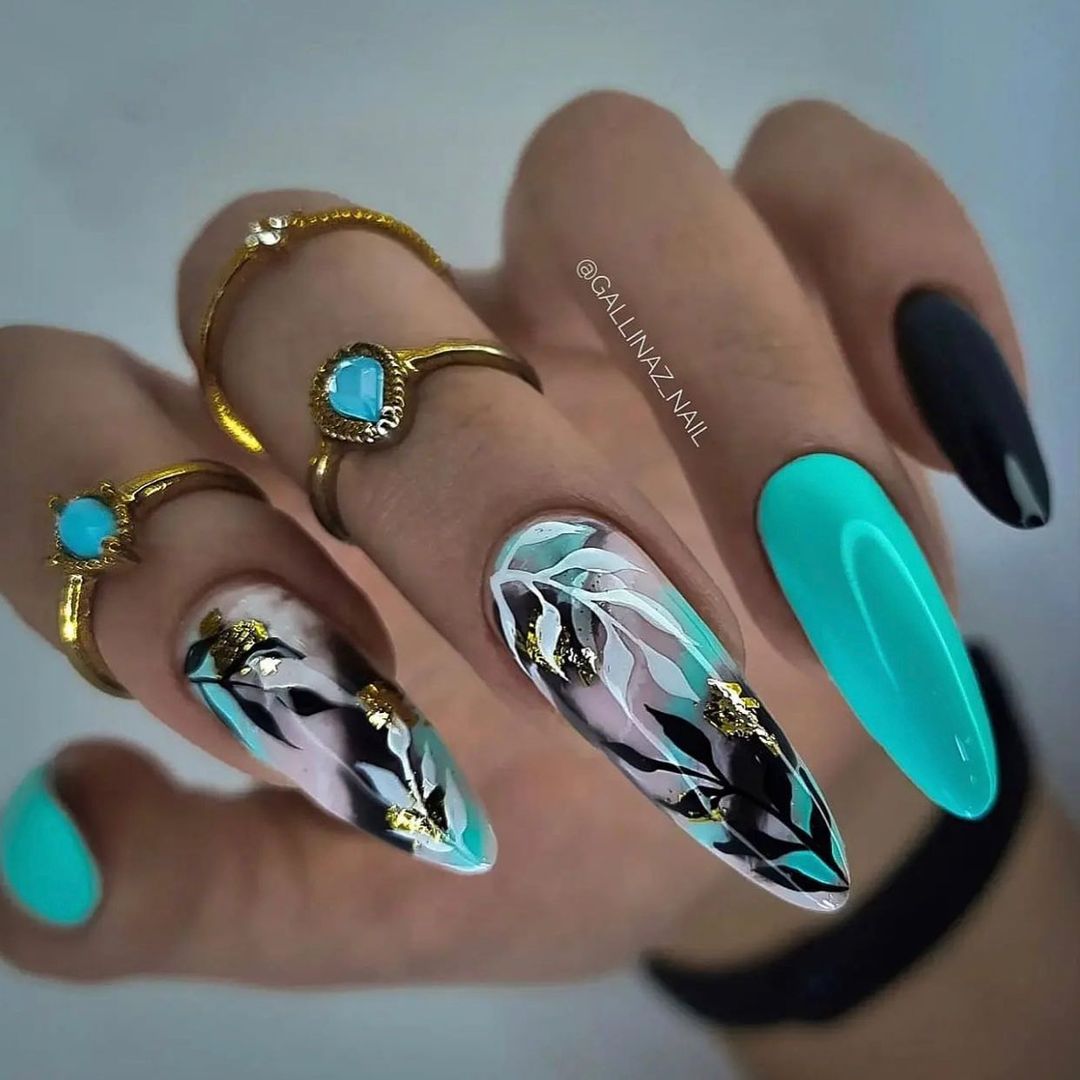
Luxurious Aqua Fantasy
These nails combine vibrant turquoise with sleek black and intricate marbling techniques to create a luxurious look. The addition of gold foil accents adds a touch of opulence, making this design perfect for those who love bold, statement-making nails.
-
- Turquoise gel polish – CND “Aqua-intance”
- Black gel polish
- Gold leaf foil
- Marbling tool
- High gloss top coat – Seche Vite
The depth created by the marbling effect, alongside the striking contrast with gold, makes these nails a masterpiece of nail art.
DIY Instructions:
-
- Apply a base coat of turquoise gel polish.
- Add drops of black gel polish and swirl gently with a marbling tool.
- Apply gold leaf foil in small pieces for an elegant touch.
- Seal with a high gloss top coat for a durable, shiny finish.
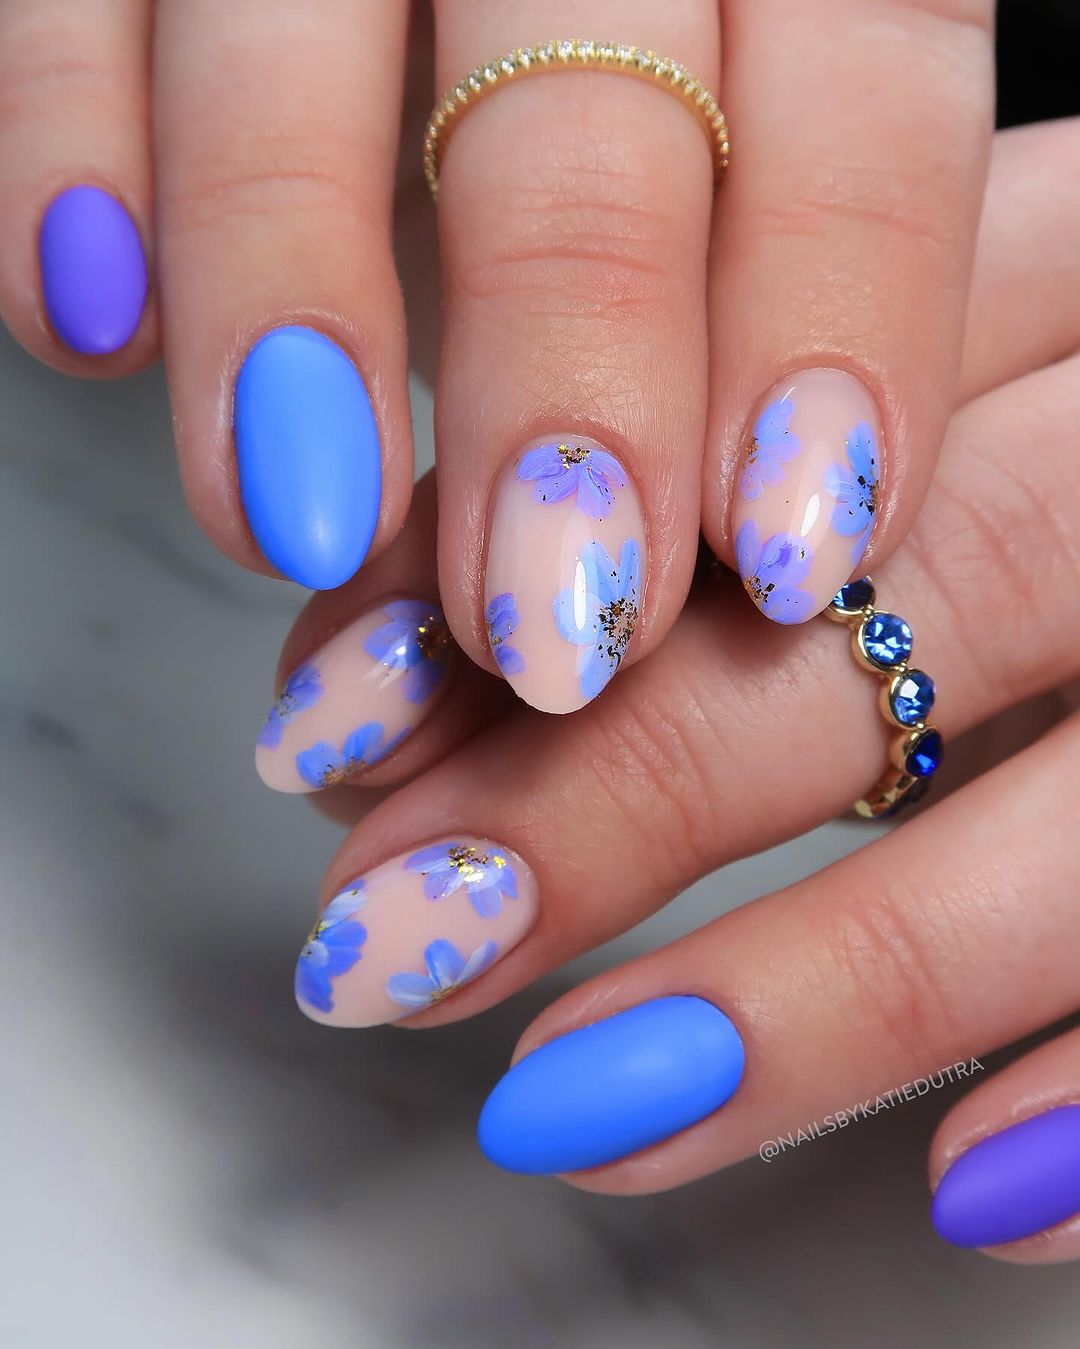
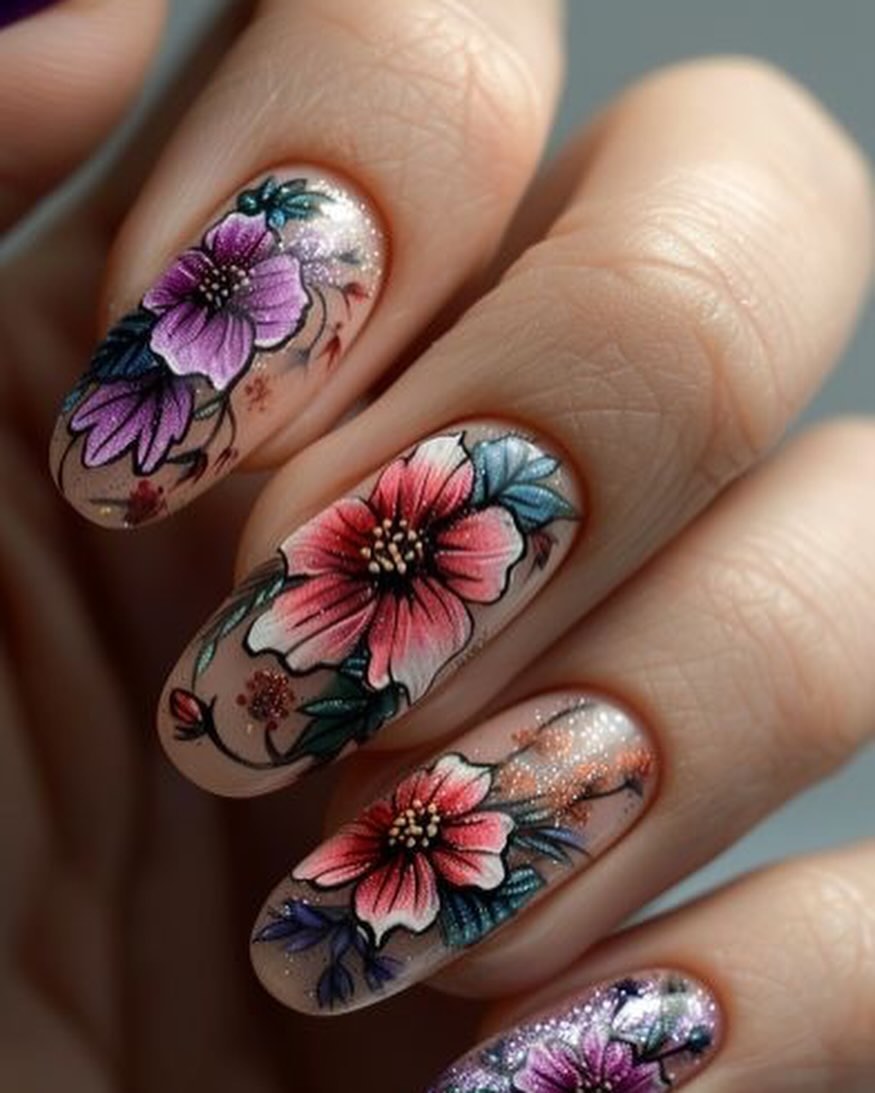
Floral Elegance
This design captures the delicate essence of summer with hand-painted flowers in shades of pink and blue, set against a nude background. The realistic detailing of the blooms, paired with a sprinkle of glitter, gives a romantic and sophisticated flair.
-
- Nude polish – Essie “Ballet Slippers”
- Pink and blue acrylic paint for flowers
- Fine detail brush
- Glitter accents
- High gloss top coat – Seche Vite
Perfect for any season, these nails bring the beauty of a blooming garden to your fingertips.
DIY Instructions:
-
- Apply a base coat of nude polish.
- Paint flowers using pink and blue acrylic paints with a fine brush.
- Add glitter accents sparingly for a subtle sparkle.
- Finish with a high gloss top coat to protect the design.
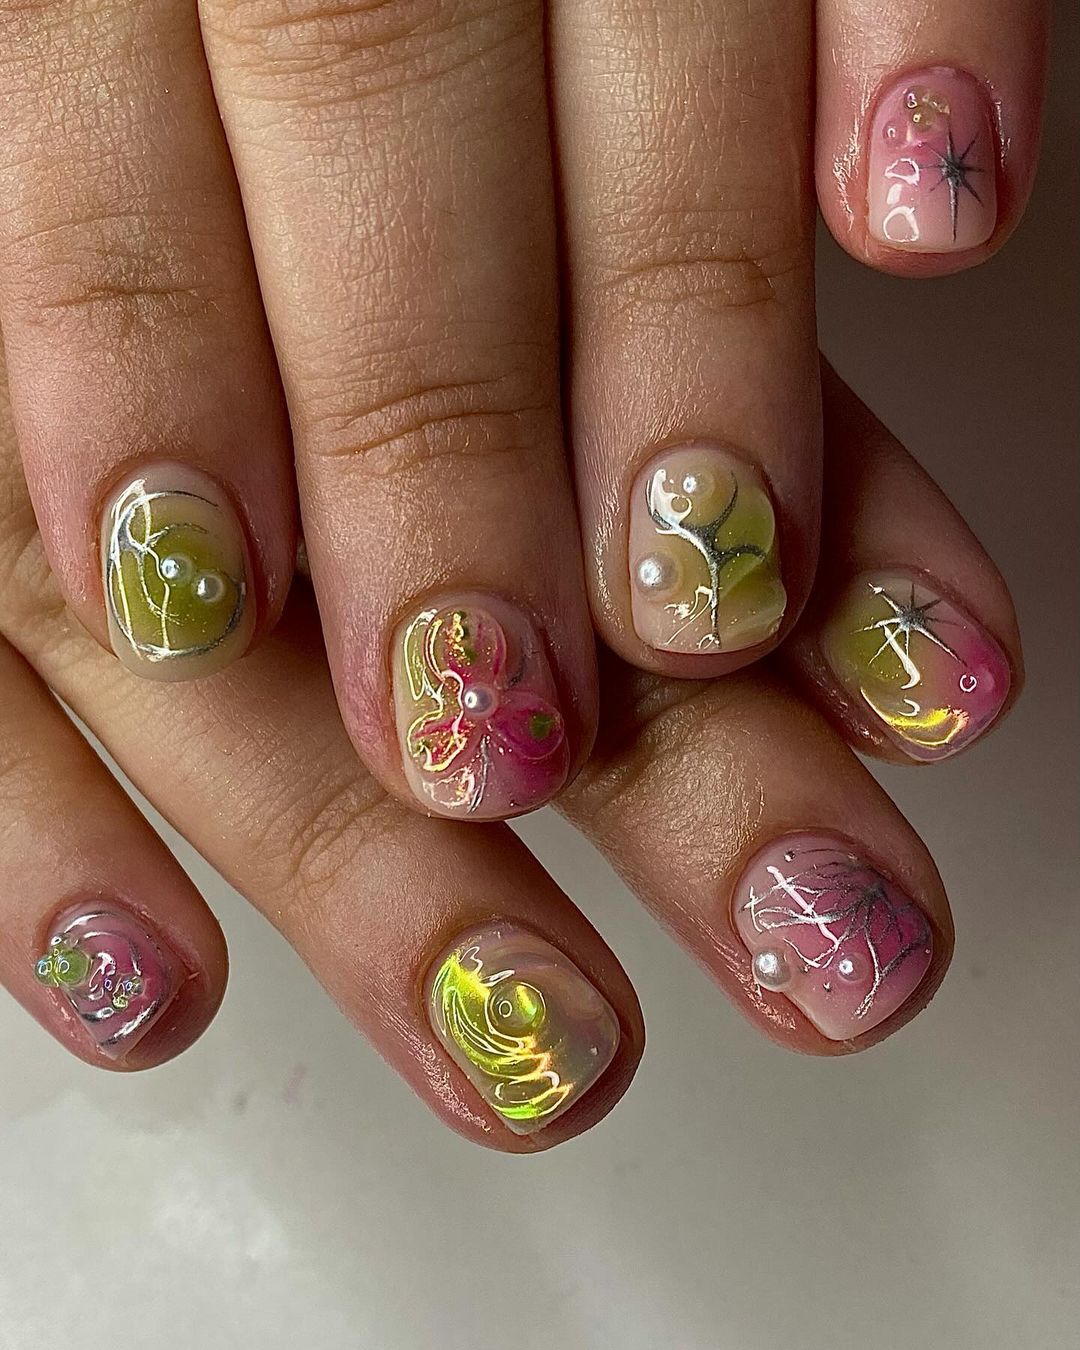
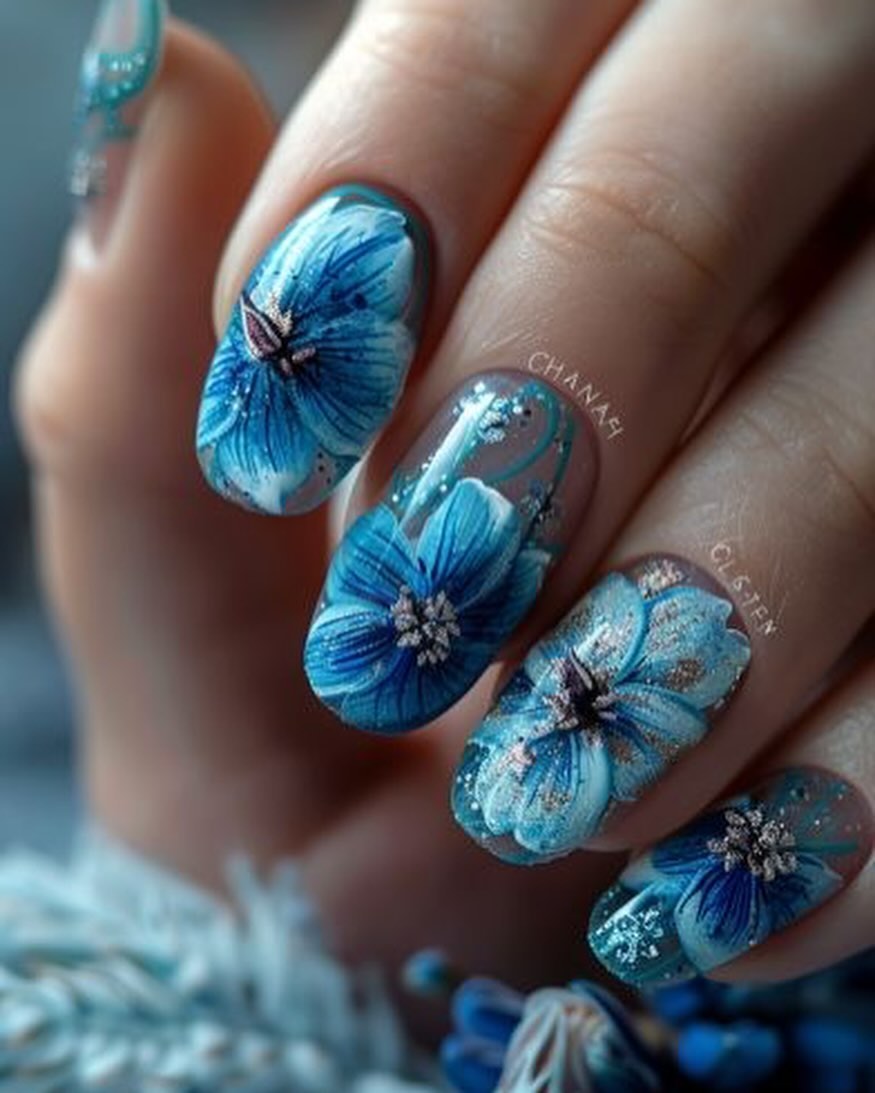
Blue Blossom Delight
These nails feature stunning blue flowers, enhanced with sparkling centers, against a shimmering background that mimics the serene colors of the sea. The detailed petals and dewy finish make this design truly breathtaking.
-
- Light blue shimmer polish – OPI “Breakfast at Tiffany’s”
- Dark blue and white acrylic paint for detailing
- Silver rhinestones
- High gloss top coat – Seche Vite
The use of shimmer polish as a base adds depth, while the detailed floral artwork brings an intricate and elegant touch.
DIY Instructions:
-
- Apply a base coat of light blue shimmer polish.
- Paint dark blue flowers with white highlights.
- Place a silver rhinestone in the center of each flower.
- Seal with a high gloss top coat to enhance the shine and depth of the design.
FAQ
Q: How can I make my nail polish last longer?
A: To extend the life of your nail polish, start by cleaning your nails thoroughly to remove oils before application. Use a quality base coat to protect the nail and improve polish adherence. After applying your polish and top coat, reapply the top coat every few days to prevent chipping and enhance shine.
Q: Can nail art damage my nails?
A: Nail art itself does not damage nails, but improper application or removal of nail products can. Always use non-acetone removers when possible, and give your nails a break between elaborate manicures to allow them to recover.
Q: What’s the best way to remove gel polish?
A: To safely remove gel polish, gently buff the surface to break the seal of the top coat, then soak cotton balls in acetone and place them on your nails. Wrap each nail with aluminum foil and let it sit for about 10-15 minutes. The gel polish should then lift off easily. If residue remains, gently push it off with a wooden cuticle stick.
Q: How often should I get a new nail design?
A: The frequency can depend on the growth rate of your nails and the type of design. Generally, most people redo their nails every 2-3 weeks to maintain the appearance and integrity of the design.
Q: Are there any nail art designs that are quicker to apply?
A: Yes, simpler designs like single-color polish with a top coat, French tips, or designs using nail stickers are quicker to apply and can be a good choice for those with less time.
Q: Is it necessary to use a top coat?
A: Using a top coat is highly recommended as it seals your nail art, provides a glossy or matte finish, and extends the durability of the manicure.
Q: How can I prevent my nails from yellowing?
A: Yellowing can be prevented by always using a clear base coat, which acts as a barrier between your nail and colored polishes. Limiting exposure to strong chemicals and sunlight can also help.
Save Pin