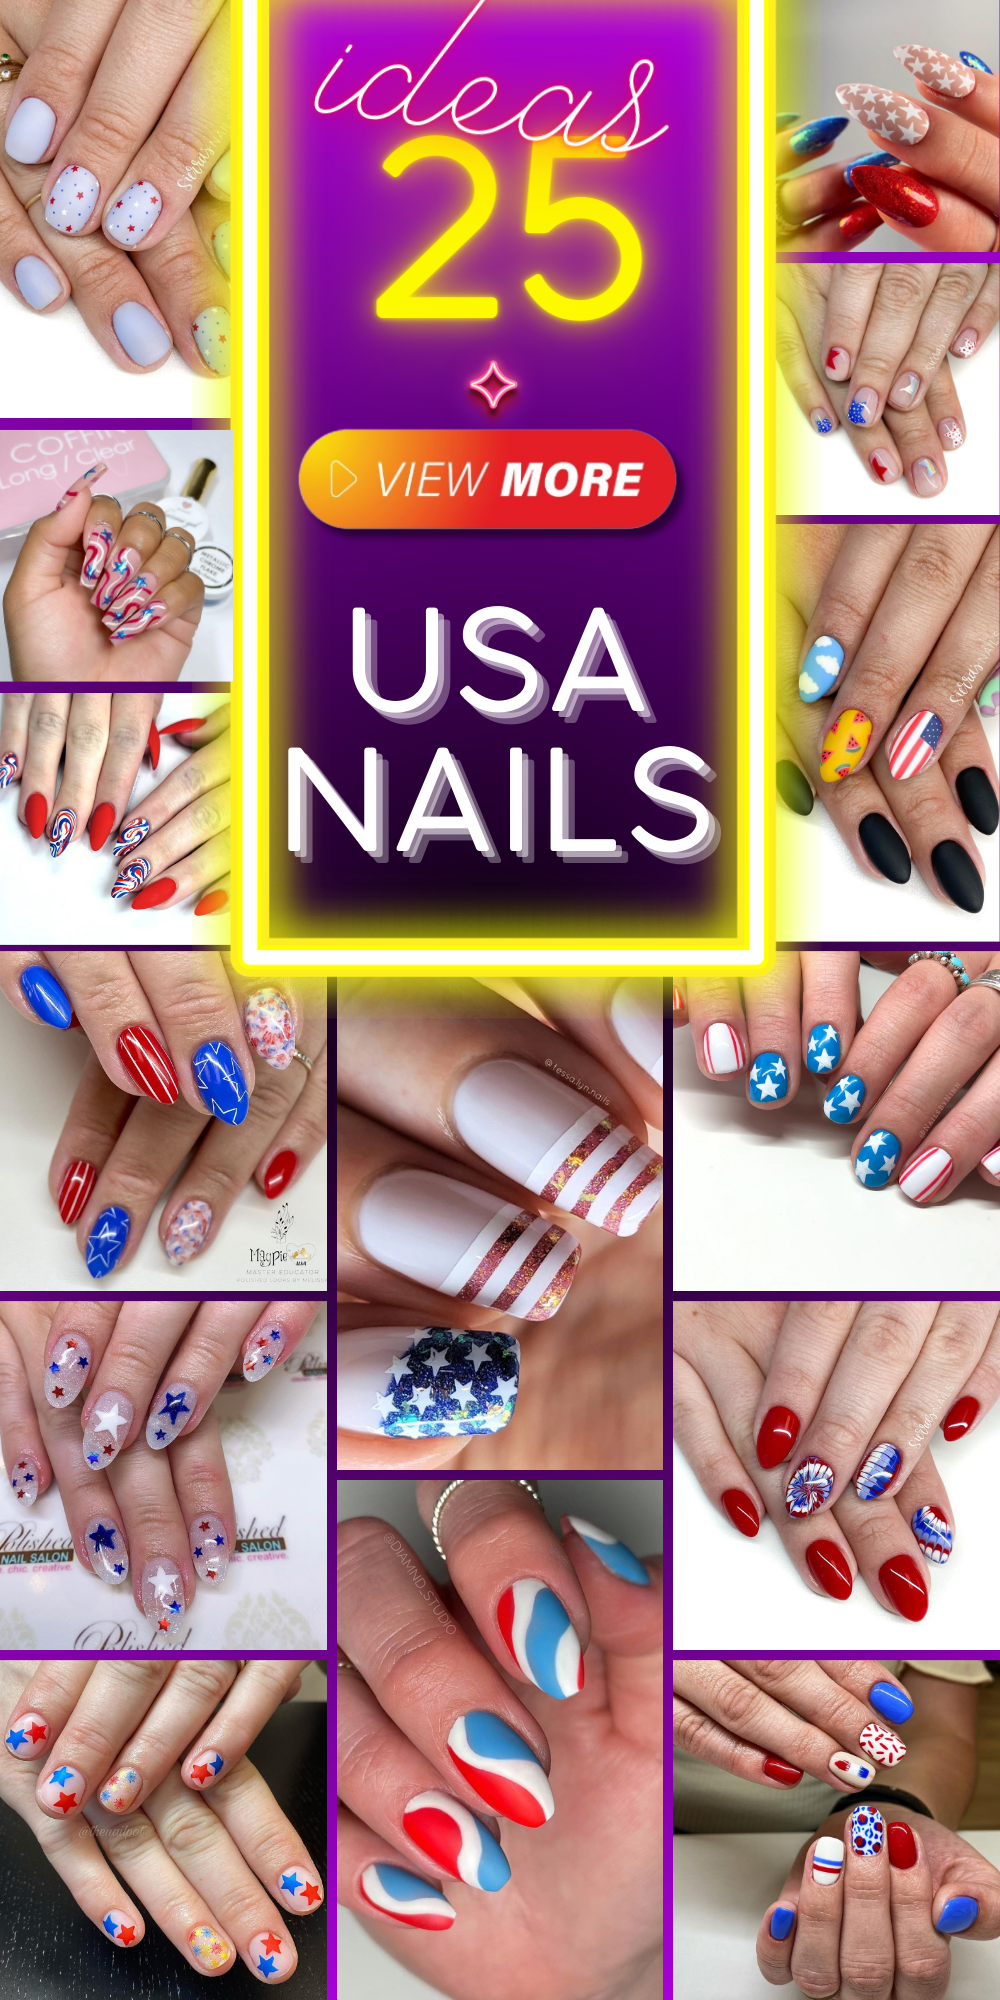
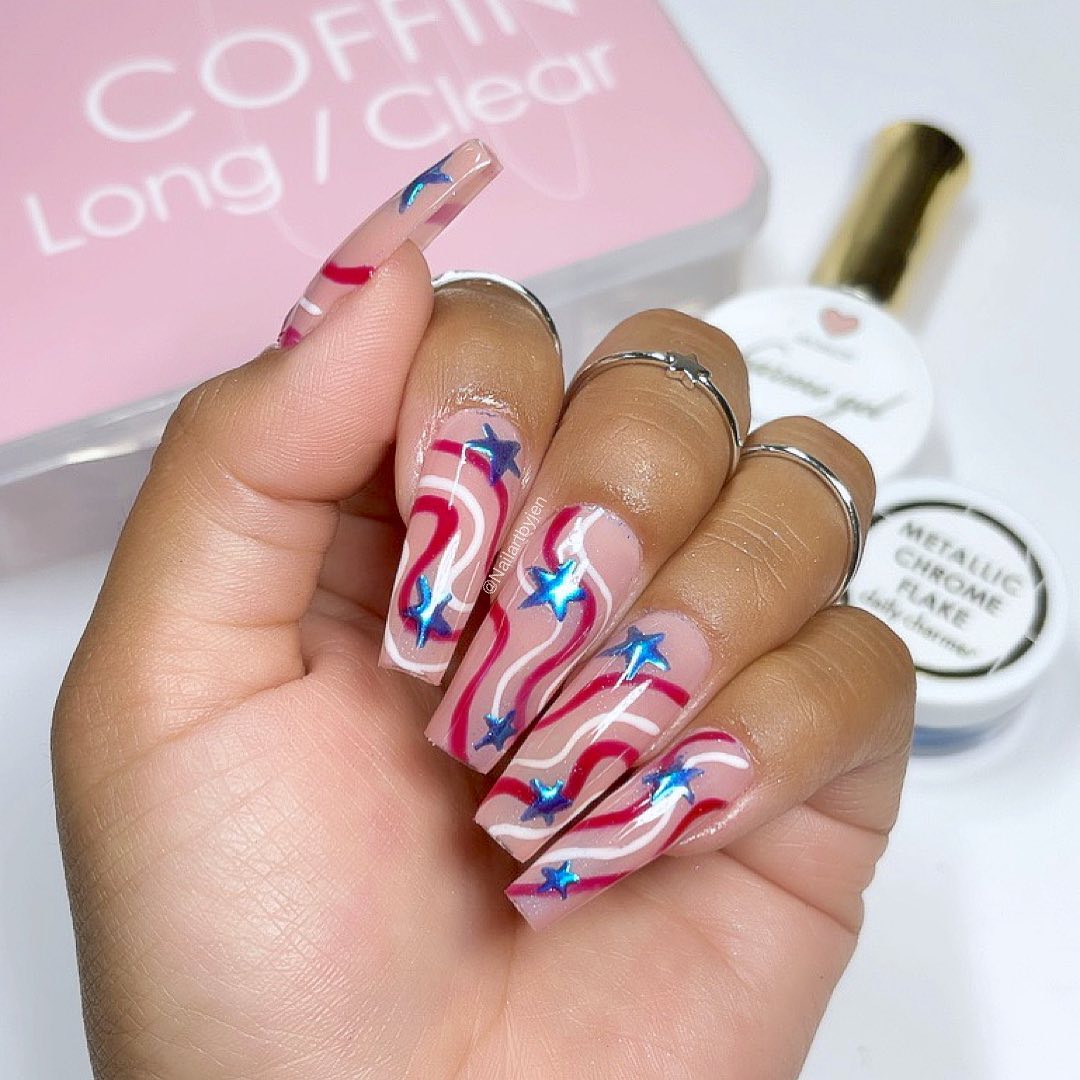
As we approach the vibrant celebrations of the 4th of July, what better way to express your patriotism than with beautifully crafted USA nails? Each year, enthusiasts and fashionistas explore creative avenues to showcase their spirit through nail art. From the bold stripes of our flag to the subtle sparkles mimicking fireworks, the designs are as limitless as they are enchanting. But how do you choose the perfect style, and can these designs be achieved at home? Let’s explore some stunning ideas to make your nails stand out this Independence Day.
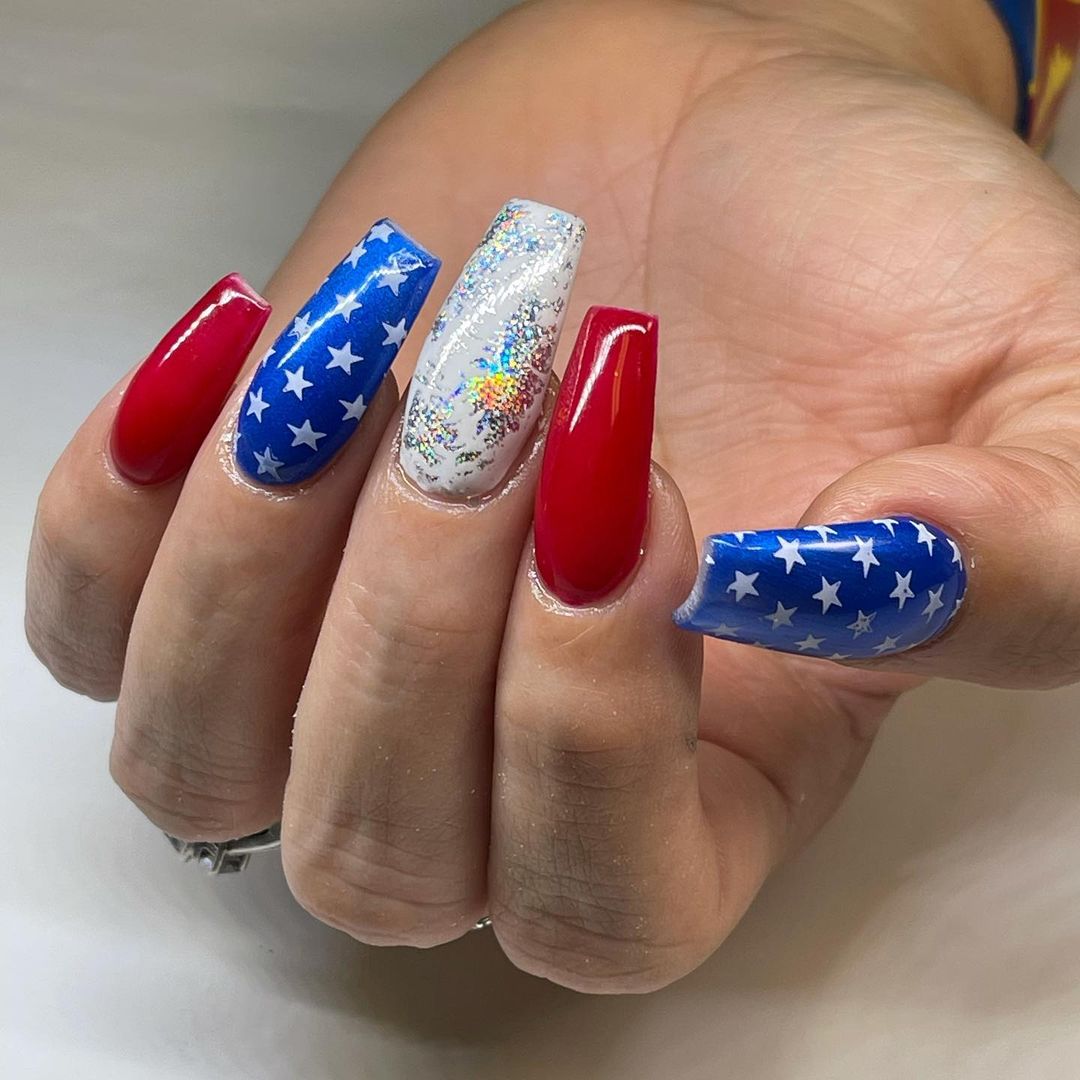
A Symphony in Red and Blue
This design captures the essence of American pride with its bold red polish and intricate accents of blue and white. As a manicure expert, it’s thrilling to see such a harmonious blend of simplicity and complexity in a design that uses traditional 4th of July themes.

-
- Red polish: OPI Big Apple Red
- White polish: Essie Blanc
- Blue polish: Sally Hansen Blue My Mind
- Silver glitter: Sinful Colors Queen of Beauty
- Star decals
- Thin detailing brush
Creating this look involves a steady hand and a bit of patience. Start with a base of red polish, followed by careful striping with white. Use a thin brush to add blue swirls, and finish with a top coat sprinkled with silver glitter. Place star decals strategically for that celebratory pop.
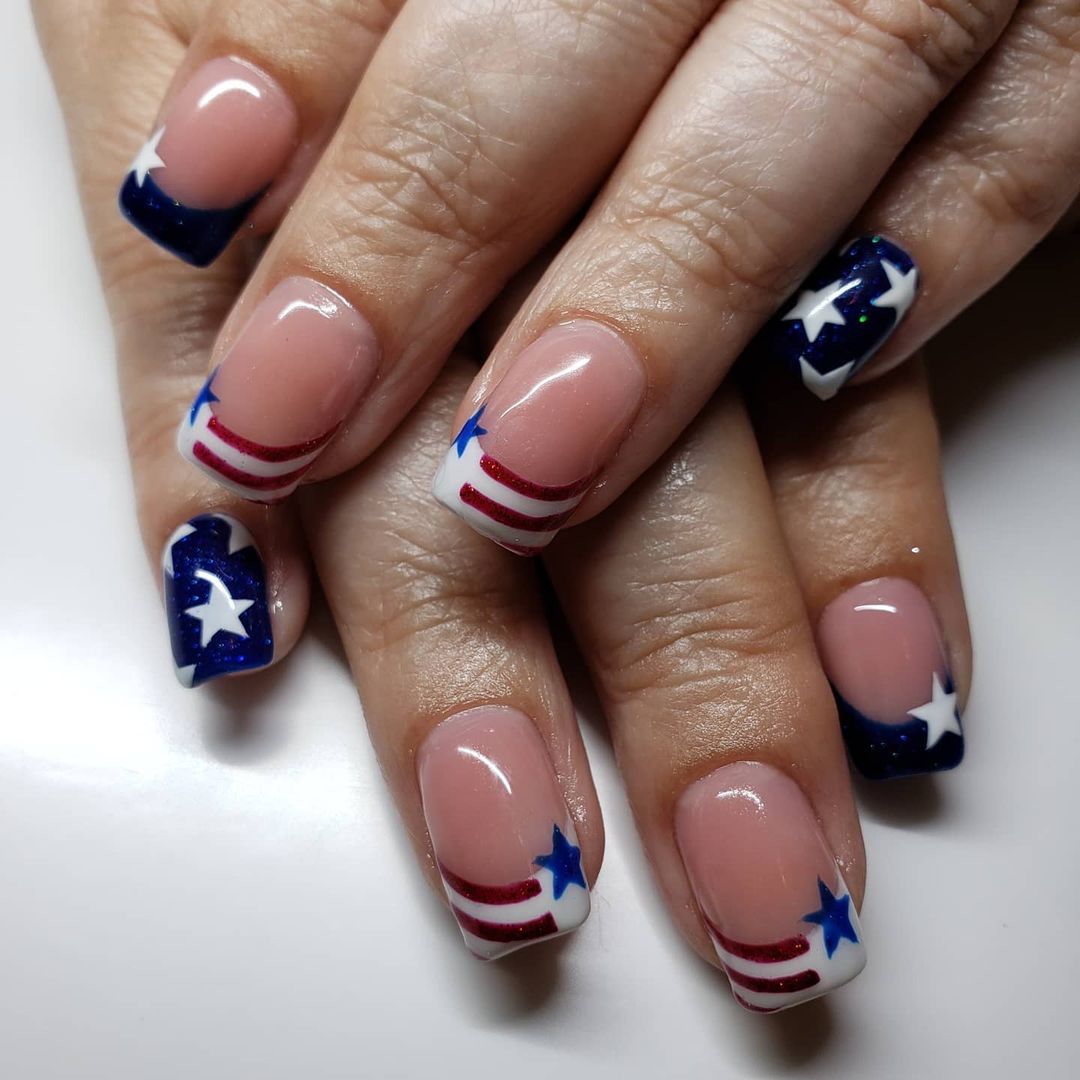
Elegance with a Twist
This nail art design offers a more subtle yet festive look, utilizing the softness of white to bring out the vibrant blue and red details. The use of French tip design elements adds a touch of class.
-
- White polish: Essie Ballet Slippers
- Red striping tape
- Blue glitter: Deborah Lippmann Across the Universe
- Matte top coat
To achieve this elegant design, apply a white base coat and allow it to dry completely. Add red striping tape to create clean lines, then apply a layer of blue glitter. Seal everything with a matte top coat for a sophisticated finish.
Playful Patriotic Flair
This playful design is perfect for those looking to add a bit of fun to their 4th of July celebrations. It features a mix of stripes, stars, and a delightful use of the art American flag.

-
- White polish: China Glaze White on White
- Red polish: Revlon Red
- Blue polish: Chanel Blue Satin
- Star stickers
- Rhinestones
- Dotting tools
Begin with a base of white polish. Use a dotting tool to add blue and red details, creating stripes and star patterns. Apply star stickers and rhinestones for additional decoration and finish with a clear top coat to protect your artwork.
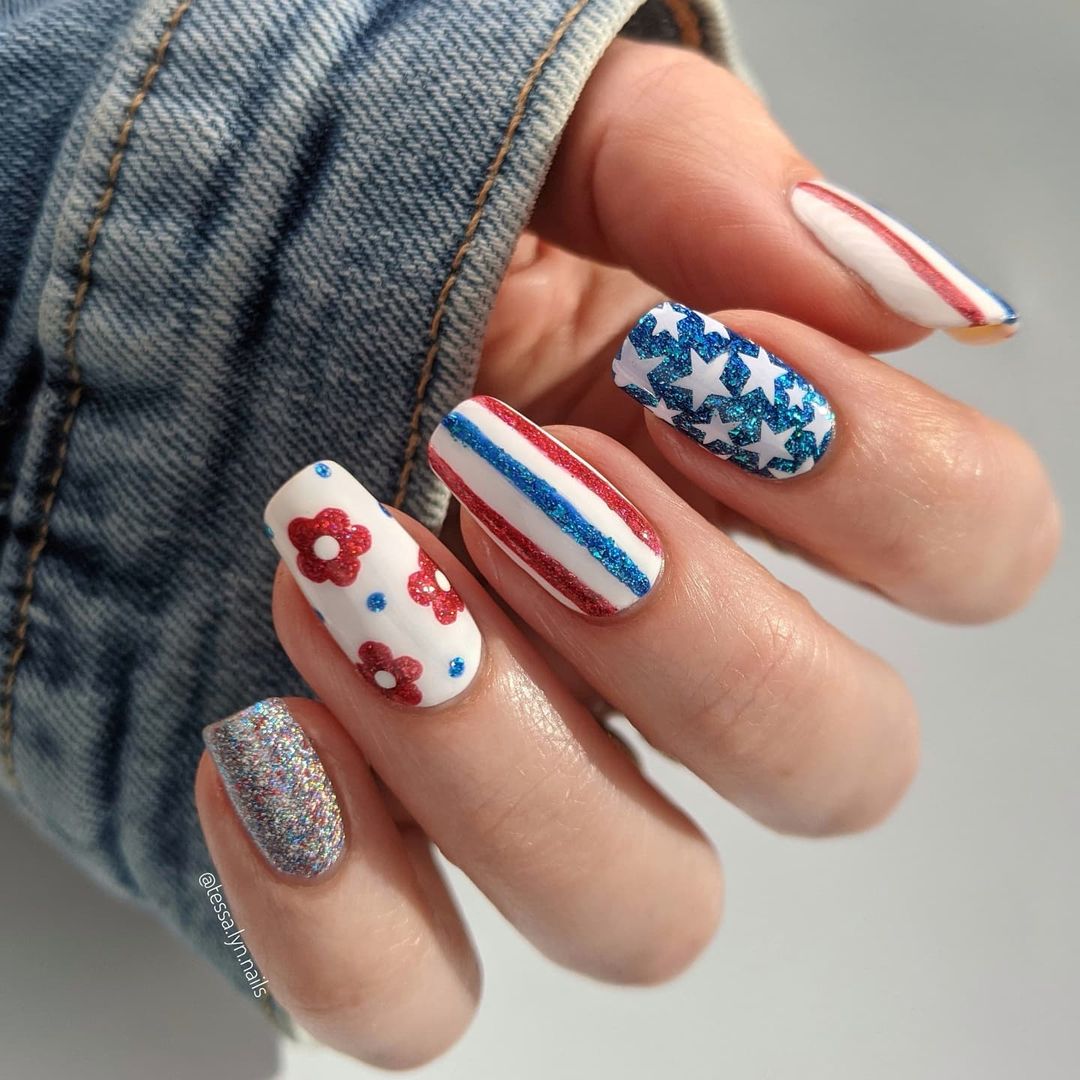
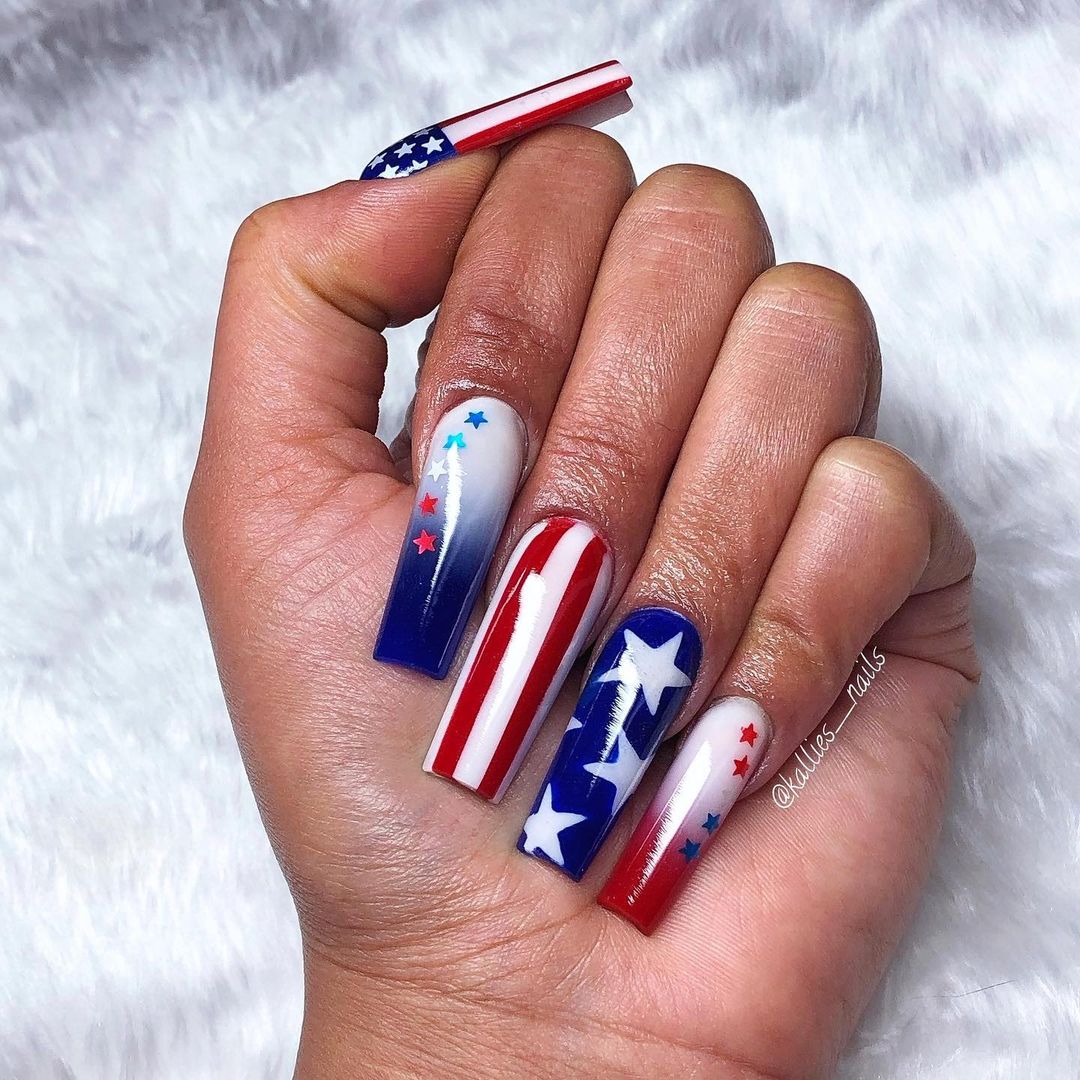
Stars and Stripes Forever
This nail design beautifully blends the iconic red, white, and blue, with a modern twist of natural nail base. It’s a fantastic example of how subtle elements can create a profound patriotic statement.
-
- Nude polish: OPI Samoan Sand
- Red polish: Essie Really Red
- Blue polish: OPI Eurso Euro
- White polish: Sally Hansen White On
- Thin striping tape
- Star decals
Begin with a base coat of nude polish to accentuate the natural look. Once dry, use striping tape to create thin red lines. Apply white polish on the tips and finish with blue polished accents adorned with white star decals for that classic American flag feel.
Save Pin
Star-Spangled Glamour
Showcasing a vivid blue and red, this design is perfect for anyone looking to make a statement during their 4th of July festivities. The inclusion of a glittery nail adds a touch of sparkle that mirrors the excitement of fireworks.
-
- Red polish: China Glaze Red-y to Rave
- Blue polish: Revlon Royal
- Glitter polish: OPI I Snow You Love Me
- Top coat: Seche Vite Dry Fast Top Coat
Start with alternating nails in blue and red. The special feature nail should be coated in glitter polish to act as the centerpiece. This design is straightforward yet striking, with a bold color palette that demands attention.
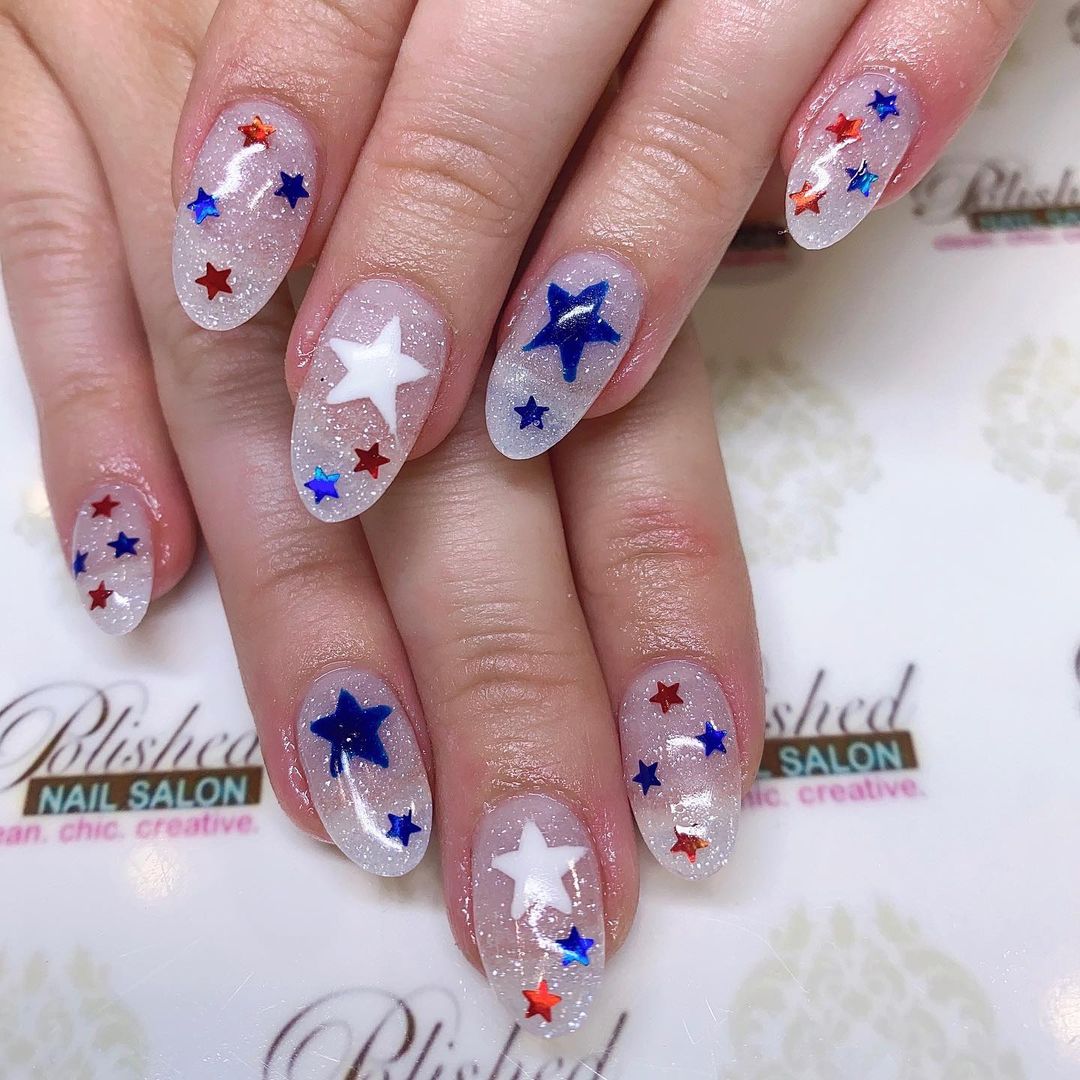
Freedom Glitters
A glittery base sets the stage for this intricate design, featuring miniature flags and symbols of the USA. It’s a detailed work that showcases not just artistic skill but also a deep appreciation for the themes of freedom and unity.
-
- Silver glitter base: Essie Set in Stones
- Red polish: OPI Big Apple Red
- Blue polish: Sally Hansen Pacific Blue
- White paint for detailing
- Detailing brush
- Top coat for sealing
Apply a thick layer of silver glitter as the base. Use a fine detailing brush to hand-paint elements of the American flag and symbolic stars on alternate nails. Each element should be outlined carefully to ensure clarity and impact.
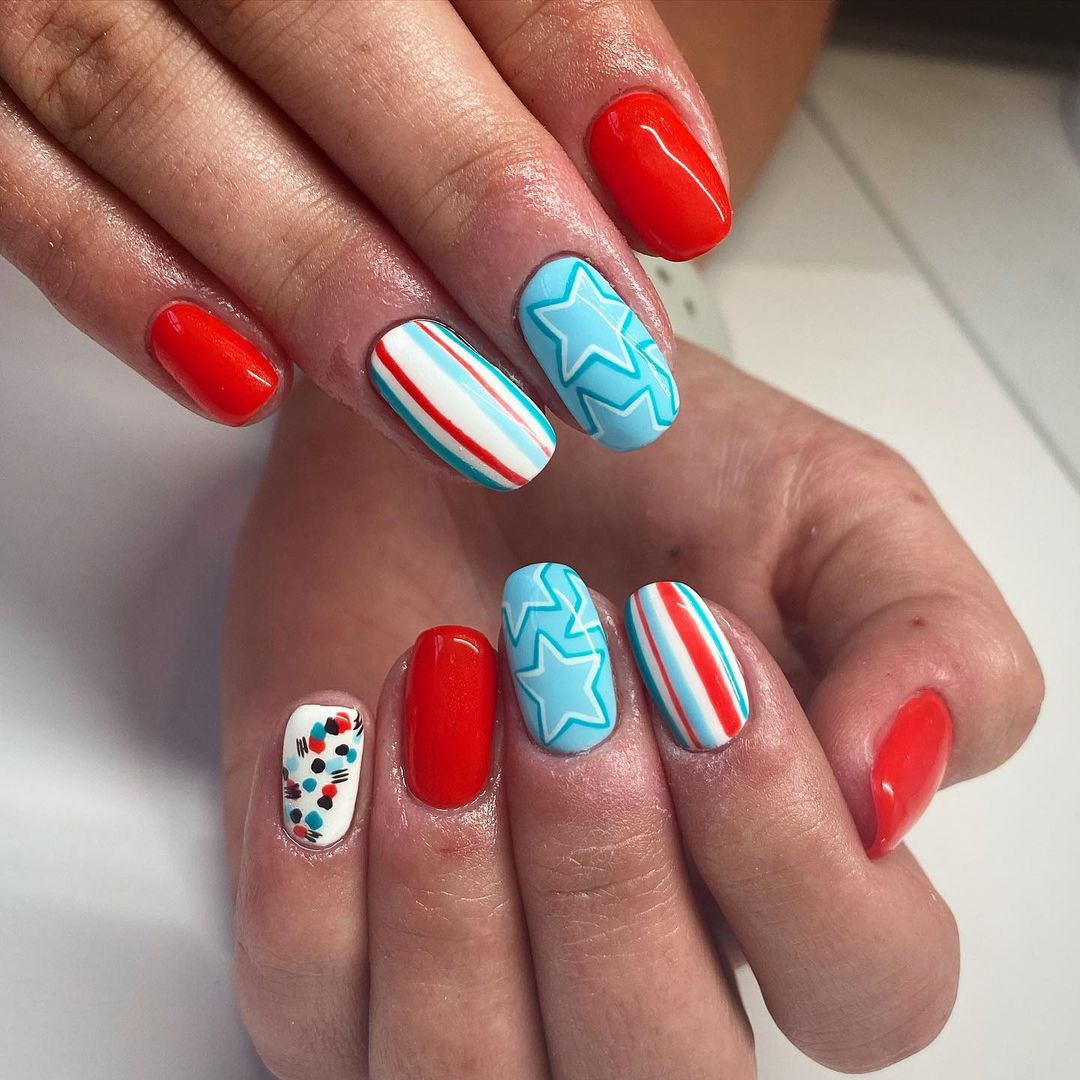
Fresh and Playful
The fresh combination of solid colors and creative patterns here exudes a youthful and energetic vibe. This design is a testament to the joyous celebrations of the 4th of July.
-
- Red polish: Essie Geranium
- White polish: OPI Alpine Snow
- Blue polish: CND Vinylux in Blue Eyeshadow
- Nail art tape
- Star stencils
- Dotting tool
This look starts with a solid red polish on some nails, and white on the others with stripes and star patterns. Use the dotting tool and stencils to create the detailed patterns and star shapes, ensuring each element pops with a crisp, clear finish.
Patriotic Longwear
Here we have a mix of stripes, stars, and a gradient technique that perfectly captures the essence of the American flag. The use of long nails accentuates the bold designs and shows off the detailed artwork more extensively.
-
- Blue gel polish: Gelish Nautically Navy
- Red gel polish: Gelish Red Roses
- White gel polish: Gelish Arctic Freeze
- Glossy top coat
- Striping tape
- Star decals
Begin with a blue base on some nails, applying white and red gel polish to create stripes on others. Use the striping tape for precision and add star decals for a festive touch. A glossy top coat gives these designs lasting shine and durability.
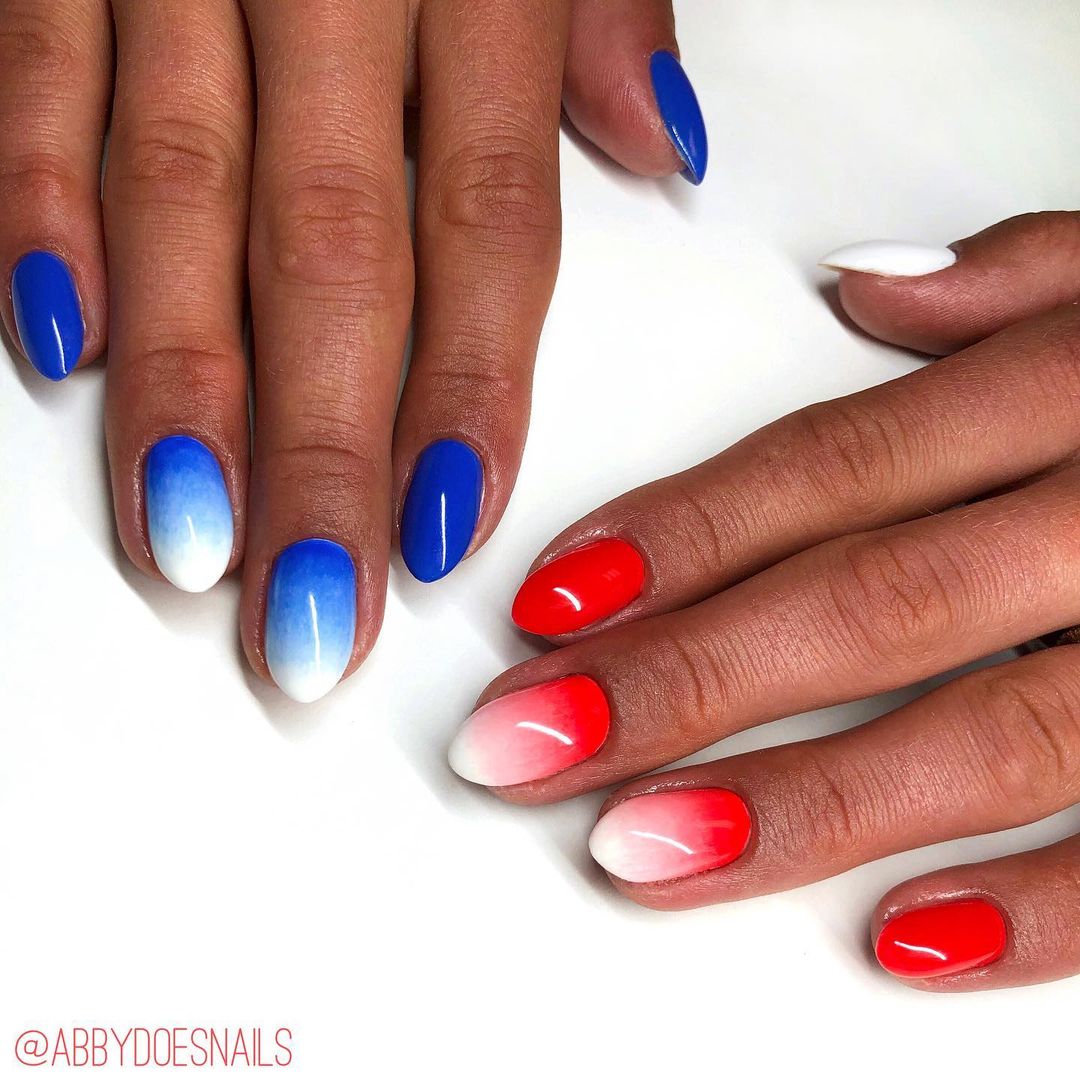
Gradient Glory
This design utilizes a smooth gradient from red to white, creating a soft yet impactful visual transition. The addition of a full blue nail adds a bold contrast, making this a standout choice for celebrating Independence Day.
-
- Red polish: OPI Big Apple Red
- White polish: Sally Hansen White On
- Blue polish: Essie Butler Please
- Sponge for gradient
- Top coat
Apply red and white polish to a sponge to create the gradient effect on each nail, blending as you dab onto the nail. Finish with a solid blue polish on alternate nails to complement the gradient effect. A top coat seals in the design and adds a smooth, glossy finish.
Save Pin
Sophisticated Patriotism
This set of nails offers a sophisticated look with its alternating pattern of vibrant red and deep blue, set against pure white tips. The sharp contrast not only reflects the colors of the American flag but also gives a clean, contemporary aesthetic.
-
- White gel polish: Gelish Arctic Freeze
- Red gel polish: Gelish Red Roses
- Blue gel polish: Gelish Caution
- Matte top coat
- Glossy top coat
Apply white gel polish as a base on all nails. Alternate between glossy red and matte blue finishes for a striking effect. Use a glossy top coat on red nails and a matte top coat on blue nails to enhance the texture contrast.
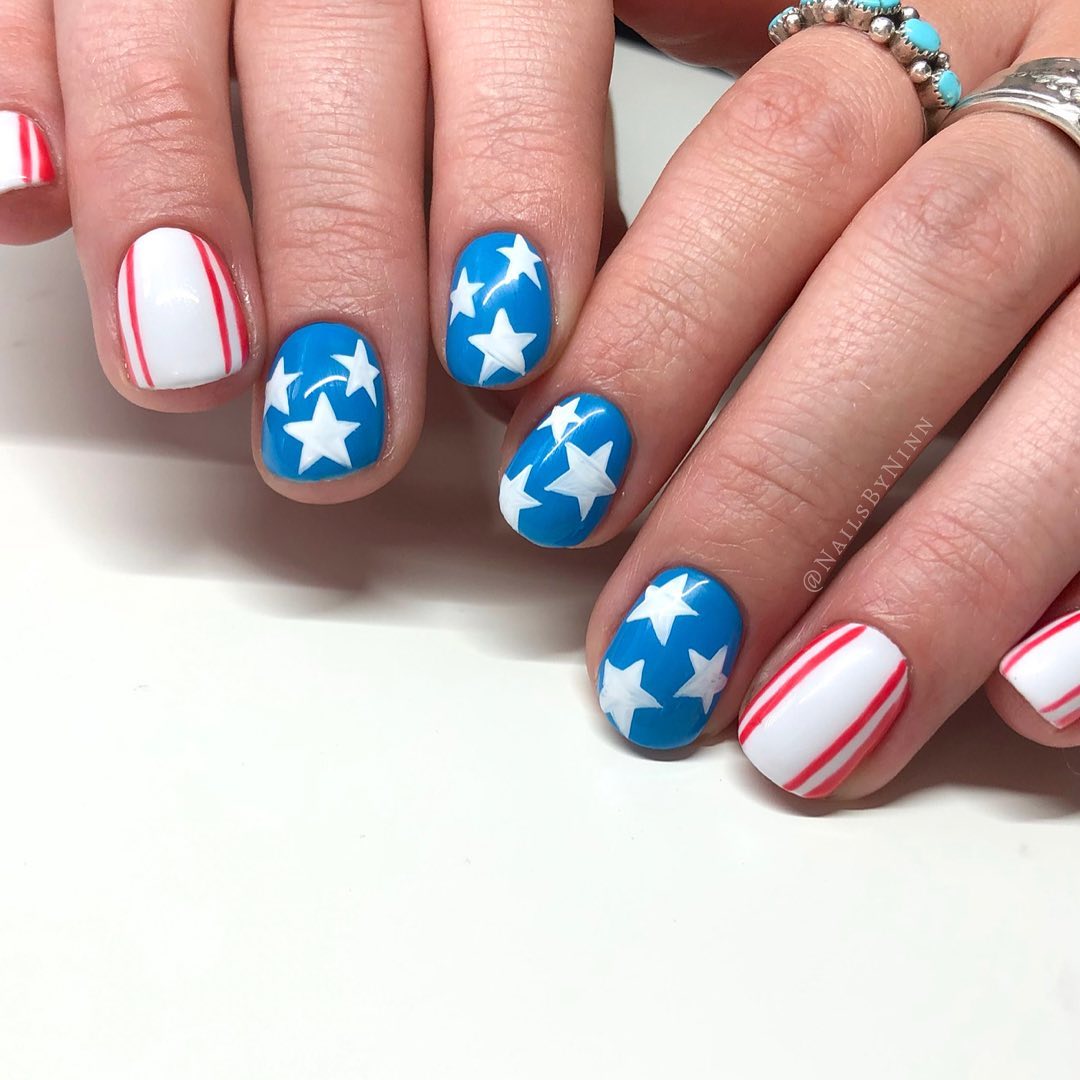
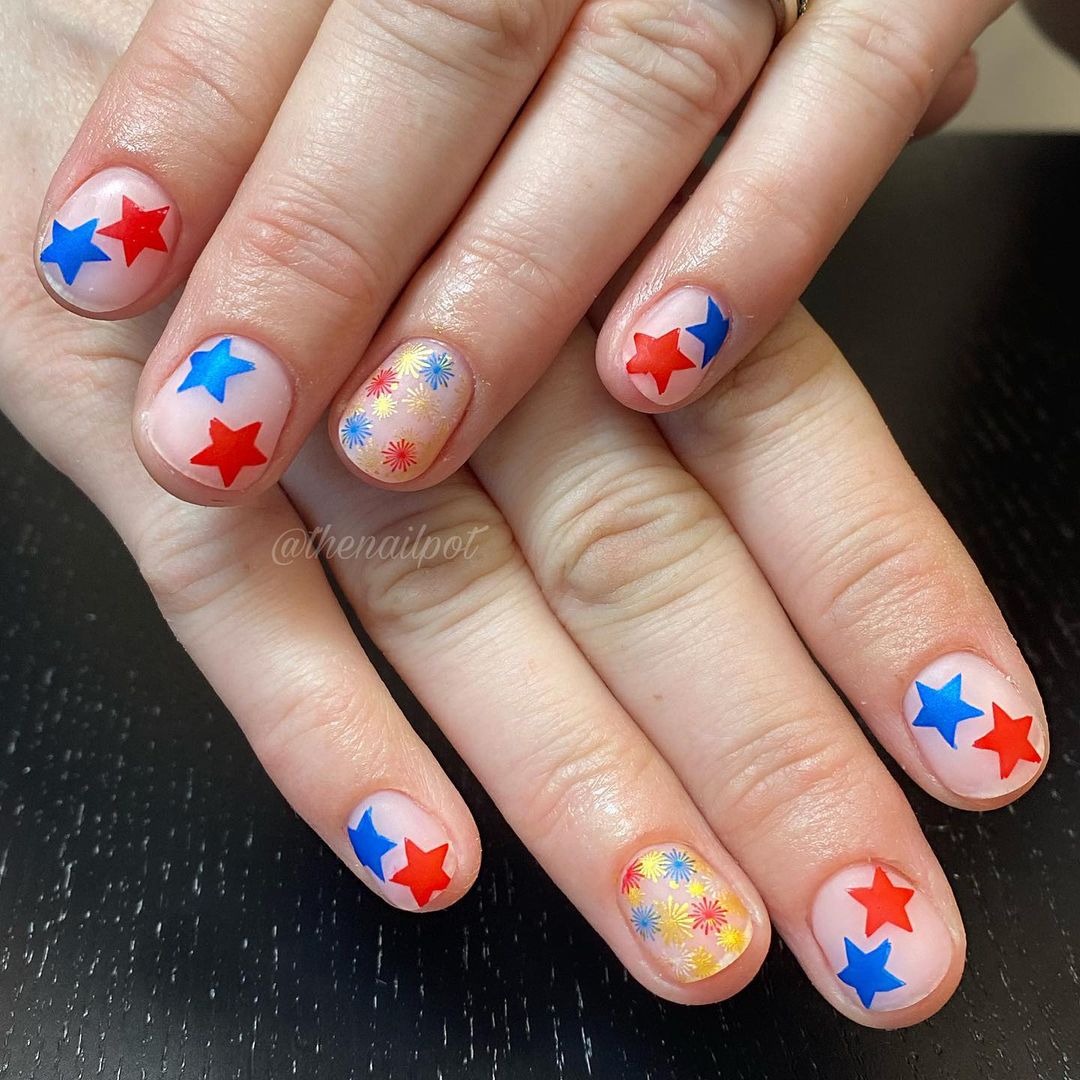
Starry Delight
Featuring a shimmering base with white stars, this design is perfect for adding a glamorous touch to your 4th of July outfit. The red and blue nails add a classic patriotic feel, while the sparkling texture captures the essence of celebration.

-
- Red glitter polish: OPI Big Apple Red Glitter
- Blue glitter polish: OPI Get Ryd-of-thym Blues
- White polish for stars: Sally Hansen White On
- Star stencils
- Fine detail brush
- Glossy top coat
Start with a red or blue glitter base on each nail. Use star stencils to paint white stars on selected nails for a thematic touch. Finish with a glossy top coat to ensure the glitter sparkles under the celebration lights.
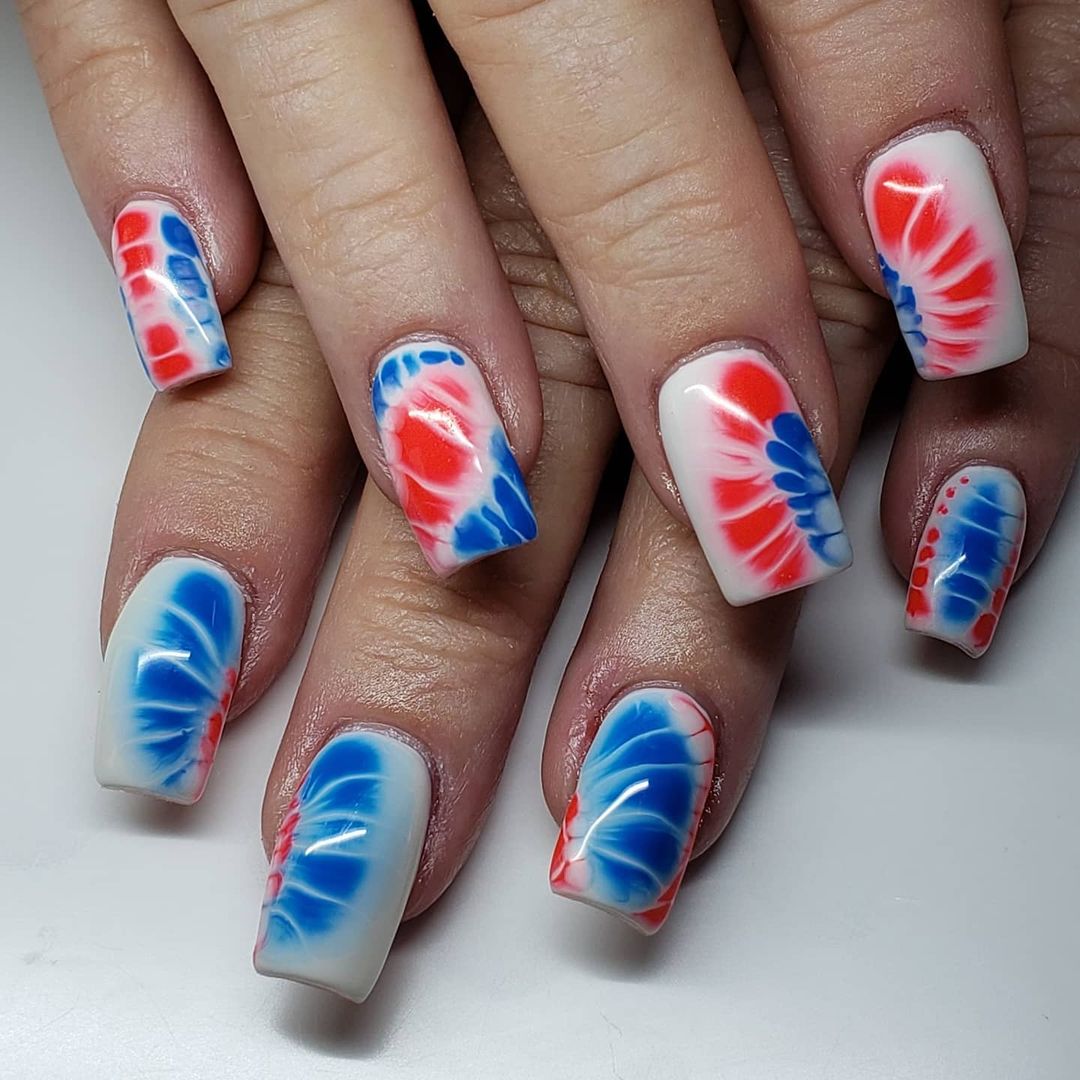
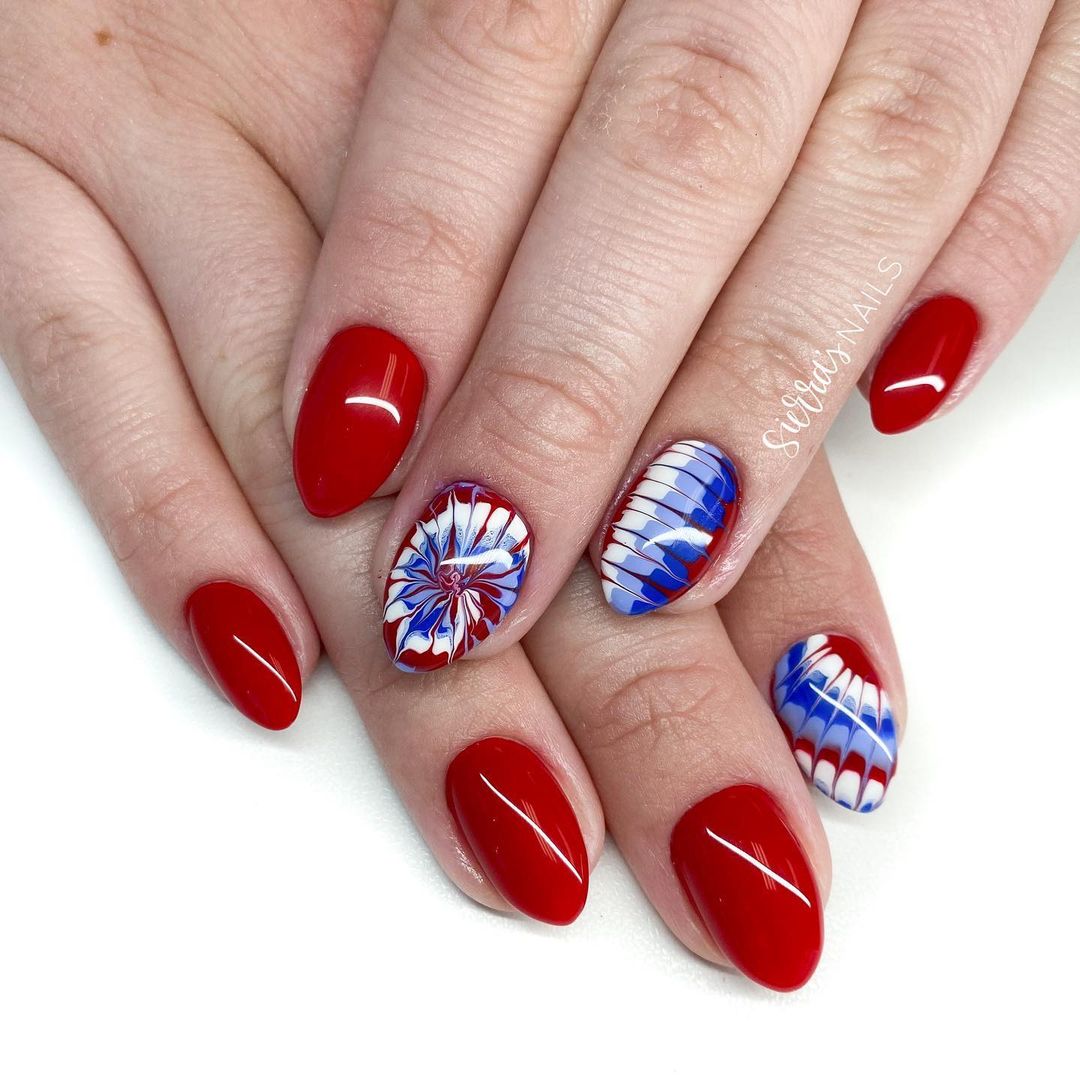
Fluid Art Magic
This design uses fluid art techniques to create a mesmerizing effect that resembles firework explosions. The dynamic swirls of red, white, and blue are perfect for expressing patriotism in an artistic and modern way.
-
- White polish: Essie Blanc
- Red polish: China Glaze Red-y to Rave
- Blue polish: Sally Hansen Pacific Blue
- Fluid art medium
- Detailing tool
Prepare your nails with a base of white polish. Mix each color with a fluid art medium and drop onto the nail surface. Use a detailing tool to swirl the colors gently, creating a natural fluid pattern. Seal with a top coat for durability and shine.
Subtle Elegance
This nail design offers a sophisticated yet playful approach with its minimalist aesthetic. Featuring subtle details and gentle patterns, it represents a less traditional but equally patriotic choice.
-
- Nude polish: Essie Topless and Barefoot
- Red polish: OPI Big Apple Red
- Blue polish: Essie Butler Please
- White polish: Sally Hansen White On
- Nail art tape
- Star decals
- Dotting tools
Apply a nude polish as the base to give a clean and natural look. Use nail art tape for precise lines and dotting tools to add small star decals and polka dots on selective nails. This design keeps it light with muted colors and delicate detailing.
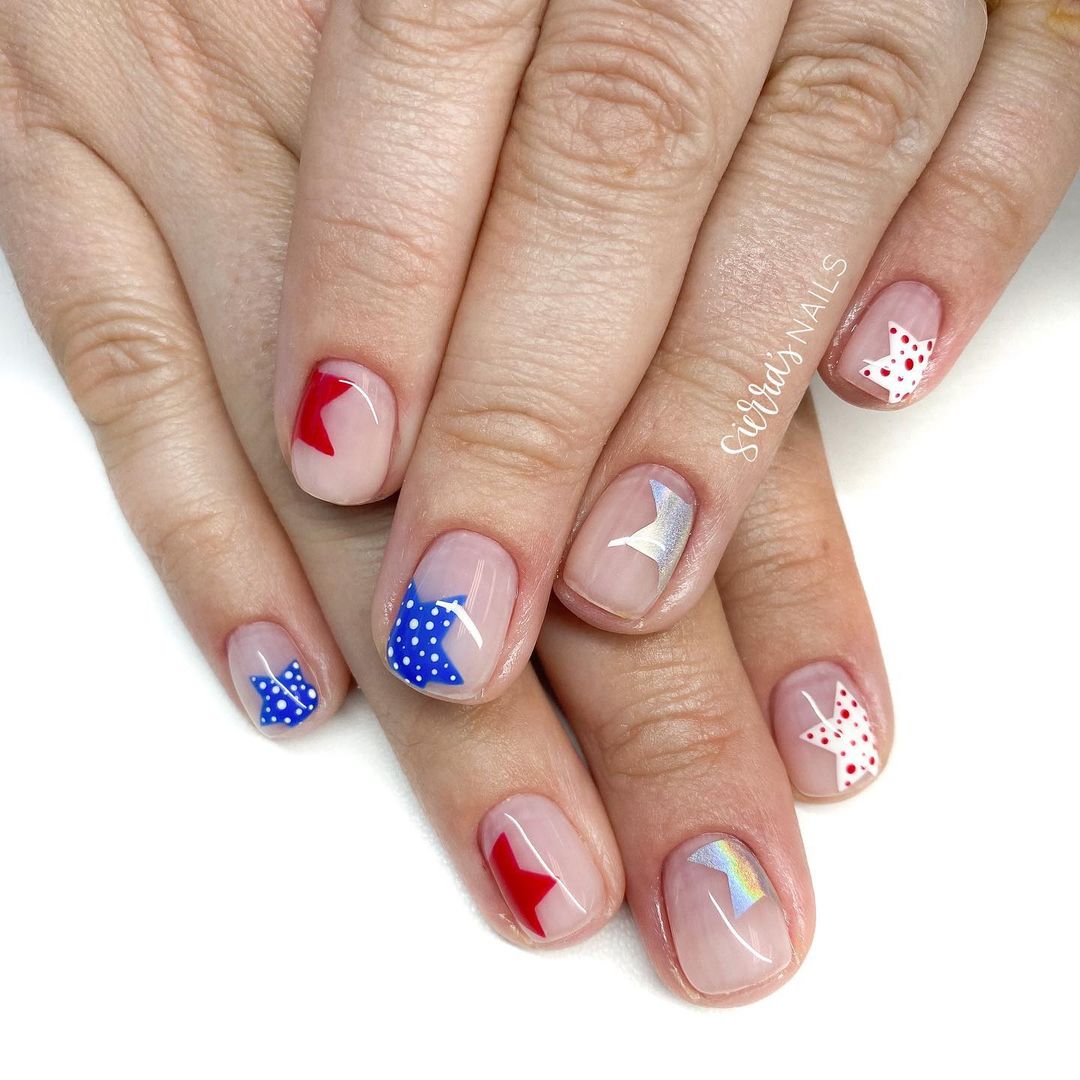
Star-Spangled Nails
This set uses a soft lavender base accented with red and blue stars for a charmingly understated nod to the American flag. It’s perfect for those who prefer a subtle celebration of the holiday.
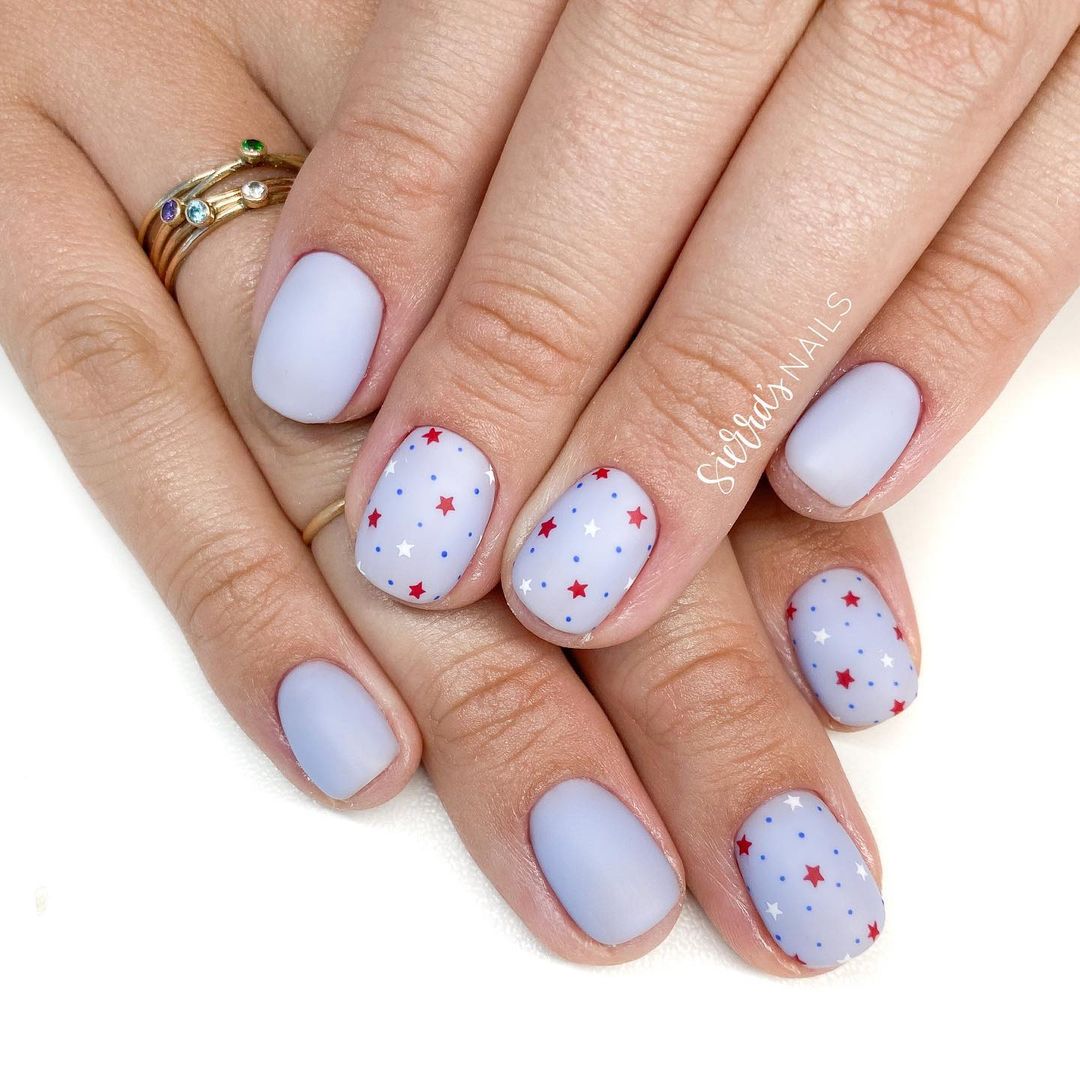
-
- Lavender polish: OPI I Care About You
- Red polish: China Glaze Apple Red
- Blue polish: OPI Blue My Mind
- Star stickers
- Top coat
Cover the nails with a lavender polish, then apply red and blue star stickers for a simple yet festive look. The use of soft pastel backgrounds with vibrant star accents provides a unique contrast, ideal for a gentle patriotic statement.
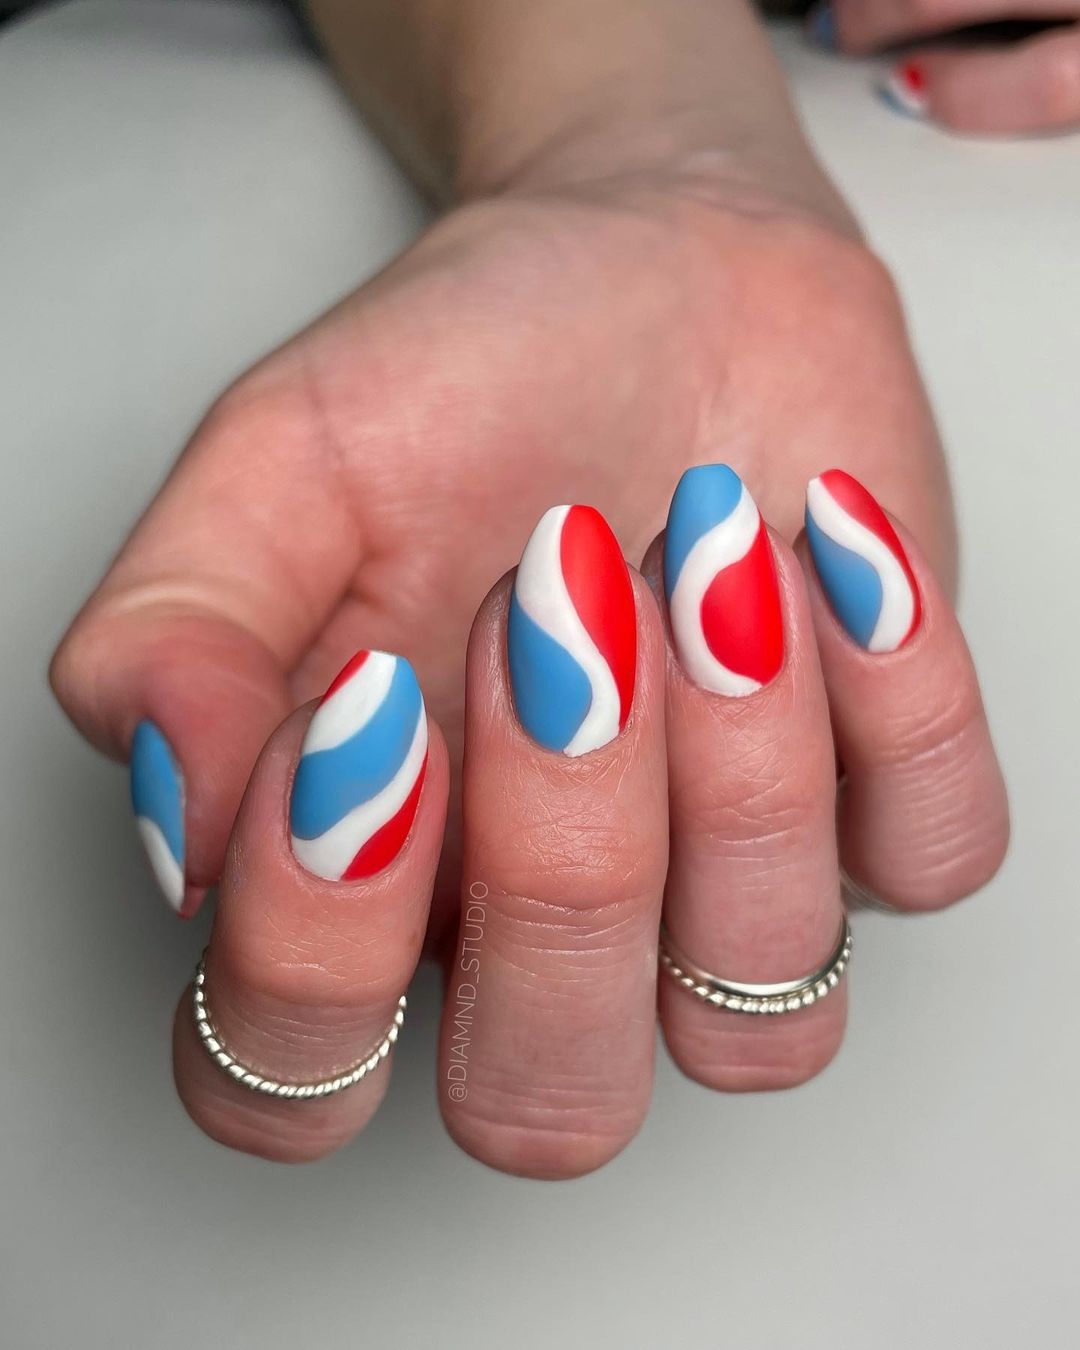
Dynamic Swirls
This design is a bold celebration of the 4th of July, utilizing vibrant colors and dynamic swirl patterns to create an eye-catching effect reminiscent of fireworks.
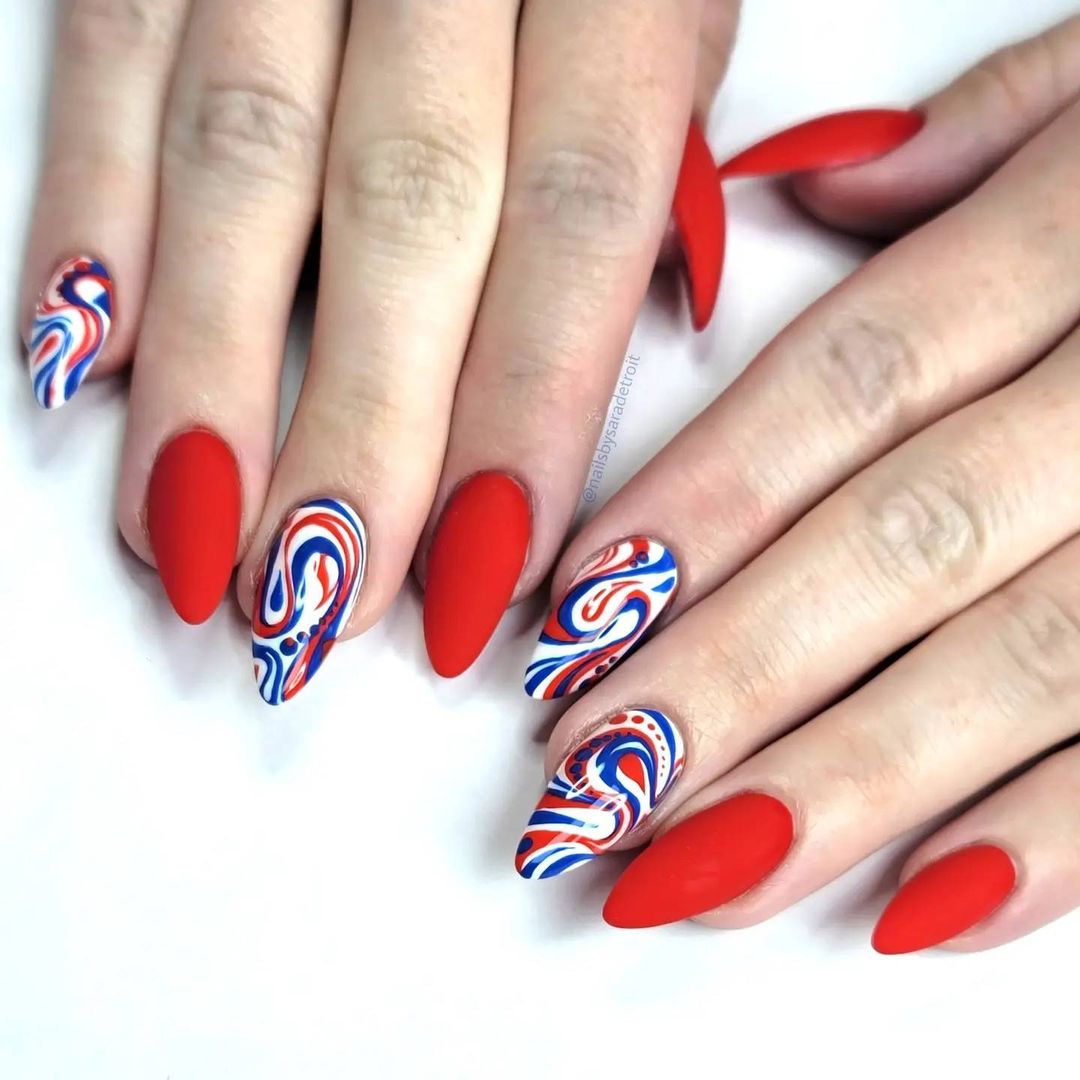
-
- Red polish: Essie Geranium
- Blue polish: Revlon Royal
- White polish: Sally Hansen White On
- Detailing brush
- Swirling tool
Start with a base of red polish, then add blue and white polish in small amounts. Use the swirling tool to gently mix the colors on the nail, creating abstract and fluid designs. This technique mirrors the beautiful chaos of fireworks in the night sky, making it a perfect match for Independence Day celebrations.
Radiant Fireworks
This nail design captures the explosive beauty of fireworks with its intricate patterns and vivid colors. The combination of red, white, and blue creates a dynamic visual effect that is both eye-catching and symbolic.
-
- Red polish: Essie Geranium
- Blue polish: OPI Eurso Euro
- White polish: Sally Hansen White On
- Detailing brush
- Dotting tools
- Glossy top coat
Start with a red base on some nails and a white base on others. Use a detailing brush to add blue and red intricate burst patterns over the white base. The red nails remain solid to balance the intricate designs on the other nails, creating a cohesive look that pops like fireworks.
Classic Stripes and Stars
This design combines classic elements with a fresh twist, featuring stripes and stars in a crisp layout that’s perfect for any 4th of July celebration.
-
- Blue polish: Essie Butler Please
- White polish: Sally Hansen White On
- Red polish: China Glaze Apple Red
- Striping tape
- Star stencils
- Glossy top coat
Apply a base of blue polish on some nails and white on others. Use striping tape to create precise red and white stripes for a clean look. Apply star stencils on the blue nails and fill in with white polish. A glossy top coat adds a final touch of shine, ensuring these nails stand out at any Independence Day event.
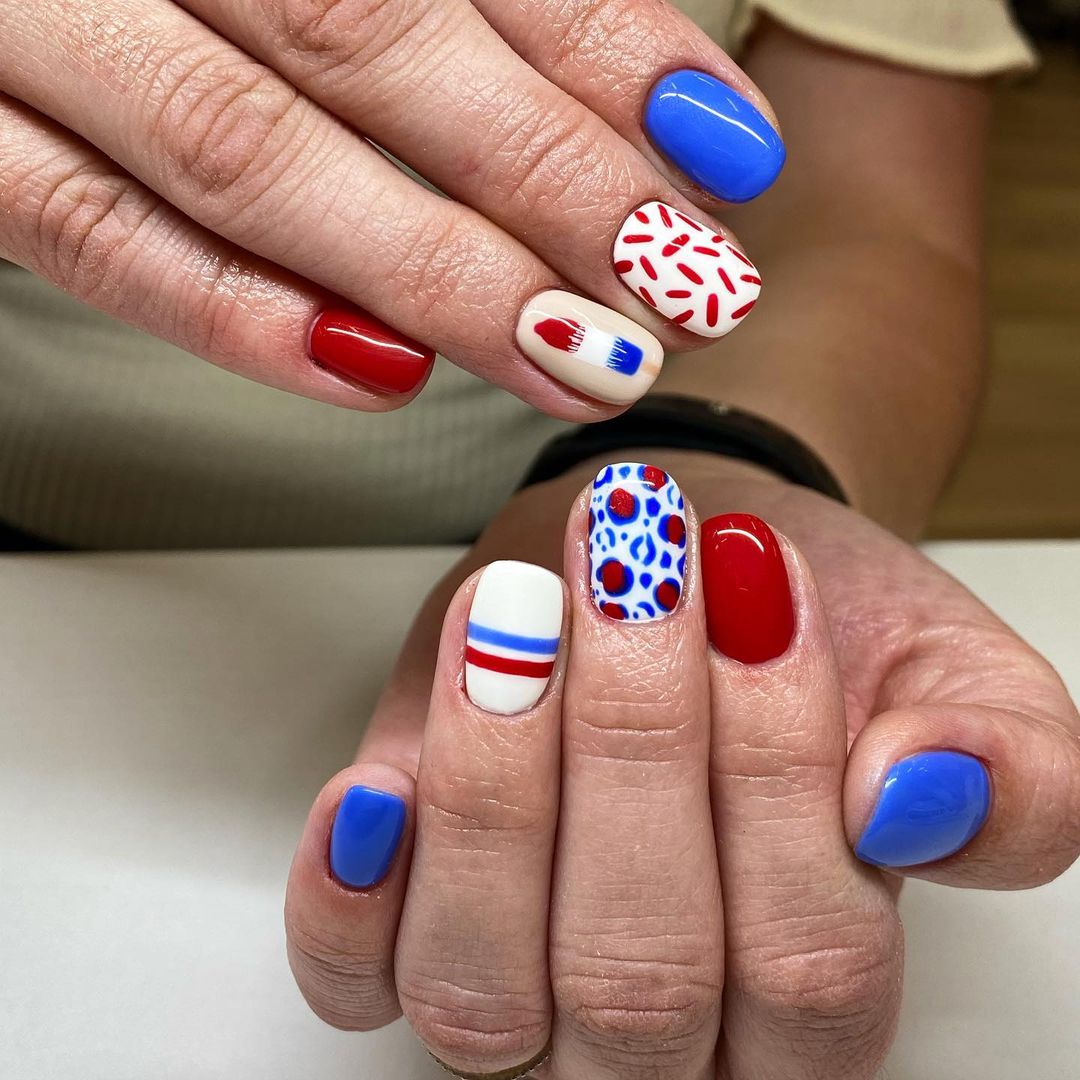
Eclectic Patterns
This set showcases a bold assortment of patterns, integrating stripes, stars, and a unique marbled effect that mimics the look of firework residue after it lights the sky—a creative twist to traditional patriotic themes.
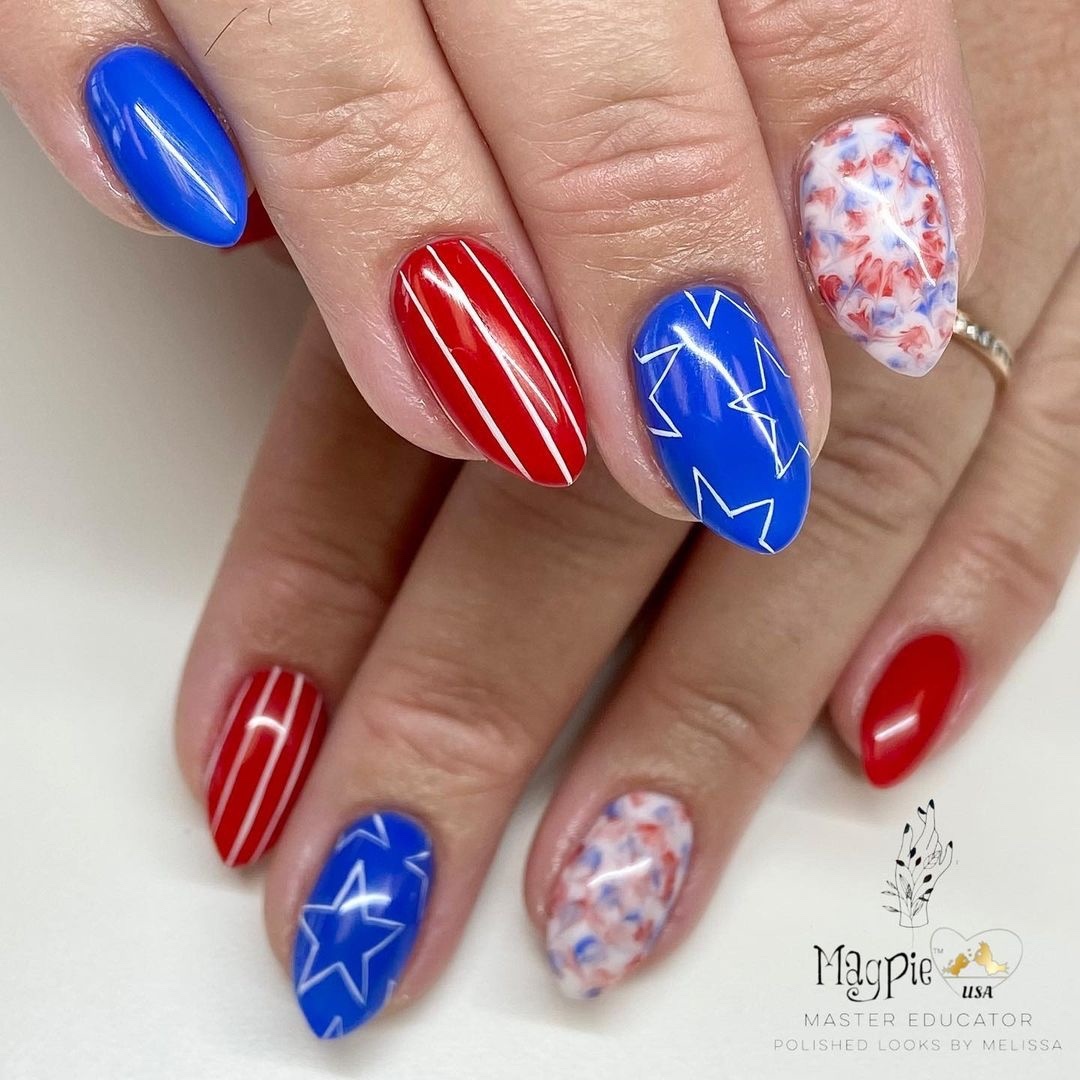
-
- Blue polish: OPI Blue My Mind
- Red polish: OPI Big Apple Red
- White polish: Essie Blanc
- Marbling tools
- Detailing brush
- Glossy top coat
Prepare the nails with a base coat of blue, red, or white depending on the design. Use a marbling tool to create the unique patterns on selective nails, incorporating all three colors for a blended effect. Detail the stars and stripes on other nails using a fine brush, and finish with a glossy top coat for durability and shine.
Eclectic Vibes
This design set stands out with its fun and eclectic mix of themes, from summery skies to juicy watermelons, along with patriotic stripes. It perfectly captures the spirit of summer and national pride in one go.
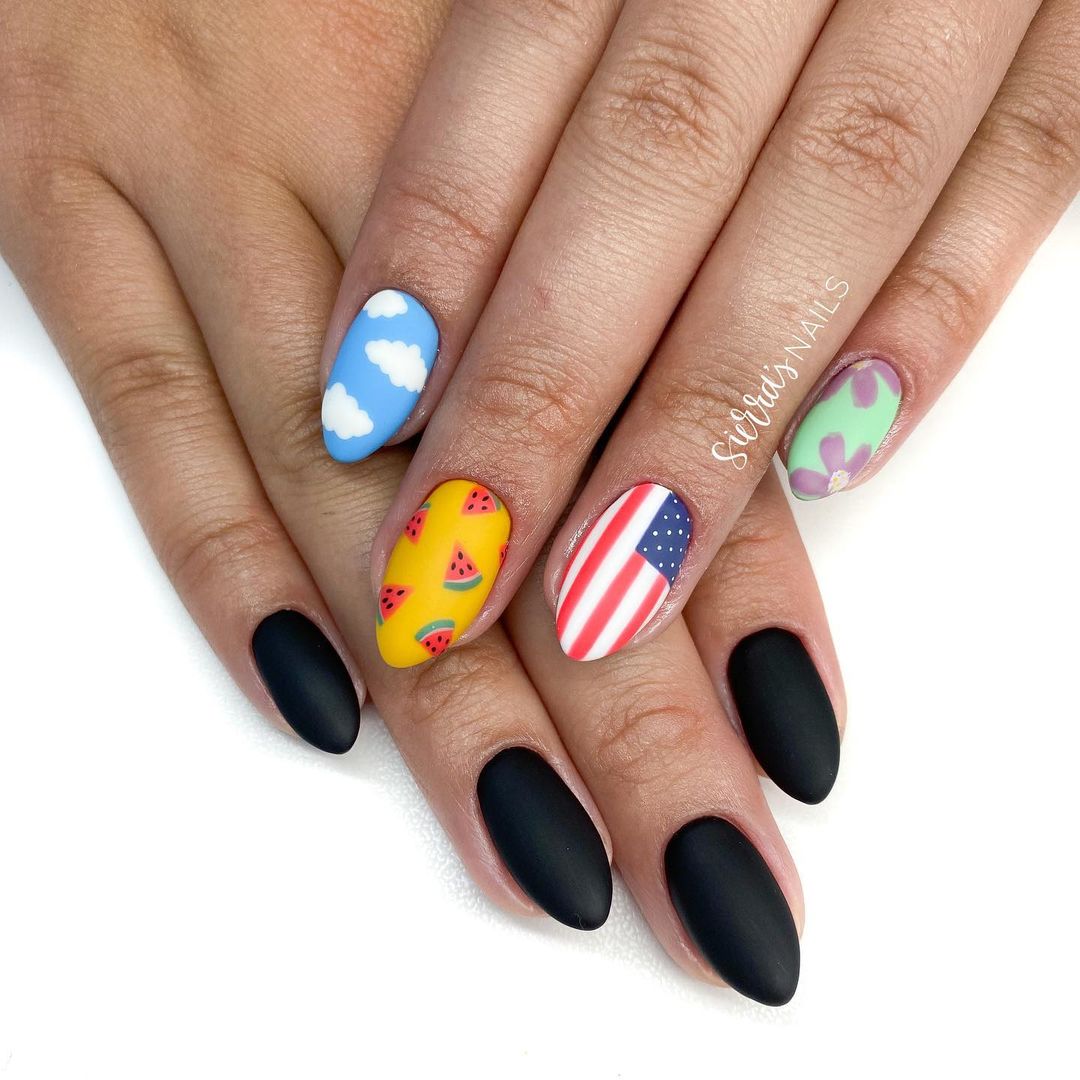
-
- Sky blue polish: Essie Bikini So Teeny
- Cloud stencil
- Watermelon pink polish: Essie Watermelon
- Black seeds detailing
- Red polish: OPI Big Apple Red
- White polish: Sally Hansen White On
- Matte black polish: OPI Black Onyx
- Top coat: Seche Vite Dry Fast Top Coat
Start with a base coat of sky blue, using stencils to add fluffy clouds. For the watermelon nail, apply a pink base and add seed details with a fine brush. The patriotic nail features precise stripes created with striping tape, and the black nails are given a matte finish to contrast the bright colors, adding a modern twist to the ensemble.
Festive Canvas
These nails feature shimmering fireworks and bright blue stars over a sheer pink base, combined with dynamic stripes for a festive look. The sheer background offers a soft contrast to the vivid decorations, creating a delicate yet celebratory look.
-
- Sheer pink polish: OPI Bubble Bath
- Blue polish: Essie Butler Please
- Red and white acrylic paint
- Star decals
- Fine detail brush
- Glitter top coat
Apply a base of sheer pink polish. Use a fine brush to hand-paint fireworks and stripes in alternating patterns. Add blue polish for the stars and detail them with white edges. A final layer of glitter top coat gives these nails a sparkling finish, enhancing the firework effect.
Patriotic Patterns
This design showcases a confident use of color and pattern, featuring bold red, white, and blue hues with intricate details and fireworks reminiscent of a vibrant 4th of July celebration.
-
- Red polish: Essie Really Red
- White polish: Sally Hansen White On
- Blue polish: OPI Eurso Euro
- Firework stencils
- Star stickers
- Detailing brush
- Glossy top coat
Prepare the nails with a solid base color—red, white, or blue. Use stencils and a fine brush to add detailed fireworks and stars. This approach allows for each nail to showcase a different pattern, creating a vibrant and engaging look that’s perfect for any holiday event.
Playful Stars and Stripes
This set offers a playful take on patriotic themes with a variety of designs, including stars, stripes, and dots in red, white, and blue. The mix-and-match patterns create a whimsical and engaging look perfect for the holiday.
-
- Blue polish: Essie Butler Please
- Red polish: OPI Big Apple Red
- White polish: Essie Blanc
- Dotting tools
- Striping tape
- Star decals
- Top coat: Essie Gel Couture Top Coat
Apply a solid blue polish on some nails and white on others. Use dotting tools to add red and white dots to the blue base and blue dots to the white base. Apply red polish and use striping tape to create clean stripes. Place star decals on selected nails, and finish with a top coat for a smooth, shiny finish.
Shimmering Patriotism
These nails are a striking example of how glitter and bold colors can be combined to create a vibrant and festive look for the 4th of July. The mix of red, white, and blue is complemented by shimmering accents that add a touch of glamor.
-
- Blue polish: OPI Blue My Mind
- Red polish: China Glaze Apple Red
- White polish: Sally Hansen White On
- Silver glitter polish: OPI I Snow You Love Me
- Star stickers
- Glossy top coat: Seche Vite Dry Fast Top Coat
Apply a base of blue, red, or white polish on each nail. Use silver glitter polish to add shimmering accents and place star stickers for a festive touch. The result is a dynamic and sparkling design that captures the spirit of Independence Day with flair and style.
Flowing Waves
This nail design captures the dynamic movement of a flag in the breeze using a fluid art technique that blends red, white, and blue in an undulating pattern. It’s both modern and patriotic, offering an artistic twist on traditional flag motifs.
-
- Red polish: Essie Really Red
- White polish: Sally Hansen White On
- Blue polish: OPI Eurso Euro
- Detailing brush
- Marbling tool
- Top coat: Seche Vite Dry Fast Top Coat
Start by applying a white base coat. Drop small amounts of red and blue polish onto the wet base, and use the marbling tool to swirl the colors gently, creating soft waves that mimic the rippling flag. Finish with a top coat to enhance the design’s depth and protect the intricate artistry.
Sparkling Stripes and Stars
This design celebrates the 4th of July with a sophisticated approach, using glittering stripes and a sparkling blue with white stars to evoke the festive spirit of Independence Day.
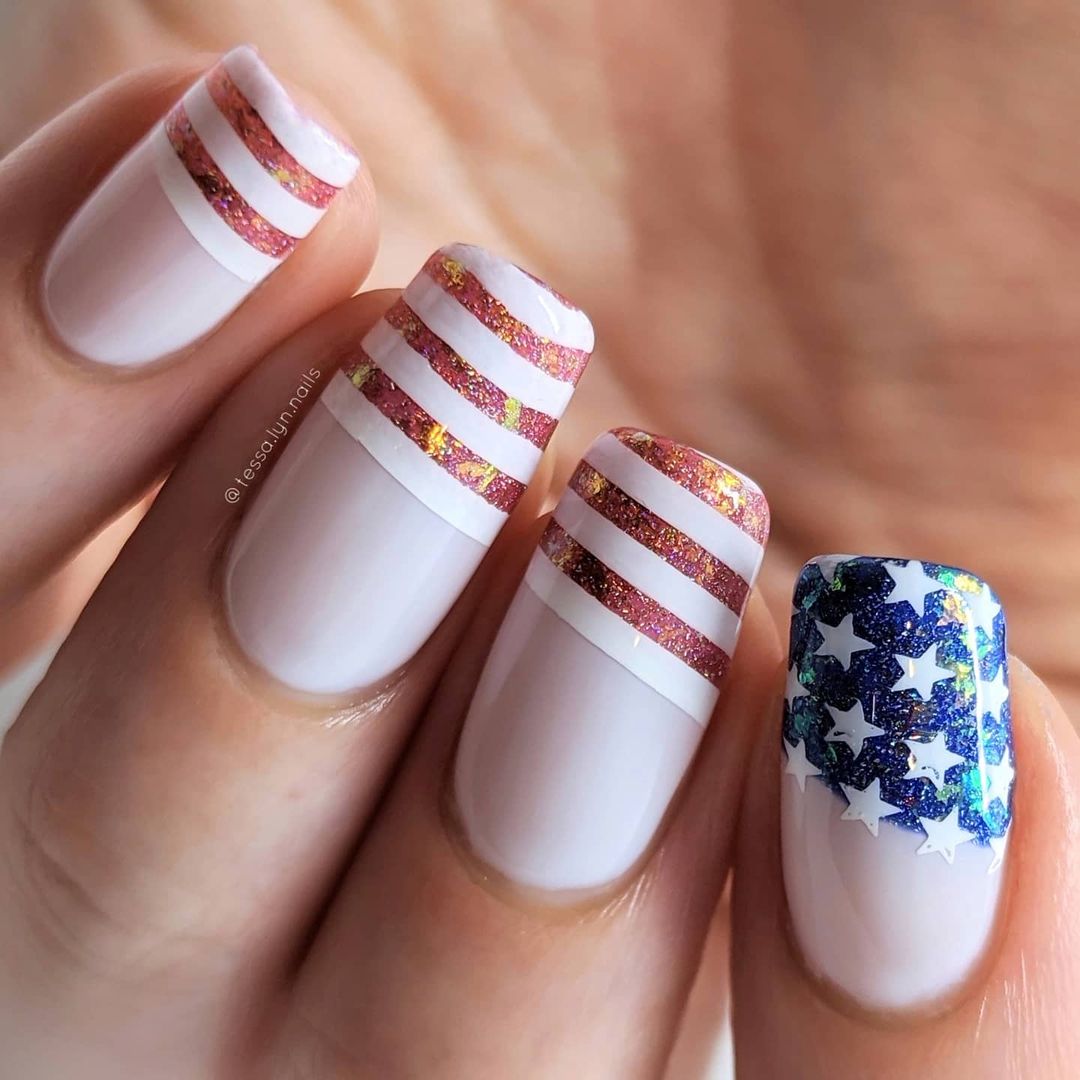
-
- White polish: Essie Blanc
- Glitter stripe tape
- Blue glitter polish: OPI Blue My Mind
- Star decals
- Top coat: Seche Vite Dry Fast Top Coat
Apply a base coat of white polish for a crisp background. Position the glitter stripe tape across the nails to create shimmering lines, and apply blue glitter polish on a feature nail. Adorn this nail with white star decals to complete the patriotic theme. Finish all nails with a top coat to seal in the design and add a luxurious gloss.
FAQ
Q: Do I need professional tools to create these nail designs? A: While professional tools like detailing brushes and dotting tools can make the process easier and more precise, you can also use household items like toothpicks or bobby pins as alternatives for simple detailing.
Q: How long will these nail designs last? A: With proper application, including base coats and top coats, these designs can last from one to two weeks. Using a high-quality top coat can extend the durability and maintain the gloss of your nails.
Q: Can these designs be done on natural nails, or are extensions necessary? A: All these designs can be applied to natural nails. Extensions are optional and only necessary if you desire a longer nail length or more surface area for intricate designs.
Q: Are there simpler variations of these designs for beginners? A: Absolutely! Beginners can modify the designs by reducing complexity. For example, instead of detailed marbling, try using a single stripe or star decals. Practice makes perfect, and starting with simpler designs is a great way to build your skills.
Q: How can I prevent the nail polish from chipping quickly? A: To prevent chipping, ensure your nails are clean and dry before applying polish. Use a base coat to protect the nail and improve polish adhesion. Apply thin layers of polish, allowing each layer to dry before applying the next. Seal everything with a strong top coat, reapplying the top coat every few days to maintain protection.
Q: What should I do if I don’t have the colors mentioned? A: Feel free to get creative with the colors you have! While traditional 4th of July designs are red, white, and blue, you can experiment with different shades or add metallics for a unique twist. The important part is to have fun and personalize your designs.
Q: Is there a quick way to dry nail polish? A: To speed up drying time, use quick-dry nail polish formulas or a drying spray or drops designed for nail polish. Avoid thick layers of polish, as they take longer to dry. You can also dip your nails in cold water for a few minutes after painting to help them set faster.
Save Pin