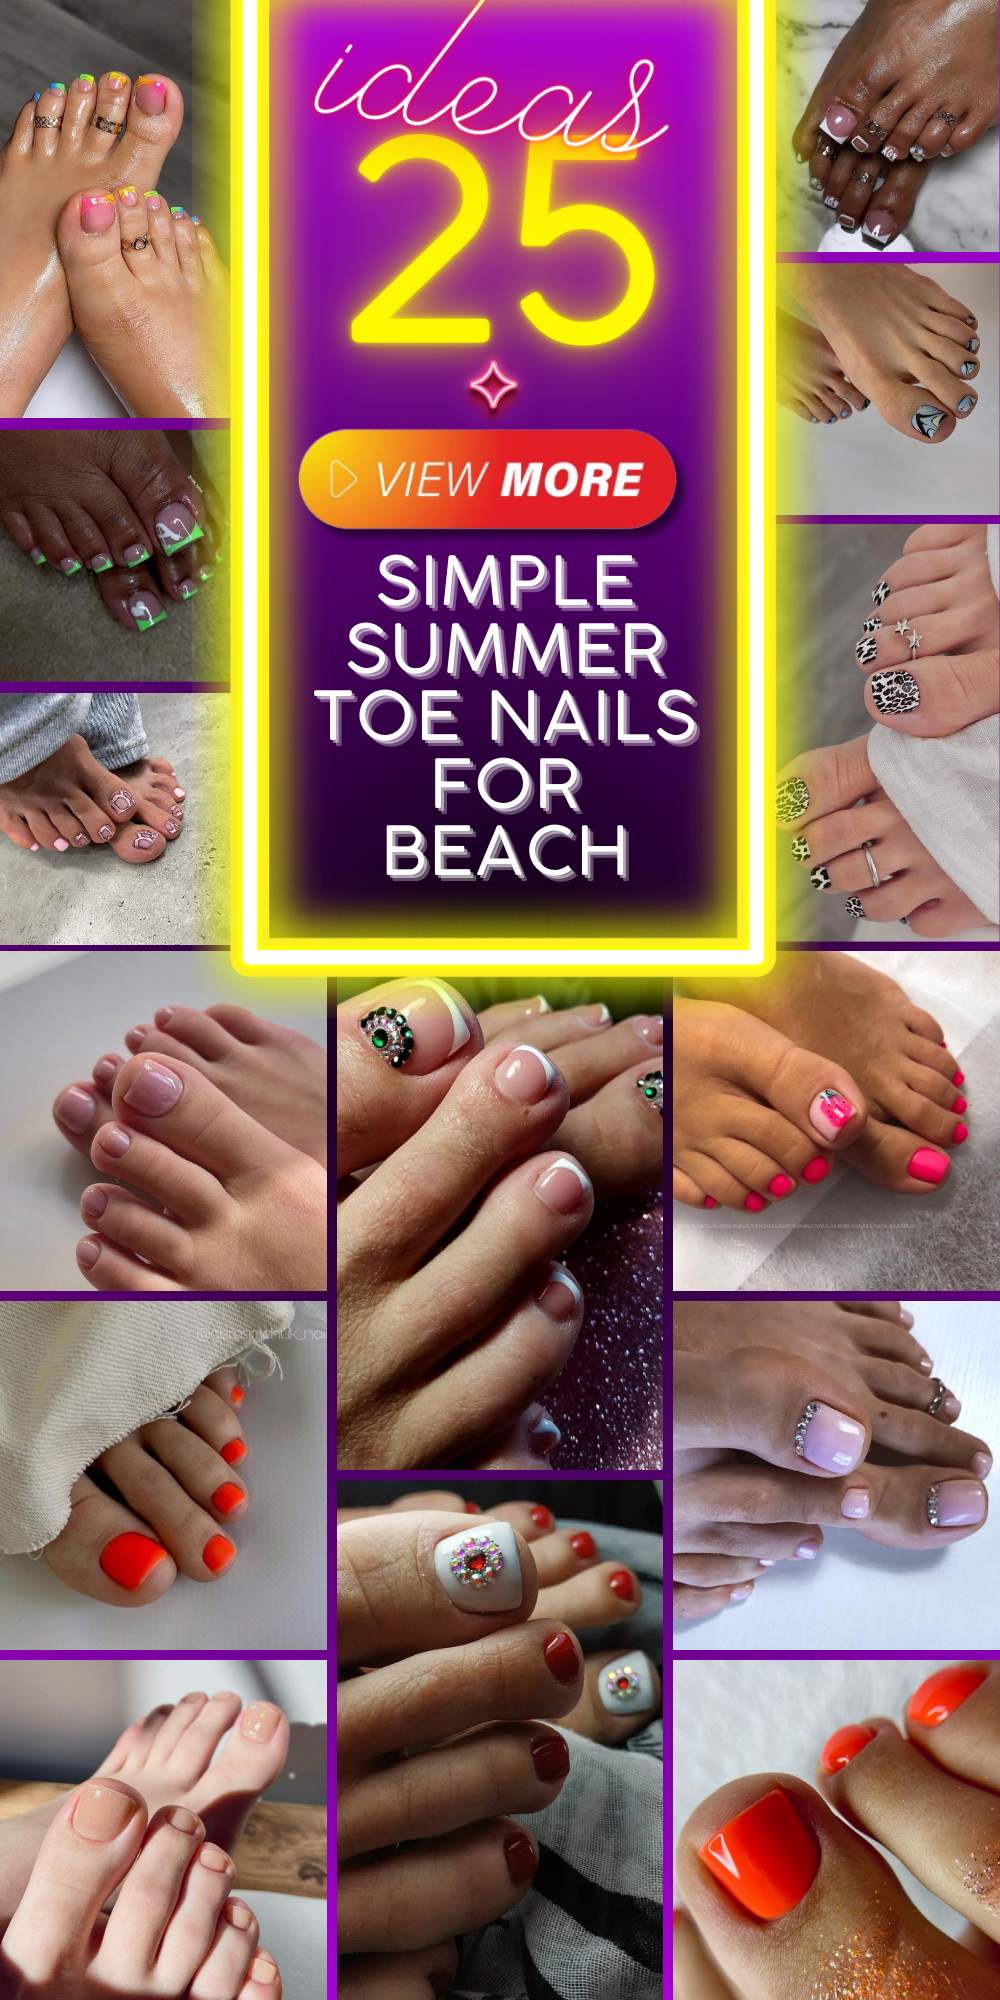
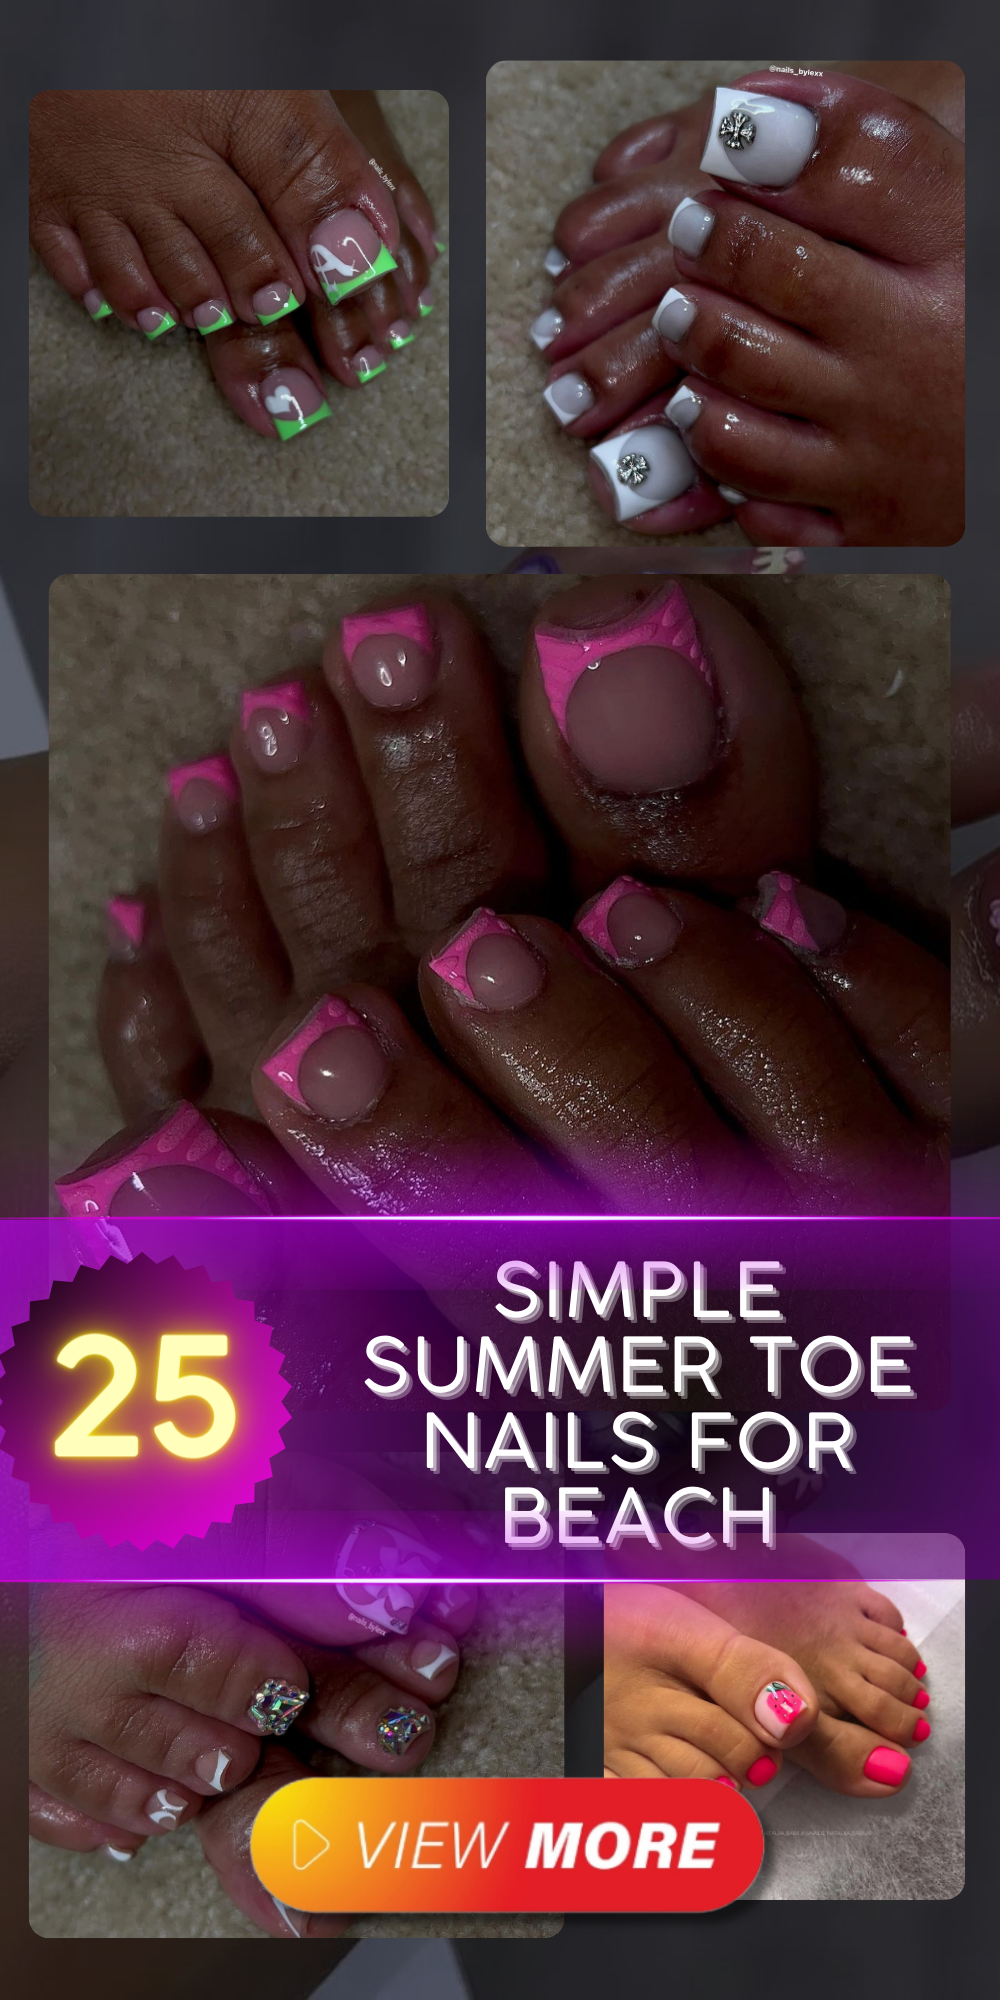
Are you dreaming of the perfect simple summer toe nails for beach escapades? Ever wondered what nail design captures the essence of the ocean’s freedom and the season’s carefree vibe? Prepare to uncover some delightful ideas for matching your nails to your beachwear, making your vacation tropical experience unforgettable.
Simple Elegance: Designs for Summer Toes
As a professional manicurist, I find the toenails white flowers depicted in this photo a timeless summer staple. The delicate floral design whispers of sunlit walks and soft sands. Each petal’s intricate detail complements the crisp white background, embodying a pristine vacation white mood.

Products Used
-
- Base coat: OPI Natural Nail Base Coat
- White polish: Essie Blanc
- Floral decals: Daisies by Nail Artisan
- Top coat: Seche Vite Dry Fast Top Coat
My pro tip is to choose a white polish that offers full coverage to prevent the need for multiple layers, which can make your nails feel heavy.
DIY Instructions
-
- Begin with a clean, buffed nail.
- Apply the base coat and let it dry.
- Paint two coats of Essie Blanc, allowing each to dry.
- Place the floral decals carefully and seal with the top coat.
With the right products, achieving this vacation simple yet fashionable look is a breeze!
Playful Pink: A Splash of Fun for Your Feet
Summer is the season of playful adventures and light-hearted days at the beach. Imagine your toes dipped in warm sands, donning a splash of pink that’s both playful and sophisticated—this is the essence of the perfect vacation simple gel pedicure.
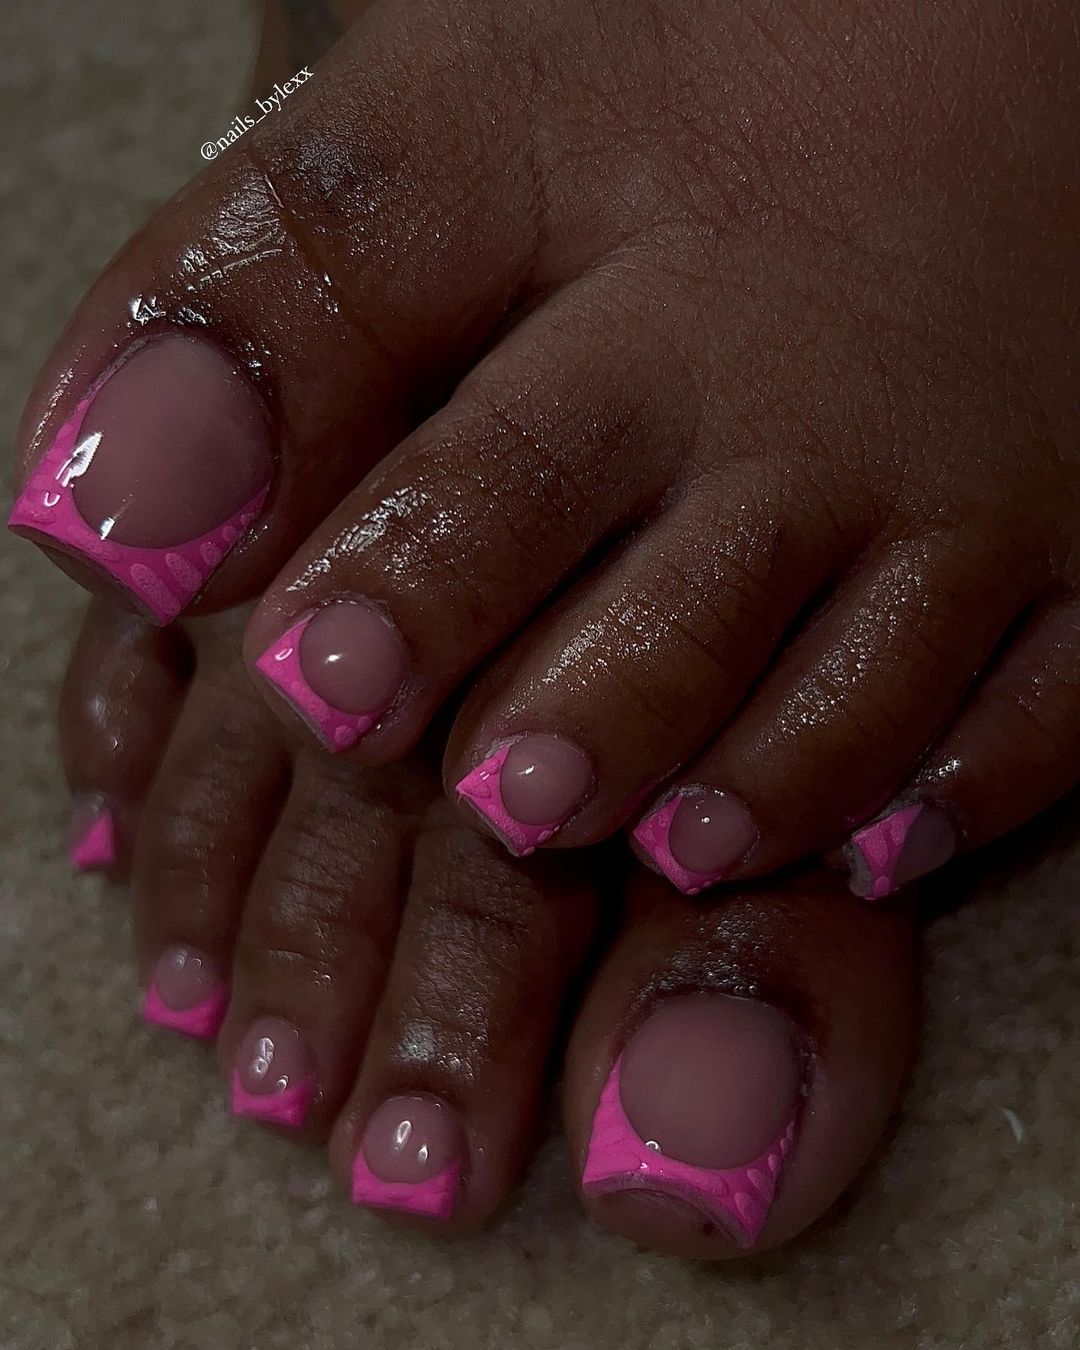
Professional Insight
The toes in this image are a testament to how a pop of pink can transform a simple look into a fashion statement. The glossy pink hue adorned with delicate white accents and the matte finish on the big toe is a striking contrast that’s both cute and chic. It’s a style that says vacation simple, yet it’s fashionably put together.
Consumables for Creation
- Base coat: Sally Hansen Double Duty
- Pink polish: Essie’s ‘Mod Square’
- Matte top coat: OPI Matte Top Coat
- White polish for accents: China Glaze ‘White on White’
- Detailing brush
My recommendation? The OPI Matte Top Coat is ideal for achieving that velvety look on your big toe, while a detailing brush will give you the control needed for those fine white accents.
DIY at Home
- Start with a nourishing base coat to protect your nails.
- Apply two coats of ‘Mod Square’ for that vivid pink.
- Use ‘White on White’ with a detailing brush to add playful accents.
- Apply a matte top coat on the big toe for an on-trend look.
Remember, it’s all about precision with the accents, so take your time and let each layer dry completely.
Neon Vibes: Summer’s Electric Beat
The buzz of neon against the soft pastels of a summer sky is a juxtaposition that’s both bold and beautiful. Perfect for the vacation tropical enthusiast, these neon accented toes are a surefire way to make a statement on your next holiday.
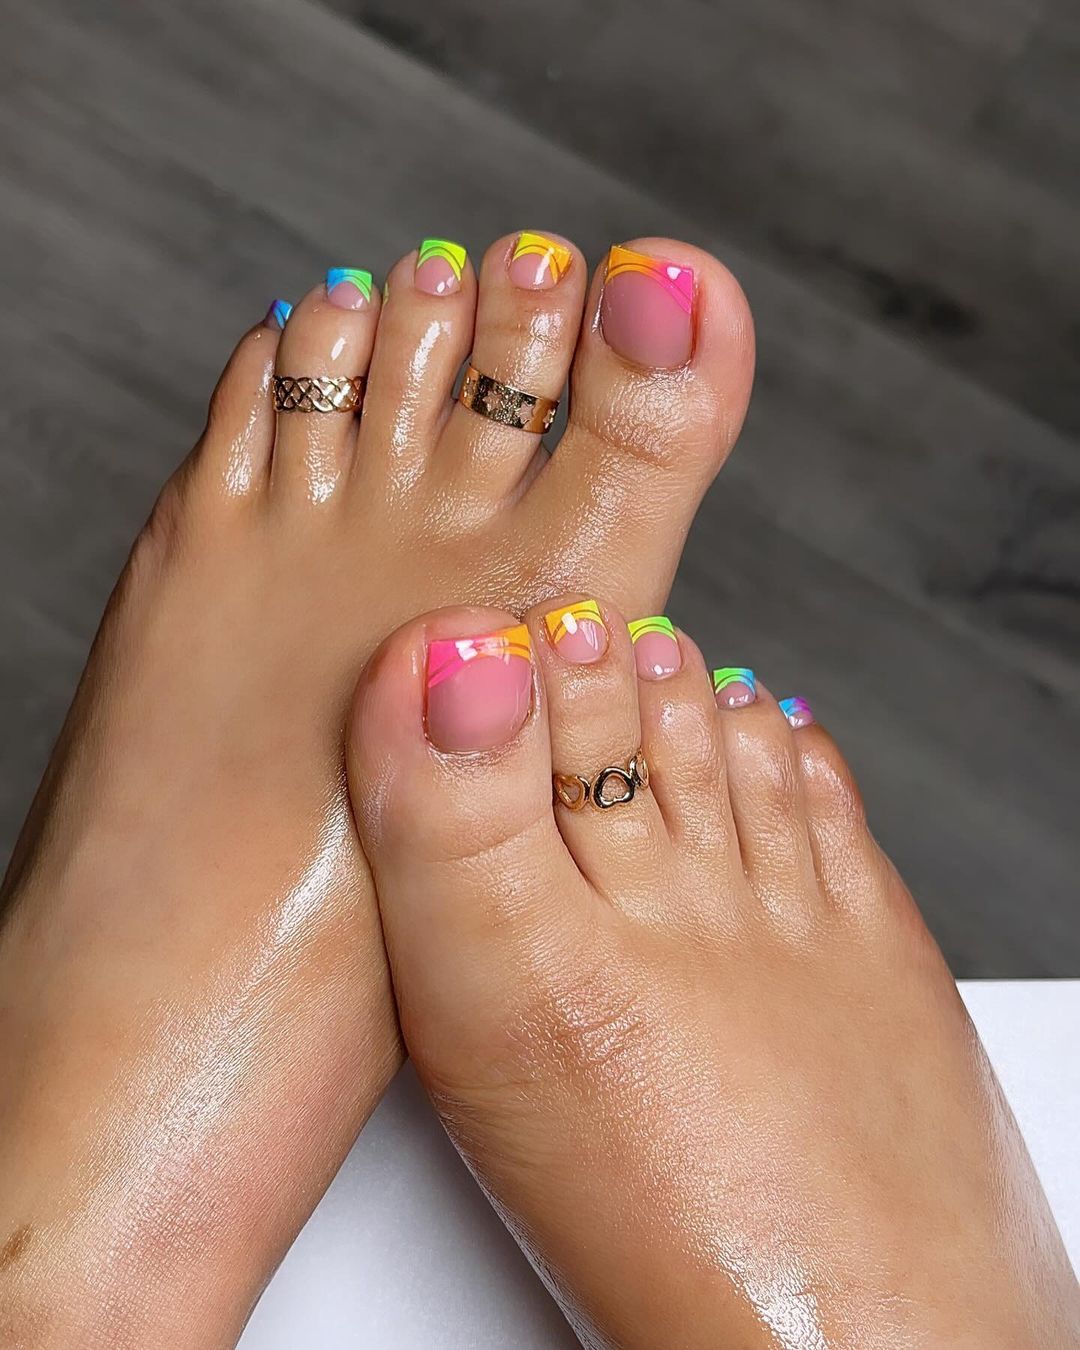
Professional Insight
This design showcases a blend of neon stripes against a soft pink backdrop, creating a themed look that’s as refreshing as a tropical breeze. The neon colors are not just bright; they’re expressive, encapsulating the spirit of summer in every step. The play of colors here is not only pretty but also perfectly embodies summer colors.
Consumables for Creation
- Base coat: Essie Here to Stay
- Pink polish: Essie’s ‘Muchi, Muchi’
- Neon polish strips: ORLY Neon Earth Collection
- Top coat: Glisten & Glow Top Coat
- Striping tape for clean lines
A tip from me: apply a stripe of white polish beneath neon colors to make them truly pop!
DIY at Home
- Prep your nails with a base coat for longevity.
- Paint a pale pink base and wait for it to dry.
- Place striping tape and apply neon polish for those vivid lines.
- Seal with a fast-drying top coat for a glossy finish that lasts.
This look is for those who love a touch of the unexpected while soaking up the sun.
Elegance and Whimsy: Chic Summer Whites
The tranquility of white sands and the elegance of a summer soirée come together on your toes. A design like this is timeless for vacation ocean lounging or a stylish vacation white party.
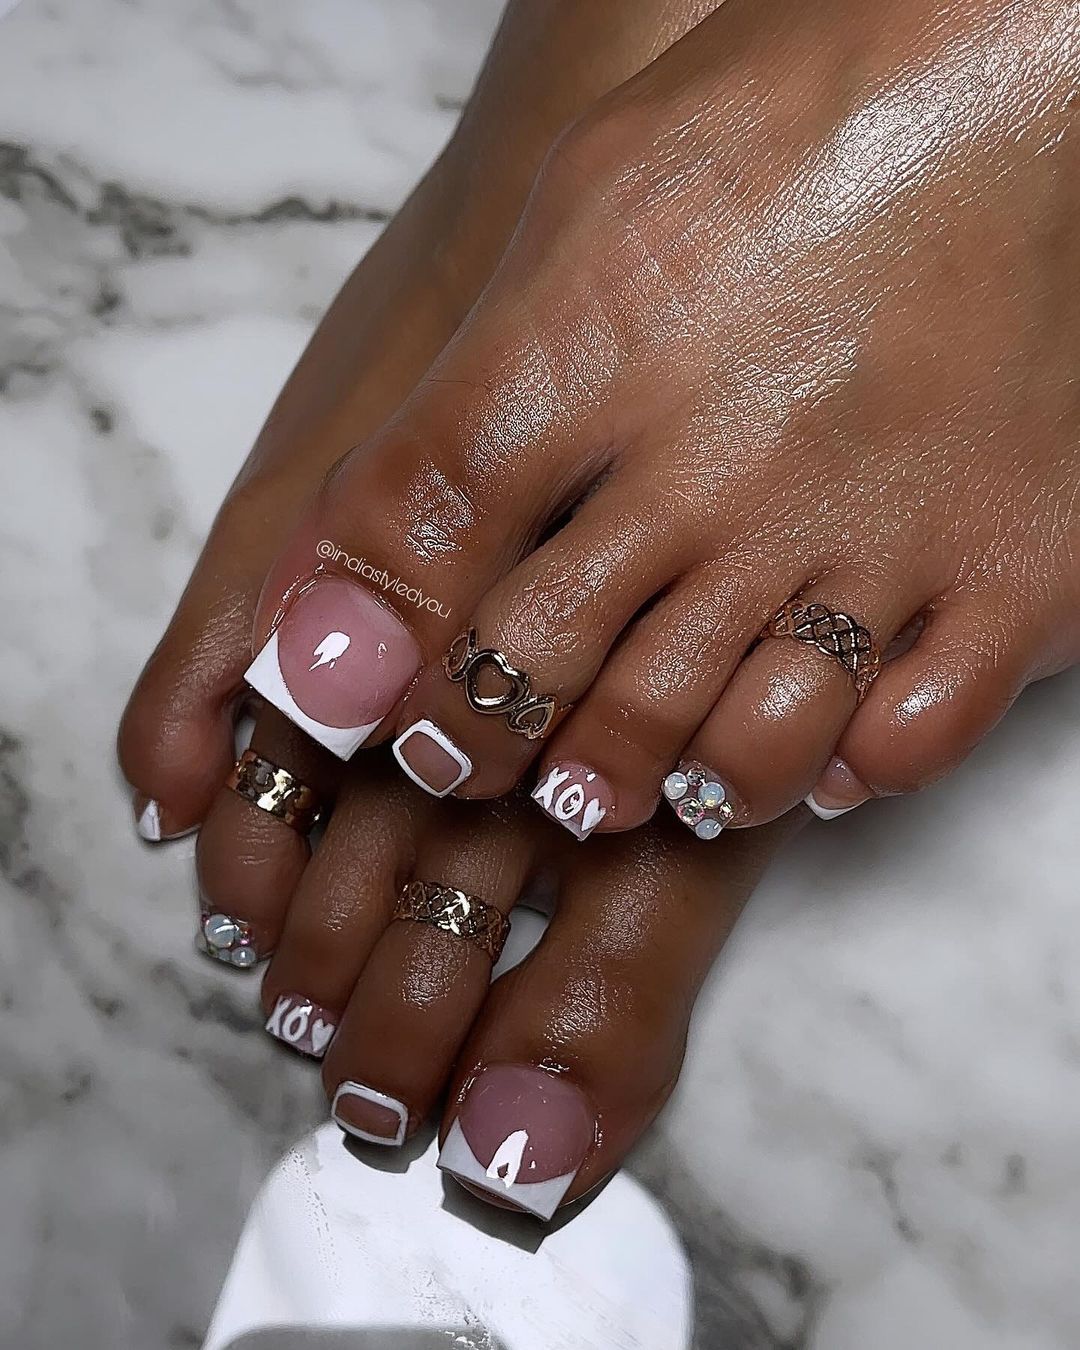
Professional Insight
The clean white base of this pedicure, edged with a sophisticated grey, exudes elegance. Adornments of tiny jewels and playful designs add a whimsical touch that’s both pretty and polished. It’s a fashion-forward approach to summer colors, maintaining a simple yet enchanting look.
Consumables for Creation
- Base coat: ORLY Bonder
- White polish: OPI Alpine Snow
- Grey polish: Zoya’s ‘Dove’
- Embellishments: Swarovski Crystal Pixie
- Top coat: Essie Gel Setter
The key to this art? Patience and precision, especially when placing those delicate Swarovski crystals.
DIY at Home
- Begin with a rubberized base coat to grip the polish.
- Apply the white polish, followed by grey tips with a steady hand.
- Adhere Swarovski crystals with a dab of top coat for that extra sparkle.
- Finish with a gel-setter top coat for a durable, glossy look.
This manicure idea is ideal for those summer nights when you want your toes to whisper tales of moonlit beaches and starry skies.
Save Pin

Vivid Florals for Sunny Days
When the warm breezes start to roll in, nothing complements a breezy sarong or a light sundress better than a set of toenails pedicure ideas that speak the language of summer. This design, with its vibrant floral patterns and playful pastel backdrop, brings the spirit of vacation tropical straight to your feet.
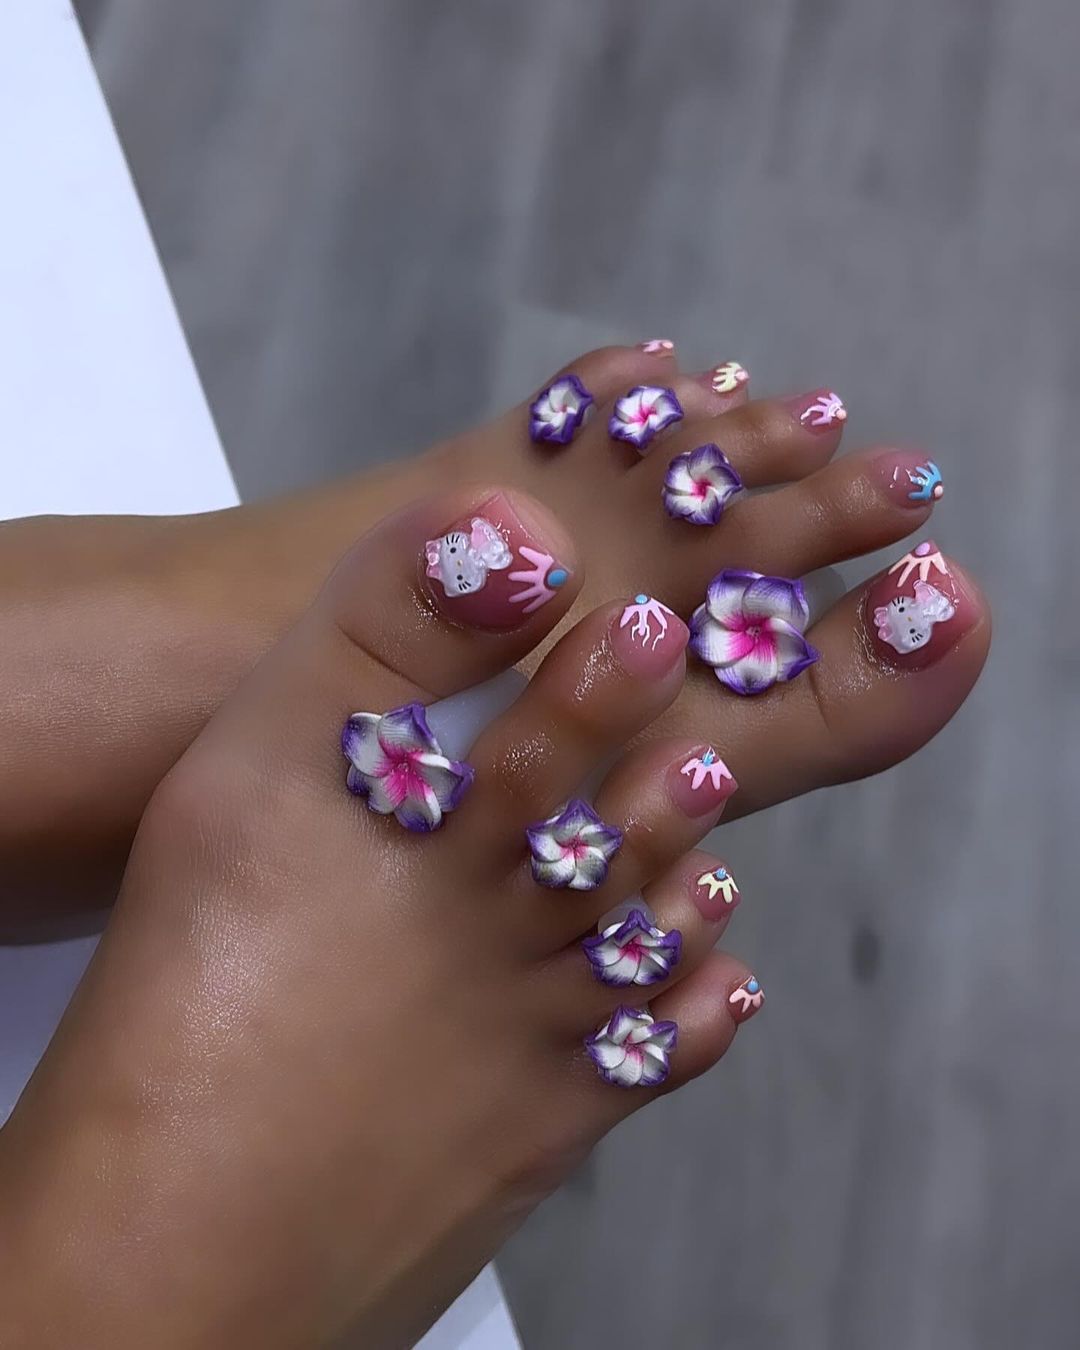
Professional Insight
The artistry displayed here is a celebration of summer colors. Each toe features a unique flower, detailed with precision, against a pastel pink canvas that allows the colors to dance vibrantly. It’s a manicure that captures the essence of vacation ocean with its bright, pretty petals and hints of light blue.
Consumables for Creation
- Base coat: Jessica Bend Don’t Break
- Pastel pink polish: ILNP Juliette
- Acrylic paints for floral art
- Detailing brushes
- Top coat: INM Out The Door
As a manicurist, I always emphasize the importance of a protective base and a hardy top coat when working with detailed art like this.
DIY at Home
- Lay down your base coat for a solid foundation.
- Paint a serene pastel pink, reminiscent of vacation simple skies at dawn.
- Use acrylic paints and a fine brush to create those striking flowers.
- A quality top coat will ensure your design remains as fresh as a summer morning.
This look is for the free spirit ready to embrace vacation vibes with every step.
Clean and Chic: Timeless French Pedicure
When it comes to simple summer toe nails for beach lounging, sometimes less is indeed more. A classic French pedicure like this one is the epitome of vacation simple elegance and never goes out of style, whether you’re sipping a cool drink by the vacation ocean or walking down a bustling resort promenade.
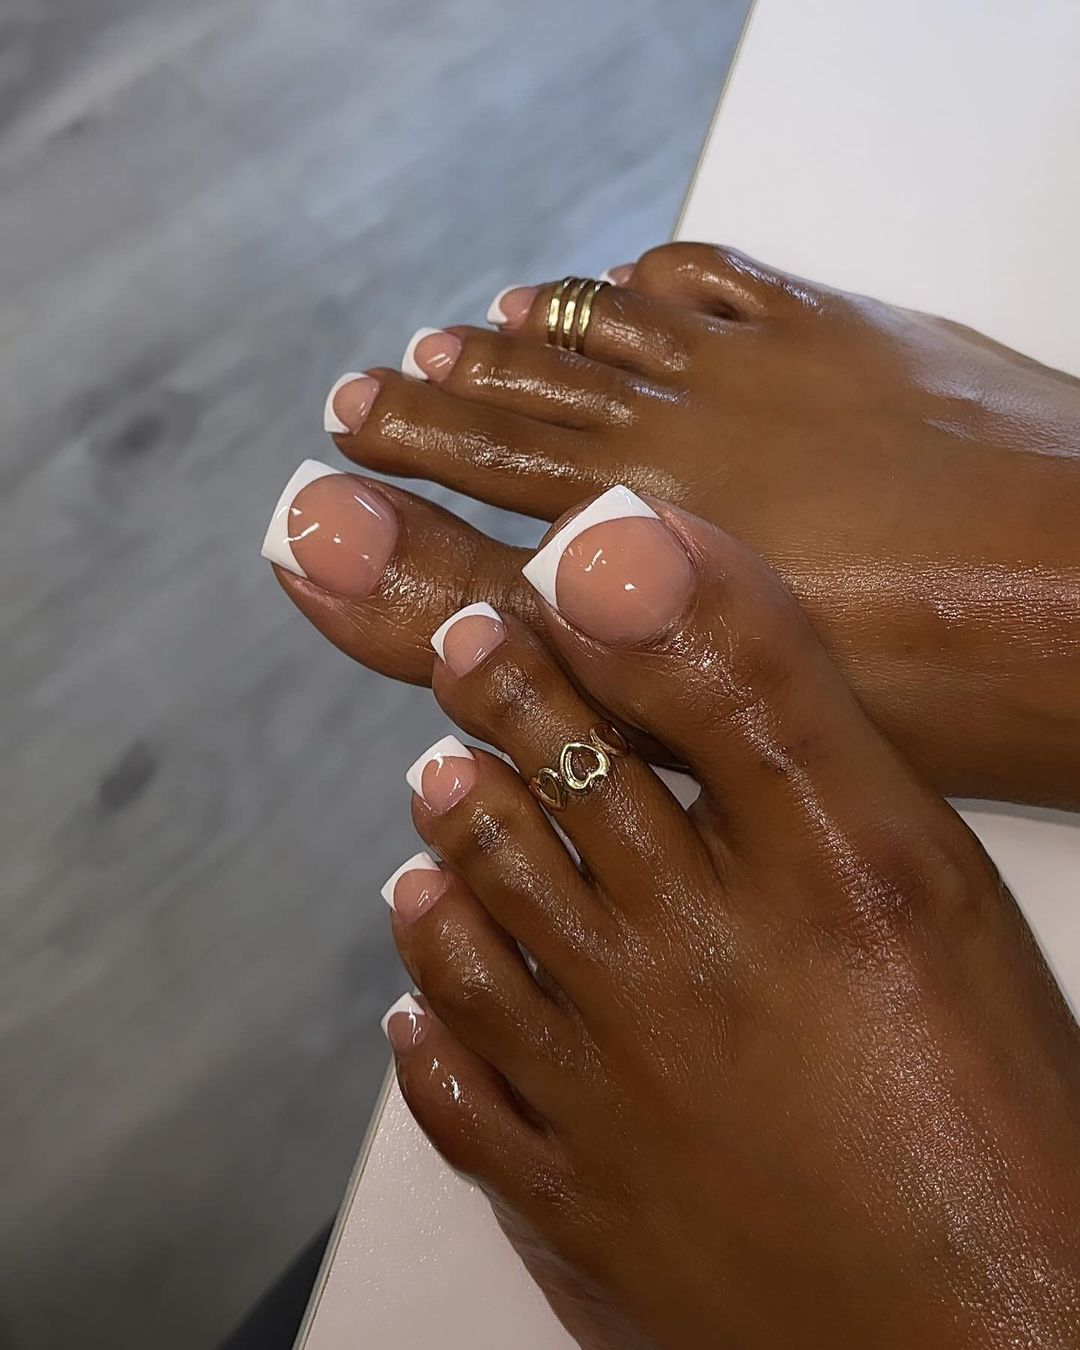
Professional Insight
This manicure’s beauty lies in its simplicity and precision—the clean lines of the white tips are a testament to the manicurist’s skill. It’s a look that’s fashion-forward in its timelessness, complementing any outfit while adding an air of vacation white sophistication.
Consumables for Creation
- Base coat: OPI Natural Nail Base Coat
- White tip polish: Essie Marshmallow
- Sheer pink polish: OPI Bubble Bath
- Top coat: Essie Good To Go
The sheer pink polish is the secret to that natural yet polished look that’s simple, pretty, and utterly chic.
DIY at Home
- Begin with a clear base coat to avoid staining and ensure adhesion.
- Carefully draw your white tips, then let them dry.
- Apply a sheer pink polish over the entire nail to unify the look.
- Finish with a fast-drying top coat for a durable shine.
This pedicure is for those who adore a touch of vacation elegance in their summer adventures.
Bold and Beautiful: Royal Blue Brilliance
For the daring and the bold, this vacation tropical pedicure idea combines the rich depths of blue with the sparkling allure of rhinestones. It’s a design that stands out, perfect for making a statement at any vacation ocean destination or holiday night event.
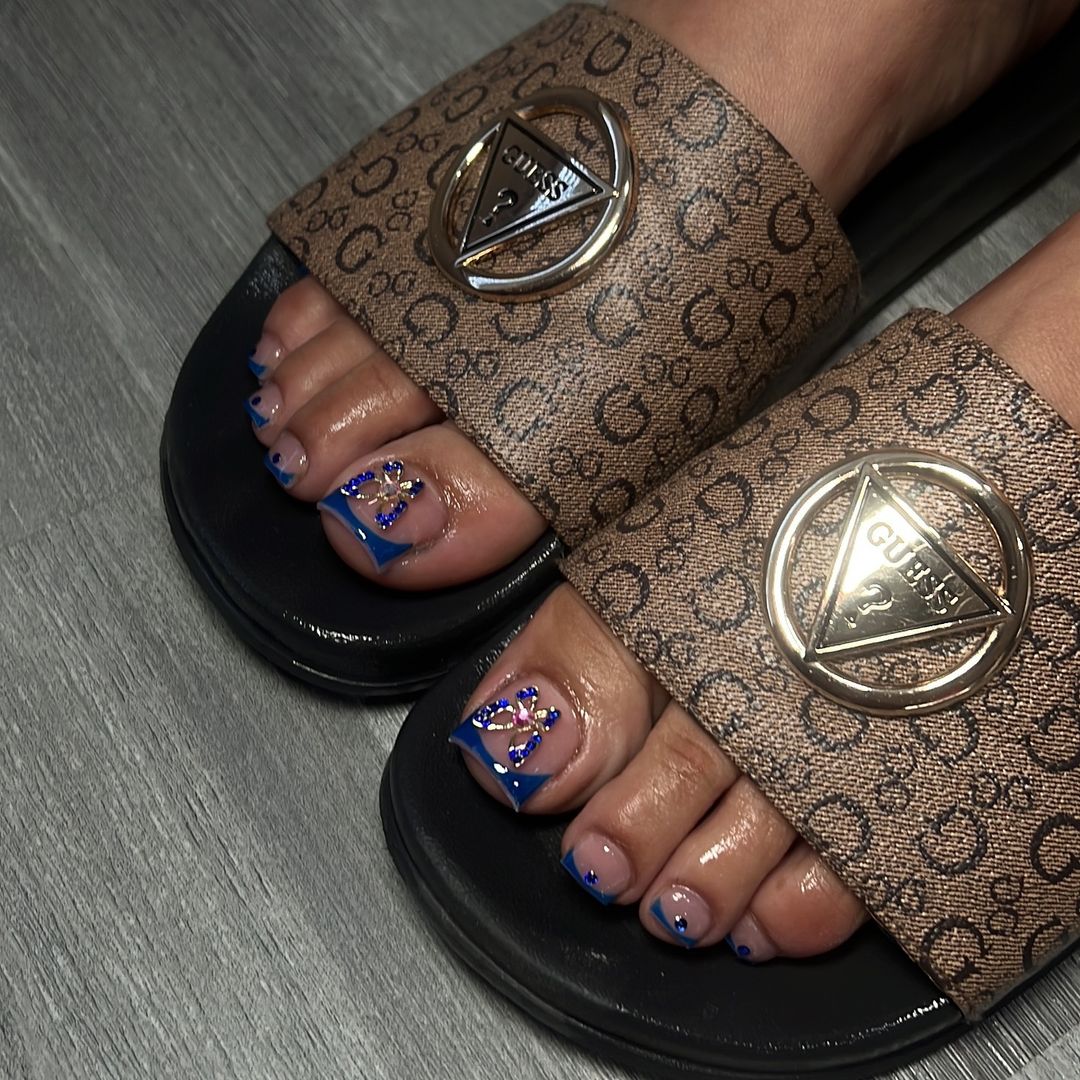
Professional Insight
The choice of colors here is what sets this design apart. The royal blue is a nod to the mysterious depths of the sea, while the added rhinestones echo the twinkling stars above. This design is not just pretty; it’s regal and commands attention.
Consumables for Creation
- Base coat: Butter London Nail Foundation
- Royal blue polish: Essie Butler Please
- Rhinestones: Nail Artistry Luxury Crystals
- Top coat: Seche Vite Dry Fast
For that jeweled effect, pick rhinestones that catch the light and mimic the clarity of ocean water.
DIY at Home
- Start with your base coat to protect the nail.
- Apply two coats of the royal blue for opulent coverage.
- While the second coat is tacky, place rhinestones as desired.
- Seal with a glossy top coat to lock in the stones and the color.
Ready for a summer of bold choices and bright nights? This pedicure will carry you through.
Sophisticated Squares: A Touch of Glamour
A sleek, squared design accented by a glittering charm is the epitome of modern elegance. This white pedicure, offset by a single, sophisticated charm on each big toe, offers a dash of glamour perfect for any summer soirée or a luxurious vacation simple retreat.

Professional Insight
The full-coverage white polish provides a bold backdrop that makes the metallic charms pop. This toenails white flowers design brings a polished, fashion-forward look that’s both pretty and practical for sandy beaches and glittering nights by the vacation ocean.
Consumables for Creation
- Base coat: Zoya Anchor Base Coat
- White polish: Sally Hansen White On
- Charms: Metallic Floral Nail Art Charms
- Top coat: Essie Gel Setter Top Coat
For added art, consider a charm that complements your personal style or the colors of your vacation wardrobe.
DIY at Home
- Apply a base coat to protect your nails.
- Opt for two coats of a stark white polish for a solid, opaque look.
- Affix a charm on each big toe with a dab of clear polish.
- A top coat over the charm ensures it stays in place, so you’re ready to shine all vacation long.
This toenails pedicure ideas concept is tailor-made for those who appreciate a touch of luxury in their vacation simple gel looks.
White Bows: Classic with a Twist
There’s something timelessly chic about white bows on a translucent pink base. It’s a classic look that’s been given a fresh update with the addition of sparkling rhinestones, perfect for any vacation tropical getaway or a relaxed holiday at the seaside.
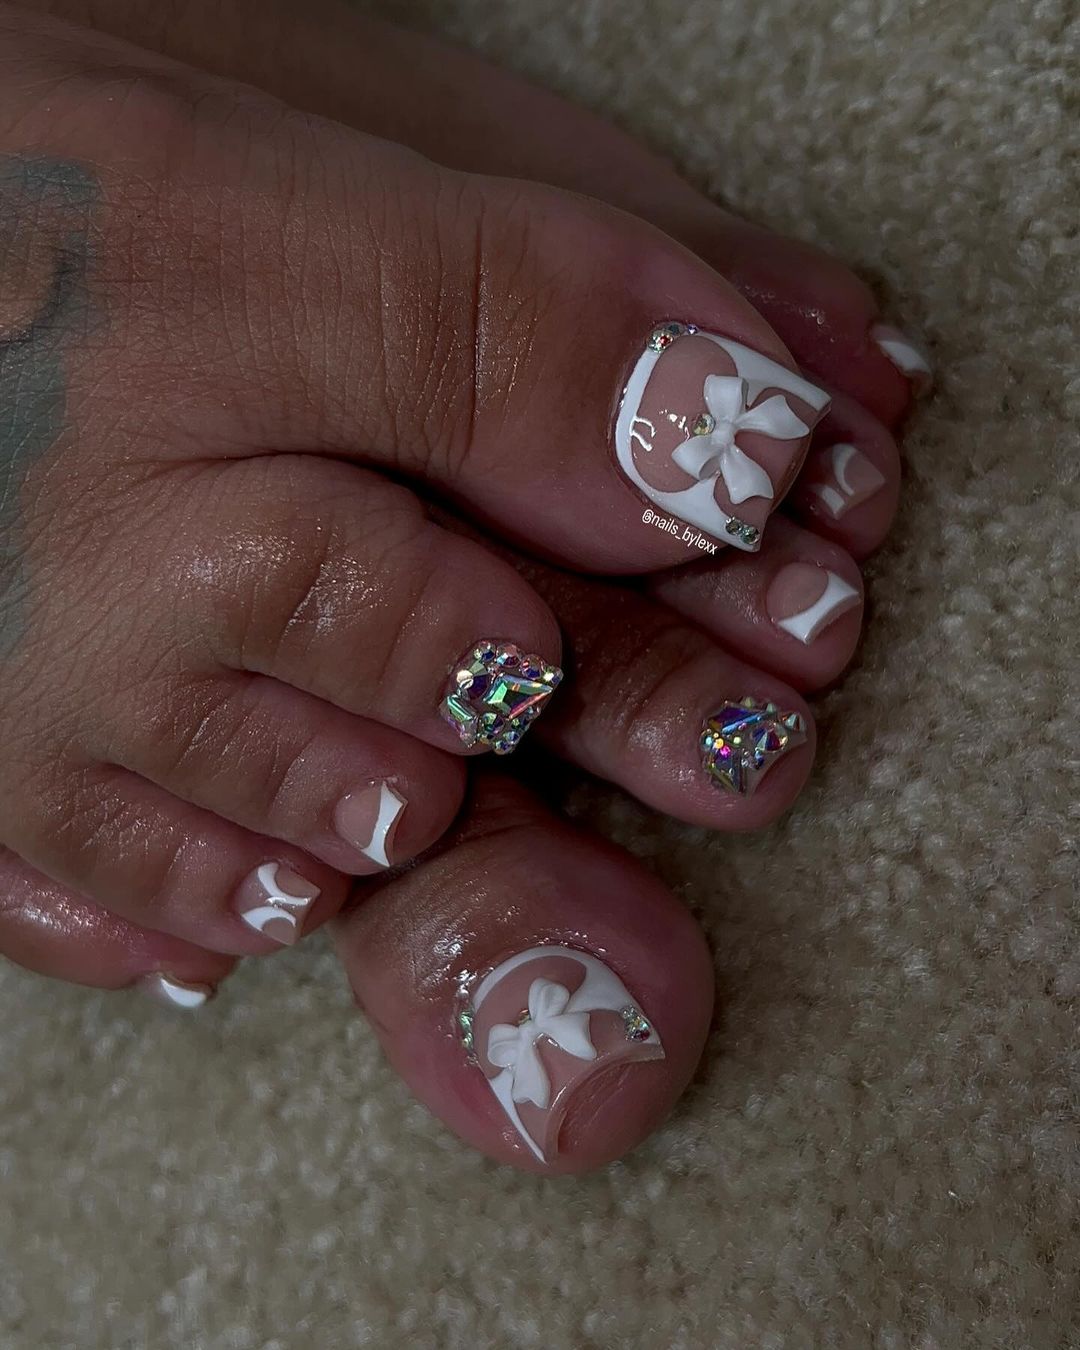
Professional Insight
The toenails white flowers are delicate and romantic, with each petal meticulously placed to create a serene pattern. The subtle addition of a few rhinestones adds a playful yet pretty touch without overwhelming the design, capturing the simple beauty of summer blooms.
Consumables for Creation
- Base coat: ORLY Bonder Rubberized Basecoat
- Translucent pink polish: OPI Bubble Bath
- White acrylic paint for flowers
- Rhinestones: Small Crystal Clear Rhinestones
- Top coat: INM Out The Door
Using acrylic paint for the flowers gives you more control than polish and allows for more intricate designs.
DIY at Home
- Protect your nails with a base coat.
- Apply a sheer pink polish as a base to mimic a healthy, natural nail.
- Paint on the white florals with acrylic paint using a fine detail brush.
- Add a touch of sparkle with rhinestones and seal with a fast-drying top coat.
This design offers a nod to the classics while still feeling fresh and fashion-able.
Save Pin
Vibrant Borders: Neon Green Highlights
Embrace the vibrancy of summer with a neon green French tip that will surely stand out whether you’re lounging poolside or dancing at a vacation tropical beach party. The contrast between the neon tips and the soft pink base is modern, fun, and undeniably summer.
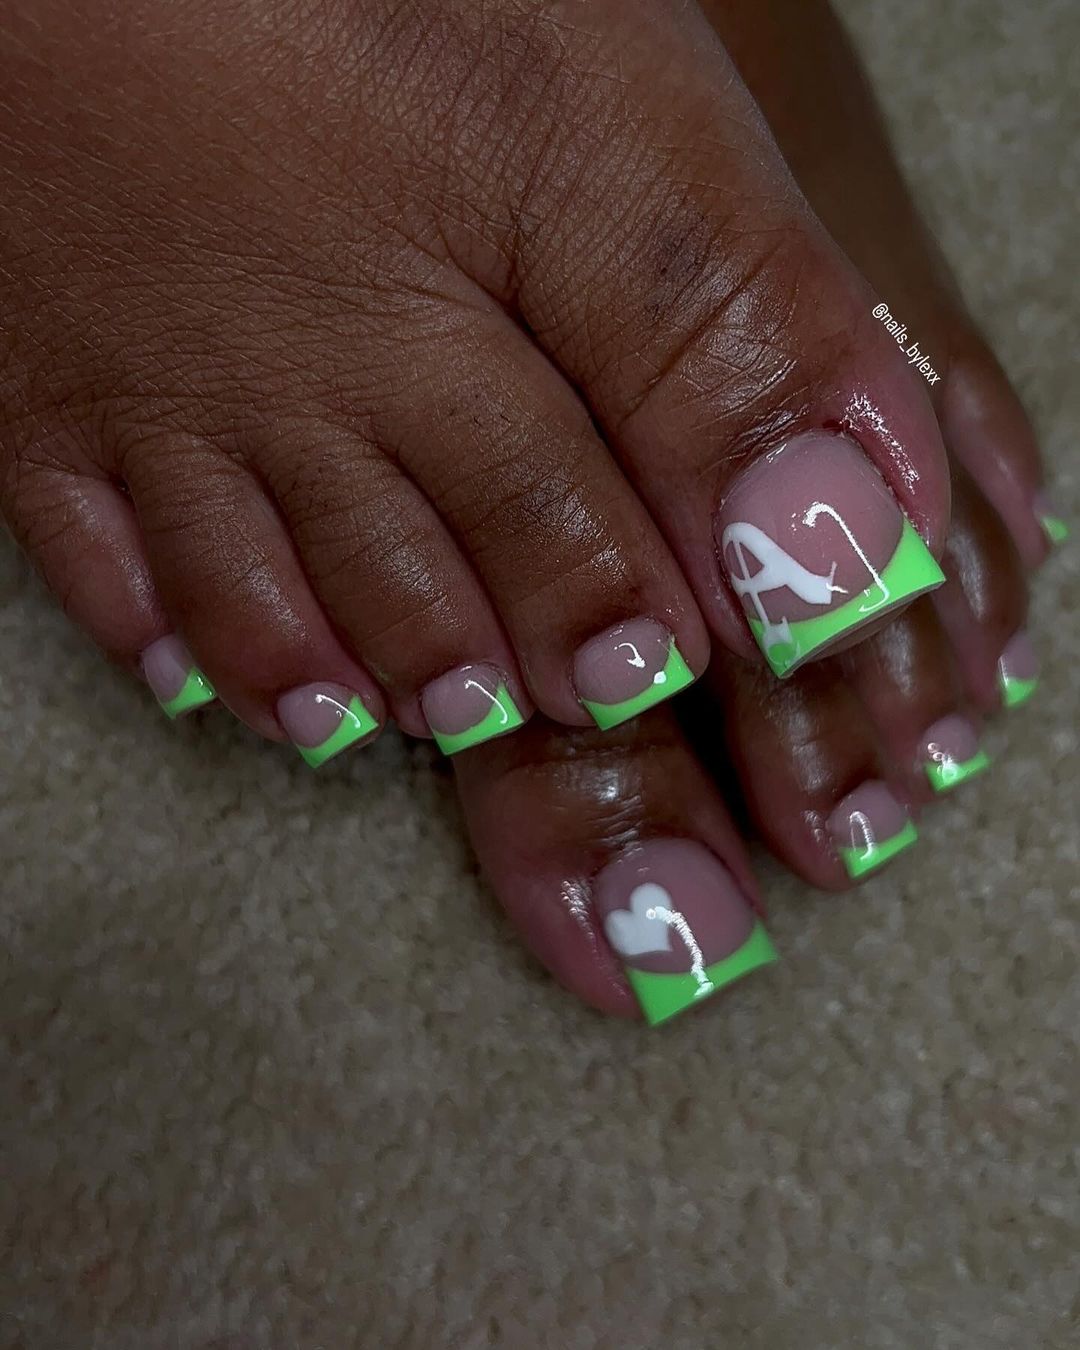
Professional Insight
This bold take on a French pedicure brings an unexpected twist to a simple design. The neon green tips are daring and playful, perfect for a vacation simple look that’s anything but boring. It’s a statement that’s pretty in pink but with an edge that says holiday-ready.
Consumables for Creation
- Base coat: Deborah Lippmann Hard Rock
- Pink polish: OPI Bubble Bath
- Neon green polish: China Glaze Lime After Lime
- Top coat: Sally Hansen Insta-Dri
The key to those crisp lines? A steady hand and some patience, or you can use striping tape for extra precision.
DIY at Home
- Start with a base coat to protect and strengthen your nails.
- Apply a neutral pink base and let it dry completely.
- For the tips, use neon green polish with a fine brush or striping tape for that sharp look.
- Finish with a clear top coat for a glossy, long-lasting summer colors pedicure.
This toenails pedicure ideas design is sure to bring a pop of color to any vacation simple ensemble.
Delicate Dots and Pastel Pink
For a whimsical touch that’s playful yet polished, look no further than this delightful dot-centric pedicure. It’s a design that adds a bit of fun to the classic pink base, making it a great choice for simple summer toe nails for beach outings or a vacation simple day out.
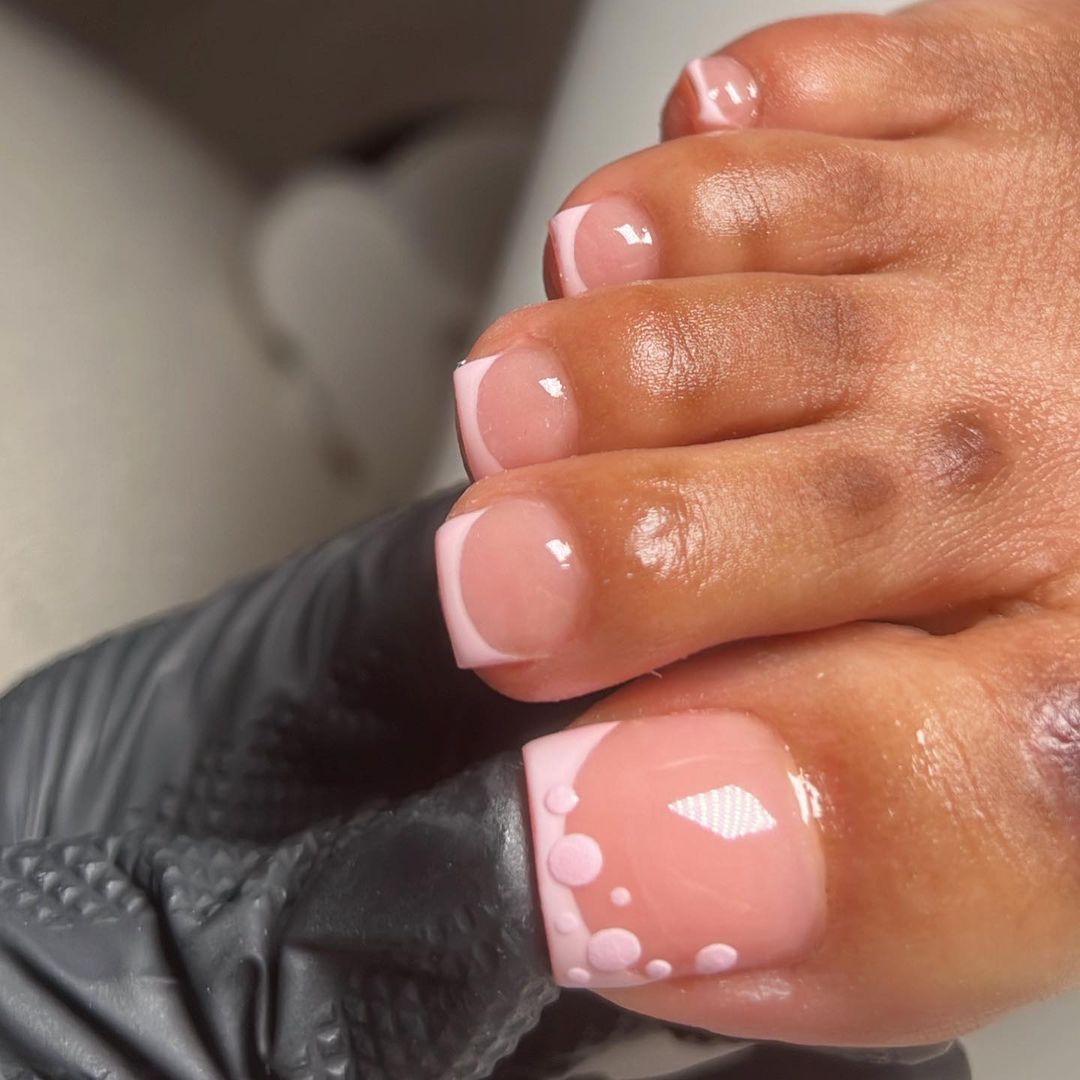
Professional Insight
The soft pink hue serves as a beautiful canvas for the white dots that create a charming border. It’s a cute and pretty approach to pedicures, offering a dash of fashion without being over-the-top, maintaining a simple yet captivating look.
Consumables for Creation
- Base coat: OPI Natural Nail Base Coat
- Pastel pink polish: Essie’s ‘Muchi, Muchi’
- White polish for dots: Sally Hansen White On
- Top coat: Essie Gel Setter
The key to perfect dots is using a dotting tool or the tip of a bobby pin for a home DIY approach.
DIY at Home
- Start with the base coat to ensure a smooth application.
- Apply the pastel pink polish as the base color.
- Dip your dotting tool in white polish to create evenly spaced dots along the nail tips.
- Finish with a gel-setter top coat for a durable, glossy finish.
This design is ideal for someone who wants to add a playful twist to their summer look.
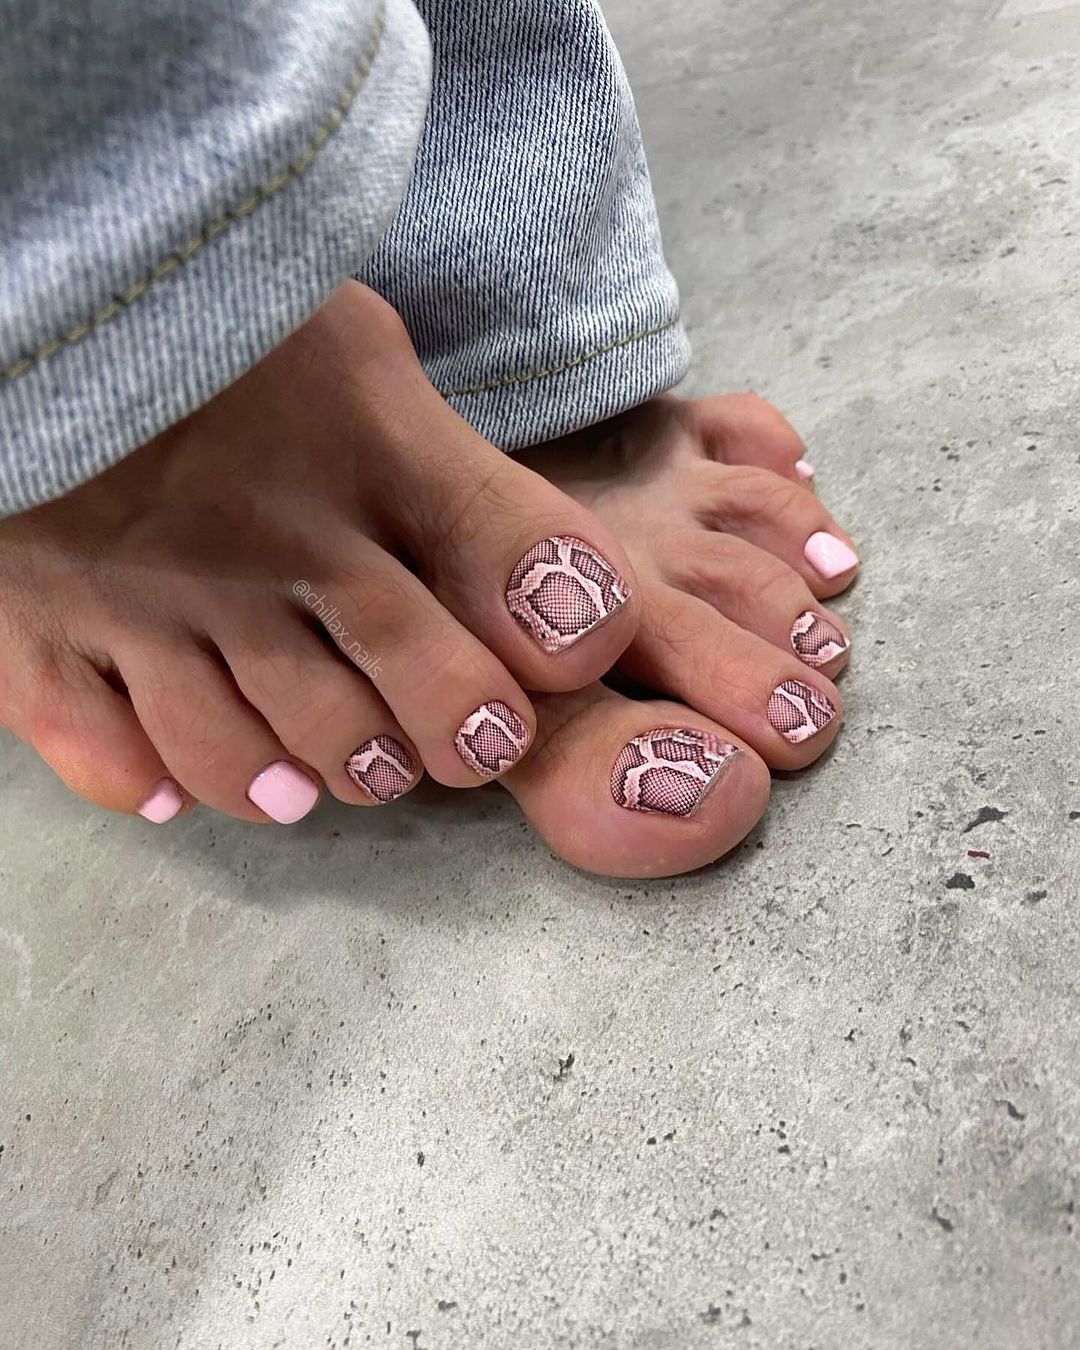
Chic in Cheetah: Wild and Free
Embrace your wild side with a nail design that’s as fierce as it is fashionable. This cheetah print pedicure is a bold statement, ideal for those who want to showcase their adventurous spirit while enjoying a vacation tropical.
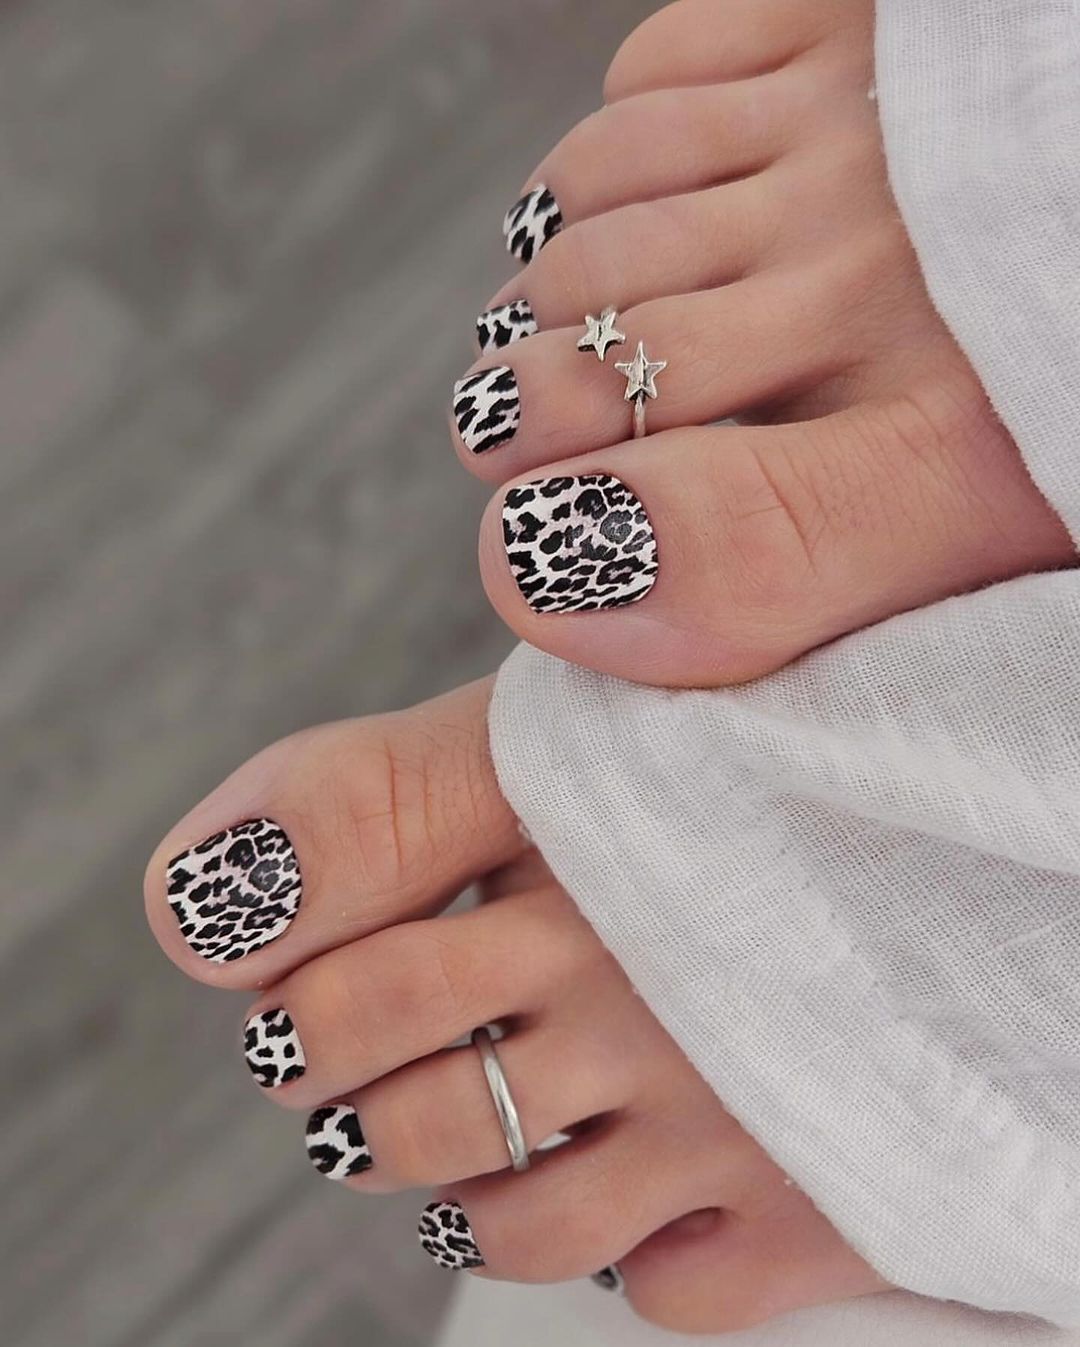
Professional Insight
The combination of black and brown spots on a white base makes for an eye-catching design that’s bright and bold. This art isn’t just a nod to the animal kingdom—it’s a fashion statement that’s pretty and powerful.
Consumables for Creation
- Base coat: ORLY Bonder Rubberized Basecoat
- White polish: OPI Alpine Snow
- Black and brown polishes for the spots: Essie’s ‘Licorice’ and ‘Mink Muffs’
- Top coat: Seche Vite Dry Fast Top Coat
I recommend using a fine-tipped brush to get the distinctive edges of the cheetah spots.
DIY at Home
- Apply a base coat to protect your nails.
- Use the white polish as a base to make the design pop.
- Paint on the cheetah spots with black and brown polish, allowing for slight imperfections to mimic the natural patterns.
- Seal the design with a quick-drying top coat for a lasting impression.
This pedicure is perfect for making a statement during your vacation ocean adventures or a night out.
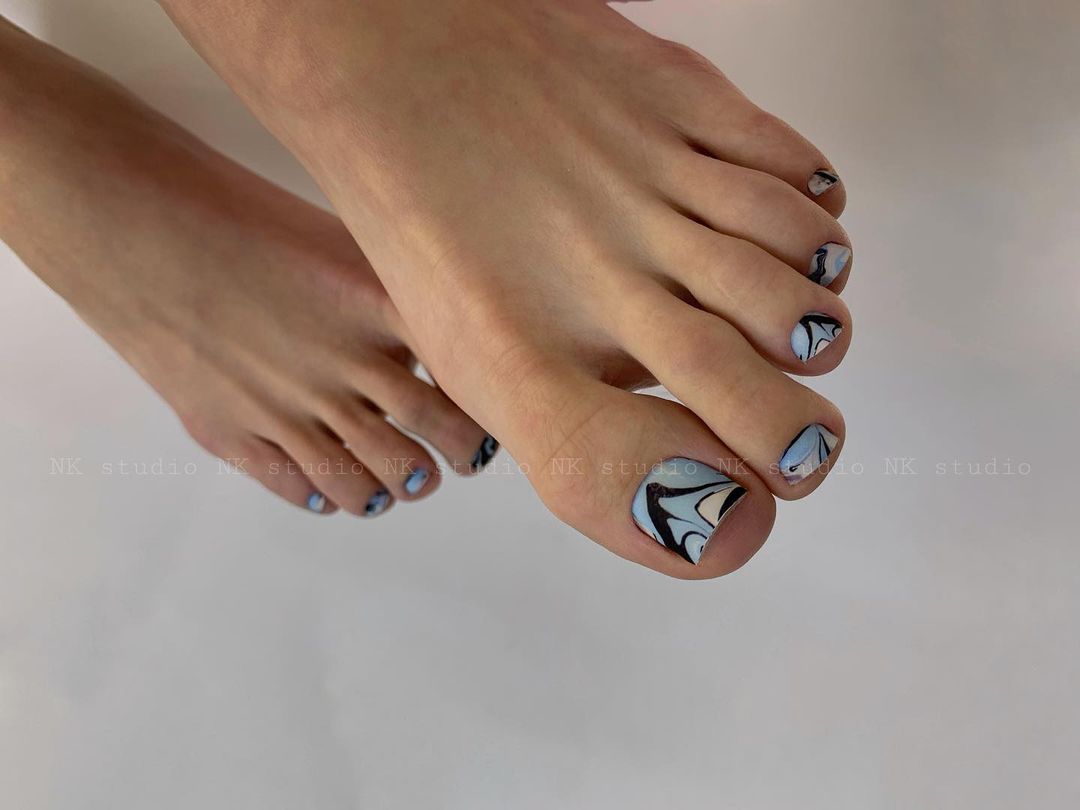
Subtle Elegance
When simple meets elegance, you get a pedicure that’s understated yet stunning. This lacy design on a soft pink base exudes sophistication and style, perfect for those moments of serene vacation simple elegance or a holiday dinner by the sea.
Professional Insight
The intricate lace pattern over the pink base is a testament to the art of nail design. It’s a themed approach that’s both pretty and delicate, offering a fashion-forward look that’s surprisingly easy to wear.
Consumables for Creation
- Base coat: CND Stickey Base Coat
- Pink polish: Essie’s ‘Muchi, Muchi’
- White polish for lace design: OPI Alpine Snow
- Top coat: Seche Vite Dry Fast Top Coat
A detailing brush will be your best friend for creating those fine lace details.
DIY at Home
- Begin with a base coat to create a perfect canvas.
- Apply a pink polish for a soft, feminine touch.
- Carefully use a white polish and a detailing brush to draw the lace design.
- A fast-drying top coat will add shine and ensure the design’s longevity.
This pedicure idea is ideal for those who love a touch of intricate detail in their summer wardrobe.
Sharks in the Water: Edgy Ocean Art
For those who are looking for a pedicure that’s bold and edgy, this shark-themed design is a showstopper. Dark, oceanic blue tones create a dramatic backdrop for the stark white shark silhouettes, making for a daring yet playful choice that’s perfect for any summer getaway.
Professional Insight
The stark contrast between the deep blue and the white in this design is what makes it truly stand out. It’s a creative take on vacation ocean themes that’s sure to draw attention and compliments. The addition of the shark design takes the simple blue pedicure to a whole new level of art and fashion.
Consumables for Creation
- Base coat: Deborah Lippmann Hard Rock
- Dark blue polish: Essie After School Boy Blazer
- White polish for shark design: OPI Alpine Snow
- Top coat: Sally Hansen Insta-Dri
For the shark silhouettes, a fine-tipped brush or a toothpick can help achieve the sharp lines and detail.
DIY at Home
- Begin with a base coat to protect your nails.
- Apply a dark blue polish as the base color for the “ocean.”
- Use a white polish to paint the shark silhouettes carefully.
- Finish with a quick-dry top coat to seal the design and add shine.
This design is for the adventurous at heart, ready to make a splash with every step.
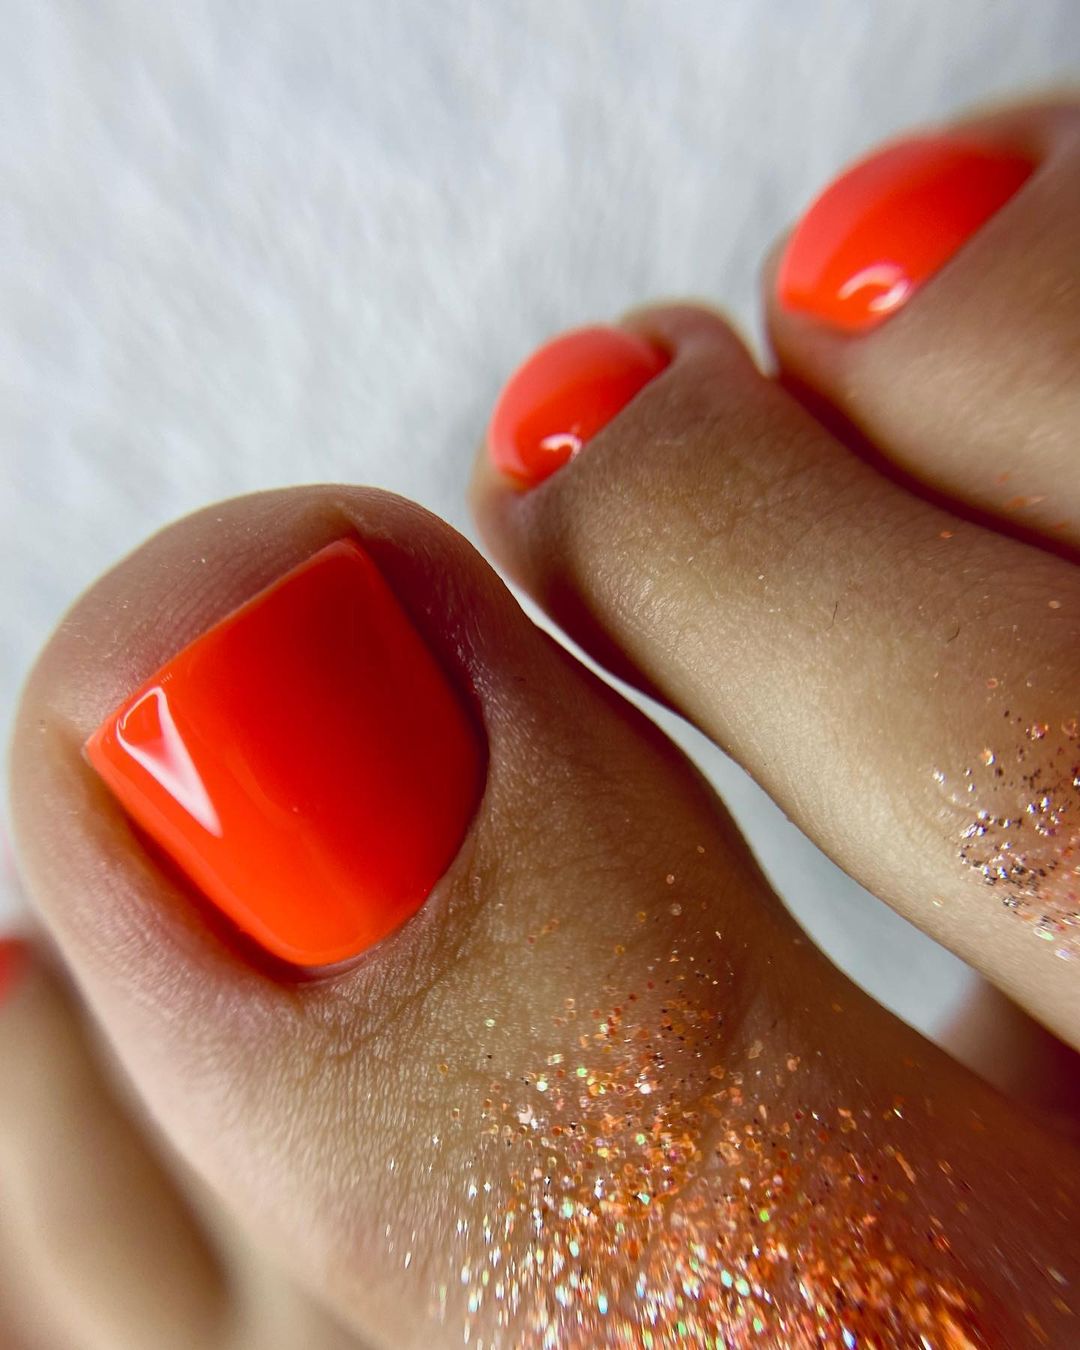
Vibrant Tangerine: Bold Summer Pop
This bright tangerine pedicure is like a burst of summer in every step. The rich, juicy orange hue is perfect for those looking to add a pop of color to their vacation simple style. It’s a shade that’s both bold and bright, capturing the essence of summer colors in a fun and fashionable way.
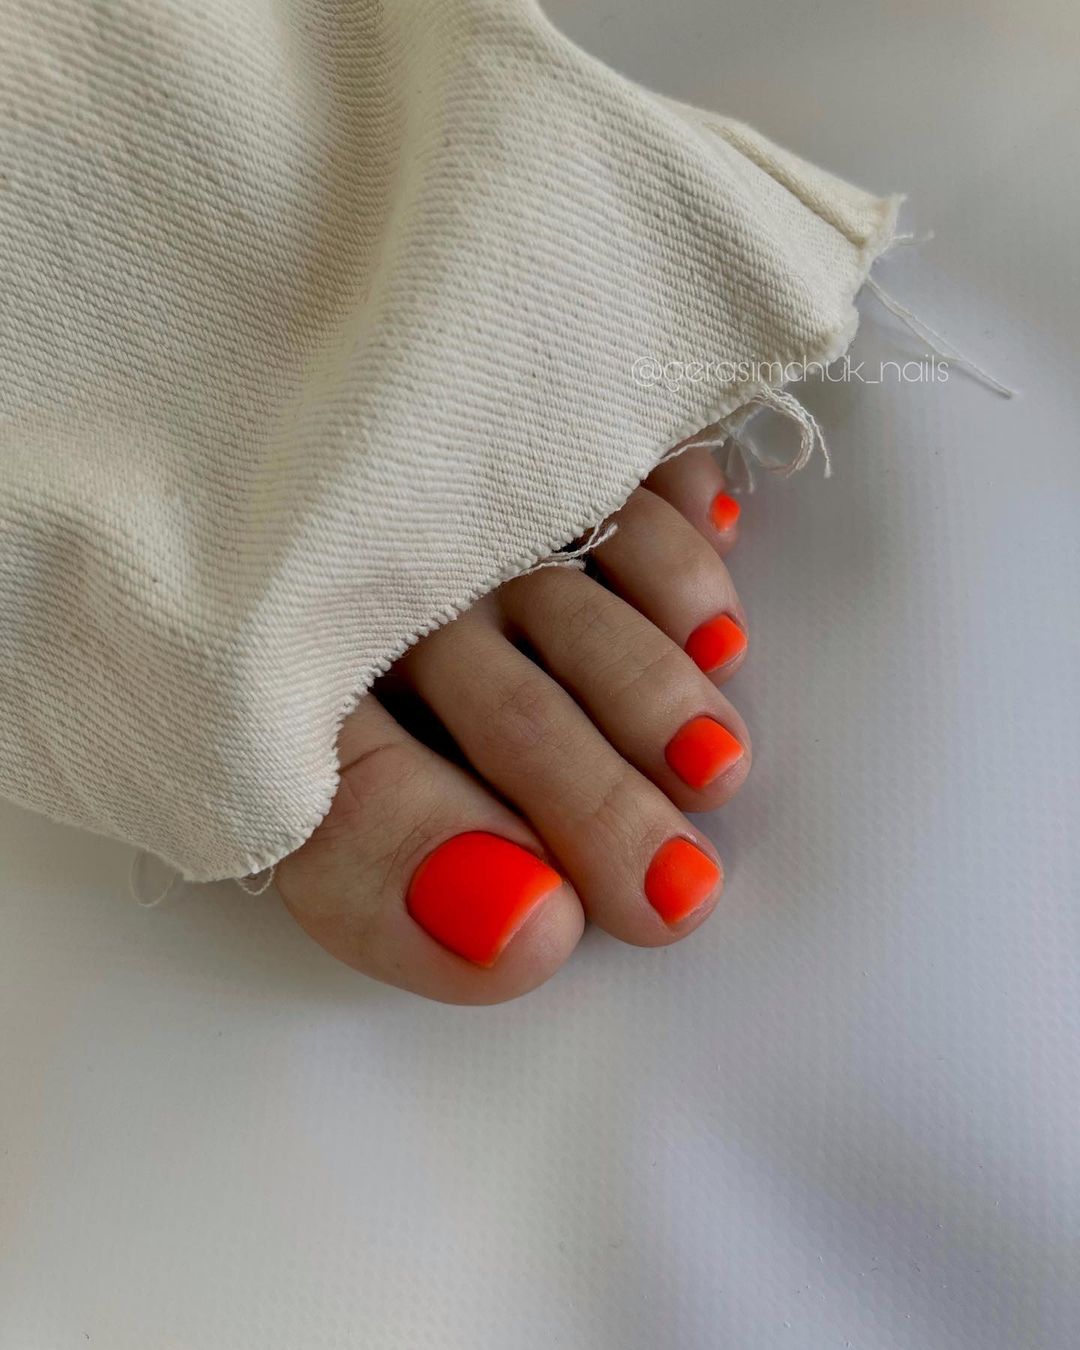
Professional Insight
The uniform color application showcases the beauty and quality of the polish. This simple yet vibrant look is a testament to the power of color in creating a fashion statement. It’s pretty, playful, and precisely what you need for a vacation tropical.
Consumables for Creation
- Base coat: ORLY Bonder Rubberized Basecoat
- Tangerine polish: China Glaze Sun Worshiper
- Top coat: Seche Vite Dry Fast Top Coat
Don’t forget to apply the polish in thin layers to avoid bubbles and to ensure even drying.
DIY at Home
- Protect your nails with a base coat.
- Apply two thin layers of the tangerine polish, allowing it to dry between coats.
- Add a top coat for a shiny, long-lasting finish.
This pedicure is for those who love to stand out and embrace the vibrant side of summer.
Fruity Delight
The playful charm of a watermelon-themed pedicure is undeniable. It’s a cute and pretty design that combines bright summer colors with a touch of whimsy. This look is perfect for a vacation simple gel manicure or for anyone who wants to add a fruity flair to their summer style.
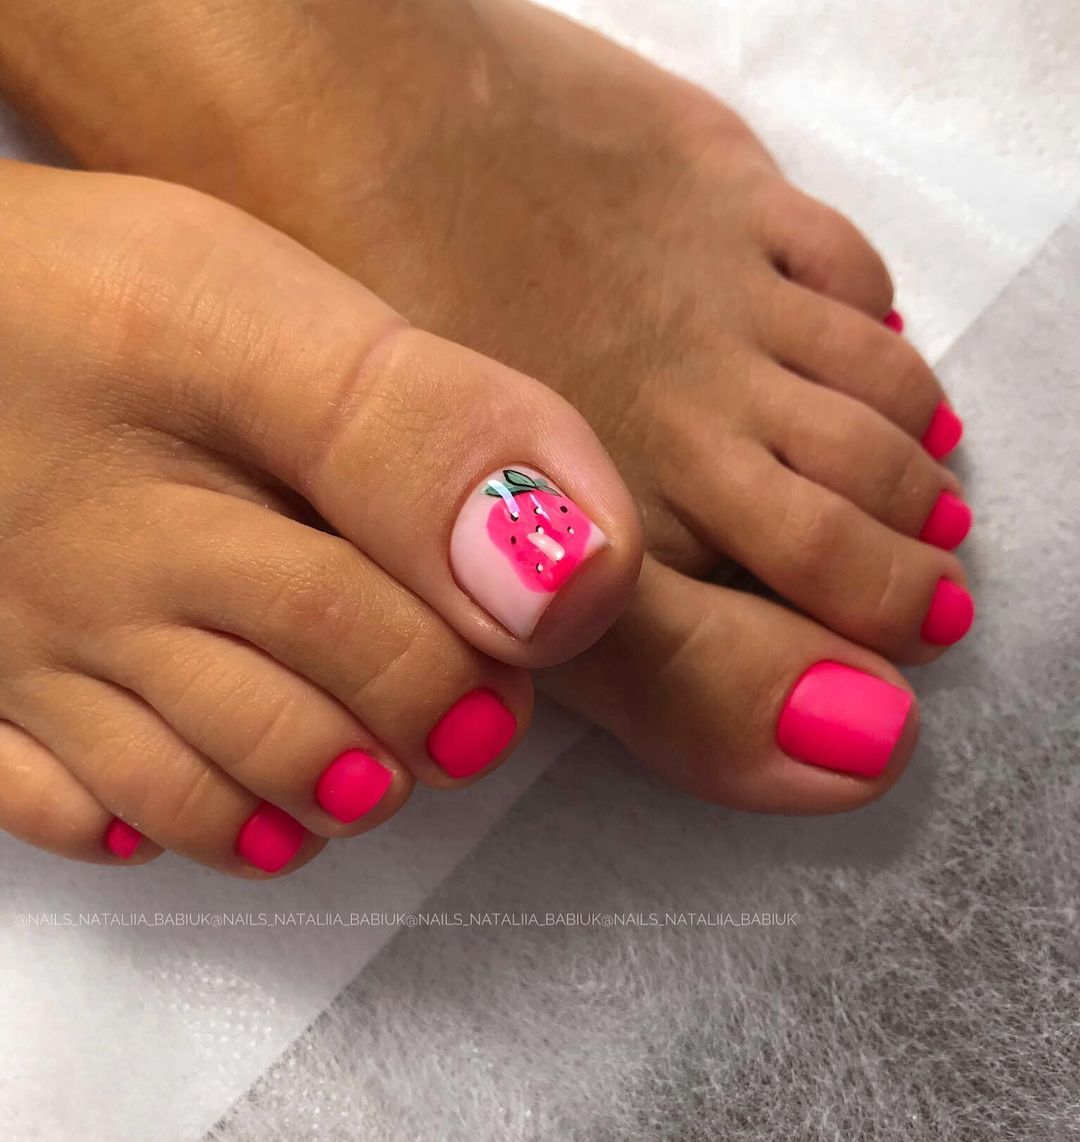
Professional Insight
The key to this design is the careful balance between the colors and the artistic detail that goes into creating the watermelon effect. The result is a pedicure that’s as pretty as it is fun, bringing a simple smile to anyone who sees it.
Consumables for Creation
- Base coat: Essie First Base
- Pink polish: OPI Elephantastic Pink
- Green polish for the rind: Essie Mojito Madness
- Black seeds: Nail art pen in black
- Top coat: INM Out The Door
Using a nail art pen for the seeds will give you more control and precision.
DIY at Home
- Apply a base coat to start.
- Paint your nails with the pink polish for the watermelon flesh.
- Add a strip of green at the base for the rind.
- Use the nail art pen to dot on the seeds.
- Seal the design with a top coat for a glossy, fresh look.
This pedicure is for those who adore a playful and artistic touch to their vacation nails.
Natural Sheer Elegance
Embracing the natural beauty of your nails can be just as striking as any bold color or intricate design. This minimalist approach focuses on the health and shine of the nails, reflecting an effortless vacation simple chic that resonates with a serene beachside vibe.
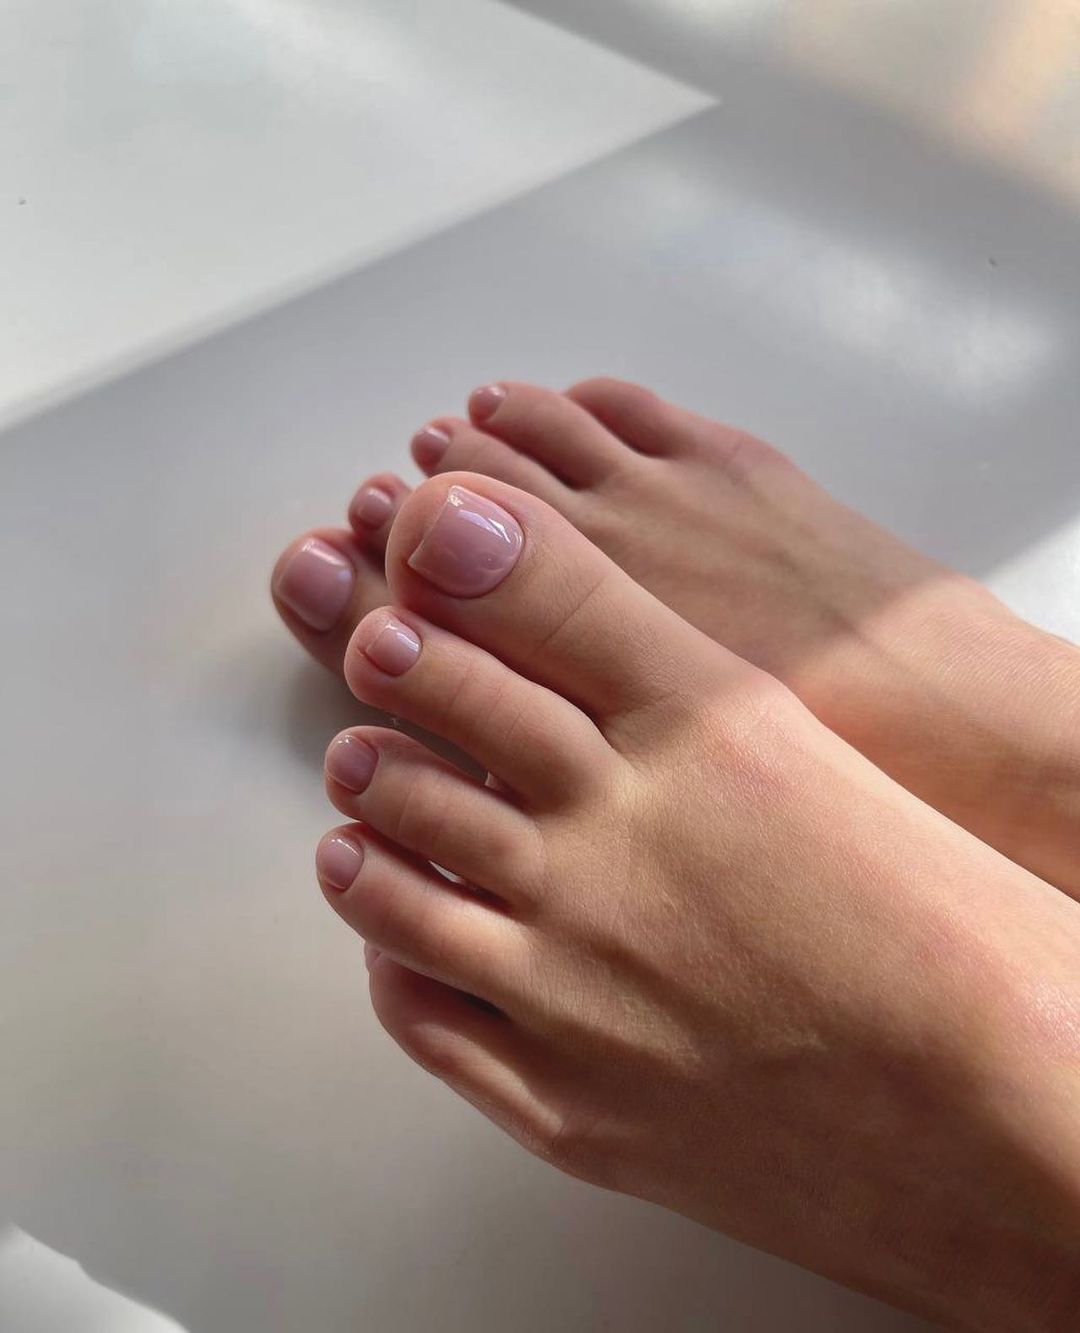
Professional Insight
The slight pink tint gives the nails a healthy glow, while the sheer finish suggests an understated elegance. It’s the epitome of a simple and pretty look, perfect for those who prefer a low-maintenance yet fashion-forward approach to their toenails.
Consumables for Creation
- Base coat: Essie First Base Base Coat
- Sheer pink polish: Essie Mademoiselle
- Top coat: INM Out The Door Top Coat
Remember, the key to this look is a high-quality top coat for that glass-like finish.
DIY at Home
- Start with a good base coat to protect your nails.
- Apply one or two coats of a sheer pink polish for a hint of color.
- Finish with a glossy top coat for that clean and polished look.
This pedicure is all about celebrating the natural beauty of your nails with just a whisper of color.
Glittering Minimalism
Who says minimalism can’t sparkle? This design adds a touch of magic to the naked nail with a sprinkle of glitter, proving that simple can also be pretty and eye-catching. It’s an ideal choice for adding a bit of summer flair without overwhelming the natural beauty of your nails.
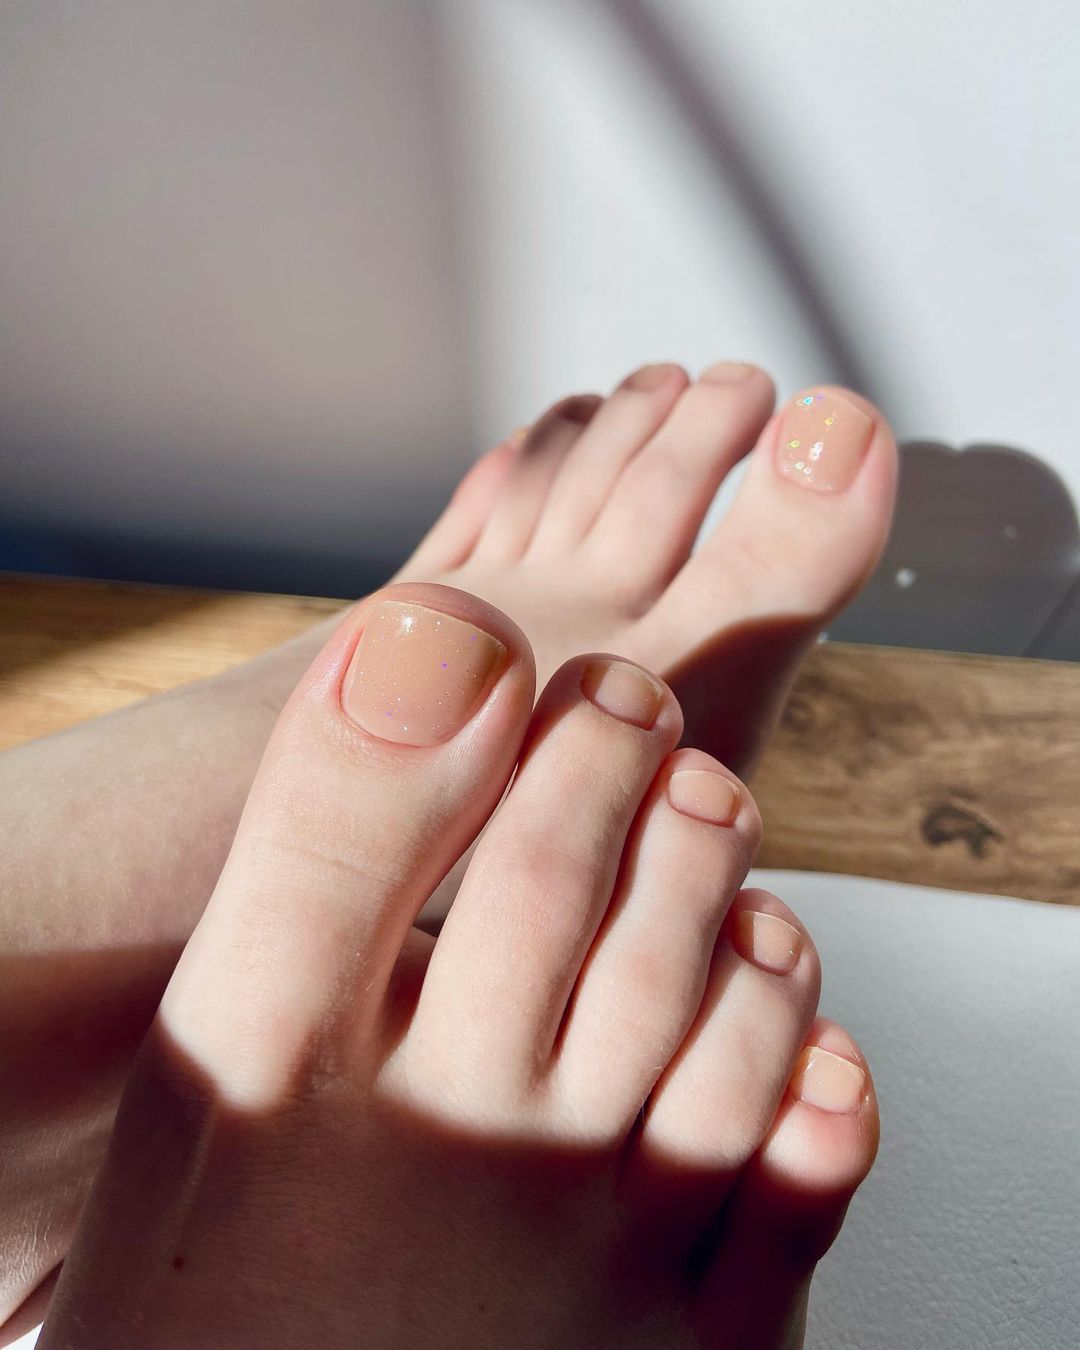
Professional Insight
The key here is the placement of the glitter—it’s subtle yet strategic, drawing the eye without dominating the overall aesthetic. This is art in its most delicate form, offering a fashion statement that’s both simple and refined.
Consumables for Creation
- Base coat: OPI Natural Nail Base Coat
- Glitter polish: China Glaze Fairy Dust
- Top coat: Seche Vite Dry Fast Top Coat
Don’t forget to apply the polish in thin layers to avoid bubbles and to ensure even drying.
DIY at Home
- Protect your nails with a base coat.
- Apply two thin layers of the tangerine polish, allowing it to dry between coats.
- Add a top coat for a shiny, long-lasting finish.
This pedicure is for those who love to stand out and embrace the vibrant side of summer.
Sheer and Glossy: Effortless Chic
Sometimes, the best nail look is one that enhances rather than distracts, like this beautifully simple and sheer polish that’s glossy and clean. It’s the kind of pedicure that’s perfect for any occasion, from a casual beach day to an elegant evening affair.
Professional Insight
The softness of the translucent polish gives a pretty blush to the nails, enhancing their natural color and shape. It’s a simple approach that speaks volumes in terms of fashion and style.
Consumables for Creation
- Base coat: Essie All in One Base
- Sheer polish: OPI Bubble Bath or similar shade
- Top coat: Sally Hansen Insta-Dri Anti-Chip Top Coat
A good top coat is essential for achieving that glassy finish that lasts.
DIY at Home
- Apply a base coat to protect and prime your nails.
- Choose a sheer polish and apply one or two coats depending on your desired opacity.
- Seal it with a fast-drying top coat for a durable, shiny finish.
Pretty in Pink: A Soft Touch
A dash of soft pink polish can be the epitome of nail elegance, offering a pretty and polished look without the need for elaborate art or design. This shade is versatile, pairing well with any outfit and suitable for all vacation scenarios, from a laid-back beach day to an upscale evening event.
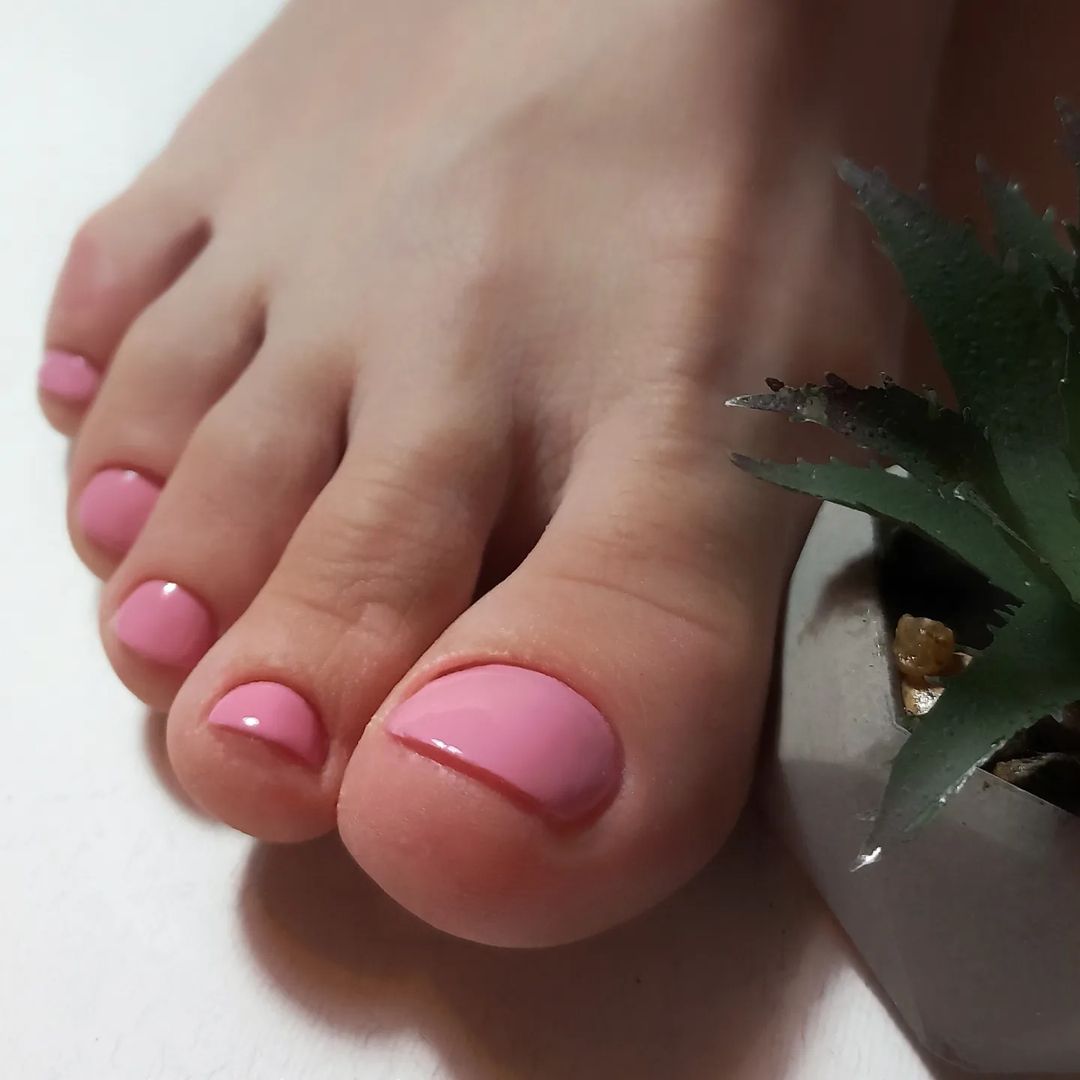
Professional Insight
The choice of a matte finish over a classic glossy one can offer a modern twist to the simple pink pedicure, making it a subtle yet significant nod to contemporary fashion. It’s a look that’s undeniably pretty and perfectly encapsulates summer vibes in a more understated manner.
Consumables for Creation
- Base coat: Essie Grow Stronger Base Coat
- Pink matte polish: OPI Mod About You
- Top coat: Essie Matte About You Top Coat
A matte top coat transforms any shiny polish into a velvet-like finish, so feel free to use what you have and mattify it!
DIY at Home
- Begin with a protective base coat to help strengthen your nails.
- Apply the pink polish in thin, even layers to avoid streaks.
- Once the color is set, apply a matte top coat for a trendy, flat finish.
This pedicure is ideal for those who prefer their summer look to be refined and elegant, with a touch of modernity in the finish. Whether you’re lounging by the pool or dining al fresco, these toenails will add a touch of class to your ensemble.
Sprinkled with Sophistication: Confetti-Like Charm
In a world where less is often more, this toenail design speaks volumes through its simplicity. With a clear base speckled with tiny flecks of color, it’s reminiscent of a delicate confetti shower—subtle, yet undeniably festive.
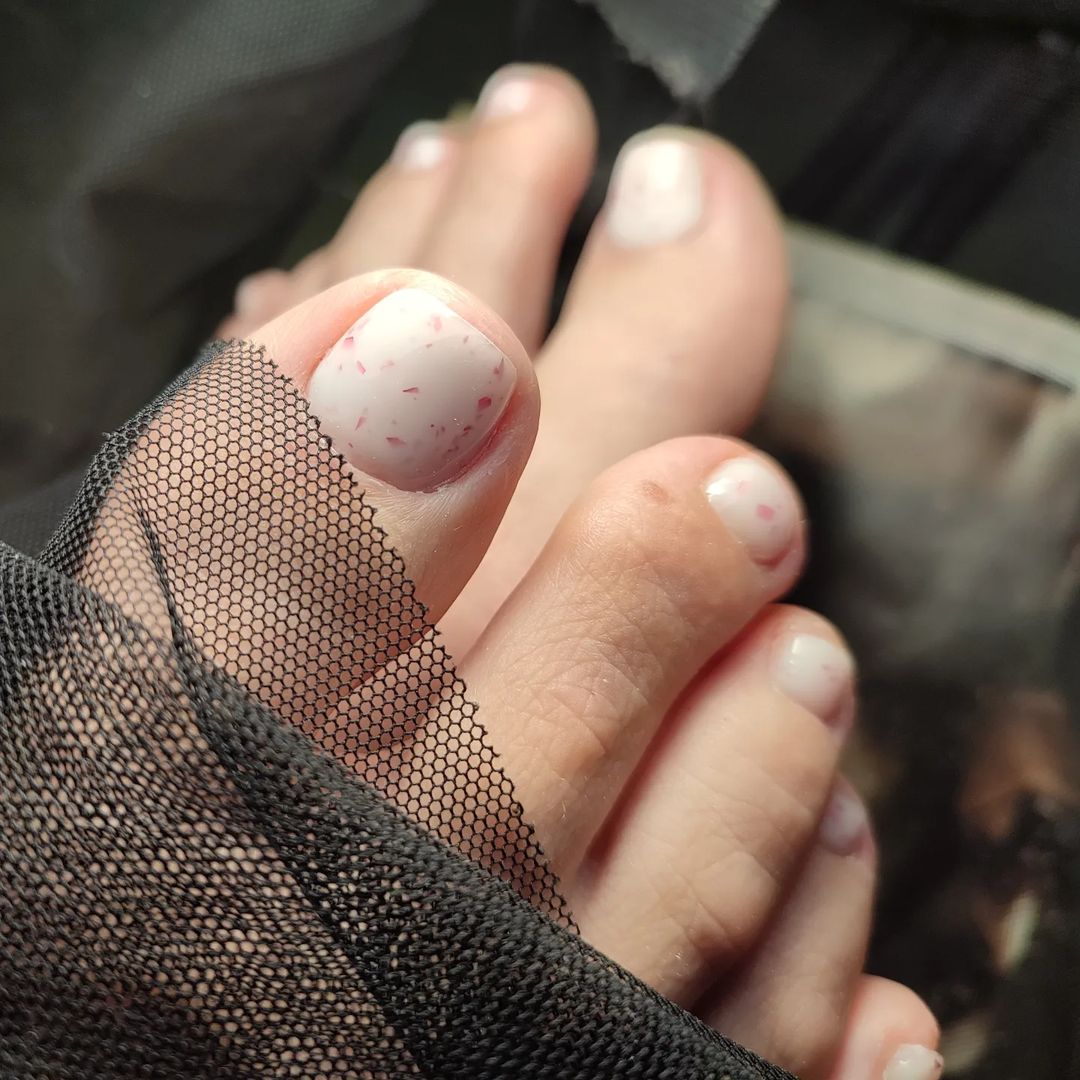
Professional Insight
This nail design achieves an effortlessly chic look that’s perfect for both everyday wear and special occasions. The sparse sprinkling of color adds just the right amount of whimsy to a simple manicure.
Consumables for Creation
- Base coat: Essie Strong Start
- Sheer polish with flecks: Deborah Lippmann Like a Virgin
- Top coat: Seche Vite Dry Fast Top Coat
Using a polish infused with colorful flecks eliminates the need for intricate nail art, making this a simple yet creative option.
DIY at Home
- Apply the base coat to protect your nails and extend the life of your manicure.
- Choose a sheer polish enhanced with tiny colored flecks and apply one or two coats as desired.
- A top coat adds shine and ensures the flecks stay in place, creating a look that’s pretty and simple.
Classic Pink with a Twist of Rhinestones
There’s something timeless about a classic pink pedicure. It’s the go-to for a pretty and polished look. But when you add a row of sparkling rhinestones to the mix, it elevates the design to new heights, perfect for those vacation nights where you want to shine.
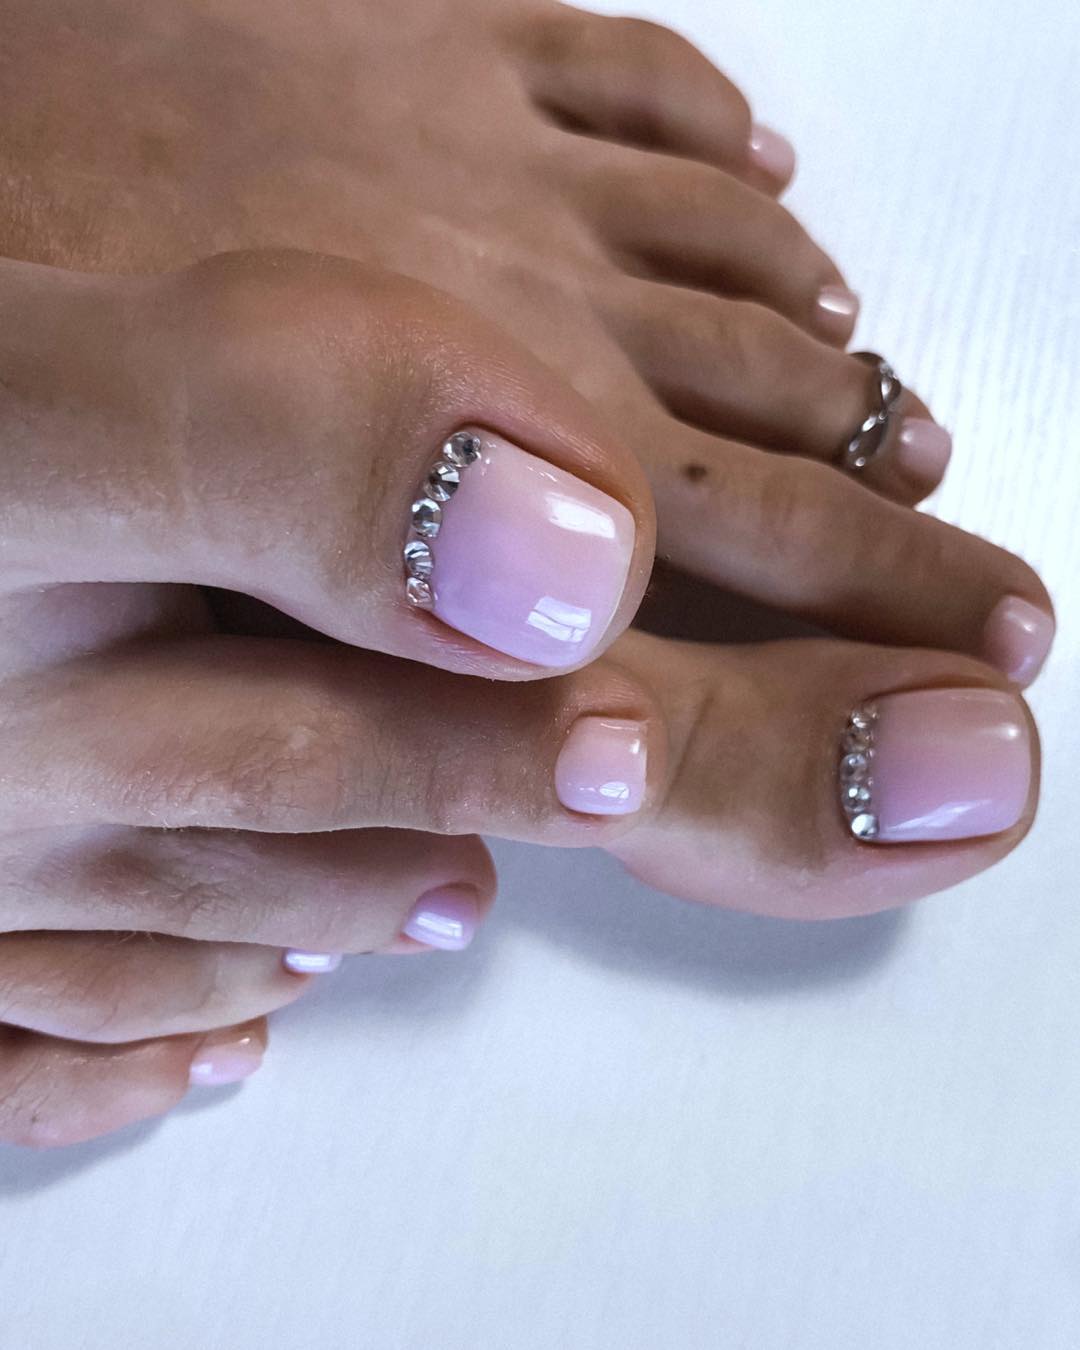
Professional Insight
The pink hue offers a soft and feminine base, while the rhinestones provide a line of subtle bling that catches the light with every step. It’s a simple design with an added touch of elegance.
Consumables for Creation
- Base coat: OPI Natural Nail Base Coat
- Pink polish: OPI Mod About You
- Rhinestones: Swarovski Clear Flatback Crystals
- Top coat: Sally Hansen Miracle Gel Top Coat
Remember to use a pair of tweezers or a dotting tool to place the rhinestones precisely along the nail’s edge.
DIY at Home
- Begin with a base coat to protect the nail.
- Apply two coats of the soft pink polish, letting each layer dry completely.
- Place rhinestones along the base or tip of the nail while the second coat is still tacky.
- Secure the design with a gel top coat for a durable and glossy finish.
Luxe Gemstone Look: Dazzlingly Detailed
For those who love a dash of drama in their style, this pedicure is a jewel. With a large gemstone as the centerpiece surrounded by smaller accents, it’s a design that’s rich with pretty and intricate details.
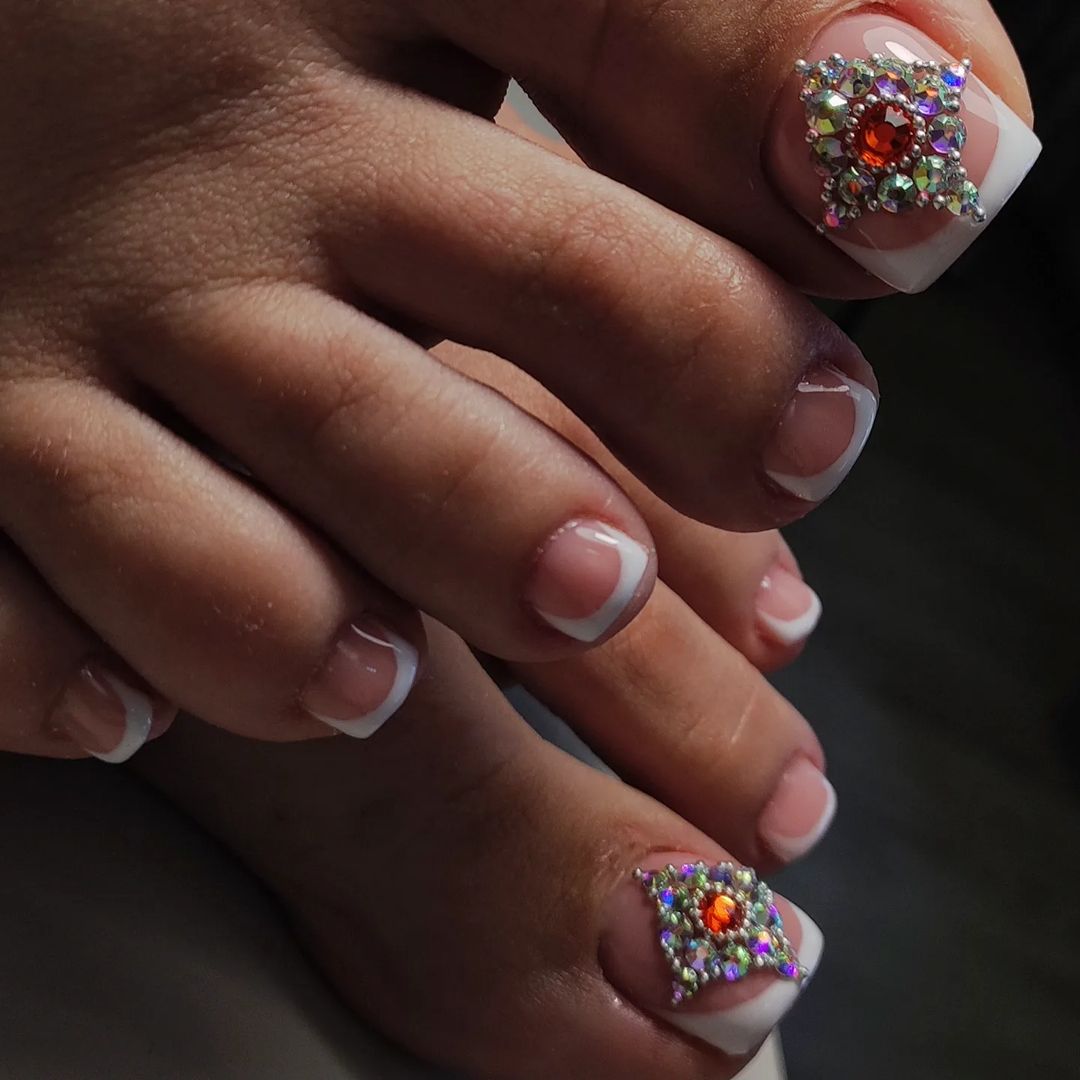
Professional Insight
The use of a single, prominent gemstone creates a luxurious focal point, while the surrounding smaller stones add depth and detail to the pedicure. It’s an opulent look that’s still simple enough not to overwhelm.
Consumables for Creation
- Base coat: Butter London Nail Foundation Priming Basecoat
- Nude polish: Essie Ballet Slippers
- Assorted gemstones: Mixed Sizes and Colors Nail Art Rhinestones
- Top coat: INM Out The Door Top Coat
Using a dot of nail glue instead of polish can give the gemstones extra hold, especially if you plan on spending a lot of time in the water or sand.
DIY at Home
- Start with a clean, prepped nail and apply your base coat.
- Paint the nails with a nude polish for a sophisticated backdrop.
- While the polish is still sticky, use a dotting tool or tweezers to place the central gemstone.
- Arrange the smaller stones around it, creating a radiant pattern.
- Apply a generous layer of top coat to secure the stones and add a high-gloss finish.
This pedicure exudes luxury and is sure to be a conversation starter at any summer event, from a casual vacation gathering to an upscale holiday gala.
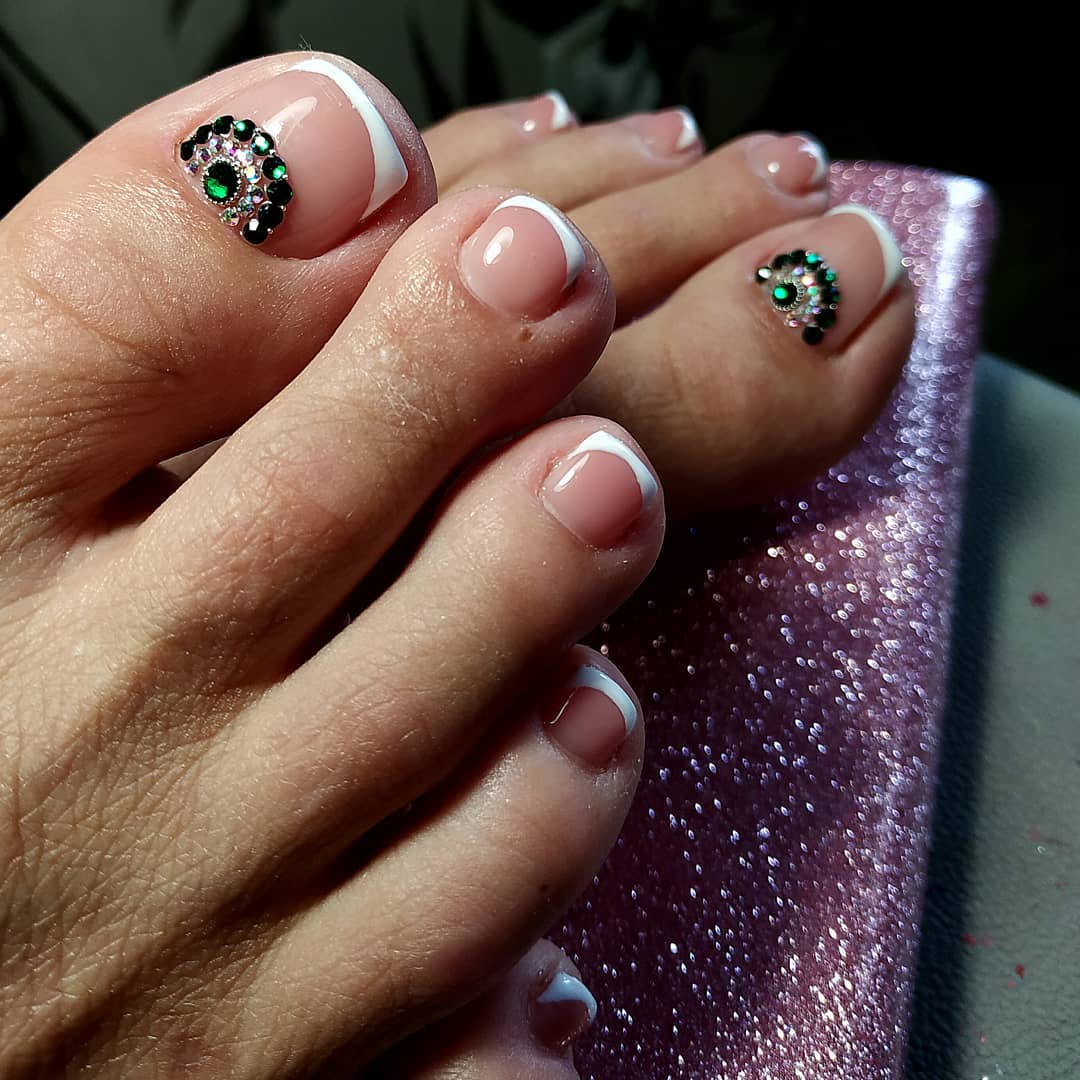
Jewel-Toned Toes
For an even more luxurious twist, consider a jewel-toned embellishment like an emerald accent. This style perfectly complements a French manicure, adding a regal touch that’s reminiscent of precious gemstones. It’s an excellent choice for a sophisticated holiday look or a pretty vacation simple evening.
Professional Insight
The rich green of the rhinestone creates a beautiful contrast against the soft pink base, turning your toes into a piece of wearable art. It’s a simple yet opulent touch that doesn’t overwhelm but enhances the overall fashion of the design.
Consumables for Creation
- Base coat: Deborah Lippmann Gel Lab Pro Base Coat
- Sheer pink polish: OPI Bubble Bath
- Emerald rhinestones: Green Nail Art Rhinestones
- Top coat: INM Out The Door
As always, applying the rhinestones while the polish is still slightly tacky will help them adhere better.
DIY at Home
- Begin with a nourishing base coat for a strong foundation.
- Apply a sheer pink polish for a natural yet polished look.
- Add an emerald rhinestone to the center of the nail, using a dot of top coat or nail glue to secure.
- Finish with a swipe of top coat to encapsulate the color and the gemstone accent.
This design is for those who prefer their summer style to carry an air of nobility, combining the understated grace of a French pedicure with the striking beauty of an emerald stone.
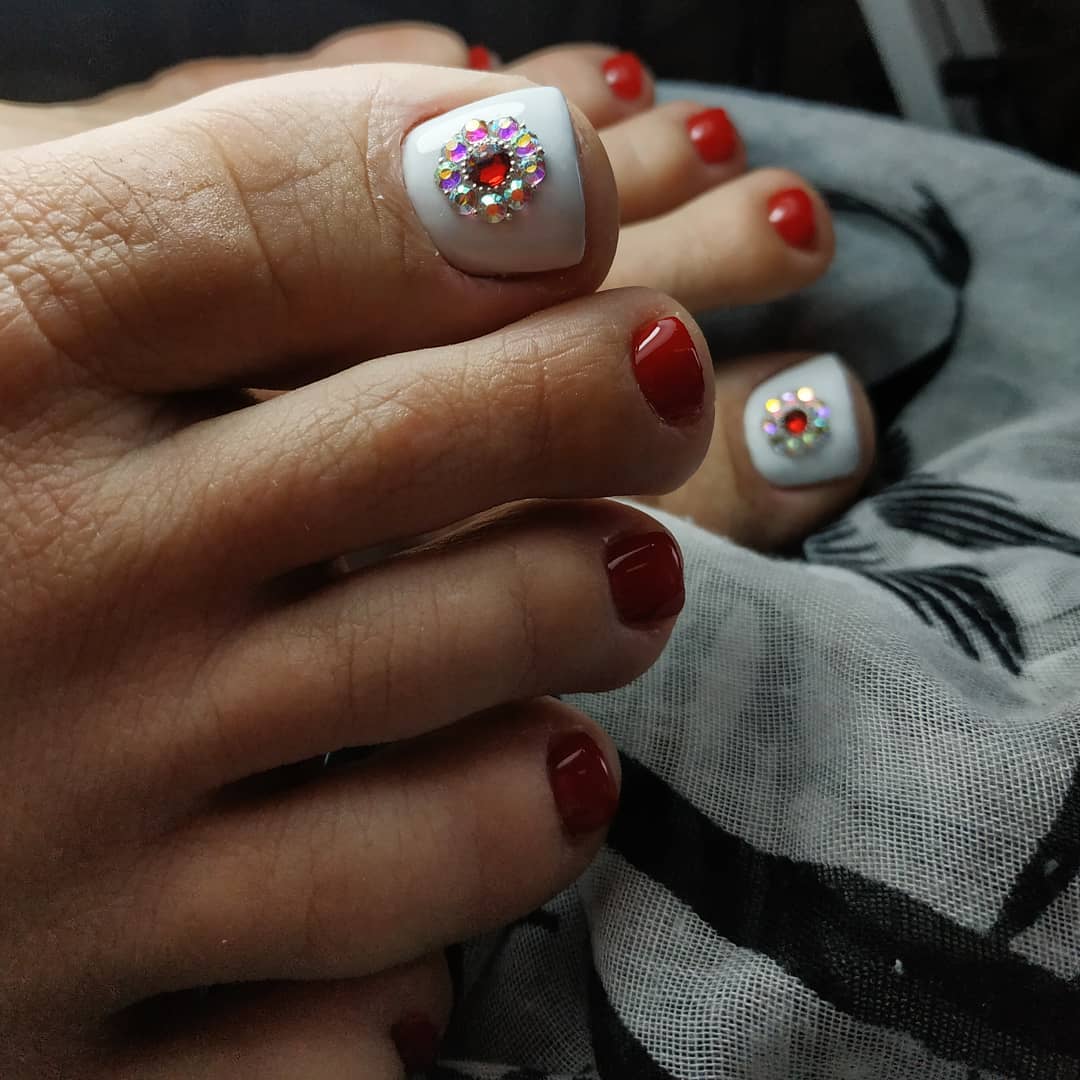
Classic French with a Pop of Sparkle
A traditional French pedicure with a modern twist—the addition of a dazzling rhinestone accent turns an elegant classic into a contemporary masterpiece. It’s a timeless design perfect for those who enjoy a touch of glam on their simple yet pretty toes.
Professional Insight
The crisp white tips serve as a beautiful contrast to the natural nail color, and the rhinestone adds a focal point that’s both bright and bold. It’s a subtle way to introduce art into a fashion staple, blending the simple lines of a French tip with the allure of summer sparkle.
Consumables for Creation
- Base coat: CND Stickey Base Coat
- White tip polish: Essie Blanc
- Rhinestone accents: Variety Pack of Nail Art Rhinestones
- Top coat: Essie Gel Setter Top Coat
A bit of nail glue can help keep the rhinestones secure, especially during active vacation adventures.
DIY at Home
- Apply the base coat to clean, filed toenails for the best adhesive surface.
- Paint a classic French tip with precision, using either freehand technique or tip guides for help.
- While the tip is still tacky, carefully place a rhinestone accent on the big toe using tweezers or a dotting tool.
- Seal everything with a gel top coat for a glossy finish and added durability.
This pedicure choice is perfect for both day and night occasions during your summer vacation, offering a simple yet stunning look.
FAQ
Q: Can I use stickers if I can’t find decals?
A: Absolutely! Nail stickers are a great alternative to decals and come in various designs perfect for summer colors.
Q: How can I prevent my toenail polish from chipping on the beach?
A: A quality top coat, like Seche Vite, not only gives a glossy finish but also protects your polish from the elements.
Save Pin