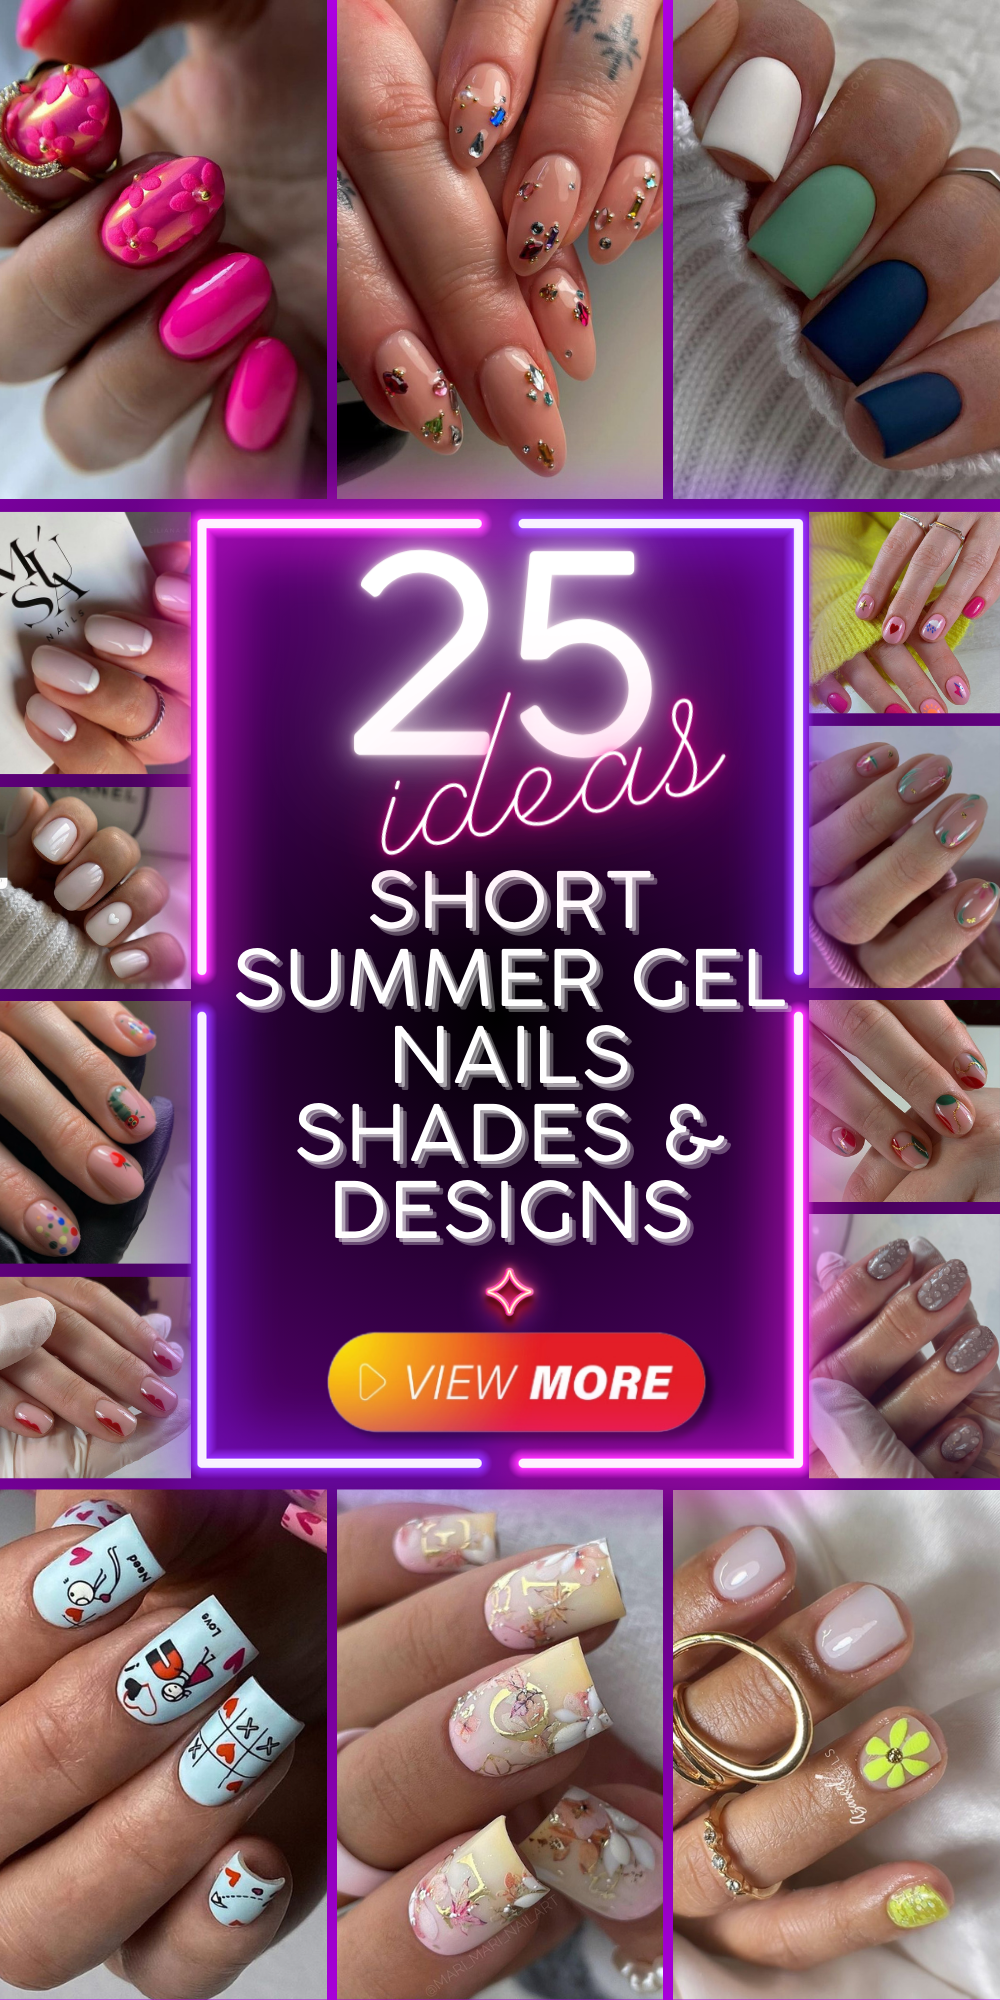
Ever wondered how neon coral nails can transform your look from simple to stunningly vibrant? As a professional manicurist, I’ve seen firsthand how the right shade of neon coral can elevate a client’s confidence and style. Today, I’m diving into the world of neon coral nails, showcasing different designs, and guiding you on how to recreate these fabulous looks at home. From the sassy bright hues to the subtle touches of glitter and chrome, neon coral nails are perfect for any season but are an undeniable favorite for design summer colors.
Neon Coral Almond Shaped Nails
Neon coral nails, particularly in an almond shape, provide a striking balance between elegance and boldness. This design, vivid and bright, stands out beautifully against different skin tones. The glossy polish finish adds a luxurious depth, enhancing the color’s vibrancy. Perfect for those who favor long nails, this style remains manageable and does not interfere with daily tasks. The consistent color application suggests the use of high-quality OPI or Gel products, ensuring a lasting finish without chipping.

- Polish: OPI GelColor in “Cajun Shrimp”
- Base Coat: OPI Natural Base Coat
- Top Coat: OPI Glossy Top Coat
- Nail File: For shaping the almond contour
- Cuticle Oil: To prep the nails before application
DIY Instructions
- Start with clean, filed nails and apply a base coat.
- Paint two coats of OPI GelColor in “Cajun Shrimp,” curing under a UV lamp between coats.
- Finish with a glossy top coat for shine and protection.
- Apply cuticle oil to nourish the skin around the nails.
Two-Tone Neon Coral Tips
This two-tone look featuring neon coral tips on a translucent base is the epitome of summer chic. The French tip design with a modern twist uses a bright neon shade that transitions beautifully with the natural nail color. This style is perfect for those who like a touch of art while keeping the overall look simple and elegant.
- Polish: Essie Gel Couture in “On the List” and “Sheer Fantasy”
- Base Coat: Essie Strong Start Base Coat
- Top Coat: Essie Gel Couture Top Coat
- Nail Tape: For precise tip application
DIY Instructions
- Apply a strong base coat and let it dry.
- Use nail tape to define the tip line and apply two coats of “On the List” on the tips.
- Remove the tape and apply one coat of “Sheer Fantasy” over the entire nail for a seamless blend.
- Seal with a top coat for a durable, glossy finish.
Artistic Neon Coral Design with Eye Motifs
Incorporating art designs like the eye motifs on these neon coral nails can truly showcase your creative side. This fun, cute, and slightly edgy design uses bright coral as a base while integrating intricate art with rhinestones for an additional sparkle. Such designs are great for design nailart enthusiasts who love to express their personality through their nails.

- Polish: Sally Hansen Miracle Gel in “Electra-Cute”
- Art Brushes: For detailed design work
- Rhinestones: Small sizes for the eye’s center
- Adhesive: Nail glue for rhinestone application
DIY Instructions
- Paint the base with two coats of “Electra-Cute.”
- Use a fine art brush to paint the eye designs using black and white polish.
- Apply a small dot of nail glue where you want the rhinestone, then place it.
- Finish with a clear top coat to seal everything in place.
Vibrant Coral Stilettos
These vibrant coral stiletto nails are not just a statement of style; they are a declaration of confidence. The high-gloss finish and the flawless, smooth surface suggest the use of top-quality gel or acrylic. The intense shade of coral, set against a floral backdrop, makes it a perfect choice for design summer colors and ideas summer.
- Polish: DND Gel & Lacquer in “Vibrant Coral”
- Base Coat: Essie Here to Stay Base Coat
- Top Coat: Seche Vite Dry Fast Top Coat
- Nail Forms: For sculpting the stiletto shape
- UV Lamp: For curing the gel polish
DIY Instructions
- Prepare your nails with a base coat and place nail forms.
- Apply the vibrant coral gel polish and cure under a UV lamp.
- Shape the nails into a stiletto form, then apply a top coat for a dazzling finish.
- Remove any residues with a cleanser to reveal a high-shine effect.
Save Pin

Sleek Neon Coral Coffin Nails
The sleek neon coral coffin nails are the epitome of modern chic. The long nail type combined with a coffin shape provides a sophisticated canvas for the bold neon coral, making it a fantastic design for both casual and formal occasions. The impeccable application suggests a skilled technique, likely involving both gel and acrylic for durability and sheen.
- Polish: Victoria Vynn Mega Base and Top Gel
- Acrylic Powder: Clear for structural integrity
- Primer: For adhesion between the natural nail and acrylic
- Nail File: To perfect the coffin shape
DIY Instructions
- Apply primer and base coat.
- Mix acrylic powder with monomer and apply to nails, shaping into the coffin form.
- Cure under a UV lamp and then apply two coats of neon coral gel polish.
- Seal with a top coat for a long-lasting, glossy finish.
Creative Coral with Golden Accents
This creative coral design embellished with golden accents and unique nail art exemplifies personalized fun and cute nail art. The use of gold foil and detailed painting on one finger adds an element of luxury and artistry. This design is particularly suitable for special occasions or as a fun way to spruce up everyday looks.
- Polish: Chanel Le Vernis Longwear Nail Colour in “Electra-Cute Coral”
- Gold Leaf: For the accents
- Detailing Brush: For intricate designs
- Top Coat: High gloss for sealing the design
DIY Instructions
-
- Apply two coats of coral polish as the base.
- Use a detailing brush to adhere gold leaf on the accent nail.
- Paint the desired design using a fine brush and black polish.
- Finish with a top coat to protect both the color and the art work.
Playful Neon Coral with Animal Print
This nail design brilliantly combines playful elements with chic aesthetics. The alternating nails feature a bright neon coral base, with one standout nail adorned in a bold animal print. This style is perfect for those who love to add a fun twist to their manicure without sacrificing sophistication.
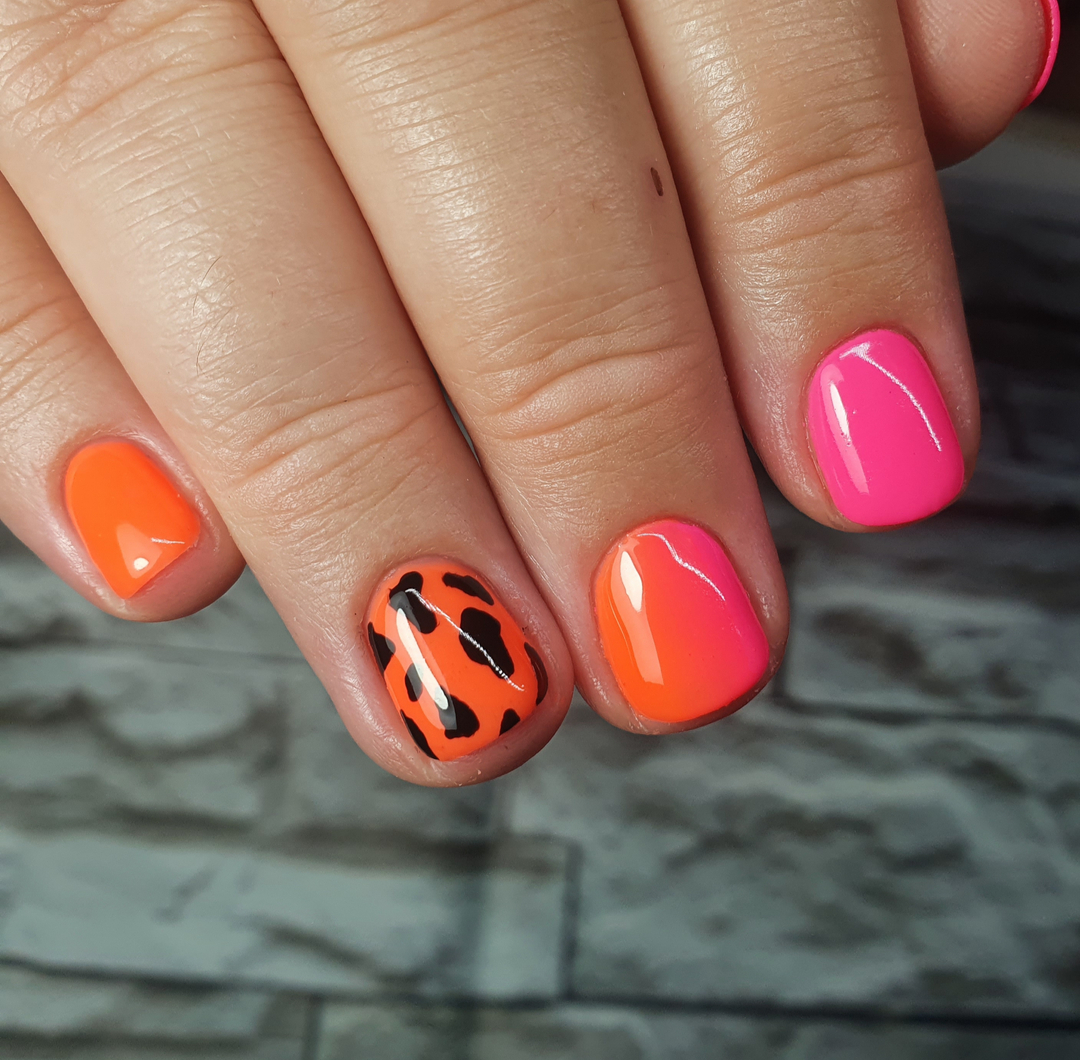
- Polish: Essie “Tart Deco” for the coral base
- Black Polish: For the animal print
- Top Coat: Seche Vite for a smooth, shiny finish
- Detailing Brush: For precision in the animal print design
DIY Instructions
- Apply a base coat to protect your natural nails.
- Paint all nails in “Tart Deco,” except for the accent nail.
- Use a detailing brush with black polish to create the animal print on one nail.
- Finish all nails with a fast-drying top coat to enhance durability and gloss.
Neon Coral with Golden Flakes
These coral nails are elegantly uplifted by the inclusion of gold flakes, giving a rich, luxurious finish. The bright coral provides a vivid backdrop that makes the gold stand out, perfect for special events or just to glam up your everyday look.
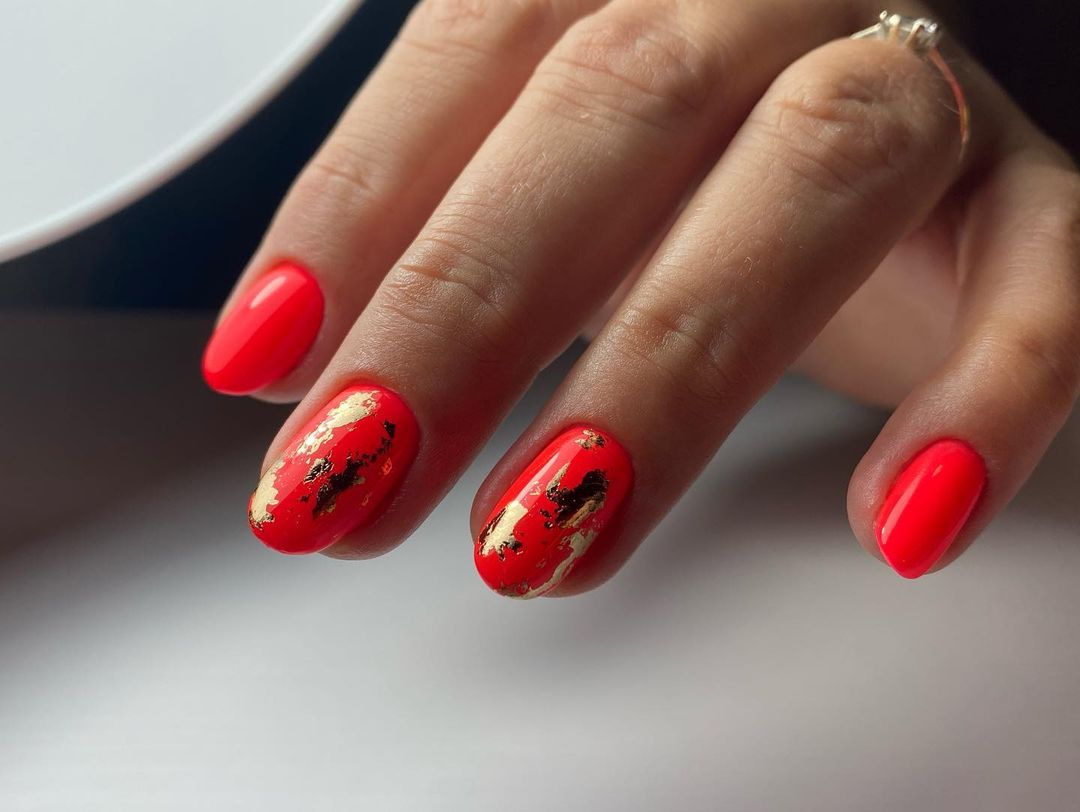
- Polish: Chanel “Holiday” for the base
- Gold Leaf Flakes: For the accents
- Top Coat: Chanel Le Gel Coat for long-lasting wear
- Tweezers: To place the gold flakes precisely
DIY Instructions
- Begin with a clean, dry base coat.
- Apply two coats of “Holiday” to achieve a solid neon coral color.
- Carefully place gold flakes using tweezers on the still wet second coat.
- Seal with a top coat to ensure the flakes are embedded and the finish is smooth.
Neon Coral Elegance with Rhinestone Accents
This design showcases neon coral with a stylish twist—featuring rhinestone accents on a singular matte accent nail. It’s a perfect blend of fun and elegance, combining a bright pop of color with subtle bling, making it ideal for those who appreciate a touch of glamour with their vivid nail colors.

- Polish: Sally Hansen “Kook a Mango” for the bright base
- Matte Top Coat: For the accent nail
- Rhinestones: Various sizes for decoration
- Adhesive: Nail glue for securing rhinestones
DIY Instructions
- Paint all nails except the accent nail with two coats of “Kook a Mango.”
- Apply a matte top coat to the accent nail.
- Once dry, use a dot of nail glue to place rhinestones in your desired design on the matte nail.
- Finish the other nails with a glossy top coat to make the coral pop and contrast with the matte texture.
Save Pin
Classic Coral Elegance
This nail design features a classic, timeless look with a high-gloss finish that enhances the coral’s natural vibrancy. The use of a quality brand like Zoya ensures a smooth application and durable wear. This style is perfect for anyone seeking a polished, professional appearance that’s versatile for both everyday and special occasions.
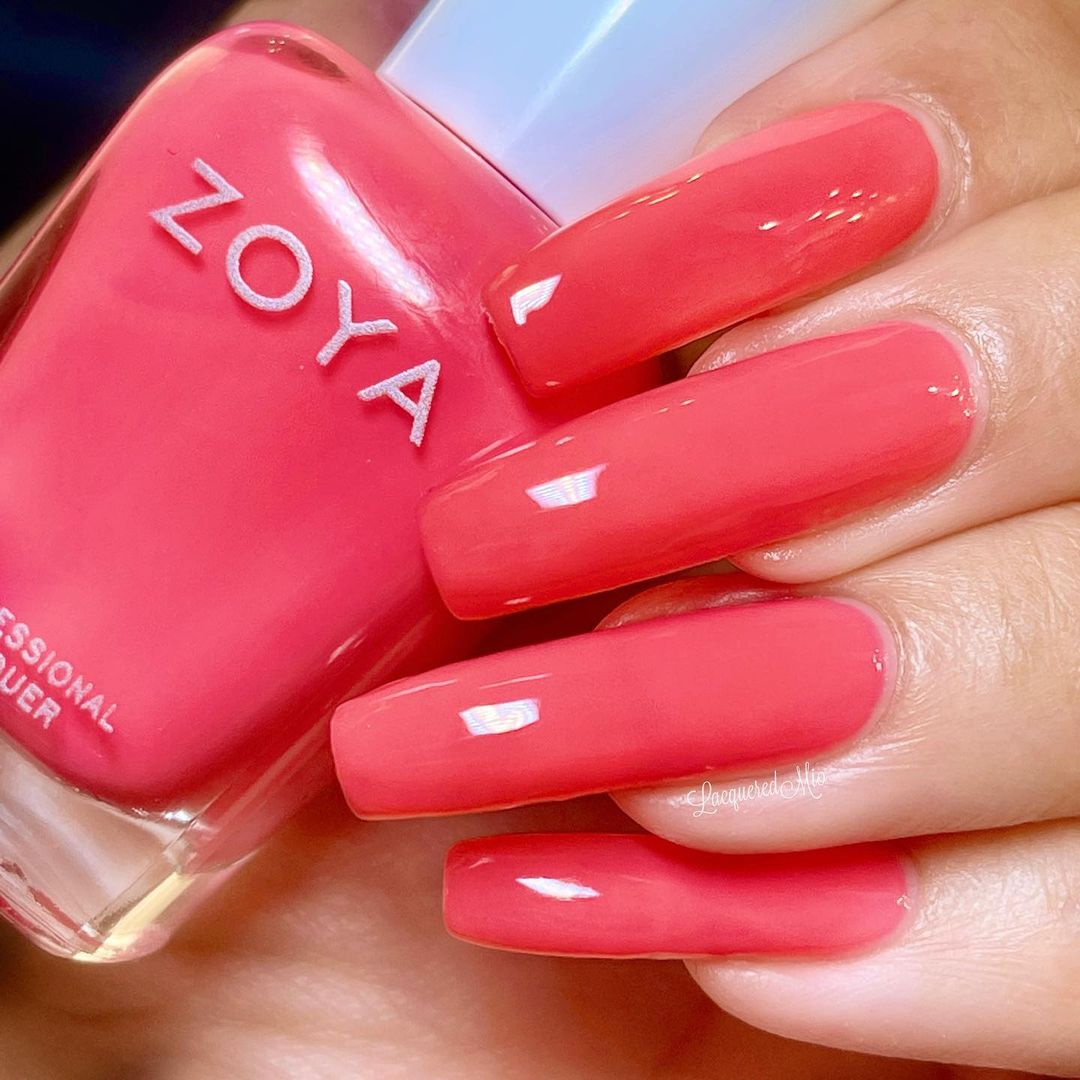
- Polish: Zoya Nail Polish in “Wendy”
- Base Coat: Zoya Anchor Base Coat
- Top Coat: Zoya Armor Top Coat
- Nail Polish Remover: For prep and cleanup
DIY Instructions
- Start by applying Zoya Anchor Base Coat to clean, prepped nails.
- Apply two coats of Zoya “Wendy,” allowing each coat to dry thoroughly.
- Finish with Zoya Armor Top Coat for a long-lasting, shiny finish.
- Clean up any edges with a nail polish remover for a neat look.
Neon Coral with Sea-Themed Art
These nails incorporate vibrant neon coral with sea-themed art, making them a perfect choice for summer or a beach vacation. The glitter underlay adds depth and sparkle, while the detailed seashell and wave patterns painted on top showcase artistic skill and creativity.
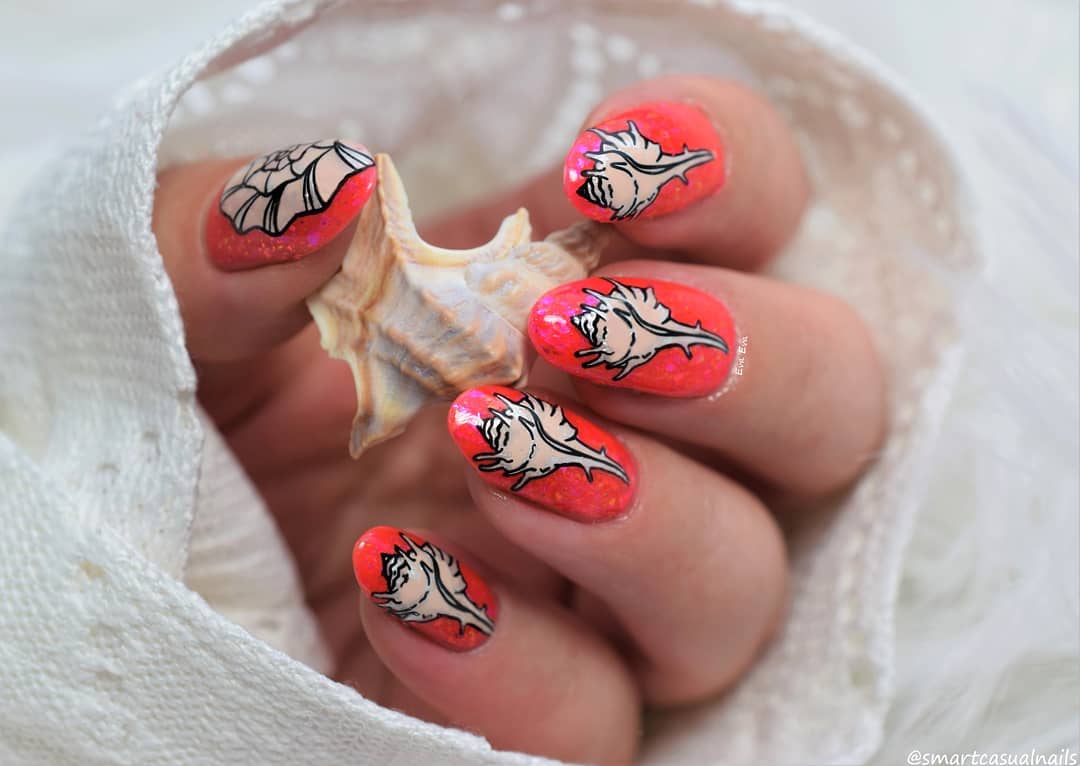
- Polish: Sally Hansen “Sun Kissed” for the base
- Glitter Polish: For the sparkling underlay
- Art Brushes: For detailed painting
- Top Coat: High-gloss for protection and shine
DIY Instructions
- Apply a base coat and then two layers of “Sun Kissed.”
- Add a layer of glitter polish for a shimmering effect.
- Use art brushes to hand-paint the seashell and wave designs.
- Seal with a high-gloss top coat to ensure durability and enhance the art.
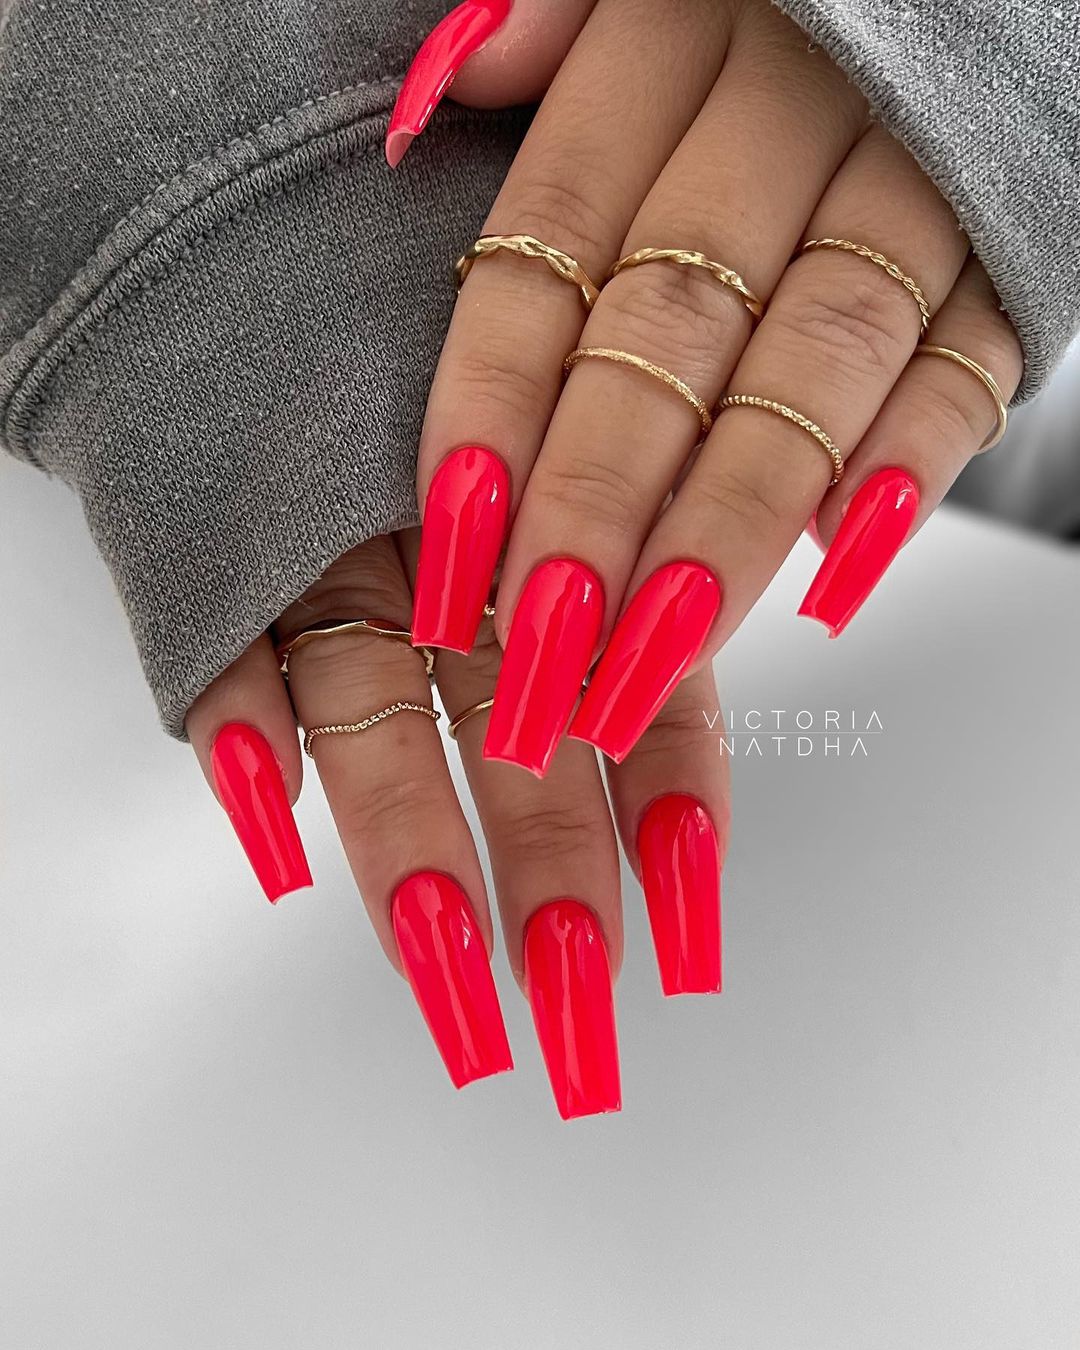
Bold and Bright Neon Coral Stilettos
These stiletto nails are bold and daring, with a bright neon coral that stands out. The smooth, shiny finish indicates expert application, likely involving a gel-based system for that perfect glossy look. Ideal for those who wish to make a striking fashion statement.
- Gel Polish: Gelish “Mango Tango” for a vibrant neon look
- UV Lamp: To cure the gel polish
- Nail File: For shaping into a stiletto form
- Top Coat: Gel-based for extra gloss and longevity
DIY Instructions
- Shape your nails into the desired stiletto form.
- Apply a base coat and cure under a UV lamp.
- Apply two coats of “Mango Tango,” curing after each application.
- Finish with a gel-based top coat and cure for the final glossy finish.
Neon Coral with Marble and Gold Detailing
This design blends neon coral polish with exquisite marble and gold leaf detailing, creating a luxurious and unique nail art. The combination of glossy coral with the soft, intricate marble pattern and the sparkle of gold offers a sophisticated yet striking look. This design is perfect for those who appreciate a refined artistic touch in their manicure.
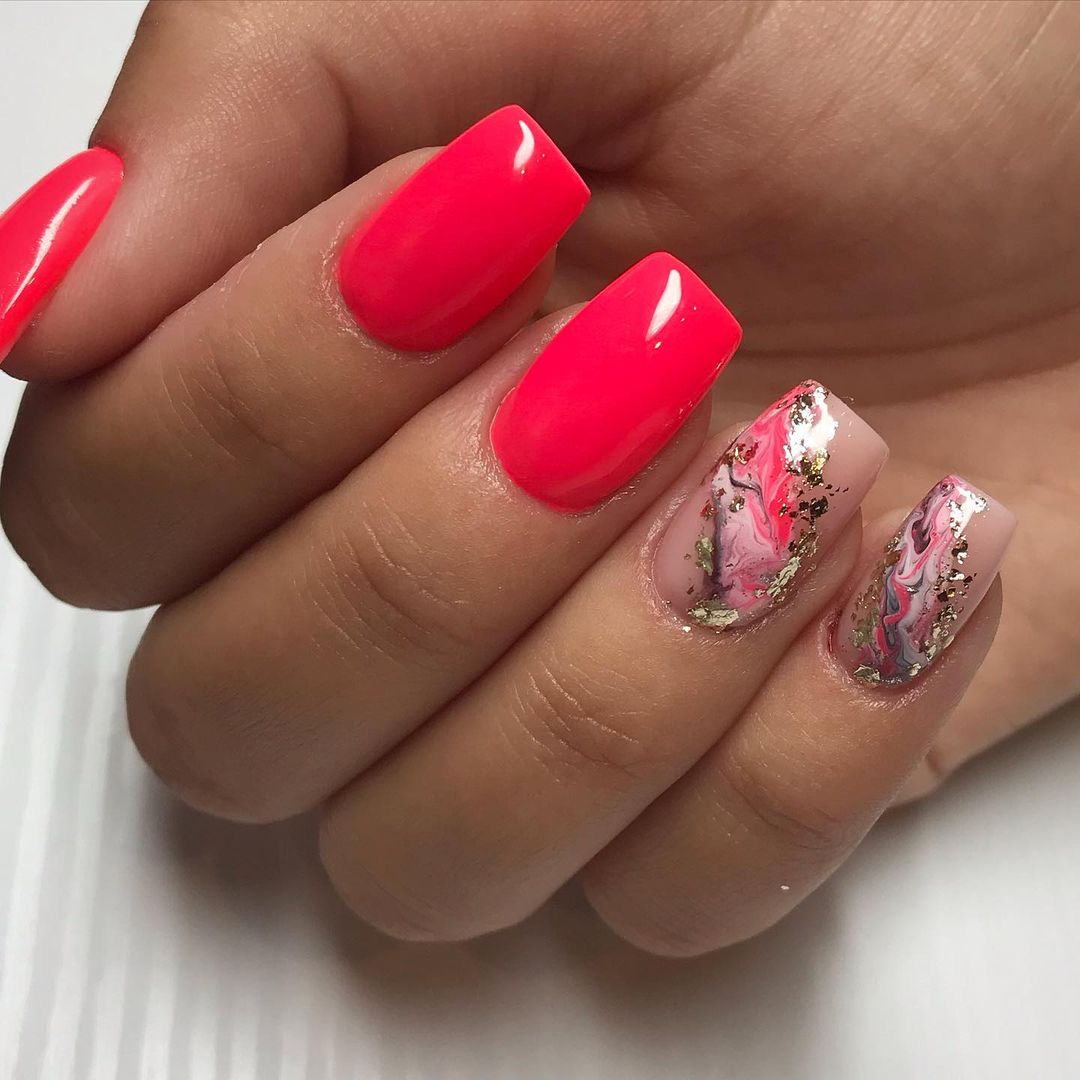
- Polish: Neon coral and white for the base and marble effect
- Gold Leaf: For the accents
- Top Coat: High-gloss for a smooth finish
- Detailing Brushes: For marble effects
- Sponge: To softly blend the marble design
DIY Instructions
- Apply a base coat and a neon coral polish as the base layer.
- Dab white polish with a sponge for a soft marble effect.
- Add thin lines of gold leaf for a touch of luxury.
- Use a fine brush to enhance the marble detailing.
- Finish with a high-gloss top coat to protect and enhance the nail art.
Modern Coral Geometry with Gold Accents
Featuring a striking contrast between neon coral and nude tones, this design is modern and edgy. The geometric lines accented with gold leaf provide a chic and eye-catching appearance. Perfect for those looking to make a bold statement with their nail art.

- Polish: Neon coral and nude for the base
- Gold Leaf: For creating bold lines
- Top Coat: Matte finish to contrast the shine
- Tape: For precise geometric patterns
DIY Instructions
- Paint the base with neon coral and nude polish in alternate sections.
- Once dry, use tape to outline geometric shapes.
- Apply gold leaf along the tape edges for sharp, metallic lines.
- Remove tape and finish with a matte top coat for a contemporary look.
Delicate Coral Florals on Soft Pink
This delightful design uses neon coral to create charming floral patterns over a soft pink base. It’s a perfect example of spring and summer nail art, combining playfulness with elegance. Ideal for casual outings or sunny beach days.
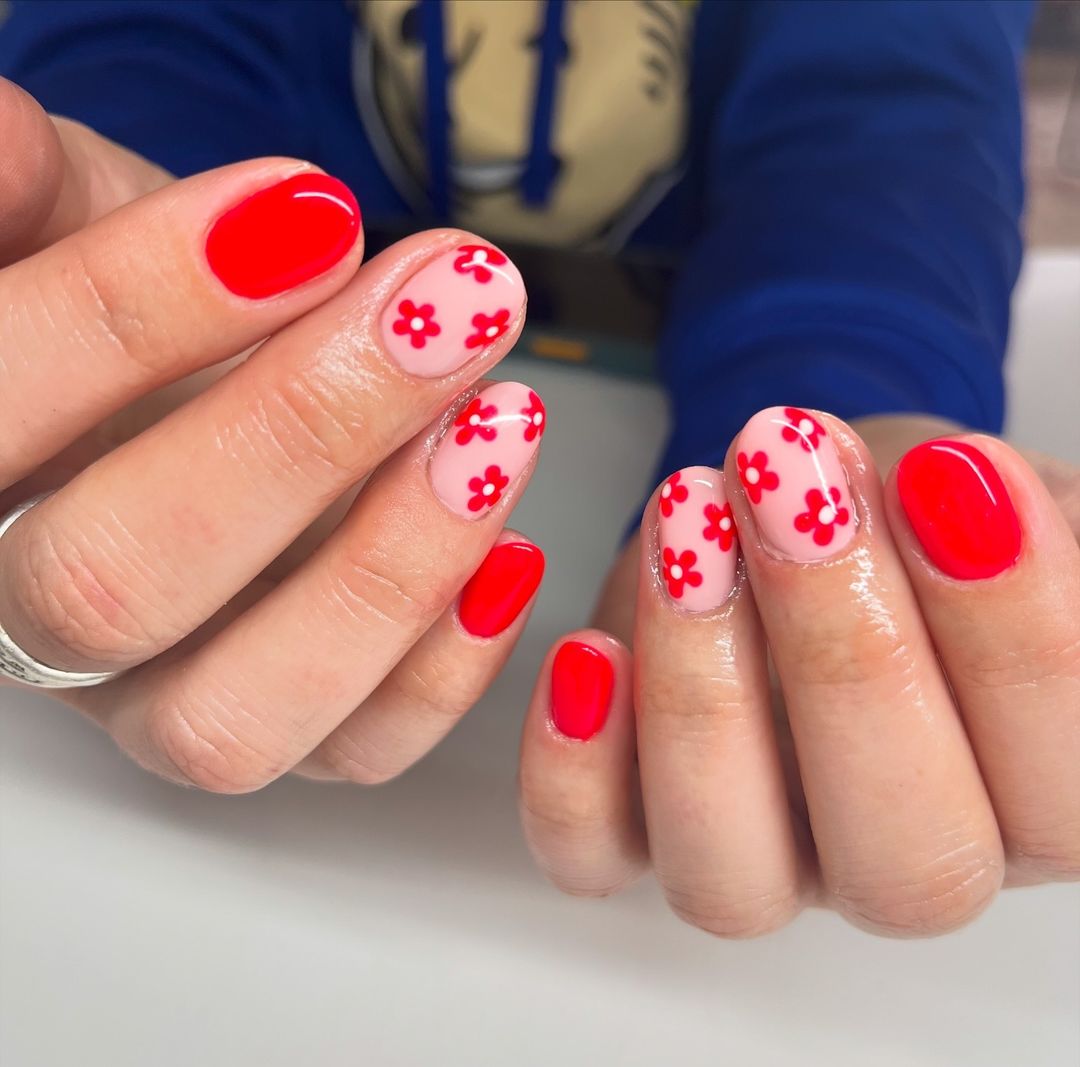
- Polish: Soft pink as the base and neon coral for the flowers
- Top Coat: Clear with a glossy finish to enhance the design
- Detailing Brush: For intricate floral art
DIY Instructions
- Start with a soft pink base coat.
- Use a detailing brush to paint small neon coral flowers.
- Add green dots for leaves to complete the floral pattern.
- Seal with a glossy top coat for durability and shine.
Neon Coral Ombre Elegance
This sophisticated design combines the boldness of neon coral with the subtlety of a nude ombre effect. The smooth transition between the vibrant coral and the soft nude creates a visually pleasing gradient that’s both modern and chic. This nail style is ideal for those who appreciate a dramatic yet refined look.

- Polish: Neon coral and nude for the gradient
- Sponge: For blending the ombre effect
- Top Coat: High-gloss for a seamless finish
- Base Coat: To ensure polish adhesion and longevity
DIY Instructions
- Apply a base coat to protect the natural nail.
- Paint the entire nail with a nude polish as the base color.
- Dab neon coral polish on a sponge and gently press onto the tip, blending towards the middle.
- Repeat until the desired ombre effect is achieved.
- Seal with a high-gloss top coat for a smooth and durable finish.
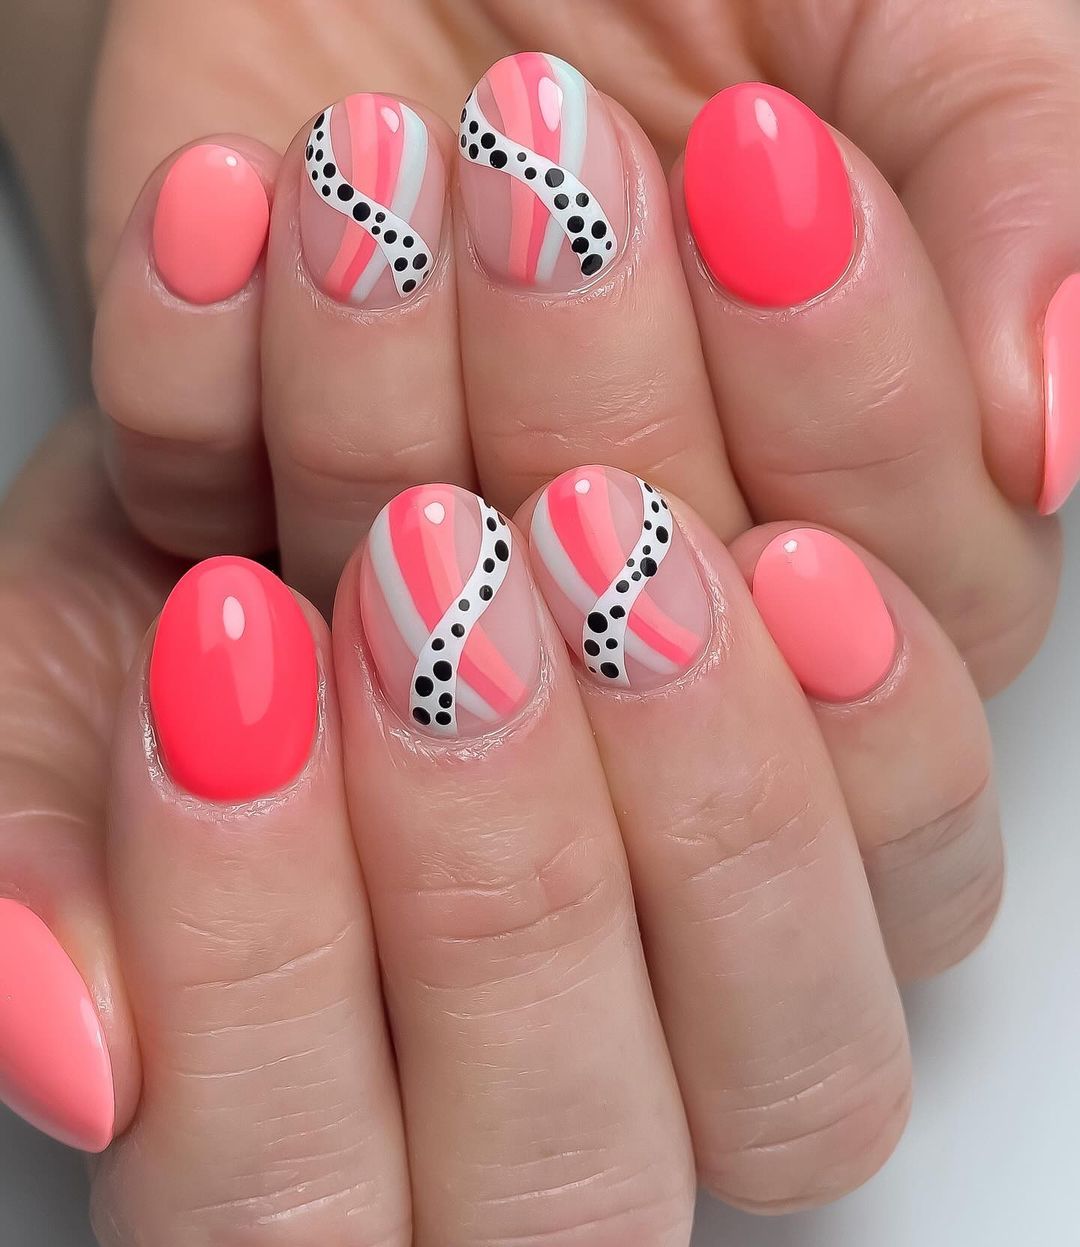
Neon Coral with Geometric Accents
This design features neon coral combined with soft pink and silver glitter, creating a delightful contrast. The geometric patterns and dotted accents add a playful yet sophisticated touch to the nails, making it a perfect choice for those who like to mix fun and classy styles.

- Polish: Neon coral, soft pink, and silver glitter
- Dotting Tool: For precise dot placement
- Tape: For creating sharp geometric lines
- Top Coat: Matte for a modern finish
DIY Instructions
- Apply a base coat to all nails.
- Paint alternate nails with neon coral and soft pink.
- Use tape to section off areas for the silver glitter and apply.
- Add dots with a dotting tool to enhance the design.
- Apply a matte top coat for a contemporary look.
Modern Art Stripes on Neon Coral
This striking design uses neon coral as a base with white art stripes, offering a fresh and vibrant look. The precise, clean lines over the bold coral provide a stark contrast that is eye-catching and stylish. This look is great for anyone seeking to make a statement with their nails.

- Polish: Neon coral and white for stripes
- Striping Tape: For perfect lines
- Top Coat: Glossy to enhance the vibrancy
- Detailing Brush: For any touch-ups
DIY Instructions
- Paint nails with two coats of neon coral polish.
- Once dry, place striping tape in desired patterns.
- Apply white polish using a detailing brush over the tape.
- Carefully remove the tape before the polish dries.
- Finish with a glossy top coat for added shine and protection.
Neon Coral with Glitter Accents
This set showcases a vibrant neon coral paired with a glittery accent nail that catches the light beautifully. The use of fine glitter over a translucent base creates a jewel-like appearance, making this design ideal for festive occasions or just to add a bit of sparkle to your everyday look.
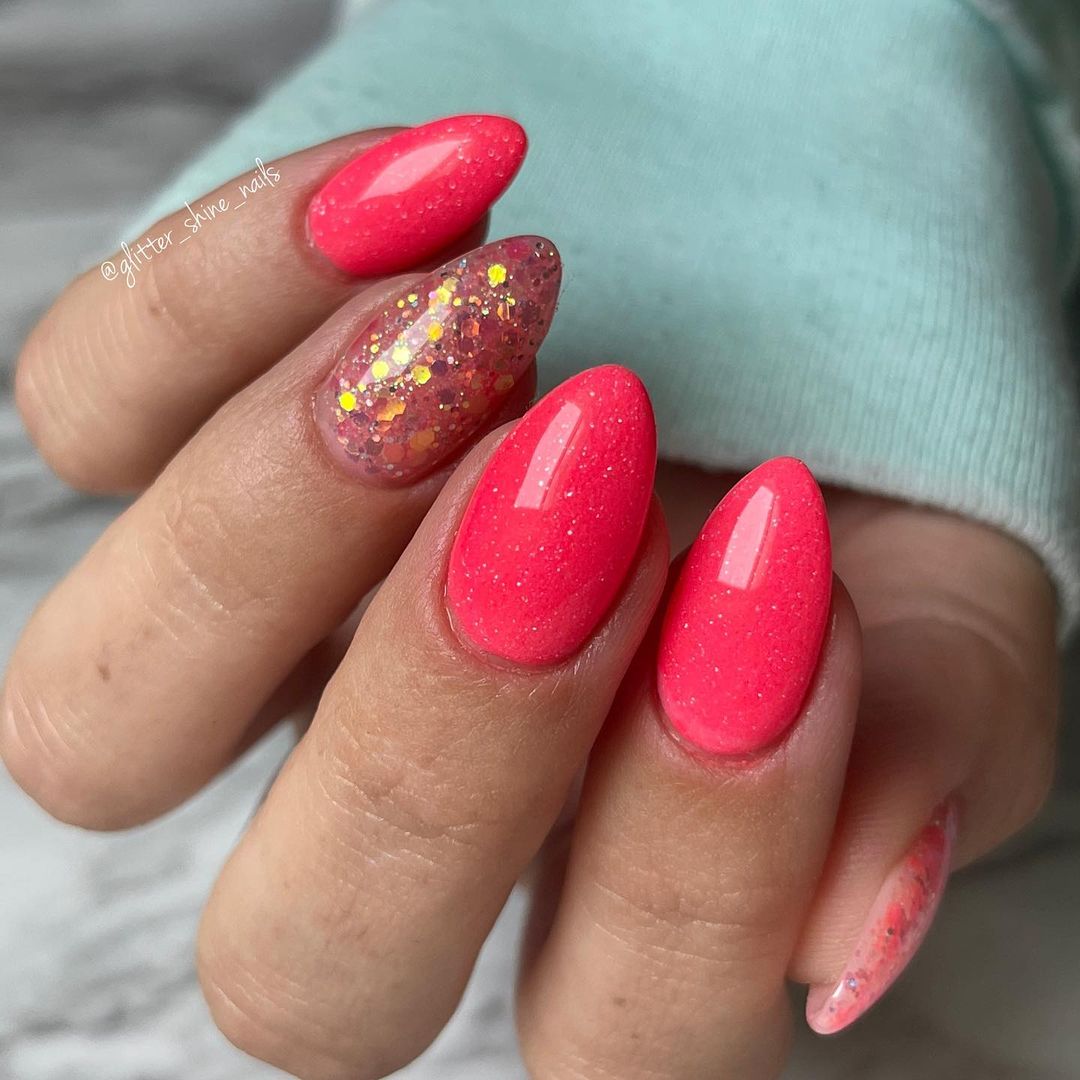
- Polish: Neon coral for the base, clear polish for the glitter nails
- Glitter: Fine pink and gold mixed glitter
- Top Coat: High-gloss to seal in the glitter and enhance the overall shine
- Base Coat: To protect the natural nails and improve polish adherence
DIY Instructions
- Apply a base coat to all nails for protection.
- Paint all but one nail with neon coral polish.
- Mix fine glitter with clear polish and apply to the accent nail.
- Seal all nails with a high-gloss top coat for a smooth, durable finish.
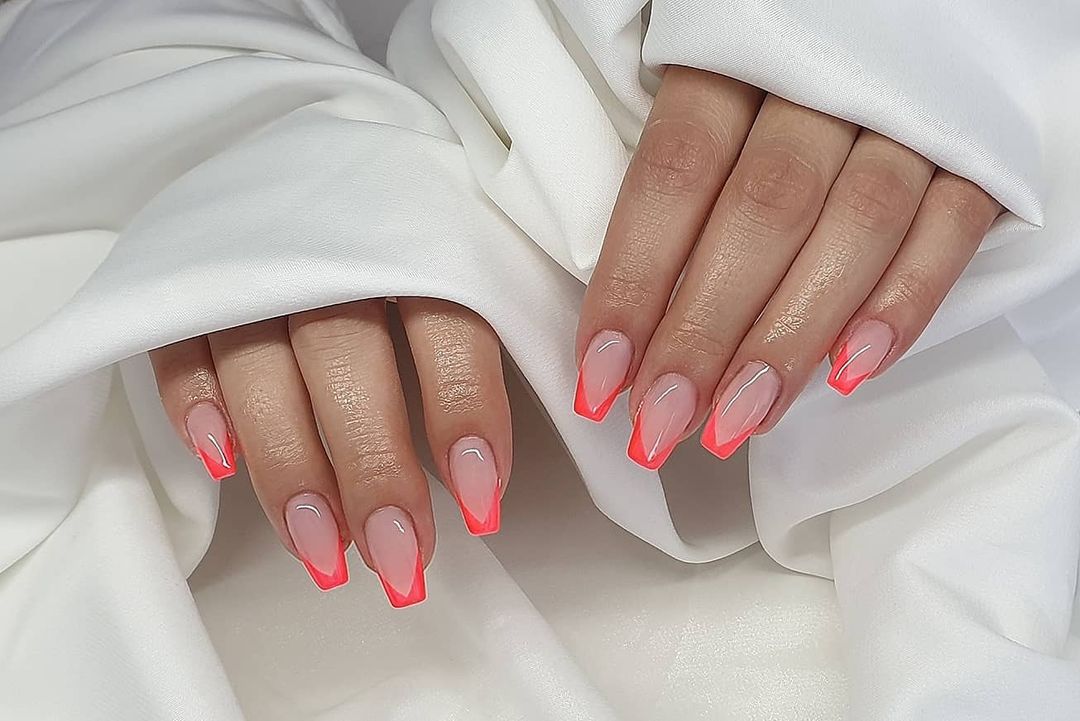
Soft Neon French Tips
This design reimagines the classic French tip with a soft neon coral edge over a nude base, blending contemporary color with traditional style. The stark contrast between the vivid coral tips and the subtle nude base is both striking and sophisticated, suitable for both professional environments and social outings.
- Polish: Nude for the base, neon coral for the tips
- Tape: For creating clean, precise tips
- Top Coat: Matte for a modern finish
- Base Coat: To smooth the nail surface and enhance color adhesion
DIY Instructions
- Begin with a base coat to protect and smooth the nails.
- Apply a nude polish as the base color on all nails.
- Once dry, use tape to delineate the tips, then paint them with neon coral.
- Finish with a matte top coat for a contemporary look.
Neon Gradient Magic
This cheerful gradient blends neon coral into yellow, creating a sunset effect that’s perfect for the summer. The seamless blend of colors is achieved through a sponge-dabbing technique that mimics the soft flow of colors across the nail, ideal for a casual yet artistic style.

- Polish: Neon coral and bright yellow
- Sponge: To create the gradient effect
- Top Coat: Glossy to ensure the gradient is smooth and shiny
- Base Coat: For longevity and protection of the natural nail
DIY Instructions
- Apply a base coat to protect your nails.
- Paint the base of the nails yellow.
- Dab neon coral onto a sponge and lightly press over the yellow, blending halfway down the nail.
- Repeat until the desired gradient is achieved.
- Finish with a glossy top coat to enhance the colors and smooth the transition.
Artistic Neon Coral Swirls with Polka Dots
This playful yet elegant design features neon coral swirls intertwined with delicate polka dots over a soft pink base. The creative use of contrasting designs not only highlights the nail artist’s skill but also provides a visually appealing and dynamic look, perfect for those seeking something uniquely stylish.
- Polish: Neon coral and white for the designs, soft pink for the base
- Top Coat: High-gloss to seal in the design and enhance durability
- Detailing Brush: For precise swirls and dots
- Dotting Tool: To create uniform polka dots
DIY Instructions
- Apply a soft pink polish as the base coat on all nails.
- Use a detailing brush with neon coral polish to draw swirls on selected nails.
- Add white polka dots with a dotting tool to enhance the design.
- Finish with a high-gloss top coat for a seamless and protective finish.
Glittering Neon Coral Beauty
This design captures the essence of fun and festivity, featuring neon coral polish paired with a sparkling glitter accent. The high-intensity coral provides a vibrant backdrop for the shimmering glitter, making it an excellent choice for party wear or a night out.
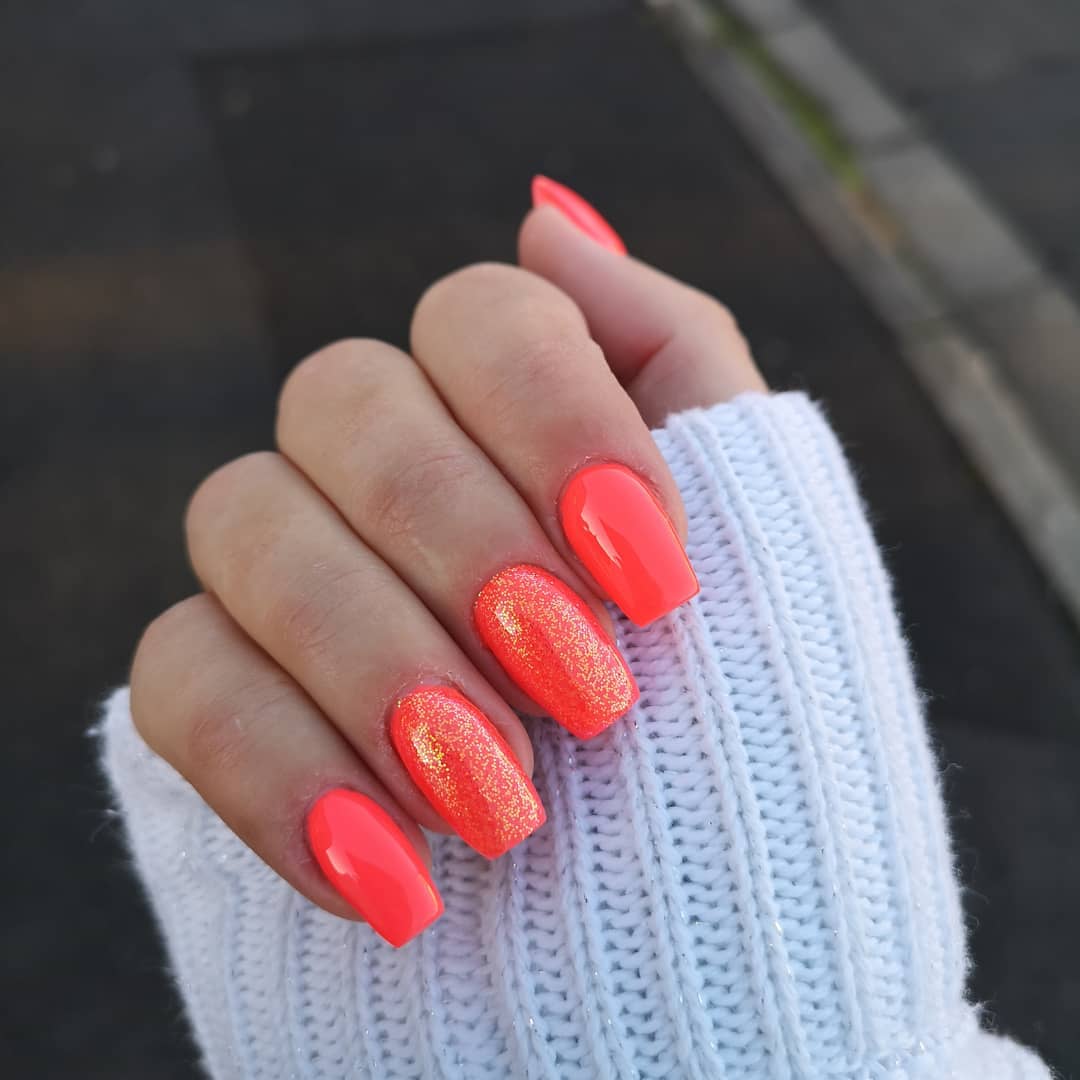
- Polish: Neon coral and glitter polish
- Top Coat: For a smooth, glossy finish that enhances the sparkle
- Base Coat: To protect the nails and ensure longevity of the polish
DIY Instructions
- Begin with a base coat to protect your nails.
- Apply two coats of neon coral polish on all but one accent nail.
- Cover the accent nail with glitter polish for a striking contrast.
- Seal with a top coat for added shine and durability.
Neon Coral and Gold Glamour
This luxurious nail design features neon coral seamlessly blended with gold accents for a sophisticated look. The addition of a full gold glitter nail complements the coral shades, providing a rich and elegant aesthetic suitable for any glamorous occasion.
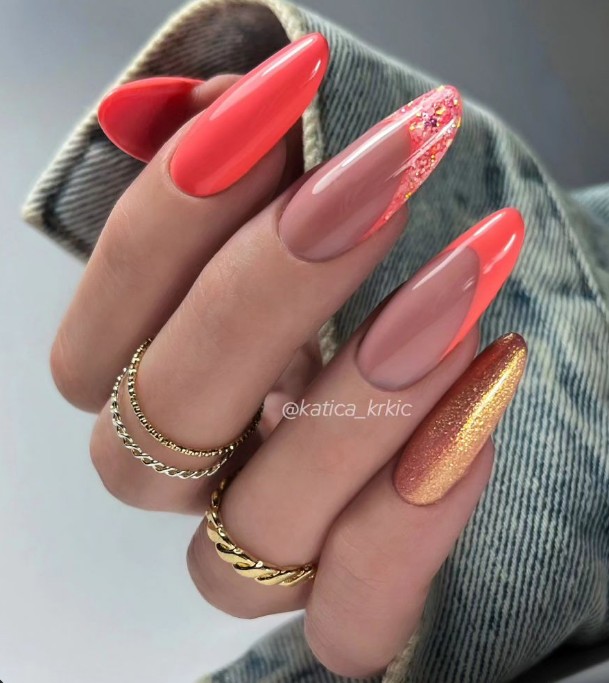
- Polish: Neon coral and gold glitter
- Top Coat: Glossy to maintain the shimmer and shine of the glitter
- Base Coat: To enhance the vibrancy of the neon color
DIY Instructions
- Prep the nails with a base coat for smooth application.
- Paint all nails neon coral, except for one fully glittered gold accent nail.
- Apply two coats on each nail to ensure solid color and glitter coverage.
- Finish with a glossy top coat to protect and enhance the design.
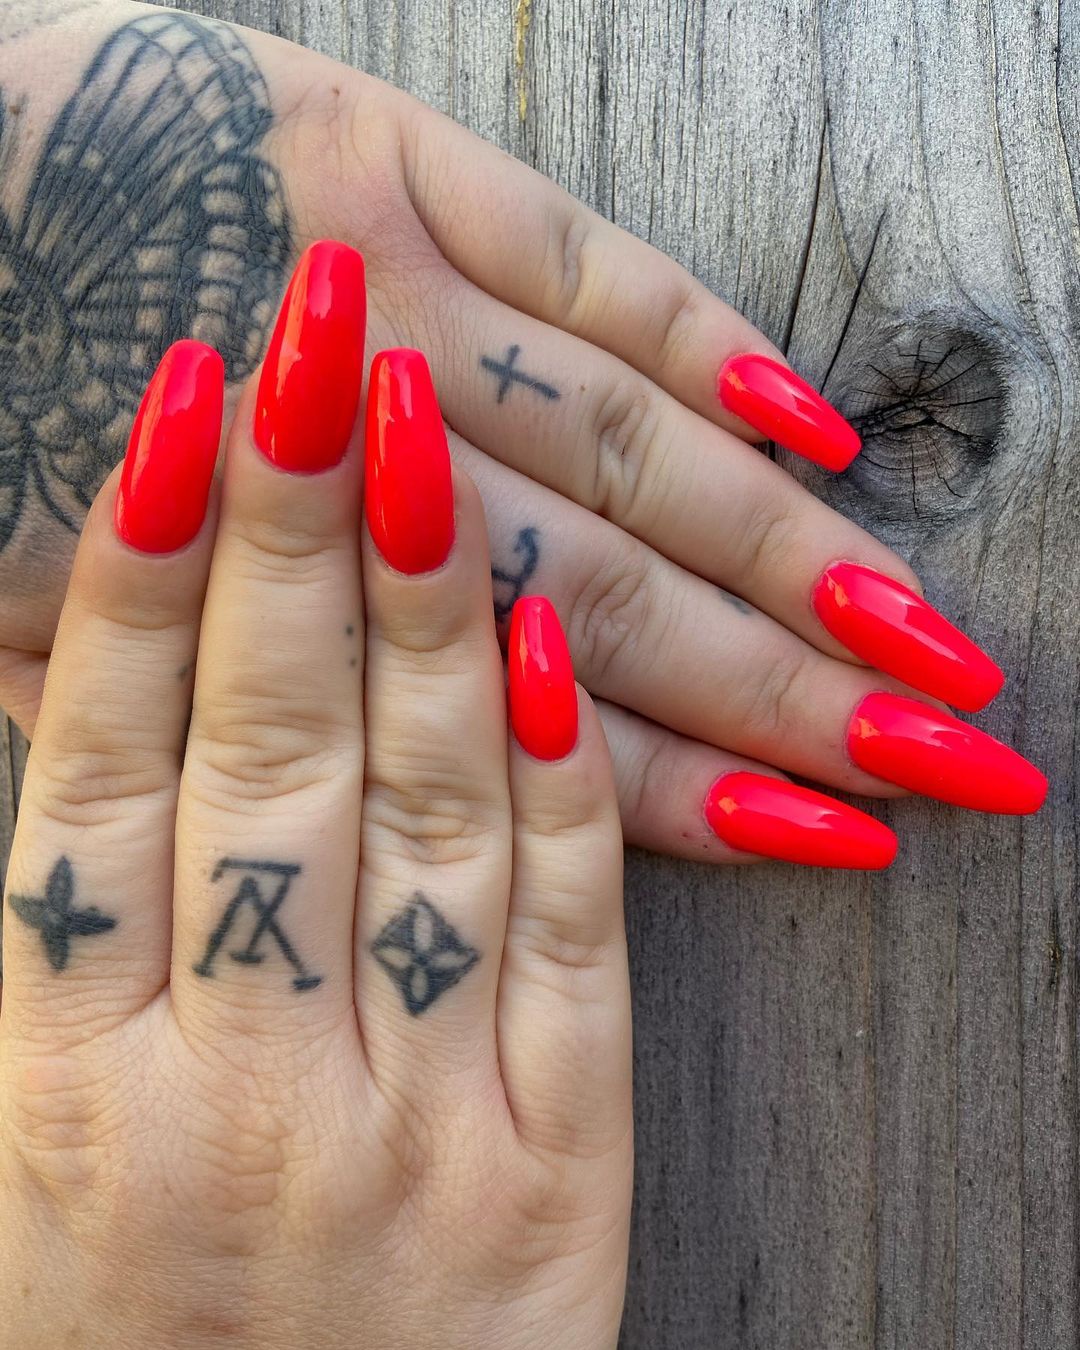
Classic Neon Coral Gloss
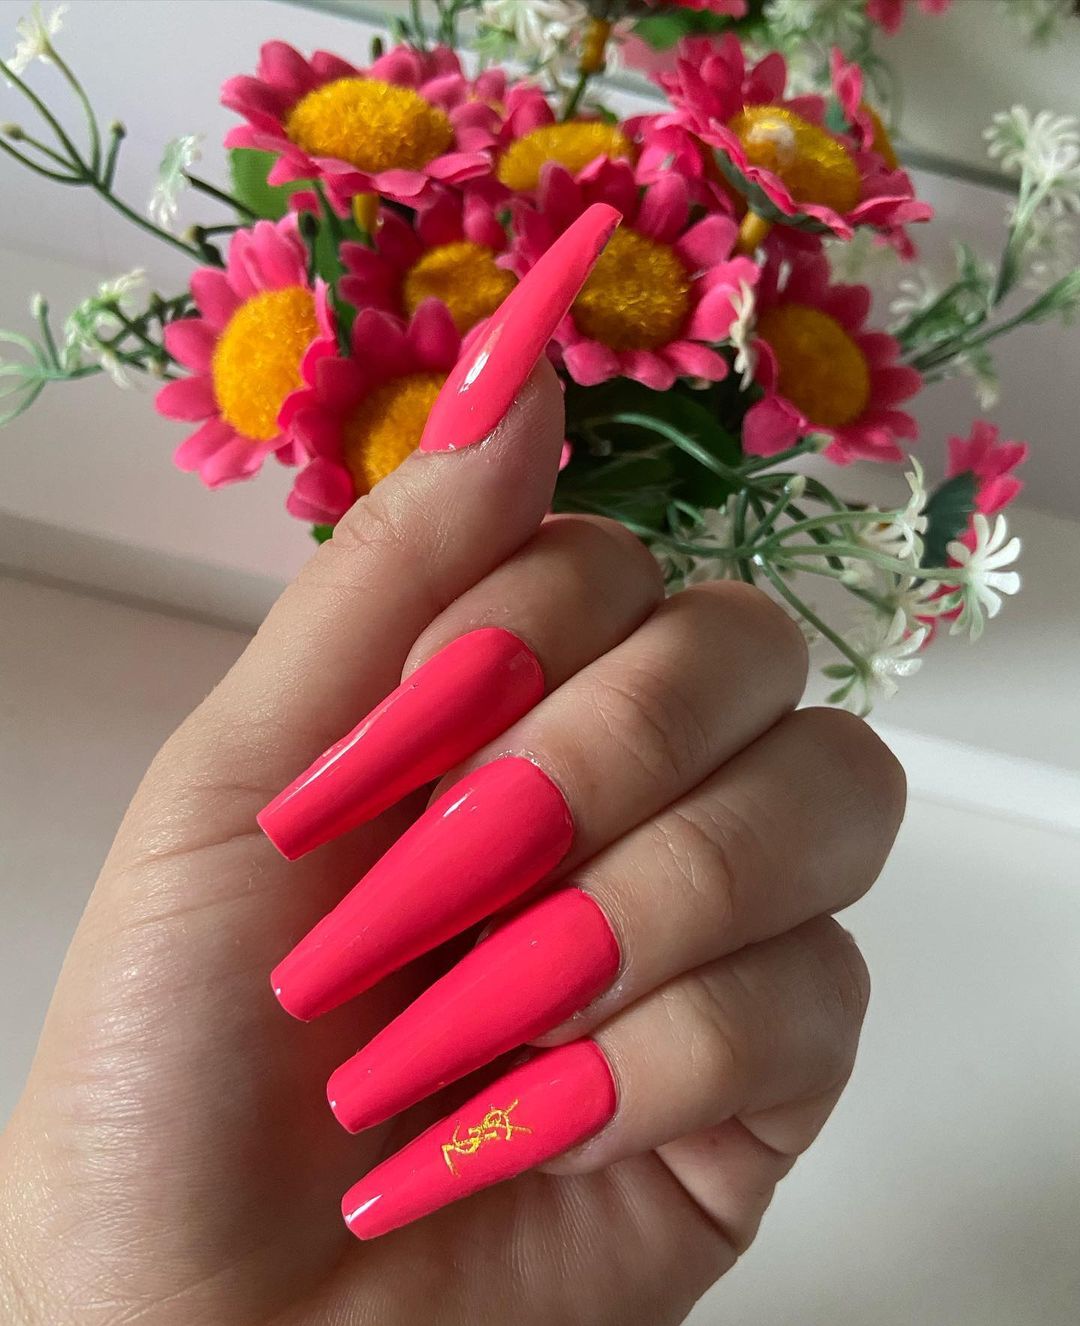
This design embodies the timeless appeal of a single-color manicure with a stunning neon coral shade, polished to a high gloss. It’s perfect for those who prefer a bold yet straightforward look, suitable for both everyday wear and special occasions. The high gloss finish not only enhances the color’s vibrancy but also provides a durable protective layer.

- Polish: High-quality neon coral polish
- Top Coat: Glossy to achieve a smooth, shiny finish
- Base Coat: To protect the nails and ensure a longer-lasting manicure
DIY Instructions
- Apply a base coat to clean, filed nails to protect them and enhance polish adherence.
- Paint two coats of neon coral polish, allowing each coat to dry thoroughly.
- Finish with a high-gloss top coat to maximize shine and durability.
Neon Coral with Metallic Accent
This nail design features neon coral as the base color with a creative metallic strip on the accent nail. It’s an excellent way for adding a touch of glamour without overwhelming the simplicity of the design. The metallic accent catches the light, making it a perfect choice for evening events or parties.

- Polish: Neon coral and metallic silver
- Top Coat: High-gloss for durability and shine
- Striping Tape: For precise metallic lines
DIY Instructions
- Apply a base coat to protect your nails.
- Paint all nails with neon coral, except for one accent nail.
- On the accent nail, use striping tape to create a space for the metallic stripe and apply metallic polish.
- Carefully remove the tape and finish all nails with a high-gloss top coat.
Zebra Stripes on Neon Coral
This playful design uses neon coral as a vibrant base for white zebra stripes, creating a dynamic and eye-catching look. It’s a fun way to incorporate animal print into your style, perfect for those who enjoy statement nails that stand out.
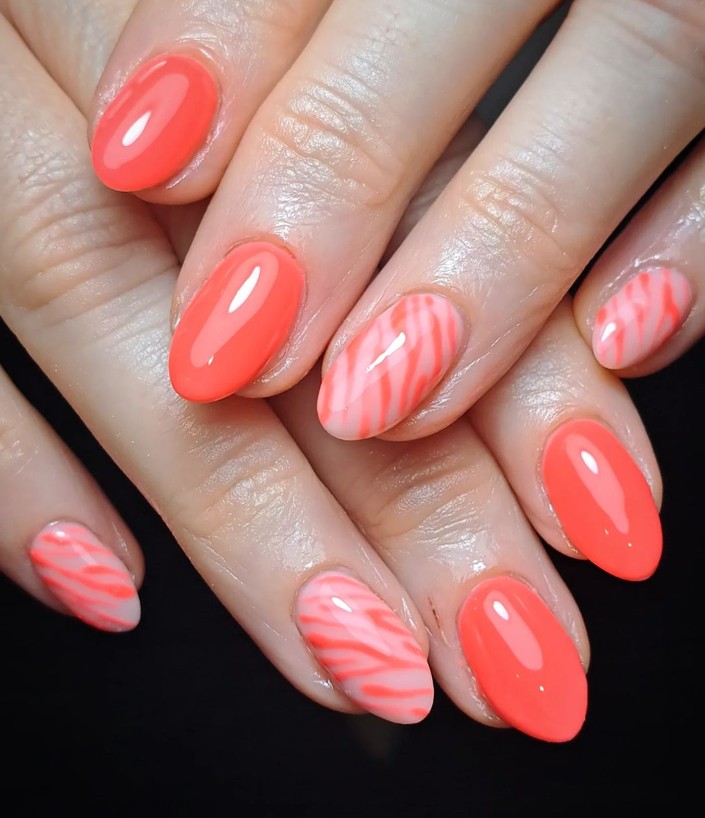
- Polish: Neon coral for the base, white for the stripes
- Top Coat: To seal the design and enhance its longevity
- Detailing Brush: For precise stripe application
DIY Instructions
- Start with a base coat to protect the nails.
- Apply two coats of neon coral polish as the base.
- Using a detailing brush, paint white zebra stripes over the base.
- Seal the design with a top coat to ensure it lasts and keeps its shine.
FAQ
Q: How long does neon coral nail polish typically last?
A: Neon coral nail polish can last from one to two weeks when applied with a quality base and top coat. Using gel polish cured under a UV or LED lamp can extend the wear up to three weeks.
Q: Can neon coral nail polish be worn in professional settings?
A: Absolutely! While neon coral is a vibrant color, it can be styled in a way that’s suitable for professional environments, especially when used in a more subdued design like a French tip or paired with neutral tones.
Q: Is neon coral nail polish suitable for all skin tones?
A: Yes, neon coral is a versatile color that complements a wide range of skin tones. It tends to stand out beautifully against both lighter and darker skins, enhancing the natural warmth of the wearer’s complexion.
Q: What are some tips for applying neon coral nail polish to avoid streaking?
A: To avoid streaking, start with a base coat to smooth out any imperfections in the nail. Apply the neon coral polish in thin layers, allowing each layer to dry completely before applying the next. Finish with a high-gloss top coat to even out the application.
Q: How can I remove neon coral nail polish without staining my nails?
A: To prevent staining, first apply a base coat before your color. When removing the polish, use an acetone-based remover, soak the nails briefly, and gently wipe off the polish. If any staining occurs, rubbing a small amount of lemon juice on your nails can help remove discoloration.
Q: What are some creative ways to style neon coral nails?
A: Neon coral can be styled in various creative ways. Try it with nail art techniques like marbling, ombre effects, or geometric patterns. For something simpler, neon coral also looks great with glitter accents or as part of a multi-colored manicure with complementary shades.
Q: Does neon coral nail polish require any specific care to maintain its brightness?
A: To maintain the brightness of neon coral polish, keep your nails protected with a top coat, which will also provide UV protection to prevent fading. Regular touch-ups can help maintain the vibrancy of the color, especially if you spend a lot of time in the sun.
Save Pin