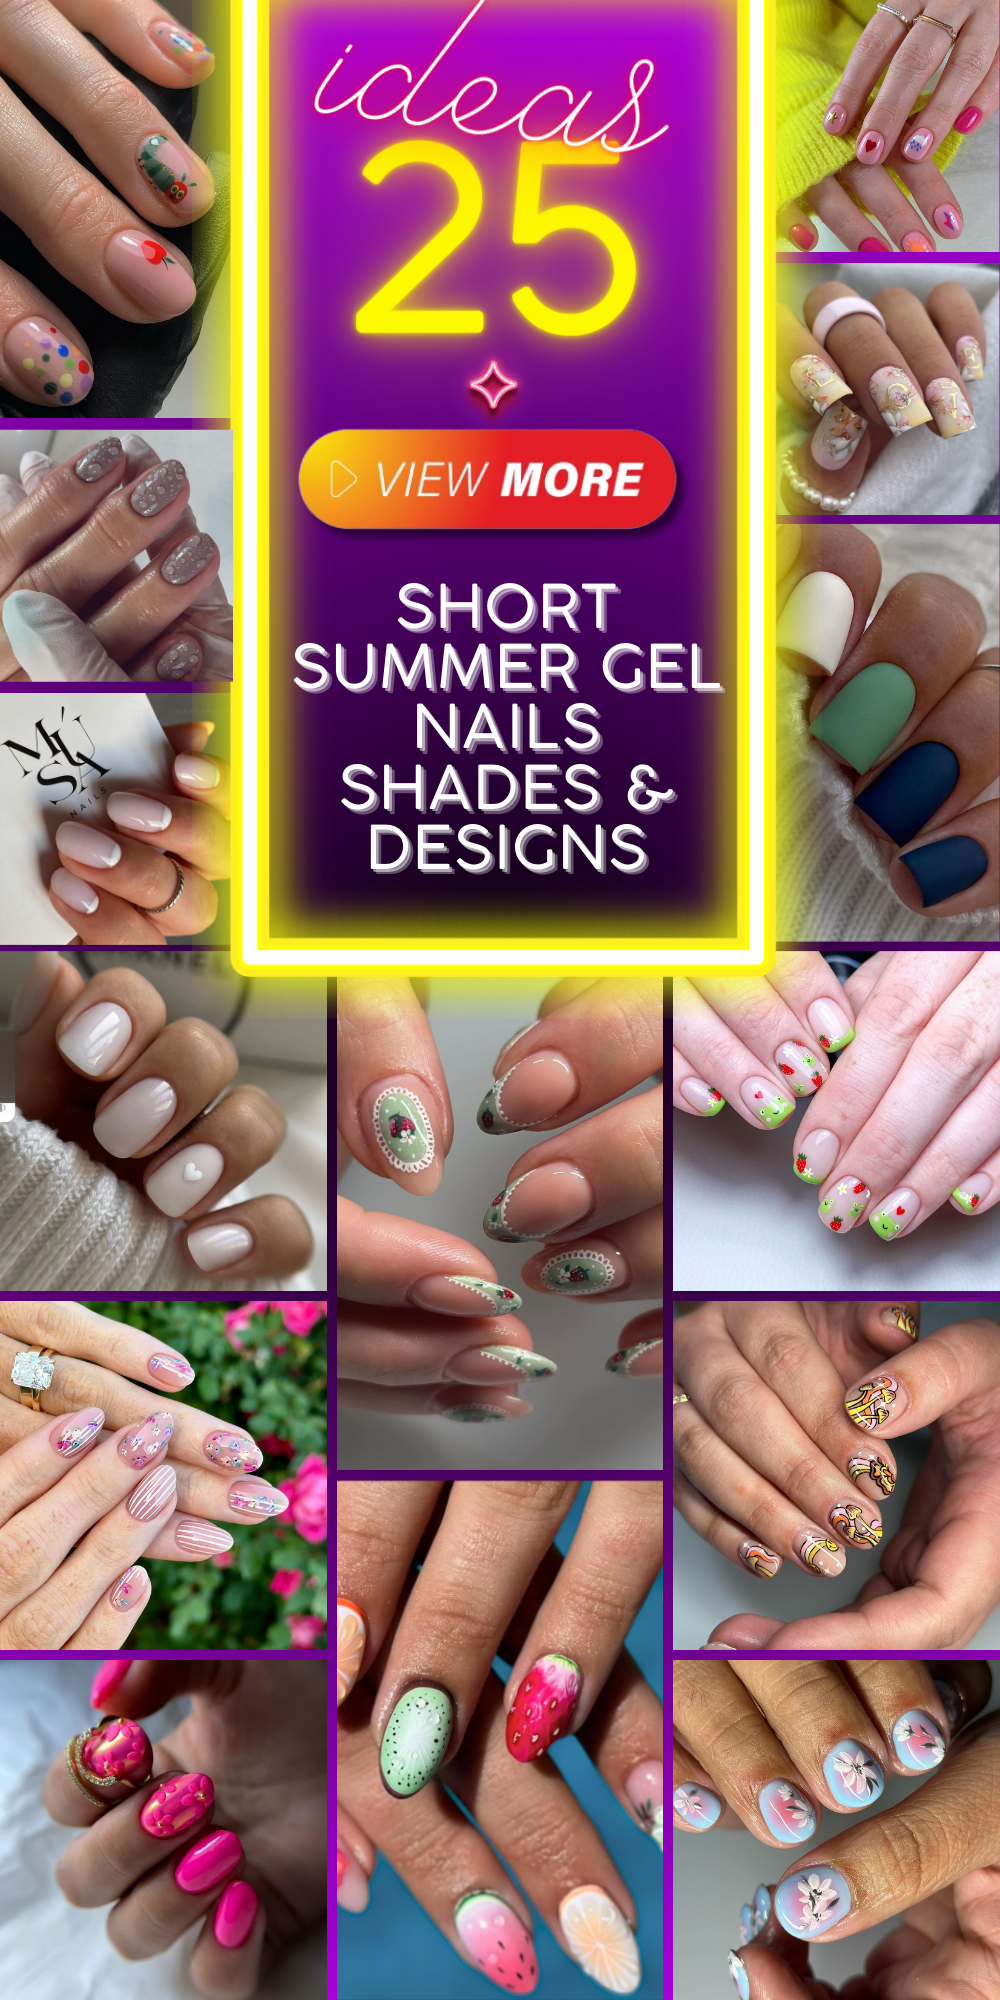
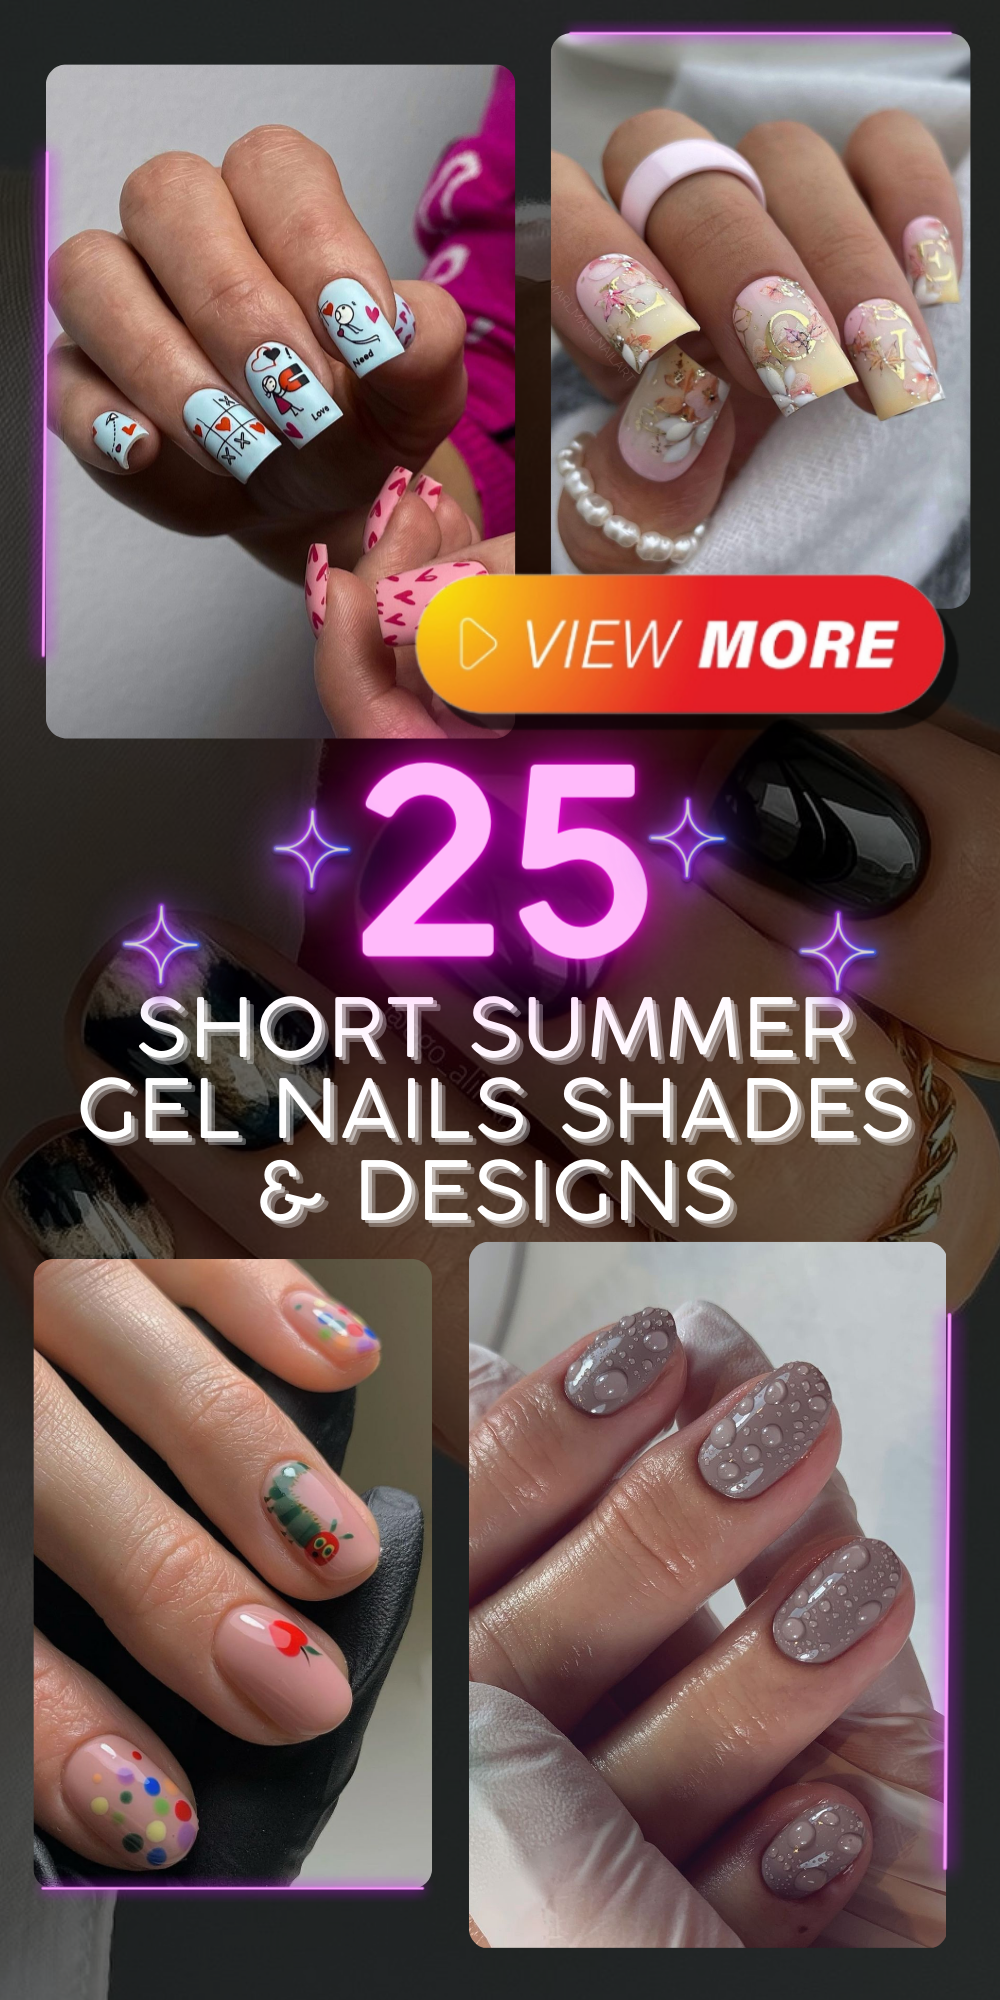
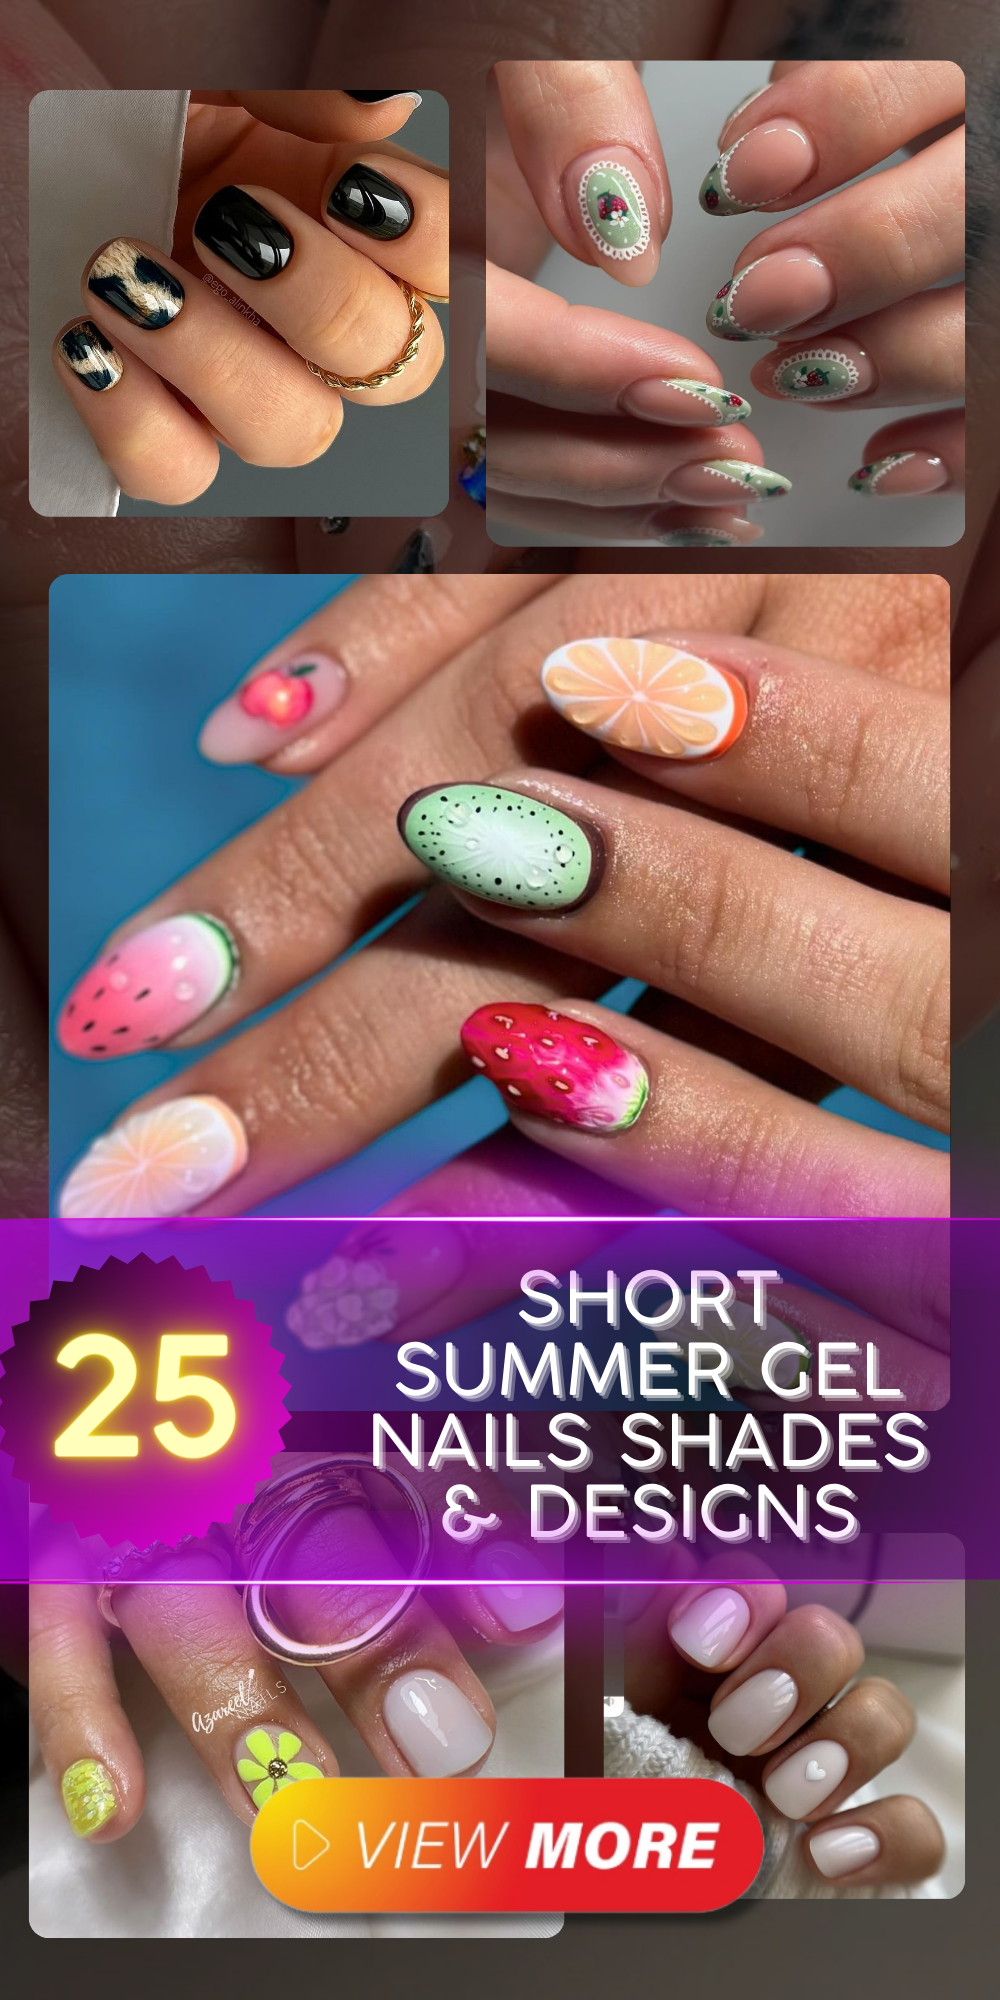
Here are some shades and designs of summer gel nails. Are your finger tips ready for a seasonal touch? Looking for a clean manicure or a holiday sparkler, let’s uncover the trends that will leave your nails the talk of summer 2024.
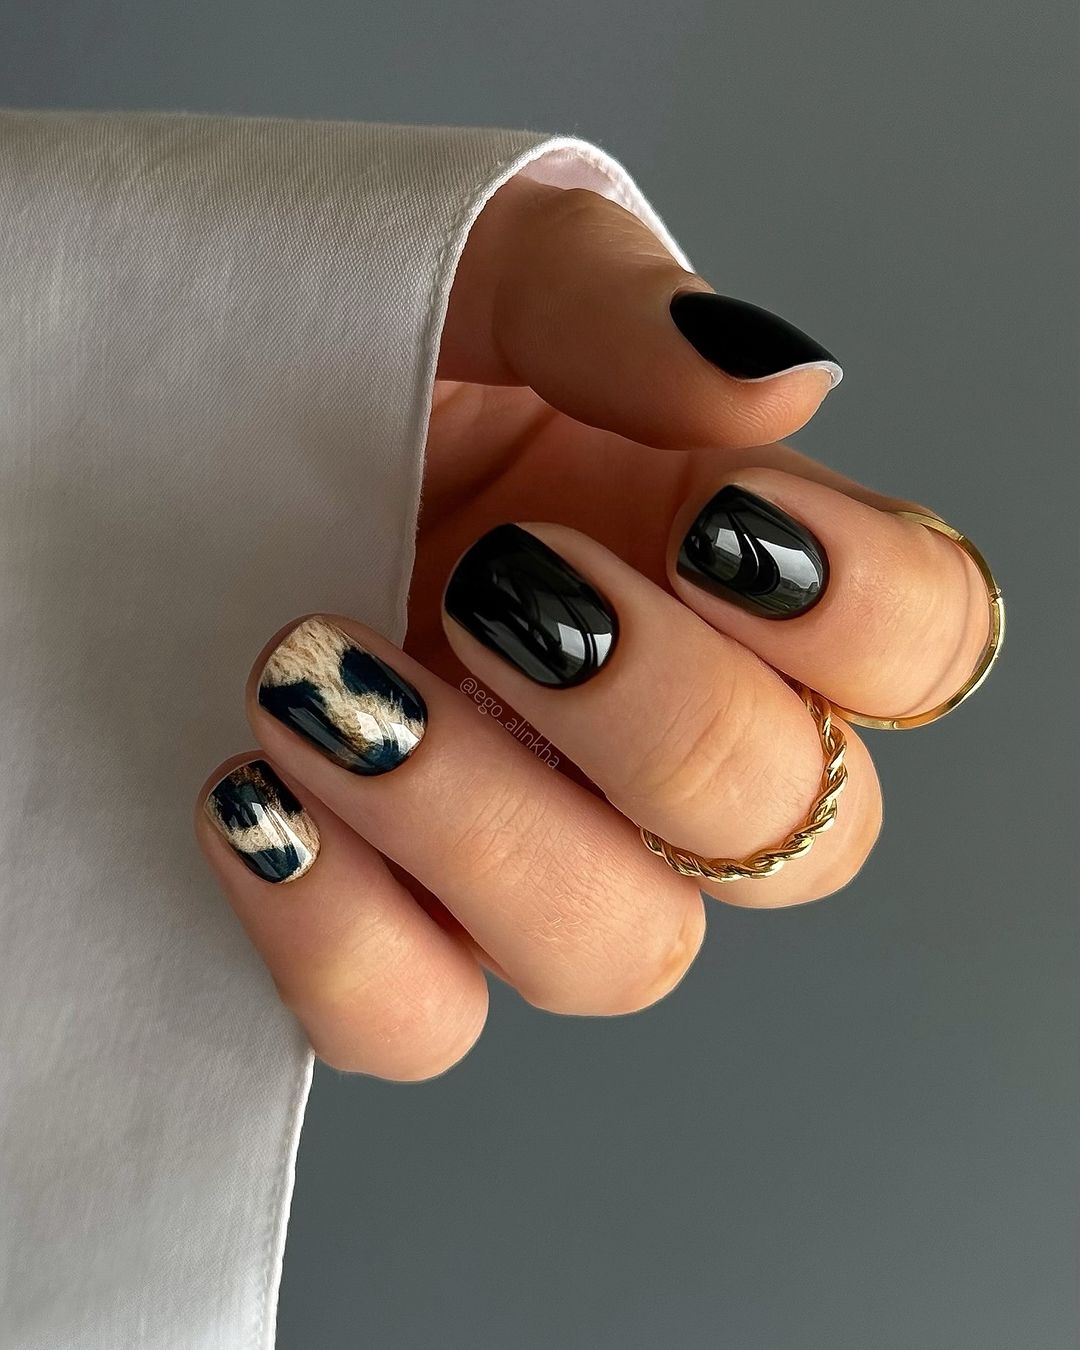
A Contemporary Take on Classic Black
The nails are textured and have a glossy black which instantly catches the eye with its strong contrast. This is no ordinary manicure; instead, it is quite daring. Black color symbolizes strength and classiness while the accent nails bear finely detailed work that gives them life making them not just beautiful but powerful.
Consumables:
- Glossy black gel polish
- White gel paint
- Matte top coat
- Gold foil accents
For the solid black nails, a shiny top coat is necessary for that sleek effect. For the accent design, I would start with a matte base and draw out intricate patterns by using white gel paint. A little bit of gold foil adds some sparkle making it look more sophisticated on the whole.
DIY Tips: To recreate this, two coats of black gel polish should be applied, curing between layers. For the marbled nail, swirl white paint on a matte base with a thin brush and gently place small parts of gold foil before sealing it all with a top coat.
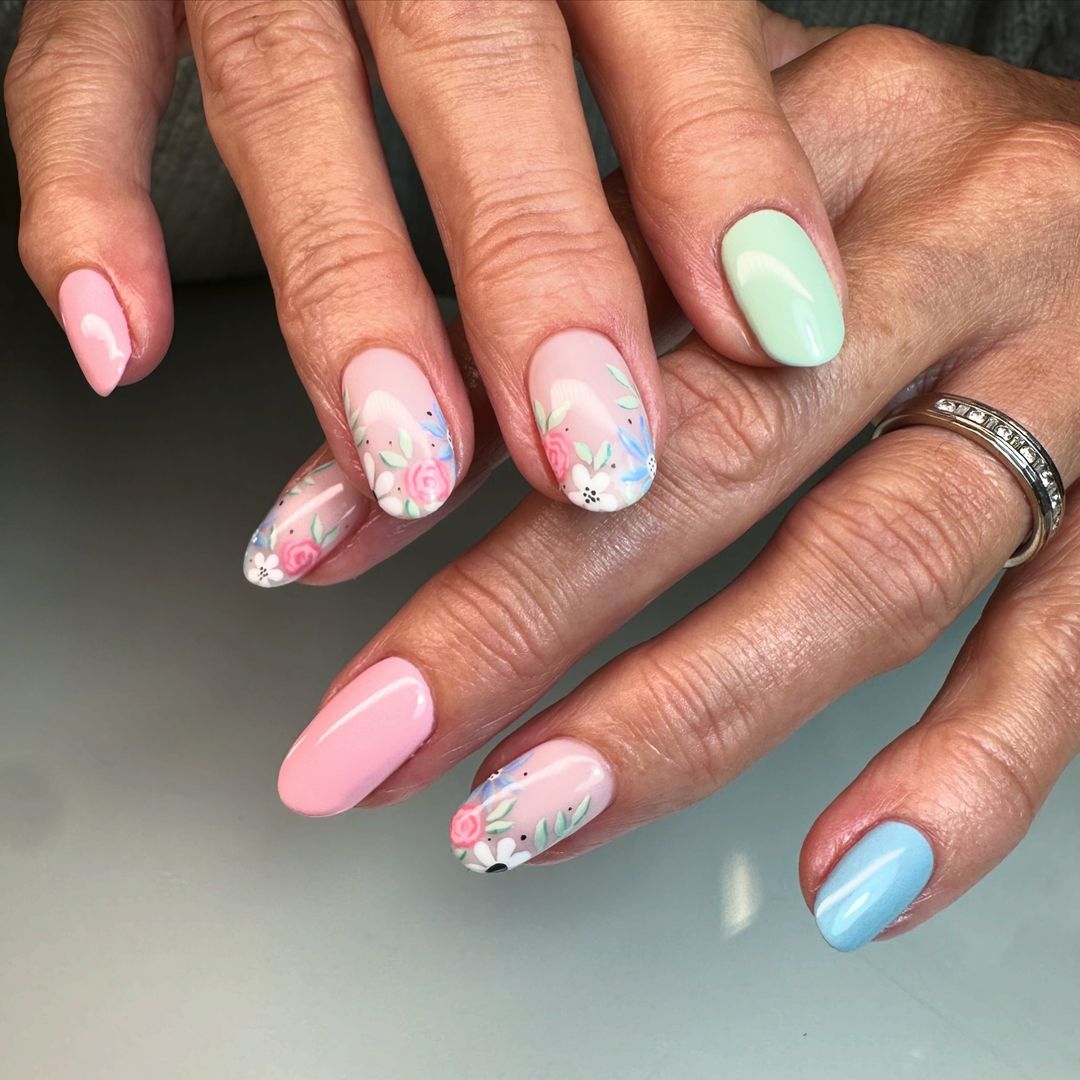
Blooming with Elegance
A simple, summer sophistication. Dainty pastel hues of pink and blue create a soft backdrop for the delicately detailed floral artwork. The white gel stands out against the background and provides accents that meld naturalness with complexity.
Items needed:
- Pastel pink and blue gel polishes
- White art gel
- Thin detailing brush
Select trusted brands like OPI for your pastels to ensure long-lasting color and smooth application. Use a thin brush to apply the white gel in order to get those crisp strokes on your flower design.
DIY Tips: Apply your pastel base color first, then sketch out your petals with the white gel. Take time with each stroke to ensure you’re getting the most life-like petals possible.
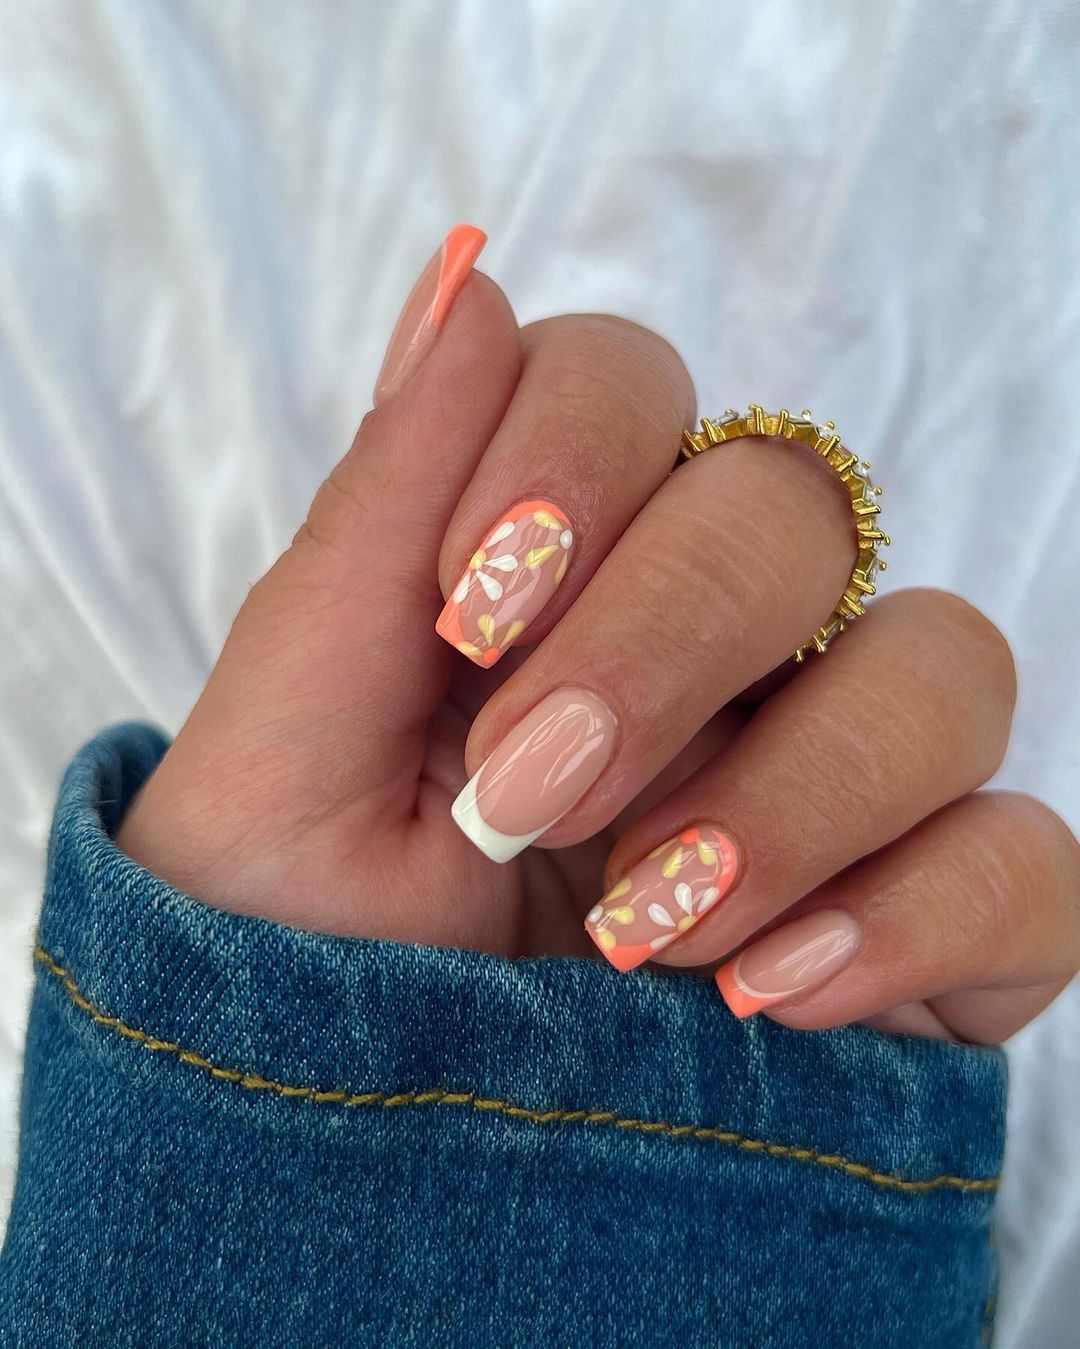
Sunset Sorbet
French tips have changed a lot in recent years, and for the summer of 2024 they’ve become like delicious fruits that are sunset influenced. From a milky orange shading into a faint white hue to the gold foils that look like scattered sunlight.
Products needed:
- Orange Gel Polish
- White Gel Polish
- Gold Foil
- Shiny Top Coat
By using a sponge to dab between orange and white, you can get the perfect sunset gradient. A tiny piece of gold foil adds touch of opulence.
DIY Tips: Post base coat apply orange gel polish, sponge on white for gradient effect put gold foil before final glossy top coat for that radiant finish.
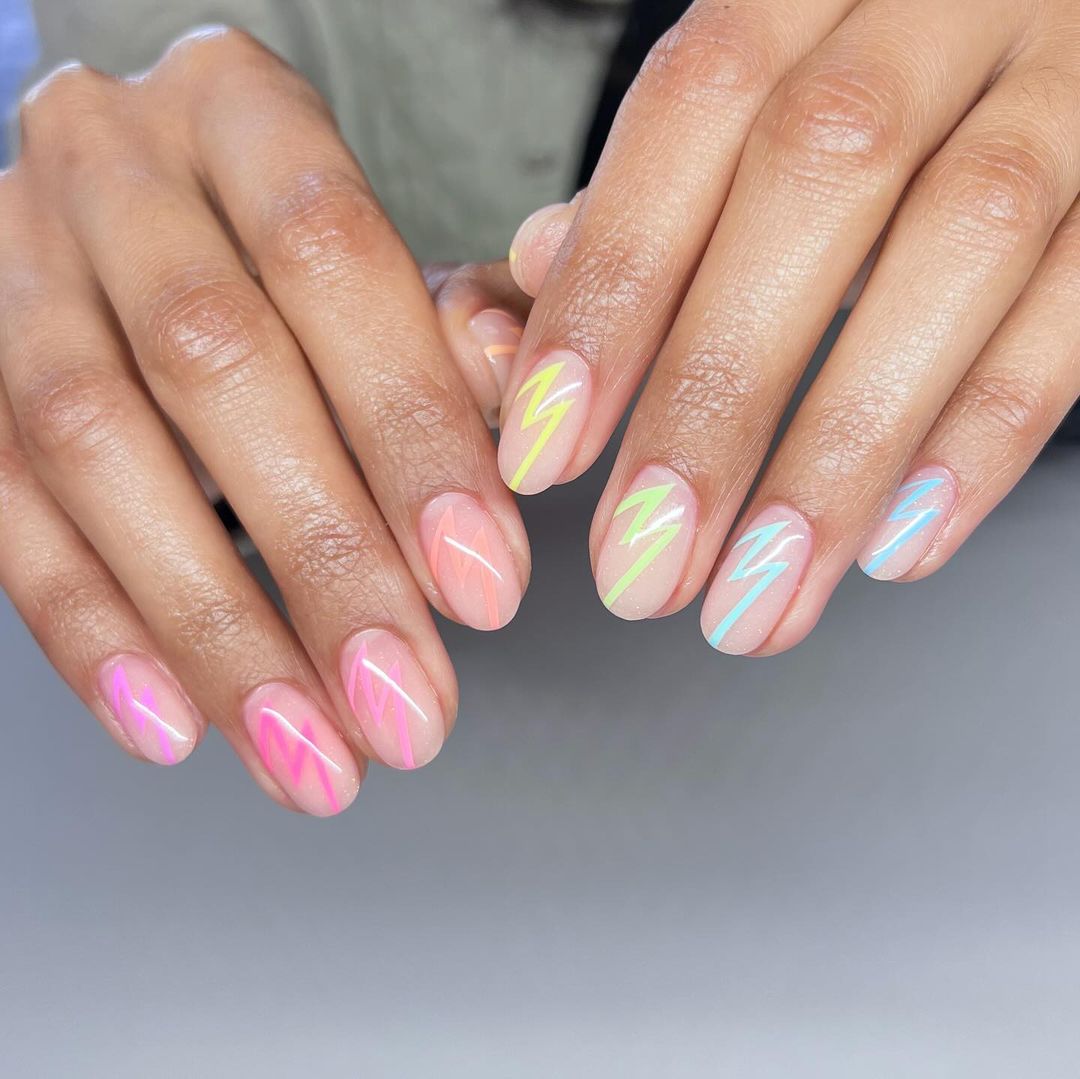
Neon Whispers
The playful brightness of neon on a sheer base makes one feel like summer is here. These nails have been styled to look like those from the ‘80’s with simple white lines that help accent the design. Every stripe of light blue, pink and white comes alive with youthful exuberance, and this is great for having a casual but fashion-forward manicure.
Consumables:
- Sheer pink gel polish
- Neon gel paints in pink, green, and yellow
- White gel liner
To achieve such neon effect, good quality gel paints like those provided by Gelish Brights collection are important for making sure that color pops. The art should be very delicate to allow for thin white line drawing using the white gel liner.
DIY Tips: Start with transparent foundation then using detail brush make neon stripes. For stability purposes while drawing, put your little finger on the table as you draw designs of the white touch.
Save Pin
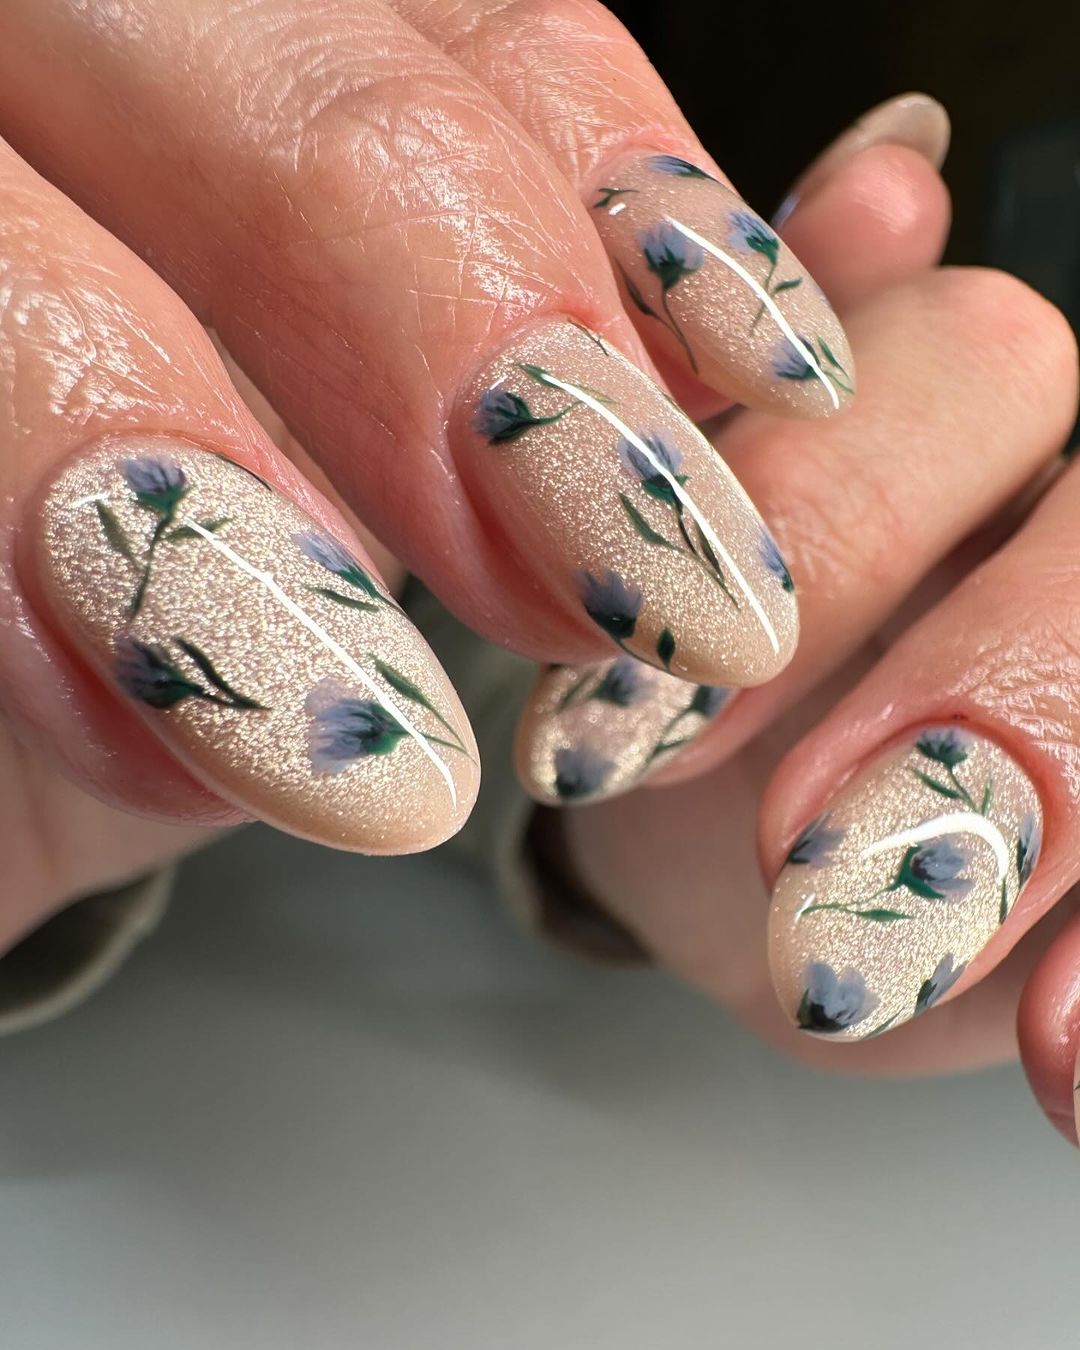
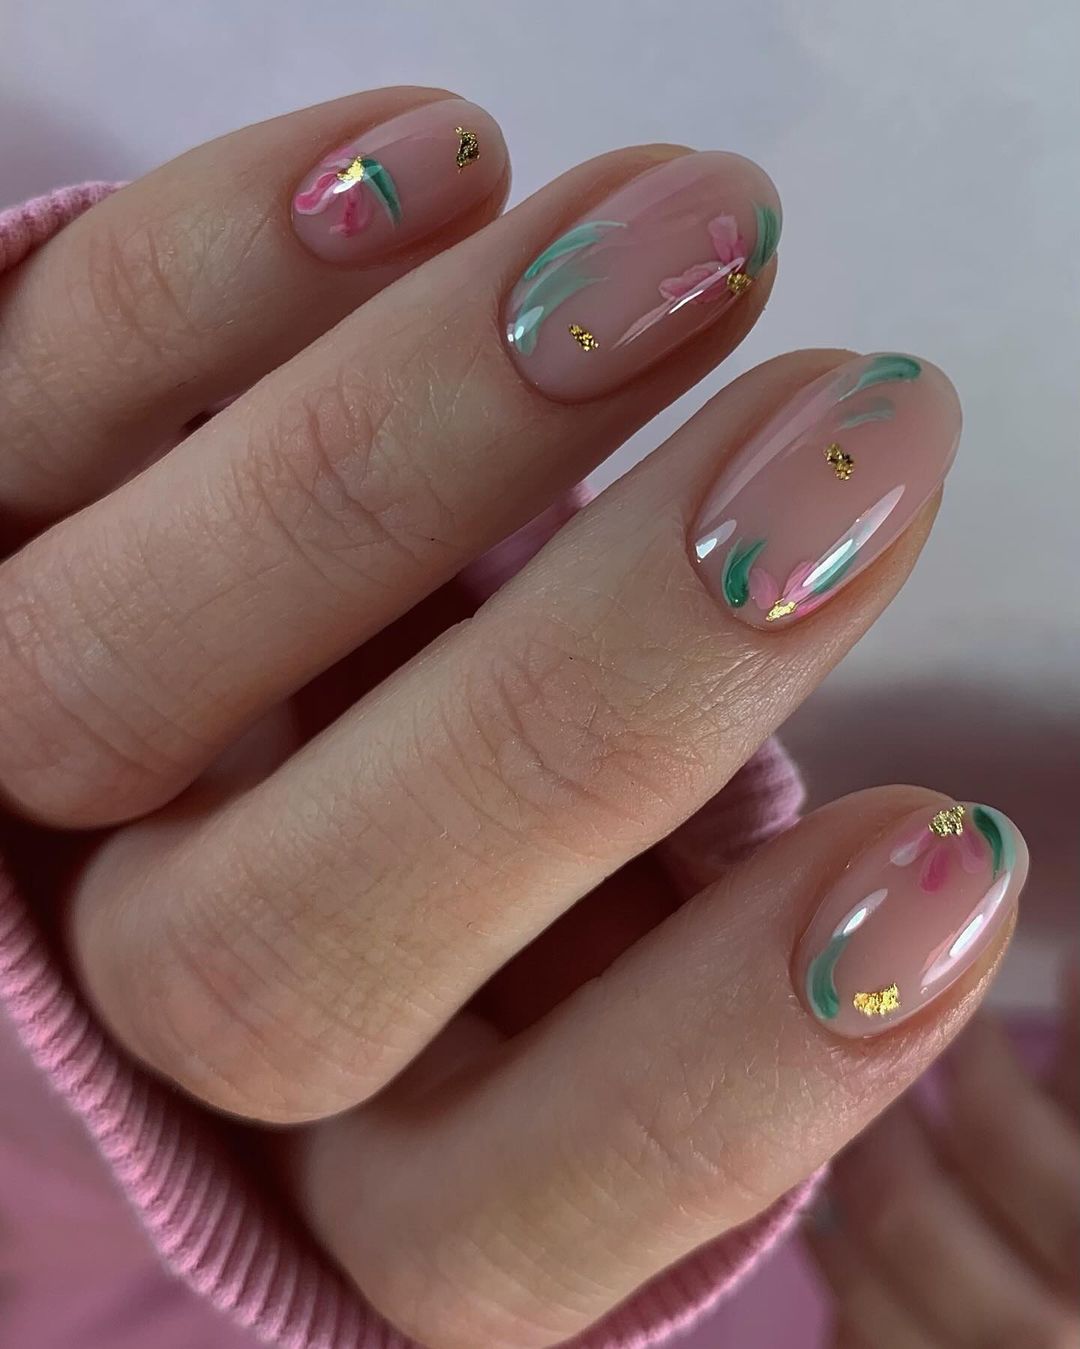
Field of Dreams
These nails are an artistic masterpiece. They remind me of a calm field under the night sky. The color scheme is captivating and enchanting, using blue and green on top of a sparkly base. Add in painted flowers and you have a whimsical look that stays classy with its simple almond shape.
Products needed:
- Nude glitter gel polish
- Blue and green art gels
- Thin art brush
The nude glitter gel polish is the perfect foundation for this design, and brands like The Gel Bottle Inc offer highly pigmented art gels that will make fine detailing easy.
Tips: After applying your glitter polish, use a thin art brush to paint the flowers. Make sure to let each layer dry before adding another so they don’t mix together.
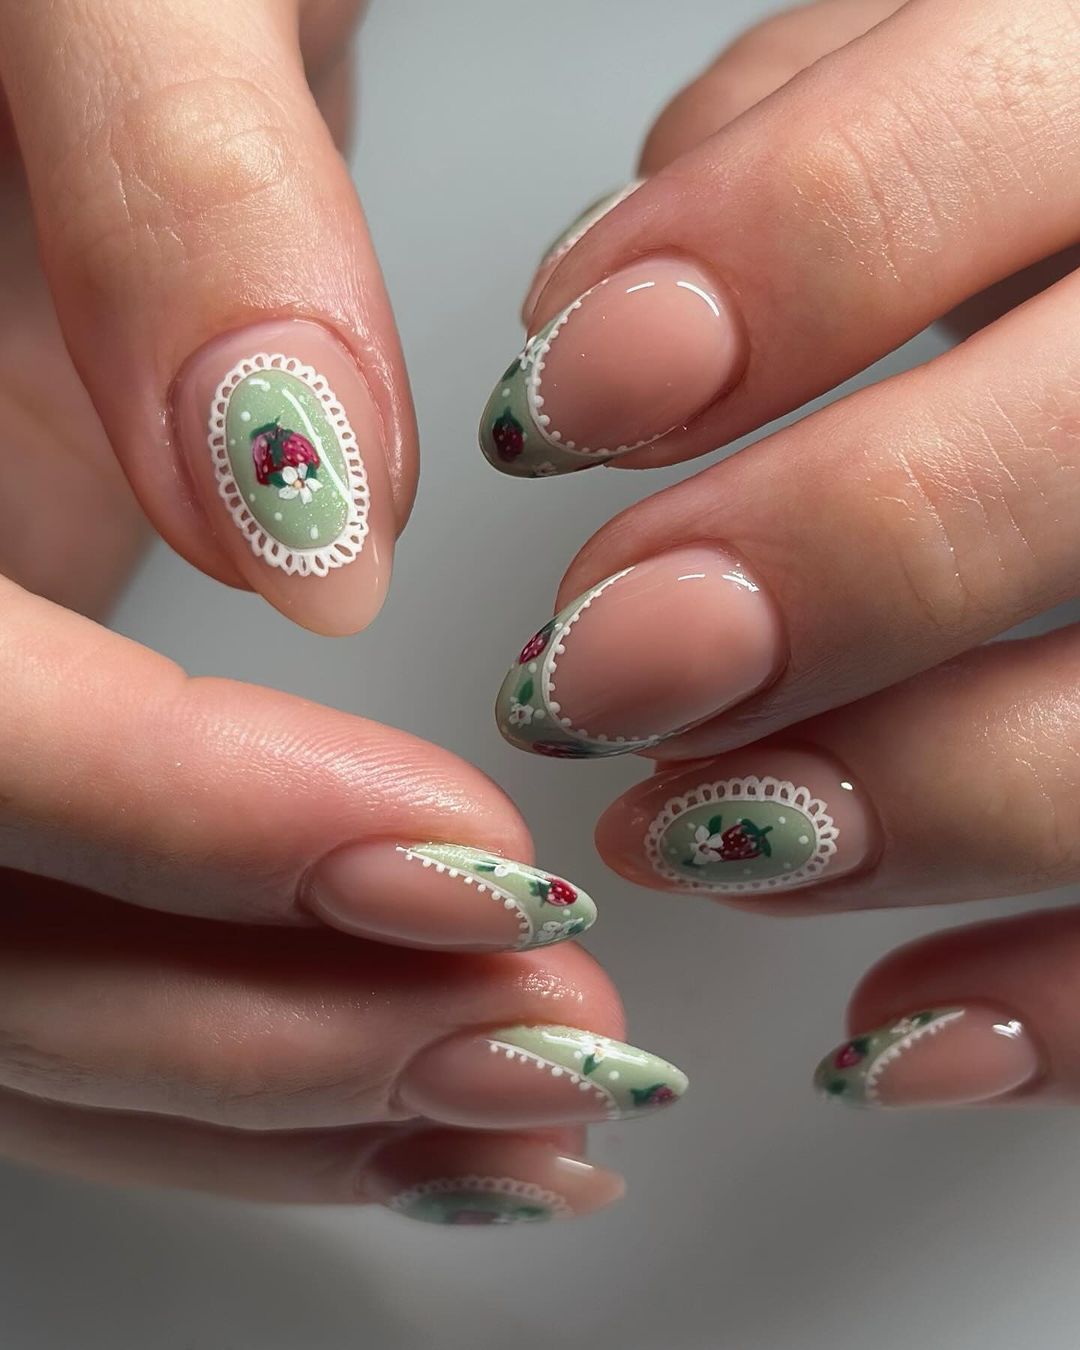
Vintage Porcelain
This manicure is pure vintage artistry with a simple green foundation surrounded by white lace-like designs. The small floral arrangements are precisely positioned to achieve an elegant and natural look. It’s the simplest choice for those who want to express their love for classical design ideas.
Materials:
- Pastel shade of light green gel polish
- White gel liner
- Art gels in red and black
- Detailing brush
For this kind of design, opt for CND’s pastel collection as a base and use a fine liner brush to paint delicate white borders around your nails.
DIY Tips: Apply the light green polish as your base, then slowly trace out the lace using a white gel liner. The flower patterns are created using a fine brush—add minute red dots here and there among them.
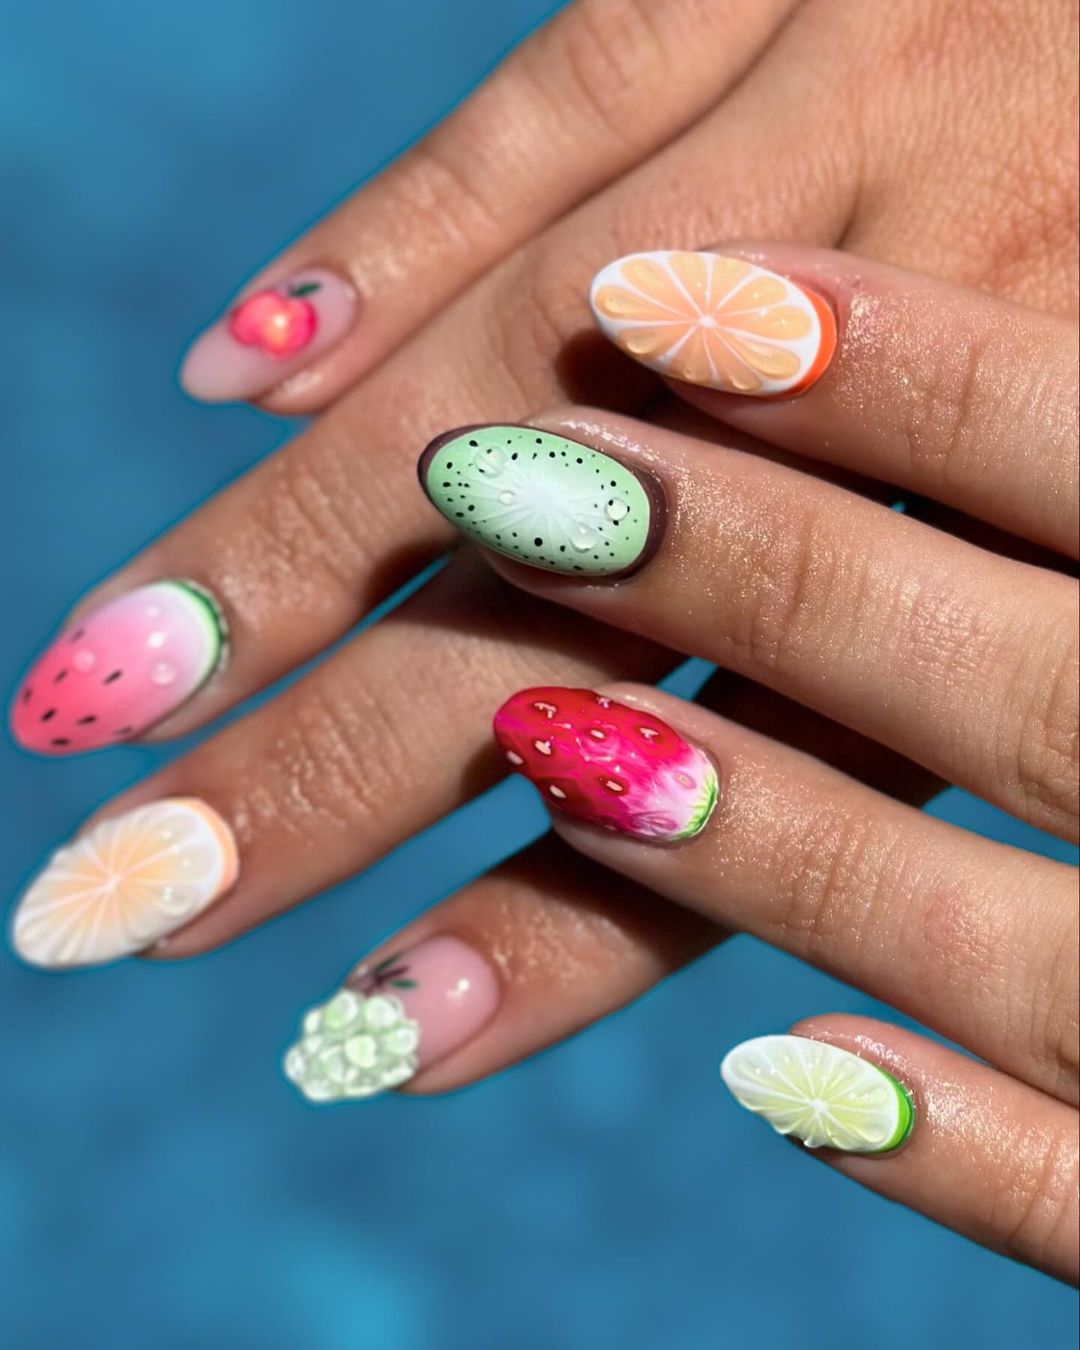
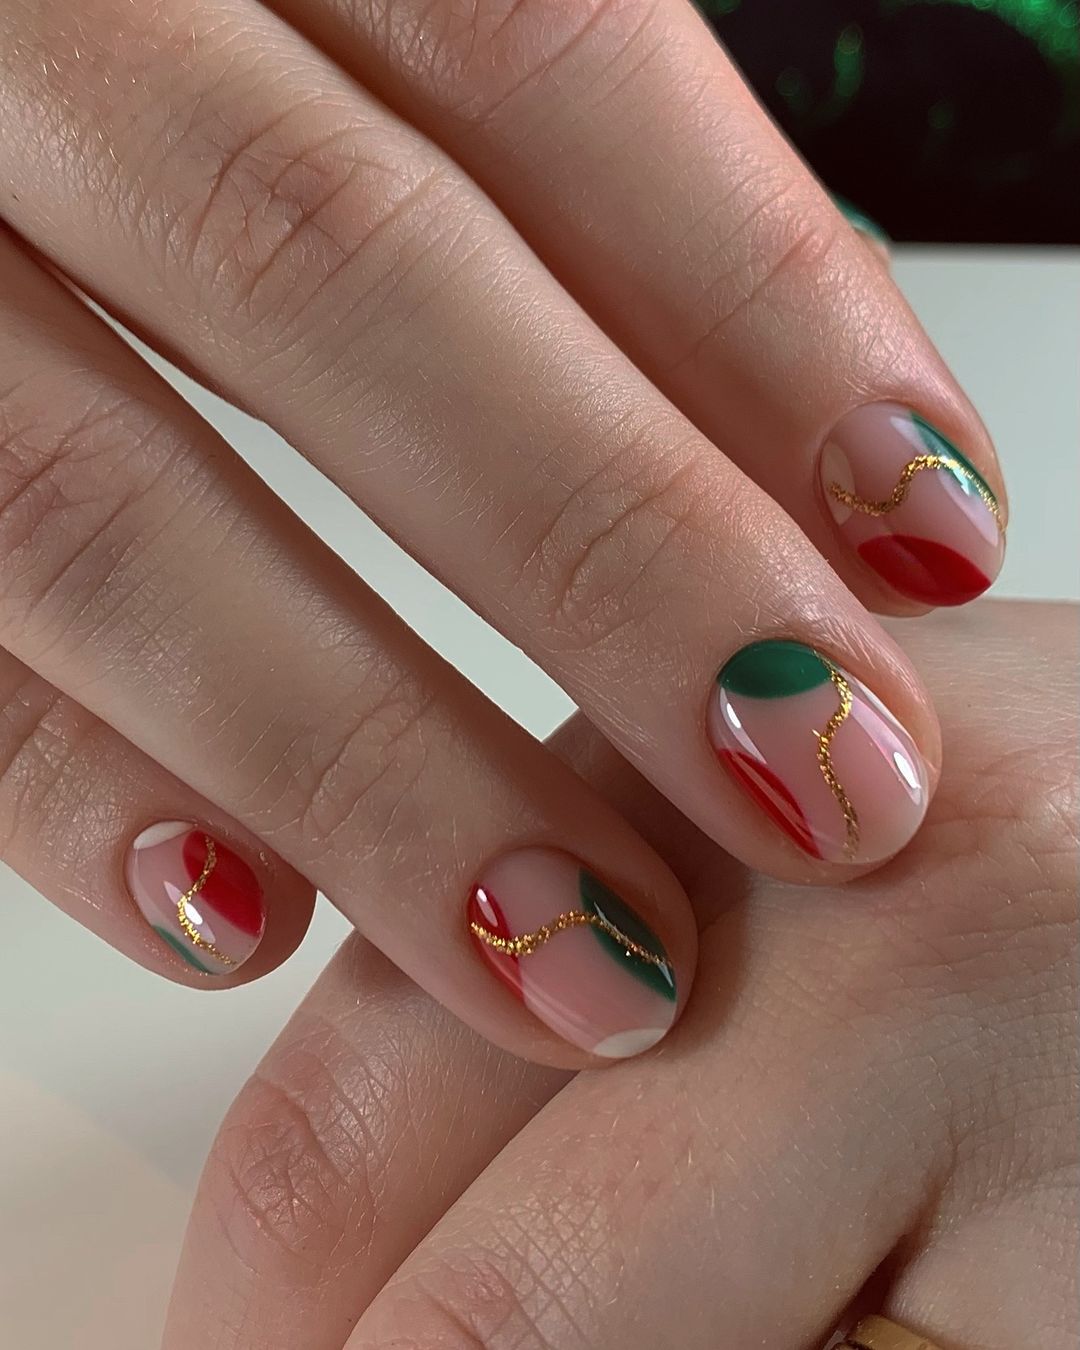
Fruity Fiesta
It’s a combination of fruit-themed designs that look playful and succulent like a summer cocktail. The base is made more appealing by the usage of bright colors such as red and green on it against pastel pink, which makes one think about watermelons or citrus slices. It is quite refreshing though.
Materials:
- Base: Pastel Pink Gel
- For the fruits: Gel paints in different shades of red, green, white and orange
- For Detailing: Dotting Tools and Fine Brushes
To achieve these detailed fruit patterns, I would recommend using Gelish’s vibrant colors with a fine-tip brush. You will need to use a dotting tool for seeds and details of the citrus.
DO IT YOURSELF TIPS: Start off with your pastel base then proceed to make your fruit designs using thin brushes. Seeds and perfect circles can be achieved by simply using a dotting tool while adding some juicy shine by applying 2 coats of shiny top coat.
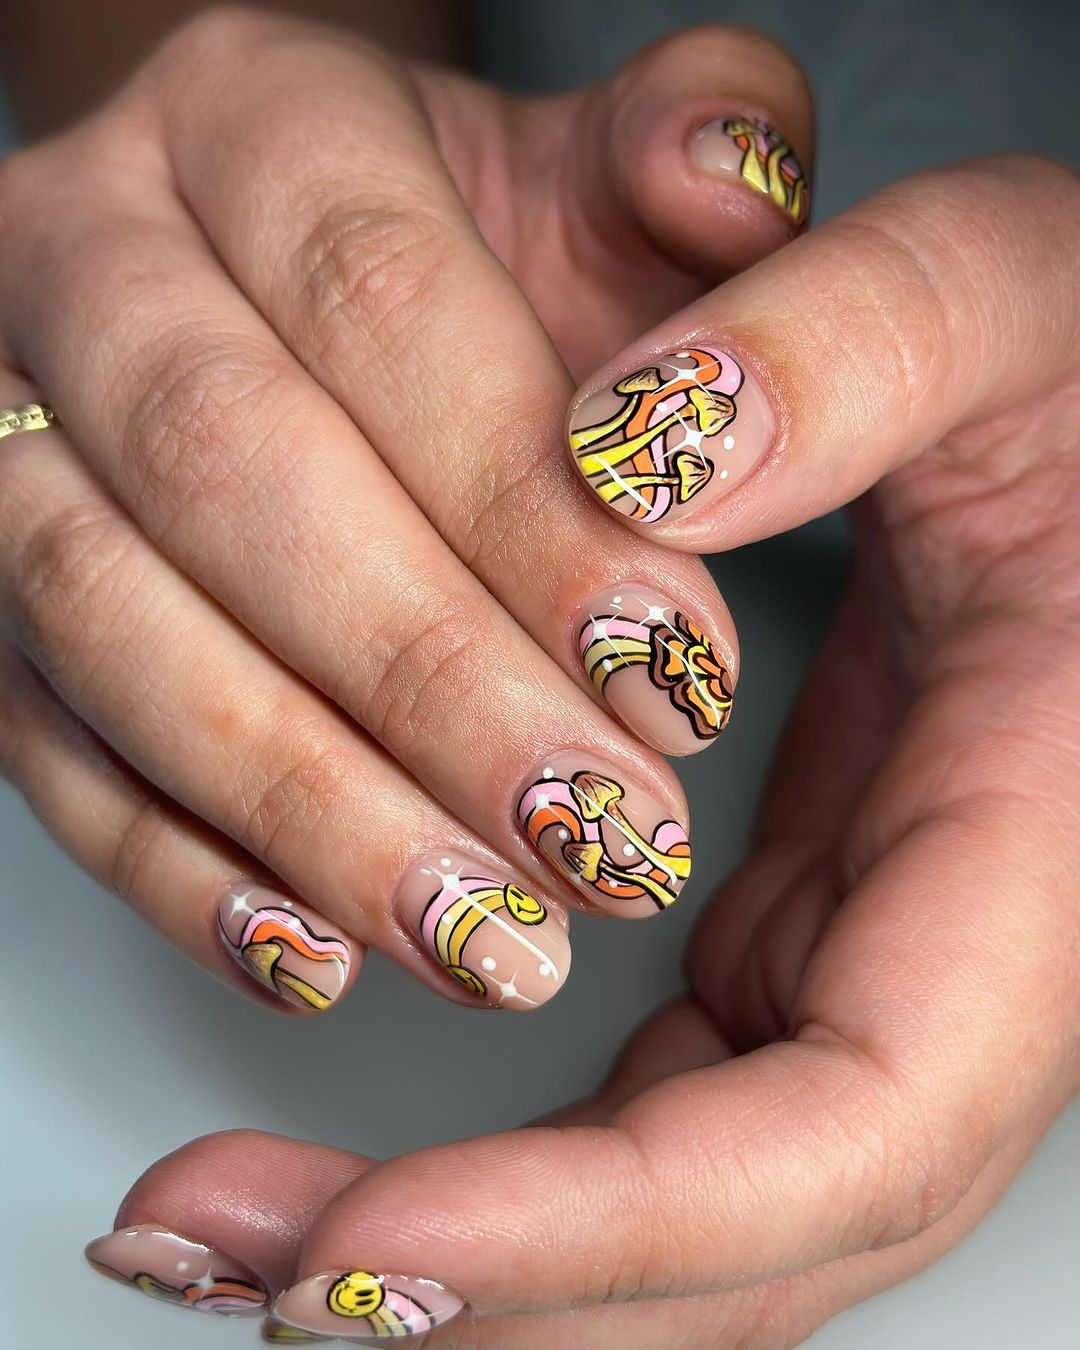
Abstract Mellow
This is the meeting of two art worlds – on one hand, we have manicures. On the other: abstract expressionism. Together, they scream at the top of their lungs simplicity through complex design, a contradiction that works way too well. This look is for the person who wants to wear their inspiration on their hands.
Materials:
- Nude Gel Polish
- Yellow Gel Paint
- Peach Gel Paint
- White Gel Paint
- Fine Detail Brush
OPI and Essie both make good nude polishes. For this look, it’s important to use high-pigment colors. We used gel paint from Gelish to get these bold lines.
Pro Tips: Start with your nude base and then let your brush do its thing. Try not to think about it too much – just lay down your colors and let them mingle where they may. It should end up looking like an accident that took years of practice to perfect!
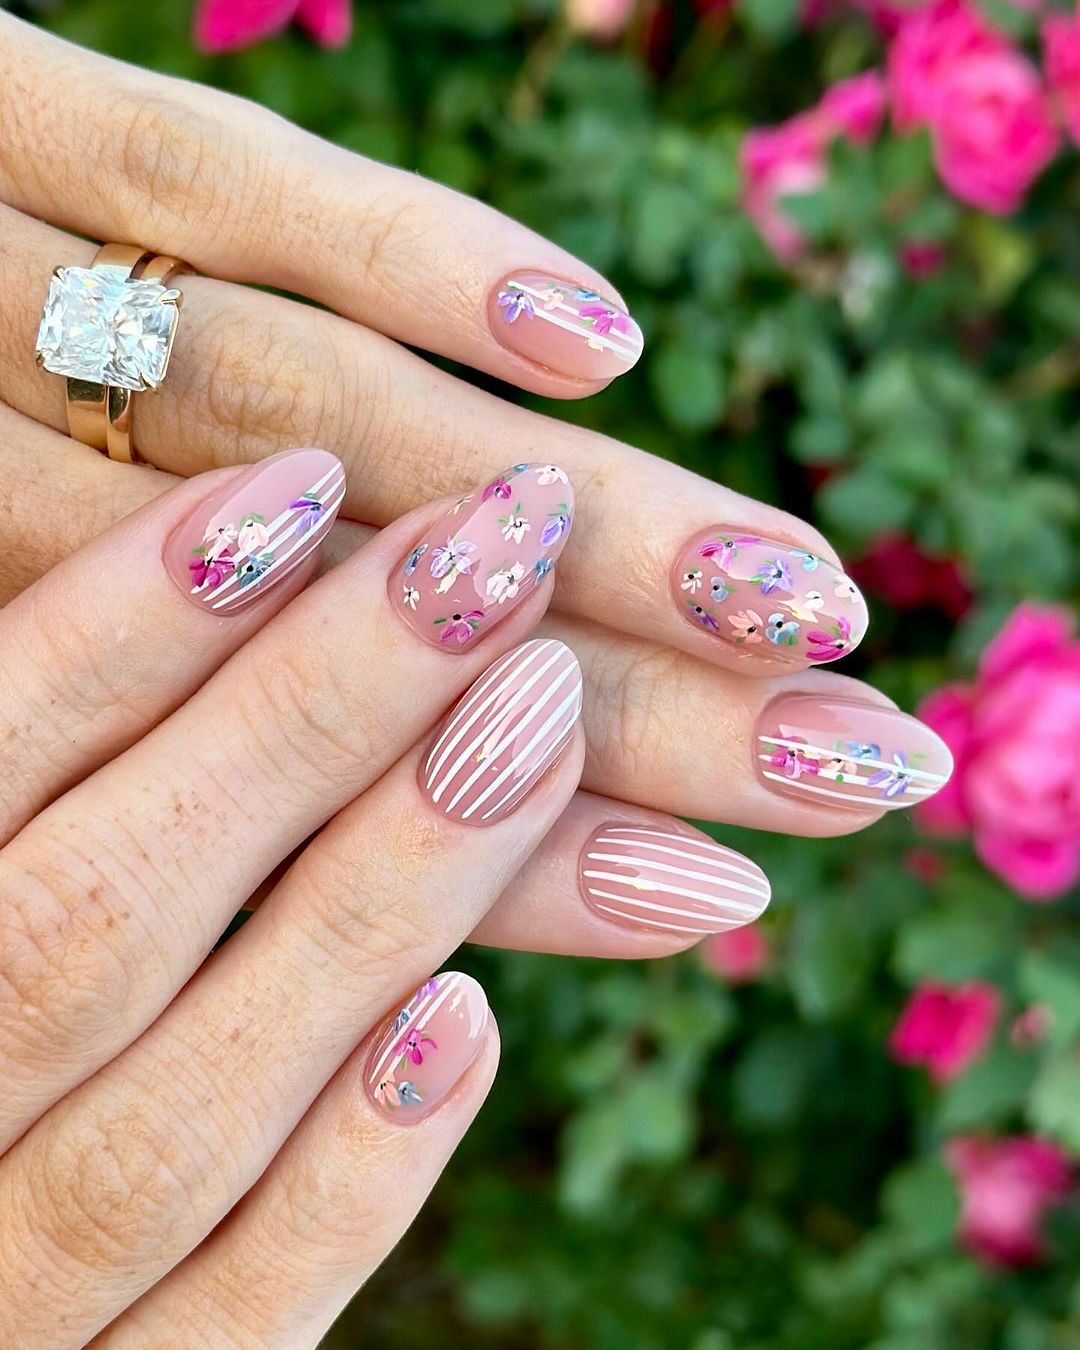
Rose Garden Romance
You can follow this procedure when you want a little bit of flowers and some structure in your manicure. Think about taking a romantic stroll through a rose garden with this manicure idea on. This is one of those kind of elegant, simple but very complicated kinds of nail arts whereby there are alternating pink shades and floral designs that are decorated by stripes and sparkles which make it look so nice.
Materials:
- Different shades of pink gel polish
- White colored gel paint for making the stripes
- Small decals or stickers that have floral designs on them
- Glitter or rhinestones used for adding sparkle to the nails.
Essie Gel Collection offers rose gradients in shades of pink; choose the best colors for your painting. A striping brush is important as you do the lines.
DIY Tips: Paint each nail with two different colours alternatively. On some nails, apply thin lines while on others stick small pictures. Stick glitters using glue that has been squeezed out from tube and finally put an extra layer over all to keep intact throughout summer 2024.
Save Pin
Soothing Sky Blossoms
The design is peaceful, like a tranquil dawn sky – a tender pink blended with light blue that serves as the background for the white frail flowers. It’s a design that evokes calm summer mornings and simplicity.
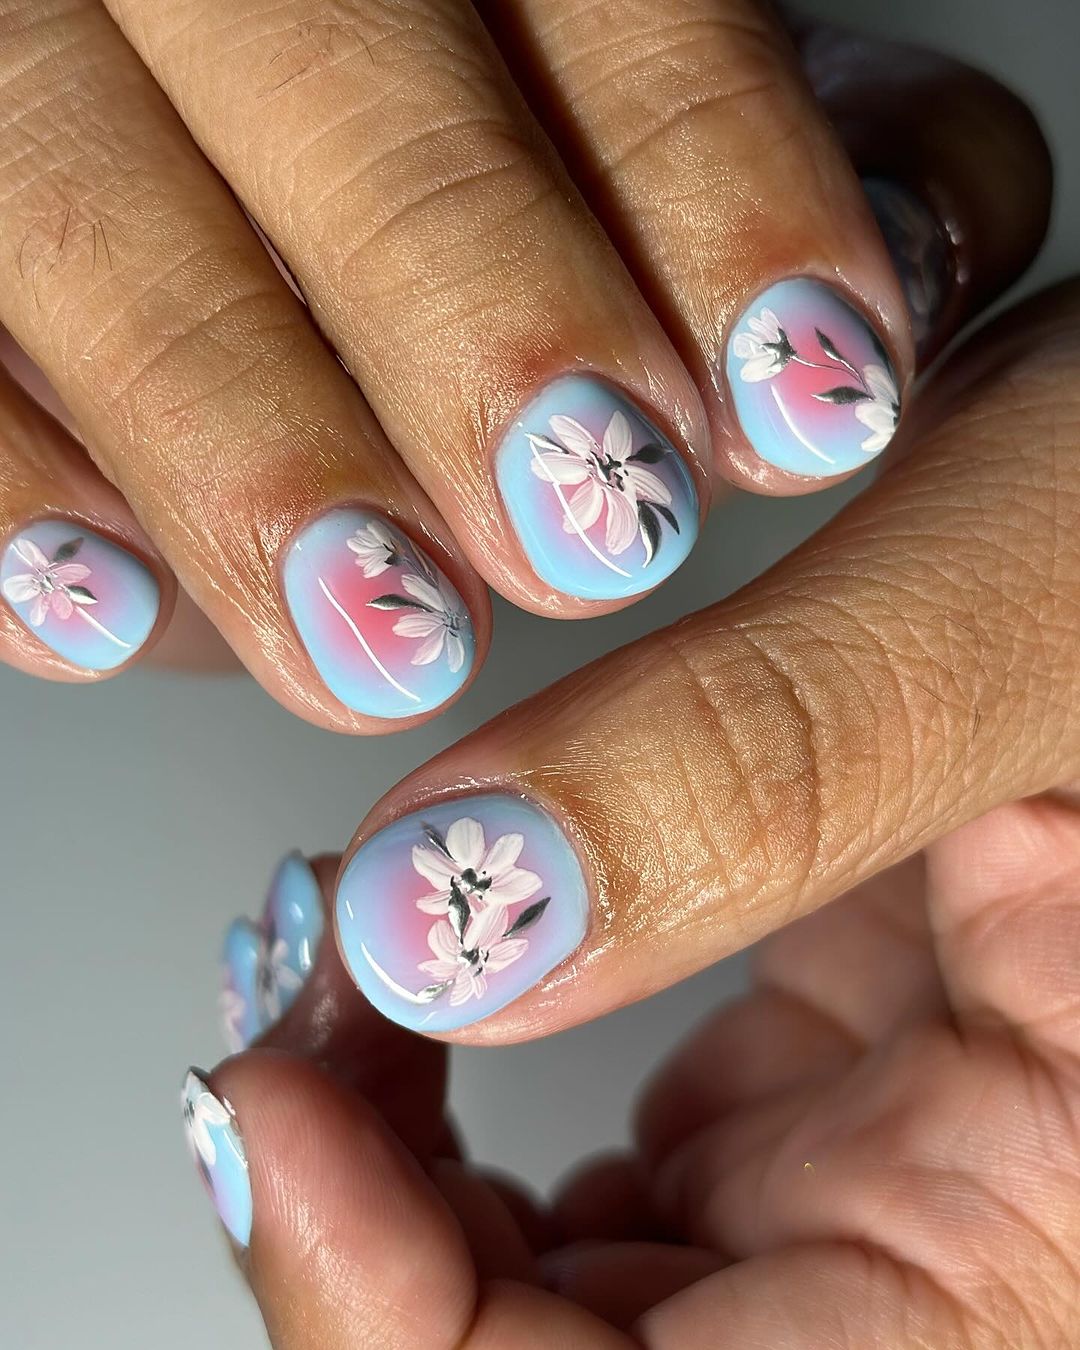
Things to Make Use Of:
- Pink and Light blue gel polish (gradient)
- White gel paint (flowers)
- Fine detail brush (petal strokes)
For the perfect gradient, I recommend using OPI Infinite Shine collection polishes because they have smooths blendability.
Do it Yourself: Apply the light blue base and sponge on pink for the gradient. With a fine brush delicately put on white blossoms, adding a black dot at the center of each flower for depth.
Strawberry Fields Mani
This playful and young idea for a manicure is super in representing the fruit that summer is so sweet for. The Strawberry and flower decal against your natural nail base with green tips will be a sight to see, which makes it perfect for fun holiday vibes.
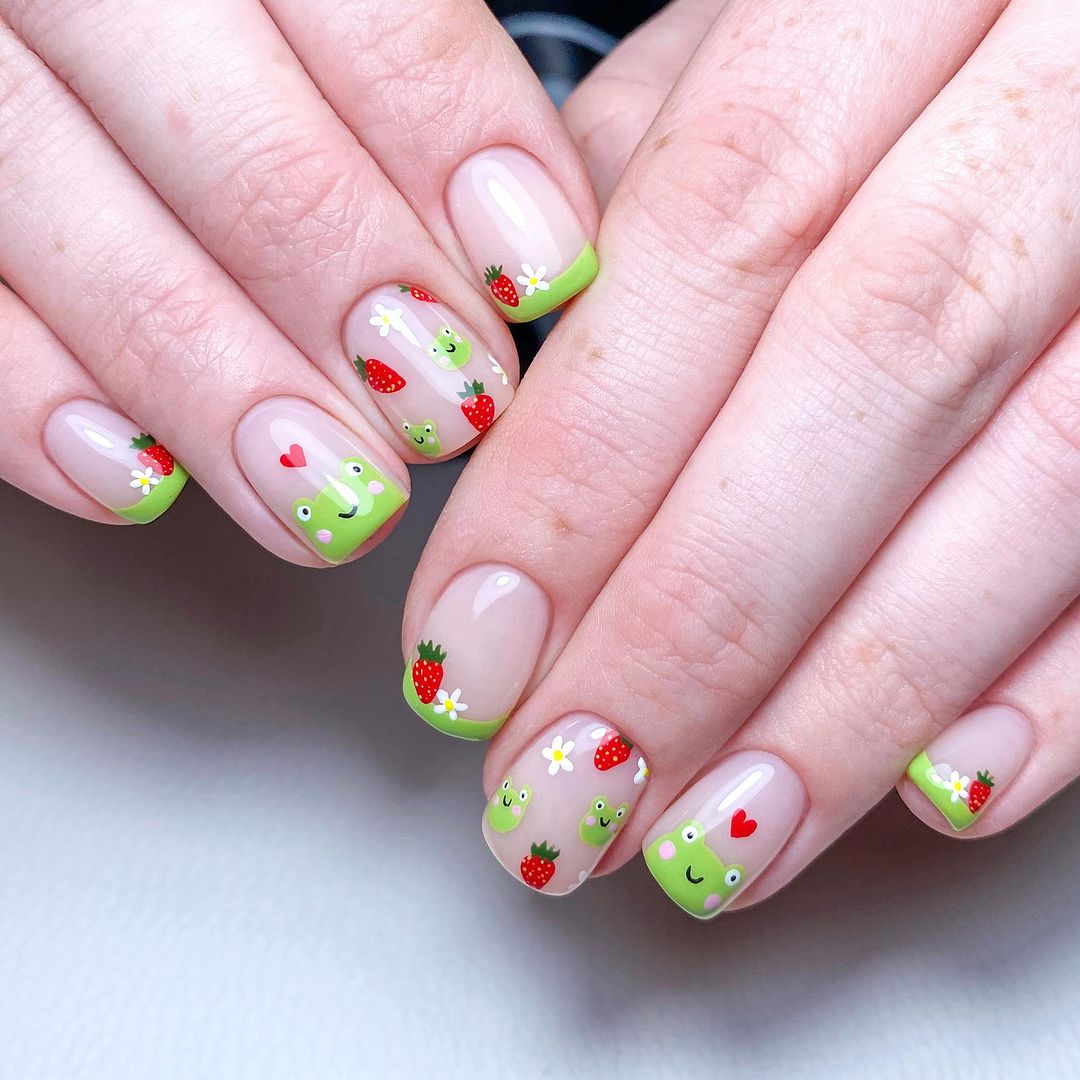
You will need:
- Natural base gel polish.
- Green gel polish (for the tips).
- Strawberry and flower nail decals.
- Small scissors or tweezers for decal placement.
Choose a soft natural polish as your base such as Essie’s Ballet Slippers and then choose a vibrant green color for your tips to mimic the feel of fresh strawberry leaves.
Tips: After applying your natural base, add your green polish to the tips. Then, place the decals carefully using your tweezers, seal them with top coat so they last longer!
Summer Fuchsia Flair
These nails are like summer fun that just bursted out – brilliant, daring, and unapologetically pink. The fuchsia base with lighter petal strokes and golden rhinestones is all about warmth and happiness in the season.
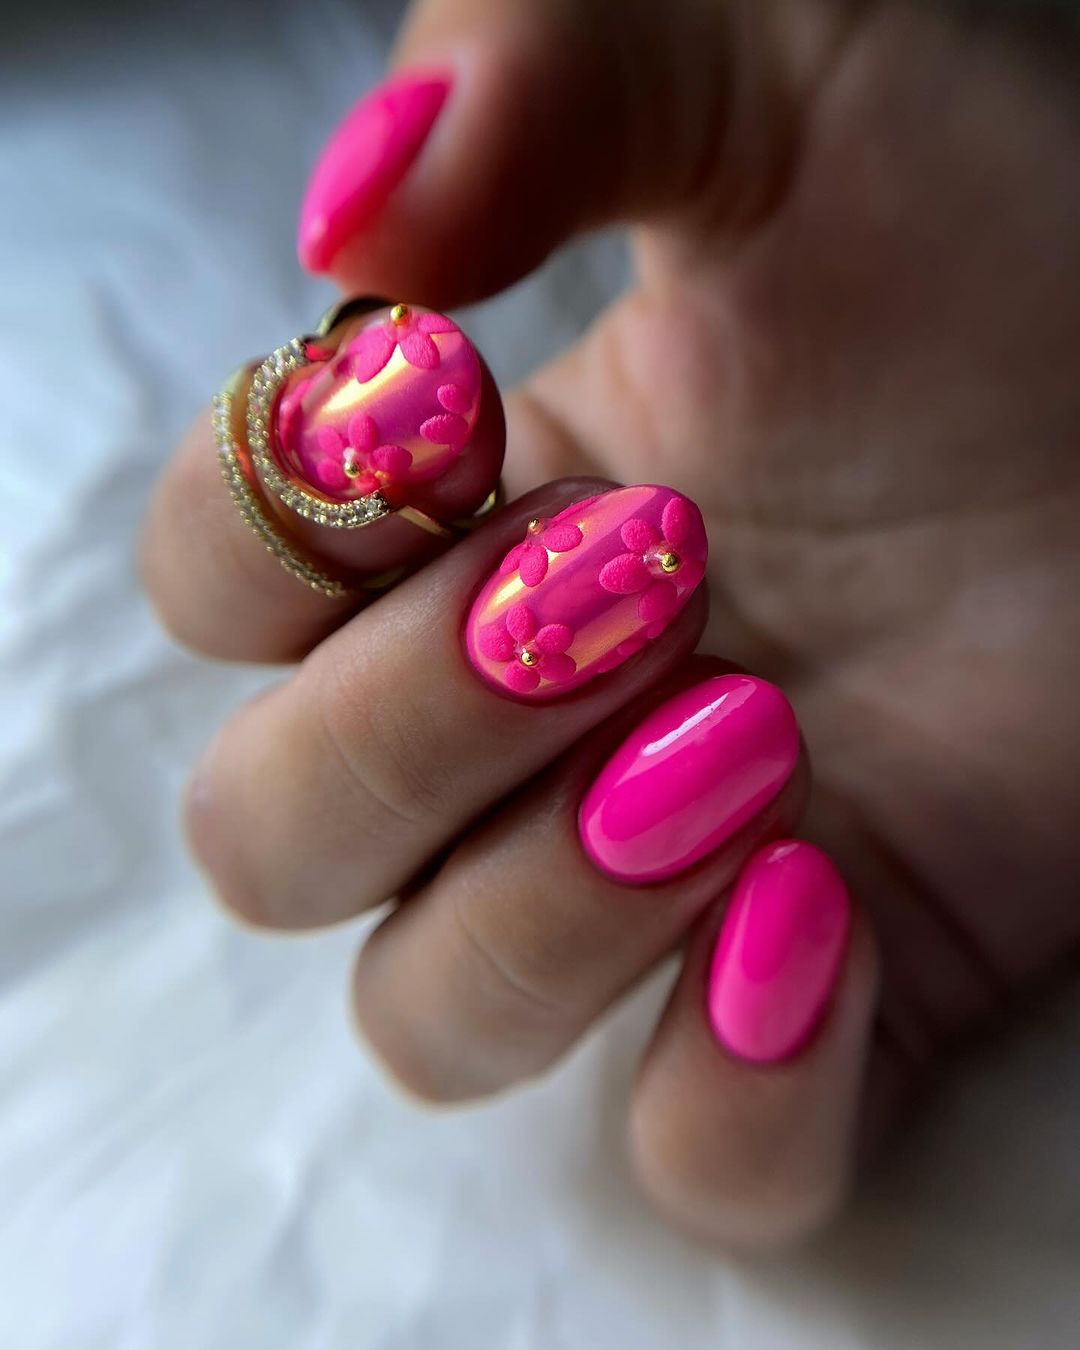
Consumables:
- Fuchsia gel polish
- Petals on the lighter side of pink (gel paint)
- Gold rhinestones
- Sealing Top Coat
The right base, a highly pigmented fuchsia like Gelish’s Hot Rod Red; plus some gems positioned perfectly for a little bling.
DIY Tips: Begin by painting the base with your fuchsia polish. Apply light pink strokes for the petals using fine brush. The extra sparkle can be achieved by attaching gold rhinestones at the center and then sealing it with top coat for protection and shine.
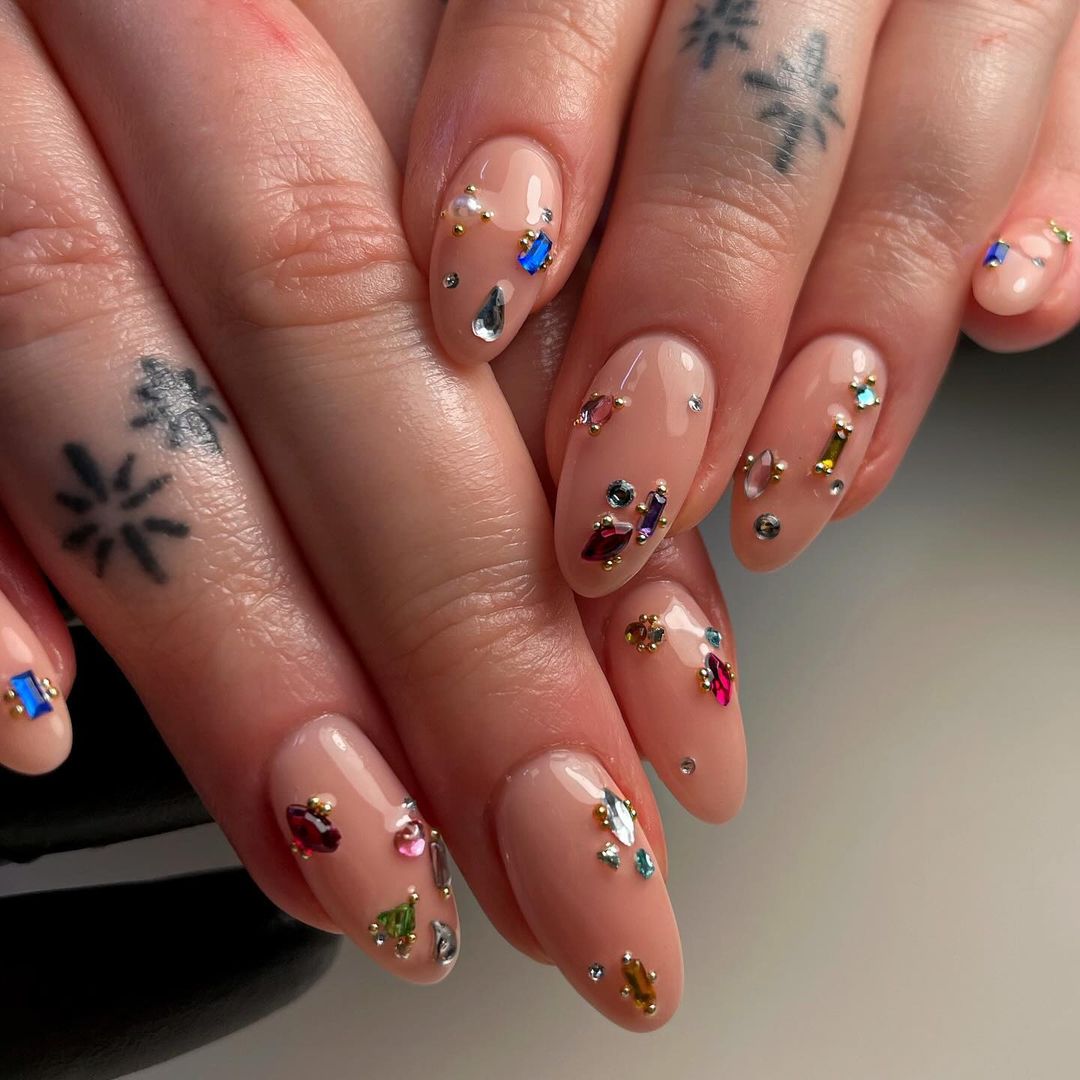
Jeweled Elegance
This manicure combines the subtle appeal of natural nail polish with the luxury of sparkling rhinestones. It’s a classy way to celebrate bling that works well for casual white evenings or luxurious summer simple brunches.
Materials Needed:
- Clear gel polish for an invisible look
- A selection of different sizes and hues of rhinestones
- Gel top coat to keep them in place
It is best to have a natural finish polish on the base that complements the shine of stones like OPI Nude colors. For those who want high quality sparkles, Swarovski is where you can buy these crystals.
DIY Tips: Lay out your desired pattern after applying your base layer. It may be useful to have a pick up tool or dab some top coat if using them. Lastly, apply an additional layer of top coat to seal it down.
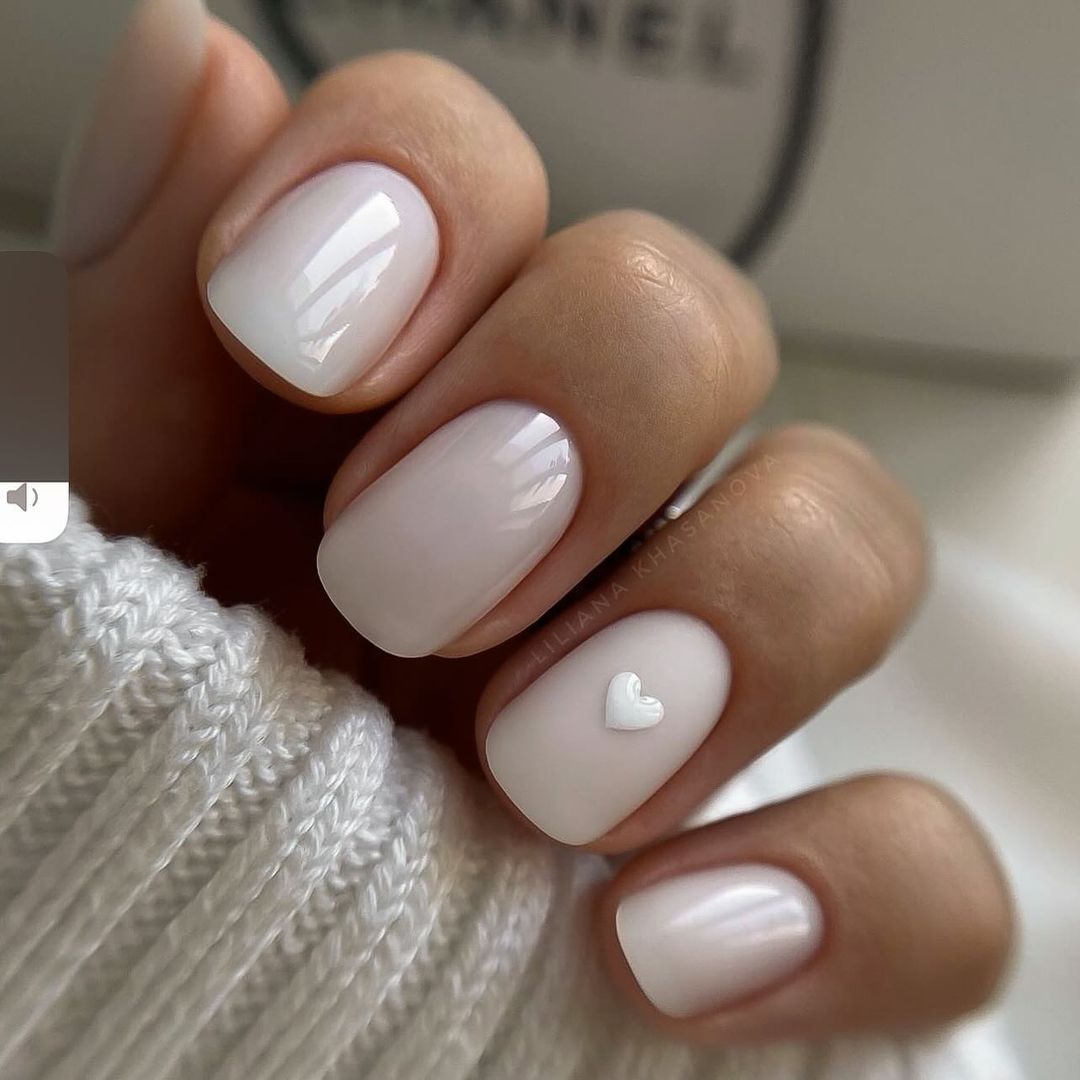
Soft Whisper
There’s always something great to be said about a sheer white polish. It’s simple, beautiful and timeless. Giving off a natural elegance in the process. This manicure takes things even further with a small white heart that is a subtle nod to love and tenderness. Making this the perfect choice for someone who wants a minimal design with a touch of whimsy.
You’ll need:
- A see through white gel polish for that light touch
- White nail art paint for the heart detail
- A thin brush for said detail
I’d recommend using Essie’s sheer whites as they’re buildable to give you full control on how much you want it to stand out. You can even use one of Winstonia’s fine brushes, which will help create that delicate heart detail.
DIY Tips: Put two coats of your sheer white gel polish on, then take your brush and create that little heart on one of the nails. It’s such a small thing that creates something special in an instant!
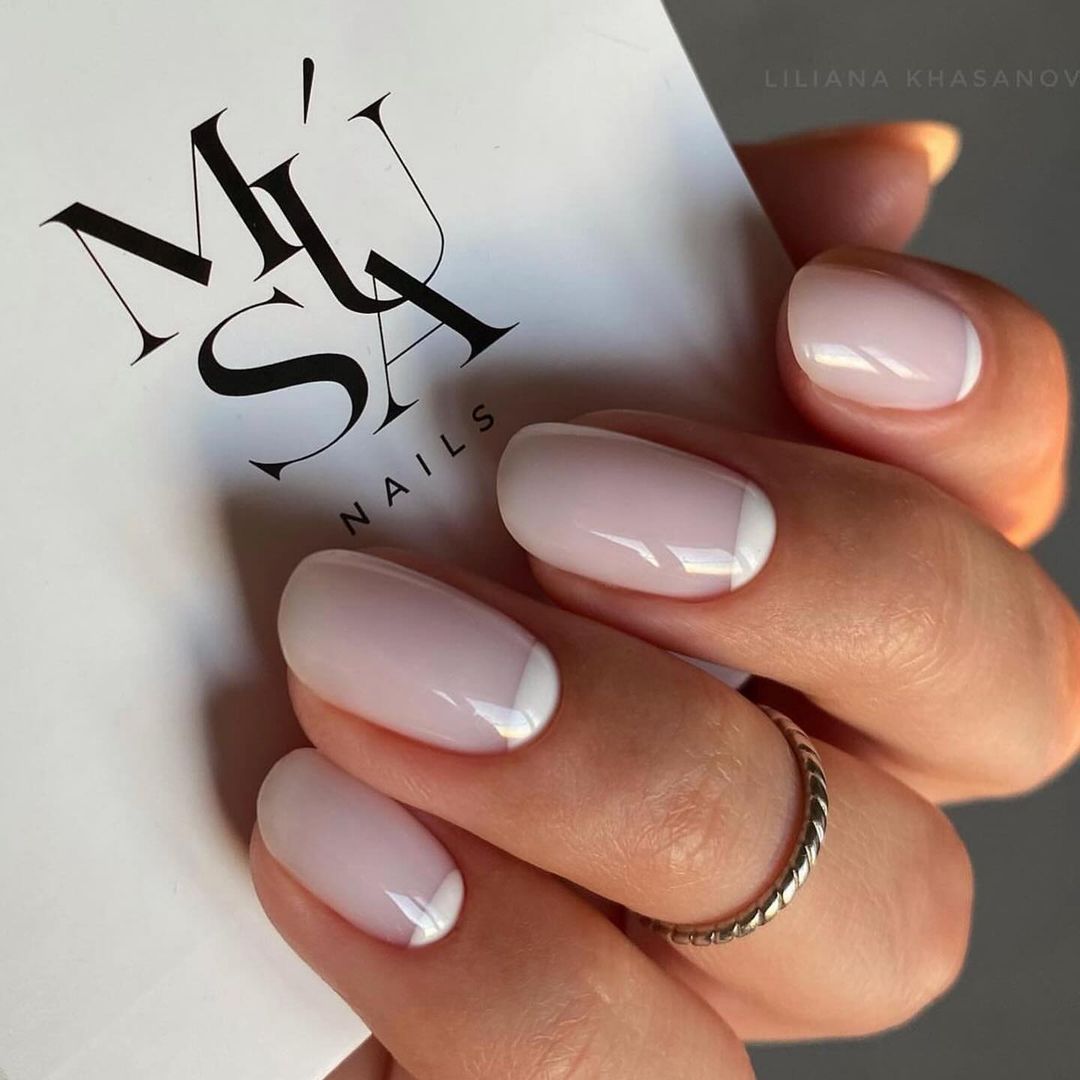
Modern French Revival
French tip manicure is a timeless classic, and this one goes even further with its ombre effect that is both refined and simple yet undoubtedly sophisticated. The white tips fade into the natural nail color with a touch of elegance; perfect for those who like French tip nails with a contemporary twist.
Consumables:
- Pink nude gel polish (as base)
- White Gel Polish(for Tips)
- A Sponge (to achieve the Ombre effect)
- To blend the white into the natural pink base to create an ombre French tip you will need a soft sponge.
DIY Tips: After your pink nude base, dab a sponge lightly coated with white polish onto the tips of your nails. Gradually build up the ombre effect to your liking, and seal it with a top coat.
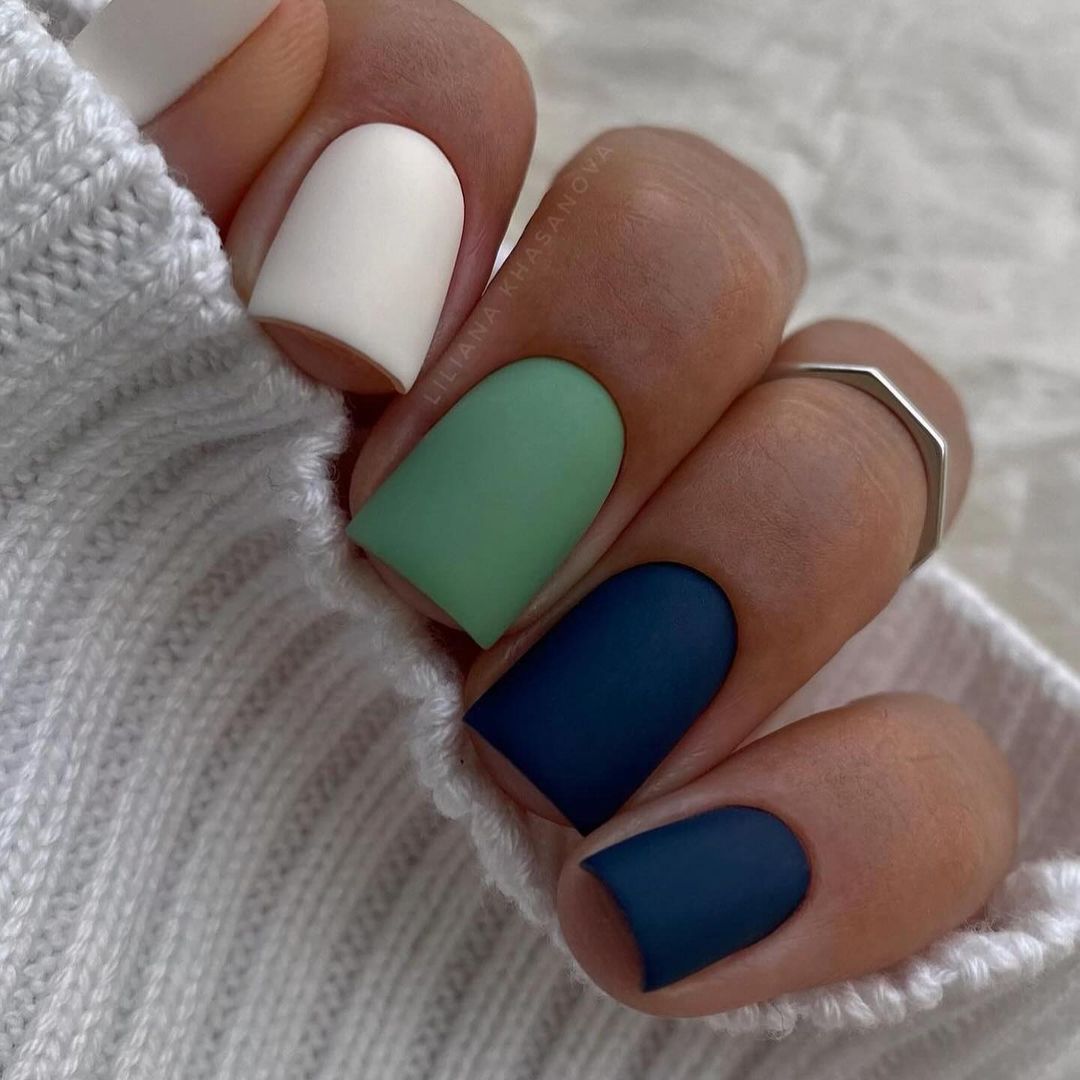
Cool Tones, Calm Vibes
This is like a new beginning, depicting the quiet tones of a peaceful seaside resort. Like a summer vacation on your nails; from pure white through soft green mint and deep sea blue. It’s minimalist, pure look with tranquil mood for long summer days in 2024.
Things you need:
- Green, blue and matte white gel polishes
- A matte top coat to give it a velvety finish.
The cool shades are given an up-to-date feel by their matt finishes. I suggest that you try OPI Matte Top Coat as it has a formula that is both smudge-free and long-lasting.
DIY Tips: Apply each color alternating on the nails as you wish. Finish off with the matte top coat which turns the shiny gel into something flat but still vibrant in appearance.
Summer’s Sweetest Accent
This look is all about playful accents on a classic natural gel polish base. The tangy lemon and daisy details on the thumb are sweet and fun, embodying bright summer days and simple joys. It’s pretty, it’s uncomplicated, and it’s incredibly lovely—a manicure idea that’s both inspo-filled and super adorable.
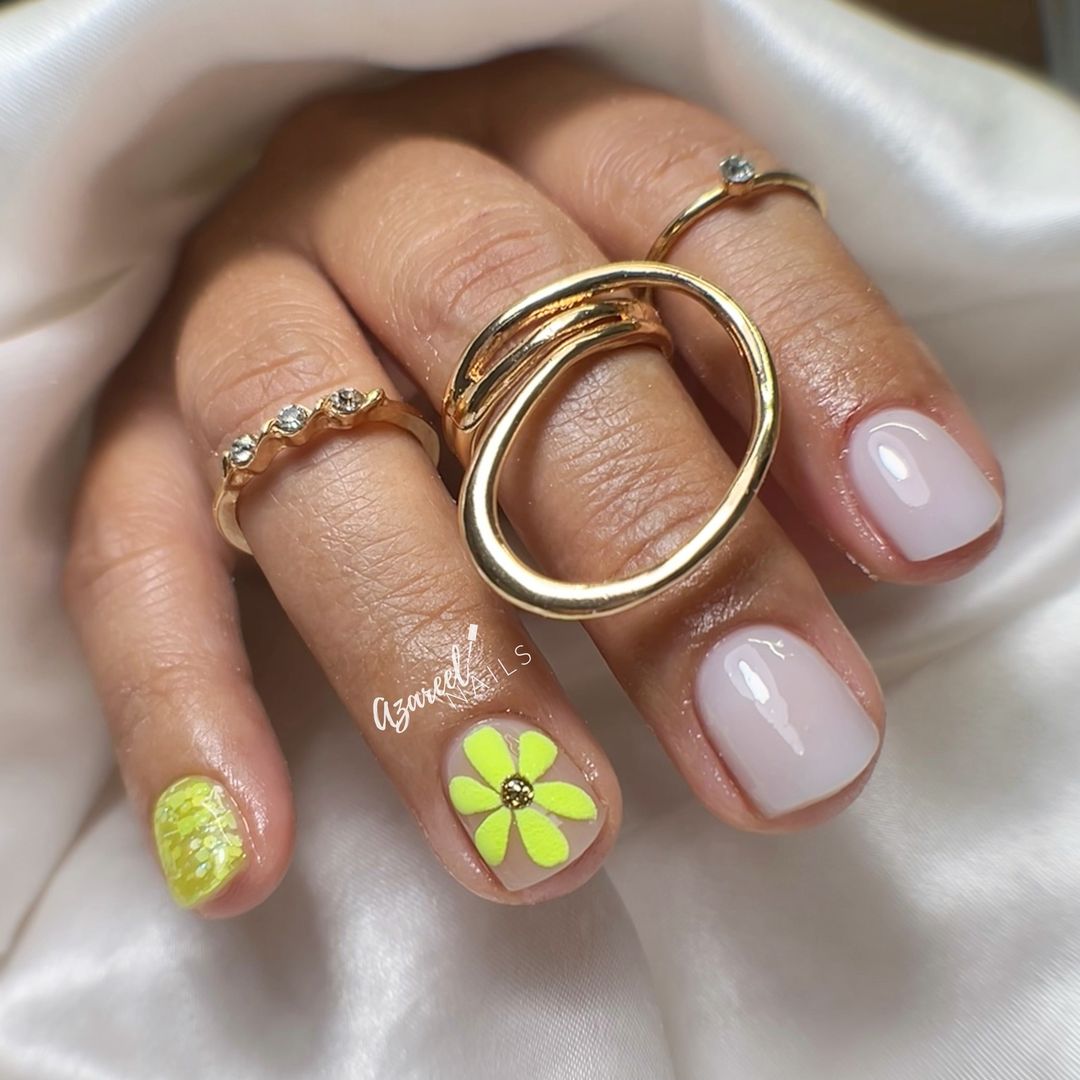
Supplies:
- Sheer natural gel polish for the base
- Yellow and white gel paint for the art
- A fine brush for detailing
For the base, try something like Essie’s Tuck It In My Tux; it has the ideal sheer quality. The bright yellow can be a shade like CND’s Bicycle Yellow, which pops beautifully against the natural background.
DIY Tips: After your base coat, use the fine brush to paint the lemon and daisy. It might require a steady hand and a bit of patience, but the end result is worth the effort.
Whimsical Love Stories
This original, vivid design reminds one of wearing a little comic strip on the nails. Each nail is a story, and love is depicted in a playful manner. It is an expressive way to demonstrate personality and love for art. Because it’s so much fun to see black sketches against hot pink hearts!
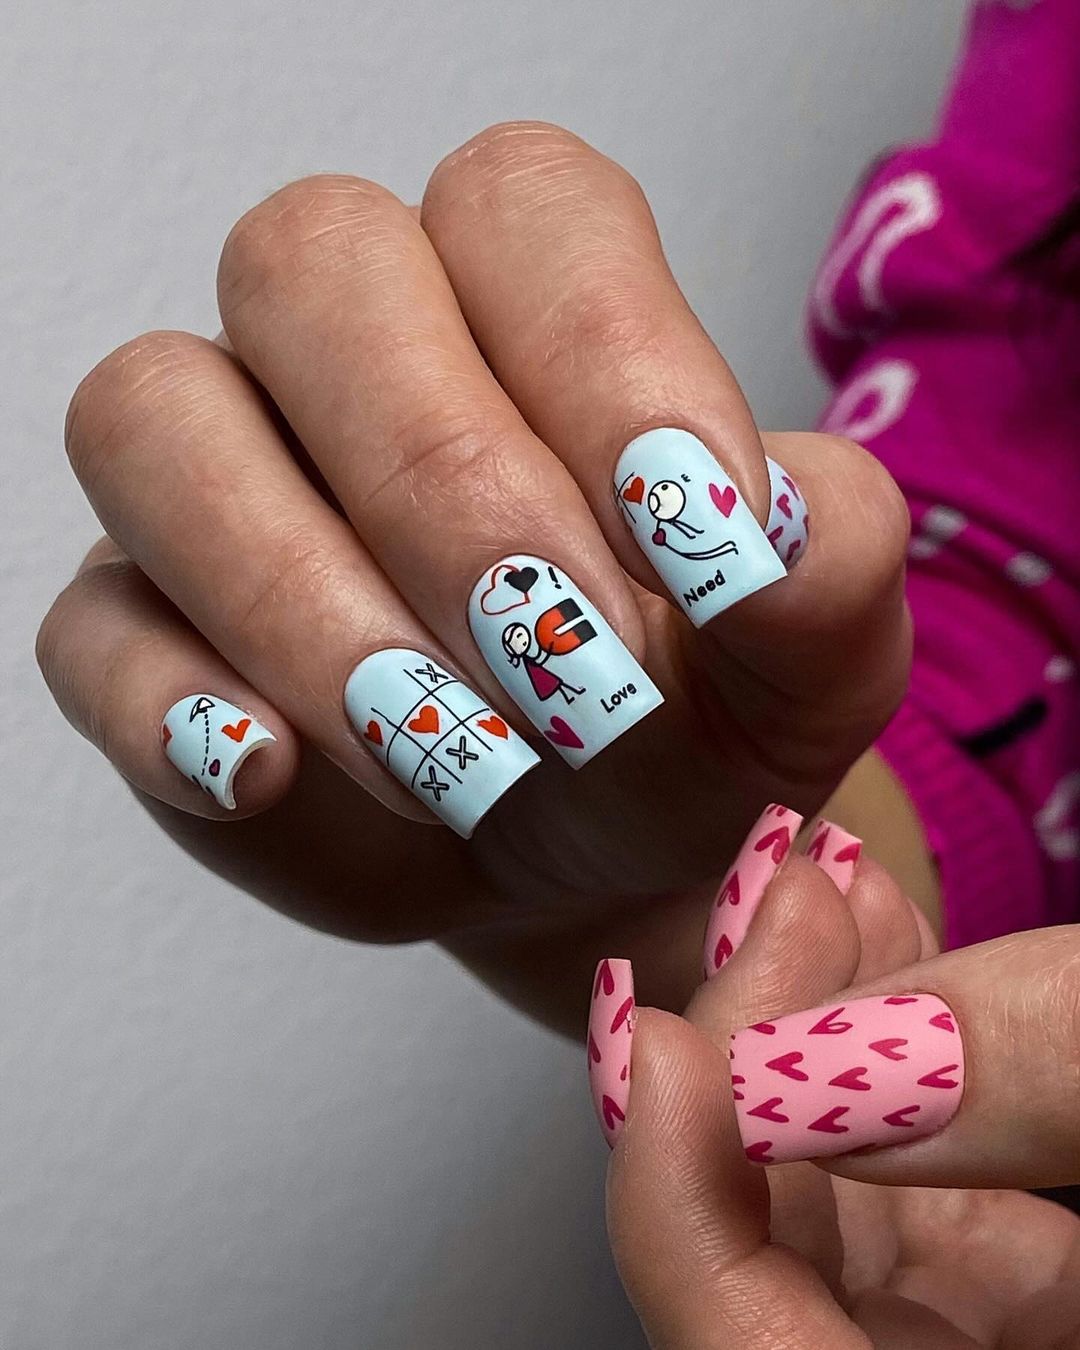
Materials:
- White base gel polish
- Black, red, and pink gel paints for the designs
- A very small tipped brush
The stark white base presents an opportunity for striking pictures whereas the fine detailed brush is necessary when drawing paintings with that level of intricacy.
Tips for Do-It-Yourself: Start by applying white color as your background so that you sketch them lightly in pencil before using gel paint on them. Take time to achieve all those lovely details, then finish up with a top coat for sealing in the design.
Floral Golden Hour
In this piece, I love my renaissance inspired nails. This is a sunset over the golden hour where soft pink and creamy yellow ombre background is decorated with complex flower patterns and gold trims. Such nails are sumptuous and intricate; they are perfect for an elegant summer evening in 2024.
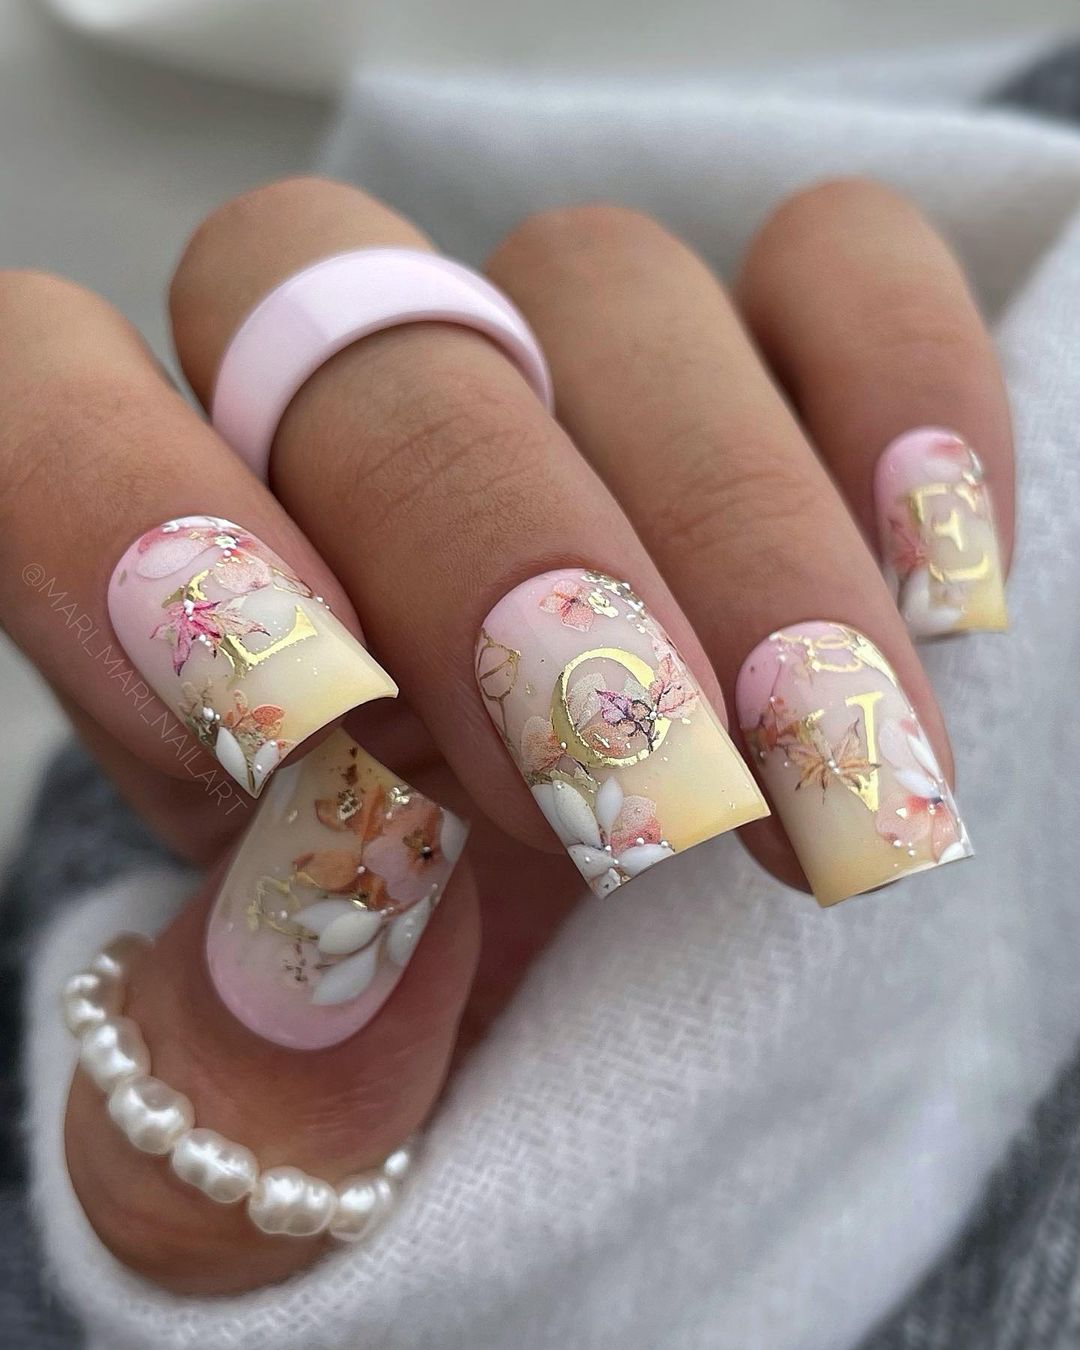
Materials:
- Ombre: Soft pink and creamy yellow gel polish
- Accents – Fine gold foil
- Floral art – Thin brushes
For a smooth transition between the colors, sponge them onto the nail beds like a light evening sky. In addition to that, carefully placed gold foil catches light and adds royal touch to the design.
DIY Tips: Hand paint floral designs after applying an ombre base coat using a fine brush. Apply gold foil on tacky gel polish areas where you want it to look shiny.
Playful Whimsy
A design that is fun and carefree. It has a base color that sits in the background with polka dots, caterpillars, and cherries scattered throughout. It’s not meant to be taken seriously and is perfect for any outdoor events or just hanging around this summer.
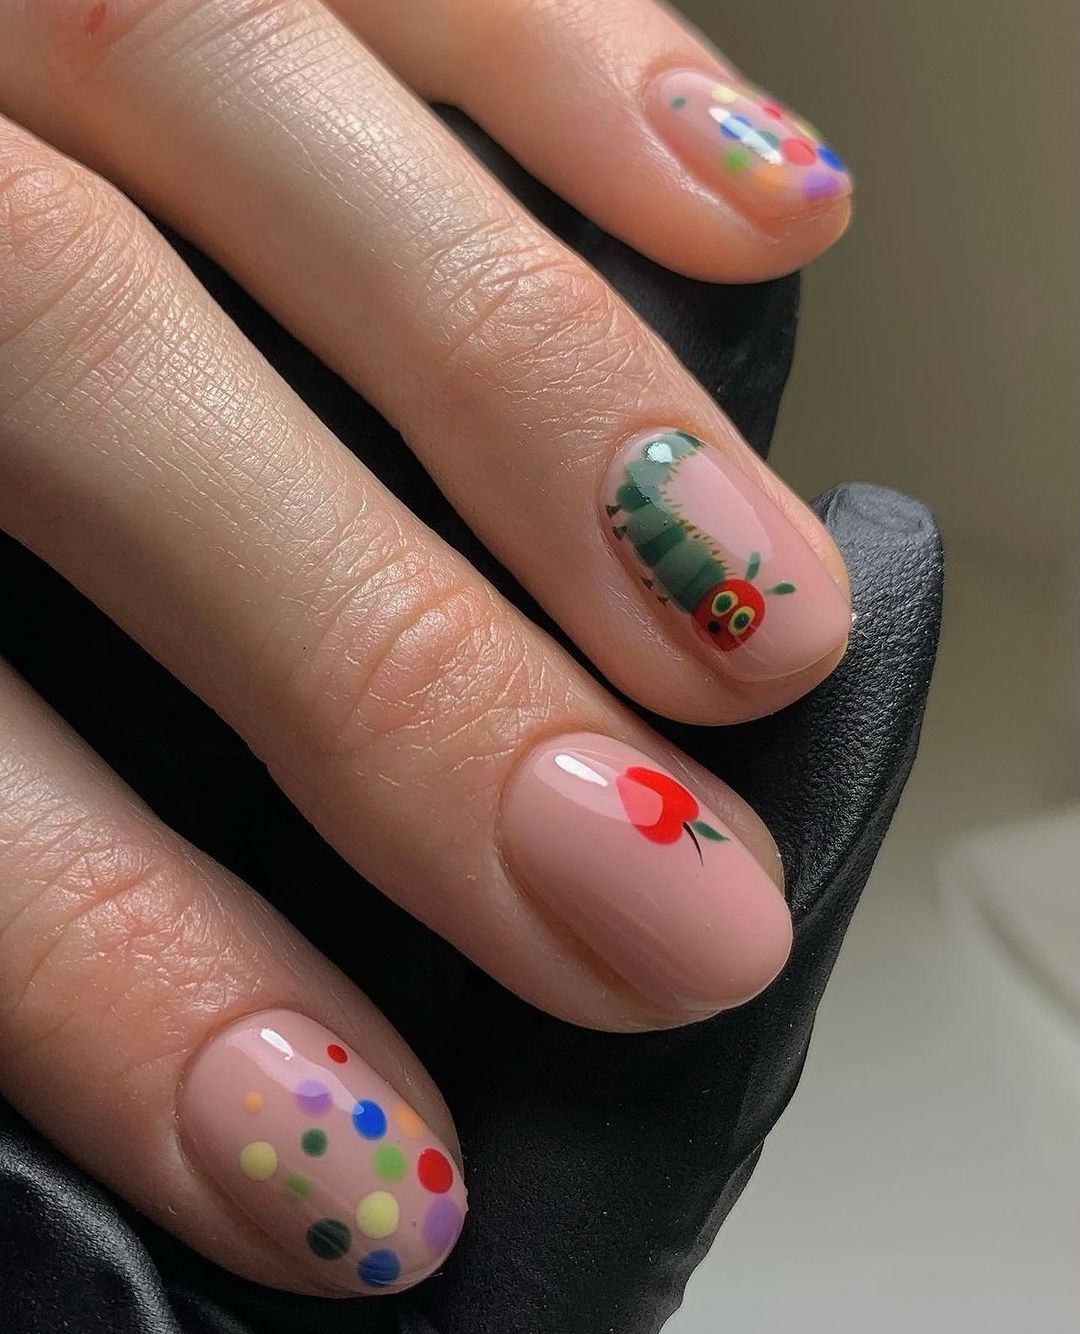
What you’ll need:
- Neutral gel polish
- Colorful gel polish for dots and details
- Dotting tool
The pop of colors will stand out against the neutral base, but the dotting tool will help make them even more eye-catching.
DIY Tips: Start by applying your neutral base coat. Once dried, dip your dotting tool into any color of your choosing; use it to create polka dots all over. Use other colorful gel polishes to coat a fine brush so you can begin drawing the details of the caterpillar and cherry.
Ethereal Watercolor Petals
The nails bring to mind light, expensive, and gold. A transparent corolla comes down on the bare skin with golden spots. It is a quiet design that speaks of class but never screams. This captures the simplicity of summer.
List of things needed:
- Nude gel polish for the base
- Translucent colored gels for the petal effect
- Gold leaf for embellishment
To create an impression of watercolors, apply translucent gels lightly blending them together, while sparingly applying gold leaf for slight sophistication.
DIY Tips: consider applying nude first then utilize clean brush to slightly tap and merge petal colors onto a nail. Then use small pieces of gold leaf before finally putting top coat so as to make it look natural.
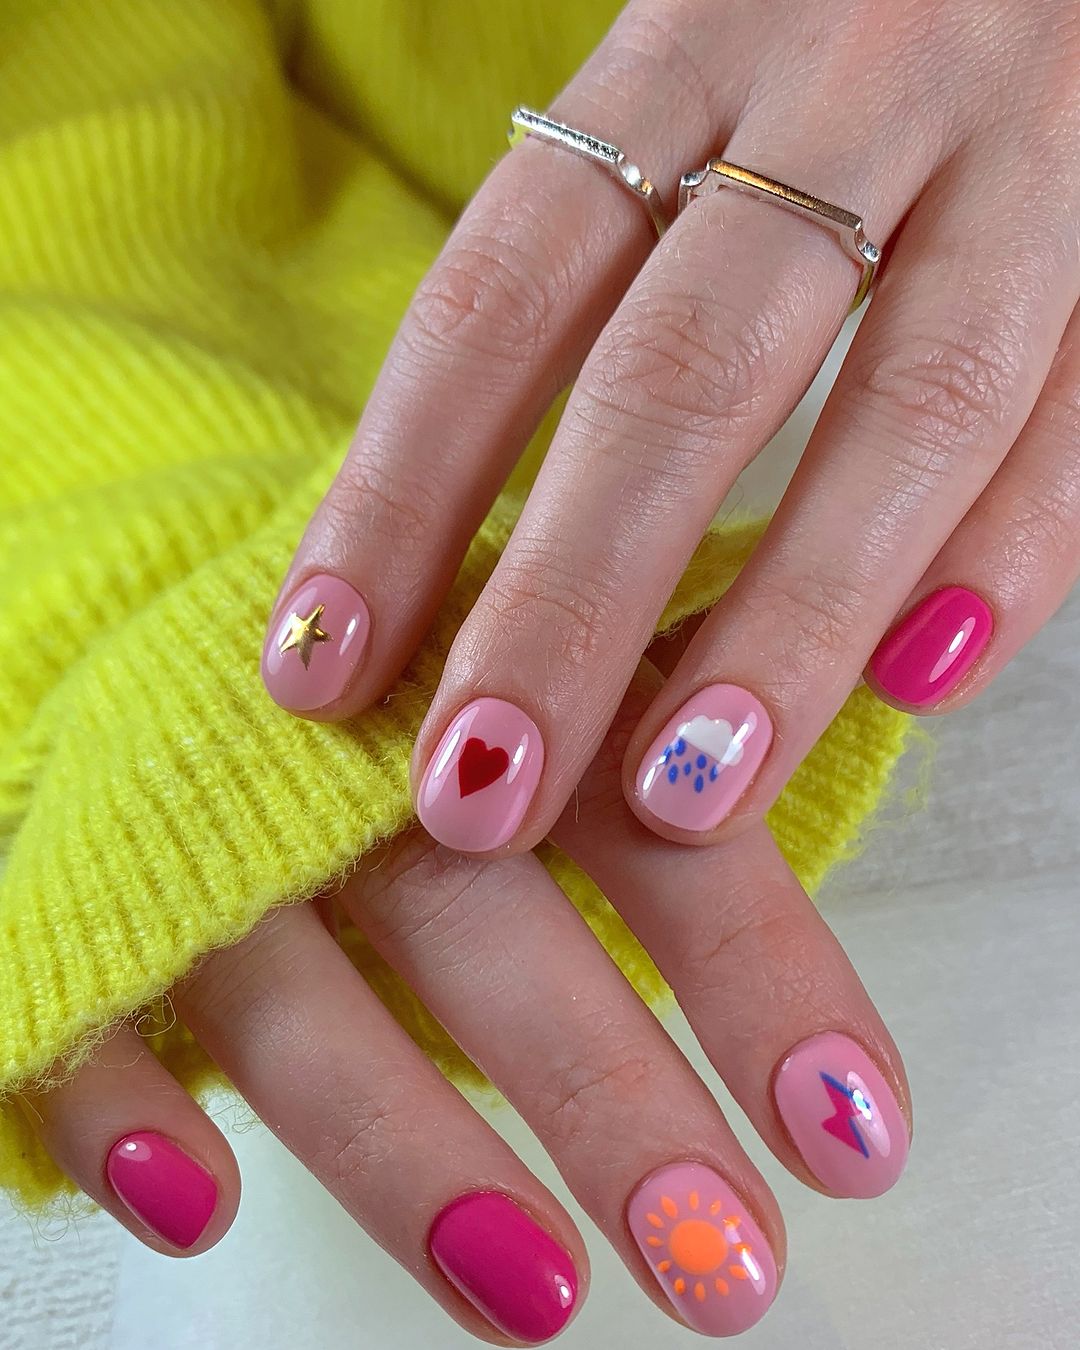
Summer Love Montage
This manicure is a playful montage of summer love; from vibrant pink shades to sweet little patterns that speak the language of love. It is a story of joyous summer on every nail, with stars, hearts and even a whimsical image of a cold summer treat.
Ingredients:
- Vivid pink and light pink gel polish
- White gel polish for the motifs
- Different fine brushes for detailed art
- Gold star studs
Choose an intense gel polish such as one from Gelish’s summer collection for the solid nails. The lighter shade of pink will make the details stand out and you can add some bling with tiny stud.
DIY Tips: Alternating between bright and soft pink paint your base colors. Take a thin brush or toothpick and place it on top of each motif before it dries so that it is still tacky.
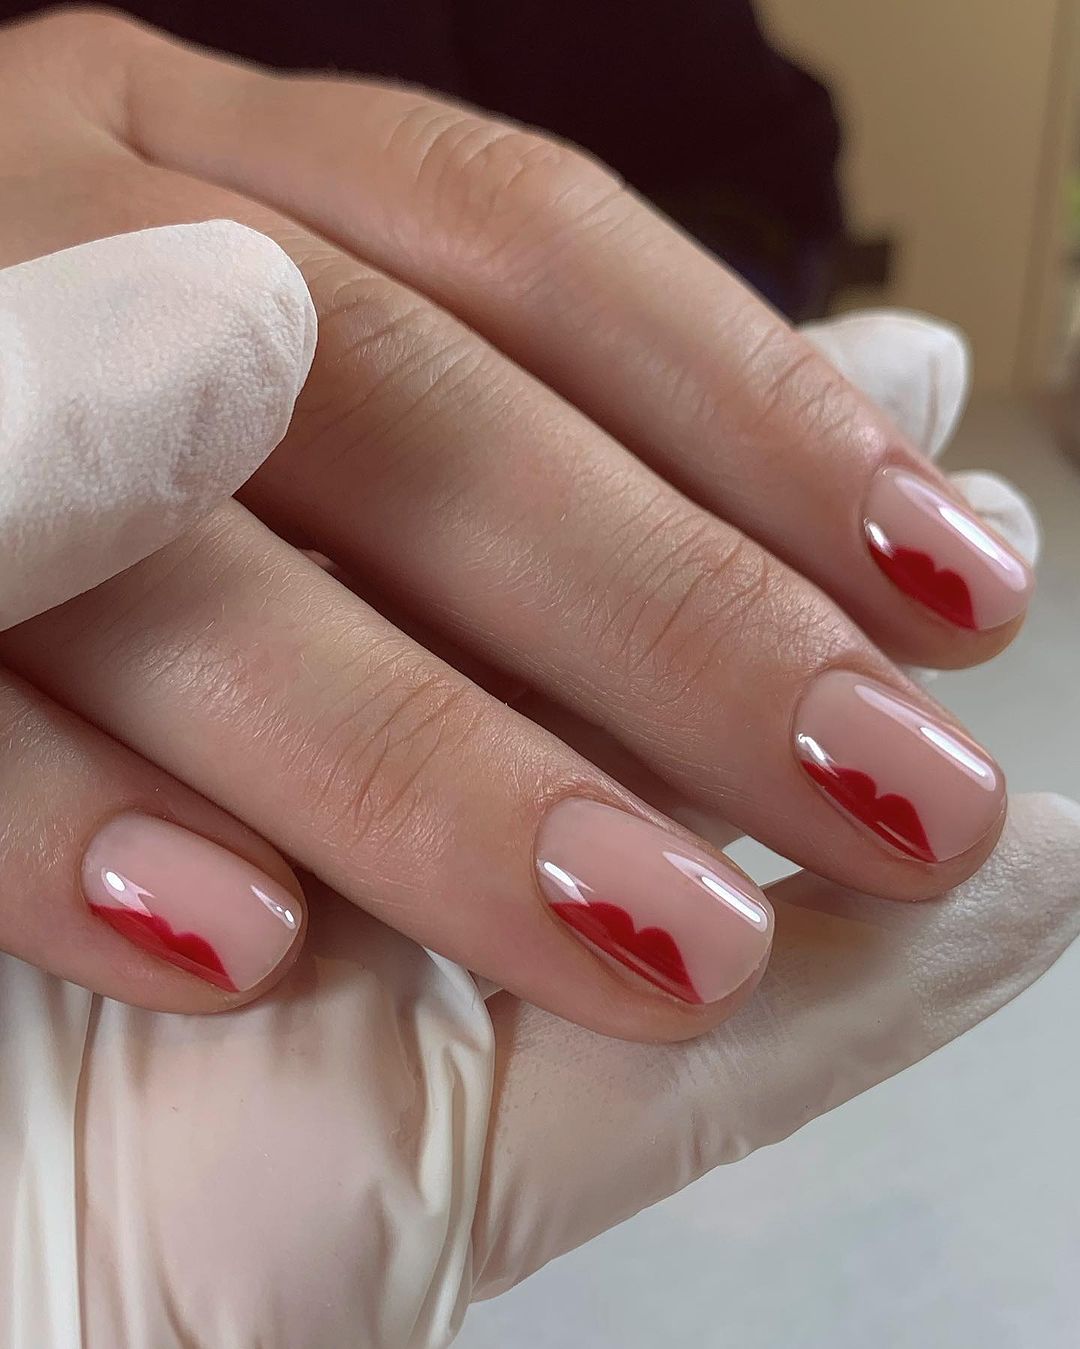
Whispering Hearts
This design is simple and elegant. A single, bright red heart on a pale pink base is pure and uncomplicated. The look is timeless and perfect for summer 2024, whether it’s a casual day out or dressed up for an event.
What you’ll need:
- Sheer pink gel polish
- Red gel polish
- A fine detail brush
For the best results, use Essie’s Ballet Slippers for the base color to look natural and OPI’s Big Apple Red for the heart.
How to:
Start off with the sheer pink as a base. Then, with the fine brush carefully draw and fill in the center of each nail with a heart shape using the red polish.
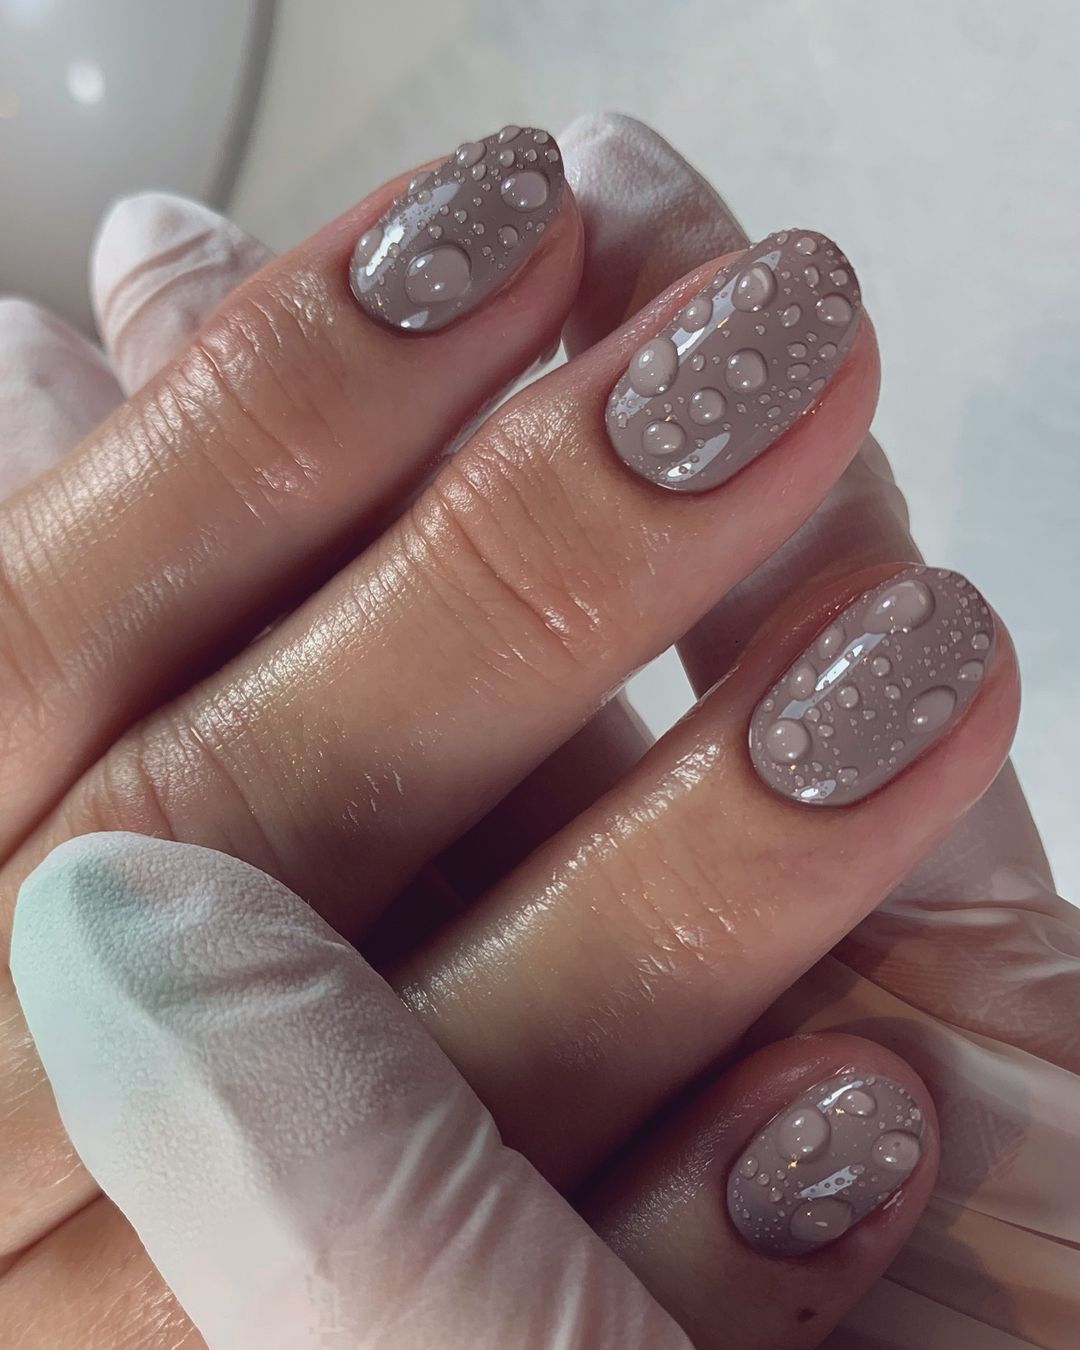
Rainy Day Reflection
Like a quiet rain, this nail design with its glossy taupe base and perfectly positioned droplets that suggest the wet look. It is an example of subtlety as art where the beauty lies in simplicity—a motif for a contemplative summer 2024.
Consumables:
- The nails are first done in glossy taupe gel polish
- For the droplet effect, we have to use clear gel
- To obtain fresh rain effect on both color and droplets you’d need high gloss finish for such kind of designs.
DIY Tips: Apply the taupe polish and cure it. Do not cure until your desired effect has been produced by using small amounts of clear gel applied with a dotting tool at places where you wish to have your droplets.
Modern Art Deco
For instance, the nail design is an up to date version of art deco style with bold geometrical forms in traditional colors such as green and red separated by thin lines made of gold. It is a rich statement that will go well with people who love to carry some luxurious history.
Items needed:
- The base should be done using sheer nude gel polish.
- Use green and red gel polishes for the shapes.
- Gold striping tape or gold gel paint for the lines
The nude base should be transparent so that all attention can be directed at the vibrant geometric figures. Instead of going through worries, use gold striping tape for accurate lines.
DIY Tips: Start with the nude polish as a base. Then carefully draw geometrical forms on it and mark out sections applying golden stripe tape.
FAQ
Q: How long does a gel nail design last?
A: The classic rule of thumb is 2-3 weeks. The life span depends on the technique of application, what products were used, and how well you treat your nails.
Q: Can gel polish hurt my nails?
A: Gel polish should not damage your nails if it was removed and applied correctly. Make sure to have your nails done professionally or follow proper procedures at home.
Q: Can I do intricate nail designs with gel polish myself?
A: Of course! With the right equipment and some practice, you can create beautiful nail art at home. Start small and work your way up to more complicated designs.
Q: How do I make my gel nail design last longer?
A: To extend the life of your manicure, keep your nails clean and dry. Wear gloves when doing anything that could possibly harm them. Apply cuticle oil often and don’t use them as tools.
Q: Are there any eco-friendly gels?
A: Yes! Brands offer environmentally friendly gels without harsh chemicals in their labs. Look out for “5-free,” “7-free,” or even “9-free” labels!
Q: How do I safe remove gel polish at home?
A: You’ll need to soak your fingertips in acetone first then gently rub off the polish with a pusher or an orange stick. Don’t pick or peel, it’ll ruin your real nails.
Q: Can I mix regular polish with a gel topcoat for designs?
A: Although it is possible to create this mixture, regular lacquer isn’t built like its brother and won’t hold up nearly as well under other conditions.
Q: How can I prevent my gels from lifting?
A: Be sure that you’re starting with properly prepped nails each time before application—avoiding any moisture or oils on the surface—and don’t let the product touch cuticles or skin, as it will cause lifting.
Q: What’s the trend for summer gel nails in 2024?
A: Expect nothing less than bright and happy colours for the sunny days of 2024. Intricate designs and unique combinations of matte and glossy finishes are also encouraged!
Q: Is a lamp necessary to cure gels?
A: Yes. Gels won’t harden and set if they’re not cured under a UV or LED light!
Save Pin