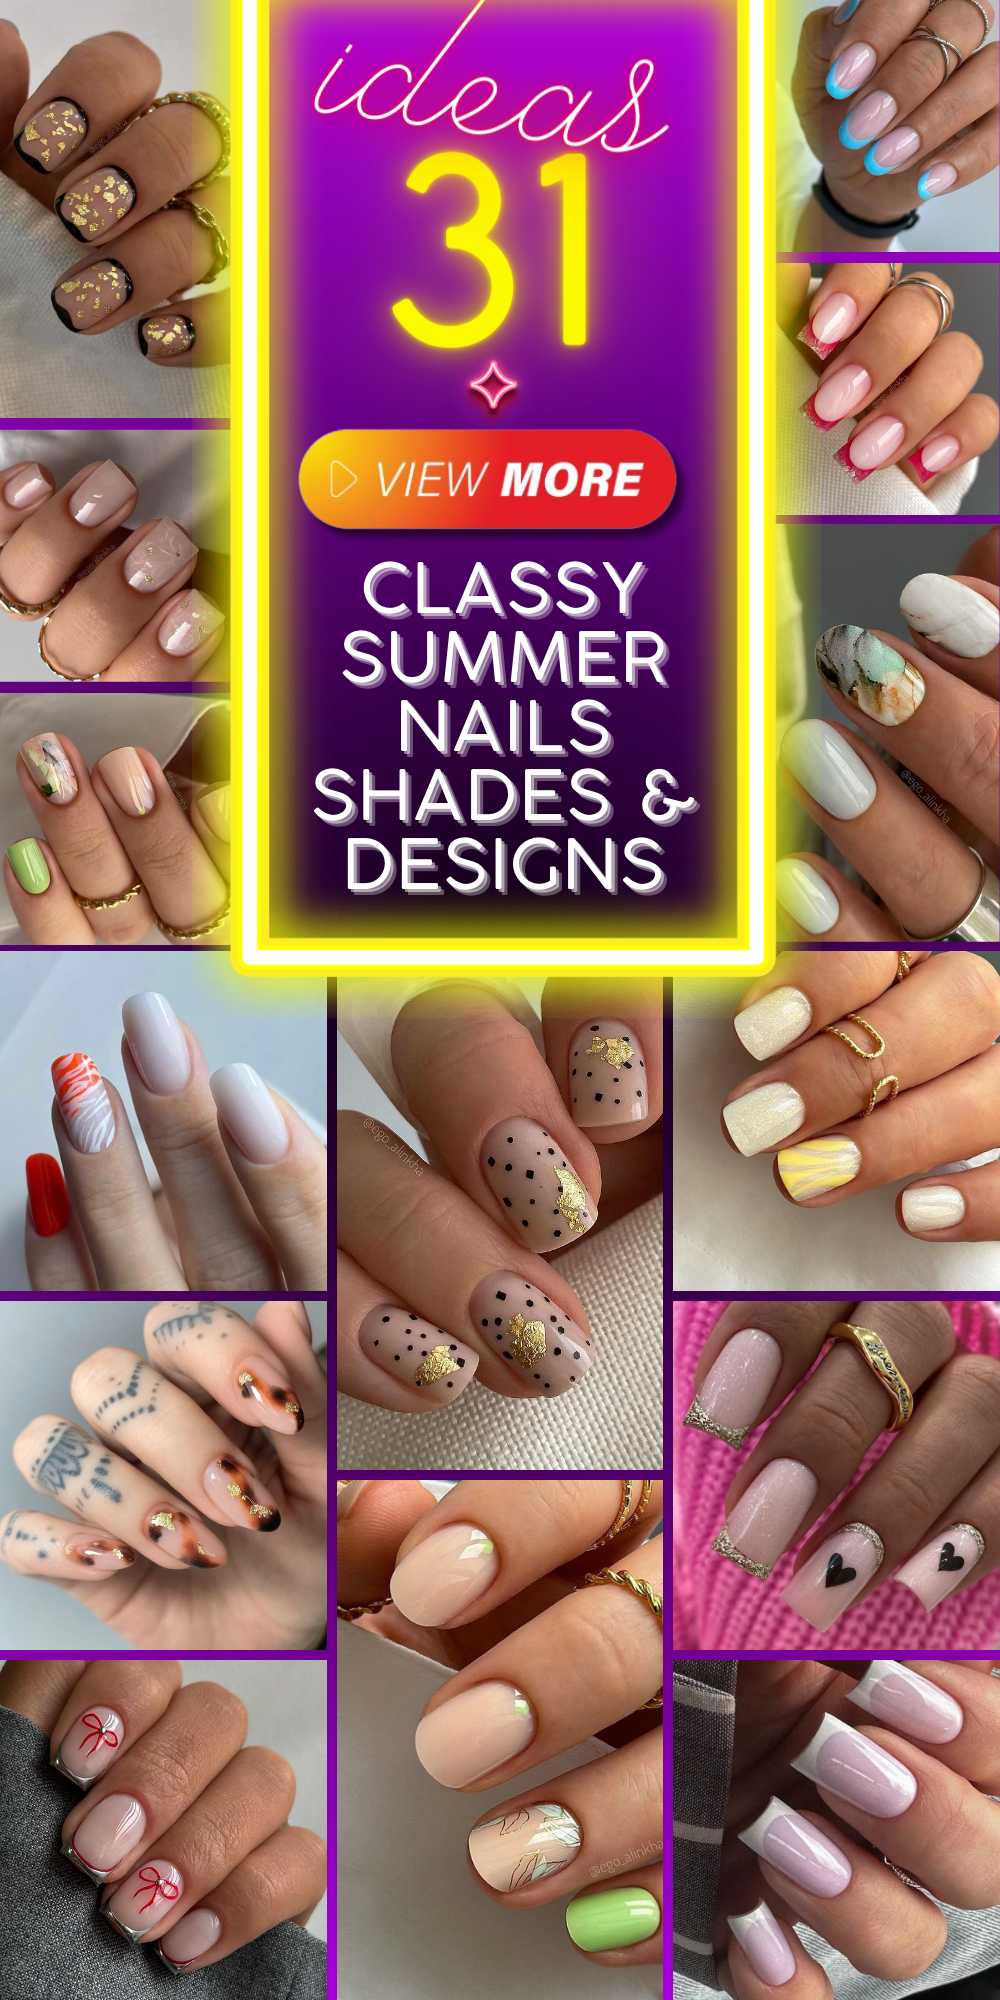
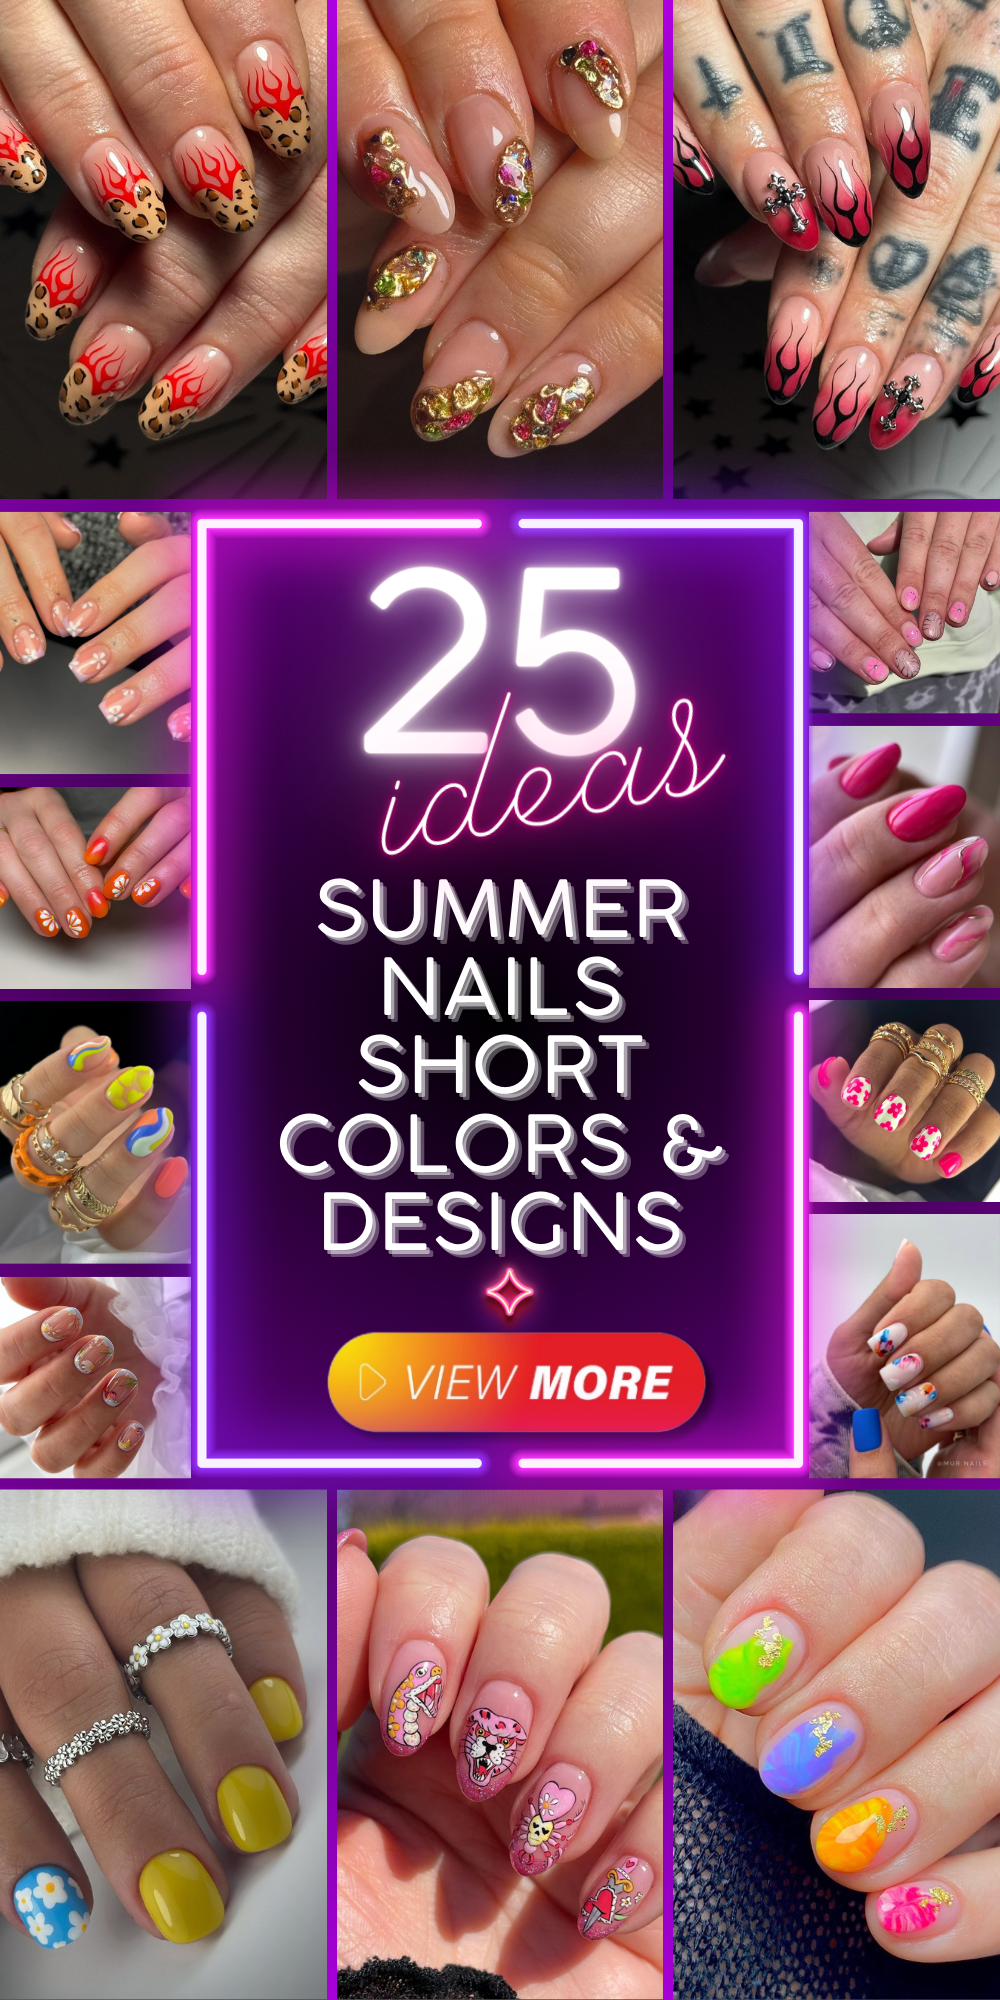
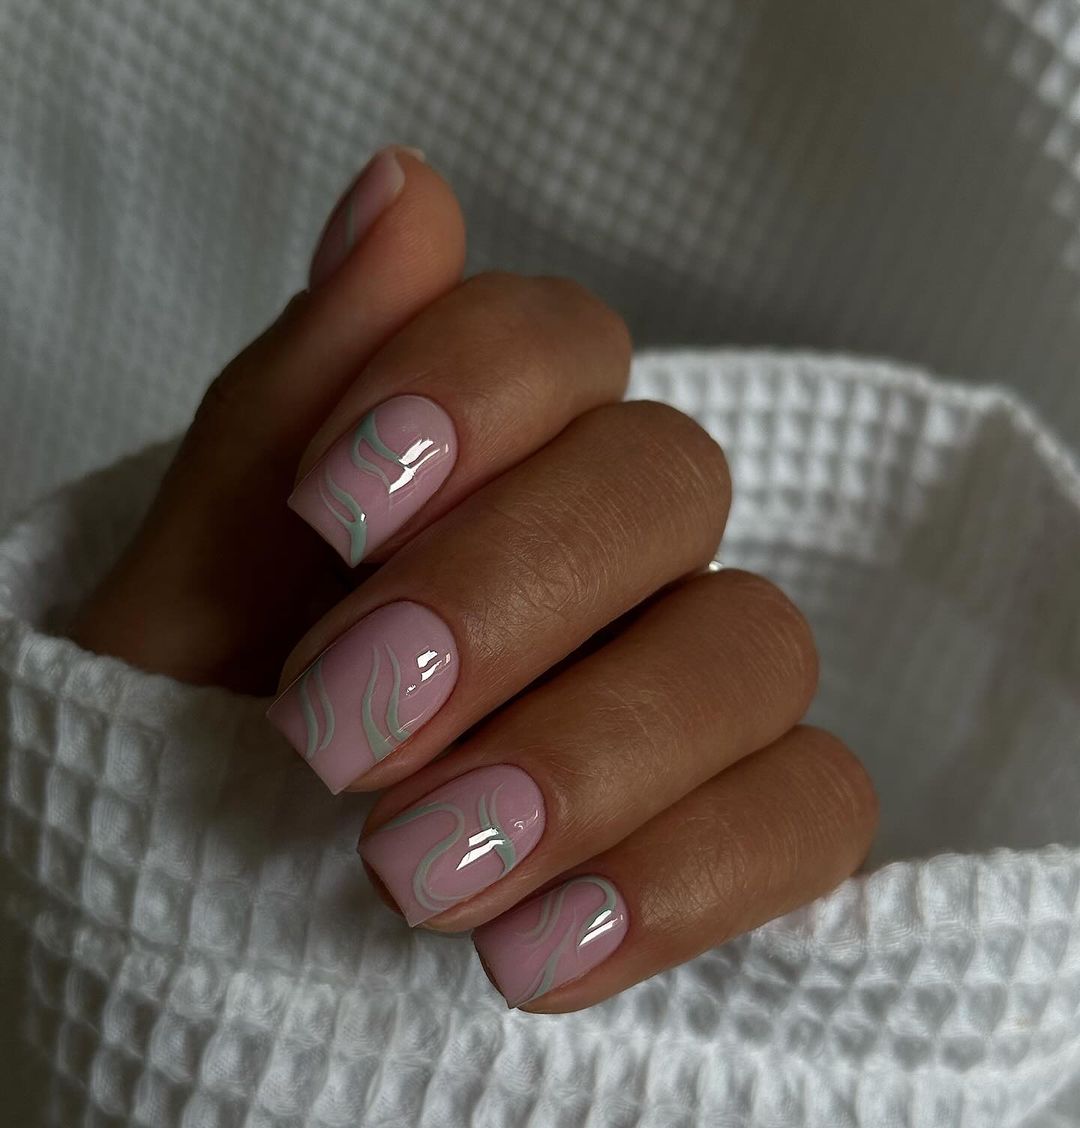
The summer is coming, and it’s the season to paint your nails with some fresh and vibrant color that will remind you of fun under the sun. But what are the trendiest nail designs this year? From short, low-maintenance nails to long stiletto tips that reach for the shoulder, we’ve got all the tea. So are you ready to discover your next standout manicure that’s going to be huge in 2024?
Summer Elegance with a Twist
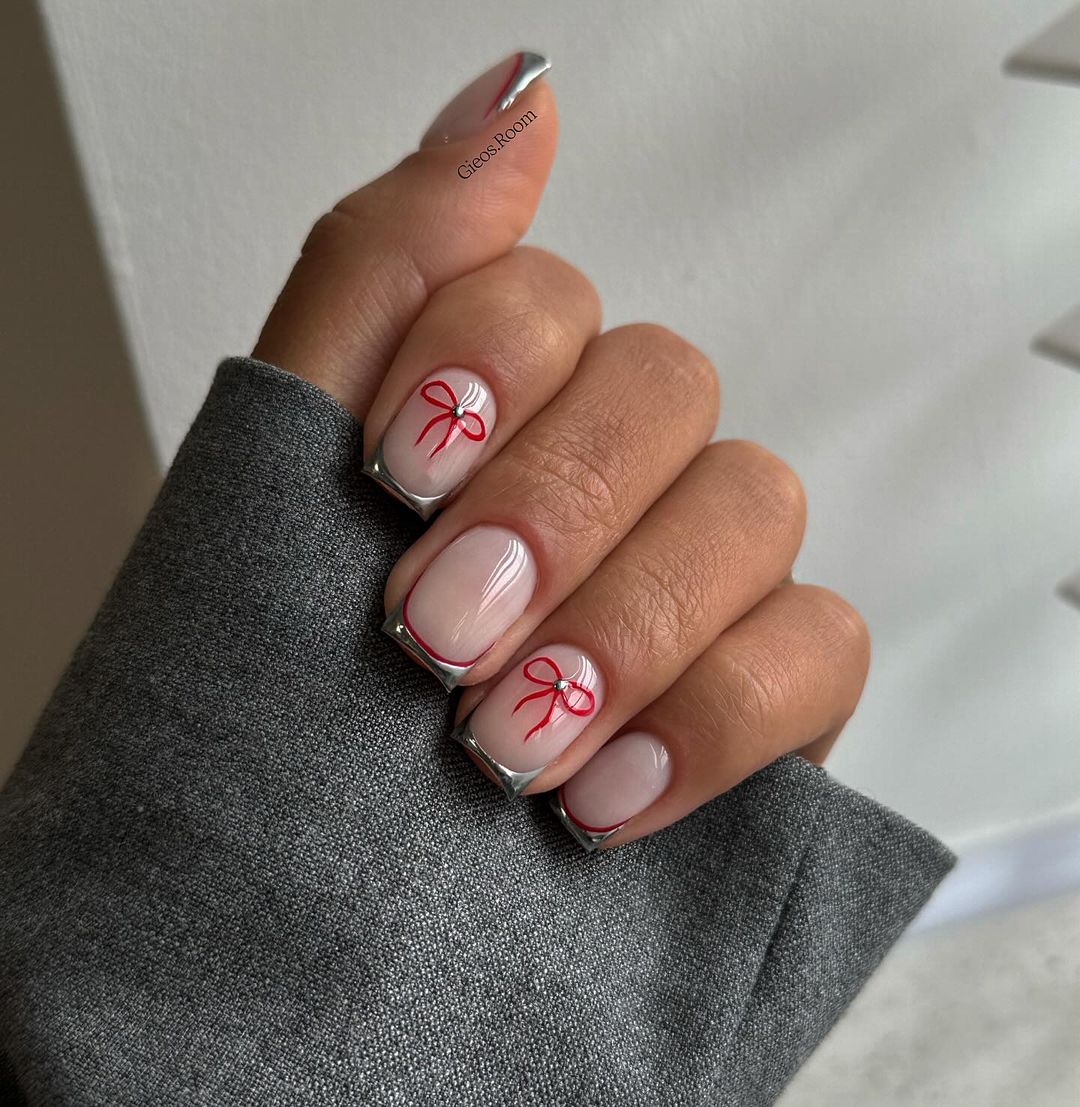
Just think about it: your nails short and neat, every movement they make whispers elegance. Picture a thin white canvas hosting lively red bows – an unexpected twist on the clean look. Tips shining like silver glitter at the sun, as if reflecting the sparkle of summer waters.
Recommended Professional Products:
- Ridge-filling Base Coat: Creates an even nail bed.
- Opaque White Polish: Gives a good background.
- Precision Red Nail Art Pen: For cute bows.
- Silver Glitter Stripper: Adds some glam.
- Glossy Top Coat: Protects the design, making it last longer.
Apply the base and then cover your nails with white polish. Take red pen for drawing skills; draw outlines of bows filling them up with paint too. Highlight edges where bows meet tips using silver glitter stripper afterwards. Finish off with top coat – now you’re ready for hot summer nights!
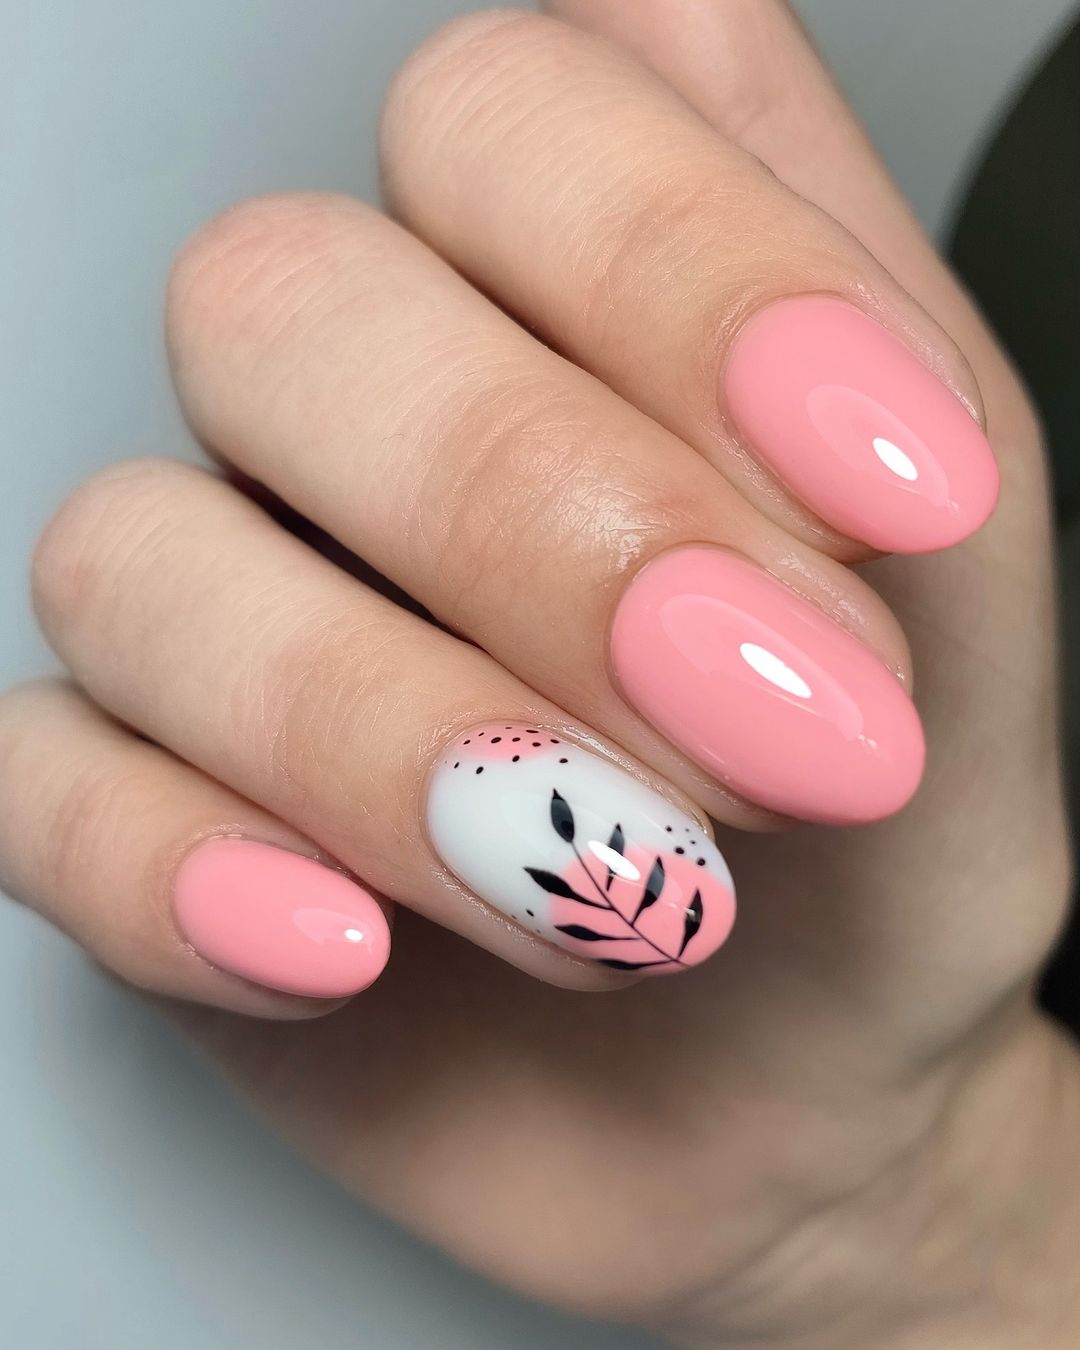
A Pink Bloom on Your Fingertips
Imagine a bubblegum pink that makes for the most irresistibly fun look of summer. The ring finger blossoms as opposed to the white background and freehand, black botanical accent with hints of pink. It is like wearing a summer garden party on your nails.
Materials needed from professional products:
- Summer pink nail polish: feeling summer on your tips.
- White paint: covers the feature nail.
- Black art paint: depicting nature’s fine lines
- Detail brush: tool used to put on the detailed work
- Soft pink tinge: gives a dimensional effect over it
- Varnish top coat: prepares your picture for the long hot season.
Get out your bag of pink and splash it all over; make sure one nail is painted white, then take up your brush! The black polish turns into petals and leaves whereas in little depth, there’s a touch of soft sheer pick. One coat later and you have become quite popular just because of those nails you fixed up.
Textured Allure: Matte and Glitter
Envisage a playful texture-involving manicure that is like dancing madly. The other nails are a canvas of cool, subdued elegance in matte pink while the pinky and index fingers sparkle with a sprinkle of glitter . This design makes an up-to-date sophistication statement that’s perfect for summer soirées.

Products for Professionals:
- Subtle Matte Pink: This add-on conveys modern simplicity as far as fashion is concerned.
- Shining Glitter Overlay: These nails will flirt you away.
- Double Coating Finish: Where subtlety is required it’s matte and where drama is needed glossy.
- Extra Fine Shimmer Dust: For ultimate sparkling effect.
Apply the matt polish quietly behind everything. On the other side, spread some glaze followed by sprinkling your overlay then once tacky apply glitter dust. These different top coats reconcile matte with glossy, and marry textures together.
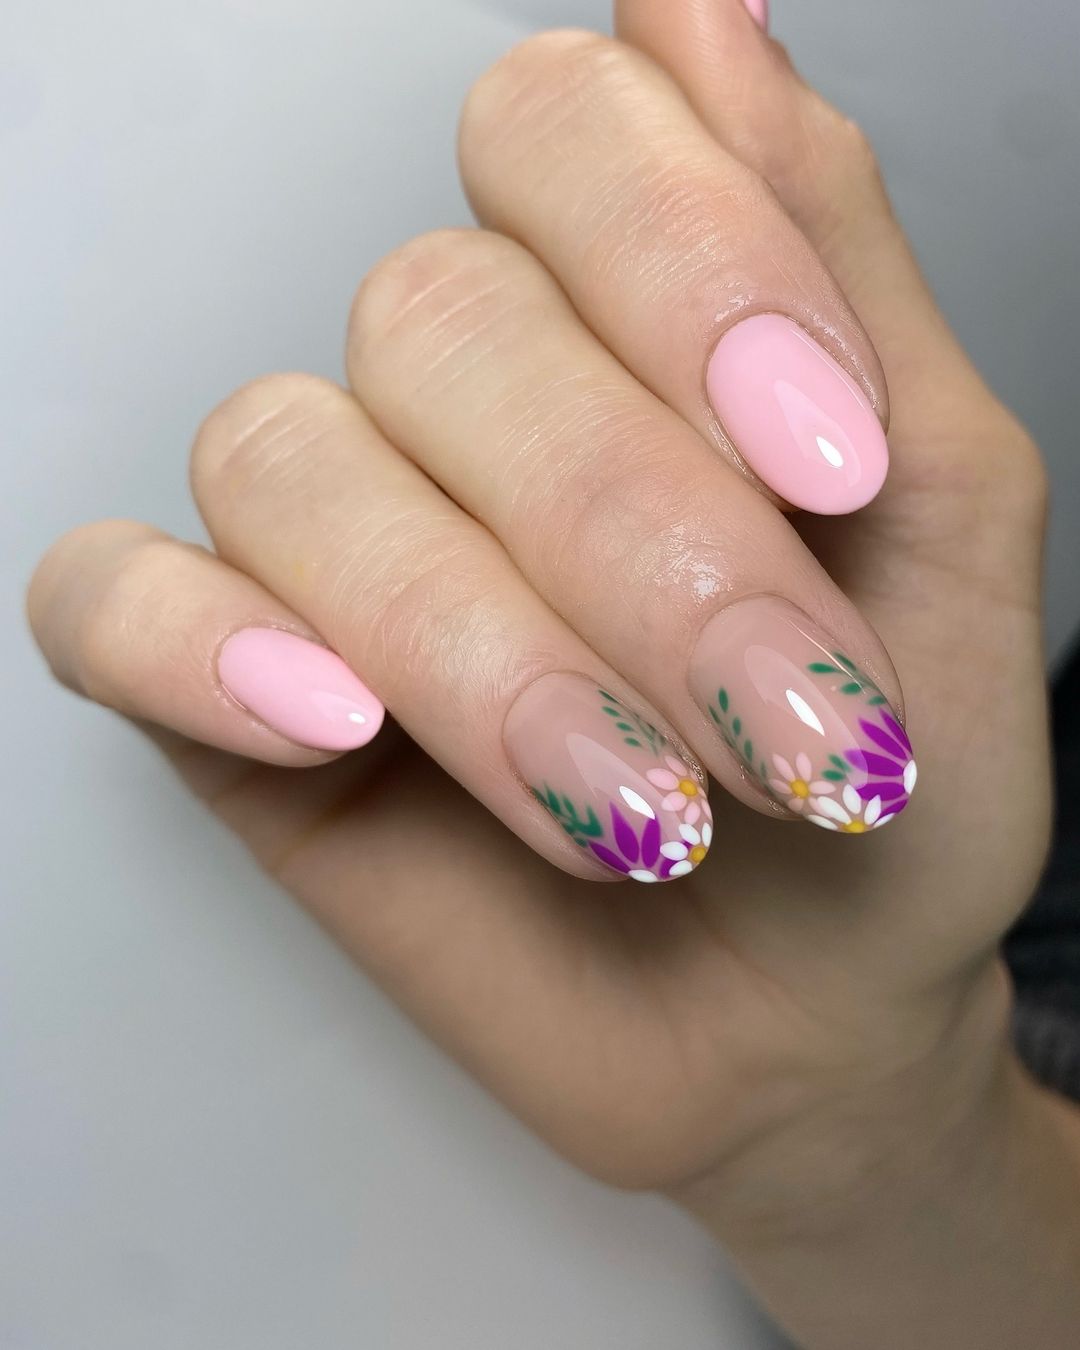
Pastel Florals: Delicate and Endearing
In the heat of summer, a light pastel pink manicure murmurs femininity and elegance. Decorated with small daisies hand-painted on each nail, they become their own meadow, with white and yellow flowers giving it a playful twist. This manicure is reminiscent of those calm summer days that are made for picnics in the park or brunch on the weekend.
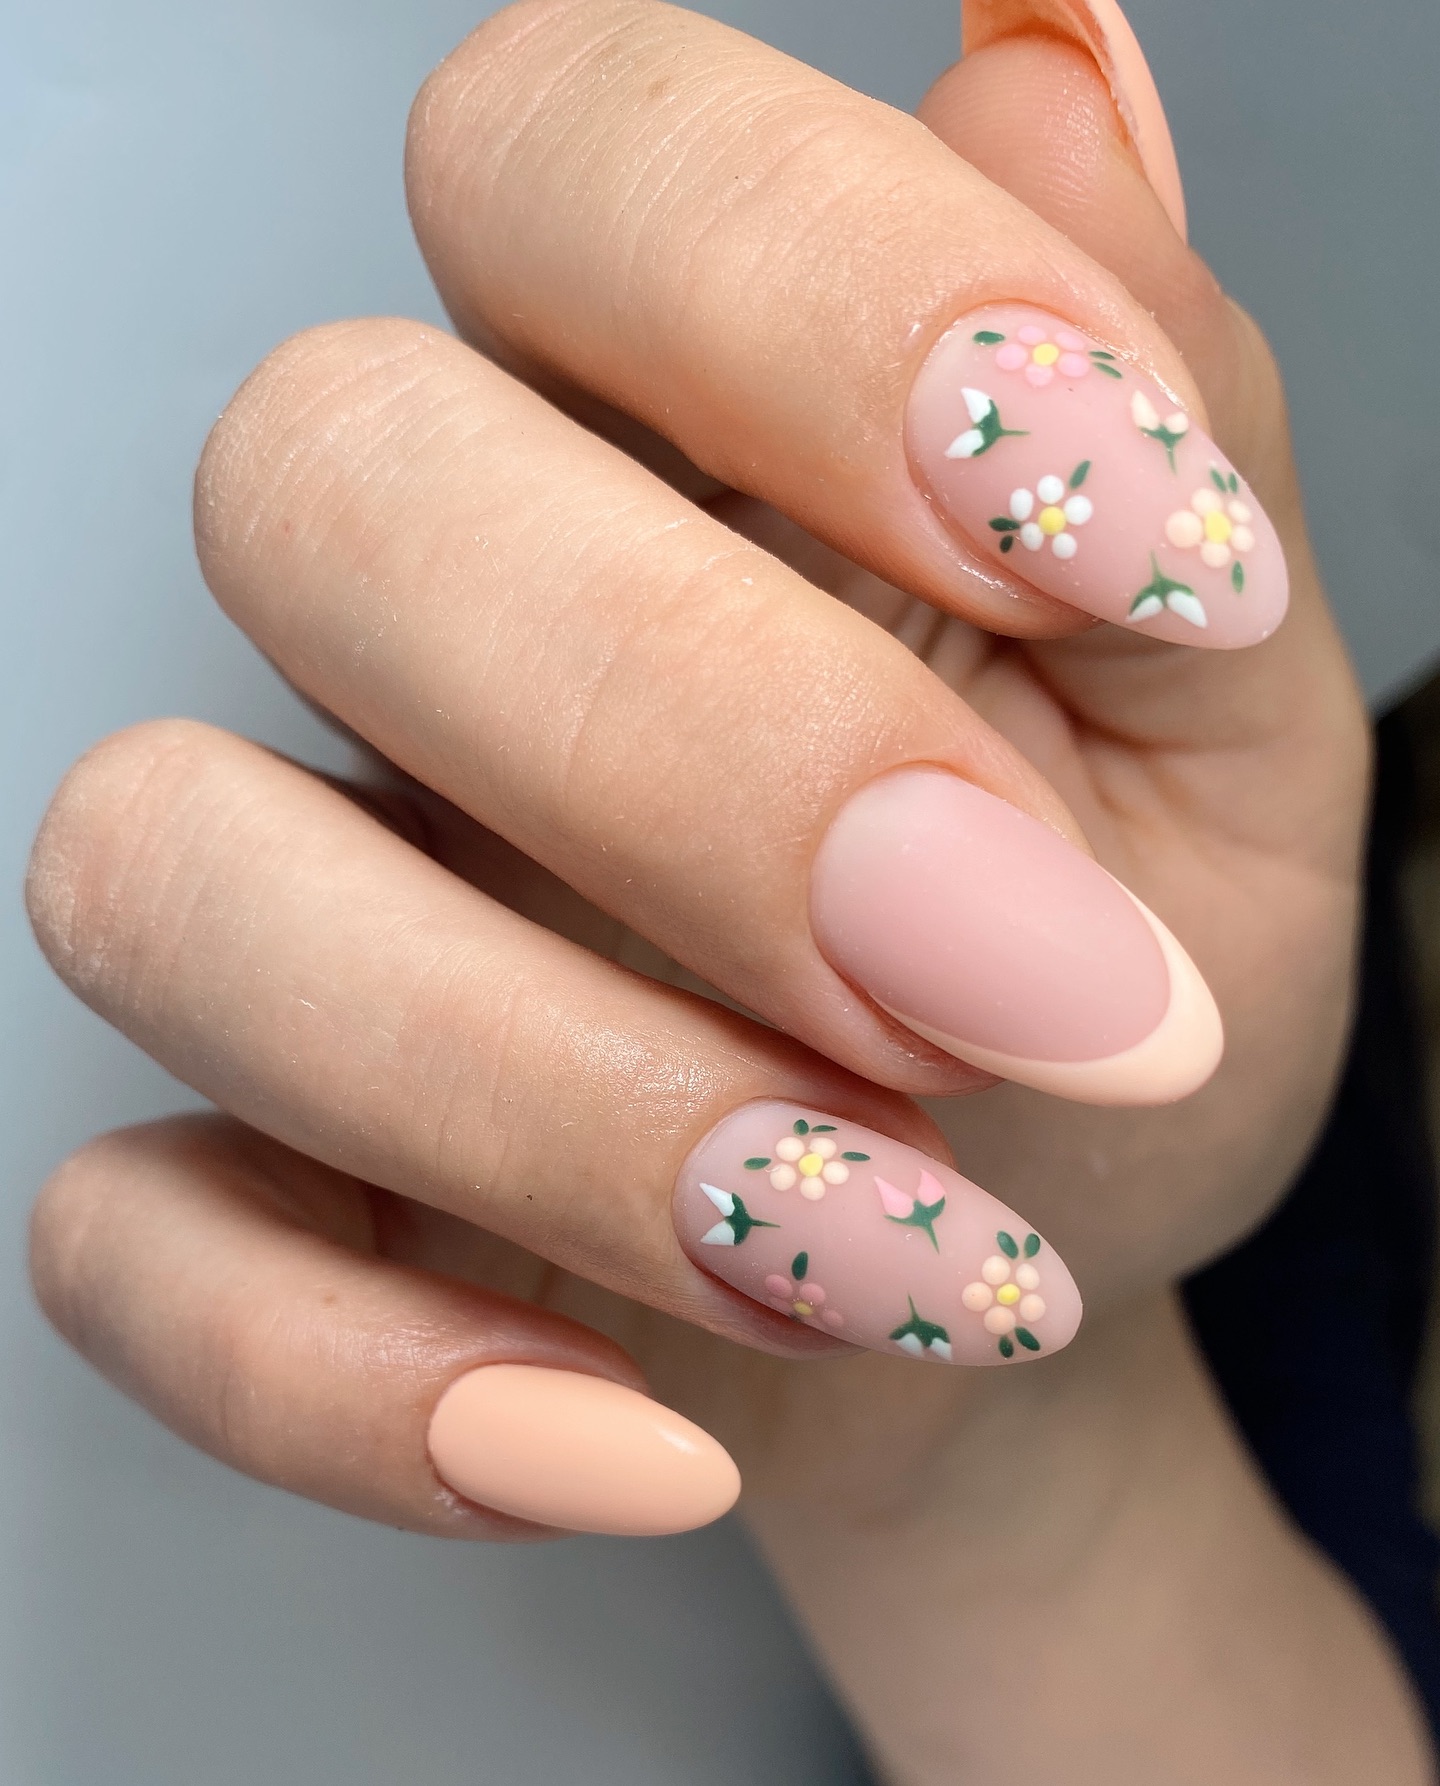
Professional Products Needed:
- Polish in Pastel Pink: A soft base for our flowery canvas.
- Acrylic Paints: White and yellow to create the daisies; green for the leaves.
- Fine Detailing Brush: Perfect for making tiny strokes on our little blossoms.
- Glossy Top Coat: The finishing touch that keeps our design safe while adding dewiness.
Apply two coats of pastel pink polish to your nails and let them dry completely. Using an acrylic paint, bring out the details of your daisies by brushing dots of yellow onto their centers before fanning out petals around them using another color like white or any light shade close enough then finally add some green around it. Once everything is dry seal all layers together with one layer top coat to make sure it lasts longer looking fresh as a daisy.
Save Pin
Seaside Serenity: Calm and Collected
The stage is set by a calm sea green for an oceanic inspired design. The seaweed green nail polish depicted the ocean’s bottom with a single accent nail which is a detailed marine motif, like the waves making their way to the shore. It is an opportunity to relax in style; this design is perfect for the woman who has the tranquil feeling of the ocean.
Professional Products Needed:
- Seafoam Green Polish: A soothing base akin to the sea.
- Marine Blue and Silver Polishes: For nautical details.
- Stamping Kit: To imprint the story of the sea on your nails.
- Matte Top Coat: A modern finish that feels soft when touched.
Begin with your seashell foundation then pick out a nautical stamp. Use blue and silver polish on top of your creation, scrape off excess and press it onto one fingernail only. With just one look downwards, let matte topcoat instantly take you to coastal beaches and more.
Sparkling French Tip: Glitz and Glamour
For the nights when summer parties come alive, a French manicure with a twist commands attention. The classic natural base is elevated with a glitter-dipped tip, sparkling under the moonlight. It’s a design that speaks of celebrations and unforgettable summer evenings.
Professional Products Needed:
- Natural Base Polish: For that timeless French look.
- Silver Glitter: Choose one that shimmers like stars.
- Tip Guides: To achieve that perfect curve.
- Glossy Top Coat: To secure the glitter and add that glass-like sheen.
Apply your base, and once it’s dry, place your tip guides. With a sponge, dab on the glitter, concentrating it at the very tip for that ombré effect. Peel away the guide, apply your top coat, and you’re ready to sparkle through the night.
Whispers of Summer: A Floral Fancy
To welcome the season, let’s do a manicure that represents the gentle caress of spring. To serve as its foundation, use a dusty pink polish which reminds us of the color of the sky in early morning; then paint some purple petals and golden flakes on top like they were caught in breeze while hovering above this base.

Materials:
- Dusky Pink Polish: A shade that imitates dawn.
- Purple & Gold Nail Foils: For flower decorations.
- Fine Tweezers: To put on delicate foils accurately.
- Sealant Top Coat: It keeps design’s transient beauty intact.
Apply pink polish onto nails as an understated background. Scatter purple foil stickers in floral arrangement around each nail, adding gold pieces for otherworldly effect. Use tweezers to place them where desired with precision. Finish off by sealing your creation with top coat so that hints at spring can never fade away.
Botanical Bliss: Vibrant and Vivacious
A celebration of life is what this design is, and the foliage that frames the beautiful white daisies are represented by vivid green strokes. A pop of color through the touch of lavender on the nail enlivens and represents the summer flowers in bloom. It’s a design for those who carry the essence of a garden wherever they go.
Must-have Professional Products:
- Soft Pink Polish: This will be your nail bed’s pale canvas.
- White and Lavender Polishes: These are to animate daisies.
- Green Stripe Polish: For thin leafy highlights.
- Detailing Brush: Your precision tool.
- Glossy Top Coat: To give you long lasting shining finish.
Start with soft pink base. Dotting a lavender center, draw white petals using your detailing brush. Give slightly slim leaves a natural edge using green polish for your floral design. Capture summer days’ light with top coat shine over it.
Tortoiseshell Tantalizer: Bold and Luxurious
Do you want to have a summer tortoiseshell design that is as bold as it is smart? Gold leaf flickered with swirls of caramel and deep brown, they create a daring yet gracious pattern. It’s a manicure that speaks volumes; perfect for the daring spirit that wants to leave their mark.
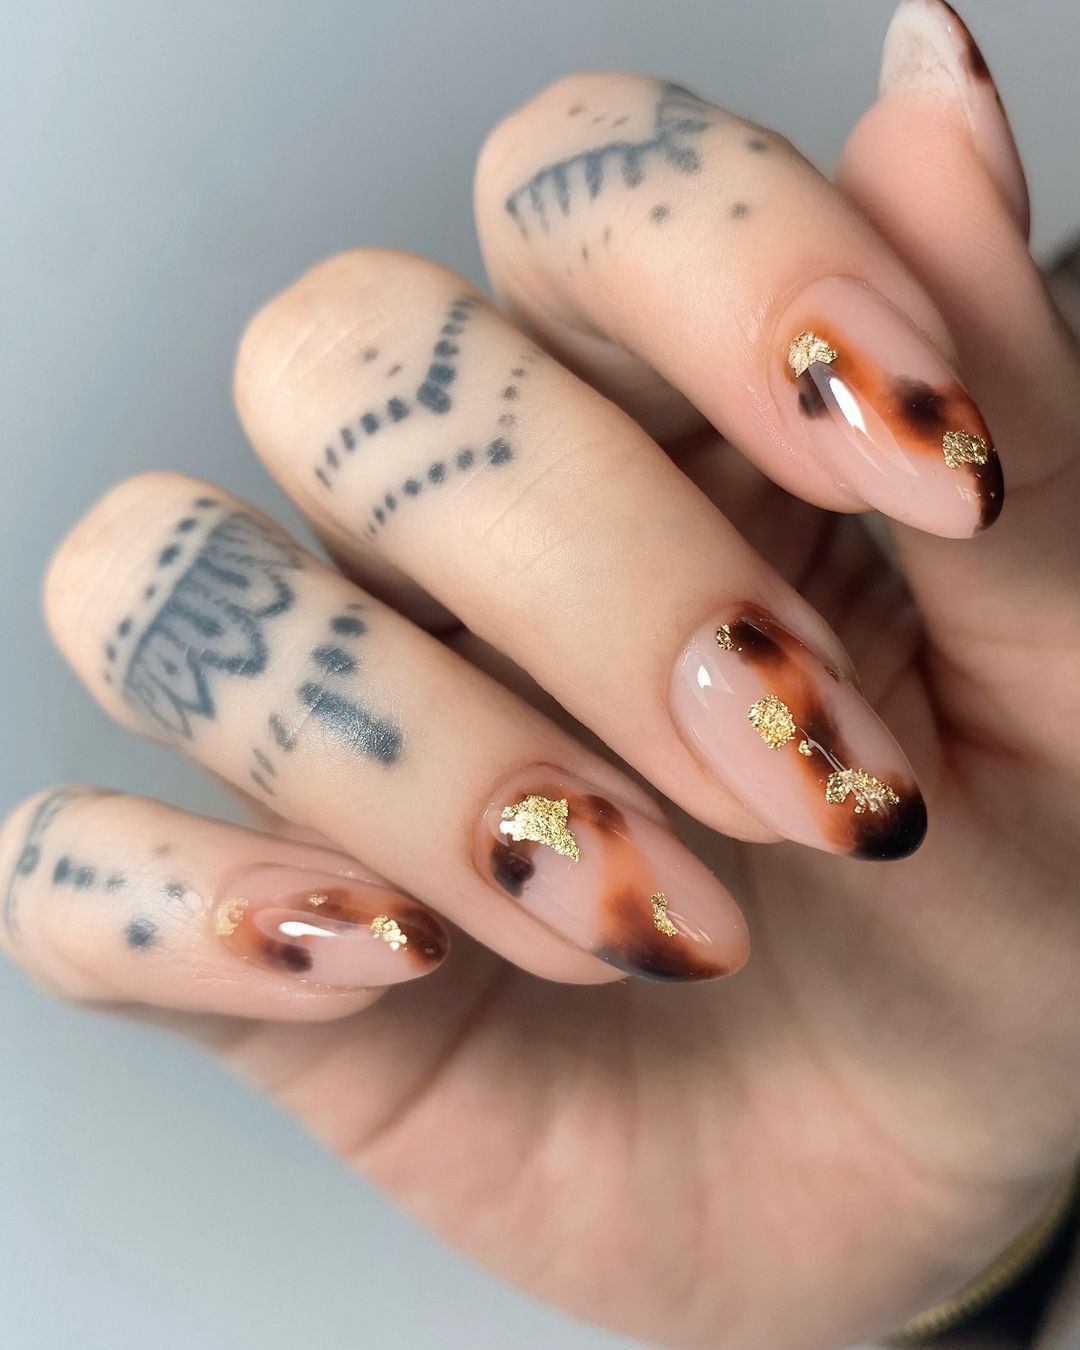
Professional Products Needed:
- Translucent Base Polish: To show off the layers.
- Caramel and Brown Polishes: For the tortoiseshell effect.
- Gold Leaf: For that opulence feeling!
- Glossy Top Coat: To put luxury over them.
Begin after your base coat, layering caramel and brown from lightest to darkest shades, blending wetly to match the organic pattern of tortoiseshell. For some decadent touch use tiny gold leaf pieces intermittently. After drying apply a glossy top coat to make sure your nails become the talk of summer.
Save Pin
Sophisticated Swirls: Modern Elegance
Speaking much with few words, these nails are definitely followers of the minimalist trend. The design is taken a notch higher towards modern art by white swirls dancing on top of a sheer pink base. It may be subtle but it screams elegance; this kind if nail art goes well with crisp white shirts or tailored blazers.
Products Needed:
- A Sheer Pink Gel Polish (For Color And Strength)
- White Nail Art Gel (To Draw The Swirls)
- Fine Detailing Brush (For Freehand Precision)
- No-Wipe Glossy Top Coat (To Enhance Gel Underneath)
- Apply a sheer pink gel as your base.
- After curing, create white swirls that loop gracefully over each nail using a fine brush.
- Cure again and seal your tiny masterpiece with an everlasting shiny top coat that needs no wiping; let it sparkle for weeks!
Tranquil Waves: Serene and Stylish
The colors of the early dawn include a soft lavender base, overlaid with white and minty cool waves. In this design you can see concentric circles as if you were watching ripples on a pond or gentle waves under the moonlight. It’s a calm design that will appeal to the people who want their style to whisper, but speak loud.
Professional Products Needed:
- Soft purple Gel Polish: For a serened color background.
- White and Mint Nail Art Gels: To depict gentle waves.
- Detailing Brush: For intricate lines and curves.
- No-Wipe Matte Top Coat: To diminish the shine while emphasizing art work
Start by curing your lavender base just right. Using a small brush, alternate between white and mint brush strokes that would look like undulating waves for an ocean feel. Cure each layer before applying another. Finish off with applying matte topcoat to turn gloss into sophisticated velvet touch.
Muted Mustard: Bold Minimalism
This mustard yellow manicure marks the point at which audacity coincides with minimalism. The nails are lacquered all over in a solid pale tone, except for one snowy white accent that looks like a rising moon on an evening sky. This design is fall-inspired but can work during any other season.
Materials Needed:
- Dull Mustard Gel Polish: A bold yet fadable hue.
- White Nail Art Gel: For the eye-catching single accent.
- Precision Brush: To define the shape of a crescent moon with such perfection.
- High-Gloss Top Coat: To go deep into colors as well as shield them from harm.
Put on one coat of mustard yellow and let it speak for itself. Paint a precise, white half circle so that it can stand alone strikingly. Apply another layer of glossy top gel to achieve a finish that is just as durable as it is visually captivating.
Geometric Grace: Chic and Tailored
For those who like to keep things simple, these nails have a clean pink background with geometrically accurate edges. They are lined with thin pastel lines of mint and lilac that outline the tips, creating a sharp but delicate border round them. This neat look pairs well with the simplicity of a plain gold band ring, which means it can be worn for any important business meeting or brunch date.
Products You Will Need:
- Light Pink Gel Polish: This is going to act as your clean sheer base.
- Mint Nail Art Gel and Lilac Nail Art Gel: These will be used to draw on the crisp geometric lines.
- Striping Tape: This will help you achieve those straight edges that we all know are impossible without it.
- No Wipe Glossy Top Coat: This top coat is going to give you a glossy finish that lasts longer than any other brand.
Start off with applying a light pink gel as your base. Once cured, use striping tape guide lines for your mint & lilac gels. Cure & peel the tape away, revealing sharp lines underneath. Finish off with a glossy top coat to lock in this geometrical design until next months planner!
Bold Borders: Statement and Contrast
The pale pink base is soft, which provides a canvas for the bold blue border, against the traditional French tip. It is confident and daring design meant for a woman who likes to add a touch of color to her outfit without overdoing it.
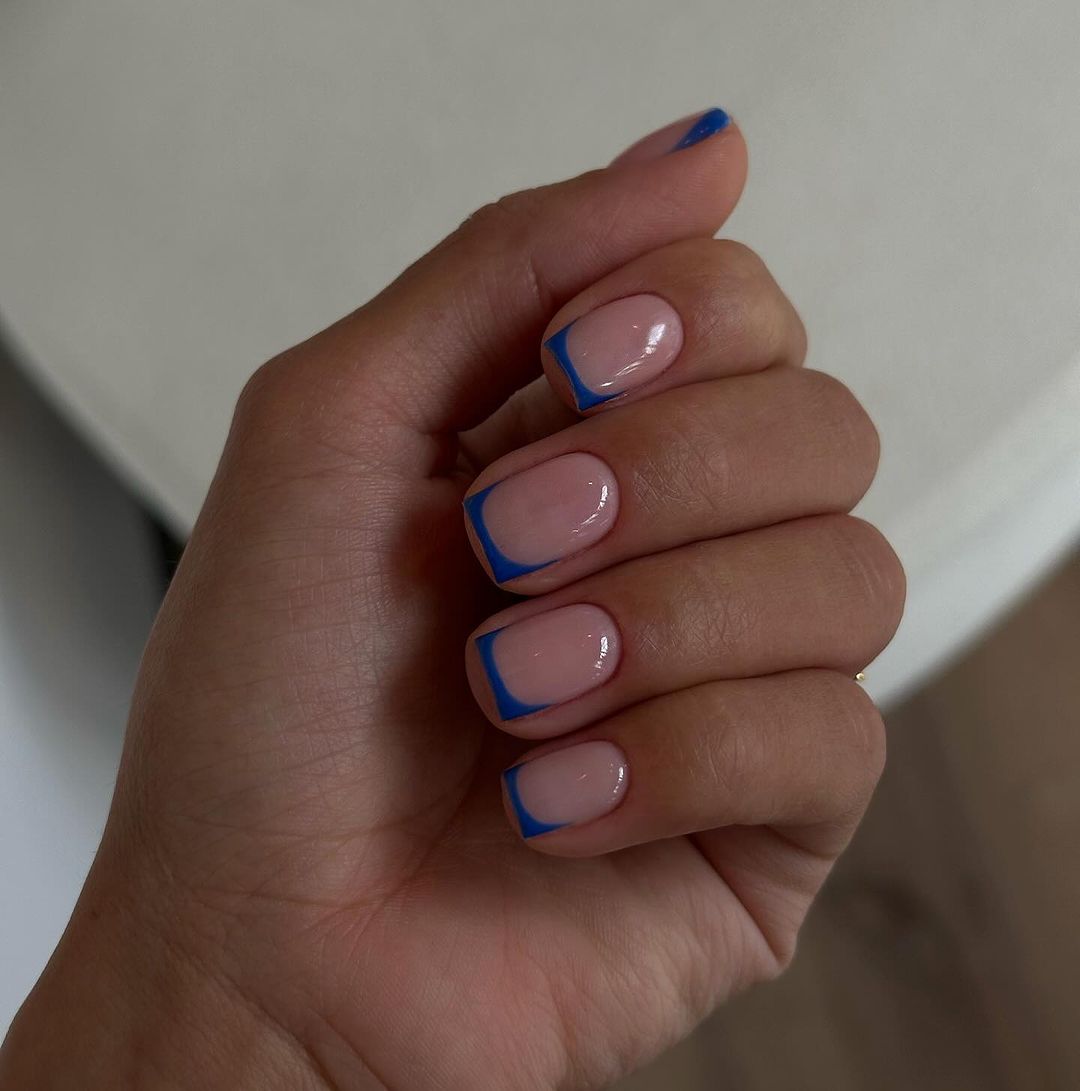
Professional Products Needed:
- Gel Polish Pale Pink: Delicately sweet and tender base hue.
- Nail Art Gel Bold Blue: To create high contrast.
- Detailing Brush: For creating clean outlines.
- No-Wipe Glossy Top Coat: To preserve color and glossiness.
After applying pale pink as the initial coat, draw the blue boundary with a thin brush at the nail tips. After curing, apply no wipe top coat resulting in glossy finish that will set you apart from others yet keep it understated everywhere else.
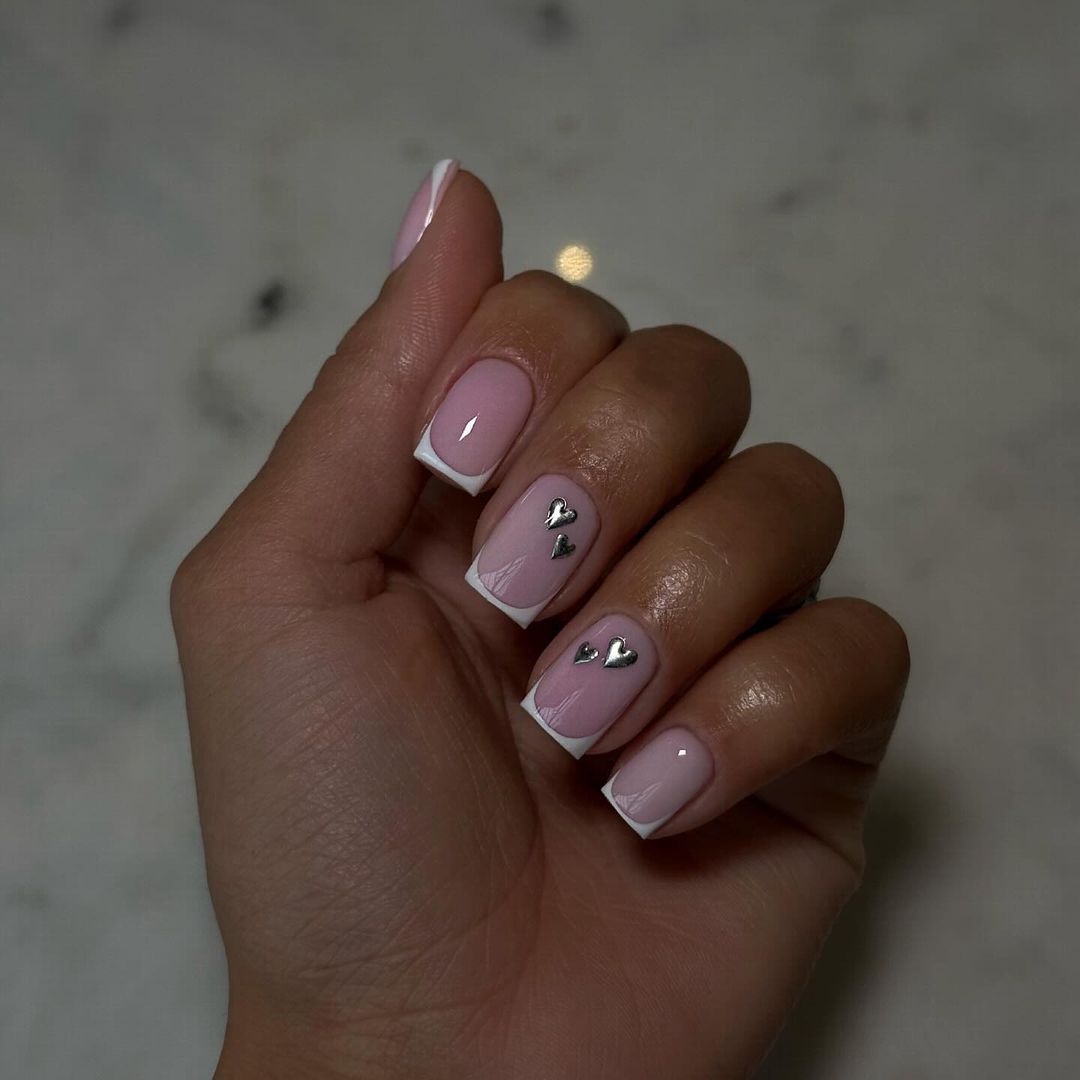
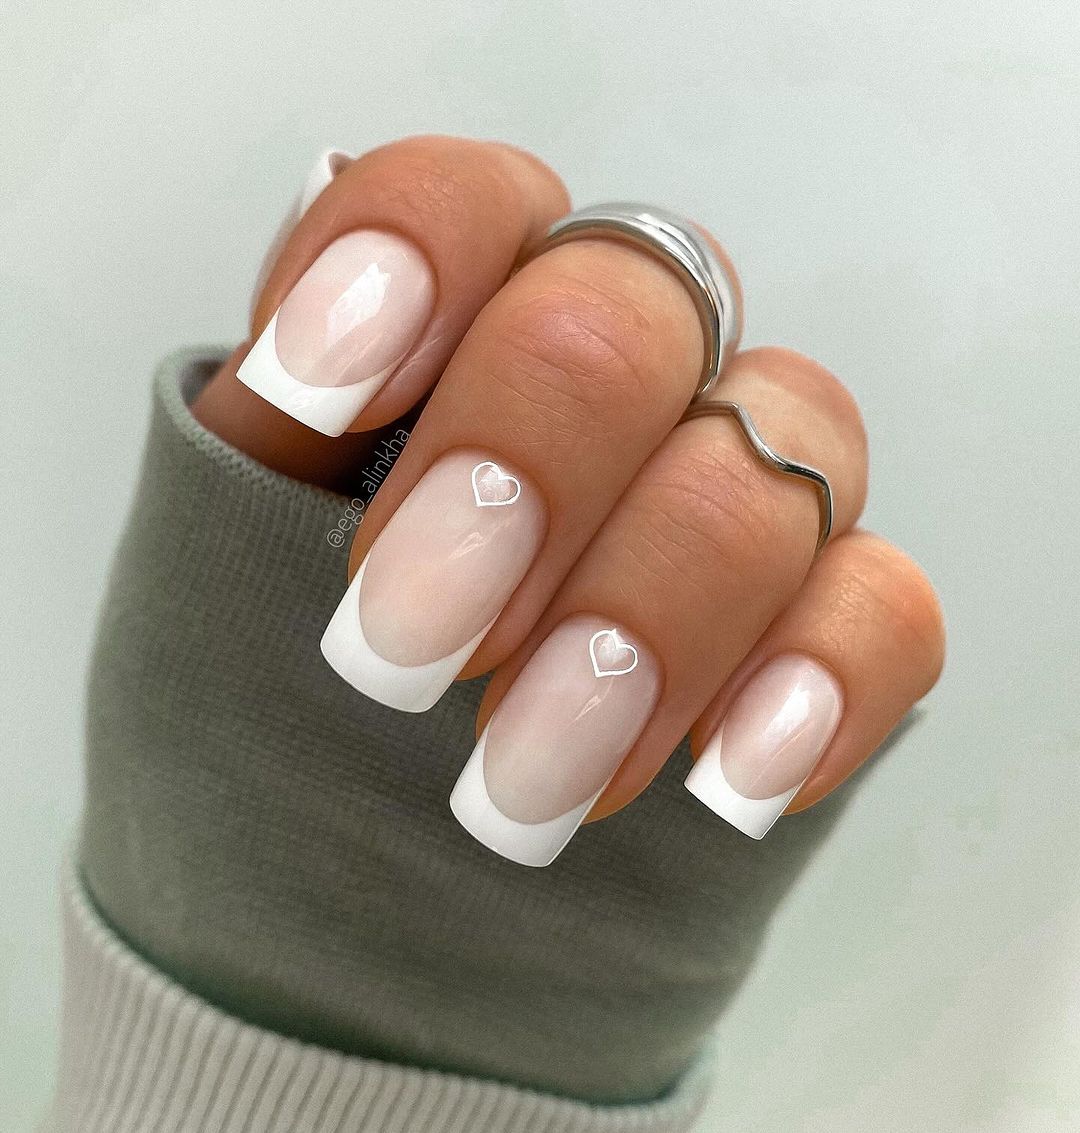
Playful Hearts: Whimsical and Charming
A classic pink manicure can be given modern flair with delicate hearts playfully arranged on the nail. Adding these tiny, silver heart accents is a fun way to inject whimsy into your look, whether it’s just a casual day out or a romantic evening. It is one of those looks that will show that you have taste but at the same time know how to have fun.
Professional Items Needed:
- Dusty Rose Gel Polish: A base with love in mind.
- Silver Heart Decals: A little extra sweetness.
- Fine Tweezers: For exact sticker placement.
- Glossy Top Coat without Residue: To make your manicure last and shine brightly.
Start by applying light dusty pink nail polish to create a base for them then use tweezers to position small stickers such as metallic hearts. Once you have placed the hearts exactly where you want them, apply a no-wipe glossy top coat which will keep them in place for long periods of time, while reflecting light and drawing attention wherever you go.
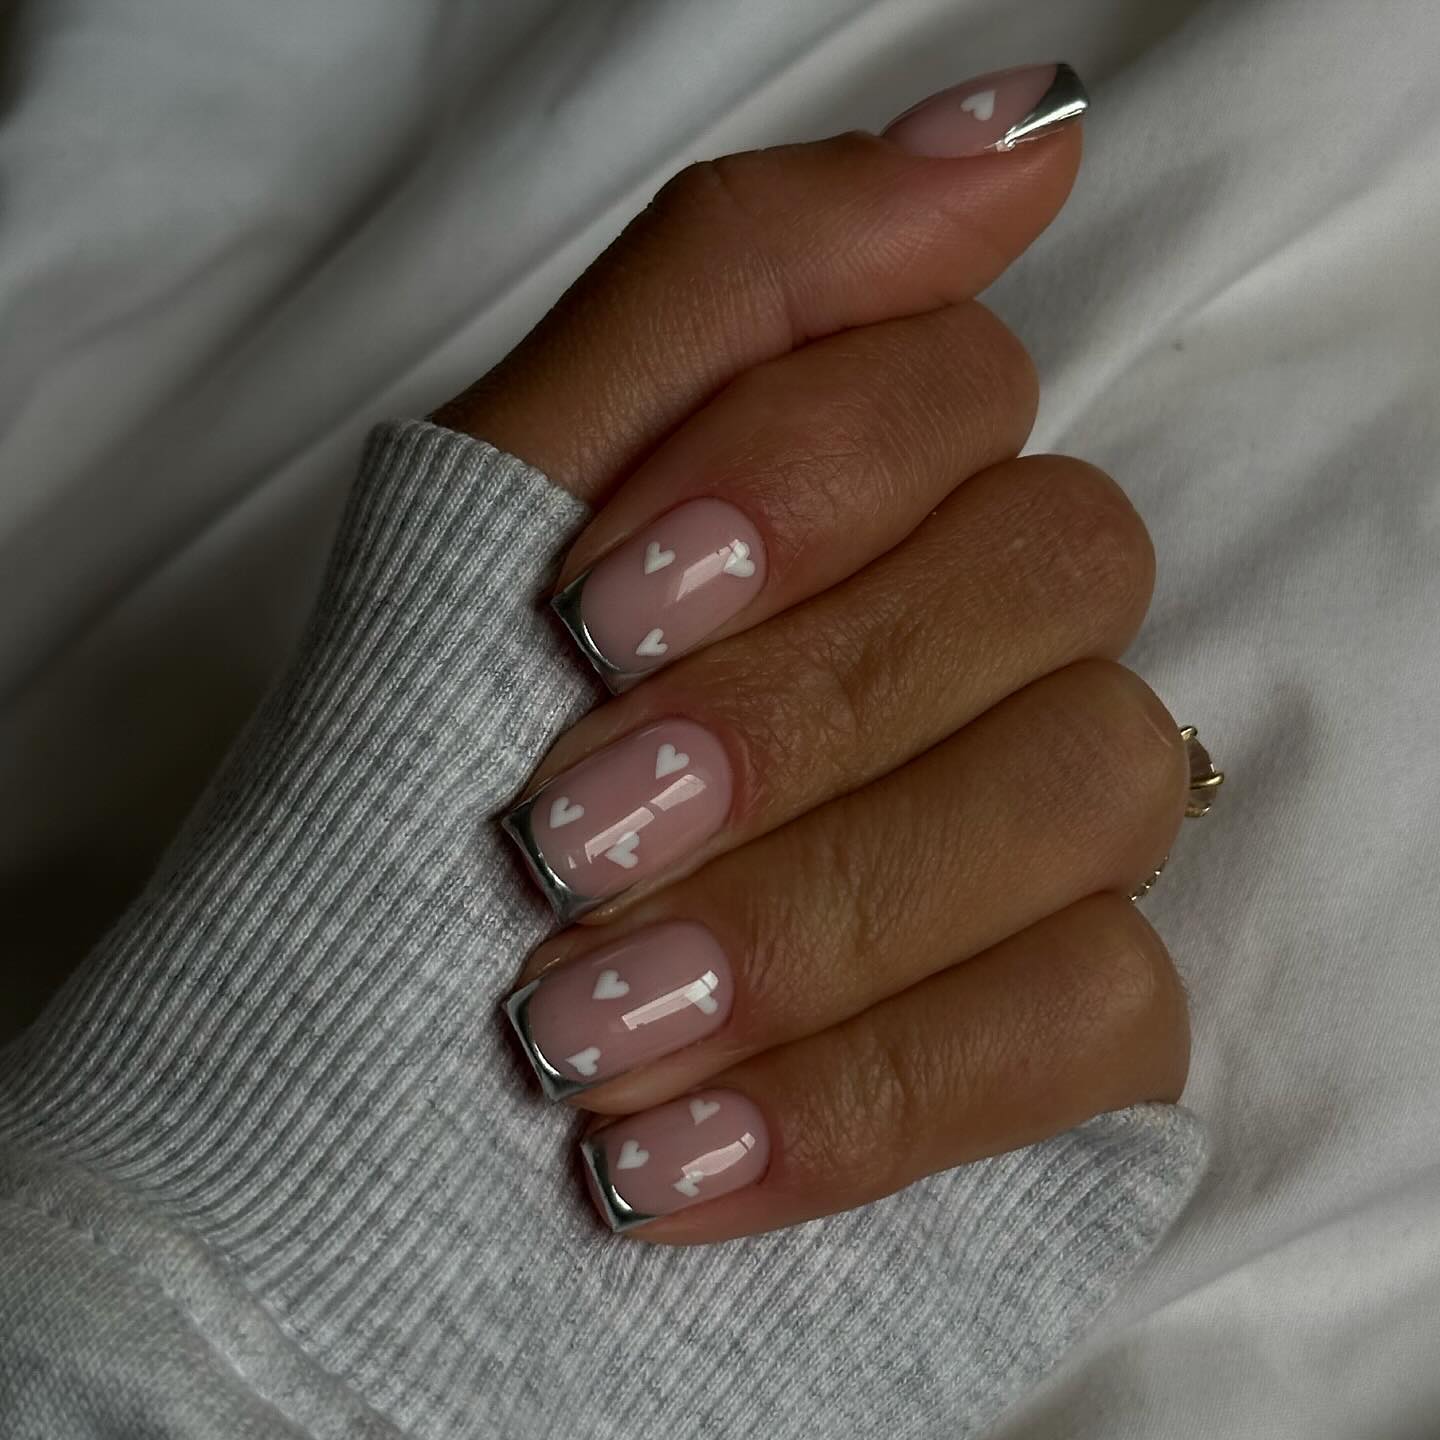
Love Letters: Romantic and Sweet
These nails are gentle as a murmured “I love you” — a pale pink base with dainty white hearts dancing across it. It’s romantic, perfect for those times when you want your hands to tell tales of love and softness.
You will need:
- Sheer Pink Gel Polish: A touch of natural color.
- White Nail Art Gel: To create the little hearts.
- Detailing Brush: For careful, affectionate lines.
- No-Wipe Glossy Top Coat: To keep the design delicate.
Brush on the sheer pink polish. Using the detailing brush, paint tiny white hearts on all of your nails. Cure the gel and then cover your love letters in no-wipe glossy top coat that’ll endure from one romantic rendezvous to another.
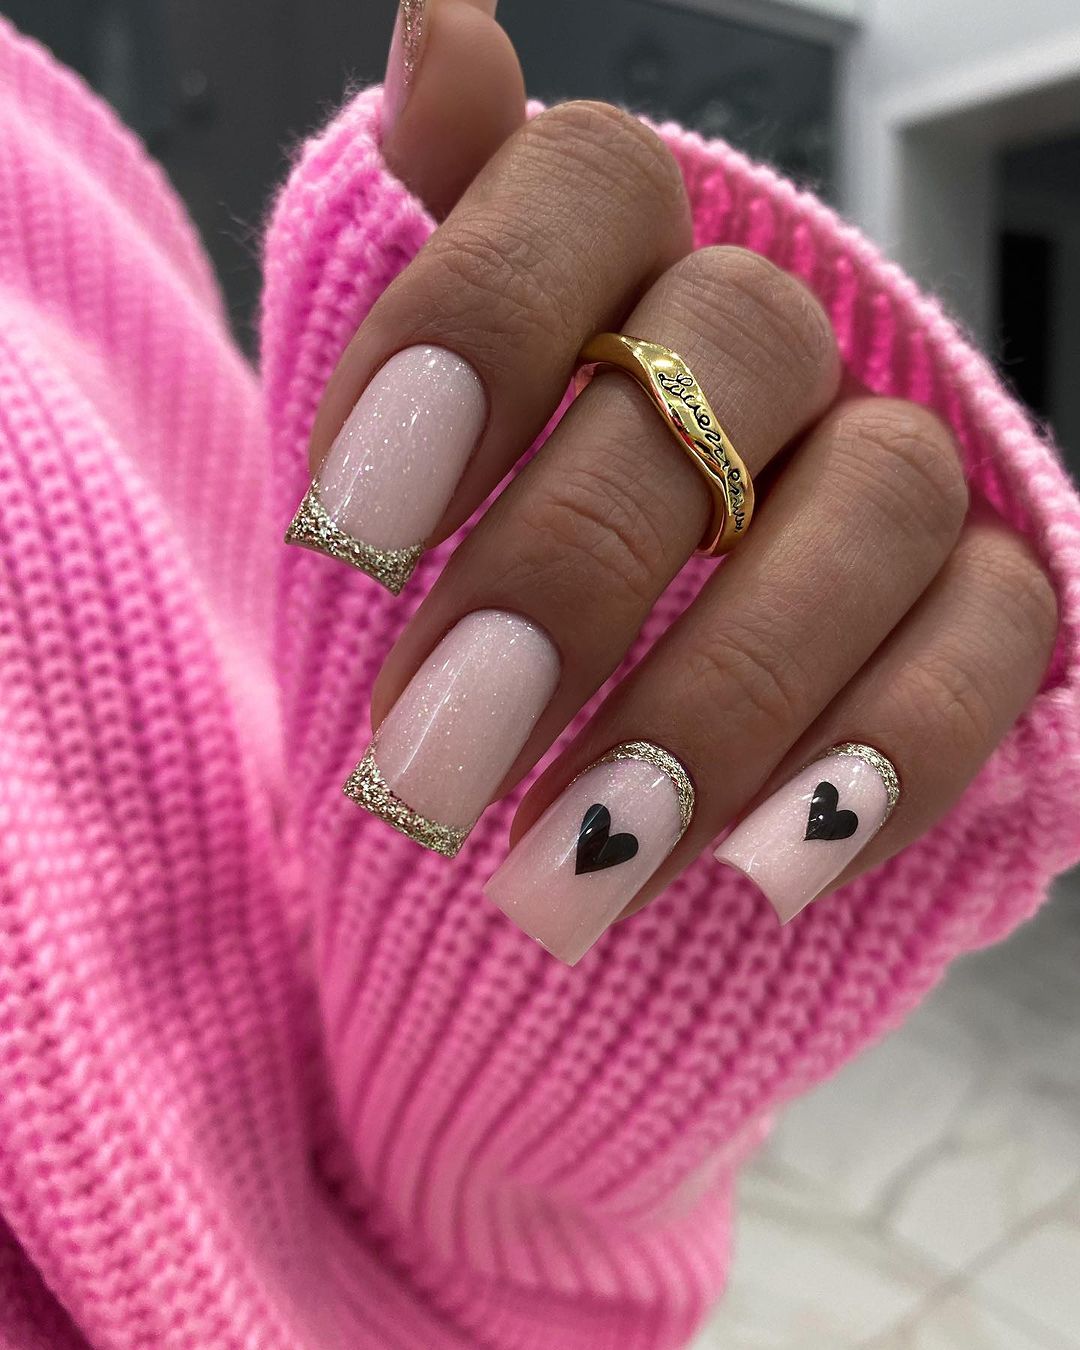
Glittering Affection: Playful and Glamorous
The manicure is characterized by a combination of shine and elegance. The pink base, lightly dusted with sparkly glitter, evokes playfulness while solid black hearts at the tips states an intense love. It is a great manicure for somebody who combines vivaciousness with little bits of glam.
List of professional products needed:
- Pink Gel Polish Infused with Glitter: To have an attractive base.
- Black Nail Art Gel: For statement hearts.
- Fine Detailing Brush: To outline the hearts.
- No-Wipe Glossy Top Coat: To seal in sparkle and sheen respectively.
Start with a layer of full-on glitzy pink glitter gel as your base. Using fine detailing brush, create bold black hearts on the tips which represent your daring affection. Apply shiny top coat to maintain the colors in their lively condition just like your soul.
Subtle Chic: Sleek and Modern
This manicure has redefined elegance with a lavender shade that is pure refinement and modernity. It’s for the woman who favors understated beauty in one single perfect hue with clean lines and subtle shine. This is a pick for busy executive days or elegant evening events.
Professional Products Needed:
- Lavender Gel Polish: A modern yet sophisticated groundwork.
- No-Wipe Glossy Top Coat: Increases the colour depth without distraction.
Gently, put on the lilac gel polish as you bask in its easy sophistication. Cure it to perfection before allowing a glossy top coat to seal your nails, adding just enough shine to catch every right light and make them look nothing less than chic.
Dynamic Contrast: Bold and Artistic
A dazzling oppositeness is shown in this manicure as it matches a weak, transparent background with a bright orange decoration. The strength of the one painted nail is set off by the artistic stripes in white, which resemble a modern art canvas. It’s for individuals that are unafraid of being daring and expressive.
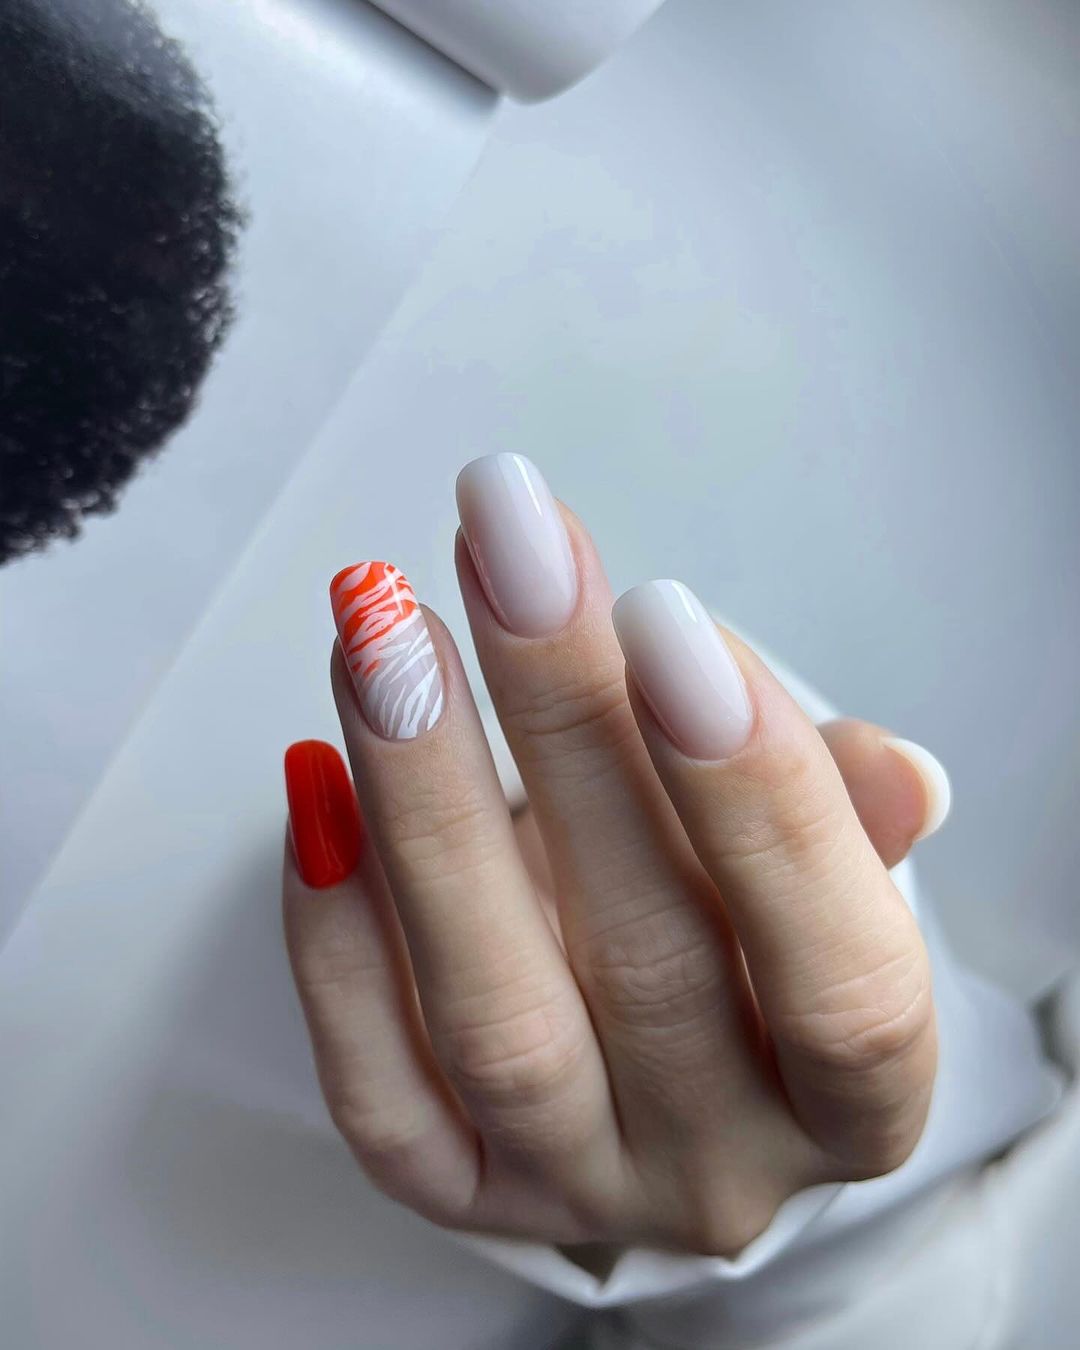
Professional Products Needed:
- Sheer Base Gel Polish: For a subtle foundation.
- Vibrant Orange Gel Polish: To catch the eye.
- White Nail Art Gel: For the fine stripes.
- Detailing Brush: To paint the precise lines.
- No-Wipe Glossy Top Coat: To bring it all together with a lasting shine.
Start with an even application of sheer base for a clean finish. Apply vibrant orange gel polish to the chosen nail, allowing it to take center stage. Use a thin brush to add delicate white stripes to surrounding nails for an artsy touch. Finish with glossy top coat for long-lasting wear.
Glitter and Glow: Subtle Radiance
With glitter, which sparkles a lot, the gentle and shining manicure brings a classic appearance. For instance, the base being shimmering resultant in white will set a festive mood while yellow accent on ring finger add a glimpse of sunshine. This makes it perfect for either day time event or elegant evening.
Professional Products Needed:
- White Glitter Gel Polish: (The one with sparkling bottom)
- Sunny Yellow Gel Polish: (Accentuating)
- No-Wipe Glossy Top Coat: (To hold the glitter)
Every nail shines with its own light as you apply white glitter gel polish to all nails. The sunny contrast is painted boldly on the ring finger using a sunny yellow. Allowing light to capture them and seal their sparkle is what glossy top coat does over all nails.
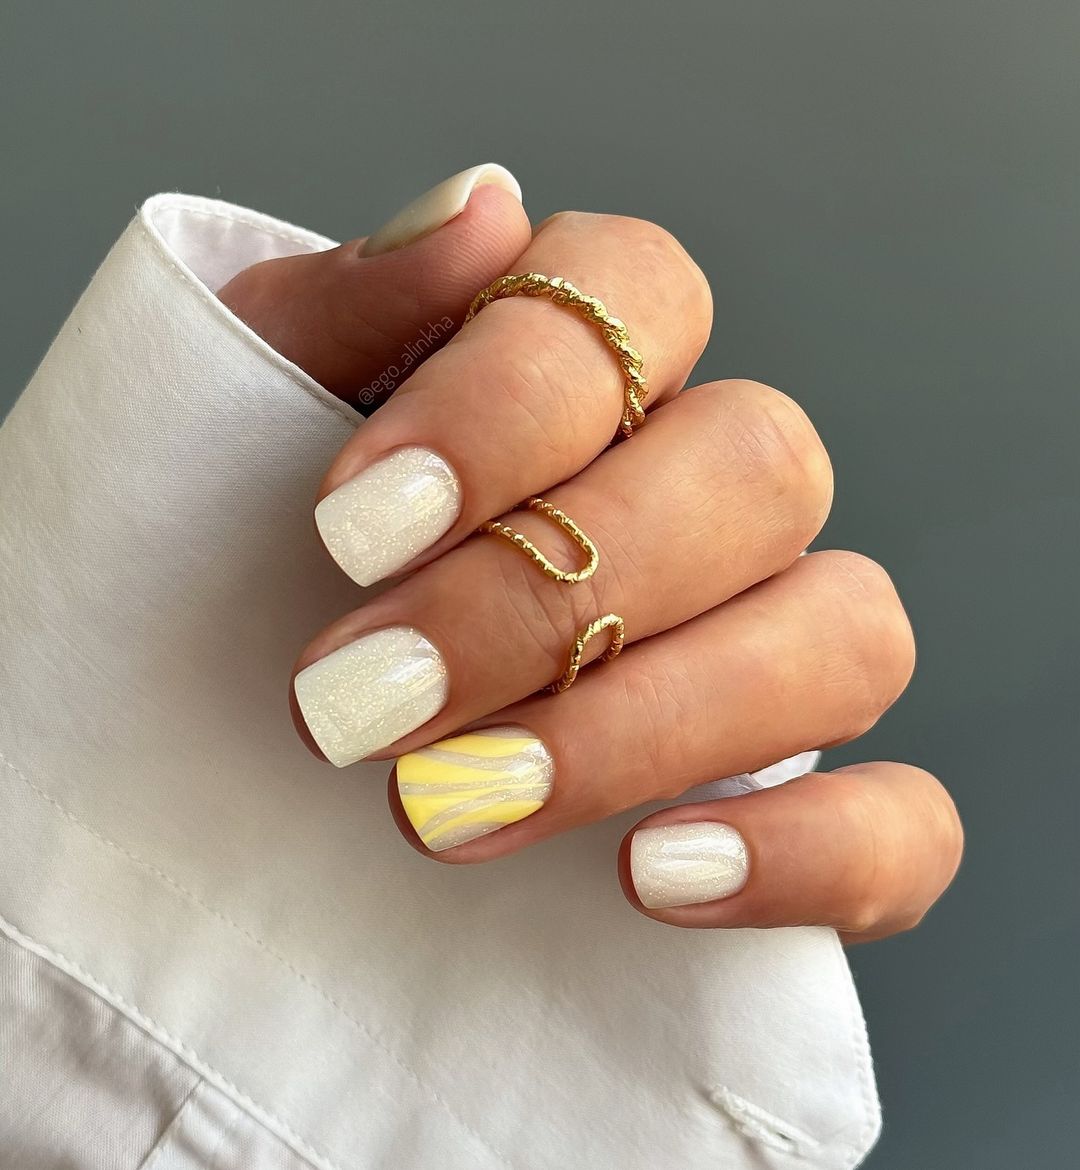
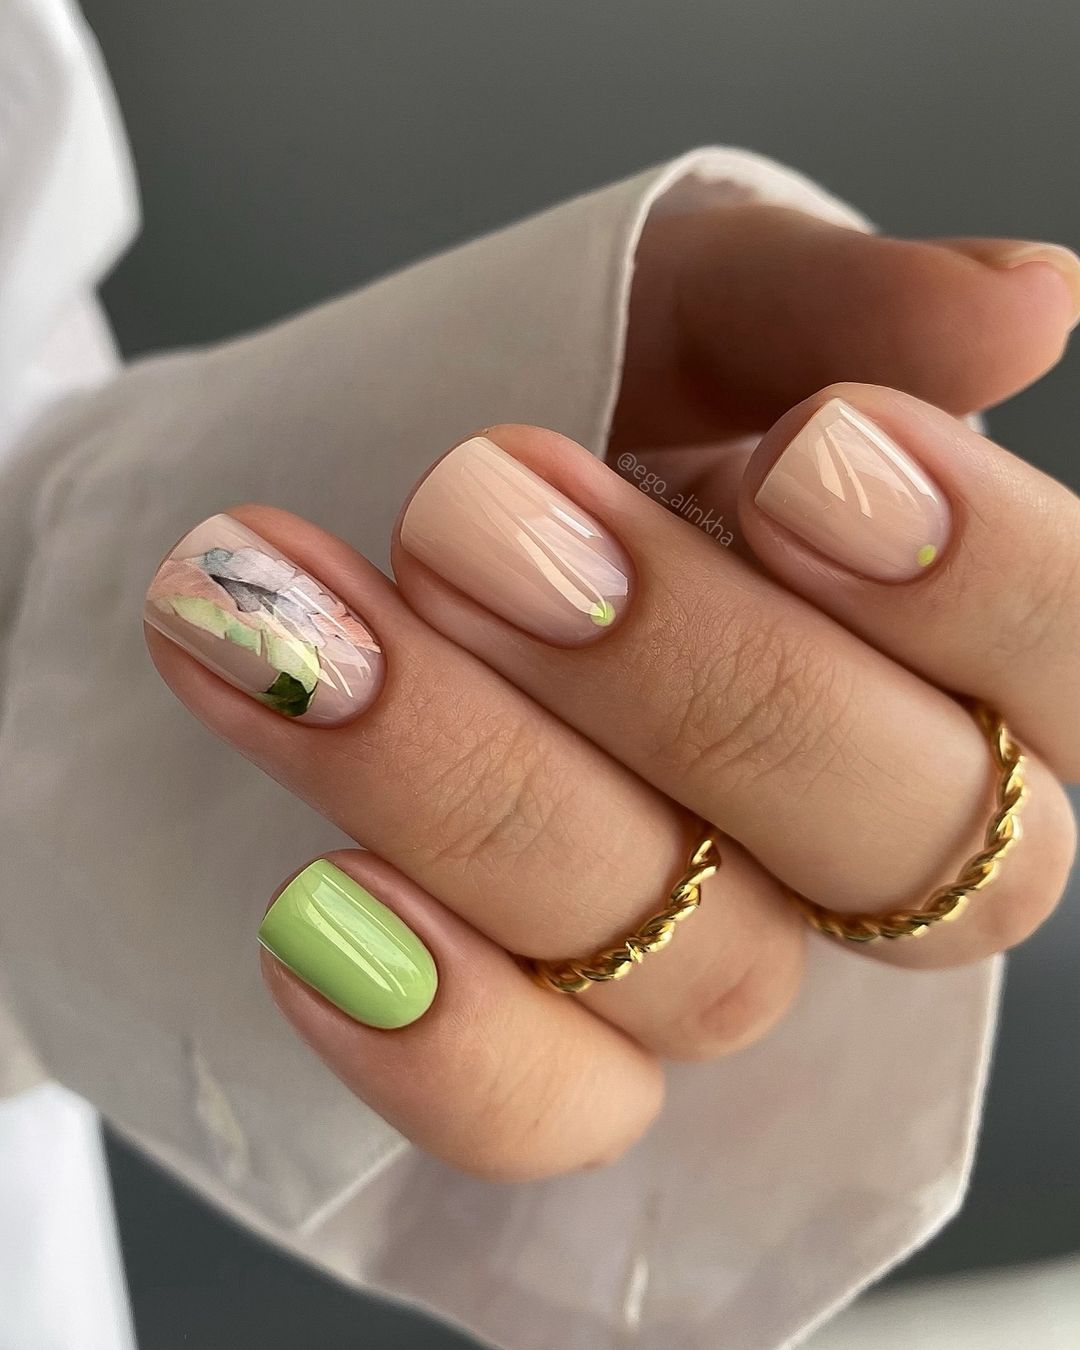
Summer Freshness: Nature-Inspired
Using this clean and fresh design, you feel the nature at your fingertips. A single lime green nail gives a touch of spring joy to the whole manicure while the soft and neutral base provides a perfect background for fine botanical illustrations. It is a manicure that brings the happiness of a new season right into your hands.
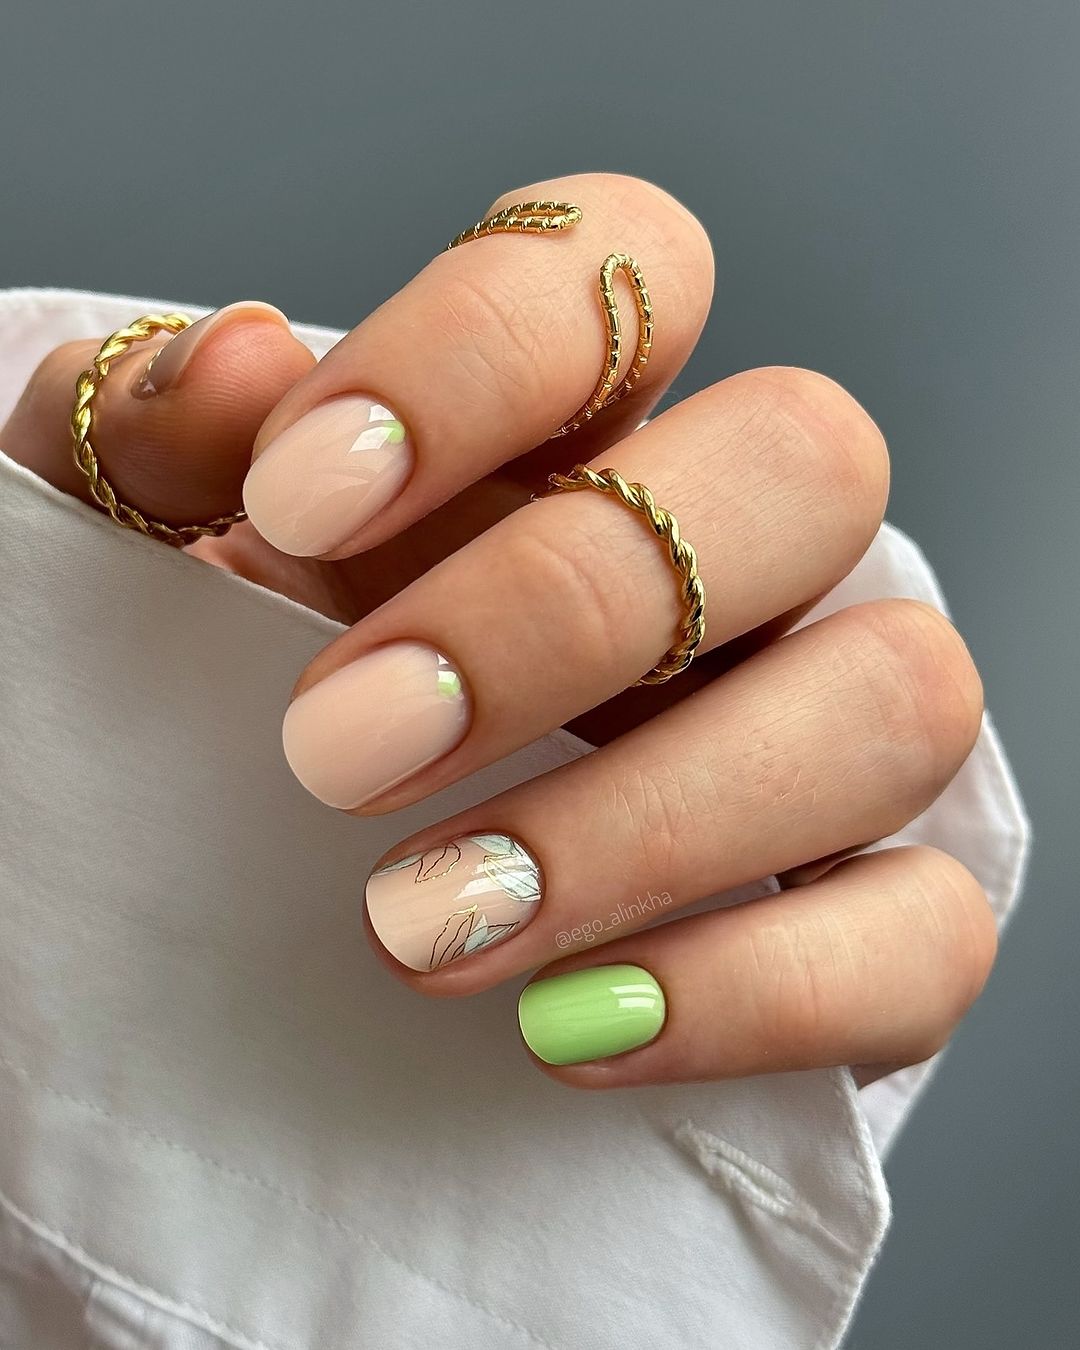
Professional Products Needed:
- Neutral Base Gel Polish: To match what nature offers.
- Botanical Nail Stickers or Hand-Painted Design: For planting some flowers.
- Lime Green Gel Polish: For just one nail.
- No-Wipe Matte Top Coat: To make pictures more like canvas paintings
Start with neutral polish as the base color. Adorned with floral stickers or hand-paint them yourself using fine brushes for delicacy on selected nails. A lime green accent is painted onto one nail to make it pop out or be easily noticeable. Finally, cover the pictures in matte top coat for genuine artistic effect.
Abstract Artistry: Bold and Beautiful
Nail art can be an outlet for creativity, and in this design a soft pink base is contrasted with one finger of abstract lines in a darker shade to make something both eye-catching and visually pleasing. This is for fans of modern art, those who can appreciate the beauty of simple marks and strong colors.
Products you will need:
- Soft Pink Gel Polish: For a subtle base.
- Bold Red Nail Art Gel: To create bold, abstract lines.
- Detailing Brush: For fine painting.
- High-Gloss Top Coat: So that your tiny artwork is at its most brilliant.
Start off by applying the pink polish as a foundation on your nails to give them an air of quiet sophistication. Pick out one nail which will serve as your canvas – let loose with red nail art gel all over it in random directions or wherever feels right; this part should be about freedom and motion more than anything else. Finish everything up with top coat for extra shine.
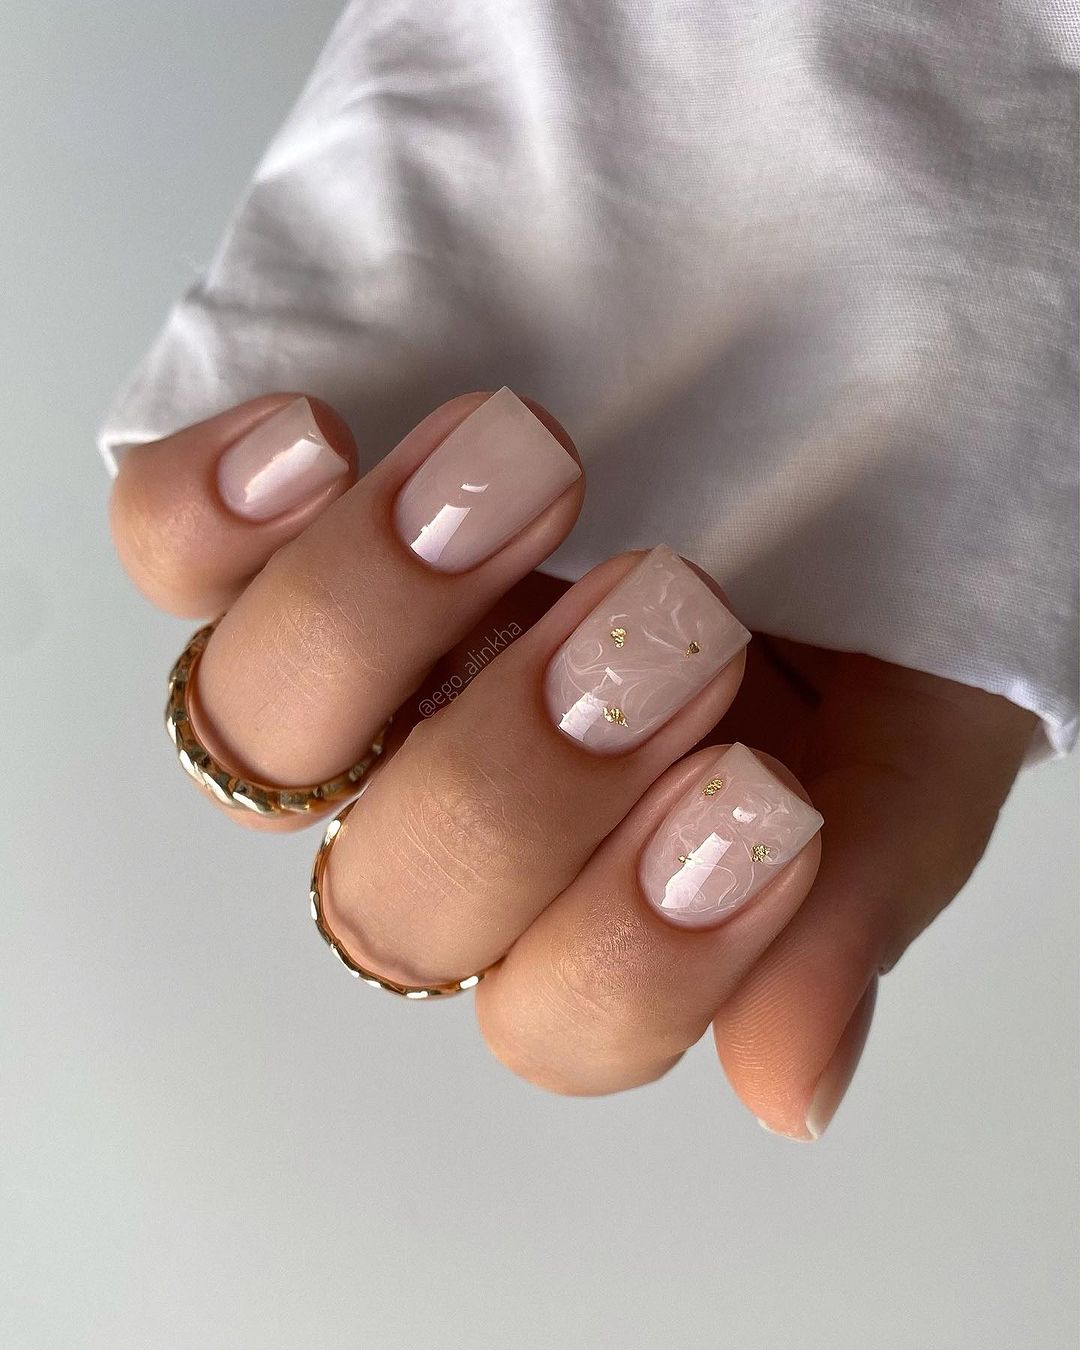
Marbled Elegance: Classic and Sophisticated
This concept is about the classic and eternal beauty of marble being available to you in all its glory. This design has golden accents and a marble pattern that makes it attractive for wearing during day time or during dinner. For those who prefer sophistication in their daily routine, this is the style.
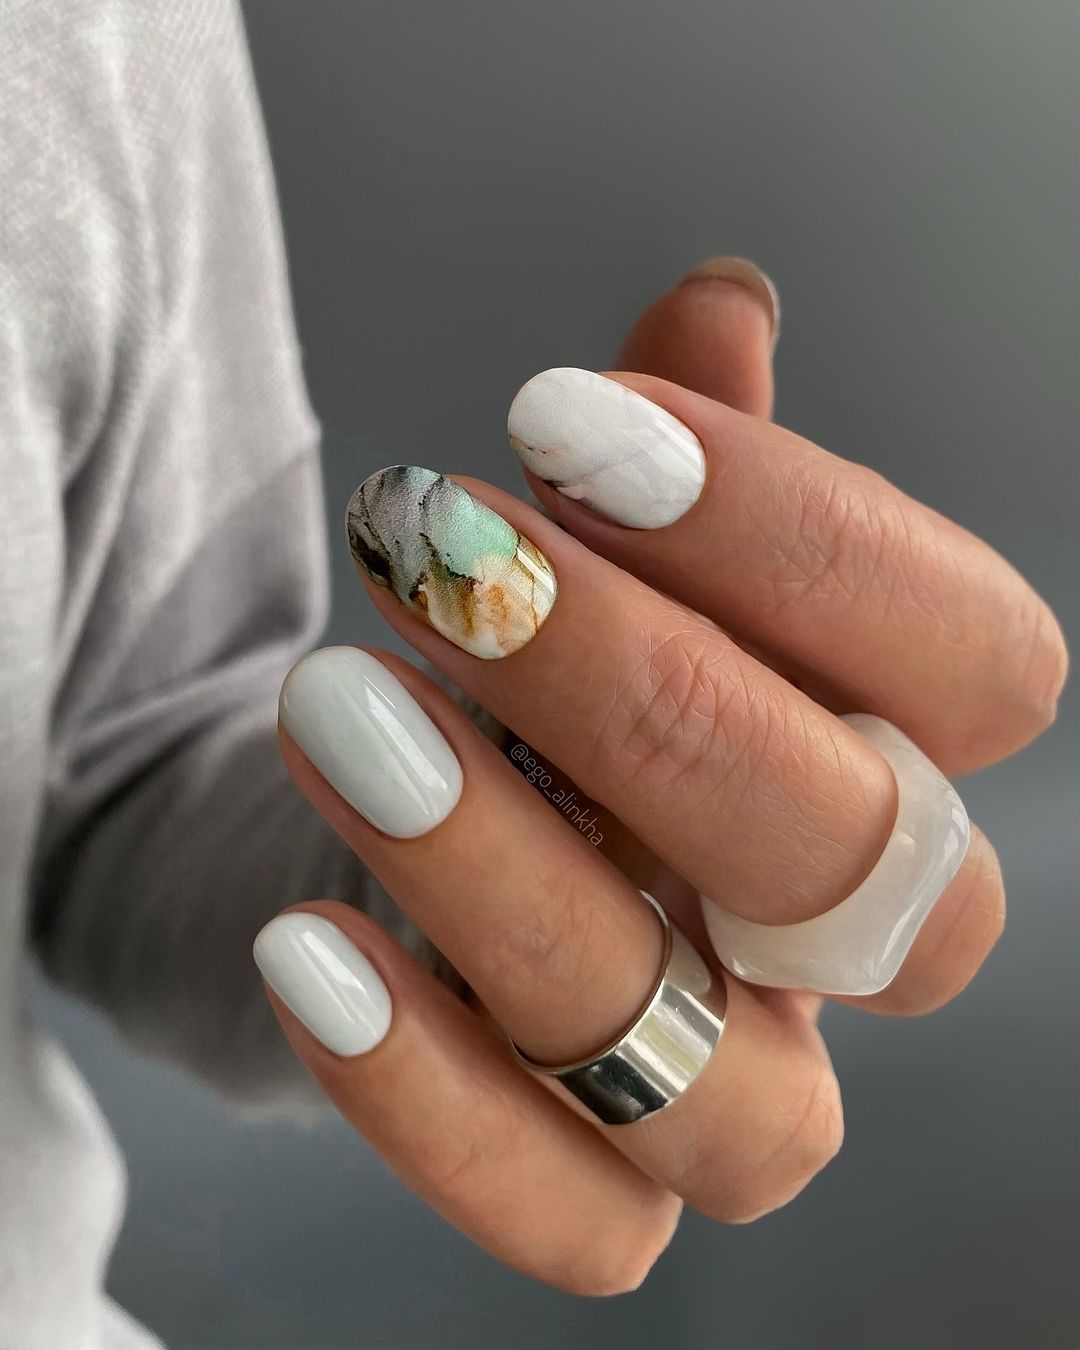
Things You Will Need:
- White And Gold Marble Nail Art Gel: marbled look creation.
- Sparkling Gold Nail Art Powder: shimmering accent.
- Detailing Brush: swirling of marble design.
- No Wipe Matte Top Coat: contemporary finish to offset sparkle.
Apply a white base coat, then add small drops of gold nail art gel while it is still tacky. Use a clean detailing brush to gently blend the two colors together for that marbled effect. Sprinkle on some gold nail art powder at the tips for an extra touch of luxury. Seal with a matte top coat for luxurious yet modern matte finish.
Leopard Luxe: Wild and Alluring
Those who are fearless enough to brave a little adventure can go for this design which has got a leopard print on one nail against the background of a light pink color scheme. It is an assertion of confidence, and the ability to mix between being daring and delicate. It is also perfect for those who want to make bold fashion statements.
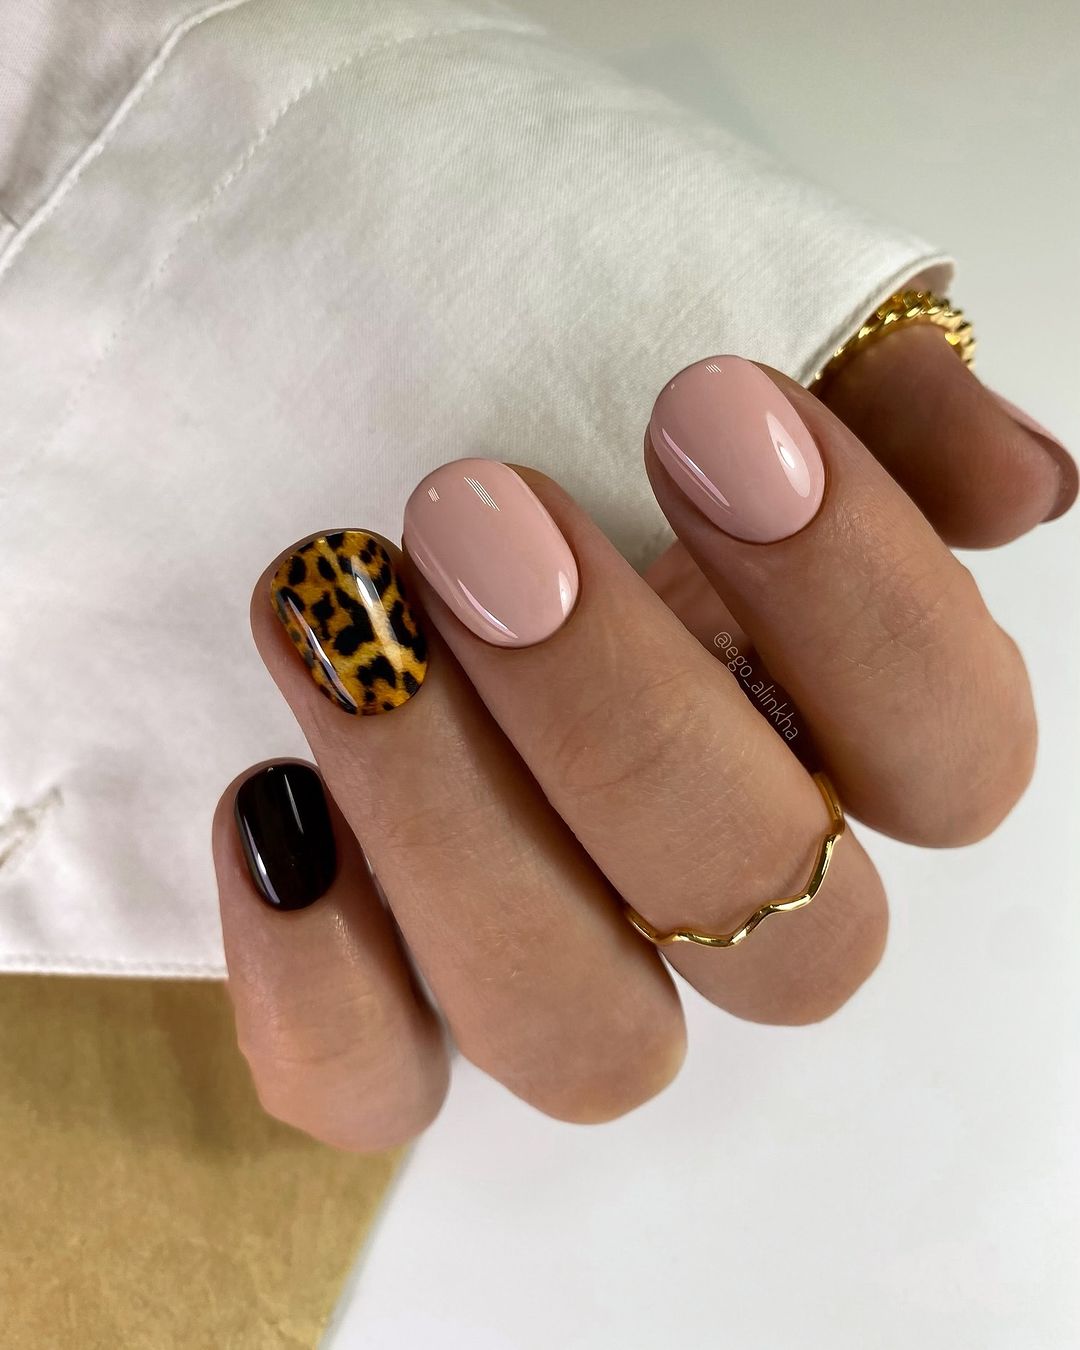
- The necessary professional products required are:
- Nude Gel Polish: As a natural and adaptable foundation.
- Black and Gold Nail Art Gels: For coloring the leopard spots.
- Detailing Brush: For careful spot application
- Glossy Top Coat: To brighten up the pattern with vibrant shine
Begin with nude polish as your base coat. On the accent nail apply black gel polish using dabbing motions in order to outline the shape of the leopard spots, fill them in with gold, then use detailing brush to neaten them. Finally add a glossy top coat on all nails for stunning finale which captures leopard print’s wild spirit.
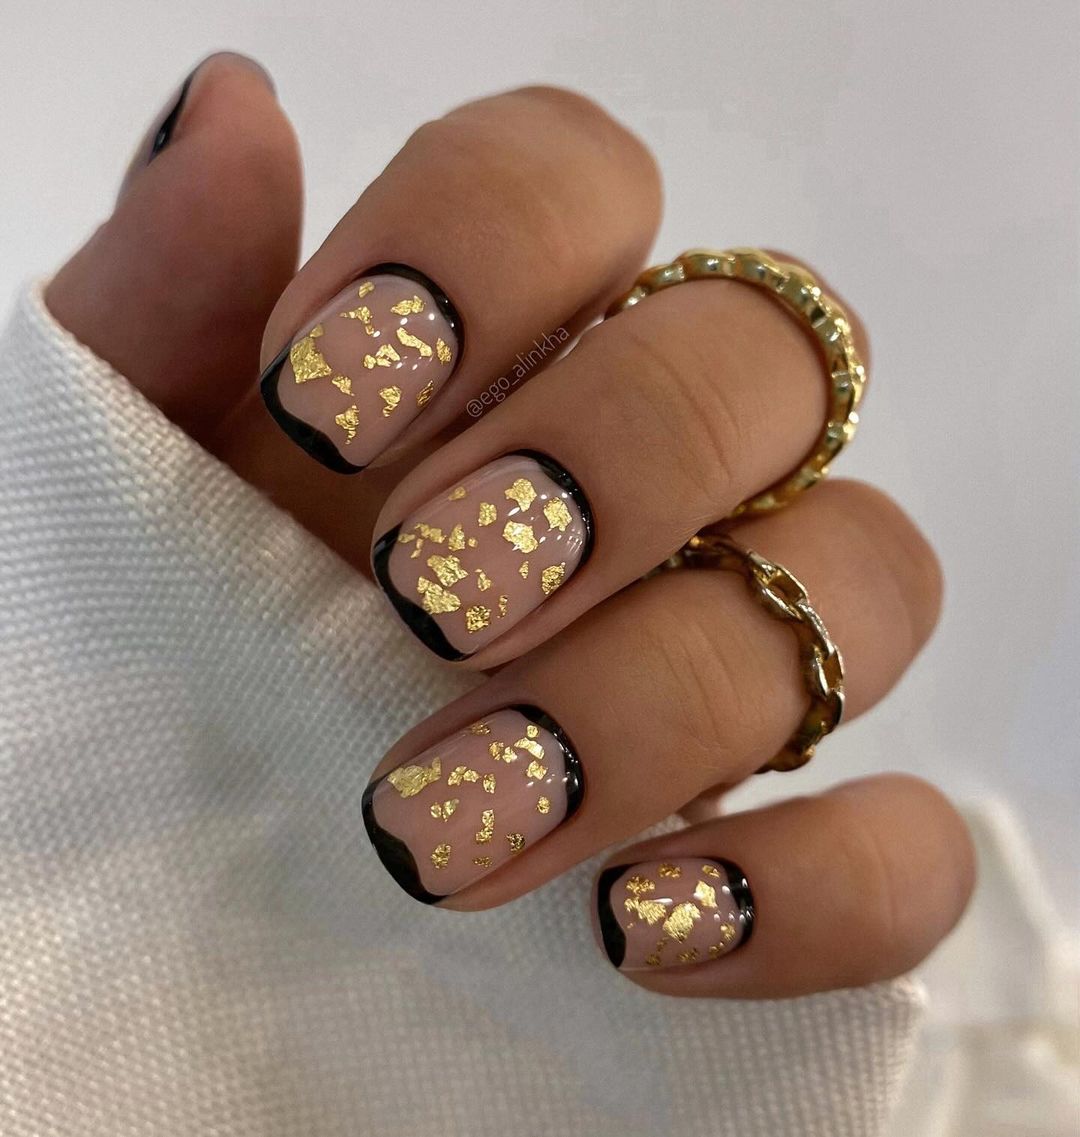
Gilded Dots and Splashes
The design for these nails encapsulates the lively nature of polka dots and the magnificence of gold. It is charmingly fantastic while still being refined. A hushed, natural polish mingles with dramatic black spots and splatters of gold leaf in this particular design. If you are a trendsetter who likes mixing traditional components with a touch of fun, then this creation is perfect for you.
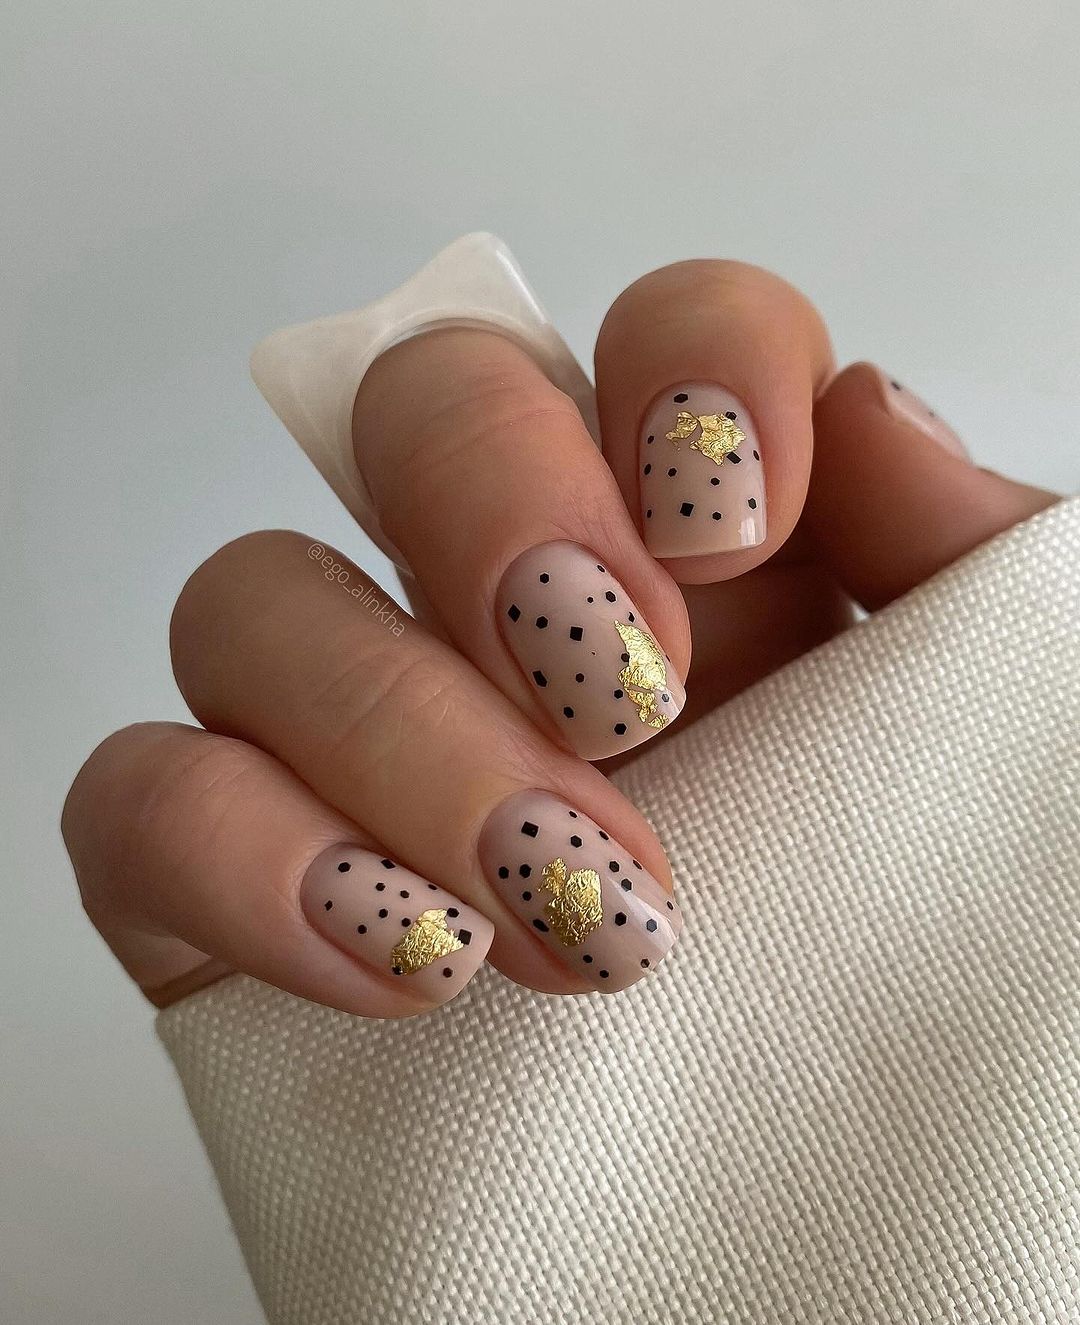
Products Required:
- Nude Gel Polish: An ageless foundation hue.
- Black Nail Art Gel: Used to create intricate polka dot patterns by dotting.
- Gold Leaf: Adds some luxury.
- Detailing Brush: To accurately place dots and gold.
- No-Wipe Glossy Top Coat: Provides a shiny finish that will last without needing to be wiped clean off afterwards.
Start with a nude gel polish as it creates an understated but versatile backdrop. Use black gel and a detailing brush to dot on polka patterns then add small pieces of gold leaf for an extravagant touch. Finish up with no-wipe glossy top coat so that your nails sparkle all day long!
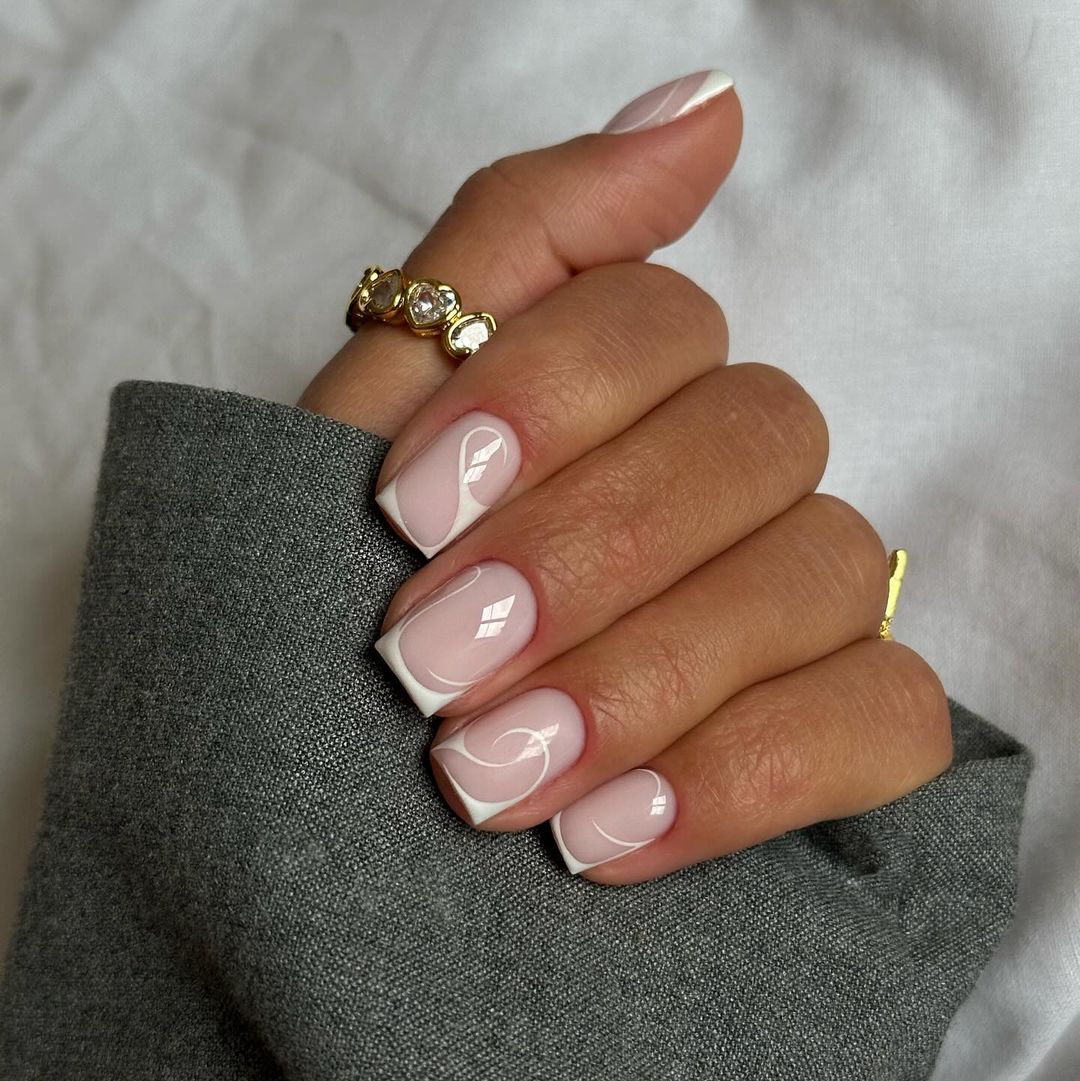
Modern French with a Twist
This nail design takes the classical French tip into the contemporary realm, with a sheer base accented by white tips and whimsical heart decals. It’s a fresh take on a timeless style, ideal for anyone who appreciates a modern yet romantic aesthetic.
Professional Products Needed:
- Sheer Gel Polish: For a barely-there elegant base.
- White Nail Art Gel: To sculpt the perfect tips.
- Heart Decals: To add a hint of romance.
- No-Wipe Glossy Top Coat: For a durable and radiant finish.
Apply sheer base coat then use white gel to create crisp tip after it is cured. Add one heart decal for whimsy. Finally, apply glossy top coat for manicure that can make classic and playful effect suitable for daily elegance or special date night.
Whimsical Topography: Soft Waves
This nail design reminds one of supple elevation marks that gently ebb and flow in a calm motion. It is a fragile work of art that goes well with neutral colors, mirroring the wearer’s love for gentle natural lines and modest grace.
Products used by professionals:
- Pale Pink Gel Polish: To lay down the foundation with an elegant and feminine touch.
- White Nail Art Gel: For sketching out flowing topographic lines.
- Detailing Brush: To make sure everything remains light and smooth along the way.
- No-Wipe Glossy Top Coat: Adds more refinement to this already sophisticated design scheme.
Evenly apply a pale pink gel across your nails as if it were a canvas. Use white nail art gel with a fine brush to create sinuous lines that traverse each nail imitating undulations found on maps showing heights above sea level. Seal everything off with glossy top coat so they look sleek and polished which makes them wearable too.
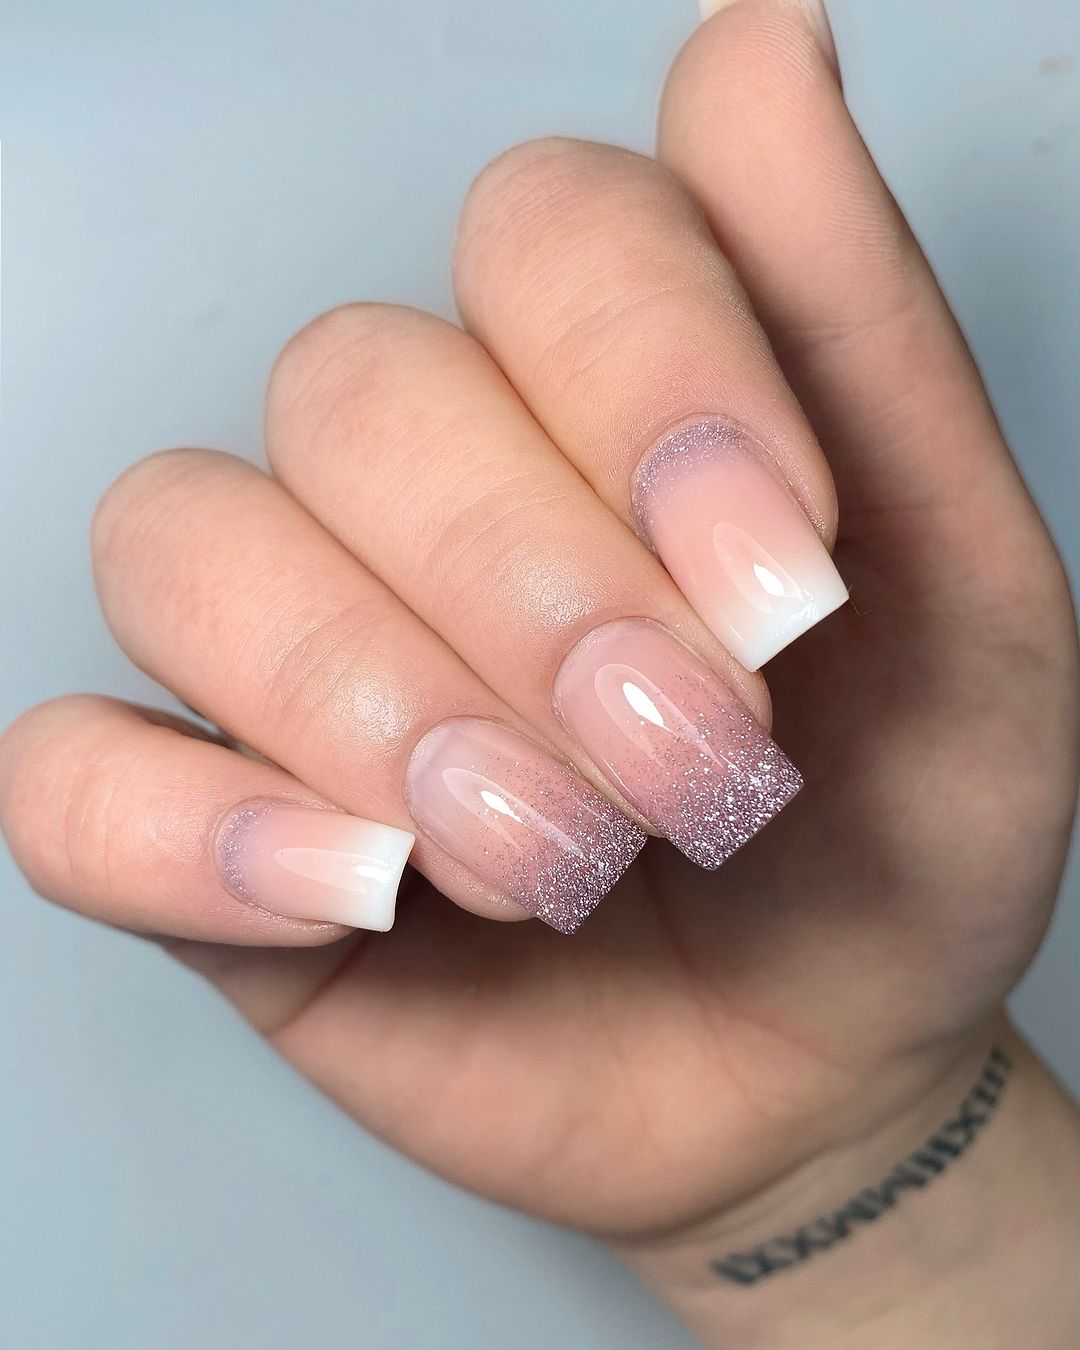
Glitter Gradient: Sparkle Meets Sophistication
When it comes to celebration, nothing says it better than glitter, and this design has a stunning gradient effect that begins with heavy application at the tips and fades into a light dusting near the base. This is a statement about joy as well as fashion, making it great for celebrations or when you need some sparkle.
Professional Products Needed:
- Clear Gel Polish: In order to allow the glitter stand out.
- Pink Glitter Polish: For a vibrant, eye-catching gradient.
- Sponge: To dab on the glitter and create a seamless gradient effect.
- No-Wipe Glossy Top Coat: One to last with sparkle.
Start by applying clear base coat. Use sponge for picking pink glitter polish up which should be dabbed on nails heavily at tip starting point then gradually becoming lighter toward base. Apply glossy top coat once all is done to add magic touch in your nails thus making them shine every time there is movement made by you.
Abstract Swirls: Fluid and Fashion-Forward
The design is a must have for eccentric fashionistas, with white abstract swirls on clear base. The final results are both modern and playful. It’s an opportunity to celebrate creativity and it’s suitable for those who think of their style as a form of self-expression.
Essential Professional Products:
- Transparent Gel Polish: As a multipurpose base.
- Nail Art Gel in White: For making the random circular designs.
- Detailing Brush: To apply these complicated curves with accuracy.
- Matte Top Coat: To give the piece a contemporary, dull look devoid of any glossiness.
Once you have applied your transparent gel polish, use your white nail art gel and detailing brush to create swirling patterns. There is no right or wrong about it; let your artistic side lead you. To make the design more visible, apply matt topcoat that gives an up-to-date touch to it making it look like an artwork.
Skyline Tips: Fresh and Uplifting
On a sunny day, the creator of this nail design was inspired by cloudless skies. The base is very pale pink and is tipped with vibrant sky blue. It is an airy and light French manicure variation perfect for spring or summer – or any time when you want to add some sunshine into your look.
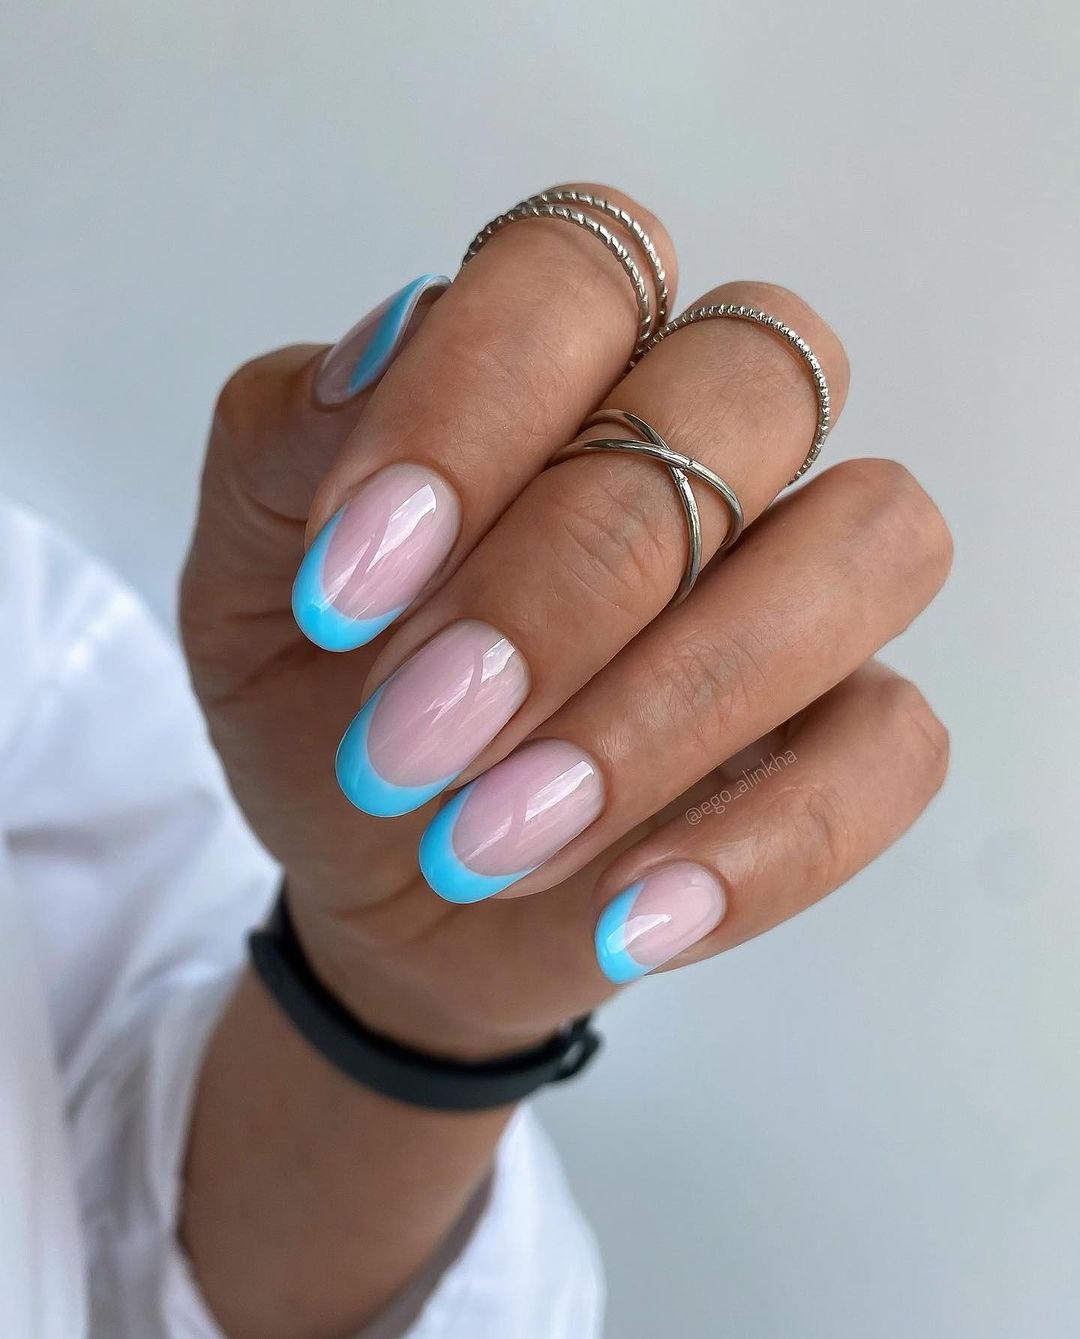
Professional Products Needed:
- Soft Pink Gel Polish: Used as a gentle foundation color.
- Sky Blue Nail Art Gel: Applied for clean, uplifting tips.
- Fine Detailing Brush: Ensures precise horizon line.
- High-Shine Topcoat: Seals design in with protective glossy finish.
Apply the pale pink gel polish to cover all nails, curing them till they are blushing perfectly. Use the sky blue gel dipped detailing brush for painting a precise smile line at each nail’s tip; fill it up with the same pop of blue that resembles best sky on earth during daytime. Finish off by adding gloss top coat that will make your hands look calm yet lively at once.
Gossamer Wings: Delicate and Enchanting
Delicate butterfly wing-like ethereal nail art, with effeminate pink shades that are overlaid in pale golden touches which seem to capture morning dew on the sunlight. This charming and magical look is perfect for those who want a touch of fantasy.
Products needed by professionals:
- Translucent Pink Gel Polish: For an almost invisible, natural base.
- Gold Leaf Flakes: To sprinkle over the nails for a gilded effect.
- Detailing Brush: To carefully place the gold accents.
- No-Wipe Matte Top Coat: For a dreamy, soft-focus finish.
Apply the translucent pink polish as a whisper of color on your nails. While still tacky, use the detailing brush to place gold leaf flakes in a random yet artful pattern, as if they’ve fluttered down upon your nails. A matte top coat gives the design a muted, velvety look, inviting a second glance to appreciate its delicate charm.
FAQ
Q: How can I prevent air bubbles in my gel polish?
A: You should stir the polish properly before using it, put on thin layers, and shaking the bottle vigorously is to be avoided. It’s also good to put some varnish on a free edge to keep a design.
Q: Can I mix different brands of nail polish or gel?
A: Yes, most of the time, you are able to do so; but for better results and avoiding any adverse chemical reactions, it is advisable to do a small test or use one brand for your base coat, color coat and top coat.
Q: What do I need for the perfect smile line when doing French manicure?
A: Use a fine brush or smile line guides. Another way is by using “reverse stamping” where you first apply polish onto a stamper then roll it over your nail.
Q: What’s the best way to apply gold leaf onto nails?
A: After applying your base coat and colour, layer on sticky top coat or nail glue. Use tweezers or dry brush and lightly pat gold leaf onto nail. Seal with topcoat.
Q: How can I make my nail art last longer?
A: Gel should be cured completely under lamp between each layer. Every few days add another top coat for glossiness which will also help protect it.
Q: Can I use regular nail polish over gel nails?
A: Absolutely, you can paint regular varnish over gel nails; just remember that this may affect how long your gel lasts as a whole. In case you want to change color go for non-acetone remover.
Q: How often should I give my nails a break from polish?
A: This varies from person to person although some people prefer giving their nails breather every 3-4 weeks in order to avoid yellowing as well as keeping them moisturized.
Q.How can I fix lifting in gel polish?
A: In case of slight lifting, you can put a thin layer of top coat all over the edge. If it is heavy lifting, it is best to remove the polish and start again so as to avoid moisture being trapped and causing nail issues.
Save Pin