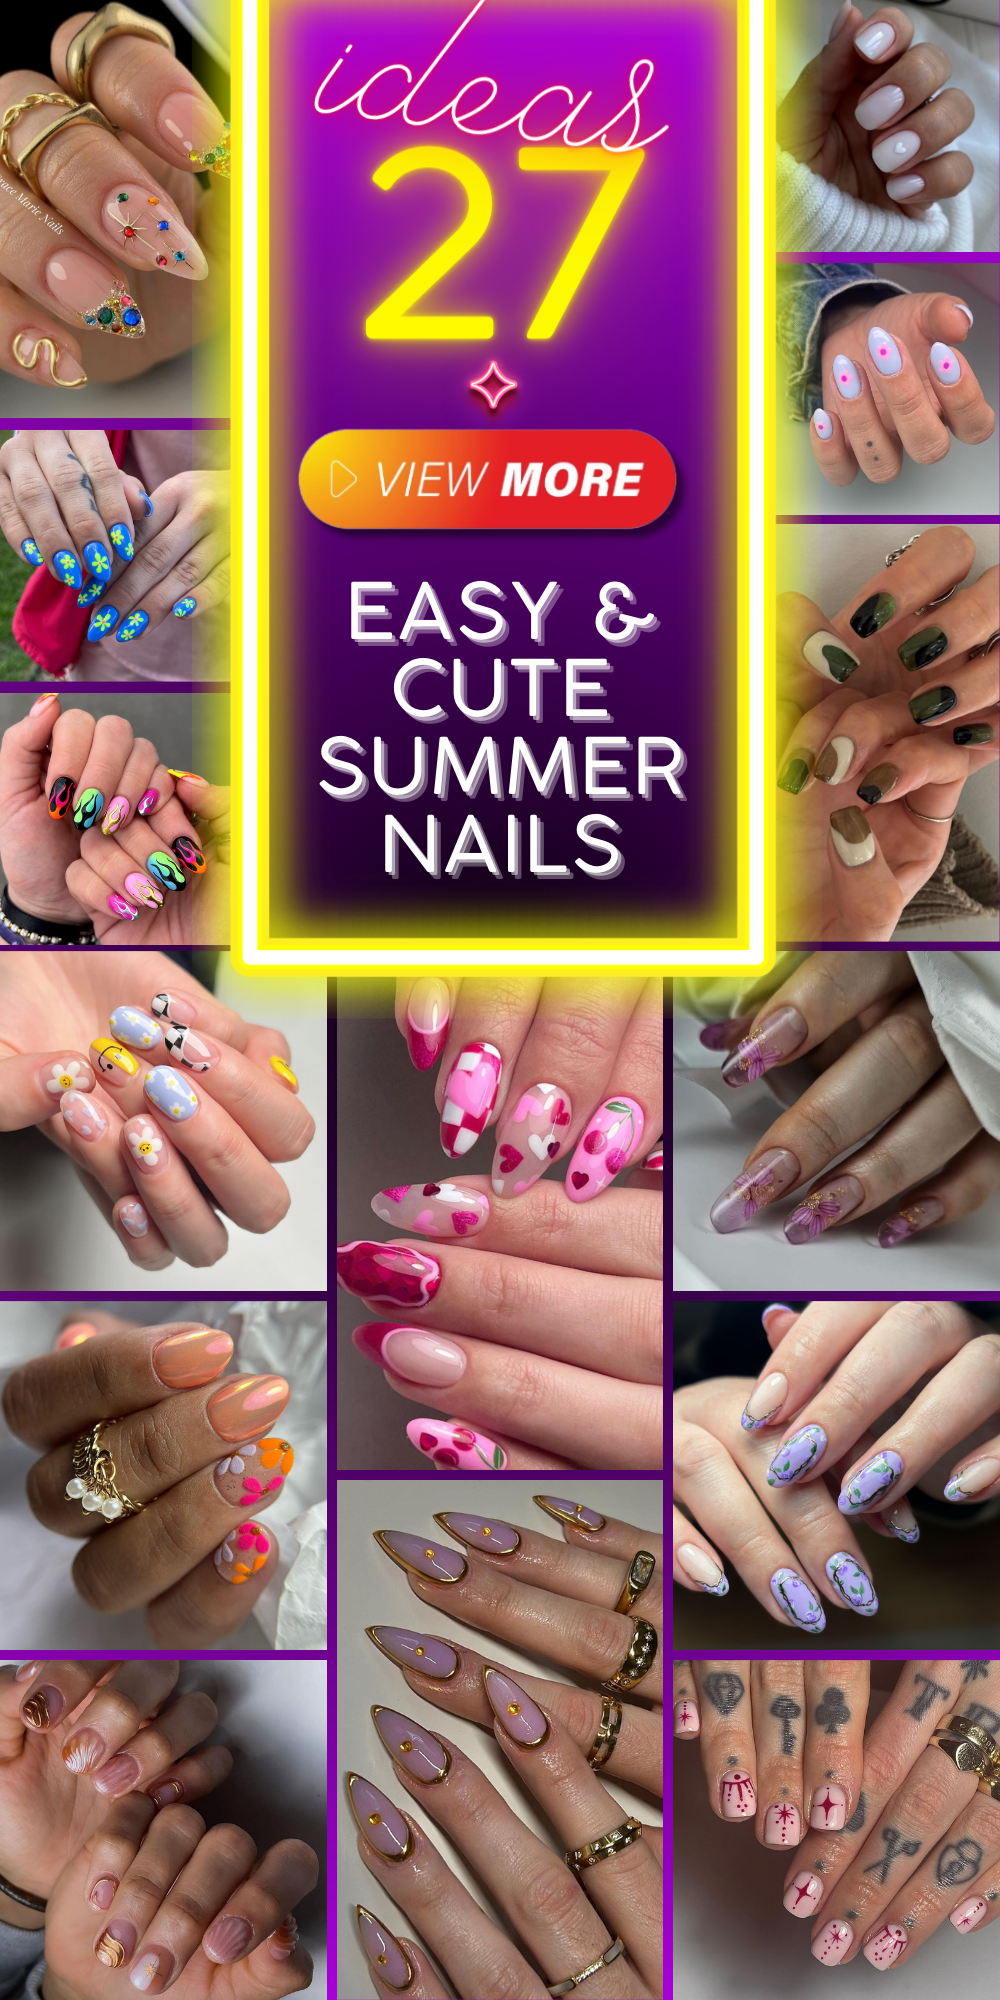
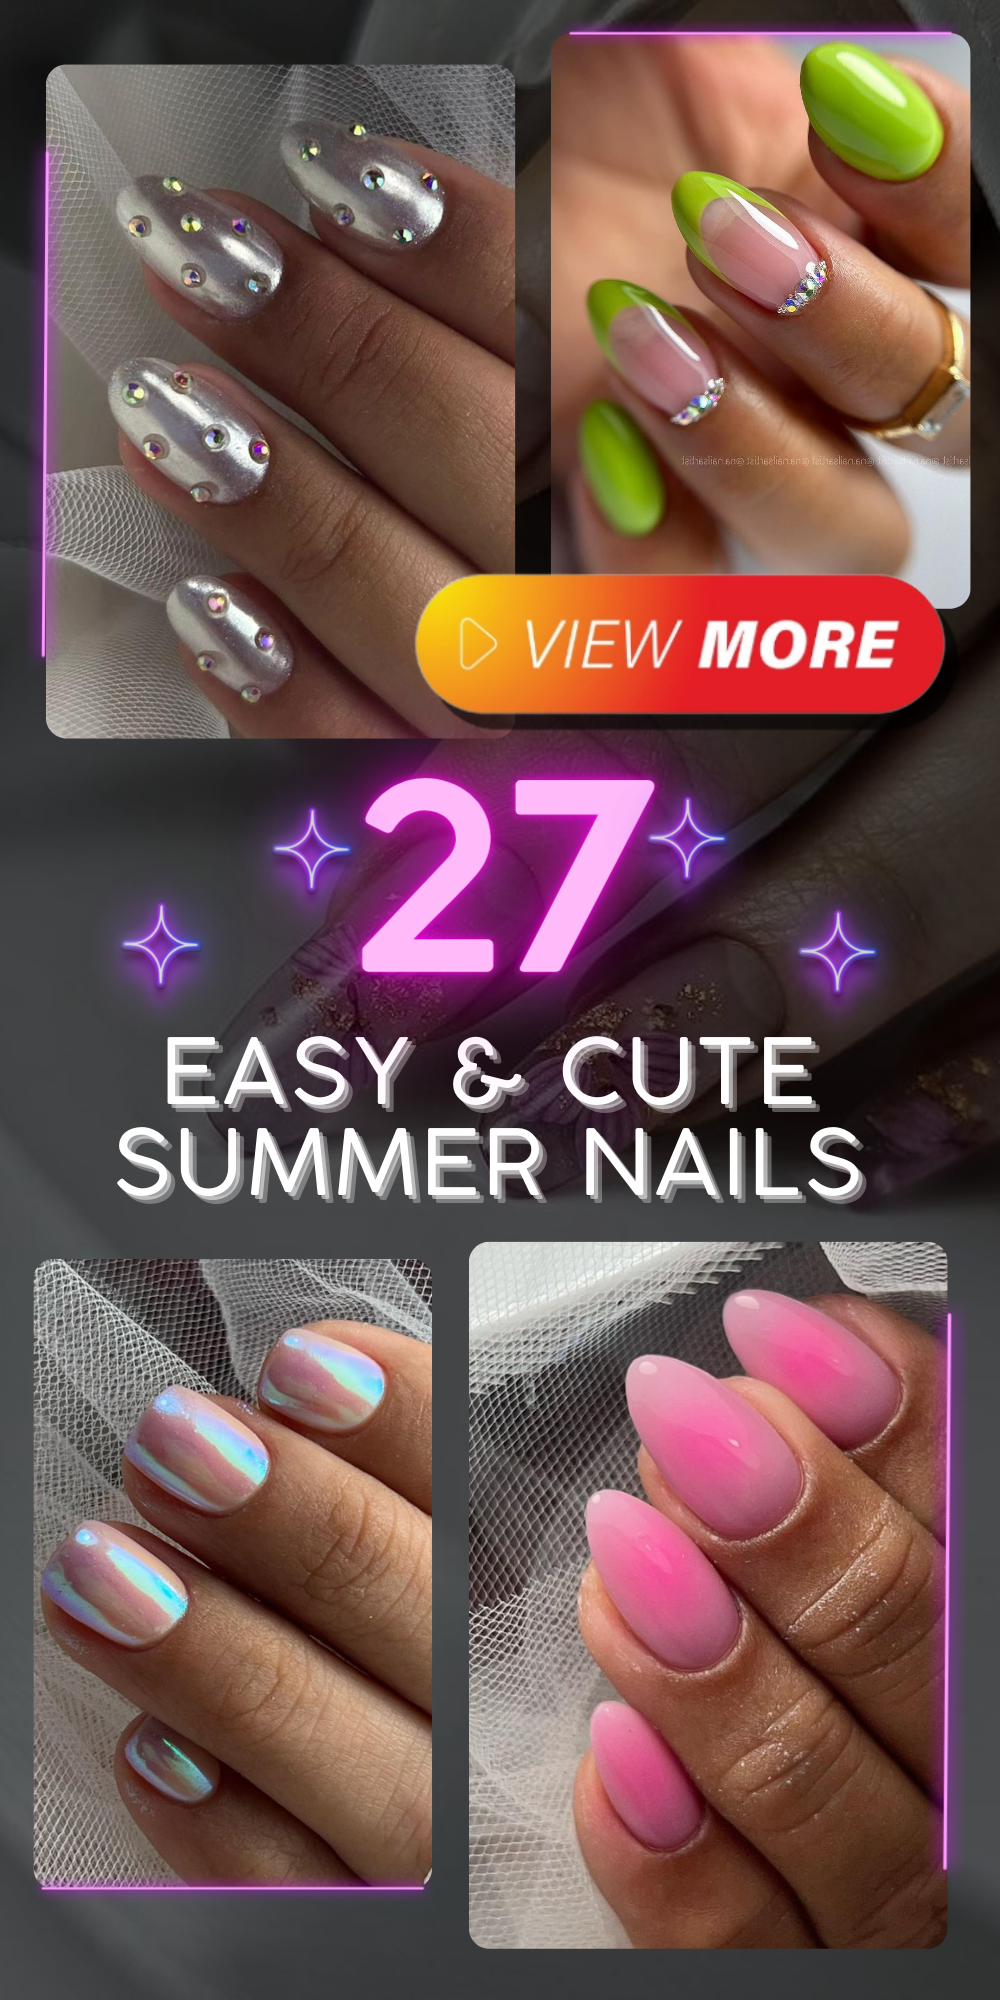
Summer is calling, and there’s no better way to welcome the warmest season than with simple & cute summer nails. Lounge by the pool or hang out in the sun all you want, but your nails can still be your best accessory. You need inspo for some DIY ideas? Or do you need some cute toenail art ideas for the season? No worries, I have everything you need. So sit back, relax, and get ready to dive into a sea of summer nail inspirations.
A Whimsical Swirl on Short Nails
Beginner designs can be just as awe-inspiring as the complex ones we see. Take this simple swirl design, it’s a breath of fresh air that any beginner or professional nail tech could appreciate. The softness in the design makes it ideal for summer and you’ll have clients coming back with their friends to show off your work!
- Swirl design products:
- Summer Breeze
- Soft pink polish
- Gold accent polish
- Topcoat
To recreate this look:
- Start with a good base coat.
- Apply two coats of soft pink polish, letting each one dry thoroughly.
- With a thin brush, gently draw your golden swirls.
- Finish the look off by sealing it with a high-shine topcoat for a long-lasting finish.
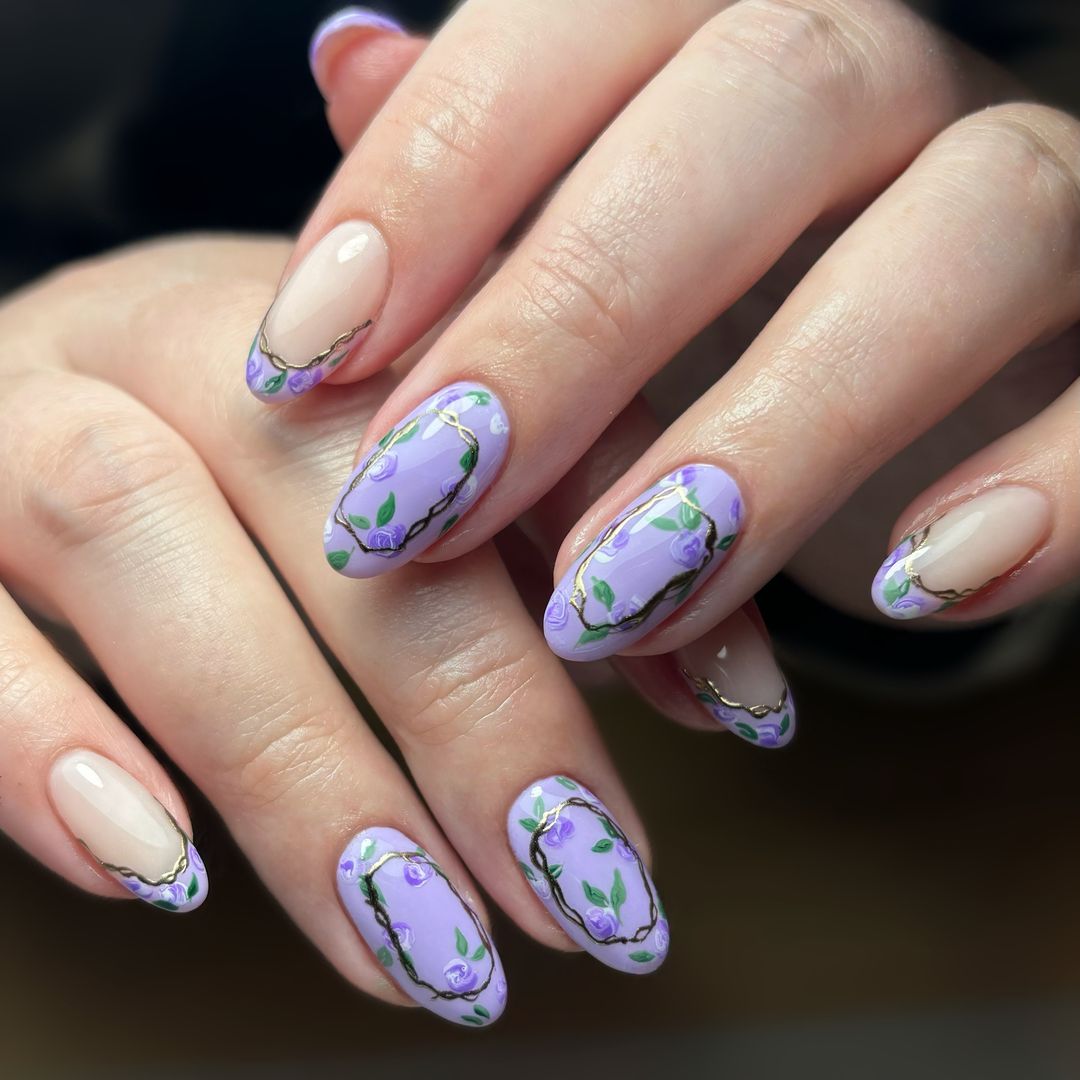
Lavender Fields on Your Fingertips
As I see it, this design reminds me of a time when walking was just as easy as breathing through the heavily scented blooms of a lavender field. A vibrant but simple picture-perfect visual for summer picnics and beach days with its violet tones merging into green color accents.
- Base coat
- Lavender polish
- Green accent polish
- Fine detailing brush
- Topcoat
Apply the lavender polish over your base coat. Then use the green one along with a thin brush to draw the tiny vines and leaves on them. Finally add a top coat to provide protection and shine.
Pink Blooms for a Festive Touch
Easter is all about spring, but who says summer can’t join the party? I’m reminded of Easter eggs when I look at these fun short nails, and they’re perfect for the summer.

Apply your light pink base coat, wait for it to dry, then switch to the darker shade for patterns. A dotting tool will make precise dots and shapes a lot easier. Once you’re done with that step, finish with a strong topcoat so your art won’t chip or fade while you’re out having fun in the sun this summer.
- Light Pink
- Dark pink used for patterns
- A dotting tool or toothpick might come in handy
- Clear topcoat
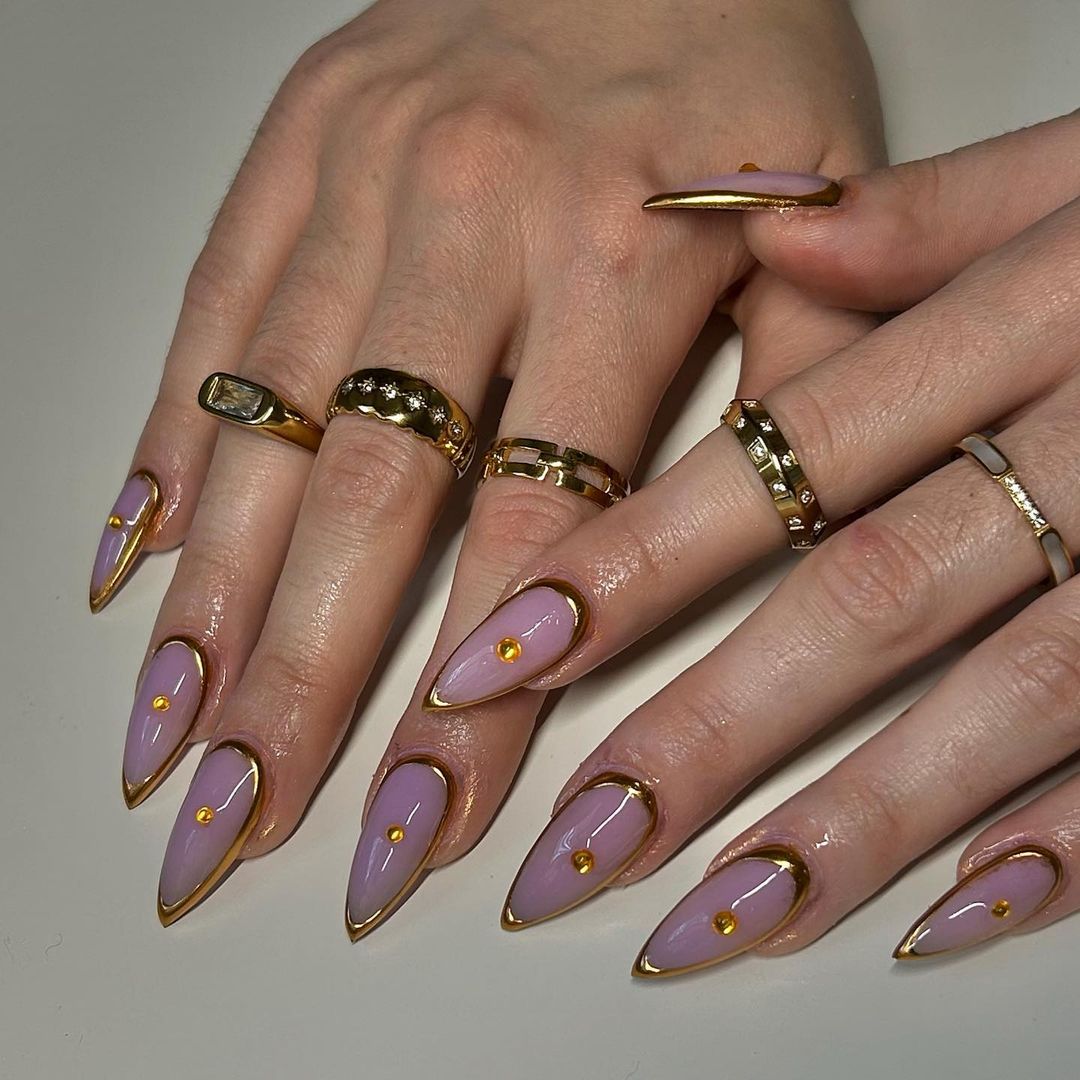
Golden Elegance with a Lavender Touch
This look is so regal and yet so simple. It’s such a small canvas but these short nails still give off the same energy as long almond-shaped ones. The lavender hue with gold trimmings is super sophisticated, and the yellow studs add a tiny bit of playfulness to it.
It’s definitely one of those “less is more” designs that speaks volume.
- Base coat
- Lavender polish
- Gold trim polish
- Yellow studs
- Topcoat
Apply your base coat as per usual, then go in with two coats of the lavender hue. Edge your tips with the gold polish while it’s still wet using a fine brush for precision. Stick on the yellow studs while the gold polish is tacky but not too wet. Then seal everything in with a glossy topcoat.
Save Pin
Blooming with Simplicity
These designs for short nails offer a completely new perspective by combining simplicity with bright colours. A simple cute summer nail look is done by applying light blue base with small pink flowers.

- Base coat
- Pastel blue polish
- Pink and purple for flowers
- Any dotting tool or pin head
- Topcoat
Start with clear base, then apply pastel blue polish. When it is dry, make tiny flowers using a dotting tool or pinhead. Simple fun art work requires top coat to protect it.
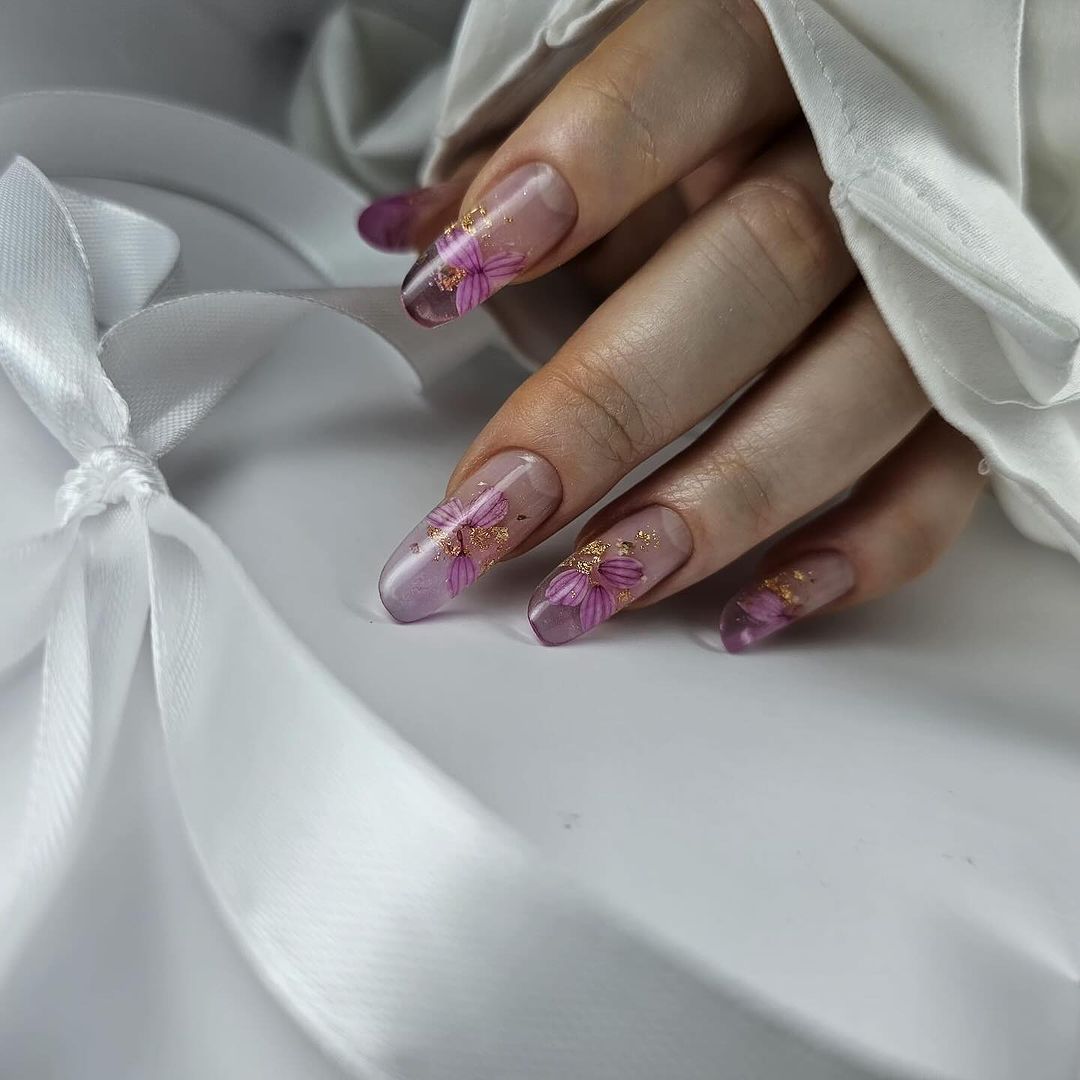
Lavender Dreams with Floral Accents
Feel the floral trend with this mature art design. A clear, see-through violet base, covered in darker purple flowers makes elegance and grace undeniable. Like a cherry on top is the gold flakes adding an extra touch of luxury.
- Base coat
- Translucent lavender polish
- Purple polish for flowers
- Gold leaf flakes
- Topcoat
To get started apply a base coat then paint on your translucent lavender for a dreamy look. Use your purple to shape your flower design and while it’s still wet, carefully place the gold flake pieces. Finish off with a strong topcoat you’re guaranteed to shine.
Pink Passion with a Playful Heart
With youthful excitement, love is in the air with these nails. These darn things are a work of art. Featuring hearts and glossy accents, this design is perfect for anyone who’s lost their head to a summer fling.

- Start with base coat
- Hot pink polish
- Blush polish
- White accent polish
- Heart-shaped decals or stencils
- Topcoat
First, paint each nail with either hot pink or blush for your base coat after applying the brand U foundation. Then use the white polish to create abstract shapes or apply those heart decals if you prefer something more playful. Lastly, slap that glossy topcoat on and get ready to smash some hearts!
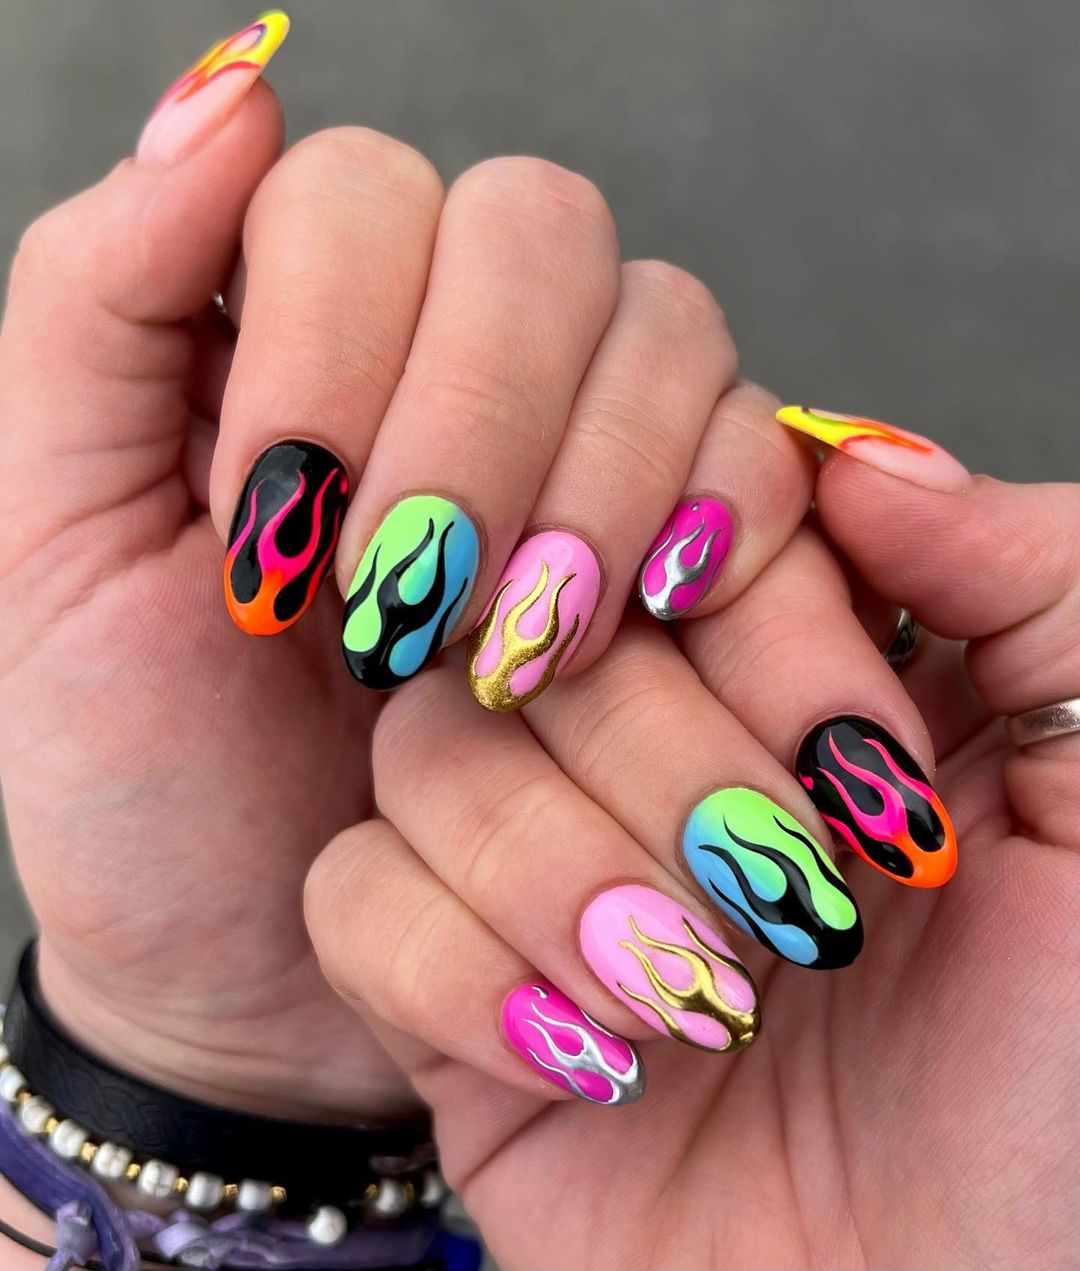
Flame On with Neon Accents
For the bold, and the brave who are looking to turn heads at beach parties and night events this summer, these nails scream super art designs with their neon flames licking at a backdrop of midnight black and pastel hues.
- Base coat
- Neon polish set
- Black polish
- Gold accent polish
- Thin detailing brush
- Topcoat
After applying your base coat, you should paint some nails with black polish while others with pastel colors. Using a thin brush draw neon flames on nails and touch them up with gold for molten effect. The last step is to apply a topcoat that will make your nails last long as they are daring.
Whispering Pink Swirls
Let’s give it up for the underrated beauty of these simple art designs — swirly clouds of white and pink that cast a dreamy haze against an iridescent backdrop. These nails don’t scream at you like long yellow talons, but they do whisper “chic.” It’s definitely one of the ideas for short nails.

- Base coat
- Pink translucent polish
- White swirls polish
- Topcoat
Start off by applying a base coat on all fingers. Then add the translucent pink to each nail. The next step is where things get fun. You can make white swirls in your own unique style or use stencils. Either way, it works! And as always, we finish it off with our topcoat so your cute swirlies don’t decay under all the sun rays and beach waves you’re going to be dealing with this summer.
Save Pin

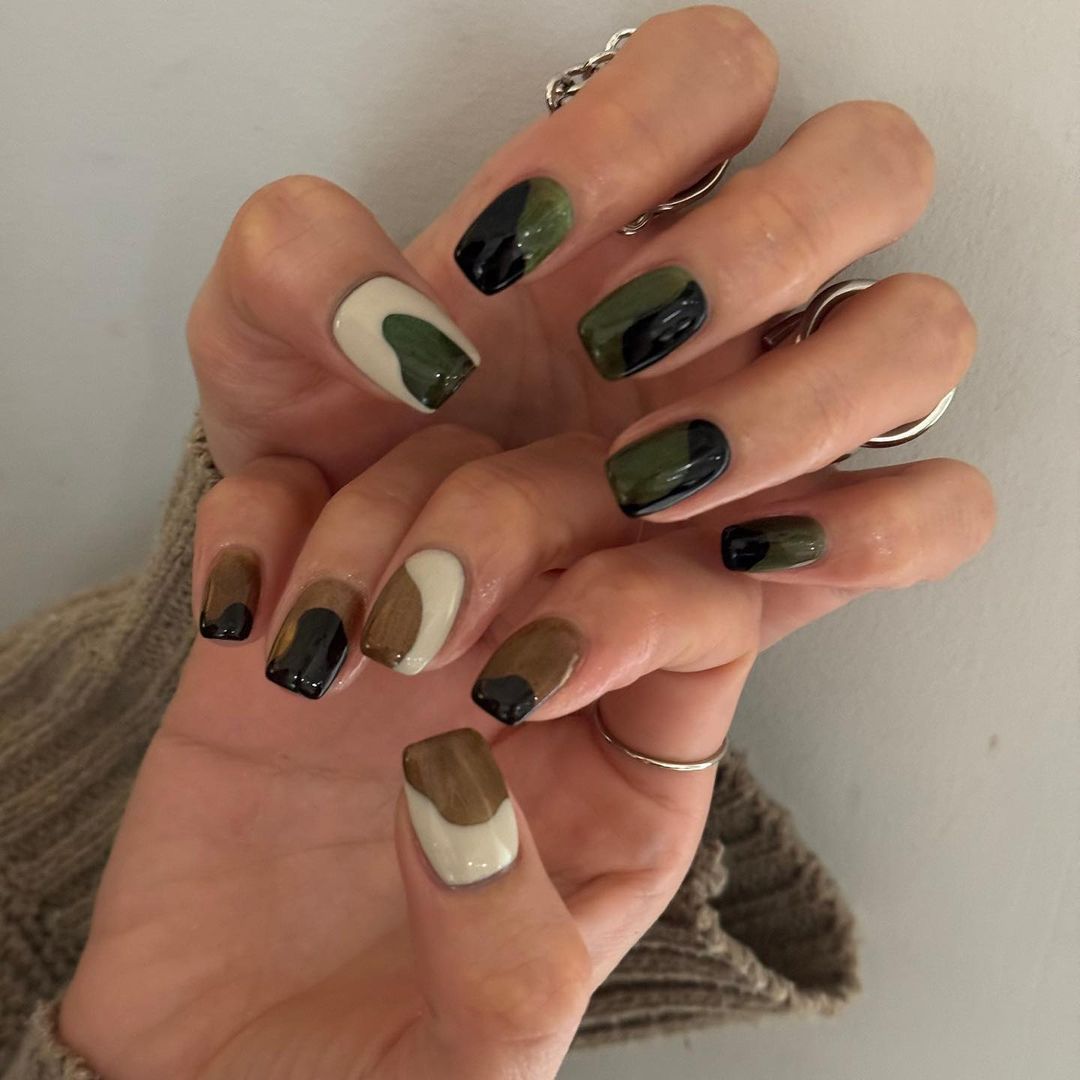
Earthy Tones and Glossy Finishes
A mix of deep greens, rich browns, and crisp whites brings an earthy palette to these nails, ideal for the nature-lover’s summer adventures. A bold yet minimalistic design, it’s perfect for those who adore subtlety with a touch of mystery.
- Base coat
- Deep green polish
- Rich brown polish
- Crisp white polish
- High-gloss topcoat
By applying a base coat on your nails first, then experimenting with the different colors on each nail individually, you’ll create a cohesive look full of variety. Once all coats have dried, apply the high-gloss topcoat to make these simple but striking colors truly stand out.
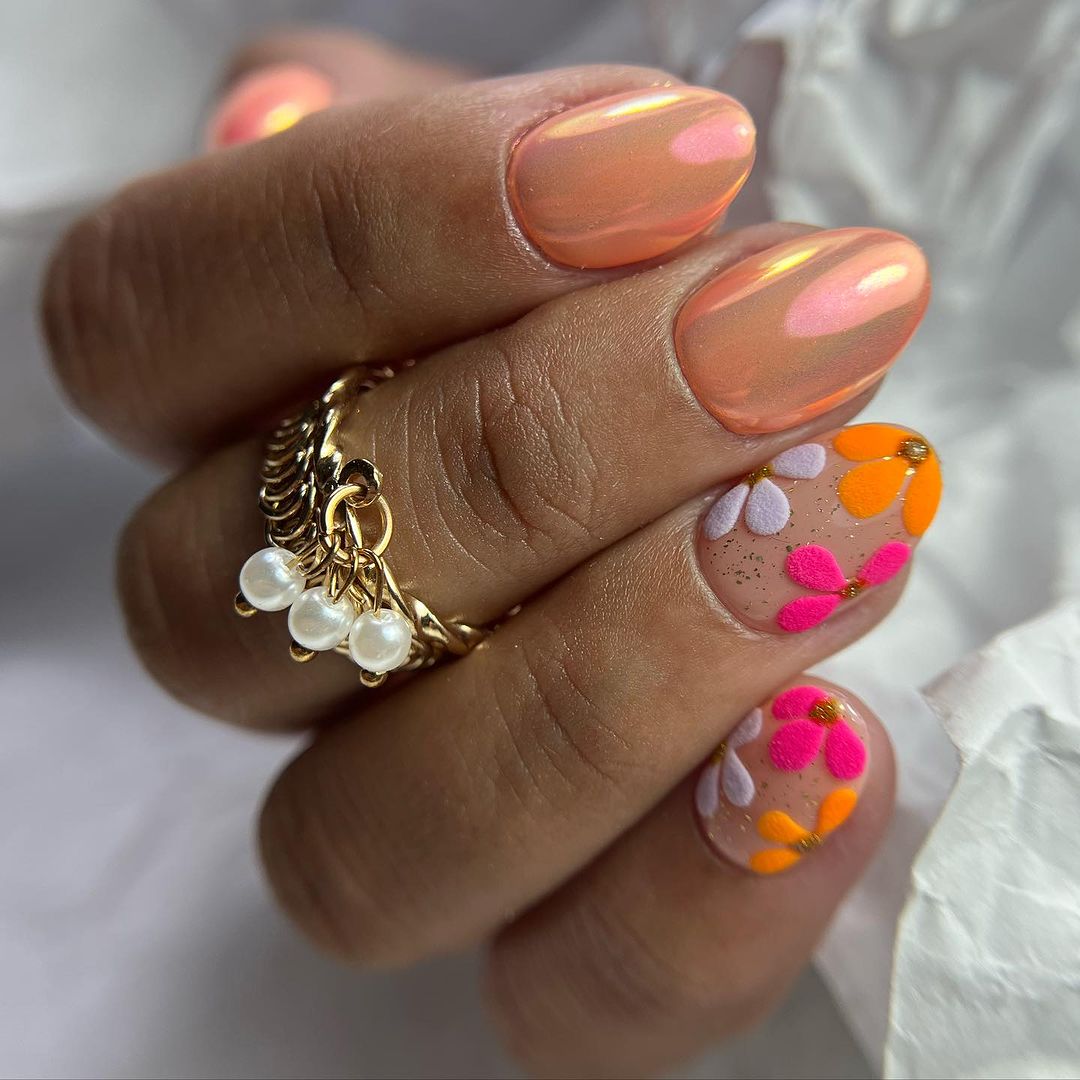
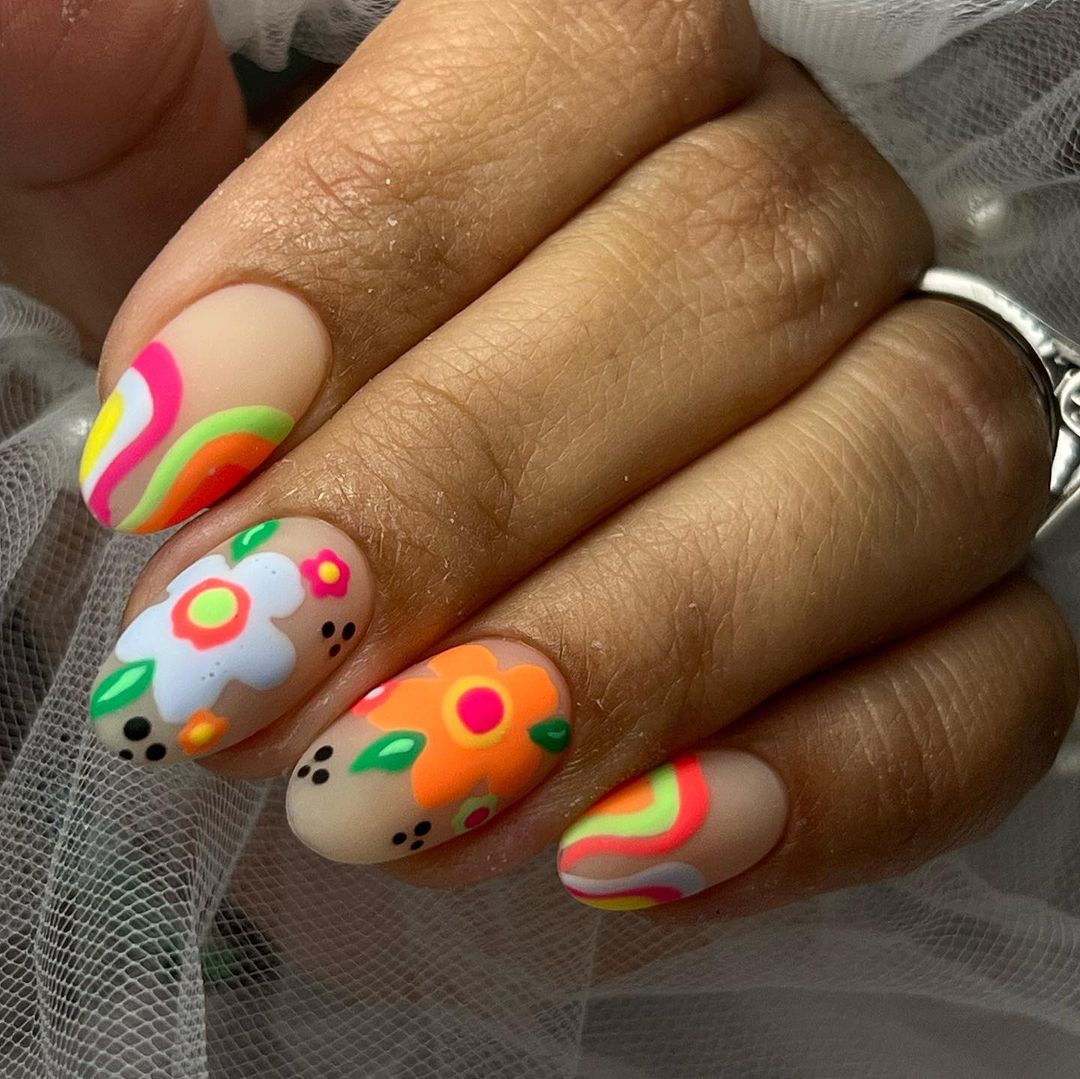
Playful Petals and Neon Accents
This is definitely the best in my list for summer fun – the nails are bright and bold and fun with neon orange paint done on playful floral patterns. It’s an excellent example of designs simple enough for DIY yet bold enough to make a statement.
- Base coat
- Neon orange polish
- Pink and purple petal polish
- Dotting tool or pointed tip
- Topcoat
After you have applied your base coat, use neon orange nail polish to create a sunset effect. Then, with a dotting tool, add some pink and purple petals for a romantic flowery touch. Make sure to apply a sturdy topcoat that will last as long as your summer memories.
Cheerful Skies and Bumblebees
Welcome the sweetness of summer with these bright skies, bumblebee accents and heart art. They’re beginner-friendly ideas for bringing a slice of the sunny season to your fingertips.

- Base coat
- Sky blue polish
- Yellow for bees
- Black and white for detailing
- Topcoat
Start with a base coat, then get out your soft sky blue and start painting. Yellow can be used for accents, stripes and wings in black and white. Don’t forget little hearts if you want to add some love! And make sure to top it all off with a good topcoat so that the story of your nails can stay fresh and bright.
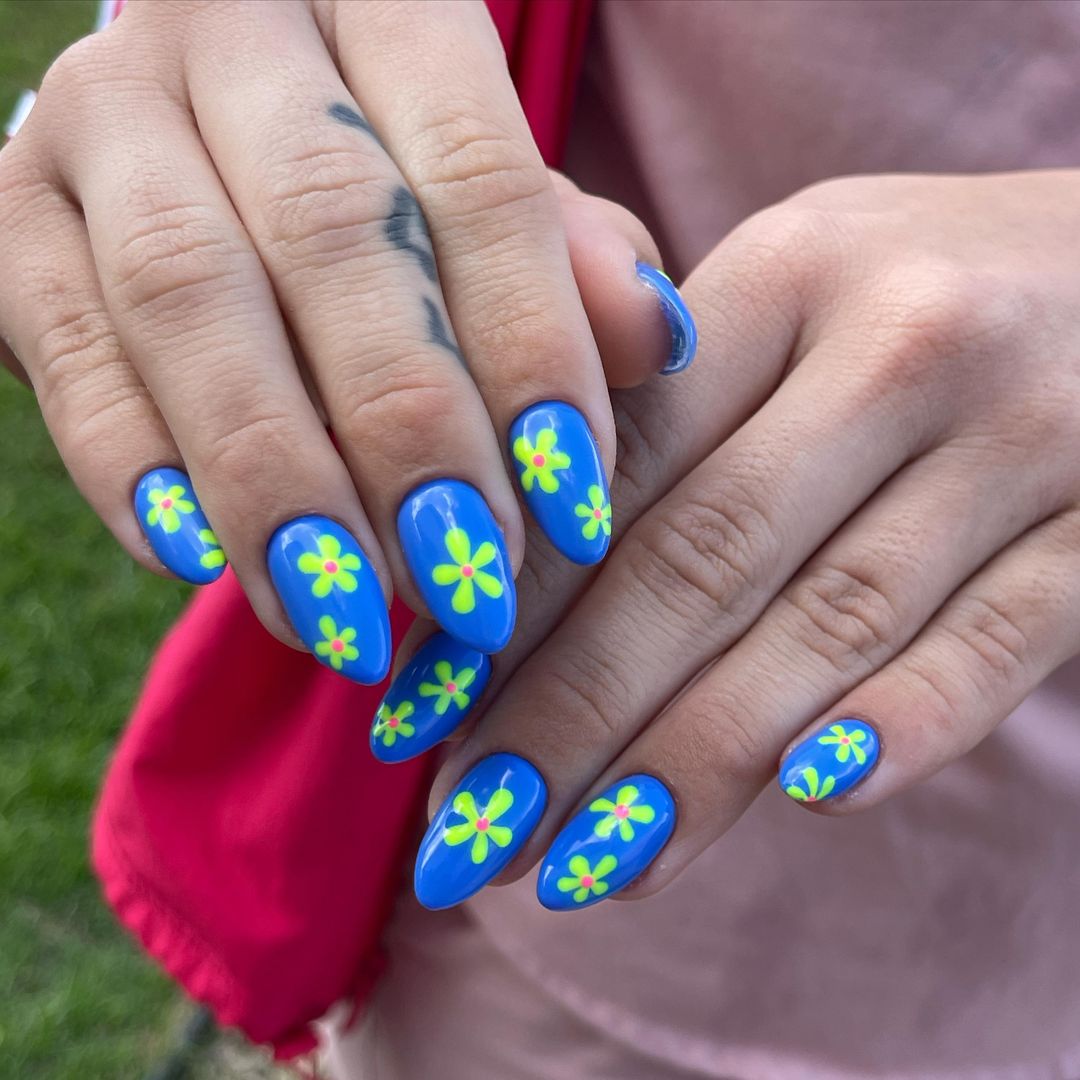
Vivid Skies and Daisy Delights
These nails are as bright and punchy as a day in summer, coated with an ocean-deep blue that mimics the sky. The daisy accents give a simple artful nod to good old-fashioned fun. You’ll be smiling with every glance.
- Base coat
- Bright blue polish
- Yellow and white polish for daisies
- Fine-tipped brush for details
- Topcoat
Apply your base coat first, then paint two coats of the blue polish. Once dry, use the fine brush to carefully draw on white daisy petals, adding a yellow dot for the centers. Apply your topcoat and let it dry completely to keep everything intact.
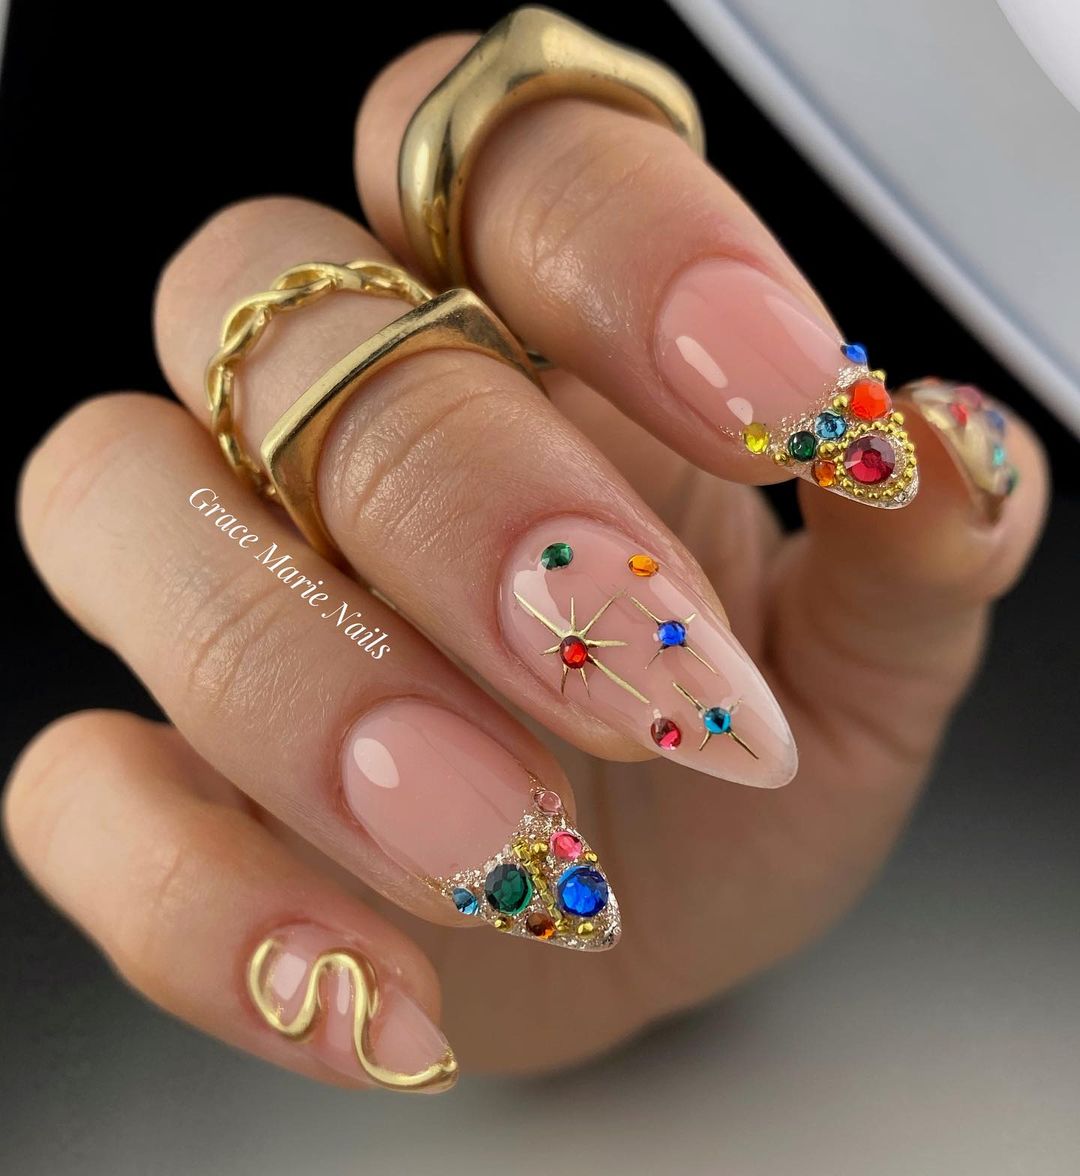
Jeweled Elegance and Gold Accents
The shown nails give luxury in a form of jewel embellishments and gold swirling for those summer nights when only the most sophisticated art designs will do. They are an art for beginners who want to indulge themselves into a little bit of luxury.
- Essie’s Millionails
- Nailicious Pink Ice Sheer
- Swarovski nail crystals, stick on motifs and decals
- Golden Rose nail polish
- Essie Good to Go Top Coat
After applying the base coat, lightly place on the sheer pink color. Arrange your jewels as desired; use the gold polish to draw ornamental swirls. Good quality topcoat protects your nails as your wealth.
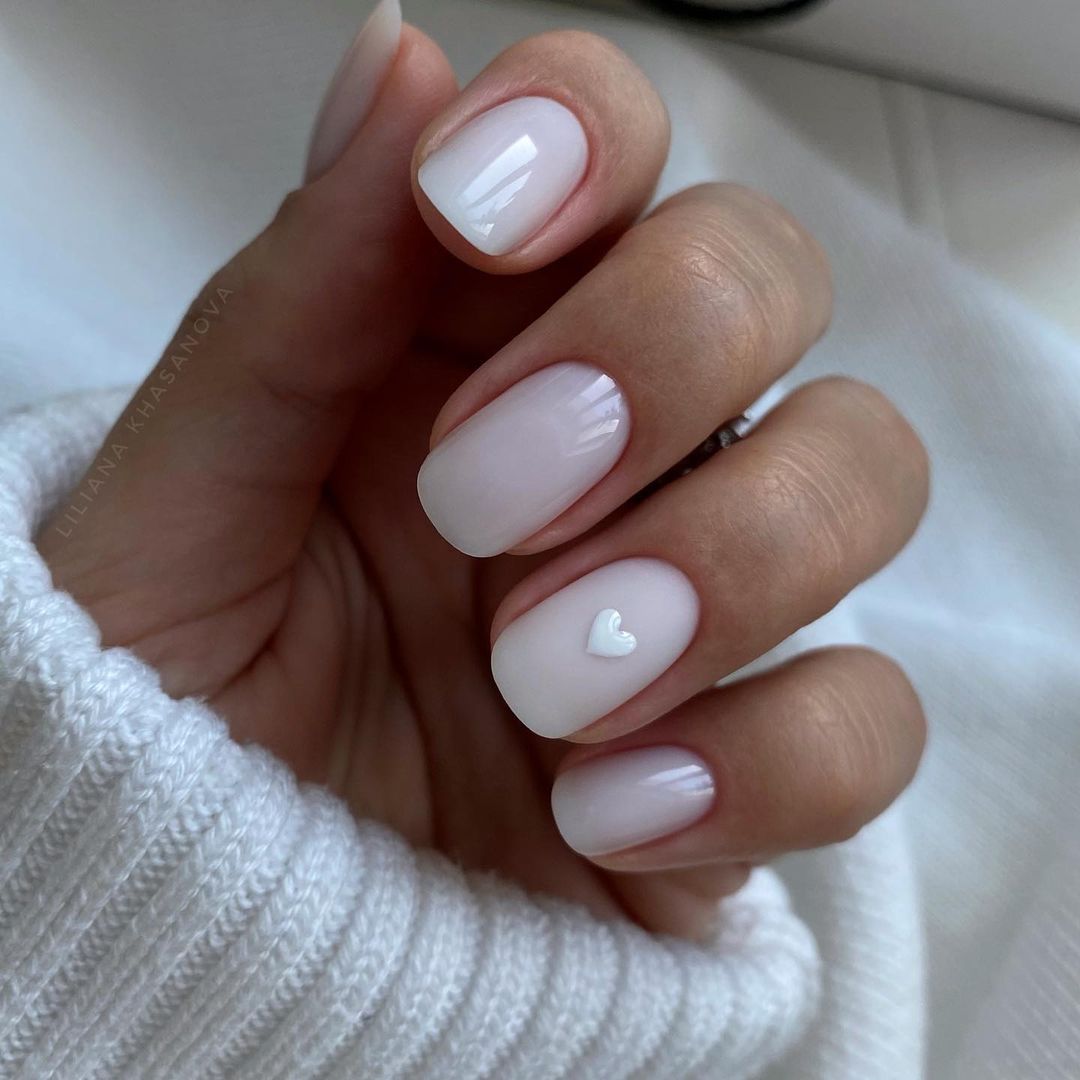
Classic French with a Heartfelt Twist
Timeless classics are great, but they don’t always allow for a personal touch. Luckily, this French manicure design does. By applying a single adorable heart, you’re able to speak volumes about yourself through simplicity.
- Base coat
- Sheer white polish for tips
- Pink polish for heart
- Topcoat
Start by applying the base coat, then add sheer white tips with a steady hand or guide stickers. With a fine-tipped brush, draw the small heart on one nail as your own signature touch. Finish by adding a swipe of topcoat for easy elegance.
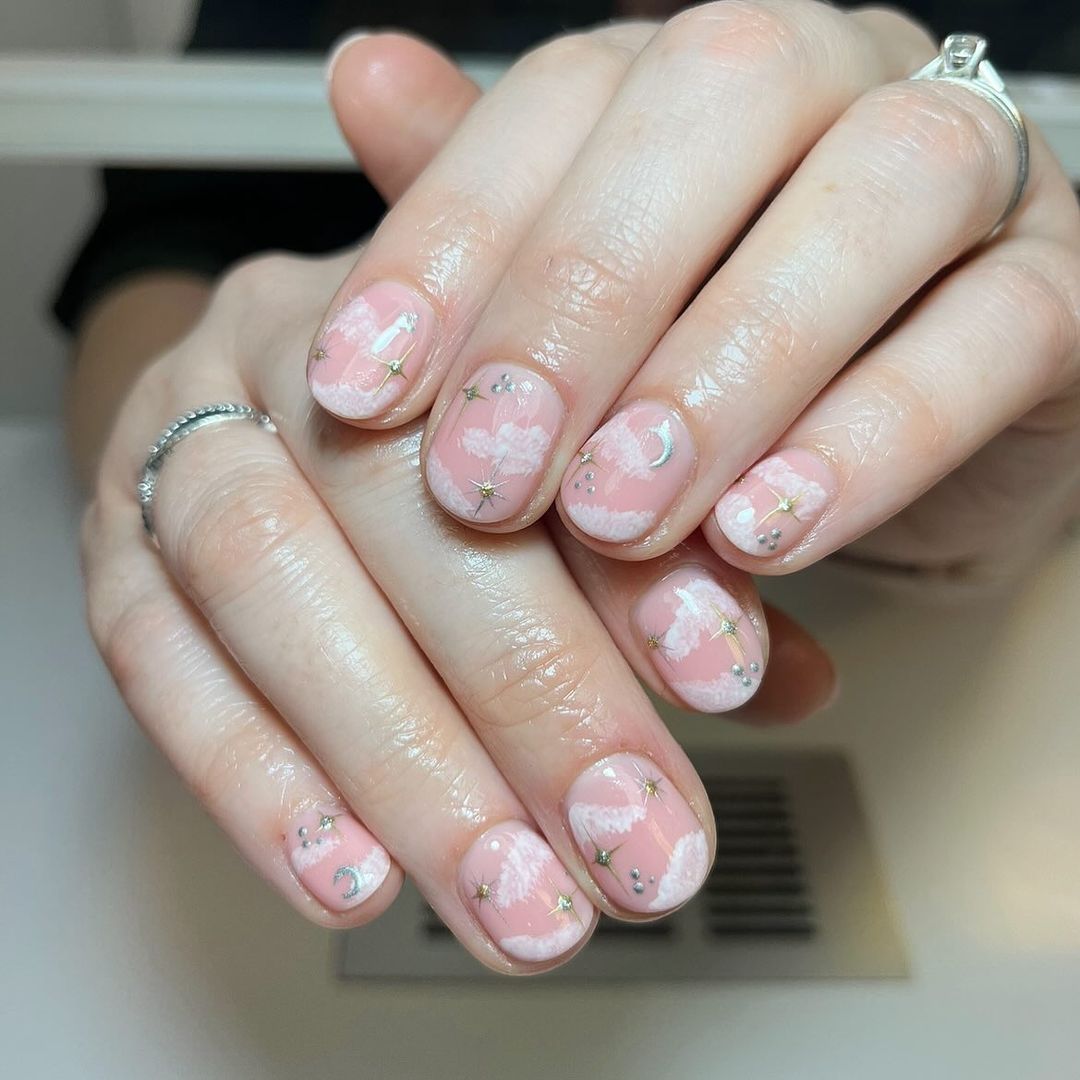
Celestial Pink Whispers
Our design transports us to a placid night beneath glittering stars. The tender pink base is drizzled with delicate cosmic symbols, comparable to a clear night sky. Its softness makes it an ideal choice for those summer nights as the mercury rises.
- Base coat
- Light pink polish
- White and gold for celestial symbols
- Intricate art brush
- Topcoat
Apply your base coat first, then put on a layer of the lightest pink. Once that’s dry, use your art brush to paint little moons and stars all over your nails. Finish off with a top coat that promises starlight at your fingertips.
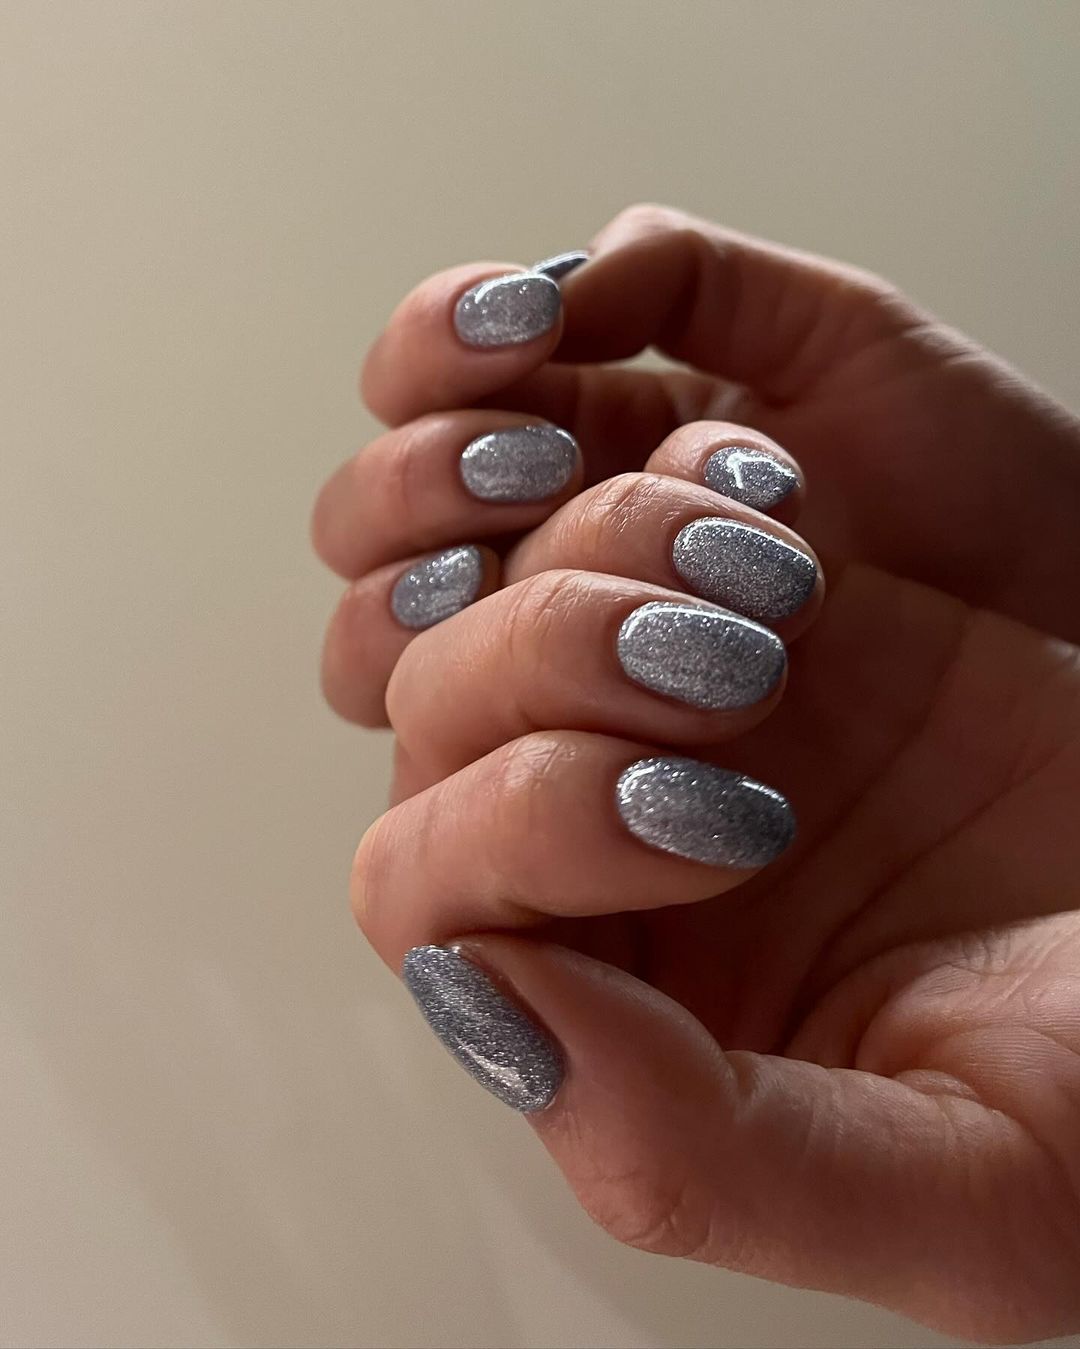
Metallic Moonlight Shimmer
When the moon is a tiny crescent, these metallic nails are the right choice. The bright appearance of this lacquer counters the night effect when you want your fingers to speak.
- Base coat
- Silver colored polish
- Topcoat that dries matte
First apply a base, then brush on silver metal paint. A dull sealant could be used to make it more puzzling and represent moonlight better.
Sugar Skull Fiesta
Use these sugar skull inspired nails to turn your fingers into a full blown celebration of life. The idea is to use vivid colors and playful patterns that will match perfectly with festivities in the summer, or just when you’re feeling festive.
- Base coat
- Nude polish as the base
- Variety of polishes for the colorful details
- Fine brush and dotting tools for the intricate design
- Topcoat
After applying your base coat, next up is the nude polish. Followed by creating your sugar skull patterns with a mix of colors using your brush and dotting tools. You want each nail to have it’s own story. Finally finish it off with a topcoat!
Sunset Hues and Ocean Breeze
The beauty of a beach sunset is unmatched. Look at the warm orange and cool turquoise that come from it. You can’t find something fresher and more vibrant than that, perfect for ythe days you’ll be spending by the water.
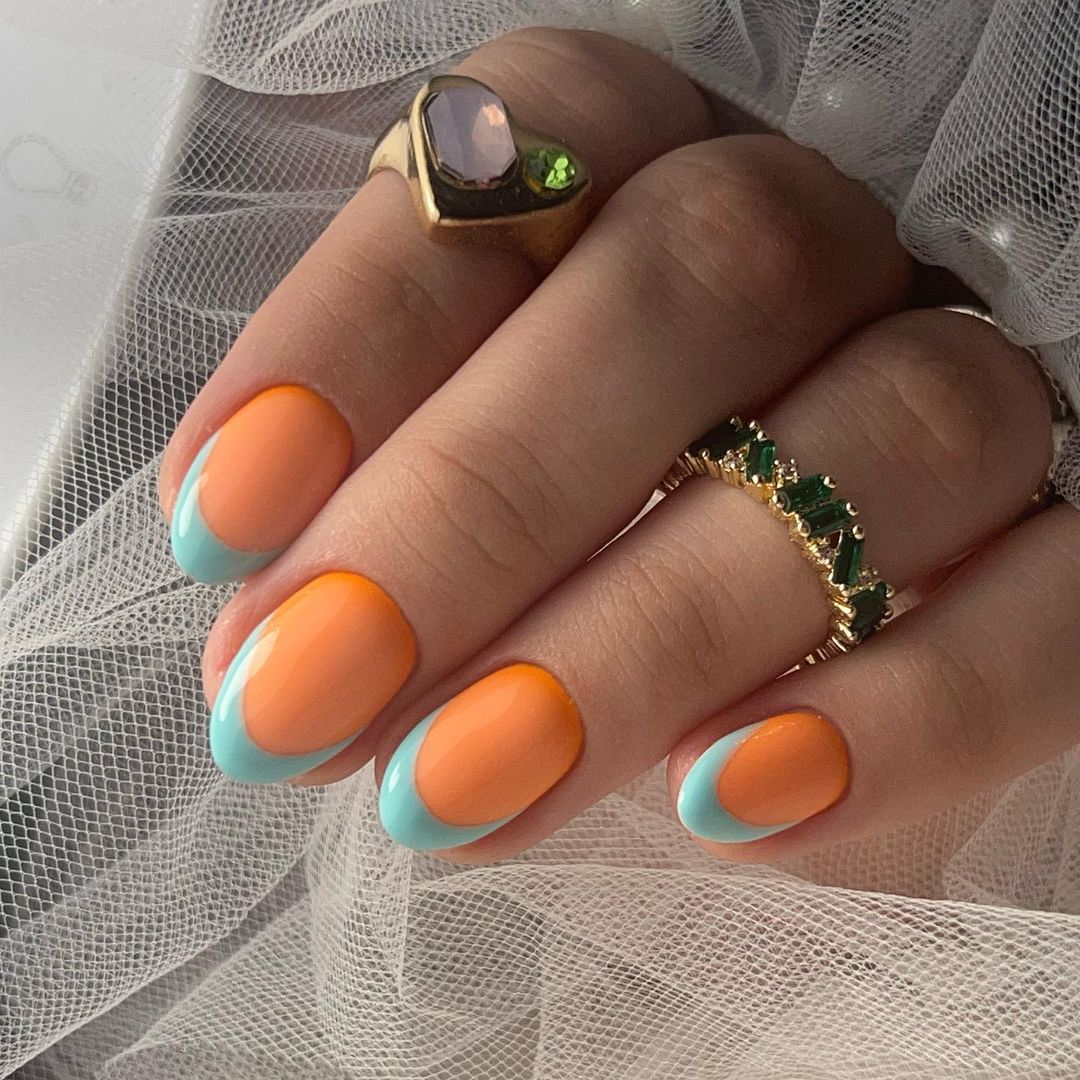
- Base coat
- Orange polish
- Turquoise polish
- Topcoat
First, put on the base coat to preserve your nails. Then paint alternate fingers with bright orange and turquoise, reflecting the beautiful contrast you see at the beach. Finally, finish with a topcoat to ensure the colors stay vivid through any summer adventure.
Pink Ombre Dreams
This pinkish ombre design is characterized by the ease of transition that accompanies sunsets in summer as it is smart and playful. This ombre is a gradient of fiery passion, starting from gentle pink to a brighter purple.

- The base coat
- Light pink nail polish
- Magenta nail polish
- Ombre sponge
- Topcoat
First apply your base coat, then add light pink polish. Then use a sponge to apply wet magenta polish at the tips and create a smooth gradient effect. Finally seal with topcoat for a dreamy finish.
Citrus Twist French Tips
This playful take on the classic French tip is perfect for anyone who likes to keep things exciting. Combine the classic with a burst of color and you’re ready to sip some fresh lemonade under the sun.
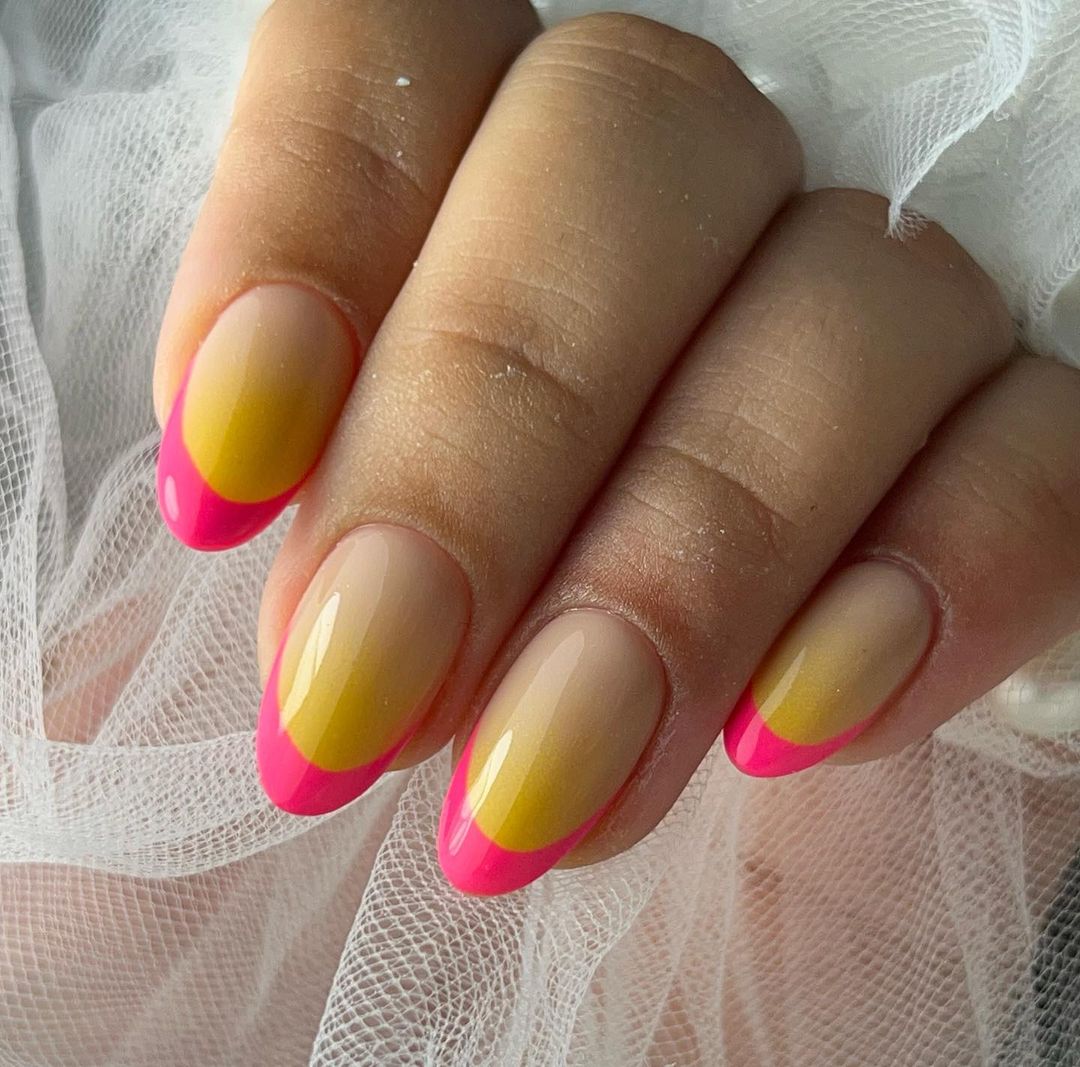
- Base coat
- Nude polish for the bottom
- Bright pink and yellow polish for tips
- Topcoat
After applying your base coat, put on the nude polish. When it dries, slowly paint on alternating stripes of pink and yellow for a candy-like look. Finally, apply your topcoat and give it this fresh twist some gloss.
Iridescent Daydream
The magic of these nails is in the way they shine. Their iridescent sheen only gives them a glimpse at every angle, but that’s all you need to fall in love. They look like soap bubbles that never pop! It’s a little nod to unicorns without going overboard.
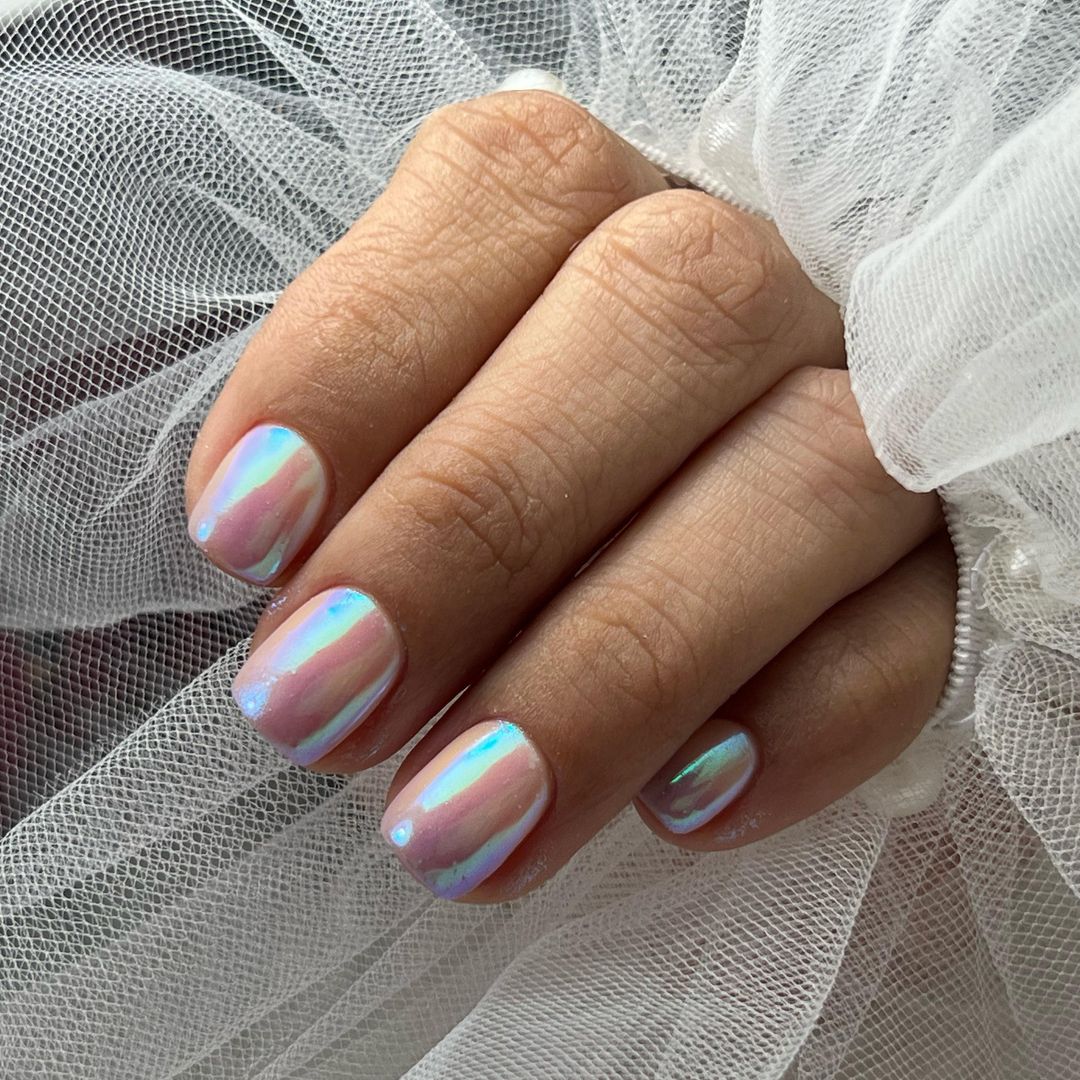
- Base coat
- Iridescent polish
- Topcoat
Just three simple steps:
- Start with your base coat.
- Apply one or two coats of the iridescent polish. More coats will give you more shine!
- Finish it up with a topcoat for extra fast drying and so everyone knows how amazing your nails are!
Silver Studs and Pearlescent Hues
You can look like a rock star with these nails that are both edgy and chic. These are modern, trendy and versatile, just perfect for an evening out or any special occasion.
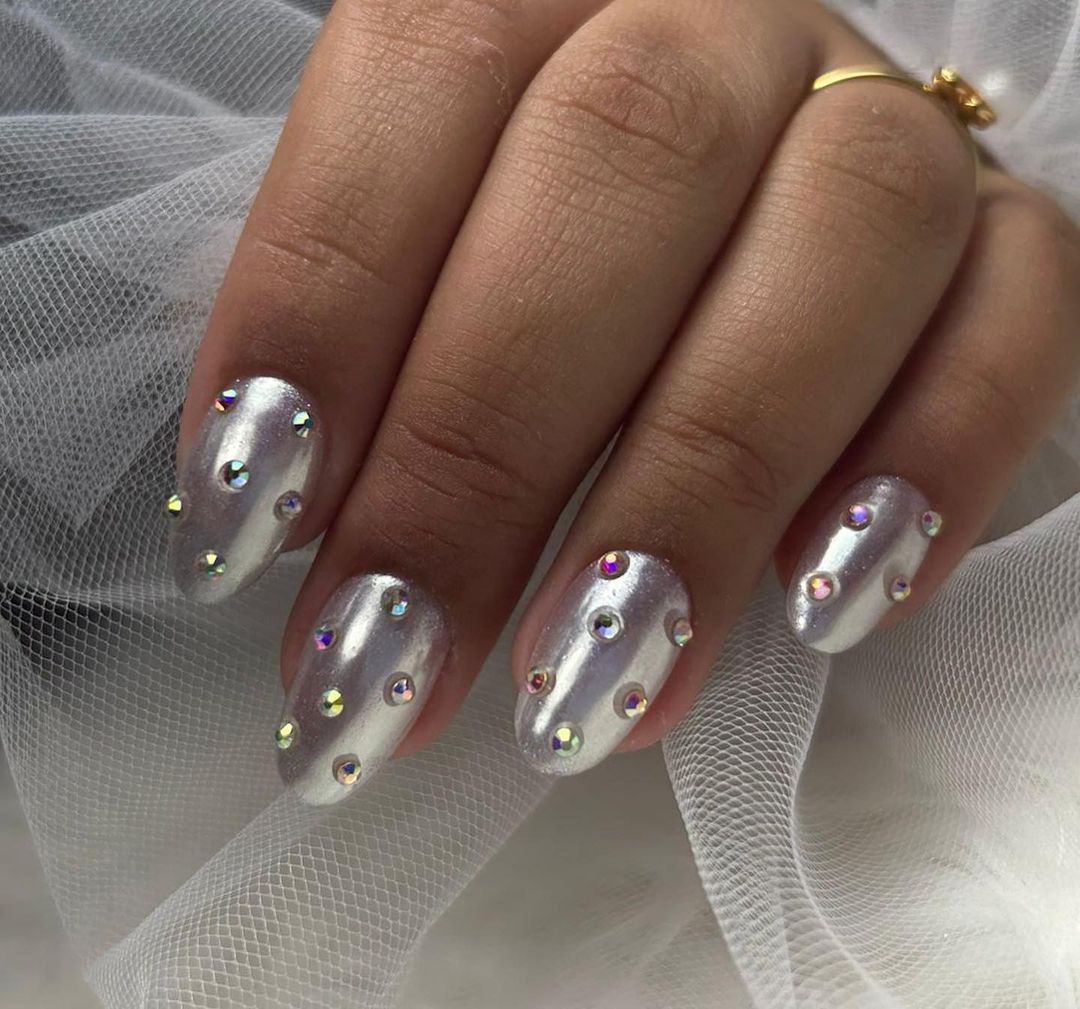
- Metal Shield
- Chrome Flash
- Tiny stud decorations
- Hard Rock Finish
First apply a protective base coat, then go ahead to use silver nail polish. While it is still sticky, put the studs on carefully. A good top coat will protect your nails and make them look ready for a concert.
Lively Green and Floral Pop
There aren’t many designs that can truly capture the essence of summer. But this one… this one comes incredibly close. With a vibrant green sparkle and a sprawling array of floral patterns, you’ll be looking at your nails as if they were a garden.
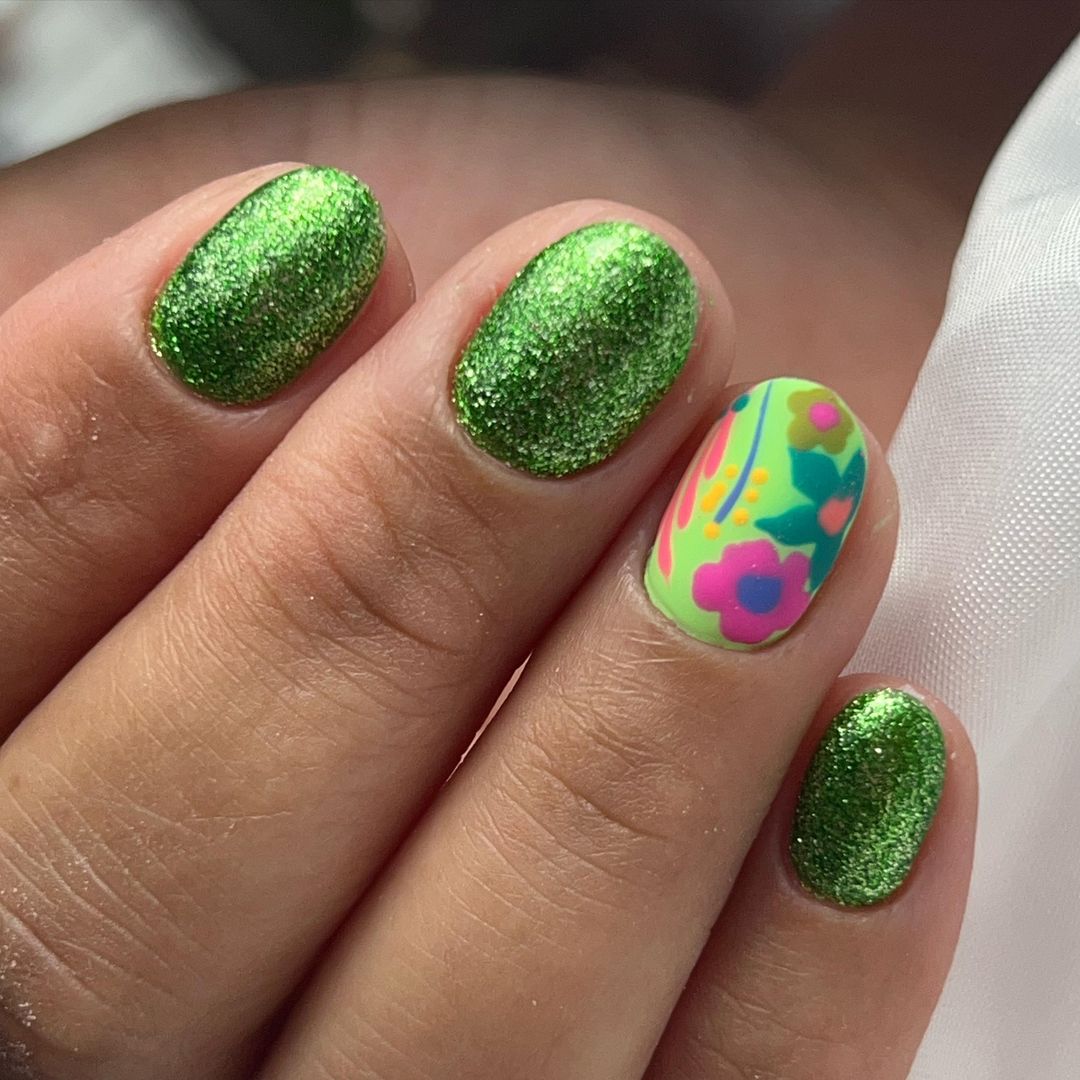
- Base coat
- Green glitter polish
- Assorted colors for the floral design
- Topcoat
Once your base coat is set, apply the green glitter polish on all but one nail. On that singular nail, use different colors to add some flowery chaos. Lastly, finish it off with a glossy topcoat for durability and shine.
Lush Lime French Tips with a Crystal Edge
These nails are basically a citrus fruit and sparkly crystal party. It’s like a little slice of summer on your fingertips, perfect for holding frosty drinks and pretending it’s not hotter than hell outside.
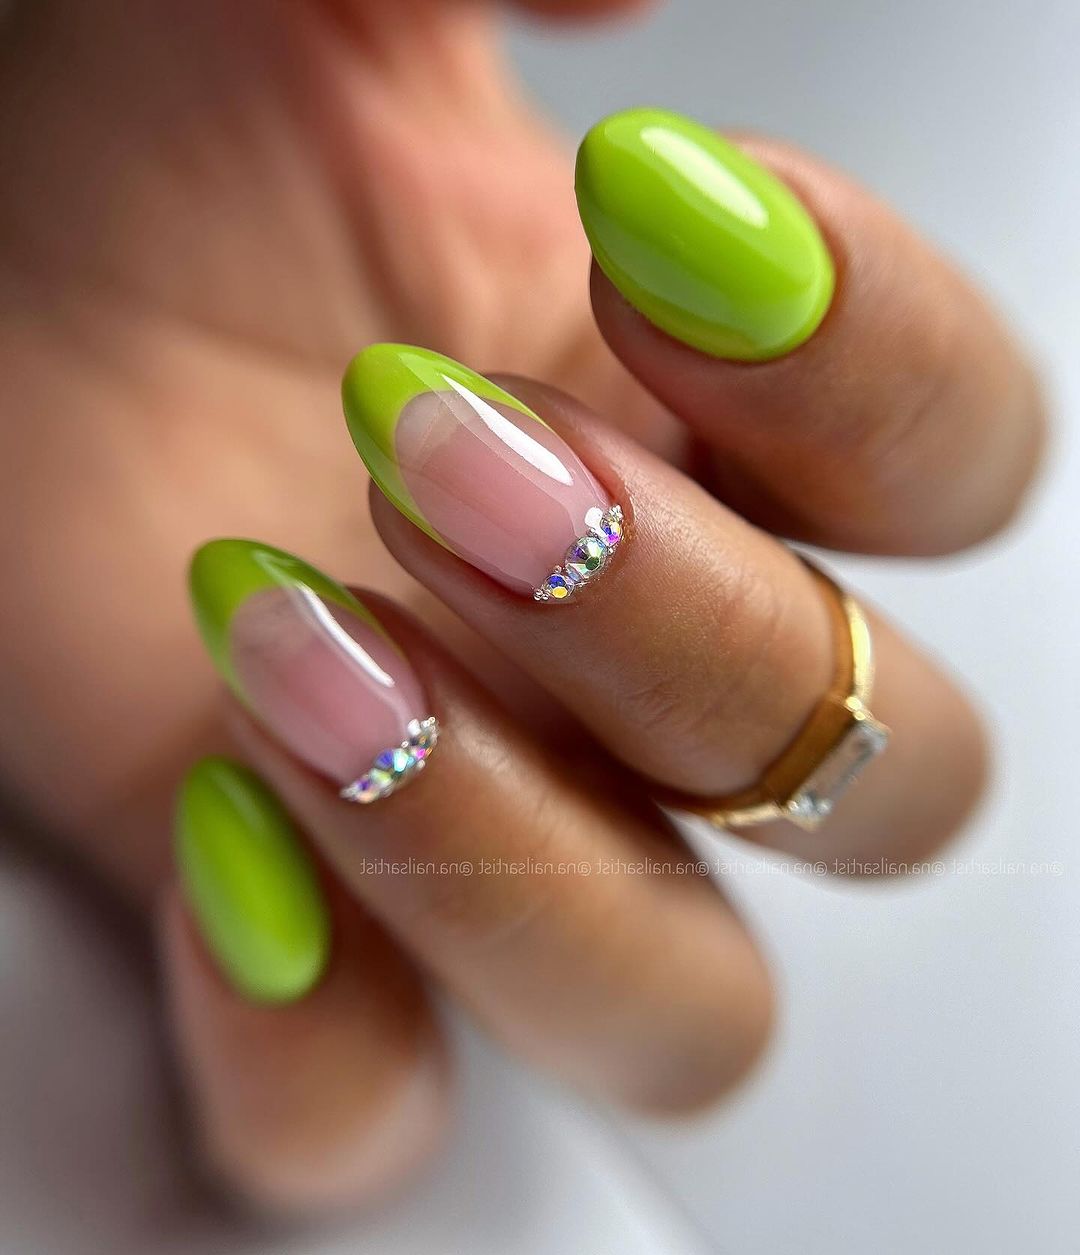
- Base coat
- Lime green polish
- Clear polish for the body
- Some lil rhinestones or small crystals
- Topcoat
First things first, lather those bad boys in brand H2’s Foundation base coat. Then, paint your tips with the vibrant lime green from brand I2 called Citrus Splash. Attach your rhinestones along the smile line to make them extra sparkly. Finally, finish off with one last layer of clear polish over the nail bed and cap it with topcoat.
Sunset Ombre with a Twilight Twist
This design seizes the striking shades of a sunset, merging with purple that is like twilight. Each nail of yours portrays how the sun bows before night fallings, making it one of the best choices for an evening summer party.

- Foundation
- For ombre: yellow, orange and purple polishes
- Sponge to create an ombre effect
Firstly, apply your base coat. Next, put some yellow on the basis of your nail using a sponge then add orange to the middle part and finally purple at its edge. Smooth out cautiously so as to obtain gradient effects and finally seal with a top coat.
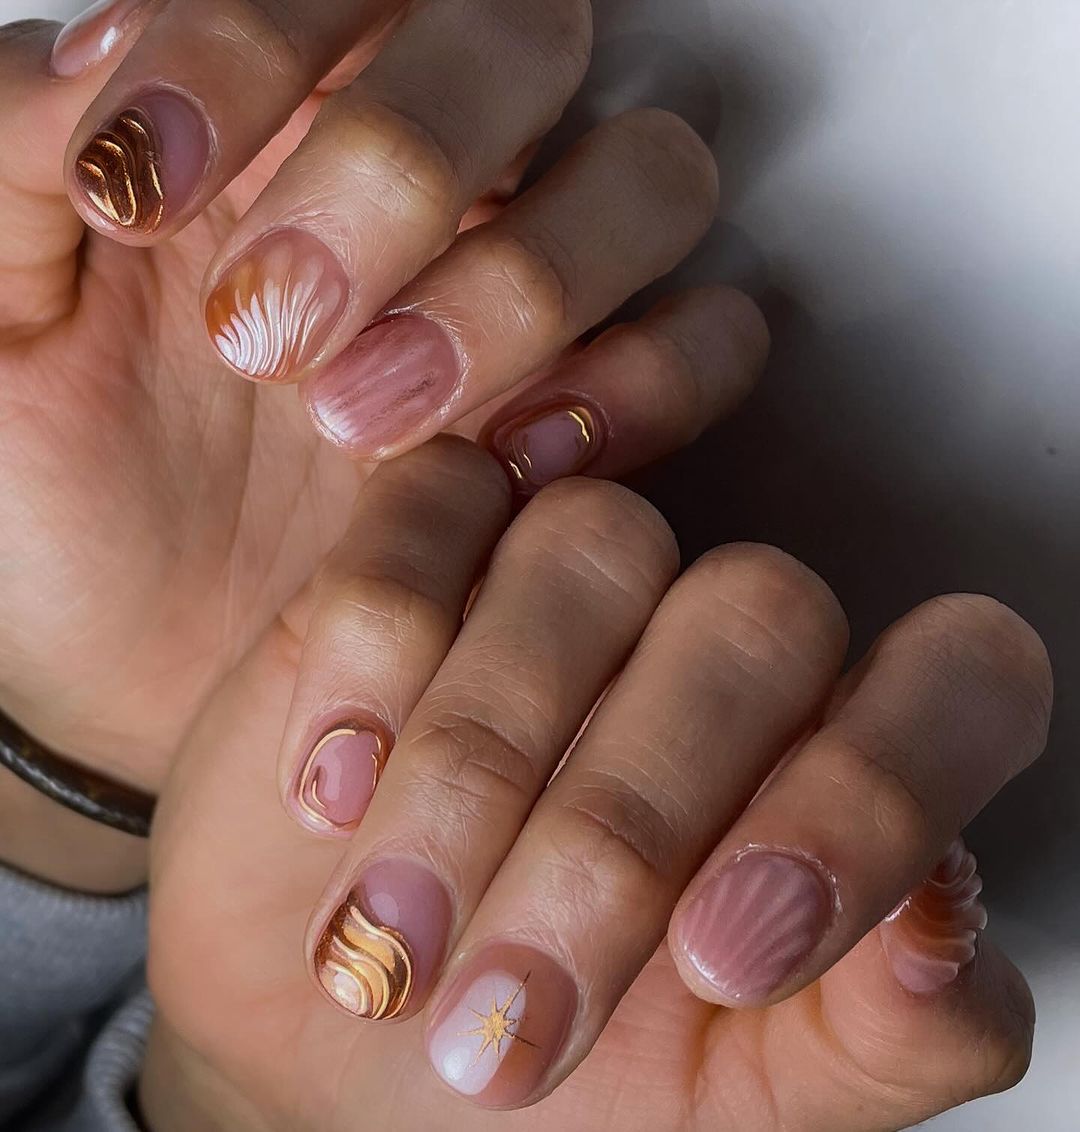
Golden Flow with Abstract Waves
For those who appreciate the skip and jump of modern art, these nails mimic the liquid gold. It’s a luxurious and artistic expression that goes well with summer’s casual elegance or its most glamorous nights.
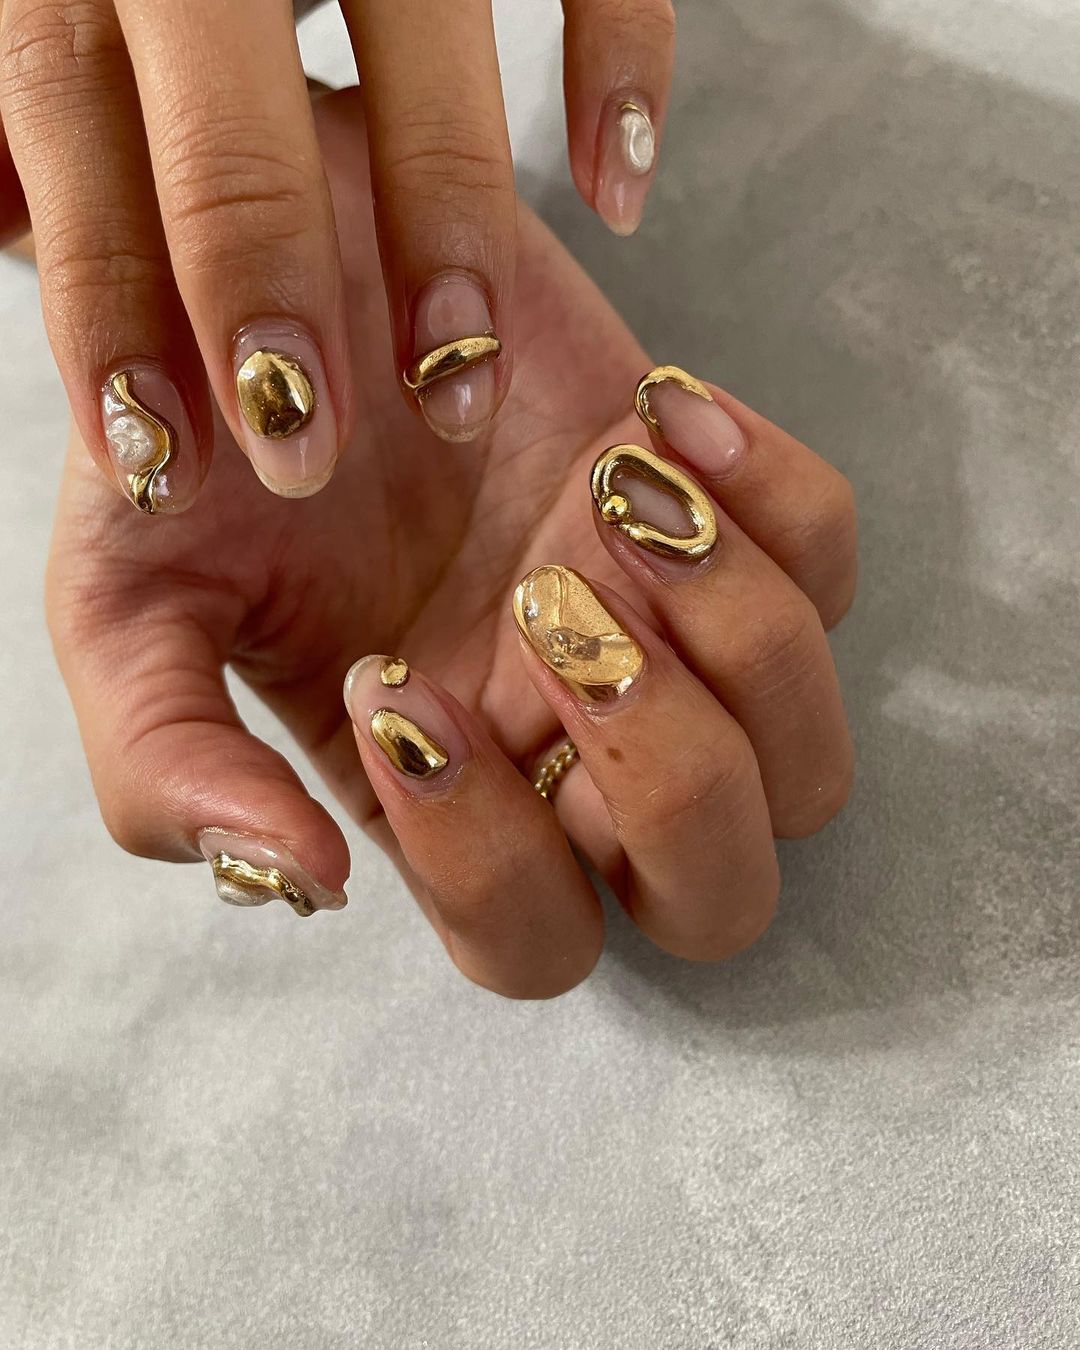
- Base coat
- Nude polish (base)
- Gold leaf or gold polish for detailing
- Top coat
Paint on base coat, followed by nude polish. After it dries, create abstract golden waves by using either gold leaf or a swirled application of gold polish. Finish with a high gloss topcoat for wet look.
FAQ
Q: How do I prevent nail polish bubbles?
A: One way is if you shake the bottle before use or put it on in a hot, humid environment. Instead of shaking the polish, simply roll the bottle between your hands. Clean and dry your nails and apply thin coats of polish, allowing each to dry thoroughly before applying another coat.
Q: Which colours go well together when doing summer nail art?
A: Summer colors are bright and loud! For instance coral and teal, sunny yellow with sky blue or hot pink mixed with bright orange. Also don’t fear to experiment with pastels and neons as summer offers an ideal platform for this!
Q: Can I still do nail art if my nails are really short?
A: Of course you can! Though you may have less space to work with, small designs such as dots or stripes can look stunning on short nails. Besides, adding some vertical lines helps make them appear longer.
Q: What can I do for my amazing nail art not to fall off during any summer activities?
A: Use a good basecoat that will shield your nail and help keep the polish in place. After drying up your design finish off using clear top coat. Reapply topcoat every 2-3 days to preserve its original look from chipping off or getting pale due to swimming.
Q: What’s trending in terms of nail arts this summer?
A: This year’s summer is about brightly coloured vivid patterns. For example geometric designs, tropic themes or traditional French tips but done differently by adding some colour twist into it. Moreover rhinestone and stickers for pop are very common adornments.
Q: Is there anything I can do about a mistake made while doing nail art without removing everything again?
A: If it was just a small one like smudging or overrunning then take a brush soak in acetone remover gently erase it out so no one notices. If it was a big one though, it would be better just to remove the polish on that nail and begin afresh with only that finger.
Q: How do I choose the right nail art design for my skin tone?
A: Think of your undertones. If you have warm undertones go for oranges, reds or yellows. Blues, purples and greens are more flattering for cool undertones. Neutrals and pastels can easily work on any skin type.
Q: How can I achieve salon-quality nail art at home?
A: The trick to professional-looking home nail art is not rushing it. Use quality polishes and tools, and give yourself enough time. Then there’s tutorials online which could help in improving your skills. You know what they say about practice!
Save Pin